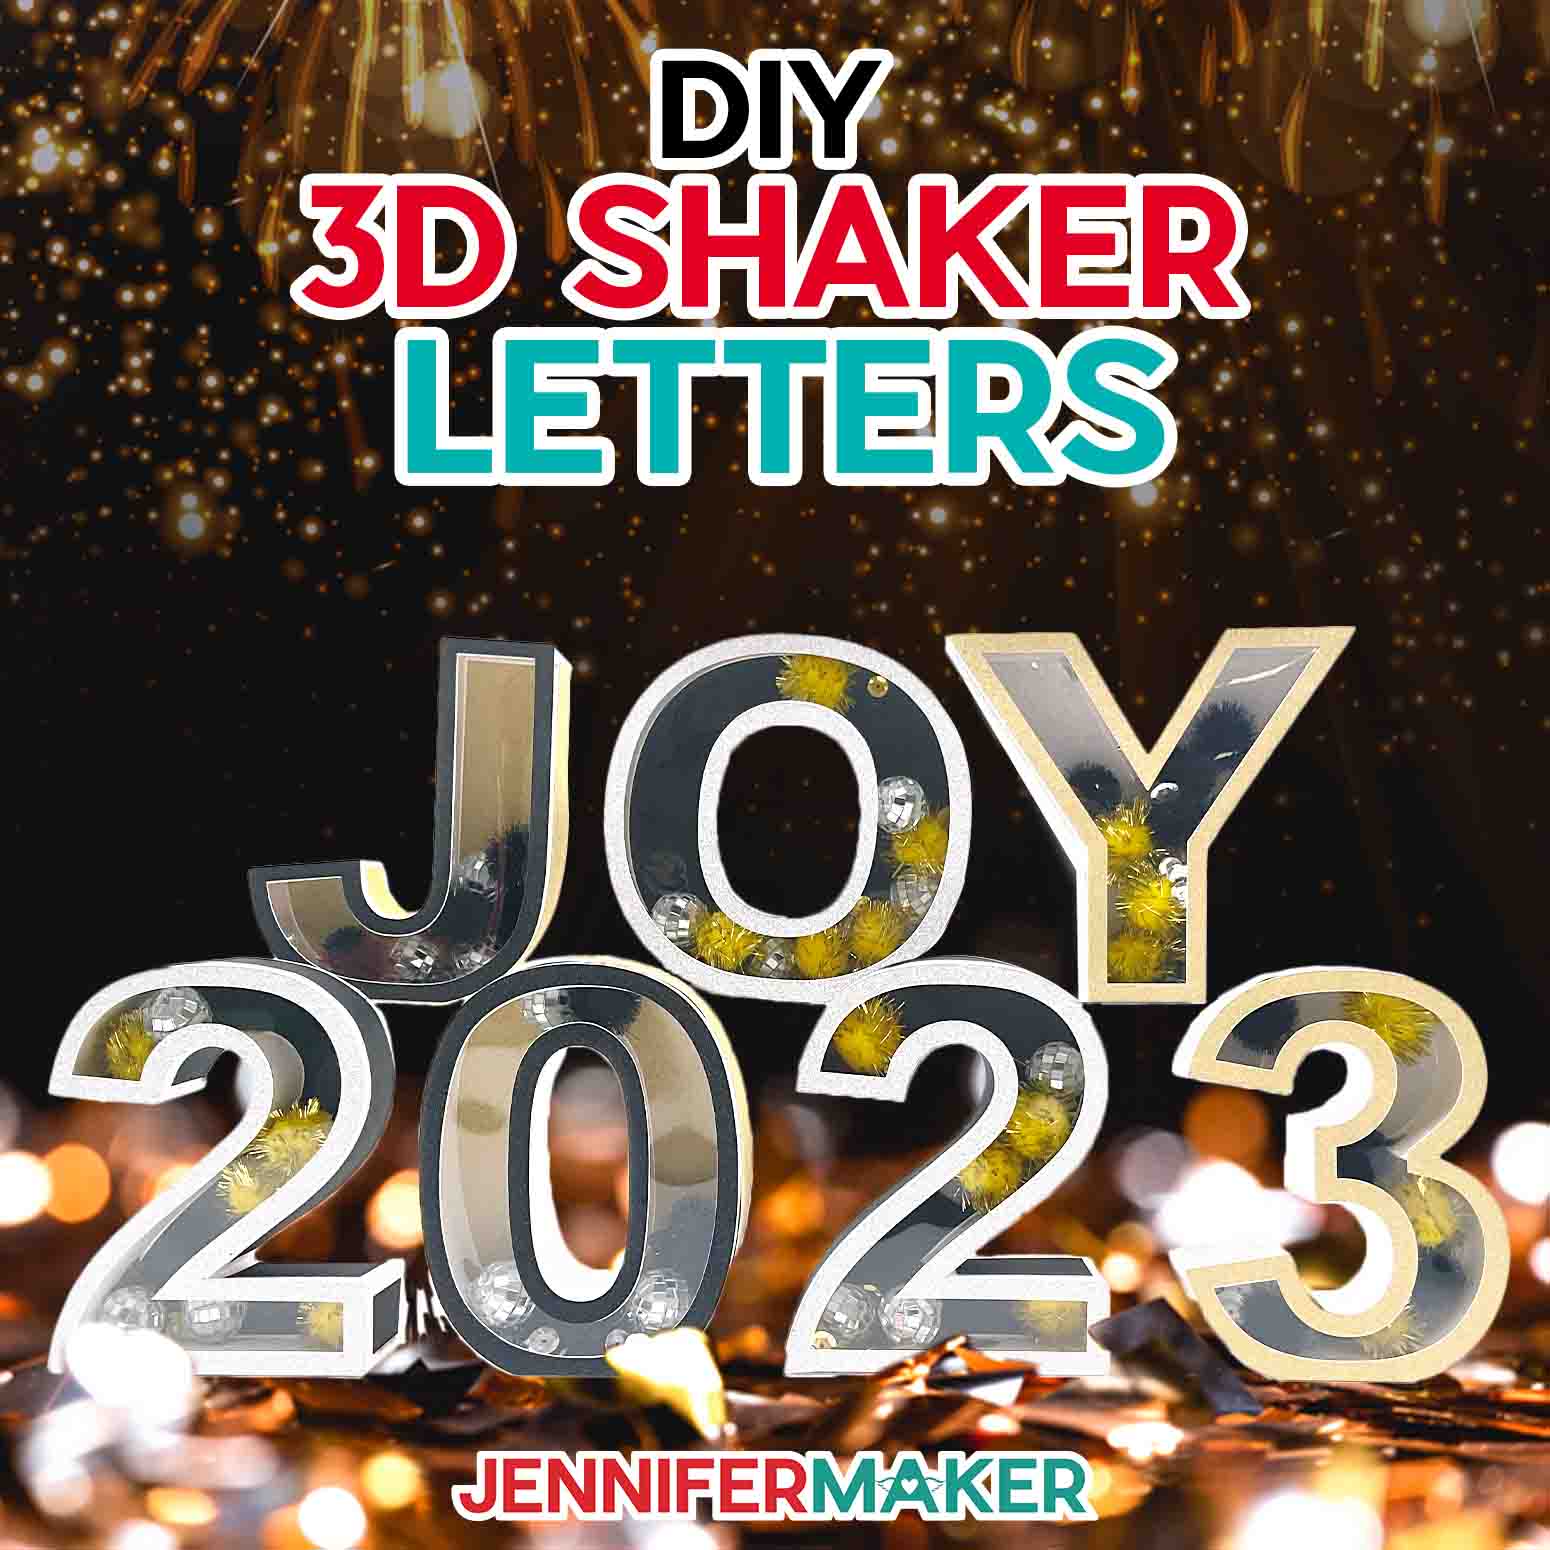
Check out my list of Top 10 Cricut Tips!
It’s been an amazing year for crafting — and learning new things! Every year, I’m so grateful to share my experiences making these projects I love so dearly. Part of that is learning awesome new Cricut hacks! These tips, tricks, and techniques enhance our Cricut projects and make us feel confident in our crafting! It’s never, ever too late to learn something new — and I’m so grateful for the opportunity to learn right alongside you. So, without further ado, here are my Top 10 Cricut Tips from this year!
Watch the full Top 10 Cricut Tips video:

10. Weed Vinyl Easily with this Spicy Hack
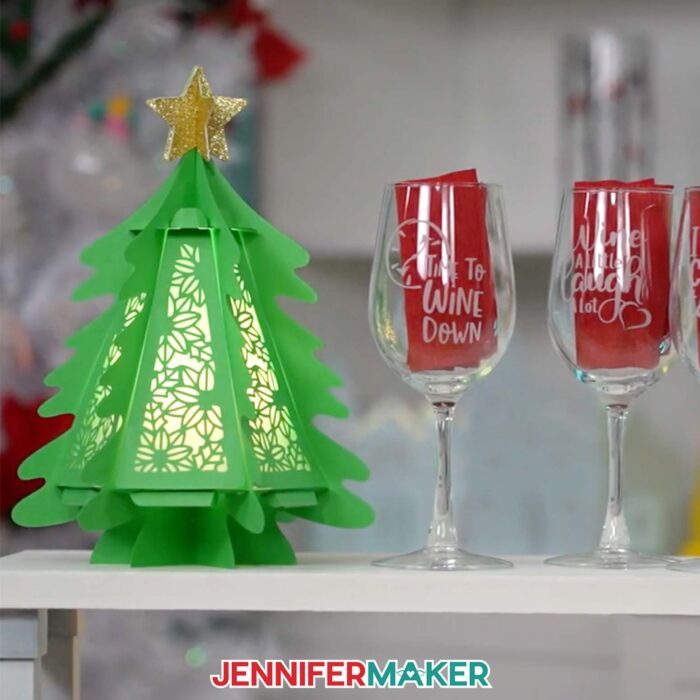
Have you ever tried to weed clear, frosted, or white vinyl and had an impossible time seeing the cut lines? You’re not alone! Don’t worry, I’ve got a spicy solution from the grocery store that I showed you in my Faux Etched Wine Glasses tutorial.
First, sprinkle some ground cinnamon onto the vinyl. Then use your fingertip or a dry paintbrush to spread it out. Cover the whole cut vinyl design! You’ll see the cinnamon fall into the cut lines, making them so much easier to see. Great tip, right?
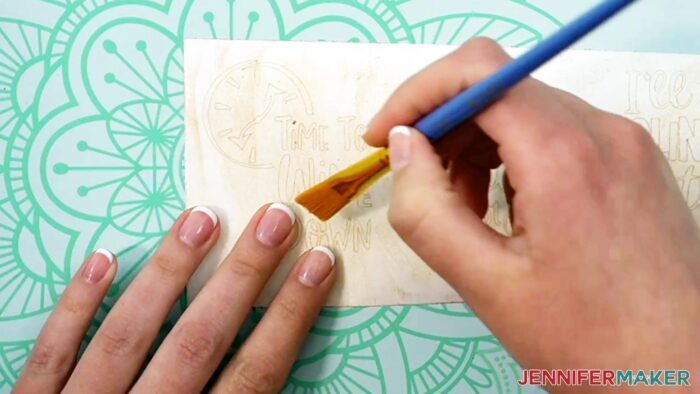
But what do you do with all the cinnamon now that it’s all over your vinyl? Brush off the excess, then adhere your vinyl (cut side up) back onto your machine mat. Why? Because it’s a lot easier to weed that way!
If you get any cinnamon on your mat, simply get some alcohol-free wet wipes or baby wipes, then rub in small circles around the affected area until the cinnamon is cleaned off. Let your mat dry, and it’s once again ready for action!
9. Warp: What is it Good For?
Move aside, bold, italic, and underline … there’s a funky new font effect in town! Cricut Design Space is always updating, and this year we got some fun new ways to modify text with neat effects. Say hello to the “Warp” feature!
Note: This is a paid feature for Cricut Access members, but you can try it out for free before deciding if Access is right for you.
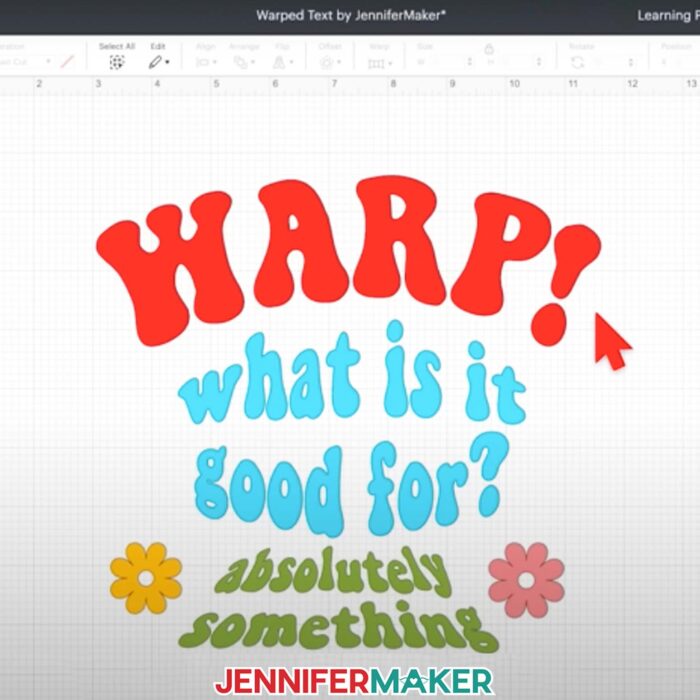
This update comes with 24 new and different ways to warp your text, all of which change your regular words to a unique shape. The best part? Editing your text within Design Space is so much easier (and faster) than using software like Photoshop or Illustrator to get pretty much the same effect.
The warp effect is even better when you use it to fit different lines of text together to create awesome typography designs! To learn all about my favorite ways to use the warp feature, watch my Warped Text tutorial!
8. Testing Vinyl, 1 … 2 … 3 …
Raise your hand if you like wasting materials! That’s right, me neither. Few things are more frustrating than ruining a crafting blank because you got the temperature or other setting wrong.
In my Iron-On Vinyl tutorial, I showed you how to use a regular household iron to apply heat transfer vinyl to a T-shirt. Irons can be tricky to use for vinyl, so how do you know if you have your temperature and time settings right?
The answer is to TEST! In the tutorial, I walked you through how to cut and apply a vinyl test shape to make sure your time and temperature settings work for your iron, your vinyl, and your shirt.
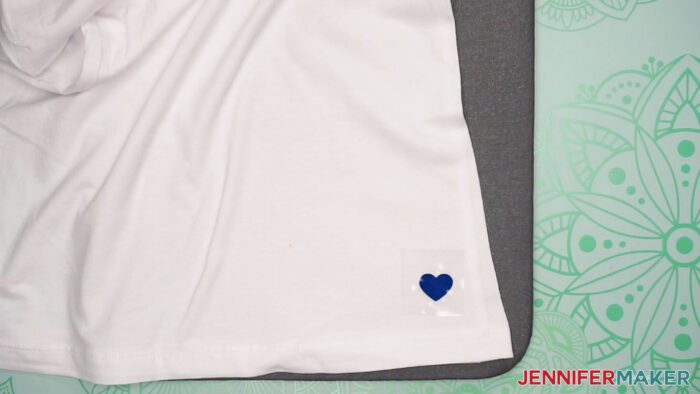
One of the most important things to remember is to turn the steam setting off. Nothing ruins an HTV project more than moisture! You also want to preheat the fabric to remove any other moisture that might be hiding inside.
After you apply the test shape and it’s cool to the touch, you can try to peel off the carrier sheet. Does it come off easily, and your vinyl looks good? Congratulations, your settings are correct! Way to go on your first try!
However, if your test shape lifts up or stays stuck to the carrier sheet, it needs more time, a higher temperature, or both. And that’s why we test!
7. Meld & Weld Your SVG Designs
This fall, I showed you how to combine SVG elements together to create a custom design with my Pumpkin Lantern and Christmas Tree Lantern projects.
The “Weld” tool is one of my favorites in Cricut Design Space, because there are so many different ways to use it across many different projects.
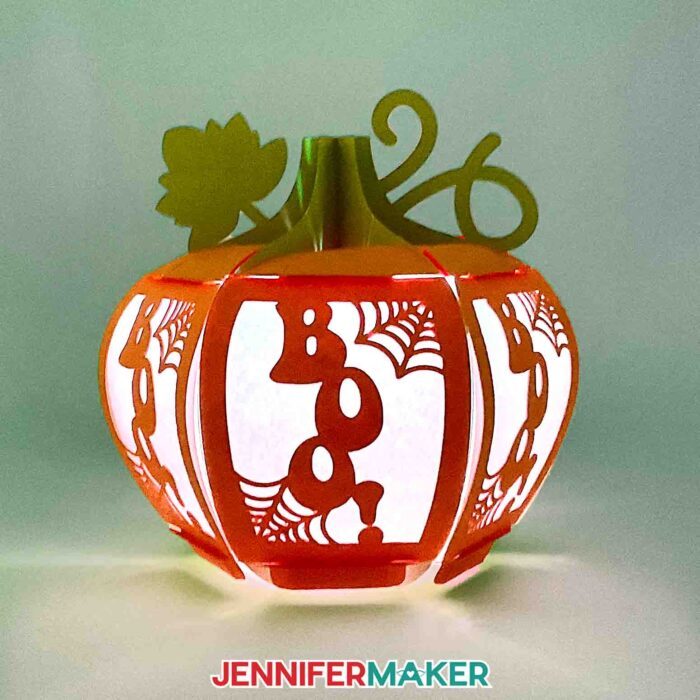
You can add text to your design, then add other design elements to personalize it however you want! Or, you can take different SVG files and combine them into one, so they all cut as one piece. It’s a simple tool, but the applications are endless.
Simply select the elements you’d like to connect to each other, then click “Combine” and choose “Weld.” That’s all there is to it!
Want to try out this technique? My Christmas Tree Lantern tutorial is the perfect place to start.
6. Clearly Protect Your Stickers
Stickers are great … until they get wet. I showed you how to make printable vinyl stickers, which are technically water resistant … but you can lengthen the life of your stickers and protect them from scratches with this (clearly awesome) tip.
First we printed a sticker sheet, then adhered it to a LightGrip machine mat. Then I showed you how to place a piece of clear vinyl over your stickers, avoiding the black registration marks. Why do we avoid the marks? Because covering them can make it tough for your Cricut to know where to cut — which is sort of important for stickers!
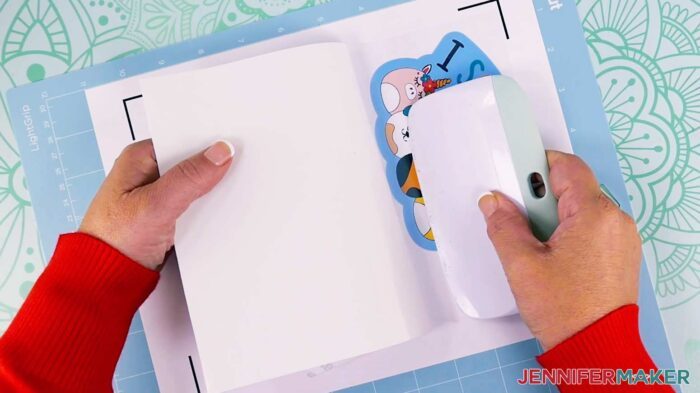
After that, I showed you the settings to use whether you’d like kiss cut or die-cut stickers. Want to try this tip yourself? Check out the full Printable Vinyl Sticker tutorial!
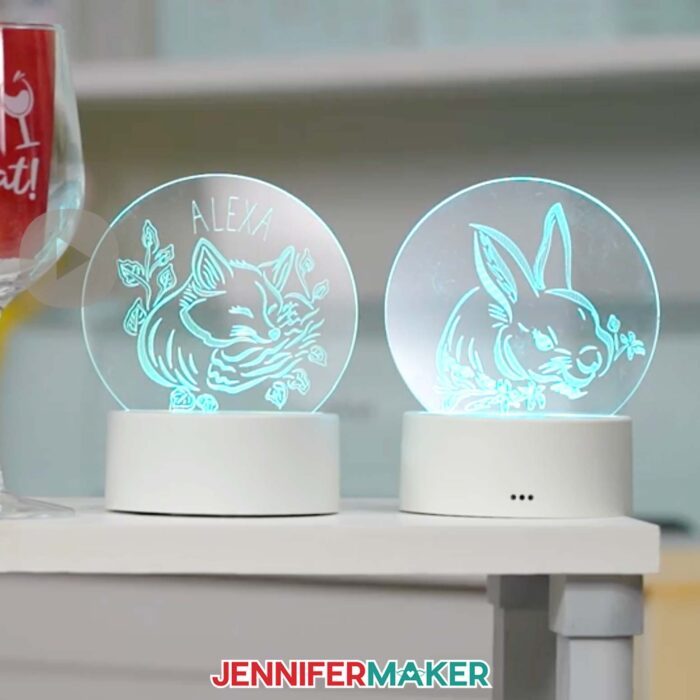
5. Find Your Center: My Best Engraving Tip
What’s the best way to get a great engraving on acrylic using your Cricut? Meet in the middle.
Earlier this year, I showed you how to make adorable engraved acrylic nightlights using your Cricut Maker or Maker 3. My best tip for great acrylic engraving would be to make sure your acrylic blank is dead center on your mat. Use some painters tape to stabilize it even more, especially if your machine mat isn’t brand new.
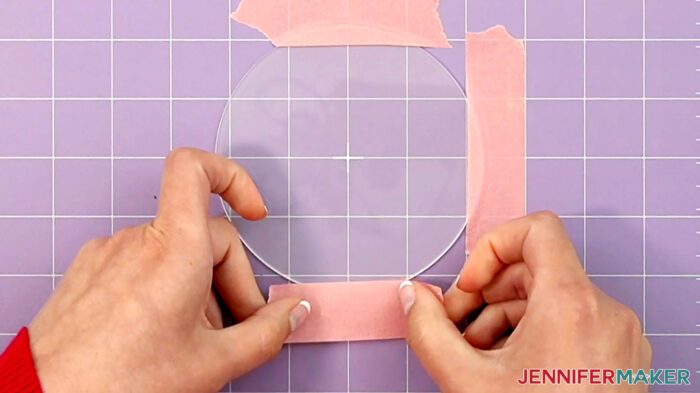
On the Cricut Design Space “Prepare” screen, position your engraving in the very center of the mat. With your base material set to “Acrylic (Thick 2mm)” and “More” Pressure, load the mat into your Cricut and watch the magic happen.
Be sure to dust off your acrylic and the inside of your Cricut — there will be lots of little bits to clean up, but it’s worth it!
You can find the FULL step-by-step instructions in my Engraved Nightlight tutorial.
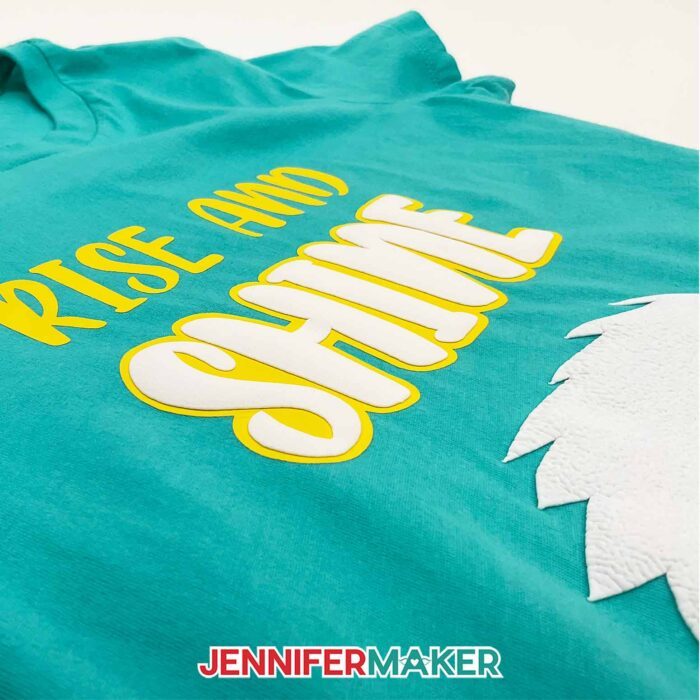
4. Make the Whole Place Shimmer … with Rhinestones!
What does a Cricut machine have anything to do with rhinestone T-shirts? Turns out, everything!
In my Rhinestone T-Shirt tutorial, I showed you how to cut stencils from flock material using — you guessed it — your Cricut. These stencils turn the tedious chore of placing the rhinestones individually into something fun and easy. But how?
The holes on the stencil are sized perfectly to allow only the right size rhinestones to drop through them and into place. Easy peasy! Once all your templates are cut, your rhinestone design is ready to apply, layer by layer.
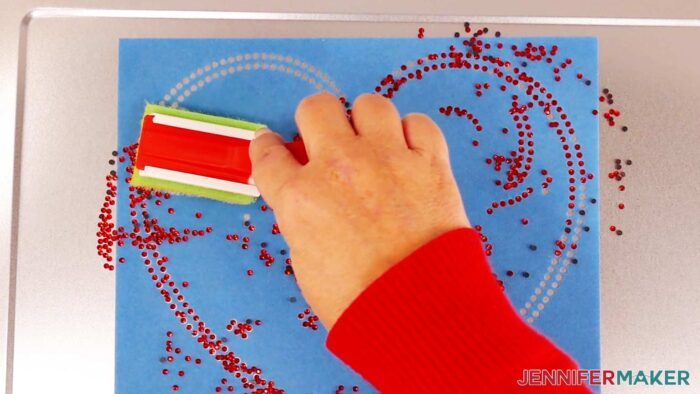
This one was a big learning experience for me, too. I’d never made a rhinestone T-shirt before, but after learning this technique I’ll definitely be making lots more! They’re just so sparkly and fun.
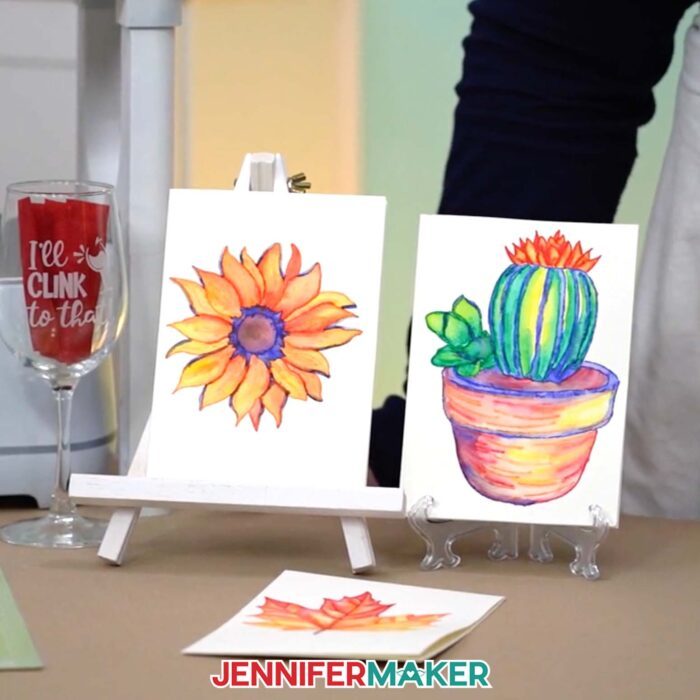
3. Watercolor Wonders
This year, we learned how to make works of watercolor art, and it was so much fun. I bet you’re wondering again what this has to do with a Cricut. I’ll tell you!
In my How to Paint Watercolor Plants with Cricut tutorial, I showed you how to use your Cricut to draw a picture using Cricut-compatible watercolor markers. Simply use one of my watercolor plant designs, set the Operation of the colored lines to “Pen” and choose the color. After a few more easy steps, you’ll be ready to Van Gogh.
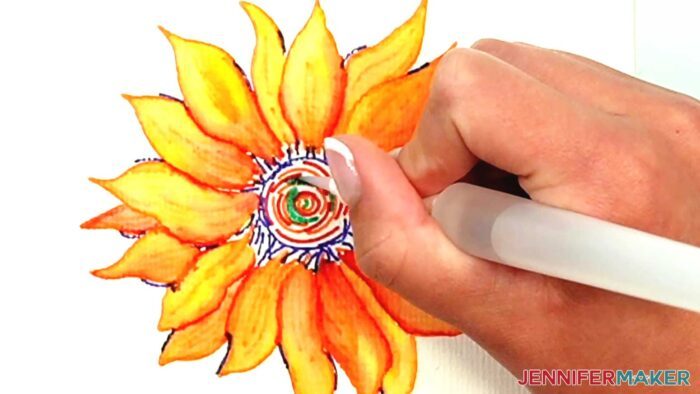
Once your watercolor drawing is finished, it’s time to paint. In the video, I showed you my favorite techniques for watercolor painting. Follow those tips and you’ll be so proud of your finished result. And the best part? We drew then painted our designs on cards — so you can send your artwork through the mail to someone special — and lucky!
2. Puff the Magic Vinyl
Ready for a blast from the past? Puff vinyl was trendy once upon a time, but it’s back! And I had lots of fun testing, re-testing, and then sharing all my findings with you about this tricky new vinyl.
Puff vinyl can be a lot of fun – IF you can get the puff right. Preparing the design in Cricut Design Space, then cutting it on my Cricut went off without a hitch — it was the application that tripped me up.
But I wasn’t alone. Lots of crafters report challenges getting this one right! Turns out, it’s not so easy to get those nice, smooth puffs like you see on the manufacturer’s packaging. So, of course, I set out to find the best way to get more consistent results.
Little did I know that the game changer would be none other than a wooden cutting board. Using a wooden cutting board instead of a pressing mat allowed me to apply the super firm pressure the puff vinyl needed to yield bigger puffs, with fewer wrinkles and undesirable textures left behind.
Bonus tip: Pre-heat your shirt! Puff vinyl and moisture are not friends, so don’t skip this step.
These aren’t just tips, they’re make-or-break guidelines you should follow for the best results! Make sure to watch the full Puff Vinyl tutorial so you don’t miss any important steps.

1. Font Freedom!
Using your own fonts in Cricut Design Space is a super fun way to customize your projects! Design Space and your operating system come with some fonts, but you can open up a whole new world of customization when you know how to install additional fonts you found or purchased onto your operating system. Then I walked you through how to locate and use them in your projects in Cricut Design Space!
But first, you need a new font. Don’t have one yet? Check out my font collection full of typefaces I designed.
Whether you’re using a Mac or Windows, I walk you through the whole process in my tutorial. Just scroll down to see the steps, or watch the video.
There are lots of free fonts available at websites like dafont.com, but I designed a brand new one just for the occasion! It’s called JM Merry, and isn’t it adorable?
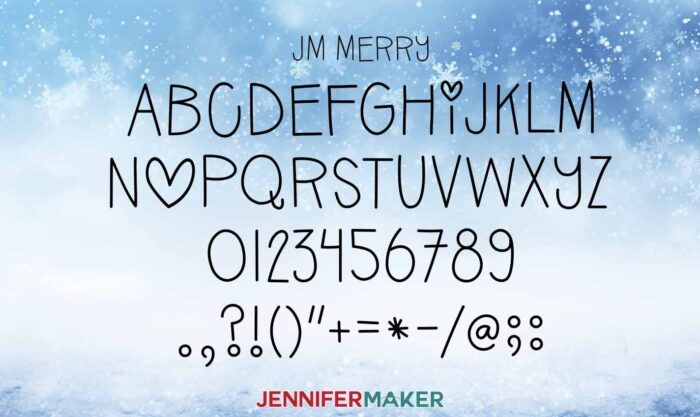
To get this new font, go to my free resource library and download #576. Then follow the instructions in the video to install it, or see the written directions below!
Let me show you some of my best Cricut tips! This post contains some affiliate links for your convenience (which means if you make a purchase after clicking a link I will earn a small commission but it won’t cost you a penny more, there is no additional cost)! Read my full disclosure policy.
Materials to Make Projects from My Top 10 Cricut Tips
For most projects:
- A way to cut your materials – I’m using the Cricut Maker 3 but depending on the project, you may be able to use the original Maker, an Explore series machine, the Venture, Joy Xtra, or original Joy.
- Cricut Green StandardGrip Machine Mat 12″ x 12″
- Scraper Tool (for removing small pieces of material from your mat)
- Spatula
- Weeding Tool
- Scissors
- Brayer
For iron-on vinyl projects:
- Cricut Everyday Iron-On Vinyl -OR- Glitter Iron-On Vinyl -OR- Foil Iron-On Vinyl
- A T-Shirt (I like Bella Canvas Women’s Long Length Favorite Jersey T-Shirts)
- Parchment Paper
- Lint Roller
- DIY T-shirt Ruler Guide
- Classic Home Iron
For printable vinyl stickers:
- One pack of Cricut White Printable Vinyl -OR- JOYEZA White Printable Vinyl
- One pack of Clear Printable Vinyl
For paper lantern projects:
- 12″ x 12″ 65 lb. Solid Core Cardstock -OR- 12” x 12” 100 lb. Solid Core Cardstock
- 8.5” x 11” Vellum -OR- 12” x 12” Wax Paper -OR- 8.5″ x 11″ Copy Paper
- 8.5″ x 11″ or 12″ x 12″ Glitter or Foil Cardstock
- Battery-Operated LED Puck Light -AND- Three (3) AAA Batteries -OR- Strand of LED Fairy Lights -OR- Remote-Controlled LED Tea Light
For engraved night lights:
-
4.5” Round Acrylic Disc, 2 mm or thinner (another disk option)
-
LED Light Base -OR- LED Light Base NOTE: The disks that come with the bases are 4 mm thick and do not fit in the Cricut
- Cricut Engraving Tip with Housing (note: If you have a Cricut Explore that is out of warranty, you can try this etching/engraving tool)
- Cricut Purple StrongGrip Machine Mat 12” x 12”
- Painter’s Tape
- Ruler
- Soft Cloth
For rhinestone T-shirts:
- A T-Shirt (I like Bella Canvas Women’s Long Length Favorite Jersey T-Shirts)
- One bag each of Clear SS10 Rhinestones, SS10 Light Siam Rhinestones, SS6 Light Siam Rhinestones, SS10 Peridot Rhinestones, SS6 Peridot Rhinestones, SS10 Red Rhinestones, and SS6 Siam Rhinestones
- One roll each of Flock Rhinestone Template Material and Rhinestone Heat Transfer Material – mine came together in a kit and I used about 70″ of each 12″ wide roll for all of my layers. Each roll contains 72″ of material.
- Small paint touch up pad and applicator
- Tweezers
- Rhinestone Picker Tool and Wax
- T-Shirt
- Baking Sheet large enough to hold your template layers
- Lint Roller
- Ruler
For watercolor projects:
- Cricut Watercolor Markers and Watercolor Brush Pen -OR- Realike Markers -AND- Watercolor Brush Pen
- Cricut 4.75″ x 6.6″ Watercolor Paper Notecards -or- Watercolor Paper 5.8″ x 8.3” Extra Fine Grade
- Paper Towels
- Cotton Swabs (optional, for shading)
- Bowl of Water (to fill your brush)
For puff vinyl projects:
- T-shirt, like this 100% Cotton Women’s Long Length T-Shirt
- VTS 3D Super Puff Vinyl
- Cricut EasyPress or Cricut AutoPress
- 1″ thick Wooden Cutting Board
For font projects:
How to Download a New Font for Cricut Design Space
Learn my Top 10 Cricut TIps 2023 for better Cricut crafting! STEP 1: GET MY FREE JM MERRY FONT 4. Next time you open Cricut Design Space, click "System" under the Font menu and JM Merry will be available! 4. Next time you open Cricut Design Space, click "System" under the Font menu and JM Merry will be available! Fonts used: JM Merry
Top Cricut Tips of 2023: Upload A New Font to Cricut Design Space
Instructions
1. First, download my JM Merry font from my free library -- look for design #576. Alternatively, you can use the Save This Project form near the top of this post and the design link will be emailed to you.
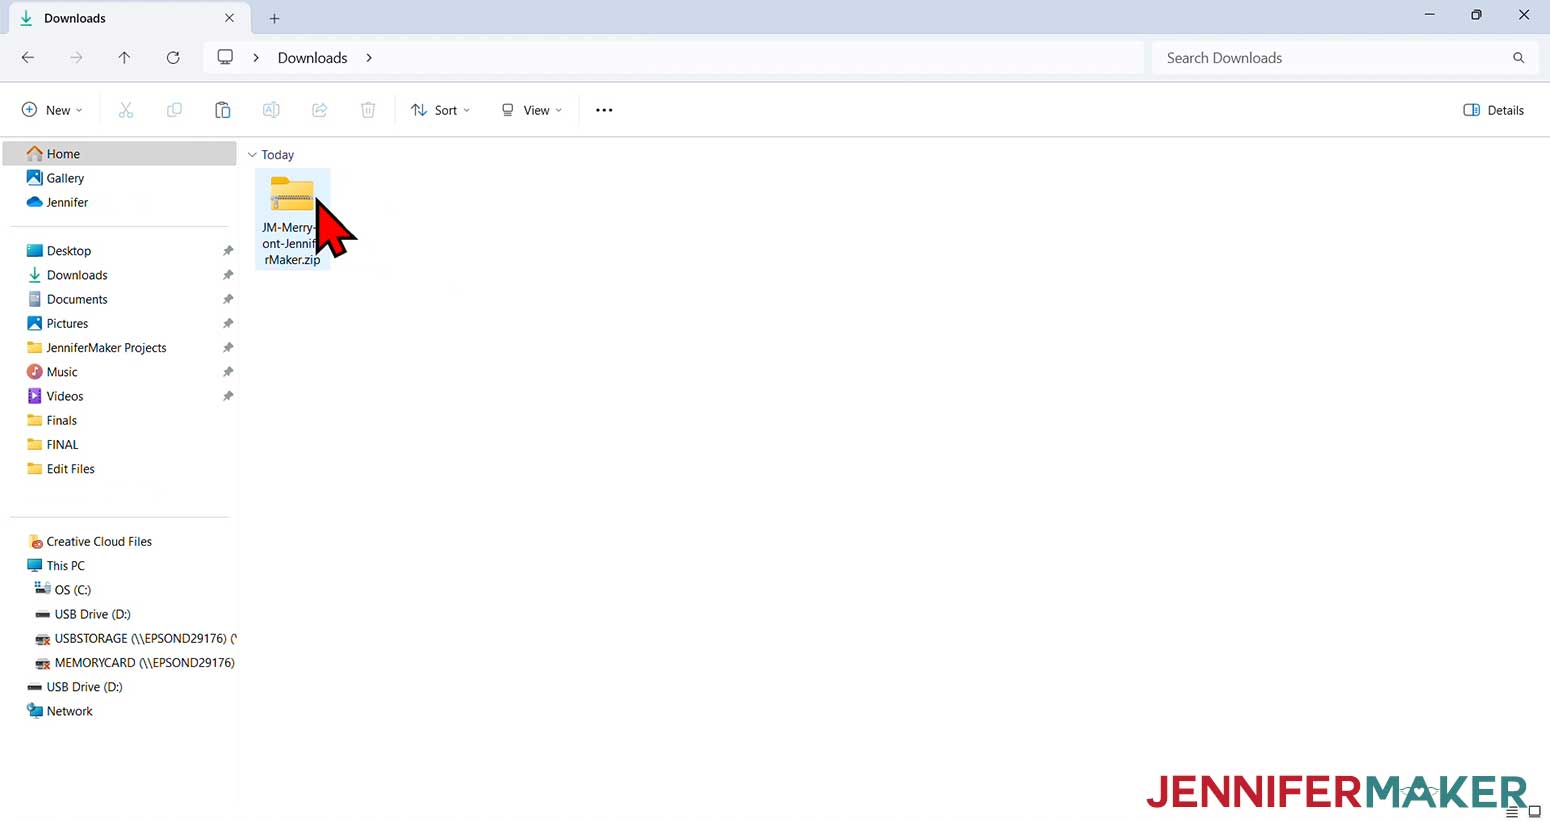
TIP: Pay attention to where your font downloads so you can find it.
2. Find the file, then double-click it to unzip it.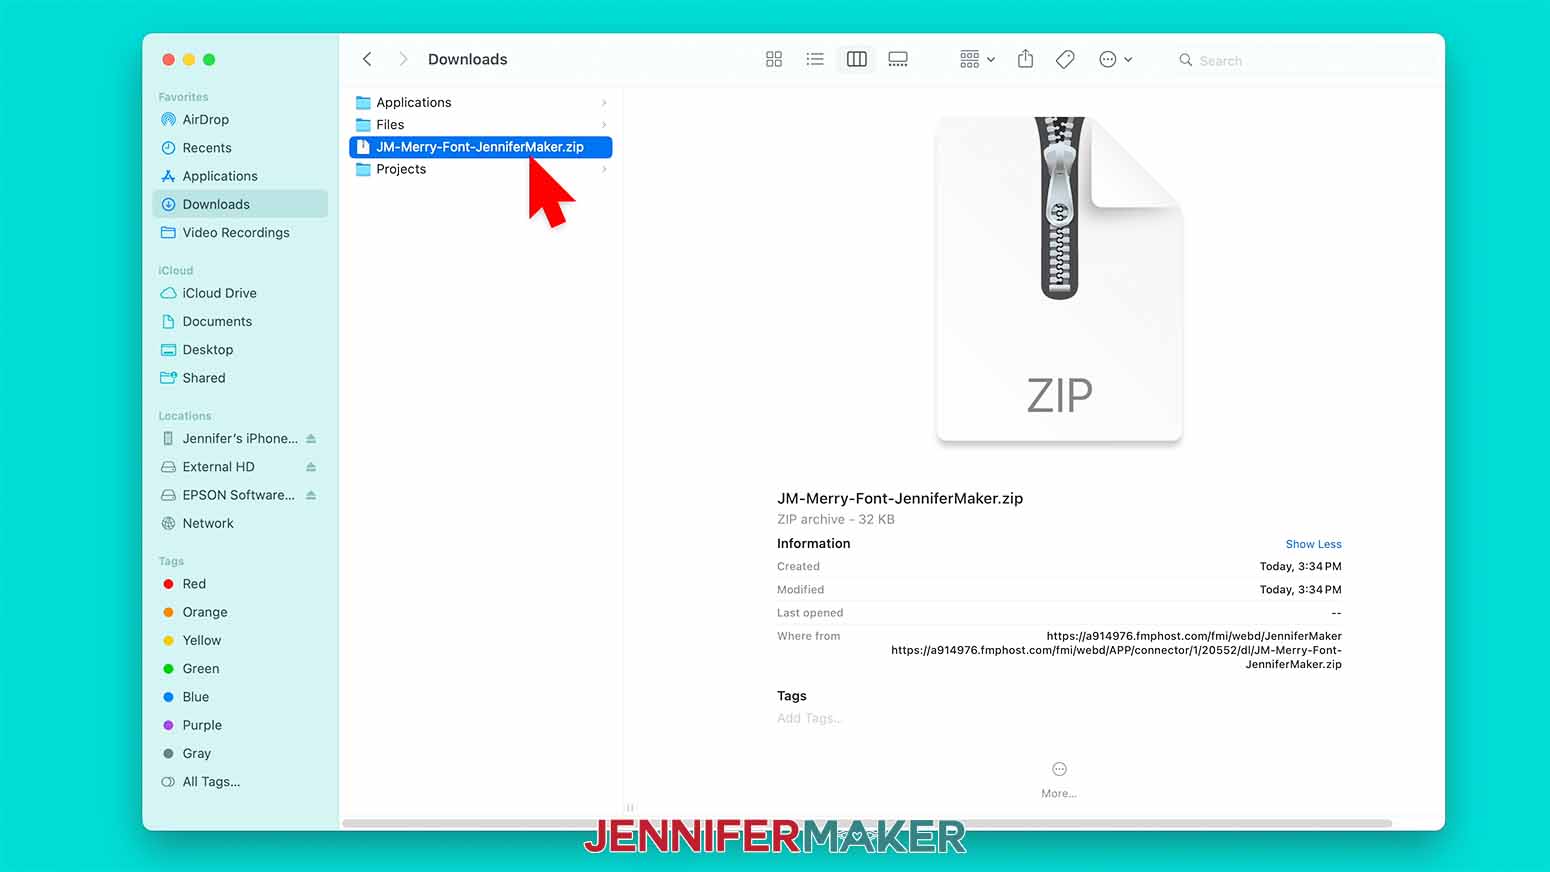
3. Open the unzipped folder. There are three files in the folder. 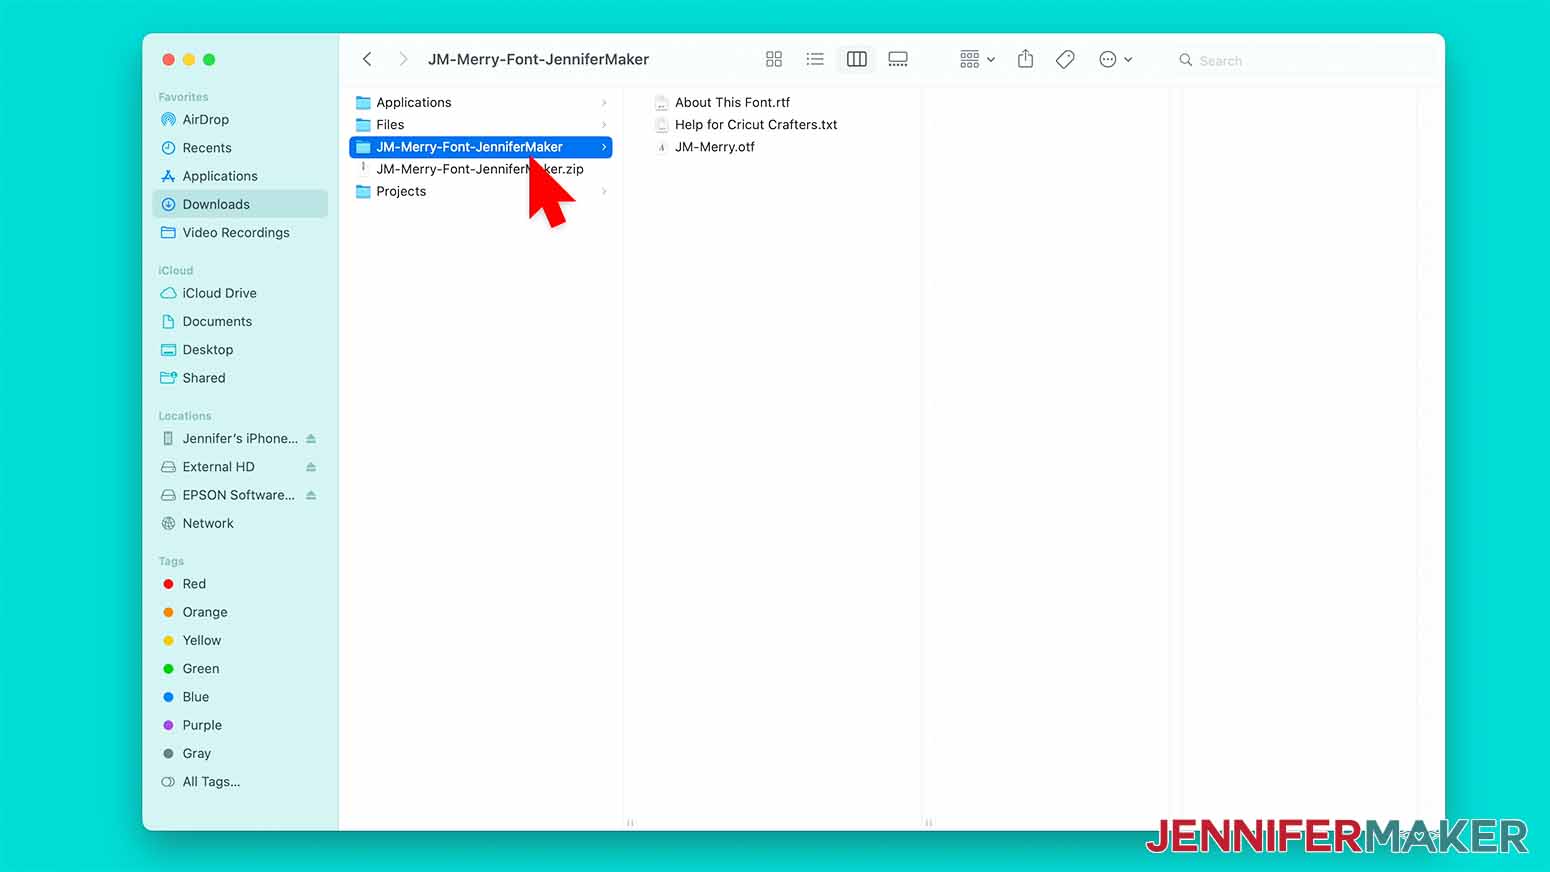
The first is an “About This Font” file, which contains some information about the font, and includes my Terms of Use and License as well as an email address to ask for help if needed.
The second is a “Help for Cricut Crafters” file which tells you how to get some additional support for your Cricut crafts.
The third file is called JM-Merry.otf – that’s the font file.
STEP 2: UPLOAD AND INSTALL THE FILE TO YOUR OPERATING SYSTEM
OPTION 1: MAC OS
MAC OS
1. If the Cricut Design Space program is open, close it. If you leave Cricut Design Space open, you’ll need to quit and restart it after installing the font. 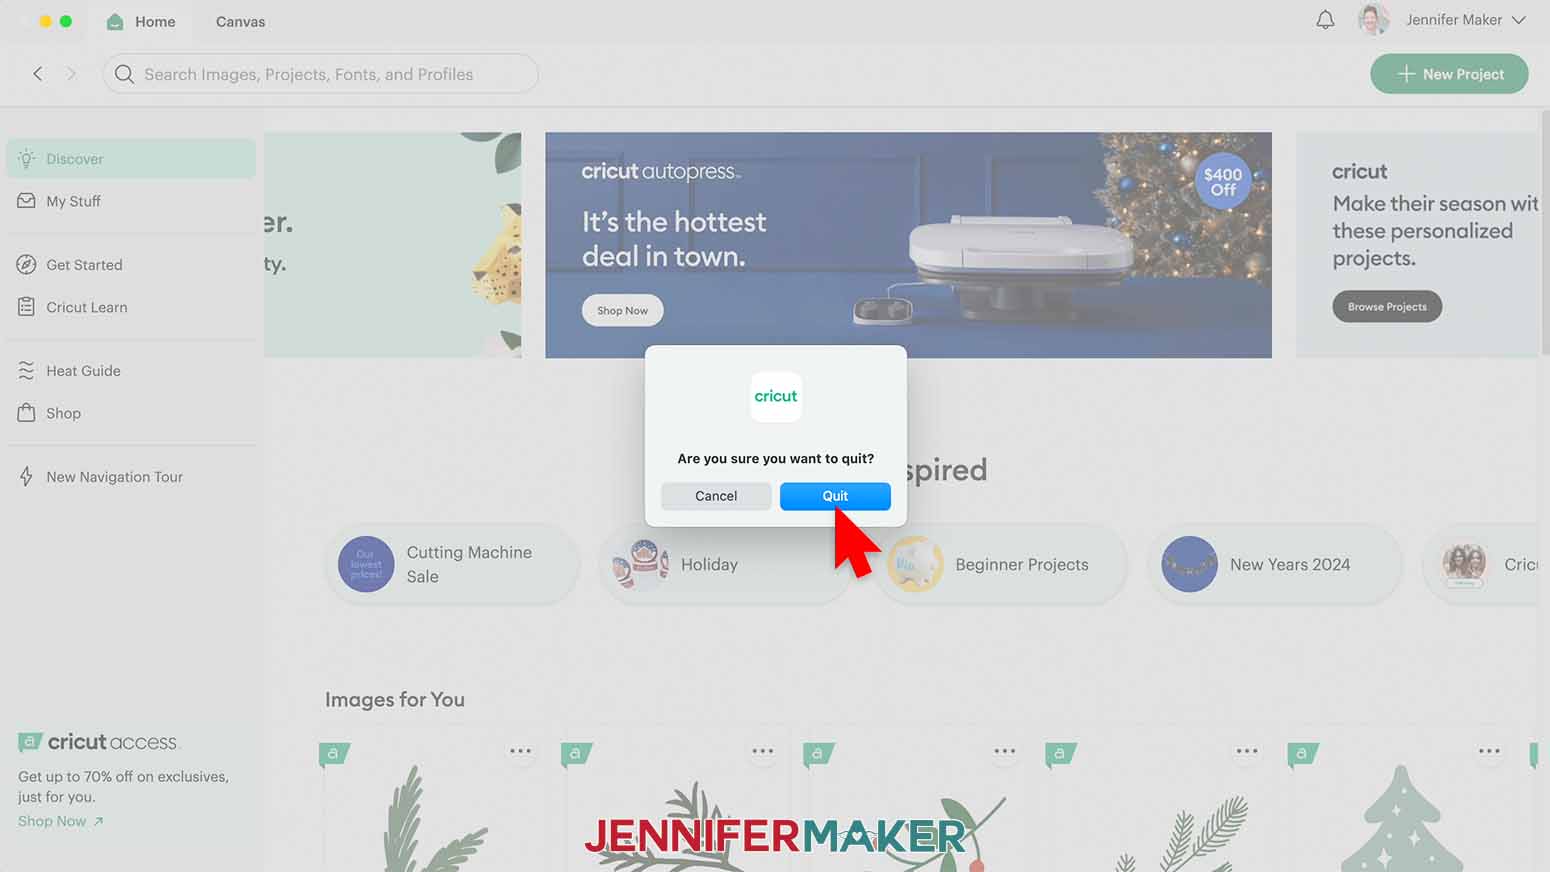
2. Double-click the JM-Merry.otf file. A pop-up will appear, showing the font.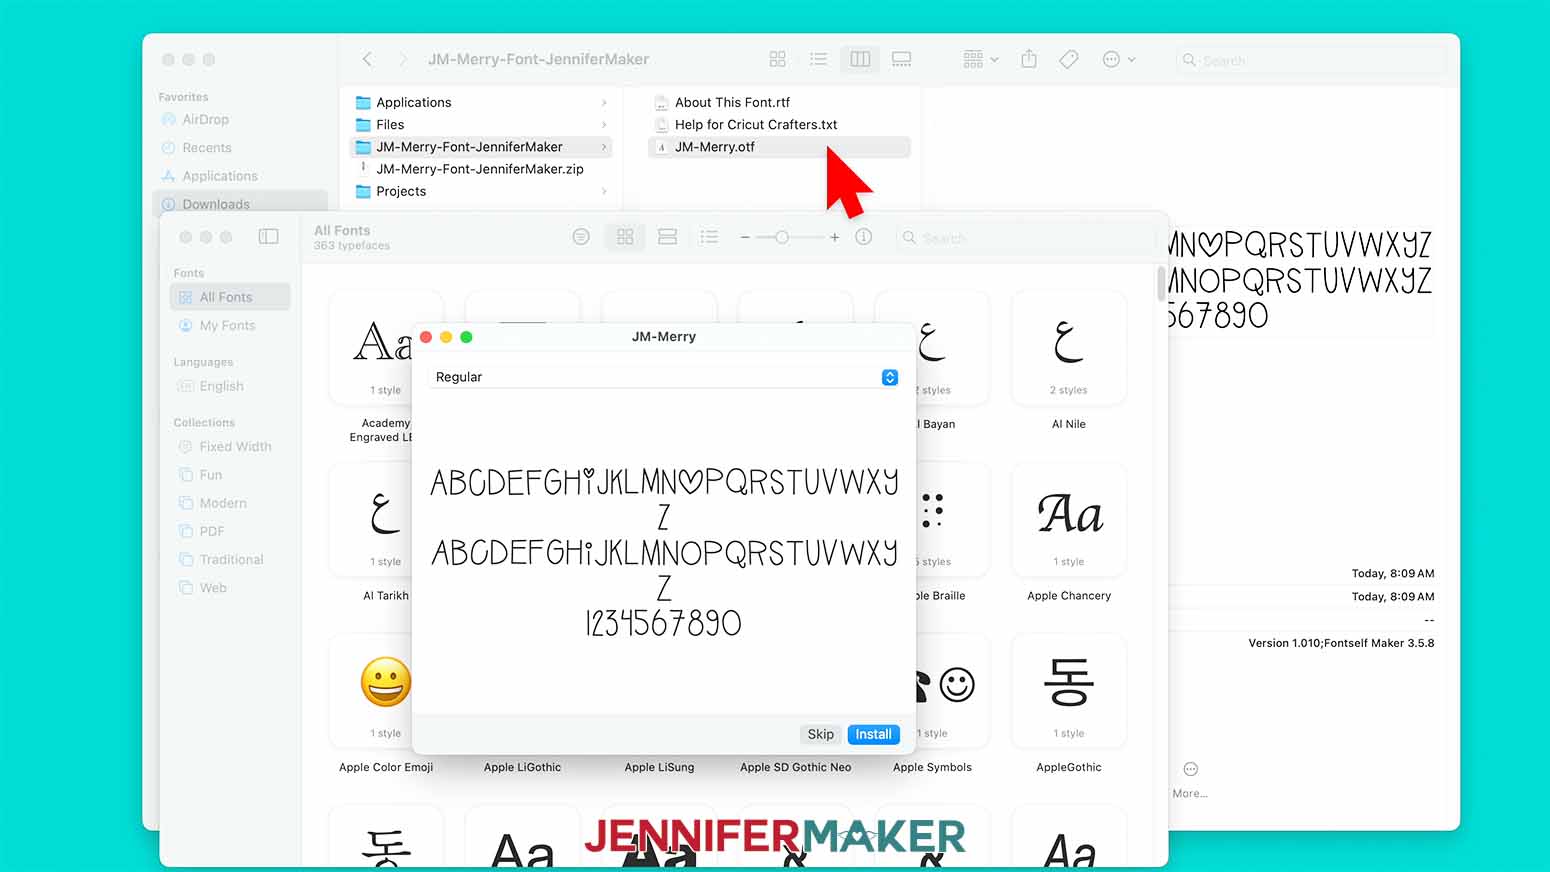
3. Click “Install.” The window will disappear, and your font is now installed to your Mac OS.
NOTE: Font Book will automatically open up and show you the new font that you just installed. You can quit Font Book after JM Merry is installed.
OPTION 2: WINDOWS
WINDOWS
1. If the Cricut Design Space program is open, close it. If you leave Cricut Design Space open, you’ll need to quit and restart it after installing the font. 
2. Double-click the JM-Merry.otf file. A pop-up will appear, showing the font.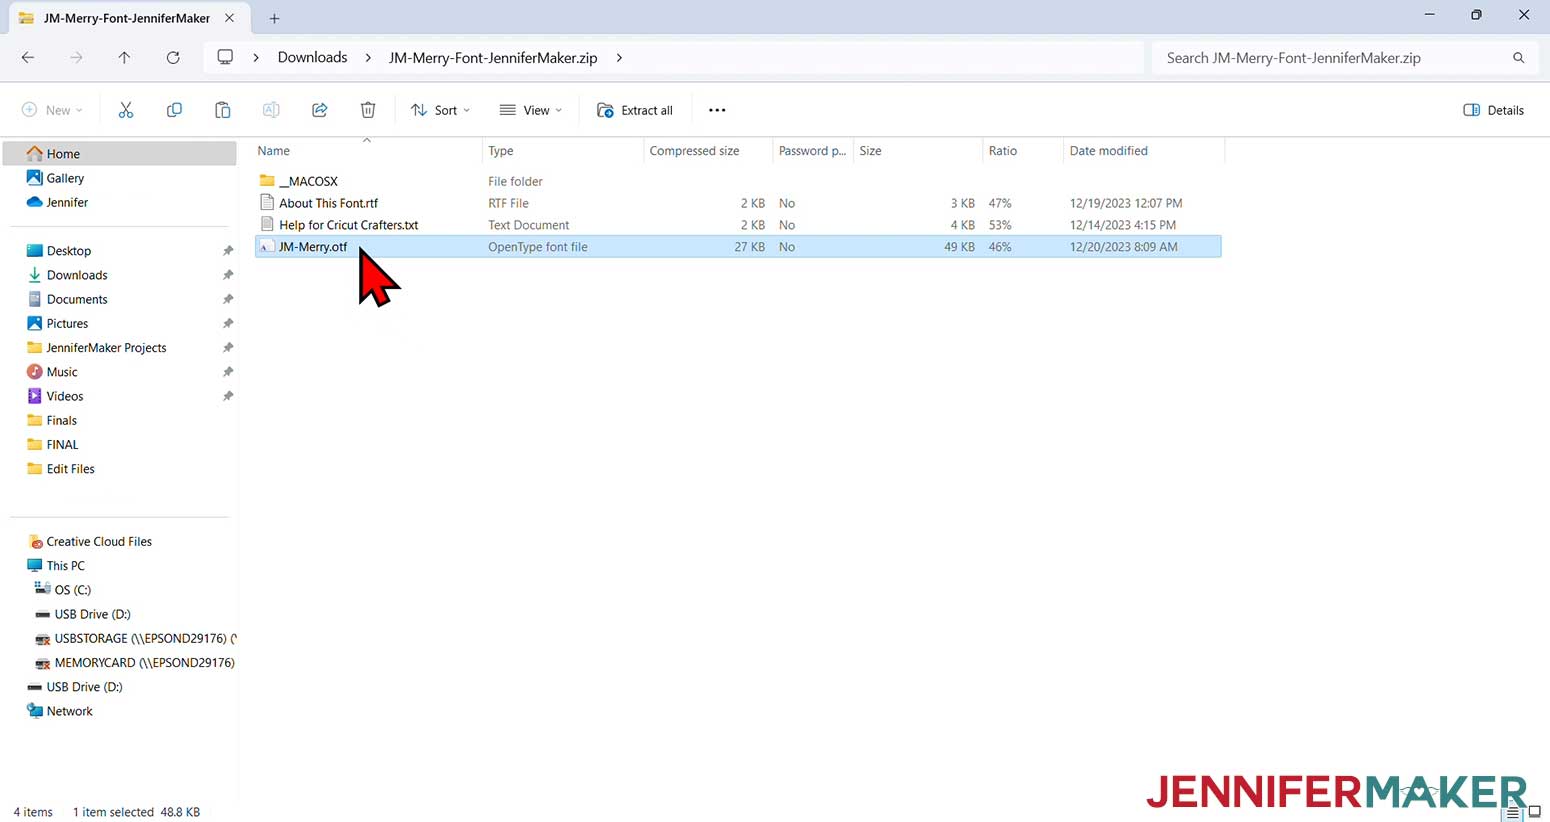
3. Click “Install.” Your font is now installed to your Windows PC, and you can close the window. 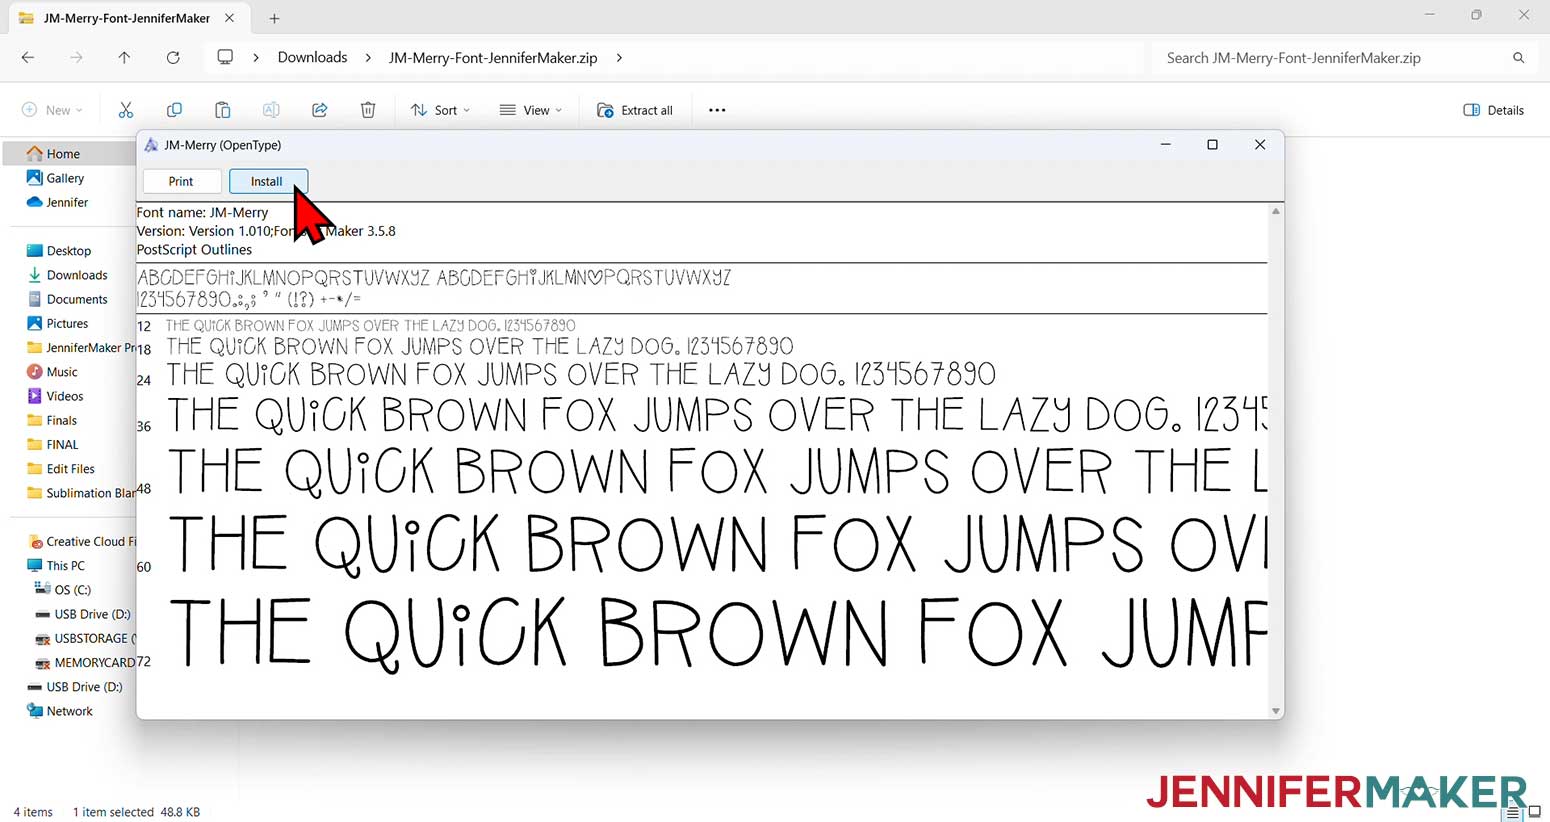
Notes
Answers to Your Questions About My Best Cricut Tips of the Year
Q: How do I get the most out of my Cricut?
A: Got a new Cricut machine and need help? One of my best tips to get the most out of your new shiny toy is to watch or read tutorials. Luckily, I have a ton of tutorials to share with you! This way, you’ll learn your Cricut (and the Cricut Design Space software) through and through — and discover things you didn’t even know it could do.
Another great way to learn your Cricut is to take a course, like my Cricut Kickoff! It will set you up with everything you need to know to get started, and guide you through beginner crafts so you can get comfortable with your amazing new machine.
Q: What is the first thing to make with a Cricut?
A: In Cricut Kickoff, the first project I’ll show you how to make is an amazing pop-up flower pot card! It may look intimidating, but I promise it’s not — and you’ll find out how easy it really is to make amazing projects thanks to a Cricut. Once you have some practice, you’ll be able to make everything from cards to home decor, gifts, projects using your own images, your own SVG files, and more!
Q: Is there a lot of waste with Cricut?
A: That depends. There is always going to be some waste with crafting, but I’ve got lots of tips and tricks for minimizing waste. My favorite tips include doing tests (like the HTV test I showed you this year), using your scrap materials on future projects, and carefully following the steps in tutorials so you get it right the first time.
Q: What do I need to know before getting a Cricut?
A: Before you go out and purchase whichever Cricut is in stock at your local craft store, first you need to know which Cricut is right for you! There are several models to choose from, like the Cricut Venture, Maker 3, original Maker, Explore 3, Explore Air 2, Joy, and Joy Xtra, but this post can help you decide.
Q: Which Cricut can do the most things?
A: The Maker 3 has the most varied capabilities, can cut the largest number of different materials, and it’s the machine I use most often. It’s also compatible with the most different blades and other tools. However, you should compare the machines so you know which one is best for you!
Q: How do I add fonts to Cricut Design Space?
A: Adding fonts to Cricut Design Space is easy! Simply install the font on your operating system, re-start Design Space, and voila! You can follow the full, detailed steps in the tutorial in this post.
Q: Why isn’t my font showing up in Cricut?
A: Have you restarted Cricut Design Space after installing the font on your operating system? This is the most likely culprit. Follow the step-by-step instructions in this post to make sure your fonts have been installed correctly, then quit and restart Design Space to access them for your projects.
Get my free font to use in your own Cricut crafts!
I love seeing what you make with my designs, files, and fonts and how you use them! Please share photos of projects from my Cricut Tips 2023 in our Facebook group or tag me on social media with #jennifermaker.
Love,

Want to remember this? Save my Top 10 Cricut Tips to your favorite Pinterest Board!