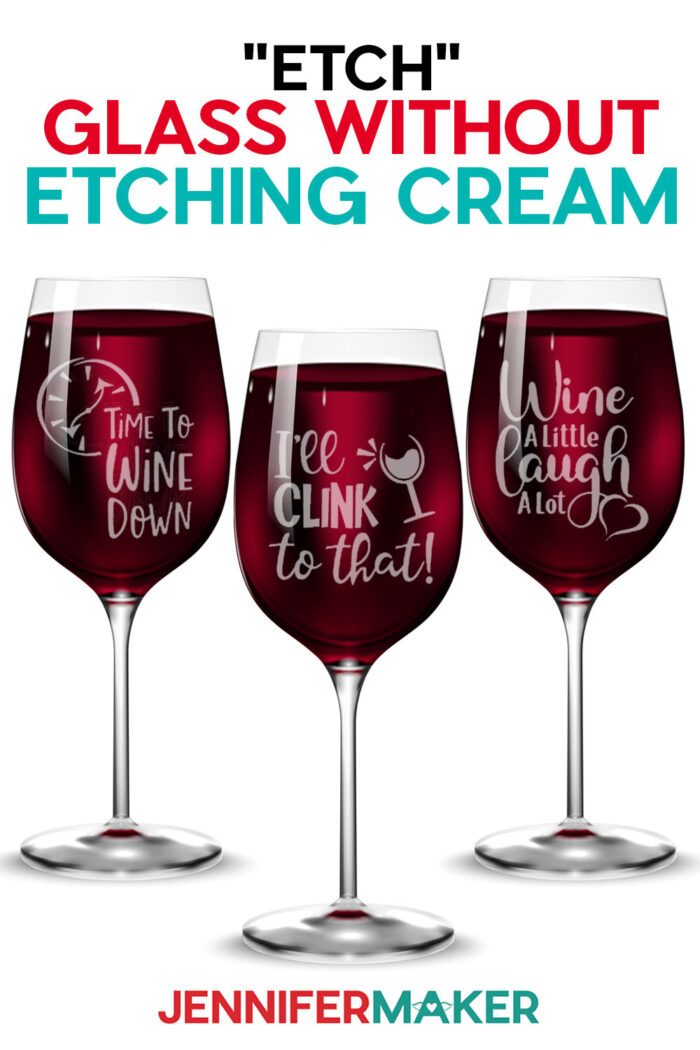
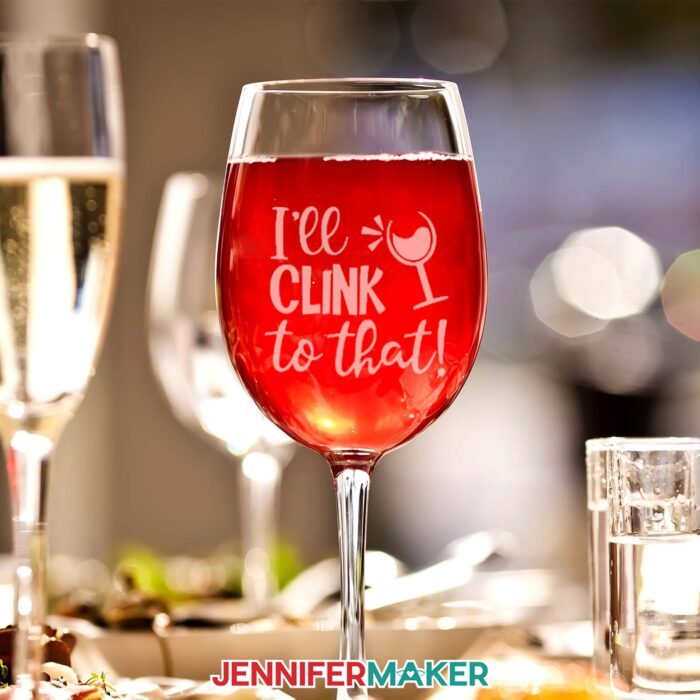
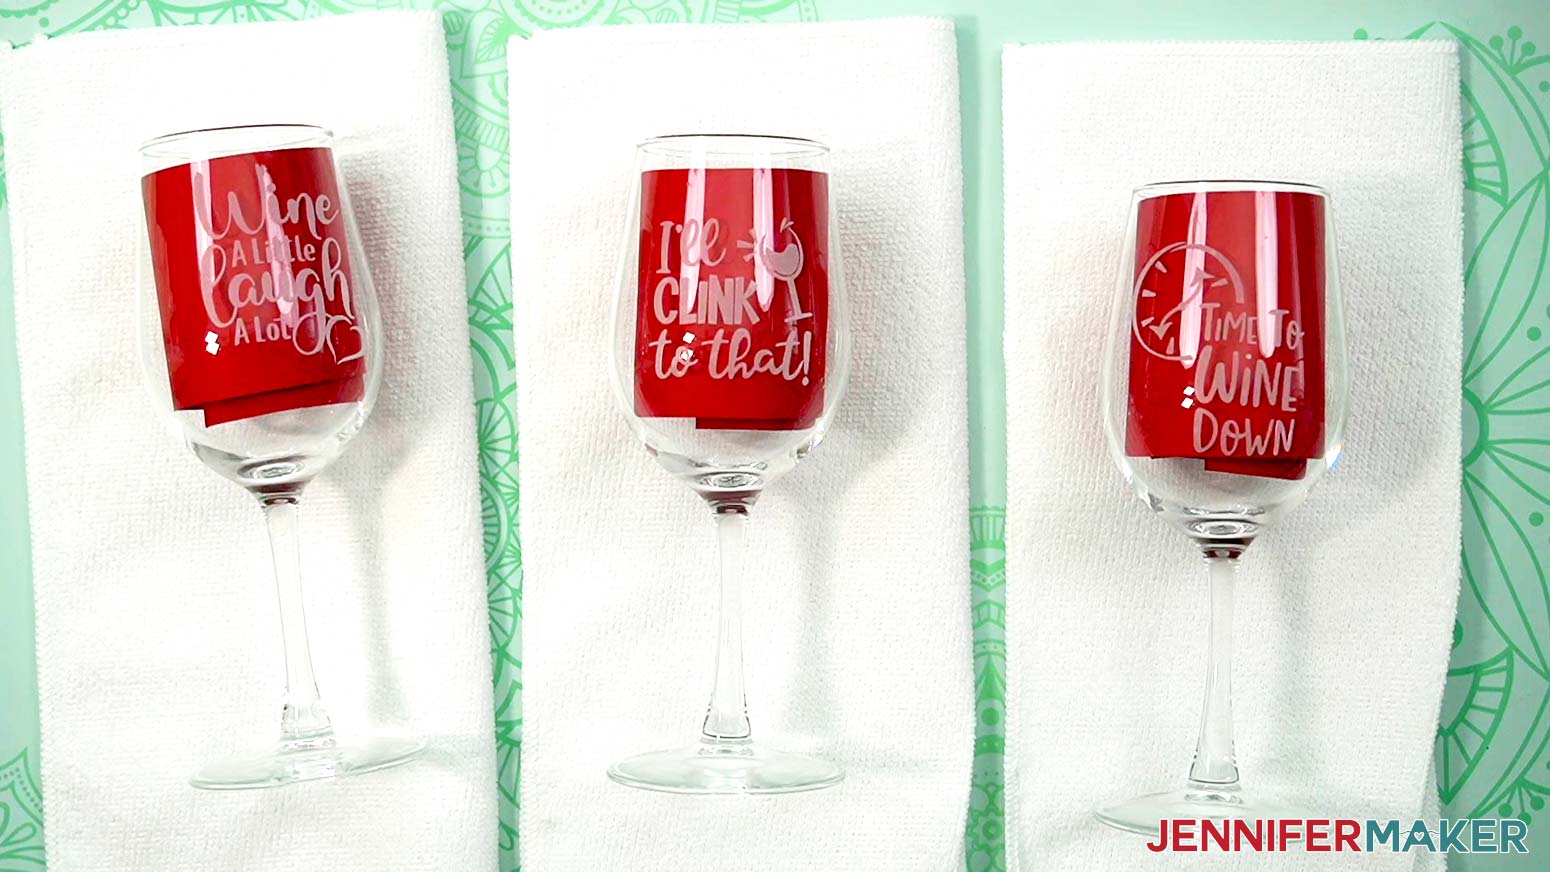
Learn how to make faux-etched wine glasses with frosted vinyl for glass!
Don’t get me wrong, I love real etched glass. We all know that etching cream is magical and can give some really beautiful results. But it’s a pretty messy process with a slew of safety concerns — which is kind of a buzzkill when you’re just wanting to whip up a few cute glasses. You’ve all loved my wine glass projects in the past (especially this glitter one!), but I think this faux etching with frosted vinyl for glass is my favorite! But why?

This is a Cricut Mystery Box project — it uses the Frosted Permanent Vinyl from the Mixed Materials, Enchanted Forest that you can get in the “Happy Camper” mystery box (affiliate link) that came out June 27, 2023. Even if the mystery box is not available when you check, you can still purchase the individual vinyls, which are all linked below in my material list. Learn more about Cricut Mystery Boxes and their contents in my Cricut Mystery Box Guide.
While glass etching can be a big task, especially if you just want to whip up a few decorated wine glasses in a short amount of time, the frosted vinyl way is so easy. It’s a great way to create a beautiful gift or to celebrate a special occasion, and only takes just a few minutes to make!
I’ll walk you through the whole process, including my best tips for perfect application on a curved glass surface. And unlike a real glass etching project, you don’t need ventilation, gloves, or a respirator! Nice, huh?

I’ve got three cute wine glass design options to share with you, or you can use or make your own. Just be sure that your design can be sized small enough to cut on your Cricut. I’ll use my Cricut Maker 3, but you can even use the Cricut Joy, which I love to use for little projects like this.
You only need a few key materials and tools to get this project done and ready for some bubbly. I used 12oz stemmed wine glasses, but you can use any kind of glass you like. You’ll also need some Cricut Frosted Vinyl, some StrongGrip transfer tape, and some cinnamon.
No, I’m not just checking if you’re paying attention. I bet you’re thinking, “Jennifer, you’ve had some pretty crazy crafting ideas, but what’s with the cinnamon?” You’ll just have to watch the tutorial to see!
Aside from a few more items you can find in the materials list, you’re ready to make some fun faux etched wine glasses with awesome frosted vinyl for glass!
Ready to learn how to make wine glasses with frosted vinyl for glass? This post contains some affiliate links for your convenience (which means if you make a purchase after clicking a link I will earn a small commission but it won’t cost you a penny more)! Read my full disclosure policy.
Materials And Tools to Make Wine Glasses with Frosted Vinyl for Glass
- 1 Pack Cricut Mixed Materials, Martha Stewart Enchanted Forest -Or-
1 pc approximately 3.5″ square Cricut Frosted Vinyl - 1 pc approximately 3.5″ square StrongGrip Transfer Tape
- 12 oz Stemmed Wine Glasses
- A method to cut your vinyl: I used the amazing Cricut Maker 3, but you can also use the Cricut Maker, Cricut Explore Series, or Cricut Joy
- Cricut Green StandardGrip Machine Mat 12” x 12”
- Brayer
- Weeding Tool
- Scissors
- Scraper Tool
- Paper Trimmer – optional for cutting the vinyl
- Towel for stabilizing the wine glass on your work surface
- Isopropyl Alcohol -AND- Coffee Filters for cleaning your wine glass
- Ruler
- OPTIONAL: Ground Cinnamon (for easy weeding!) -AND- Baby Wipes (for cleaning cinnamon off your mat)
- Brush – optional to help remove excess cinnamon
- OPTIONAL: Dark Colored Cardstock (for easy applying!)
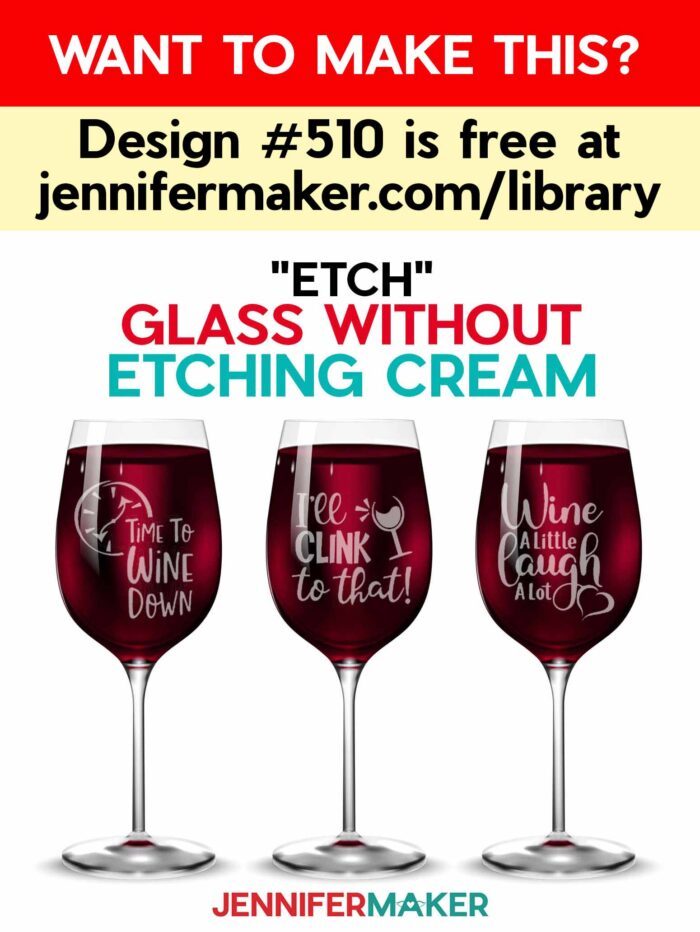
- Design #510 (My free SVG/PDF/DXF design files available in my free resource library – get the password by filling out the form at the bottom of this page)
How to Use Frosted Vinyl for Glass to Make Faux Etched Wine Glasses!
Frosted Vinyl For Glass
Learn how to easily get an etched glass look without the messy etching cream by using frosted vinyl for glass!
Materials
- 1 Pack Cricut Mixed Materials, Martha Stewart Enchanted Forest -Or-
- 1 pc approximately 3.5" square Cricut Frosted Vinyl
- 1 pc approximately 3.5" square StrongGrip Transfer Tape
- 12 oz Stemmed Wine Glasses
- OPTIONAL: Ground Cinnamon (for easy weeding!)
- OPTIONAL: Dark Colored Cardstock (for easy applying!)
- Design #510 (My free SVG/PDF/DXF design files available in my free resource library - get the password by filling out the form at the bottom of this page)
Tools
- A method to cut your vinyl: I used the amazing Cricut Maker 3, but you can also use the Cricut Maker, Cricut Explore Series, or Cricut Joy
- Cricut Green StandardGrip Machine Mat 12” x 12”
- Brayer
- Weeding Tool
- Scissors
- Scraper Tool
- Isopropyl Alcohol
- Coffee Filters
- Ruler
- Paper Trimmer (optional to cut vinyl)
- Paintbrush (optional to brush off cinnamon)
- Towel (optional to hold wine glass steady)
- Wipes (optional to clean cinnamon off mat)
Instructions
STEP 1: GET MY FREE FROSTED VINYL FOR GLASS FILES
First, download my Frosted Vinyl SVG/PDF/DXF files from my free resource library. It's Design 510.
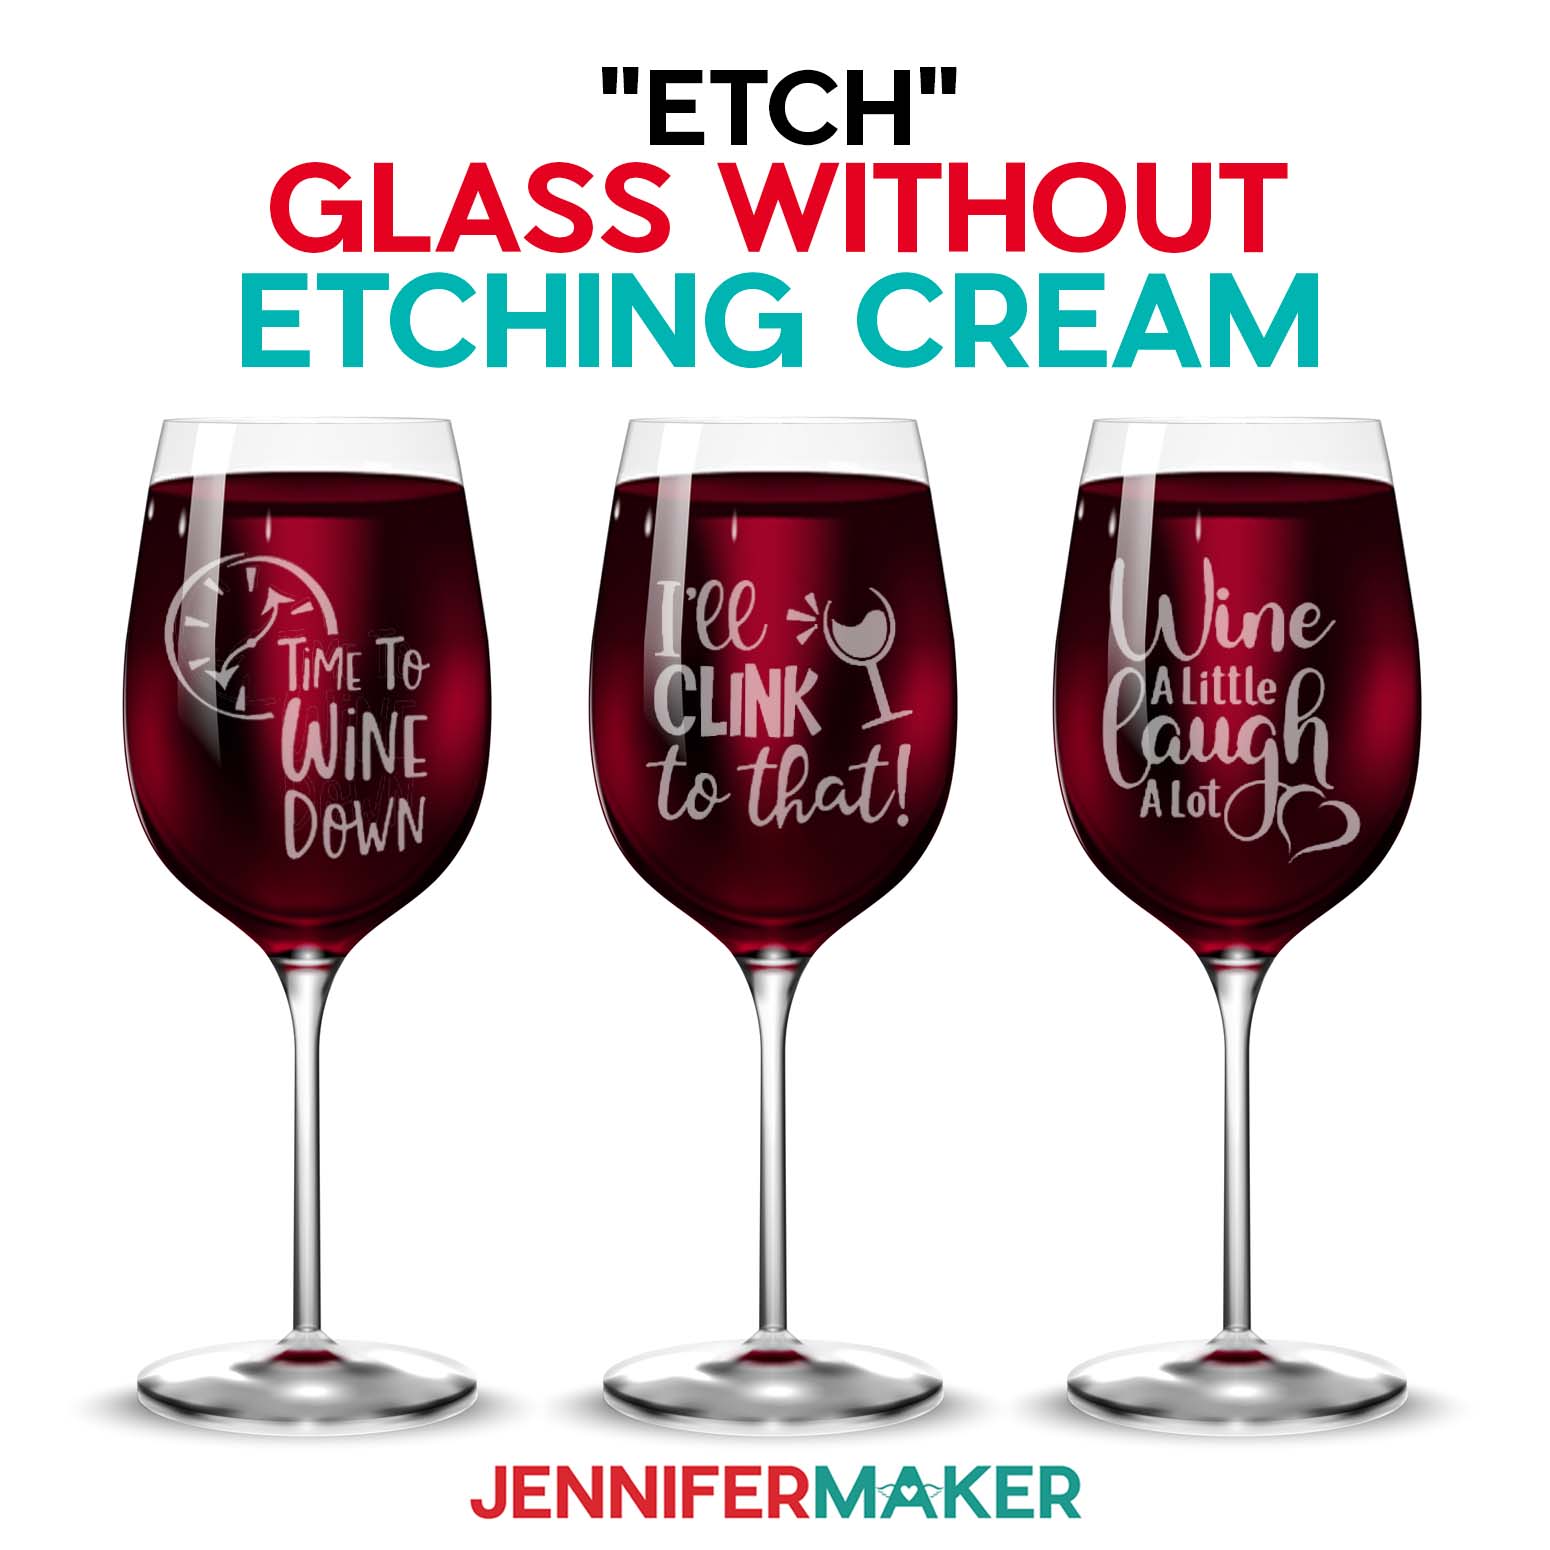
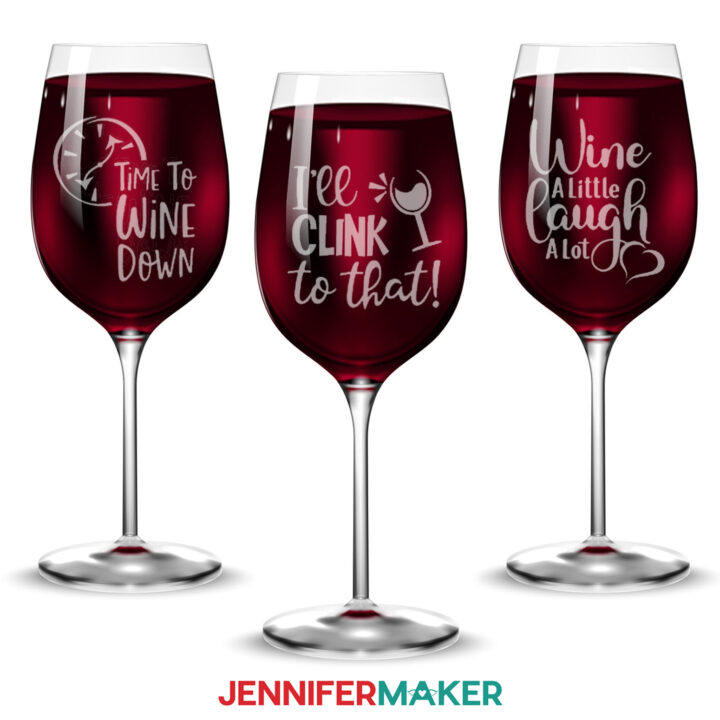
The file includes three different fun designs you can place on your glasses:
- “I’ll Clink To That” (2.1” x 2”)
- “Time To Wine Down” (2.26” x 2.5”)
- “Wine A Little Laugh A Lot” (2.11” x 2.5”)
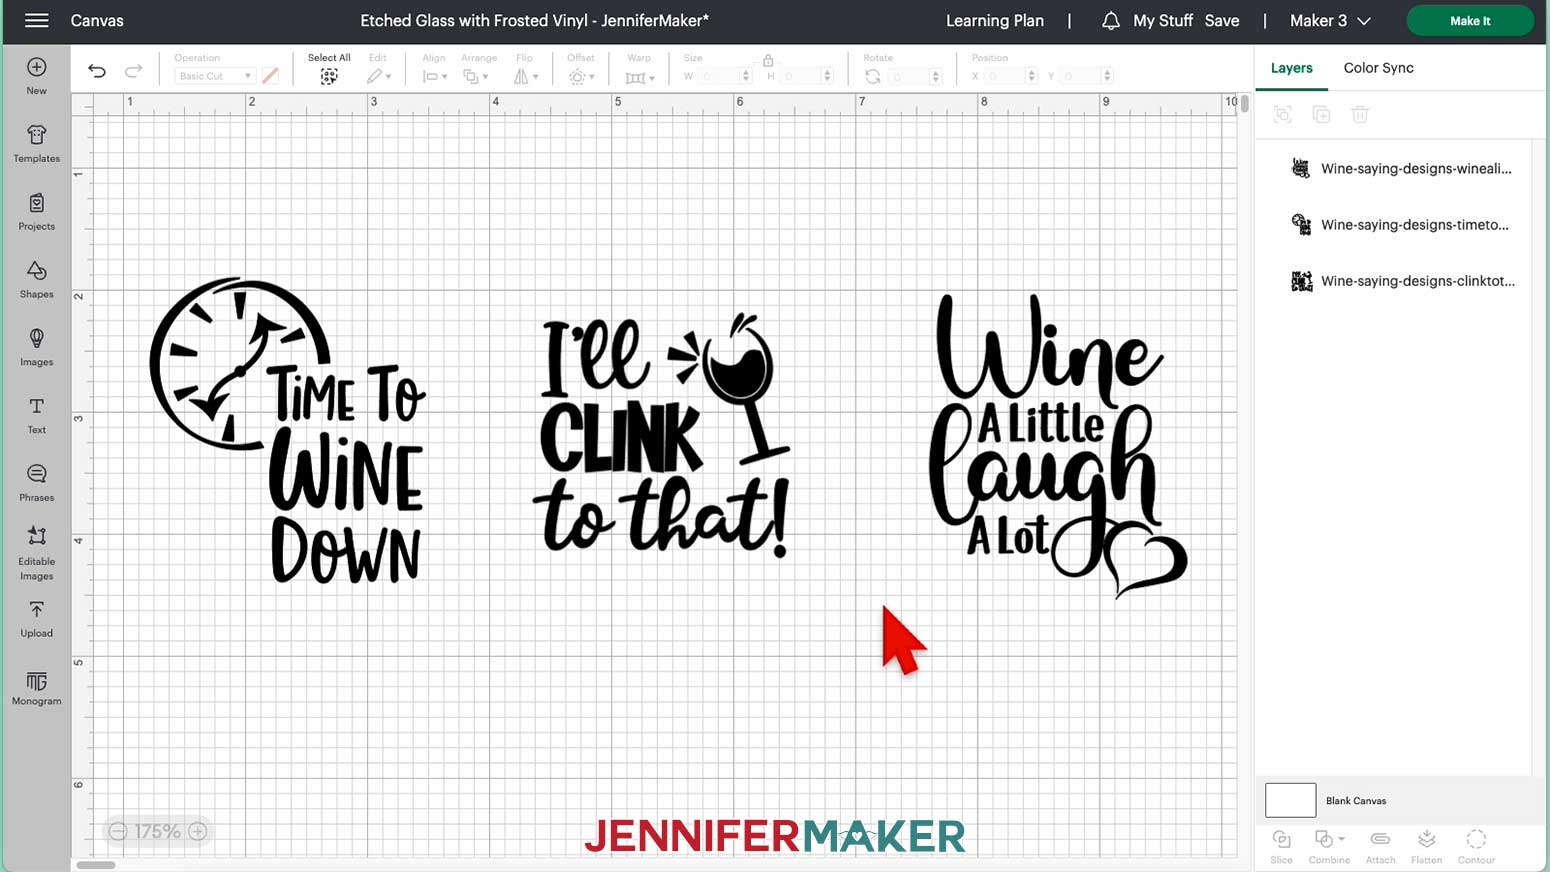
Upload the SVGs and add them to your Canvas.
If you are not sure how to upload an SVG cut file to Cricut Design Space, watch this helpful video training series I made.
If you are on an iPad or iPhone, here is how to download and upload SVG files to the Cricut Design Space app.
TIP: You can also design your own monograms in Design Space that are suitable for vinyl decals! Check out my How To Glitter Wine Glasses project for detailed instructions!
STEP 2: PREPARE THE DESIGNS
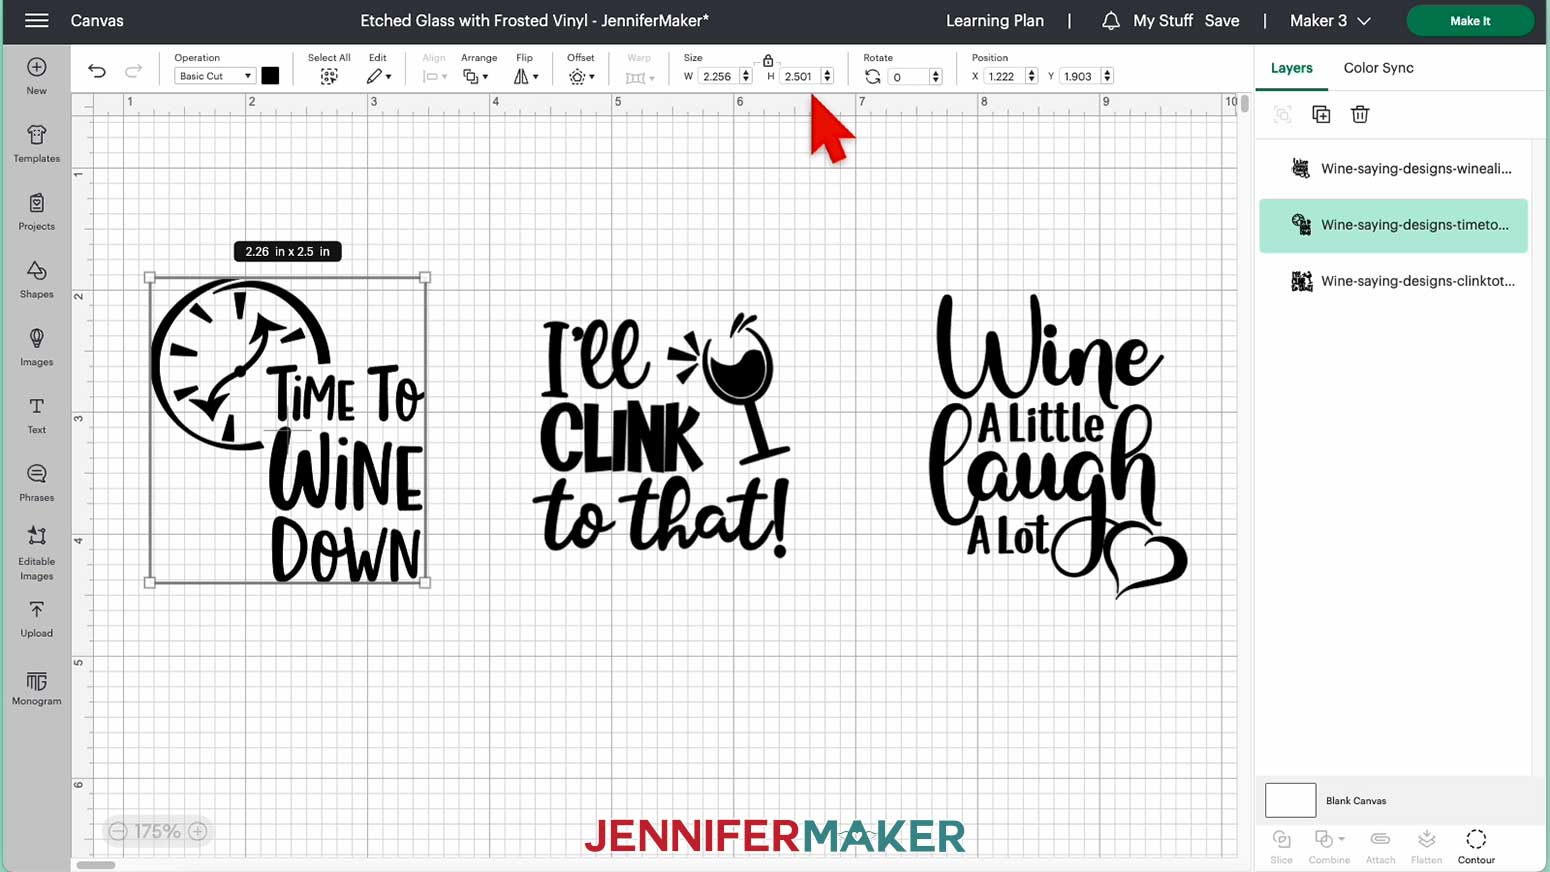
Here is how the designs look on my Canvas.
All three decal designs are sized for the exact glasses I use in this tutorial, but if you have different-sized glasses, you can change the size of the decals.
First, measure the height of the space in which your decal will need to fit.
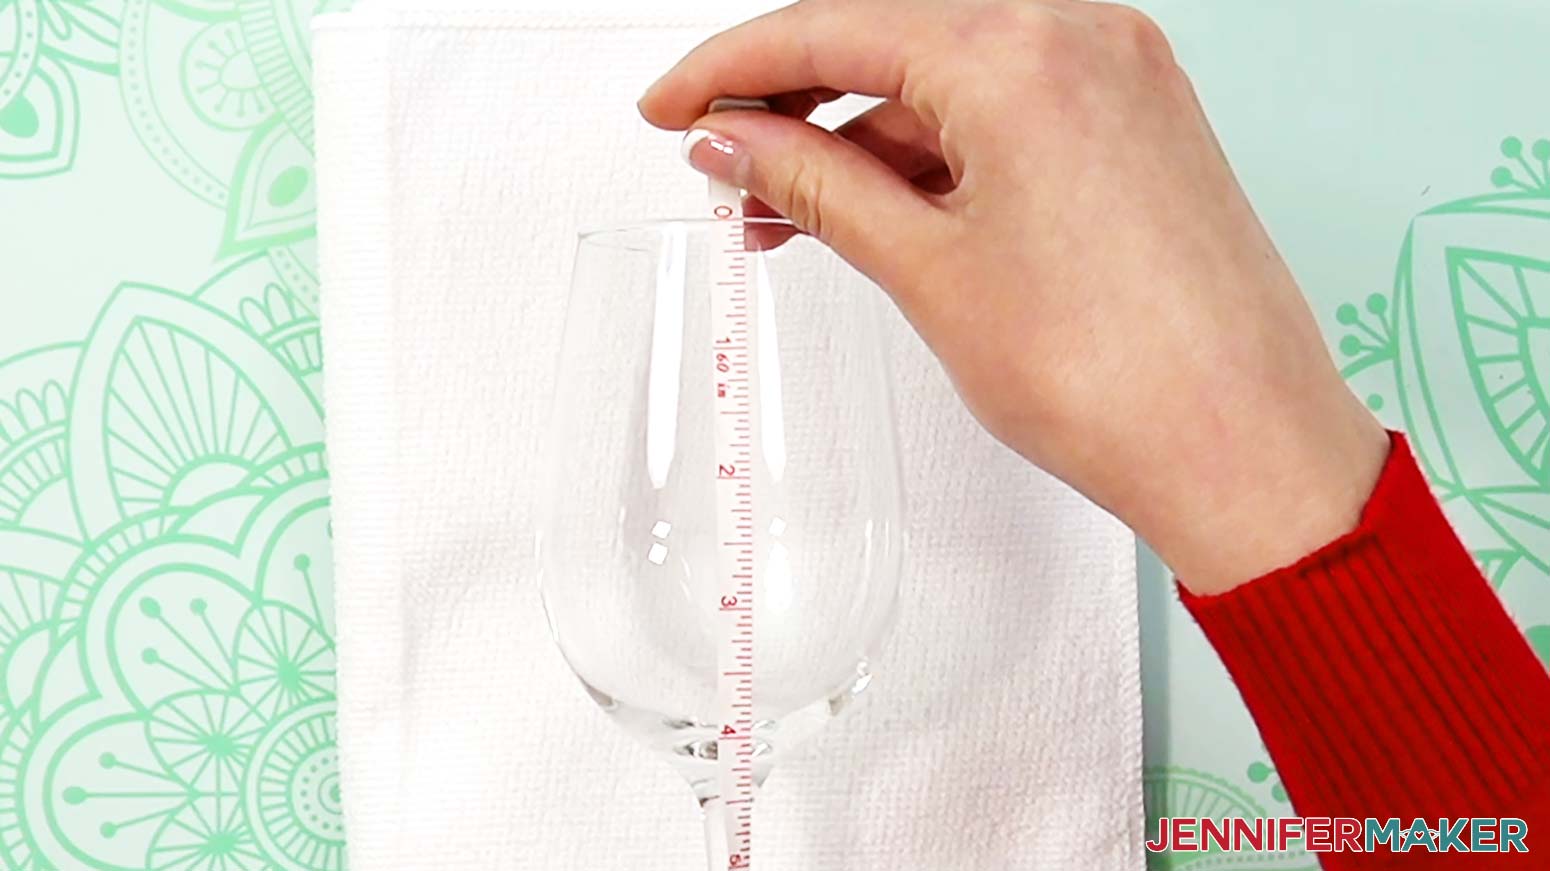
Choose a height for the decal approximately ½” smaller than the measured height. This allows for a small glass border all around the decal.
Select the decal you want to re-size. Then, after making sure the lock icon is in the locked position, type the correct size into the Width box. The decal is now shown at your adjusted size.
This project uses frosted vinyl to make an etched glass look, so we can leave the image black. If you wish to use colored vinyl, you can change the color of the decal by selecting it on the Canvas and then selecting the Material Colors box next to the Operation drop-down menu in the upper part of the screen.
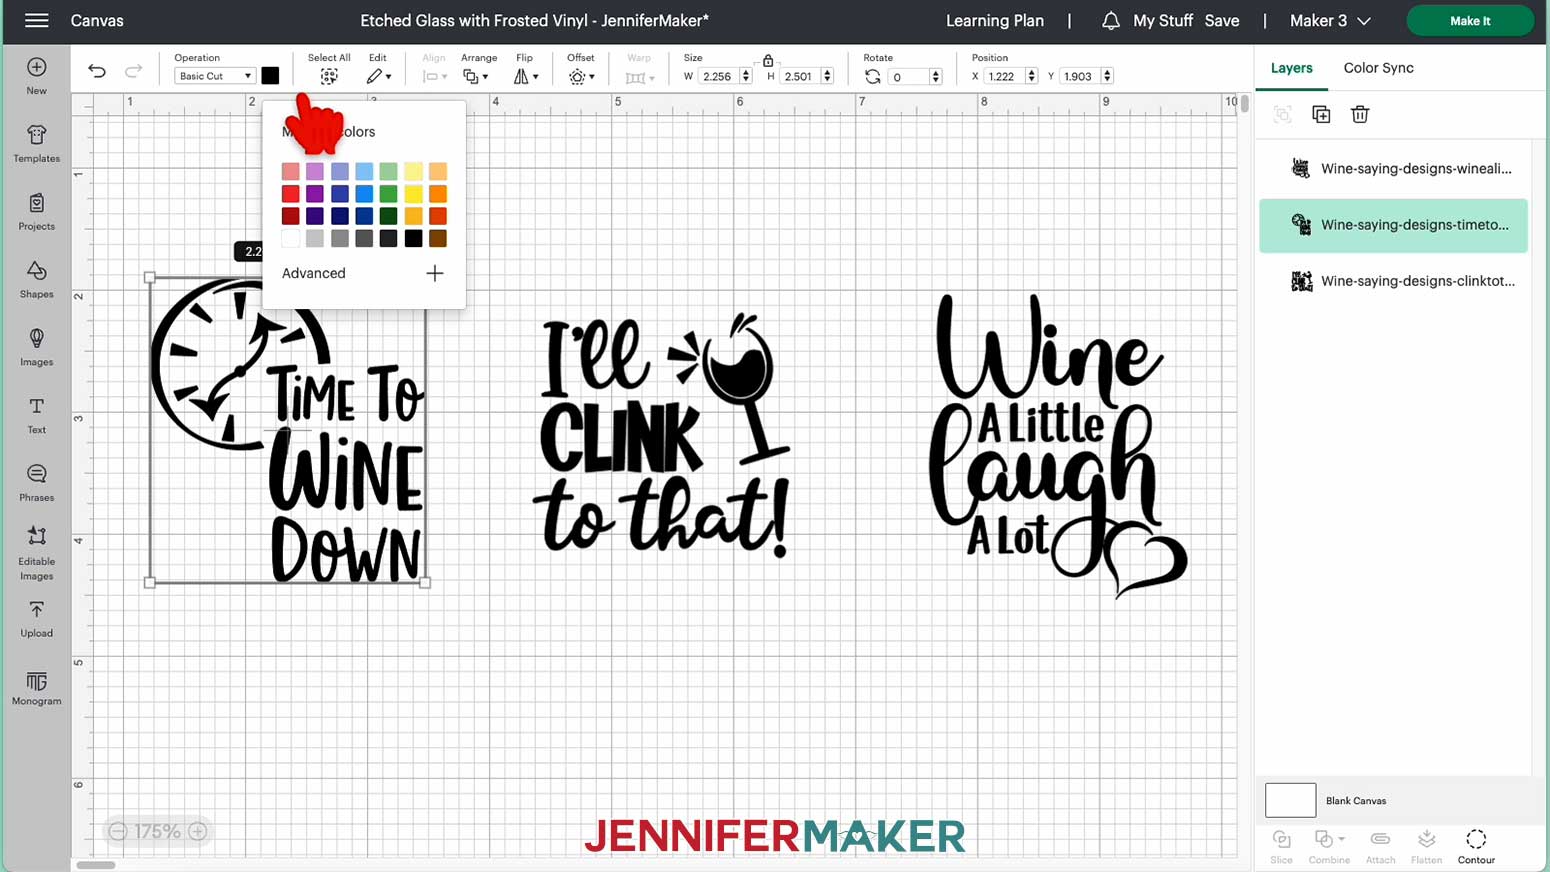
You are now ready to cut the decals!
STEP 3: CUT THE FROSTED VINYL FOR GLASS
Check that the right machine is listed in the top right corner, then click "Make It!"
If you are asked if you are cutting your designs without a mat, on a mat, or multiple ways, select "On Mat" and "12 x 12." Then click "Confirm."
On the Prepare screen, keep the "Material Size" at 12" x 12”. Leave the “Mirror” setting in the “Off” position.
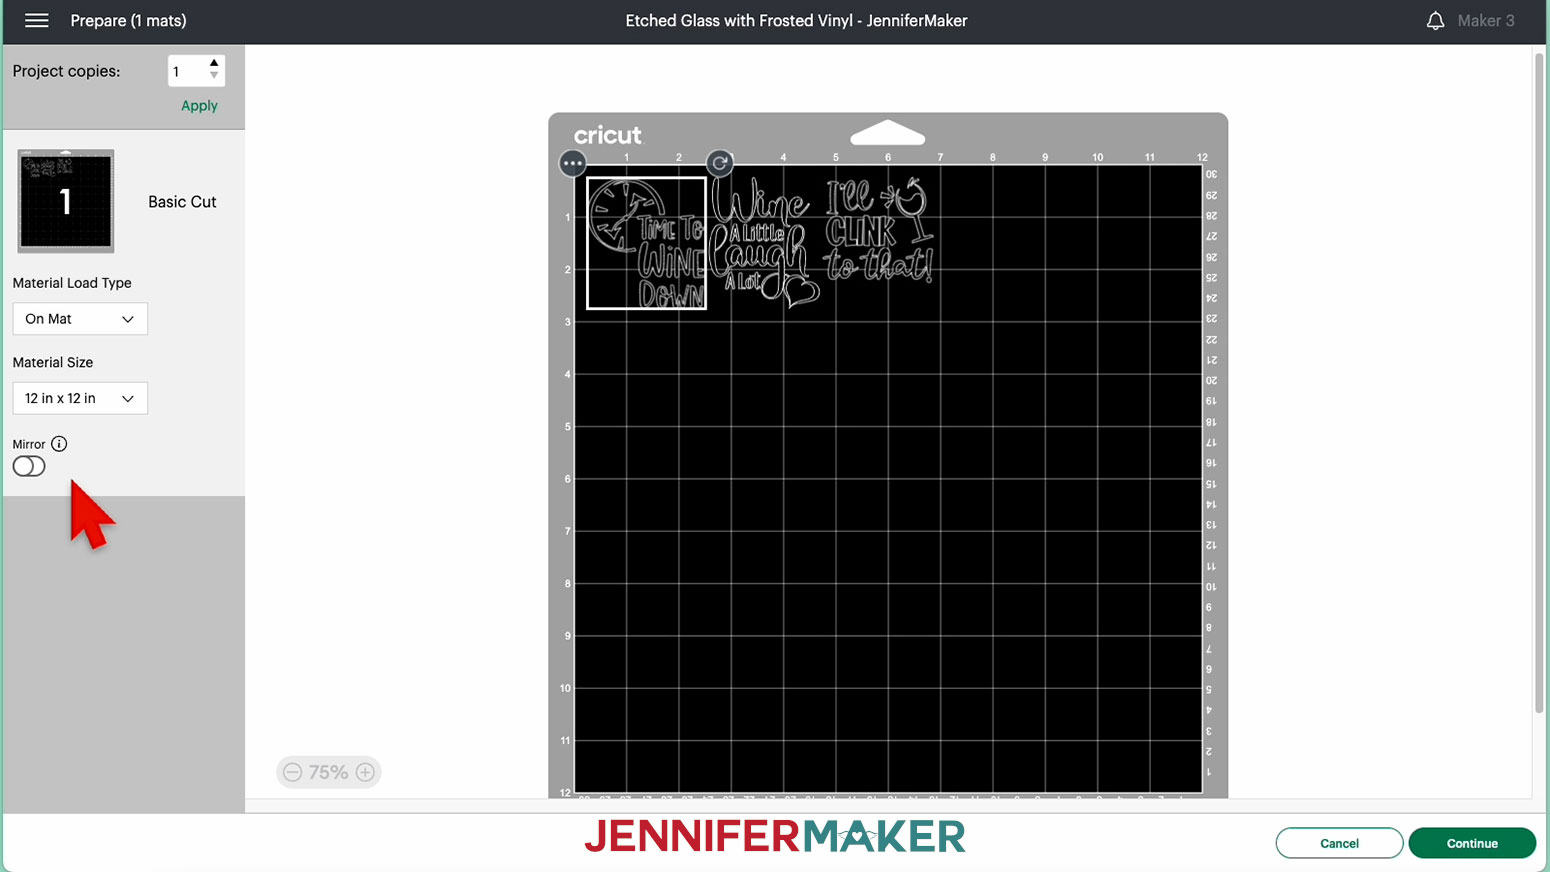
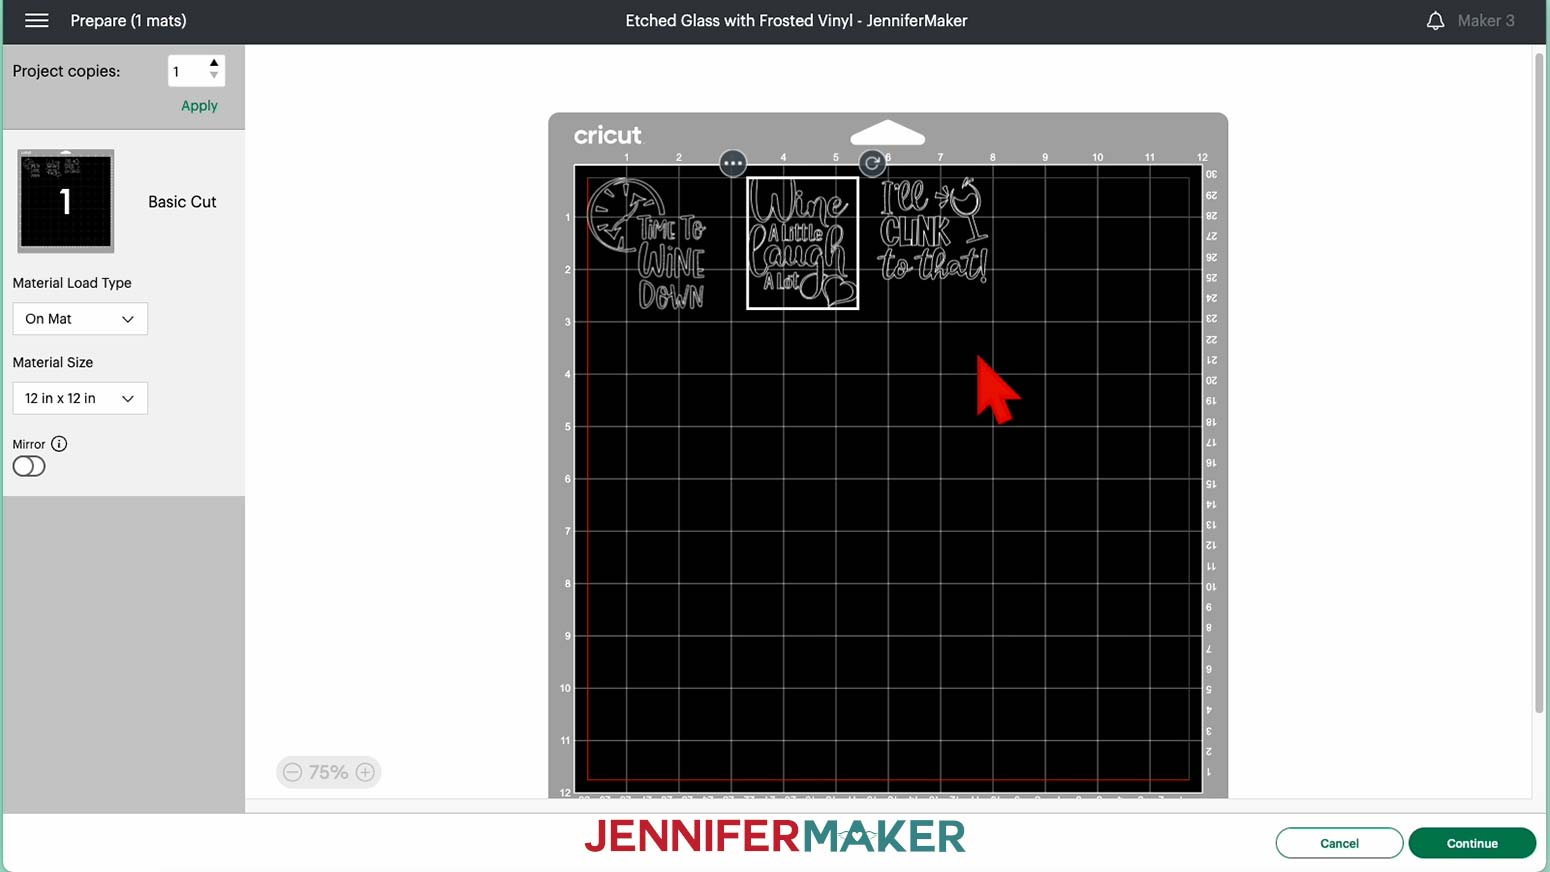
All the decals will appear on a single mat, but make sure to allow extra room between each decal.
On the Make screen, select the correct material setting for the cut. I am using Frosted Vinyl so I’ll need to click “Browse All Materials” to select the proper cut setting.
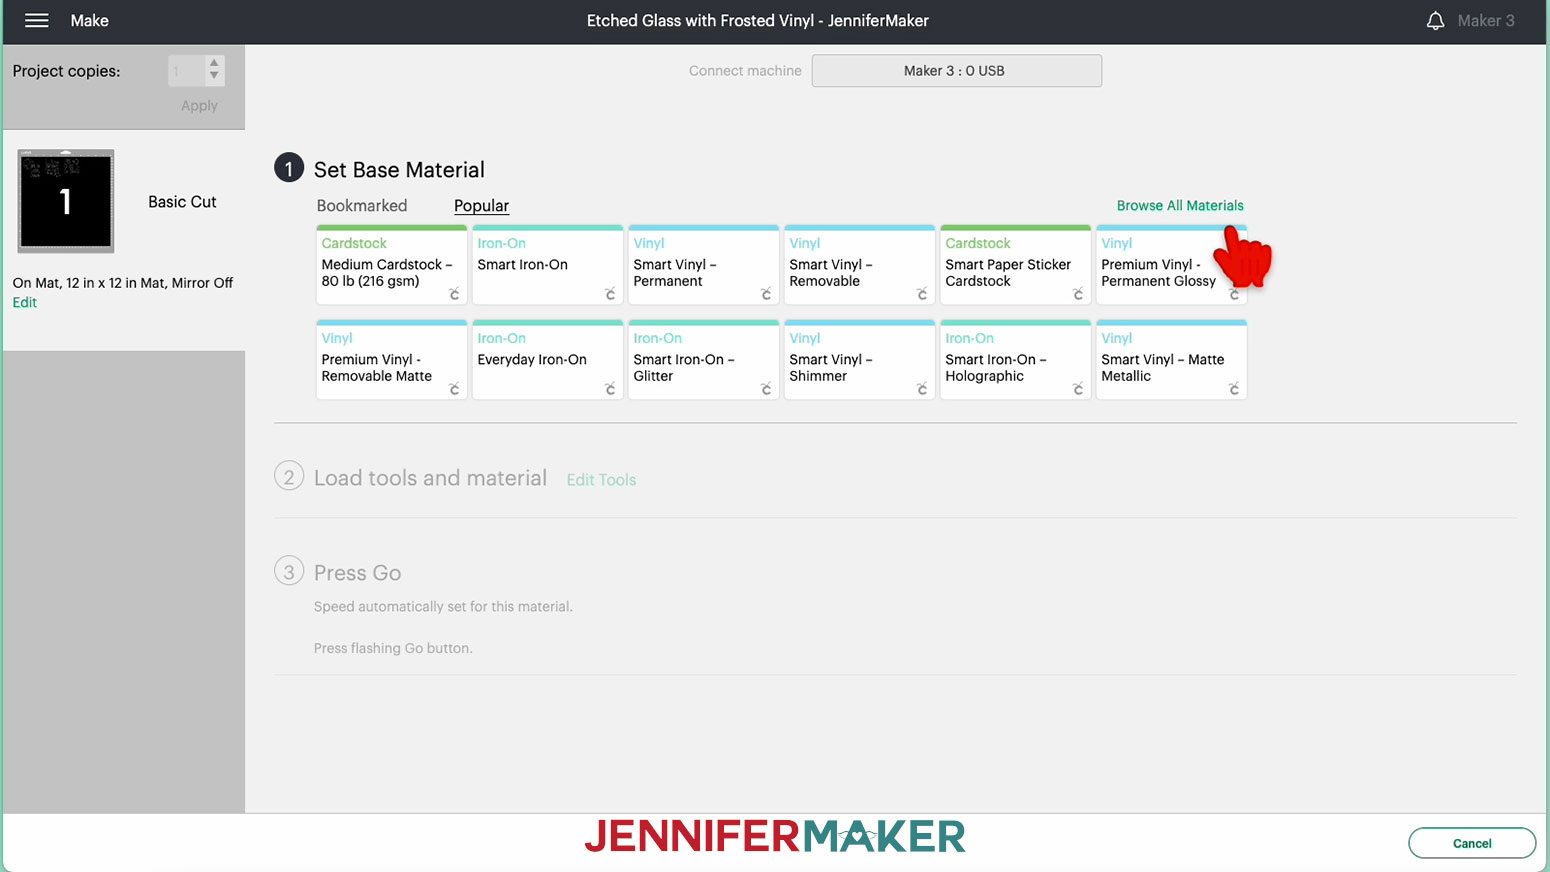
I can quickly sort through the options by typing “Premium Vinyl” in the search box and clicking the magnifying glass next to the box. I need to select “Premium Vinyl – Frosted Opaque.”
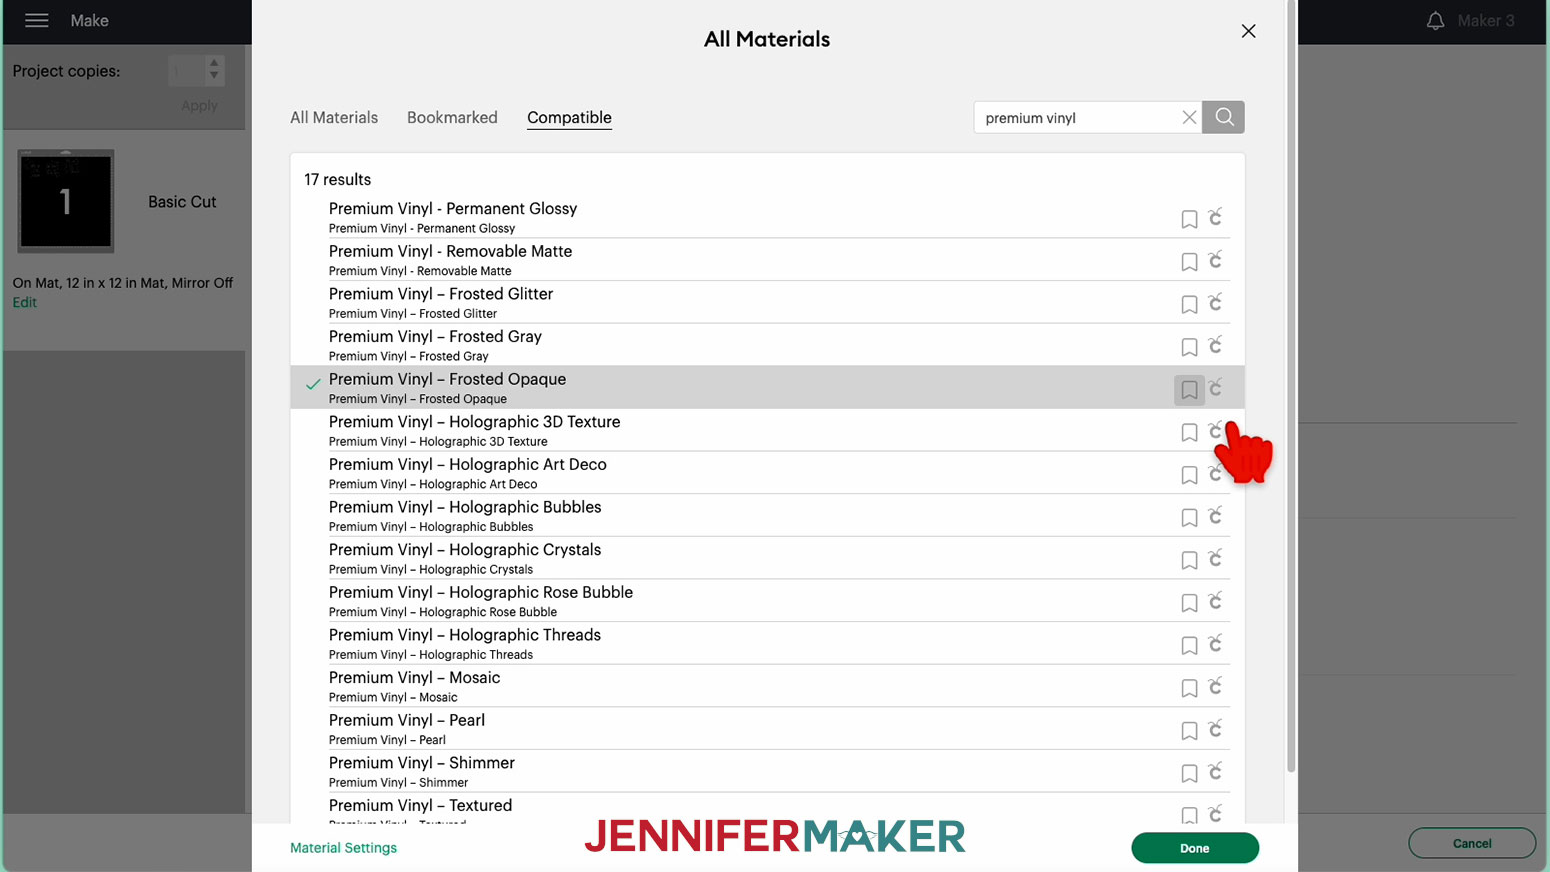
Click “Done” to add it to the “Make” Screen.
Next, choose your pressure setting. I find I get the best results with "More" Pressure.
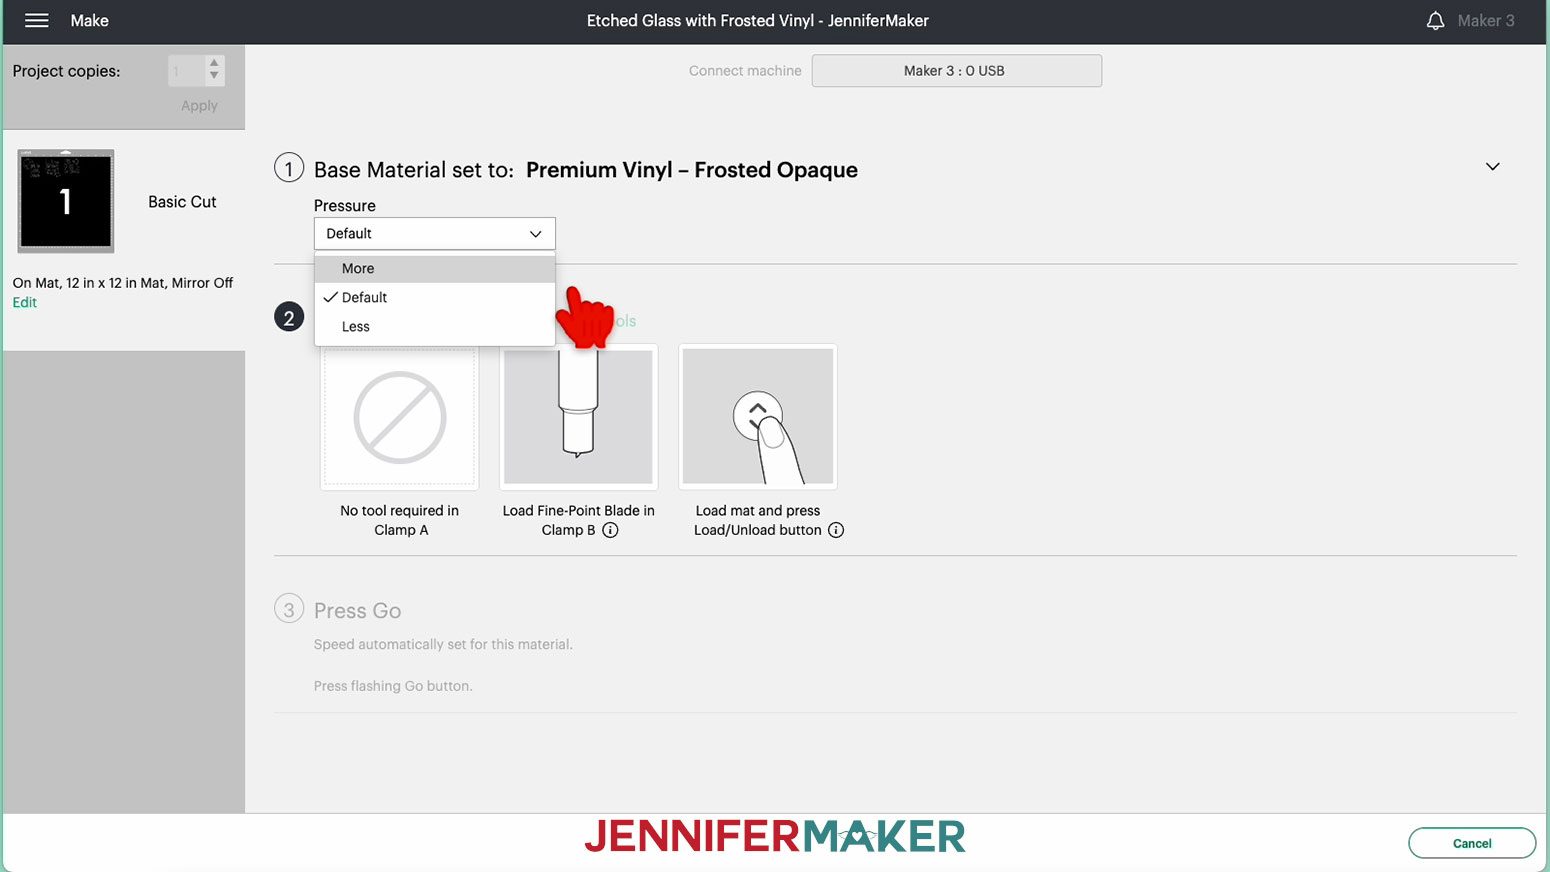
Make sure your Fine-Point Blade is clean and in Clamp B.
Place your first piece of vinyl, frosted side up, on your green StandardGrip machine mat and make sure it is well-adhered with a brayer. Since these designs are small, it can be a material saver for you to cut your vinyl into a shape only slightly larger than your designs before adding it to your machine mat. (If you cut the vinyl smaller, make sure the piece covers the same design area as on the screen!)

Load the mat into your Cricut and press the flashing button to begin cutting.
TIP: If you run into any issues cutting your materials, check out my Cricut Tips & Tricks for Cleaner Cuts.
Once the cutting is complete, remove the cut vinyl from the machine mat. It is now time to weed the vinyl, but the cuts are very difficult to see on frosted vinyl!
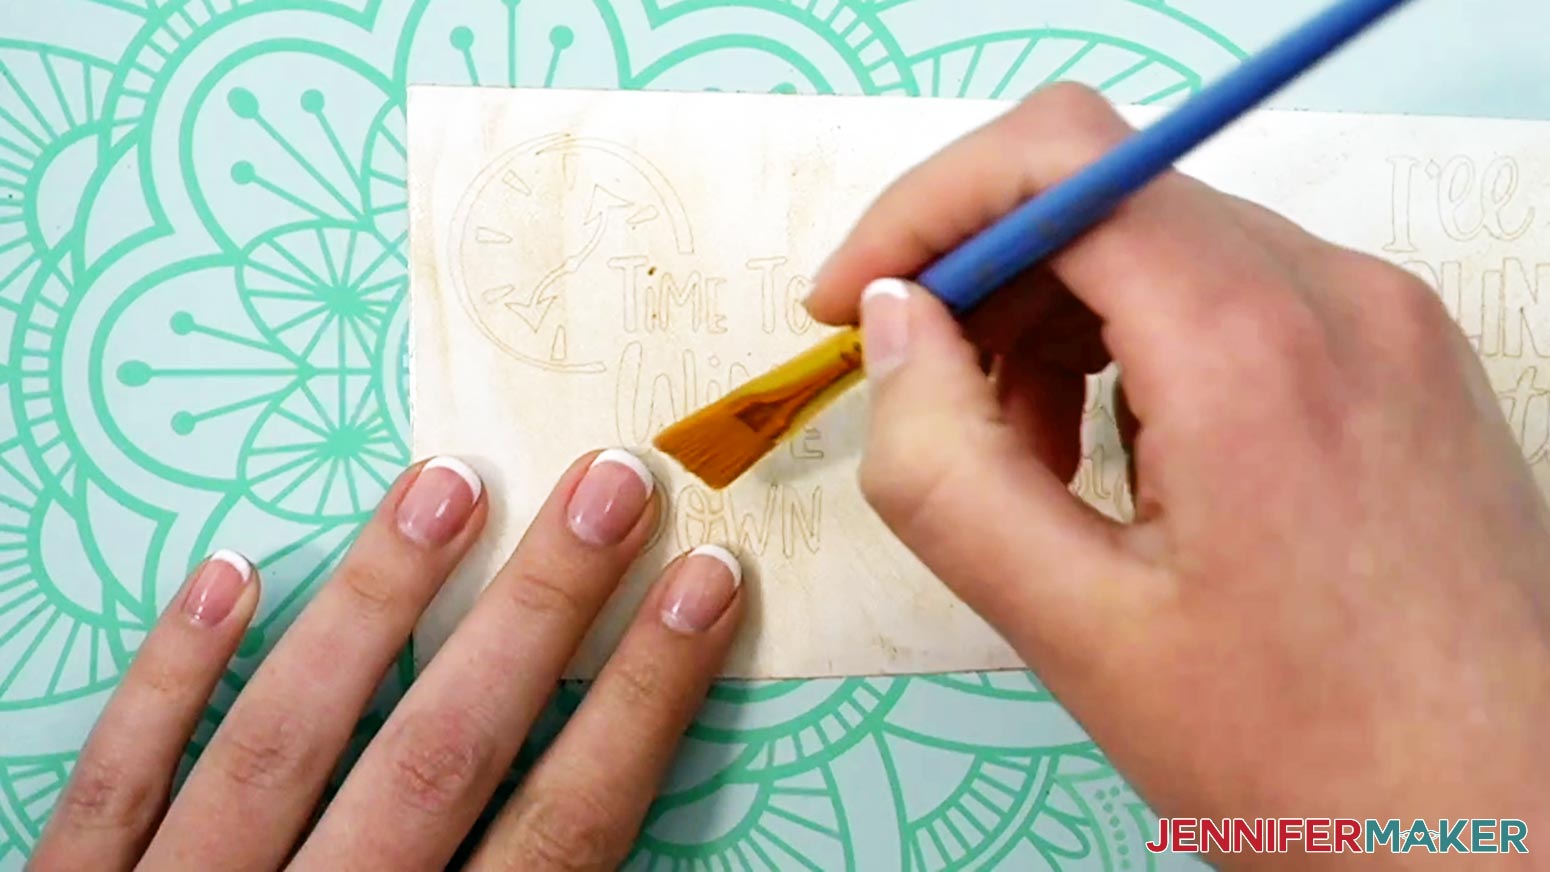
To make it easier to see the cut lines for weeding, sprinkle some ground cinnamon (or a similar fine dark powder, such as loose make-up powder) onto the vinyl and lightly brush it over the whole design with your fingertip. The cinnamon will fall into the cracks made by the cuts and clearly show the lines of the design. (Don’t worry if the vinyl looks a little darker after the cinnamon is applied. The transfer tape will lift the extra powder off after the design is applied to the glass.)
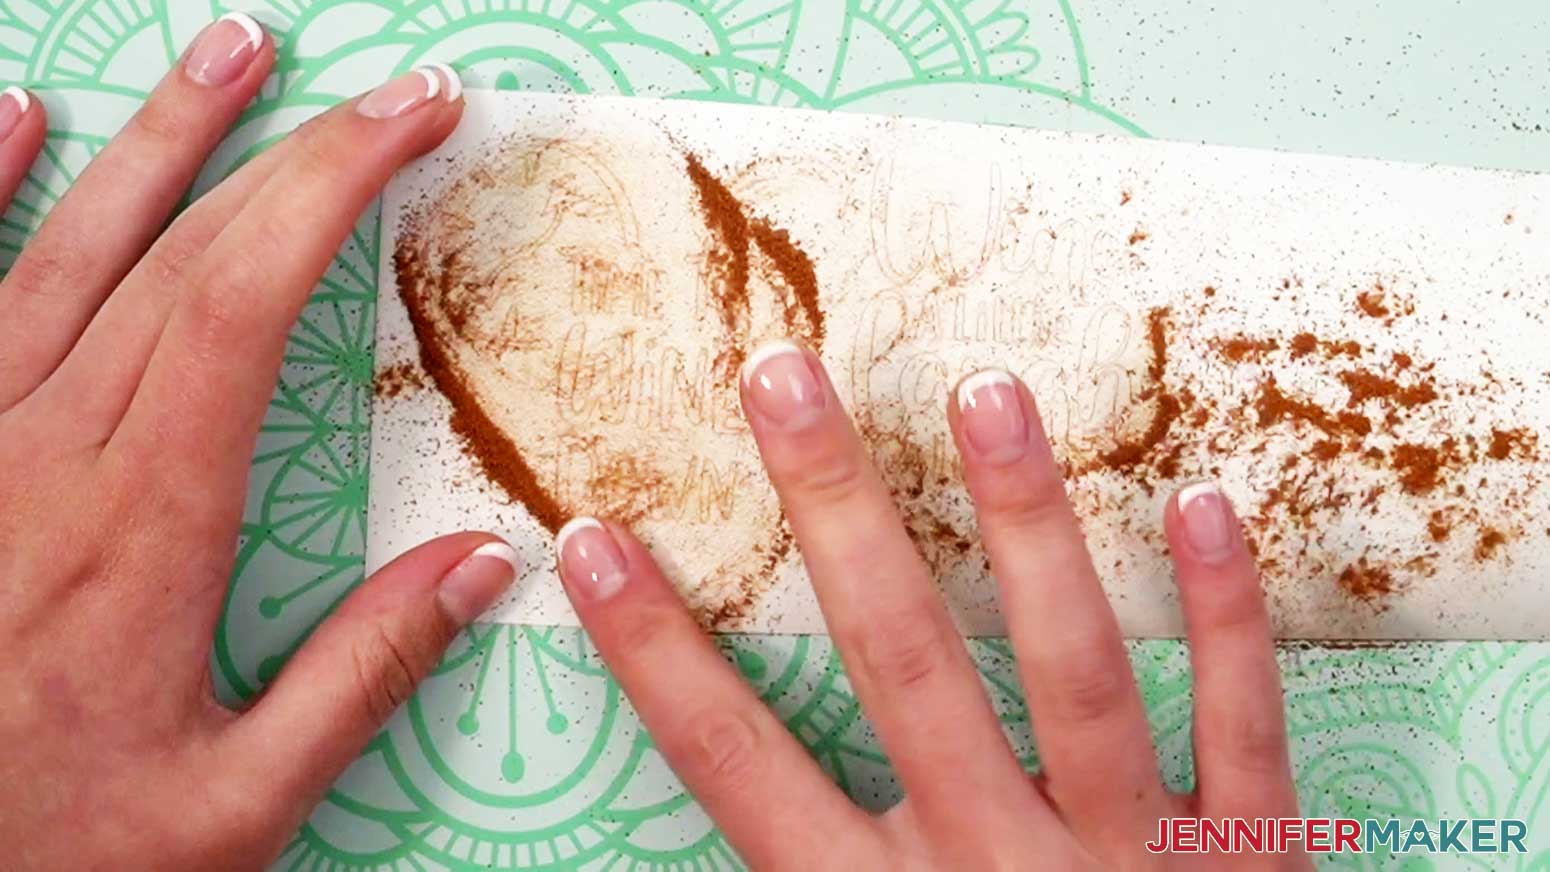
Brush off the excess cinnamon and weed the design.
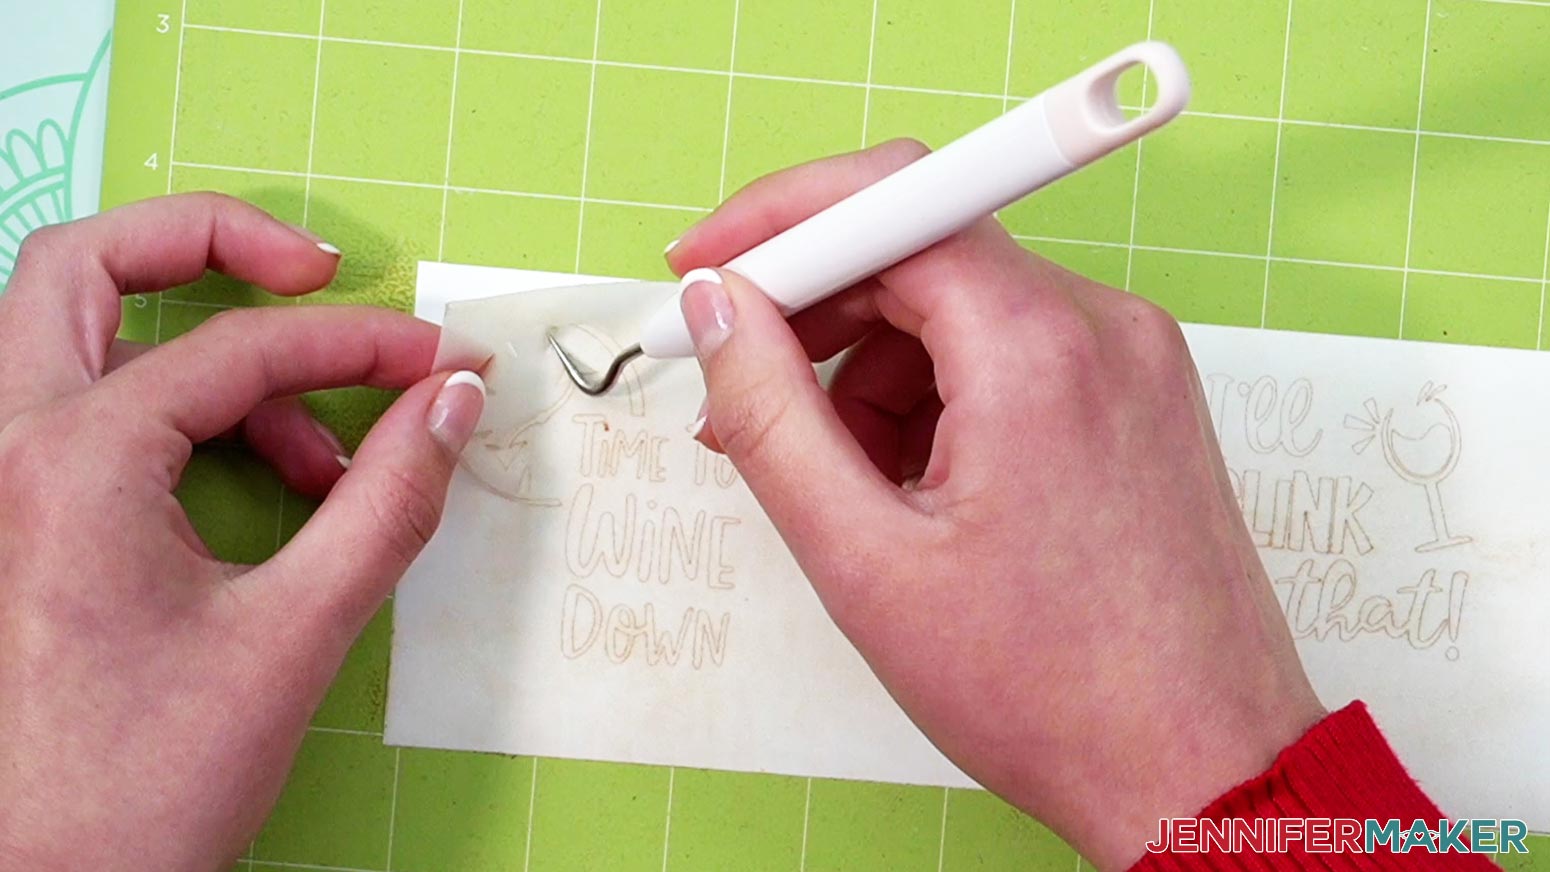
TIP: It can be easier to weed vinyl, especially small, detailed designs, while it is adhered to the machine mat. Once you’ve applied your cinnamon powder to the vinyl, you can place it back down on the machine mat for extra control over the weeding process.
I like to work from larger to smaller sections during weeding. Using a weeding tool, very carefully peel away the extra background vinyl.
Poke your weeding tool into each section you want to remove. Gently lift it away from the design. Make sure you do not pull up any pieces you want to keep! If they come up, gently pat them back in place and try again. Don't forget to remove the middle parts of letters and watch out for small pieces that tend to get lost, like punctuation marks and dots above the lowercase “i”.
STEP 4: APPLY THE FROSTED VINYL FOR GLASS DECALS
First, we'll apply transfer tape to all the decals.
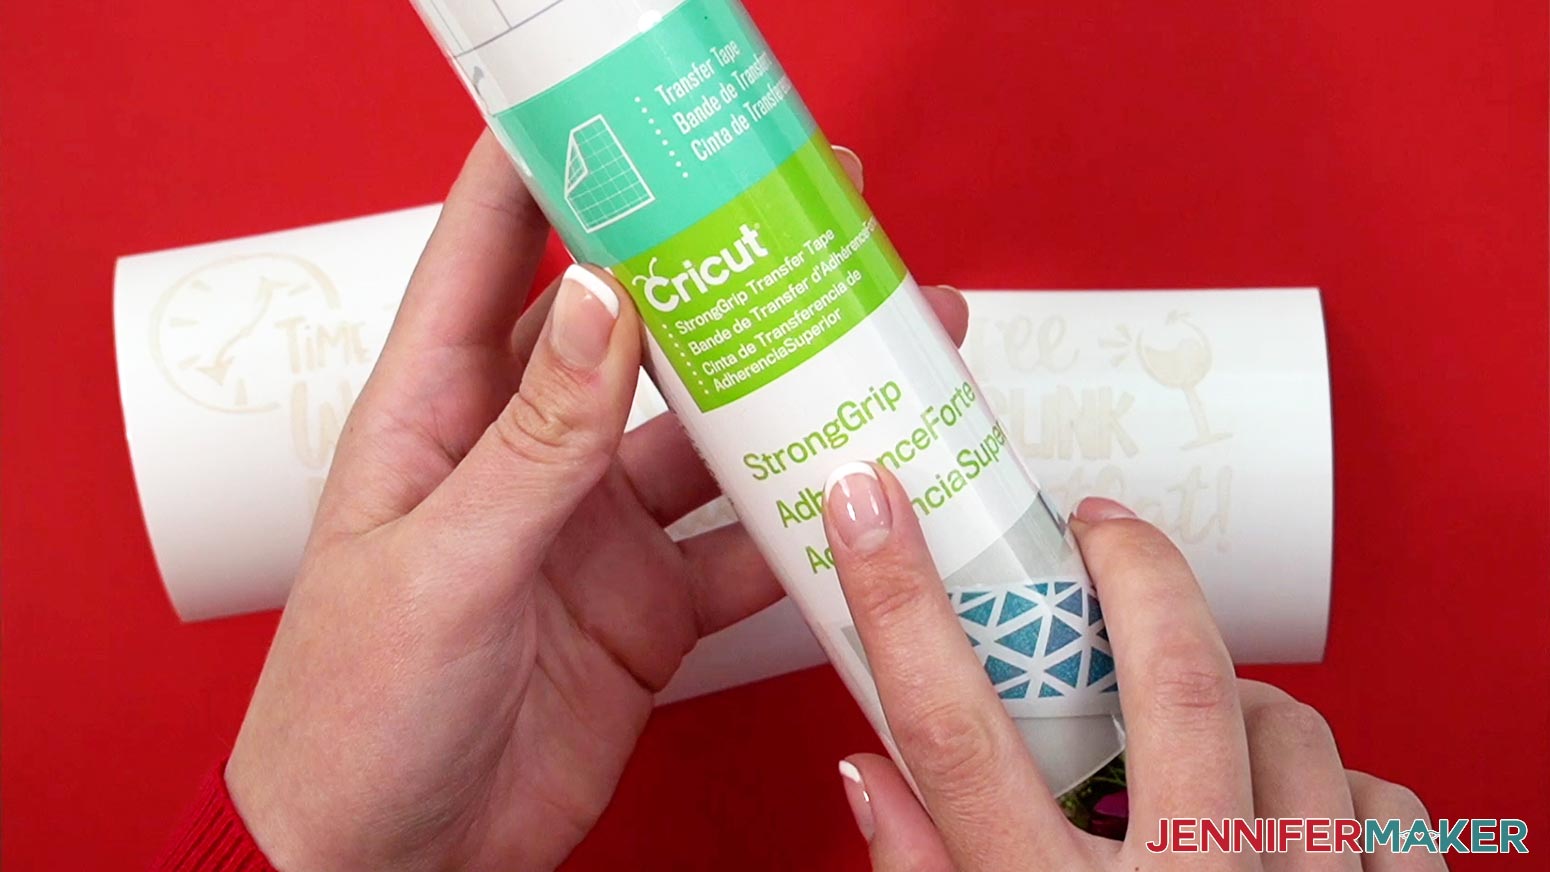
Make sure to use the correct transfer tape for the type of vinyl you are applying. “Premium Vinyl - Frosted Opaque” needs StrongGrip Transfer Tape due to the slight texture of the vinyl. You can tell the difference between StandardGrip and StrongGrip Transfer Tape by their colors. StandardGrip has a blue grid while StrongGrip is printed in purple.
Cut a piece of transfer tape that is slightly larger than the decal it will be applied to.
Remove the backer from the transfer tape and place it face down on the decal using my "taco method". Hold your transfer tape in the shape of a “taco”, then put the bottom of the “taco” onto the middle of your design.
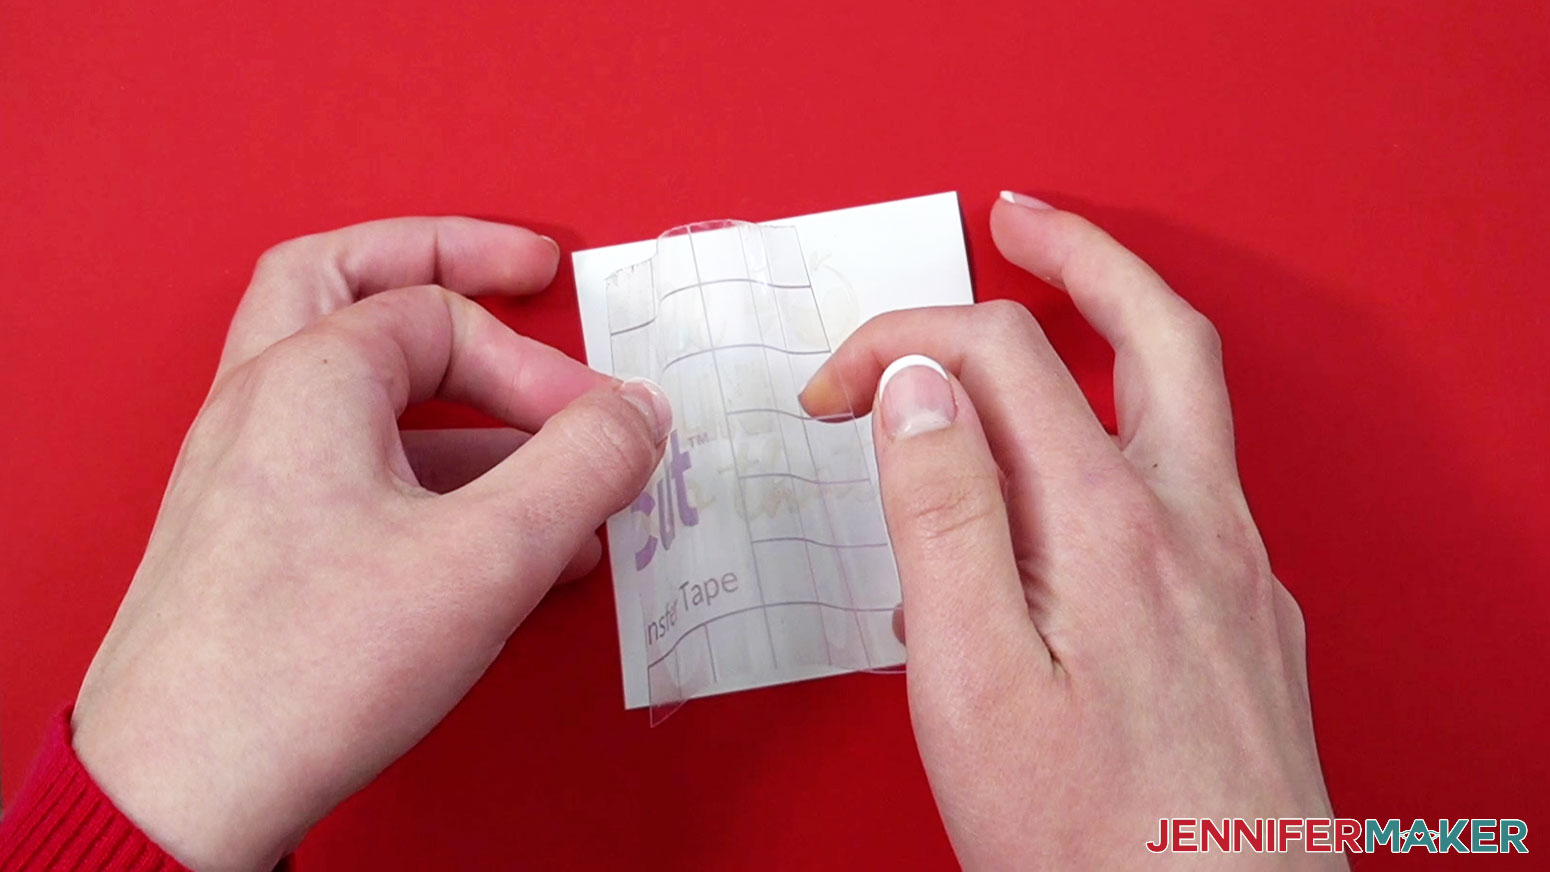
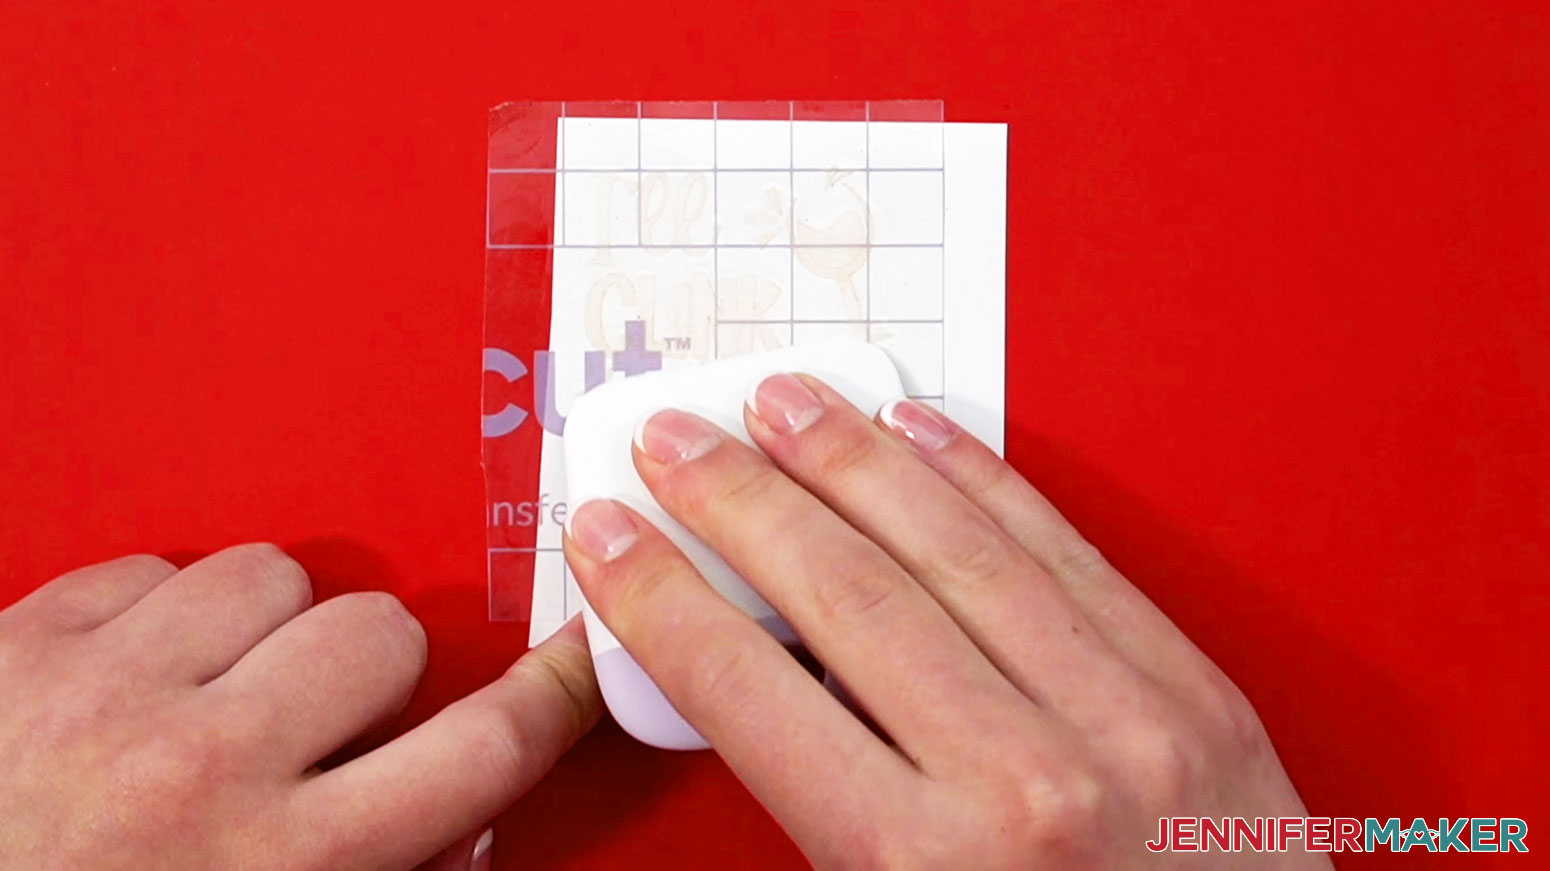
Smooth the transfer tape over the decal from the center outward and burnish it down using the Scraper Tool.
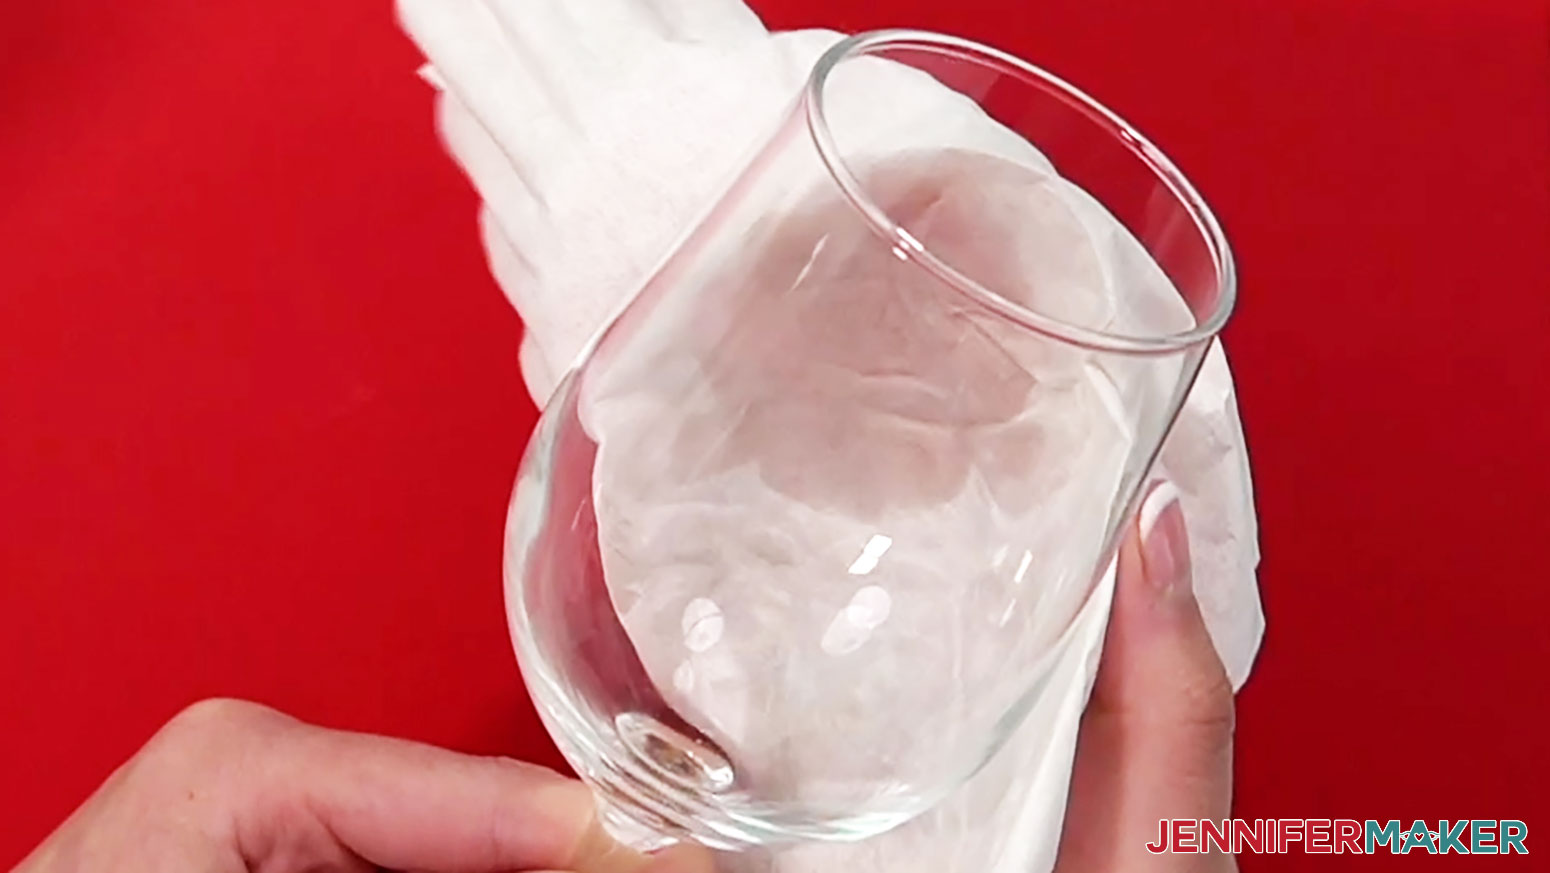
Next, clean your glasses by using alcohol and a lint-free material. (I like to use coffee filters!)
It’s time to apply the designs to the glasses!
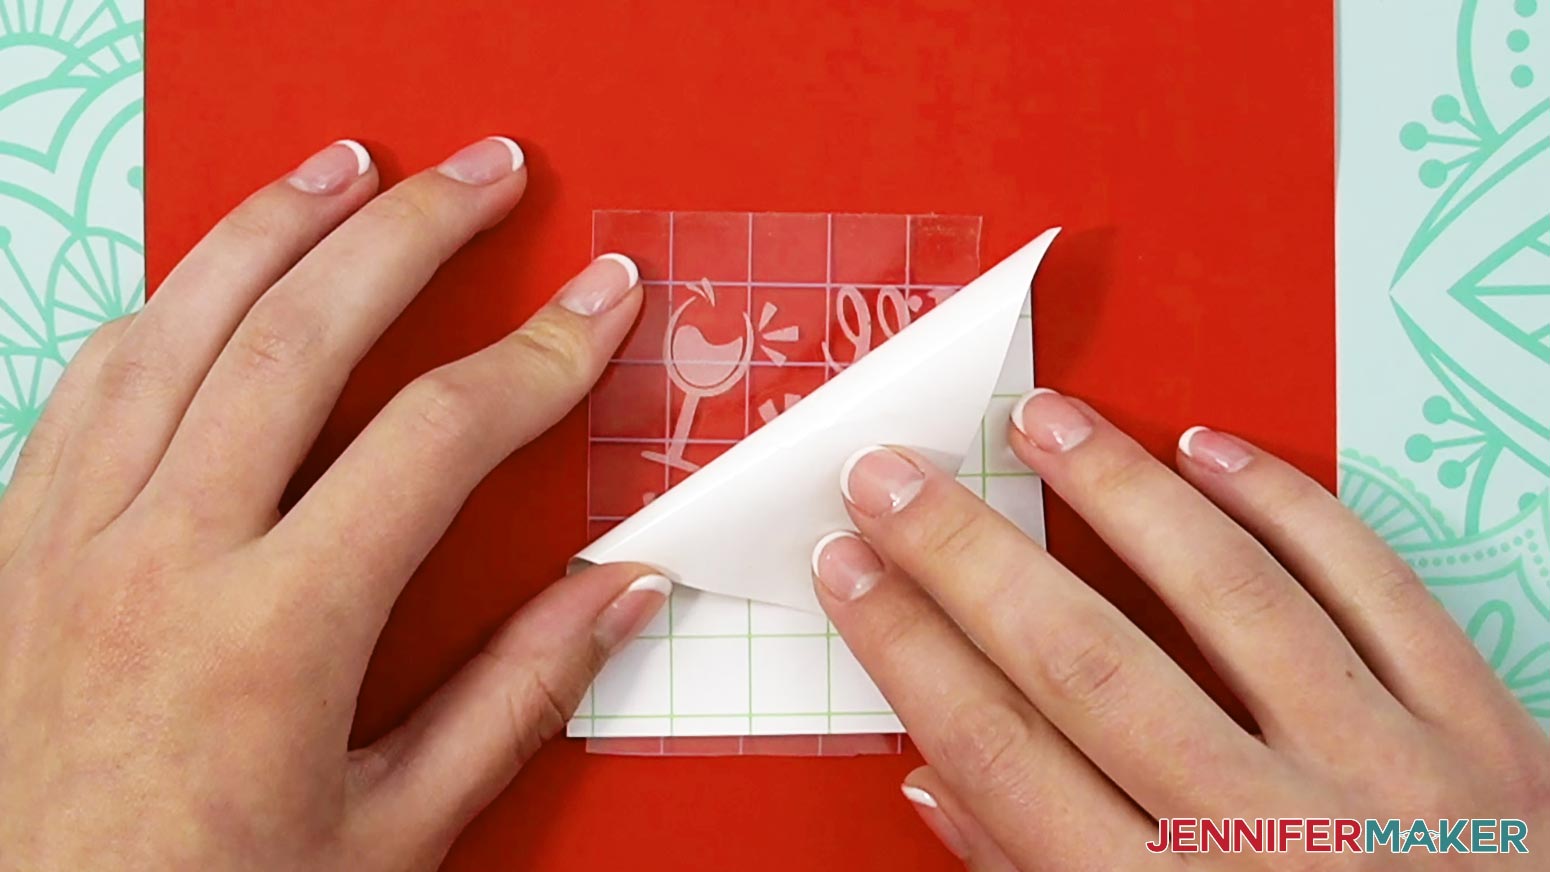
To apply decals to the glasses, start by removing the backer from the decal. If the vinyl does not stick to the transfer tape, lay it back down and burnish it again. Now peel your transfer tape, with the decal attached, off the vinyl backing.
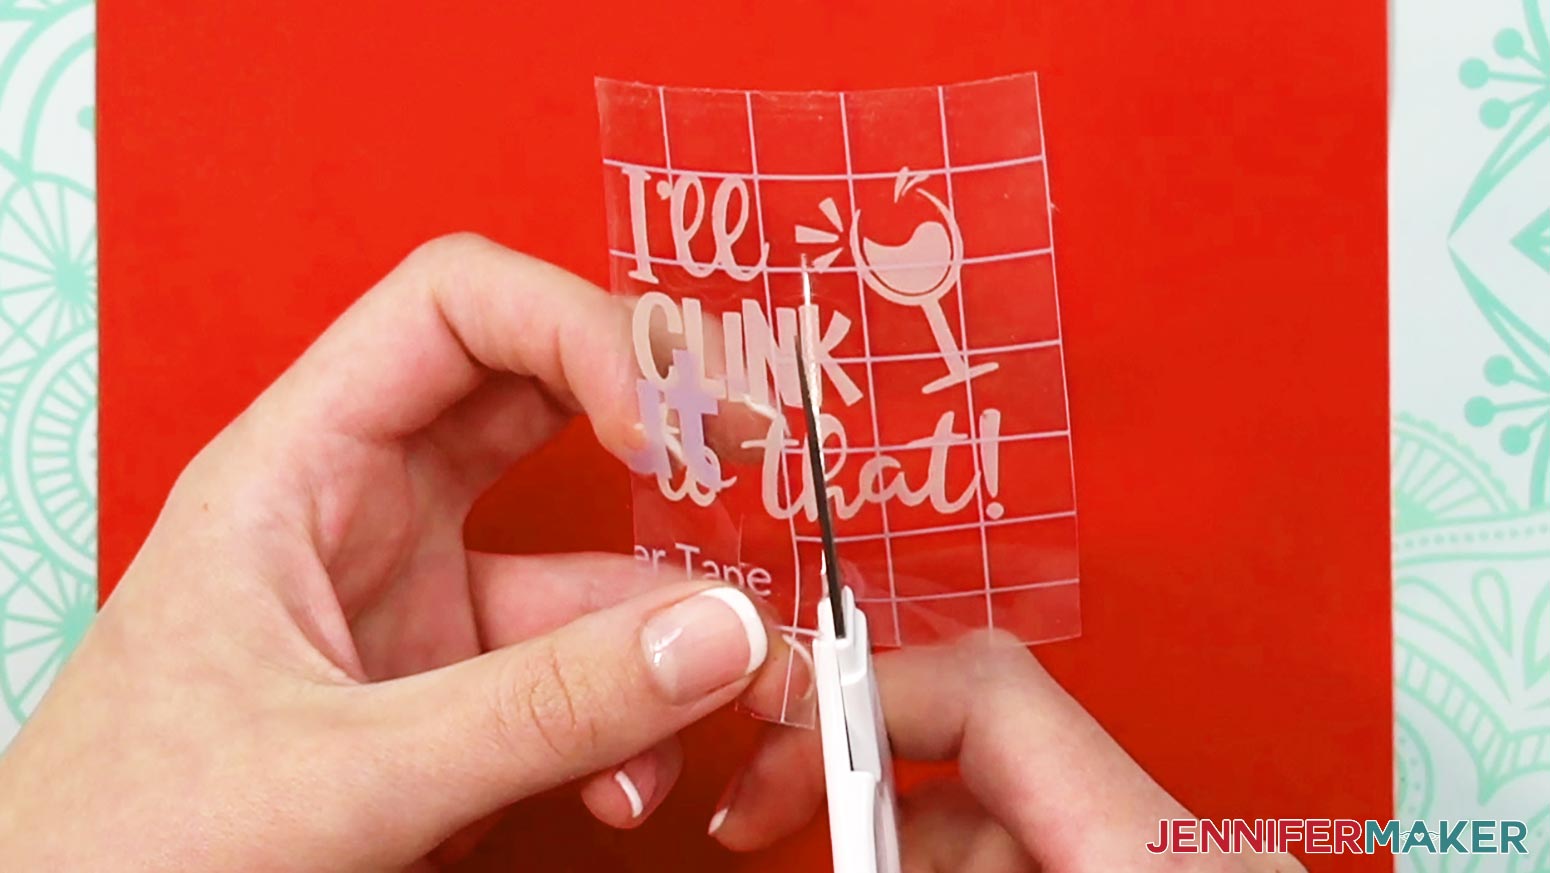
Then, use your scissors to make some small cuts around the edges of the transfer tape into the areas with vinyl, but don’t nick any of the designs. This will help evenly apply the vinyl to the curve of the glass.
Place the center of your decal halfway between the edge of the top and bottom edge of the “bowl” of the glass.
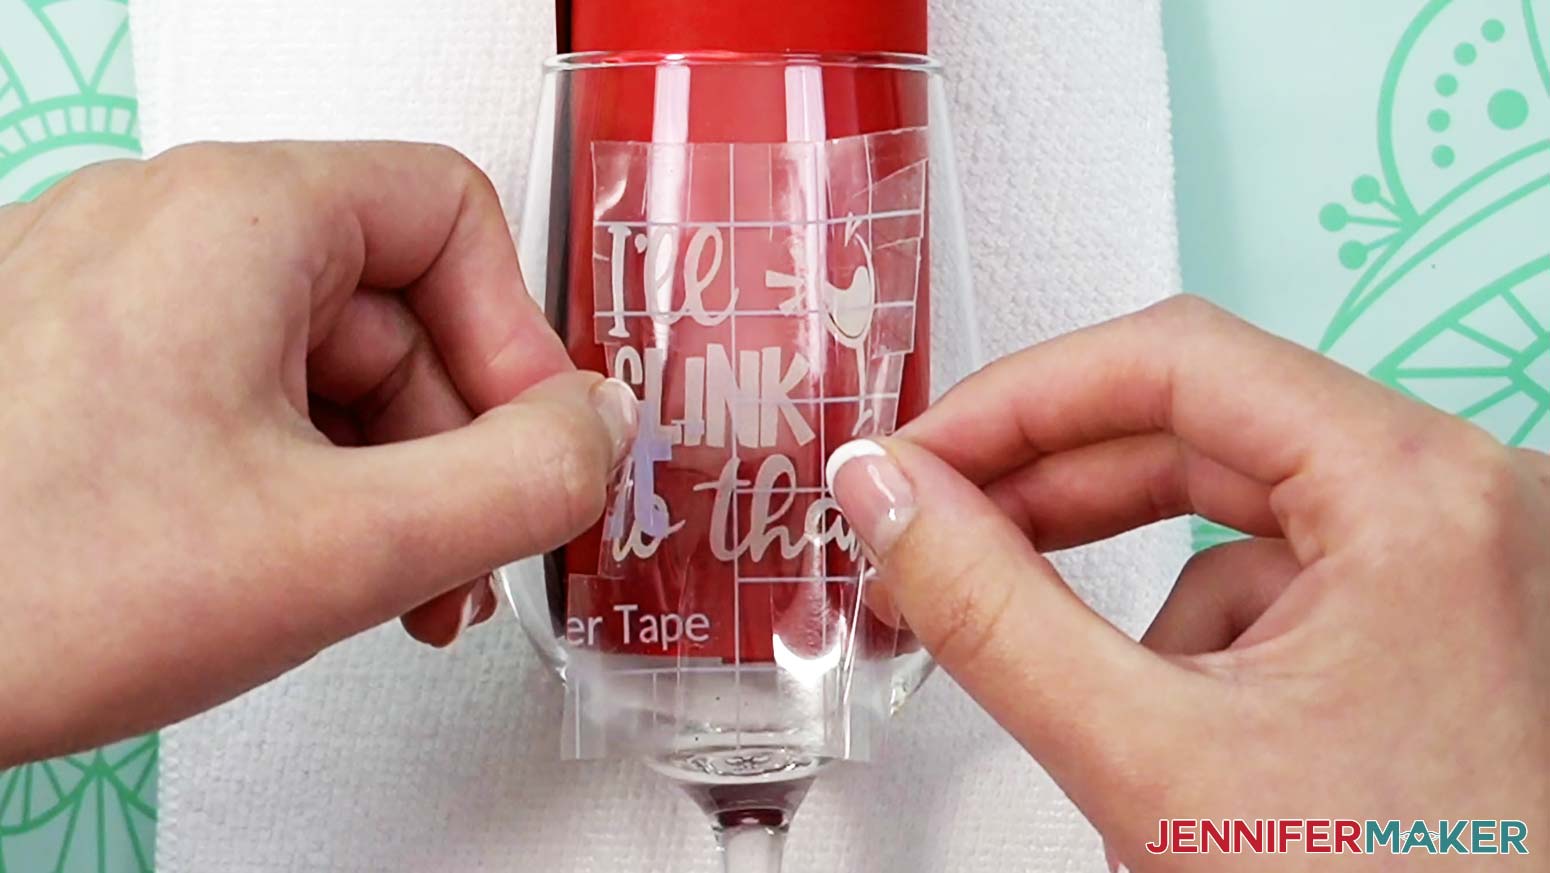
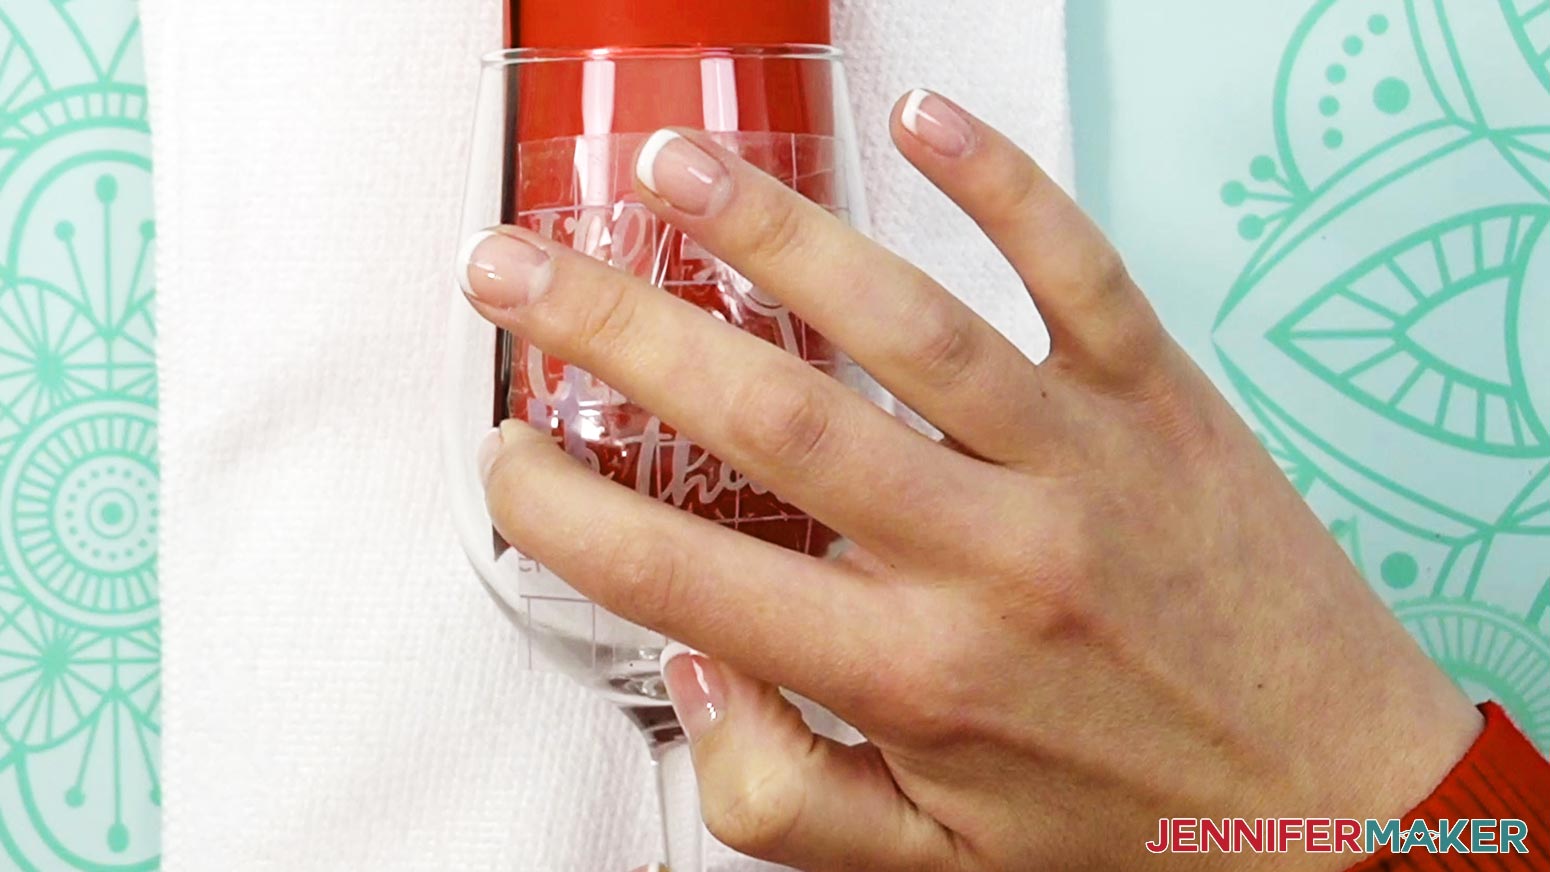
Using your finger, rub from the center of the vinyl outward, tacking the vinyl into place.
Gently remove the transfer tape, leaving the vinyl on the glass.
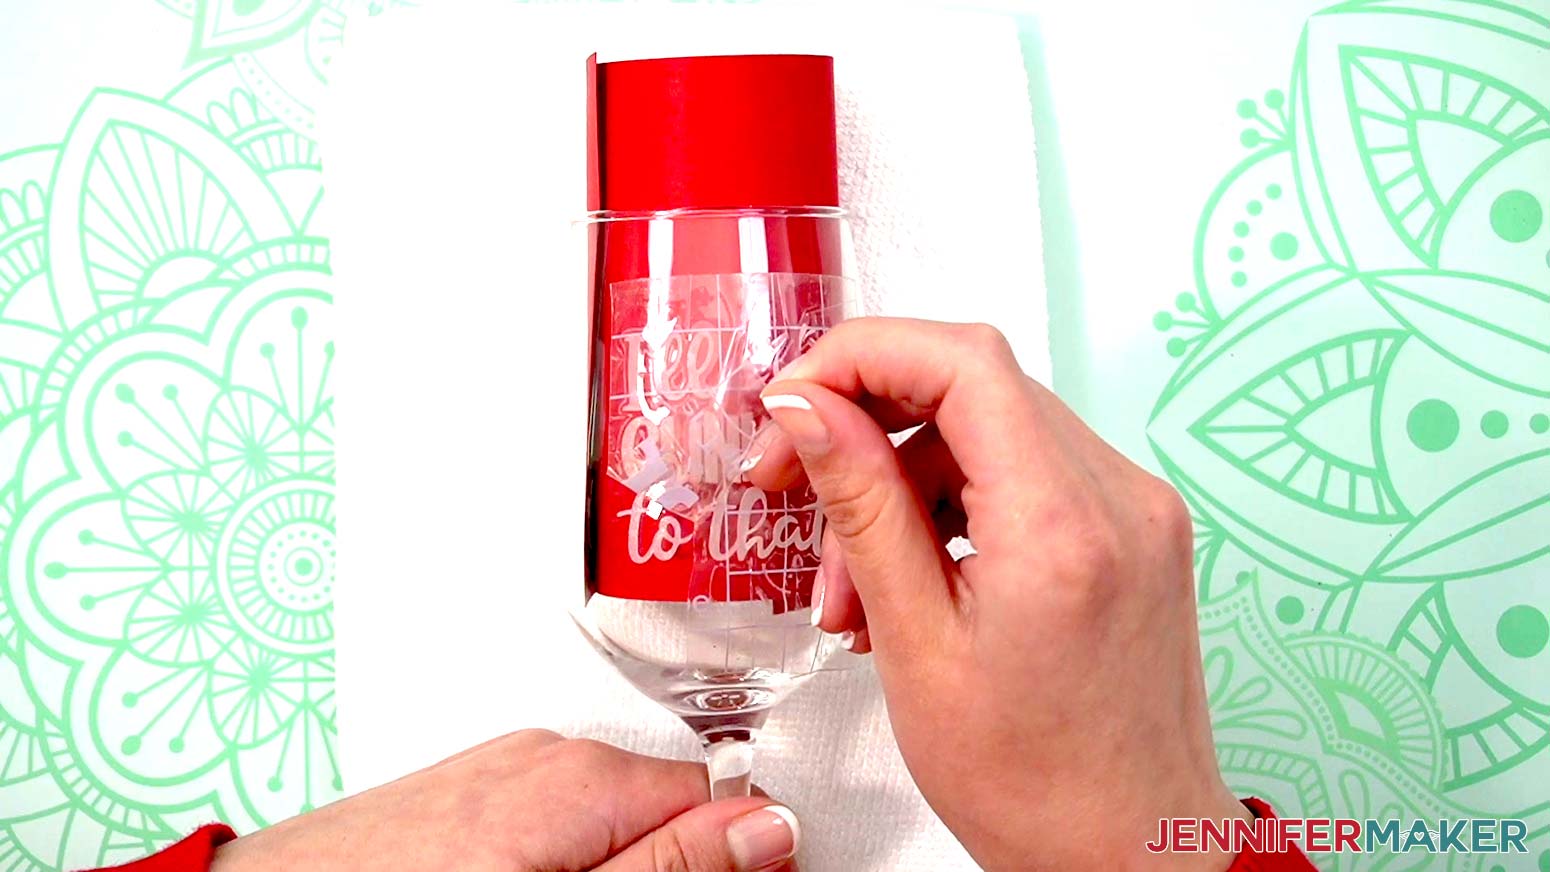
Smooth any bubbles that were missed, working from the center outward.

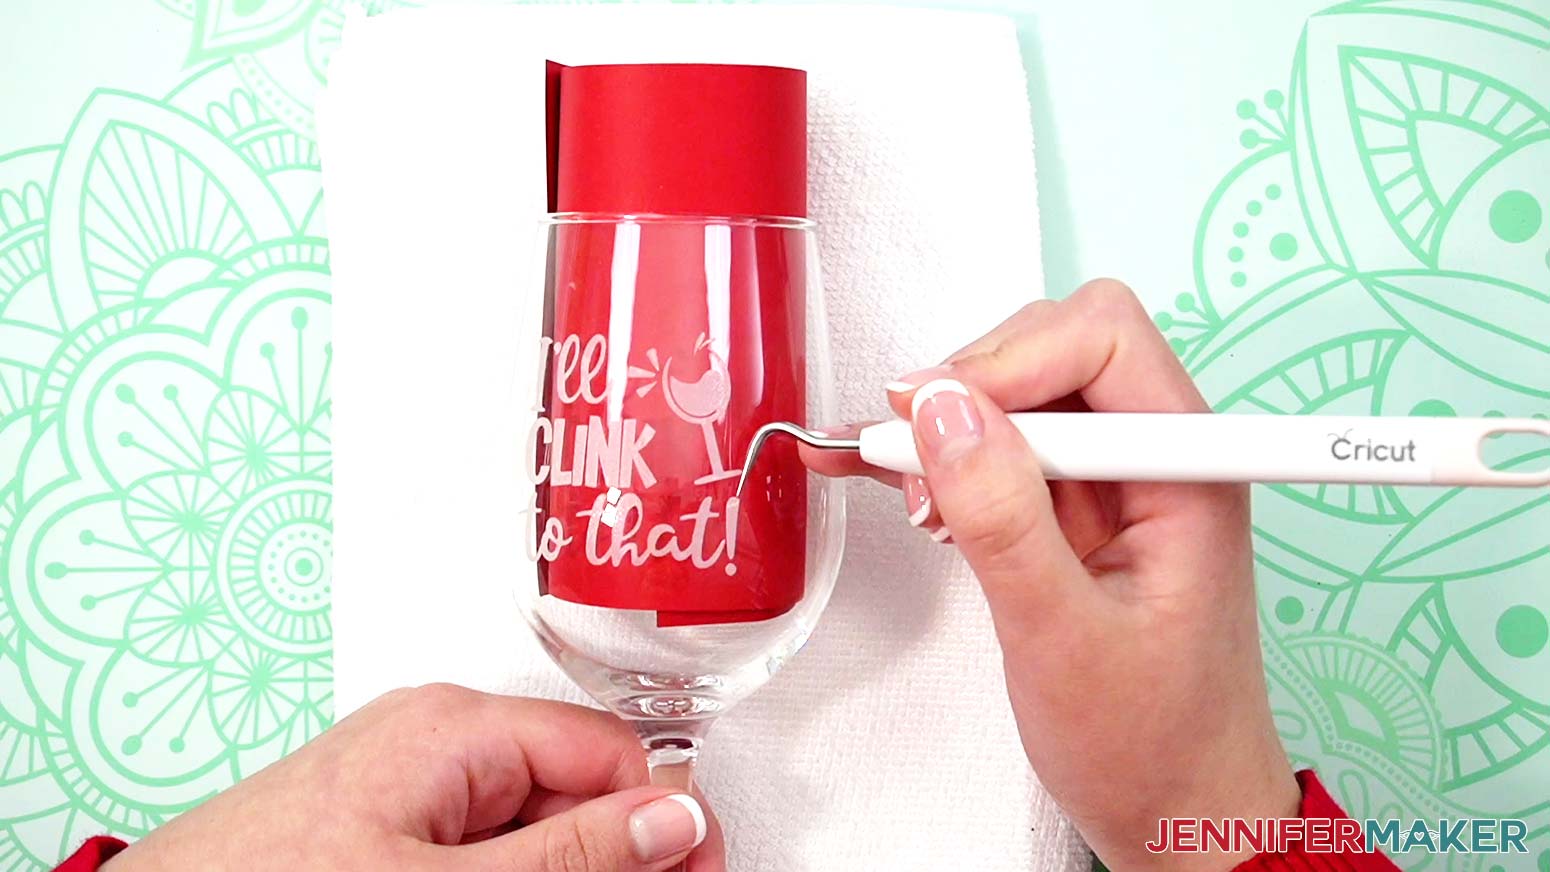
If thin parts of the decal do not lay down correctly and form “bumps” that can’t be pushed down, you can very carefully peel the vinyl back up off the glass with a weeding tool and then gently lay it back down.
Your glass is now ready to enjoy!
STEP 5: SHOW IT OFF!
Use your frosted vinyl glasses for customized celebrations and quick and easy gifts!
Notes
CARE:
It is recommended to hand wash glasses for longevity of the vinyl application.
FONTS:
Wine A Little Laught A Lot: Christmas Jellyshake and SnowHut
Time To Wine Down: Cattieshine Sans Regular
I'll Clink To That: Wonderful Display Font Regular and Beachwood
Answers to Your Questions About How to Make Faux-Etched Wine Glasses with Frosted Vinyl for Glass
Q: Is there vinyl that looks like etching?
A: There certainly is! Frosted vinyl is awesome, and applying it to glass really gives the frosted look of an etching, which is so cool!
Q: Can you use regular vinyl for glass etching?
A: Glass etching with chemicals is different than what I showed you in this tutorial. To get the etched effect, you do need to use frosted vinyl. However if you’re wanting to actually etch your glasses with etching cream, using permanent adhesive vinyl to create a stencil is a great way to get your design, company logo, etc. on your wine glass! Learn how to do glass etching two ways with my easy etched wine glasses and bottles tutorial, as well as my etched casserole dish tutorial.
Q: How do you fake etch glass?
A: Just follow this tutorial! I tell you everything you need to know about creating frosted vinyl decals with your Cricut that you can apply to any glass, plexiglass, or other clear surface!
Q: Is etched glass more expensive?
A: Etching glass does cost a bit more than using frosted vinyl to achieve a very similar visual effect. You have the cost of the etching cream, applicators, and of course all of the personal protective equipment (PPE) to do the craft safely. Using frosted vinyl is faster and easier and a fraction of the cost of doing a chemical etching.
Q: What are the disadvantages of glass etching?
A: Like I said above, it costs quite a bit more when you consider the PPE you’ll need. Using frosted vinyl instead of traditional etching techniques means you can be a bit more versatile with what you’re decorating, too. Etching a window, for example, would be tough (and messy!) but with frosted vinyl you can decorate glass windows, glass doors, create a really neat privacy film, the possibilities are endless!
Q: Will vinyl stay on wine glasses?
A: If you hand wash your frosted vinyl decorated wine glasses with warm water and a mild dish soap after use, you can expect to enjoy your decals for several years to come.
Get my free SVG/DXF/PDF files to Make Wine Glasses with Frosted Vinyl for Glass!
I’d love to see YOUR beautiful faux-etched wine glasses! Please share a photo in our Facebook group or tag me on social media with #jennifermaker.
Love,

Want to remember this? Save this tutorial on How to Make Faux Etched Wine Glasses with Frosted Vinyl for Glass to your favorite Pinterest Board!