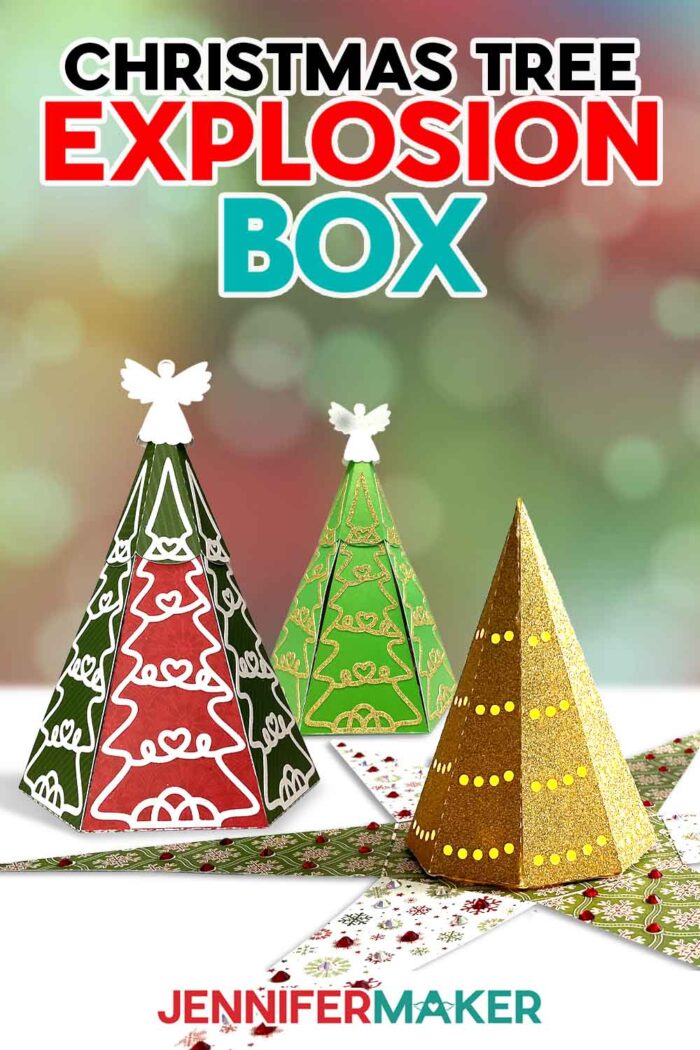
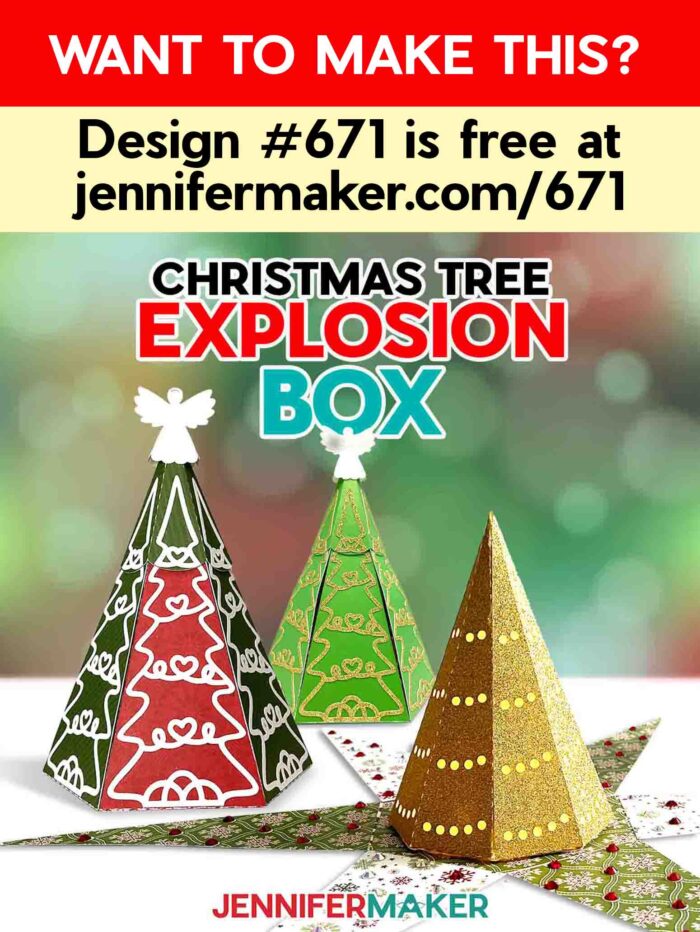
Learn how to create an incredible Christmas Tree Explosion Box!
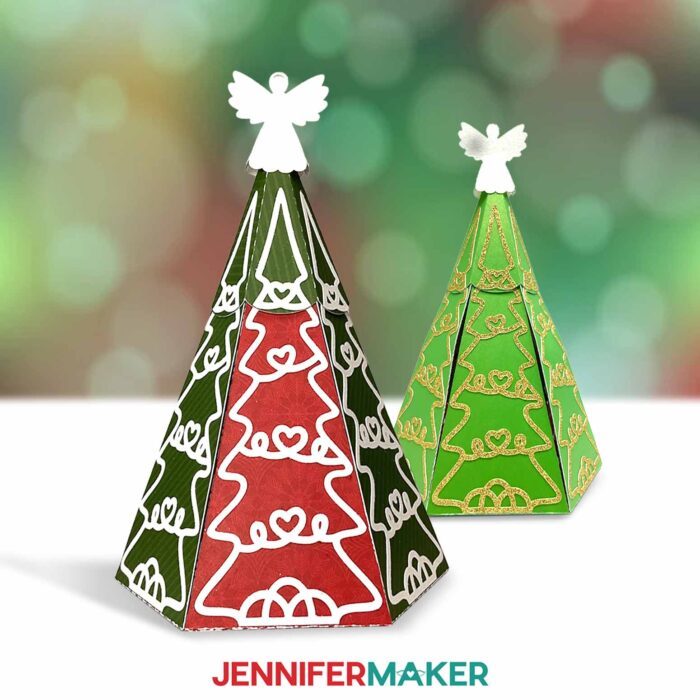
Homemade gift boxes are cool and all, but have you ever seen one explode? Explosion boxes are so much fun to make, but it’s even more fun to watch someone open them up! In this tutorial, I’ll show you how to make a Christmas tree explosion box that doubles as a centerpiece.
The full step-by-step video showing you exactly how to create your own Christmas tree explosion box was part of Maker Academy Weekend 2024. Get a pass to watch all 18 workshops, each with a printable handbook, transcript, audio files, design files, and support with a Maker Academy Weekend 2024 VIP pass!
Did you know ADVANCE with JenniferMaker annual members get a free 2024 VIP pass and lifetime access to the 2024 Maker Academy Weekend projects? Join now!
My Christmas tree explosion box might look like a pretty centerpiece, but there’s more to it! Pick up the angel at the top, and the tree’s sides will cascade down, revealing surprises inside! You can slip gift cards between the layers, a monetary gift, small pieces of candy, and put a small LED light inside to make the inner tree a pretty lantern. So many options!
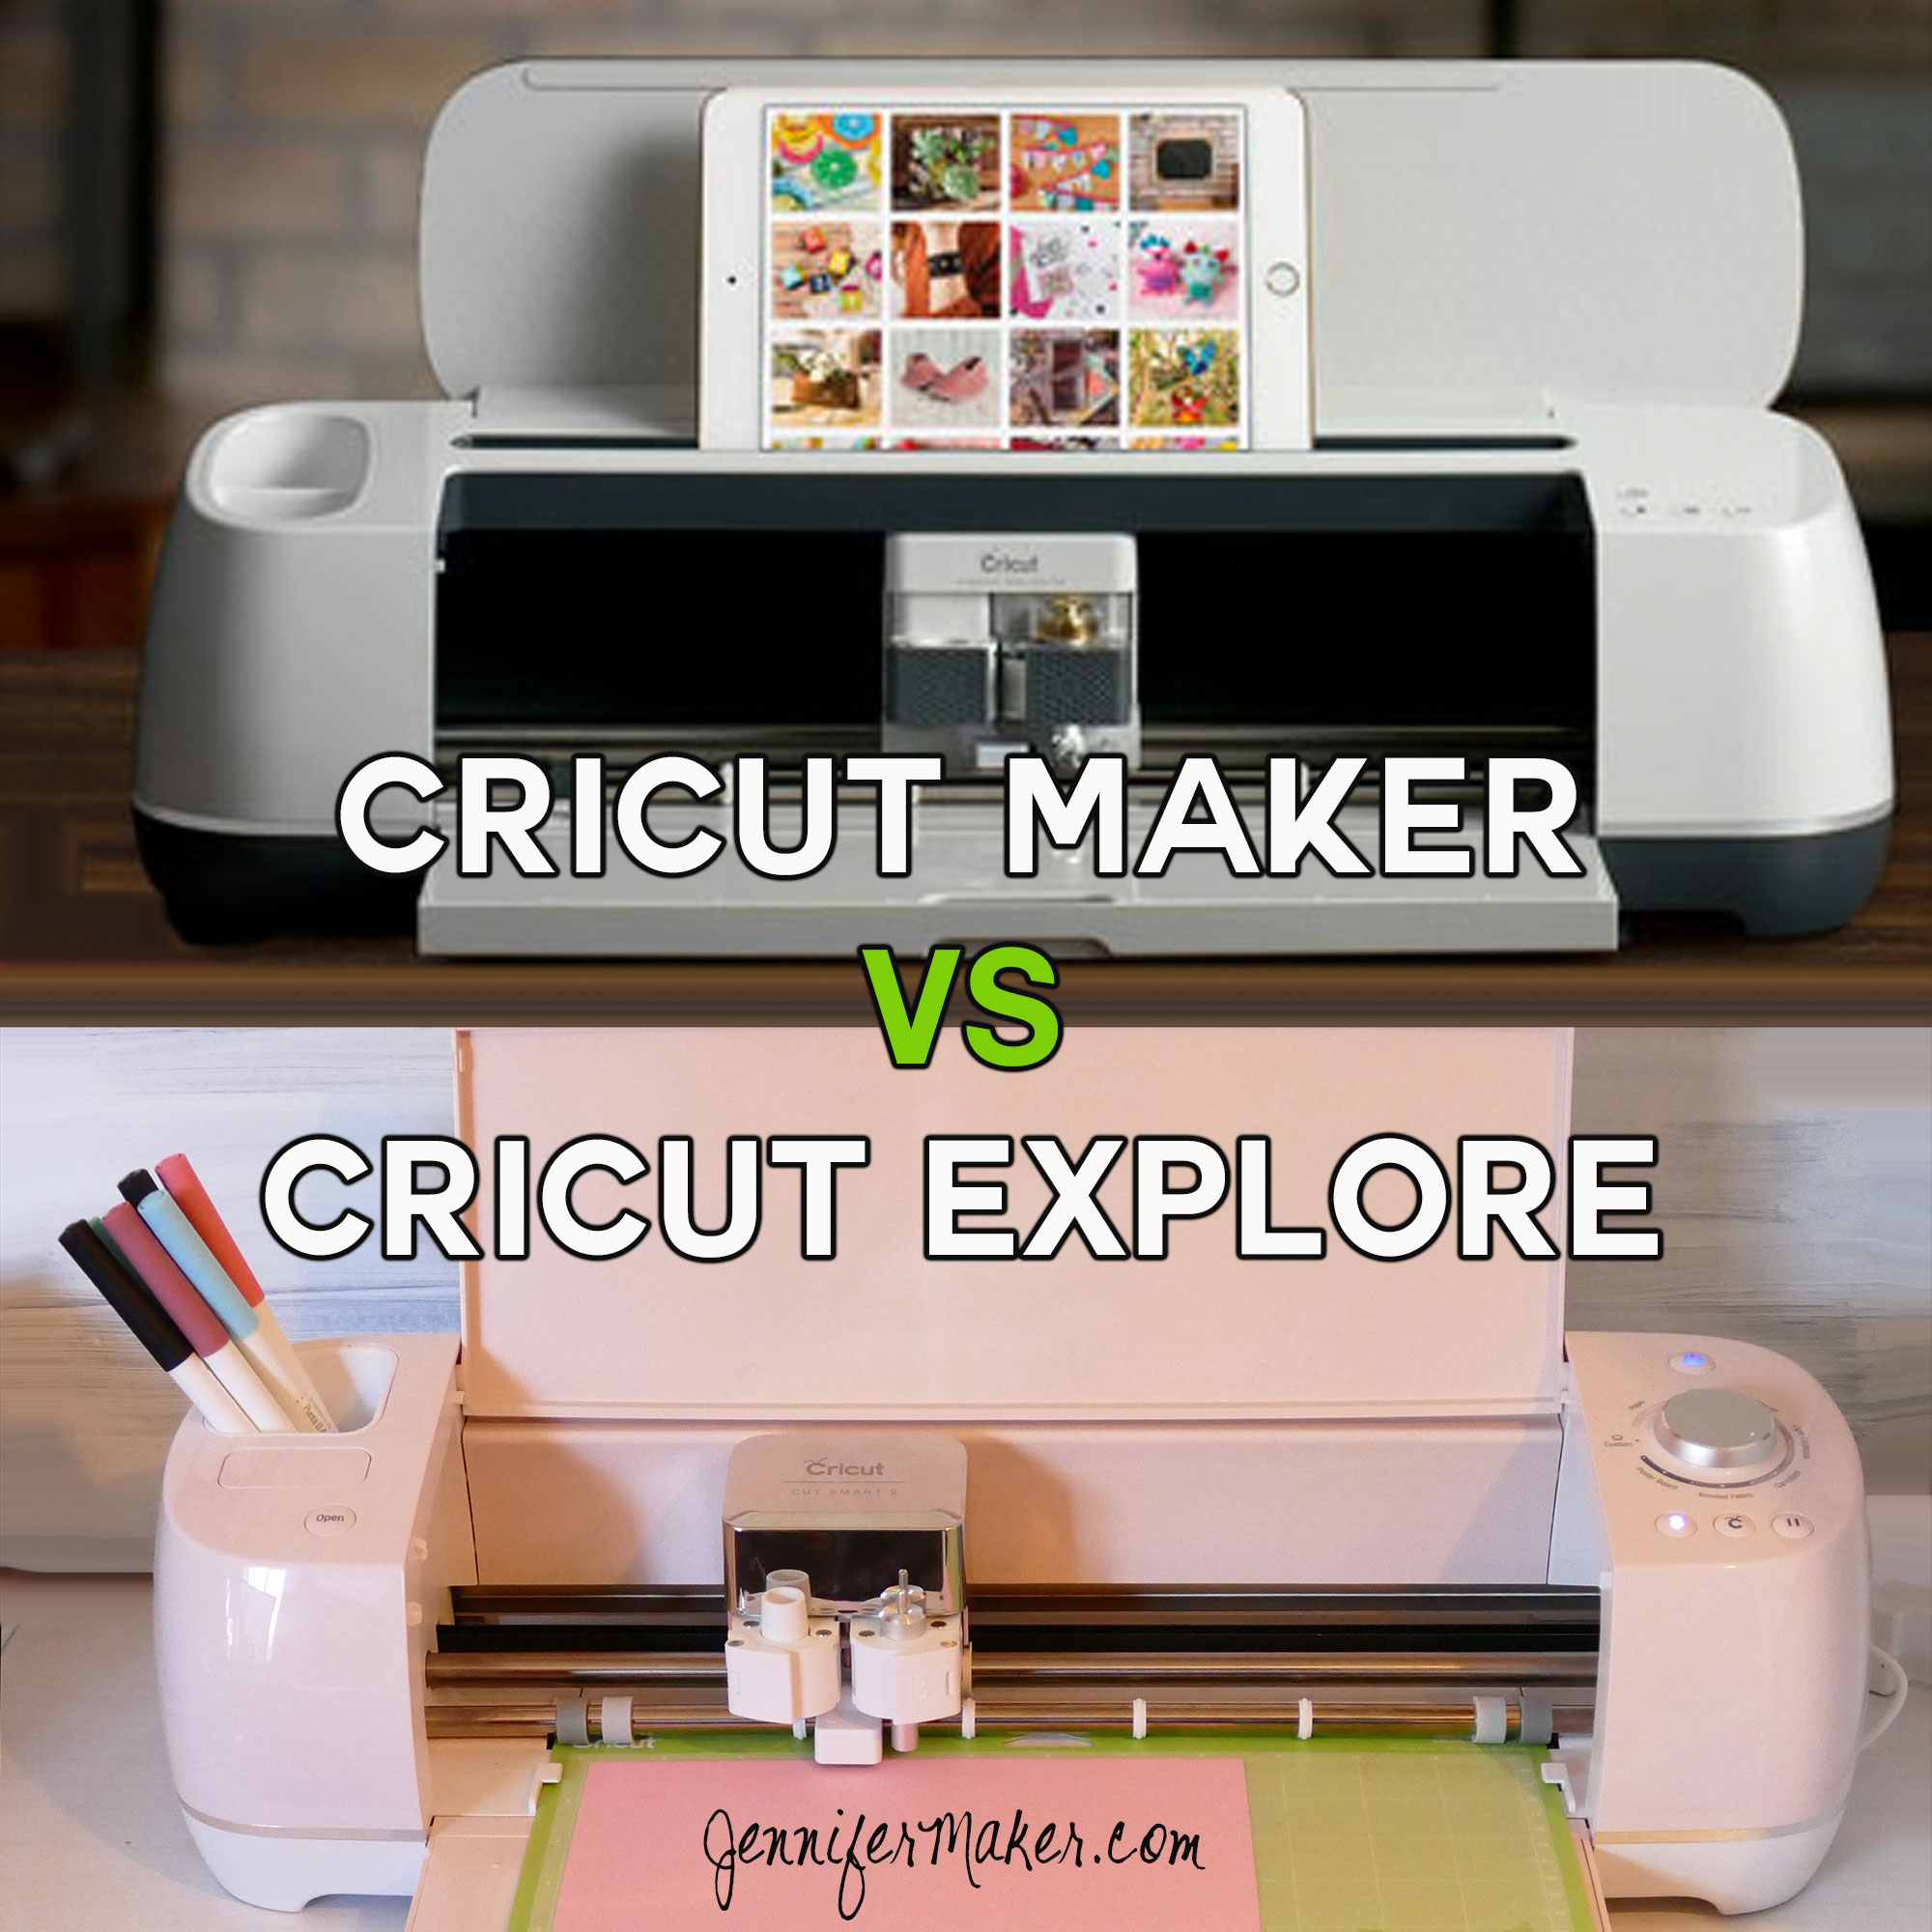
I used my Cricut Maker 3 to cut the pieces from several sheets of cardstock and vellum (for light diffuser panels), but you can also use a Cricut Explore series machine, other Makers, a Venture, or the Cricut Joy Xtra. If you want to make score lines for the fold lines (instead of dashed cut lines) use the “score” files and pay attention to the score section of the video.

When it’s time to assemble the Christmas tree explosion box, make sure your layers are in the right order. The tree inside (the part that doubles as a lantern) is a smaller size than the one on the outside, allowing it to hide within. Then pop the angel on top for a lovely finish!
These are so fun and easy to make! You can size them up if you have a cutting machine large enough, or make some small trees to gift or place around your home. Experiment with different patterns of cardstock, or print digital paper pages for a customized twist.
For being such a showstopping design, these explosion boxes are a great value because they only use a few inexpensive materials! Simple projects are my favorite! A Christmas tree explosion box can be a small gift if you give it as a simple luminary, or a BIG gift if you fill it with goodies! Either way, your special person will love it!
Let me show you how to make a Christmas tree explosion box! This post contains some affiliate links for your convenience (which means if you make a purchase after clicking a link I will earn a small commission but it won’t cost you a penny more, there is no additional cost)! Read my full disclosure policy.
Materials to Make A Christmas Tree Explosion Box
View my Amazon shopping list for the exact items I used!
- Four to Eight (4-8) Sheets of 12″ x 12″ 65 lb. Patterned Cardstock
- One to Fourteen (1-14) Sheets of 8.5” x 11” or 12″ x 12″ 65 lb. Solid-Core Cardstock (any patterned or solid paper colors)
- Three (3) Sheets of 8.5″ x 11″ or 12″ x 12″ Glitter Cardstock (I used 2 sheets of white and 1 sheet of gold)
- One (1) Sheet of 8.5″ x 11″ or 12″ x 12″ Vellum (any color, optional for diffuser layer)
- One (1) Strand of LED Fairy Lights
- Eight (8) Sets of 3/8″ Clear Hook and Loop Dots (optional to attach the lantern to the tree base)
- SS30 Sized Flat Back Rhinestones (optional for decoration)
- A way to cut your cardstock – I’m using the Cricut Maker 3, but you can also use the Cricut Maker, a Cricut Explore Series machine, the Cricut Venture, or the Cricut Joy Xtra
- Cricut Green StandardGrip Machine Mat 12″ x 12″
- Cricut Blue LightGrip Machine Mat 12″ x 12″ (optional for vellum)
- Scoring Stylus (optional for files with score lines) -OR-
- Single Scoring Wheel (optional for files with score lines)
- Craft Glue (I used Bearly Art Precision Glue)
- Hot Glue Gun & Glue Sticks (for glitter cardstock)
- Silicone Finger Protectors
- Brayer
- Spatula
- Scraper
- Weeding Tool (for popping out small cutouts from intricate areas)
- Tweezers (optional)
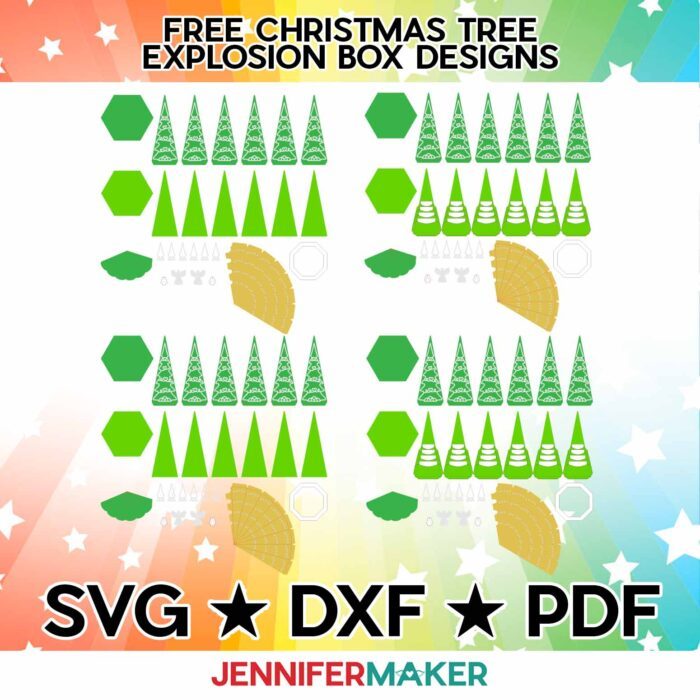
- Design #671 – My free SVG/PDF/DXF design files are available in my free resource library (get the password by filling out the form at the bottom of this page) or get additional access to the workshop video and printable workbook by getting a 2024 VIP Pass to Maker Academy Weekend or by joining the ADVANCE with JenniferMaker program as an ANNUAL (yearly) member!
How to Make A Christmas Tree Explosion Box!
The detailed step-by-step assembly video on how to make a Christmas tree explosion box was available to watch for free for 24 hours during Maker Academy Weekend 2024, held online November 7-10, 2024. Get access to the Maker Academy Weekend 2024 videos, printable handbooks, and design files with a 2024 VIP Pass to Maker Academy Weekend or by joining the ADVANCE with JenniferMaker program as an ANNUAL (yearly) member!

Answers to Your Questions About My Christmas Tree Explosion Box Tutorial
Q: Where is your tutorial for this project?
A: This is a special project we made for our free Maker Academy Weekend 2024 event! A complete and detailed step-by-step video premiered during the event November 7-10, 2024. You can get access to the video tutorial and printable handbook that details how to make this great project if you get a 2024 VIP Pass to Maker Academy Weekend or by joining the ADVANCE with JenniferMaker program as an ANNUAL (yearly) member which comes with other perks and bonuses, too!
Q: Can you make an explosion box with Cricut?
A: Yes, my Christmas tree explosion box works best at it’s original size, but you can make it with any of the Cricuts other than the small Joy.
Q: What do you need for an explosion box?
A: You’ll need cardstock. glue, a way to cut and crease the papers, and my free design files!
Q: What paper should I use for explosion box?
A: I like 65-80 lb. or medium weight card stock for these fun gift boxes.
Q: Do you have ideas of what to put in the middle of an explosion box?
A: Candies are my favorites to put inside explosion boxes!
Q: Can I make this project without a Cricut?
A: Yes, you can print my included PDF files and use them as templates to cut the shapes by hand with scissors or a craft knife.
Q: Do I need to use a Cricut cutting machine to cut card stock?
A: No! I always include several versions of each digital item in my zip format download. If you have a Silhouette Cameo, which uses Silhouette Studio, you can use the DXF cut files in Silhouette Basic Edition. If you have upgraded to Silhouette Designer Edition, Designer Edition Plus, or Business, you can use the SVG file. A Brother ScanNCut works, too, If you don’t have one of these powerful tools, you can print and then cut out my digital download PDF file, too, and assemble it like die cuts. The ZIP file in my resource library includes these file types and more! And good news, you can also use Cricut cut files and Design Space on a mobile device. Just make sure you have the latest version of the app.
Q: How do I know if my design uploaded at the correct size?
A: If you are using Cricut Design Space Beta for Desktop, try switching to the Live version as this has sometimes worked in our testing, or use the stacked version of the design and ungroup it to spread the pieces out. Here are the dimensions you should see for each design on your Canvas:
tree-explosion-box-noscore-jennifermaker-SVG: 25.911″ x 27.356″
tree-explosion-box-pckts-noscore-jennifermaker-SVG: 25.911″ x 27.356″
tree-explosion-box-pckts-score-jennifermaker-SVG: 25.91″ x 27.356″
tree-explosion-box-score-jennifermaker-SVG: 25.911″ x 27.356″
If you need help resizing your design, please see our Resizing Guide.
Get my free SVG file set to make a Christmas tree explosion box!
(If you do not see the signup form above, click here.)
I love seeing what you make with my designs and tips! Please share a photo of your Christmas tree explosion box in our Facebook group or tag me on social media with #jennifermaker.
Love,

Want to remember this? Save this Christmas Tree Explosion Box Tutorial to your favorite Pinterest Board!