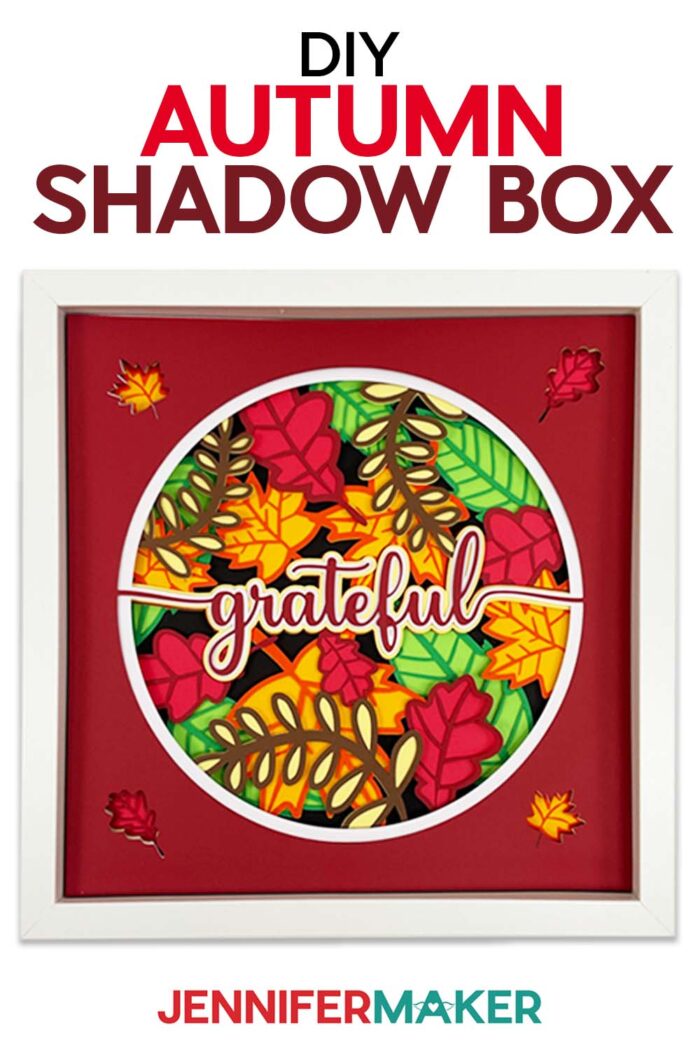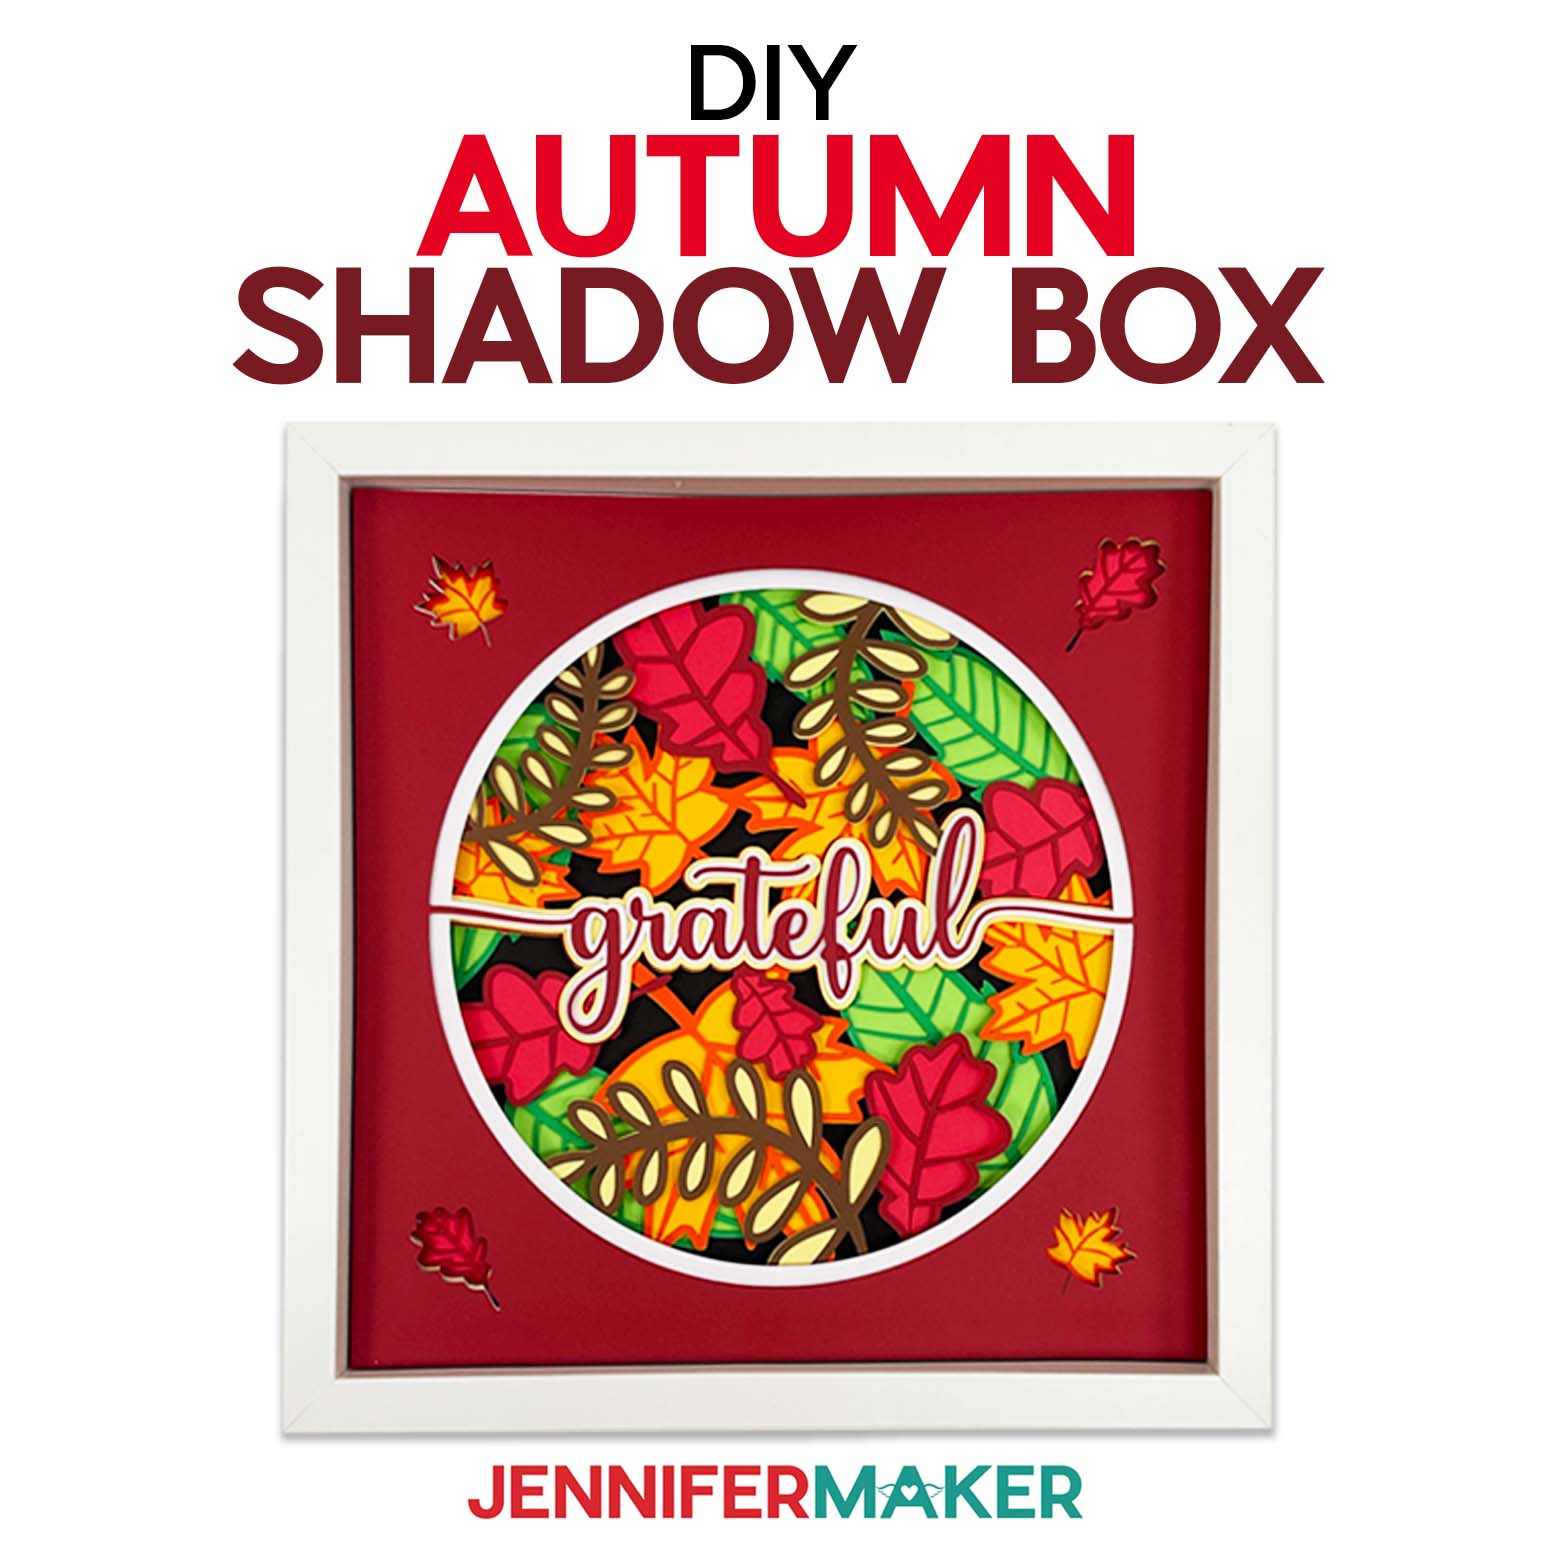

Learn how to make a layered shadow box celebrating the season!
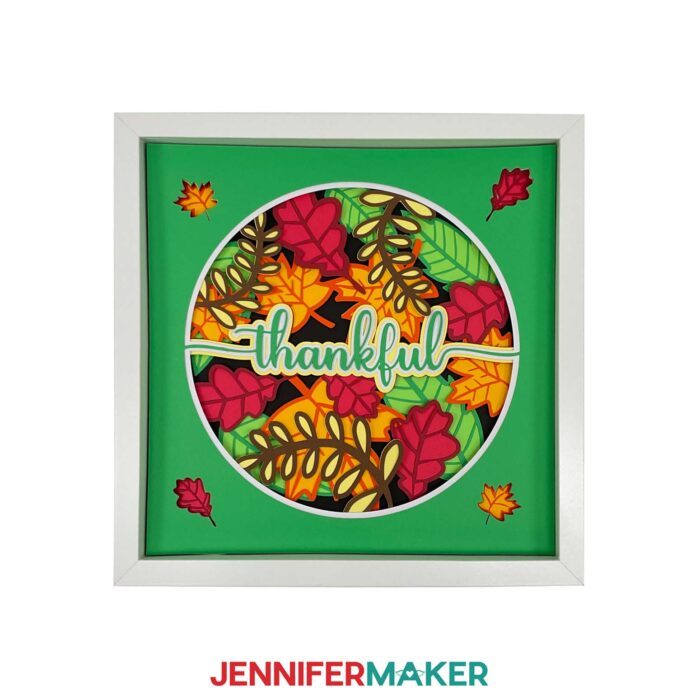
I love the colors of fall, don’t you? I’ll show you how to using simple cardstock and adhesives to make a beautiful autumn shadowbox for your wall or shelf. Each design fits right in the shadowbox frame, and features faux leaves and one of four words to suit the season. I’ll even show you how to customize it using your own word, too! My shadow boxes are fun and easy to make, and look really amazing when they’re assembled. Follow my tutorial to make one for your autumn decor!
Want to save this project? Enter your email below and we’ll send the project straight to your inbox.
Got some autumn wishes for some fresh new fall decor? When the seasons change, so do my decorations. Seasonal shadowboxes are fun and versatile because you can just swap one piece of framed paper art for another as the year goes on!
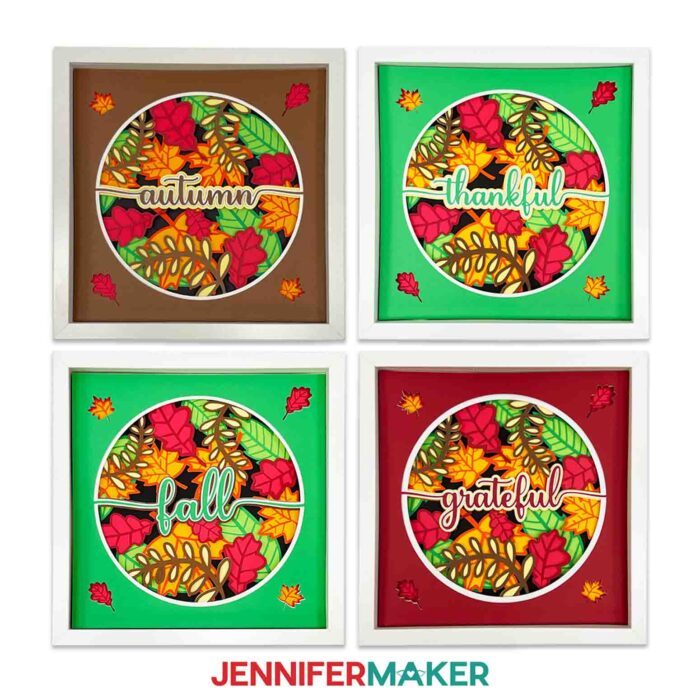
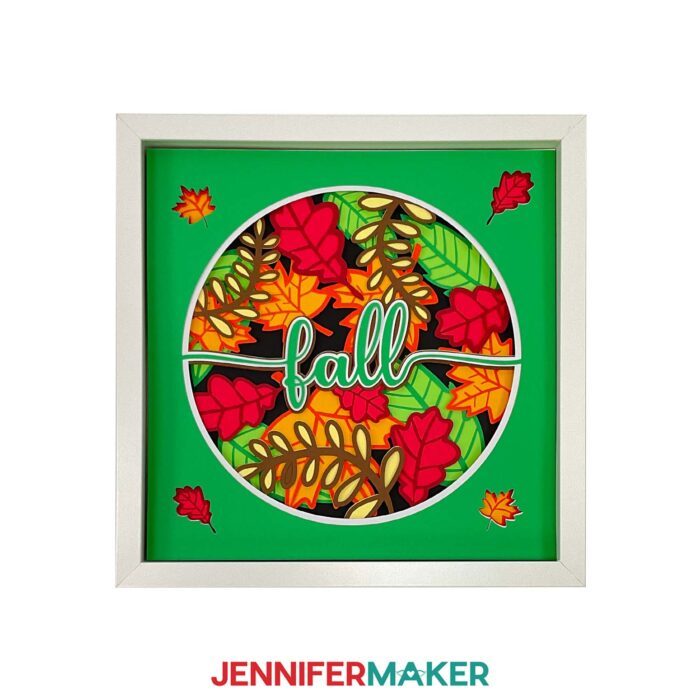
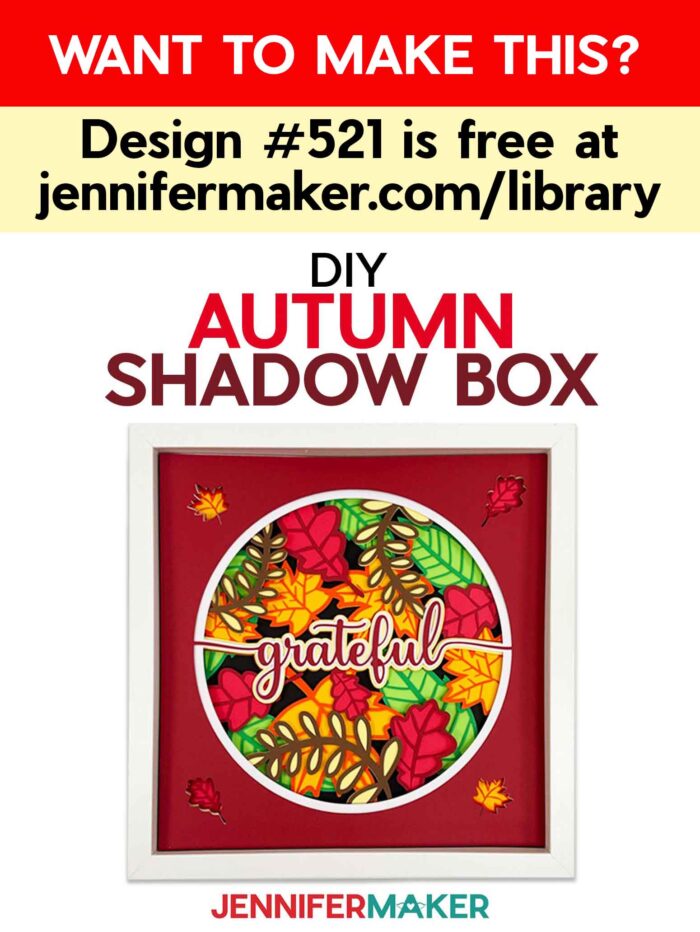
First, download my digital designs and choose which shadowbox you’d like to make. I’ve included one design that says “Autumn,” one that says “Fall,” one that says “Grateful,” and one that says “Thankful.” I’ve also added a blank design that you can customize with your own word — if you follow my steps carefully!
First, you’ll choose and upload the SVG of your choice to your Canvas in Cricut Design Space. All five of the files are ready to cut for a 12″ x 12″ frame. If you have a different sized frame, I’ll show you how you can resize the file. Just don’t make it too tiny, because the cuts might end up too intricate even for your Cricut (and freshly cleaned blade) to handle.
Speaking of cleaning blades, have you cleaned yours lately? It’s always a good idea to clean your blade before (and during!) a project — especially a multi-mat project using intricate cuts like this one. Find out my favorite method for cleaning my blades on my Cricut Cutting Problems: Tips for Cleaner Cuts blog post.
To create your own autumn shadow box, you only need a few materials like some good quality cardstock, a shadowbox frame (or make your own) a cutting machine, and a few other basic tools and supplies you can find in my materials list in this tutorial. You can customize the look of your shadowbox by using patterned or autumn themed papers or cardstock. This can add some extra dimension or texture, and it makes your shadowbox even more unique!
I’ll show you how to make this project easily with a Cricut – you can use any Explore or Maker machine, or the Venture. It is possible to cut these shadowboxes by hand with scissors or an X-Acto knife, but due to the intricacies I highly recommend you use a cutting machine.

Creating your own custom word takes some patience but you can totally do it! In the download folder, I include a version with a blank layer with “autumn shadowbox blank” in the name. This is the file you should use if you want to customize the word in your shadowbox.
When you open that file in Design Space, you will notice that two red layers have a floating leaf in them. We will use those to weld to our custom word, so the word attaches to that layer. It’s several steps to get there, but I will guide you through the process the entire way.
For the words in shadowboxes, I used the font Hey Lover, which features some really pretty glyphs that we can add to your custom word. You can download the font for free at dafont.com if you plan to use it strictly for personal use. If you plan to sell your designs, though, you’ll need to purchase the licensed version for commercial use from FontBundles.
And if you need help installing fonts for use in Cricut Design Space, I’ve got you covered.
Once you’re ready to prepare your file with your custom word, we’ll begin by creating some offset layers. Then we’ll add some of those cool glyphs I told you about, and adjust the letter spacing so everything looks right. I’ll show you exactly how to incorporate the new word into the design so it looks just as good as other complete shadowbox designs in the collection.
There are some things to look out for, like tiny cutouts in the design on your Canvas that can sometimes cause cutting issues. I’ll show you how to remove them using Design Space’s “Contour” function, so you can get the cleanest cuts possible.

When it is time to cut, Your design will appear on eleven different mats. Pay close attention to the color order so you can be sure to load your mat with the right cardstock. Since I cut my designs as-is and didn’t resize them, I used a full page of 12″ x 12″ cardstock for each layer of the shadowbox. I found it helpful to arrange all of my cardstock in the cutting order listed in Design Space. Design Space sorts the mats according to hue and saturation, which often differs from the actual order of the shadow box layers! To learn more about how this works, check out my blog post about Cricut mat order.
After your cuts are complete and you remove the layers from your machine mat, a weeding tool may be useful to poke out any little pieces of stubborn cardstock that didn’t get fully cut out.
Then it’s time to assemble the layers. We’ll start from the bottom layer and use a combination of Zots glue dots and adhesive foam tape to give the layers more dimension. When the layering is complete, we’ll insert the finished cardstock creation into the shadowbox frame. Then you’ll be ready to show off your beautiful autumn wall decor!
My DIY autumn shadow boxes are a fun and easy fall decoration that can stay up from the first pumpkin spice latte all the way through Thanksgiving! Aren’t you always amazed at the super cool things we can make with a little cardstock?
Here’s a supply list of what you need to make your own autumn shadowbox! This post contains some affiliate links for your convenience (which means if you make a purchase after clicking a link I will earn a small commission but it won’t cost you a penny more)! Read my full disclosure policy.
Materials and Tools to Make an Autumn Shadowbox
View my Amazon shopping list with the exact items we used to make this project
- 12″ x 12″ 65 lb Cardstock, assorted autumn colors
- 12″ x 12″ Shadowbox
- Small Clear Zots – 3/16″ Diameter x 1/64″ thick
- Medium Clear Zots – 3/8″ Diameter x 1/64″ thick
- Adhesive Foam Squares
- A method to cut your cardstock, I used the amazing Cricut Maker 3 but you can also use the Cricut Maker, Explore series machines, or the Venture
- Cricut 12″ x 12″ green StandardGrip Machine Mat
- Ruler or Measuring Tape
- Brayer
- Scraper
- Weeding Tool
- 12″ x 12″ White Kraftboard – optional, for DIY Shadowbox Frame
- Bearly Art Precision Craft Glue – optional, for DIY Shadowbox Frame
- Design #521 – My free SVG/PDF/DXF design files in my free resource library (get the password by filling out the form at the bottom of this page)
How to Make Your Own Autumn Shadowbox
The detailed step-by-step assembly video on how to make an autumn shadowbox debuted during Maker Academy Weekend 2023, held online November 1-5, 2023. Get an on-demand pass to watch all 30+ workshops, each with a printable handbook, transcript, audio file, design files, and support with a VIP pass below:

Answers to Your Questions About How to Make an Autumn Shadowbox
Q: Where is your tutorial for this project?
These autumn shadowboxes are a special project we made for our free Maker Academy Weekend 2023 event! A complete and detailed step-by-step video premiered during the event November 1-5, 2023 — this tutorial video was available to watch for free for 24 hours only during the event. If you missed it, you can get access to the full video, the 15-page printable handbook that details how to make this beautiful project with a VIP Pass to Maker Academy Weekend 2023, which comes with other perks and bonuses, too! !
Q: What do you put between layers in a shadow box?
A: I like to use glue dots like Zots between the layers of my shadow boxes. They hold up well over time and keep the layers nice and separated so you get the maximum 3D effect. I don’t just love Zots for shadowboxes, either. According to the Zots product information, you can also use them on photos and matting in picture frames, as well as decorations and embellishments like buttons, beads, paper flowers, and more. In addition to the Zots, I also like to use adhesive foam tape. Check out my tutorial to learn exactly how and where I use both of these materials in my shadowboxes.
Q: What materials do you need for a shadow box?
A: I’ve got a full materials list in my tutorial, but this is actually a pretty simple project that doesn’t require a lot of supplies or tools. You’ll want a square shadow box frame (mine is 12″ x 12″), some high quality cardstock, a full-size cutting machine like a Cricut Venture, Maker, Maker 3, or Explore series machine, a StandardGrip machine mat, and some Zots and adhesive foam tape. You may already have many of these materials and tools in your craft supplies, but you can also likely find them at your local craft store (though I do love me some free shipping with Amazon Prime).
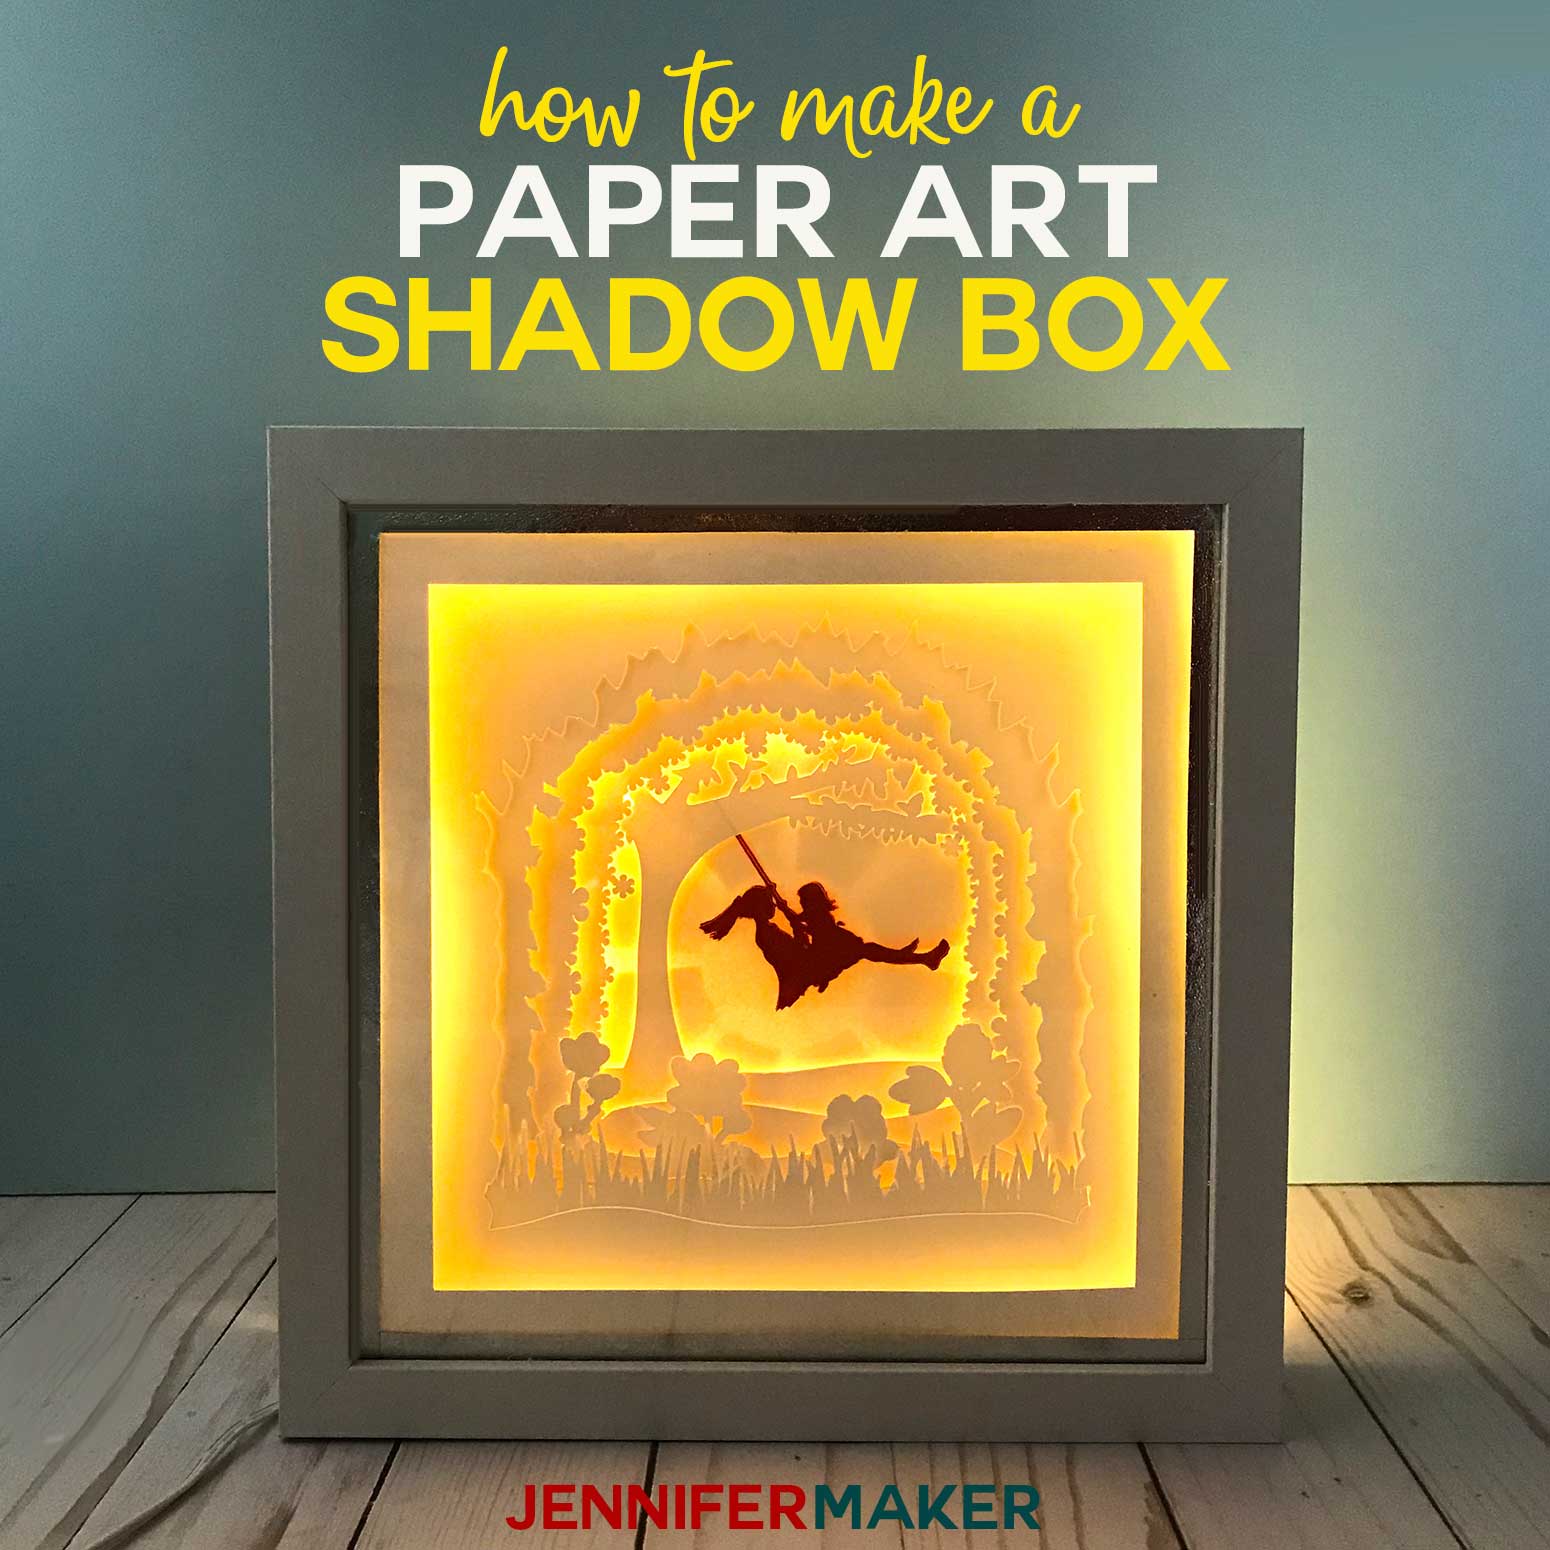
Want to make your shadowbox a little “extra?” Learn how to add lights and make it glow!
Q; How do you cut your cardstock so intricately without tearing and ripping?
A: The key is to use a clean sticky machine mat and a clean fine point blade. Get the full details on how to get cleaner cuts on your Cricut cardstock projects in my Cricut Cutting Problems guide.
Q: Are there more layered paper shadowboxes like this I can make?
A: Absolutely! Check out these layered cardstock shadowbox project tutorials: Winter Shadowboxes, Cardinal Shadowbox, Easter Truck Shadowbox, Crystal Diamond Shadowbox, Star Shadowbox, Pinwheel Shadowbox, Flower Shadowbox, Heart Shadowbox, Heart Mandala Shadowbox, Woodland Animals Shadowbox, “KIND” Shadowbox, Sea Animal Shadowboxes, and XO “Hugs and Kisses” Shadowboxes.
Want to light it up? Check out my paper cut light box tutorial. You can also find lots more layered cardstock projects that you can use inside shadowboxes on my blog.
Layers not your thing? Here’s a super easy Christmas Shadowbox with bells!
Get my free SVG files to create an autumn shadowbox!
Get FREE access to this design and ALL of my SVG cut files!

Subscribe (free!) to my newsletter with updates and tips PLUS get instant access to my resource library with this file and all of my other free files, printables, and patterns! Once subscribed, I will send you a newsletter with details about my new free and helpful files each week.
Enter my free resource library for my latest files, printables, and patterns! Password is 'craft' -- please copy and paste that in at the link above. Thanks for being a subscriber!!
I SO hope you’ll make an autumn shadowbox! Please join my social network and share a photo of your fall home decor in our Facebook group or tag me on social media with #jennifermaker.
Love,

Want to remember this? Save this Autumn Shadowbox tutorial to your favorite Pinterest Board!