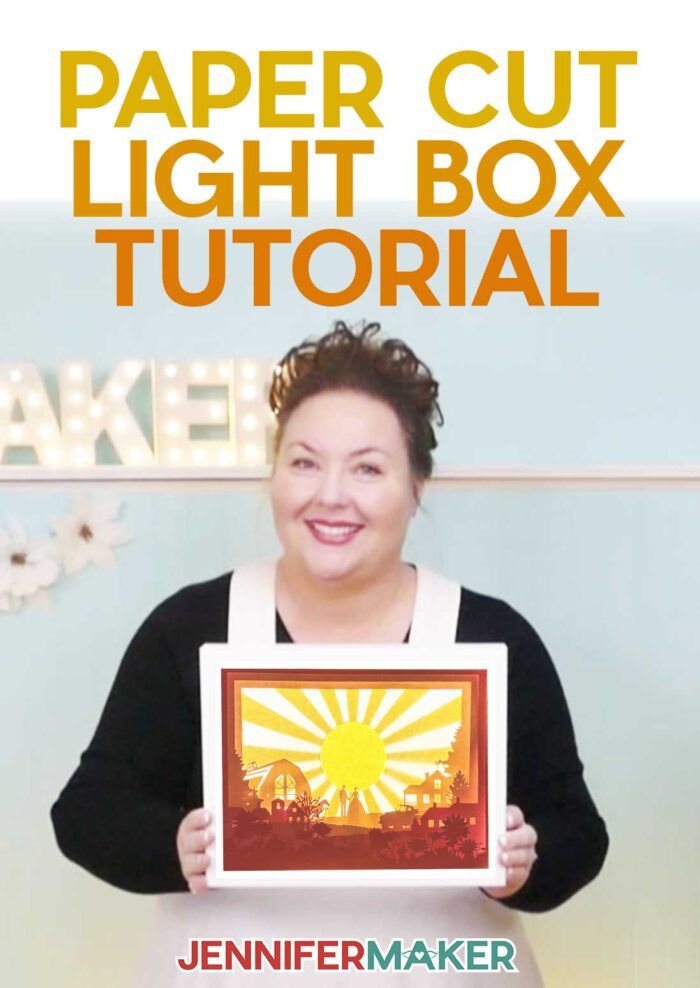
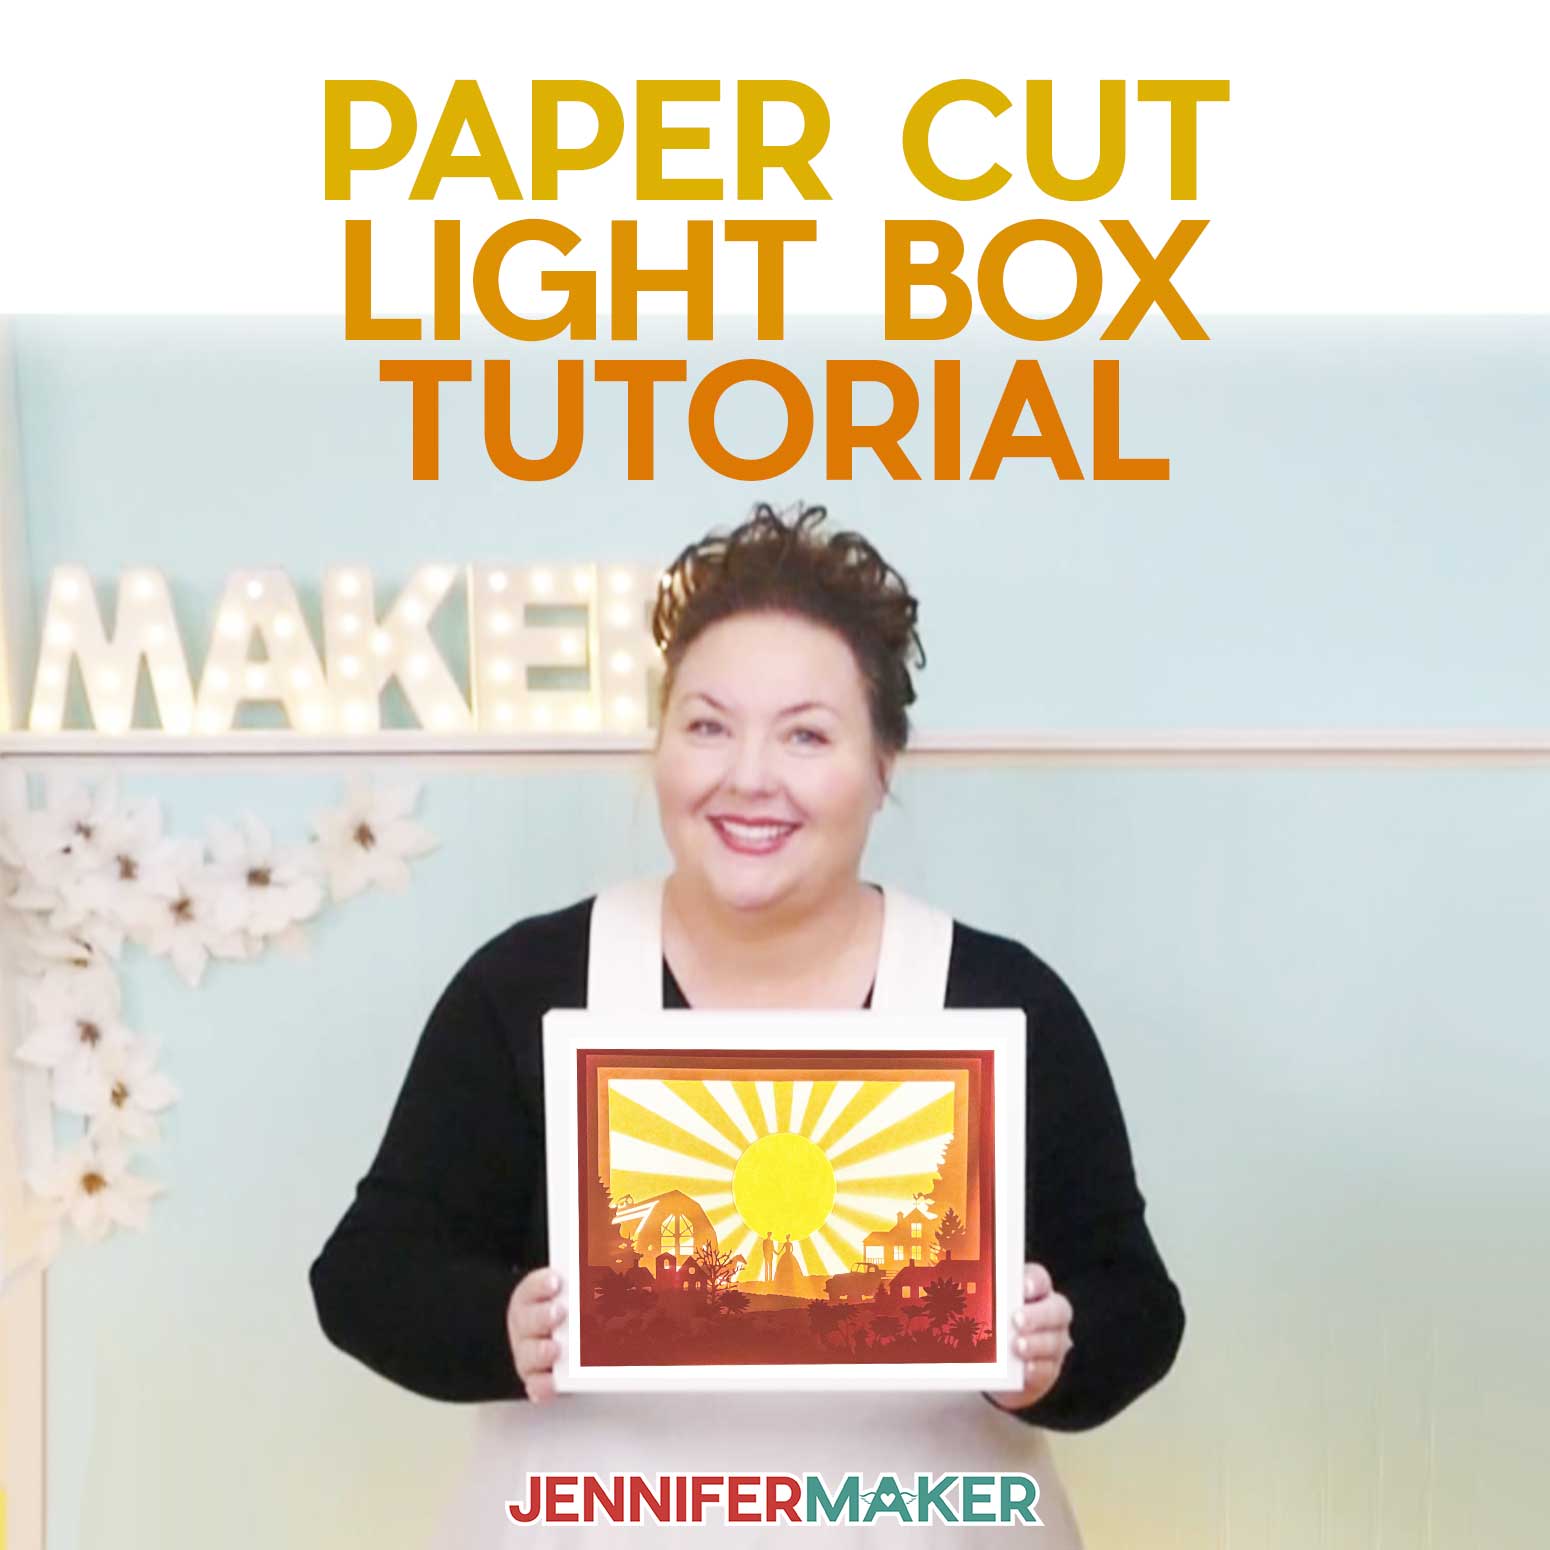
Create your own version of a beautiful farmhouse scene with my paper cut light box tutorial and a DIY shadow box!
Light boxes are one of the best projects to make with a Cricut, because you can cut intricate layers to the perfect size for your frame! The appearance of depth you can create with spacers and light is stunning. You just want to climb in! I’ve heard that many of you feel that way about the farm scene on my Youtube channel. So many of you have asked to make it, and now you can! Even better, I’ll show you how to customize the scene in my paper cut light box tutorial. And, I’ll teach you how to make a DIY cardstock frame if you don’t have a shadow box. You can make frames for all your layered designs in no time!
Watch my complete step-by-step tutorial on how to create a customized paper cut light box:

My daughter Alexa and I made the original animation in Blender, and I love starting every video with the scene. Did you know that’s us by the tree swing?
After so many of you asked how to make it, a layered paper light box seemed like the best way to capture the scene’s depth in a paper-friendly way! All it takes is good-quality cardstock and glue dots!
The easiest way to cut all the intricate design layers is definitely a Cricut. You’ll just need the fine-point blade, which is the original cutting tool that came with your Cricut machine, and a blue LightGrip mat.
The layers for my paper cut light box tutorial work best at their original size, which fit in the shadow box frame on my list. OR, you can make your own cardstock frame using the additional file. I’ll show you how to make it in no time at all. You’ll need 12″ x 12″ cardstock, a scoring tool, green StandardGrip mat, and craft glue to make a frame.
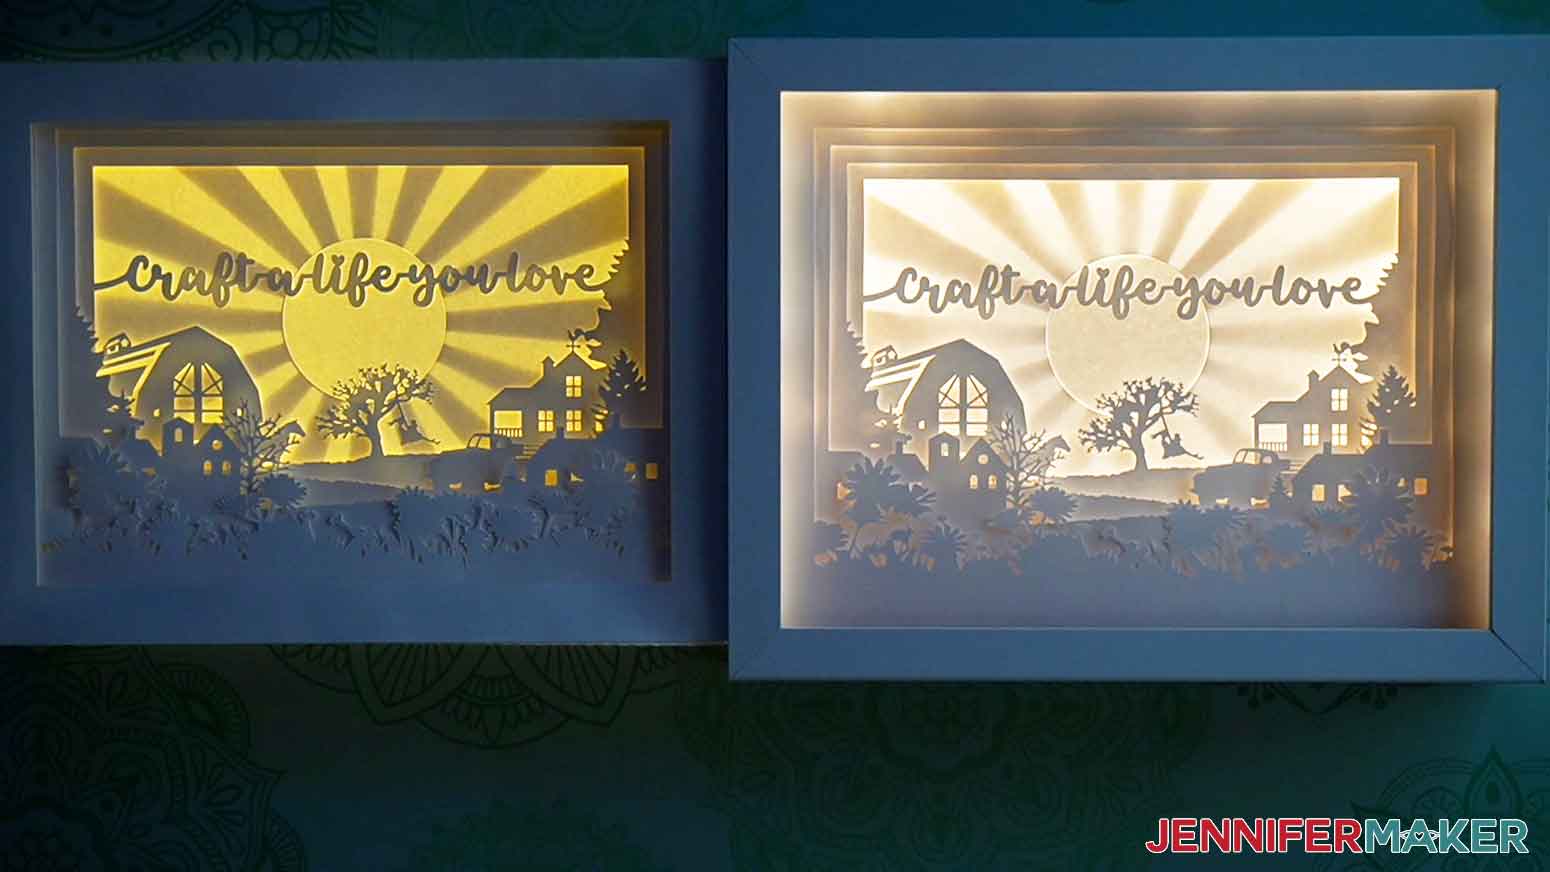
I’ve included a few complete designs, but you I’ll also show you how to edit the SVG in Cricut Design Space. You can make your own unique design with the free template! Check out how different it looks depending on the colors you use!
Finally, I’ll show you how to light it up! You can use LED lights on a strip or fairy lights. We’ll make each layer glow as light shows through the layers of paper!
This wonderful home decor project is a special option for a wedding gift or unique birthday present! Just follow my paper cut light box tutorial video to change the focal point or image. It will be a great gift with your own unique feel!
Ready to make tour own version with my paper cut light box tutorial? I’m super excited to show you how! This post contains some affiliate links for your convenience (which means if you make a purchase after clicking a link I will earn a small commission but it won’t cost you a penny more)! Read my full disclosure policy.
Materials for My Paper Cut Light Box Tutorial
View my Amazon shopping list with the exact items we used to make this project
Six (6) sheets of 65 lb 12″ x 12″ white cardstock for monochromatic layers, or different colors to create your desired effect. I cut the layers on a blue LightGrip Machine Mat and held them together with 3D 1/2″ Zots Glue Dots and Medium 3/8″ Zots Glue Dots.
If you want to make a DIY cardstock frame with a Cricut instead of the 8.5″ x 11″ shadow box frame, you will need five (5) sheets of high-quality, 65 lb 12″ x 12″ white cardstock, a green StandardGrip machine mat, craft glue, and a scoring stylus or single scoring wheel.
Different light sources (optional) – I’ll show you how to use LED strip lights or fairy lights. My LED strip needed three (3) AA batteries
- A method to cut your cardstock — I used the amazing Cricut Maker 3 but you can also use the Cricut Maker or the Cricut Explore Series with a Green StandardGrip Machine Mat 12″ x 12″
- Tools including a ruler, weeding tool, brayer, spatula, scraper, scissors, tweeers, a lint roller, and a craft knife and self healing mat to cut a notch in the corner of the back piece of your purchased shadow box if you add lights with a corded power supply
- Butcher Paper – optional, but helps to keep your glass panel and cardstock frame clean
- Design #409 (My free paper cut light box tutorial SVG/PDF/DXF design files are available in my free resource library – get the password by filling out the form at the bottom of this page)

How to Make a Project with My Paper Cut Light Box Tutorial
Paper Cut Light Box Tutorial
Learn how to create and customize a fun paper cut light box that looks just like the beginning of all my tutorial videos!
Materials
- Six (6) Sheets of 65 lb 12" x 12" White Cardstock
- Five (5) Sheets of 65 lb 12" x 12" White Cardstock for the DIY Cardstock Frame -OR-
- One (1) 8.5" x 11" Shadow Box Frame
- 3D 1/2" Zots Glue Dots
- Medium 3/8" Zots Glue Dots — for adhering the back two layers
- One (1) Strand of LED Strip Lights
- Three (3) AA Batteries — for the LED strip lights
- Fairy Lights (optional) — for using instead of the LED strip lights with the cardstock frame
- Design #409 (My free SVG/DXF/PDF design files available in my free resource library - get the password by filling out the form at the bottom of this page)
Tools
- A way to cut your cardstock. I used the amazing Cricut Maker 3 but you can also use the original Maker or an Explore series machine with the Fine-Point Blade.
- Cricut Blue LightGrip Machine Mat, 12" x 12" -OR-
- Cricut Green StandardGrip Machine Mat, 12" x 12"
- Scoring Stylus — for scoring the cardstock frame -OR-
- Single Scoring Wheel
- Brayer
- Spatula
- Scraper
- Tweezers
- Weeding Tool — for popping out small pieces from intricate areas
- Craft Glue (I used Bearly Art Precision Glue) — for gluing the cardstock frame
- Scissors — to cut the LED strip lights to size
- Craft Knife (I used the Cricut True Control Knife) — to cut a notch in the corner of the back of your purchased shadow box
- Self Healing Mat — to use with a craft knife to cut a notch in the corner of the back of your purchased shadow box
- Ruler (optional) — to help fold the cardstock frame
- Butcher Paper (optional) — to keep your layers and cardstock frame clean
Instructions
STEP 1: GET MY FREE PAPER CUT LIGHT BOX FILES
First, download my Paper Cut Light Box SVG/DXF/PDF files from my free resource library. It's Design #409.
There are five files in the SVG folder:
- the customizable light box design layers
- the light box design layers with a tree and swing in the center
- the light box design layers with the tree swing and the words "Craft a life you love" in the center
- the optional DIY cardstock shadow box frame with "score-tool-or-stylus" in the name to be made with score lines using a scoring stylus or single scoring wheel
- the optional DIY cardstock shadow box frame with "no-score-tool-needed" in the file name to be made with dashed cut lines using a Fine-Point Blade
I'll show you how to create the light box design and adjust it with your own focal point using the customizable file. I'll also show you how to make the DIY cardstock frame with the "no-score-tool" version of the file and lights.
If you'd like to make the "score" tool version, follow the steps in my How to Make an Envelope tutorial to adjust the score lines.
If you'd prefer to use a pre-made shadow box, just skip the steps related to the DIY frame. The designs are sized for the 8.5" x 11" shadow box frame in my materials list.
If you want to make the light box design with the tree swing or the words "Craft a life you love" just as it is, upload that file and you're ready to cut!
If you'd like to add lights to the DIY frame, you can use either frame file. However, you will get some light leaking out of the dashed cut lines if you use the "no-score-tool" version.
Upload the SVG files you need to Cricut Design Space and add them to your Canvas. I'll start by customizing the shadow box design. I recommend cutting the frame layers separately.
STEP 2: CUSTOMIZE YOUR DESIGN
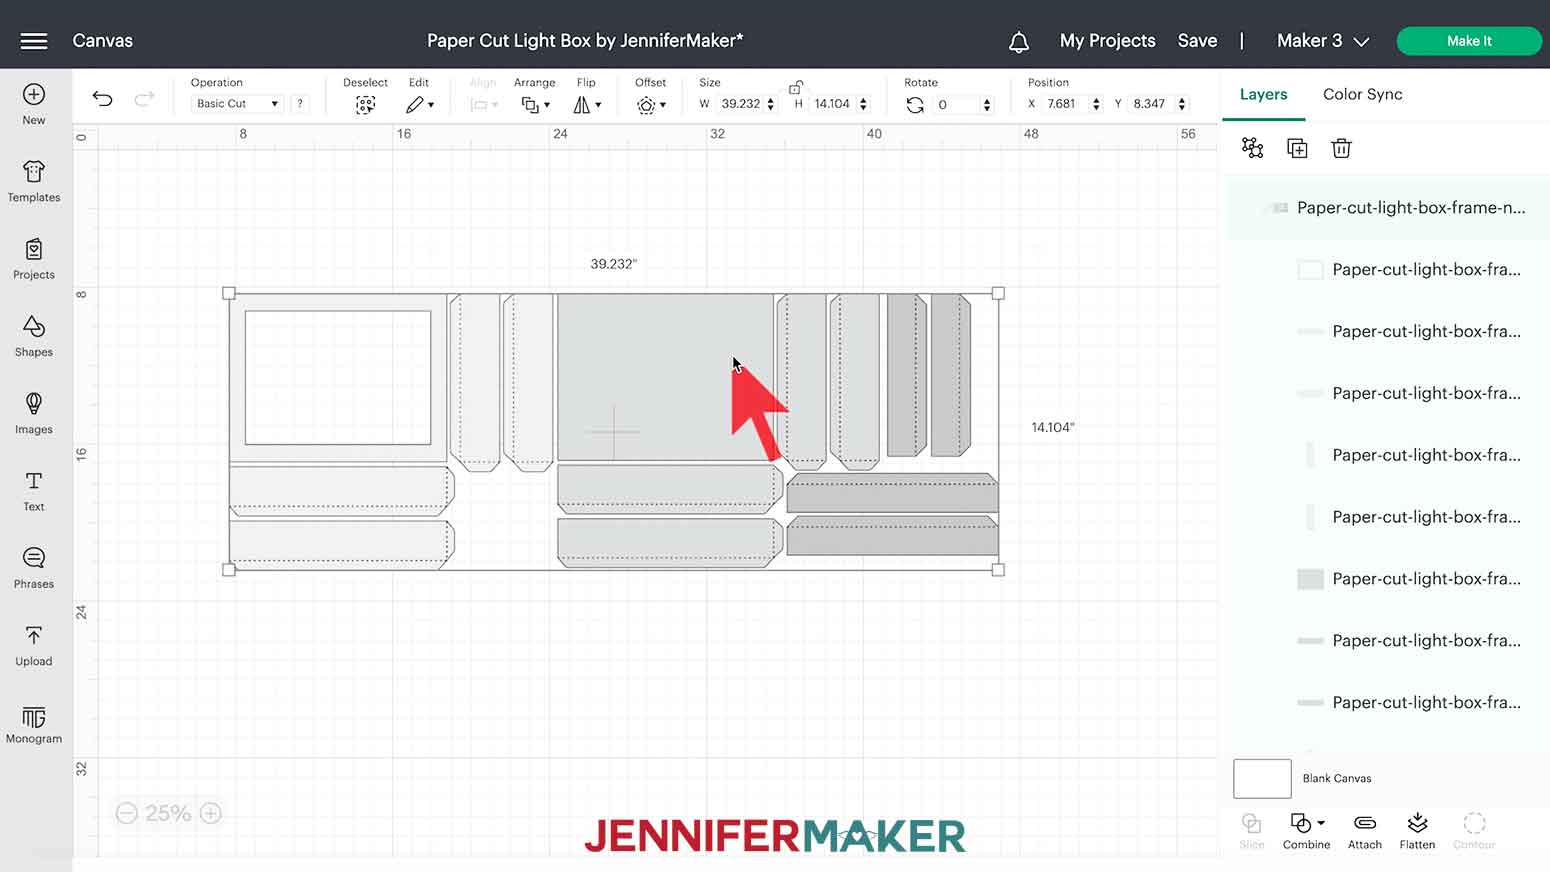
This is what my customizable light box layers look like on the Canvas.
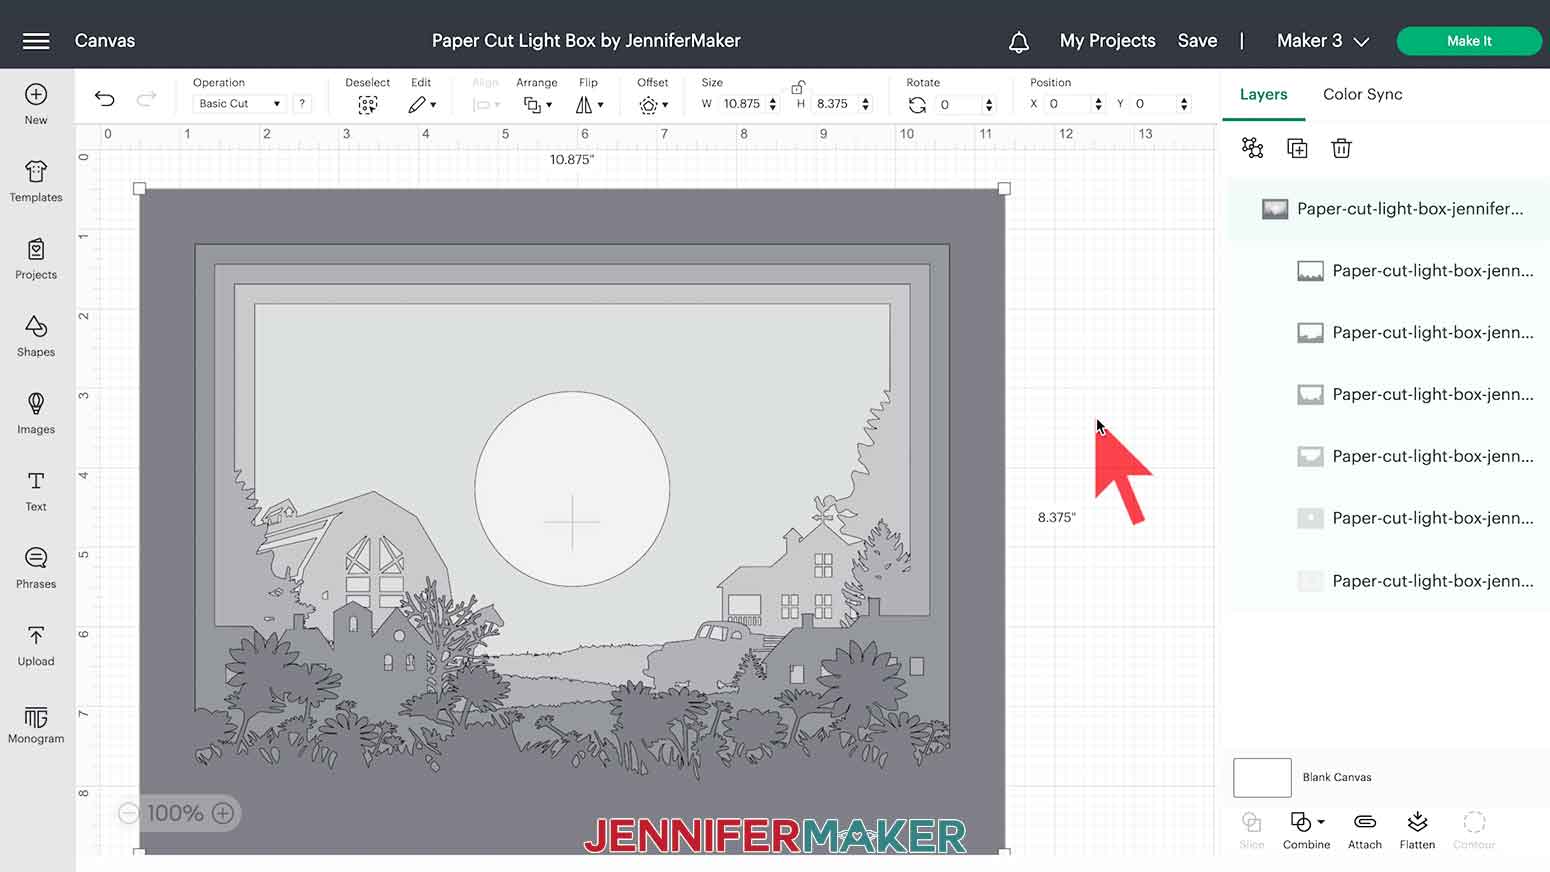
The six design layers fit perfectly into both the shadow box linked in my materials list and the DIY cardstock frame. I don't recommend resizing any of the files.
I've designed the file using different shades of gray for each layer to help distinguish them on the Canvas, but you can cut all of them on white cardstock.
Customize the Design Layers
You can customize your own Paper Cut Light Box by adding an image from Cricut Design Space. There are some things to look for when selecting an image for a light box, so let's go over the details.
First, ungroup the layers so we can work with them.
To work in a light box layer, an image must have solid areas that are all connected and all one color. If the pieces are separate from each other, they'll be difficult to place correctly in the layers.
We can use the image search filters to help find some good options. Click the Images icon to the left, then click "Browse All Images."
![]()
To the left under Filters, check the boxes next to:
- Free
- Under Operation Type, Cut Only
- Under Layers, Single
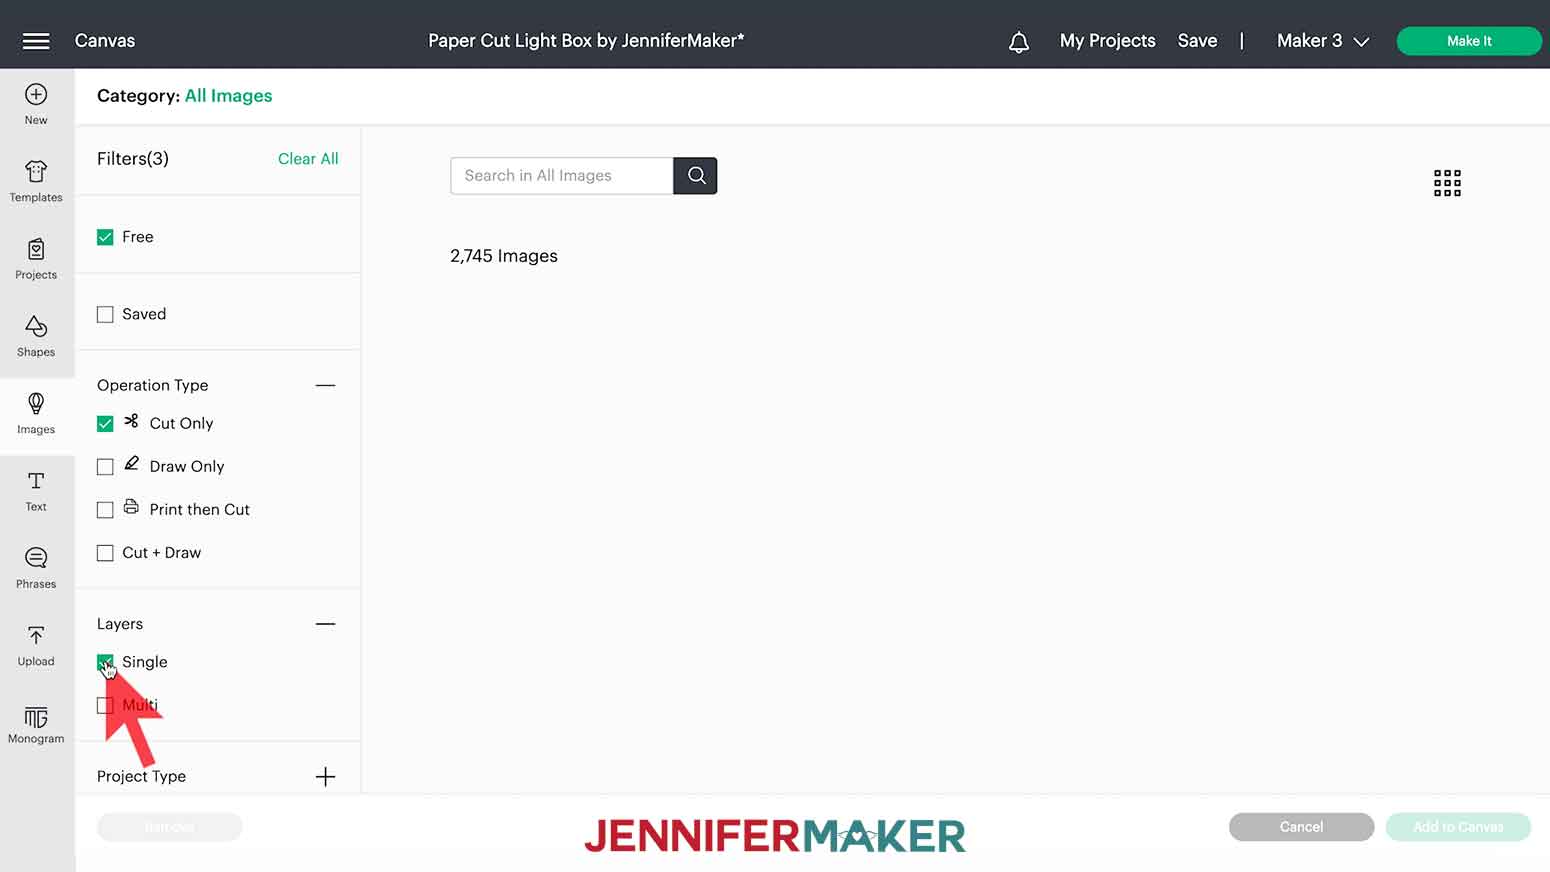
Images not designed for Cut Only often need lots of editing to make them work in shadow boxes. So stick to Cut Only while you’re learning. Your options will now be much easier to work into a design! They won't all work, though.
Look for images that are mostly solid with some areas of cutouts for interest. Silhouettes that are all one piece work great and are easy to drop in to your light box layers. And since we want to add a shape to our layer instead of cut it out of a solid section, there must be a solid outline around the edge to keep the details together.
I have an image in mind, so I'll search for "couple."
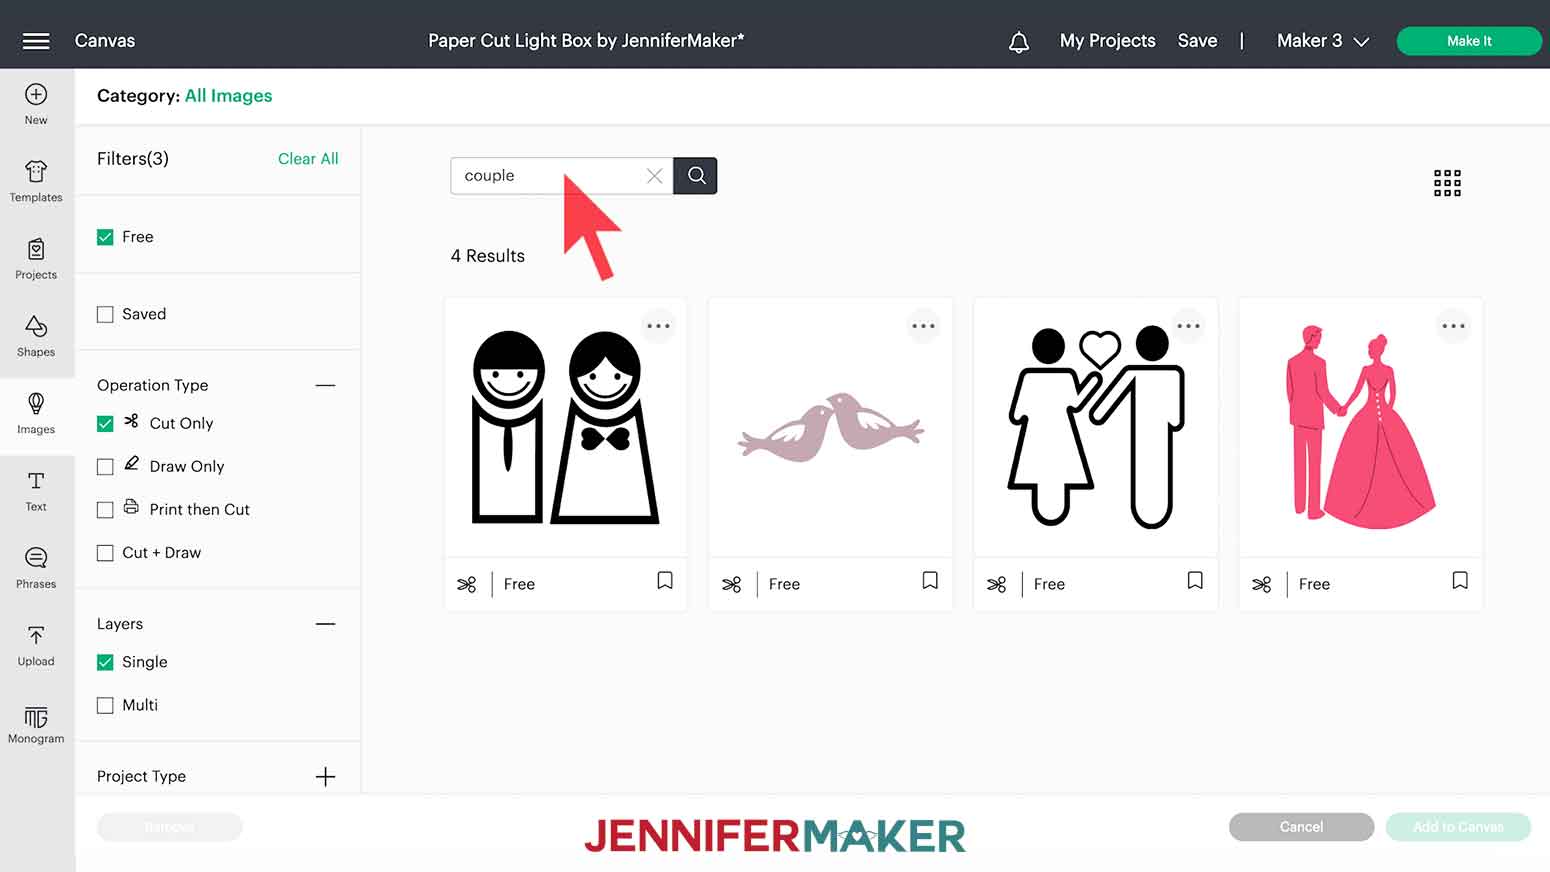
Of the four results, I recommend using the Bride and Groom image, #M3428C. The bird couple would also work well, but the others won’t work because they have lots of unconnected parts.
NOTE: New images are added as well as deleted from Cricut Design Space all the time, so this exact image may not be available. Feel free to use something similar.
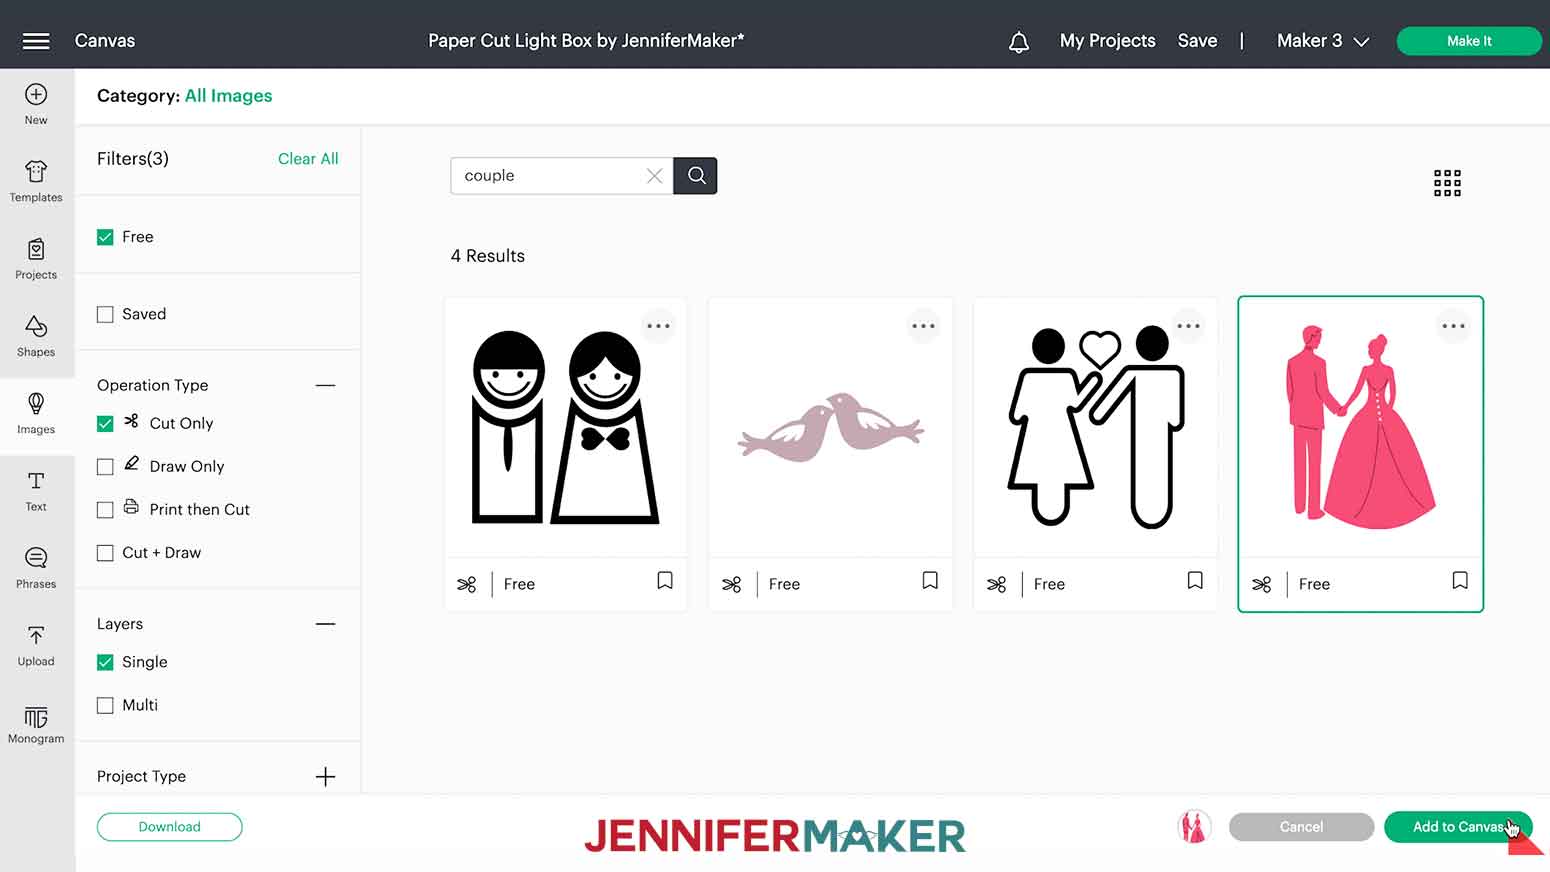
Click your preferred image and then "Add to Canvas."
Drag the image into place in the center of the custom layer, making sure the bottom slightly overlaps the grass.
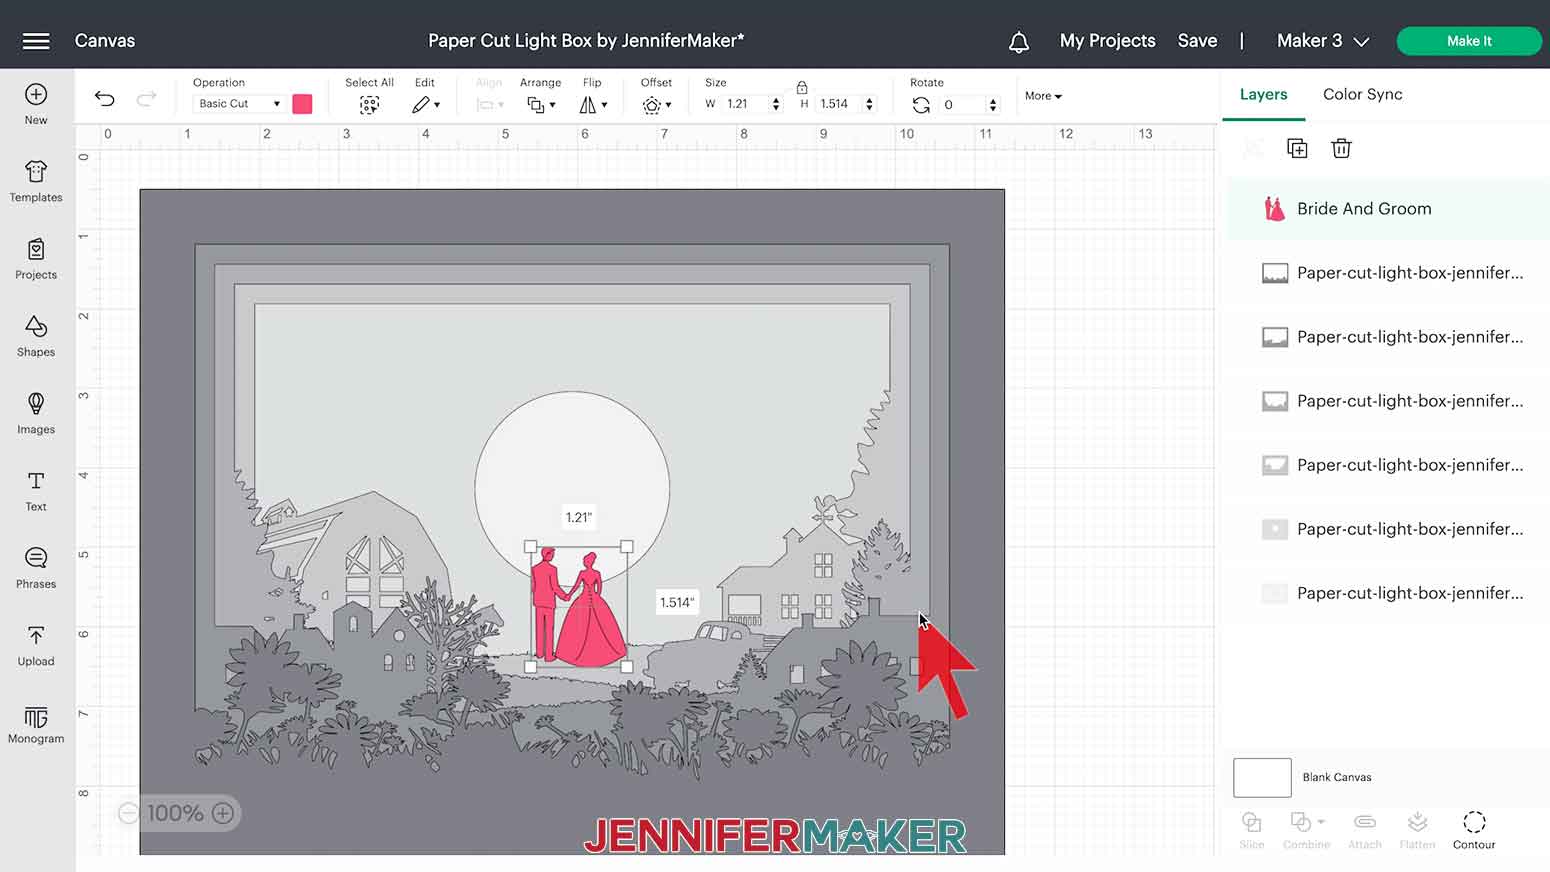
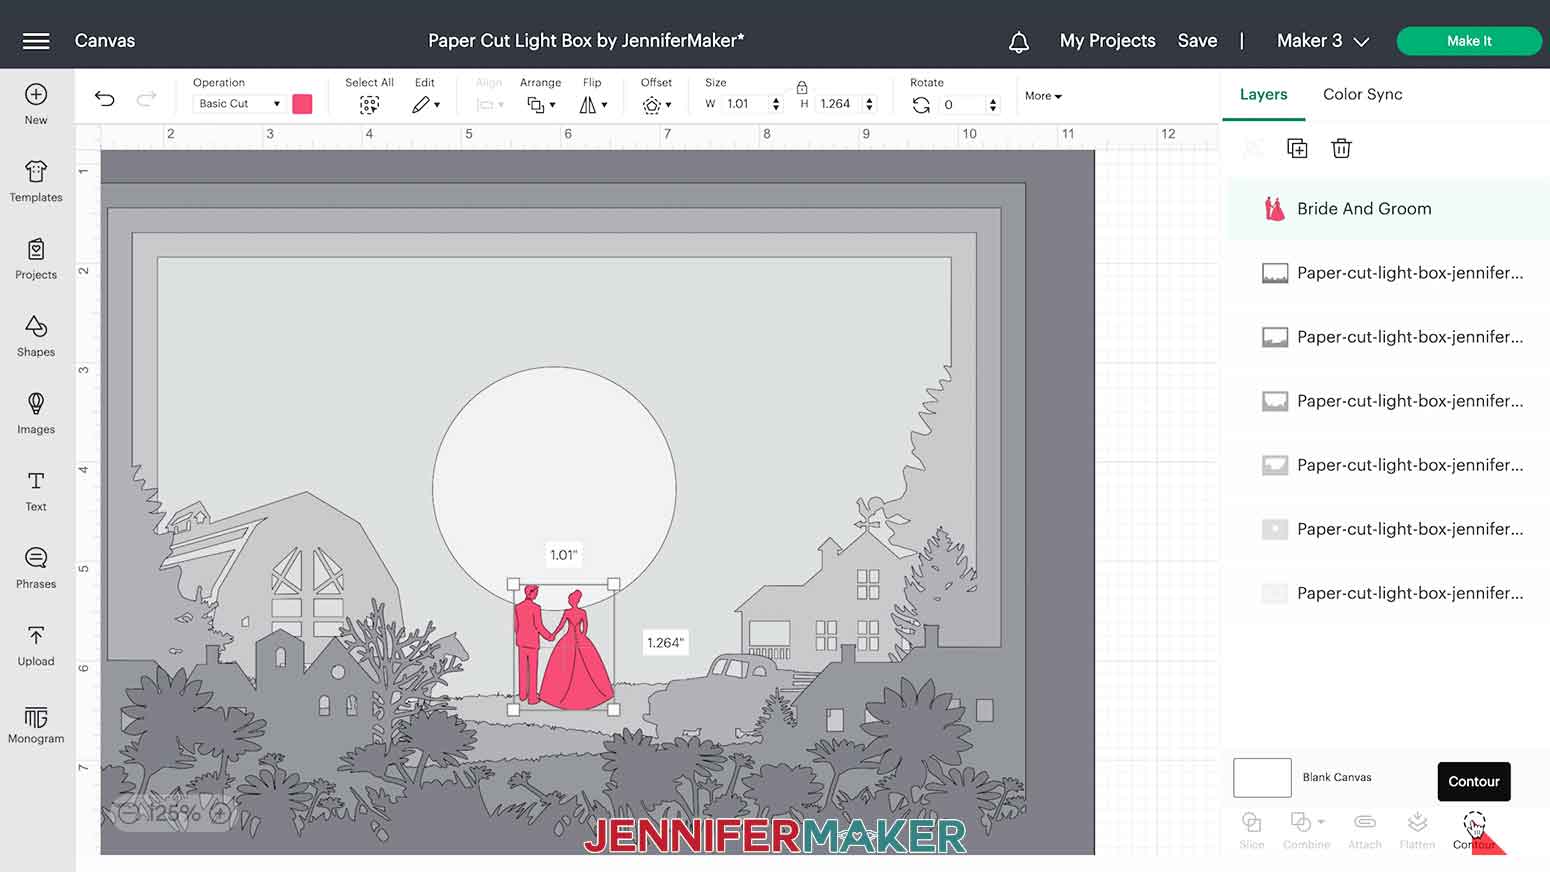
With the lock icon closed, drag a corner of the bounding box to resize the image so the couple doesn’t look too large compared to the barn and house. I made mine about an inch wide. Zoom in to reposition them if needed.
I found that this image cut better without the buttons on the back of the bride’s dress. To remove those, select the image of the couple and then click “Contour” below the Layers Panel.
Click on the five circles to remove them. Their outlines will change from black to gray when they’re selected. You can ignore the rest of the shapes.
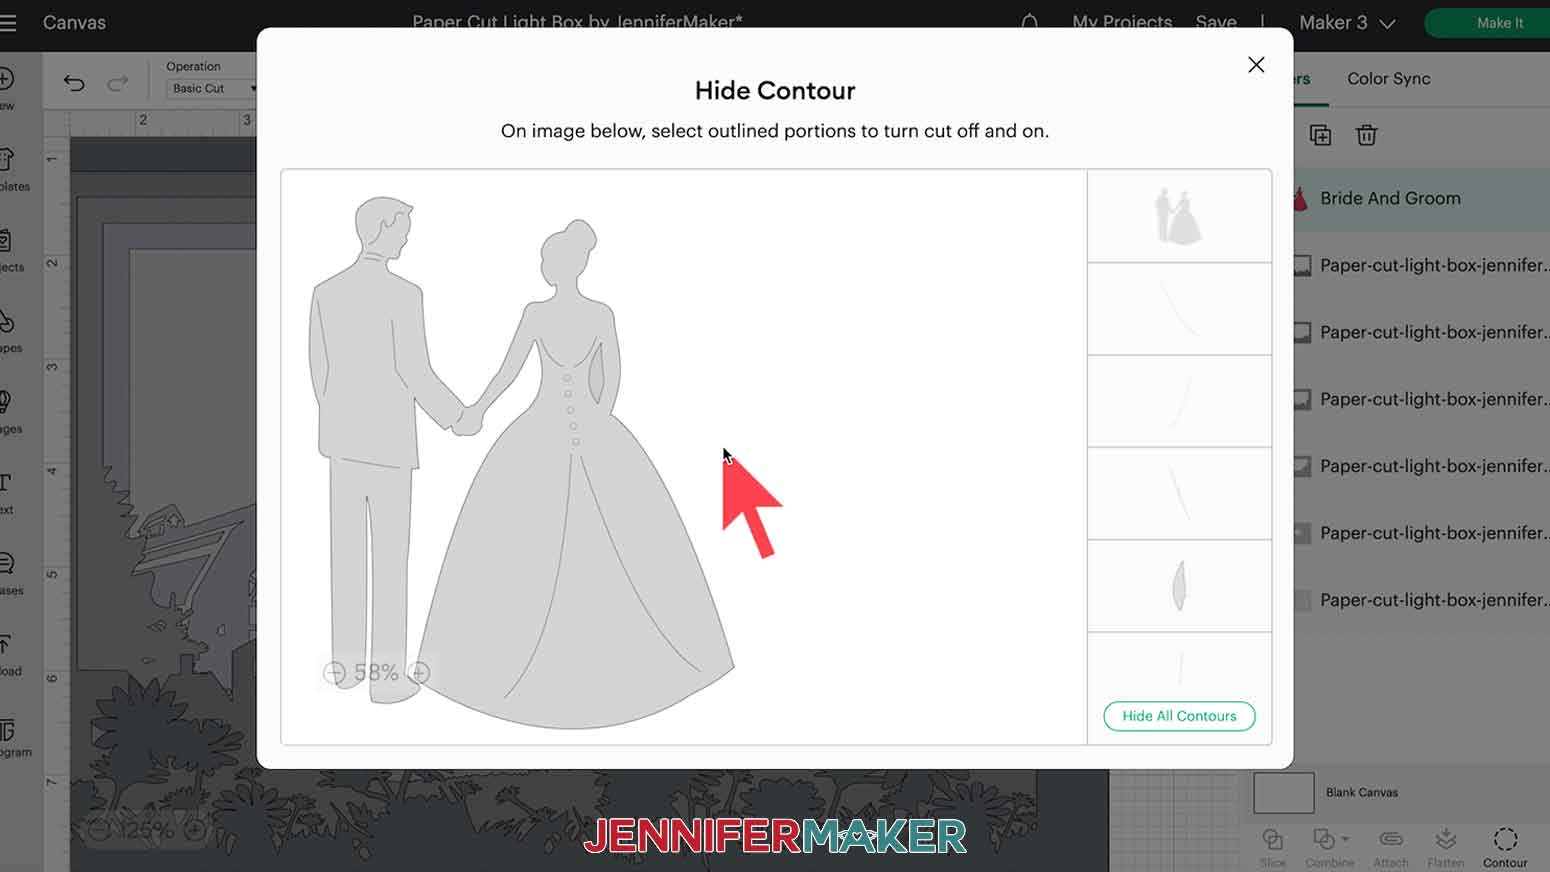
Then click the X in the top right to close the Contour menu. The buttons should now be gone.
Hold Shift on your keyboard and select both the couple and the custom barn layer. Click "Weld" below the Layers Panel. Depending on which version of Design Space you're using, you may need to click "Combine" first.
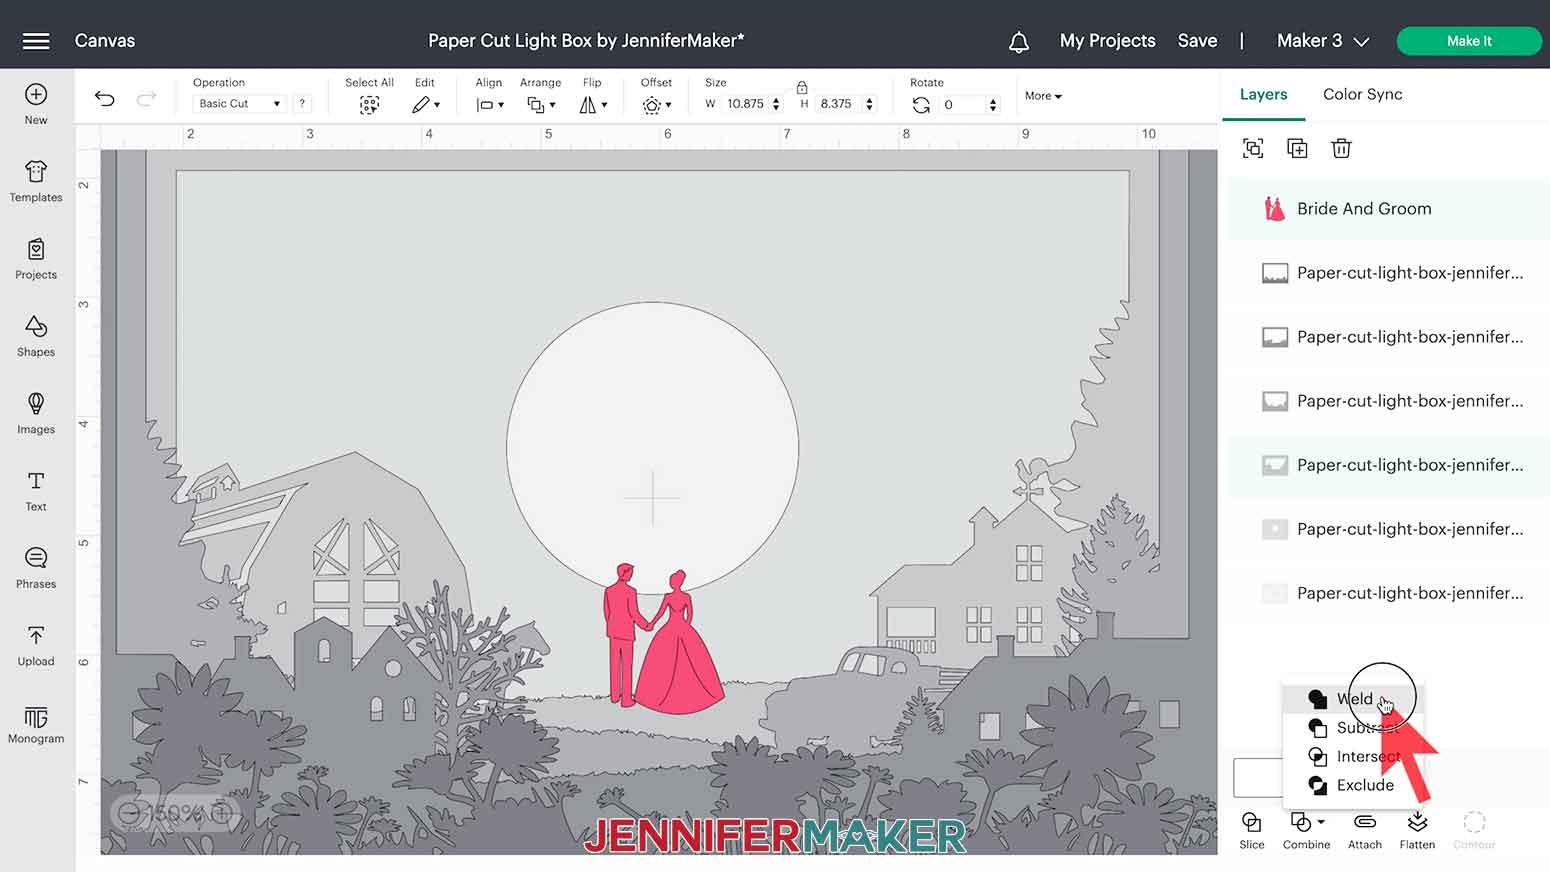
The result will be gray. Your custom layer is now ready!
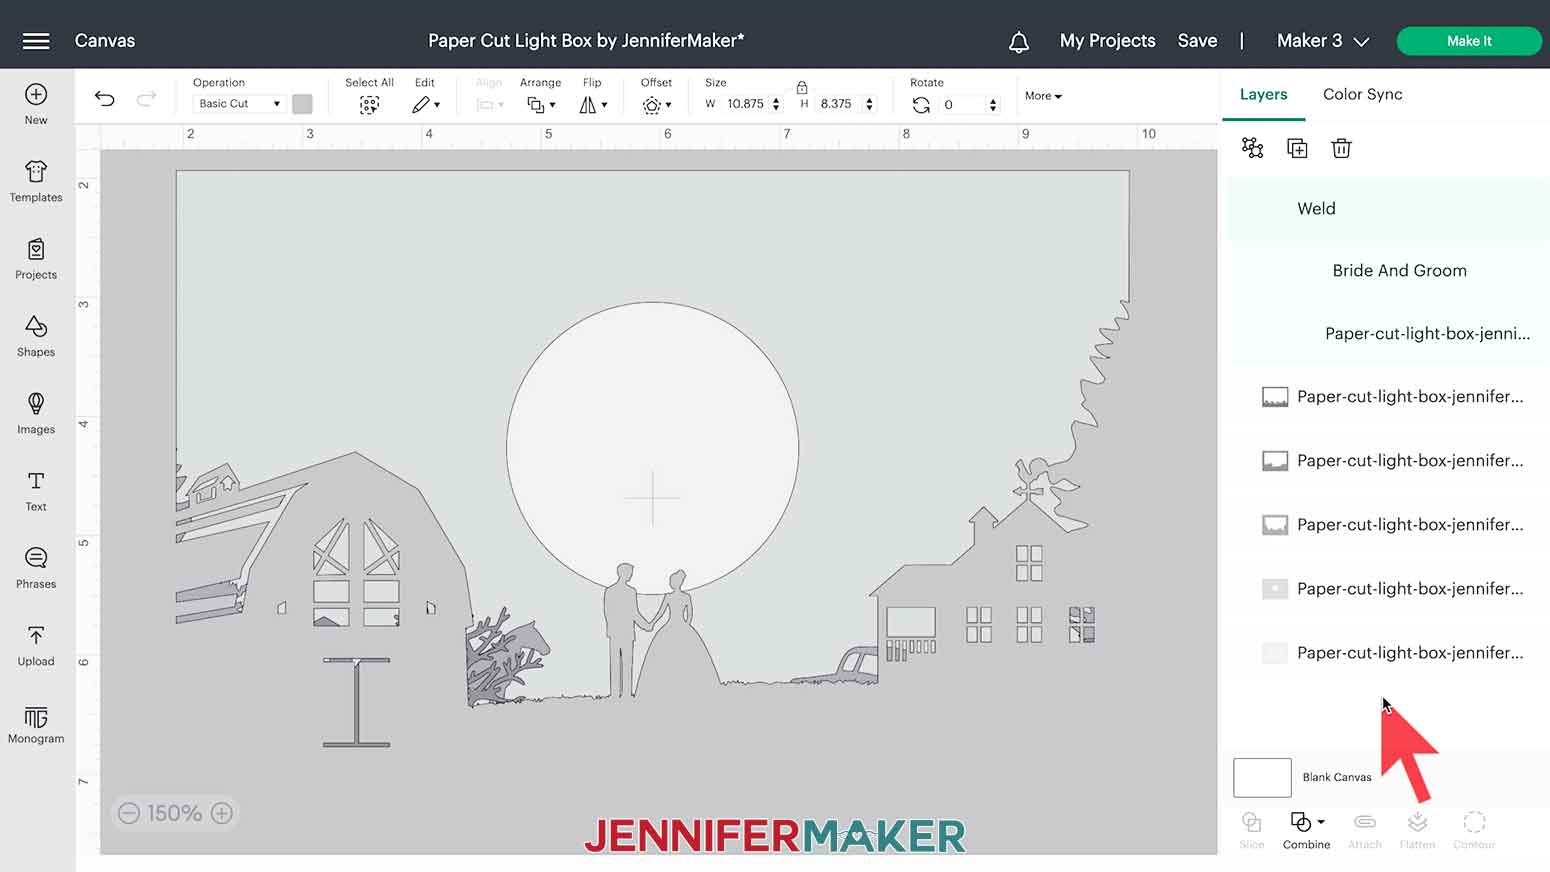
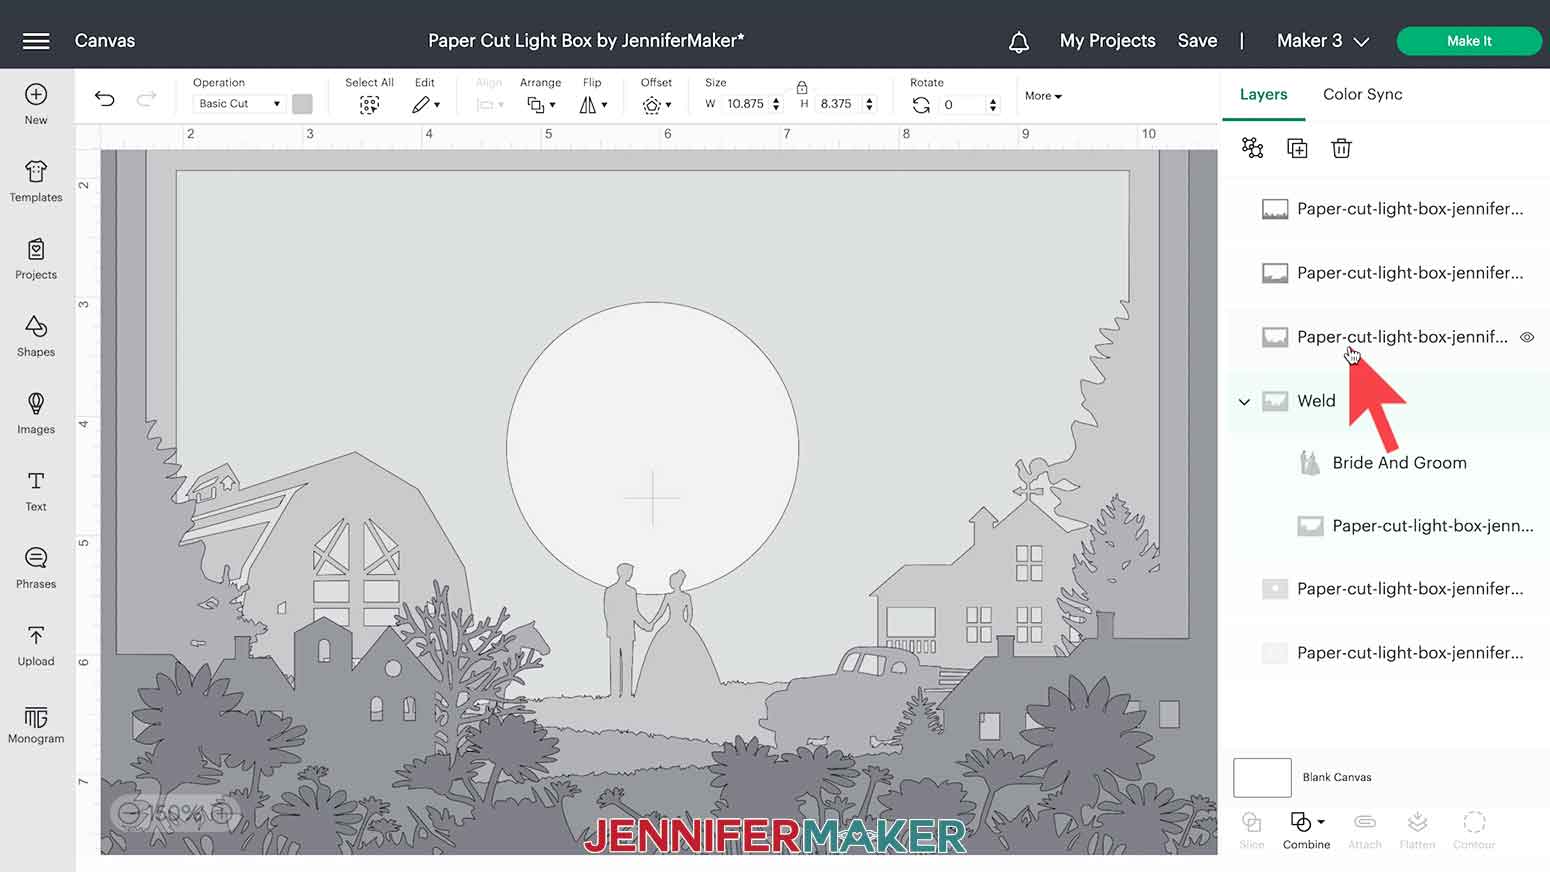
You may need to move your welded layer back into place, as Design Space will automatically move it to the top of your Layers Panel. Just click and drag it into position in the panel.
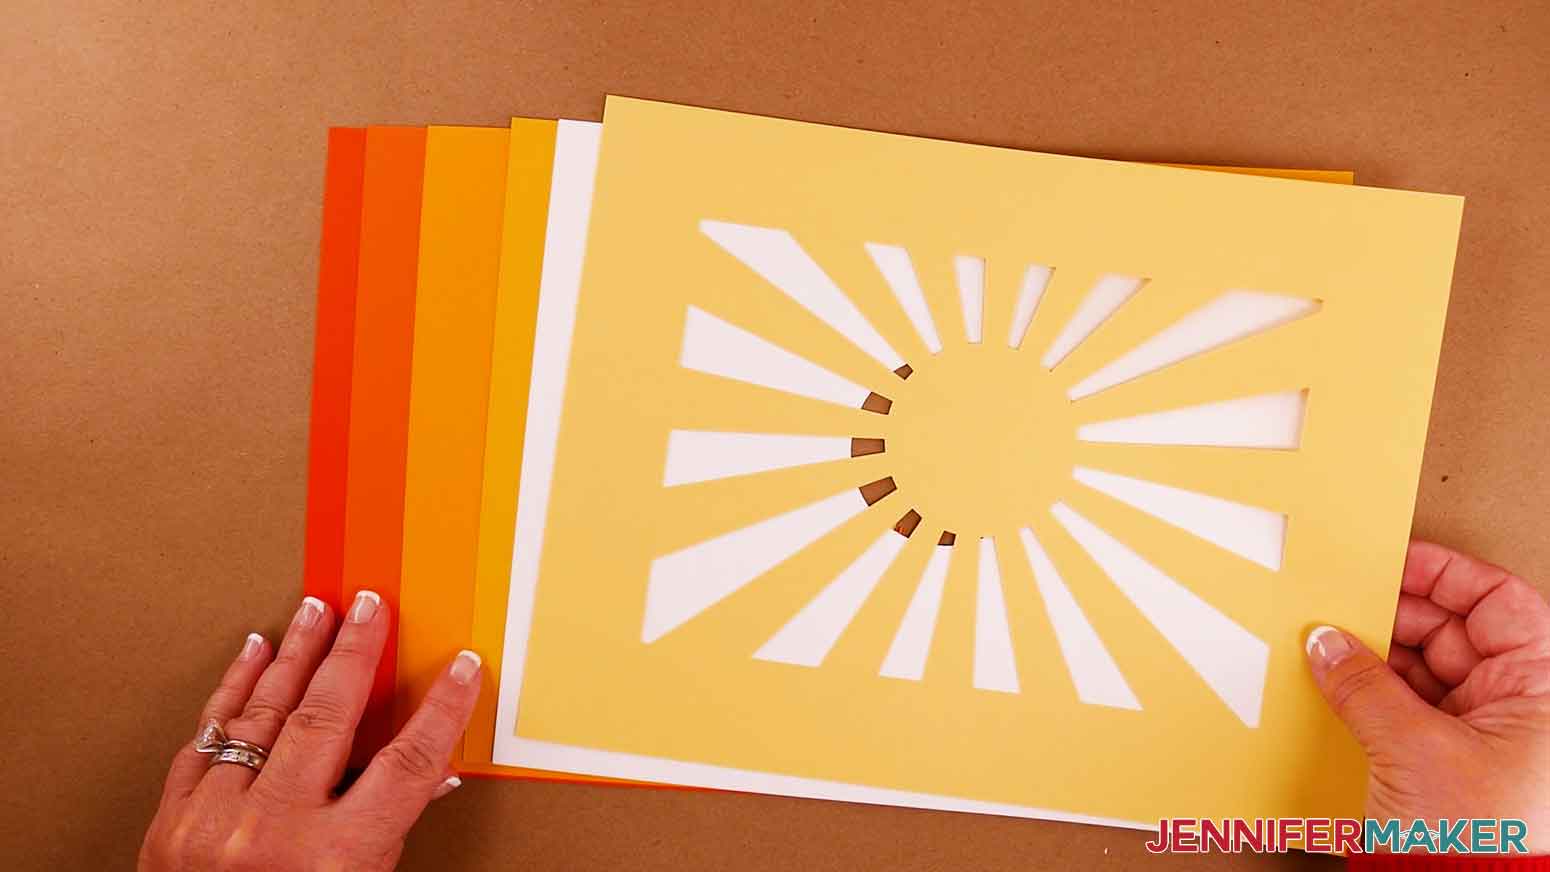
If you want to cut the layers out of the same color cardstock, click "Select All" in the top menu and change the color swatch box to one color. White or very light colors will work best to let light through.
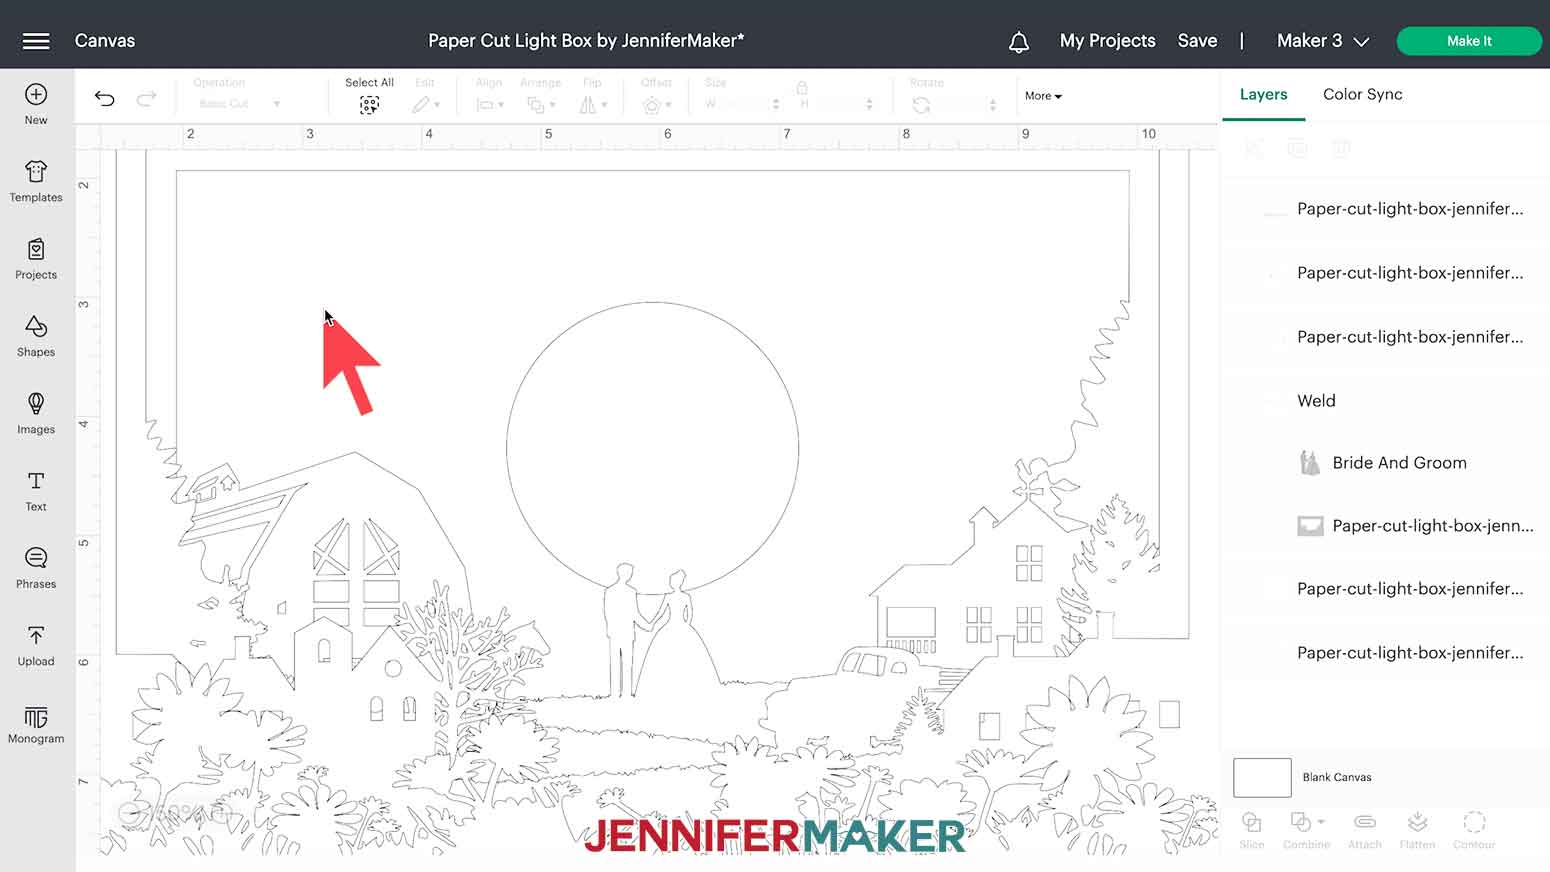
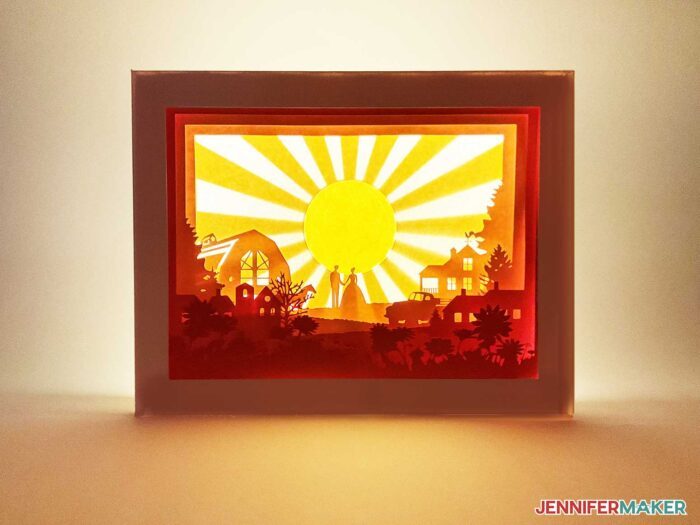
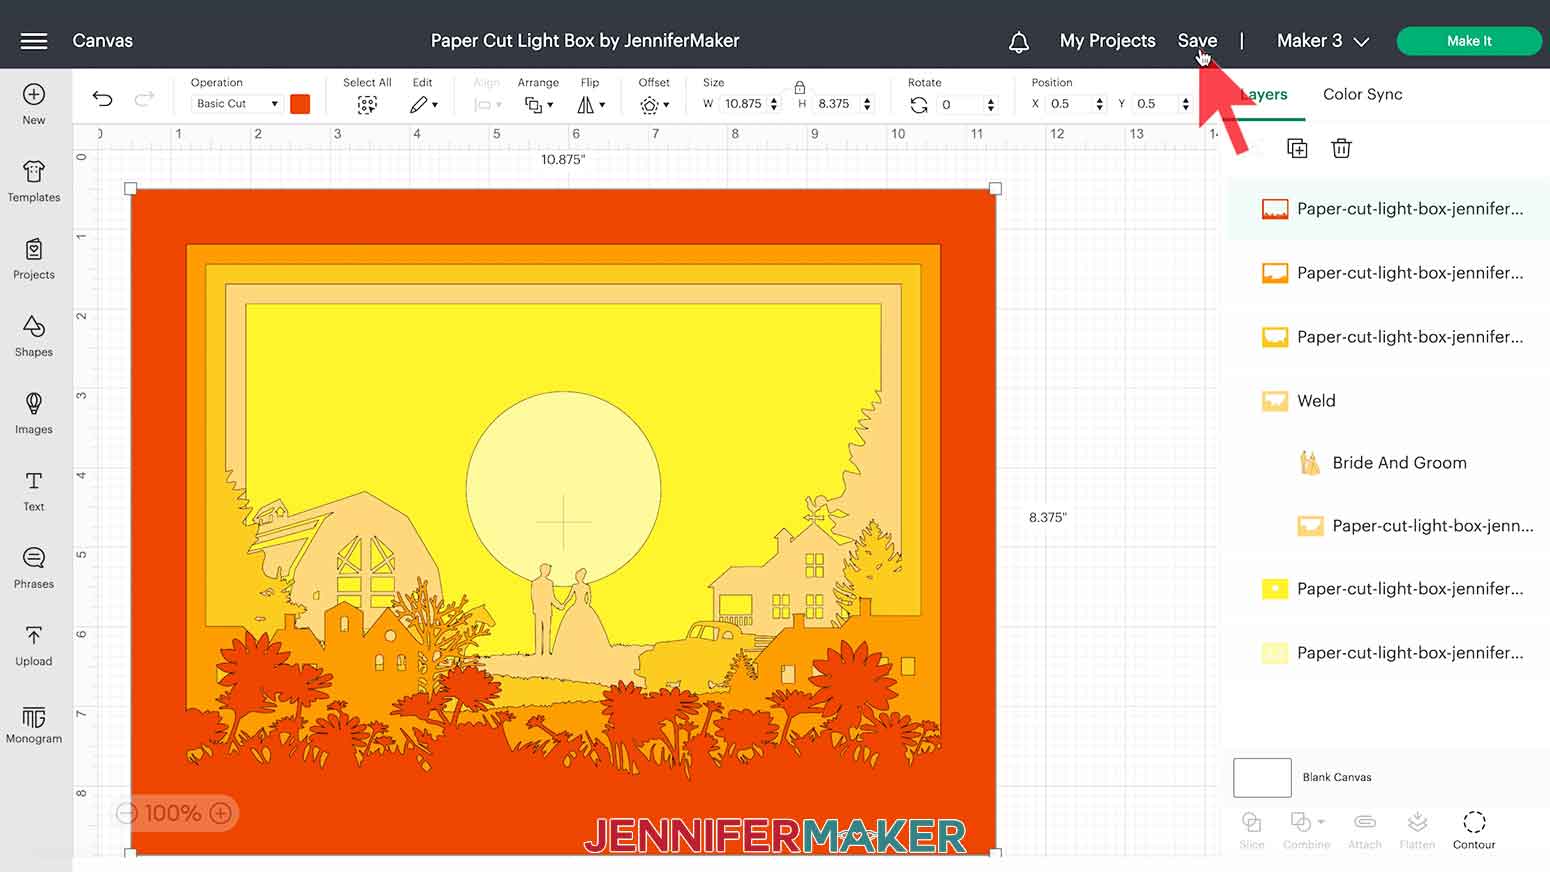
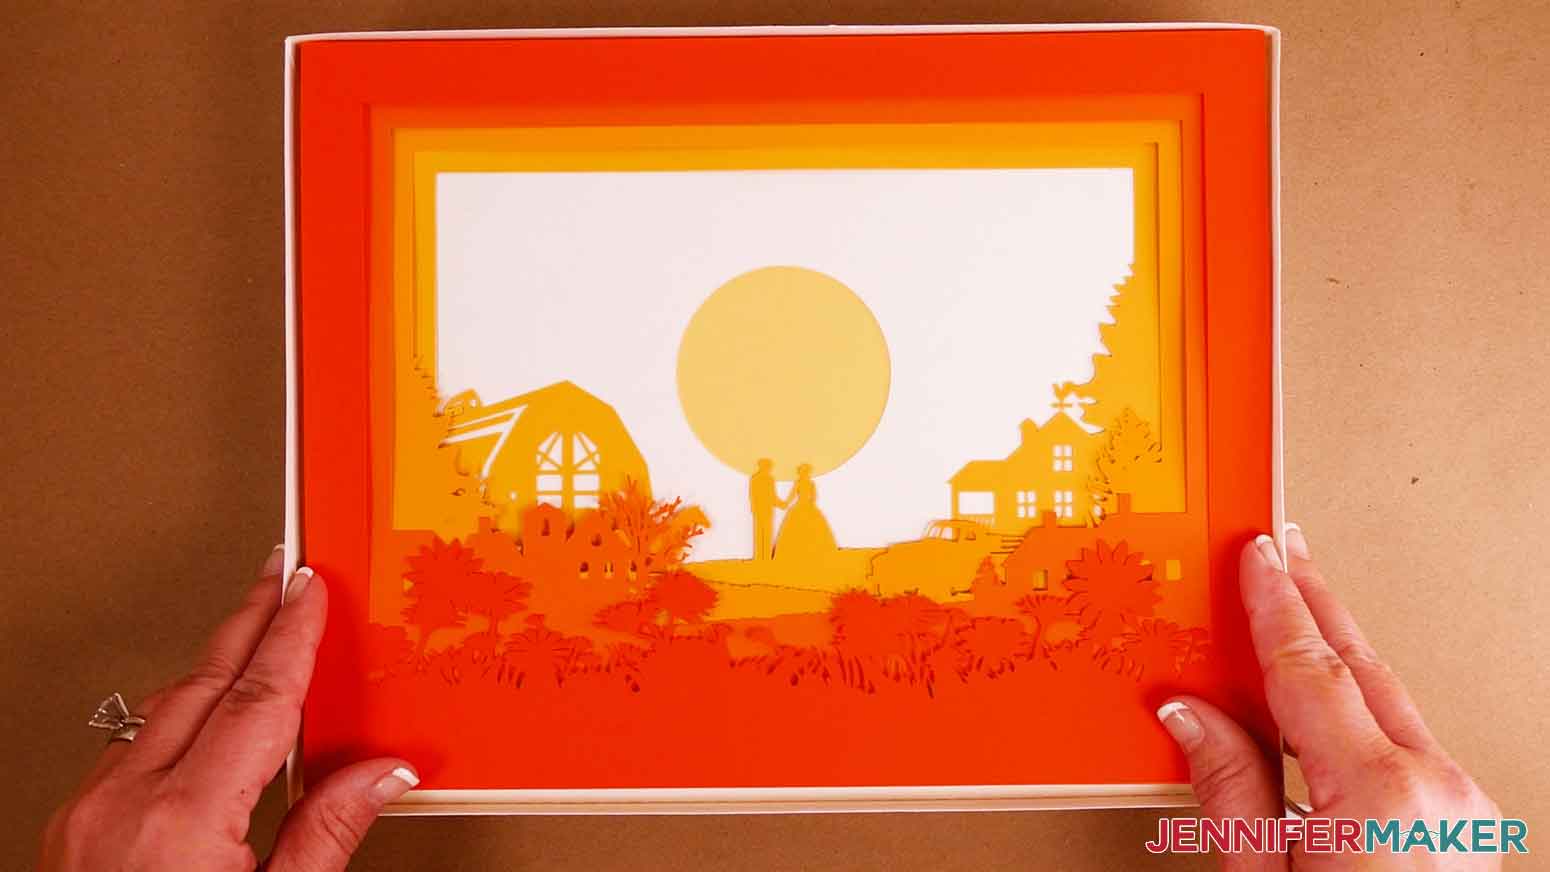
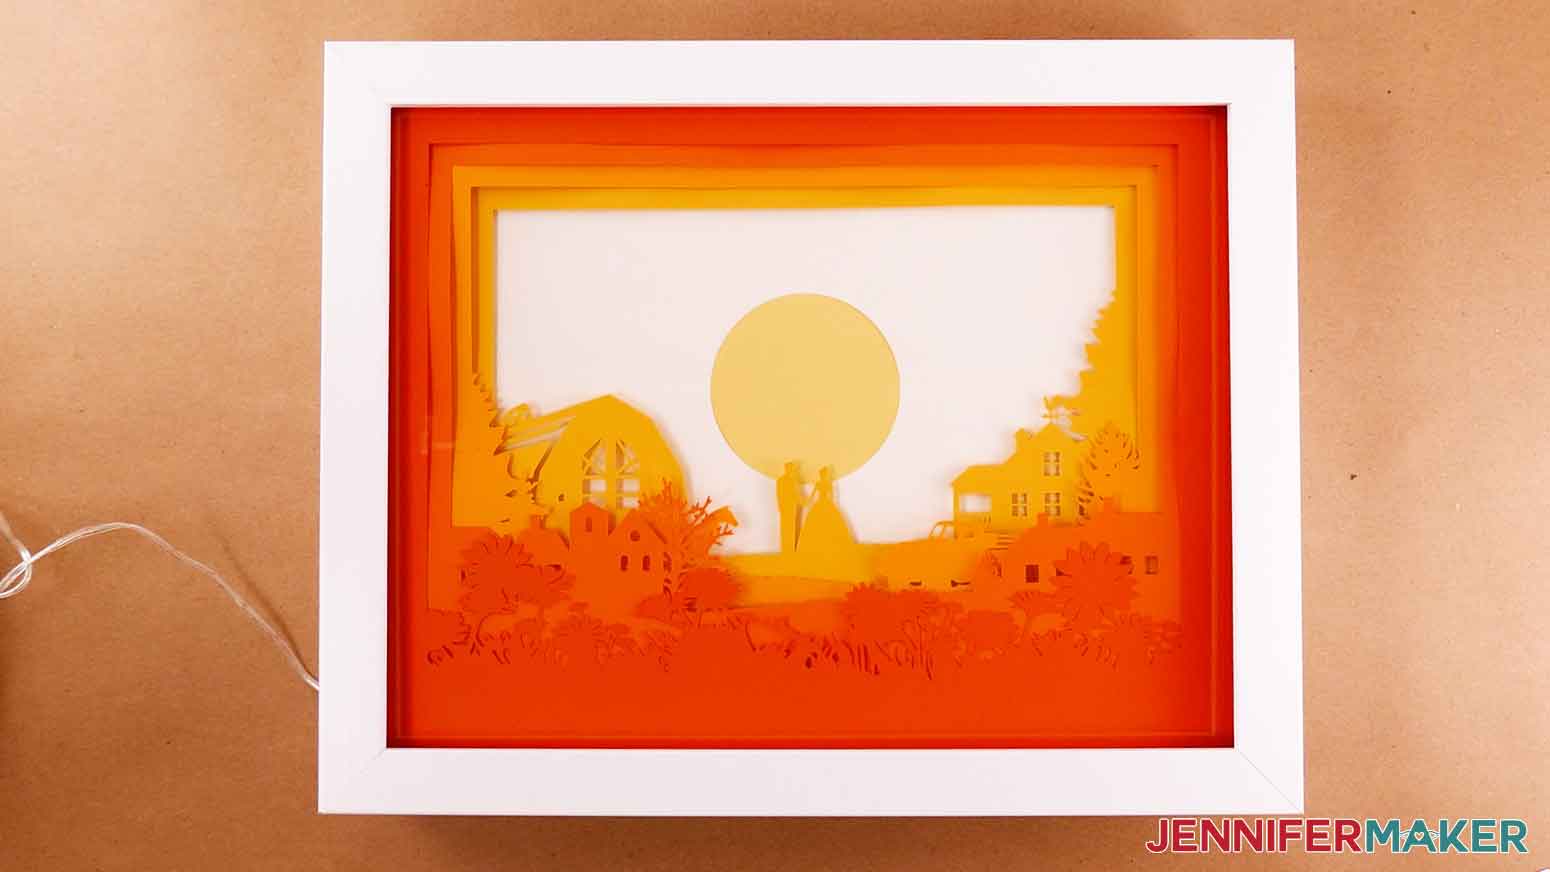
I'm going to use shades of yellow and orange to make it easier to show you the different layers.
Your Custom Light Box is ready to cut if you're using a pre-made shadow box. It's a good idea to save your project now after all that work.
DIY Cardstock Frame
This is what my "no-score" DIY frame SVG file looks like on the Canvas. You can zoom out to see all of the design by clicking on the minus (-) sign on the lower left.
The pieces are colored in three different shades of gray. The light gray pieces (A, B, C) are for the front of the frame, the medium gray pieces (D, E, F) are for the back, and the dark gray pieces (G, H) are for the inner "shelves", which will hold the layers in place. While we'll cut them all out of the same cardstock, this approach will tell the Cricut to cut the components on different mats, so you can keep them straight.
Your DIY frame is ready to cut!
STEP 3: CUT YOUR DESIGN FILES
Light Box Layers
With the design on your screen, select the correct machine and click "Make It."
If prompted, click "On Mat," "12 in x 12 in," and "Continue."
Make sure you have six mats showing on your Prepare screen. Remember, your colors may be different. If you added an object, make sure it will cut as one piece with the correct layer and that there are no tiny pieces that will cut by themselves.
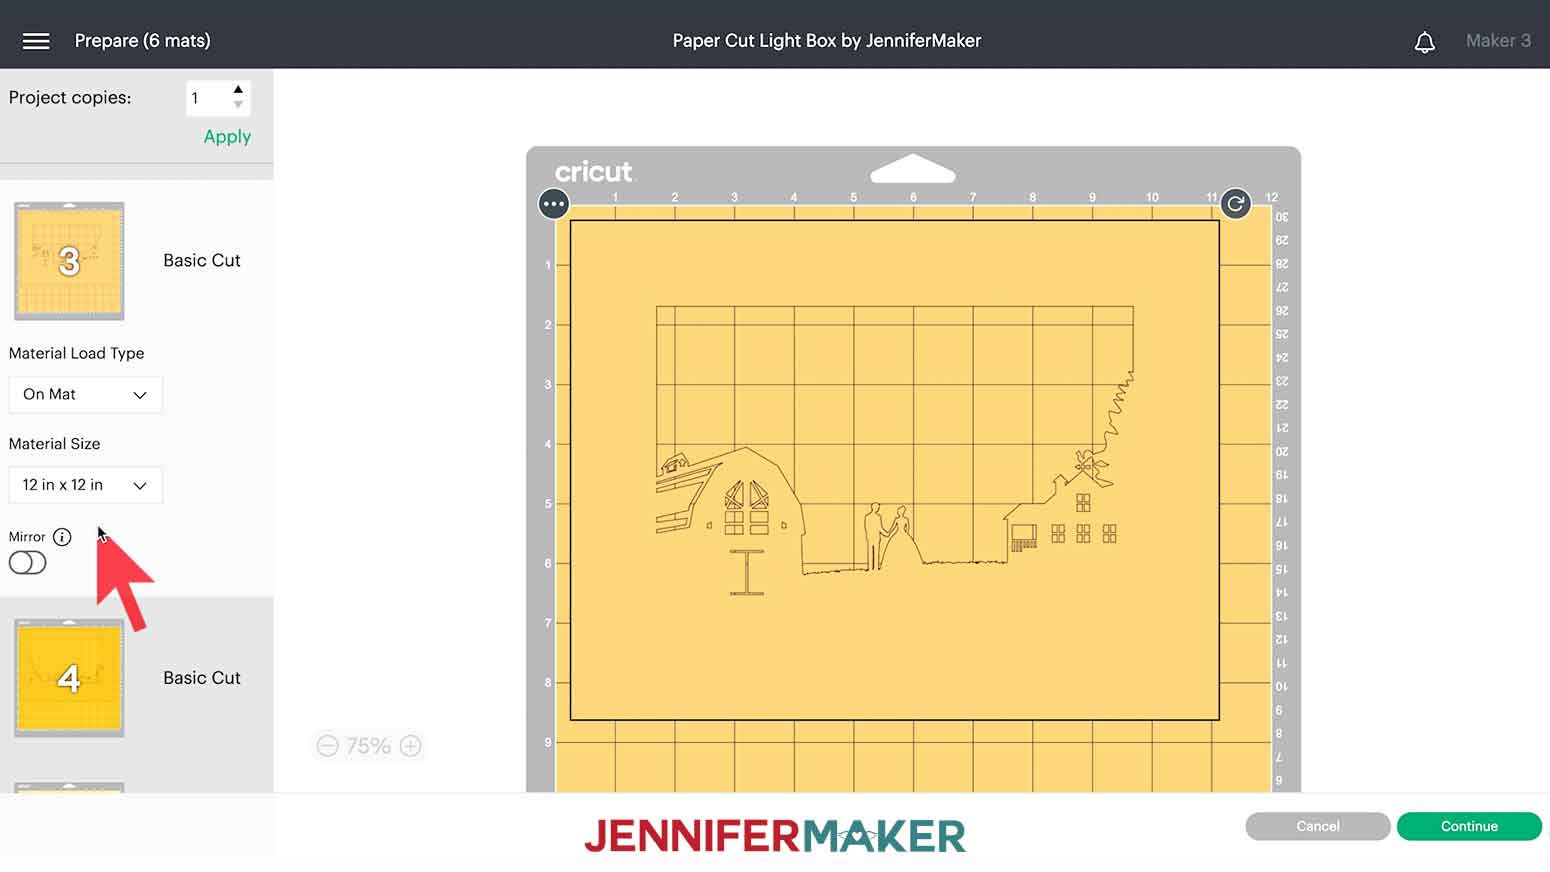
Click back on the first mat, then click "Continue" in the bottom right.
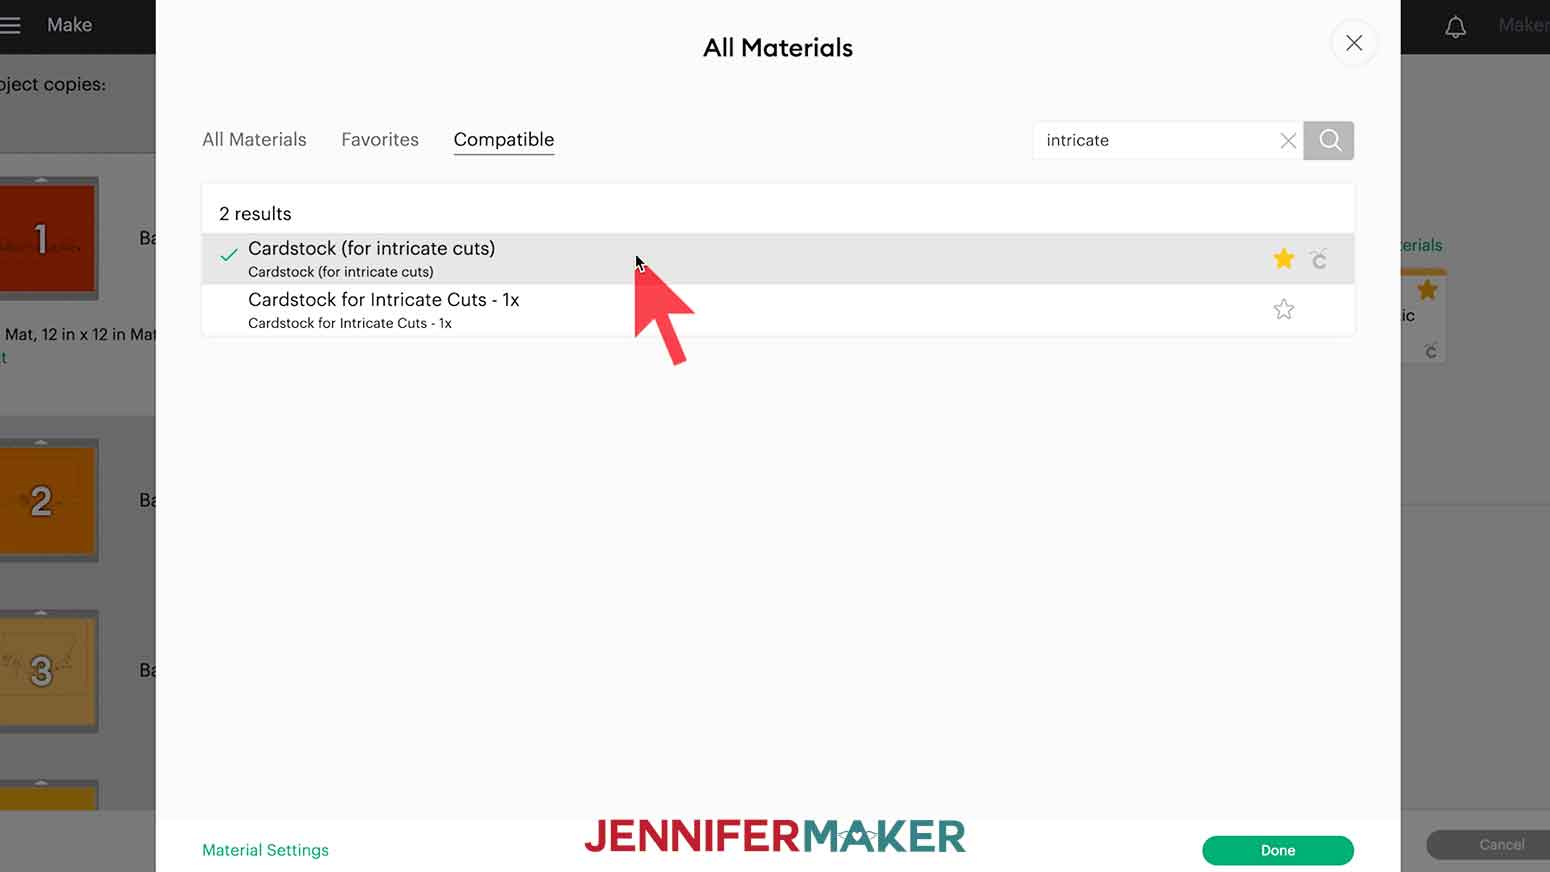
On the Make screen, select the "Cardstock (for intricate cuts)" setting. To find it, click "Browse All Materials" and type "Intricate" in the search bar. Then select the result, click "Done," and leave the Pressure at "Default."
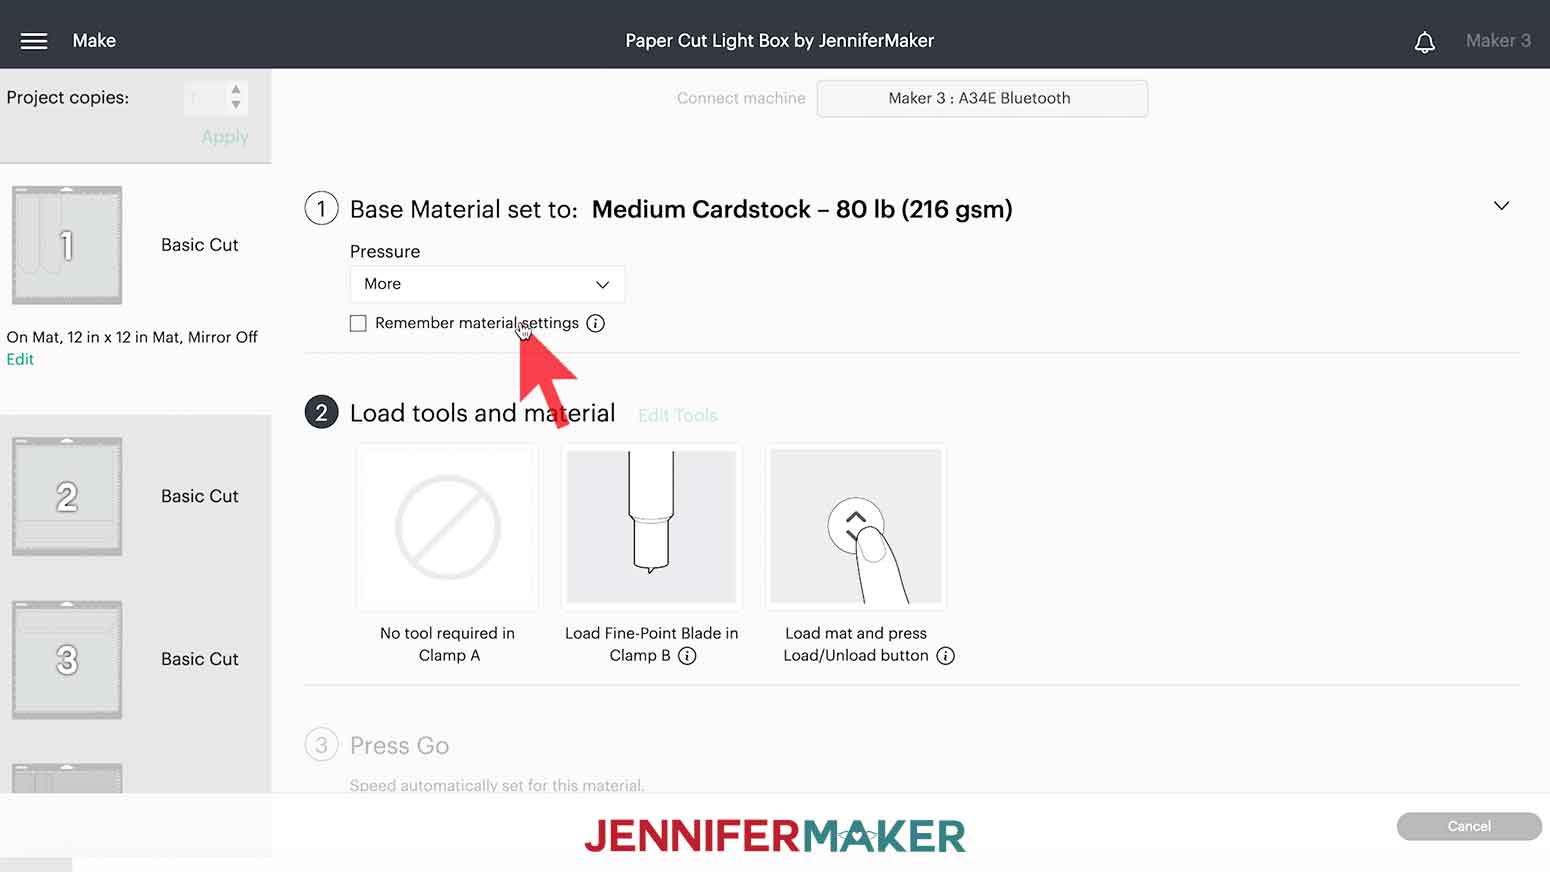
Check the box for “Remember material settings” to save time between cuts!
Place your first mat's cardstock face up on your blue LightGrip machine mat and use a brayer to make sure it's fully adhered. Check that your Fine-Point Blade is clean and in Clamp B. Then, load the mat into the machine and press "Go."
When the cut is finished, unload the mat, flip it over, and roll it back to release the cardstock. This helps prevent the material from curling and ripping.
Repeat the same steps for the rest of the mats. The mats with intricate details will take longer to cut. You can slide your spatula gently under those pieces to remove them.

You can use your weeding tool to pop out any small pieces of cardstock from the intricate areas of your layers after you've removed them from your mat.
TIP: If you have trouble with any of the cuts, check out my Cricut Tips & Tricks for Cleaner Cuts.
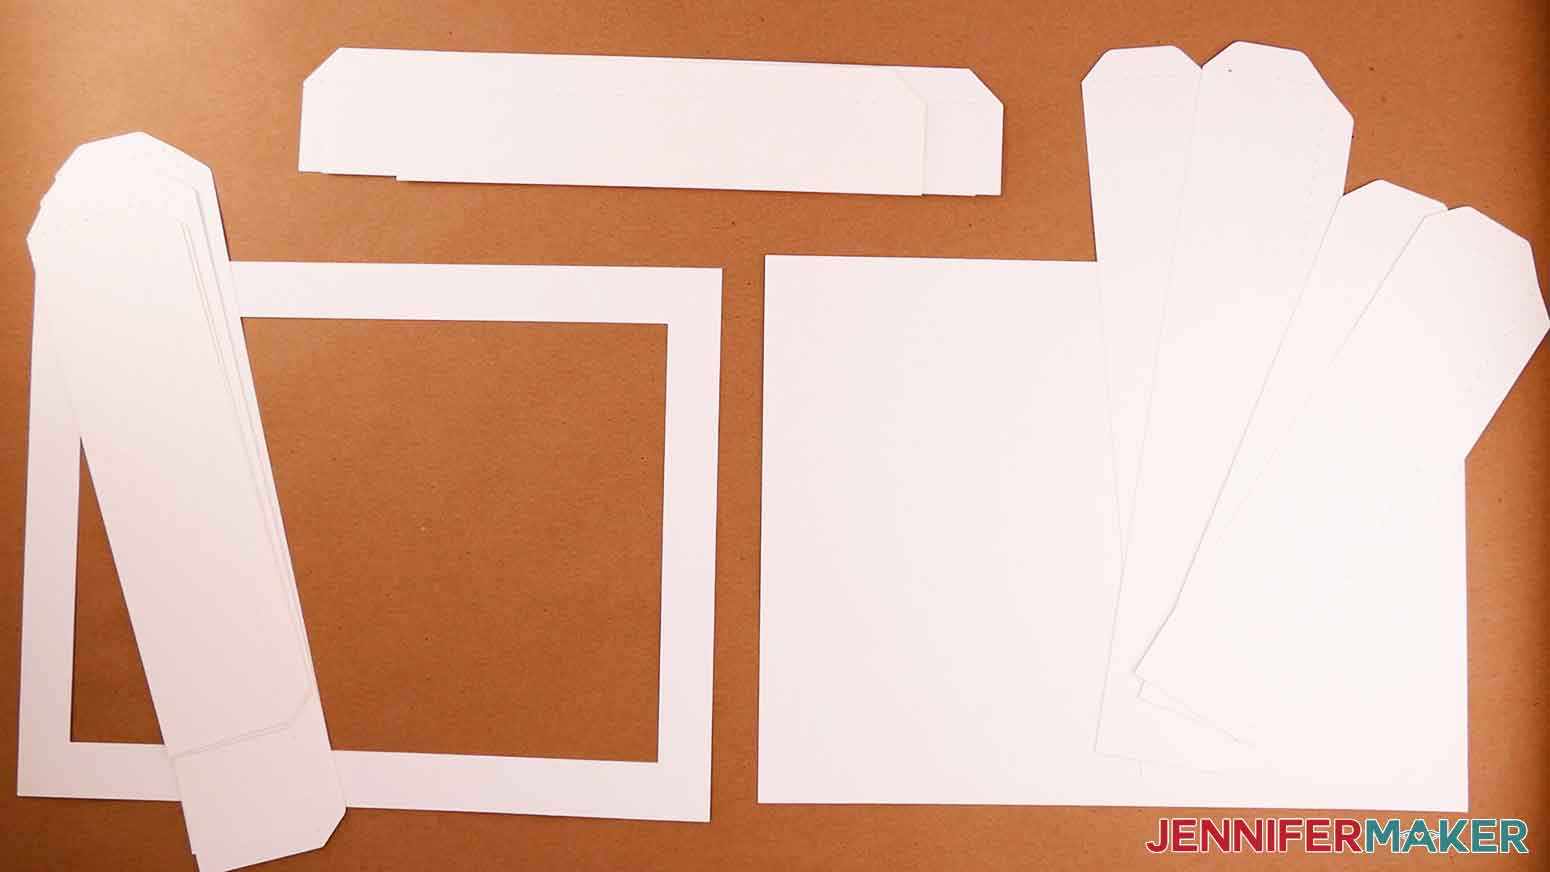
DIY Cardstock Frame Layers
With the design on your screen, select the correct machine and click "Make It."
If prompted, click "On Mat," "12 in x 12 in," and "Continue."
TIP: If you’re making the "no-score" DIY frame like me, you can combine some of the mats to save time and cardstock. See the steps in my DIY Lollipop Holders tutorial if you need help doing this. I’m going to leave my mats as they are.
Use the "Medium Cardstock" setting with "More" Pressure for cleaner cuts.
As they cut, place the frame pieces face up in groups for the front, back, and shelf pieces.
STEP 4: ASSEMBLE THE DESIGNS
Grab your design layers and place them in order face down:
- Piece A (top layer of assembled box) - grass and flowers
- Piece B - two buildings
- Piece C - horse and truck
- Piece D - barn with tree swing, customized object, or optional words
- Piece E - sun cutout
- Piece F (bottom layer of assembled box) - sun rays
The assembly steps depend on whether you are using a purchased shadow box or the DIY frame.
Glass Shadow Box
Lay a piece of butcher paper down to keep your frame and layers clean.
Remove the backing, inner wooden piece, and bag of push pins (if you're using the one from my list) from the shadow box.
Clean the glass with a coffee filter and rubbing alcohol. Put the frame face down.
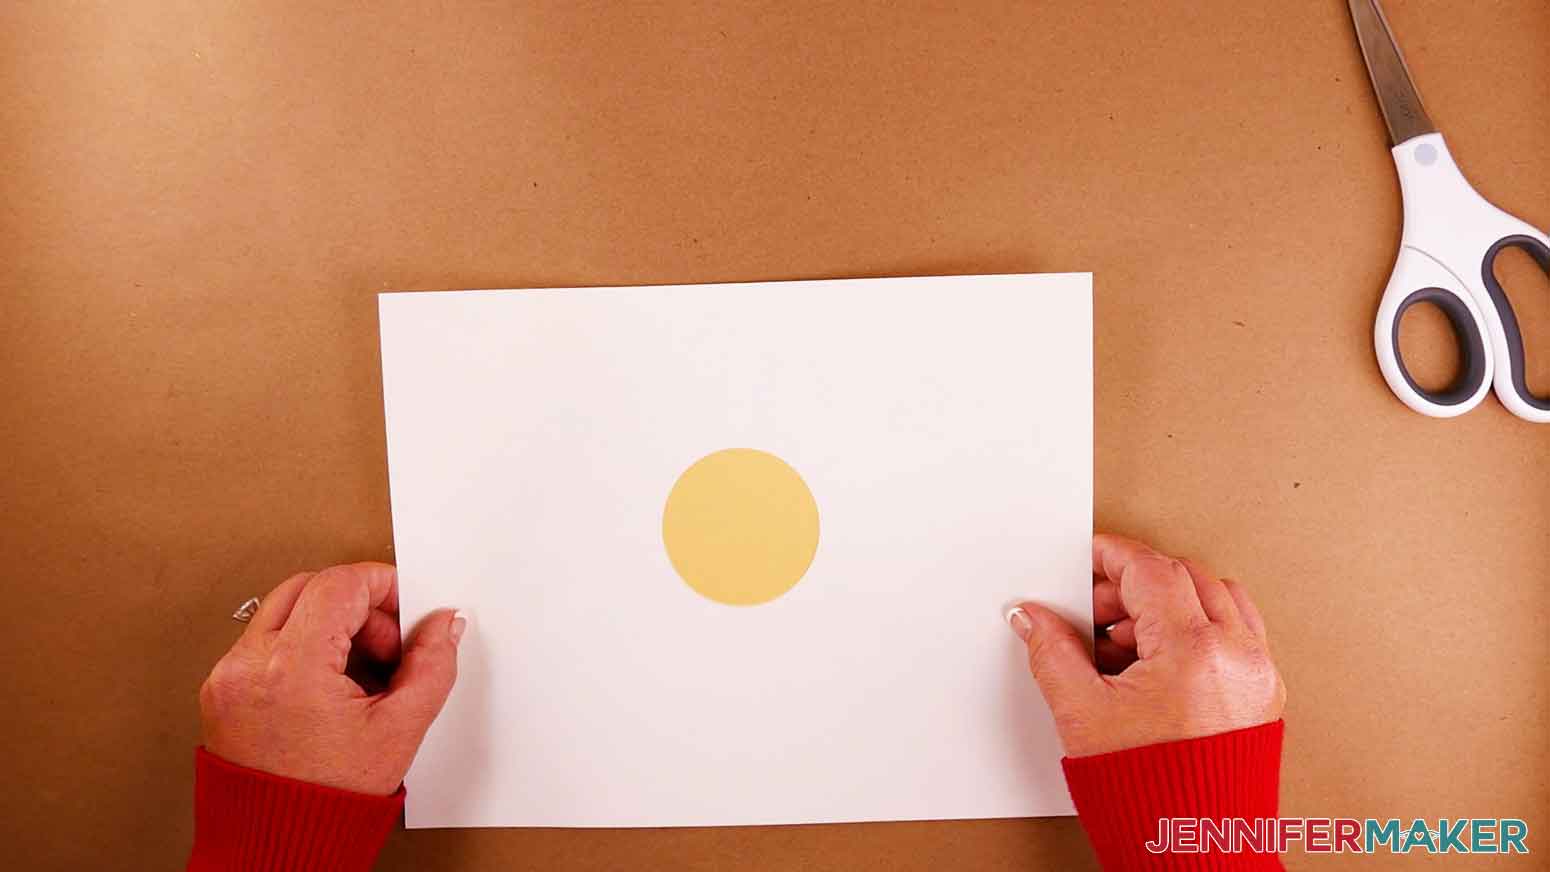
Take Piece F and lay it face up on your work surface or in the frame.
Place medium glue dots on the back of Piece E around the perimeter. They’re very sticky, so tweezers might help.
Align Piece E face up on top of Piece F. Once the edges look even, press down gently.
Use the same method to add 3D glue dots around the perimeter of Piece D's back. It helps to offset the position of your glue dots for every other layer to prevent sagging.
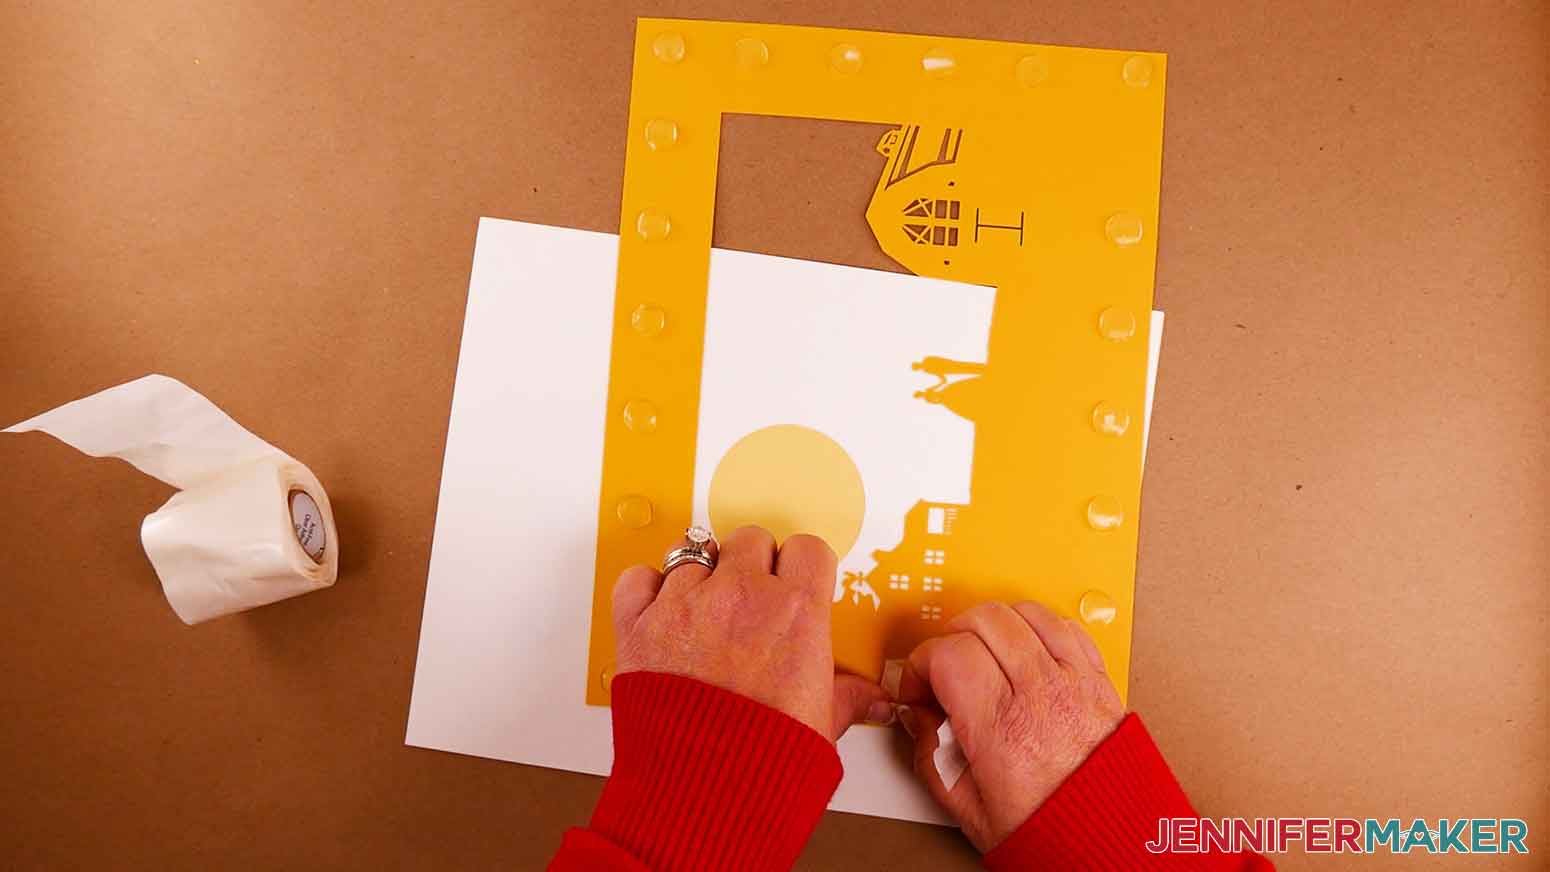
Adhere Piece D on top of Piece E, making sure the edges are aligned. Press down around the entire edge to make sure both layers are well adhered.
Continue applying more 3D glue dots following the steps above until you have all six layers attached.
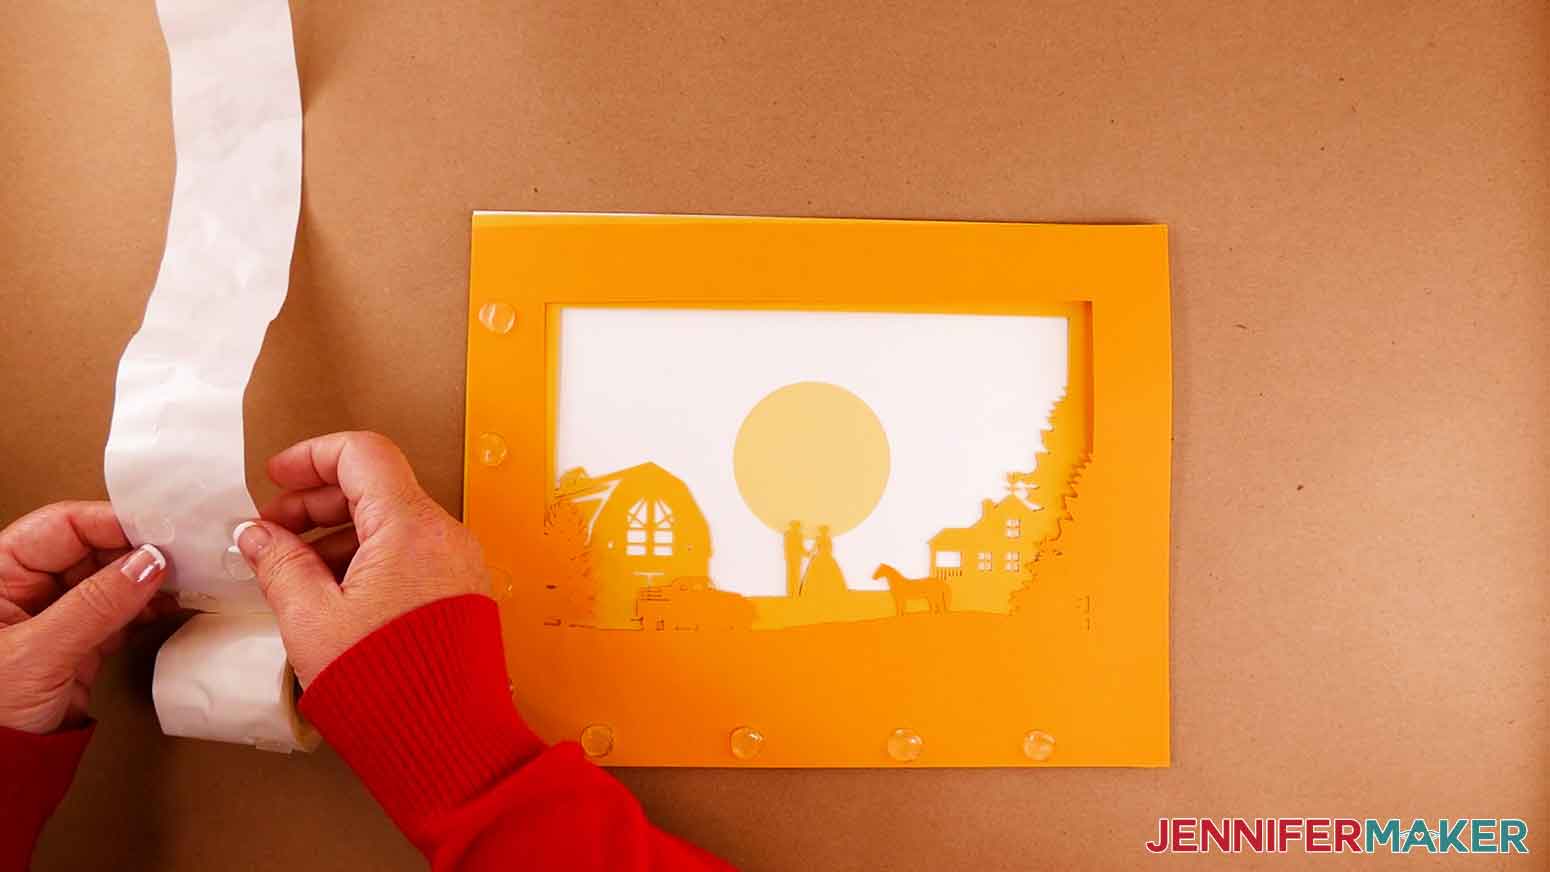
Then, place the layers face down inside your shadow box. If you want to add lights, proceed to Step 5.
DIY Cardstock Frame
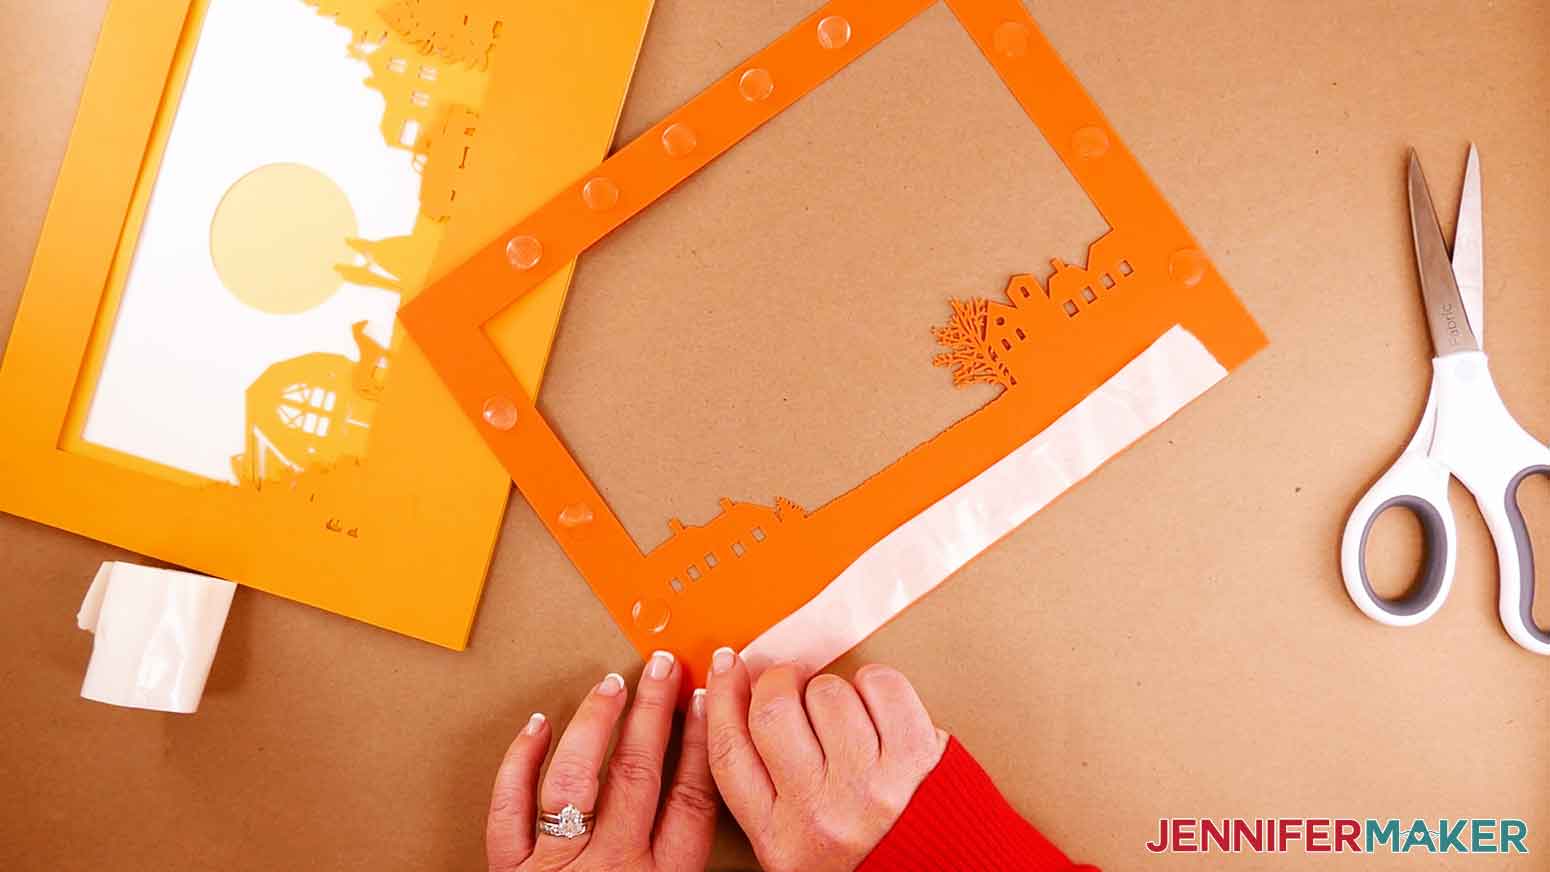
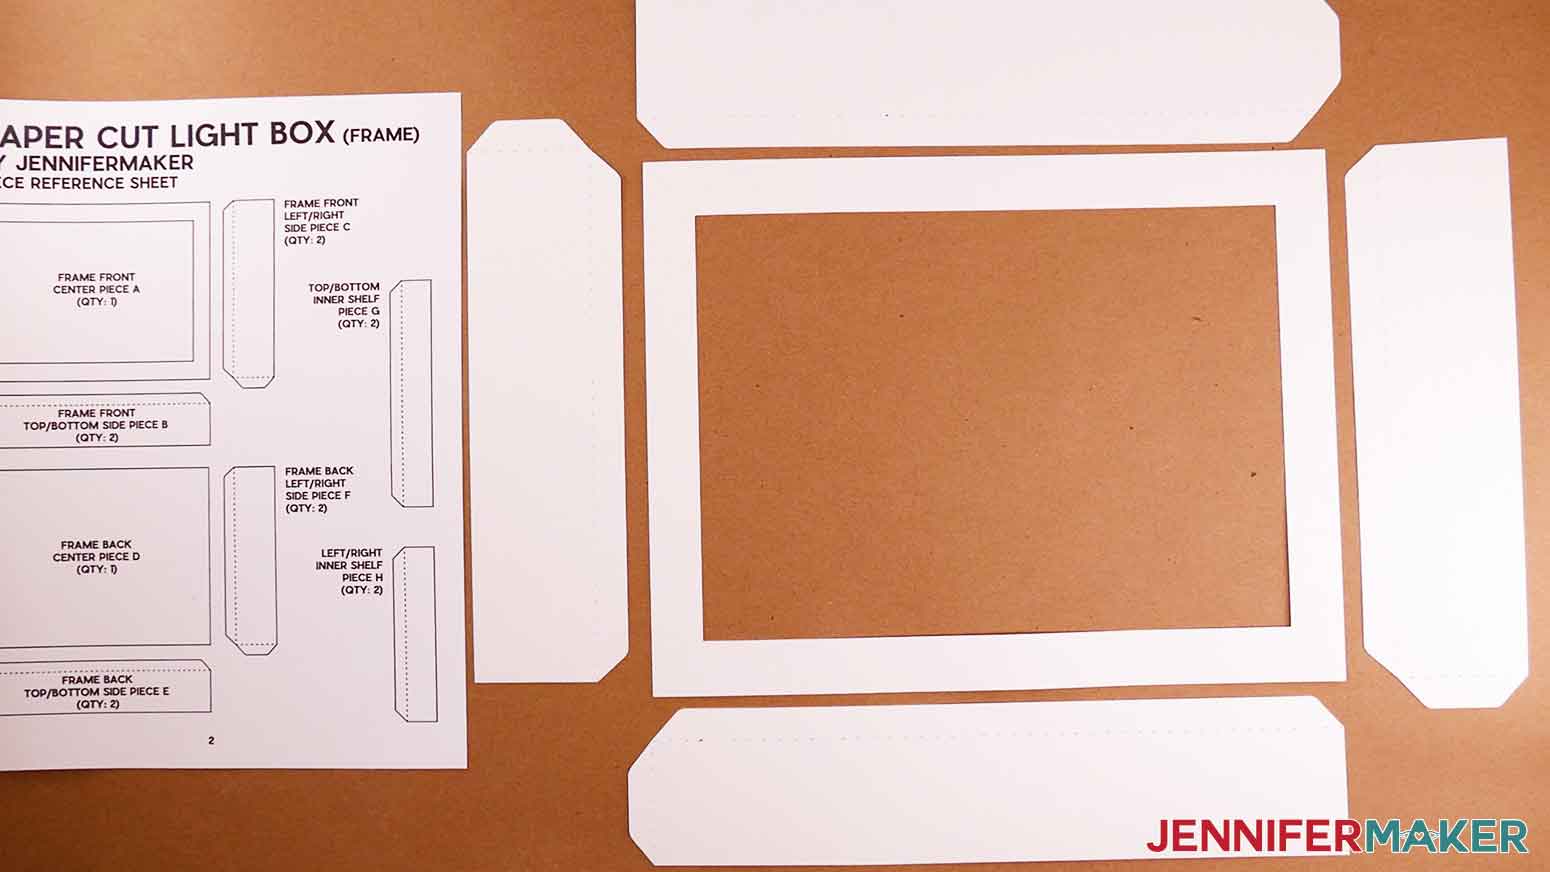
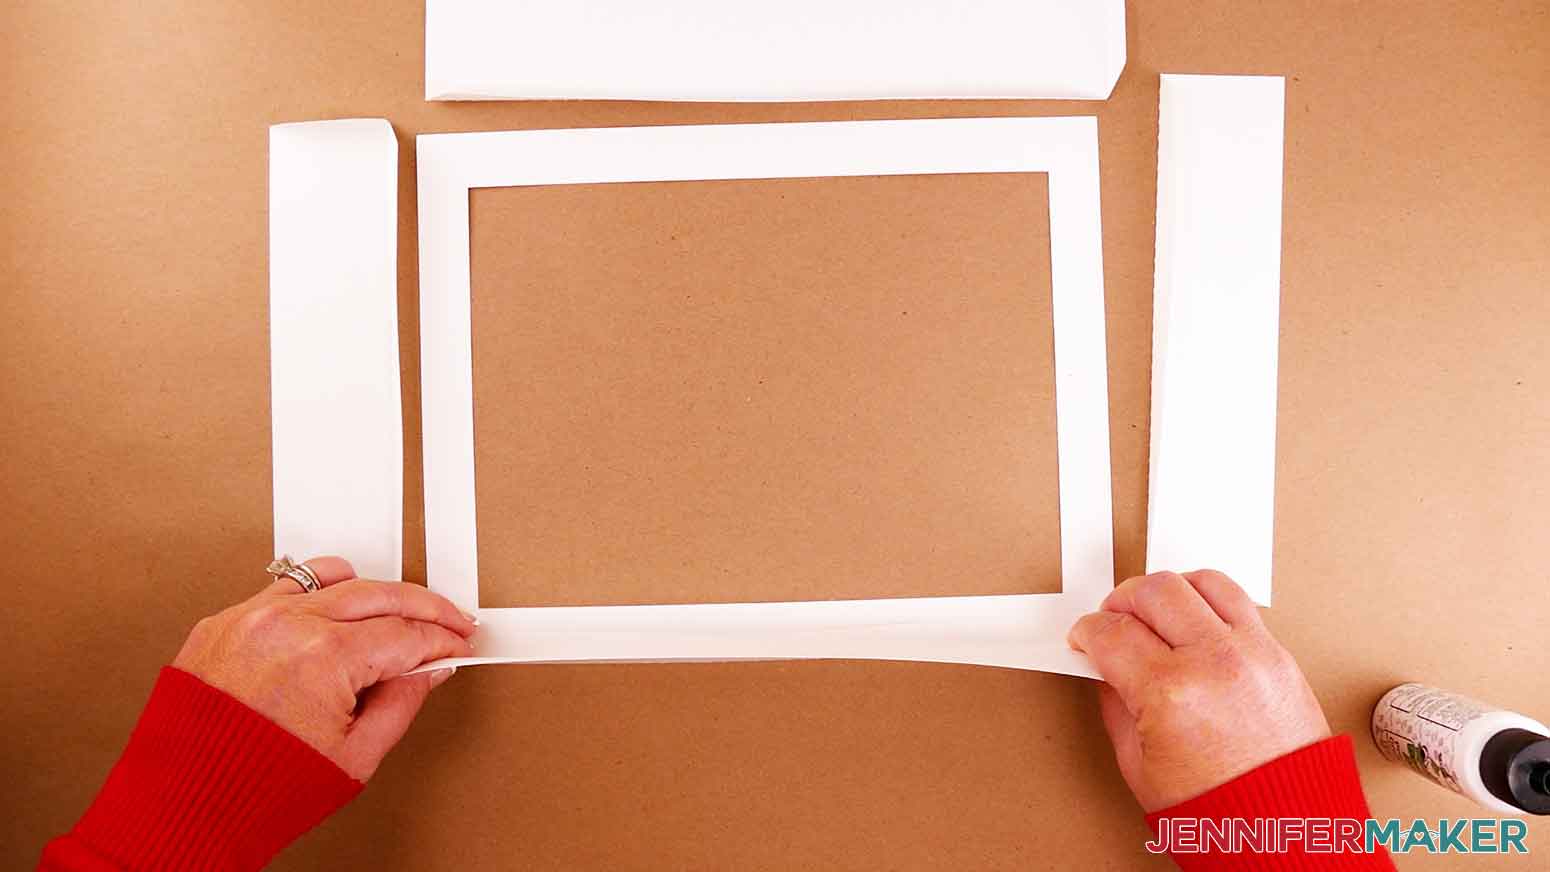
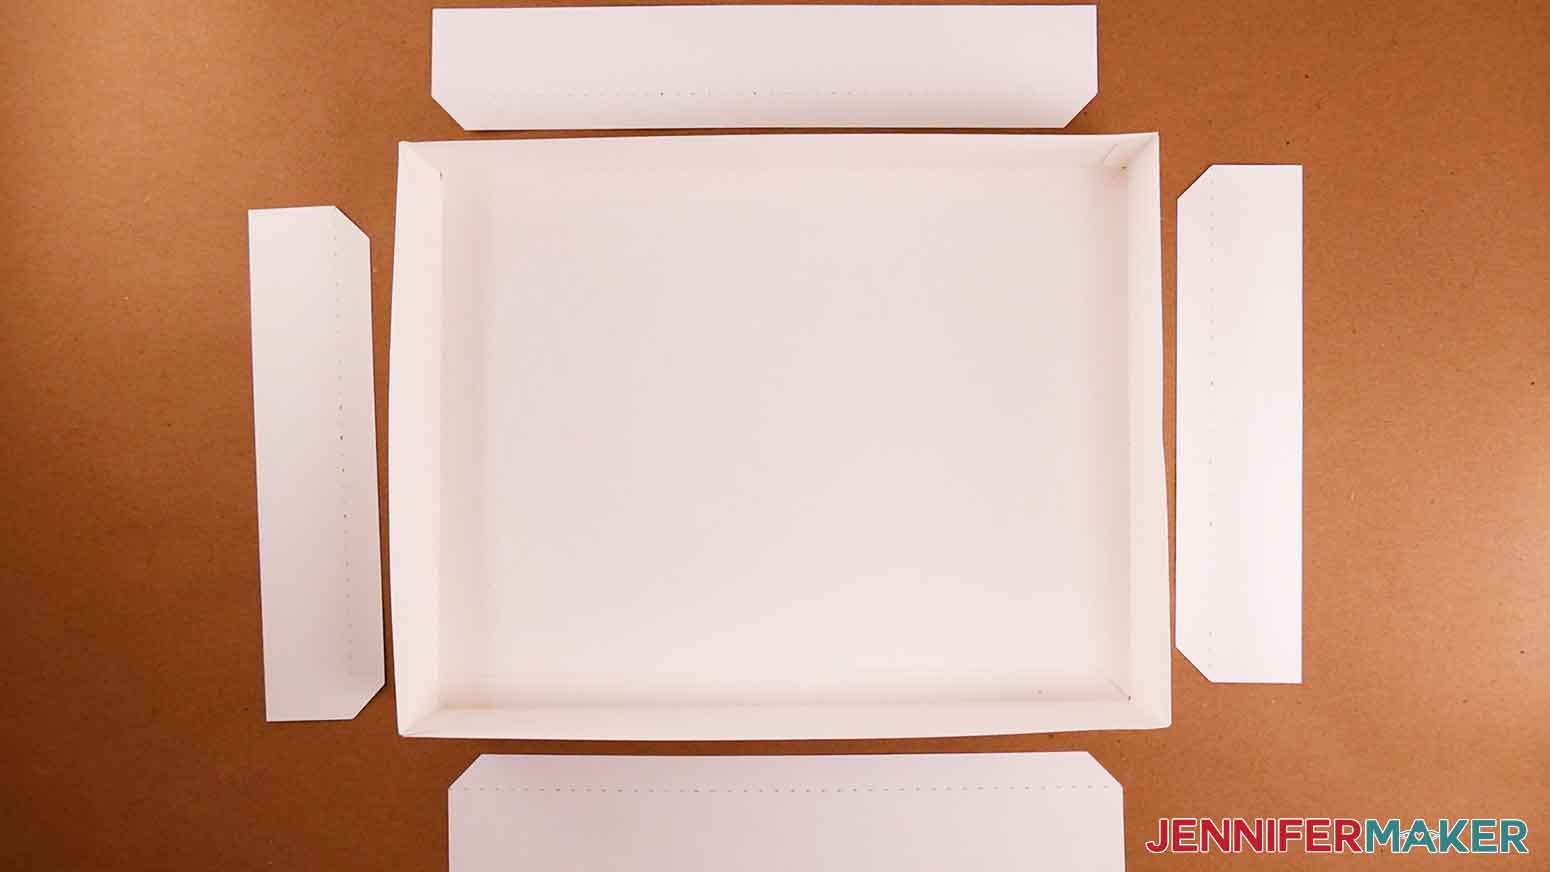
Lay a piece of butcher paper down to keep your frame pieces clean. Place your matching pieces together like they are on your reference sheet. Find Pieces A, B, and C, which will make up the front of the frame.
Place them in front of you face down with the four side pieces surrounding the center piece. The long tabs on the side pieces should face inward and none of the short tabs should overlap each other.
Fold upward along all the dashed cut lines. Use your scraper tool if needed.
TIP: It helps to bend the cardstock along a flat edged object, such as a ruler, to make nice, straight creases.
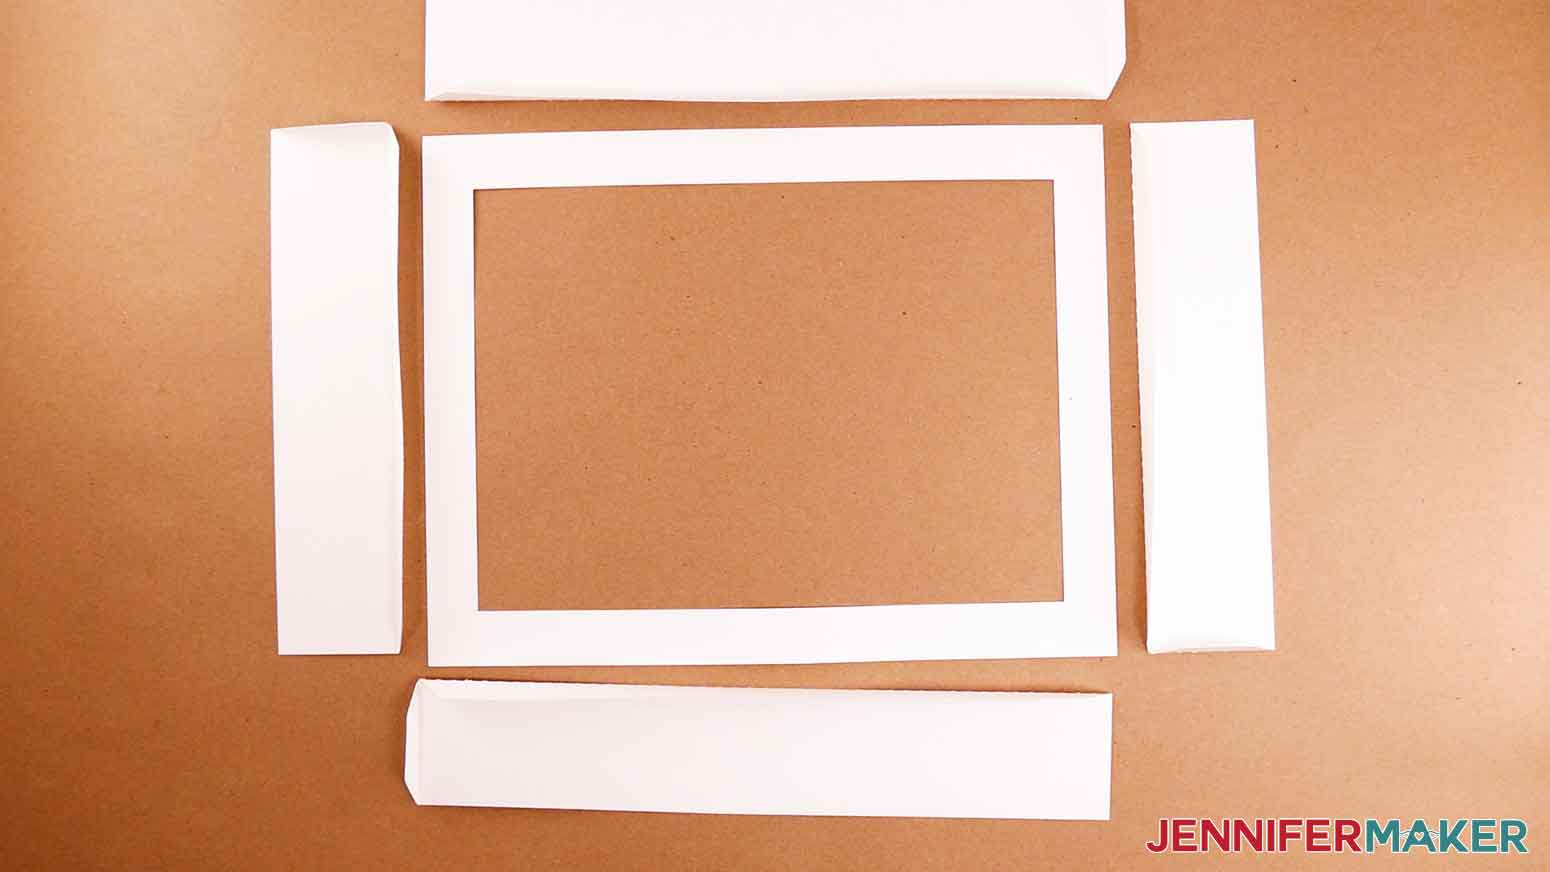
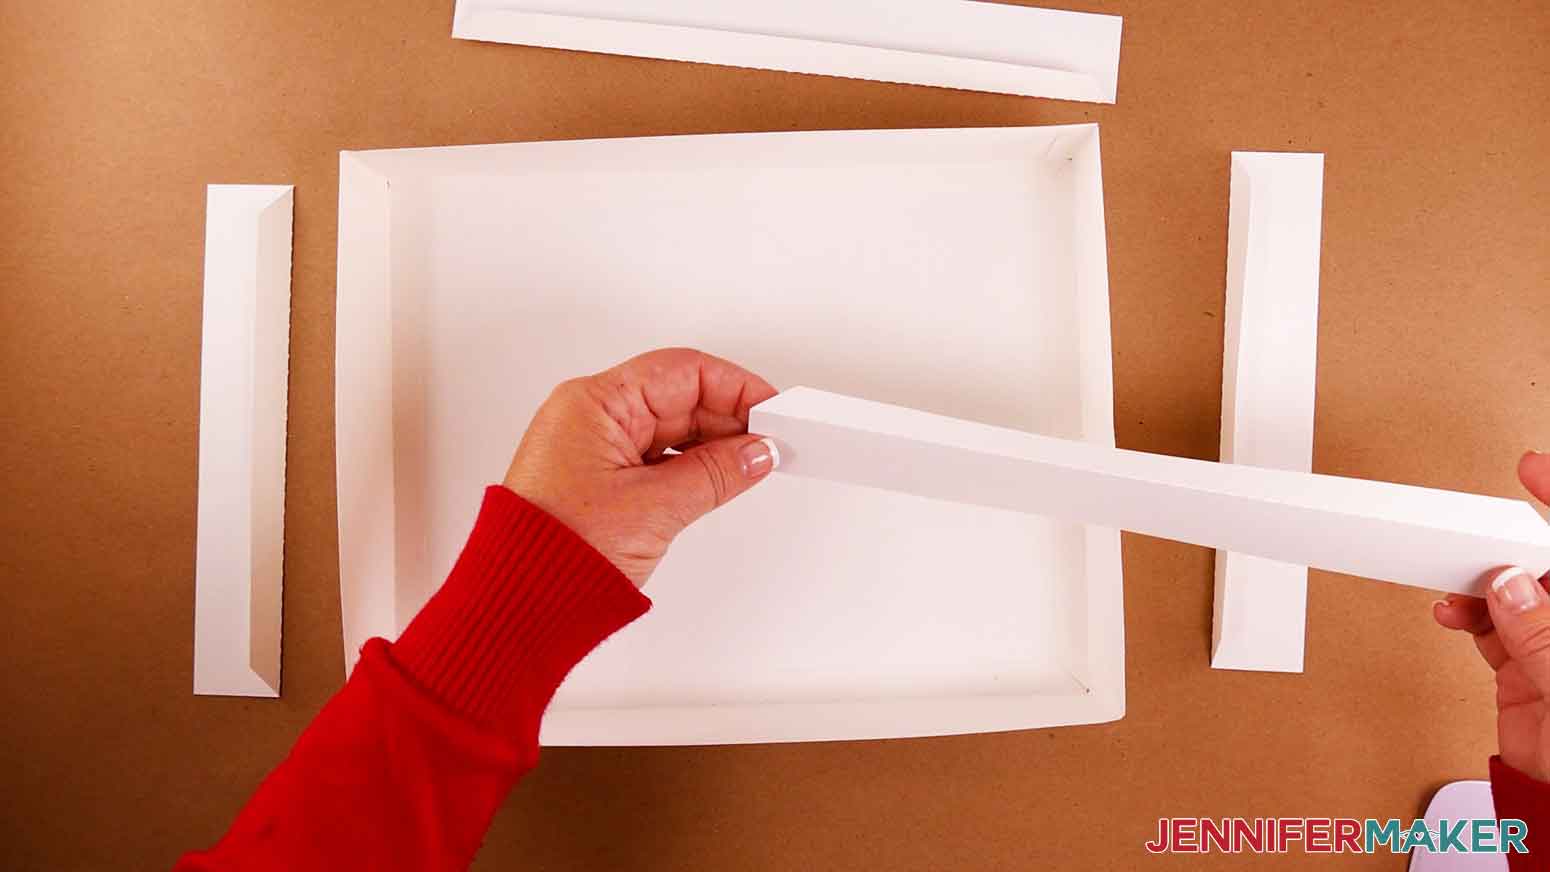
First, glue the long tabs on the side pieces to the center frame piece.
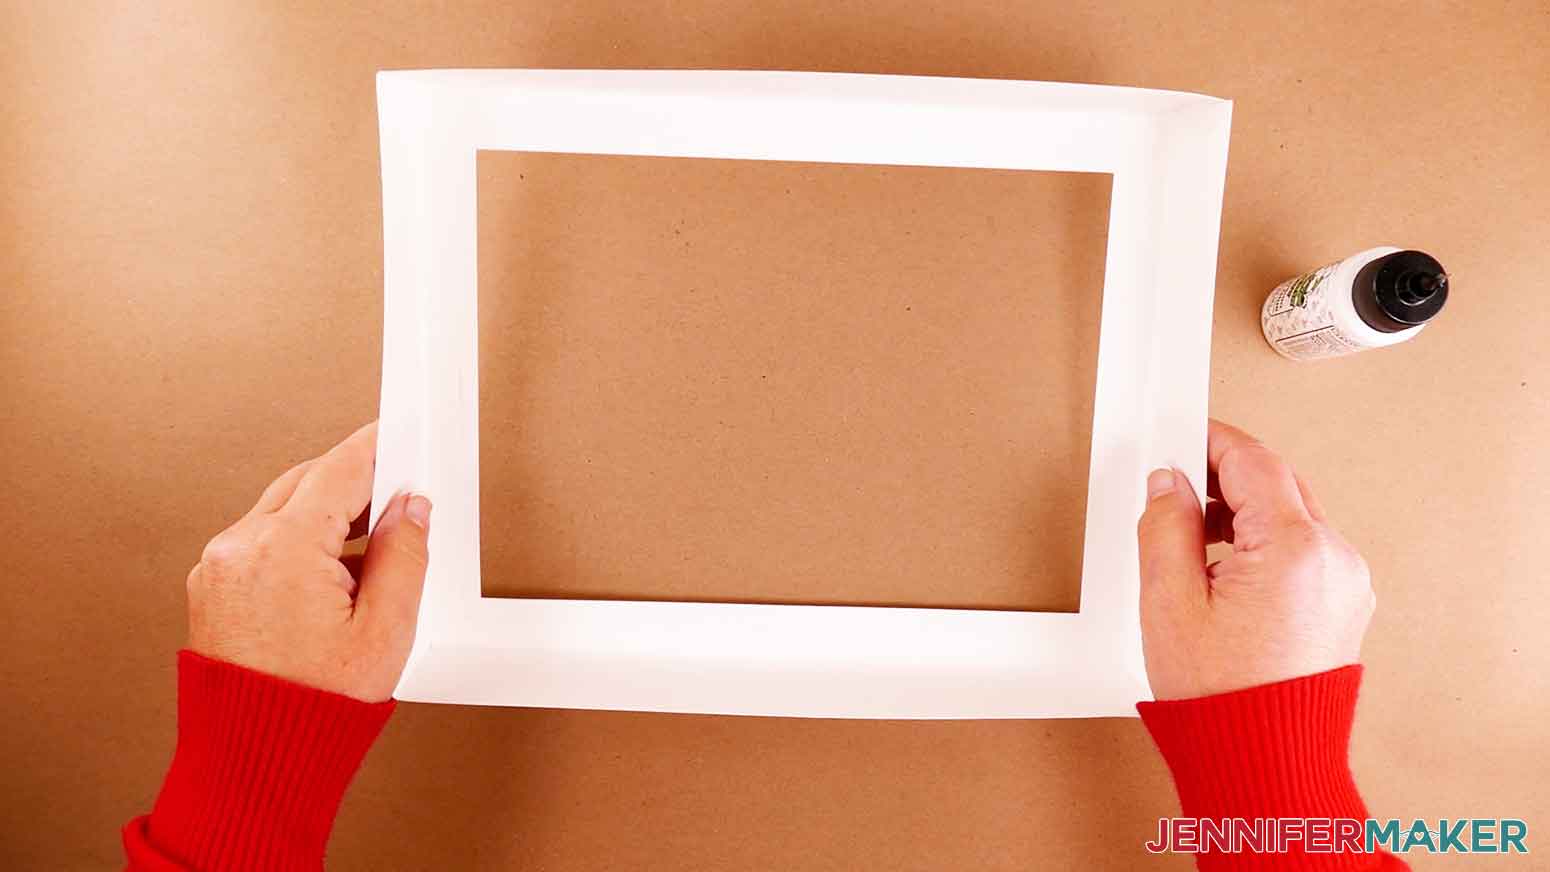
Then, glue the short tabs to their adjacent sides to give the frame its depth. Press to adhere them to the inside of the frame.
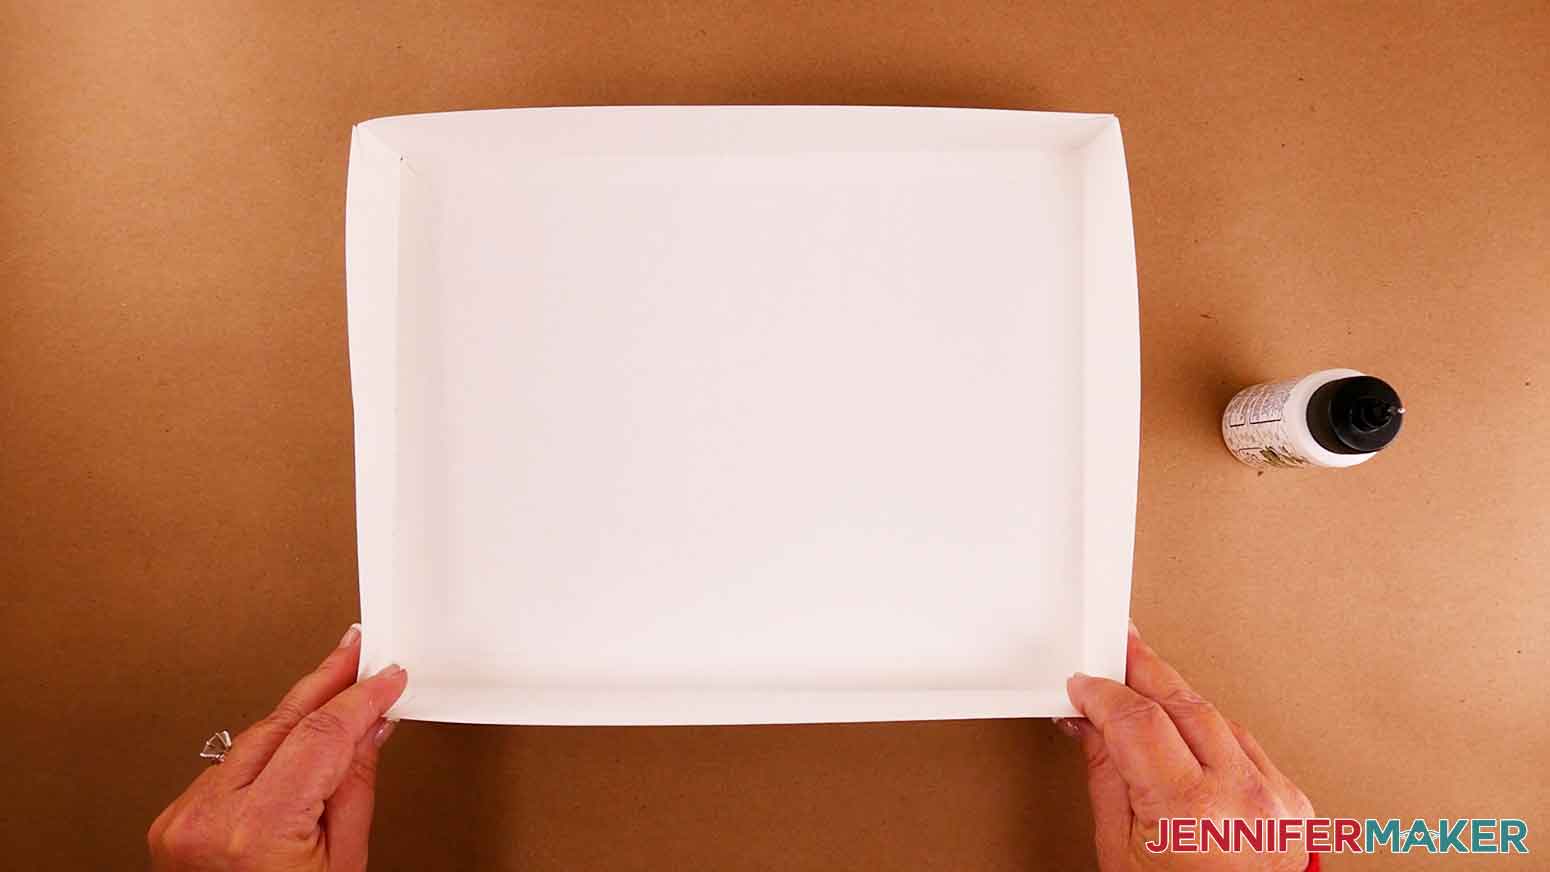
Now find your four remaining side pieces with tabs along the top and side and the corresponding large rectangular piece for the center - pieces D, E, and F. These will make up the back of the frame.
Follow the steps above to fold and glue the tabs in place.
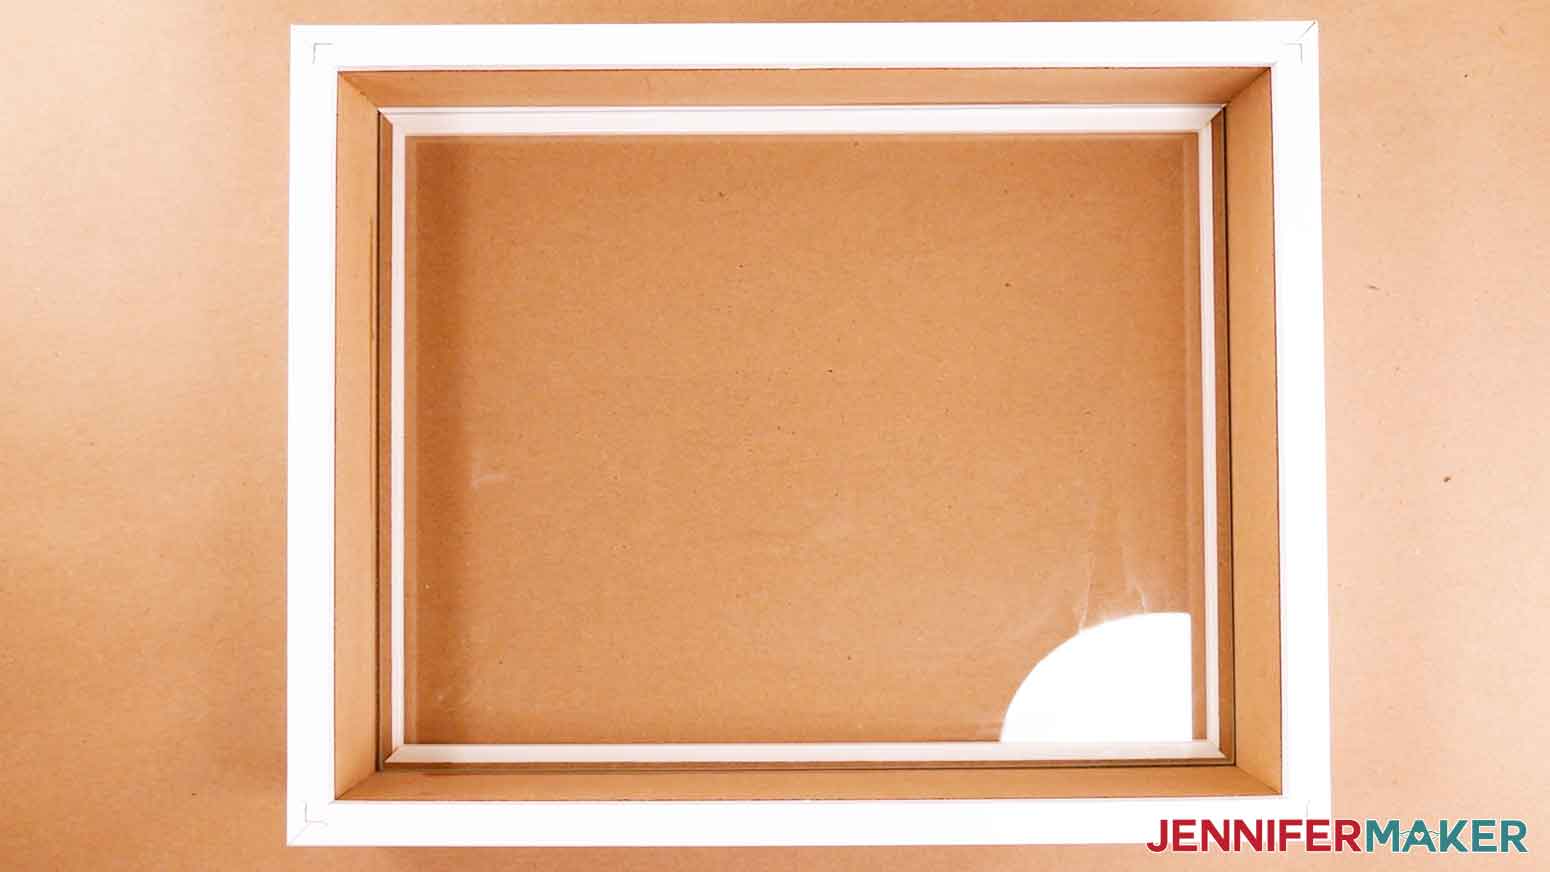
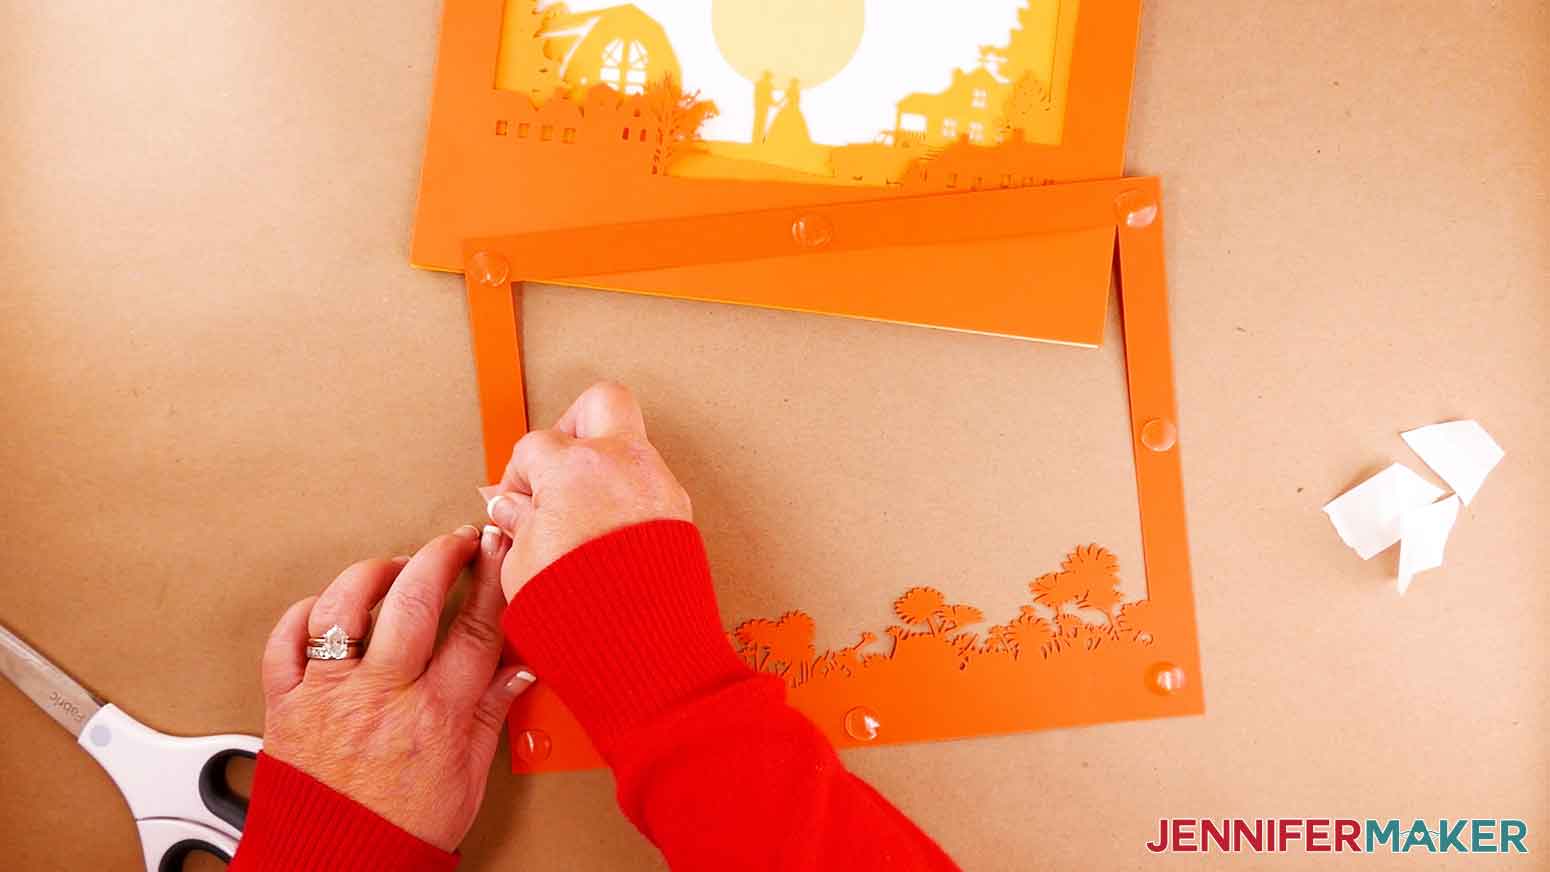
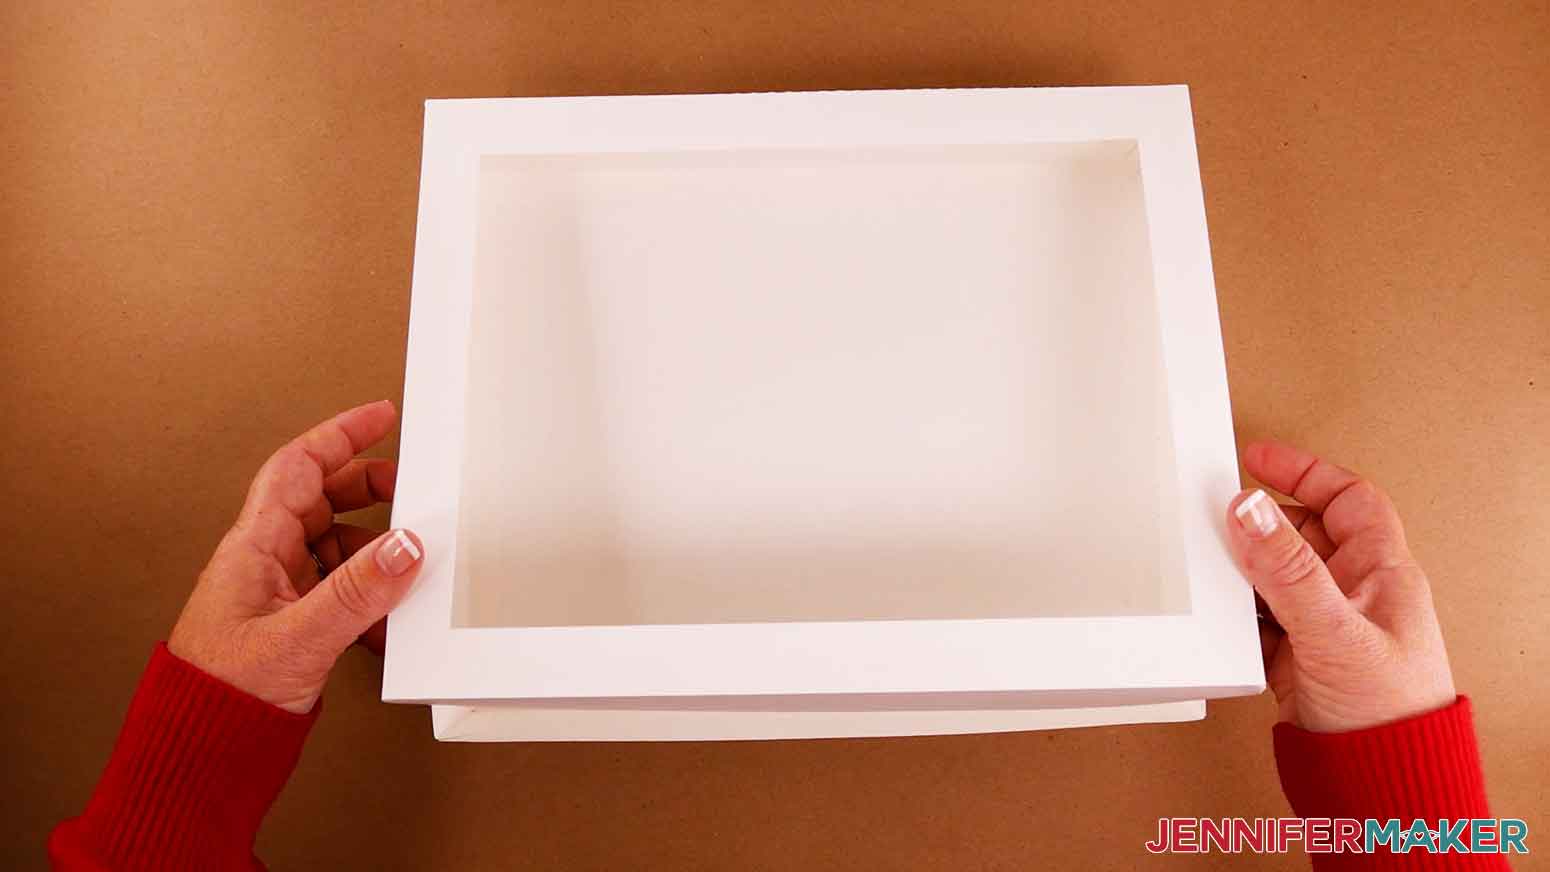
Once the glue is dry, make sure your front frame piece (the one with the cutout in the center) slides easily onto your back frame piece.
The last step is to take the four remaining "shelf" pieces with tabs along one of their sides - pieces G and H - and attach them to the inside of the assembled back frame.
Fold along the dashed lines to create the shelves (the sections with angled ends).
Apply glue to the outside of the larger section of each piece and adhere them to the inside of the frame's sides. The two small shelves will go on the left and right sides and the two large ones will go on the top and bottom. The long unfolded edge of each piece should be aligned at the very bottom of each side, which will leave about a half inch above the shelf for the design layers to rest on.

Your frame is now ready!
STEP 5: ADD THE LIGHTS
Glass Shadow Box with LED Strip Lights
Grab your lights and turn them on to make sure they work. If you're using the LED strip lights from my materials list, you'll need to correctly insert three AA batteries and use the button on the battery pack or the included remote to turn them on.
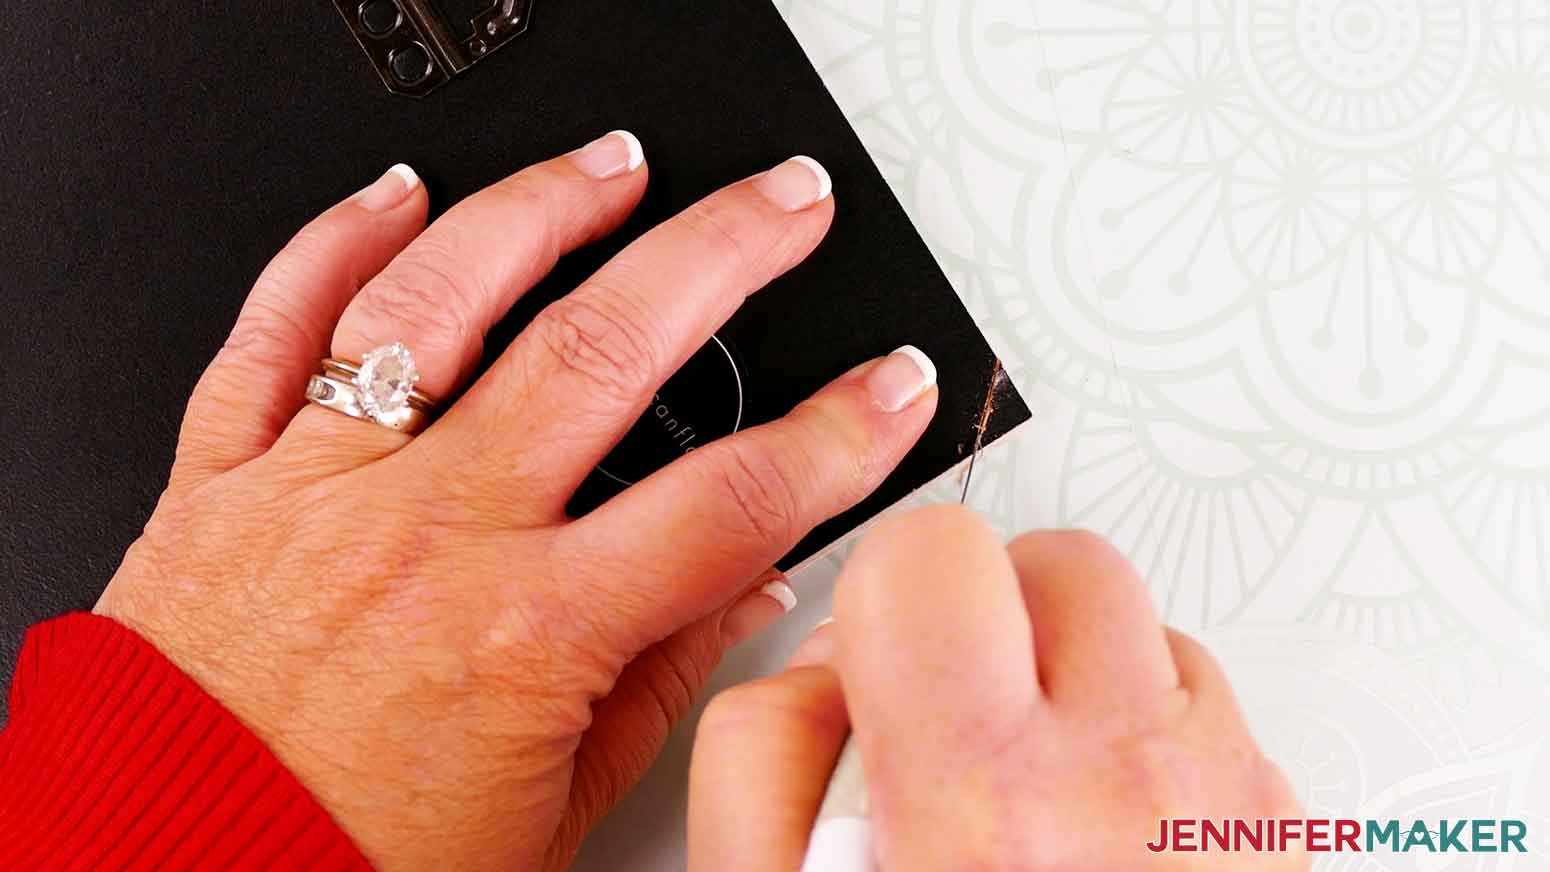
We need to cut a small notch in the frame's backing so the LED light wire connected to the battery pack can slide through. Place your frame's backing piece face down (hardware facing up and at the top) on your self-healing mat. Use your craft knife to carefully make a diagonal cut across one of the bottom corners about a half an inch tall. Discard the triangular piece you cut off.
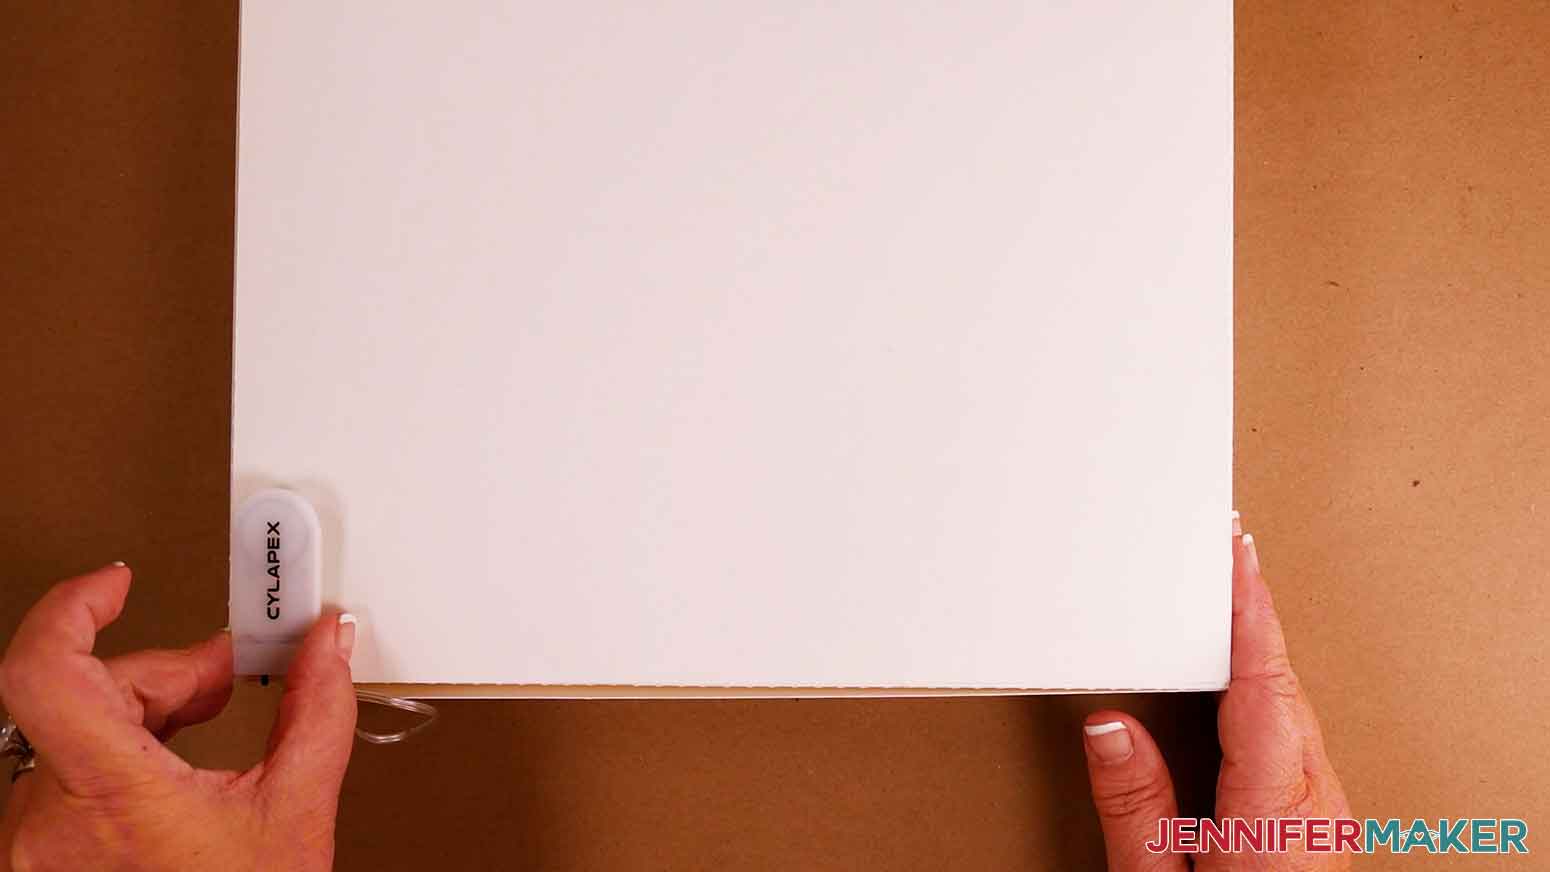
Unroll your LED lights so you have a foot or so to work with. Peel off just a bit of the plastic backing at the end of the lights near the battery to reveal the adhesive.
TIP: If you're having trouble getting the backing to release, use your weeding tool to get it started.
Place the shadow box with the assembled layers inside face down. Take your lights and make sure the wire without any lights and the battery pack itself are both outside the frame and not attached. This will be placed behind the box when it's displayed.
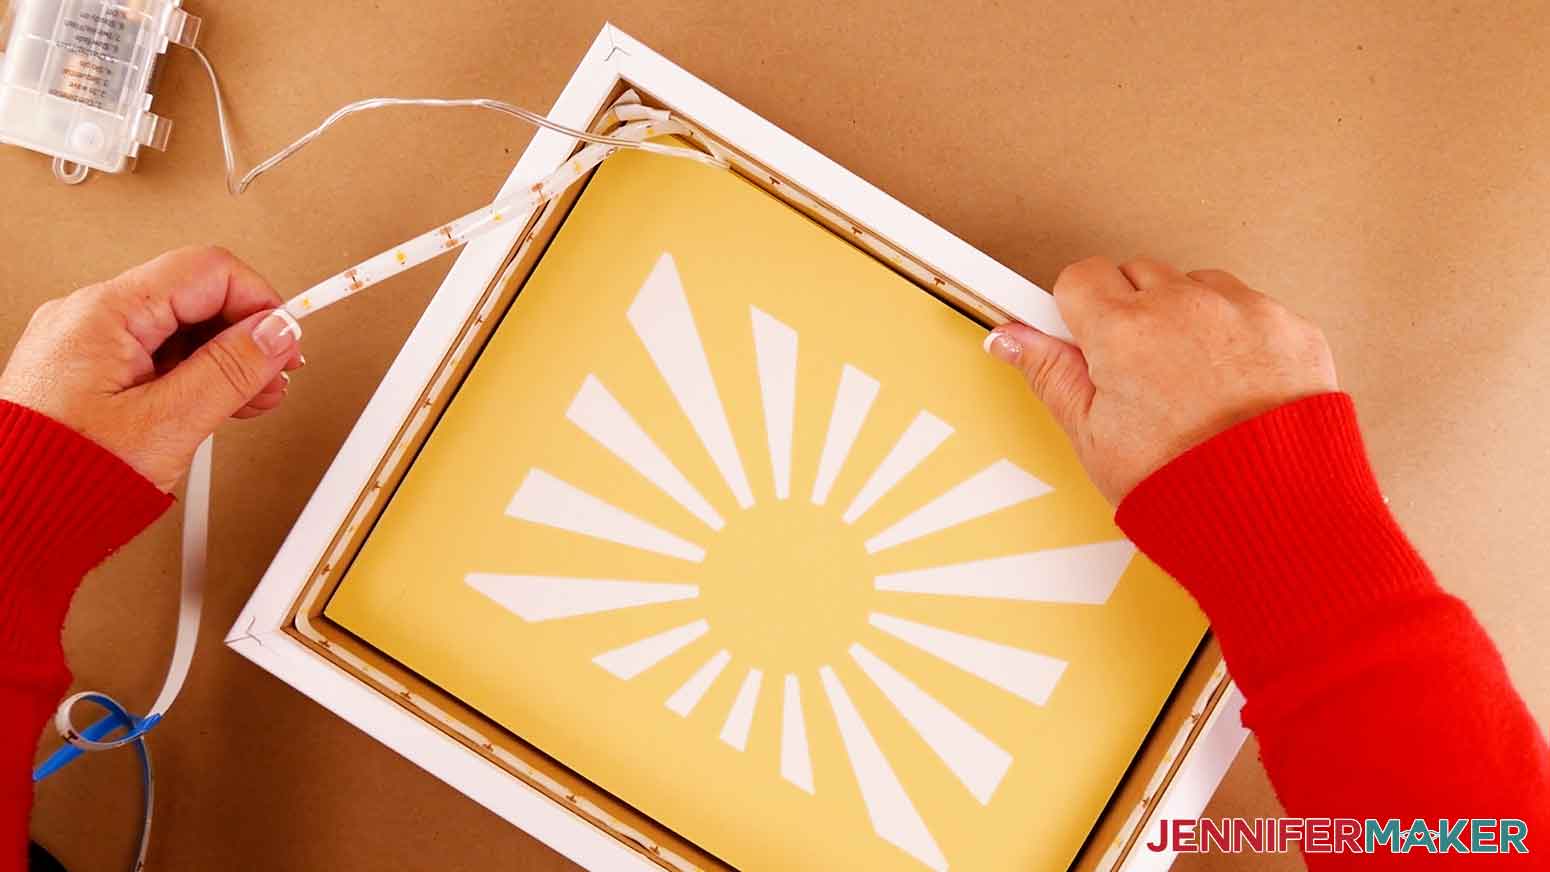
Starting in the same bottom corner as the notch on your backing, attach the exposed adhesive to the inside of the frame about a quarter inch from the top.Don't start at the very top to leave room for the backing piece to fit inside above the lights.
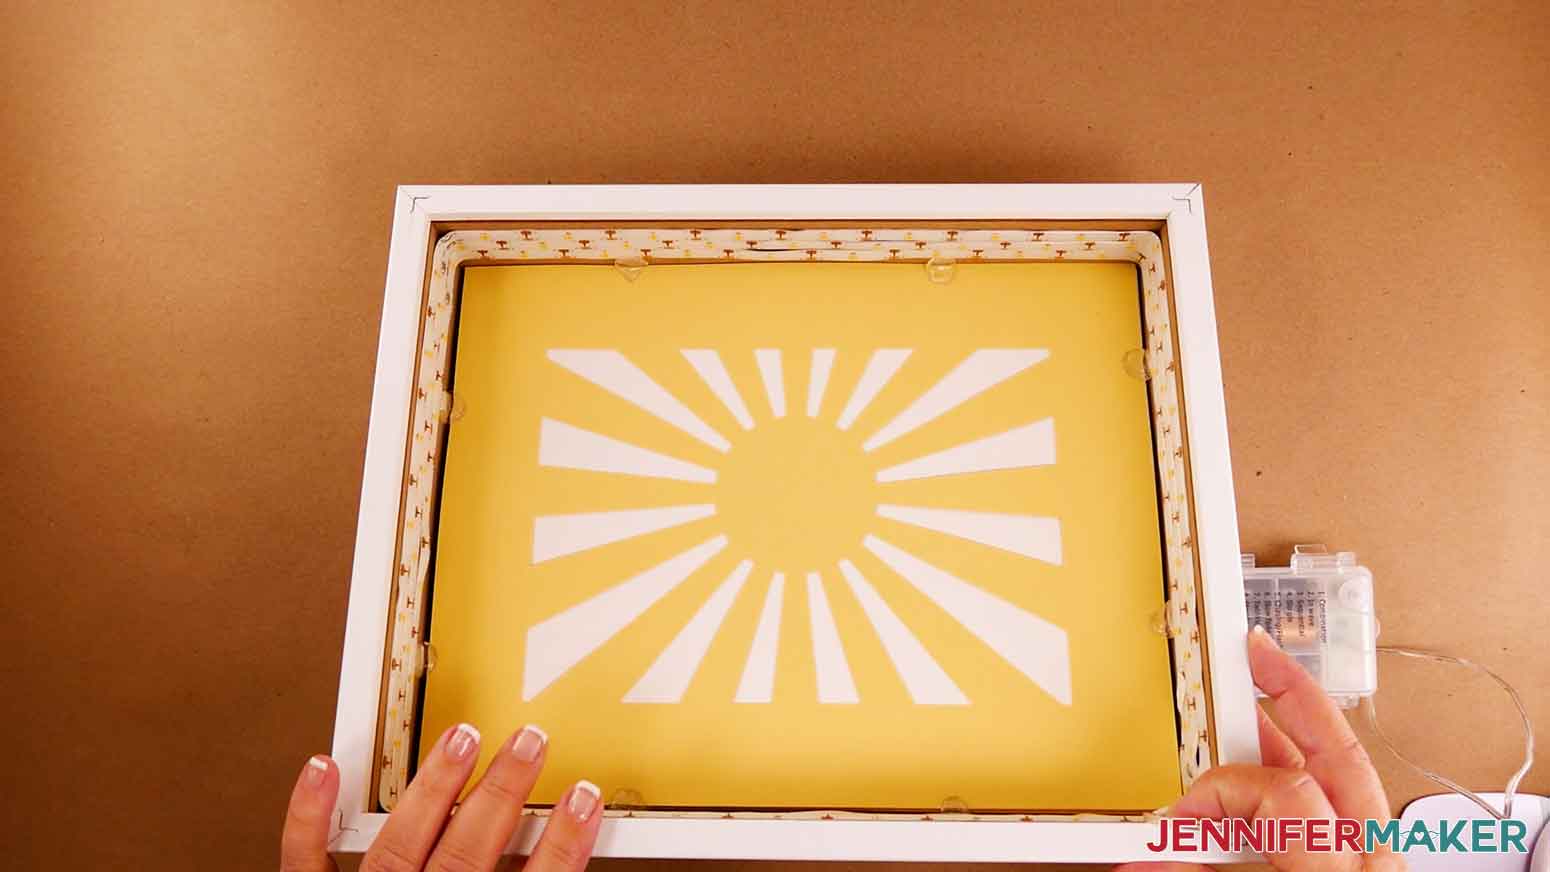
Continue peeling off the backing and attaching the lights evenly around the perimeter of the frame until you reach the starting point. Your lights should look similar to mine.
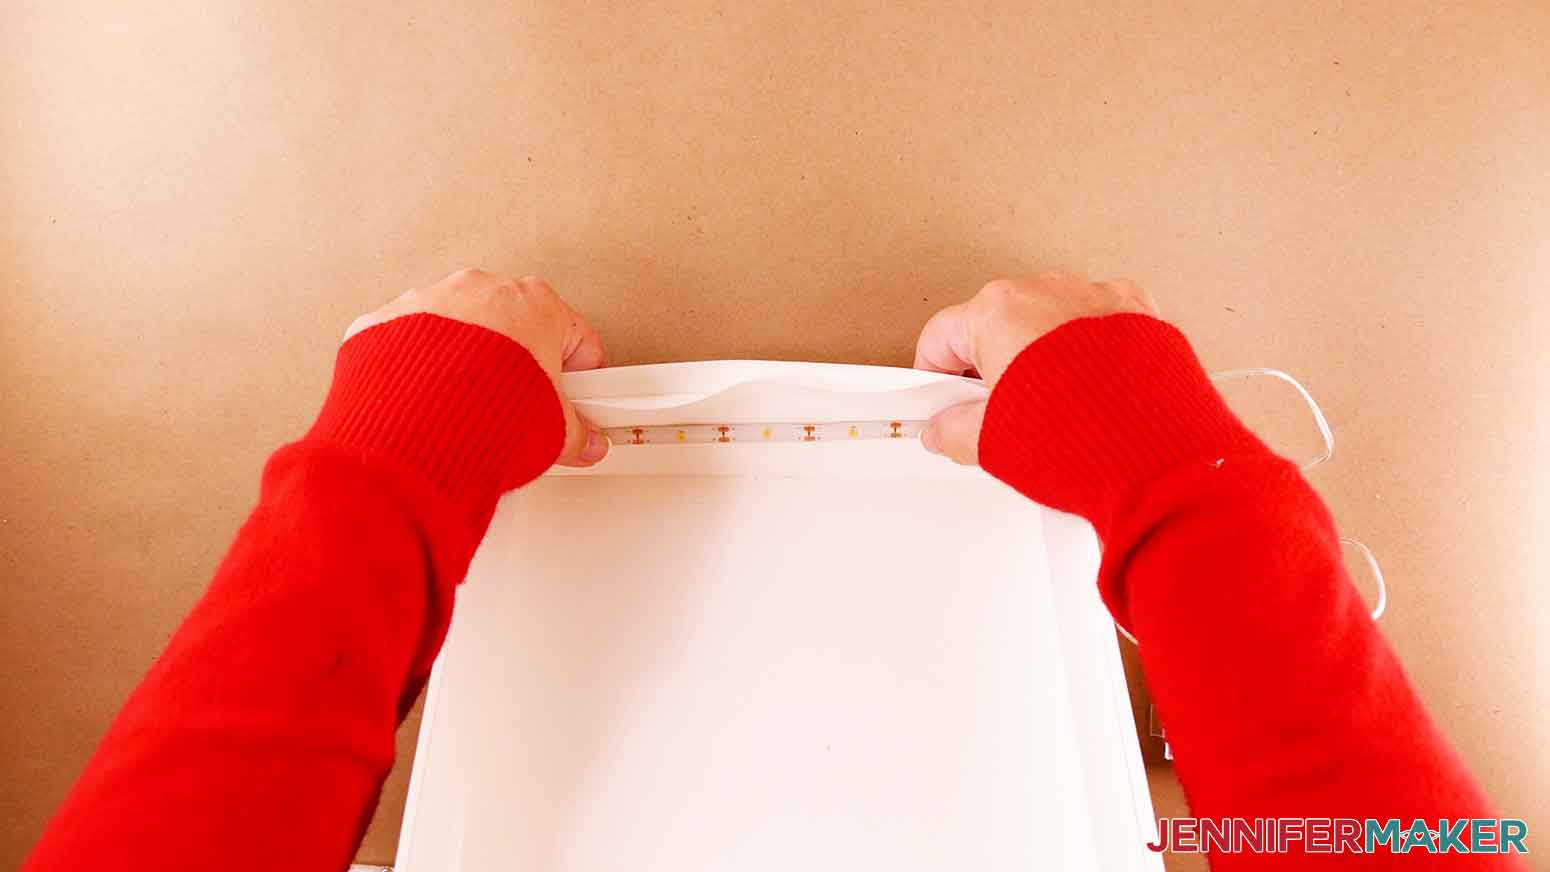
The lights from my materials list are long enough to wrap around the inside of the shadow box three times. The more lights you attach, the better you can see the layers, so attach another row of lights directly below your first one. You will have to angle the strip down a bit at the beginning, but you can straighten it out after that.
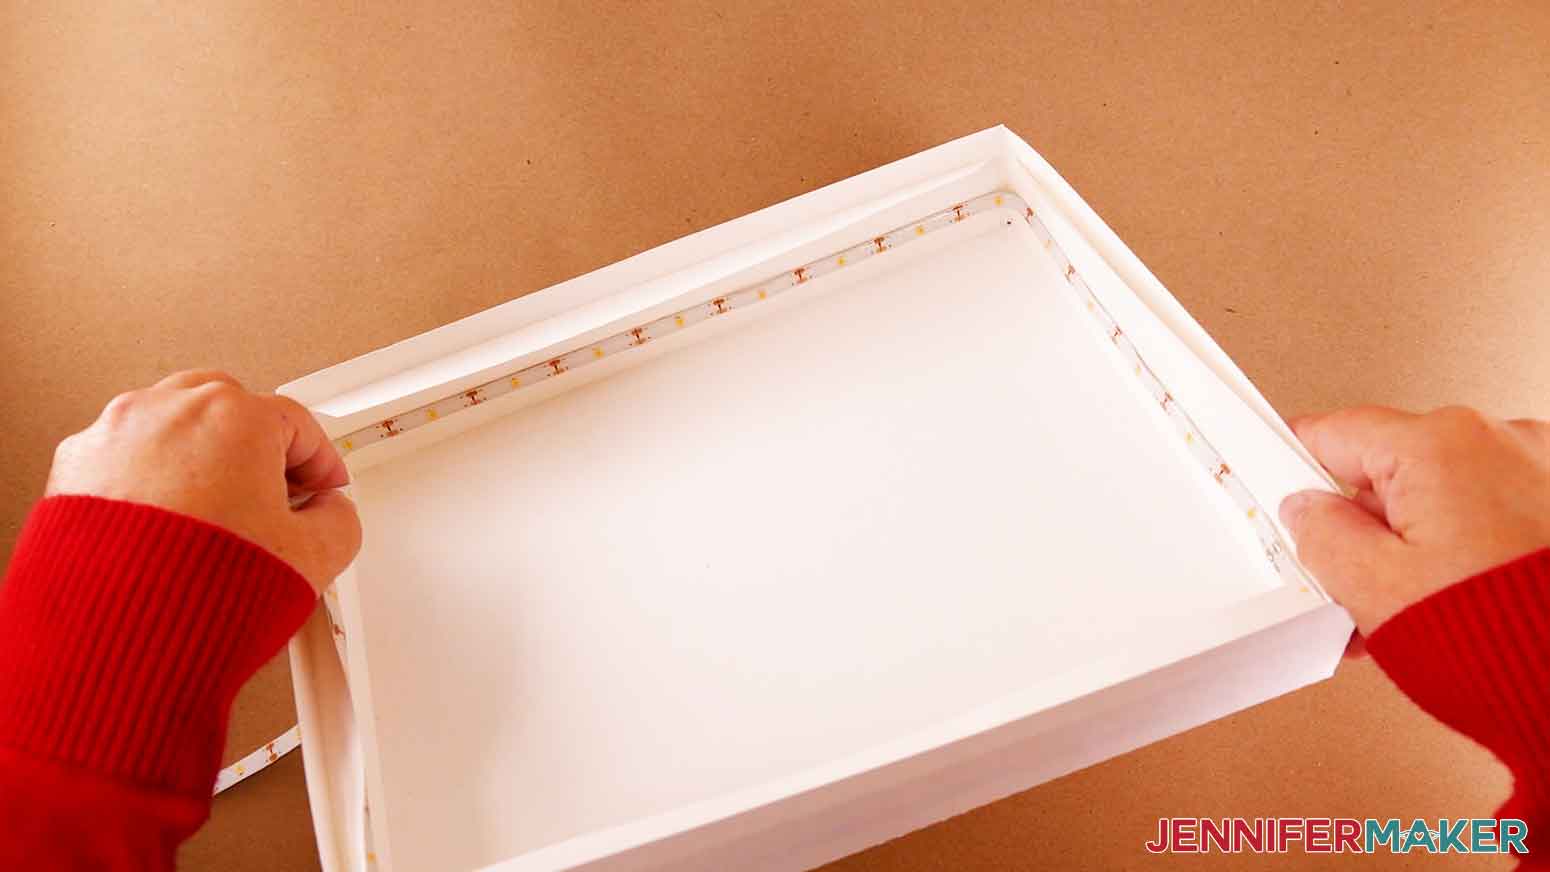
Follow the same process as above until you have three rows of lights and are back at your starting point.
If you have any space below your third strip of lights and above your cardstock layers, you can keep the cardstock layers from moving or sagging by attaching a few glue dots (I used the 3D ones for this) around the perimeter. Make sure the glue dots touch both your cardstock and the side of the frame to adhere them.
Now you can reattach your shadow box's backing and slide the wire through the notch.
DIY Cardstock Frame
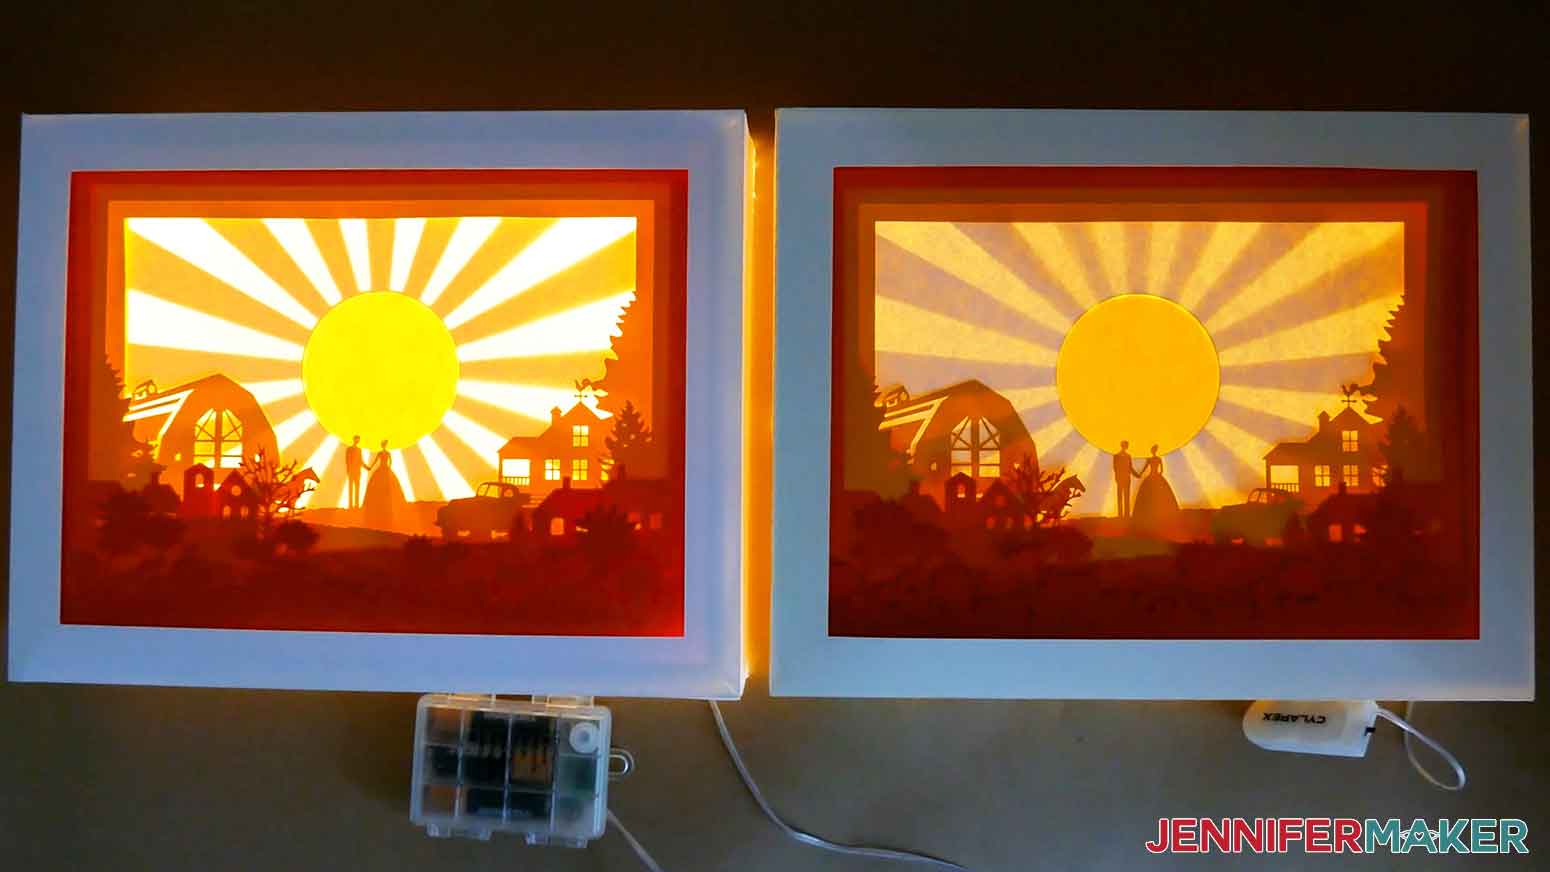
You can use either LED strip lights or fairy lights with the DIY frame. They will create different results, so check out the examples before deciding!
Variation: LED Strip Lights
First, turn on your lights to make sure they work. If you're using the LED strip lights from my materials list, you'll need to correctly insert three AA batteries and use the button on the battery pack or the included remote to turn them on.
Unroll your lights so you have a foot or so to work with. Peel off just a bit of the plastic backing at the end of the lights to reveal the adhesive.
TIP: If you're having trouble getting the backing to release, try using your weeding tool to get it started.
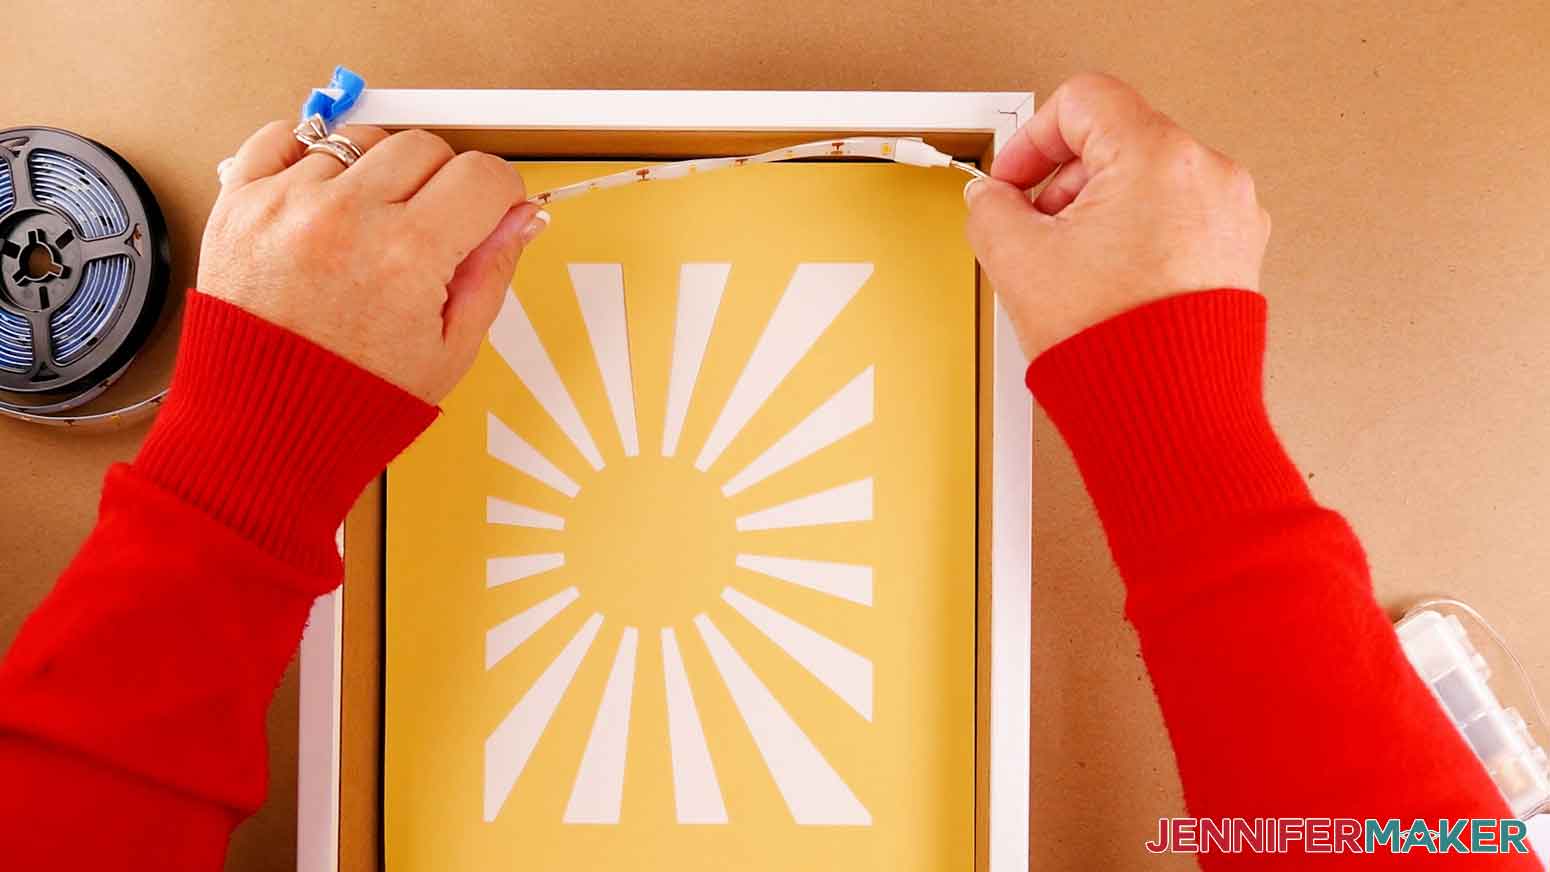
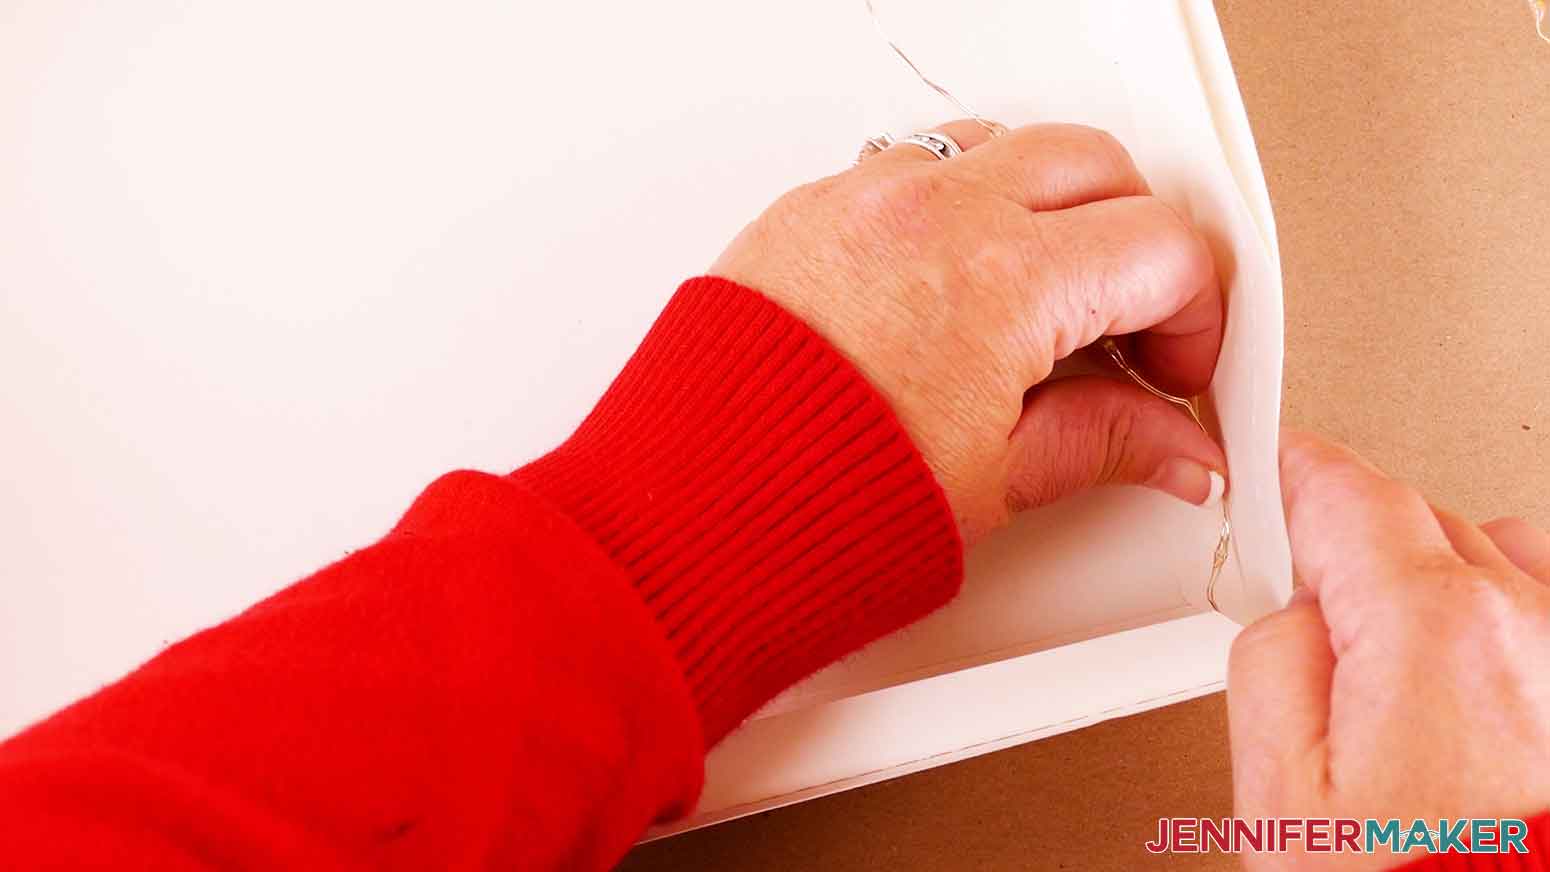
Take the back piece of your frame with the shelves attached and place it flat in front of you. Make sure the wire without any lights and the battery pack itself are outside the frame and not attached. Starting in one of the bottom corners inside of your frame, attach the exposed adhesive to the side of the frame, under the shelves.
Continue peeling off the backing and attaching the lights evenly around the perimeter of the frame until you reach the point where you started. Your lights should look similar to mine.
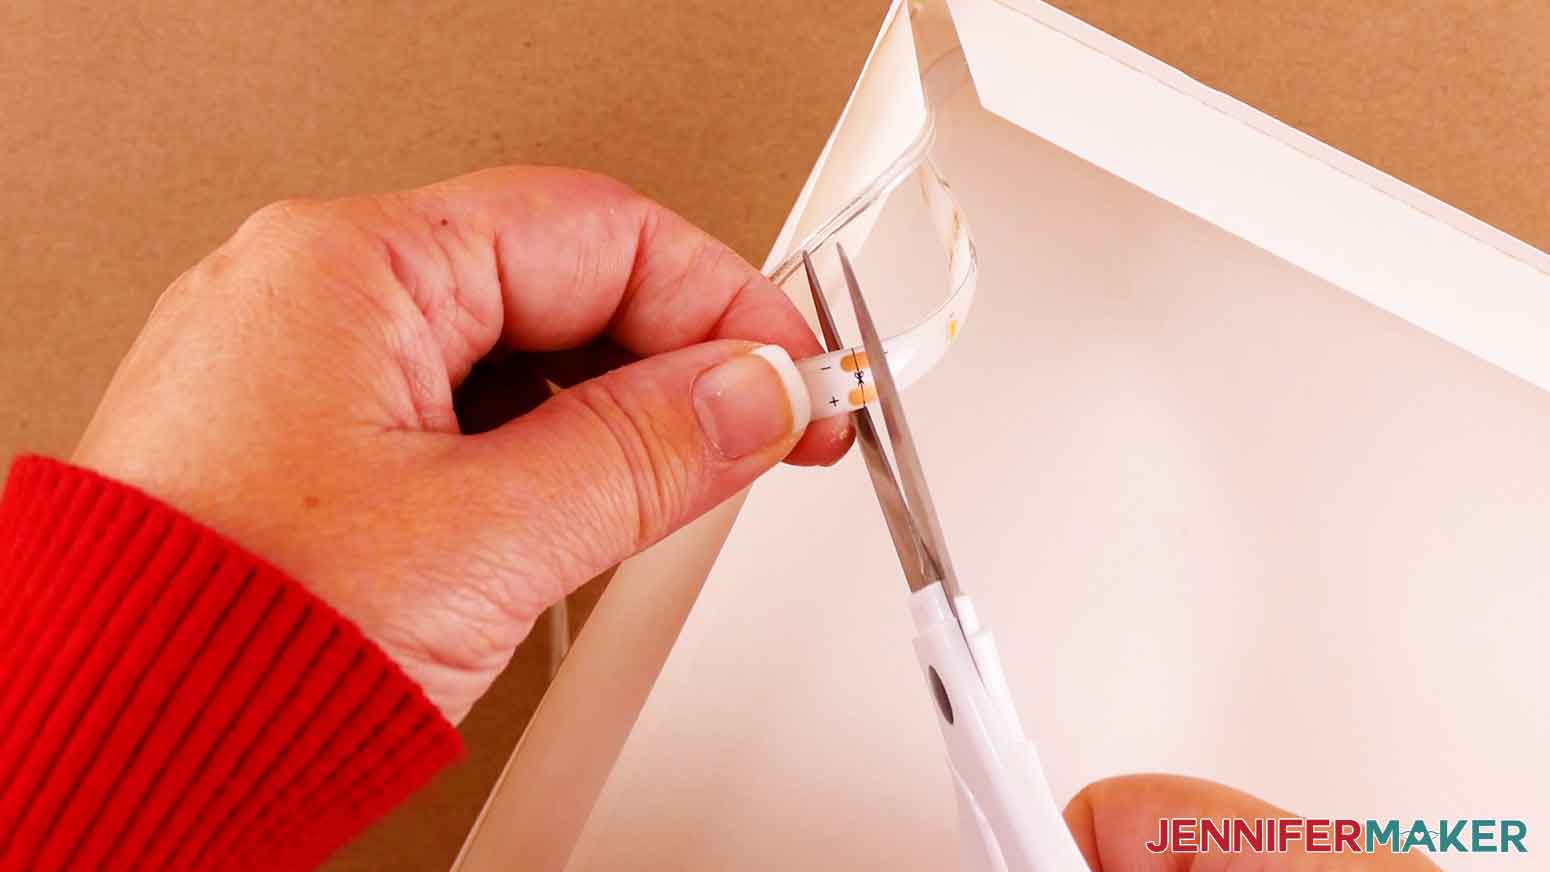
Since the cardstock frame isn't as sturdy as the glass shadow box, only one row of lights fits without making it sag. Find the closest spot on your light strip where it can be cut. This will be denoted by a small scissors icon with + and - symbols on both sides. Make sure your lights are off and use your scissors to cut the lights in this area.
Variation: Fairy Lights
First, turn on your lights to make sure they work. You might have to remove a battery protector tab first.
We'll use medium sized glue dots to attach the fairy lights evenly around the inside edge of the back of your frame. Place the frame's back piece face up on your butcher paper.
Start by attaching the lights at the end near the battery pack. Make sure the wire without any lights and the battery back itself are outside the frame and not attached. Place a glue dot in a bottom corner of your frame, under the shelves. Then press the wire next to the first fairy light against it to adhere it.
Continue attaching glue dots evenly around the inside edge -- about two to three inches apart -- and pressing the wire sections on top. Once your entire strand of fairy lights is attached, it should cover the entire perimeter of the frame, with some overlap at the end.

Adding the Layers
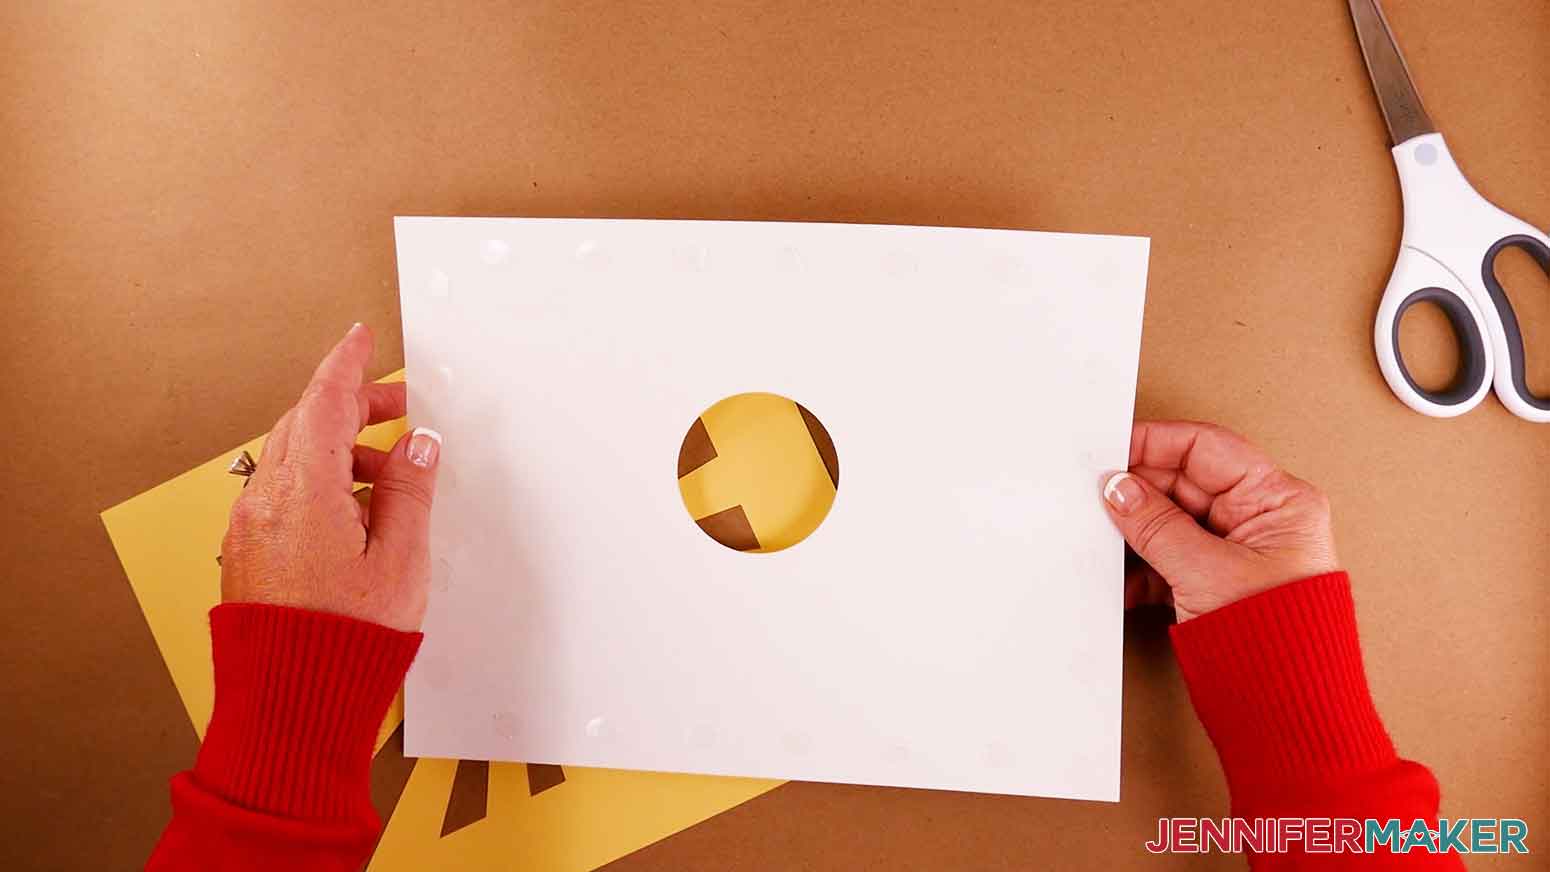
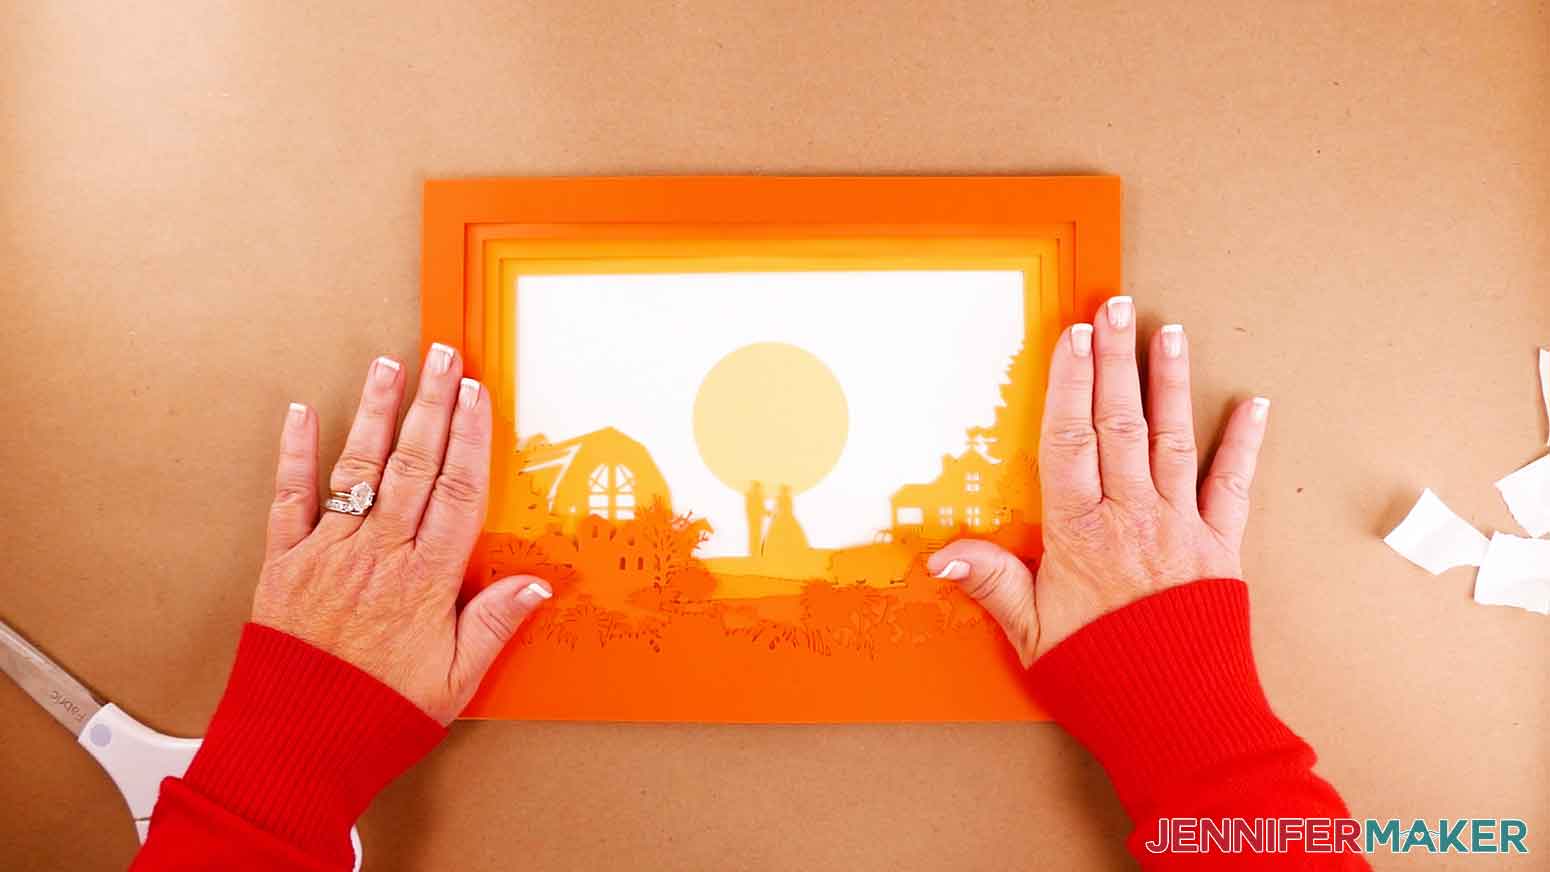
After adding either type of lights, take your assembled design layers and place them on top of the shelves inside the frame to make sure they fit well and look even. Then, place a medium glue dot in the center of each shelf piece and carefully press down on the assembled layers to adhere them to the shelves.
Once your design layers are attached to the back piece of your frame, slide the front of your frame over the top. You can secure it with a few glue dots around the outside edges if you like.
If you used the LED strip lights, you won't be able to attach the battery pack to your cardstock frame, as it's too heavy to be supported by the paper. However, the wire connecting the lights to the battery pack is fairly long and should make it easy to hide the pack behind your shadow box on a shelf or table.
You can secure the fairy lights' battery pack with another glue dot. If you're hanging your frame on a wall, you'll want to attach the battery pack on an outside edge of the frame so you can turn the lights off and on.
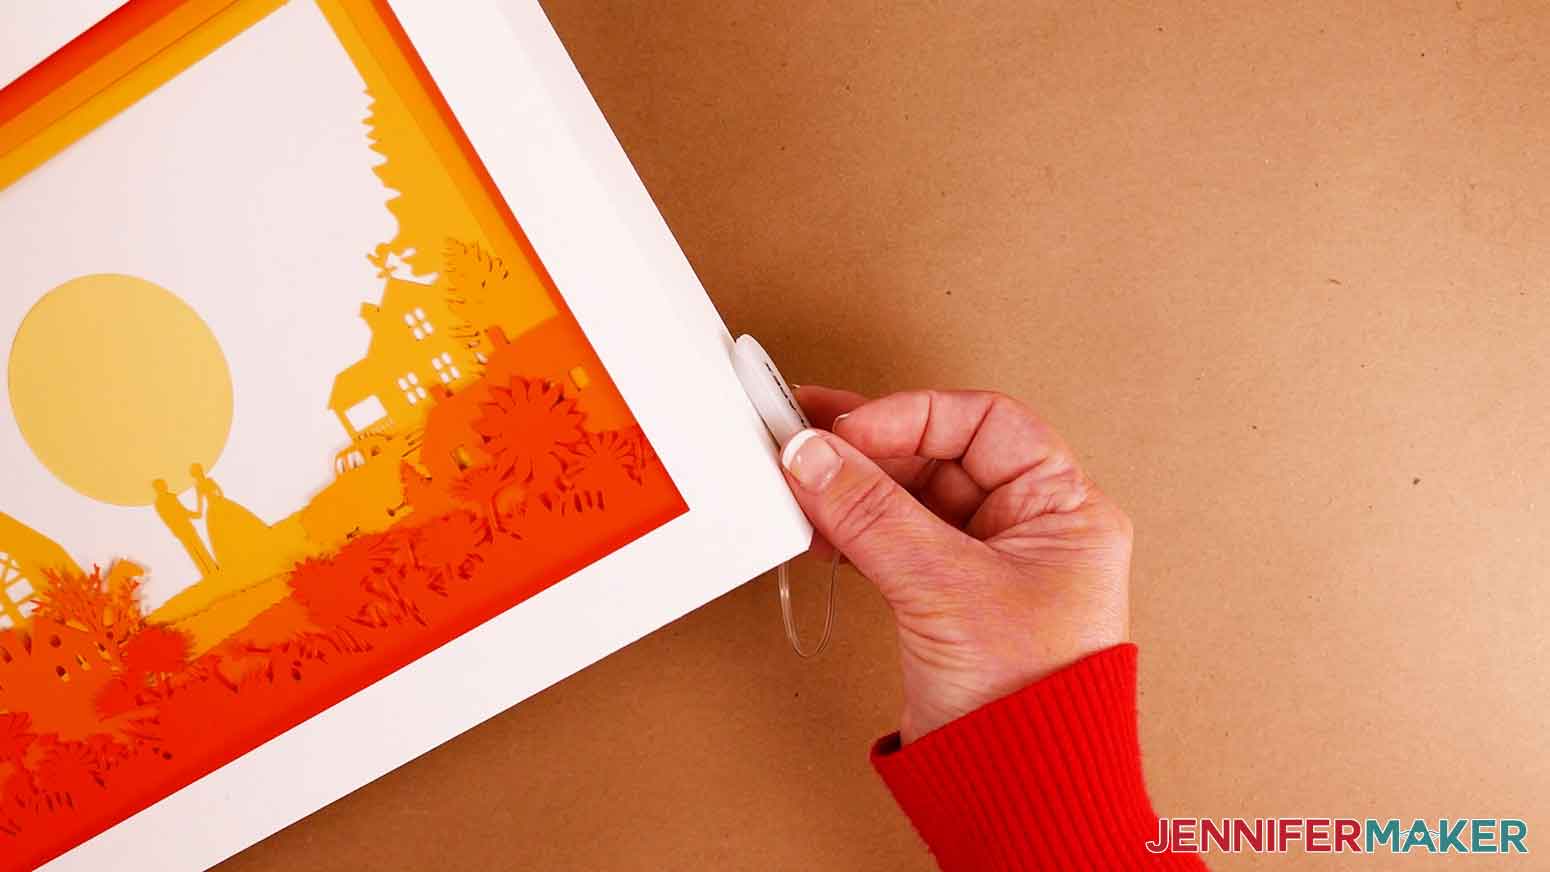
If you're setting your frame on a flat surface, you can attach the battery pack to the back side. One medium sized glue dot should be enough to hold the pack in place.
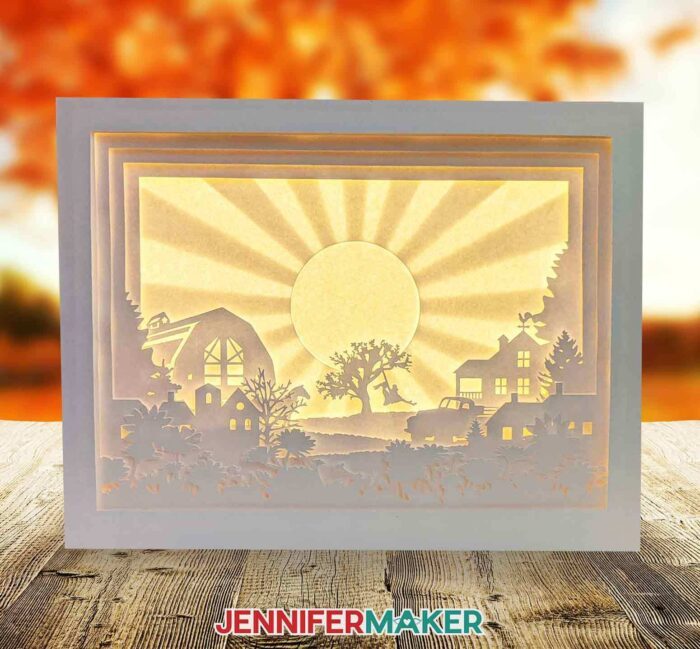
STEP 6: SHOW IT OFF!
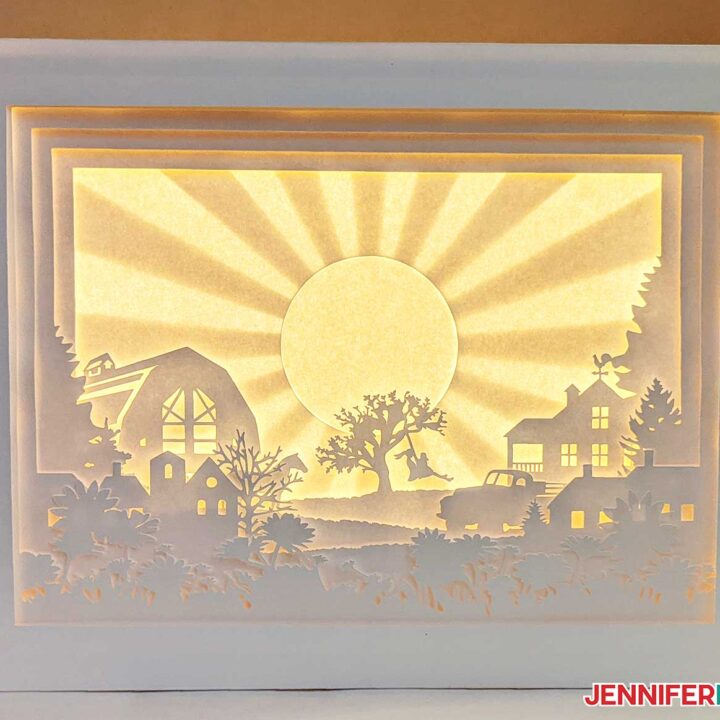
You're done! Here's what my finished paper cut light boxes look like. Aren't they beautiful? Now you can display your finished shadow box on a table, desk, shelf, or wall where you can admire all the detailed layers with the lights on.
Notes
The design is set up to make one light box with a glass shadow box measuring 12" wide by 9.5" tall, which is listed in the materials section. If you're making the DIY cardstock frame, your finished light box will measure approximately 11.1" wide by 8.6" tall.
Font used:
Craft a Life You Love: Tingler Script, available for purchase from FontBundles
Answers to Your Questions About My Paper Cut Light Box SVG
Q. How do you make a homemade light box?
The first thing is to find a shadow box template you like. Then, cut the SVG using a cutting machine, or print the PDF file to cut with a utility knife. Assemble the layers in your frame and add a light strip before replacing the back side.
Q: What kind of paper do I use for a light box?
You can really use any 65 lb or higher cardstock to follow this paper cut light box tutorial — it’s your choice which colors and textures. If you want to use the exact same materials I used, check the list above for my white card stock.
Q: How do I keep my layers stuck together?
I used different-sized glue dots for my layers. Depending on the look you want, you can also use foam spacers, sticky foam strips, foam board, or double-sided tape.
Q: My cardstock keeps ripping on the intricate cuts. What can I do?
Be sure you’re using a clean and sticky machine mat, good-quality cardstock, and a clean blade. See my Cricut Cutting Problems post for all the tips I use to get a clean, accurate cut every time.
Q. How do you make a homemade light box? Do I have to use a Cricut?
No! I always include several versions of each digital item in the Zip file. If you have a Silhouette Cameo, which uses Silhouette Studio, you can use the DXF cut files in Silhouette Basic Edition. If you have upgraded to Silhouette Designer Edition, Designer Edition Plus, or Business, you can use the SVG files. If you don’t have a cutting machine, you can print and then cut out the paper cut light box tutorial PDF files, too and then use scissors or an X-acto knife to make the paper cut outs.
Get my free download of the paper cut light box SVG cut files here:
If you make one of these shadow boxes, I’d love to see it! Please share your paper cut light box tutorial results in my Cricut Crafters & Makers group where you’ll find hundreds of thousands of crafters like you, sharing their tips, projects, and inspiration.
By the way, you’re free to use my free digital files to create physical items to sell — I just ask that you share that you used one of my designs on your listing or with your product.
Love,

Want to remember this? Save this Paper Cut Light Box Tutorial to your favorite Pinterest Board