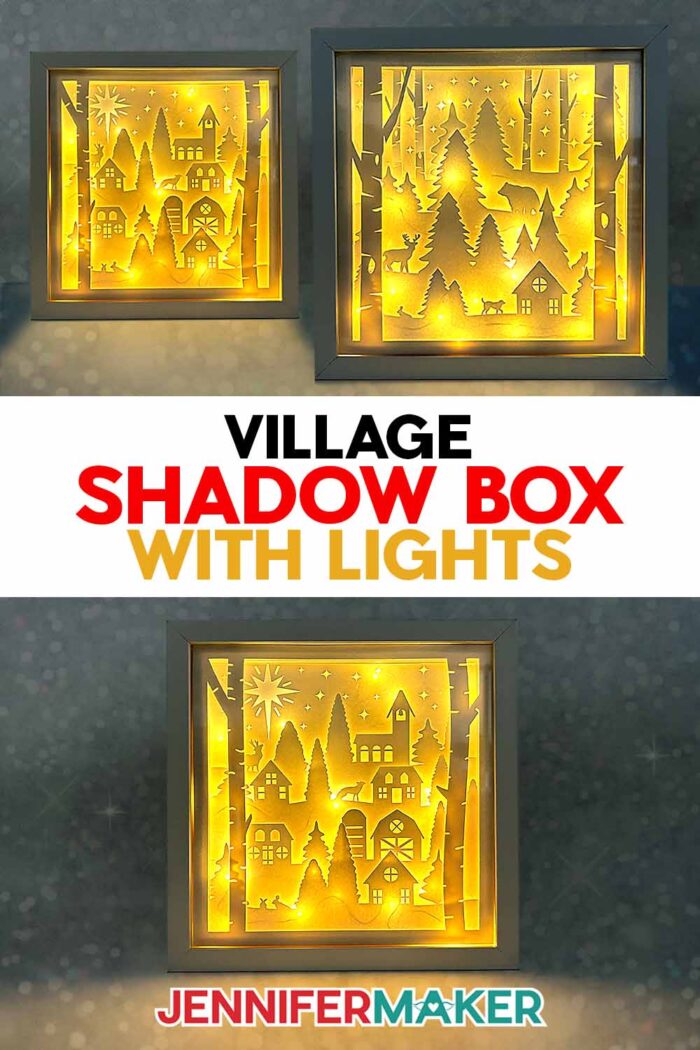
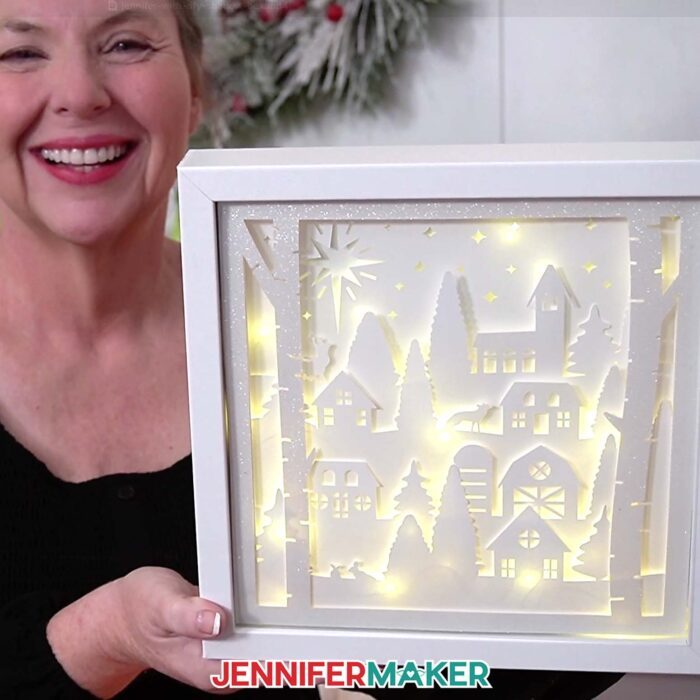
Learn how to make an enchanting winter village shadow box with lights that glow!
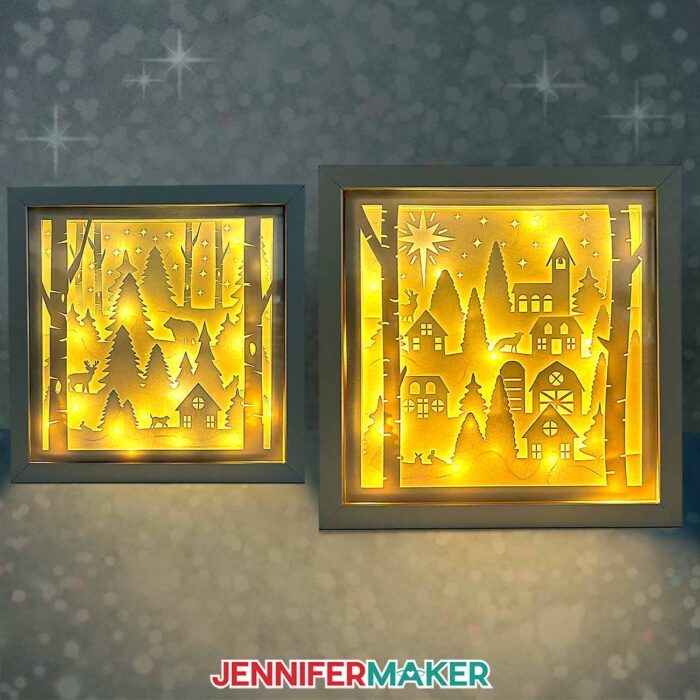
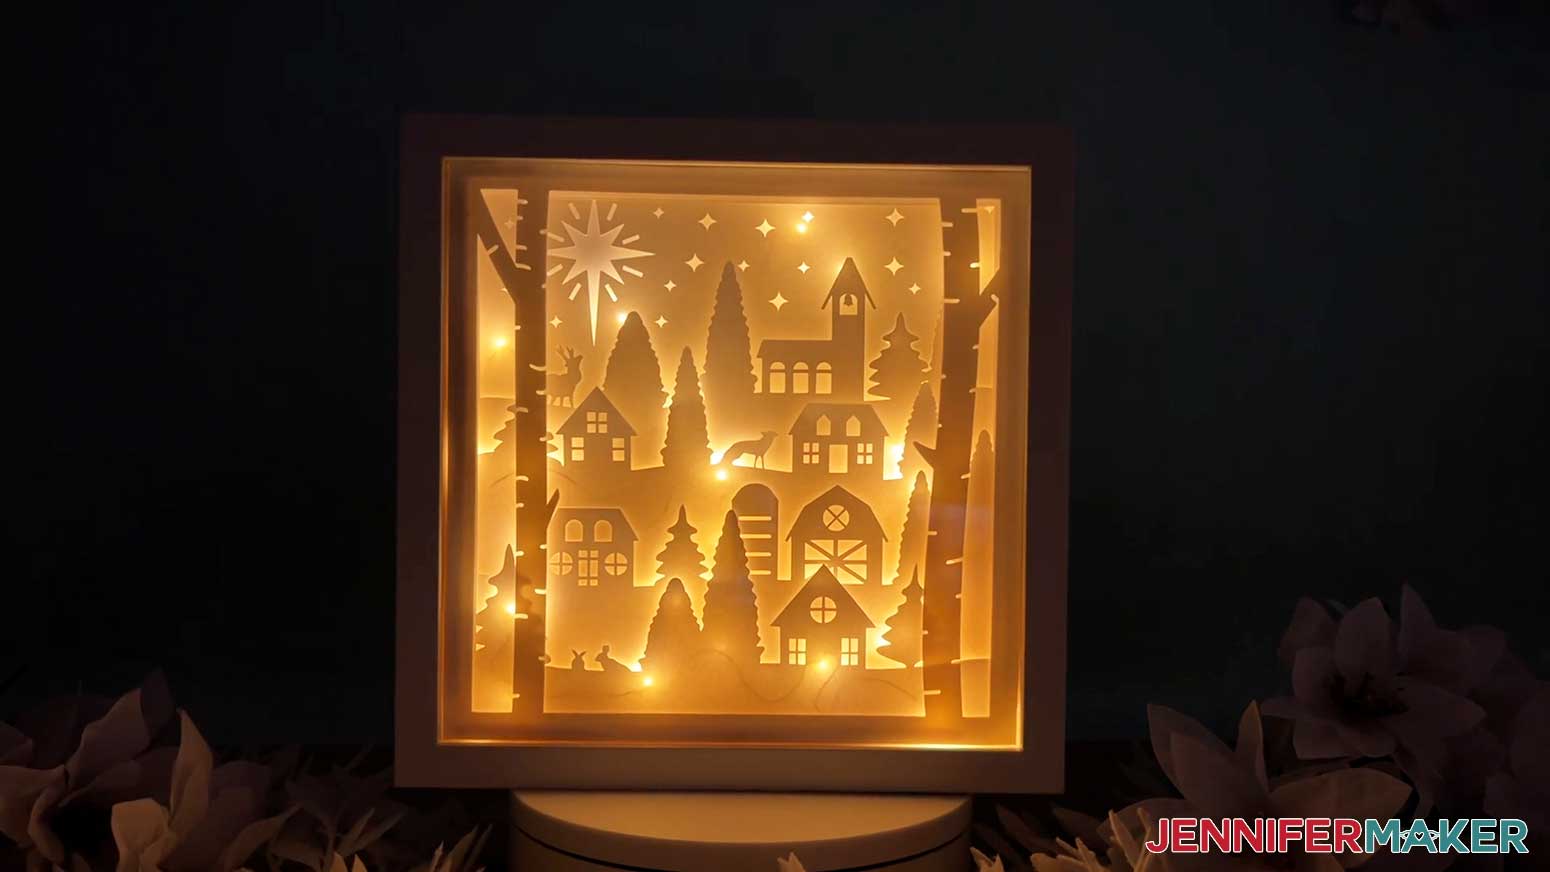
There’s a special kind of magic that happens when paper and light work together. But many shadow boxes hide that glow behind too many layers. An ultra-detailed scene doesn’t have to mean lackluster lighting, though. The first time I turned on my finished village shadow box with lights, it felt completely different. The whole scene lit up the way I always wanted, thanks to a simple method using regular fairy lights. It looked like a tiny storybook winter night: so warm and inviting! If you love Christmas crafts that feel cozy and full of depth, this one might become your new favorite.
See the full step-by-step video tutorial on how to make a village shadow box with lights:

You only need a simple shadow box frame to start, but once the cardstock layers and lights come together, it becomes a framed wall decoration that you can display year after year. With my free SVG files, I’ll show you how to make your own DIY Christmas shadow box with the right combination of layers and lights to make a jaw-dropping and dimensional winter display.
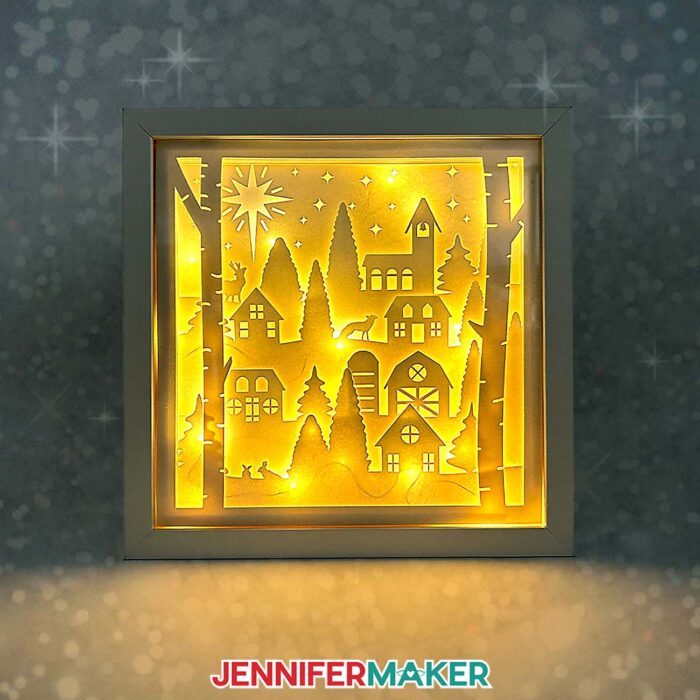
What makes this project feel so special is the way the lights weave between the layers, not just add light from behind them. This creates a warm, even glow through the windows, trees, and tiny star cutouts. It’s a simple special effect, but it completely changes the look of the finished piece. Instead of a dim display, you get an illuminated little Christmas village that almost feels alive!
Most of the design is just white cardstock cut from the free SVG files, stacked inside a shadow box frame with adhesive foam tape for spacing. I used plain white for the inner layers and switched the front layer to glitter cardstock for a pretty holiday sparkle. It’s a tiny change that makes the whole winter village feel extra festive! A green StandardGrip mat, clean Fine-Point blade, and a sheet of copy paper help keep everything clean and crisp.

The lighting comes from two strands of battery-powered fairy lights, attached with glue dots and guided through the tiny corner notches in the layers so the glow weaves naturally through the scene. The picture frame holds everything together, and a small folded cardstock spacer keeps the layers from shifting once the backer is on.
My free download comes with SVG files, DXF files, and PDFs, so whether you’re using a cutting machine or trimming by hand, you can get clean, detailed layers ready to go. The video tutorial shows everything you need to know, from prepping the shadow box frame to aligning the layers, handling the fairy lights, and getting a nice, even glow.
I love projects like this because they offer such a big visual payoff with simple materials. A shadow box picture frame, some cardstock, a few glue dots, and fairy lights come together to make something you’ll want to display next year and beyond! It’s one of those Christmas crafts that feels impressive but is totally doable, even if you’re new to layered paper projects or just dipping your toes into shadow box ideas for the first time.
And if you want to take the idea even further, my ADVANCE by JenniferMaker tutorial shows you how to design your own layers so you can build custom winter scenes inside your shadow box frame. Learn more about ADVANCE with JenniferMaker here!
When your village shadow box with lights is ready to shine, just switch it on, step back, and soak in the glow. It’s amazing what a little paper and light can do! This village may be tiny, but the magic it adds to your holiday décor is anything but small!
Let me show you how to make a village shadow box with lights! This post contains some affiliate links for your convenience (which means if you make a purchase after clicking a link I will earn a small commission but it won’t cost you a penny more, there is no additional cost)! Read my full disclosure policy.
Materials to Make a Village Shadow Box With Lights
View my Amazon shopping list with the exact items I used.
- 10″ x 10″ Shadow Box
- Six (6) Sheets of 12″ x 12″ White 65 lb. Cardstock
- One (1) Sheet of 12″ x 12″ White Glitter Cardstock
- One (1) Sheet of Copy Paper (optional to protect the white cardstock while using the brayer)
- Two (2) Strands of 7 ft. Long Fairy Lights
- A way to cut your material – I’m using the Cricut Maker 4, but you can also use a Maker series, Cricut Explore series, or Cricut Venture cutting machine
- Cricut Green StandardGrip Machine Mat 12″ x 12″
- Brayer
- Spatula
- Scraper
- Tweezers (optional)
- Craft Knife (optional to cut the shadow box backing) -AND-
- Self-Healing Cutting Mat (optional to cut the shadow box backing) -AND-
- Metal Safety Ruler (optional to cut the shadow box backing)
- Measuring Tape (optional for measuring the inside of the shadow box)
- Isopropyl Alcohol (optional for cleaning the glass on the shadow box) -AND-
- Lint-Free Cloth (optional for cleaning the glass on the shadow box)
- Bearly Art Precision Craft Glue (optional – I used someto glue paper spacer together to fill the empty space at the back of the shadow box)
- 1/4″ Thick Double-Sided Adhesive Foam Tape
- Small 3/16″ Clear Zots
How to Make a Village Shadow Box With Lights!

Village Shadow Box With Lights
Learn how to make a Village Shadow Box With Lights!
Materials
- One (1) 10” x 10” Shadow Box
- Six (6) Sheets of 12” x 12” White 65 lb. Cardstock
- One (1) Sheet of 12” x 12” White Glitter Cardstock
- Two (2) Strands of 7 ft. Long Fairy Lights
- 1/4" Thick Double-Sided Adhesive Foam Tape
- Small 3/16” Clear Zots
- One (1) Sheet of Copy Paper (optional to protect the white cardstock while using the brayer)
- Design #784 (My free SVG/PDF/DXF design files are available in my free resource library - get the password by filling out the form at the bottom of this page)
Tools
- A way to cut your material - I’m using the Cricut Maker 4, but you can use any Cricut Maker Series, Cricut Explore Series, or Cricut Venture cutting machine
- Cricut Green StandardGrip Machine Mat 12" x 12”
- Brayer
- Spatula
- Scraper
- Weeding Tool
- Tweezers (optional)
- Craft Knife (optional to cut the shadow box backing) -AND-
- Self-Healing Cutting Mat (optional to cut the shadow box backing) -AND-
- Metal Safety Ruler (optional to cut the shadow box backing)
- Measuring Tape (optional for measuring the inside of the shadow bow)
- Isopropyl Alcohol (optional for cleaning the glass on the shadow box) -AND-
- Lint-Free Cloth (optional for cleaning the glass on the shadow box)
- Bearly Art Precision Craft Glue (optional - used to glue paper spacer together to make spacers to fill the empty space at the back of the shadow box)
Instructions
STEP 1: GET MY FREE VILLAGE SHADOW BOX WITH LIGHTS DESIGN
First, download my village shadow box design from my free library – look for Design #784. Alternatively, you can use the Save This Project form near the top of this post and the design link will be emailed to you.
TIP: If you’re not sure how to upload, go to jennifermaker.com/svgs to learn how to unzip and upload SVG files.
Inside the SVG folder, you’ll see one village shadow box design. There is also a DXF folder with a version of the cut file for other cutting machines, and a PDF folder with a version you can print and cut by hand.
For this tutorial, I’ll show you how to cut the village shadow box SVG design with my Cricut Maker 4, but you can also use another Cricut Maker series machine, a Cricut Explore series machine, or a Cricut Venture cutting machine.
STEP 2: PREPARE AND CUT YOUR VILLAGE SHADOW BOX WITH LIGHTS DESIGN
CRICUT DESIGN SPACE
1. In Cricut Design Space on a blank Canvas, click “Upload.”
NOTE: If you’re new to using Cricut Design Space, go to cricutkickoff.com for my introductory tutorial on Design Space basics.
2. Click “Upload Image.”
3. Click “Browse.”
4. Find and select the “village-shadow-box” SVG.
5. Click “Open” and then “Continue.”
6. Click “Upload” to add the design to your Canvas, then use the small arrow to close the side panel.

7. Click “Save” and give your project a name.
8. If you want to resize the design for a different size shadow box, keep the Lock icon closed and adjust the height or width in the Size fields before Ungrouping.
TIP: I don't recommend making the boxes much smaller due to the delicate details.
9. If you want to change the color of any of your layers, click the arrow next to the design in the Layers Panel to expand it.
10. Select the layer you’d like to change, then use the Color Box to select a new color.
NOTE: I’ll change Layer 1 (the birch tree layer) to light gray to represent the white glitter cardstock I’ll use, so my Cricut knows to cut it with different settings.
11. Make sure the correct machine is selected in the top right.
12. Click “Make.”
13. On the Prepare screen, change the Material Size to match each material you’re using.
NOTE: I’m using 12” x 12” cardstock for everything.
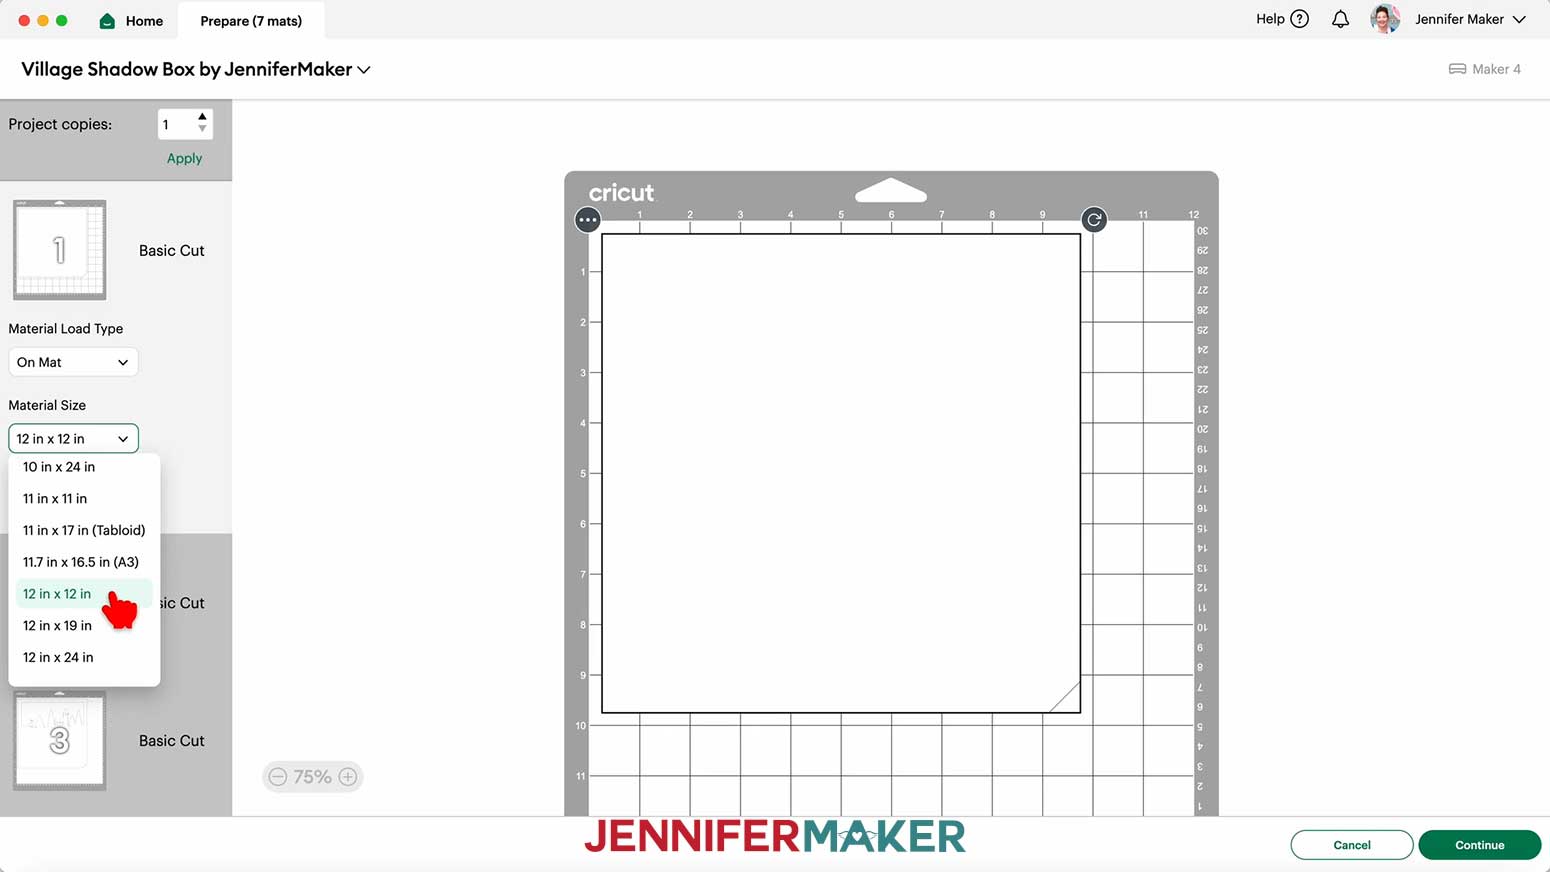
14. Select the first mat again and click “Continue.”
CUTTING
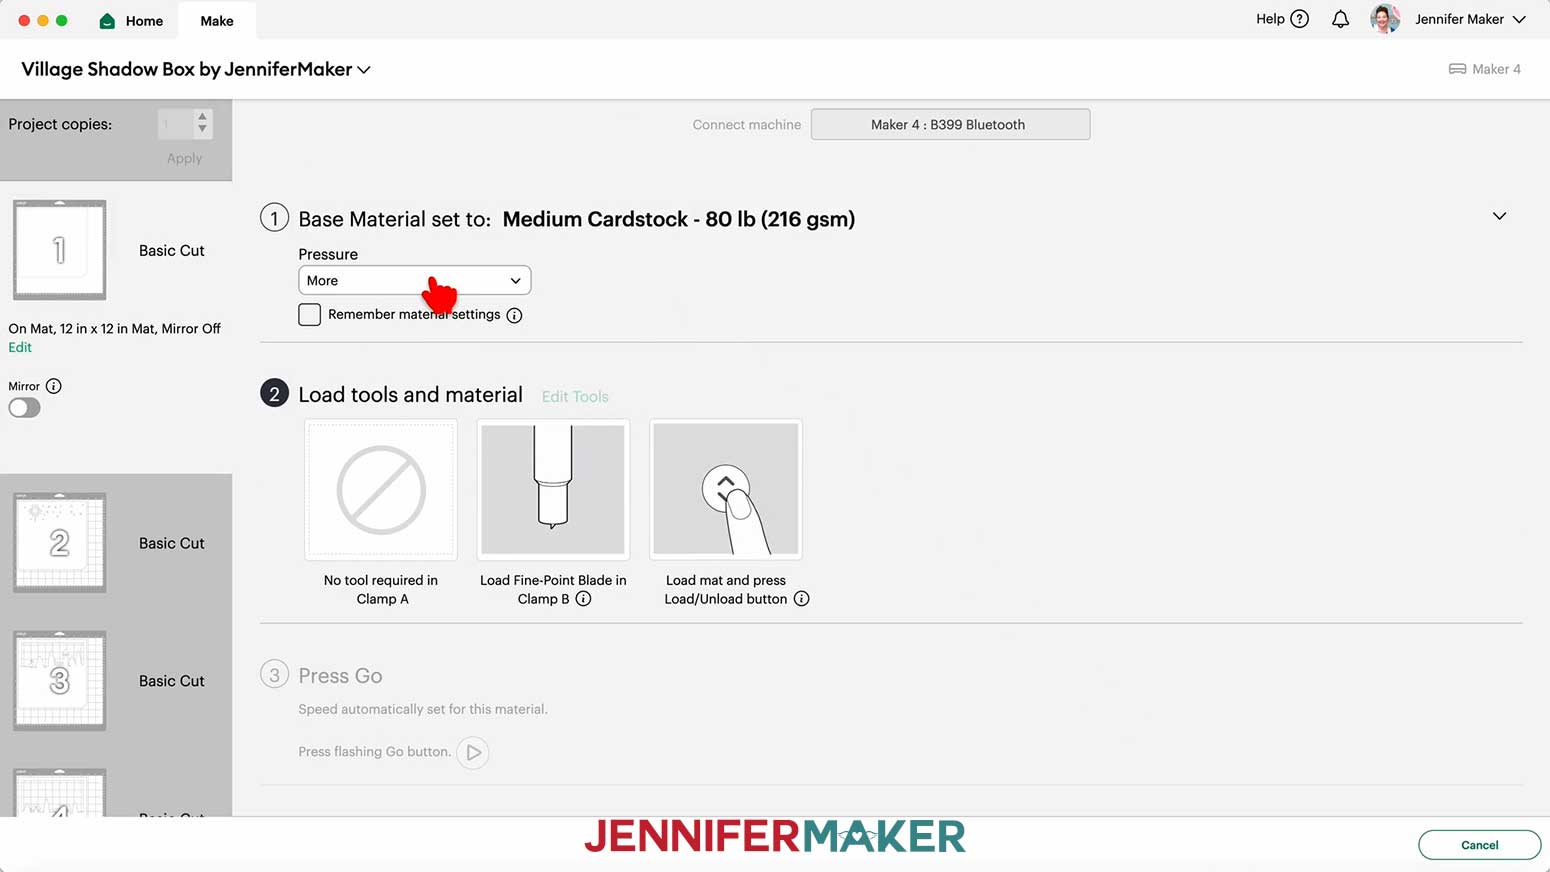
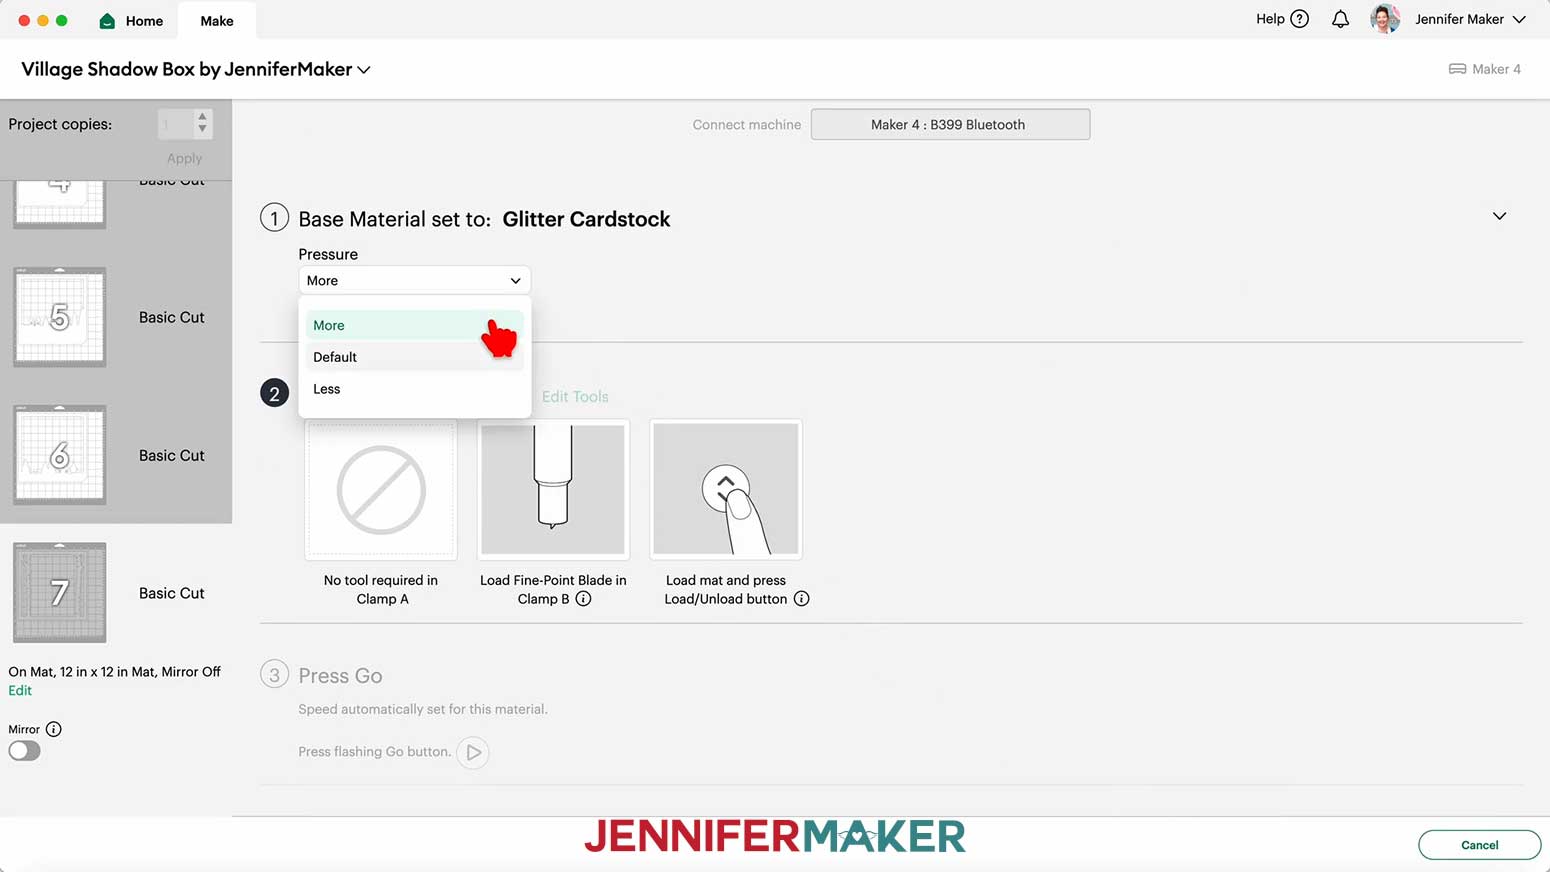
1. On the Make Screen, click “Browse All Materials.”
2. Search for and select the settings needed for the materials you’re using.
I used 65 lb. white cardstock for the inner and back layers (Layers 2-7), plus white glitter cardstock for the front layer (Layer 1).
These are the settings you can use for each material:
65 lb. Cardstock - “Medium Cardstock - 80 lb (216 gsm)” setting with "More" Pressure
Glitter Cardstock - "Glitter Cardstock" setting with "More" Pressure
3. Check that your Fine-Point blade is clean and in the correct clamp.
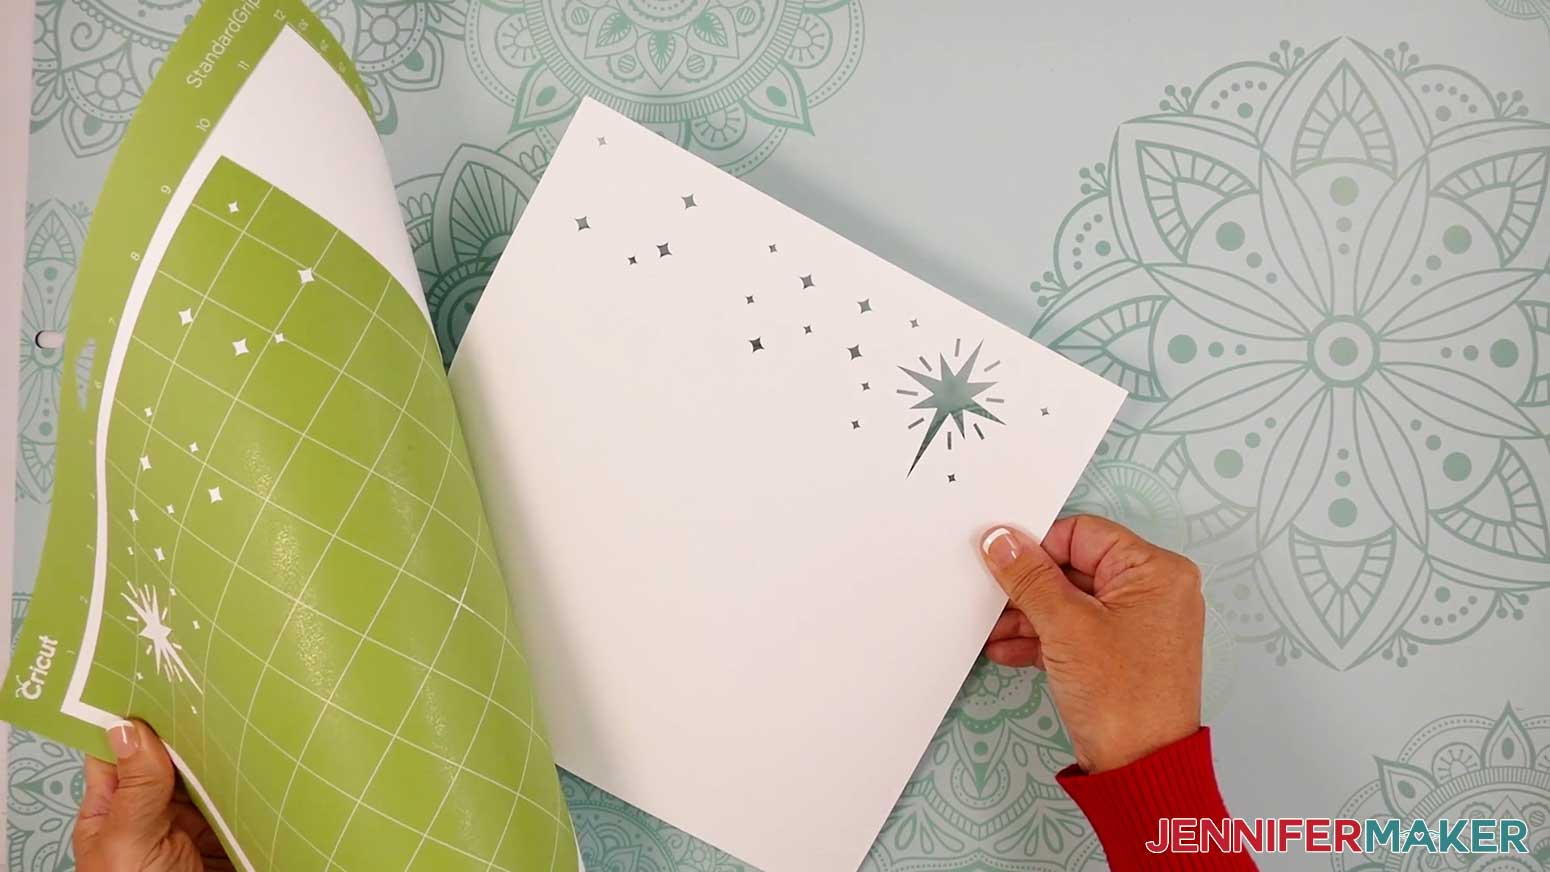
4. Place your material face up on a green StandardGrip machine mat.
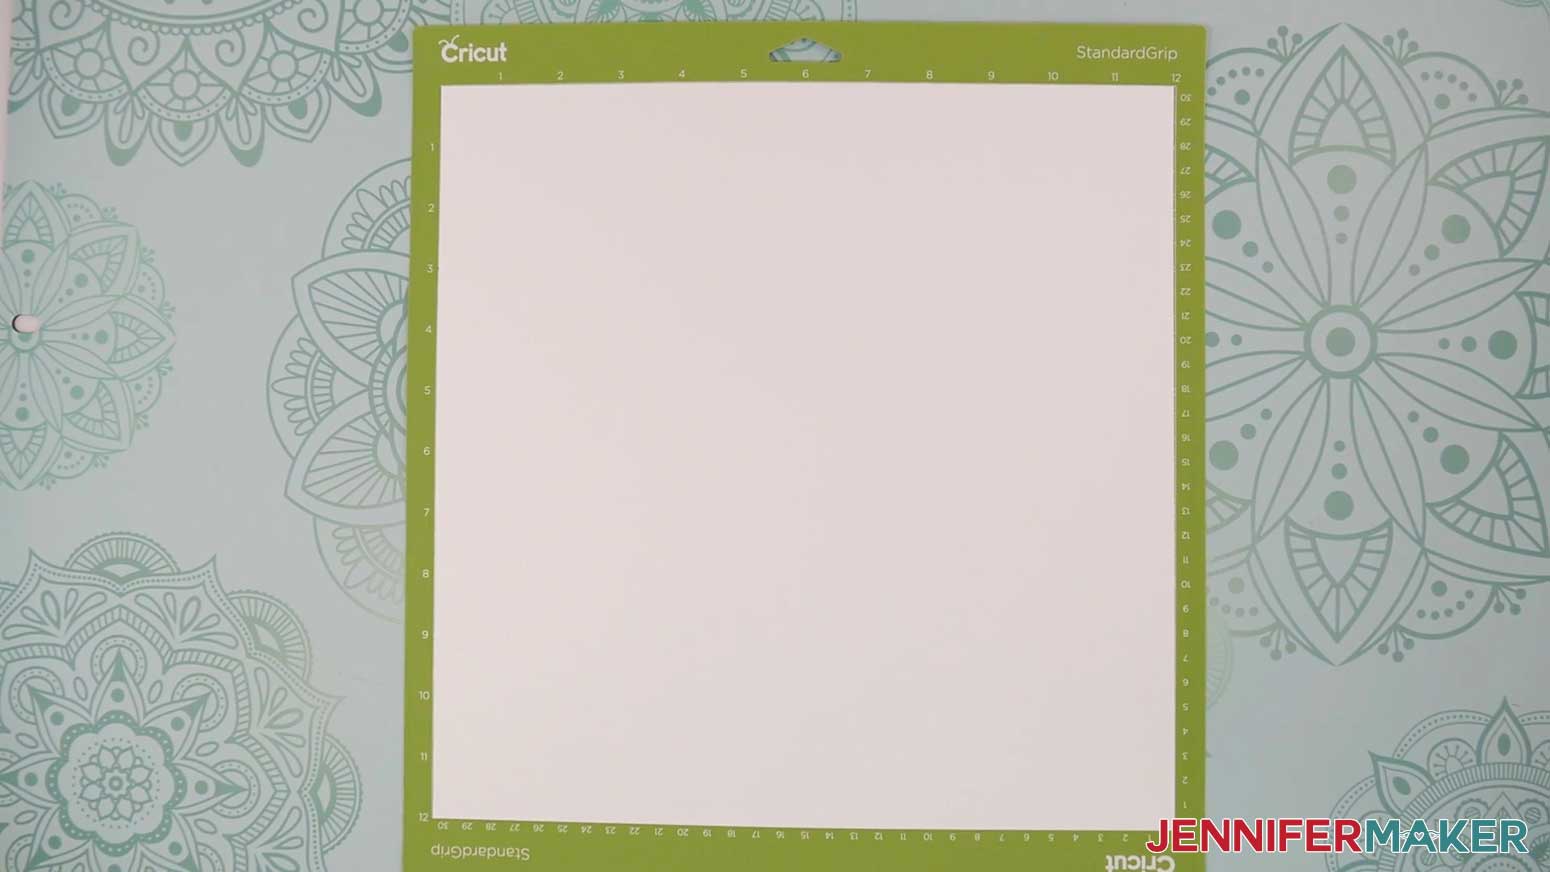
5. Use a brayer to make sure it’s fully adhered.
6. Press the flashing load/unload button to load the prepared mat into your Cricut.
7. Press the flashing middle button to begin cutting.
8. Before unloading the mat, use a weeding tool to gently lift part of the material where it’s cut to see if the cut went all the way through. If not, press the middle button to cut the design in the same spot again.
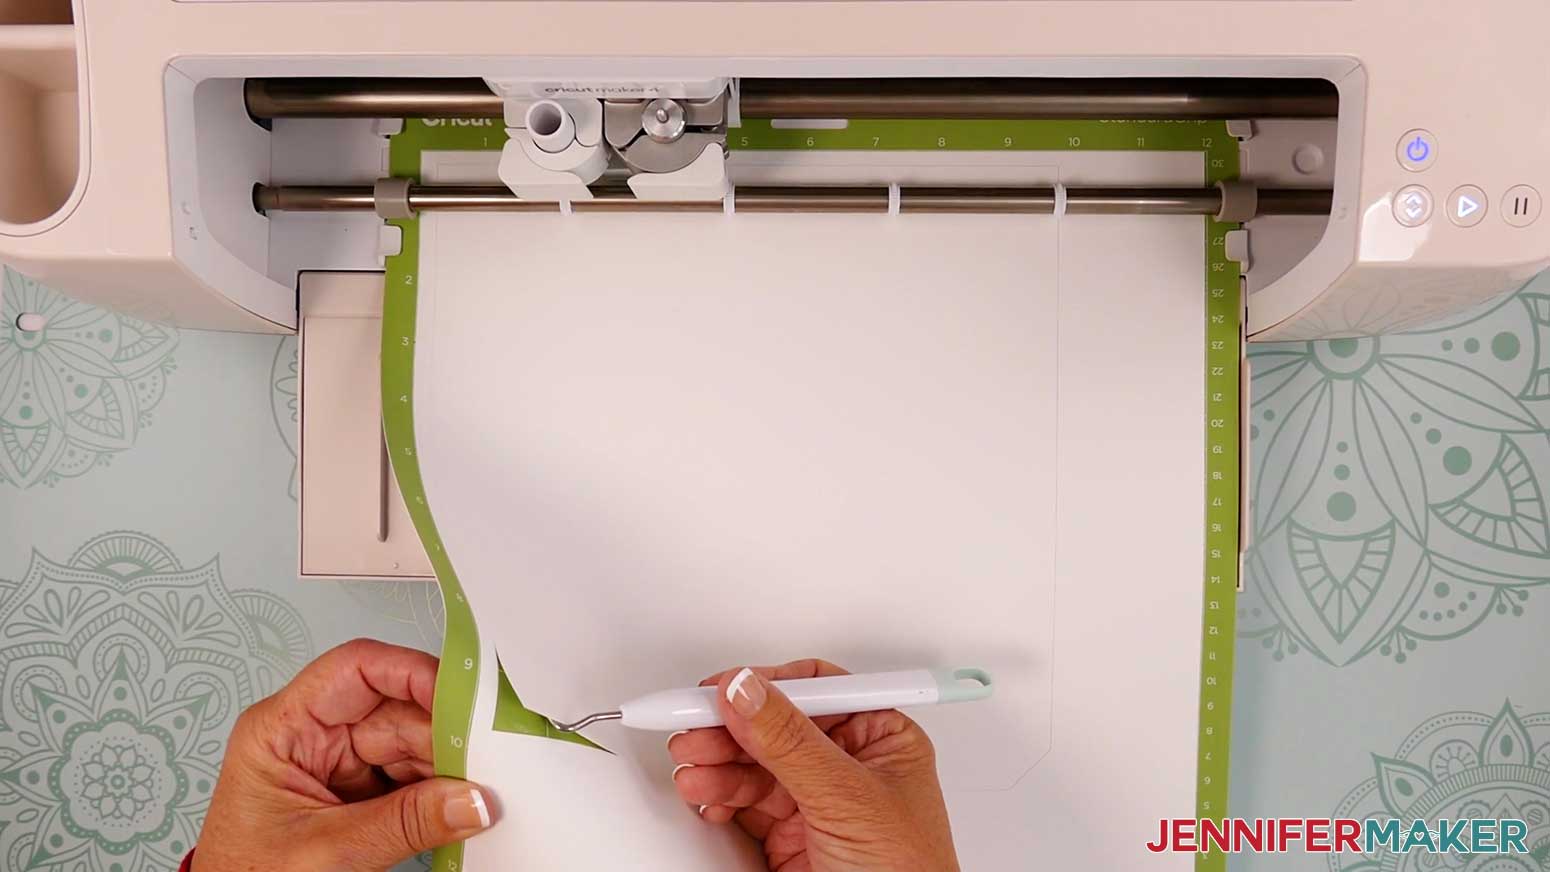
9. When it has finished cutting, unload the mat, flip it over onto your work surface, and roll it back to release the paper.
10. Use a weeding tool to poke out small bits of cardstock that may be left in cutout areas.
11. Follow steps 1-10 to cut your remaining mats.
NOTE: If you have any issues with your cuts, check out my Tips & Tricks for Cleaner Cuts tutorial.
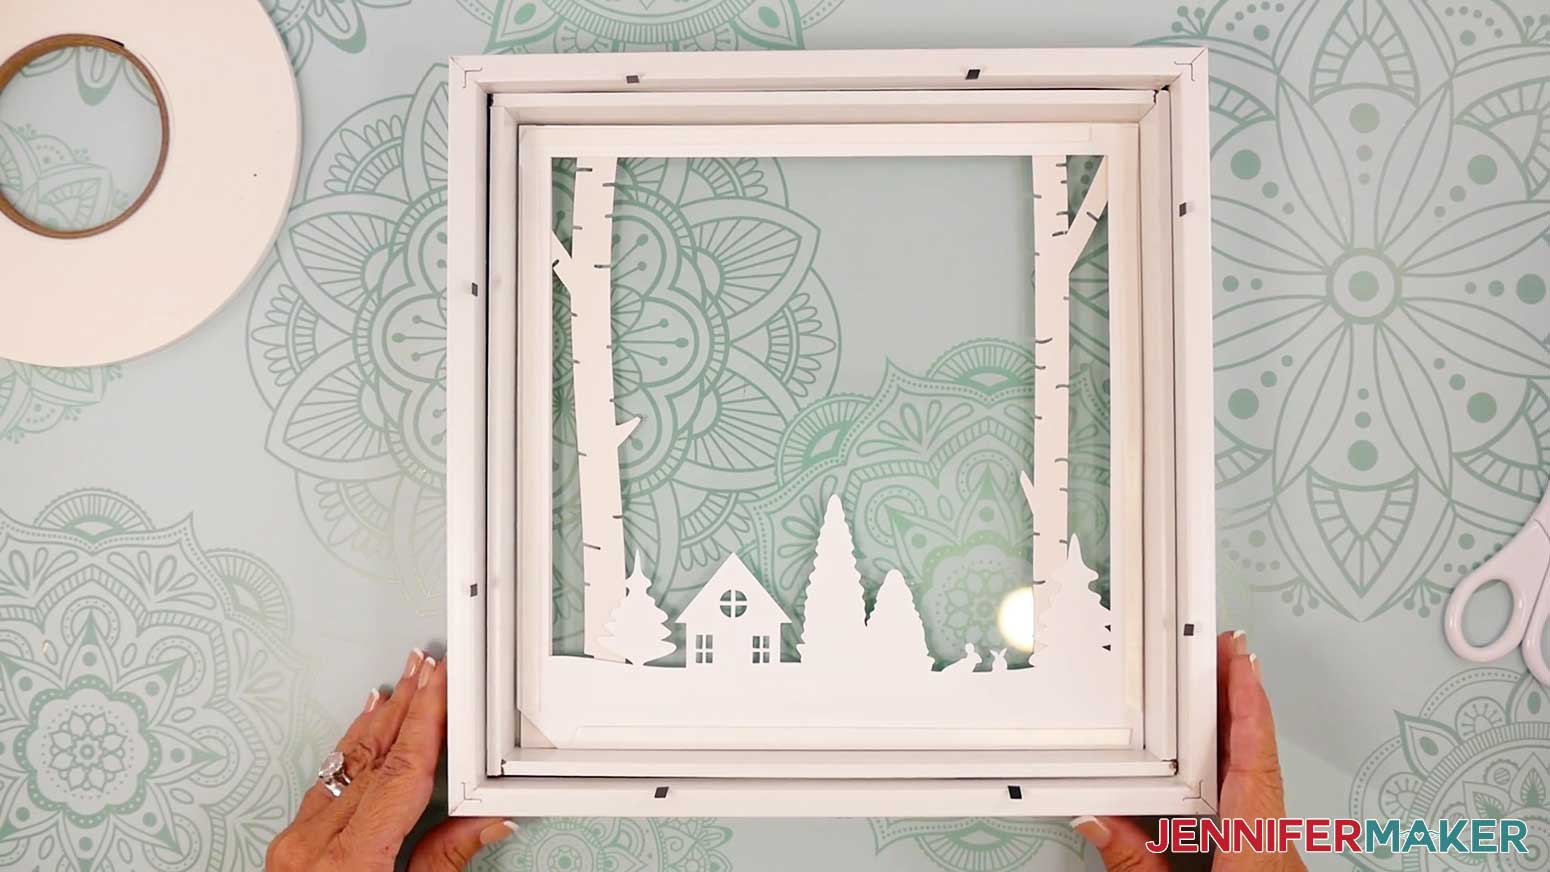
STEP 3: ASSEMBLE YOUR VILLAGE SHADOW BOX WITH LIGHTS
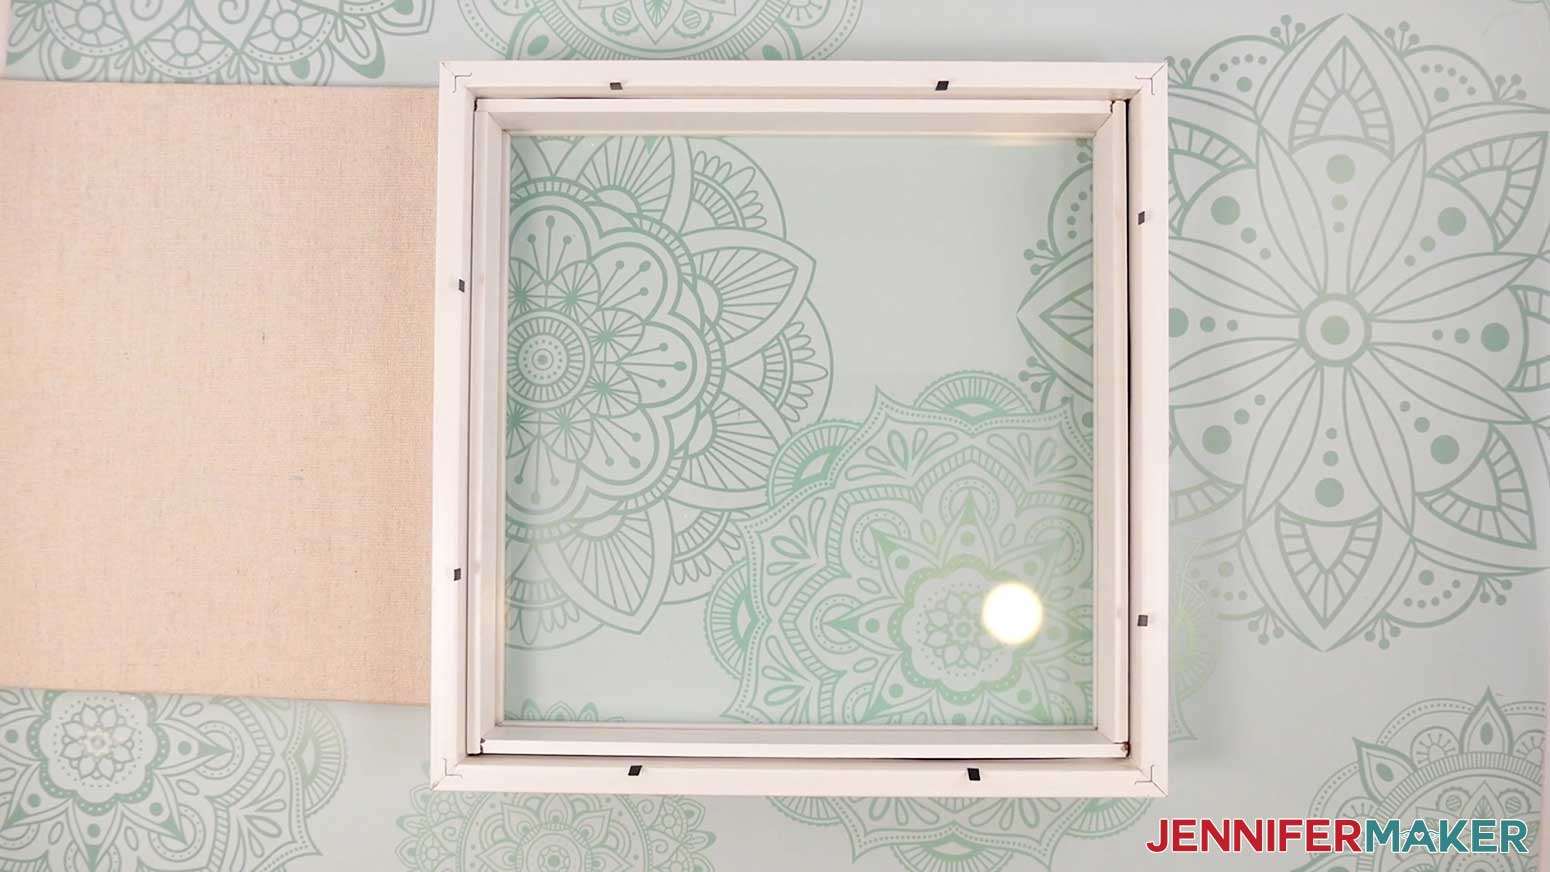
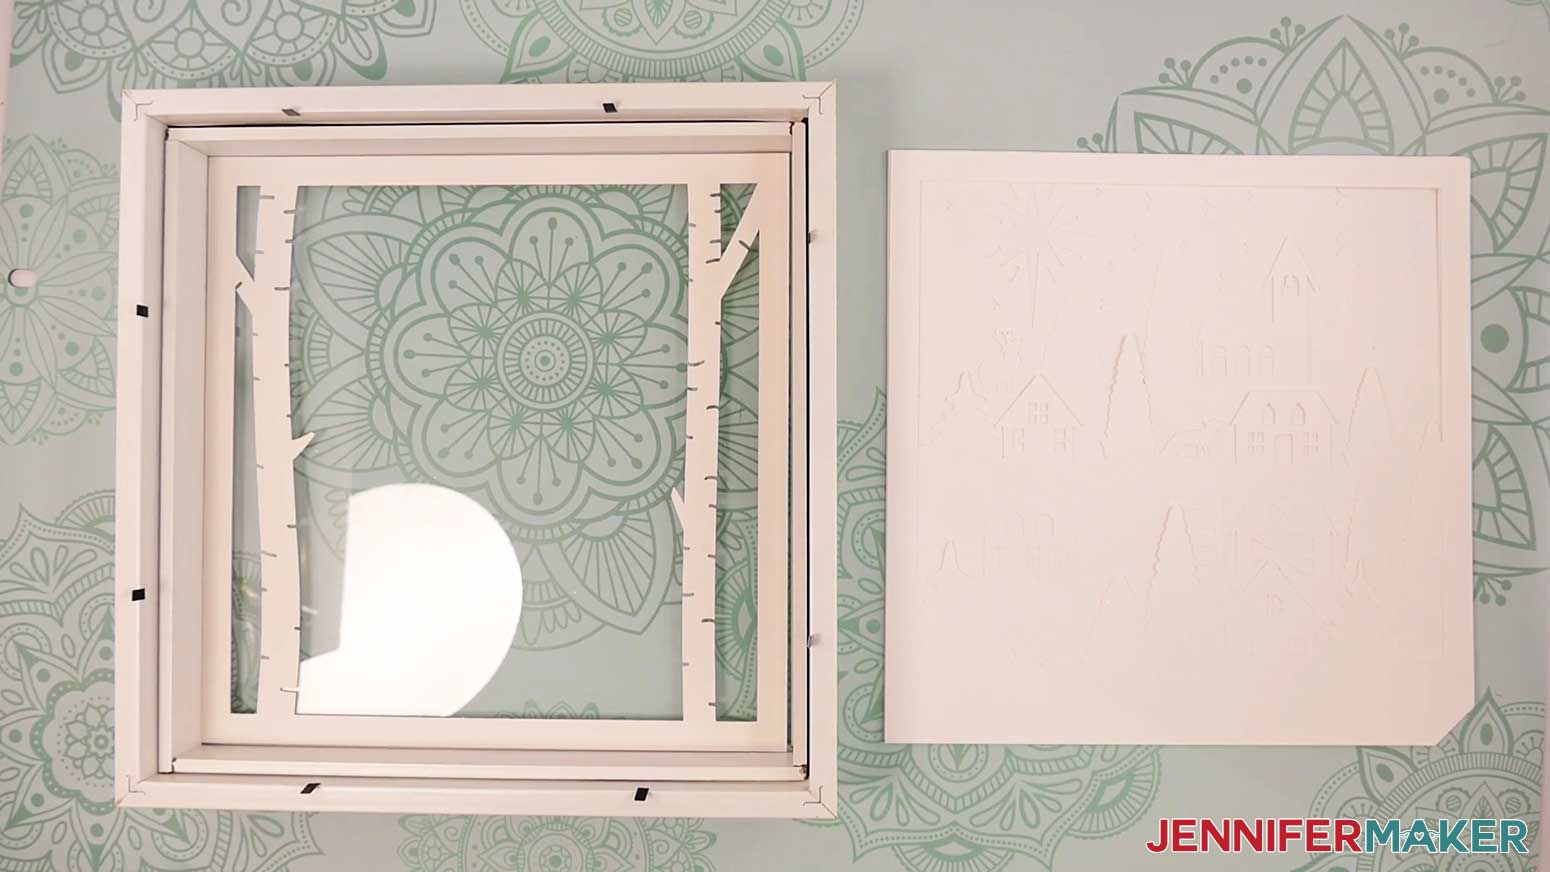
1. Use isopropyl alcohol and a lint-free cloth to clean the inside of the frame’s glass of any smudges or fingerprints.
2. Turn your shadow box frame face down on your work surface so the “top” is pointing away from you.
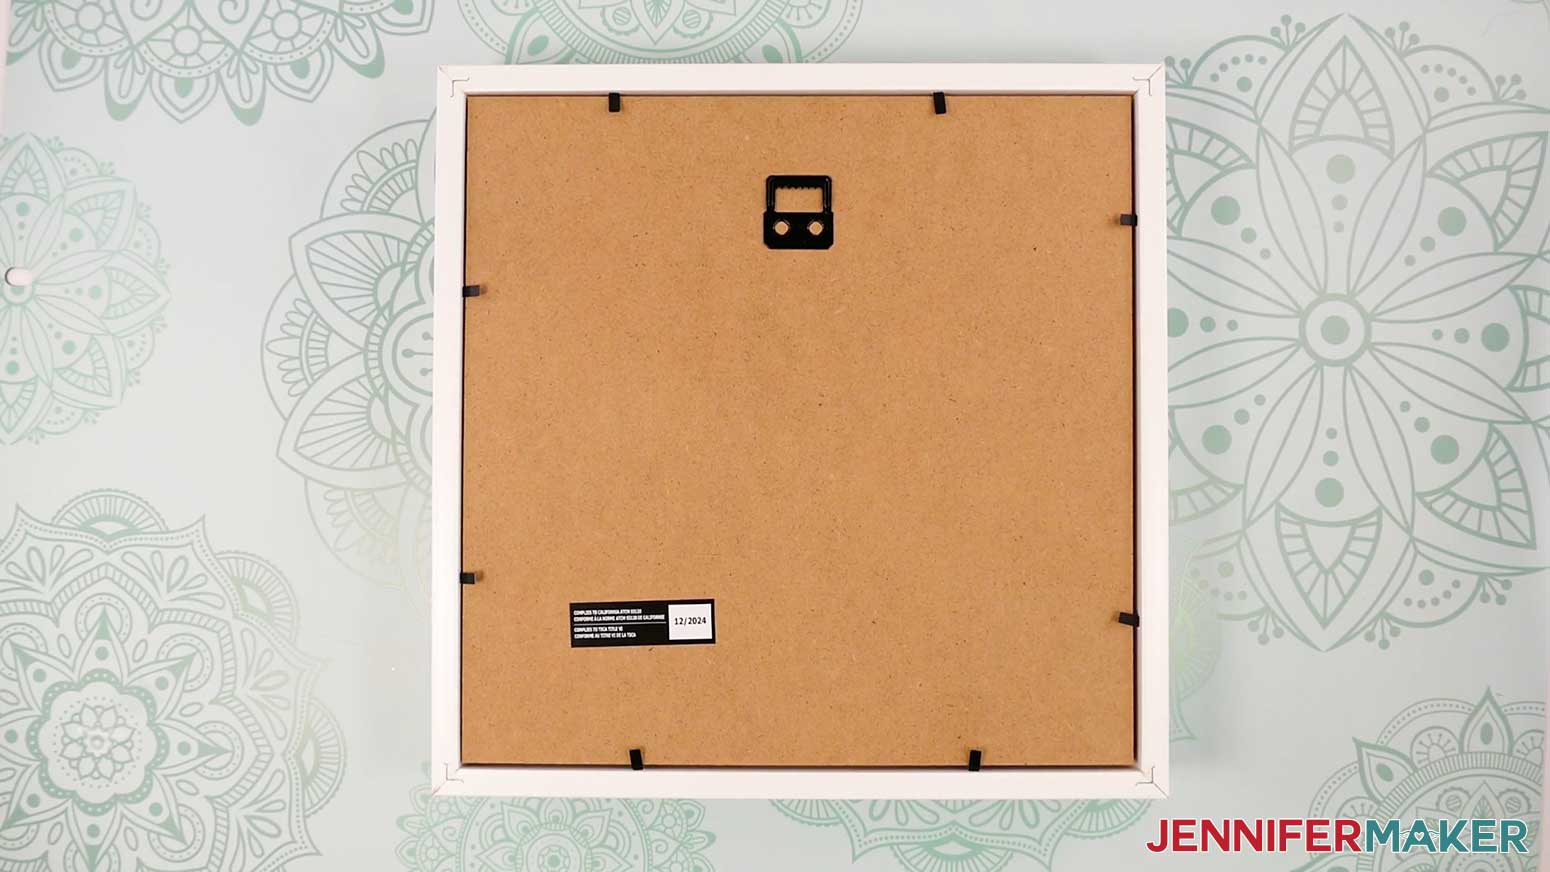
3. Remove the backer from the shadow box frame.
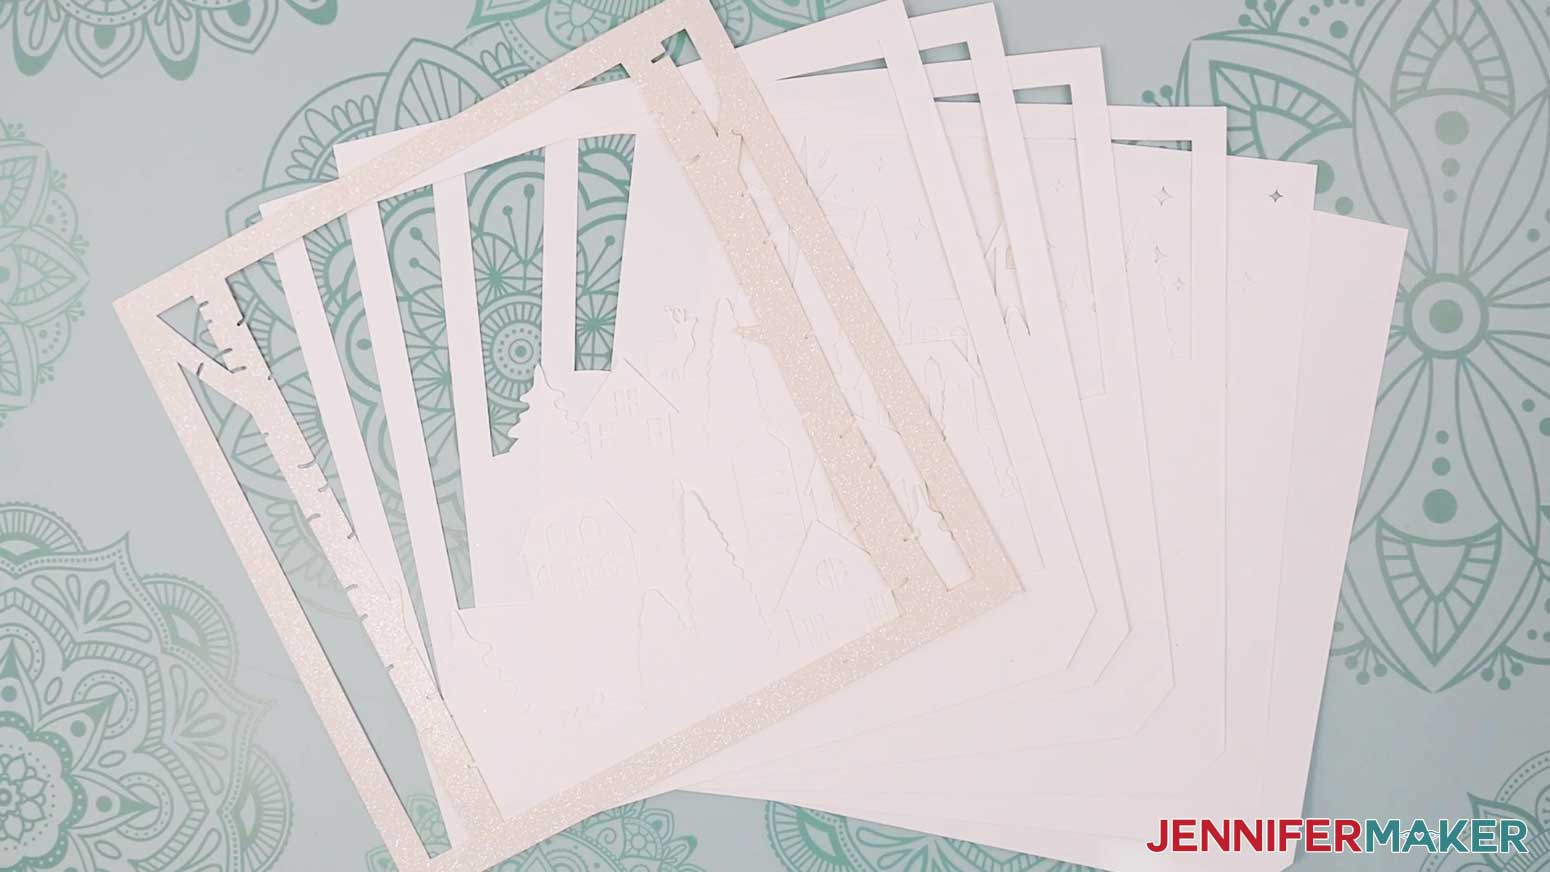
4. Stack your shadow box layers face up on your work surface, in order from front to back. The notches on layers 2-7 should align.
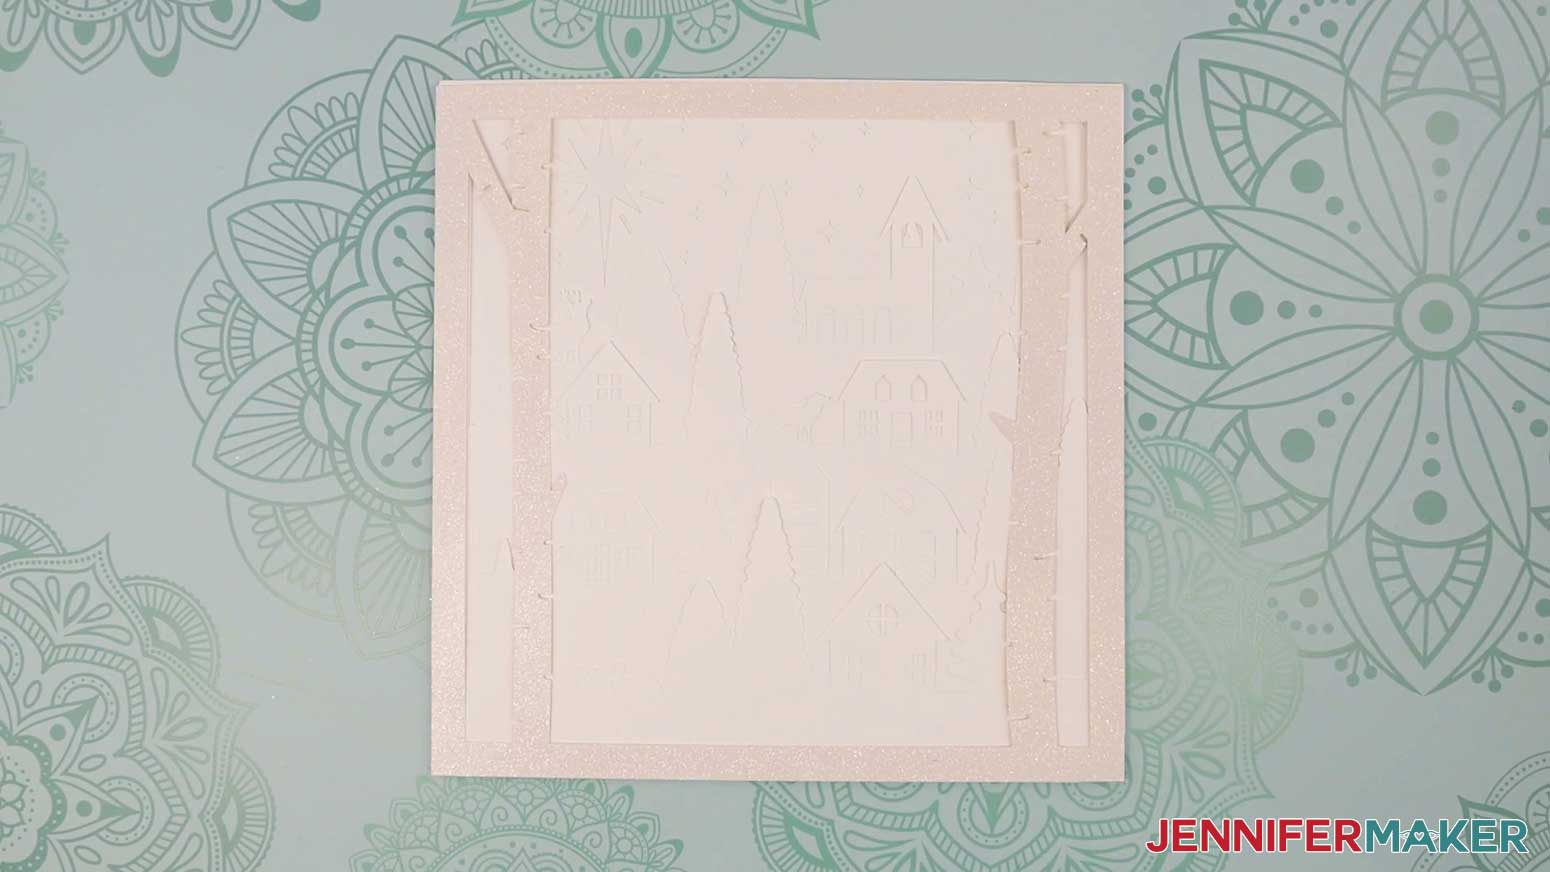
TIP: If you’re not sure if your layers are face up, or what order they go in, refer to your screen in Cricut Design Space.
5. Turn Layer 1 (the glitter cardstock birch tree layer) face down, oriented so the top of the design is pointing away from you.
NOTE: You can also assemble the layers inside the shadow box to help make sure they are perfectly aligned.
6. Grab Layer 2 (the house layer) and lay it face up on your work surface. Set the other layers aside for now.
7. Use scissors to cut four adhesive foam strips, each a little shorter than the layer’s sides (about 9.25” long if you didn’t resize your design).
8. Leave the backing on one side, and adhere one adhesive foam strip to each outer edge of the front of Layer 2, making sure it doesn’t overlap the notch or the outer edges of the layer.
NOTE: Use scissors to trim the length of the strip if it extends past the edge of the layer.
9. Remove the backing from the adhesive foam strips on the front of Layer 2.
10. Turn Layer 2 face down, and lay it on top of Layer 1 so the top of the design is pointing away from you.
11. Use scissors to cut four adhesive foam strips, each a little shorter than each layer’s sides.
12. Leave the backing on one side, and adhere one adhesive foam strip to each outer edge of the back of Layer 2, making sure it doesn’t overlap the notch or the outer edges of the layer.
13. It’s easiest to prepare the other layers in advance, so repeat steps 11-12 with Layers 3, 4, 5, and 6, stacking them face down to the side (not inside the frame) as you go.
NOTE: Remember to keep the backing ON the exposed sides of the adhesive foam strips for now.
14. Check your light strands to make sure they work. You may need to remove the plastic protector in the battery compartment first.
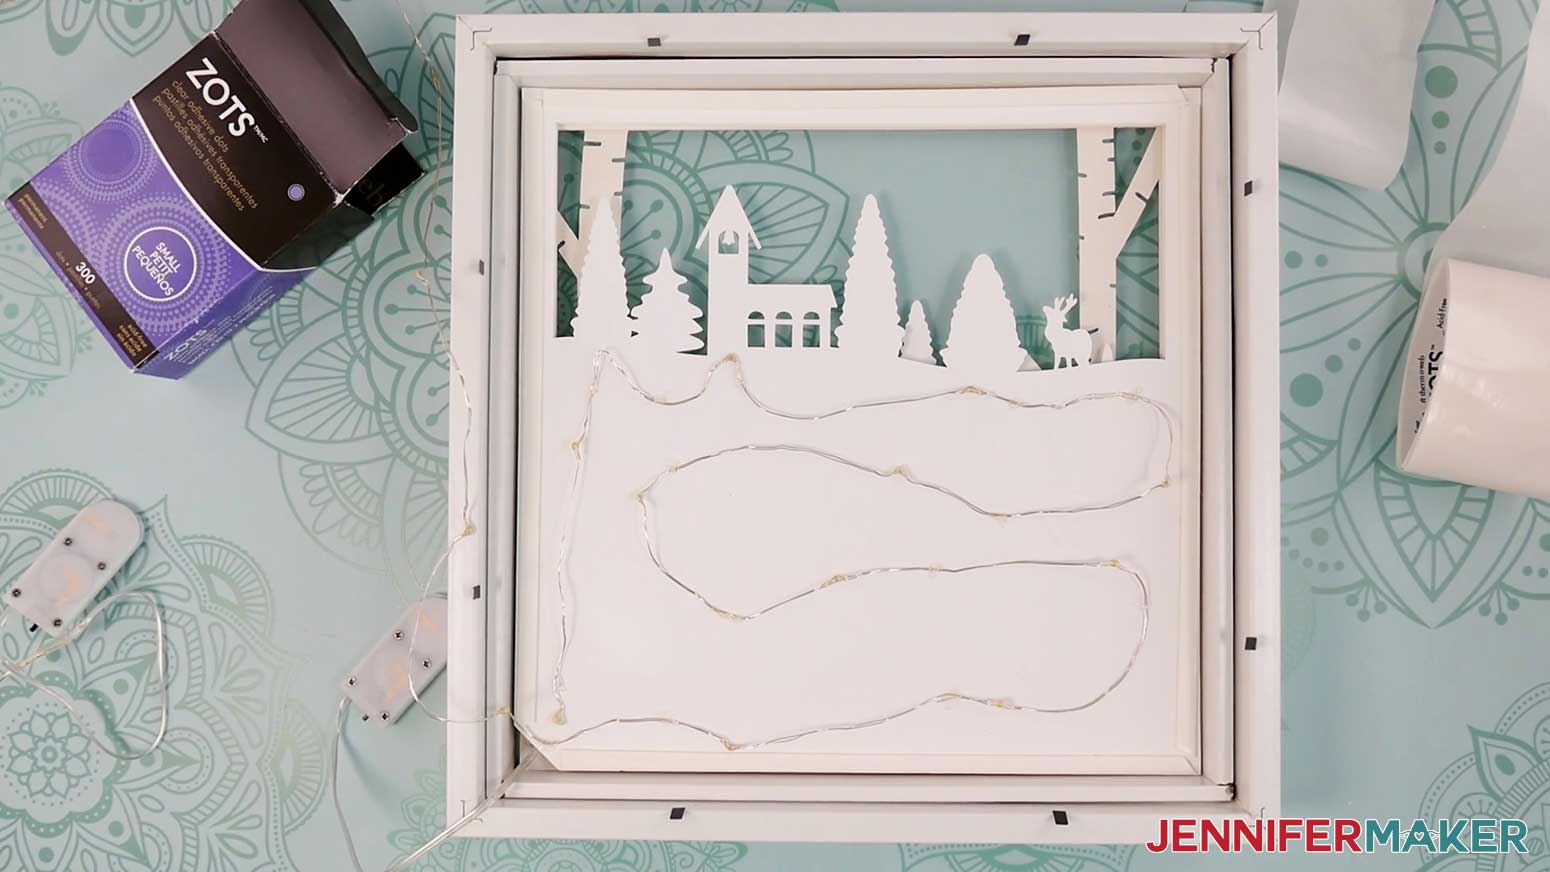
NOTE: I used one light strand across Layers 2, 3, and 4 and one light strand across Layers 5 and 6.
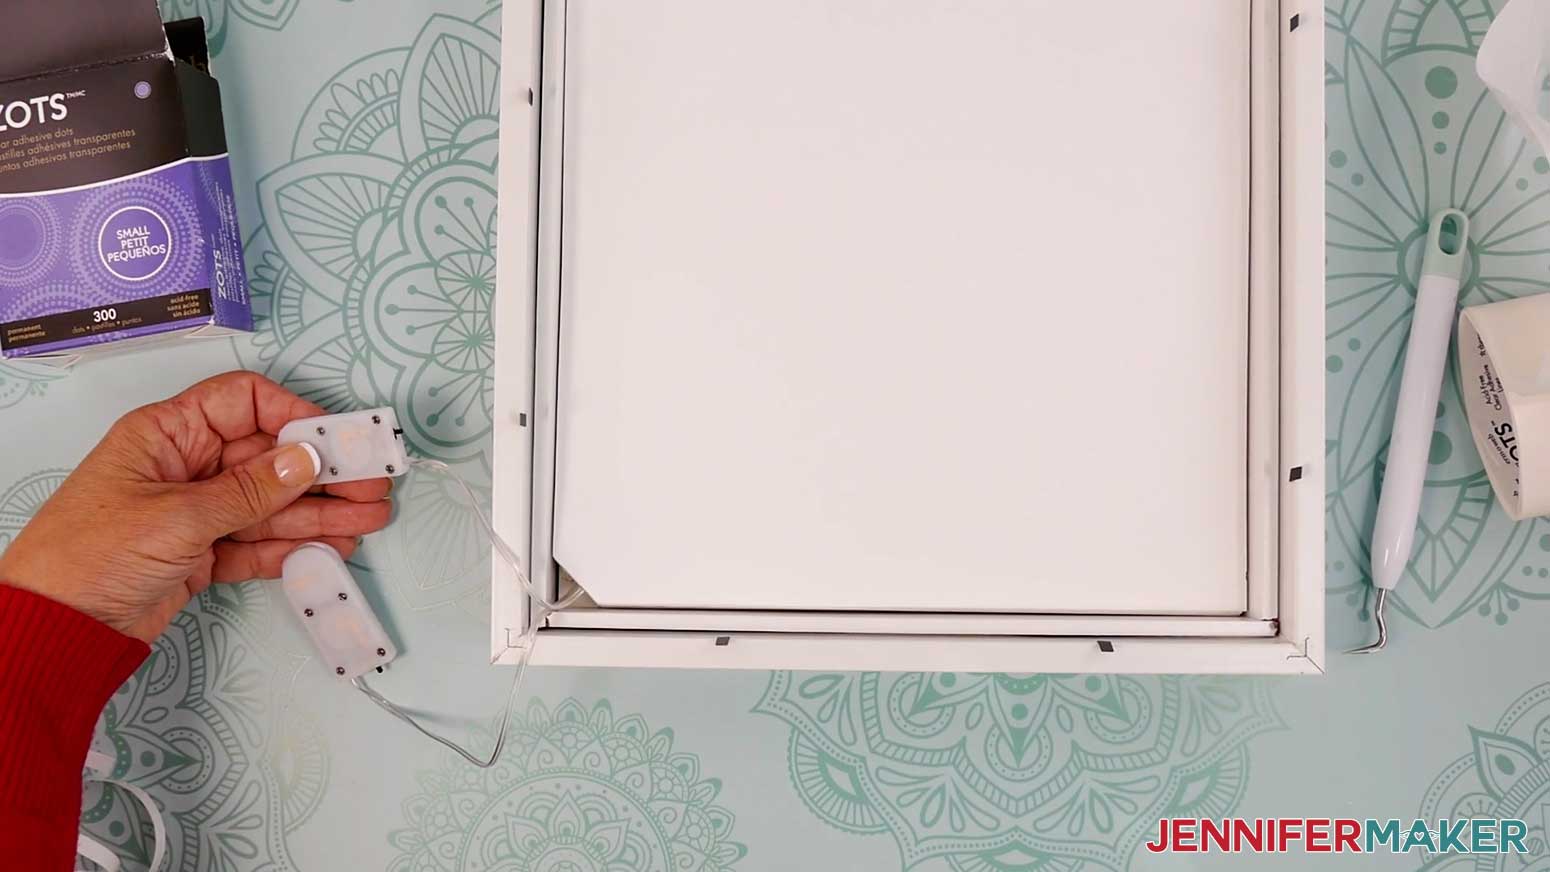
15. Starting at the beginning of the strand furthest away from the battery pack, place the strand onto a solid area on the back of Layer 2, then adhere it to the paper by placing a small Zot glue dot over the wire.
NOTE: Do NOT apply the Zots near or over the lights or light housings.
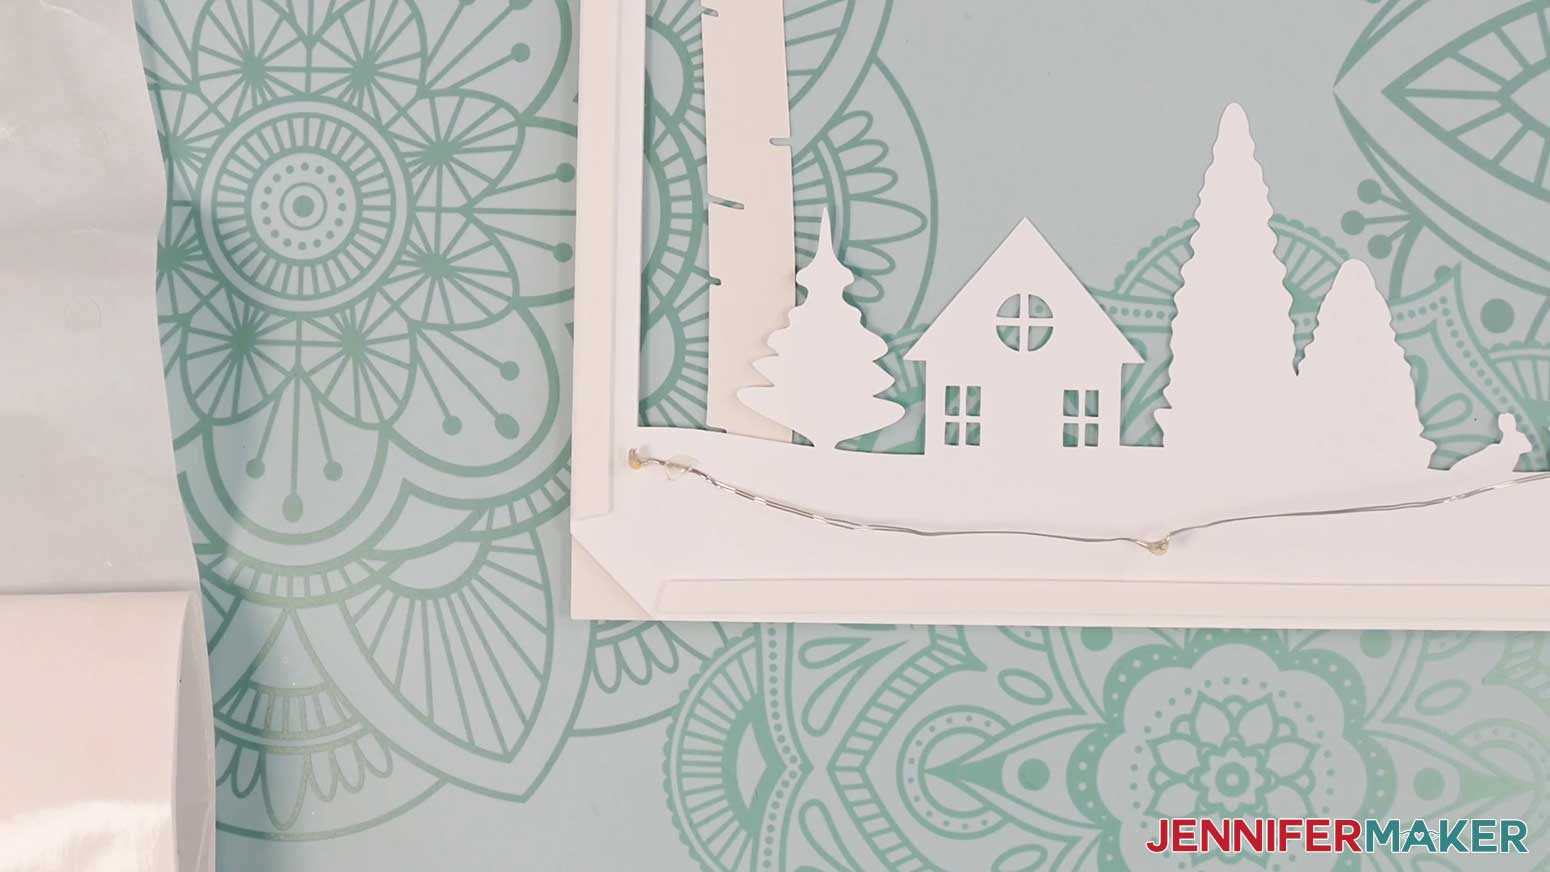
16. Continue using small Zots to adhere about ⅓ of the fairy lights strand to the back of Layer 2, spacing the lights evenly, and looping them around the solid design of the layer two to three times, moving back toward the notched corner. Avoid overlapping the wire with itself.
17. Once the solid area is covered with fairy lights, position the wire and battery pack out over the notched corner, securing the wire with another Zot.
18. Peel back about half of the protective backing from the adhesive foam strip on the left edge of Layer 2.
19. Grab Layer 3 (the barn layer), hold it face down, and align its edges with Layer 2.
NOTE: The notches in Layers 2 and 3 should be in the same corner.
20. Press Layer 3 down onto the exposed adhesive foam.
21. Keeping the edges aligned, remove the remaining backing from the adhesive foam on the left side, and press Layer 3 into place on that edge.
22. Remove the backing from the remaining adhesive foam strips on Layer 2, one at a time, and press Layer 3 into place, keeping the edges aligned.
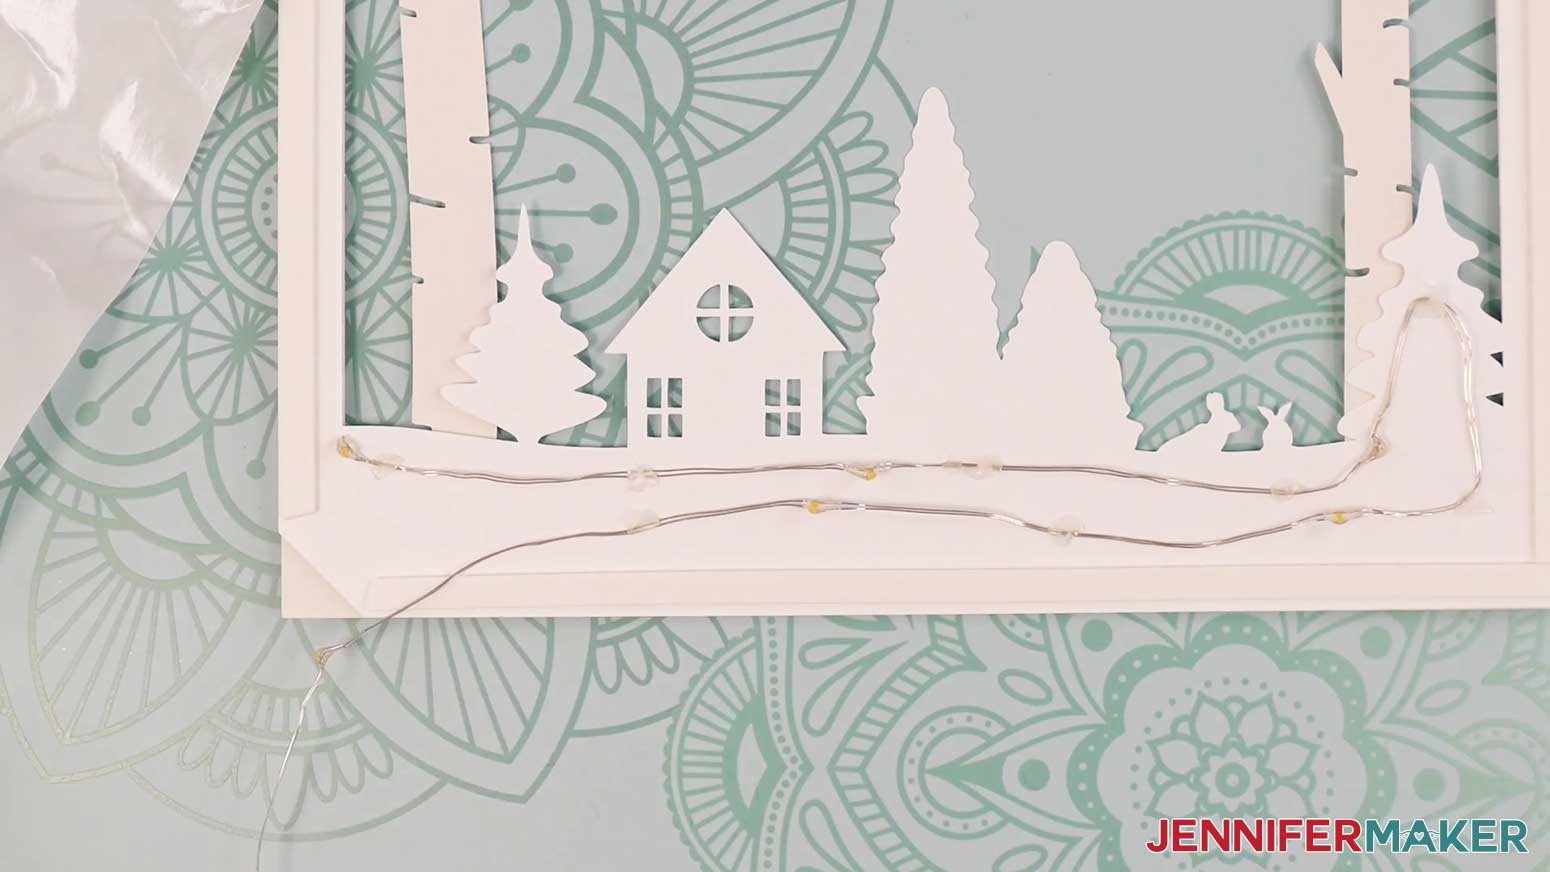
23. Grab the loose end of the fairy light strand you applied to the back of Layer 2, and use Zots to adhere ½ of the remaining lights to the back of Layer 3, spacing the lights evenly, and looping them around the solid design of the layer 2-3 times, moving back toward the notched corner.
24. Once the solid area is covered in lights, feed the wire and battery pack out over the notched corner, securing the wire at the notch with another Zot.
25. Peel back about half of the protective backing from the adhesive foam strip on the left edge of Layer 3.
26. Grab Layer 4 (the fox layer), hold it face down, and align its edges with Layer 3.
NOTE: The notches in Layers 3 and 4 should be in the same corner.
27. Press Layer 4 down onto the exposed adhesive foam.

28. Keeping the edges aligned, remove the remaining backing from the adhesive foam strip on the left side, and press Layer 4 into place on that edge.
29. Remove the backing from the remaining adhesive foam strips on Layer 3, one at a time, and press Layer 4 into place, keeping the edges aligned.
30. Grab the loose end of the fairy light strand you applied to the back of Layer 3, and use Zots to apply the remainder of the strand to the back of Layer 4, spacing the lights evenly, and looping them around the solid design of the layer two to three times.
31. Once the solid area is covered in lights, feed the wire and battery pack out through the notched corner, securing the wire at the notch with another Zot.
32. Peel back about half of the protective backing from the adhesive foam strip on the left edge of Layer 4.
33. Grab Layer 5 (the church layer), hold it face down, and align its edges with Layer 4.
NOTE: The notches in Layers 4 and 5 should be in the same corner.
34. Press Layer 5 down onto the exposed adhesive foam.

35. Keeping the edges aligned, remove the remaining backing from the adhesive foam strip on the left side, and press Layer 5 into place on that edge.
36. Remove the backing from the remaining adhesive foam strips on layer 4, one at a time, and press Layer 5 into place, keeping the edges aligned.
37. Set the battery pack for the first light strand to the side for now.
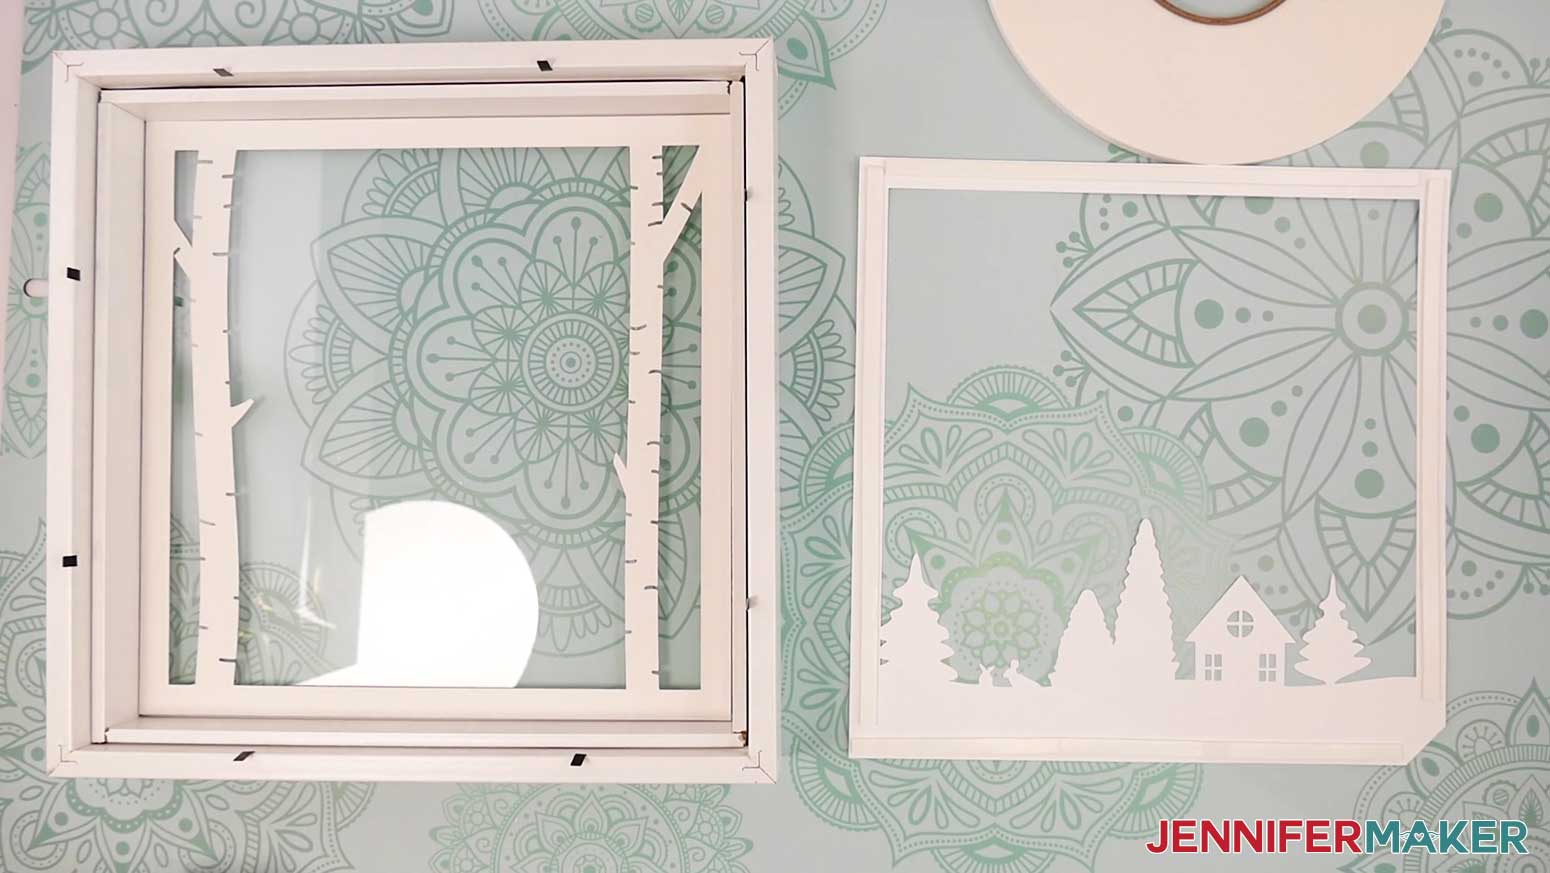
38. Grab your second strand of fairy lights, and use Zots to apply about ½ of the strand to the back of Layer 5, spacing the lights evenly, and looping them around the solid design.
39. Once the solid area is covered in lights, feed the wire and battery pack out through the notched corner, securing the wire at the notch with another Zot.
40. Peel back about half of the protective backing from the adhesive foam strip on the left edge of Layer 5.
41. Grab Layer 6 (the star layer), hold it face down, and align its edges with Layer 5.
NOTE: The notches in Layers 5 and 6 should be in the same corner.
42. Press Layer 6 down onto the exposed adhesive foam.
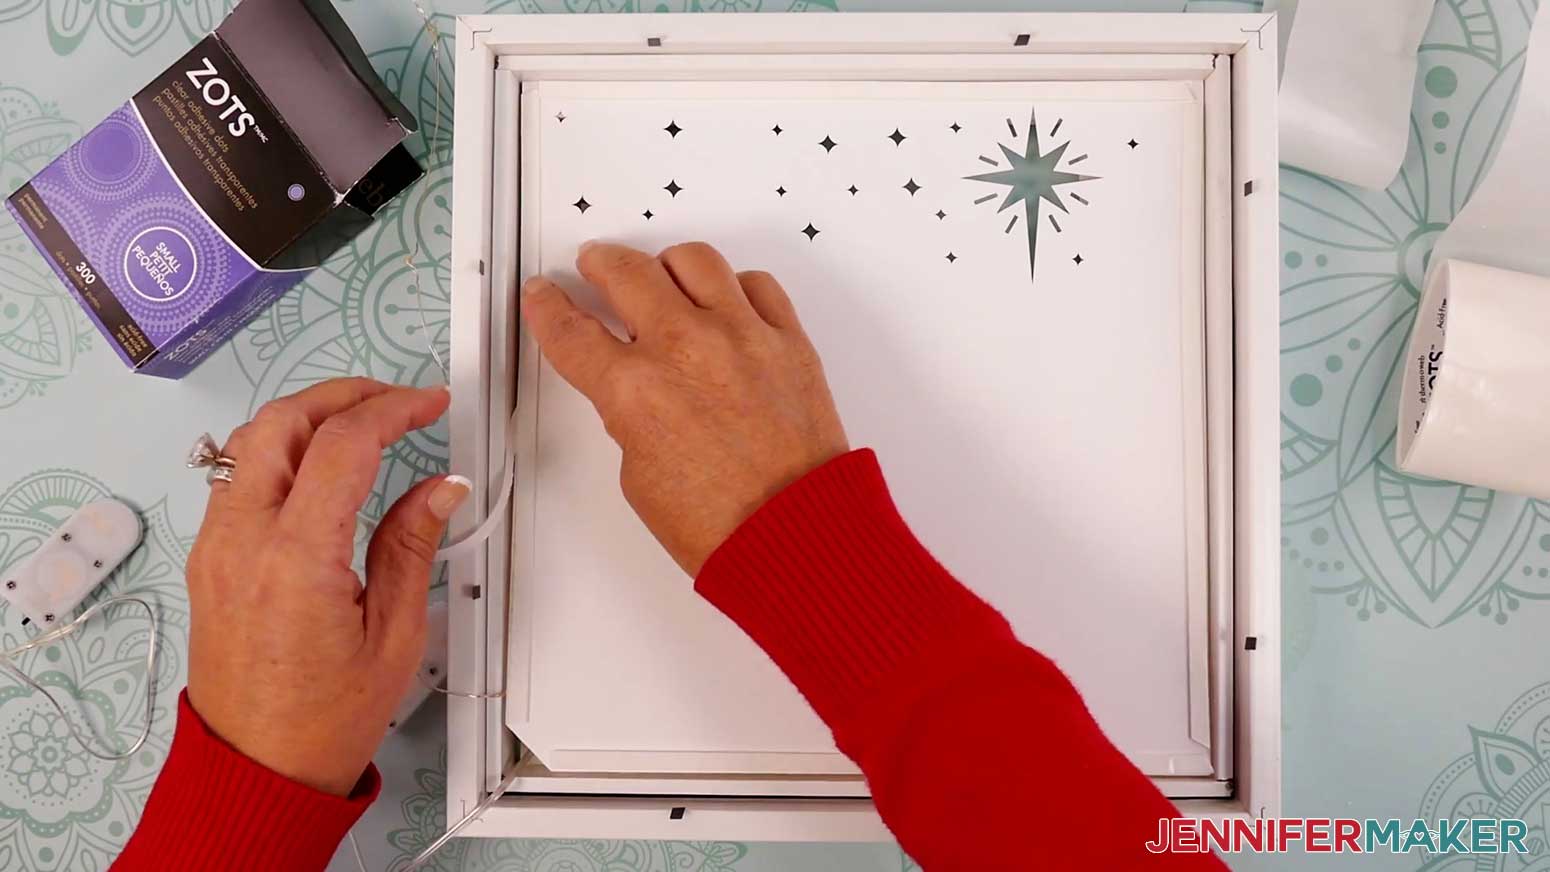
43. Keeping the edges aligned, remove the remaining backing from the adhesive foam strip on the left side, and press Layer 6 into place on that edge.
44. Remove the backing from the remaining adhesive foam strips on Layer 5, one at a time, and press Layer 6 into place, keeping the edges aligned.
45. Grab the loose end of the fairy light strand you applied to the back of Layer 5, and use Zots to apply the remainder of the strand to the back of Layer 6, spacing the lights evenly, and looping them around the back of the layer, including within the area with the star cutouts.
46. Once the layer is covered in lights, feed the wire and battery pack out through the notched corner, securing the wire at the notch with another Zot.
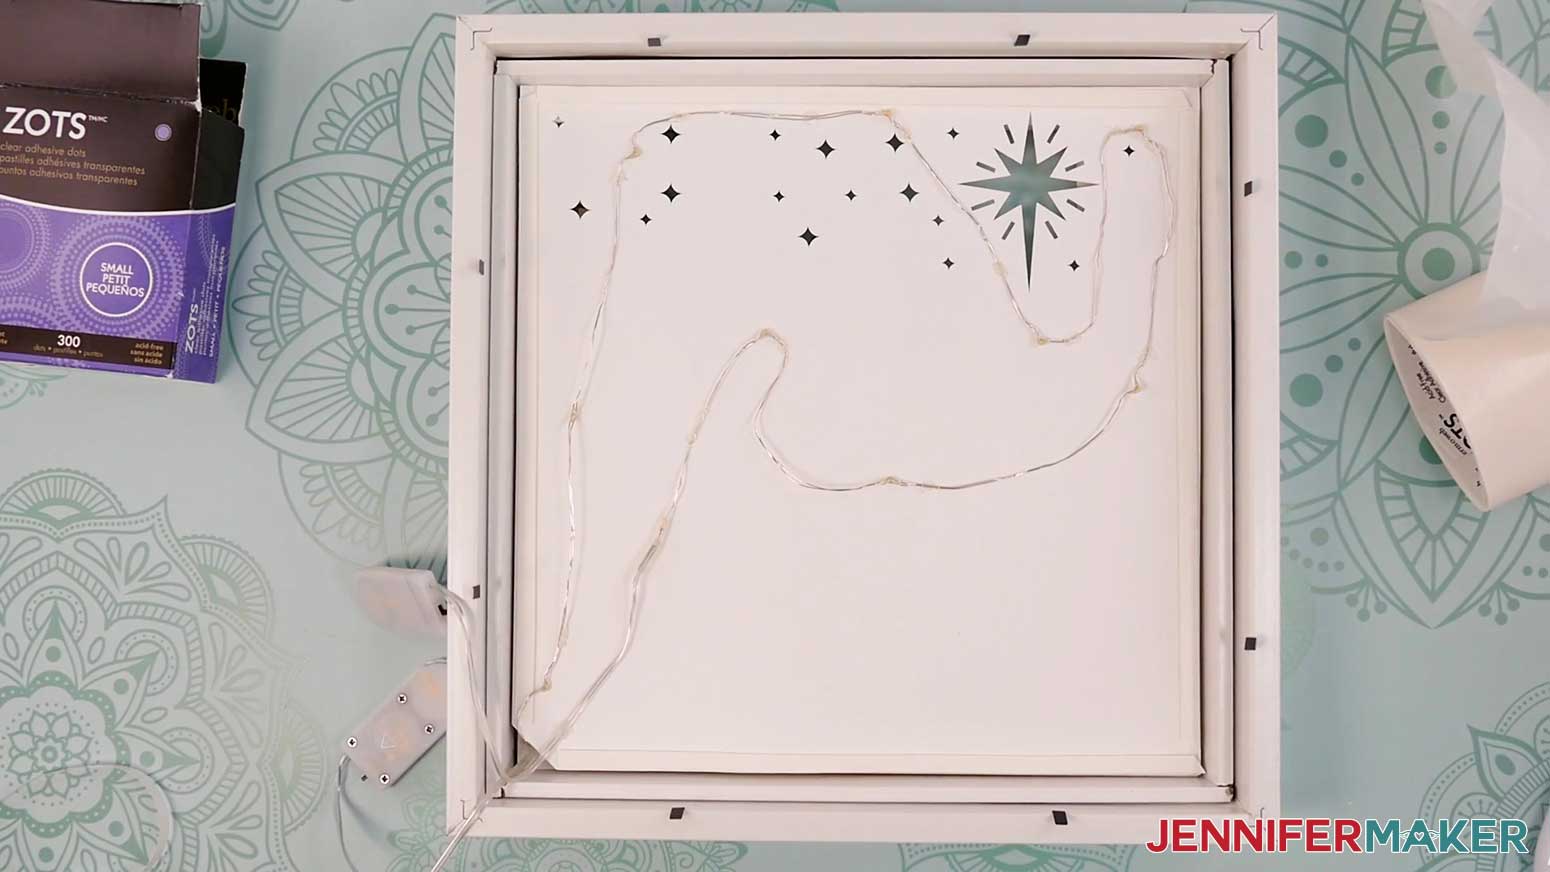
47. Peel back about half of the protective backing from the adhesive foam strip on the left edge of Layer 6.
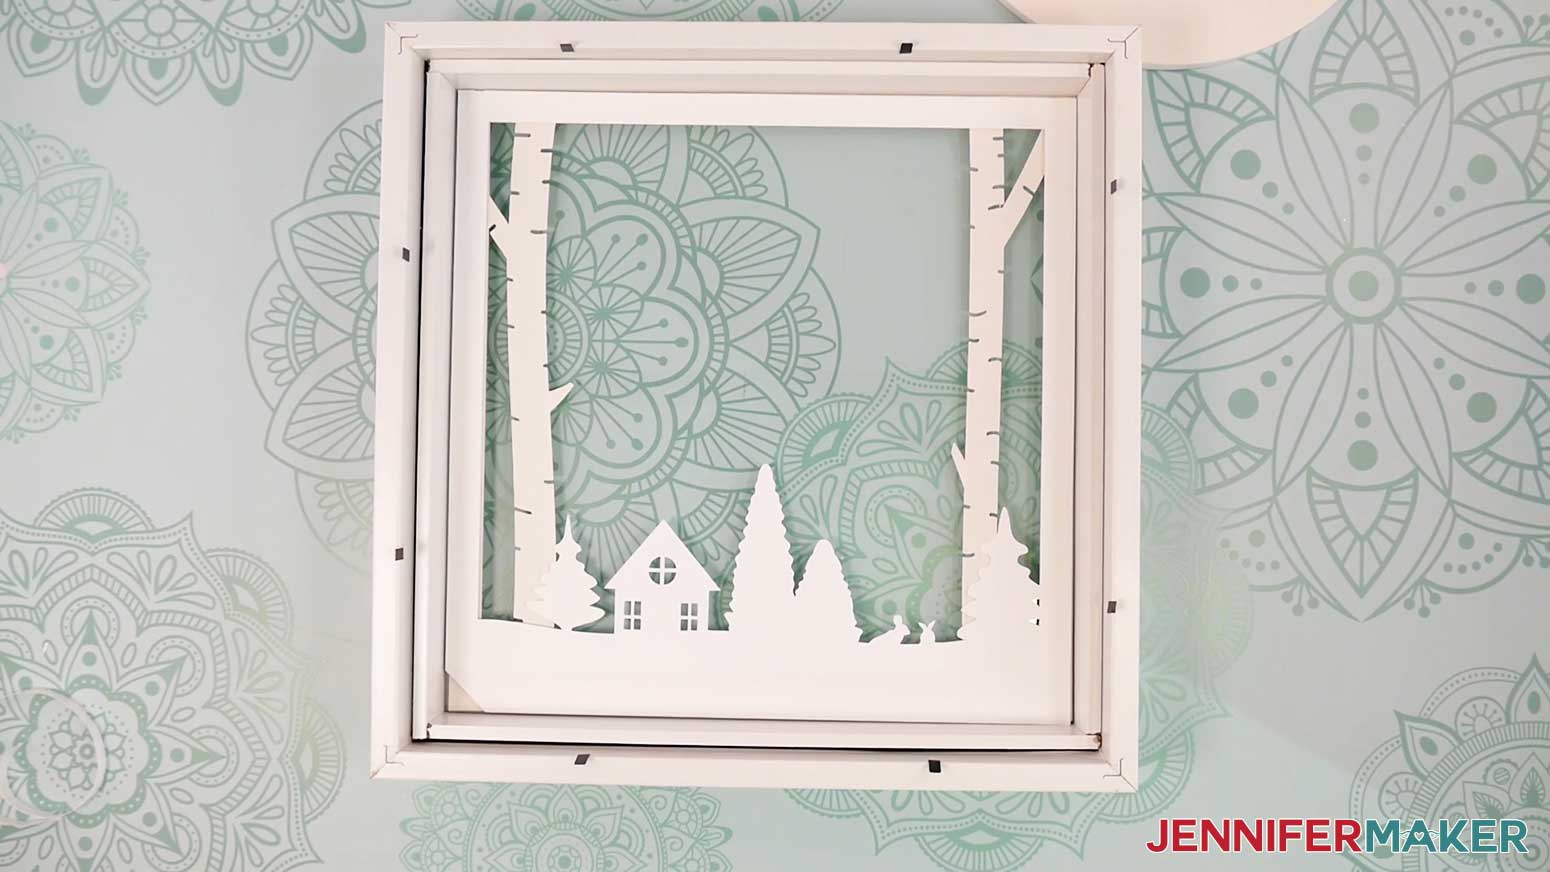
48. Grab Layer 7 (the solid backing layer), hold it face down, and align its edges with Layer 6.
49. Press Layer 7 down onto the exposed adhesive foam.
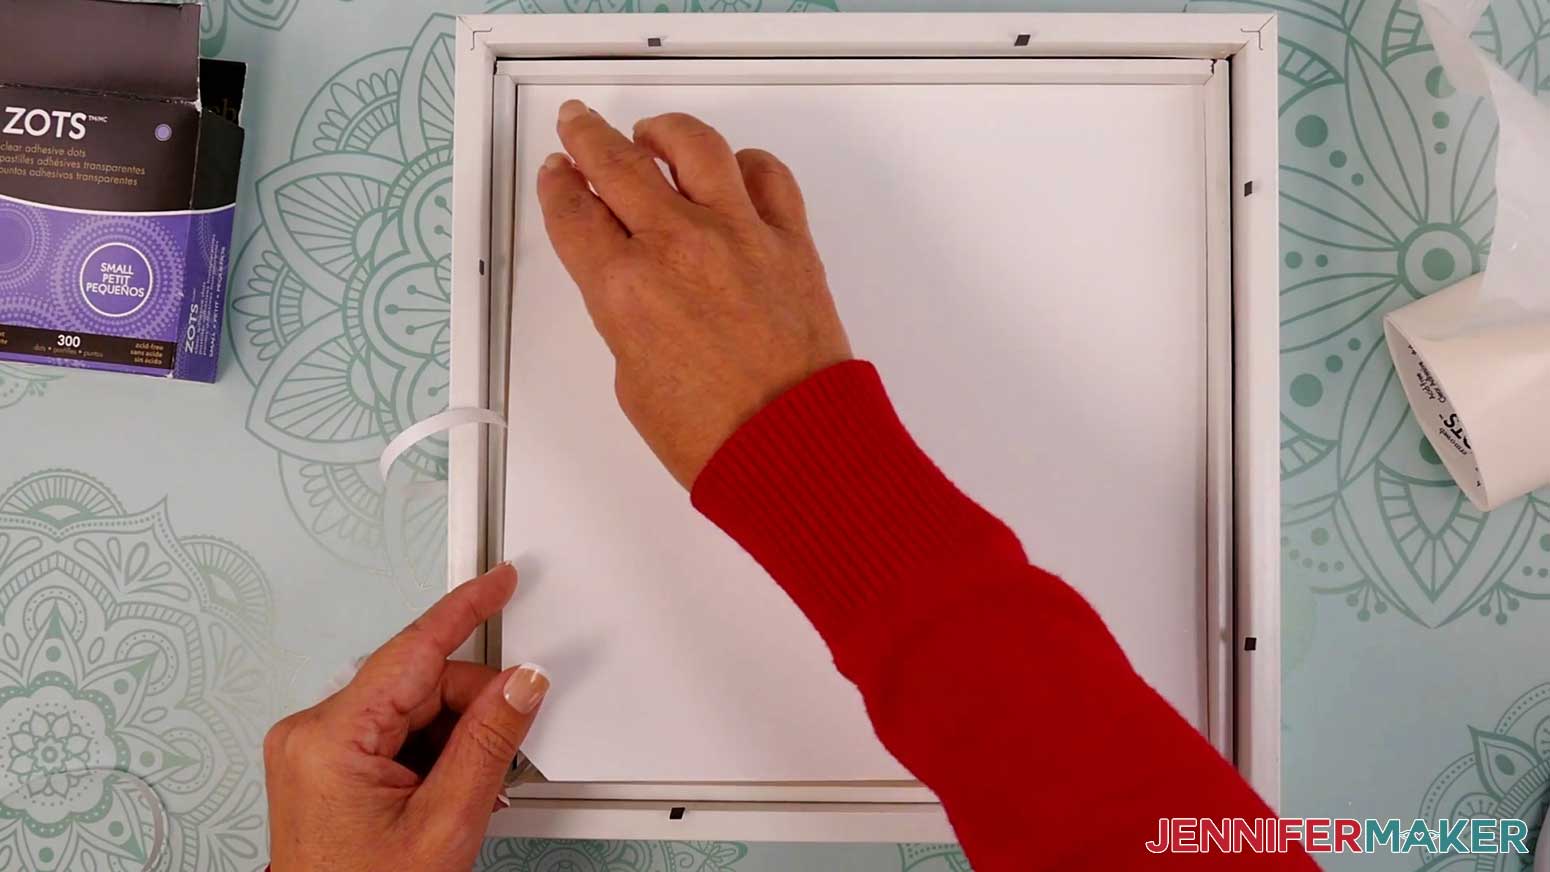
50. Keeping the edges aligned, remove the remaining backing from the adhesive foam strip on the left side, and press Layer 7 into place on that edge.
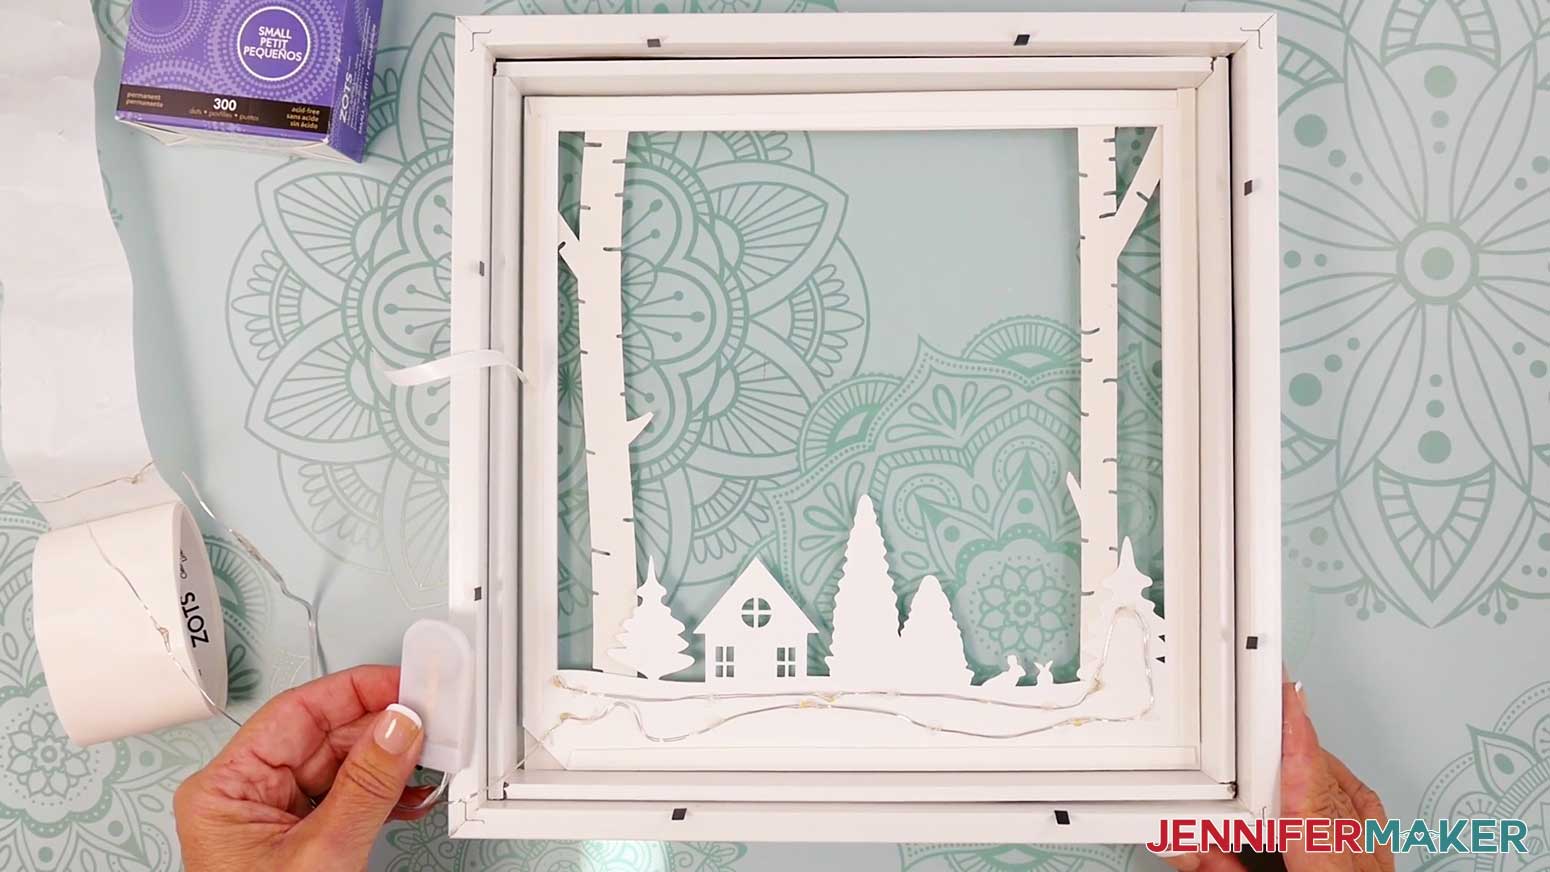
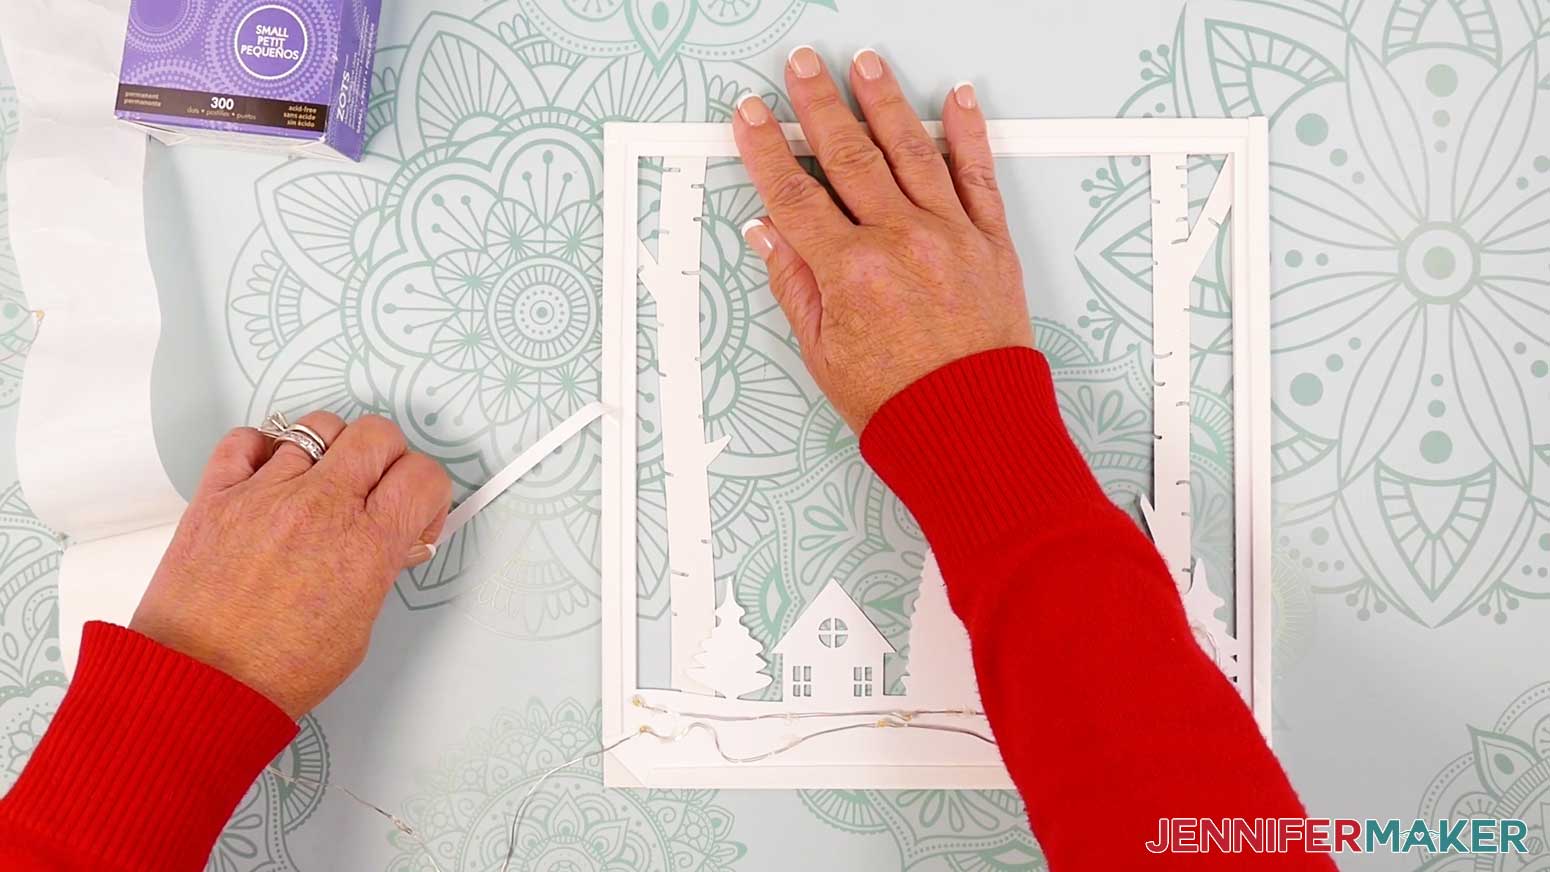
51. If you assembled your layers and lights outside of your shadow box frame, gently pick up your assembled design and place it inside the frame so it’s oriented correctly.
NOTE: Make sure both battery packs are feeding out of the box through the notches in the layered design.
52. If there’s a gap between the cardstock and where the frame’s backer will sit, the layers could move around during hanging. You can make spacers to fill the void and hold the design in place. Fold a rectangular scrap of cardstock in thirds to make a rolled triangle.
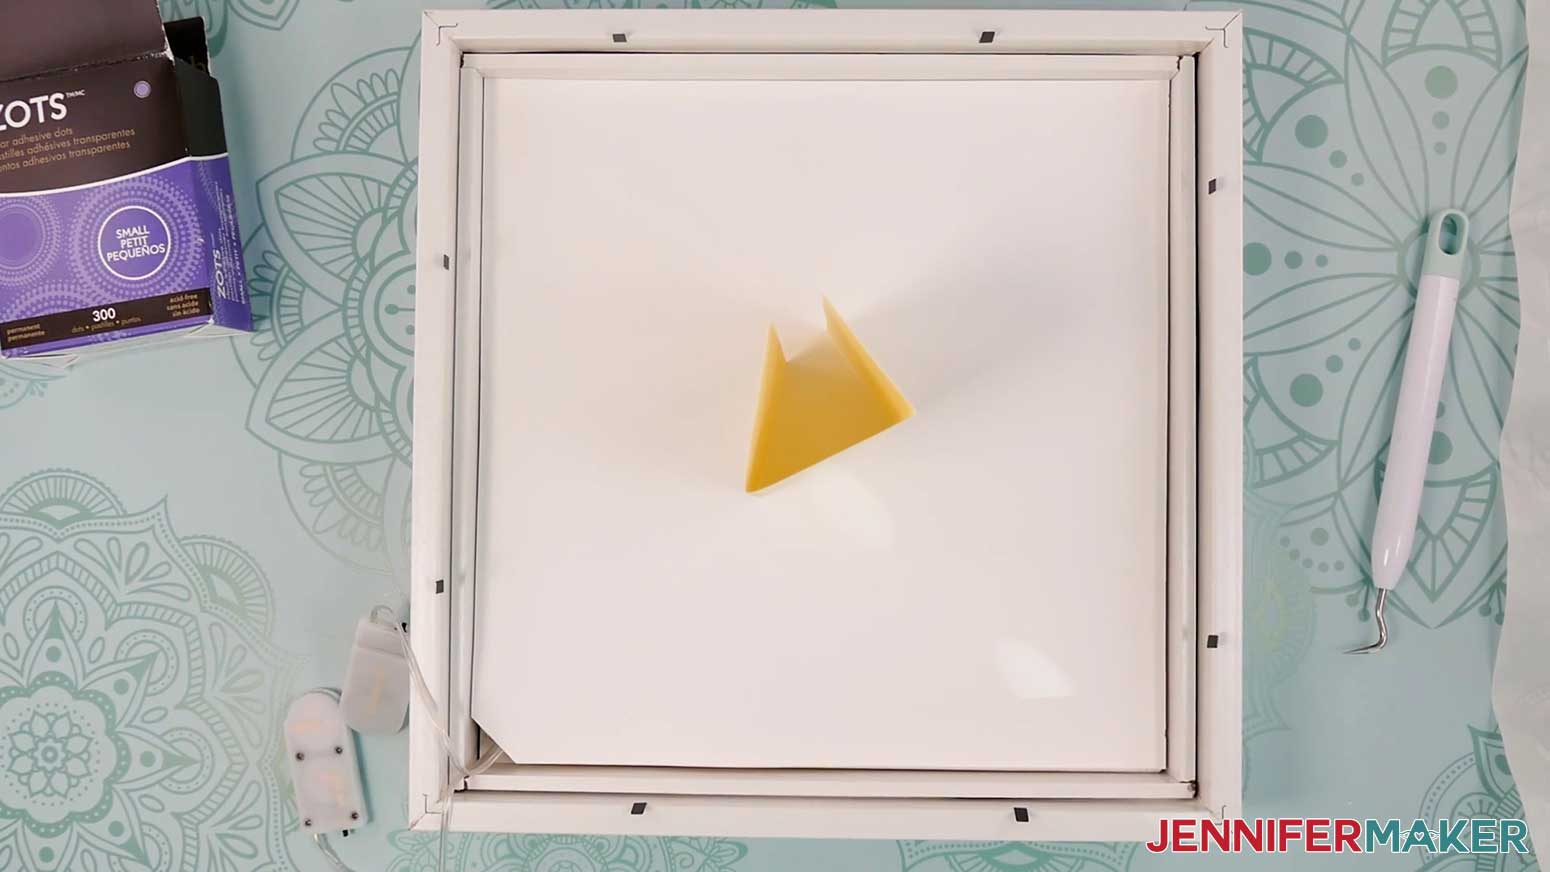
53. Add some glue to the middle area of the rolled triangle.
54. Press it onto the center of the back layer.
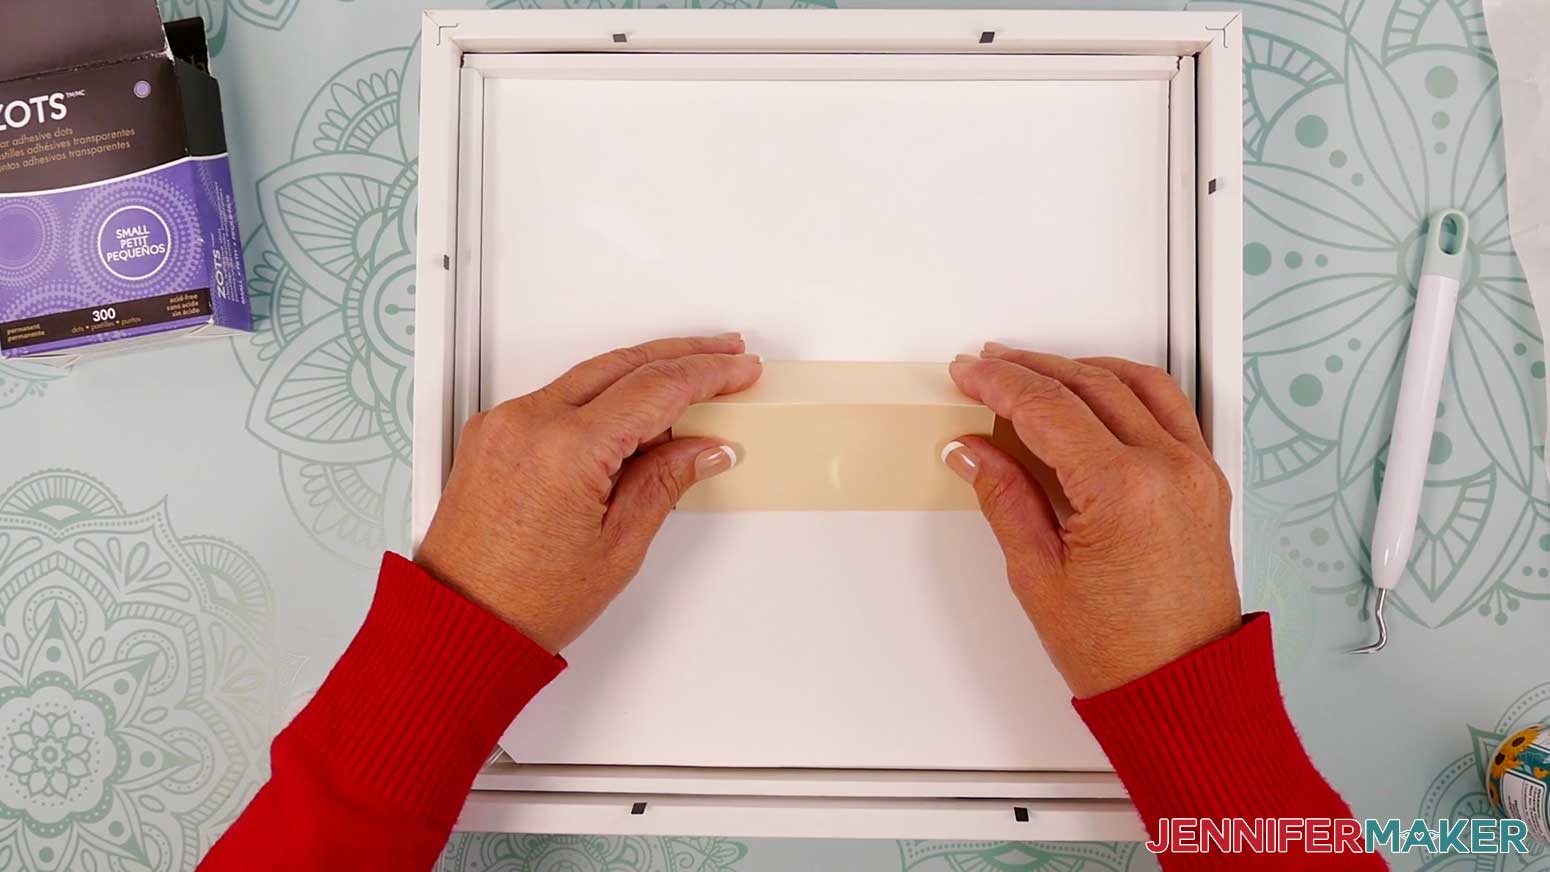
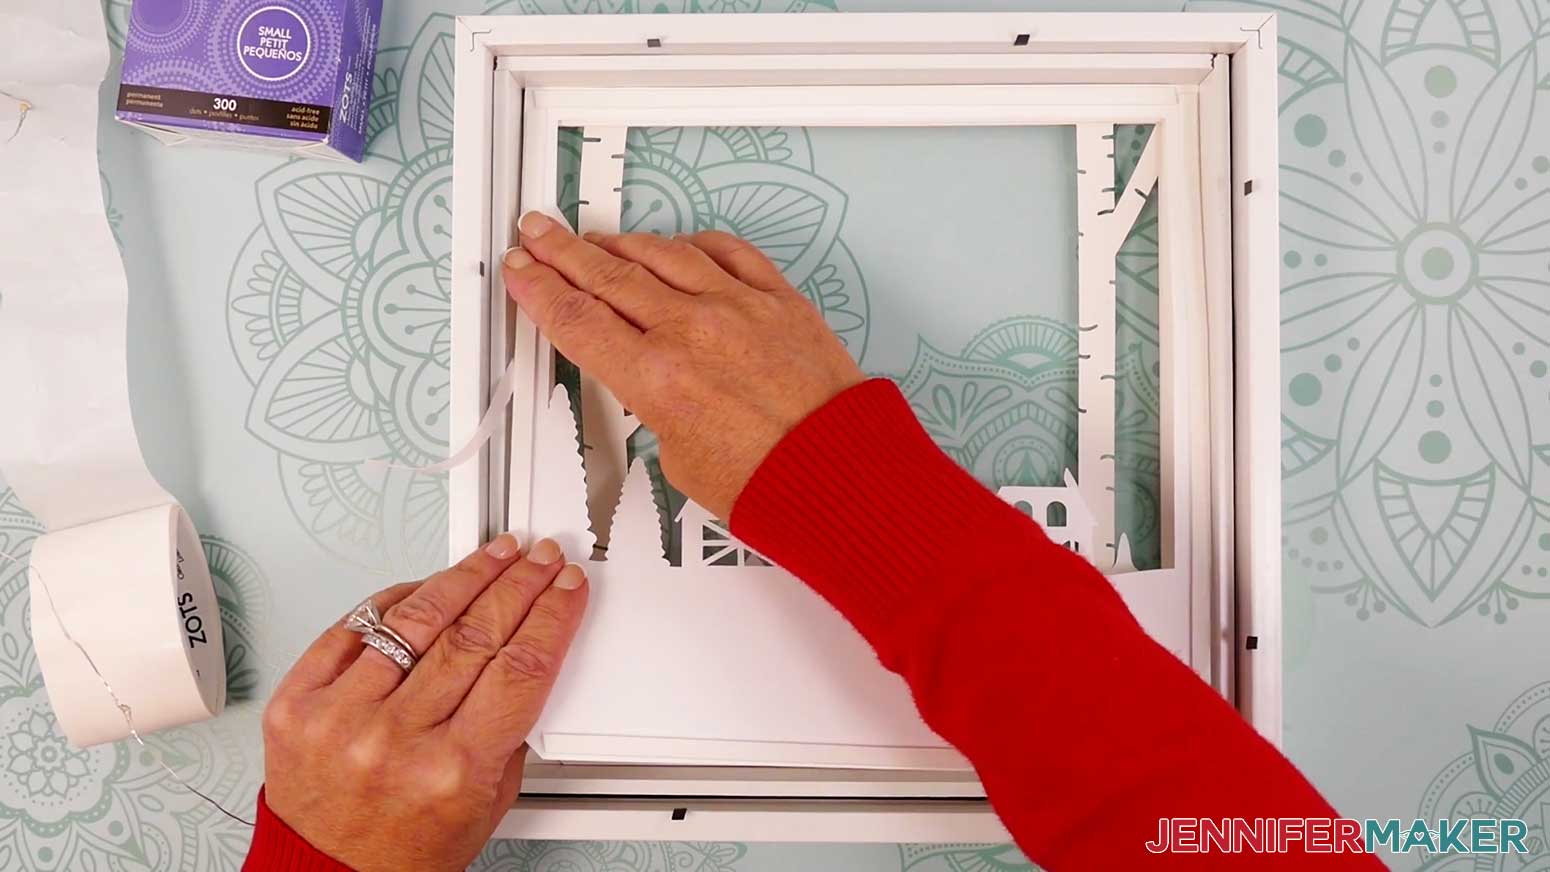
55. Once the glue dries, place the shadow box’s backer onto the shadow box, feed the wires out of the bottom edge, and bend the clips to hold the backer in place.
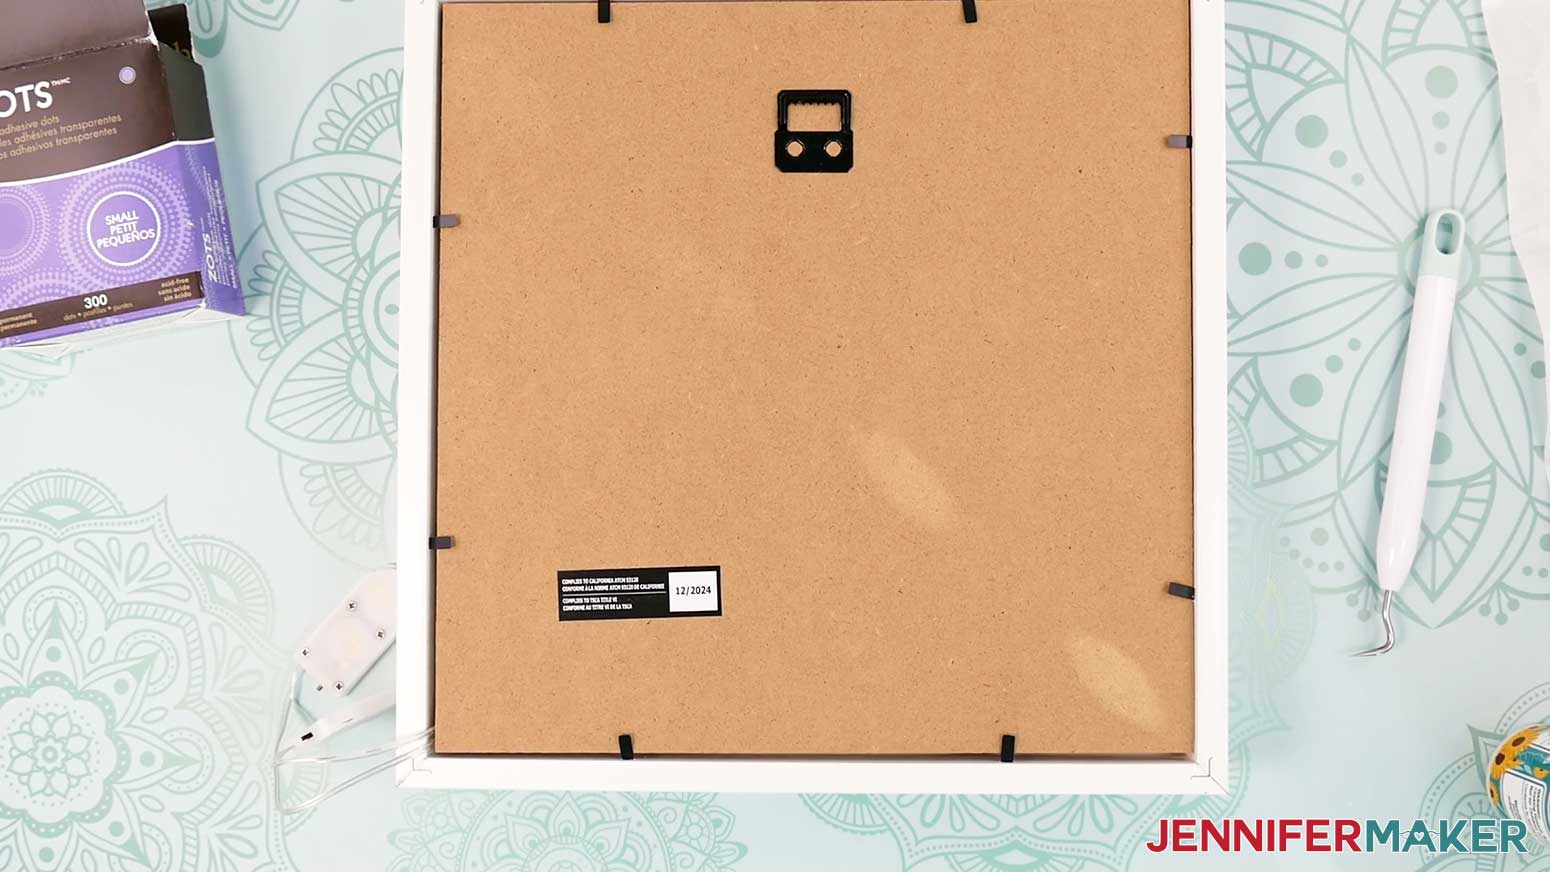
TIP: My wires fit, but if your wires are too thick to feed out from between the shadow box’s backer and frame, use a craft knife and self-healing mat to carefully cut a notch in the lower corner of the backer (the same corner as your other notches) to create more room for the wires.
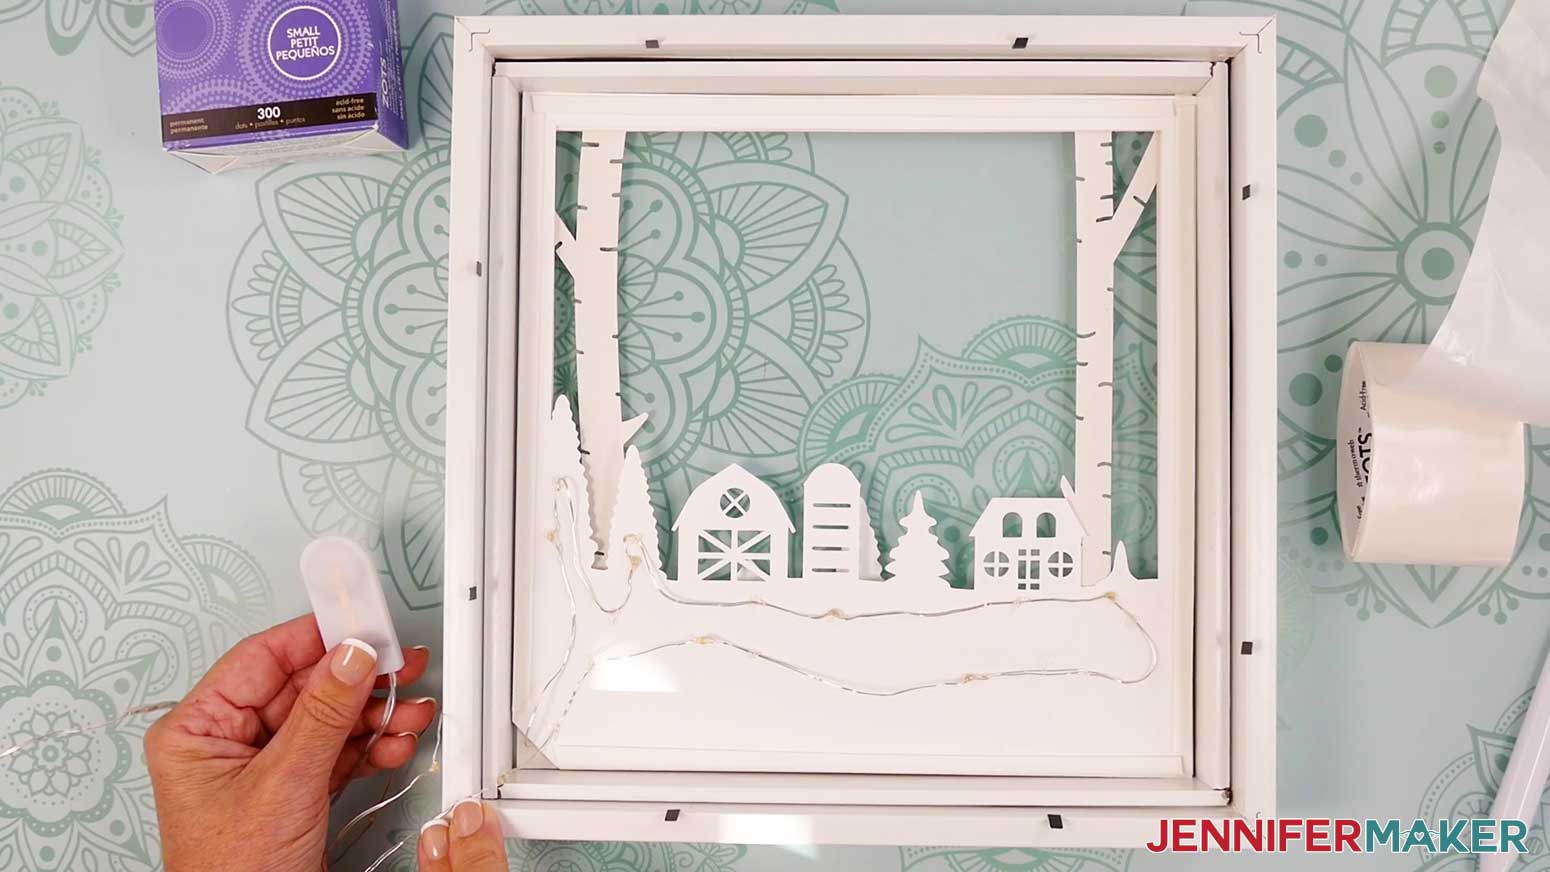
56. You can use Zots to adhere the battery packs to the back, sides, or bottom of the frame, or leave them dangling.
57. Use isopropyl alcohol and a lint-free cloth to clean the outside of the frame’s glass of any smudges or fingerprints.
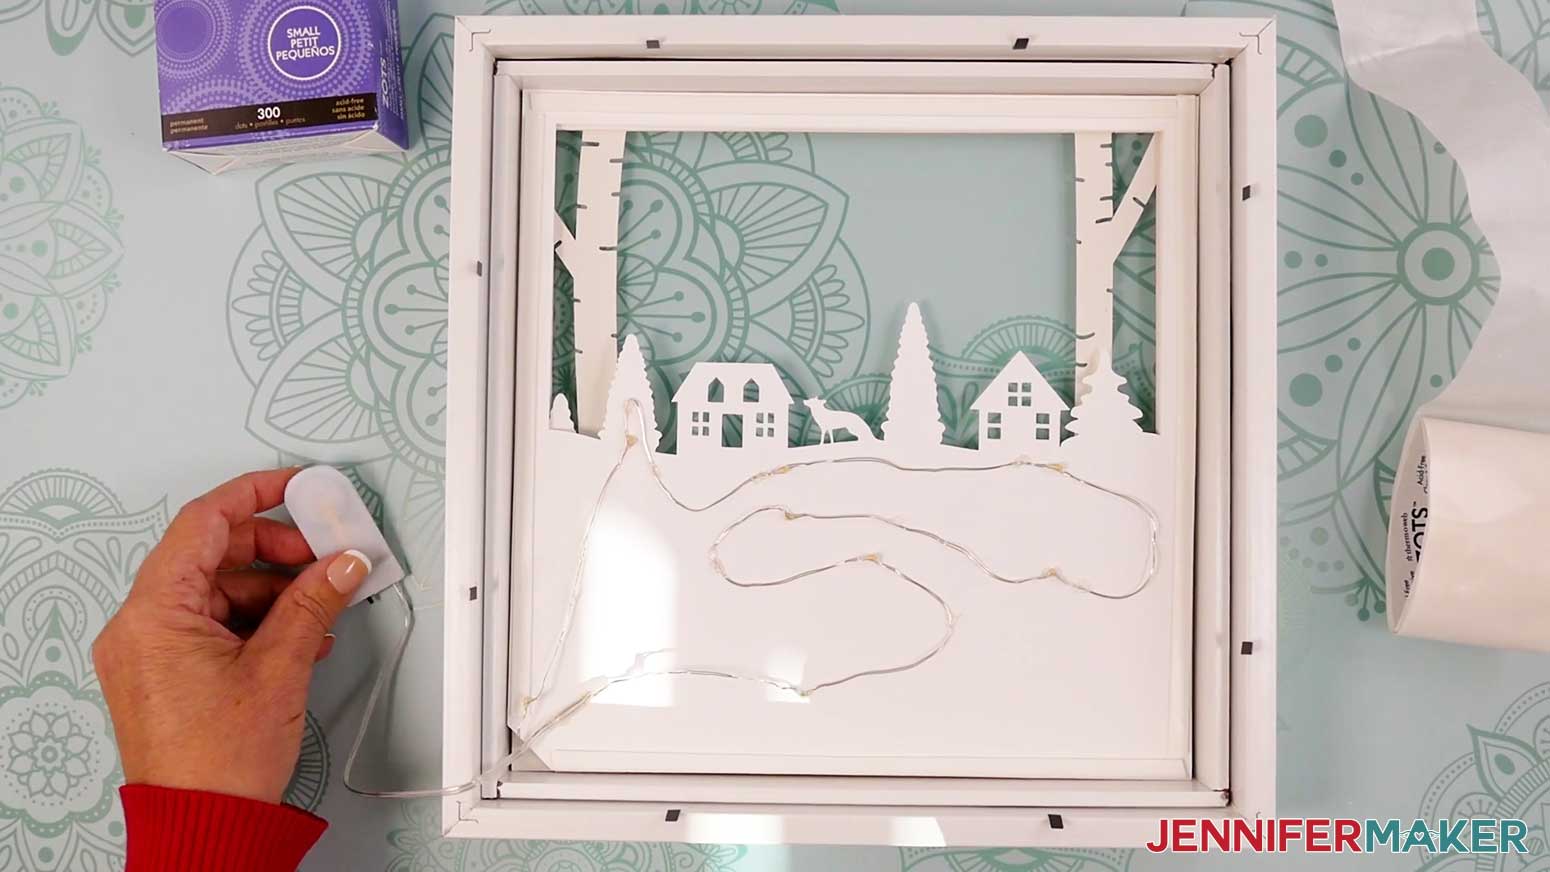
STEP 4: SHOW IT OFF
Your village shadow box with lights is ready to gift or display!
Notes
Finished Sizes:
Artwork: 9.5” x 9.5”
Shadow Box: 10” x 10”
Answers to Your Questions About Making a Village Shadow Box With Lights
Q: I want to design my own village shadow box layers. How can I do that?
A: You can learn how to design custom village shadow box layers in my ADVANCE program. Learn more about ADVANCE here!

Q: How many layers are in this Christmas village design?
A: The project uses seven layers to create the depth and glow of the winter scene. Each layer builds on the one before it, and the notches in the corners help keep everything aligned inside the frame.
Q: What kind of shadow box frames work best for this project?
A: A standard shadow box frame with enough depth to hold all the layers and the fairy lights works perfectly. The layers, foam tape, and lighting all fit neatly inside without crowding, and the backer closes securely when everything is in place.
Q: Can I make a village shadow box with lights without a cutting machine?
A: Yes! While the SVG files are great for Cricut users, the project also includes PDF versions you can use to help you cut the pieces by hand.
Q: What kind of lights go in a shadow box?
A: I used two strands of 7 ft. long warm white LED fairy lights. Other shadow boxes I’ve made have used the same, or LED light strips.
Q: Do the fairy lights go behind all the layers or between them?
A: The lights are placed between several layers rather than only behind them. This is what gives the Christmas village its even glow and helps the details shine through instead of getting lost in the shadows.
Q: Can I change the paper colors or use glitter for the front layer?
A: Absolutely. The top layer looks especially beautiful when cut from glitter cardstock, and the rest of the layers work well in white or light colors to let the glow shine through.
Q: Where do I put the battery packs?
A: You can attach the battery packs to the back, side, or bottom of the frame with glue dots. They sit outside the layers but remain easy to access and turn on whenever you want to light up your village.
Get my free village shadow box SVG/DXF/PDF files!
(If you do not see the signup form above, click here.)
I love seeing what you make with my tutorials and how you customize them! Please share a photo of your village shadow box with lights in our Facebook group or tag me on social media with #jennifermaker.
Love,

Want to remember this? Save this How to Make a Village Shadow Box With Lights tutorial to your favorite Pinterest Board!