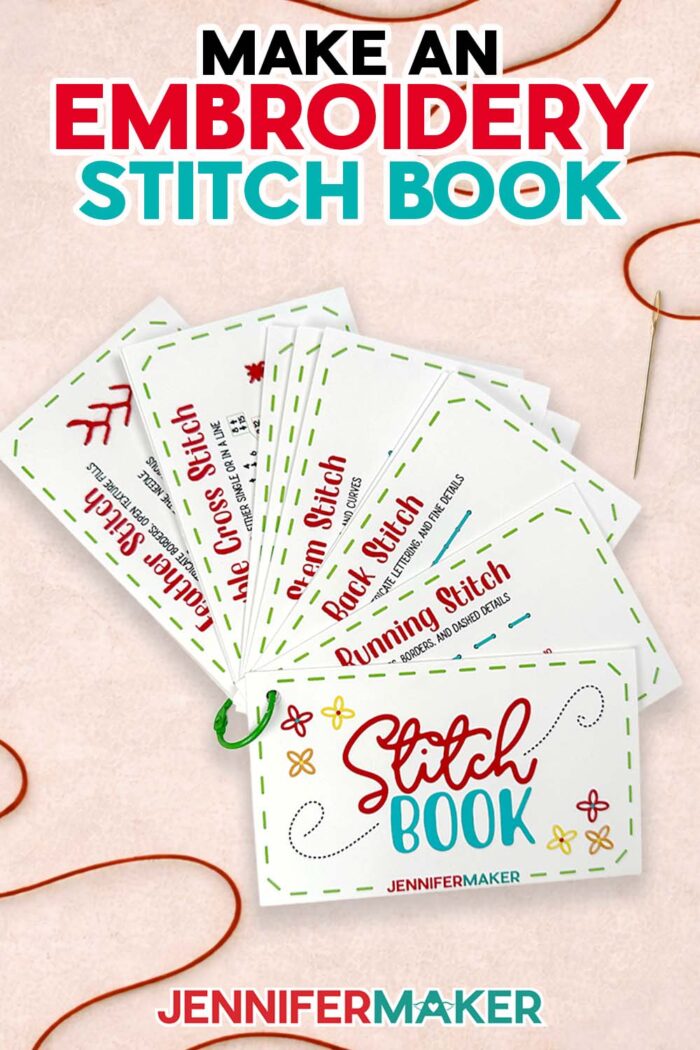
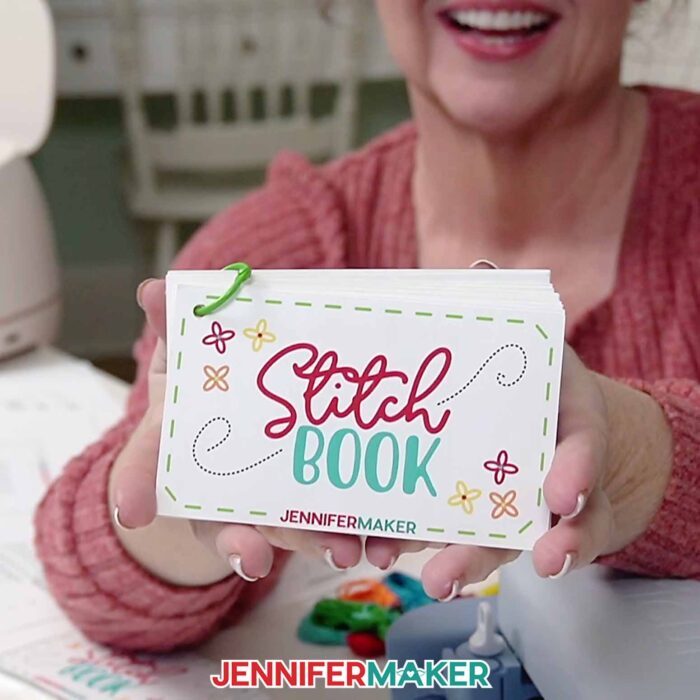
Learn how to make an embroidery stitch book to practice your stitches!
Have you ever been in the middle of embroidering a stitch and couldn’t remember where your needle was supposed to go next? That’s one of the most common things I hear from beginners. And trust me, I’ve been there, too! Honestly, it’s one of the challenges that makes embroidery feel way harder than it really is. That’s exactly why I wanted to show you how to make an embroidery stitch book that helps you learn as you go, so you can feel confident with every stitch!
See the full step-by-step video tutorial for how to make an embroidery stitch book here:

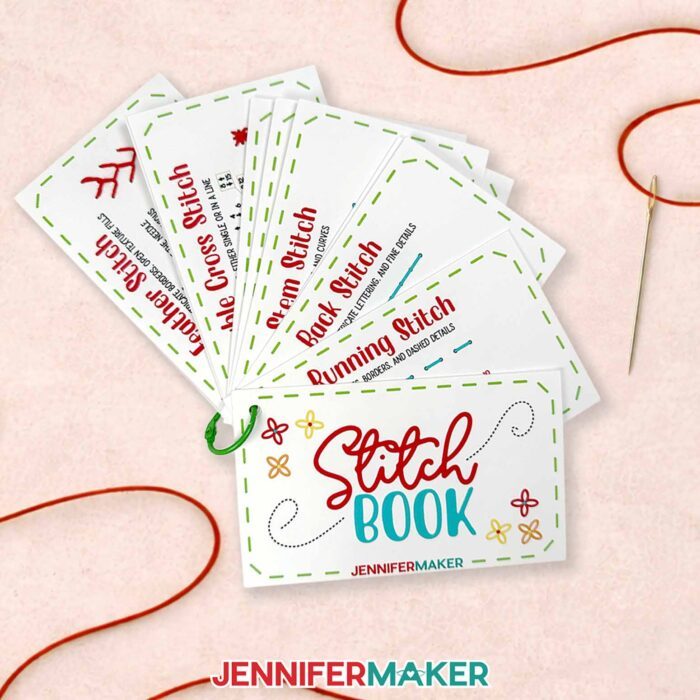
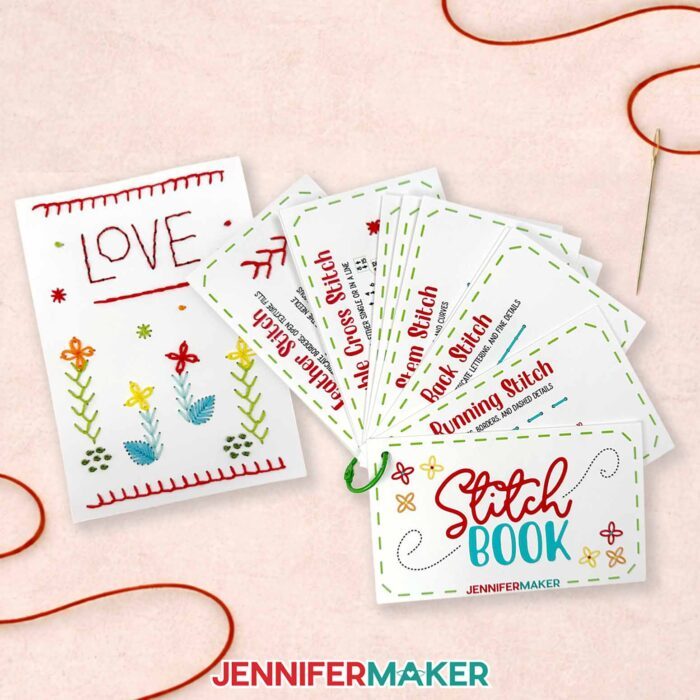
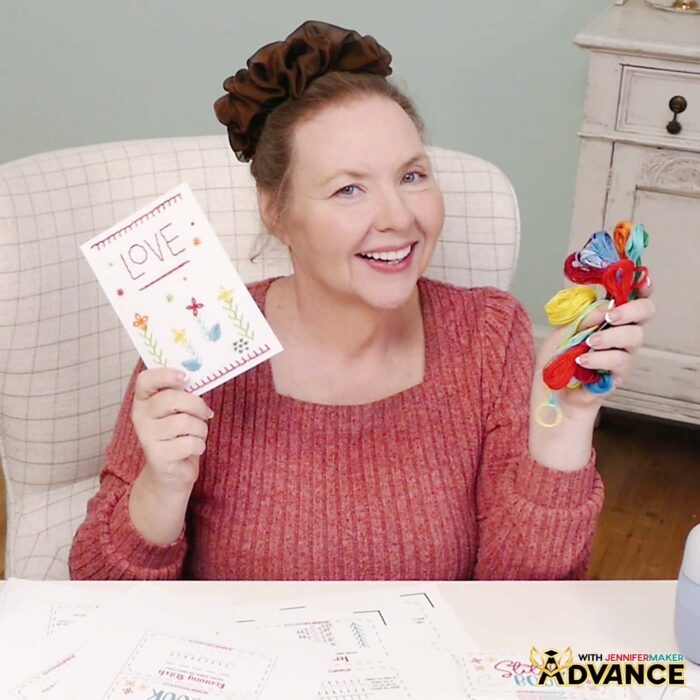
I’ve designed a printable set of cards covering the most common embroidery stitches. Each card guides you step by step with numbered holes and arrows, so you always know what comes next. They make learning hand embroidery less frustrating and much more relaxing and enjoyable.
What I really love about this book is that it’s not just about remembering stitches: it’s about learning them in a way that finally makes sense. You can see each stitch come together, and how they build on each other. As you work through the cards, you’re building confidence while practicing embroidery stitches in a hands-on, visual way. And when you’re done, you have a reference book you can keep nearby anytime you need it.
Here’s what I used to make my stitch book:
- A color inkjet printer
- A Cricut machine for cutting the cards and needle holes (but you can also poke them out with a sturdy needle and cardboard)
- Photo paper or cardstock
- Embroidery floss in a variety of colors
- An embroidery needle (plus a needle threader: such a time-saver!)
- A binder ring to hold the cards together
I also made sure this project works no matter what tools you have. Inside the files, you’ll find options for both Print Then Cut with a Cricut and a version you can simply print and cut by hand. So whether you love using your cutting machine, or prefer to keep things simple, you can still make the same helpful stitch cards. Either way works just fine, which makes this a really flexible project no matter what tools you have.
I just love how this stitch book gives you a chance to practice before jumping into embroidery on fabric. You can take your time, repeat stitches, and really get comfortable without worrying about making mistakes. So it’s perfect for beginners (especially if you’re still getting a feel for things), but also great for more experienced embroiderers who need a quick refresh. I’ve been stitching for years and still enjoy practicing with my stitch book!
If this is your first time trying embroidery, just go at your own pace. There’s no rush. This is one of those crafts where practice really does make it easier and more fun!
You might start with a simple straight stitch or back stitch, then move on to a stem stitch, and eventually try French knots for a little texture. As you try different stitches, the movements start to feel more natural. And before long, you’ll feel ready to experiment with more complicated stitches and even start combining them for your own ideas!
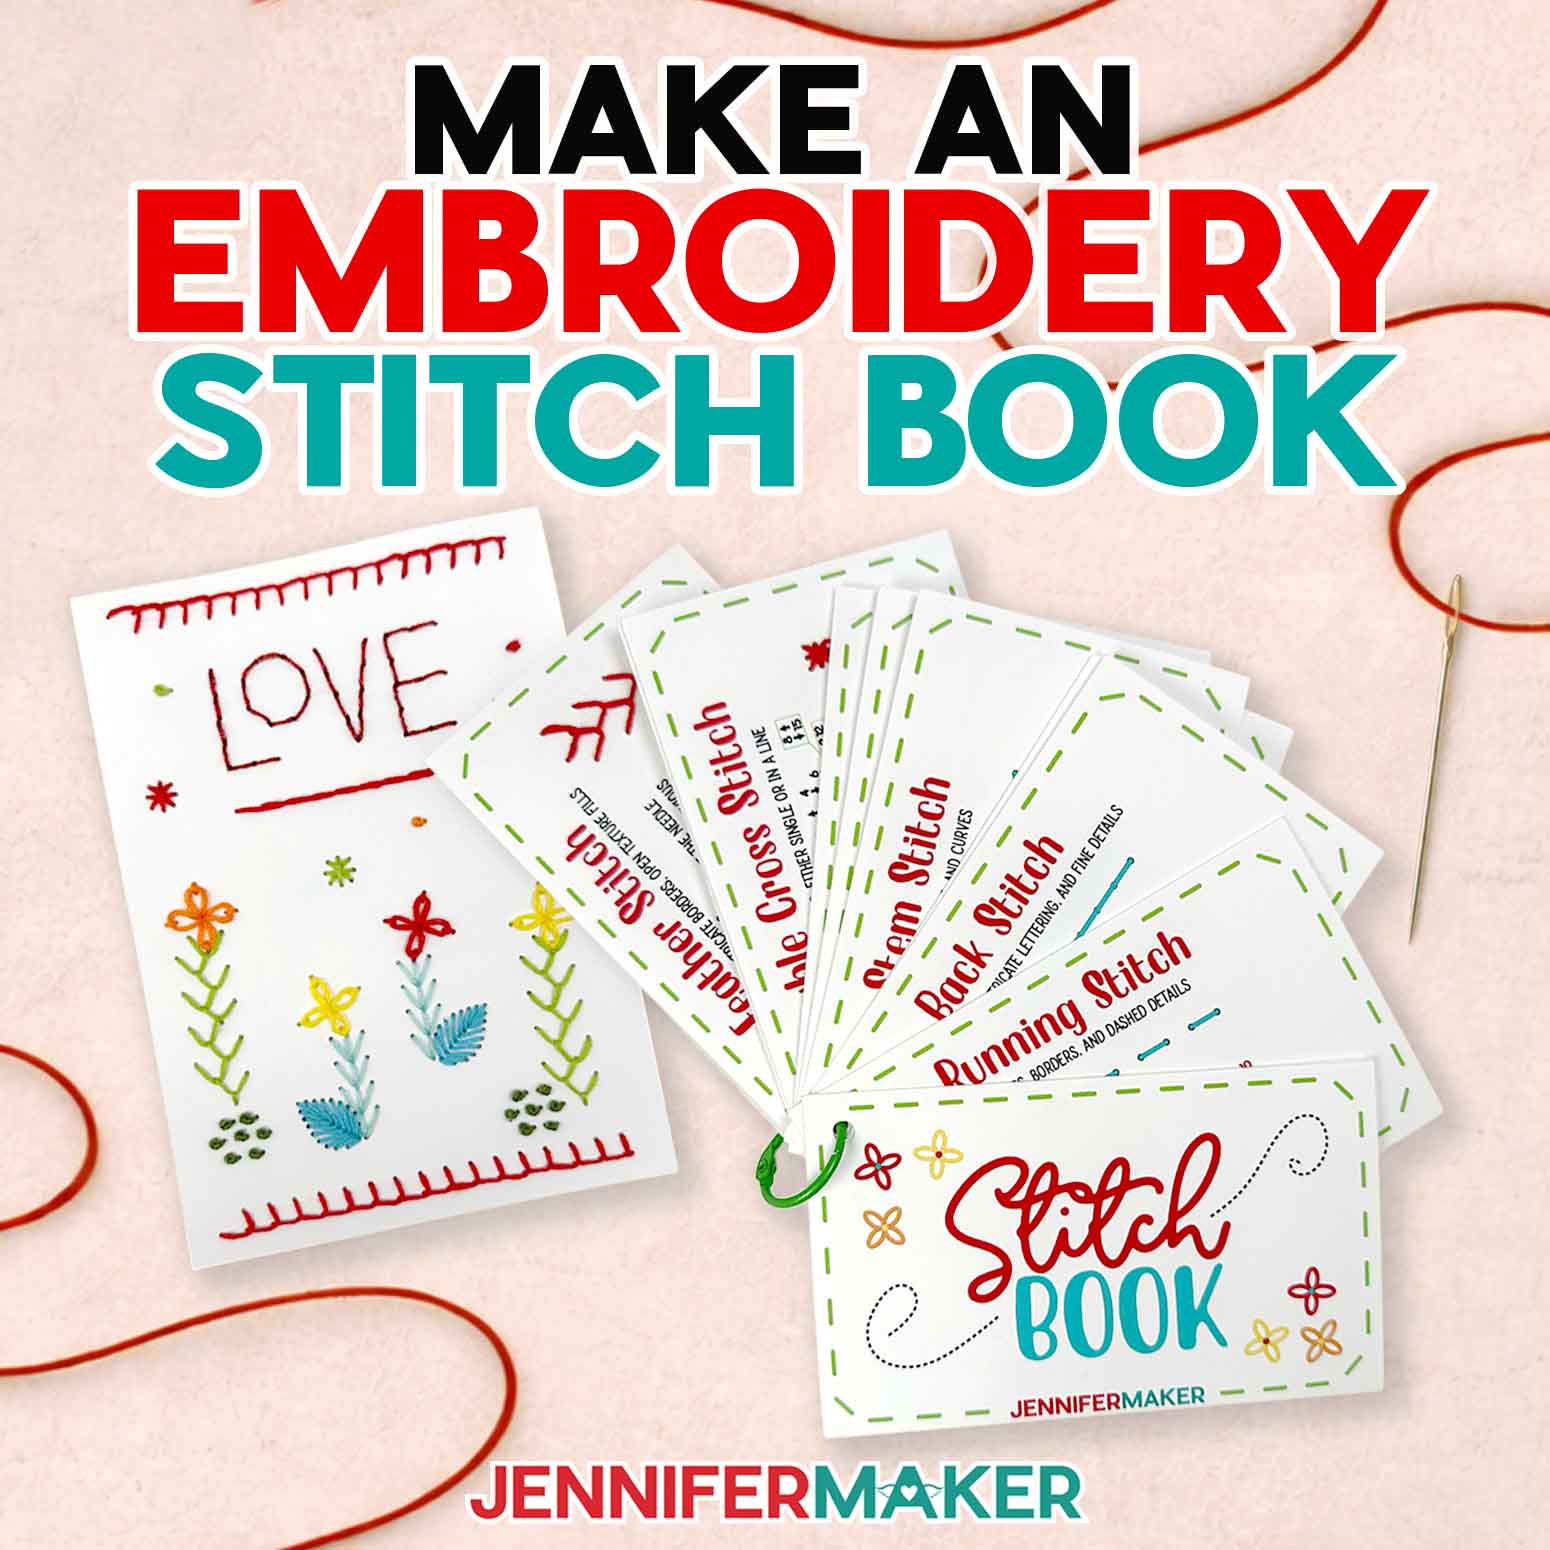
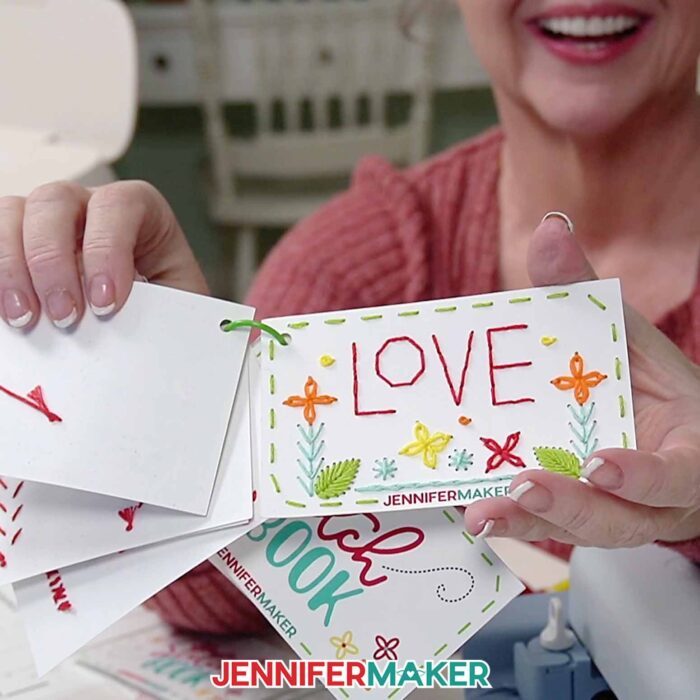
I’ve even included a practice design that brings everything together in a cohesive arrangement. Plus, you’ll be able to see how to use basic embroidery stitches to create cute little details like flowers or lettering. I recommend keeping your cards nearby while you stitch so you can quickly reference any steps as you go. It’s a great way to reinforce what you’ve learned without feeling overwhelmed.
And if you decide you want to take your embroidery skills a step further, inside my ADVANCE with JenniferMaker membership program I teach you how to create your own custom embroidery designs using a toolkit with all the stitches in your book. I even show you how to connect stitches to create cool patterns and decorations! If you’re looking for a fun way to build on what you’ve learned, click here to find out more about ADVANCE.
Definitely watch the video tutorial as you make your cards and practice your stitches. I explain how to sew every stitch using my special numbering system, and how to use each stitch to add detail and texture to fabric. It helps to see everything in action, and you can pause or rewind anytime you need. Check out my FAQ section below for more info on how to make an embroidery stitch book, too.
I can’t wait to see what you make with this! A stitch book may seem like such a simple project, but it really helps take the guesswork out of embroidery, and that’s when it starts to feel fun. Before you know it, you’ll be stitching like a pro!
Do you want to learn how to make an embroidery stitch book? Let me show you how fun and easy it is with my free tutorial and cut files! This post contains some affiliate links for your convenience (which means if you make a purchase after clicking a link I will earn a small commission but it won’t cost you a penny more)! Read my full disclosure policy.
Materials to Make an Embroidery Stitch Book
View my Amazon shopping list with the exact items I used.
- Five to Seven (5-7) Sheets of 8.5” x 11” 61 lb. Matte Photo Paper -OR-
- Five to Seven (5-7) Sheets of 8.5″ x 11″ White 65 lb. Cardstock
- Embroidery Thread (Variety of Colors)
- One (1) 1″ Binder Ring
- One (1) Sheet of 8.5” x 11” Copy Paper (to protect the printed images from the brayer)
- Scrap Cardboard (optional for poking holes in the PDF print files)
- A way to cut your materials – I’m using the Cricut Maker 4, but you can use any Cricut Maker Series machine, a Cricut Explore Series machine, the Cricut Joy Xtra, the Cricut Joy 2, or the Cricut Venture
- Color Inkjet Printer
- Cricut Green StandardGrip Machine Mat 12″ x 12”
- Scissors
- Scraper
- Spatula
- Weeding Tool (optional for removing small pieces from cut material)
- Painter’s Tape (optional for holding thread instead of knotting)
- Large Eye Sewing Needle
- Embroidery Needle Threading Tool
- Paper Trimmer (optional for PDF file)
- Single Hole Punch (optional for PDF file)
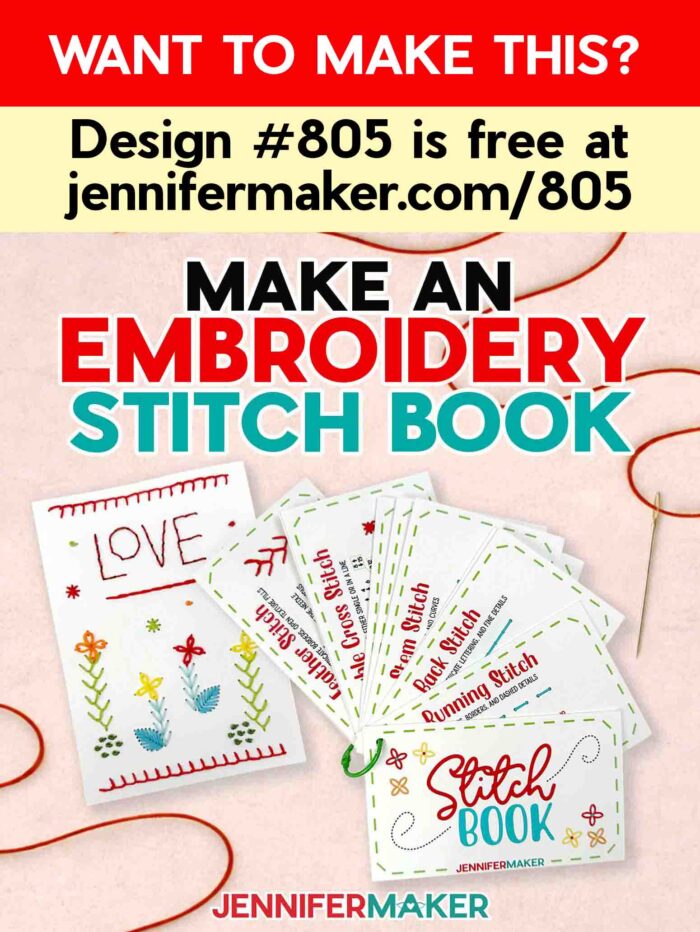
- Design #805 (My free PNG/PDF design files are available in my free library – get the password by filling out the form at the bottom of this page)
How to Make an Embroidery Stitch Book

How to Make an Embroidery Stitch Book
Learn how to make an embroidery stitch book to practice your stitches!
Materials
- Five to Seven (5-7) Sheets of 8.5” x 11” 61 lb. Matte Photo Paper -OR-
- Five to Seven (5-7) Sheets of 8.5" x 11" White 65 lb. Cardstock
- Embroidery Thread (Variety of Colors)
- One (1) 1" Binder Ring
- One (1) Sheet of 8.5” x 11” Copy Paper (to protect the printed images from the brayer)
- Scrap Cardboard (optional for poking holes in the PDF print files)
- Design #805 (My free PNG/PDF design files are available in my free resource library - get the password by filling out the form at the bottom of this page)
Tools
- A way to cut your materials - I’m using the Cricut Maker 4, but you can use any Cricut Maker Series machine, a Cricut Explore Series machine, the Cricut Joy Xtra, the Cricut Joy 2, or the Cricut Venture
- Color Inkjet Printer
- Cricut Green StandardGrip Machine Mat 12" x 12”
- Scissors
- Scraper
- Spatula
- Weeding Tool (optional for removing small pieces from cut material)
- Painter’s Tape (optional for holding thread instead of knotting)
- Large Eye Sewing Needle
- Embroidery Needle Threading Tool
- Paper Trimmer (optional for trimming the PDF file)
- Sewing Awl (optional for poking holes in the PDF file)
- Single Hole Punch (optional for the corners of the PDF file)
Instructions
STEP 1: GET MY FREE EMBROIDERY STITCH BOOK DESIGNS
First, download my Embroidery Stitch Book files from my free library – look for Design #805. Alternatively, you can use the Save This Project form near the top of this post and the design link will be emailed to you.
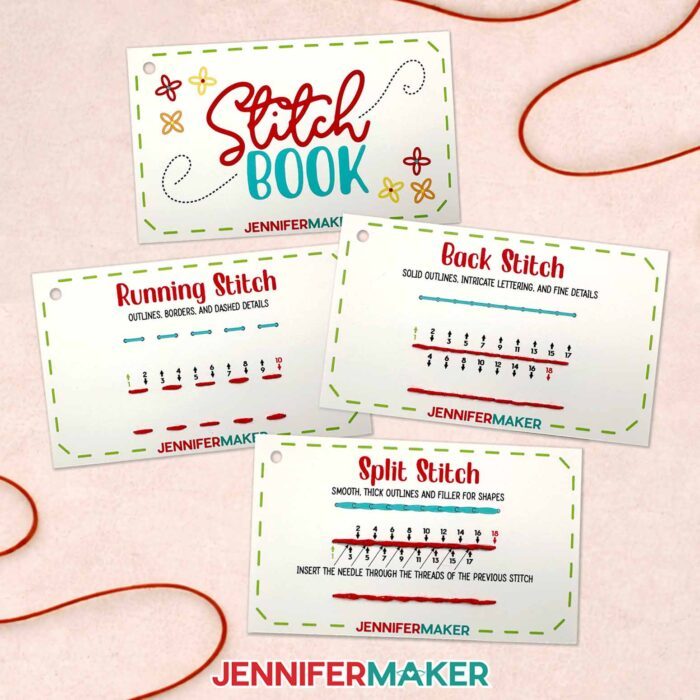
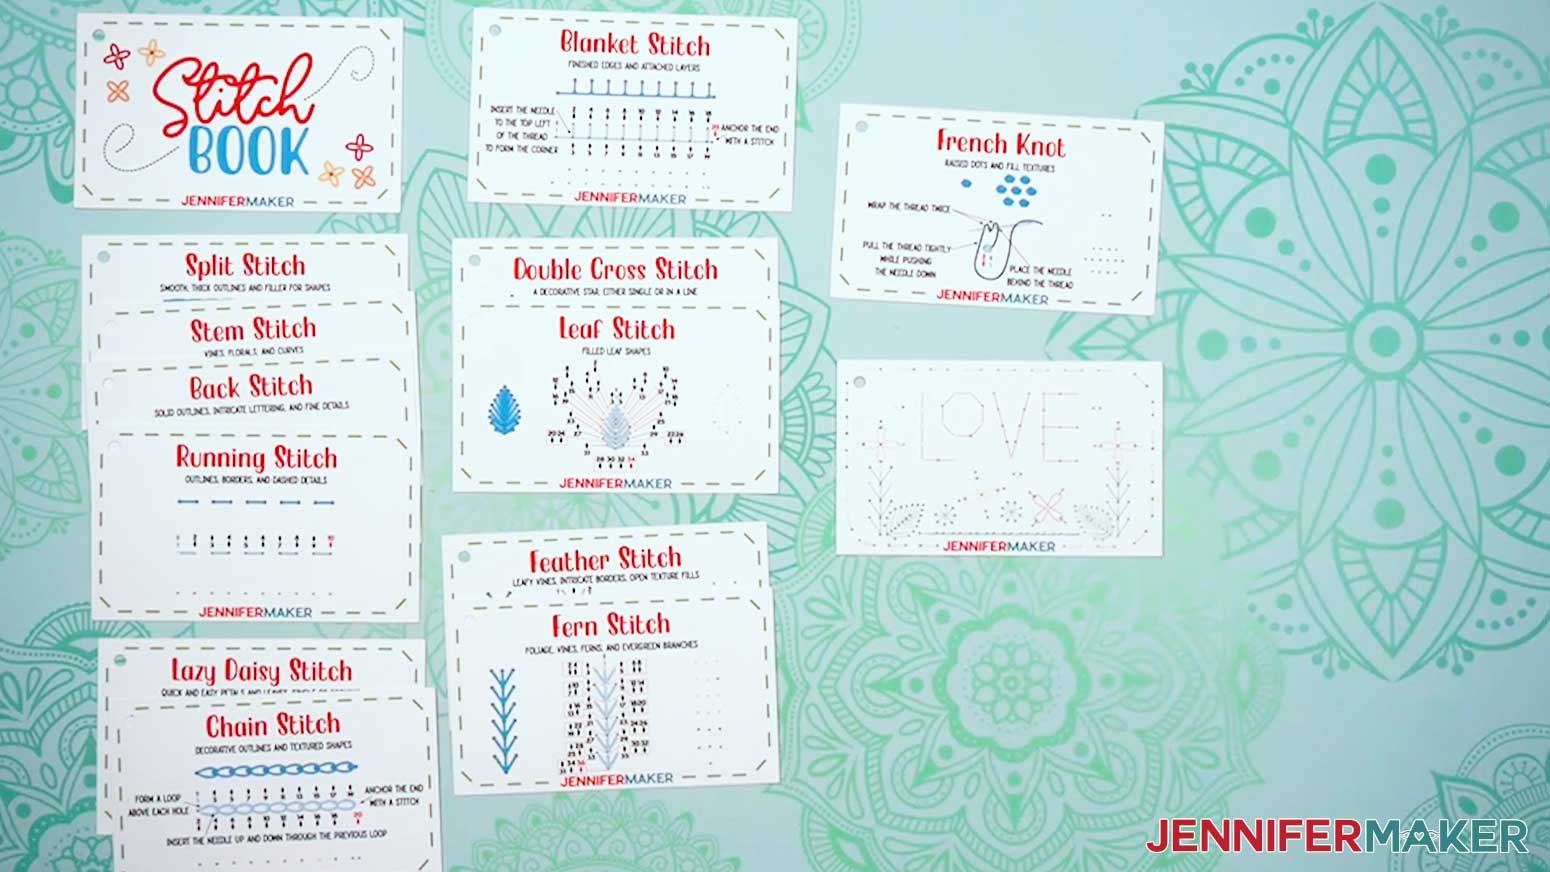
In the PNG folder, you’ll find 14 images you can use to create your embroidery stitch book in Cricut Design Space, including a cover, 12 basic stitch guides, and a simple design that uses many of the stitches.
There is also a PDF folder with a version you can print and cut by hand.
In this tutorial, I’ll teach you how to make both versions of the stitch book, as well as how to use the stitch guides.
This project is optimized for the Cricut Maker and Explore series machines, but you can also make it on a Cricut Joy Xtra or Joy 2 with a few adjustments.
TIP: If you’re not sure how to upload, go to jennifermaker.com/svgs to learn how to unzip PNG files.
STEP 2: PREPARE AND CUT YOUR STITCH BOOK
OPTION 1: CRICUT DESIGN SPACE
- In Cricut Design Space, open a blank Canvas.
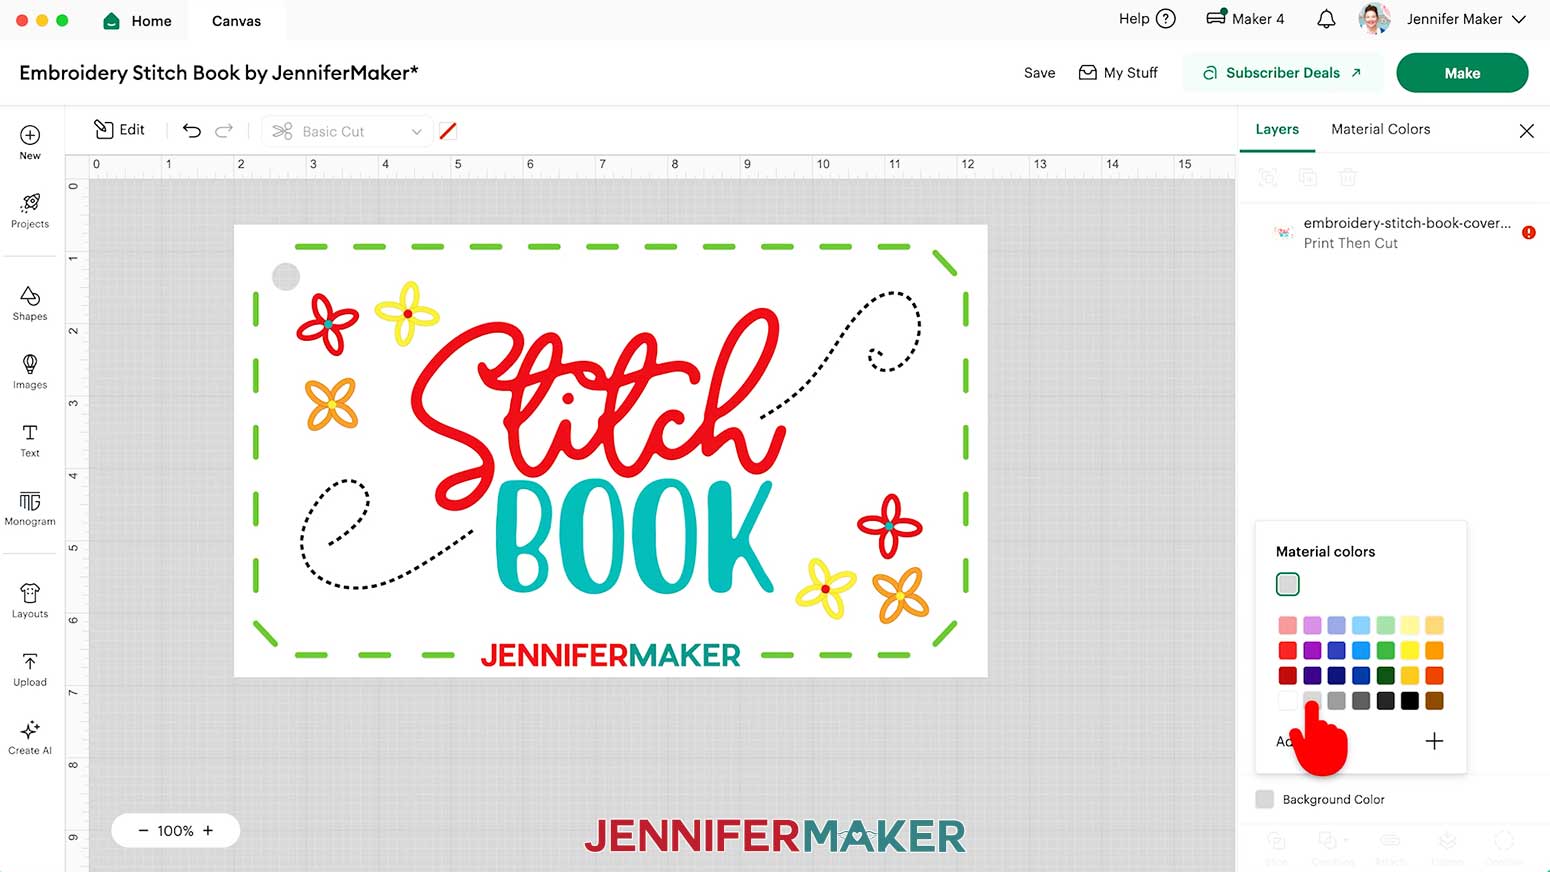
NOTE: If you’re new to using Cricut Design Space, go to cricutkickoff.com for my introductory tutorial on Design Space basics. - Since the stitch book PNG images have borderless white backgrounds and can be hard to see on a white Canvas, click the “Background Color” box at the bottom of the Layers Panel, then select a new color option for your Canvas.
NOTE: I’ll choose light gray.
- To add the stitch book pages to your Canvas, click “Upload” and then “Upload Image.”
- Click “Browse.”
- Select the “cover” PNG.
- Click “Open,” and then “Continue.”
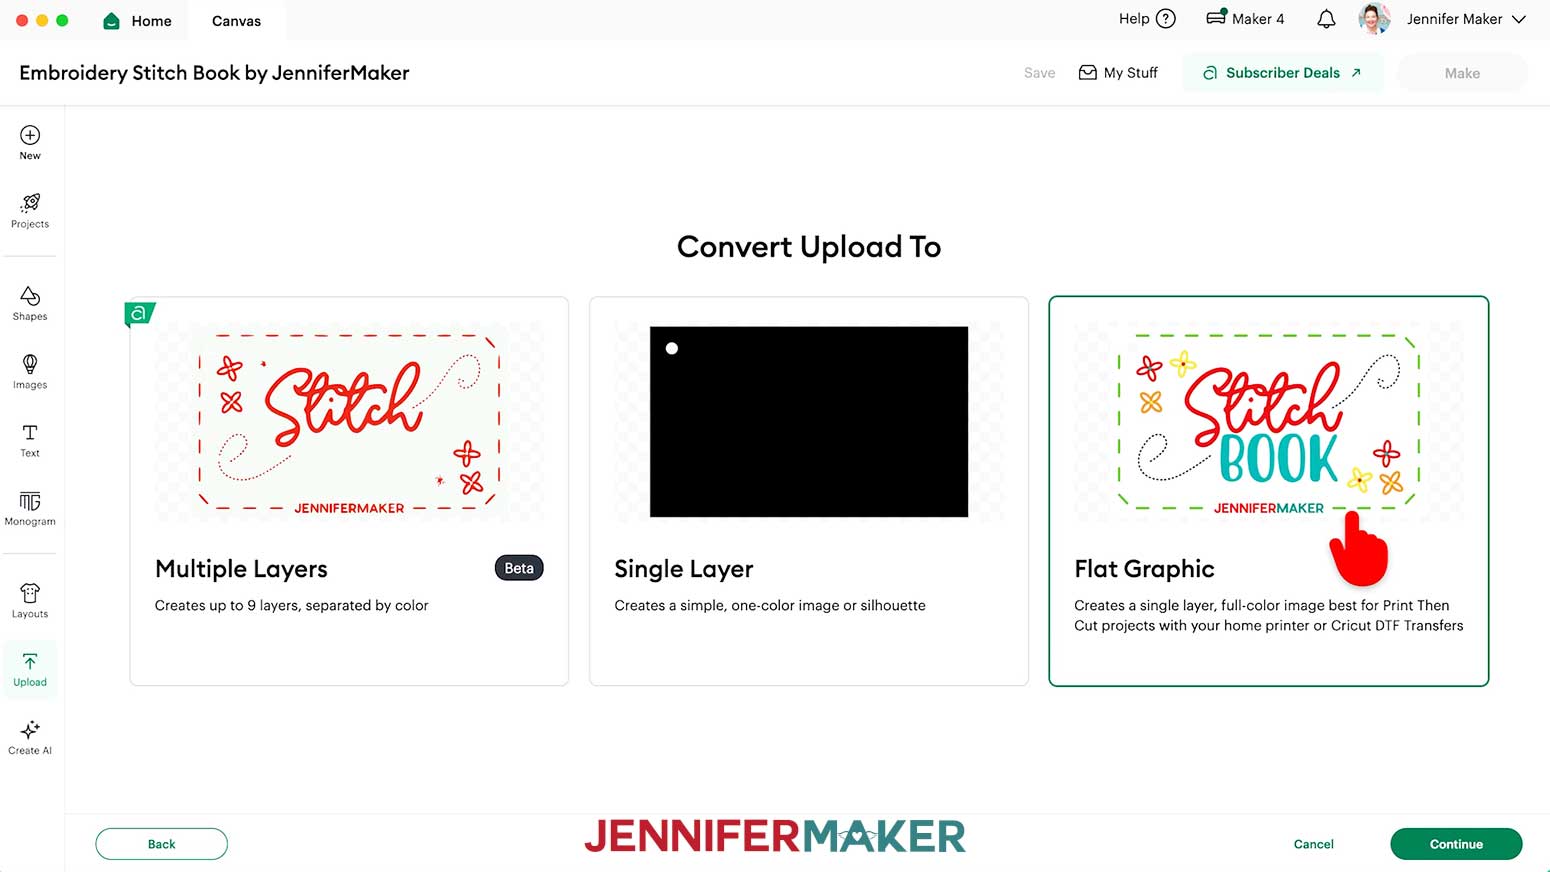
- On the “Background Remover” screen, you don’t need to do anything since my PNG images already have the necessary areas removed, so click “Apply & Continue.”
- On the “Convert Upload To” page, select “Flat Graphic” and click “Continue.”
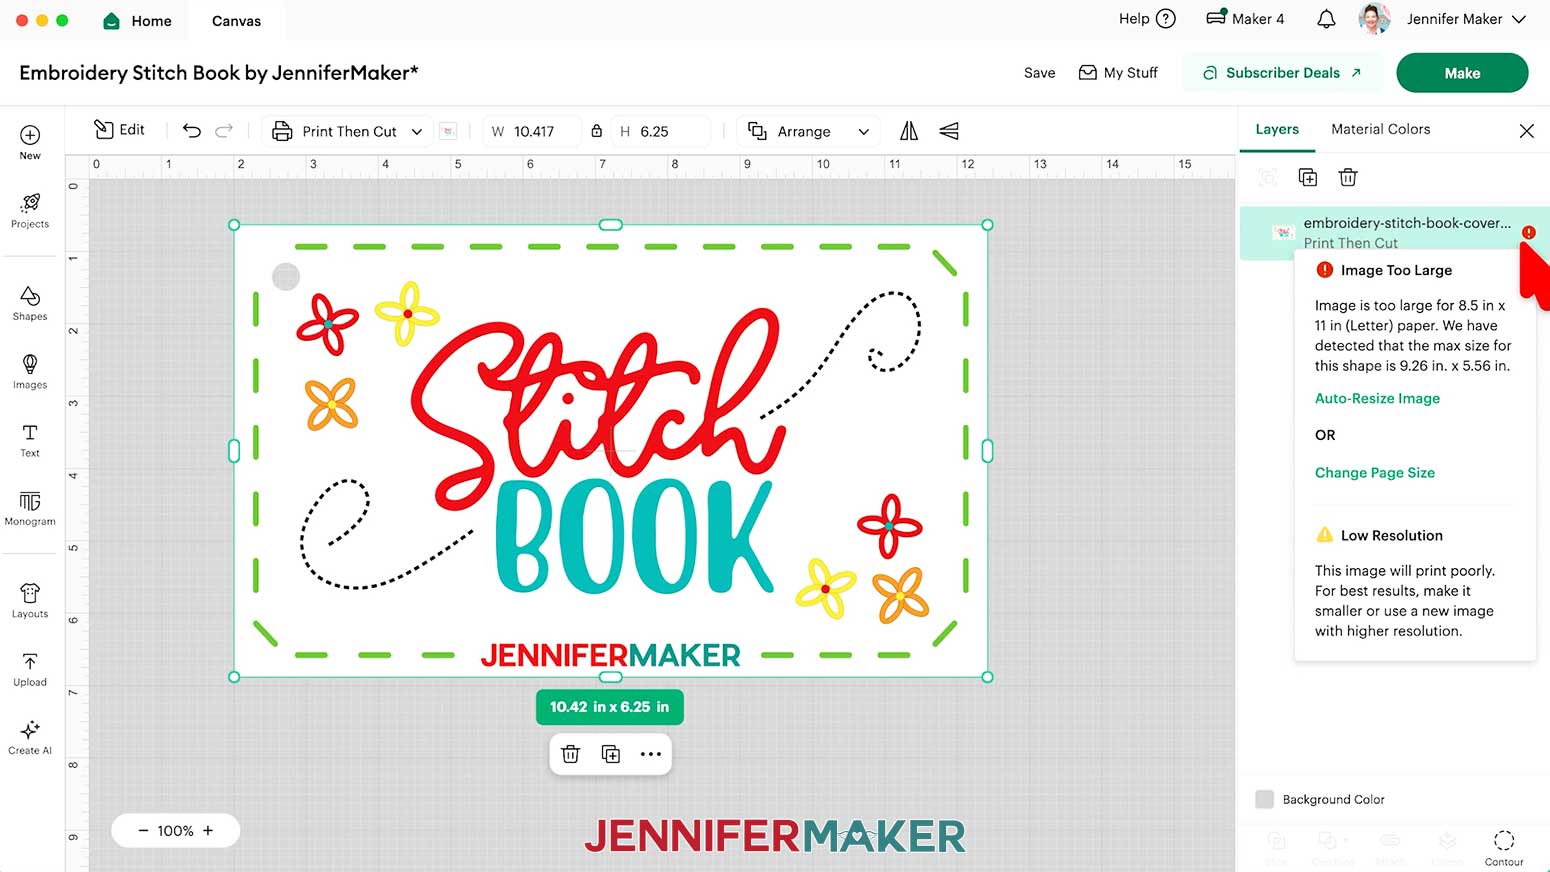
- Click “Upload” to add the image to your Canvas.
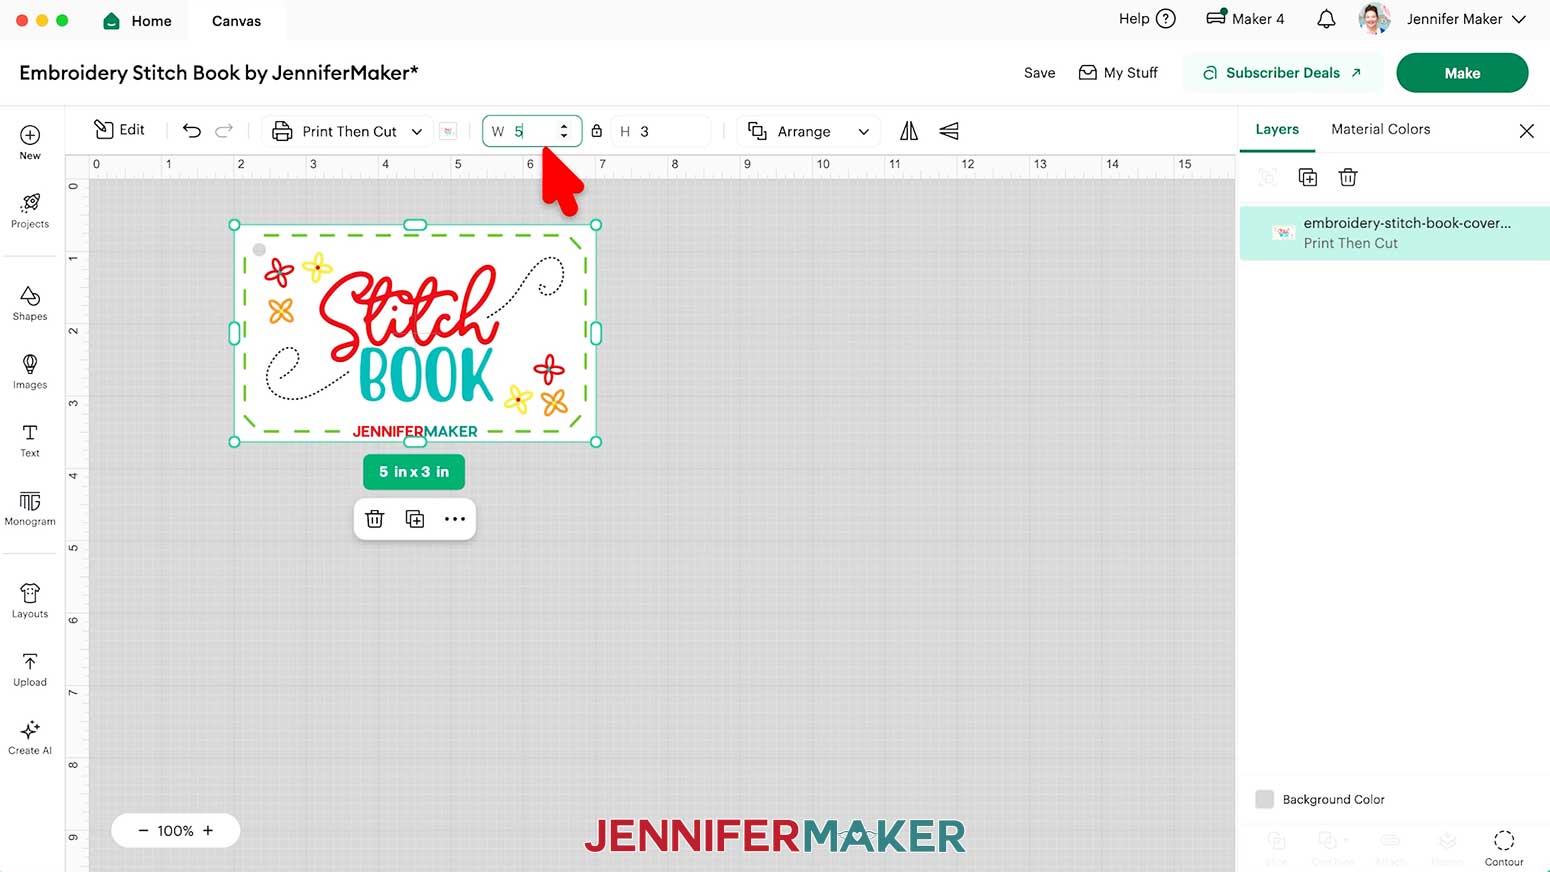
NOTE: The image will load in too large for Print Then Cut, and you’ll see a red warning icon in the Layers Panel, but we will fix it. - With the image selected, keep the “Lock” icon at the top closed, and enter “5” in the “Width (W)” field.
TIP: The height will automatically adjust to 3”.
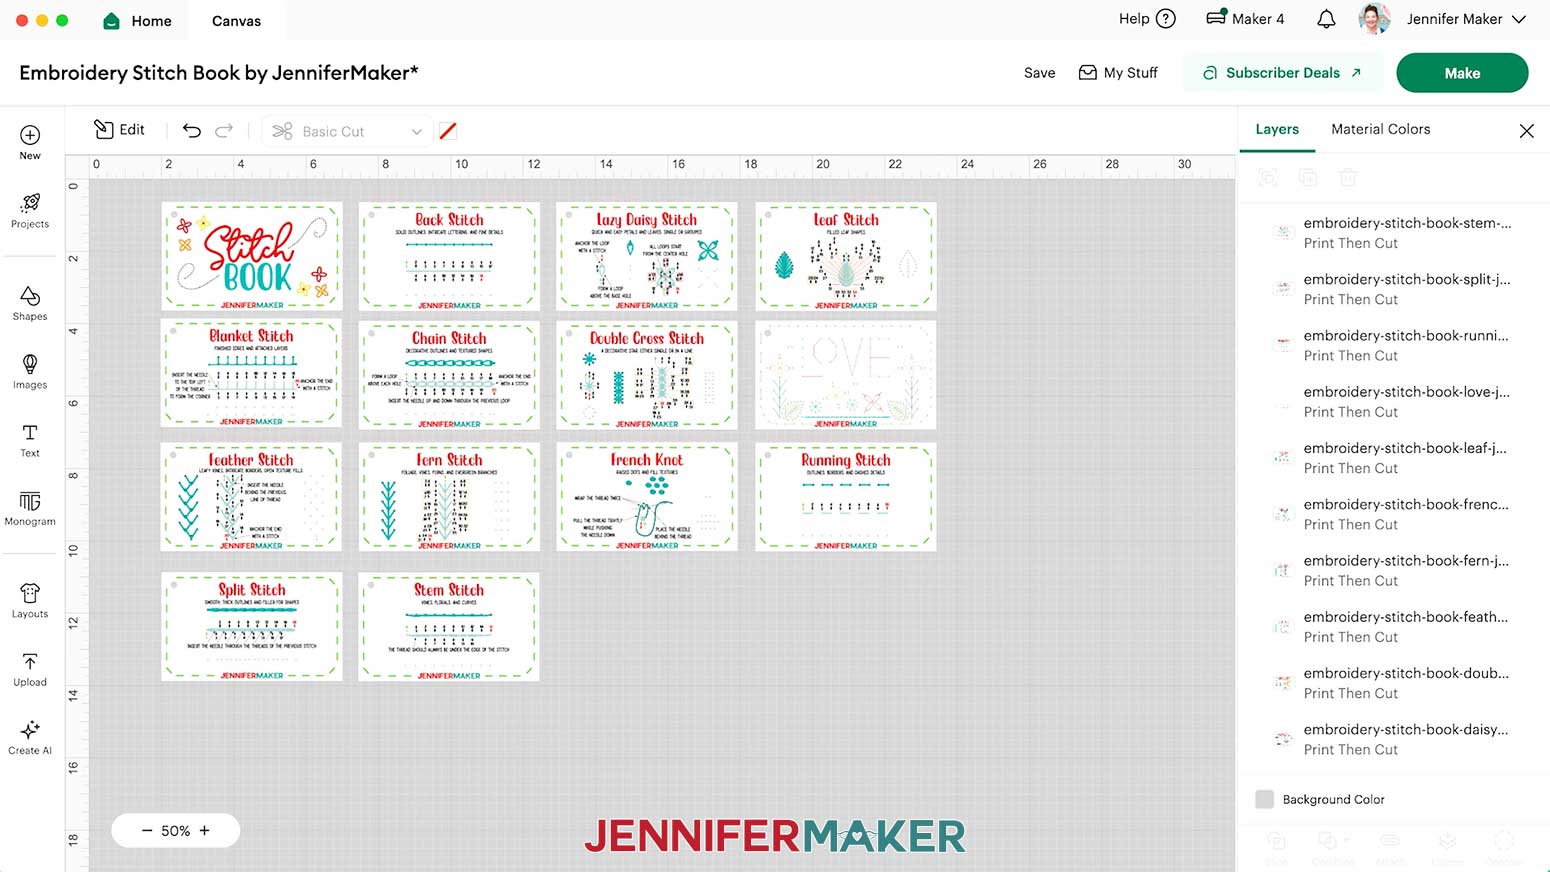
NOTE: At this size, you can fit three cards on one 8.5” x 11” piece of paper using the Print Then Cut feature. - Repeat Steps 3-10 to add the remaining stitch book PNGs to your Canvas and spread them out.
TIP: If Design Space lags when working with all the stitch book files simultaneously, you can load, prepare, and cut a few cards at a time instead. - Click “Save” and give your project a name.
- And now your stitch book cards are ready to Print Then Cut!

PRINT THEN CUT
IMPORTANT: If you haven’t calibrated your Cricut in a while, or if your Print Then Cut projects aren’t cutting precisely, follow the steps from “STEP 3: CALIBRATE YOUR CRICUT FOR PRINT THEN CUT” of my Patterns in Cricut Design Space tutorial to improve your cuts.
- Make sure the correct machine is selected in the top right.
- Click “Make.”
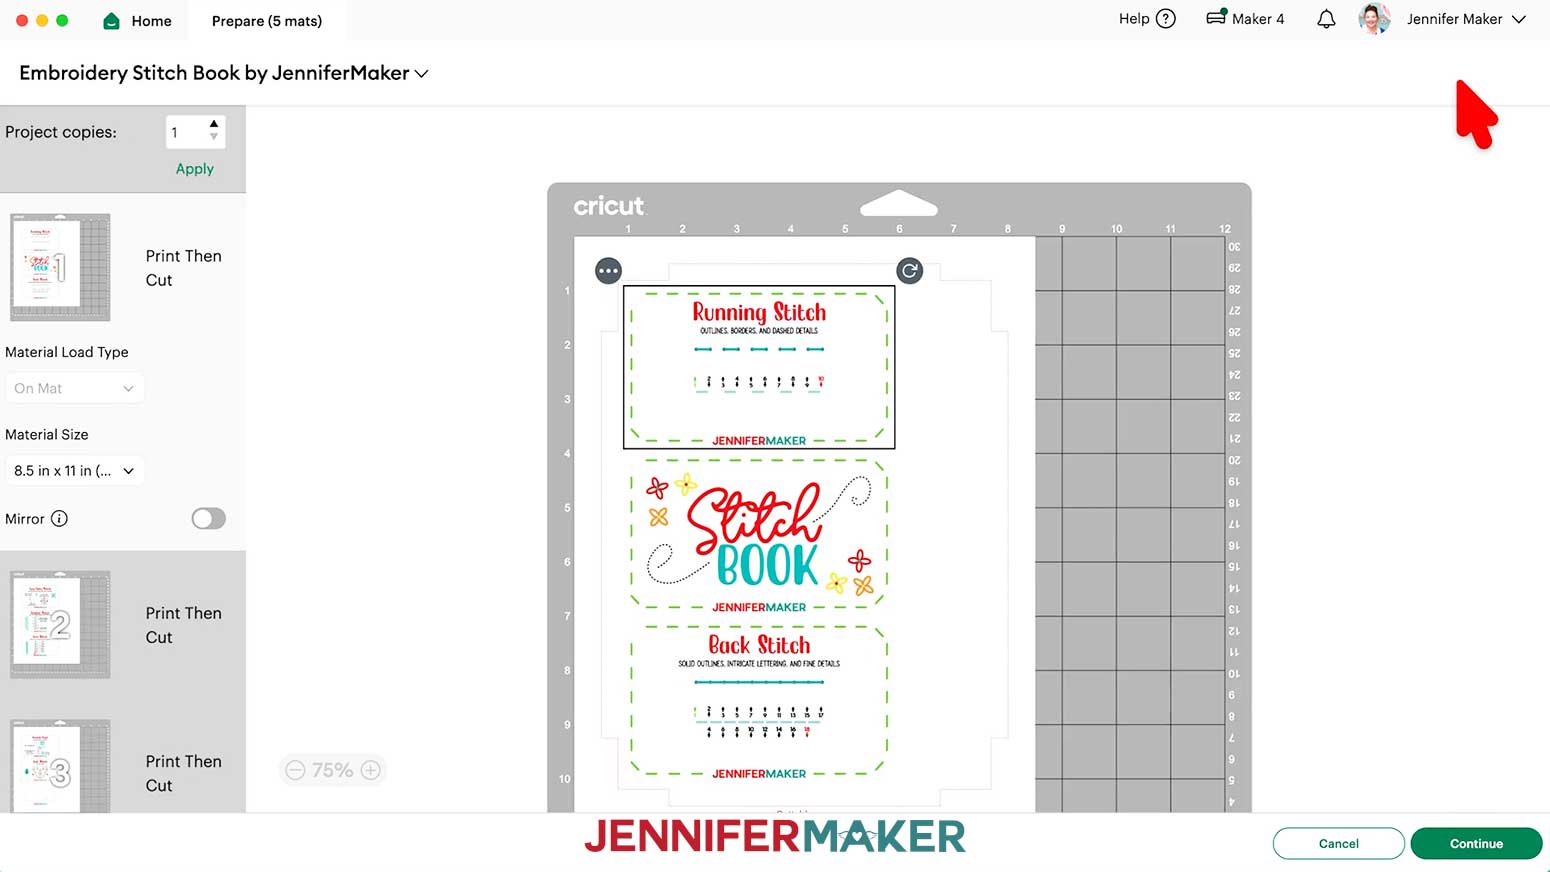
- On the “Prepare” screen, make sure the correct “Material Size” is selected for your mats.
NOTE: I’m using “8.5 in x 11 in” for all my mats to match my photo paper. - Make sure Mat 1 is selected so it loads first on the next screen and click “Continue.”
- On the “Make” screen, click “Send to Printer.”
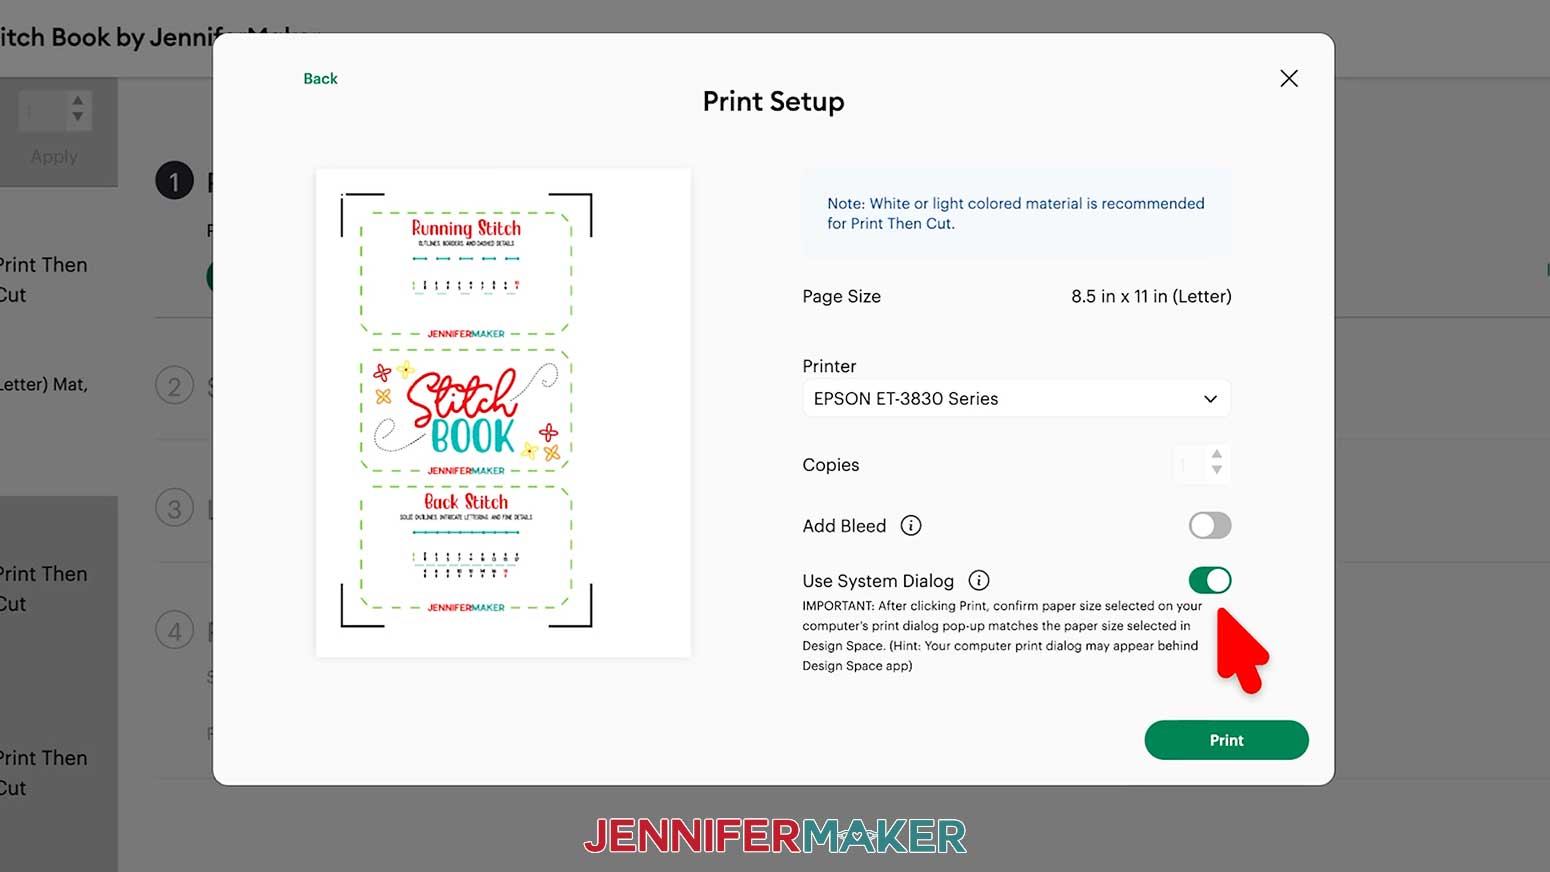
- In the “Print Setup” window, select your printer, toggle OFF “Add Bleed” since the card background is white, and toggle ON “Use System Dialog” for advanced print settings.
NOTE: Your System Dialog window might be behind the Cricut Design Space window, so minimize it if you don’t see the settings. - Click “Print.”
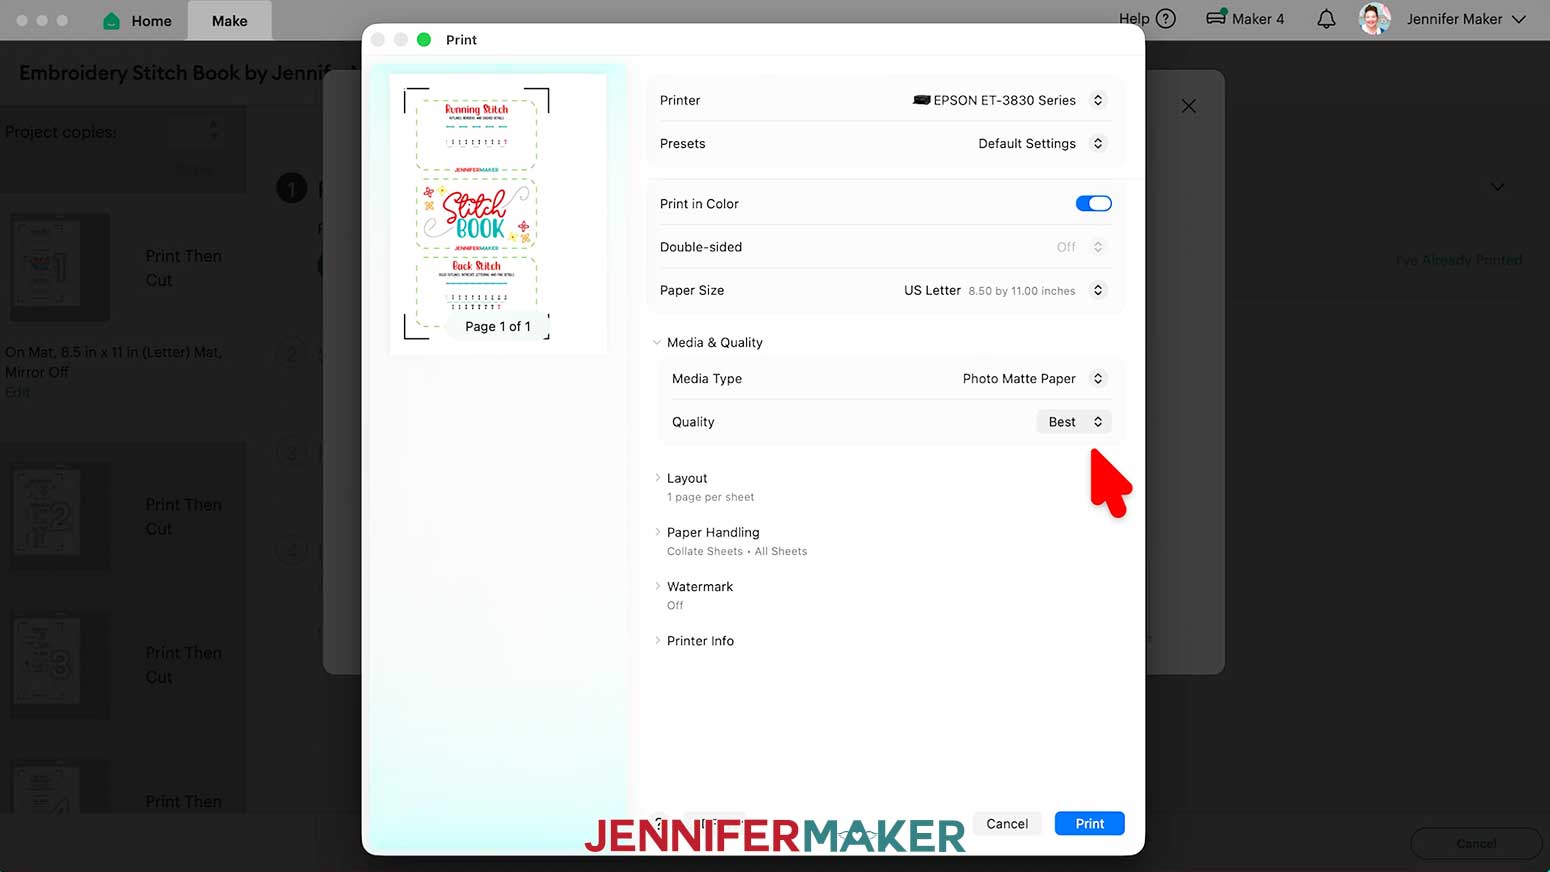
- In the System Dialog window, make sure your color printer is selected, change the Media Type to “Photo Matte Paper,” and change the Quality to “Best.”
NOTE: Not all printer settings will be the same, but you can use my choices as guidelines. - Load the photo paper into your printer according to the directions on the package.
NOTE: If you’re using single-sided photo paper for printing, make sure your paper is facing the correct way in the tray, as the ink will appear washed out if printed on the wrong side. Consult the packaging for guidance. - Click “Print” to send the first page of Print Then Cut cards to your printer.
NOTE: My cards print three per page and I’ll Print Then Cut them one page at a time. - Let the print dry before handling it to avoid smudges.
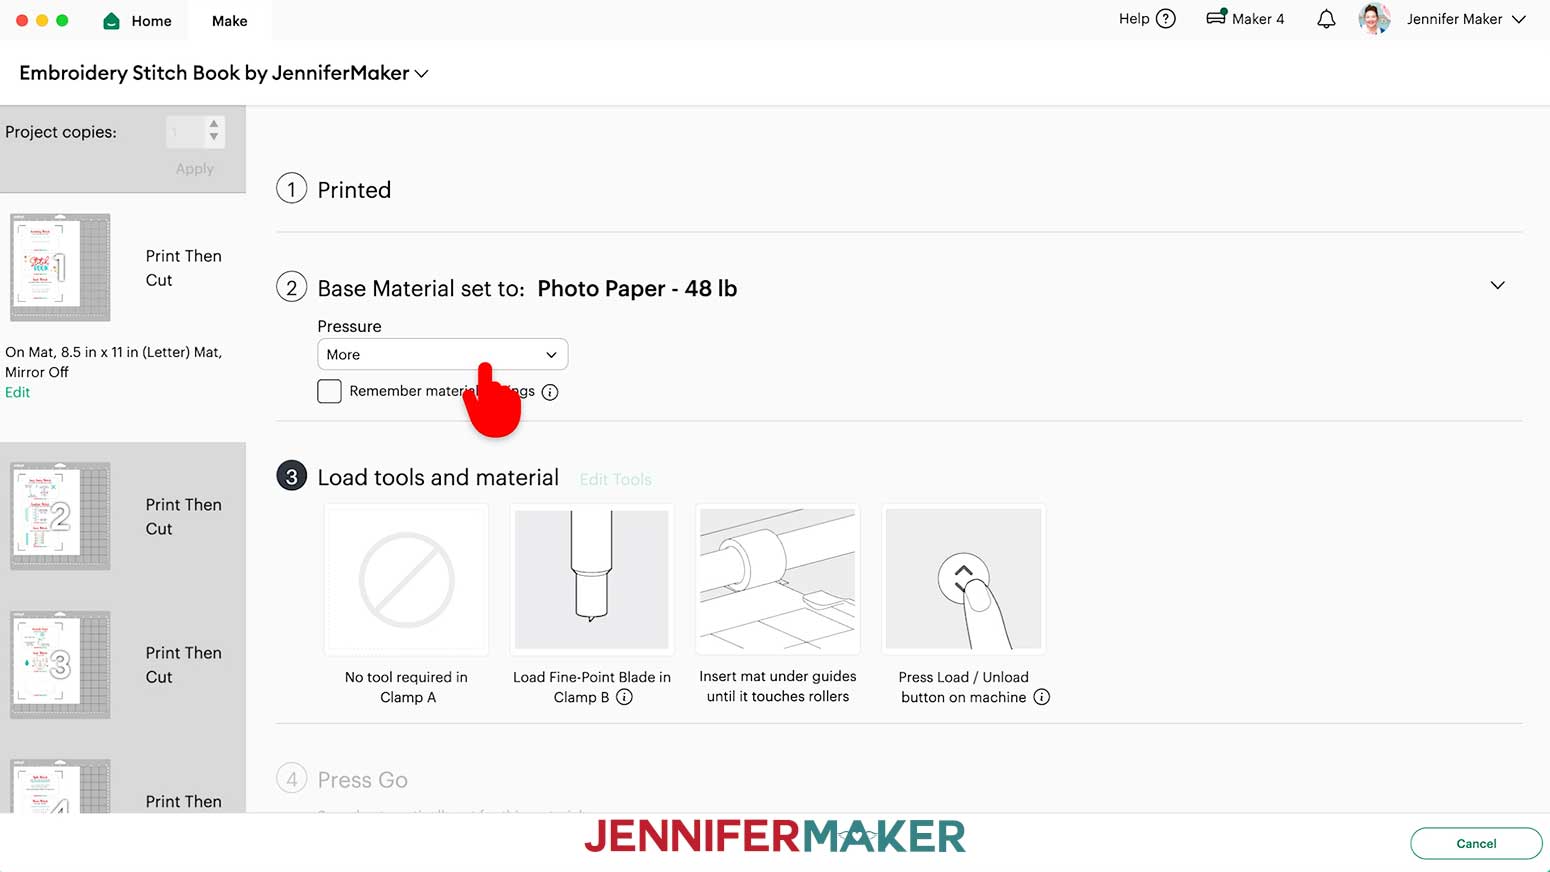
- Back on Cricut Design Space’s "Make" screen, set the Base Material for your first mat. I’ll use the “Photo Paper - 48lb” setting with “More” Pressure for cleaner cuts.
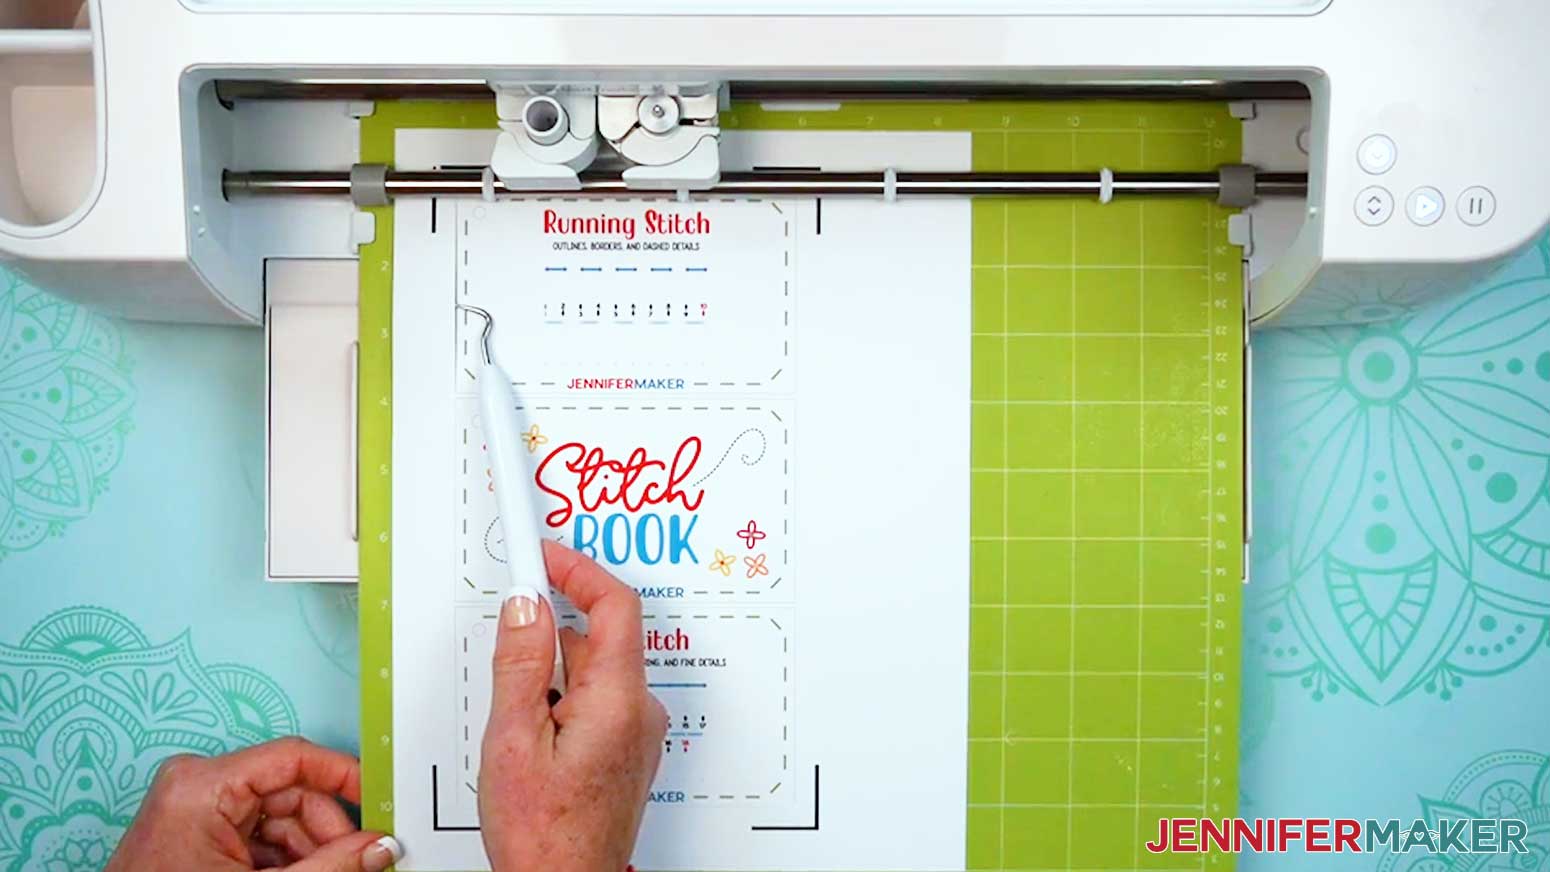
NOTE: If using cardstock instead, the “Medium Cardstock - 80 lb. (216 gsm)” setting worked well for me. - Place your printed sheet face up on a green StandardGrip machine mat to match the screen preview.
NOTE: Make sure the cards match the machine mat that is being cut so the holes are cut on the correct cards. Printing and cutting one page at a time helps keep everything matched up. - Place a clean sheet of copy paper on top of the print to protect it.
- Use a brayer to make sure the print is fully adhered.
- Remove the copy paper.
- Check that your Premium Fine-Point Blade is clean and in the clamp.
- Press the flashing “Load/Unload” button to load the prepared mat into your Cricut so it matches the screen.
- Press the flashing middle button to begin cutting.
- When it has finished cutting, don’t unload the mat right away. Gently lift a corner of the material to make sure the cuts went all the way through the photo paper. If not, press the middle button again to make a second pass of cuts in the same spots.
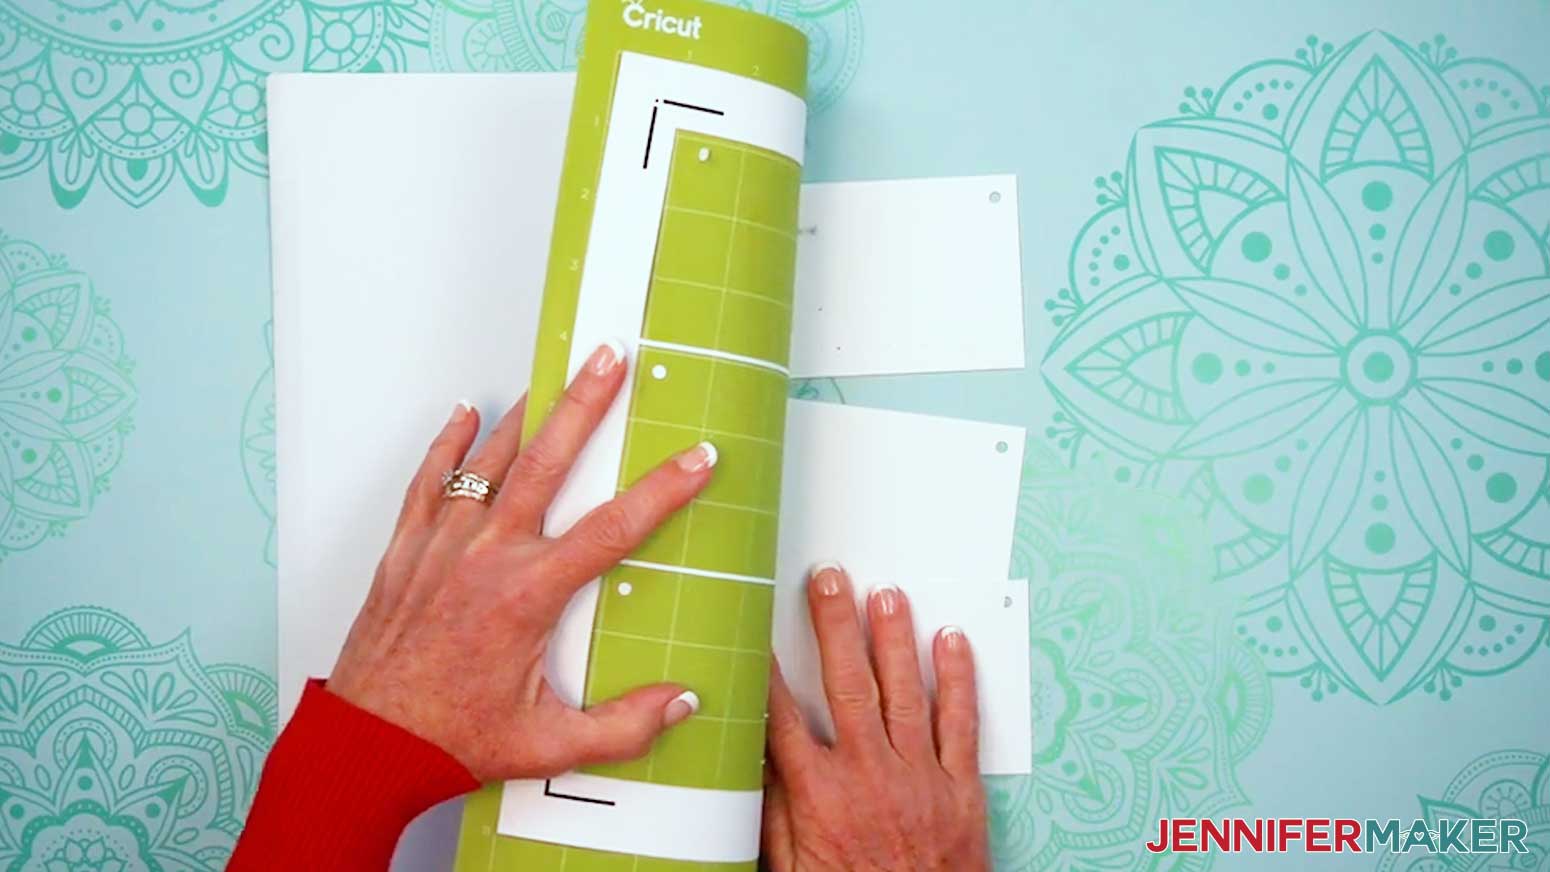
TIP: If you have any issues with your cuts, go to jennifermaker.com/cleaner-cuts. - When the cuts are complete, unload the mat, flip it over onto your work surface, and roll it back to release the photo paper.
TIP: Use a scraper tool to remove any paper circles that remain on the mat. - Repeat Steps 5-21 to Print Then Cut your remaining mats.
- Lay out all of your cards face up.
TIP: Refer to the Design Space screen if you’re not sure about some cards’ orientation.


OPTION 2: PRINT THE PDF
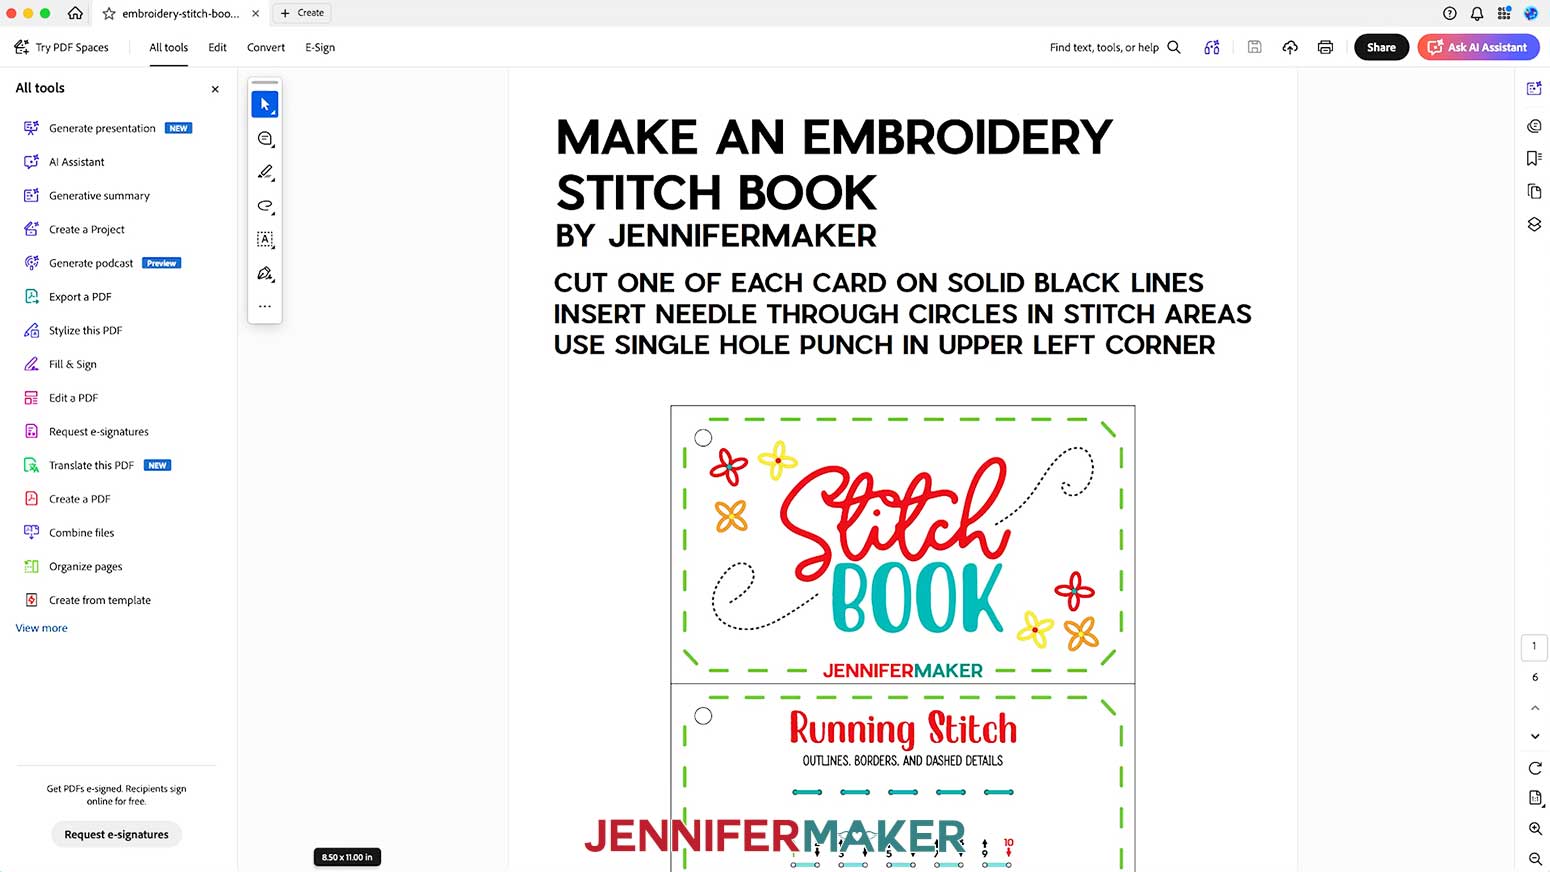
- Open the stitch book file in the PDF folder using your favorite PDF printing software, like the free version of Adobe Acrobat Reader.
NOTE: Pages 1-5 contain your stitch book cards, including the cover card, 12 stitch cards, and a practice design card. Page 6 has the stitch reference for the practice design. - Click the “Print” icon to bring up your software’s print settings.
- Make sure the correct color printer is selected.
- Click on “Properties,” then set the “Pages to Print” to “Pages” and enter “1-5” in the page numbers field, make sure “Actual size” is selected under “Page Sizing & Handling,” change the Paper Type to “Photo Matte Paper,” change the Quality to “Best,” and click “OK.”
NOTE: Not all printer settings will be the same, but you can use my choices as guidelines. - Load the photo paper into your printer according to the directions on the package.
NOTE: If you’re using single-sided photo paper for printing, make sure your paper is facing the correct way in the tray, as the ink will appear washed out if printed on the wrong side. Consult the packaging for guidance. - Click “Print” to send your cards to your printer.
- Let the prints dry before handling them to avoid smudges.
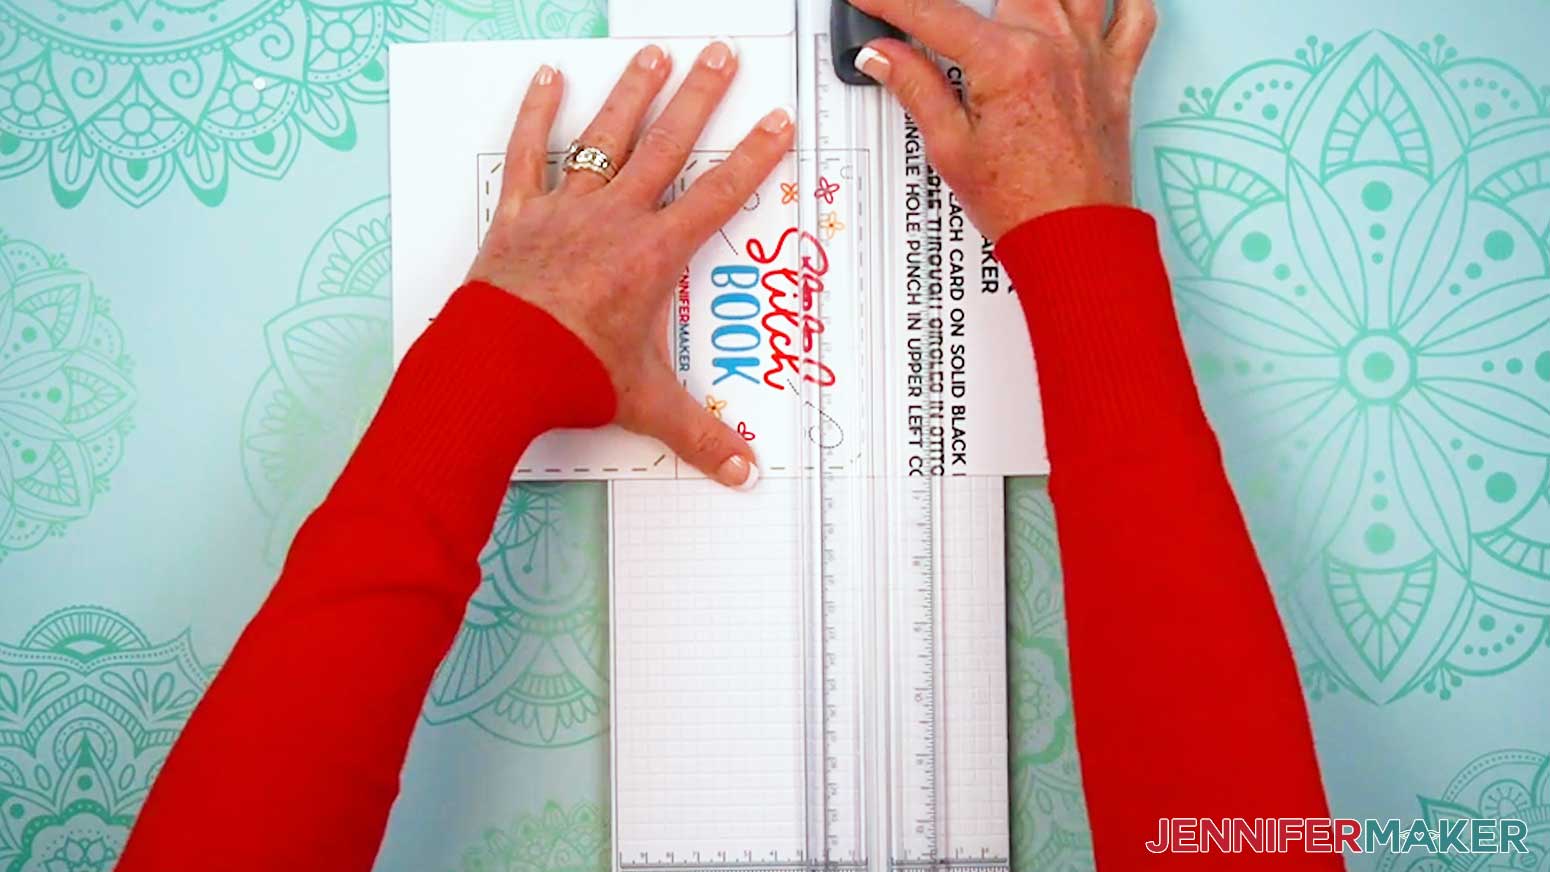
- Use a paper trimmer or scissors to cut along the black outline for each card.
- Use a single hole punch to punch a hole in the top left corner of each card where the large circle is.
- Take your first stitch card and lay it face up on a piece of scrap cardboard.
- Use an embroidery needle to poke each of the small stitch holes into the card, letting the needle poke into the cardboard.
TIP: The cardboard backing helps prevent damage to your work surface or the needle.
NOTE: Poking the holes now makes it easier and safer to stitch the cards later. - Repeat for your remaining stitch cards and the design card.
- Lay out all of your cards face up.
TIP: Refer to the PDF file on screen if you’re not sure about some cards’ orientation.

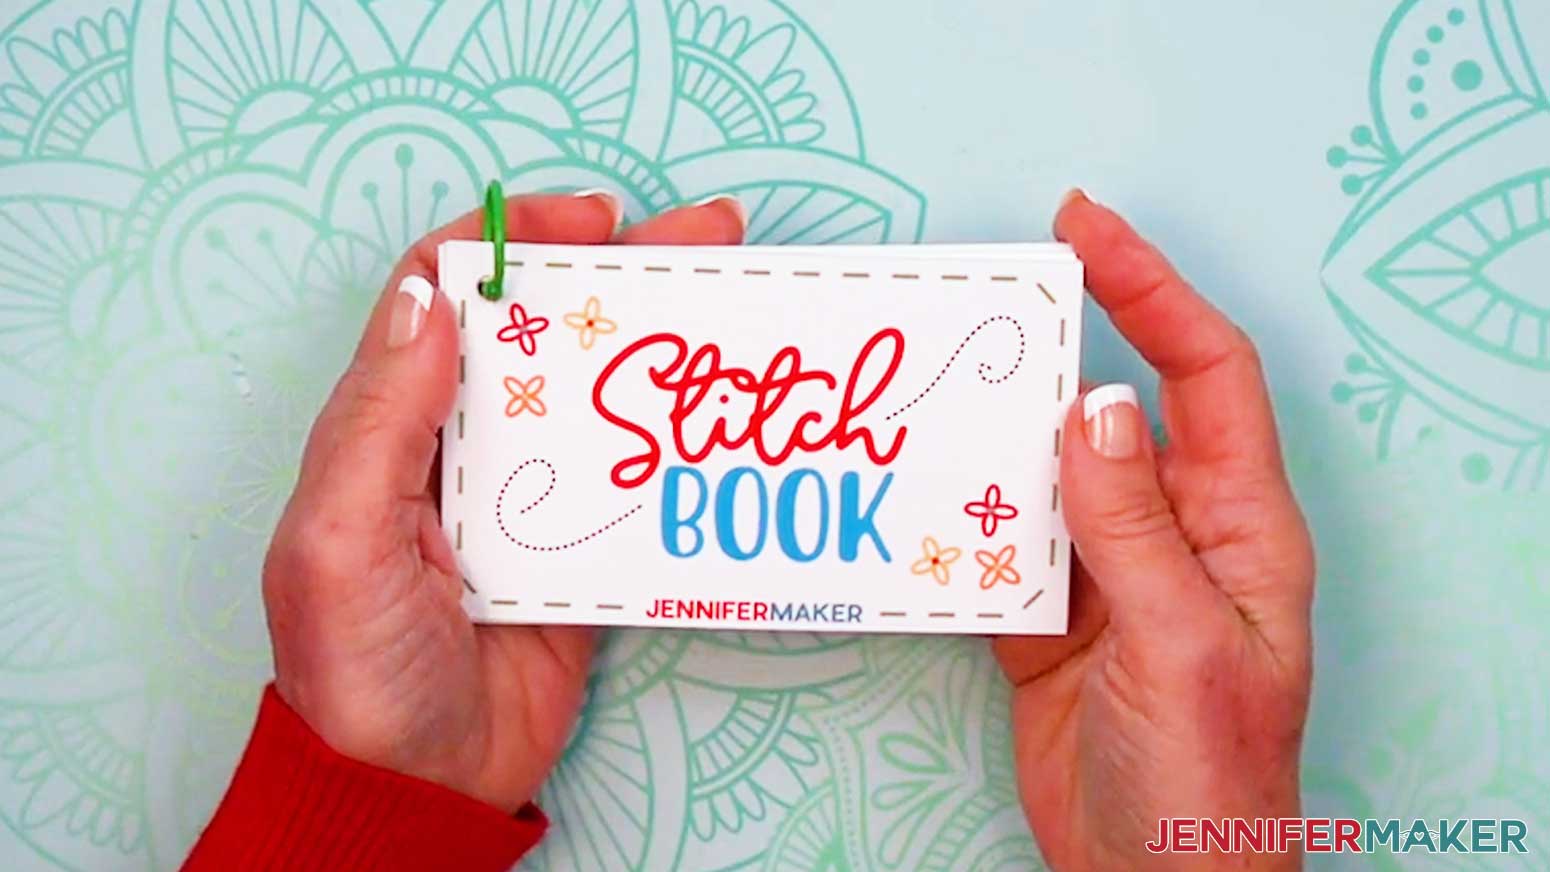
STEP 3: ASSEMBLE YOUR STITCH BOOK
- Stack your stitch book cards face up in order, from cover to back design.
- Unclasp the binder ring.
- Slide one end of the open binder ring through the holes in the top left of your cards.
- Close the binder ring.
- Now you can keep your stitch book cards together so you don’t lose any of them before stitching!
STEP 4: PRACTICE WITH YOUR STITCH BOOK
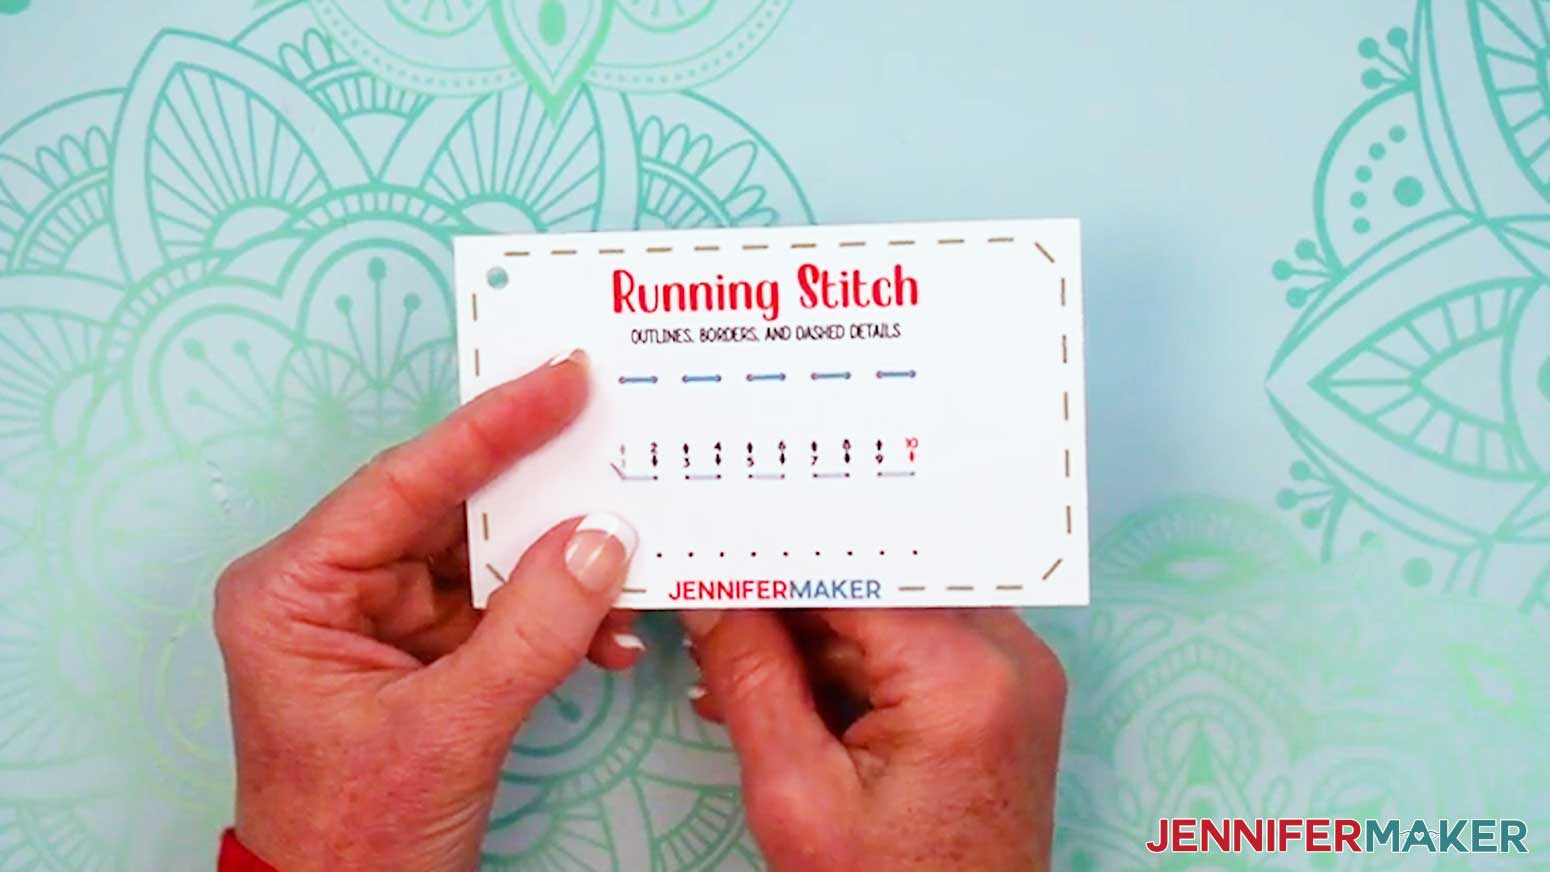
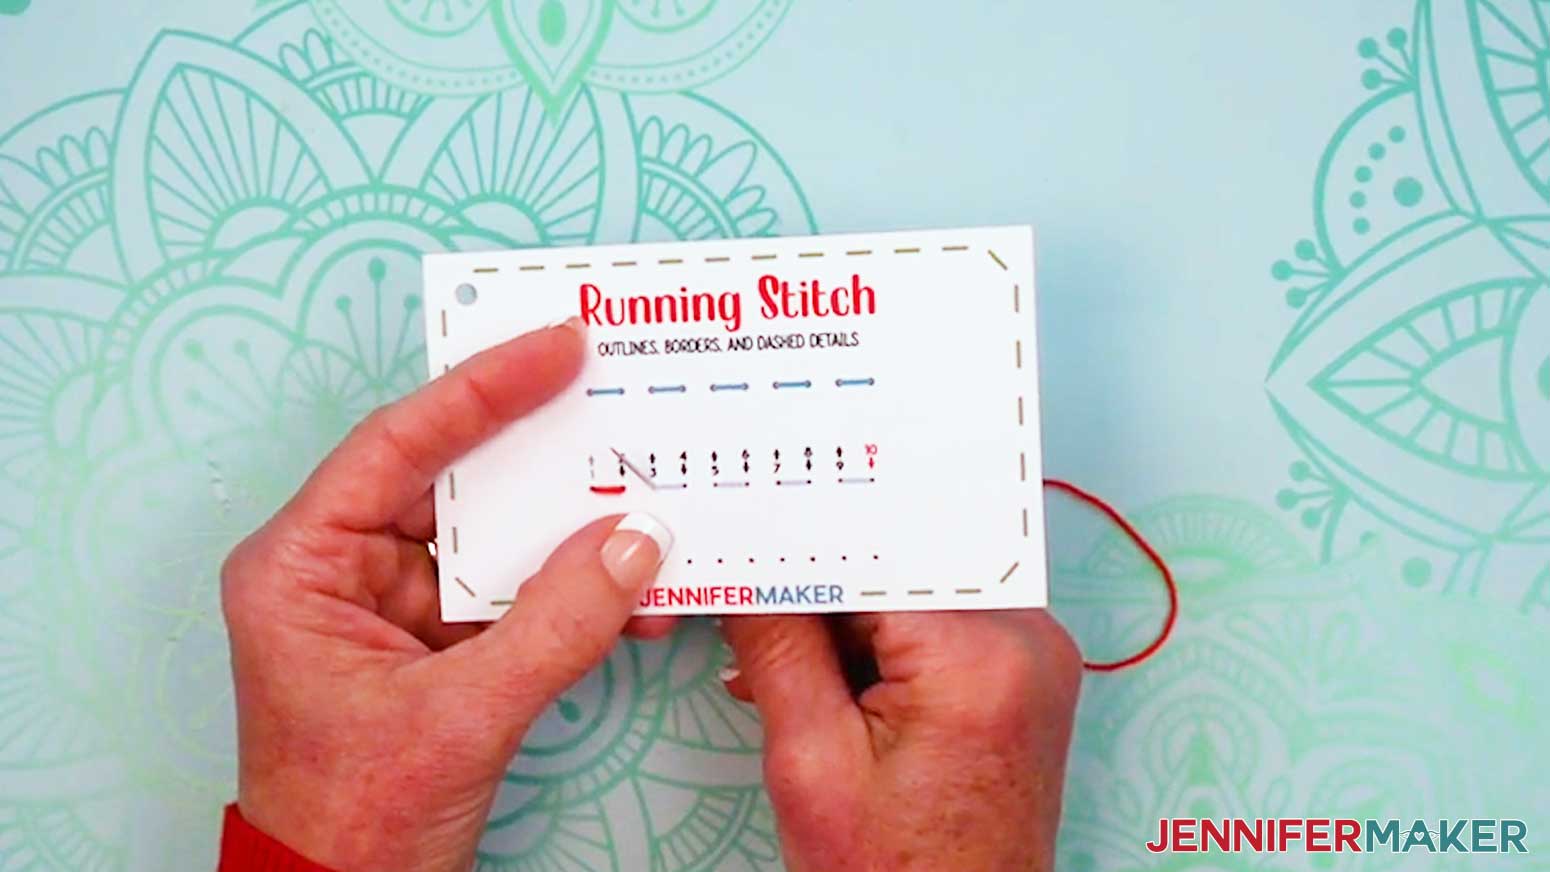
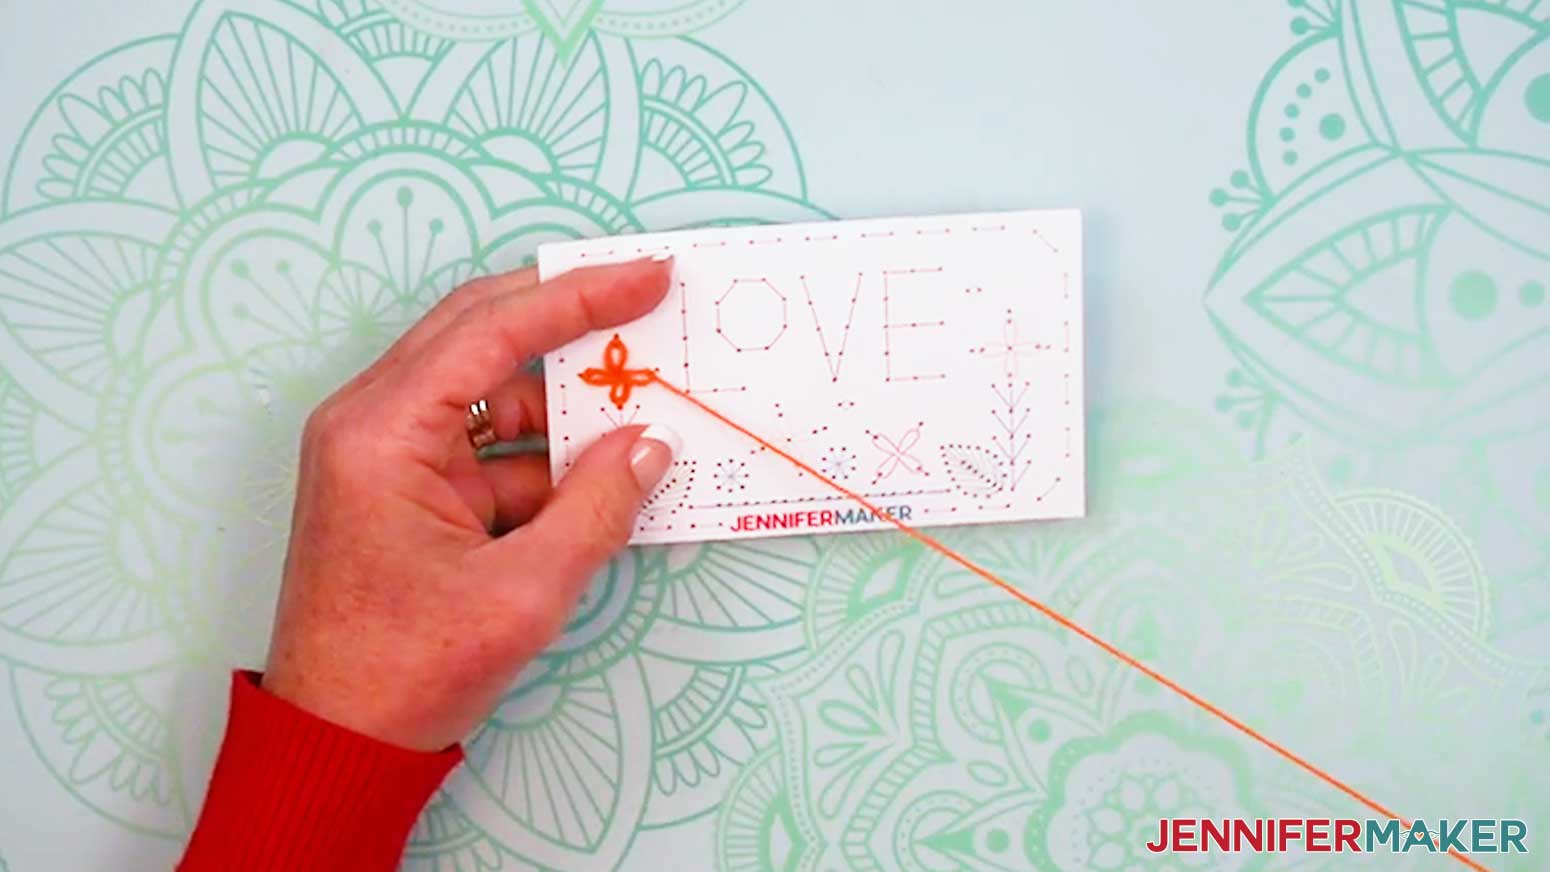
- To use your stitch book, pick a card and remove it from the binder ring to make it easier to work with.
NOTE: I’ll demonstrate with the “running stitch” card. - Use scissors to cut a piece of embroidery floss about 12-18” long.
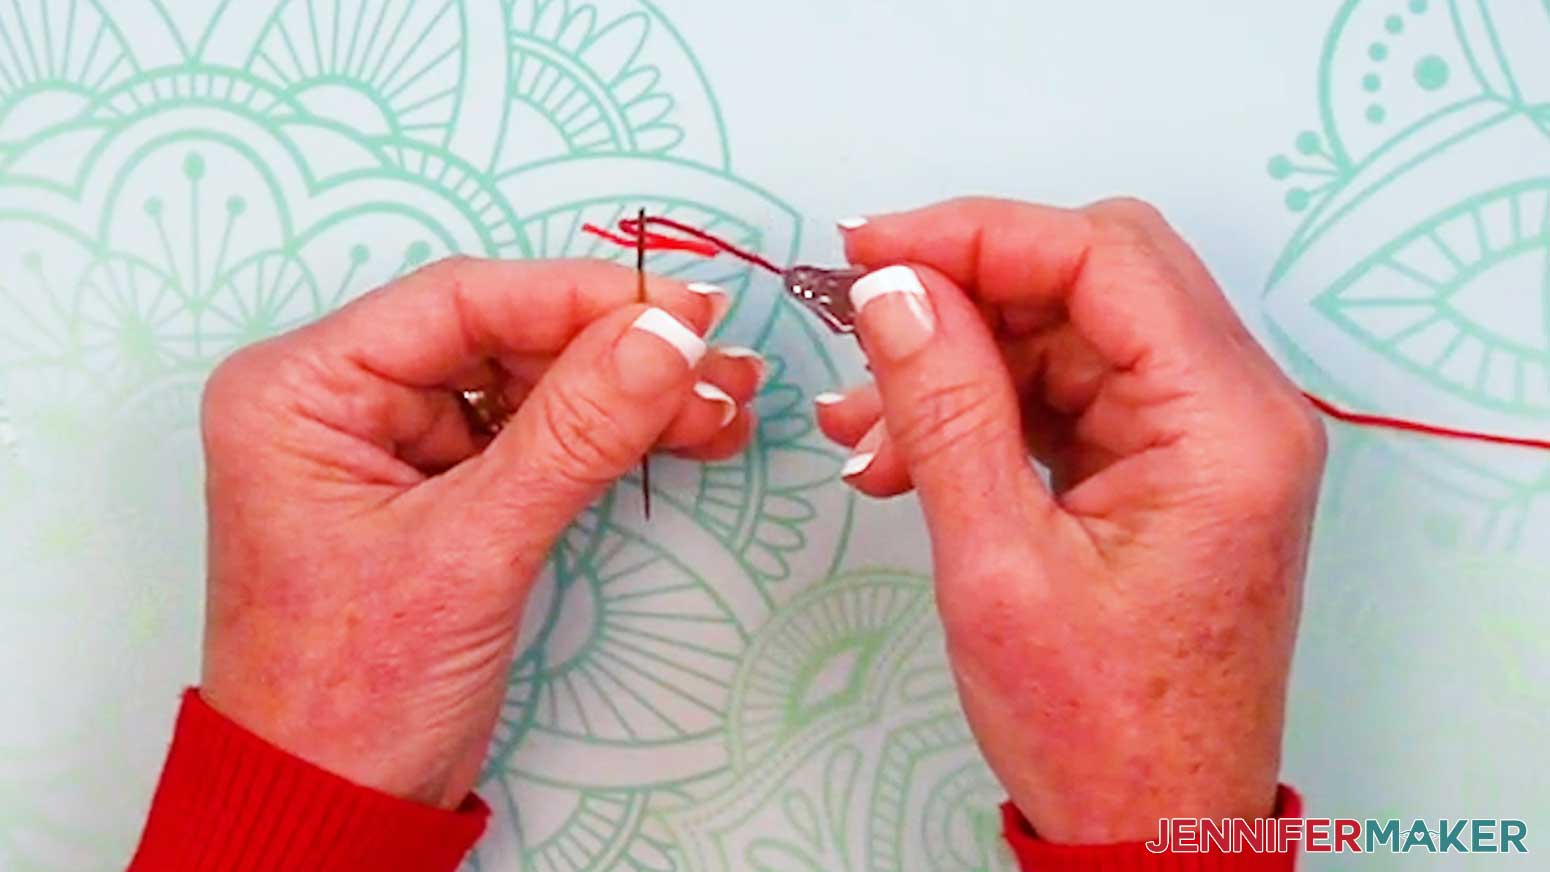
- Thread the floss through the eye of your sewing needle.
TIP: If you have trouble threading your needle, you can also use a needle threading tool. Push the loop end of the threader through the needle’s eye. Slide your thread through the loop, then pull the loop back through the eye. - Tie a knot about 1” from the end of the thread farthest from the needle. Now you’re ready to begin stitching!
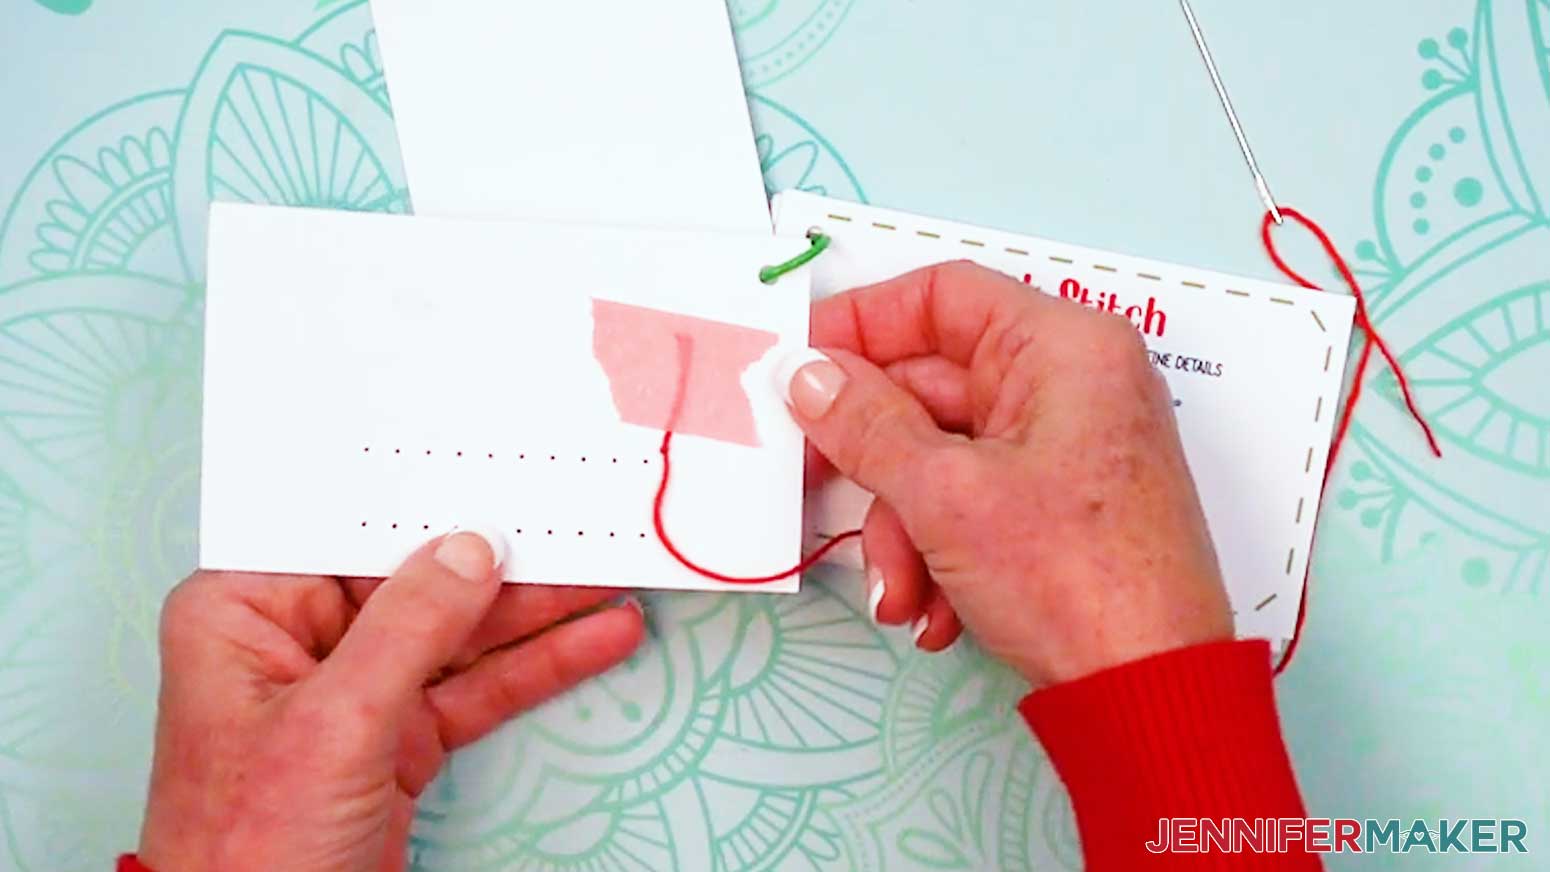
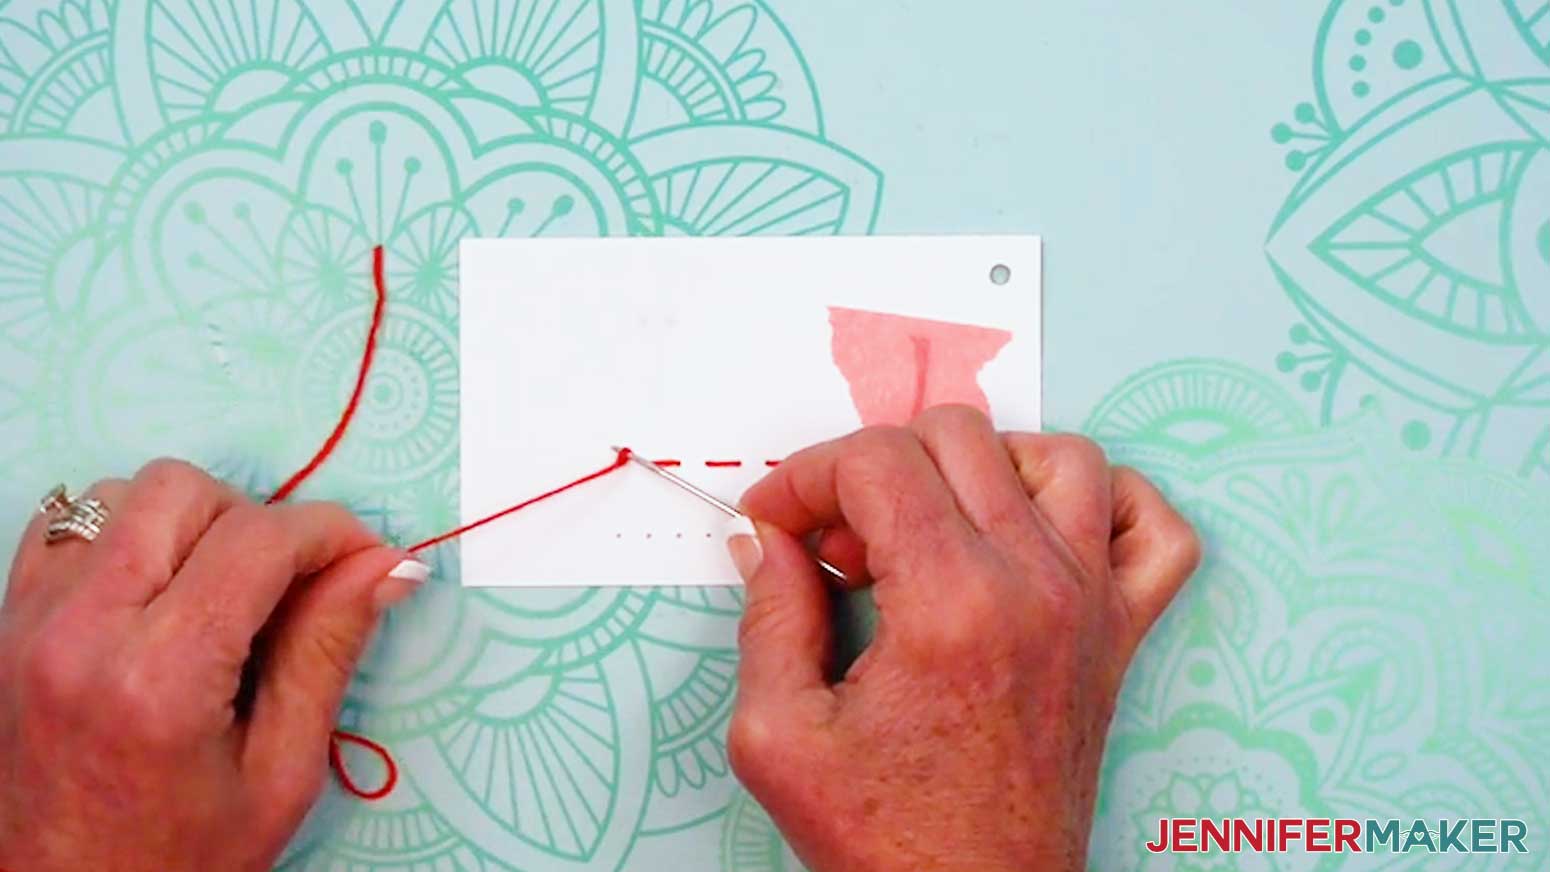
TIP: Use painter’s tape to secure the end of the thread to the back of the card if you don't want any hanging threads. - Start by inserting the threaded needle from the back of the card up into Hole 1 (shown in green). This number has an up arrow, meaning the needle will go from the back up through the hole on that step.
- Pull the entire length of the floss through so the knot rests at the back of the card. Don’t pull too hard or the knot may come through.
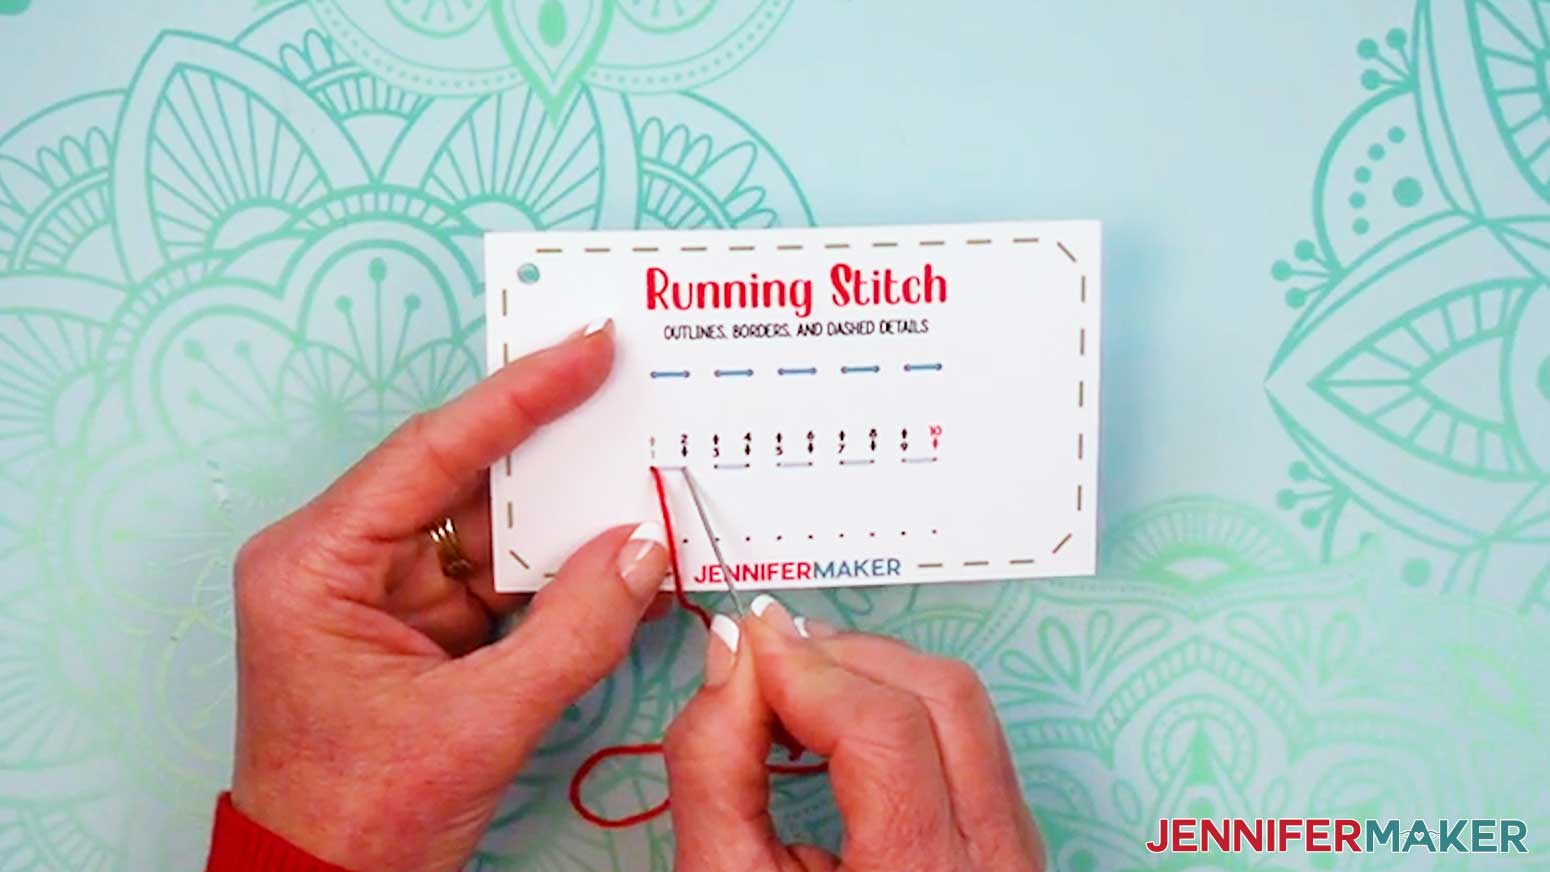
- Insert the threaded needle down into Hole 2 to complete your first running stitch. This number has a down arrow, meaning the needle will go down on that step.
- Bring the needle back up through Hole 3.
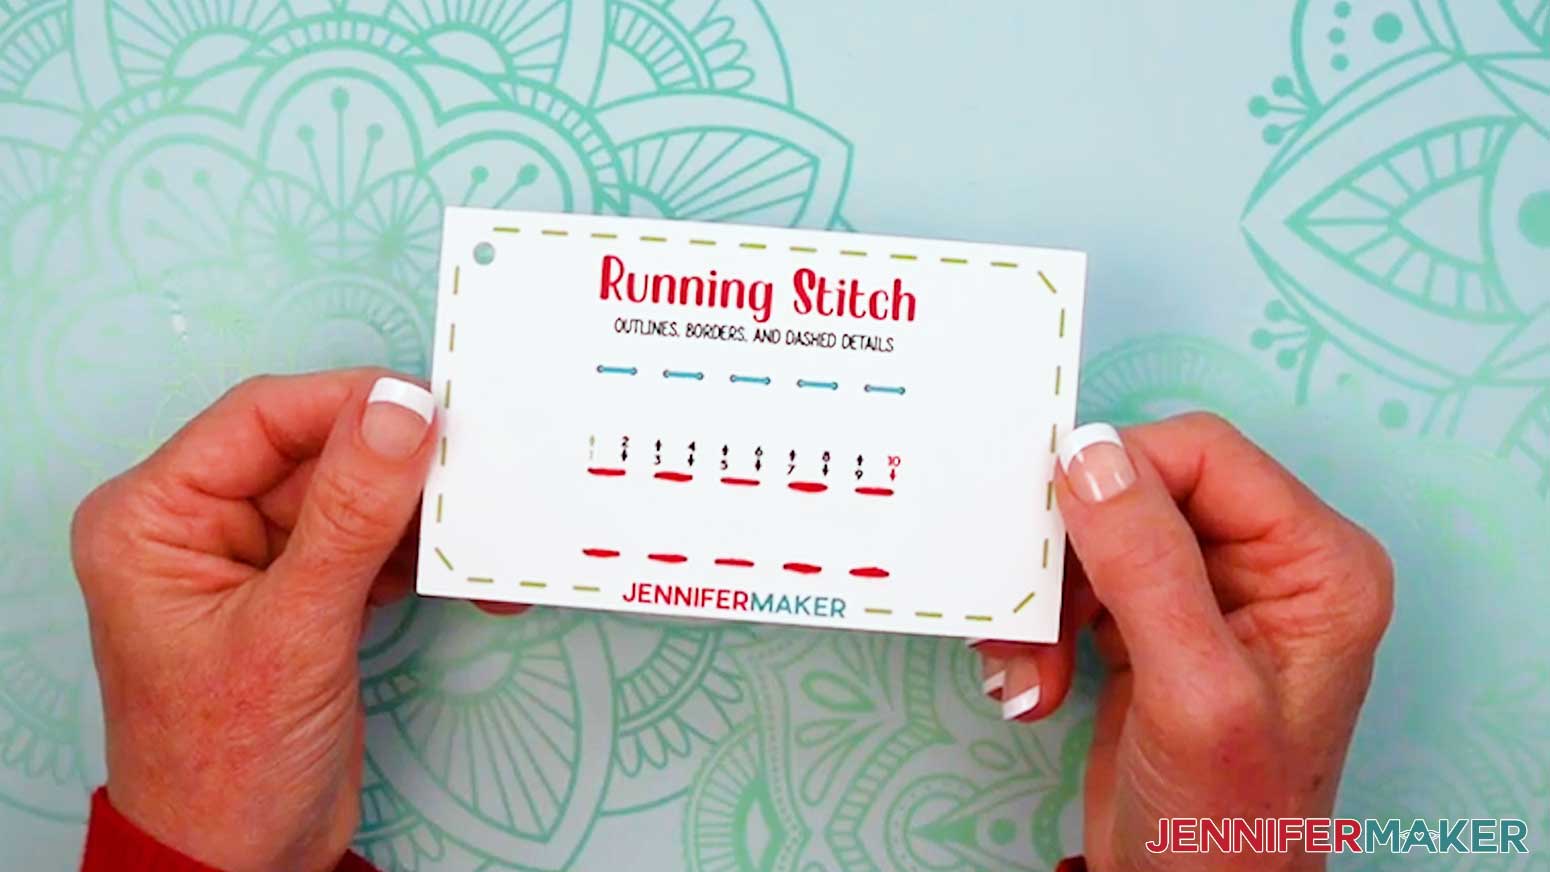
- Continue following the numbers and arrows until you thread Hole 10 with a red number and a down arrow.
TIP: Pay attention to any special instructions printed on the cards.
NOTE: Stitches grouped together in a box use the same hole. - Remove the needle from the floss’s loose end after the last stitch.
- Tie a loose knot in the floss.
- Place the end of your needle in the loop of the knot, and slide it close to the photo paper.
- Hold the strands in place with the needle while you pull the tail to tighten the knot.
- Trim the excess floss on both ends to about ⅛” long.
- And now your first card is ready! Add it back to your binder ring for safe-keeping, and grab the next card when you’re ready to stitch.
LINE STITCHES
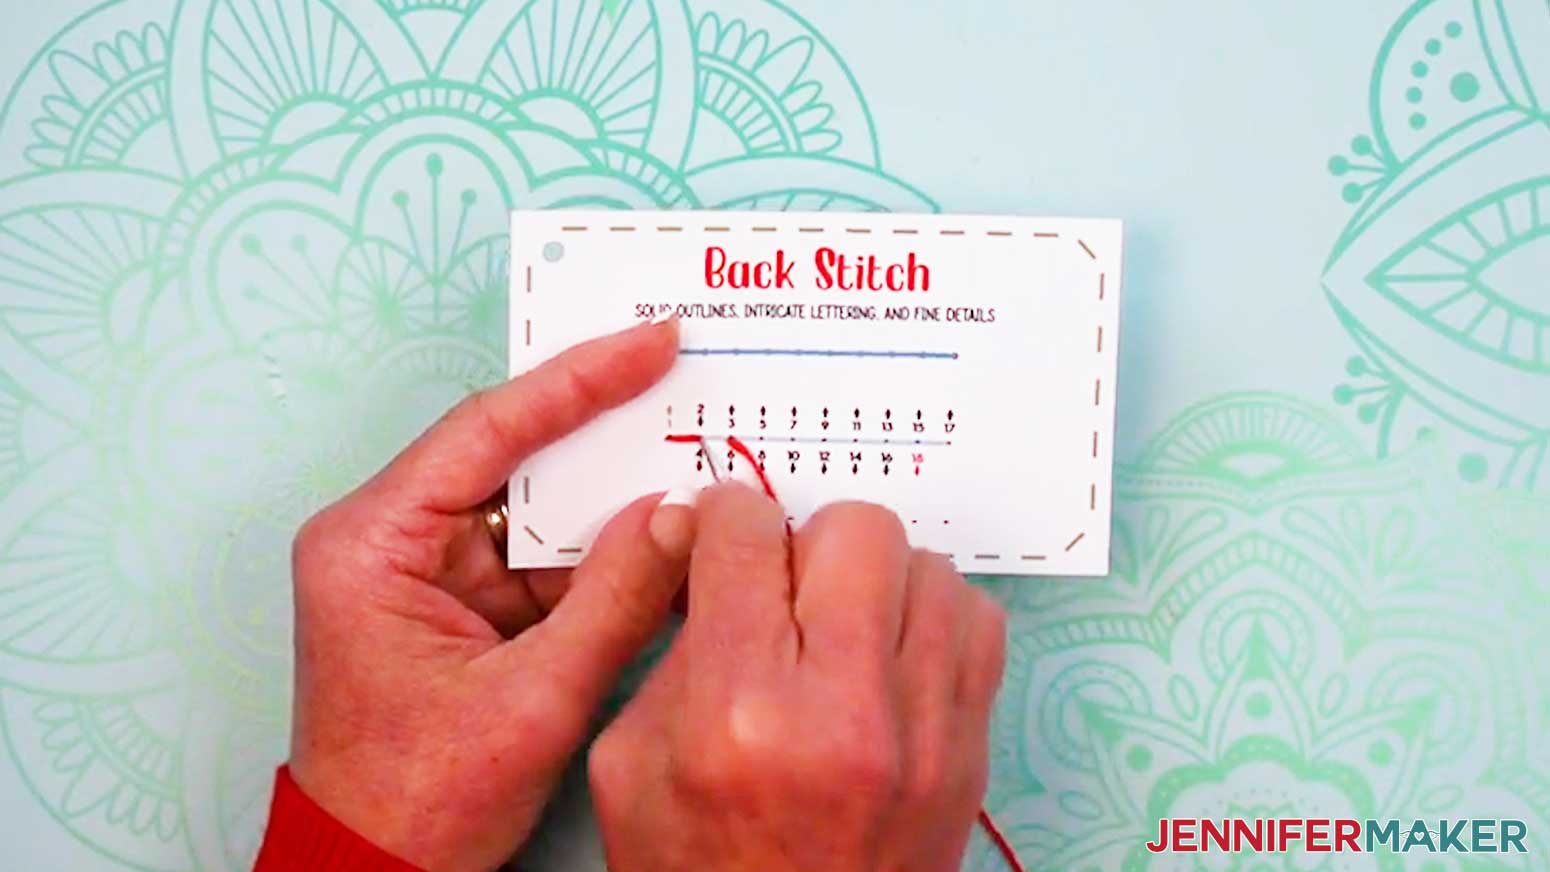
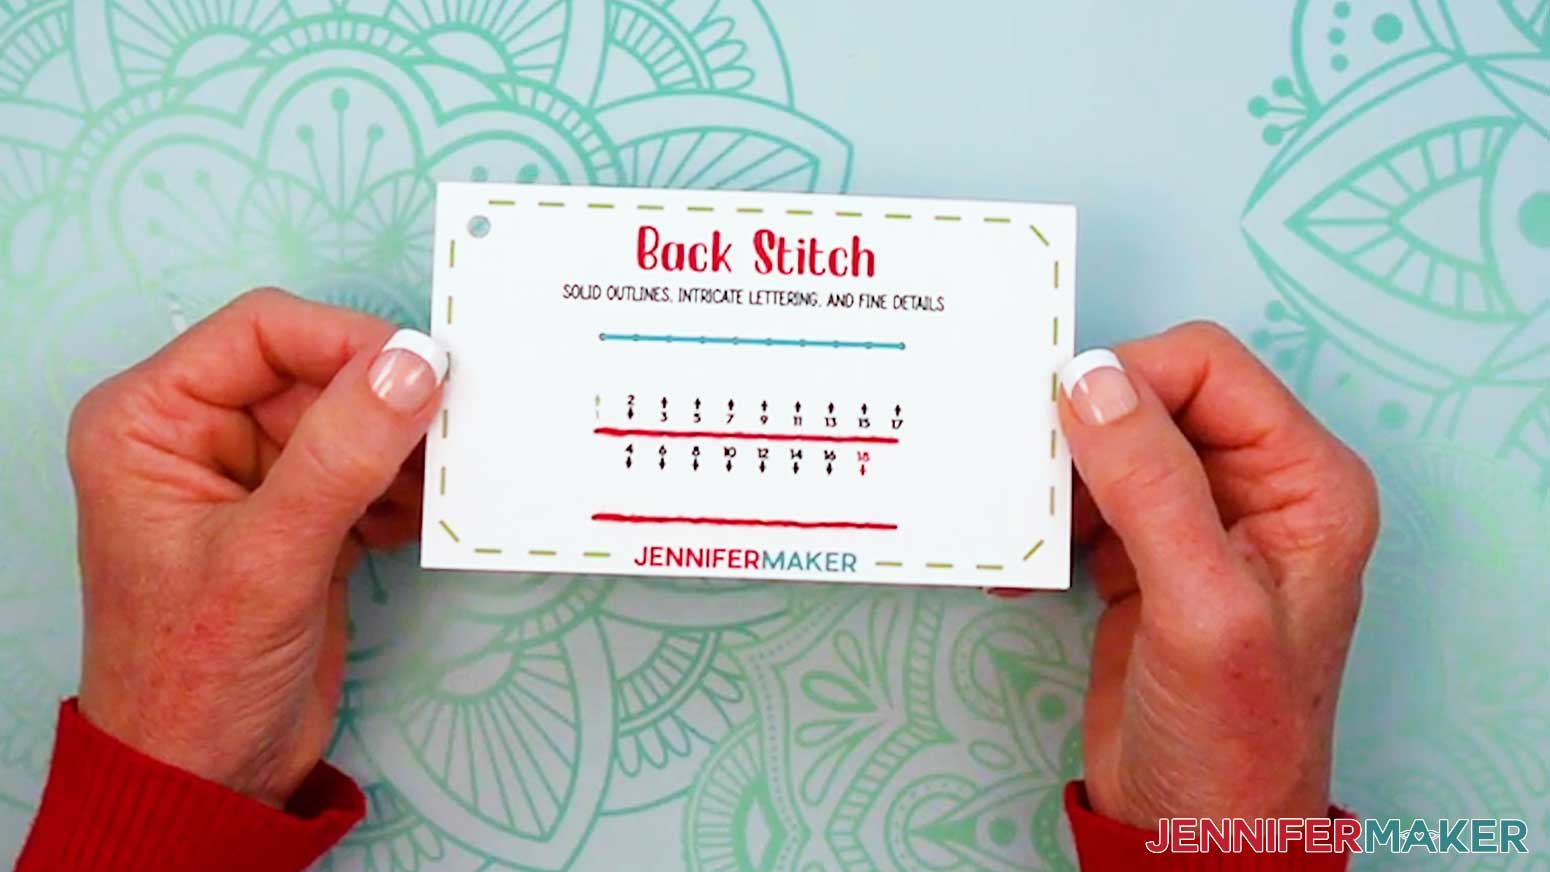
BACK STITCH
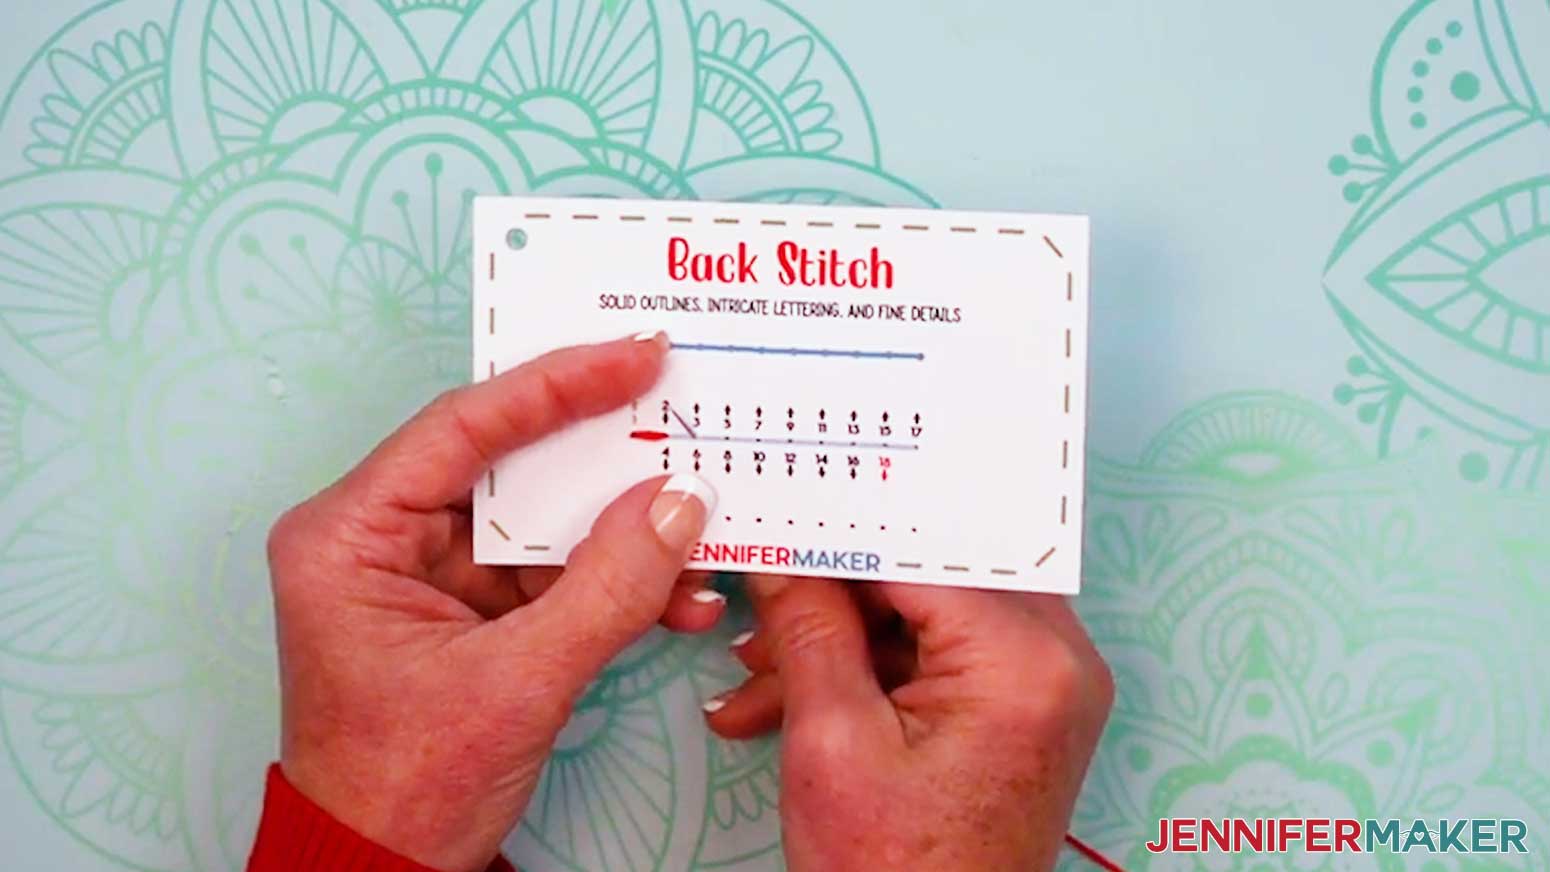
- Grab your “back stitch” card and prepare a needle with thread.
- Insert the threaded needle up through Hole 1.
- Then insert the threaded needle down into Hole 2 to make the first stitch.
- Bring the needle up Hole 3, ahead of the first stitch.
- Then move the needle backward to Hole 4 (the same as Hole 2) to create your first back stitch.
- Thread Holes 5-18 to stitch a solid line of back stitches.
- Tie off and trim your thread.
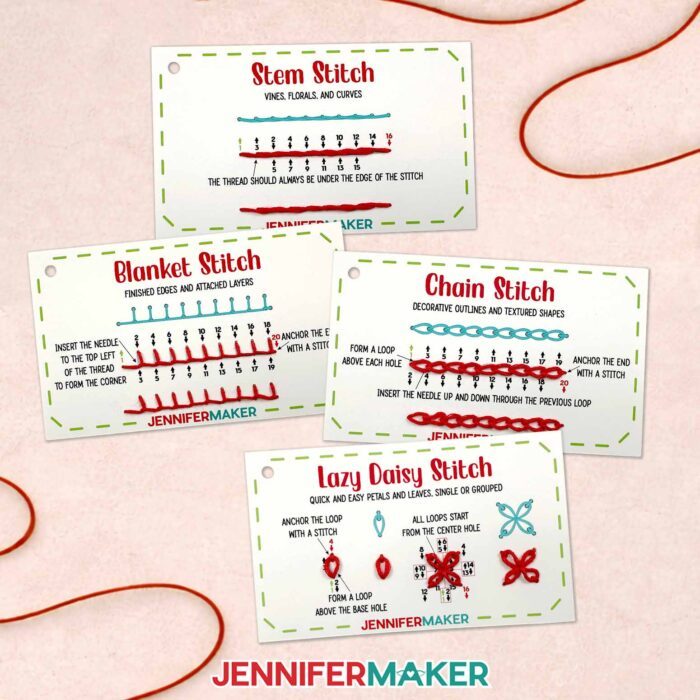
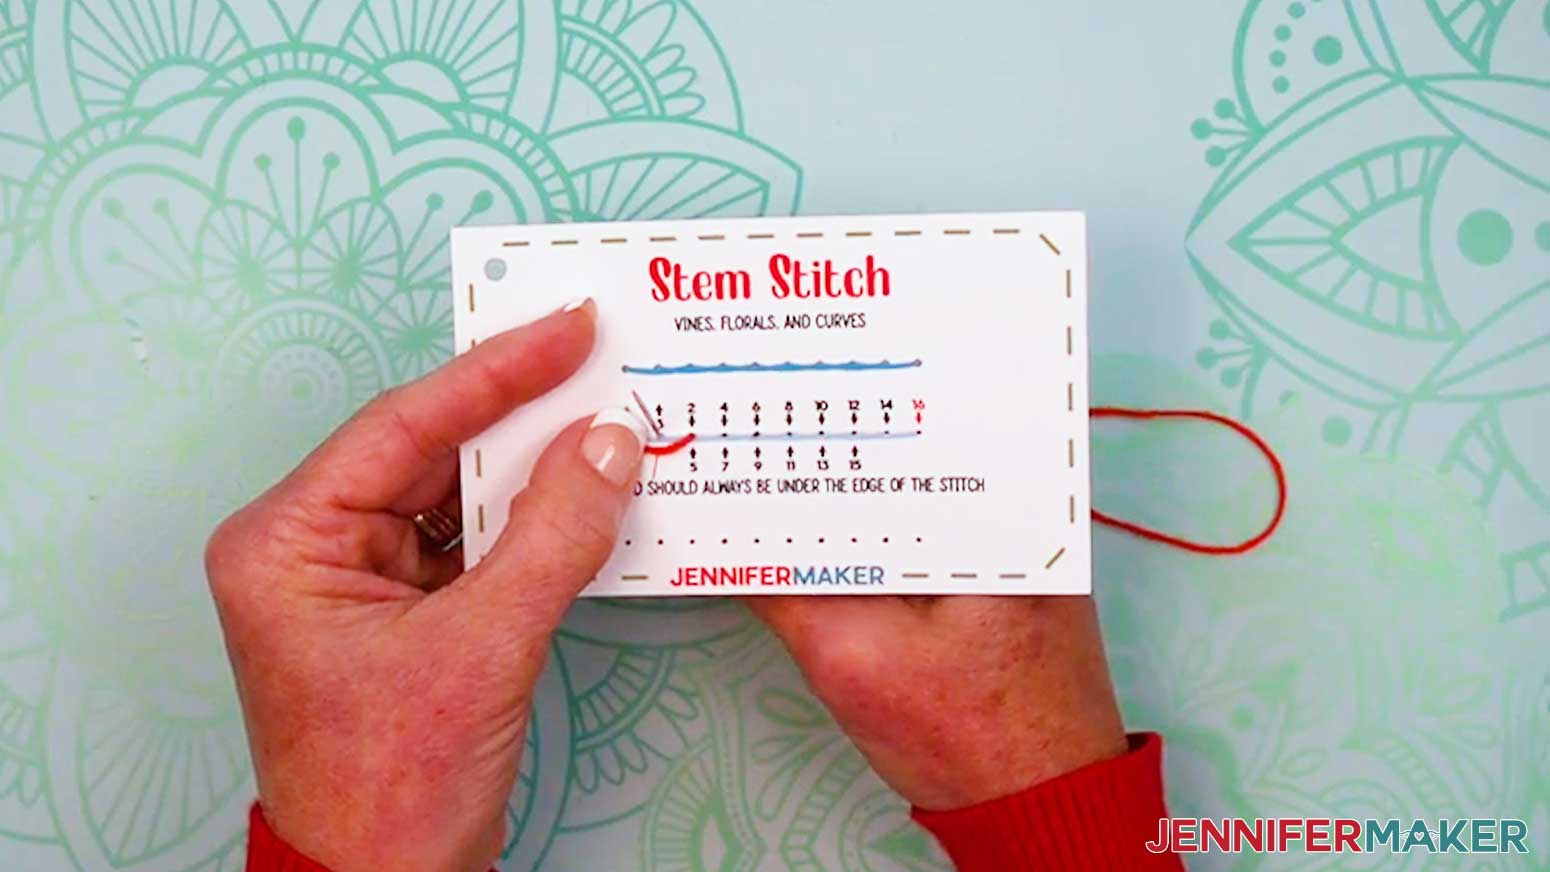
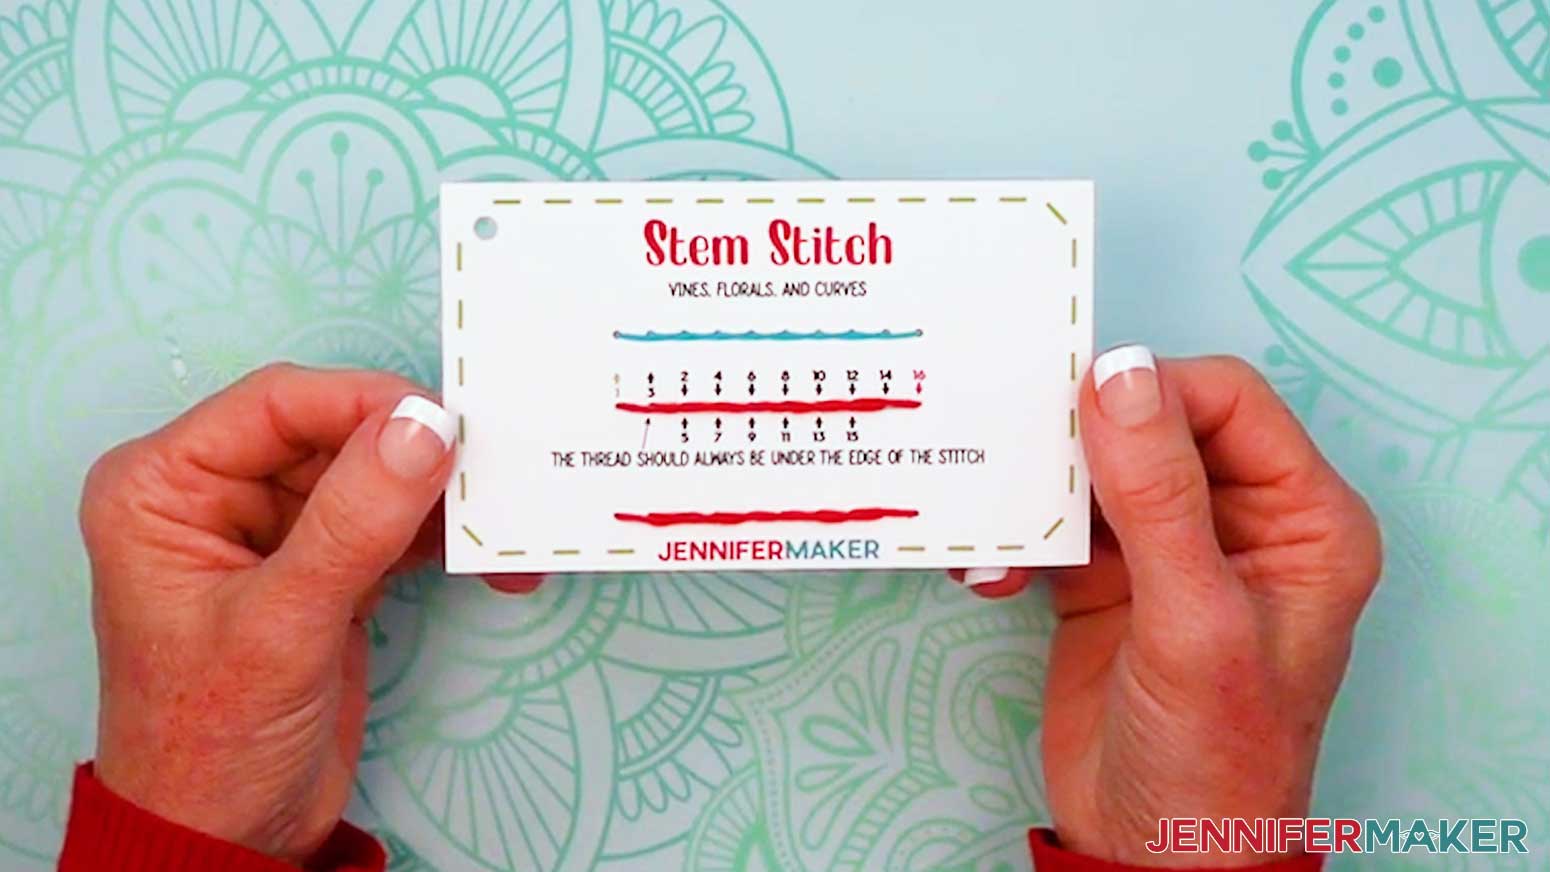
STEM STITCH
- Grab your “stem stitch” card and prepare a needle with thread.
- Insert the threaded needle up through Hole 1.
- Then insert the threaded needle down into Hole 2.
- Bring the needle up Hole 3, just above the thread between Holes 1 and 2.
- Then insert the needle down into Hole 4 so the previous thread runs below the current stitch.
- Thread Holes 5-16 the same way, with the thread always coming up under the edge of the stitch, to stitch a curvy line.
- Tie off and trim your thread.
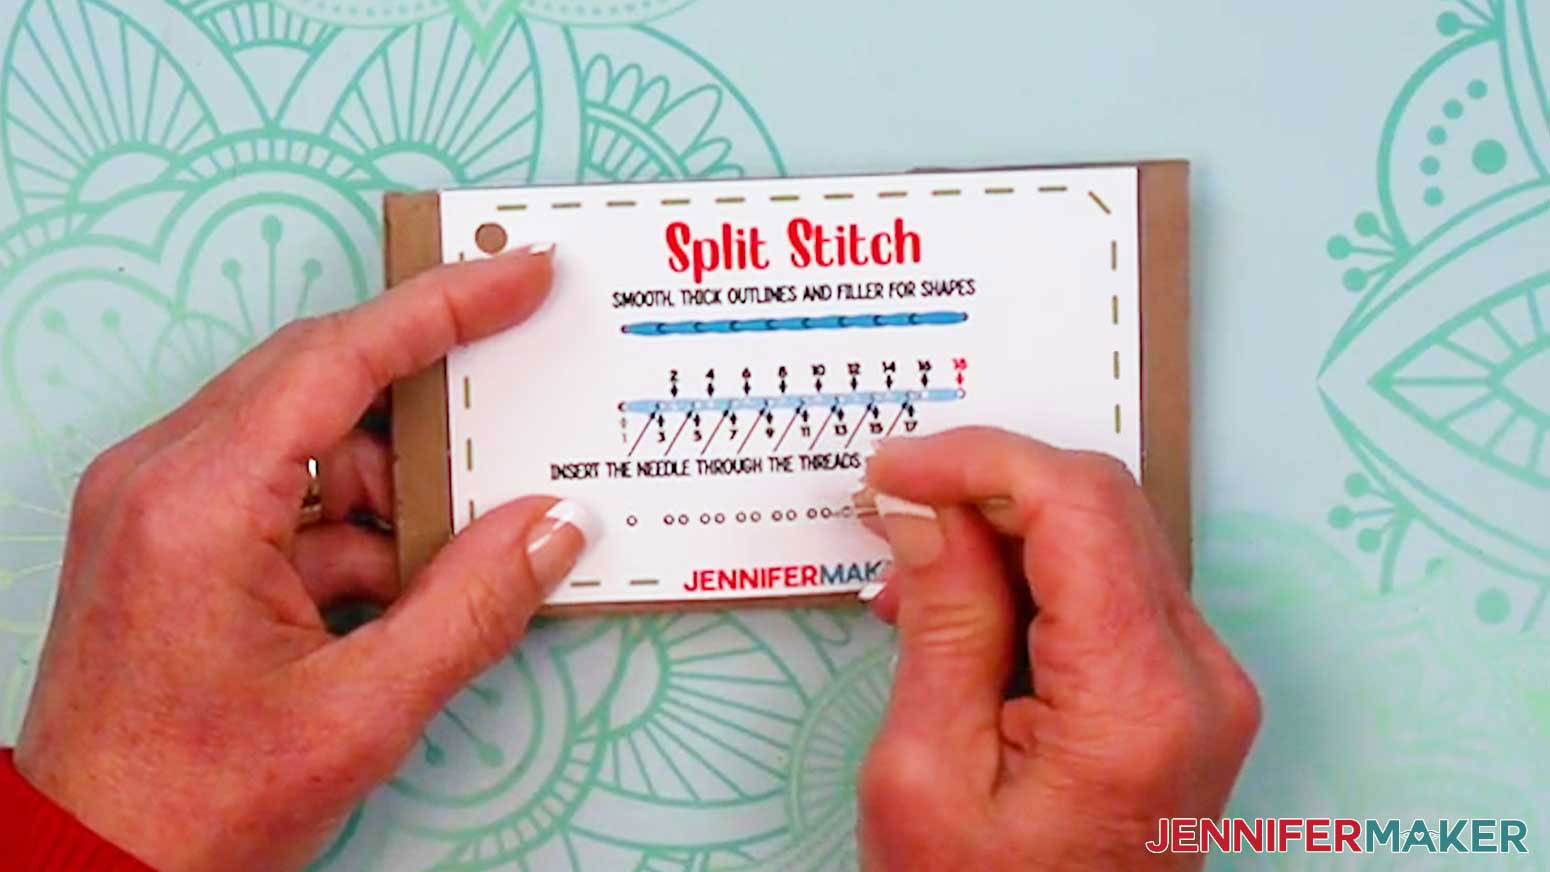
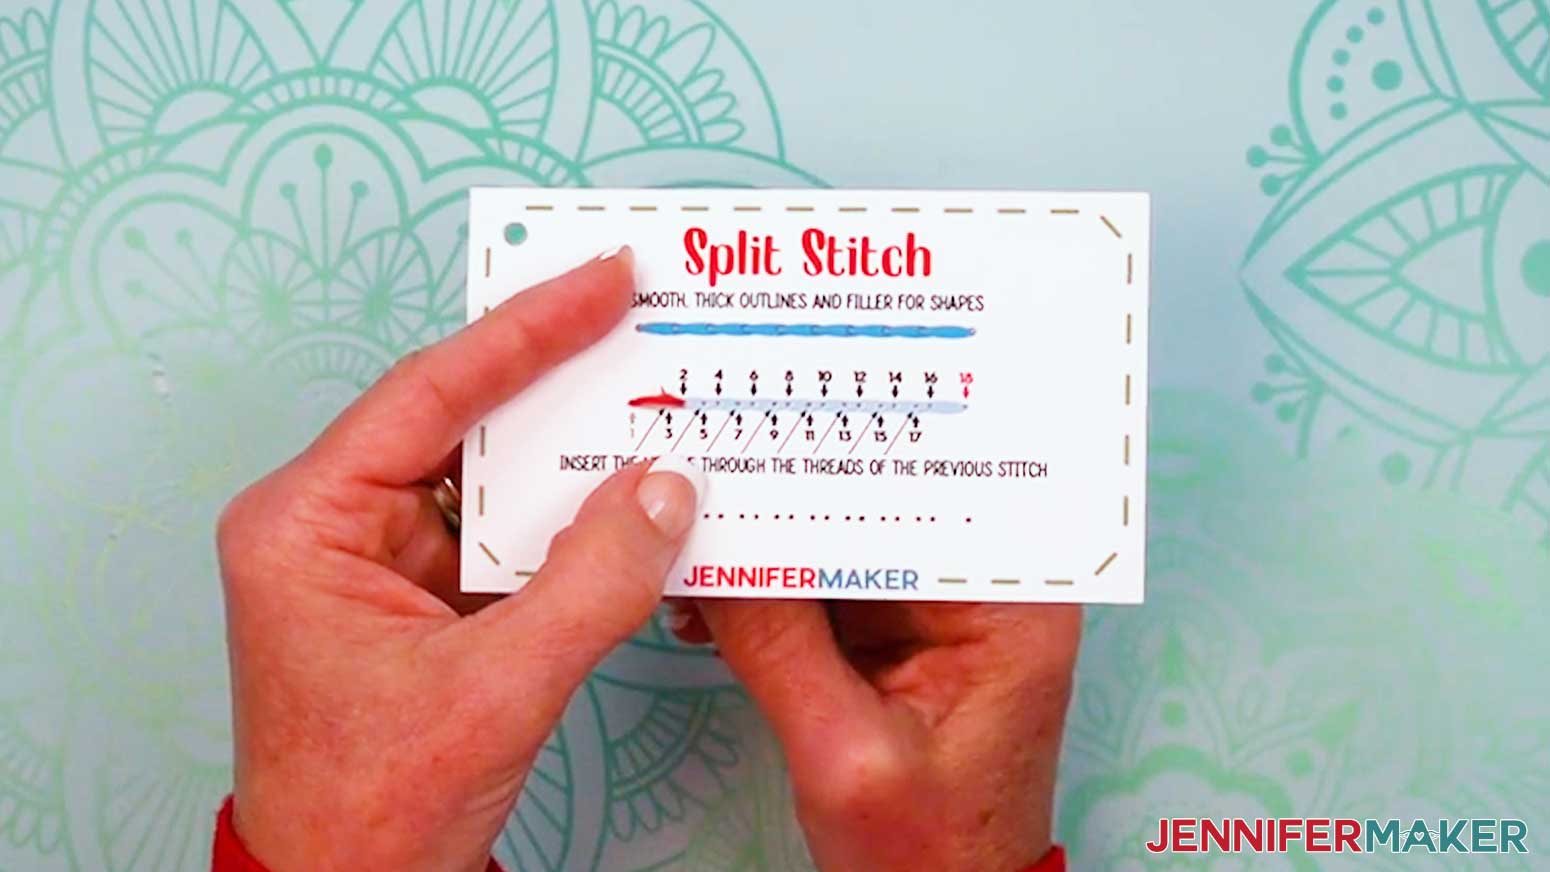
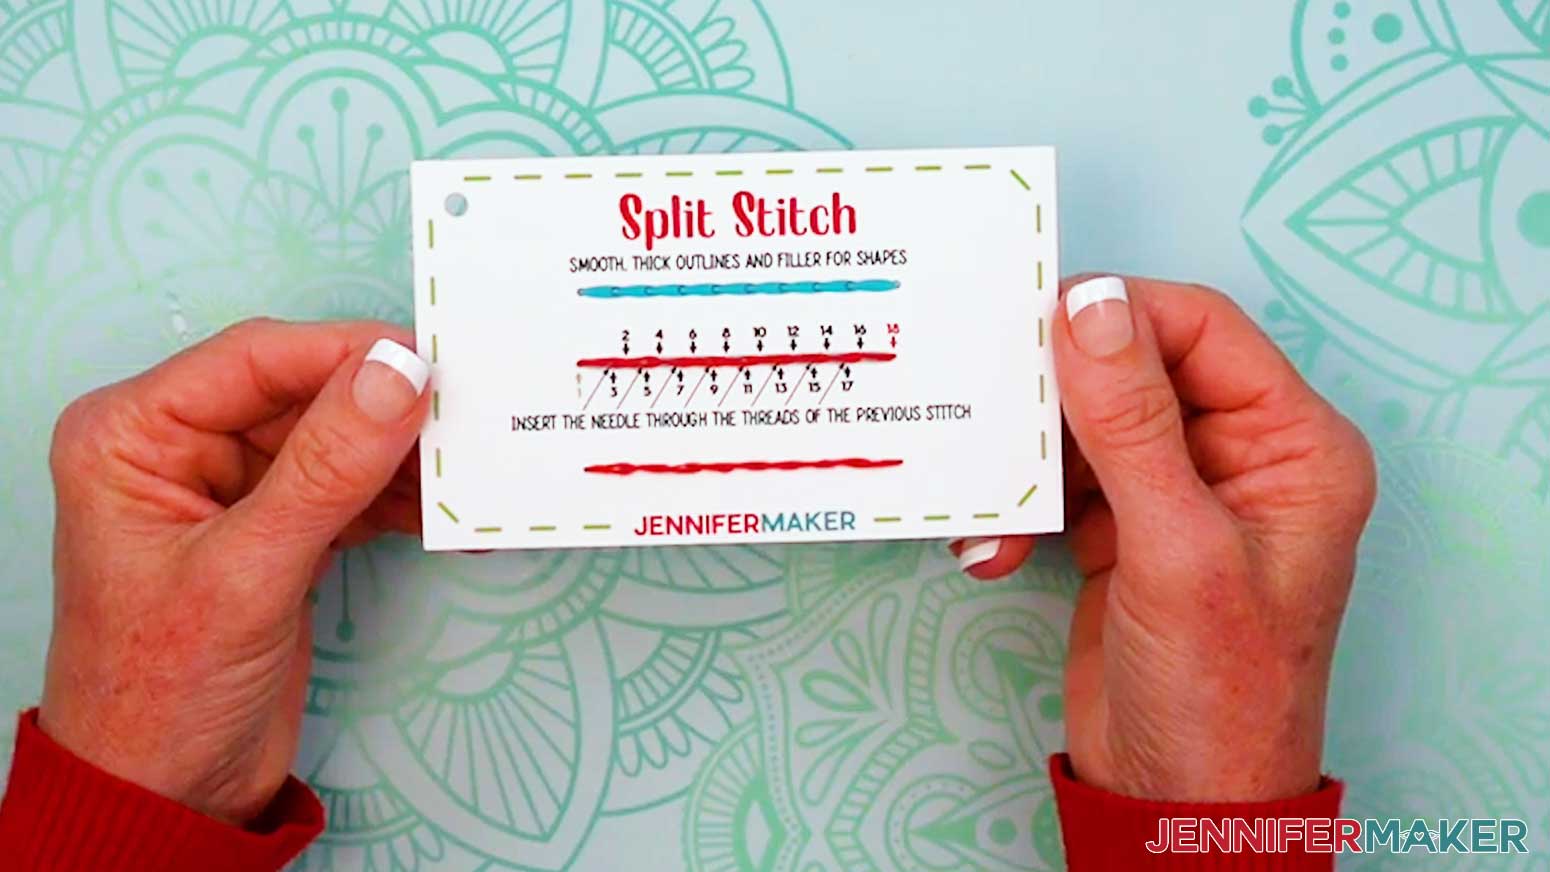
SPLIT STITCH
- Grab your “split stitch” card and prepare a needle with thread.
- Insert the threaded needle up through Hole 1.
- Then insert the threaded needle down into Hole 2.
- Bring the needle up Hole 3, inserting the needle through the threads of the previous stitch.
- Then insert the needle down into Hole 4.
- Thread Holes 5-18 the same way, with odd-numbered (upward) stitches always coming up through the threads of the previous stitch to create a thick line.
- Tie off and trim your thread.
LOOP STITCHES
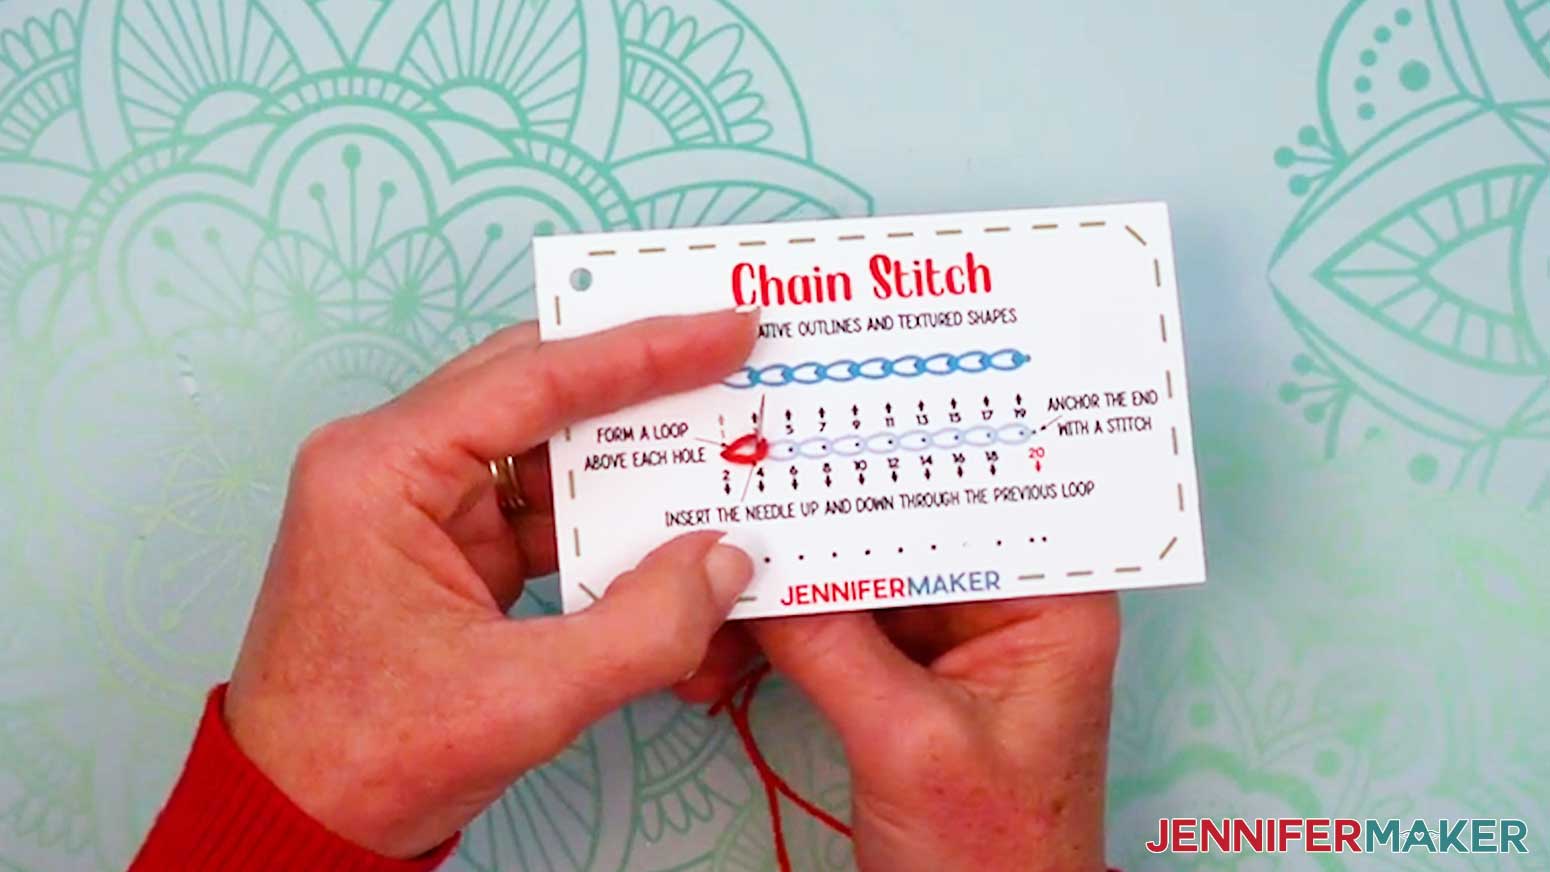
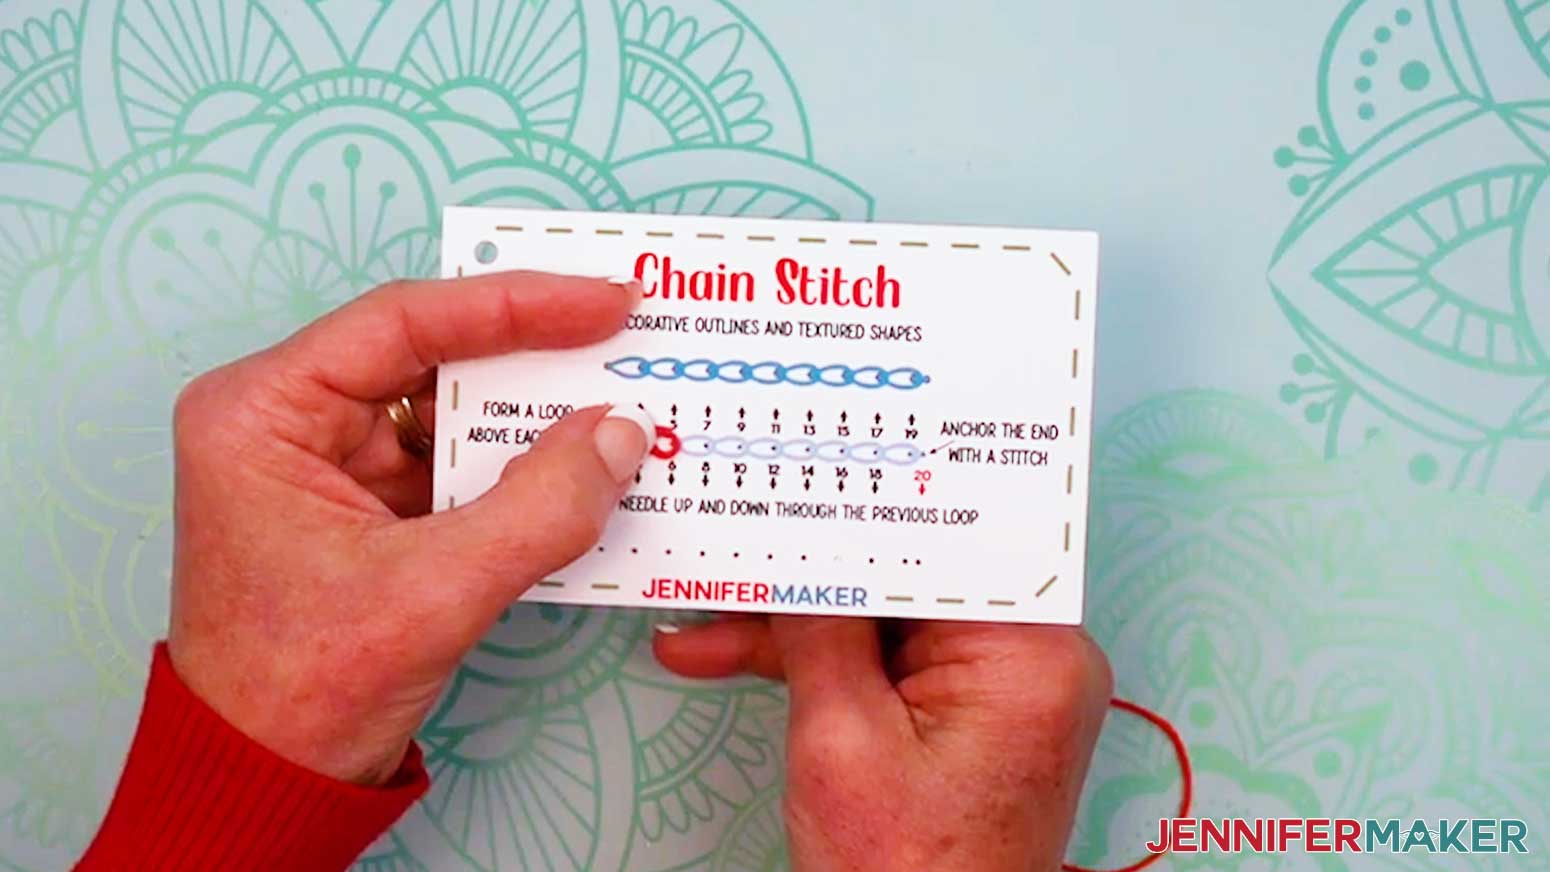
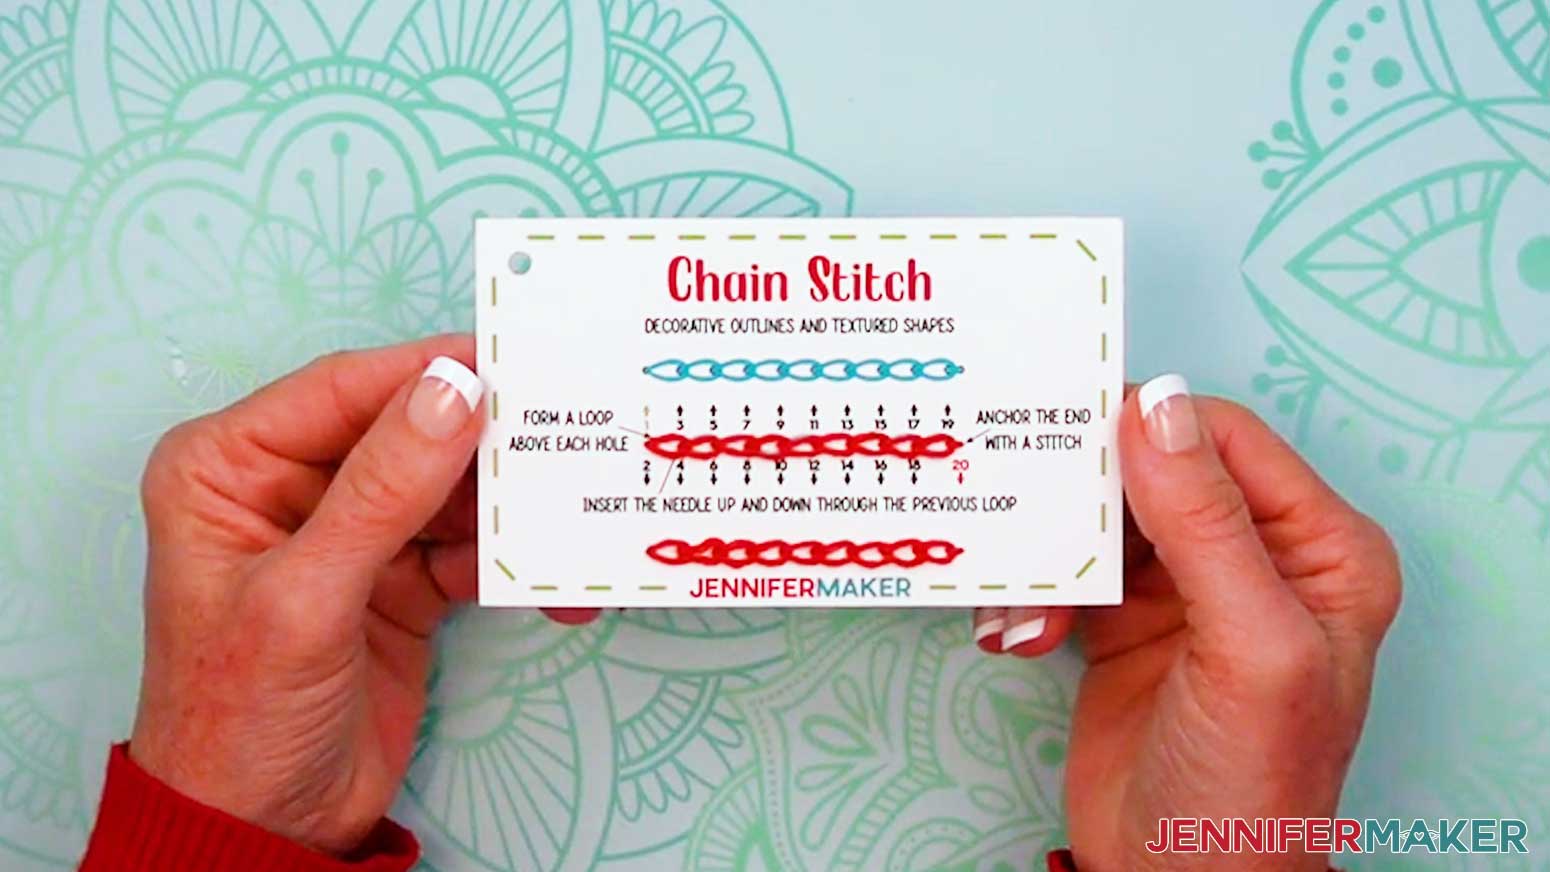
CHAIN STITCH
- Grab your “chain stitch” card and prepare a needle with thread.
- Insert the threaded needle up through Hole 1 and down Hole 2 (the same as Hole 1), leaving a small loop of thread above the hole.
- Bring the needle up through Hole 3, inside the previous loop.
- Keeping the thread inside the previous loop, insert the needle down through Hole 4 (the same as Hole 3), leaving another small loop of thread above the hole, inside the first previous loop.
- Thread Holes 5-18 the same way to stitch a series of chained loops.
- Bring the needle up Hole 19, through the previous loop.
- Then send the needle down Hole 20 on the outside of the previous loop to make an anchor stitch to hold the final loop in place.
NOTE: An anchor stitch is a small stitch that holds your thread in place. - Tie off and trim your thread.

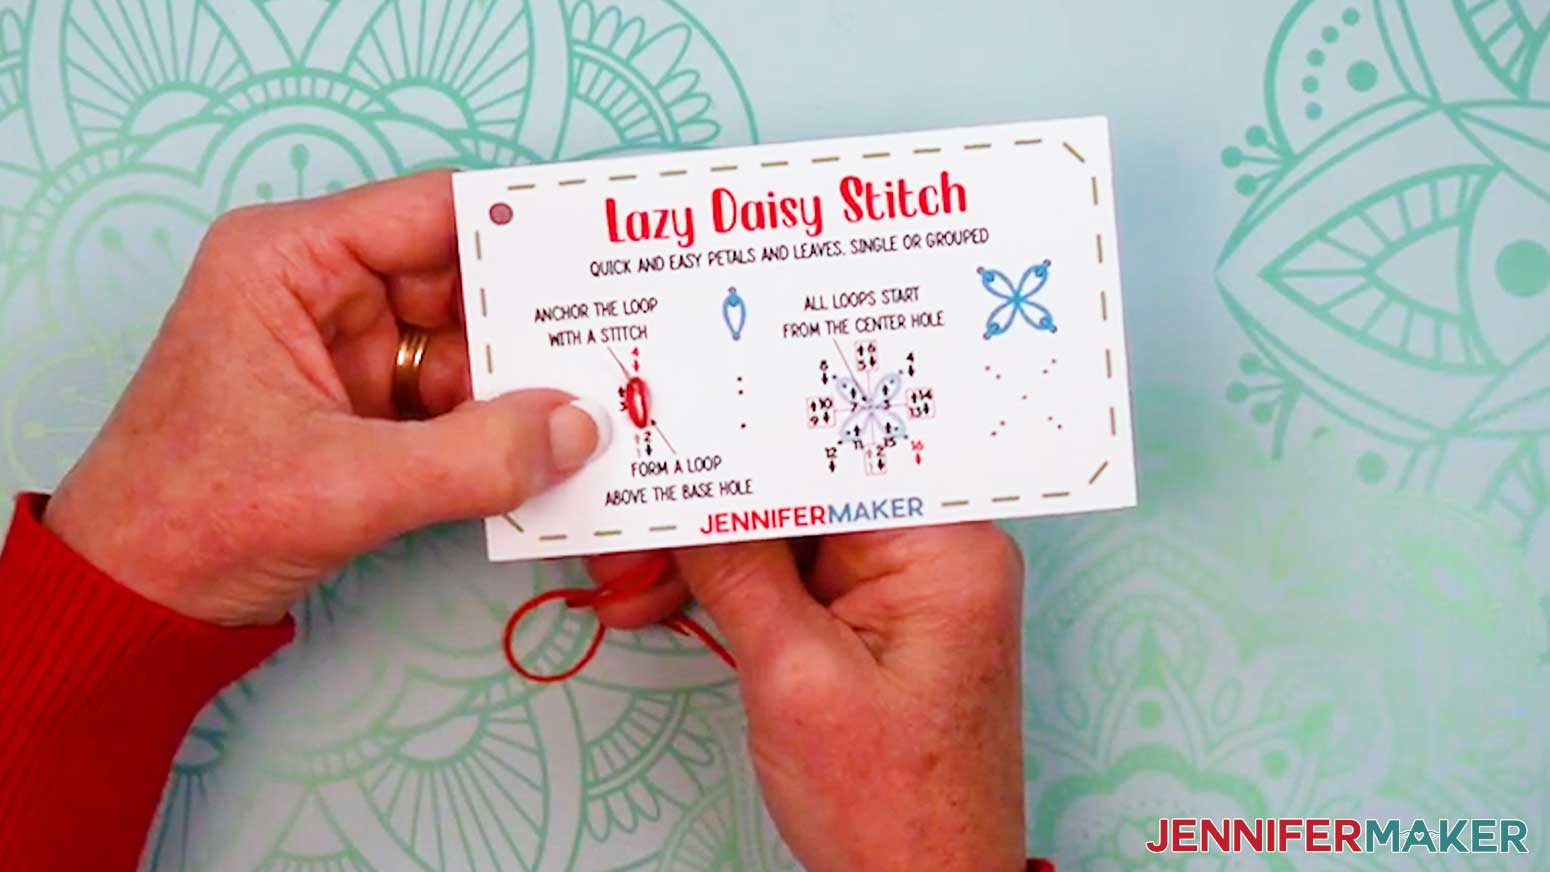
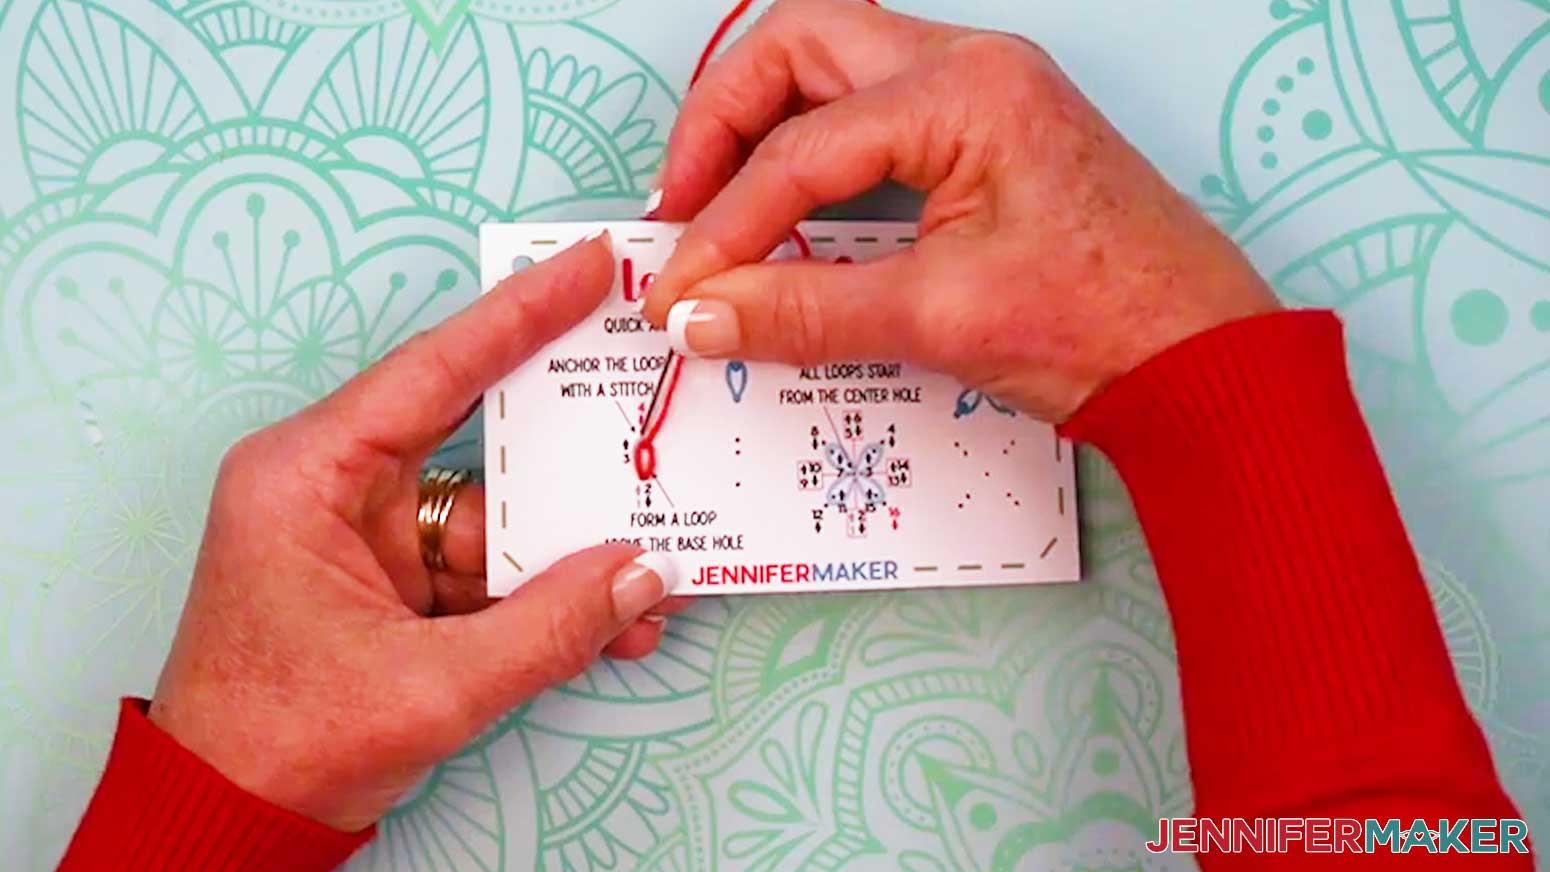
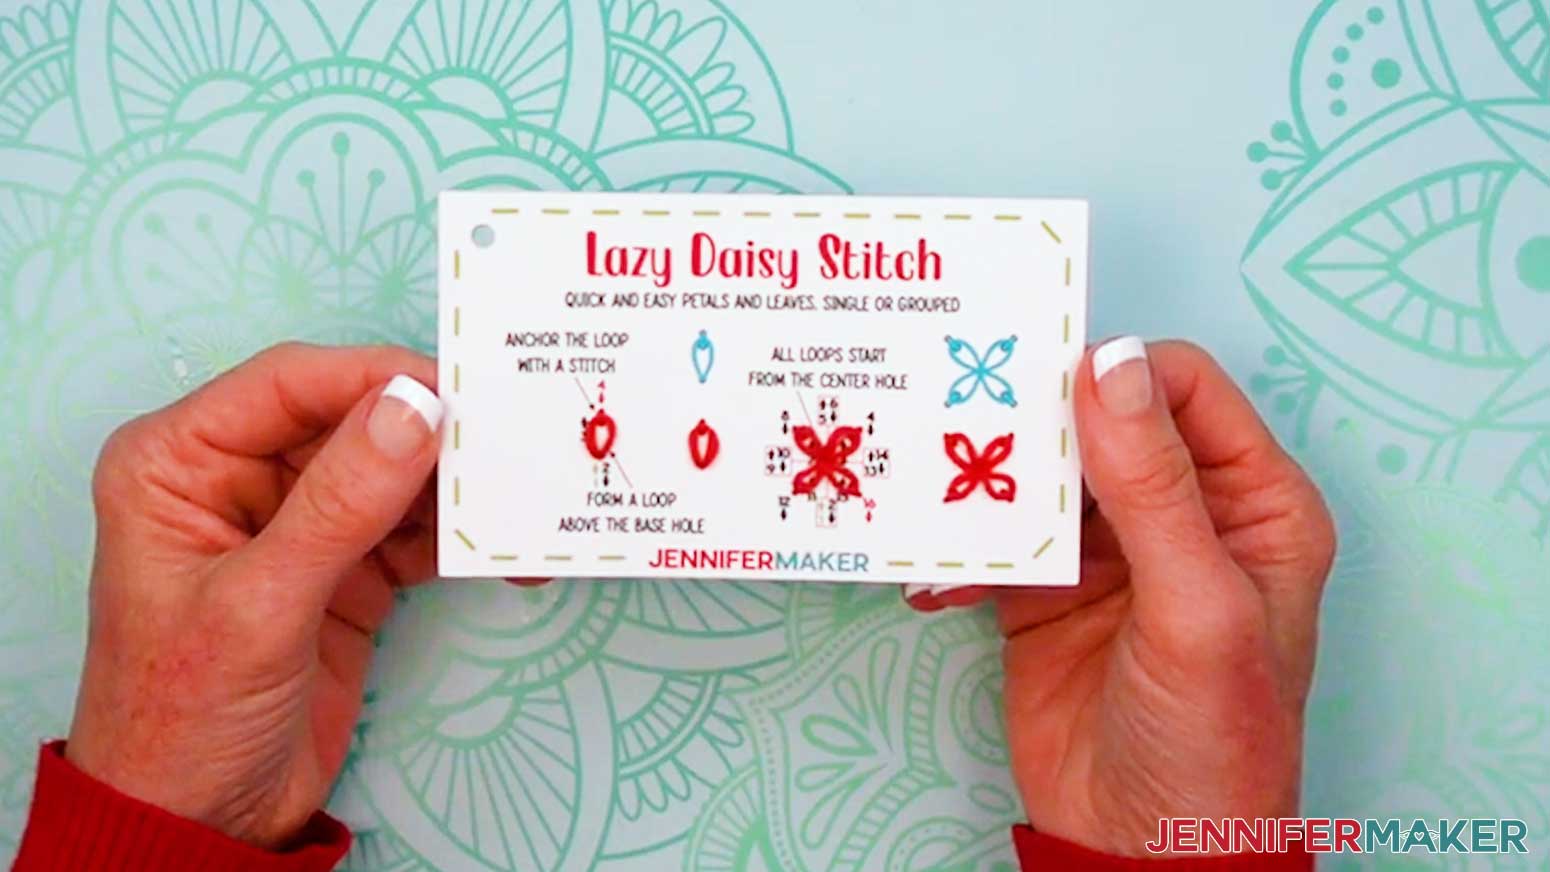
LAZY DAISY STITCH
- Grab your “lazy daisy stitch” card and prepare a needle with thread.
- Insert the threaded needle up through Hole 1 and down Hole 2 (the same as Hole 1), leaving a small loop of thread above the hole.
- Bring the needle up through Hole 3, inside the previous loop.
- Insert the needle down through Hole 4 on the outside of the loop to anchor it in place.
- Continue threading Holes 5-16 to create three more anchored loops and form a flower.
- Tie off and trim your thread.
EDGE STITCHES
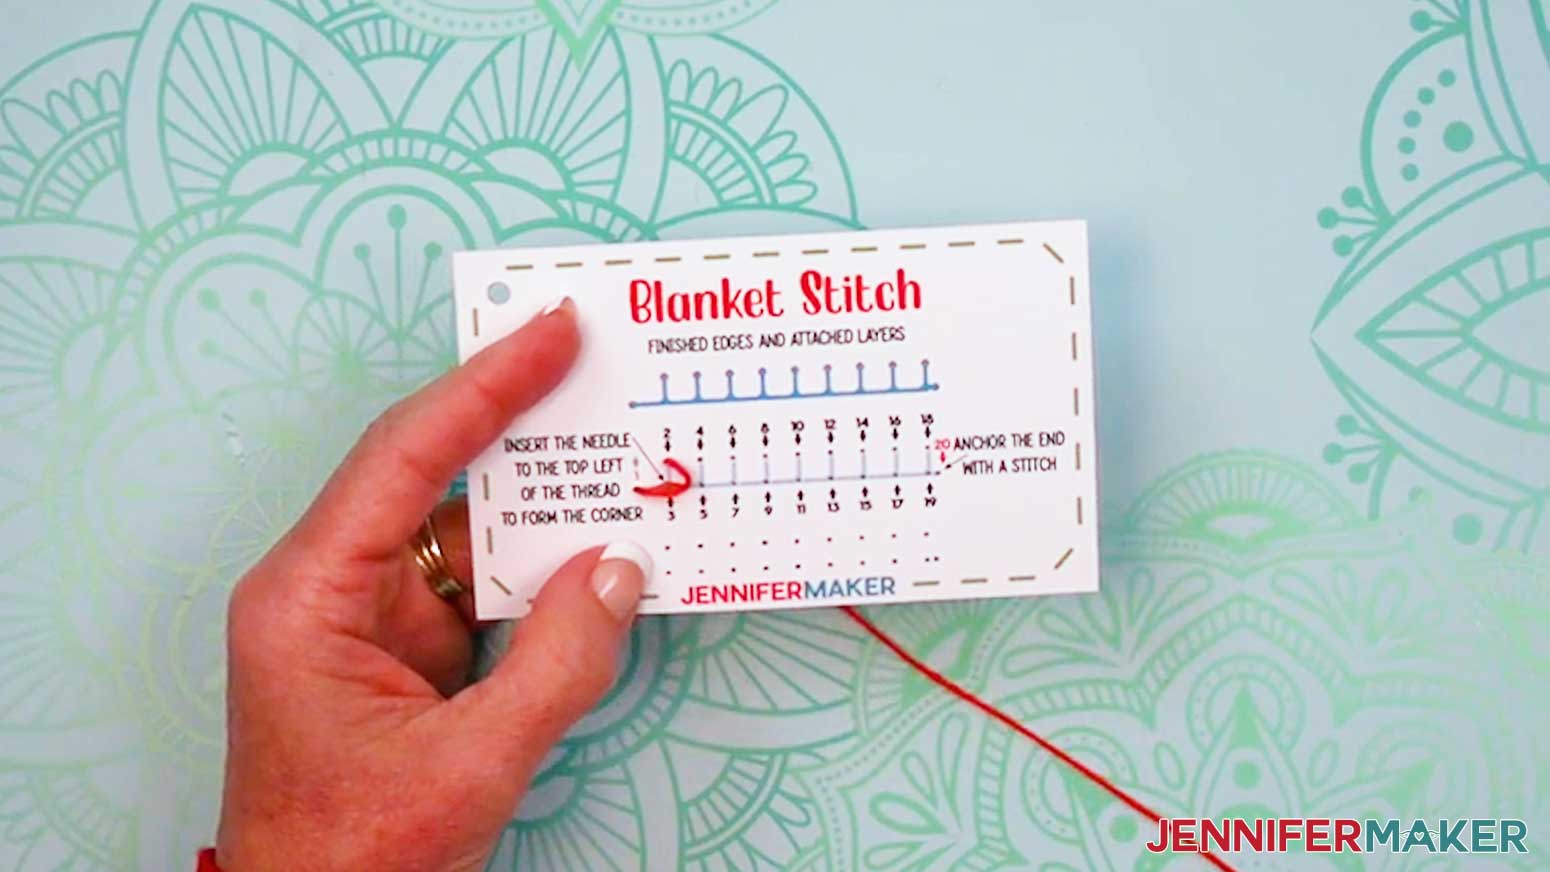
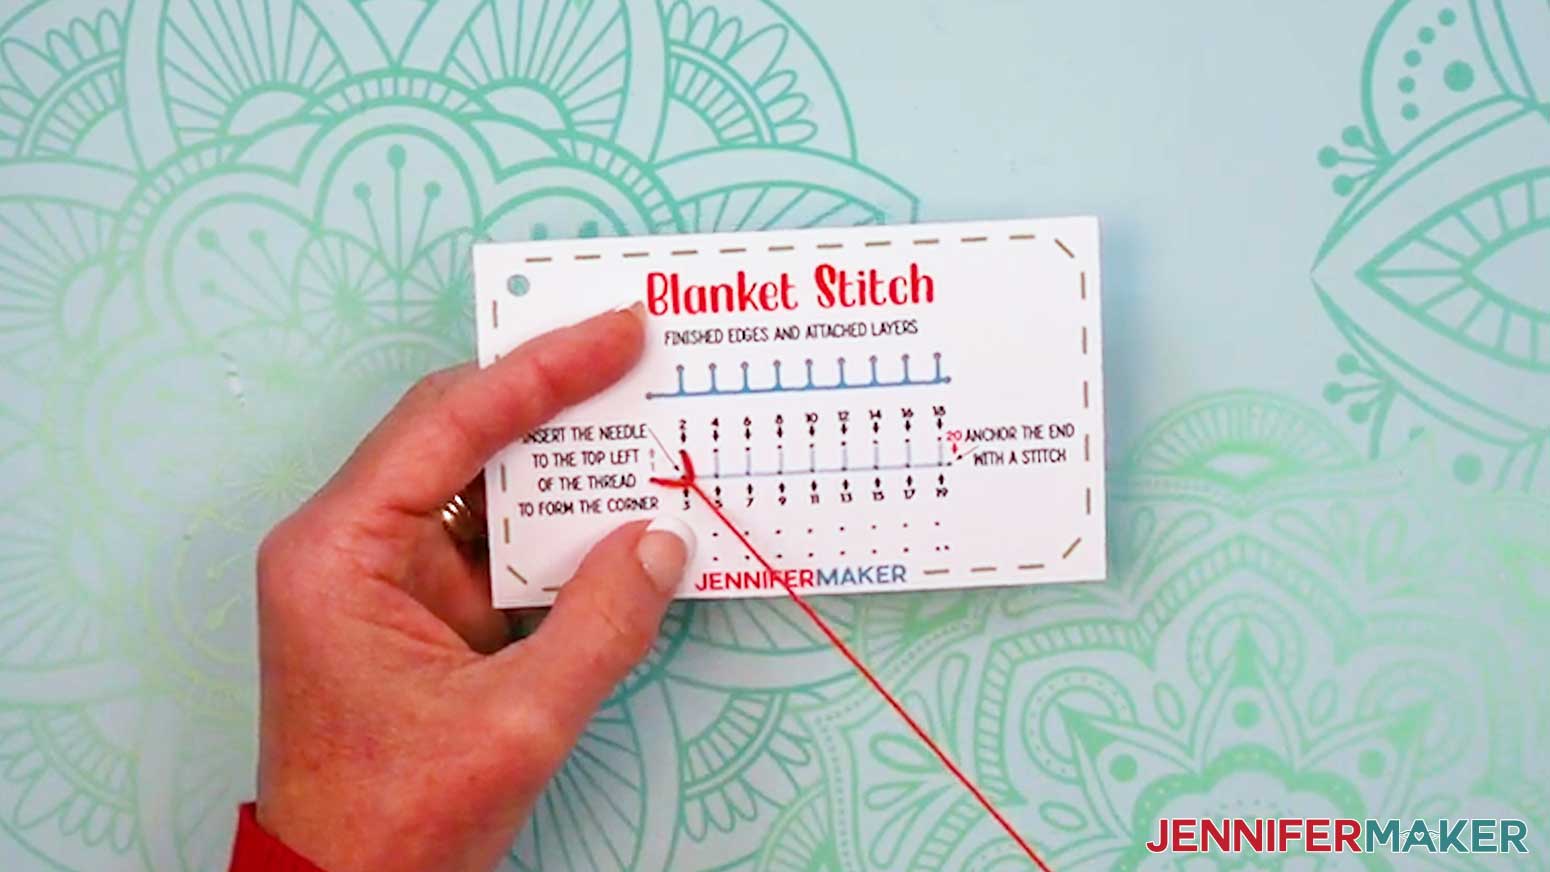
BLANKET STITCH
- Grab your “blanket stitch” card and prepare a needle with thread.
- Insert the threaded needle up through Hole 1.
- Then insert the threaded needle down into Hole 2, making sure the thread isn’t too tight.
NOTE: The thread won’t follow the line on the card yet. - Bring the needle up Hole 3, run it under the top left thread (between Holes 1 and 2), and pull the thread taut into the corner at Hole 3 to make it a backwards L shape.
- Continue threading Holes 4-19 the same way, bringing down the left thread into the corner with each odd-numbered stitch.
- Insert the needle down through Hole 20 to anchor the final stitch in place.
- Tie off and trim your thread.

FILL STITCHES
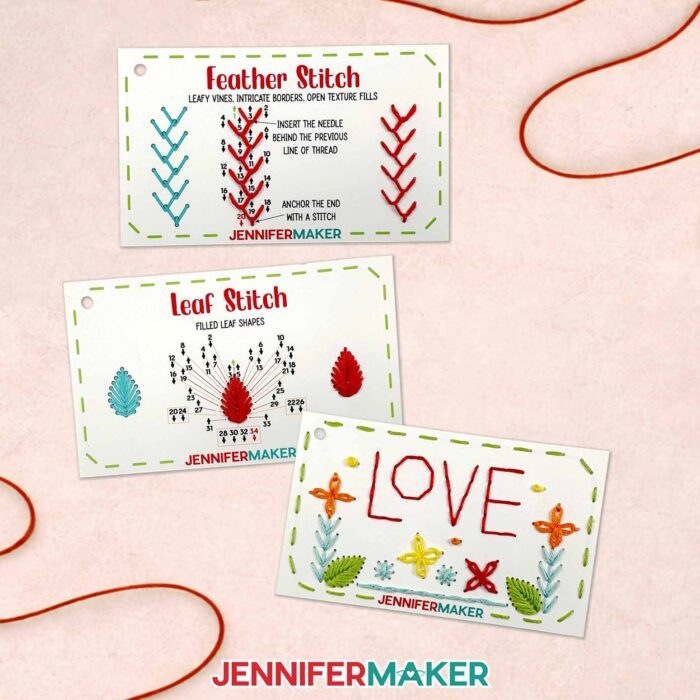
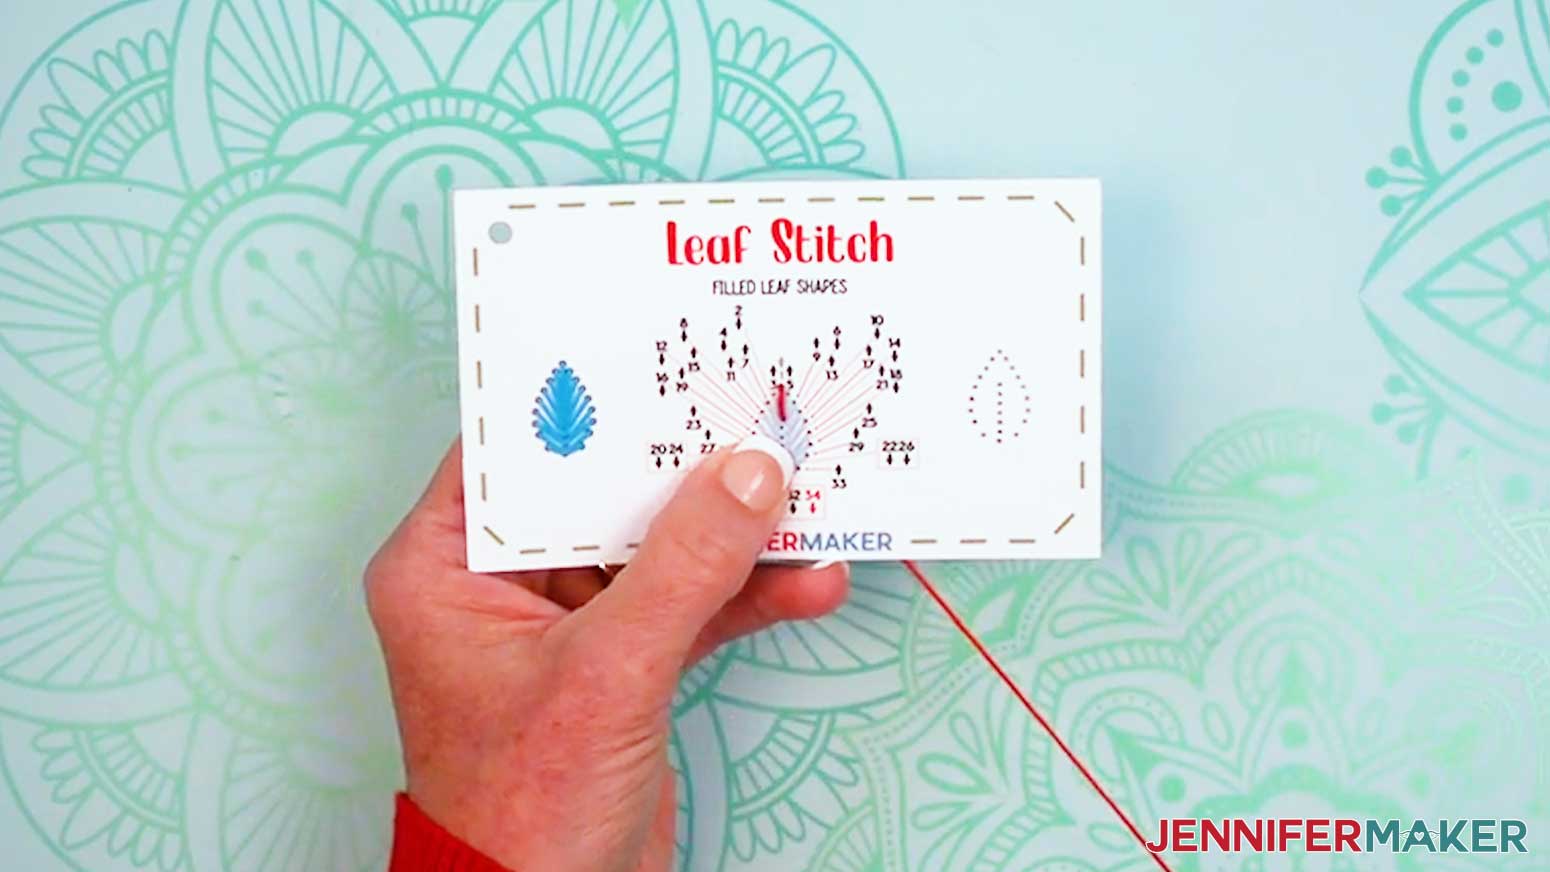
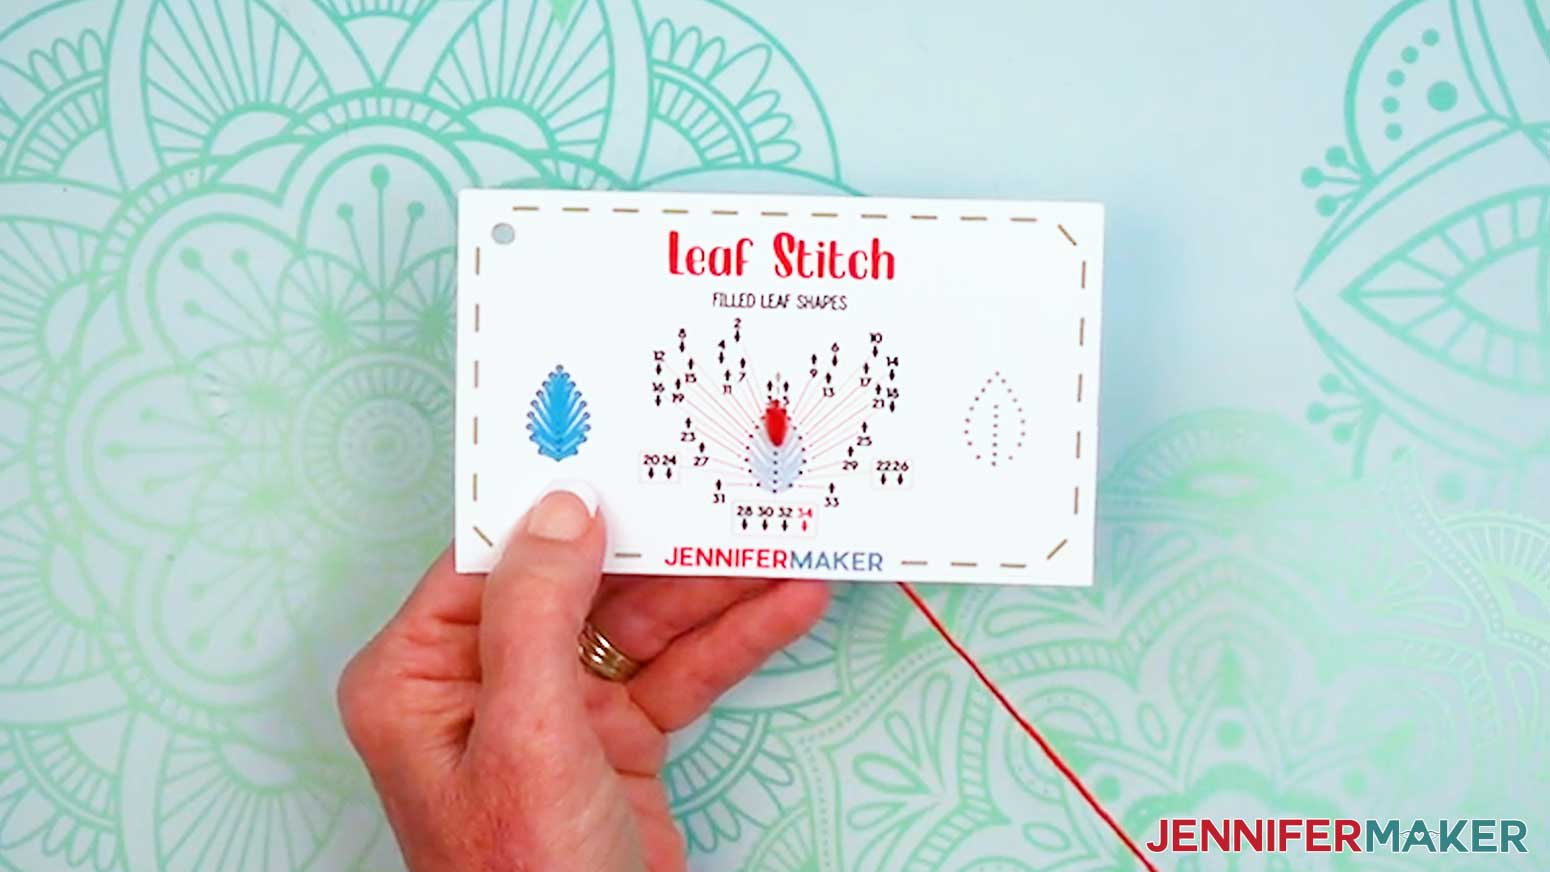
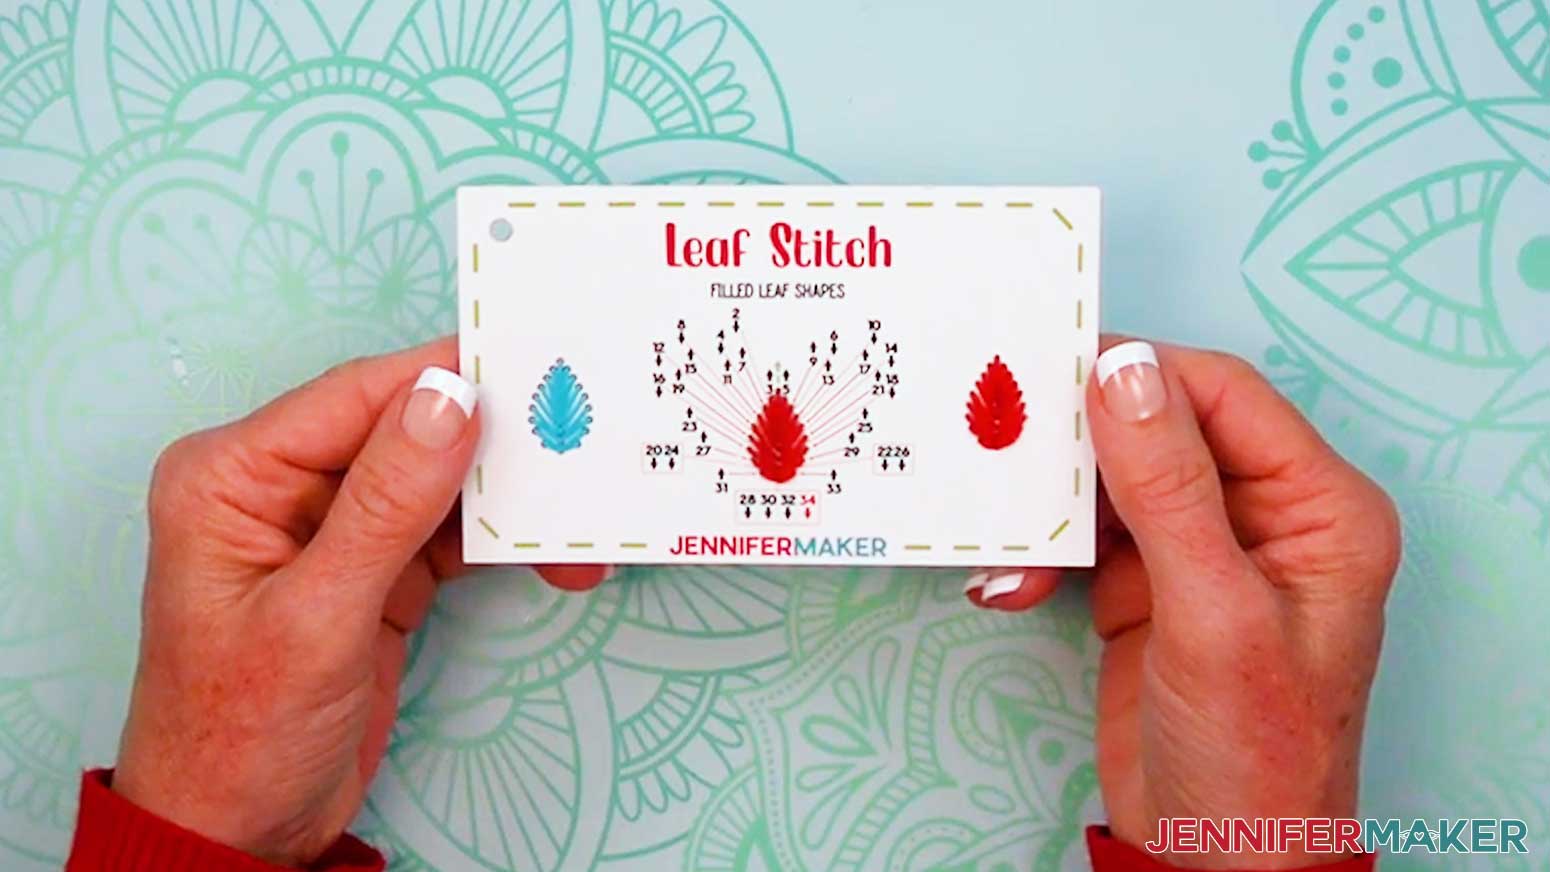
LEAF STITCH
- Grab your “leaf stitch” card and prepare a needle with thread.
- Insert the threaded needle up through Hole 1.
- Then insert the threaded needle down into Hole 2 to start your leaf stitch’s center vertical line.
- Thread Holes 3-4 and 5-6 to start your leaf stitch’s sides and extend the center line.
- Continue threading Holes 7-34 to fill out your leaf, alternating sides and extending the center line as you stitch.
- Tie off and trim your thread.
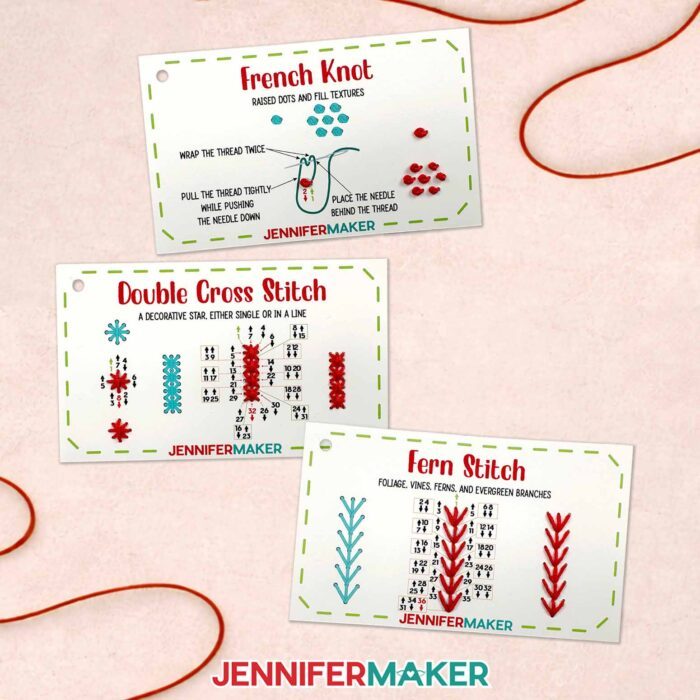
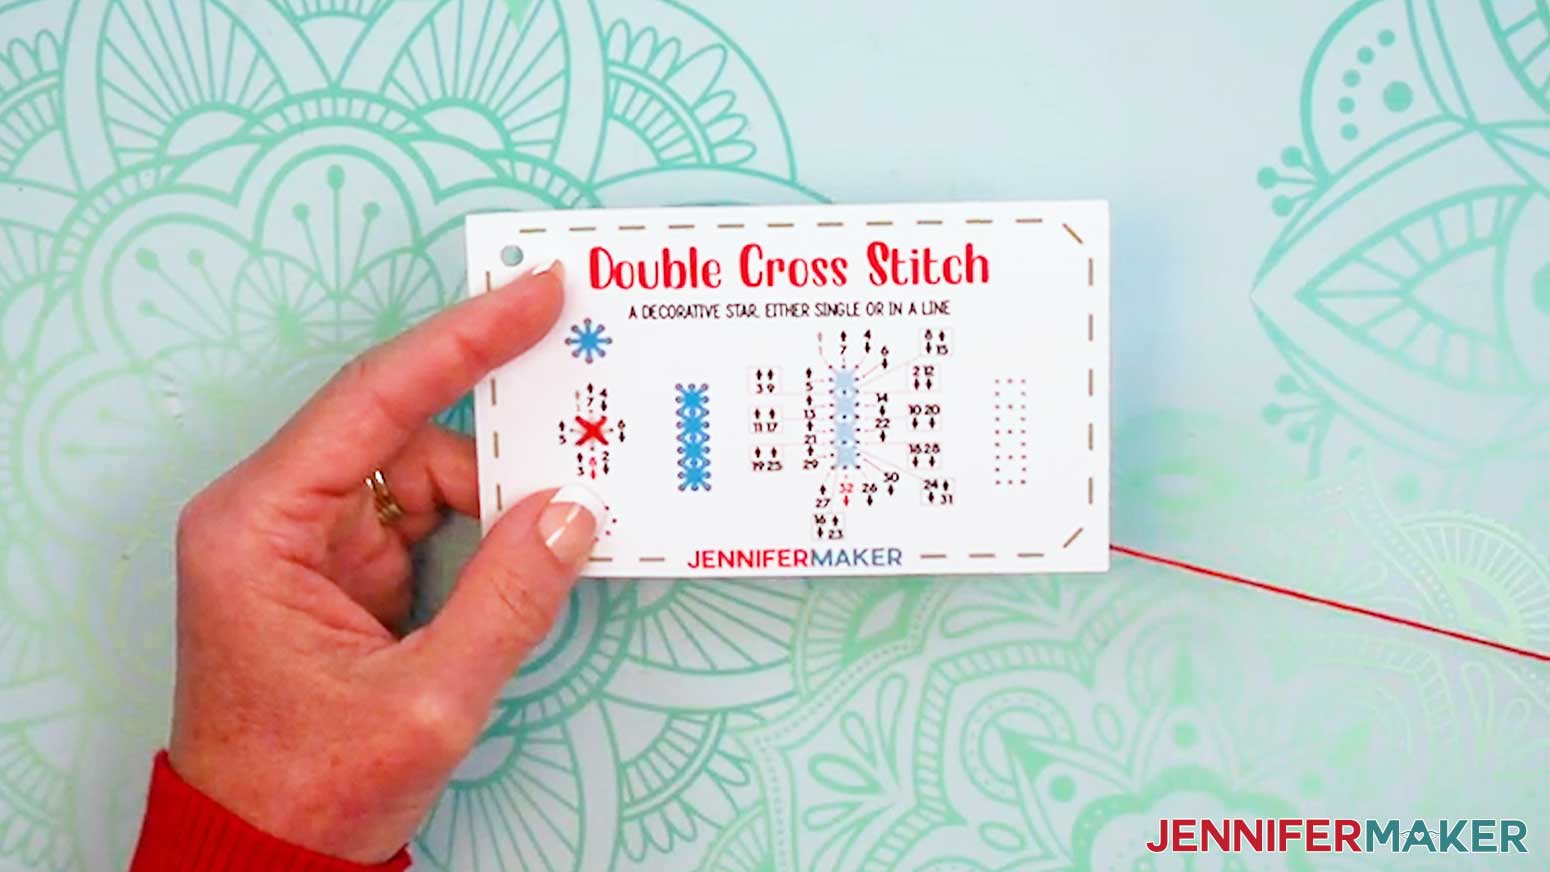
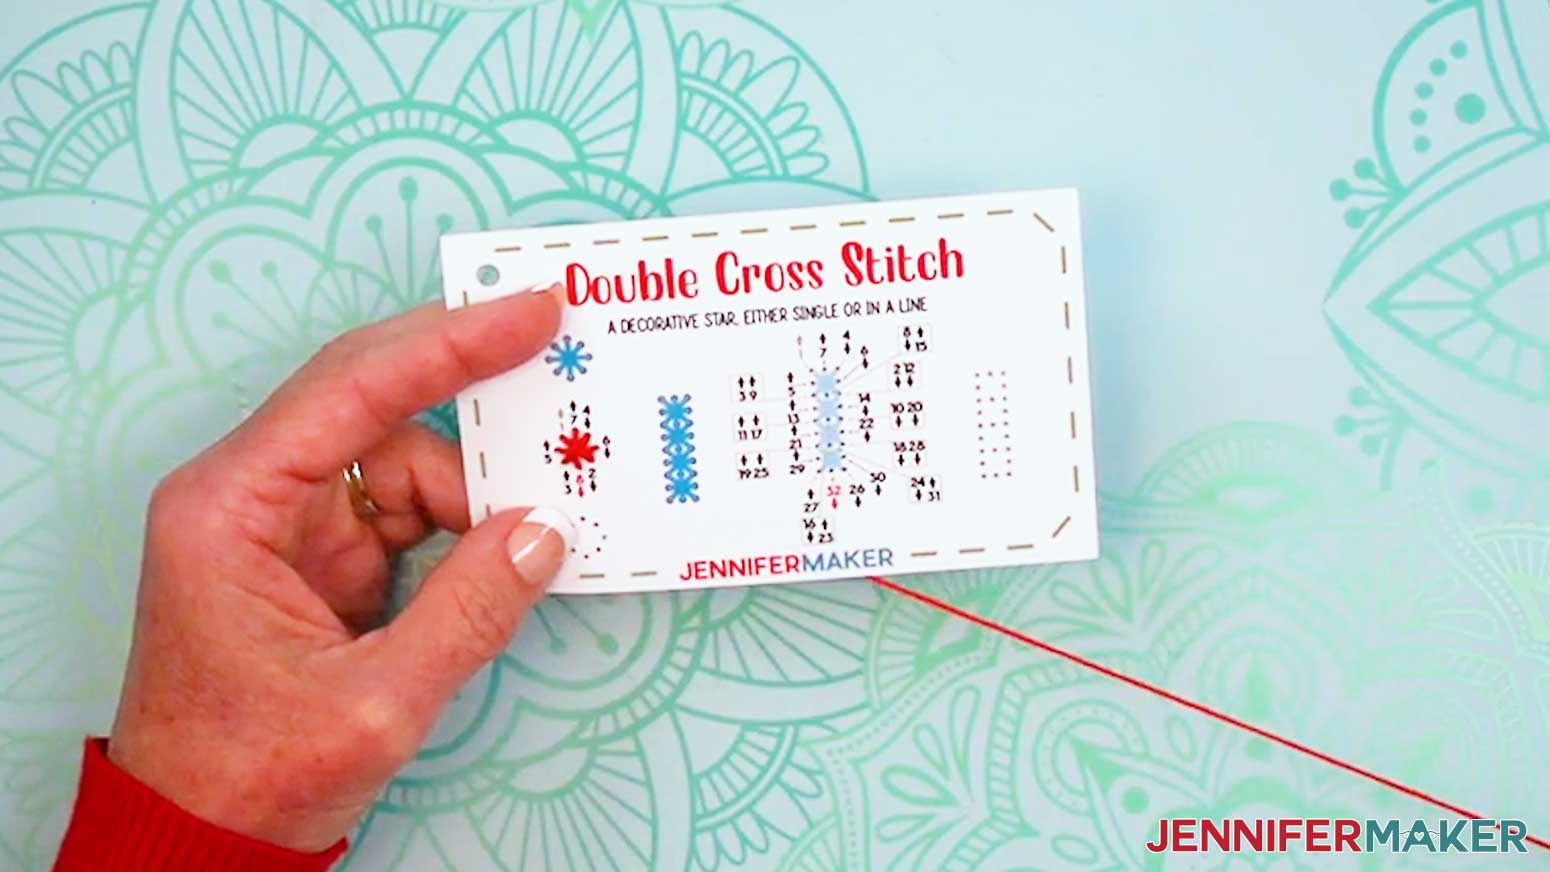
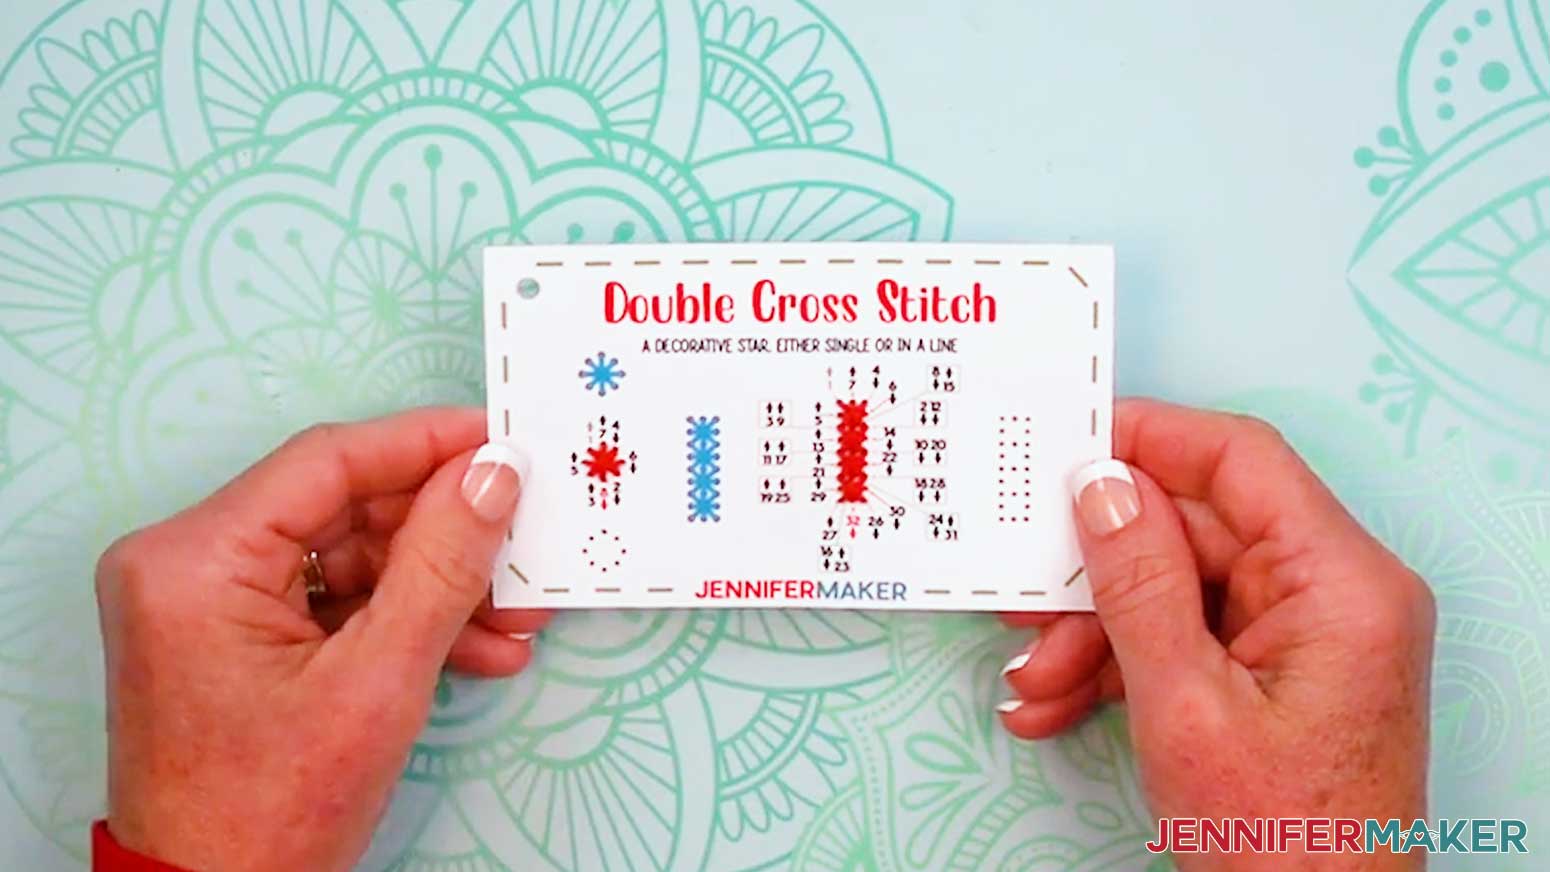
DOUBLE CROSS STITCH
- Grab your “double cross stitch” card and prepare a needle with thread.
- To make the first double cross, which looks like a single star, insert the threaded needle up through Hole 1.
- Then insert the threaded needle down into Hole 2.
- Thread up through Hole 3 and down Hole 4 to create an “X” shape.
- Then thread Holes 5-8 to form a “Plus” shape over the “X” shape.
- To make a line of double cross stitches, follow the numbers and arrows to thread Holes 1-32 to form a series of four double cross stitches in a column.
- Tie off and trim your thread.
BRANCHING STITCHES
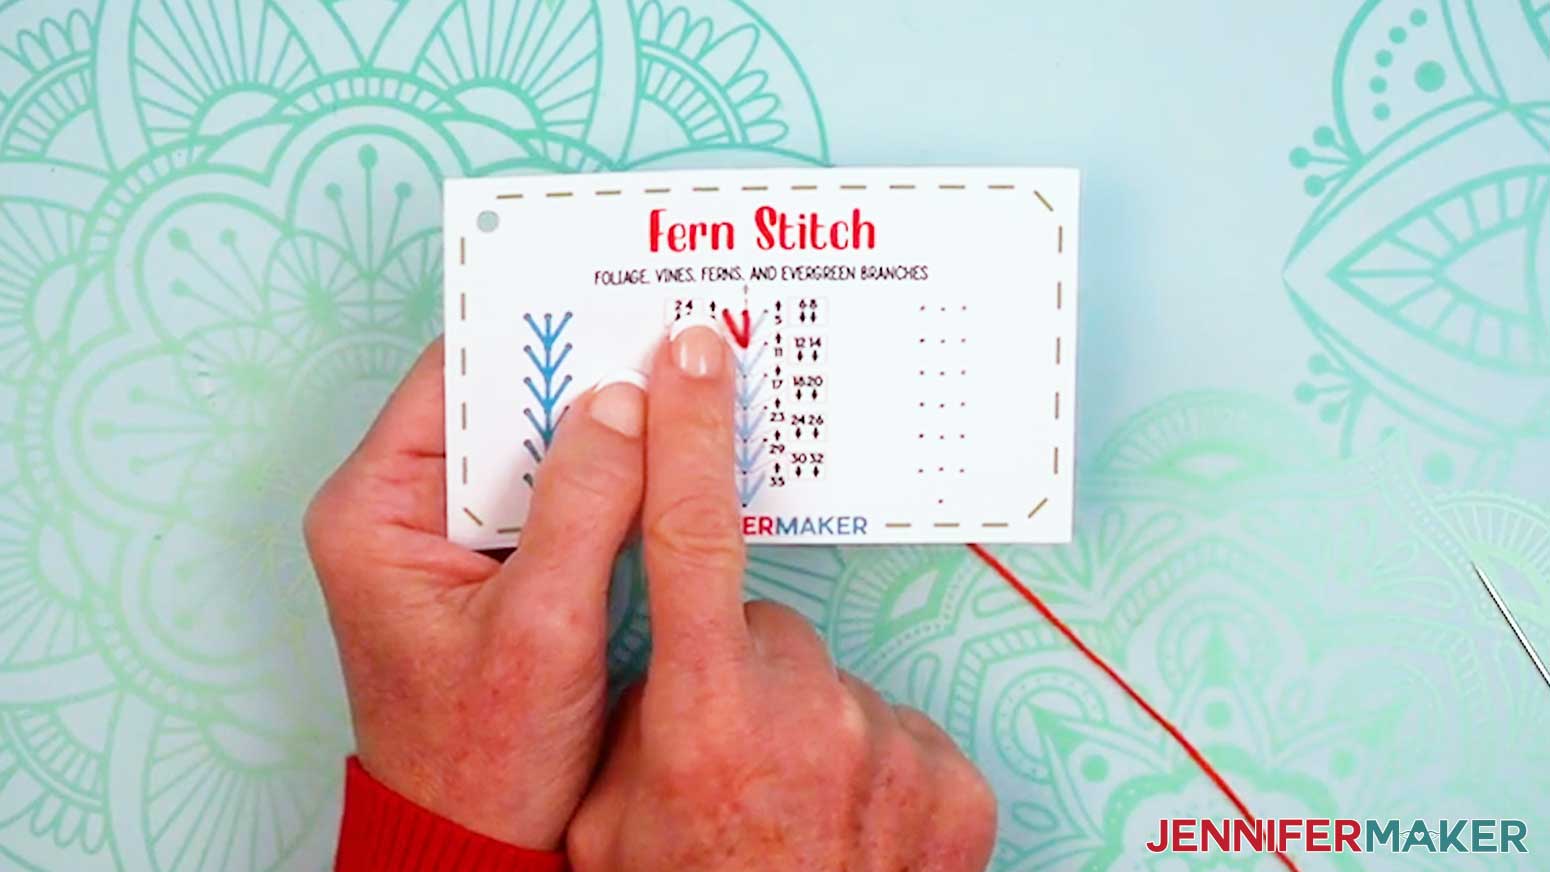
FERN STITCH
- Grab your “fern stitch” card and prepare a needle with thread.
- Insert the threaded needle up through Hole 1.
- Then insert the threaded needle down into Hole 2 to make the stem line.
- Bring the needle up through Hole 3, and down through Hole 4 (the same as Hole 2) to make the left leaf line.
- Bring the needle up through Hole 5, and down through Hole 6 (the same as Hole 2) to make the right leaf line.
- Bring the needle up through Hole 7, down through Hole 8 (the same as Hole 2) to make the next center stem line.
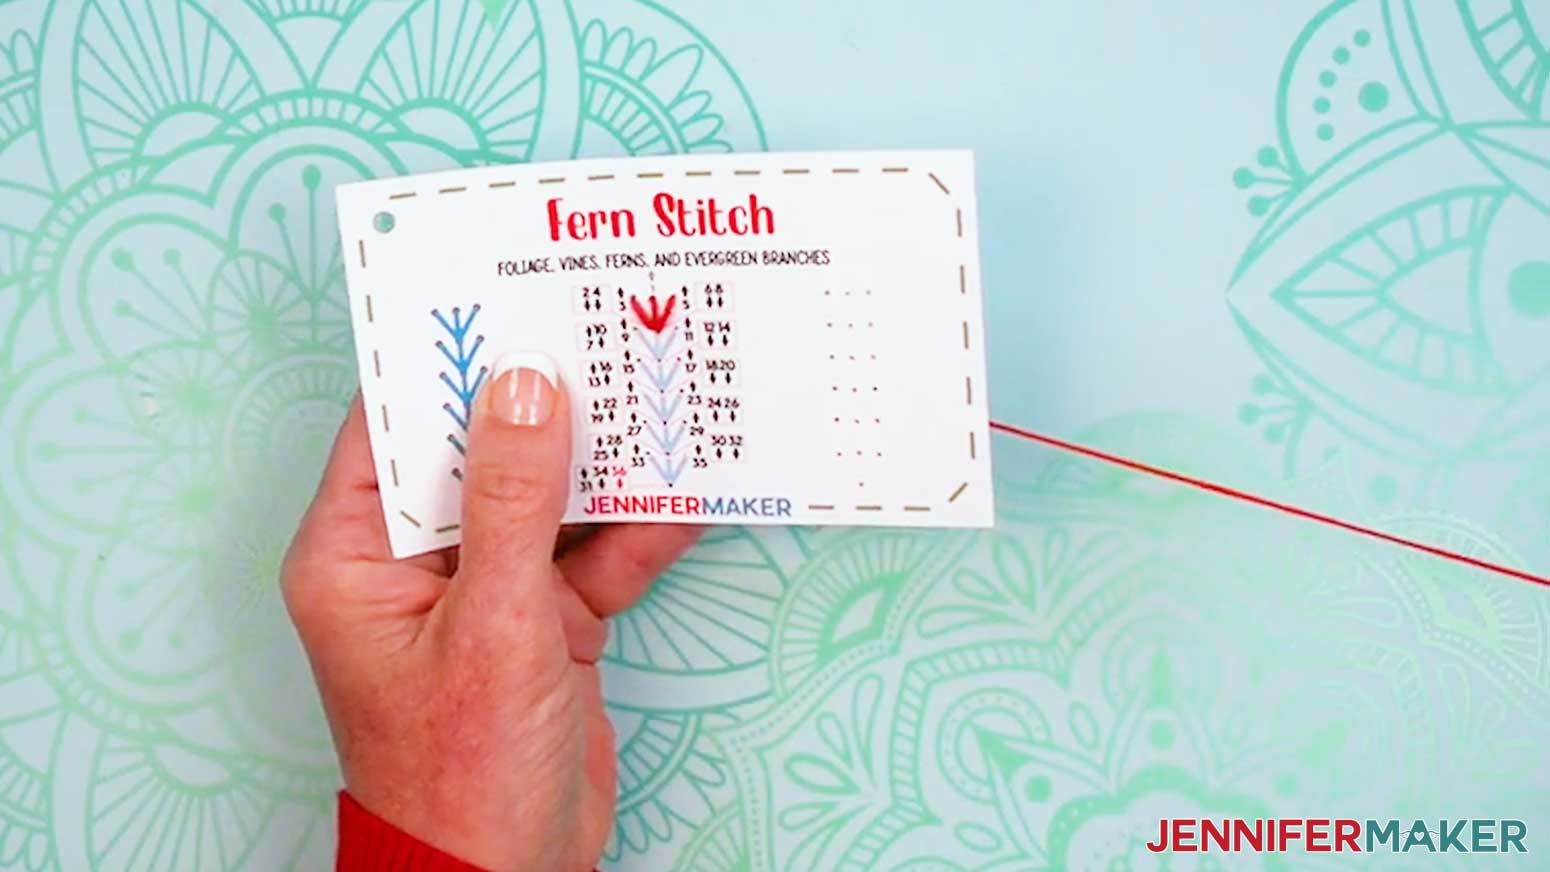
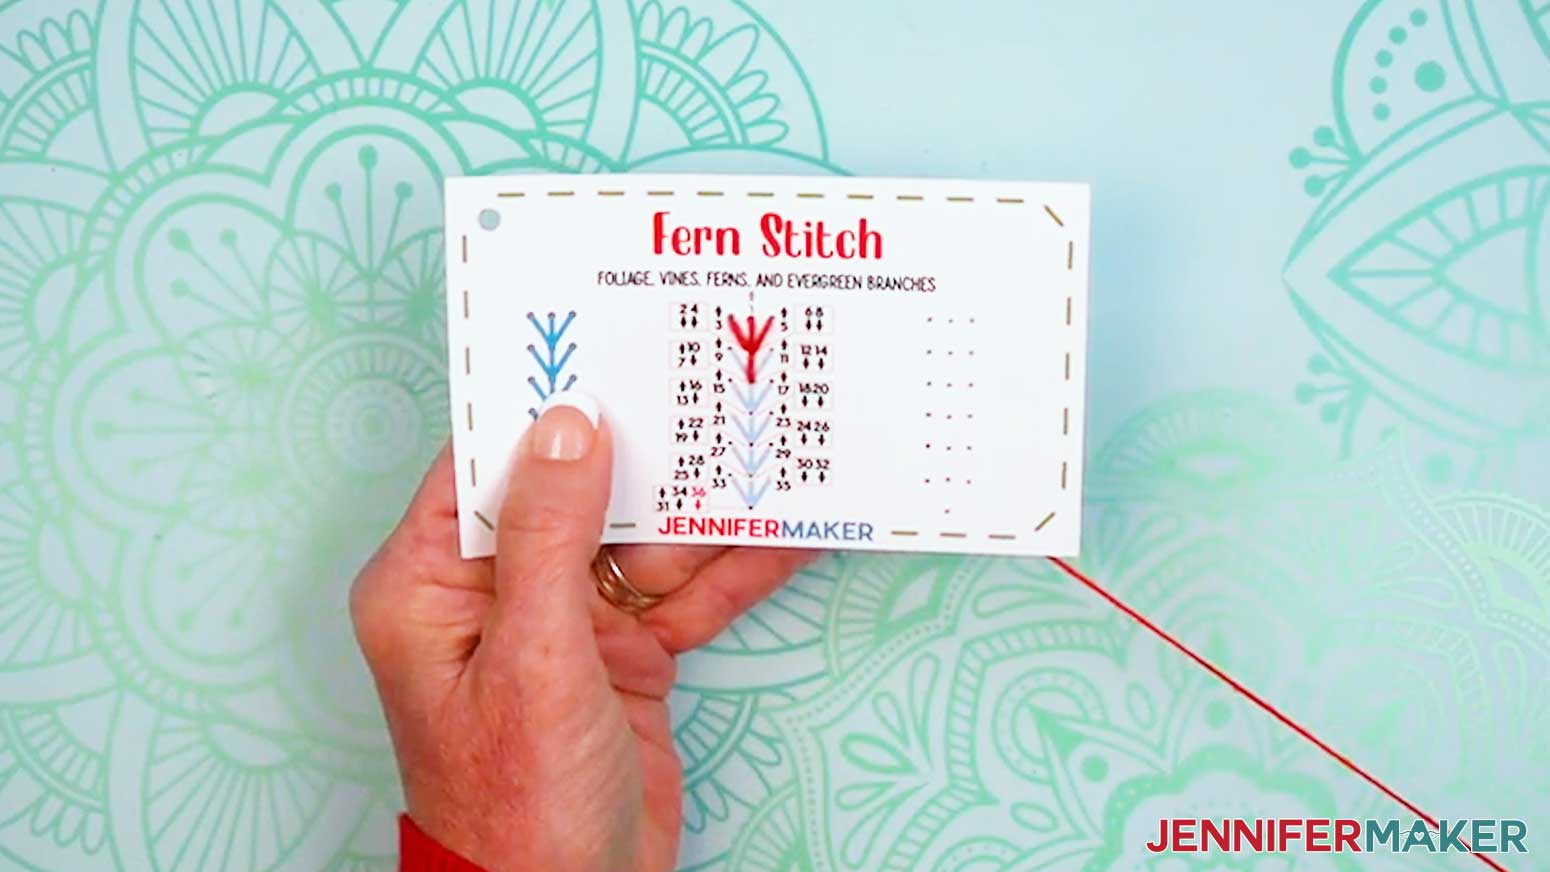
- Follow the numbers and arrows to thread Holes 9-36, creating a series of simple branching stitches.
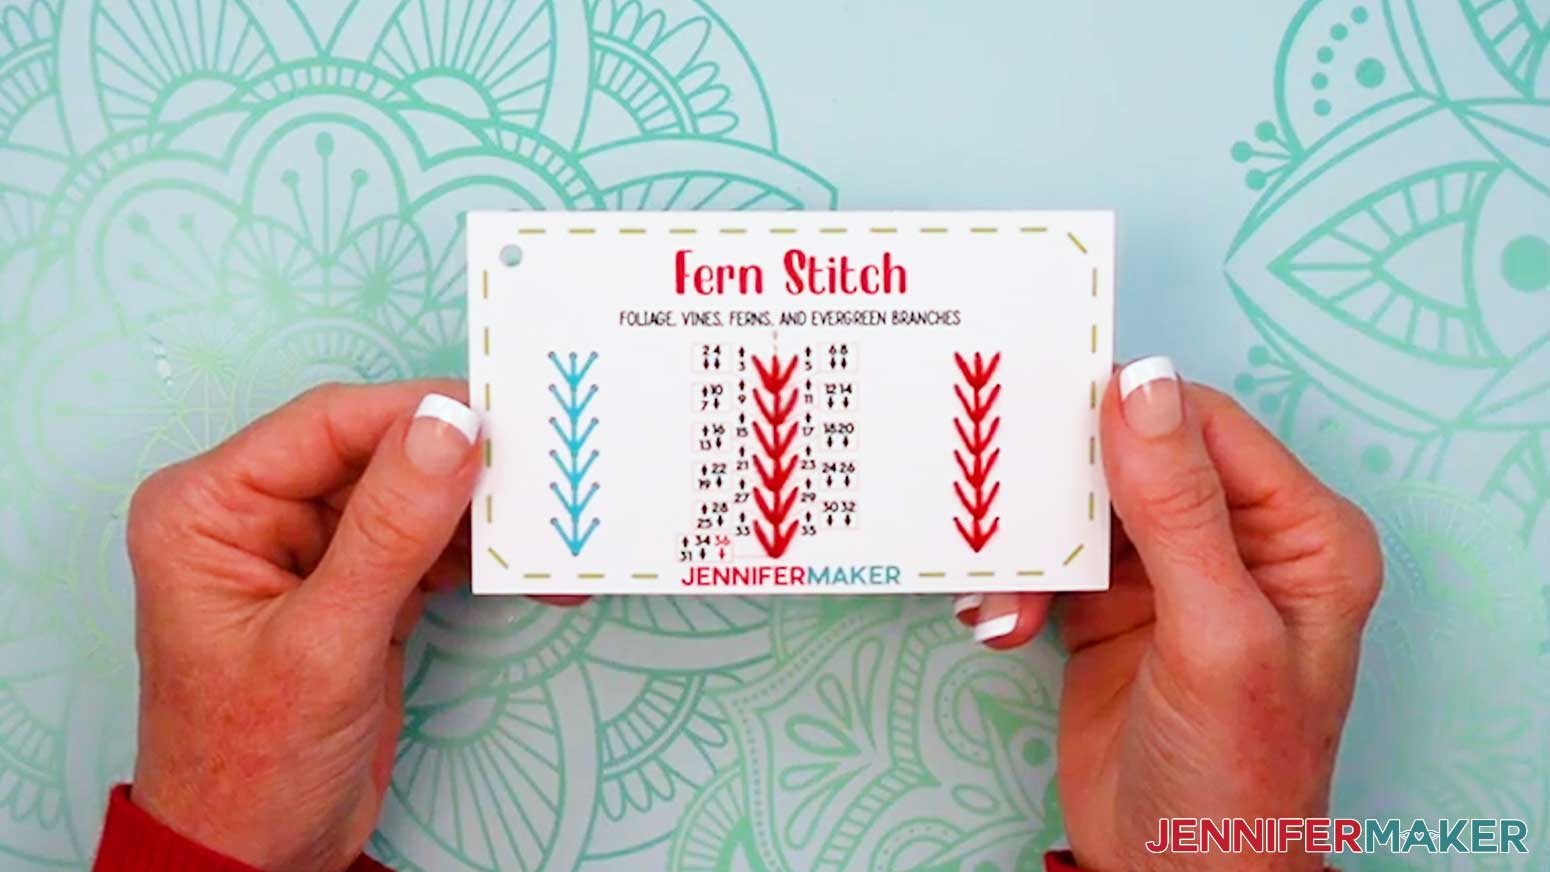
- Tie off and trim your thread.
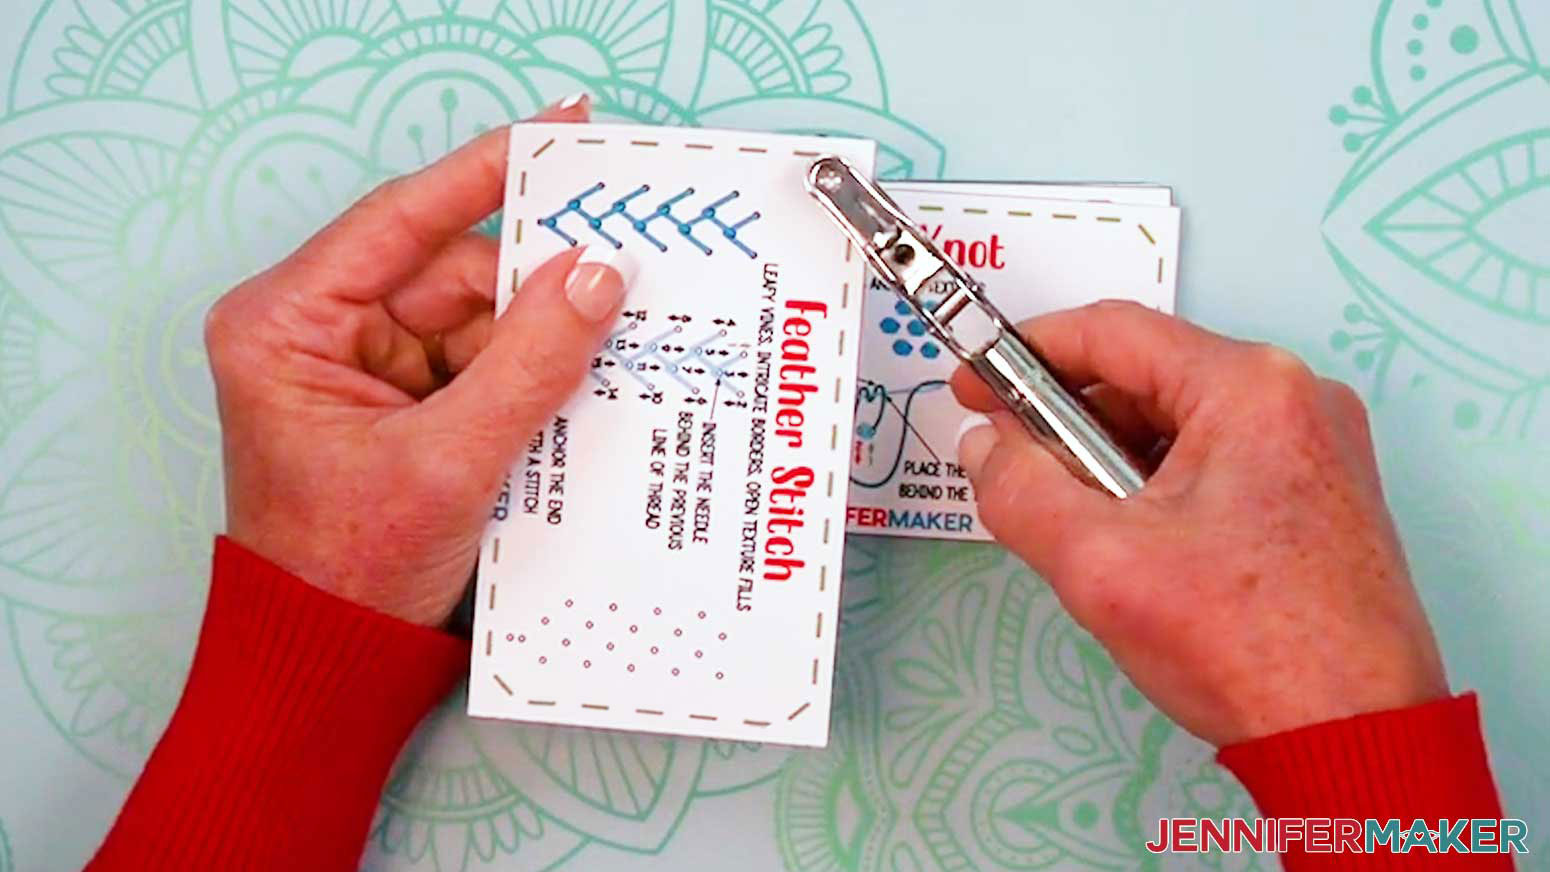
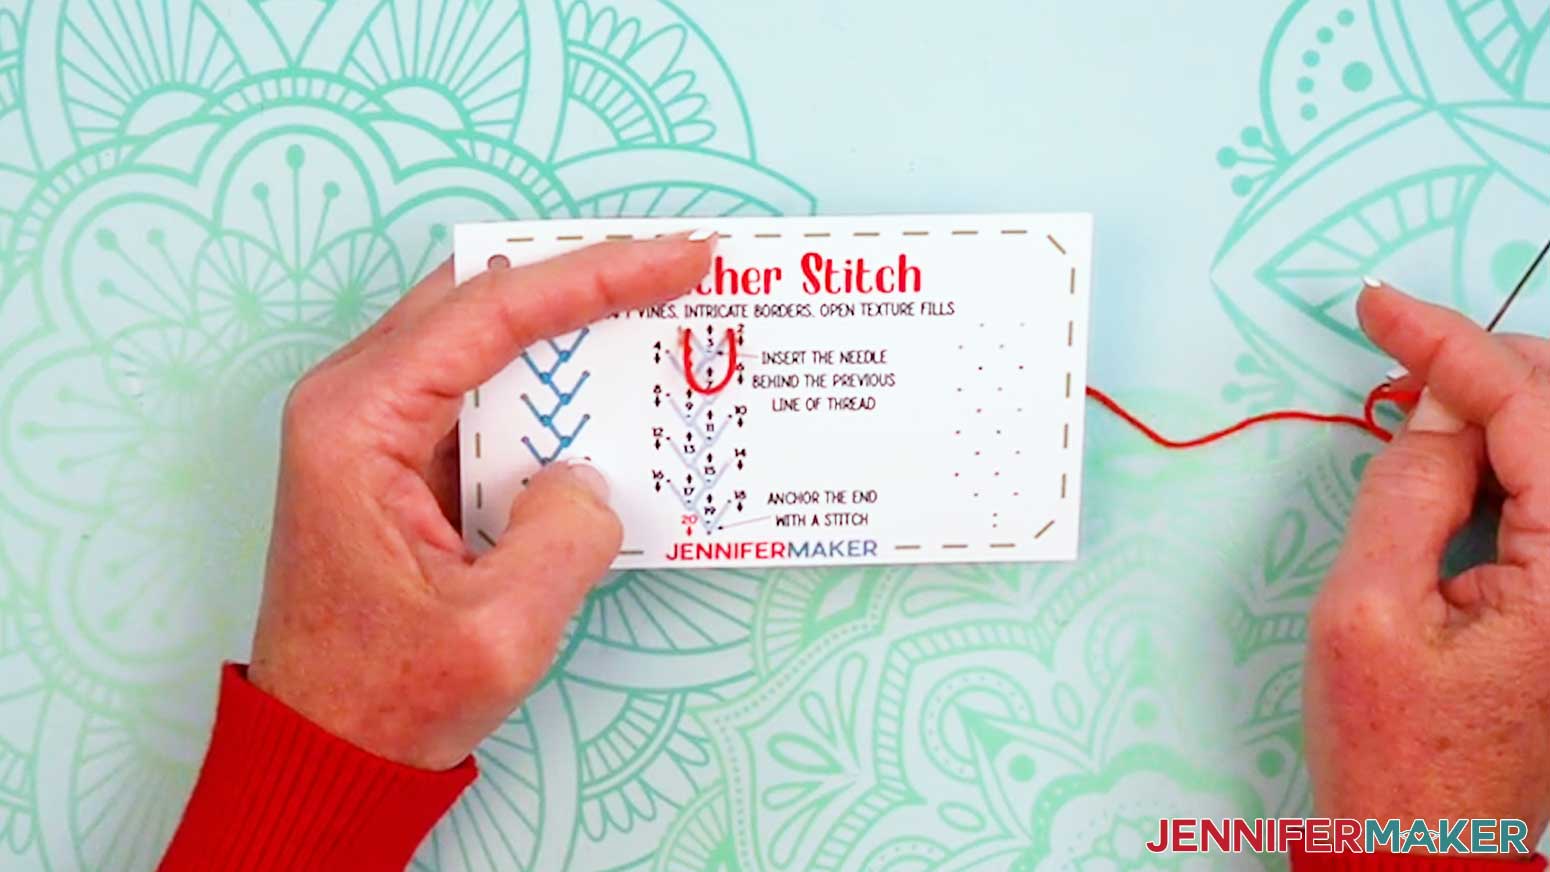
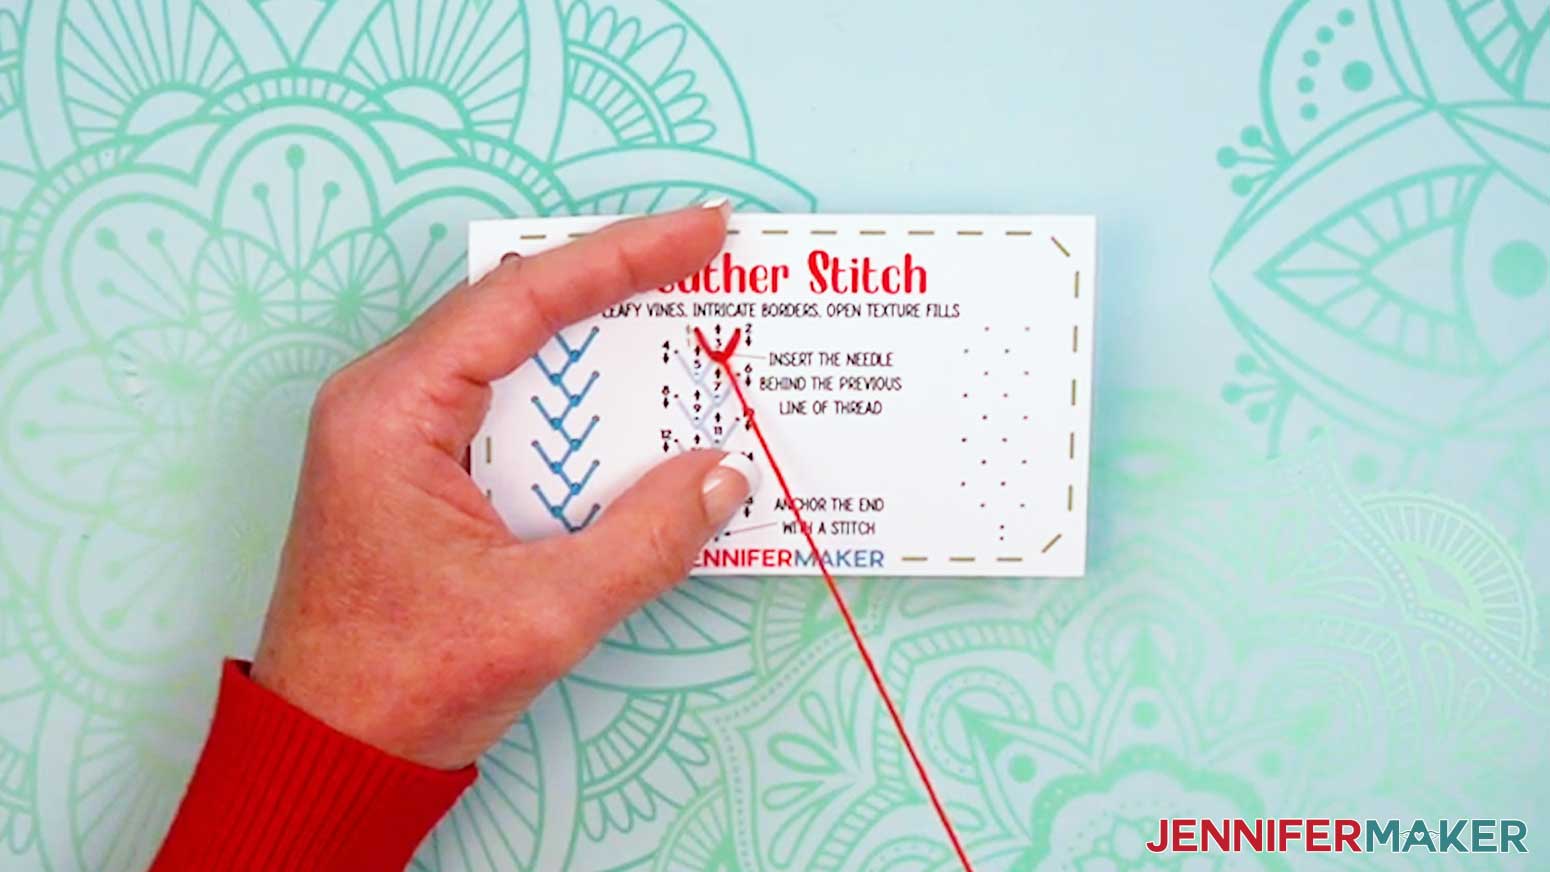
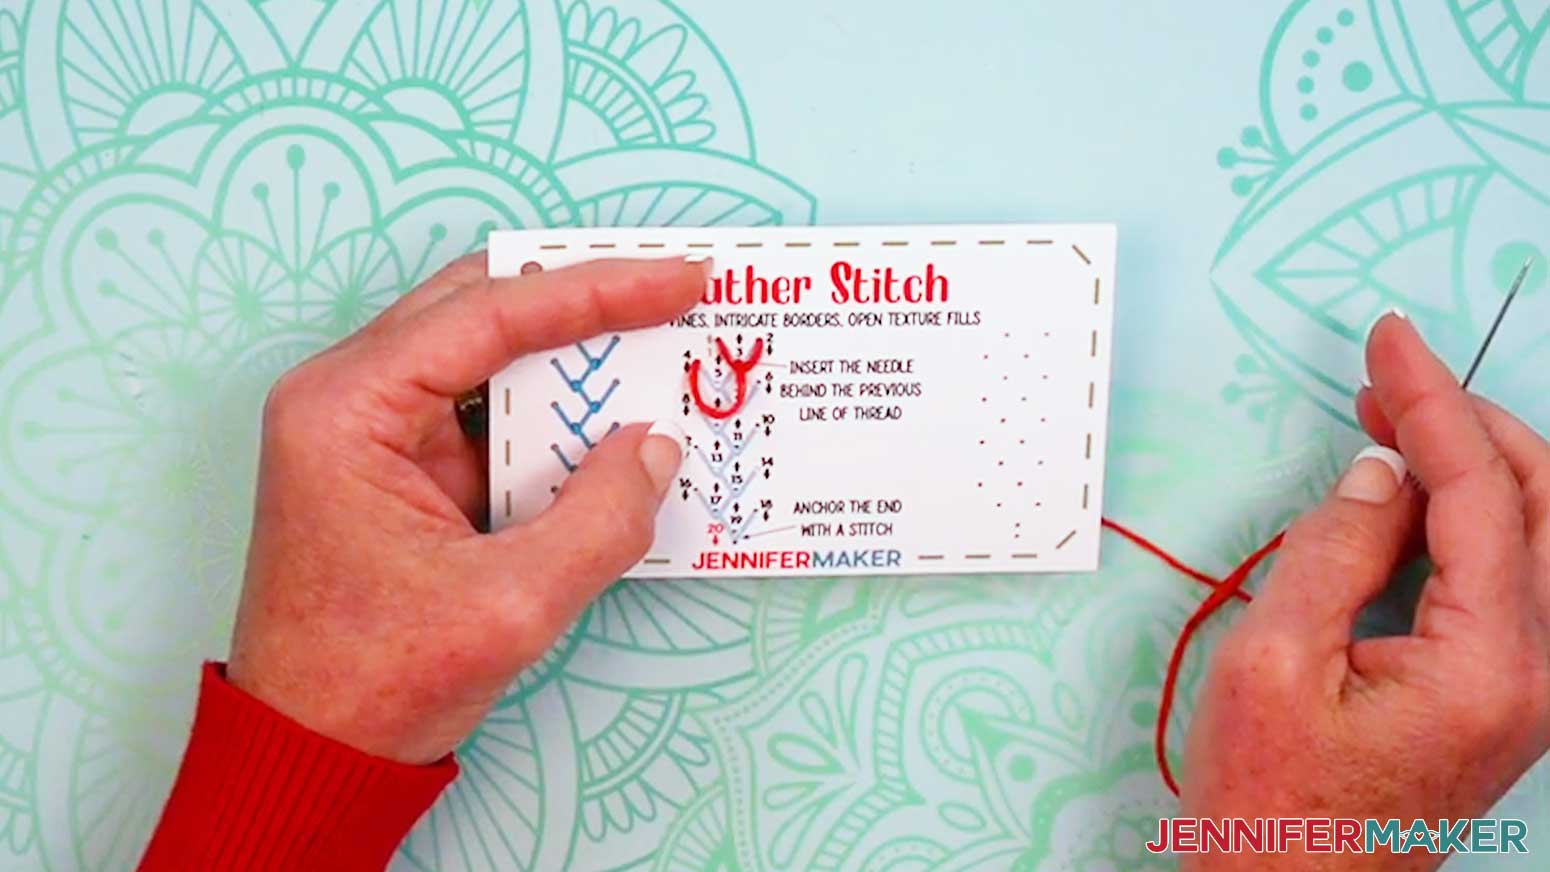
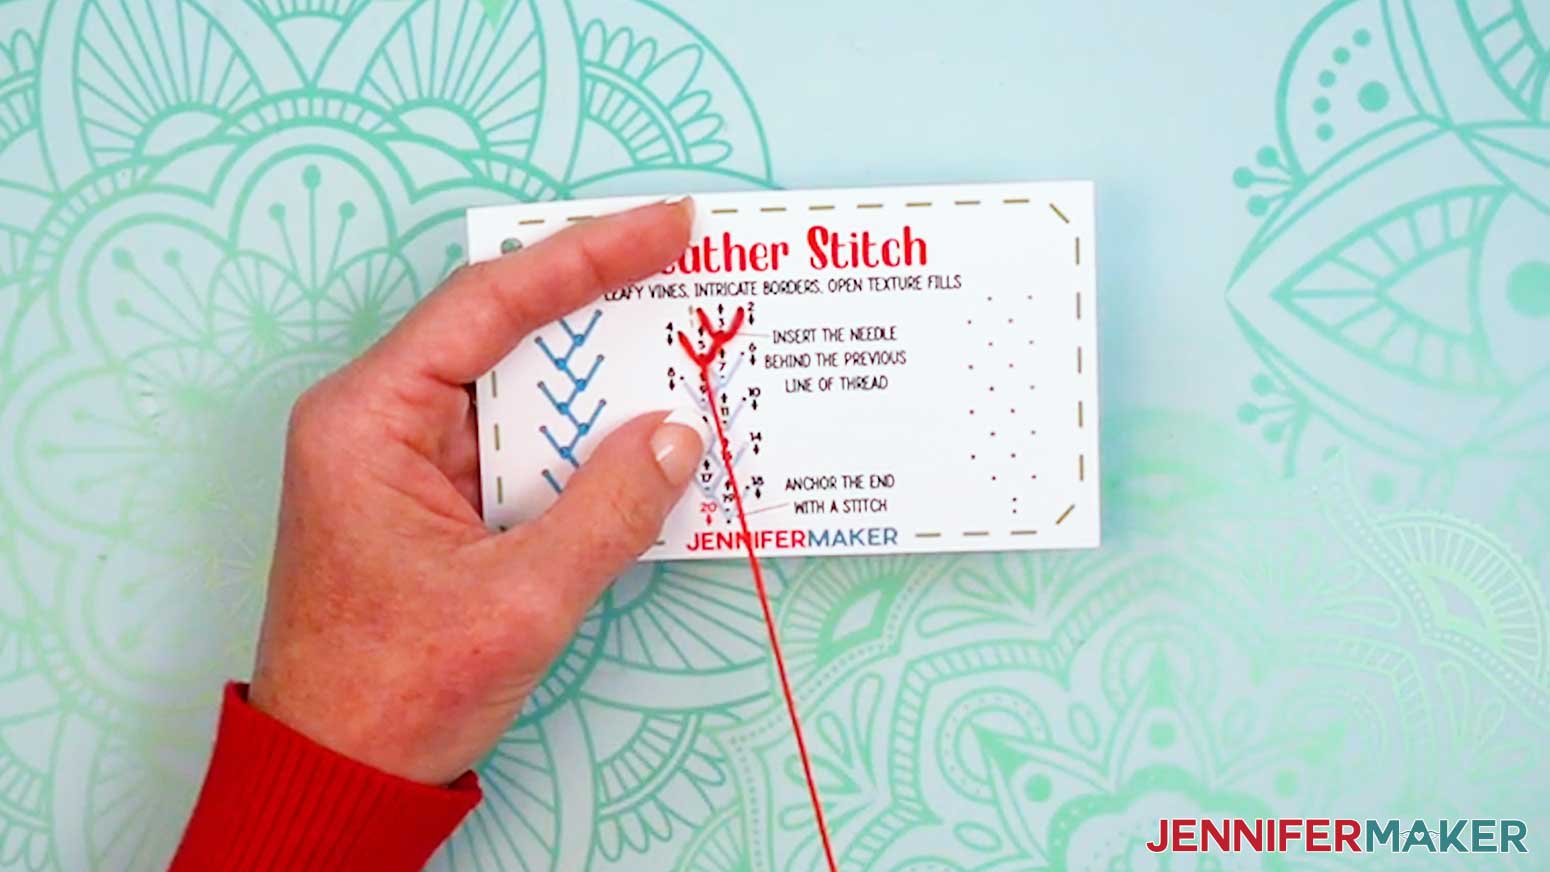
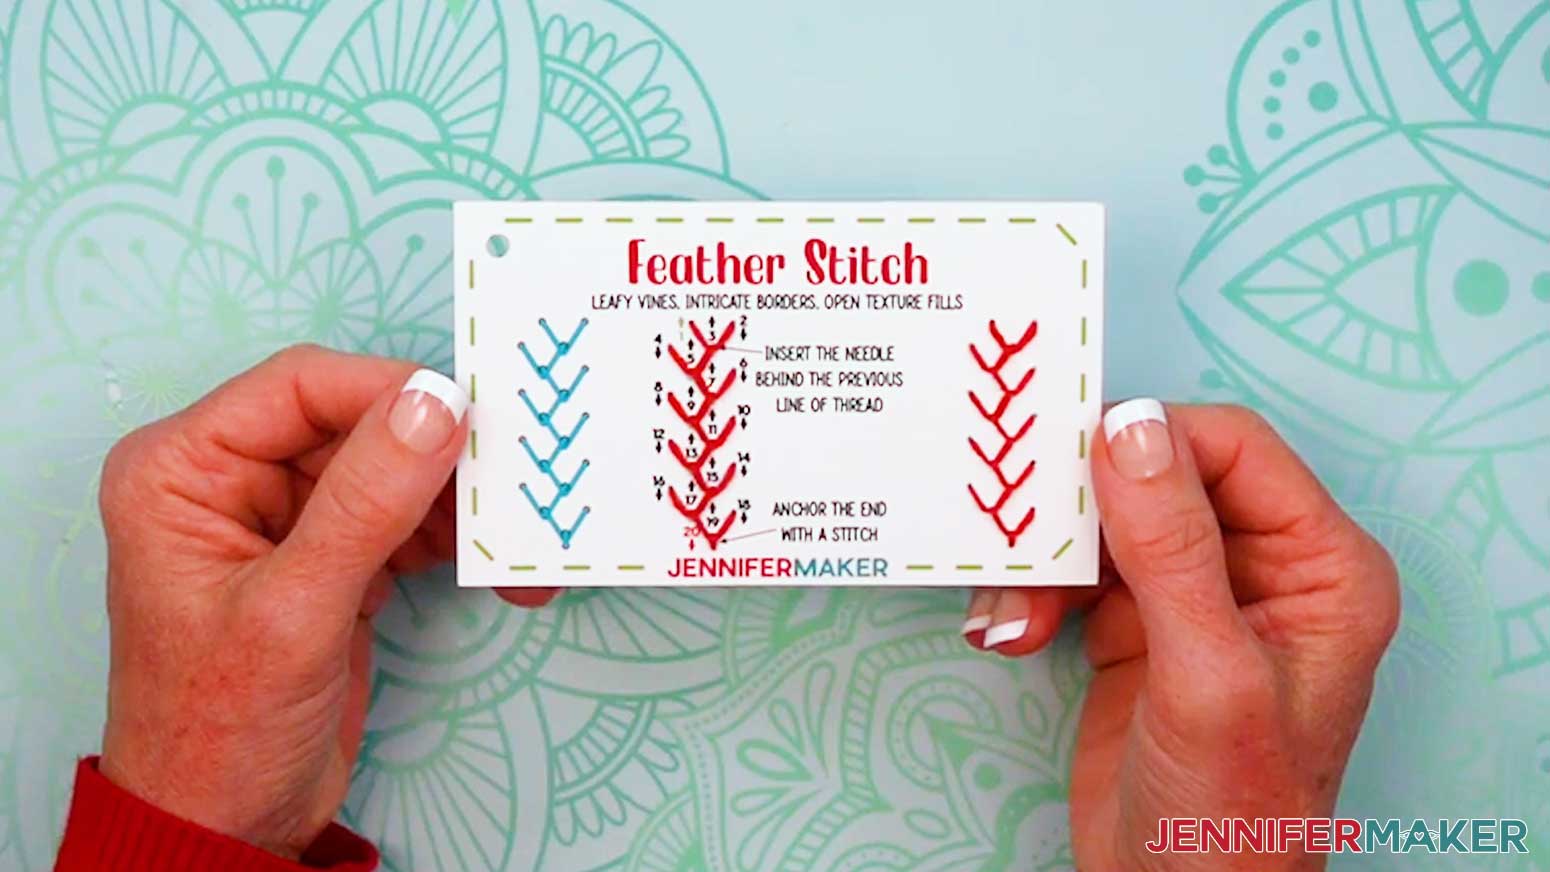
FEATHER STITCH
- Grab your “feather stitch” card and prepare a needle with thread.
- Insert the threaded needle up through Hole 1.
- Then insert the threaded needle down into Hole 2, making sure the thread isn’t too tight.
NOTE: The thread won’t follow the line on the card yet. - Bring the needle up Hole 3, insert it under the top thread (between Holes 1 and 2), and pull the thread into a point at the bottom of Hole 3.
- Bring the thread down into Hole 4 to make a line for the next feather line.
NOTE: The thread won’t follow the line on the card yet. - Bring the needle up Hole 5, insert it under the top thread (between Holes 3 and 4), and pull the thread into a point at the bottom of Hole 5.
- Follow Holes 6-19 the same way, making loose horizontal stitches and bringing the thread down to a bottom point at each odd-numbered hole to form intricate branching stitches.
- Insert the needle down through Hole 20 to anchor the stitches in place.
- Tie off and trim your thread.
ACCENT STITCHES
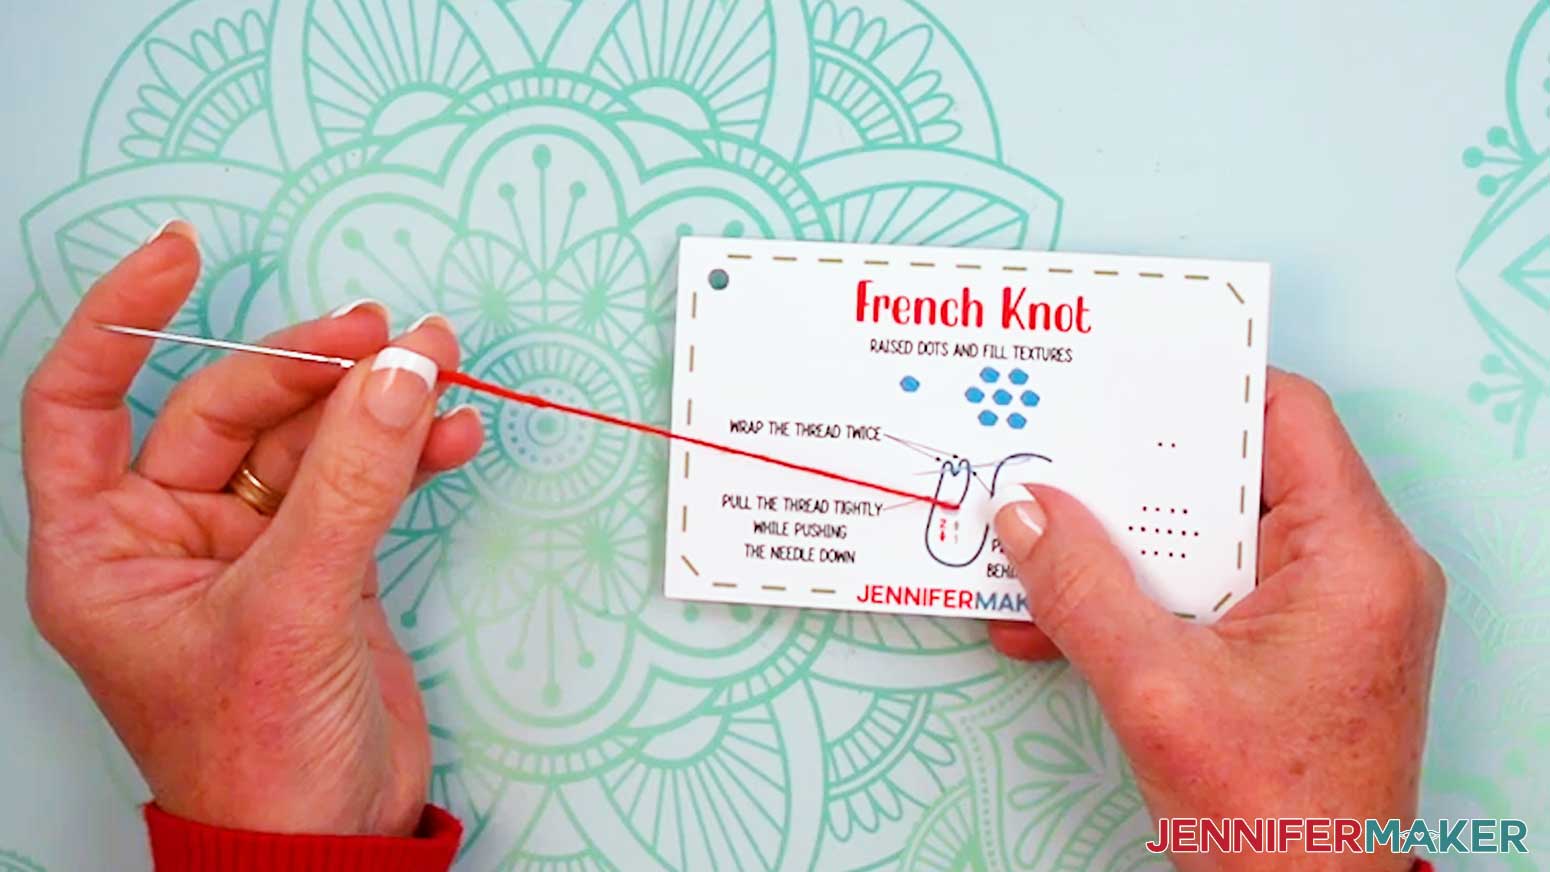
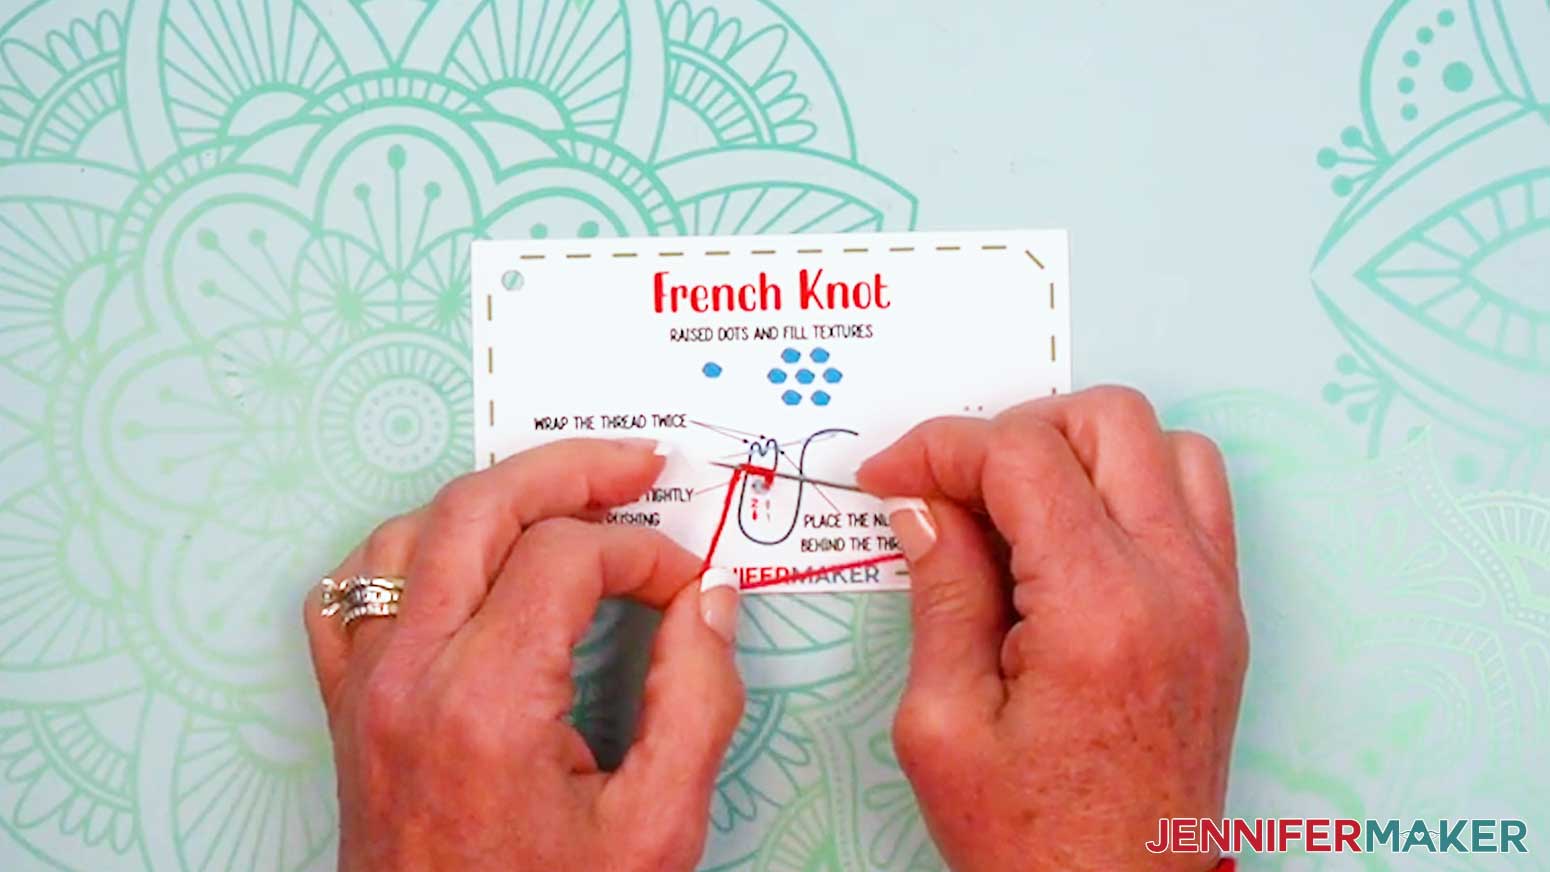
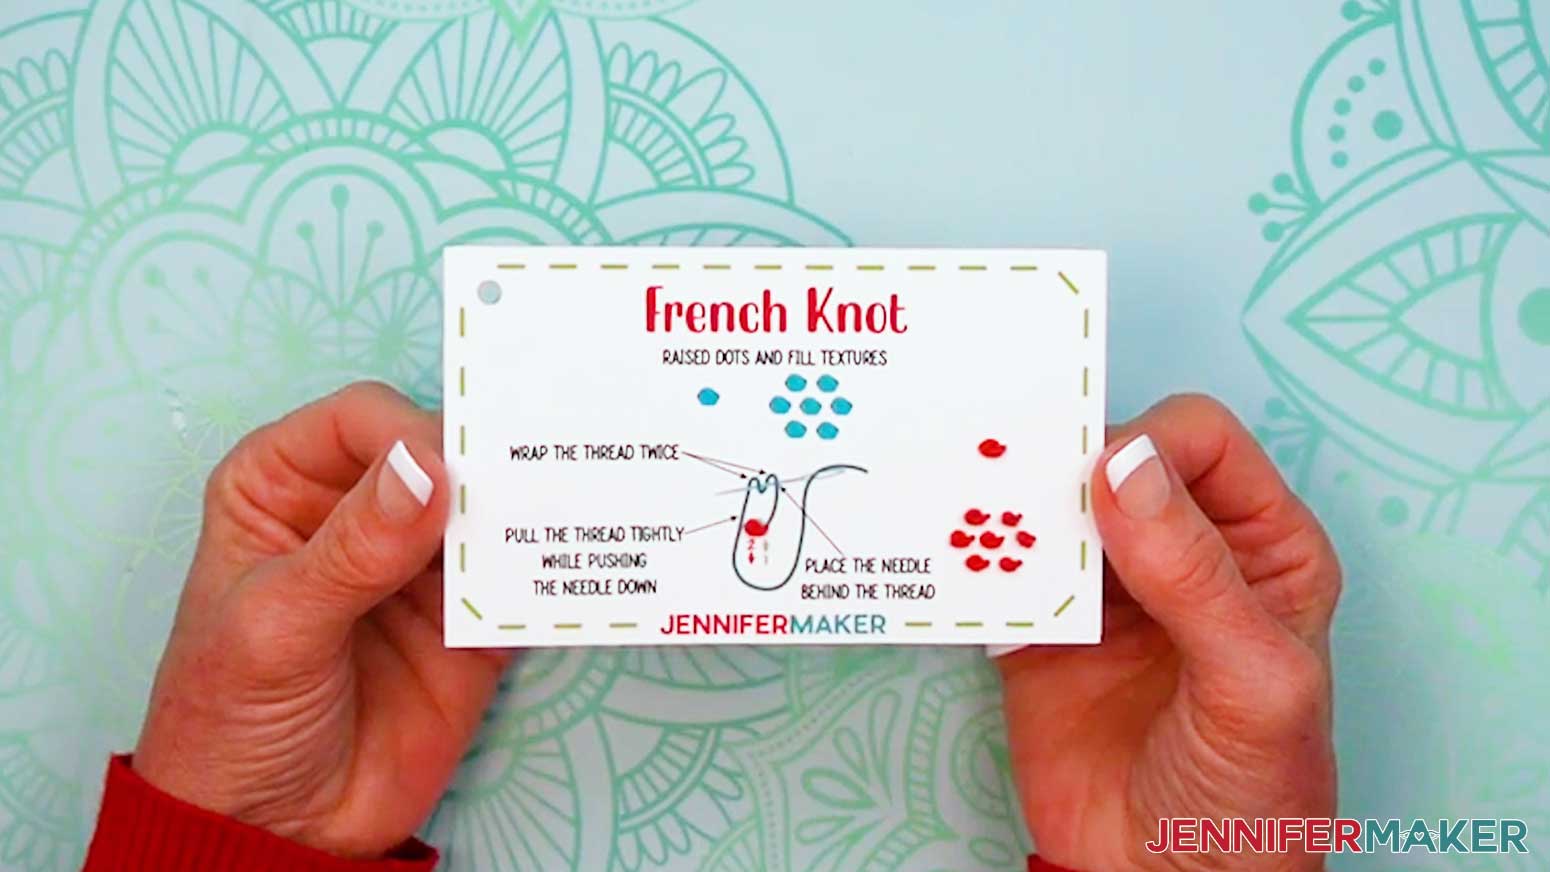
FRENCH KNOT
- Grab your “French knot” card and prepare a needle with thread.
- Insert the threaded needle up through Hole 1.
- Pull the thread to the side of the circle in a straight line.
- Hold the needle over the top part of the thread line.
- Wrap the thread around the needle twice.
- Pull the thread tightly while pushing the needle down through Hole 2 to form a raised dot.
- Tie off and trim your thread.
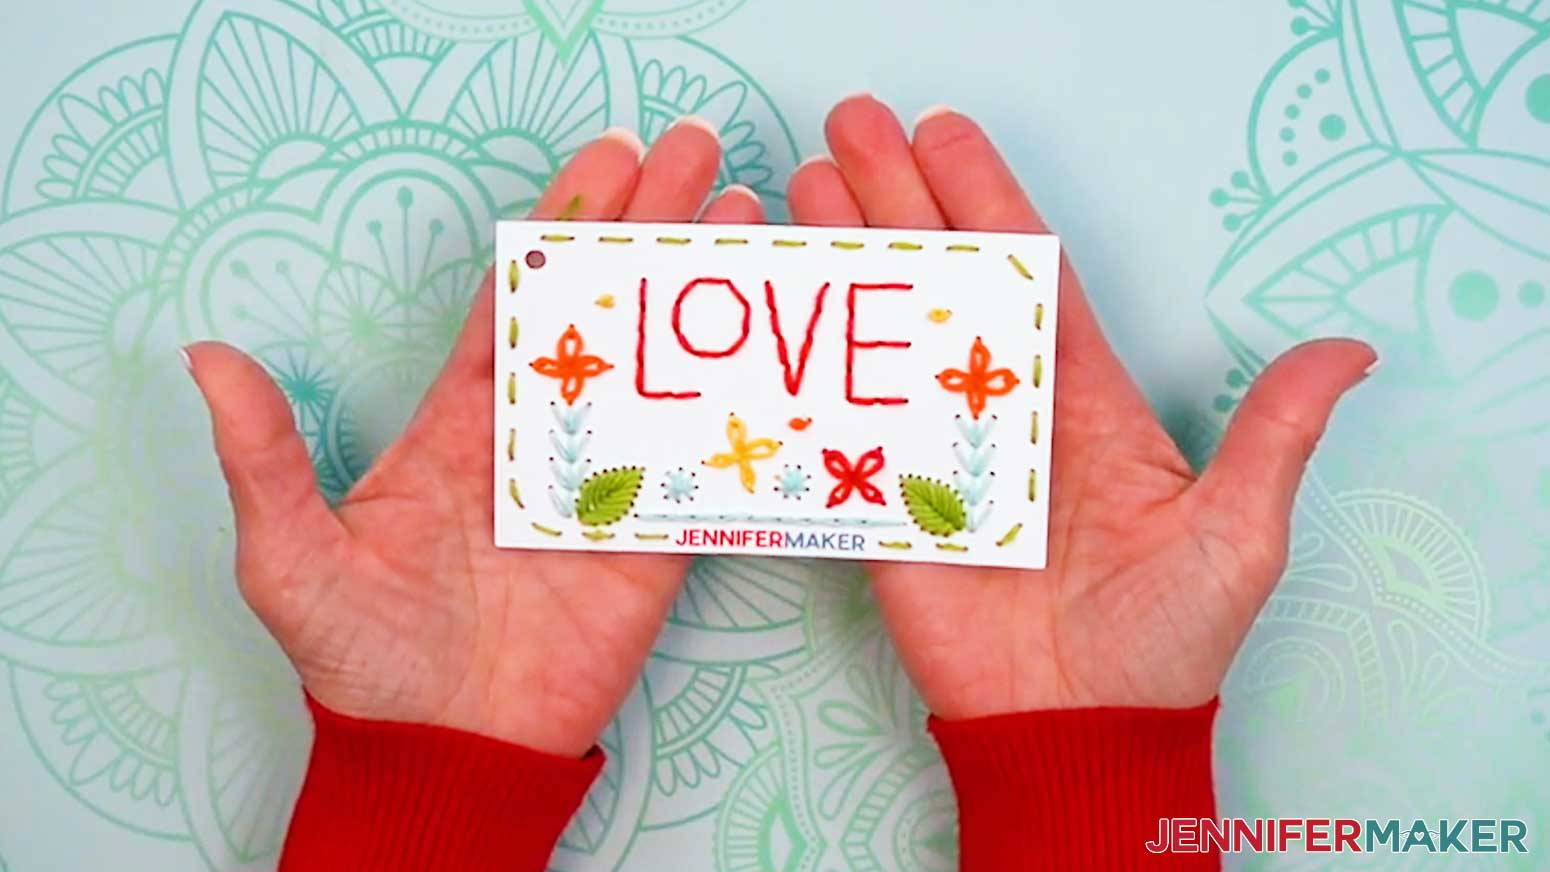
STITCH YOUR DESIGN CARD
- When you’re ready to put your stitches all together, grab your design card.
- Prepare a needle with thread.
- Find a stitch you recognize and embroider that part of the design. Refer back to your stitch book for instructions, if necessary.
- Tie off and trim your thread.
- Repeat Steps 2-4 until your design is finished!
STEP 5: SHOW IT OFF
You now have a beautiful Embroidery Stitch Book! Use the stitches you’ve learned to create unique embroidery designs on fabric!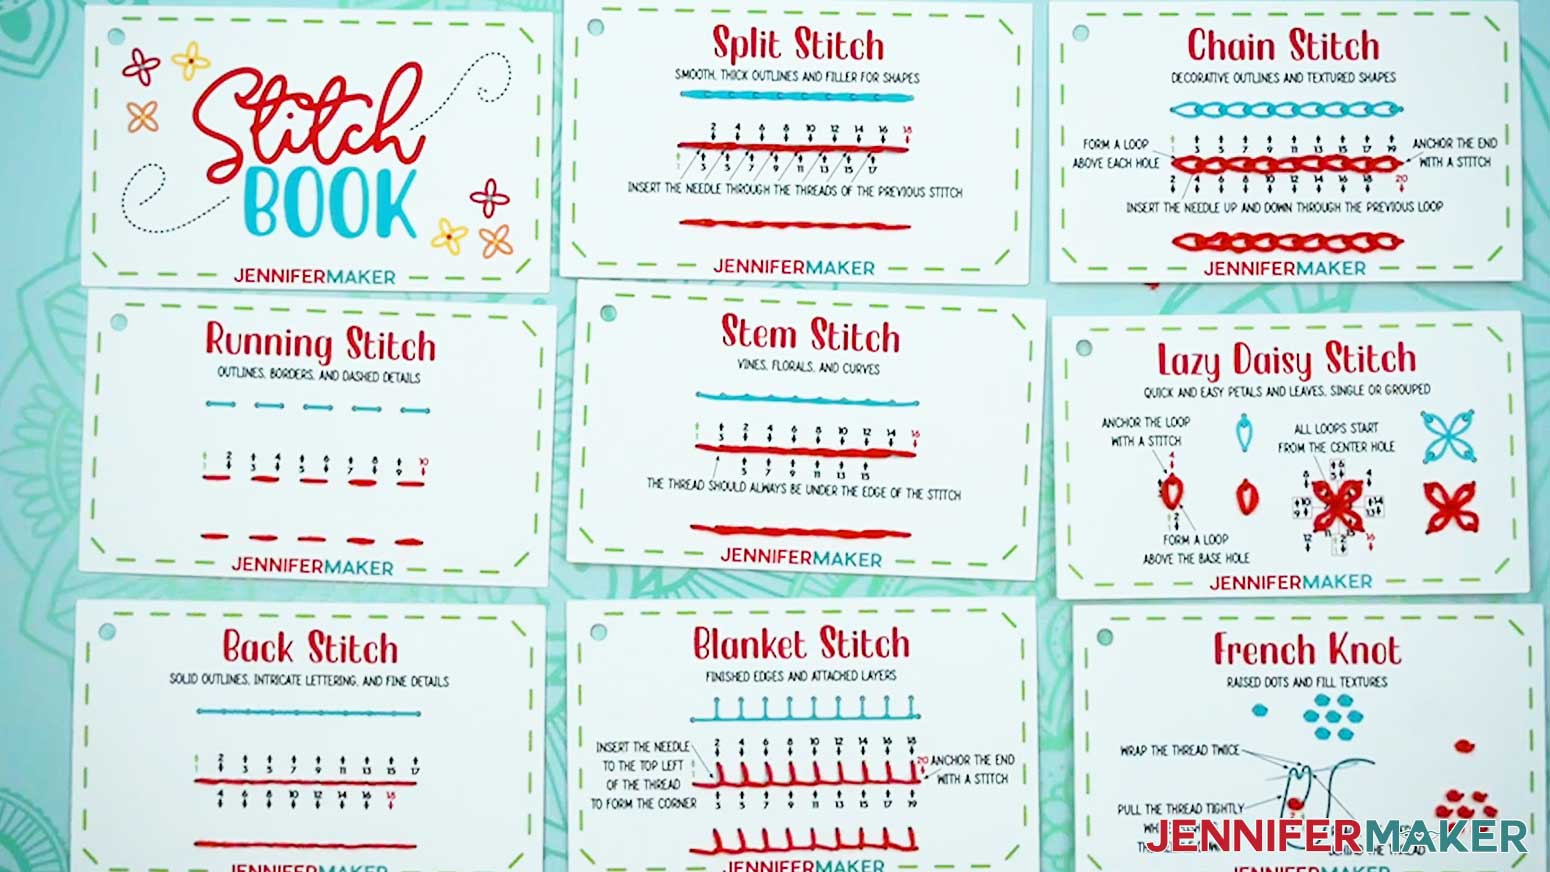
Notes
Embroidery Card Size: 5" wide x 3" tall
Fonts Used:
Balmonde / Free For Personal Use: Balmonde
Ballyhoo Regular / Free Alternative: Sunday Best
Dear Agatha Sans 2 / Free Alternative: Better Together
Answers to Your Questions About Making Embroidery Stitch Books
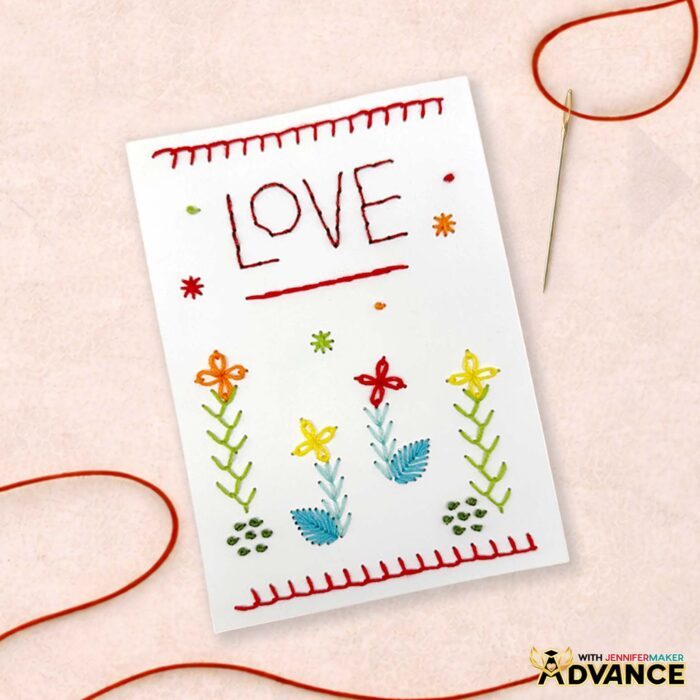
Q: Is there a way to create a custom embroidery design using the stitches I’ve learned?
A: You can learn how to design your own custom embroidery design like the one below in my ADVANCE program. Learn more about ADVANCE here!
Q: Help! My Cricut Design Space screen looks different from yours!
A: If you’re using the latest version of Cricut Design Space, your screen may have slight variations from the screen you see on the video tutorial. Good news! All of the same functions are there, they may just be in different spots or have new icons.
Q: Can I make and sell embroidery stitch books or other embroidery projects using your designs?
A: If you want to use my stitch book designs and project for commercial use, please familiarize yourself with my important licensing information before selling your crafts.
Q: Which Cricut machines work for making an embroidery stitch book?
A: You can make this project on any Cricut that has Print Then Cut capabilities, such as any Cricut Maker Series machine, a Cricut Explore Series machine, the Cricut Joy Xtra, the Cricut Joy 2, or the Cricut Venture.
Q: Can I make this without a Cricut?
A: Yes! While it’s quicker and easier to let your machine do all the work (especially cutting out all those tiny little holes!), I also include a printable PDF to help you hand-cut the cards as part of my free download. I cover the steps to make an embroidery stitch book by hand in my tutorial video above, as well. To make it, you’ll need scissors to cut the cards, and a needle, scrap cardboard, and lots of patience to poke the individual holes. Don’t forget to give your hands a break between cards!
Q: What is an embroidery stitch book used for?
A: My embroidery stitch book is both a learning tool and something you can keep as a reference. It helps you practice embroidery stitches using a simple numbering guide and colored arrows, and later on, you can flip back to any card if you need a reminder. It’s especially helpful when you’re working on a project and don’t want to stop to look something up.
Q: Which stitches can I learn with this project?
A: You’ll learn a variety of stitches, including basics like the straight stitch and back stitch, along with decorative ones like the blanket stitch and French knots. You’ll also see some more complicated stitches, which helps you build your skills gradually.
Q: Is this good for beginners?
A: Yes, it’s great for beginners and especially helpful if it’s your first time trying embroidery. The numbered holes show you exactly where your needle goes and the arrows tell you whether to insert your needle up or down, so you don’t have to guess or feel unsure.
Q: How does this help me learn faster?
A: Because you’re actually stitching each step, your hands start to remember what to do. Following a straight line or pattern this way makes it easier to understand how stitches are formed.
Q: How should I organize my stitch book?
A: You can arrange your stitch book however you like. I recommend keeping the front cover on top and grouping similar stitches together so they’re easy to find.
Q: Can I reuse the cards or make new ones?
A: You can reuse the cards if you have the patience to pull out the embroidery floss, but I recommend printing new ones whenever you want more practice. Since your cards are kept on a ring, it’s easy to swap old cards out and replace them with new ones.
Q: What can I do after finishing the cards?
A: Once you’re comfortable, you can start using what you’ve learned on real projects. You can decorate fabric, add details to items, or combine stitches into your own designs.
Q: Why is this method easier than traditional embroidery learning?
A: Traditional instructions can feel confusing because they rely on diagrams or written steps. This method shows you exactly where to stitch, and makes everything much clearer and easier to follow.
Q: Where can I get help if I get stuck?
A: If you want quick troubleshooting or you want to show off your finished embroidery stitch book, my Cricut Facebook group is a helpful place to get help, compare notes, and see what others are making!
Get my free PNG/PDF files to make your own Embroidery Stitch Book!
(If you do not see the signup form above, click here.)
I absolutely love seeing your embroidery projects! Once you’ve filled out your book and stitched the practice design, inspire others and share photos of your finished project in our Facebook group or tag me on social media with #jennifermaker.
Love,

Want to remember this? Save this tutorial on How to Make an Embroidery Stitch Book to your favorite Pinterest Board!