
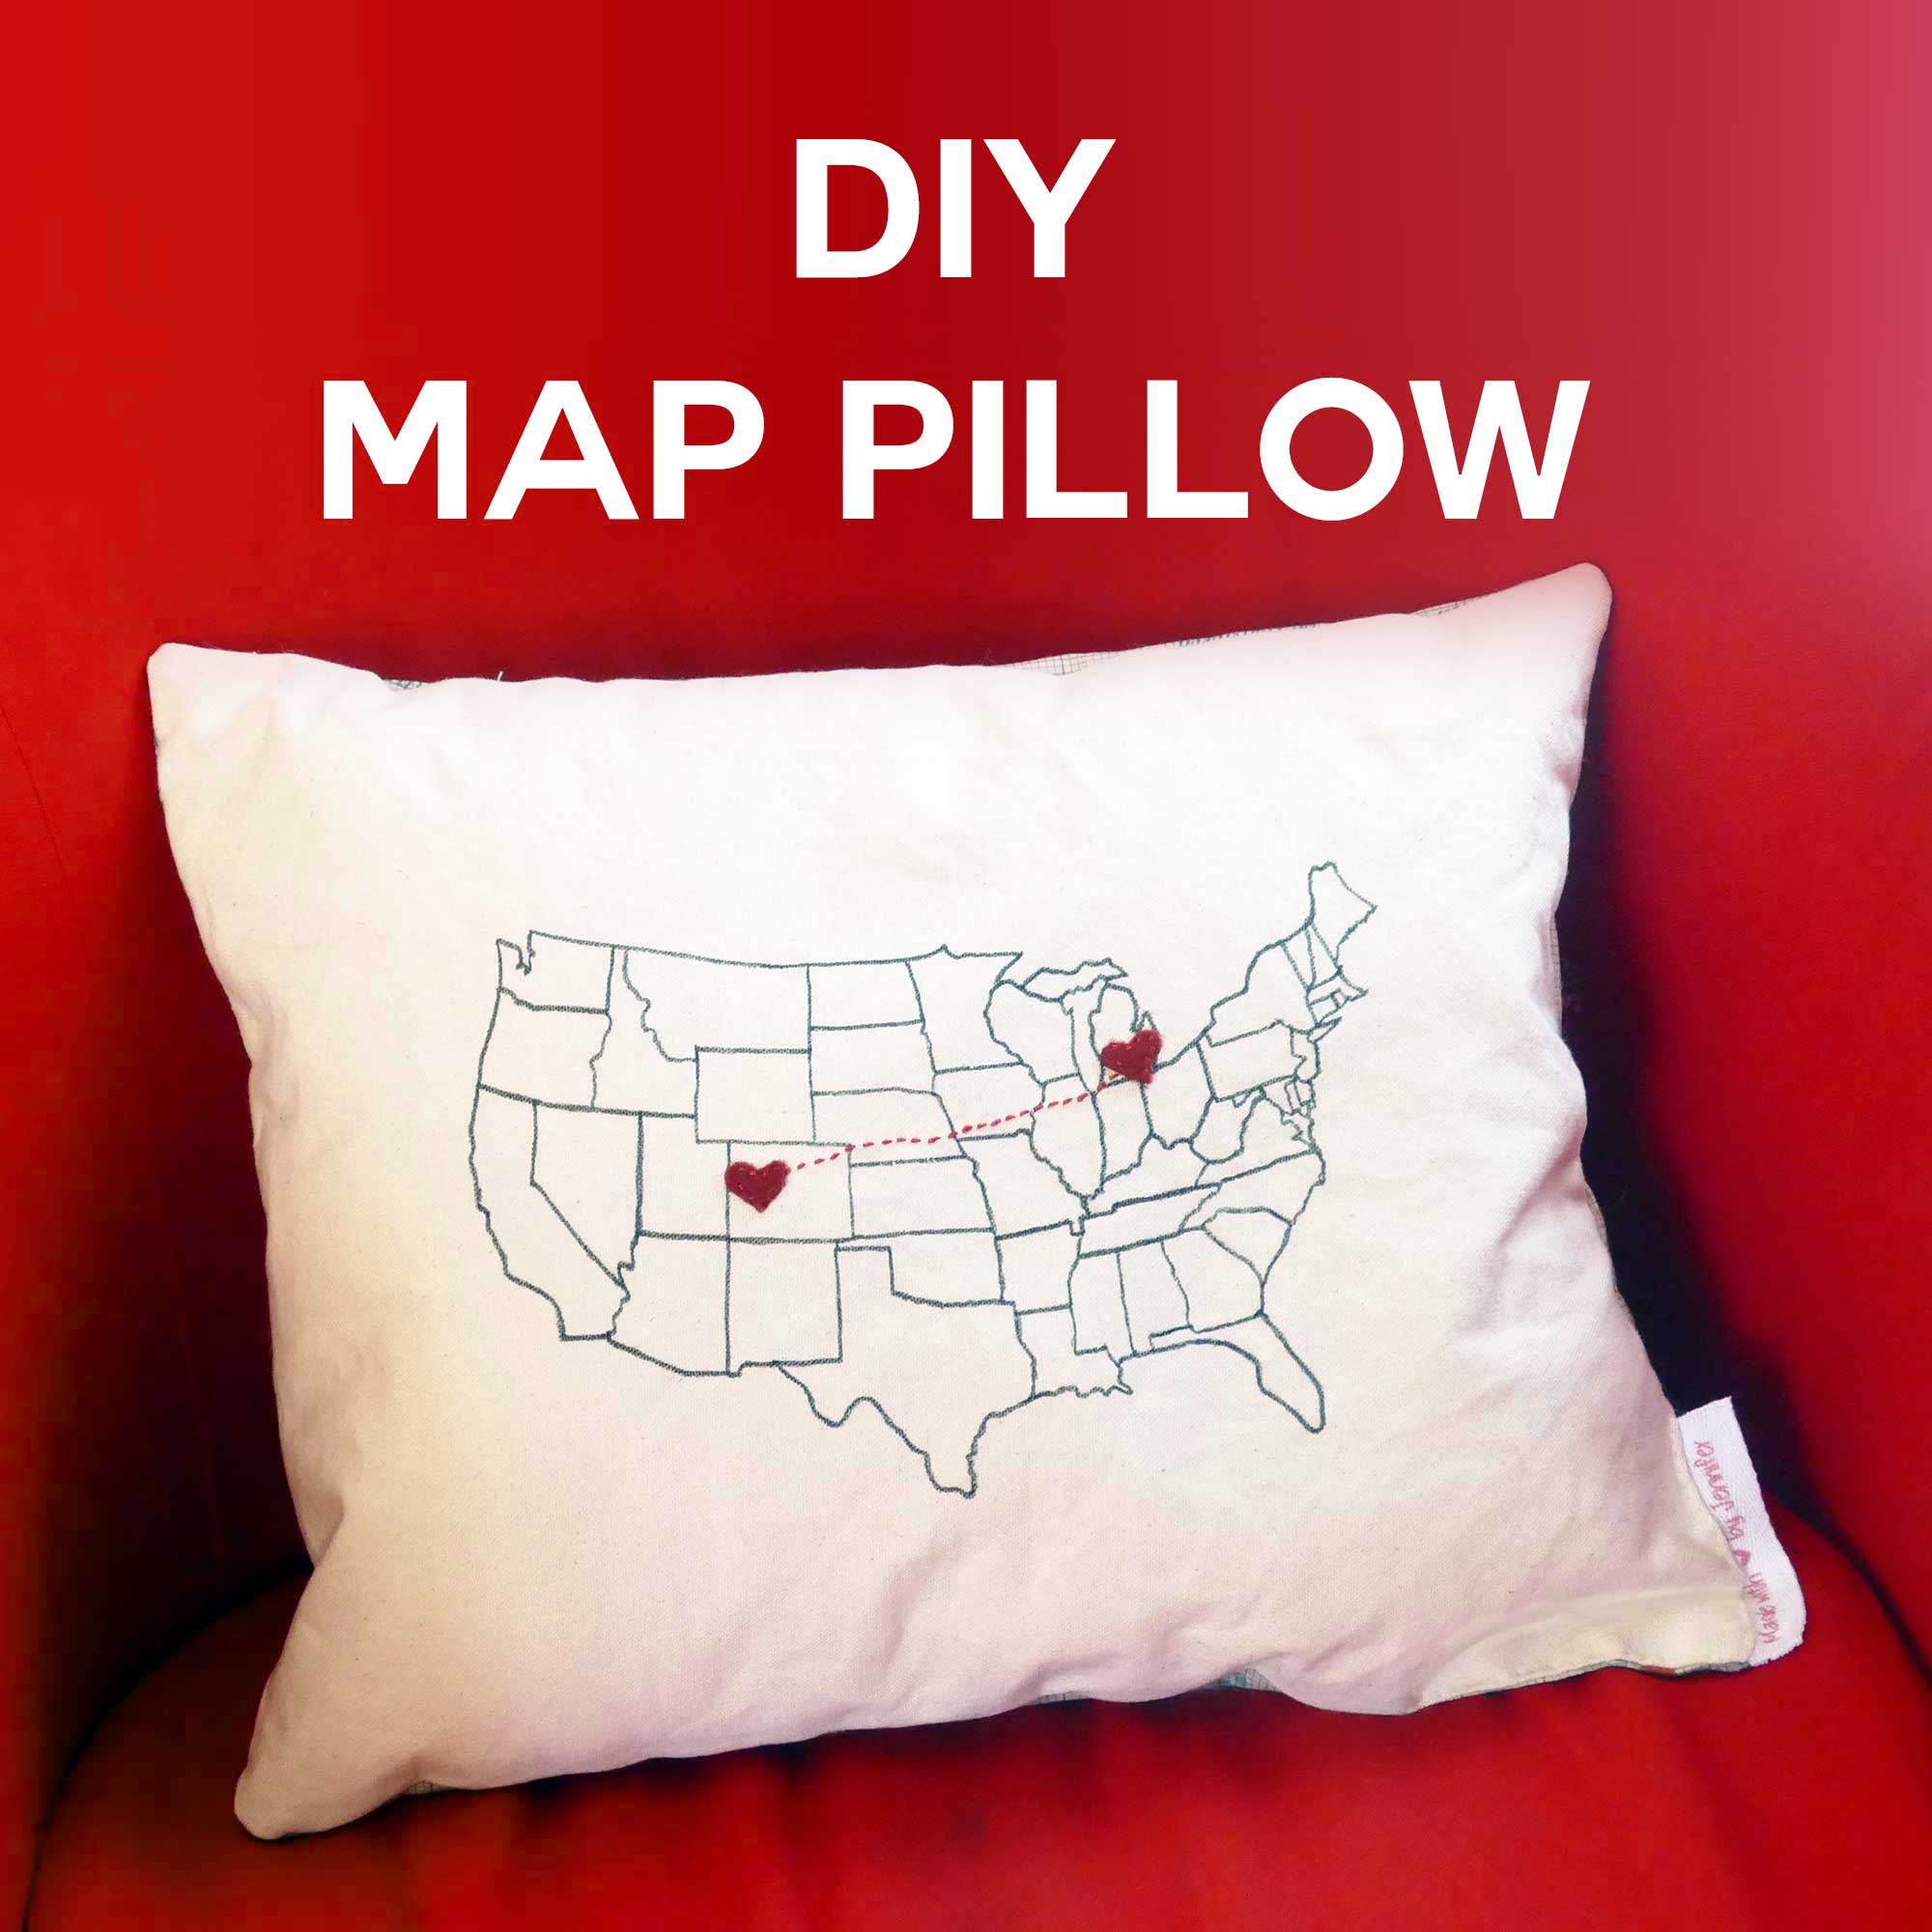
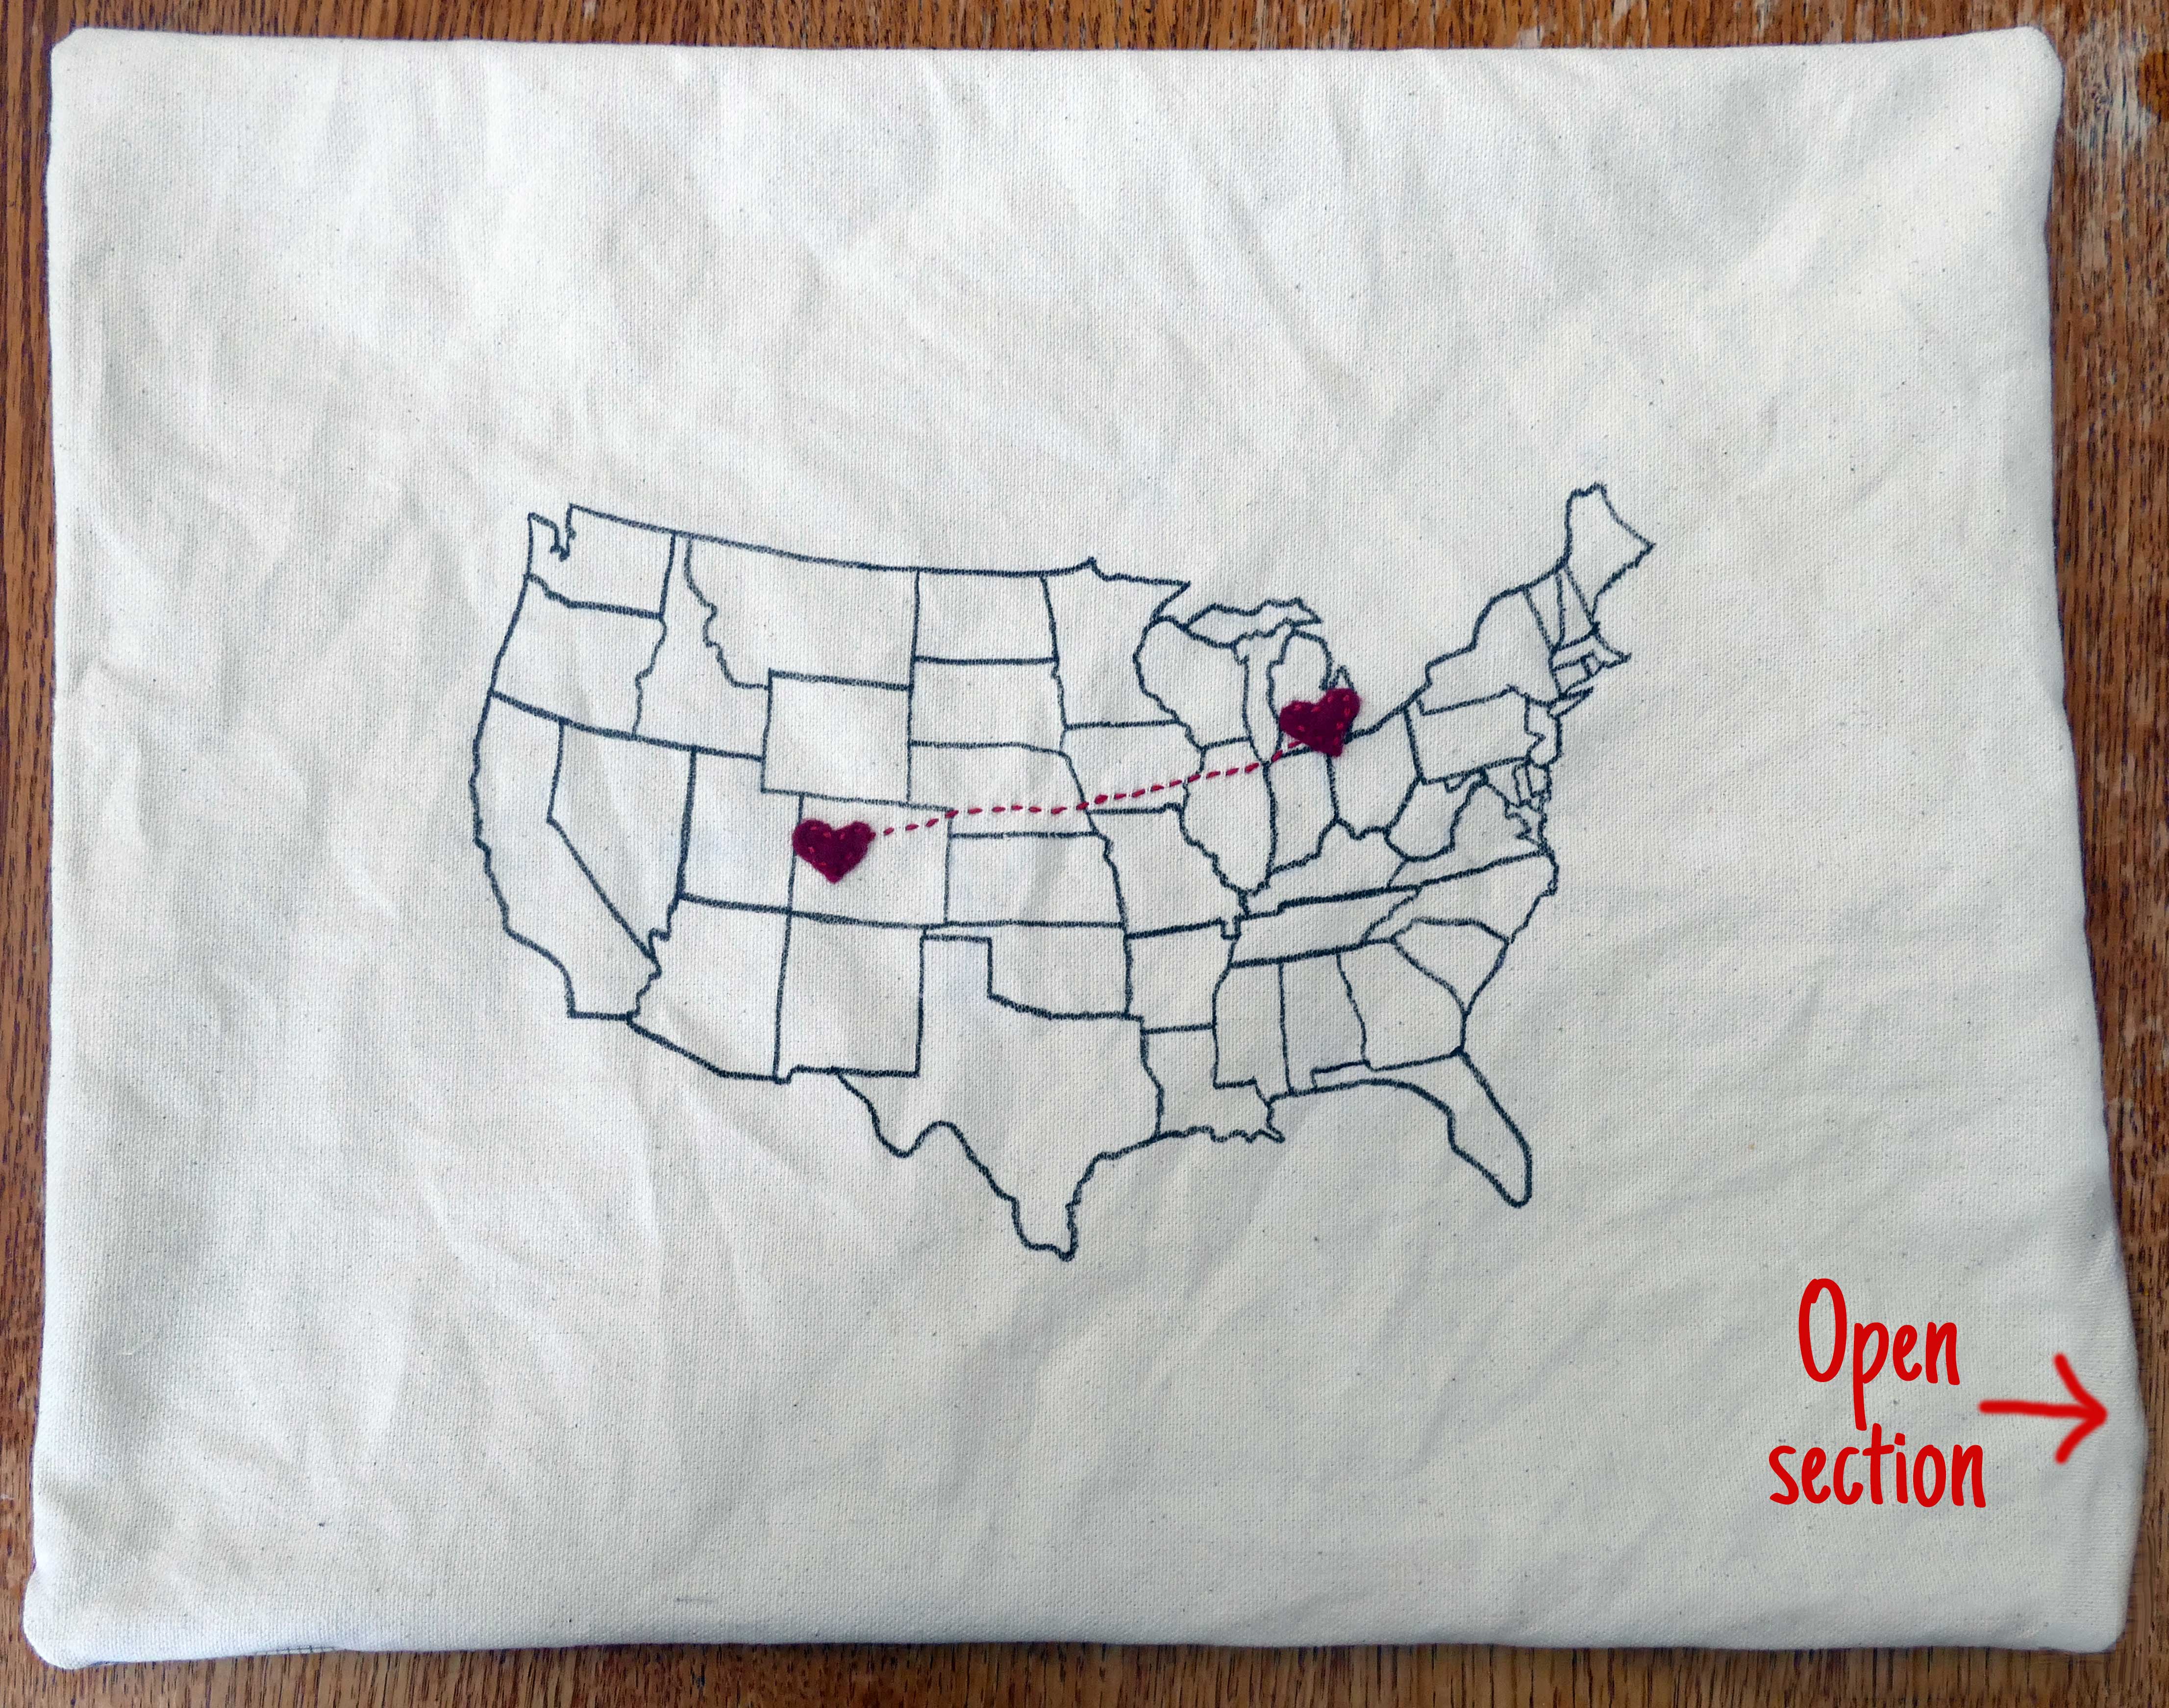
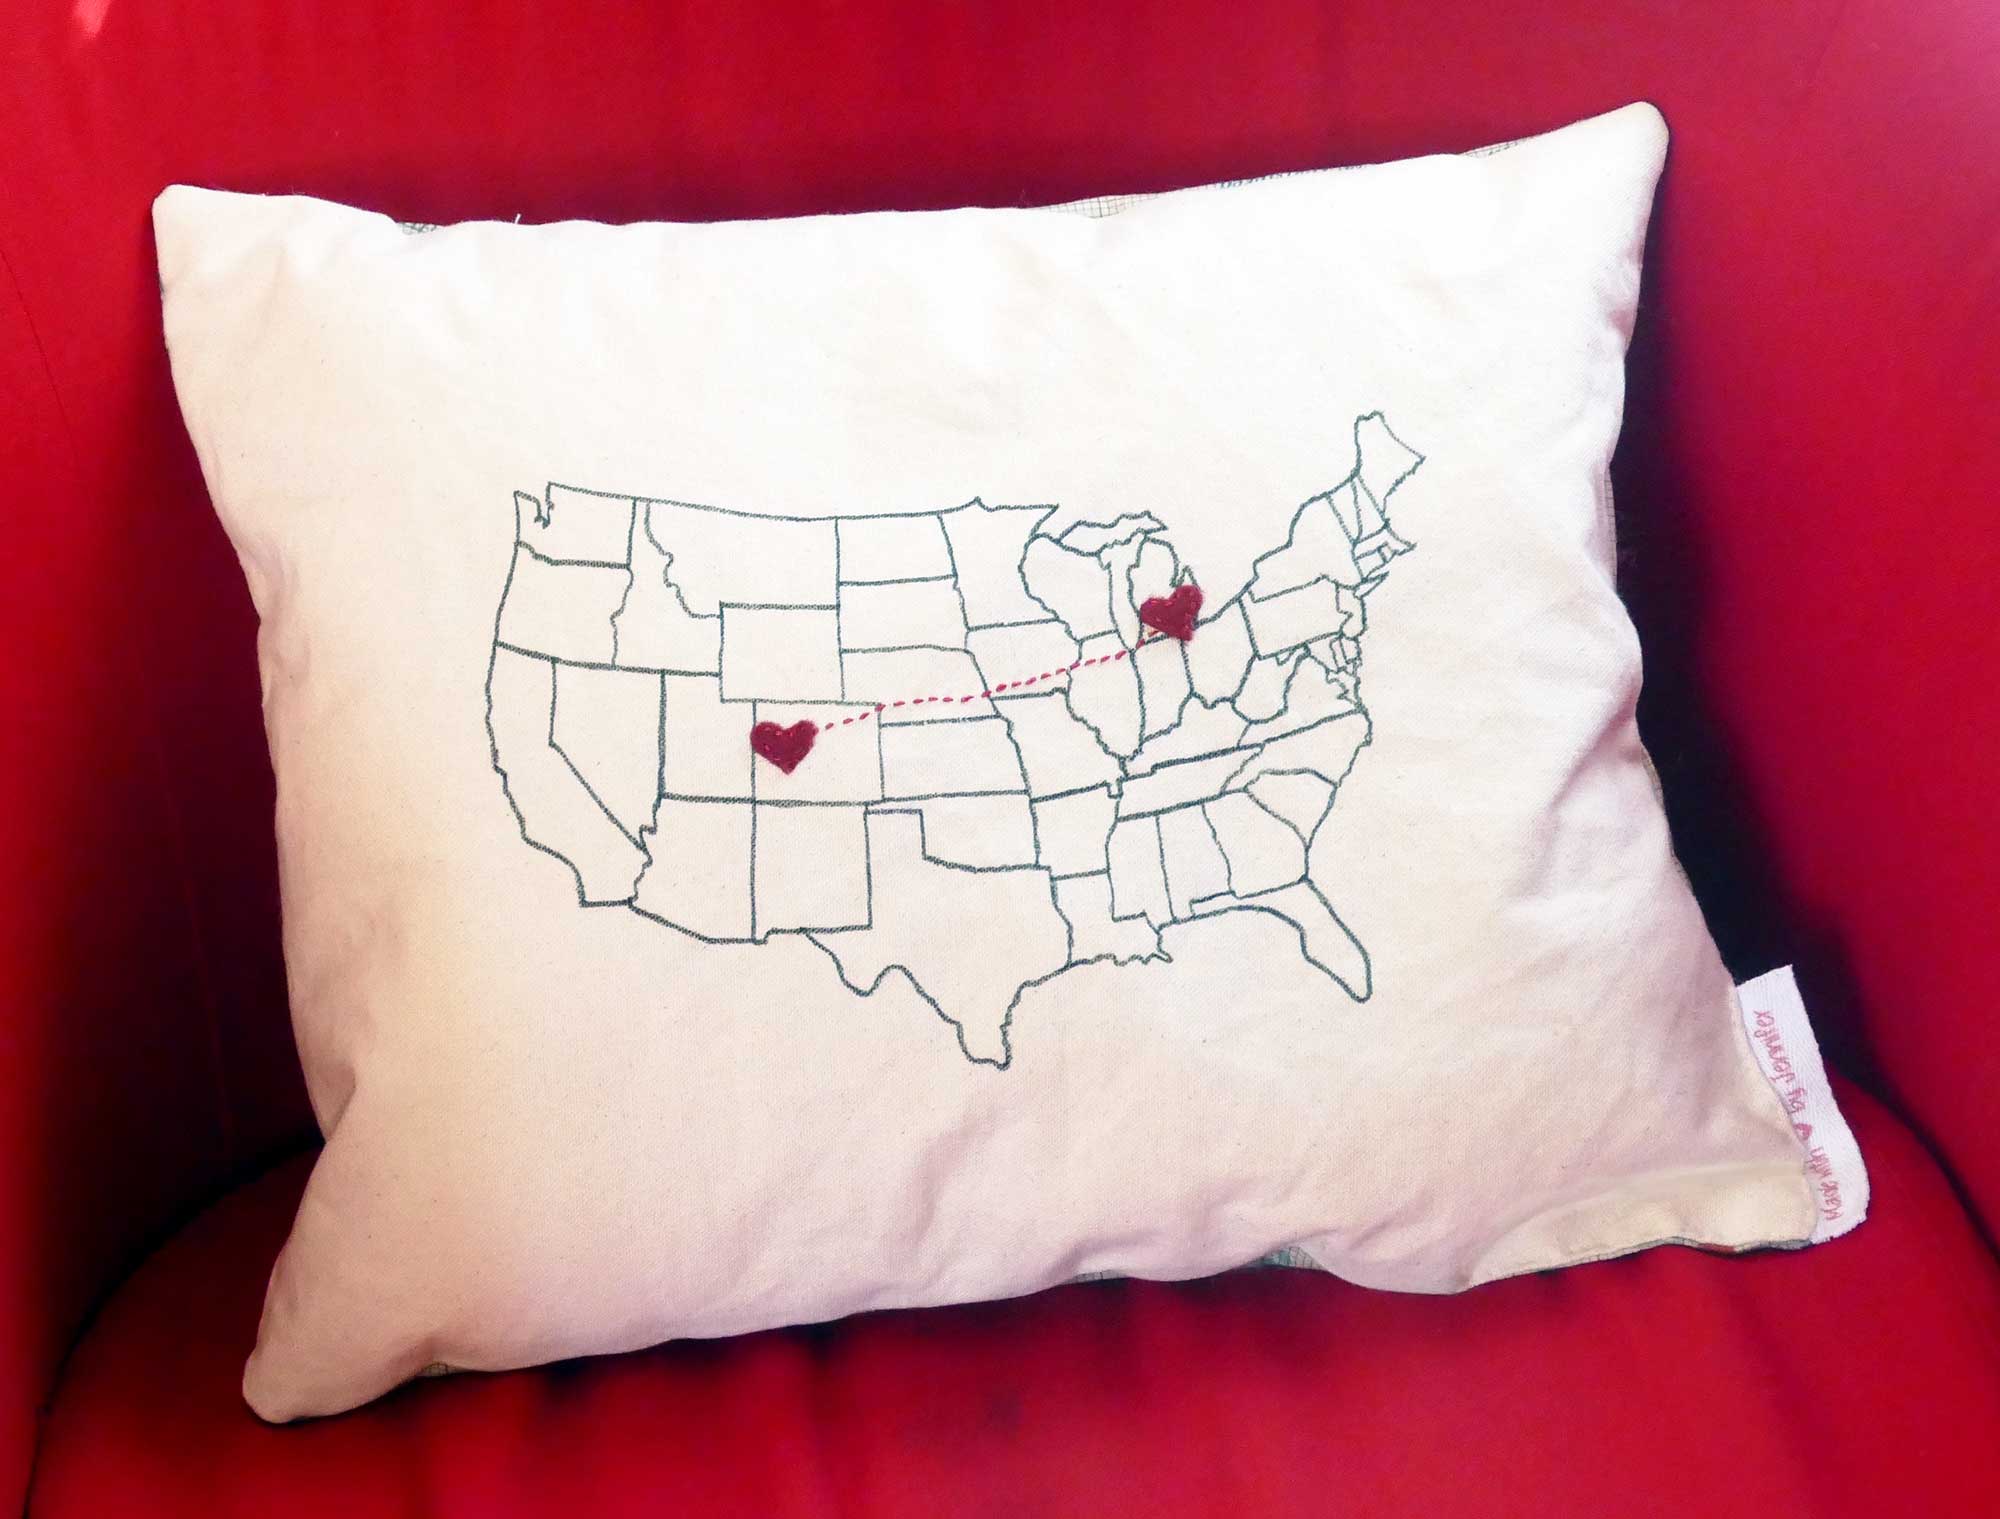
Greg’s parents live in Colorado, a very long way from Michigan. We only get to drive out to visit his family once in a while, but we do love to exchange gifts. This year I made a DIY map pillow with our locations marked by red felt hearts on a map of the U.S. A simple embroidered line marks the route we drive to see them. The back of the pillow is a quilting cotton with an air mail pattern. I saw a pillow with a similar design a while back on Etsy (I can no longer remember who made it). So this isn’t my idea, but it’s well worth sharing! You could give this as a gift to a long distance loved one, faraway friends, or just mark the route of a special vacation you took. I think this state to state pillow turned out really cute and I’m going to show you how to make one, too!
DIY Map Pillow Materials
Here’s what you need to make your own DIY map pillow. This post contains some affiliate links for your convenience (which means if you make a purchase after clicking a link I will earn a small commission but it won’t cost you a penny more)! Read my full disclosure policy.

- Off-white cotton canvas (aka “duck cloth”) — you need two pieces, each 15″ x 20″
- Decorative cotton (optional) — one pieces, 15″ x 20″ (Option #1, Option #2, Option #3)
- Pillow stuffing (“fiber fill”) — 12 oz. bag
- Wax-free fabric tracing paper (I recommend a blue sheet)
- Black fabric pen
- Red felt
- Red embroidery floss
- White thread
- Needle
- Pins
- Pen or pencil
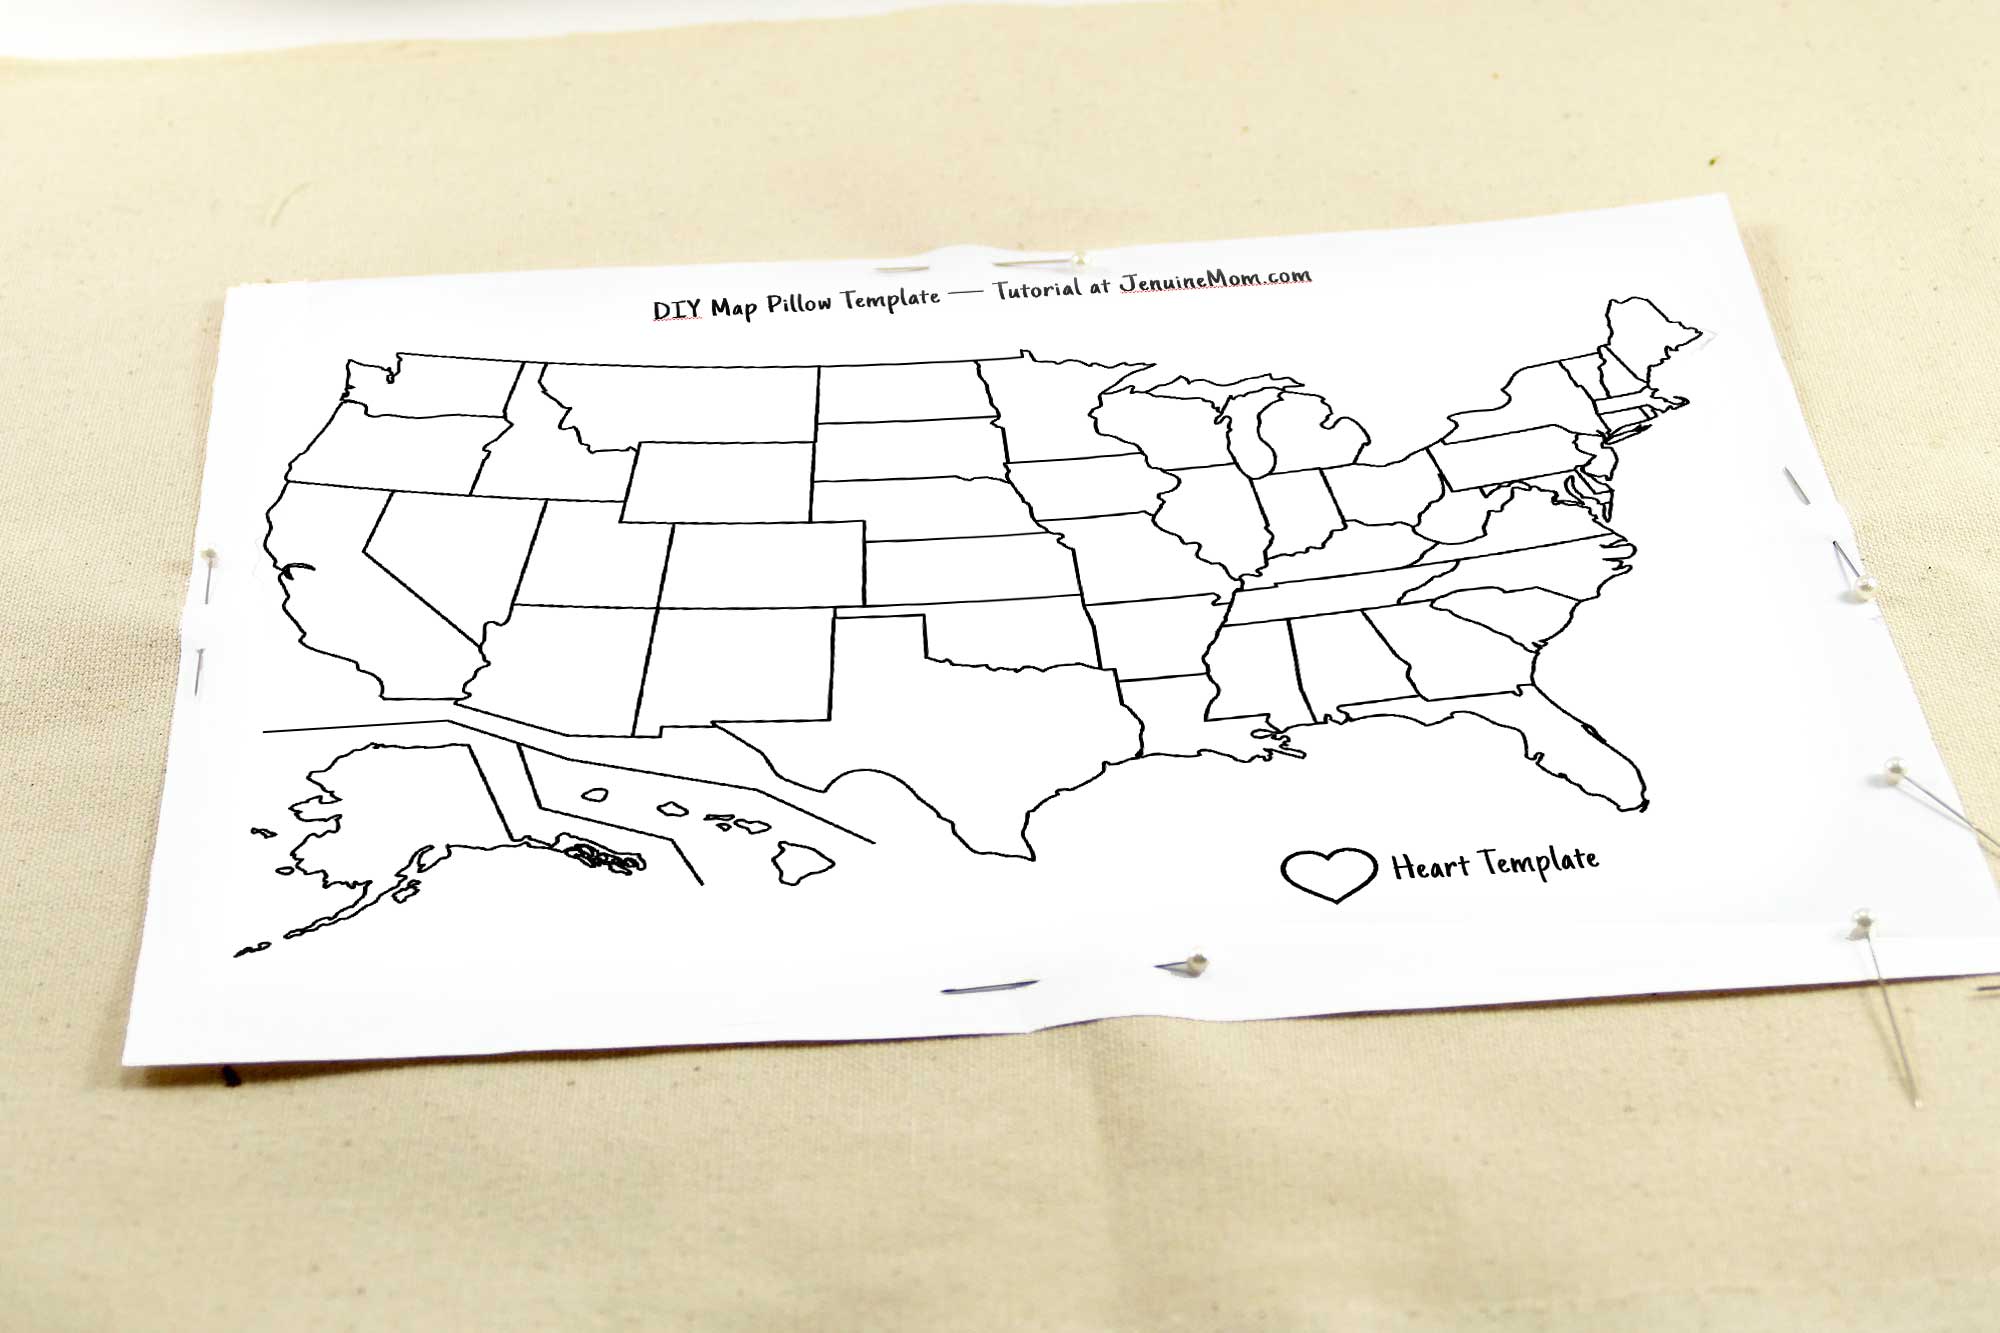
- Design #9 – Map template (get it in my Free Resource Library — get the password to the library by filling out the format the bottom of this post)
- DIY Fabric Tag (optional, see tutorial here)
DIY Map Pillow Step-by-Step Directions
Step 1: Print out the map (Design #9) (free download in my resource library) onto regular paper, center it on one piece of your canvas, and pin it in place.
Step 2: Slide a piece of fabric transfer paper between the paper and canvas (transfer side down). Begin tracing onto the canvas by pressing down with good pressure on the lines of the map. Move your tracing paper around as necessary until you’ve traced the full map onto your canvas.
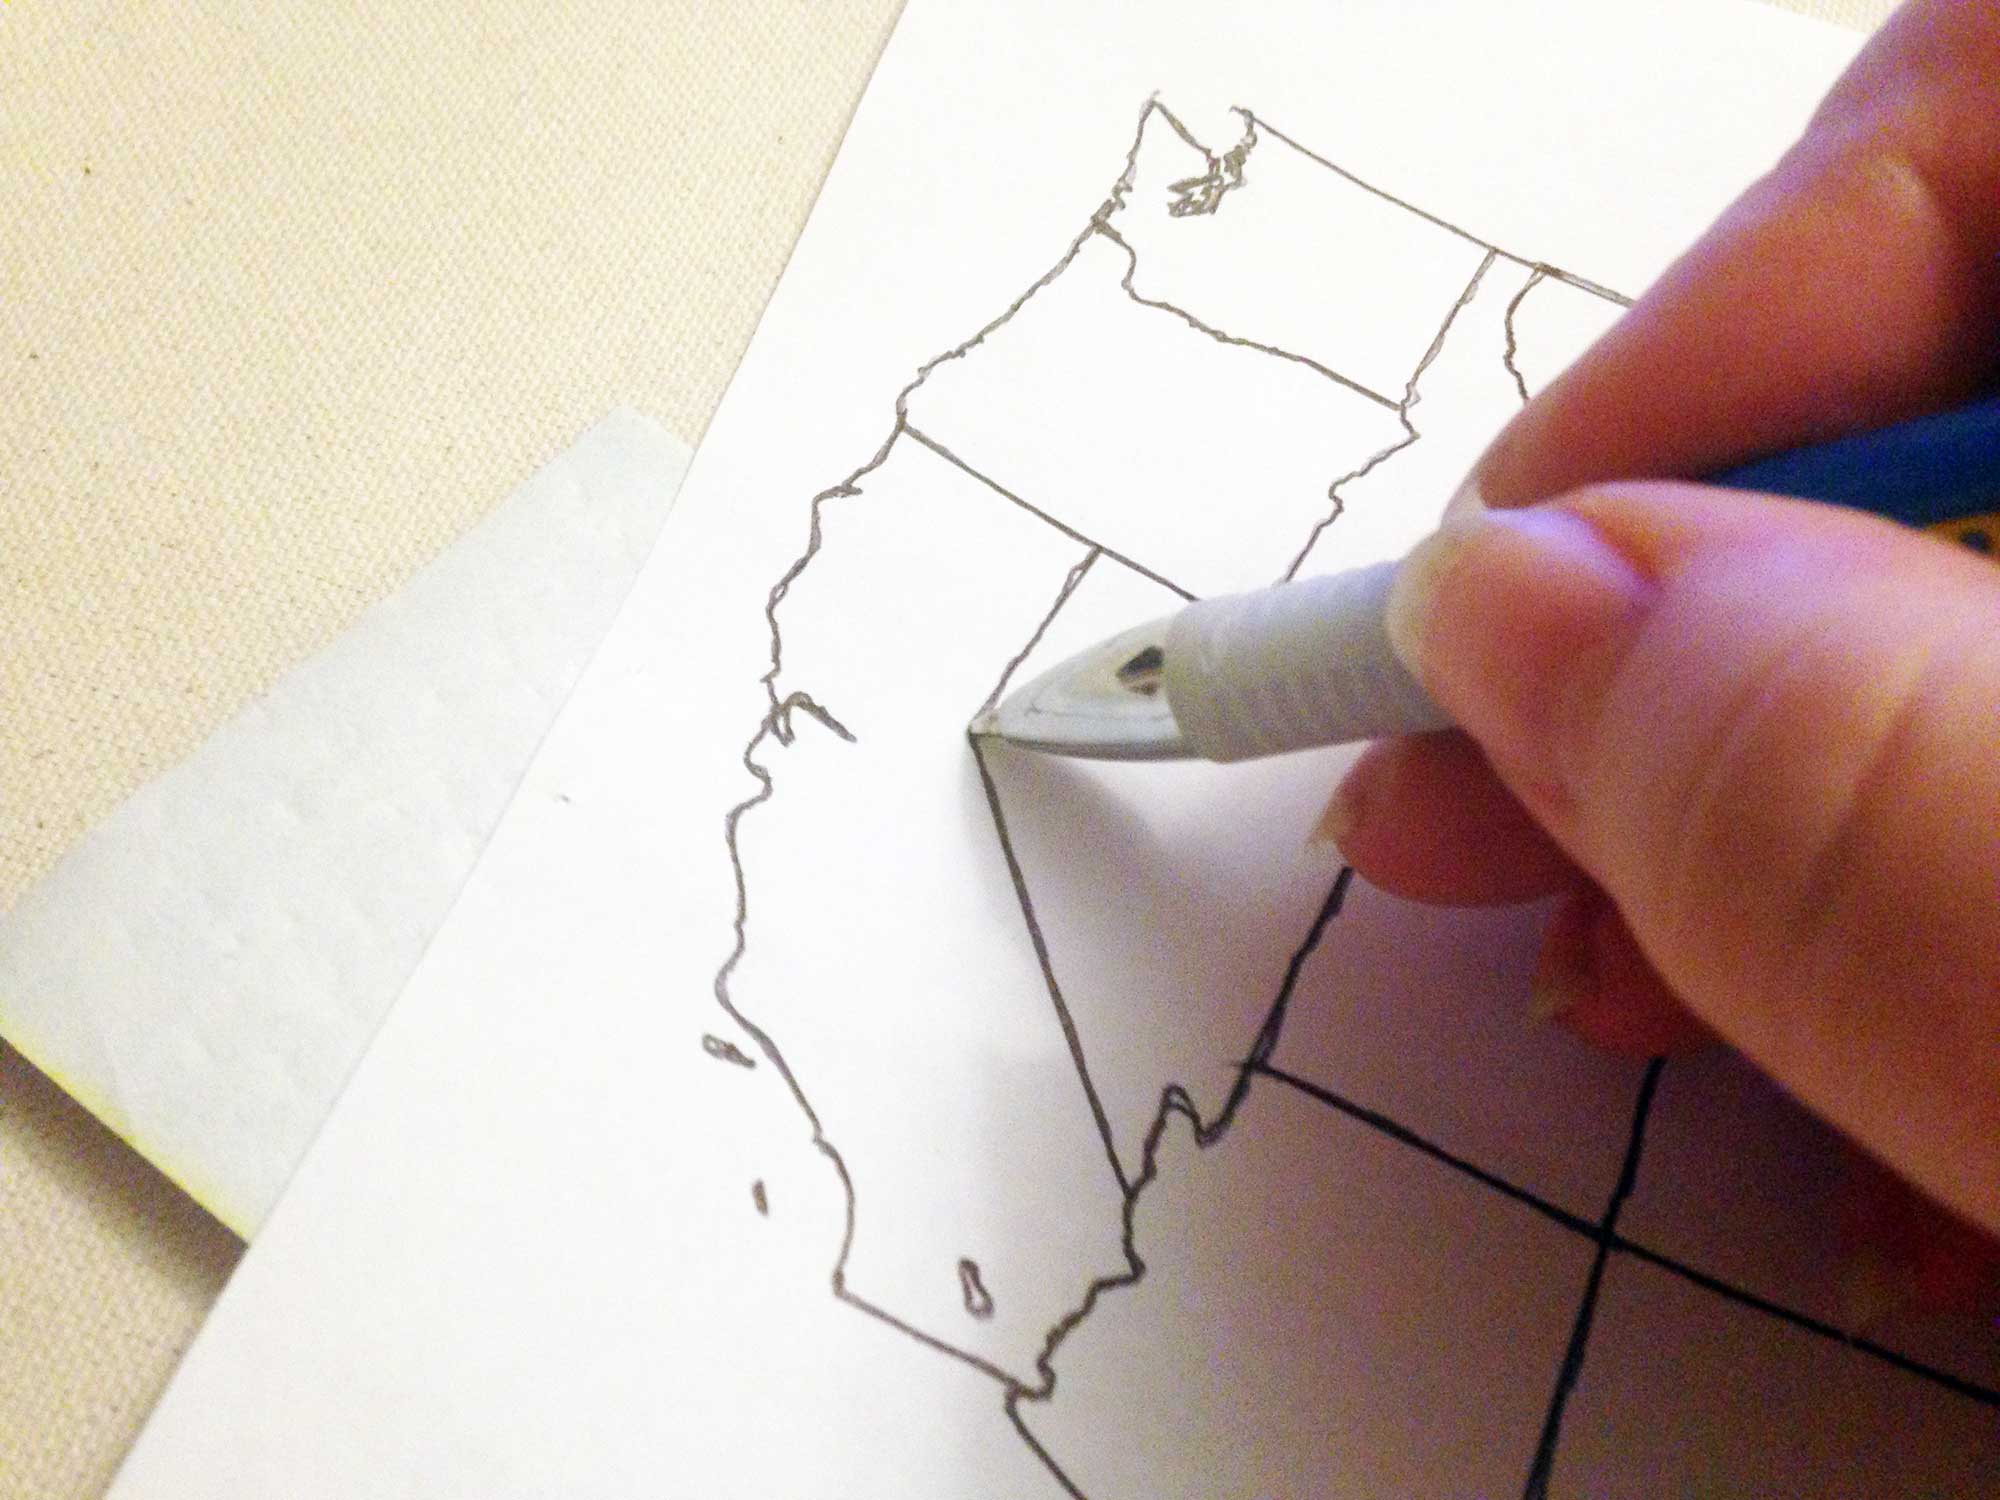

Here is my traced map in the photo above. You can see a few spots where I got too much of the blue tracing material onto my canvas — if this happens to you, don’t worry. It washes right out.
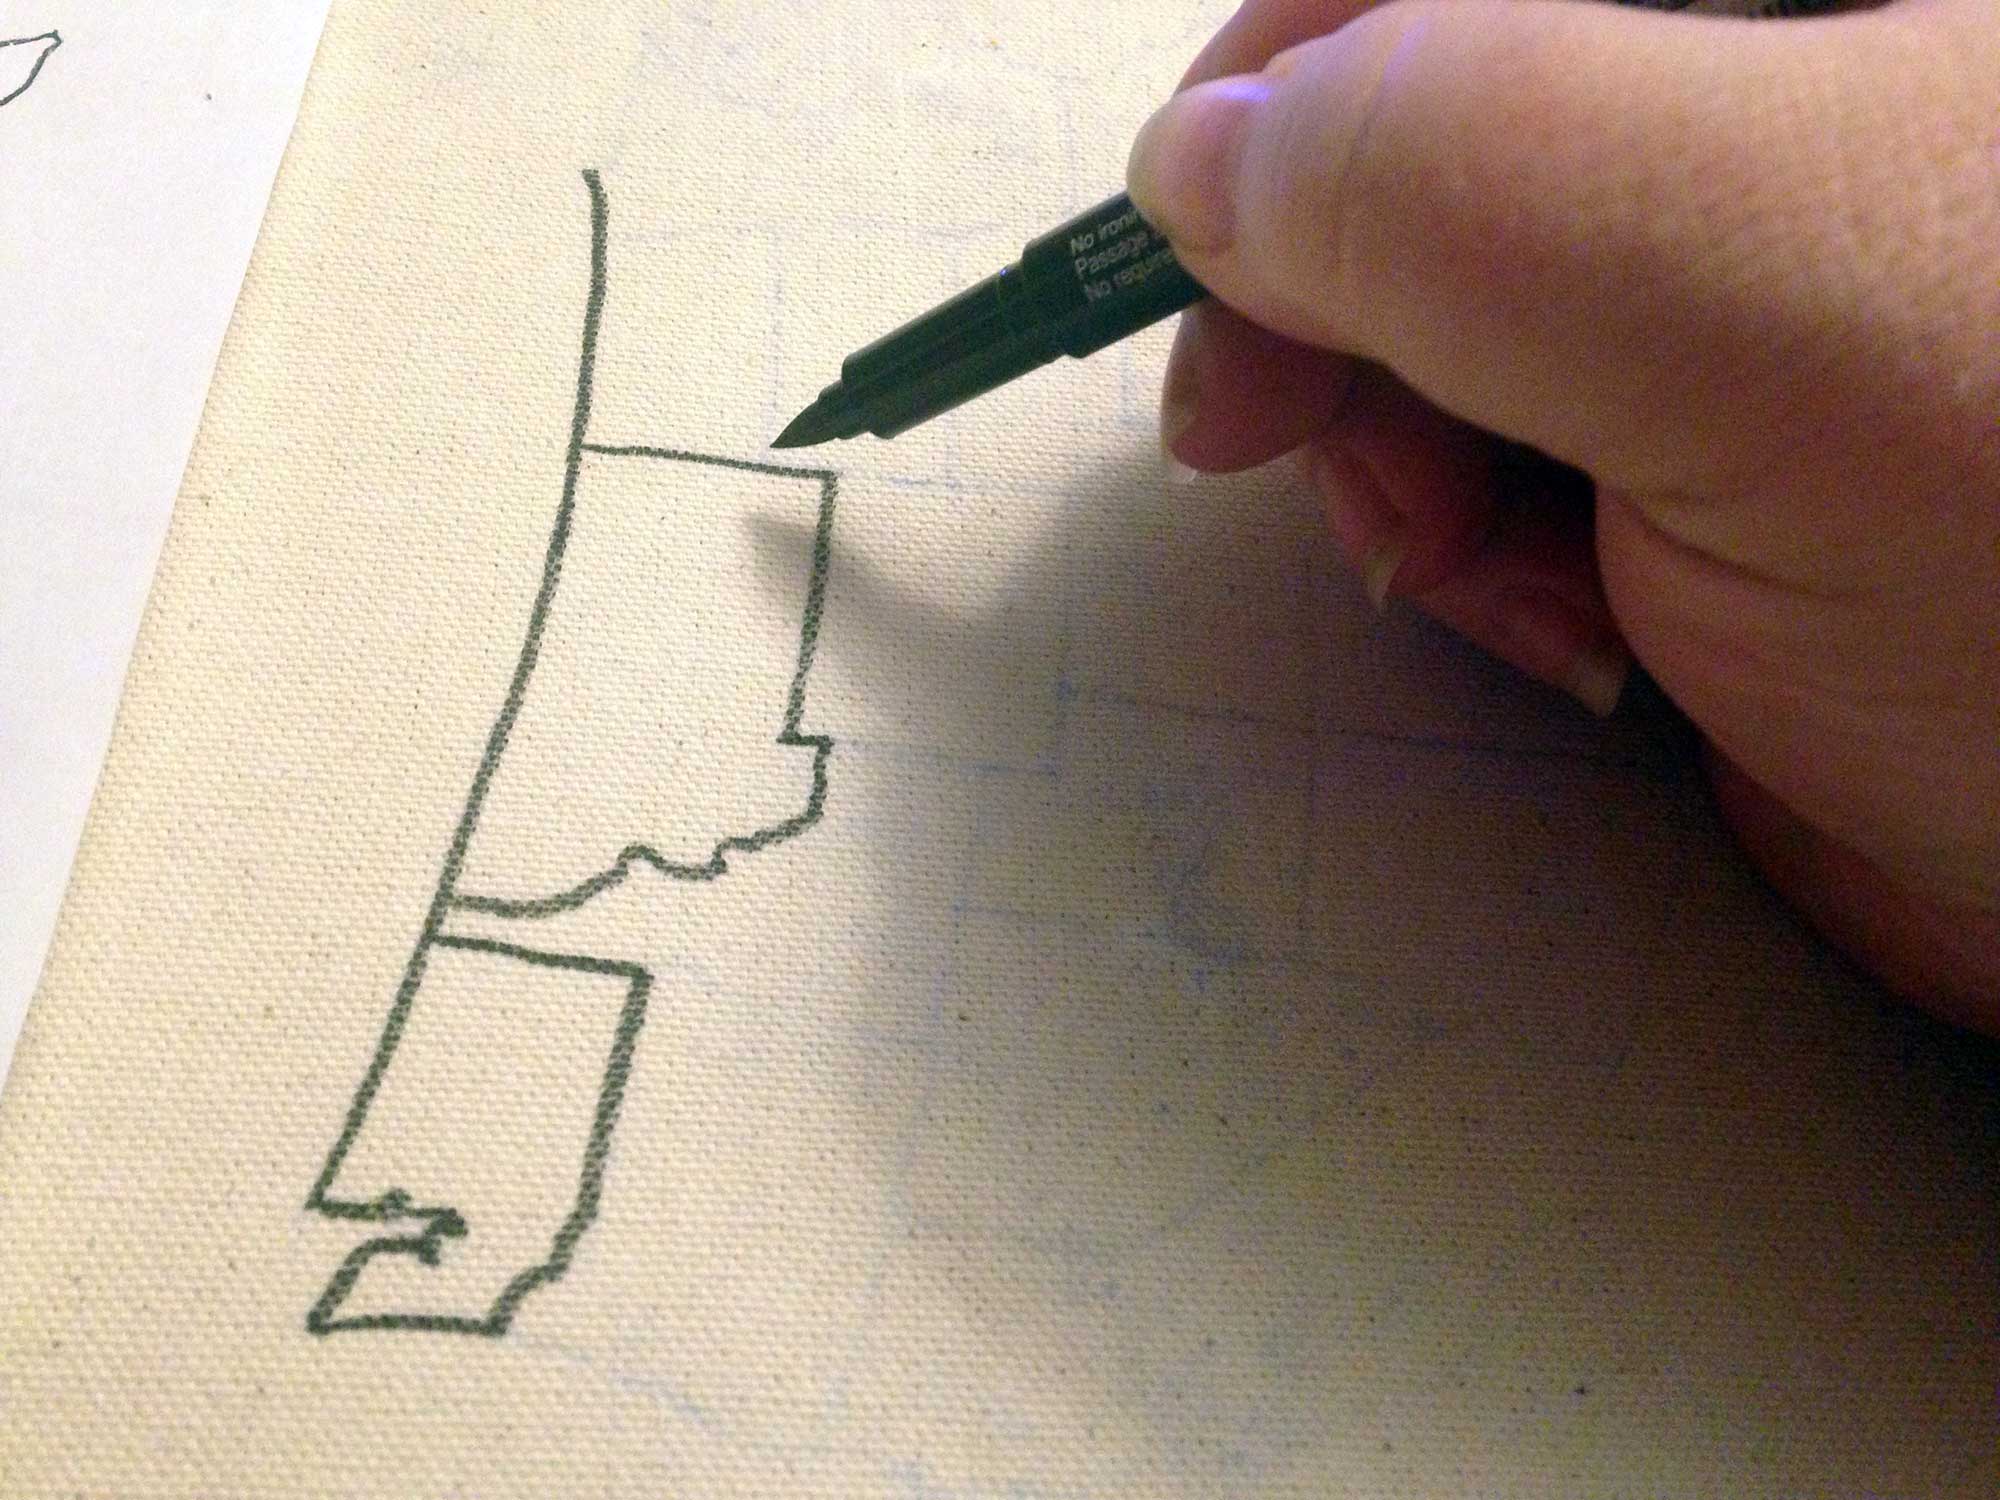
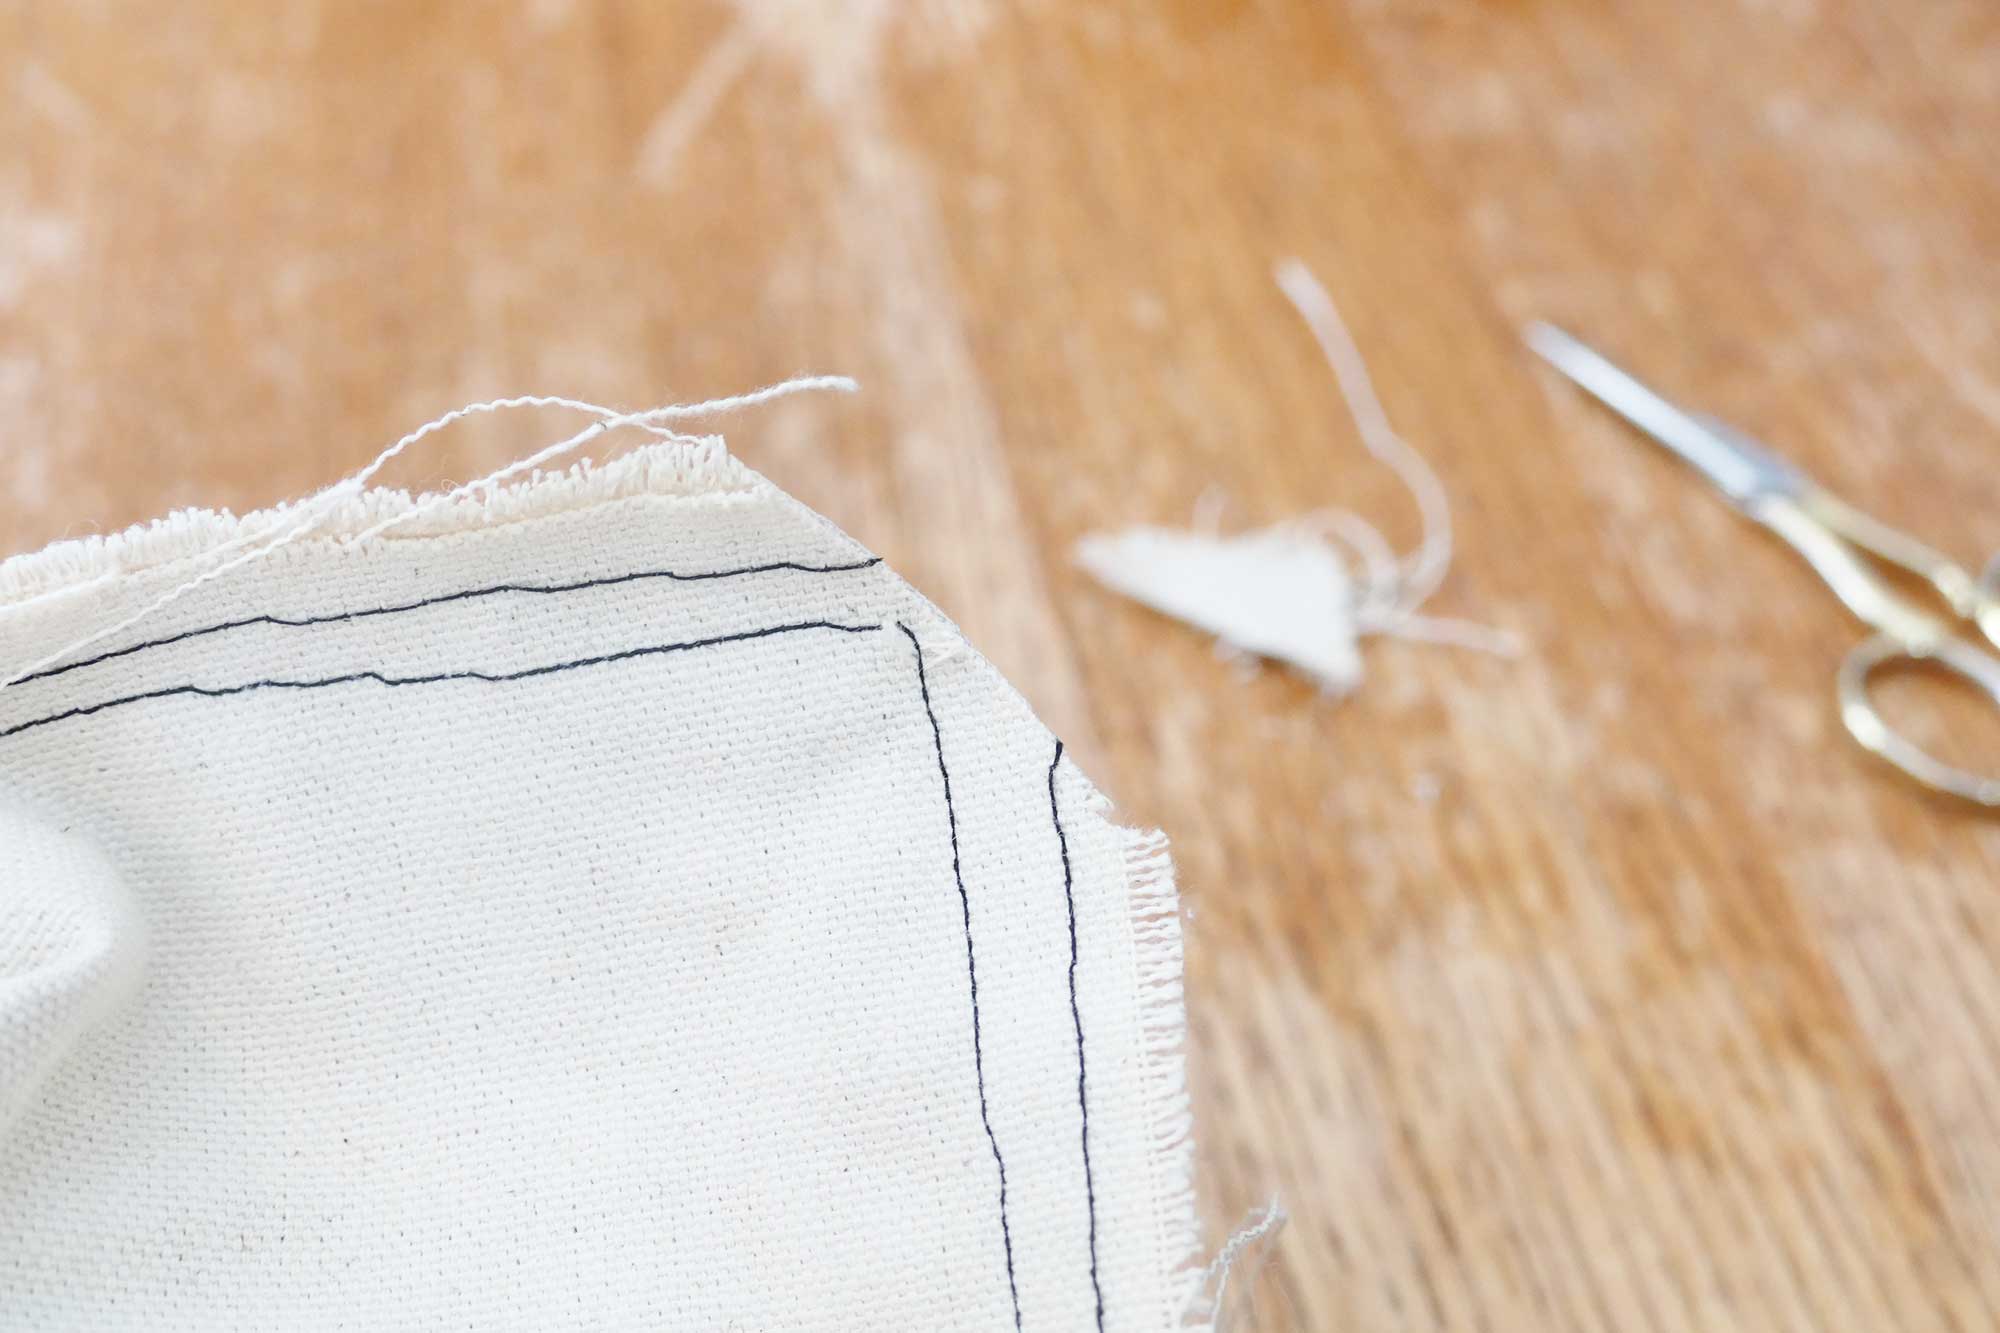
Step 3: Trace over your lines with the black fabric marker. I went over mine twice to make sure they were dark and bold.
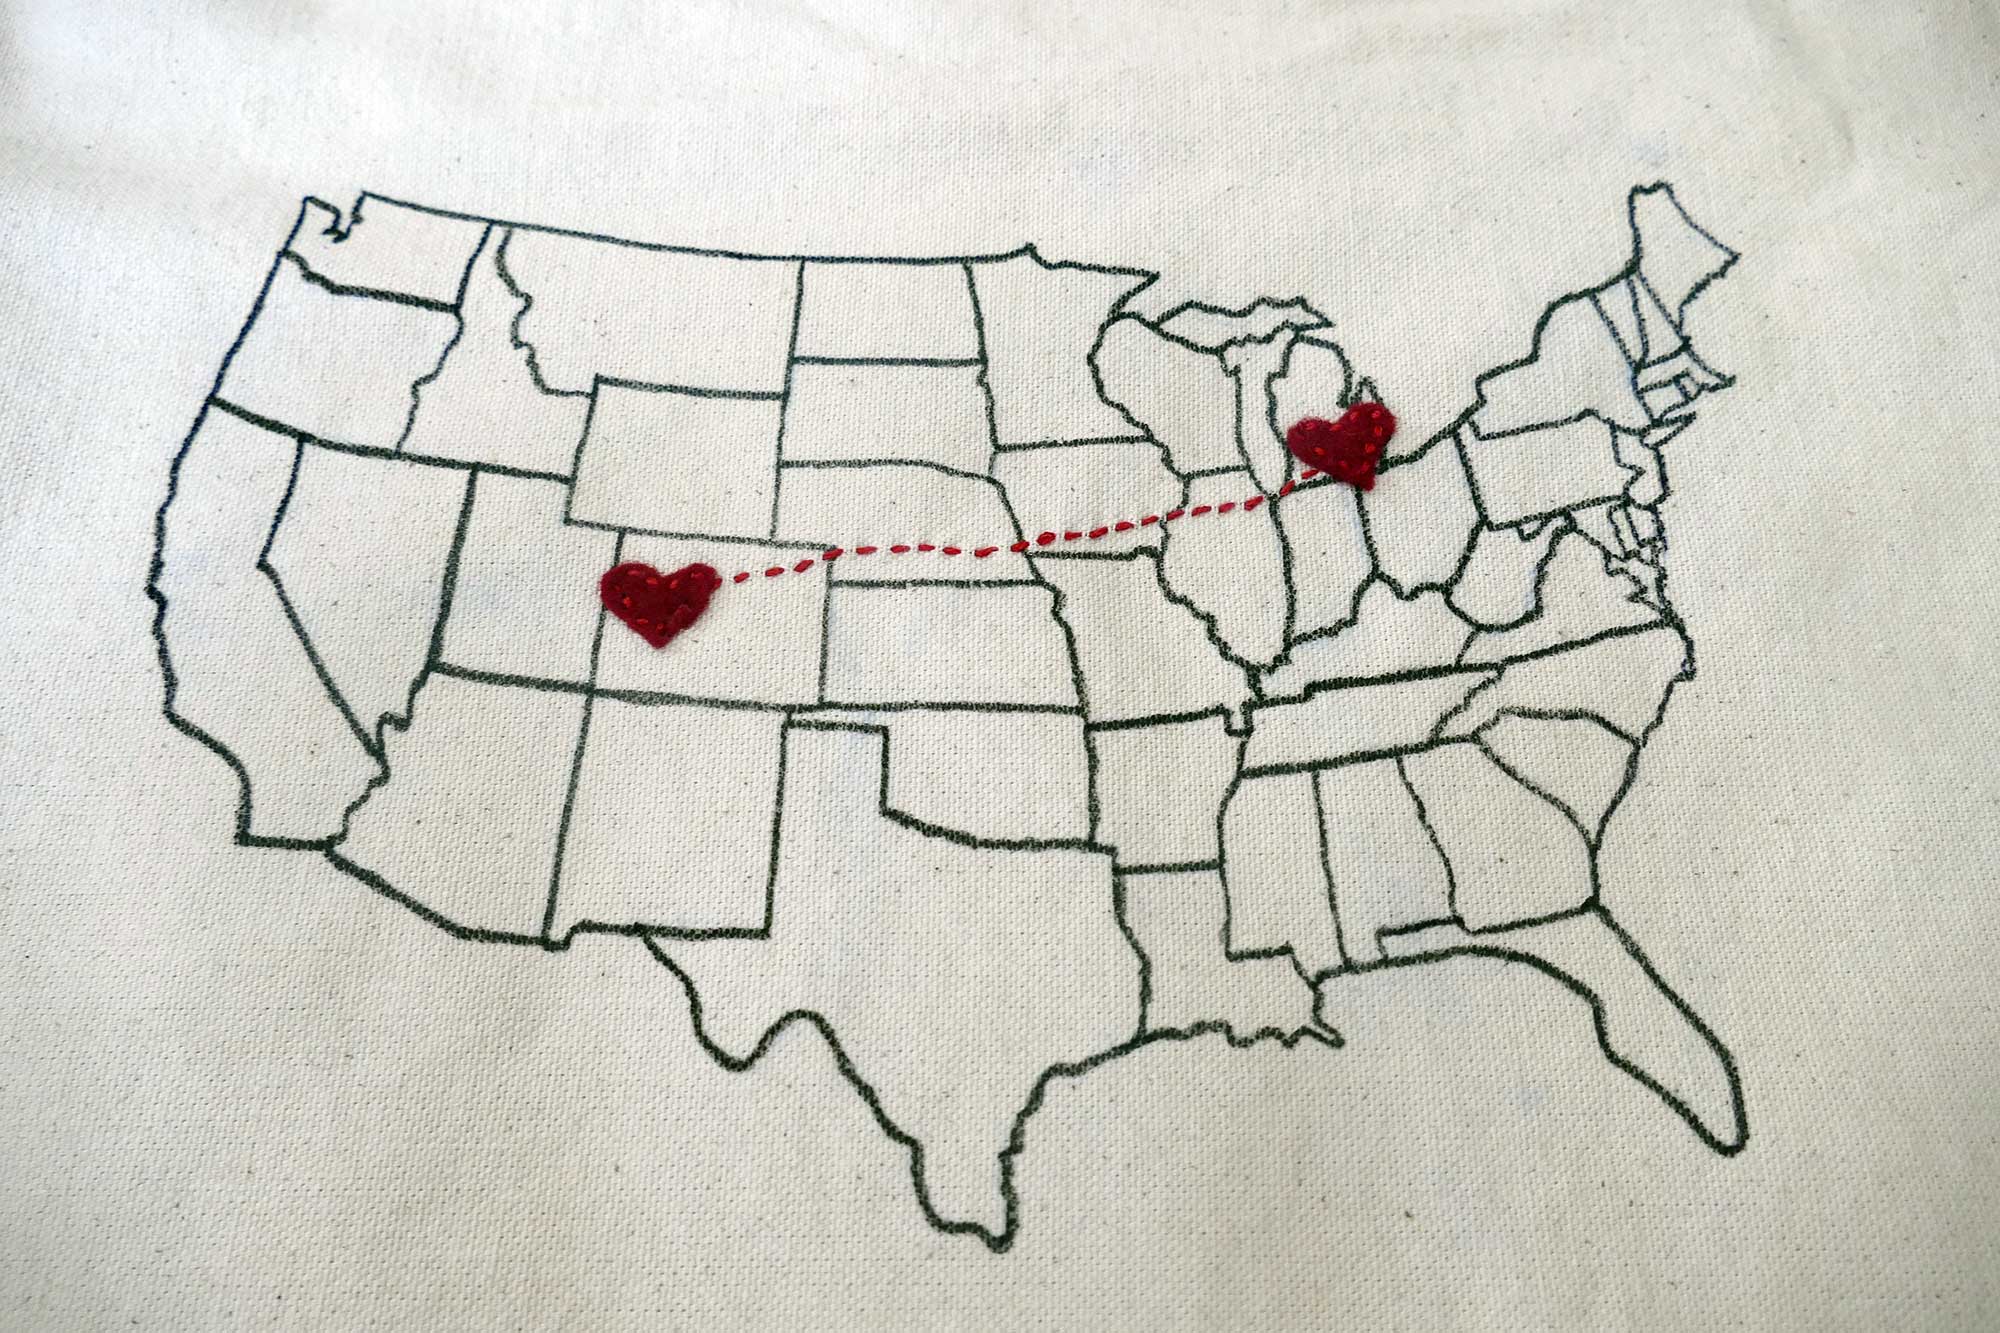
Step 4: Cut out small hearts from the red felt and place them where you want.
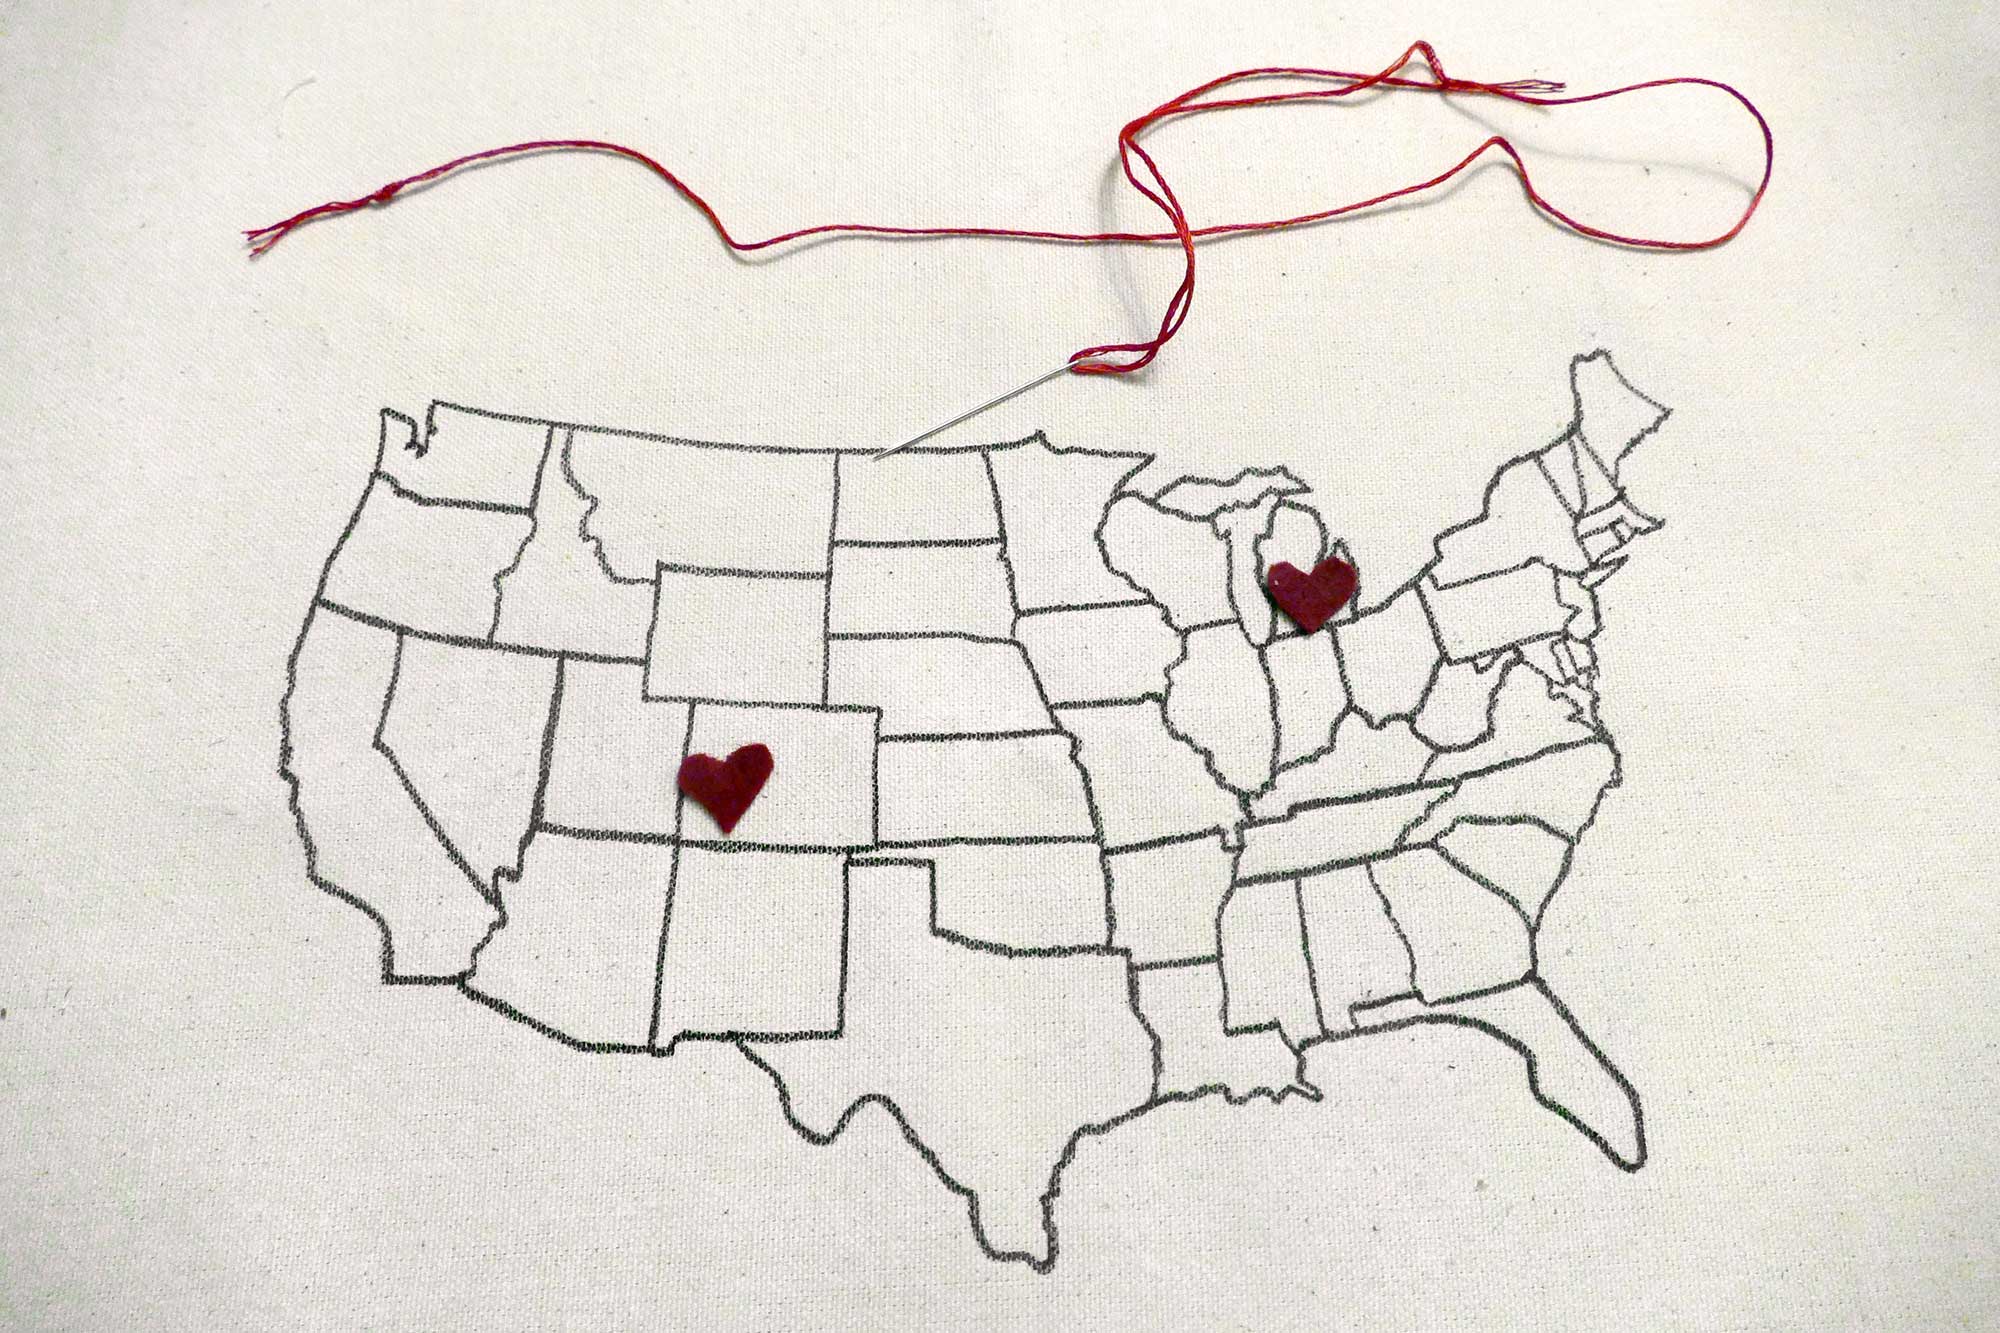
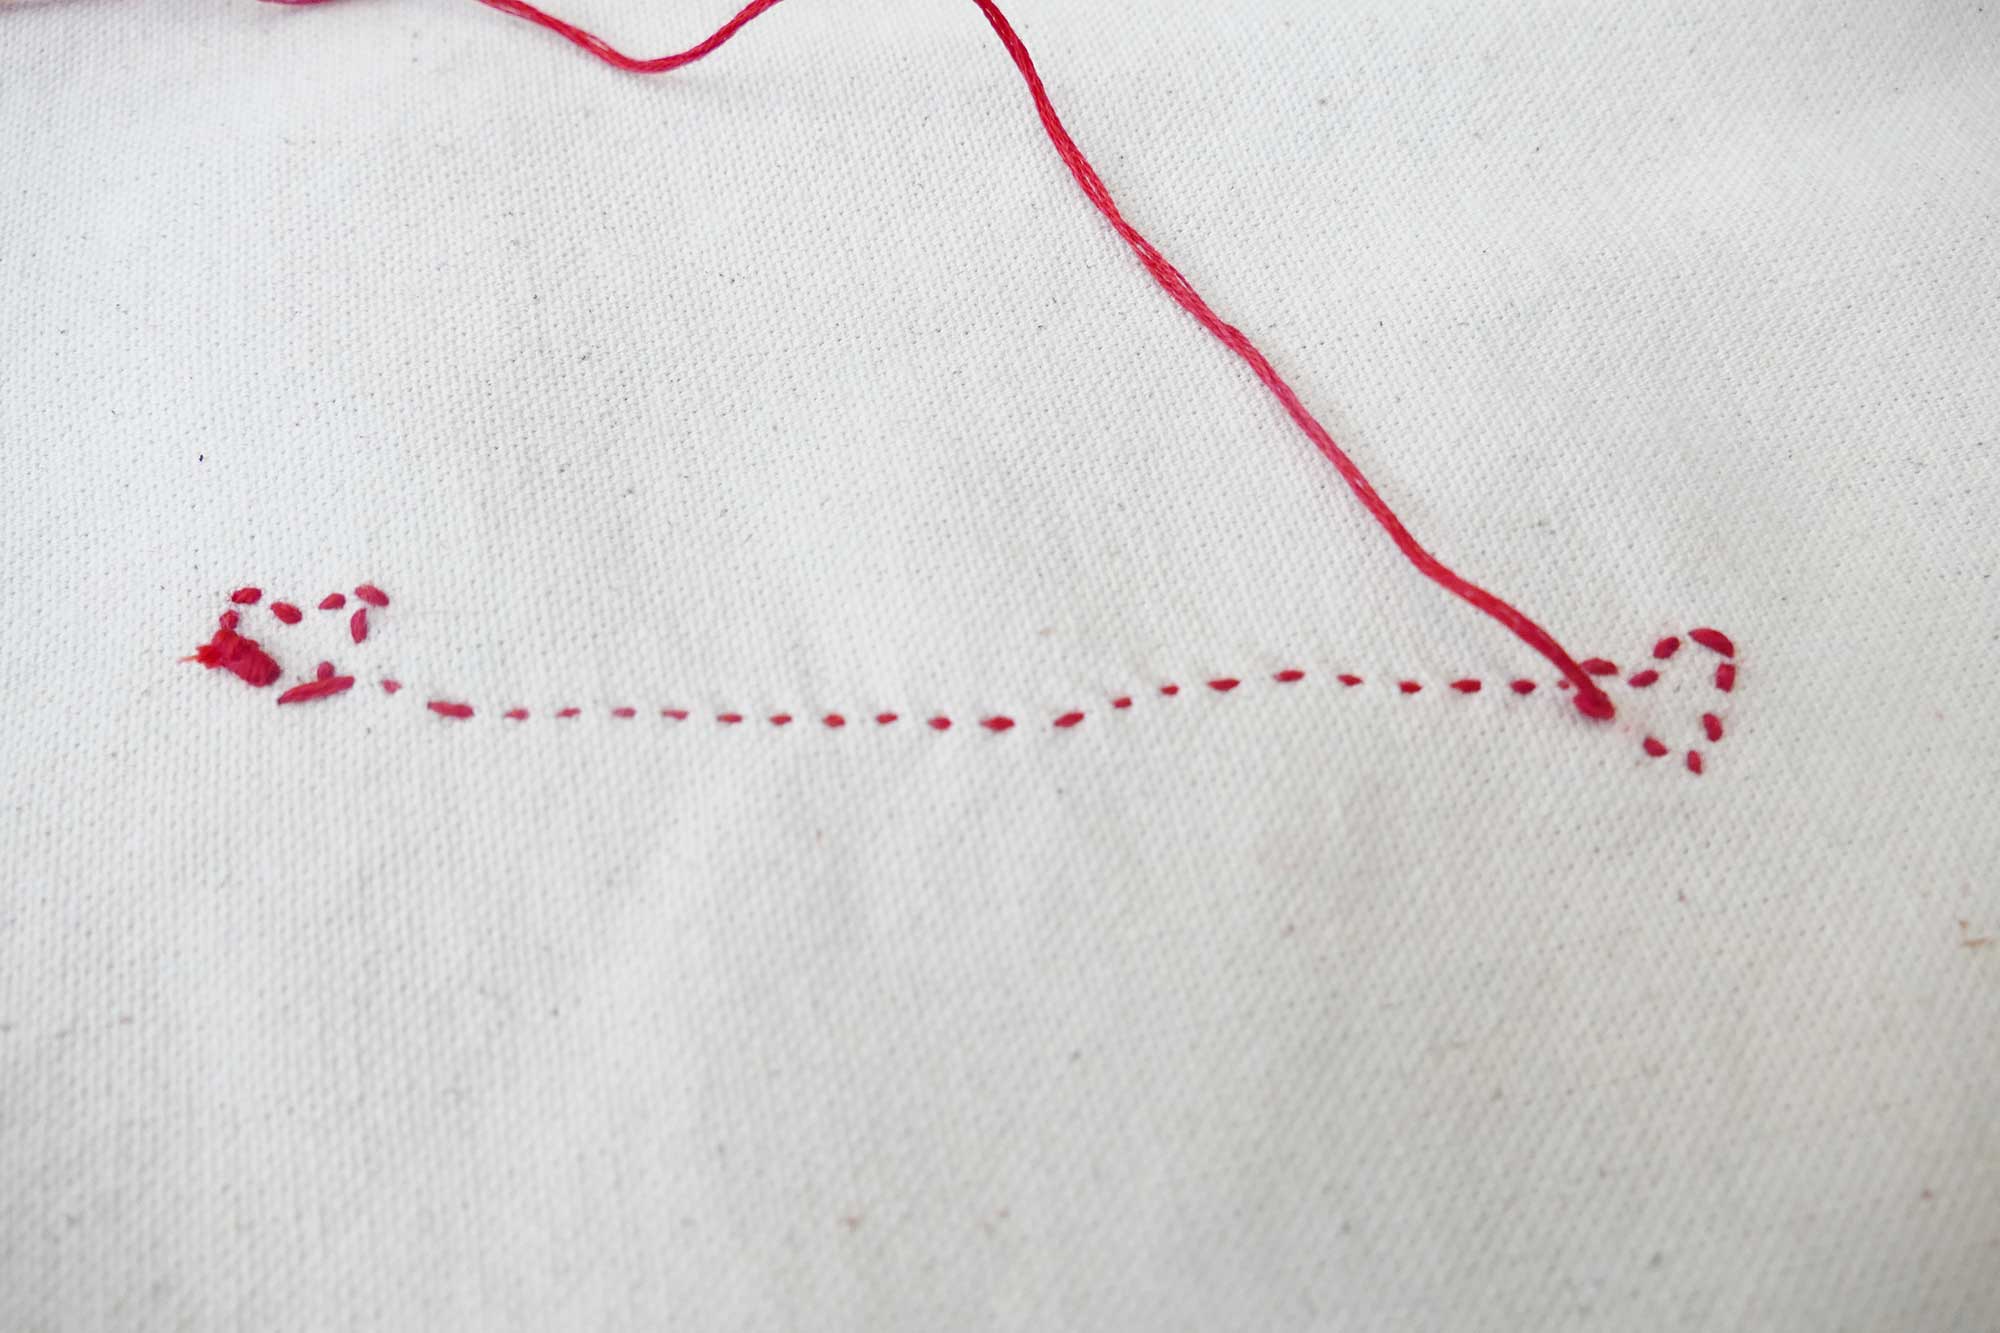
Step 5: Thread your needle with the embroidery floss, knot the end, and start sewing the perimeter of a heart with a running stitch. I recommend you start your stitches at the tip of the heart, then when you finish sewing the heart, you can go right into sewing the route. When you get to the end of the route, sew on the heart. Tip: If you drive like we do, look up the route so you sew it accurately. Alternately, you can get creative and sew the route in a curly-Q or curly-heart shape.

Step 6: When done, knot the thread on the back of your canvas and cut the excess thread.
Step 7 (Optional): If you are using a decorative piece of fabric other than your canvas, sew it to the other blank canvas piece. You want to sew all four sides, wrong sides together. From now one, treat these as one piece of fabric. (If you’re wondering why we do this, it’s because the decorative fabric is likely not as thick and sturdy as the canvas, so we’re adding the canvas to the back of it.)


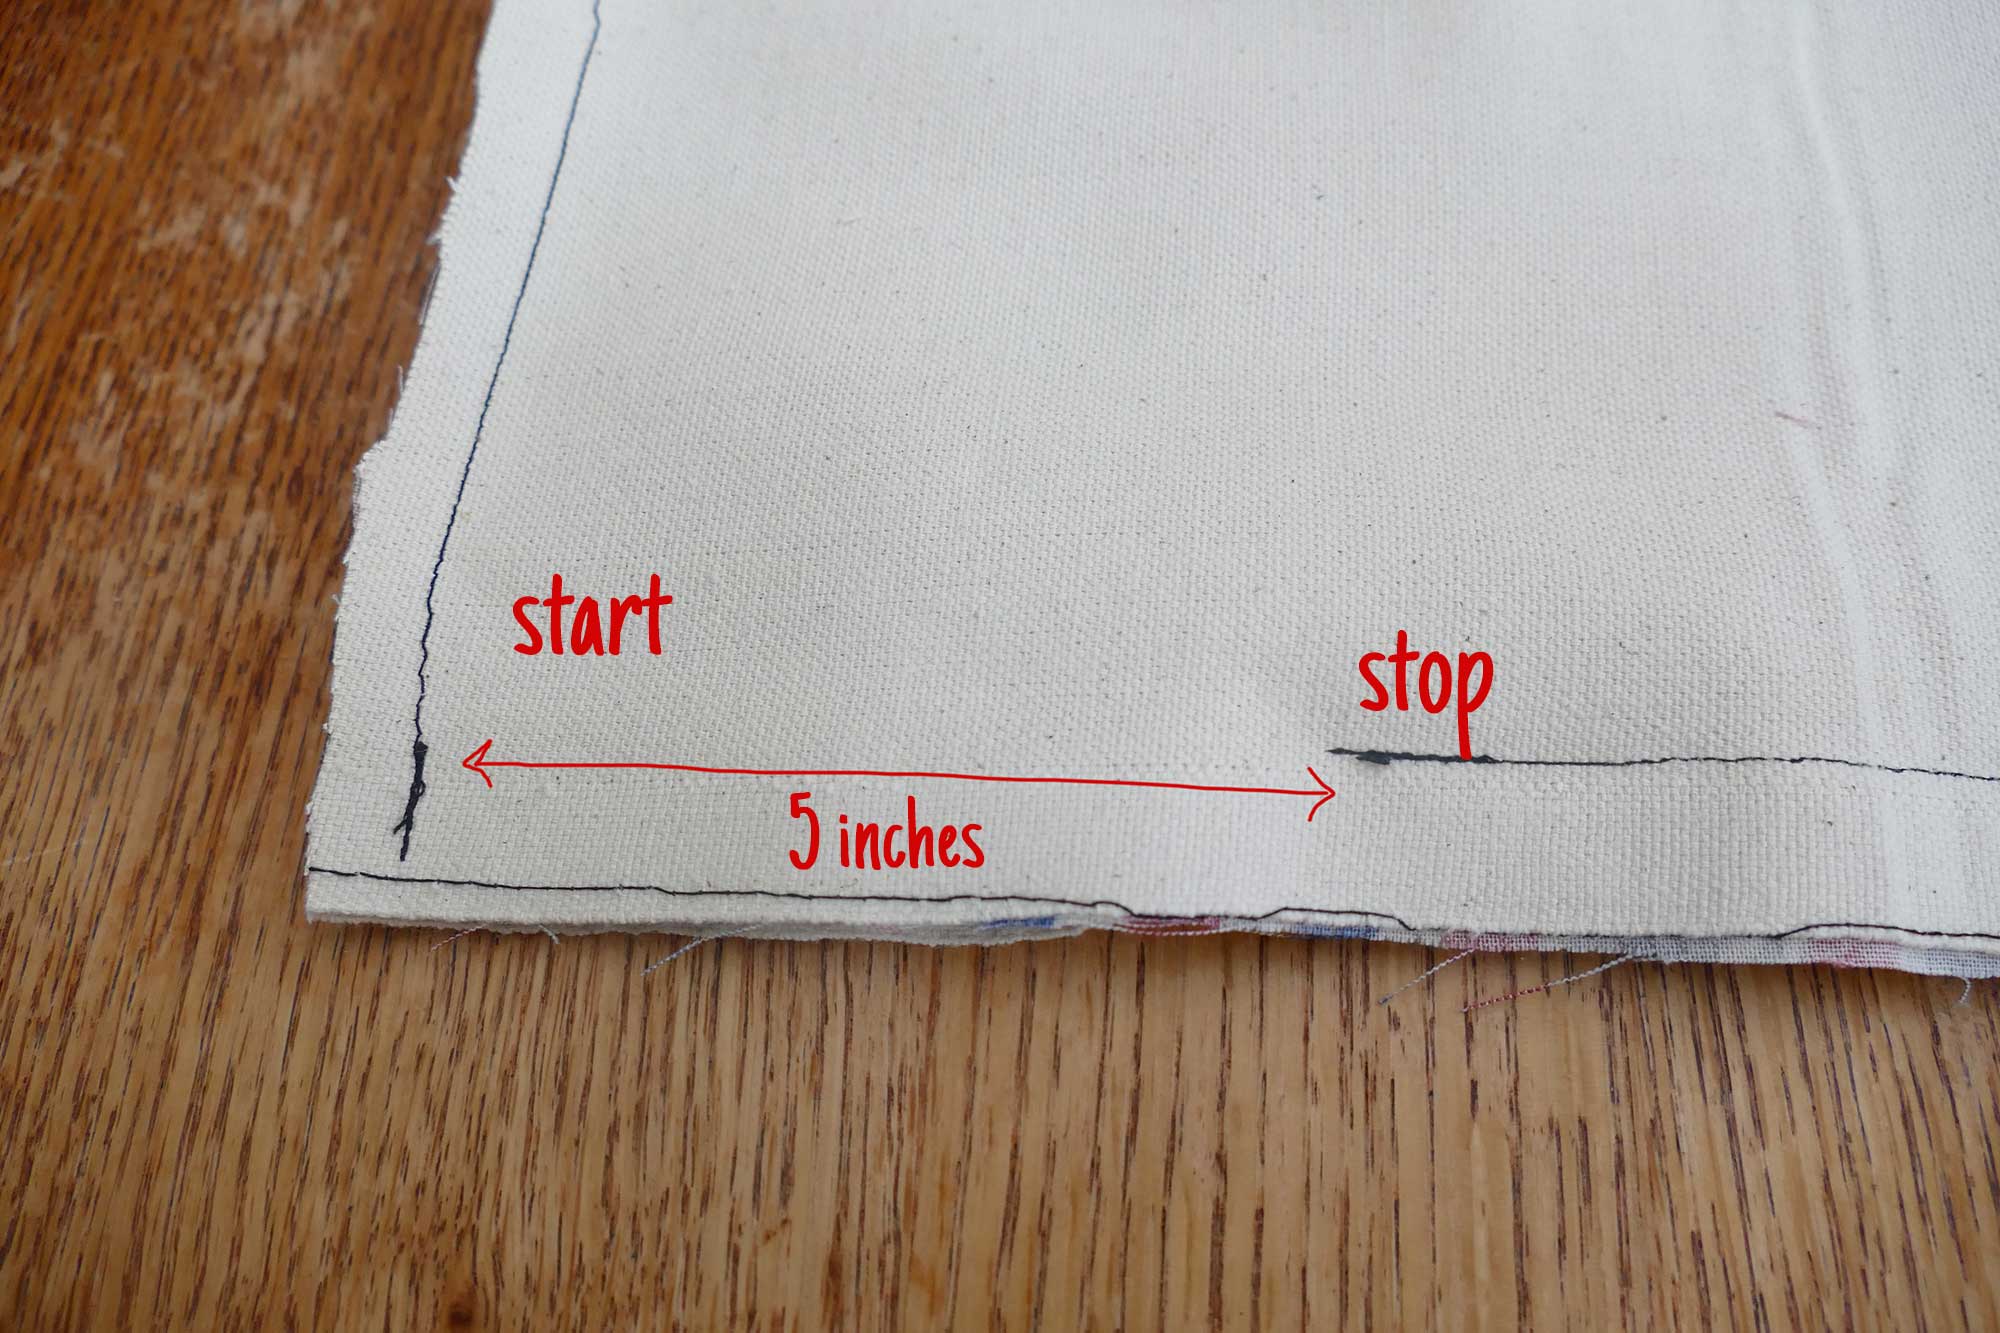
Step 8: Place the top piece of canvas with your map on your back piece, this time right sides together. So your map side should be touching your decorative fabric side. Pin in place and sew 1/2″ from the edge starting in the lower corner and going clockwise around your pillow. Stop when you get 5″ from where you started.

Step 9: Clip all four corners diagonally as shown, being careful not to clip into the stitches you made in the previous step. This will help your corners look sharper when you turn it inside out in the next step. Note: The outer line of stitches you see in this photo here are the ones I made in step 7 to sew my decorative fabric onto my back piece of canvas. and thus it was okay to cut through those.
Step 10: Turn your pillow inside out through that 5 inch space you left. Poke each corner from the inside to get as sharp a corner as possible.
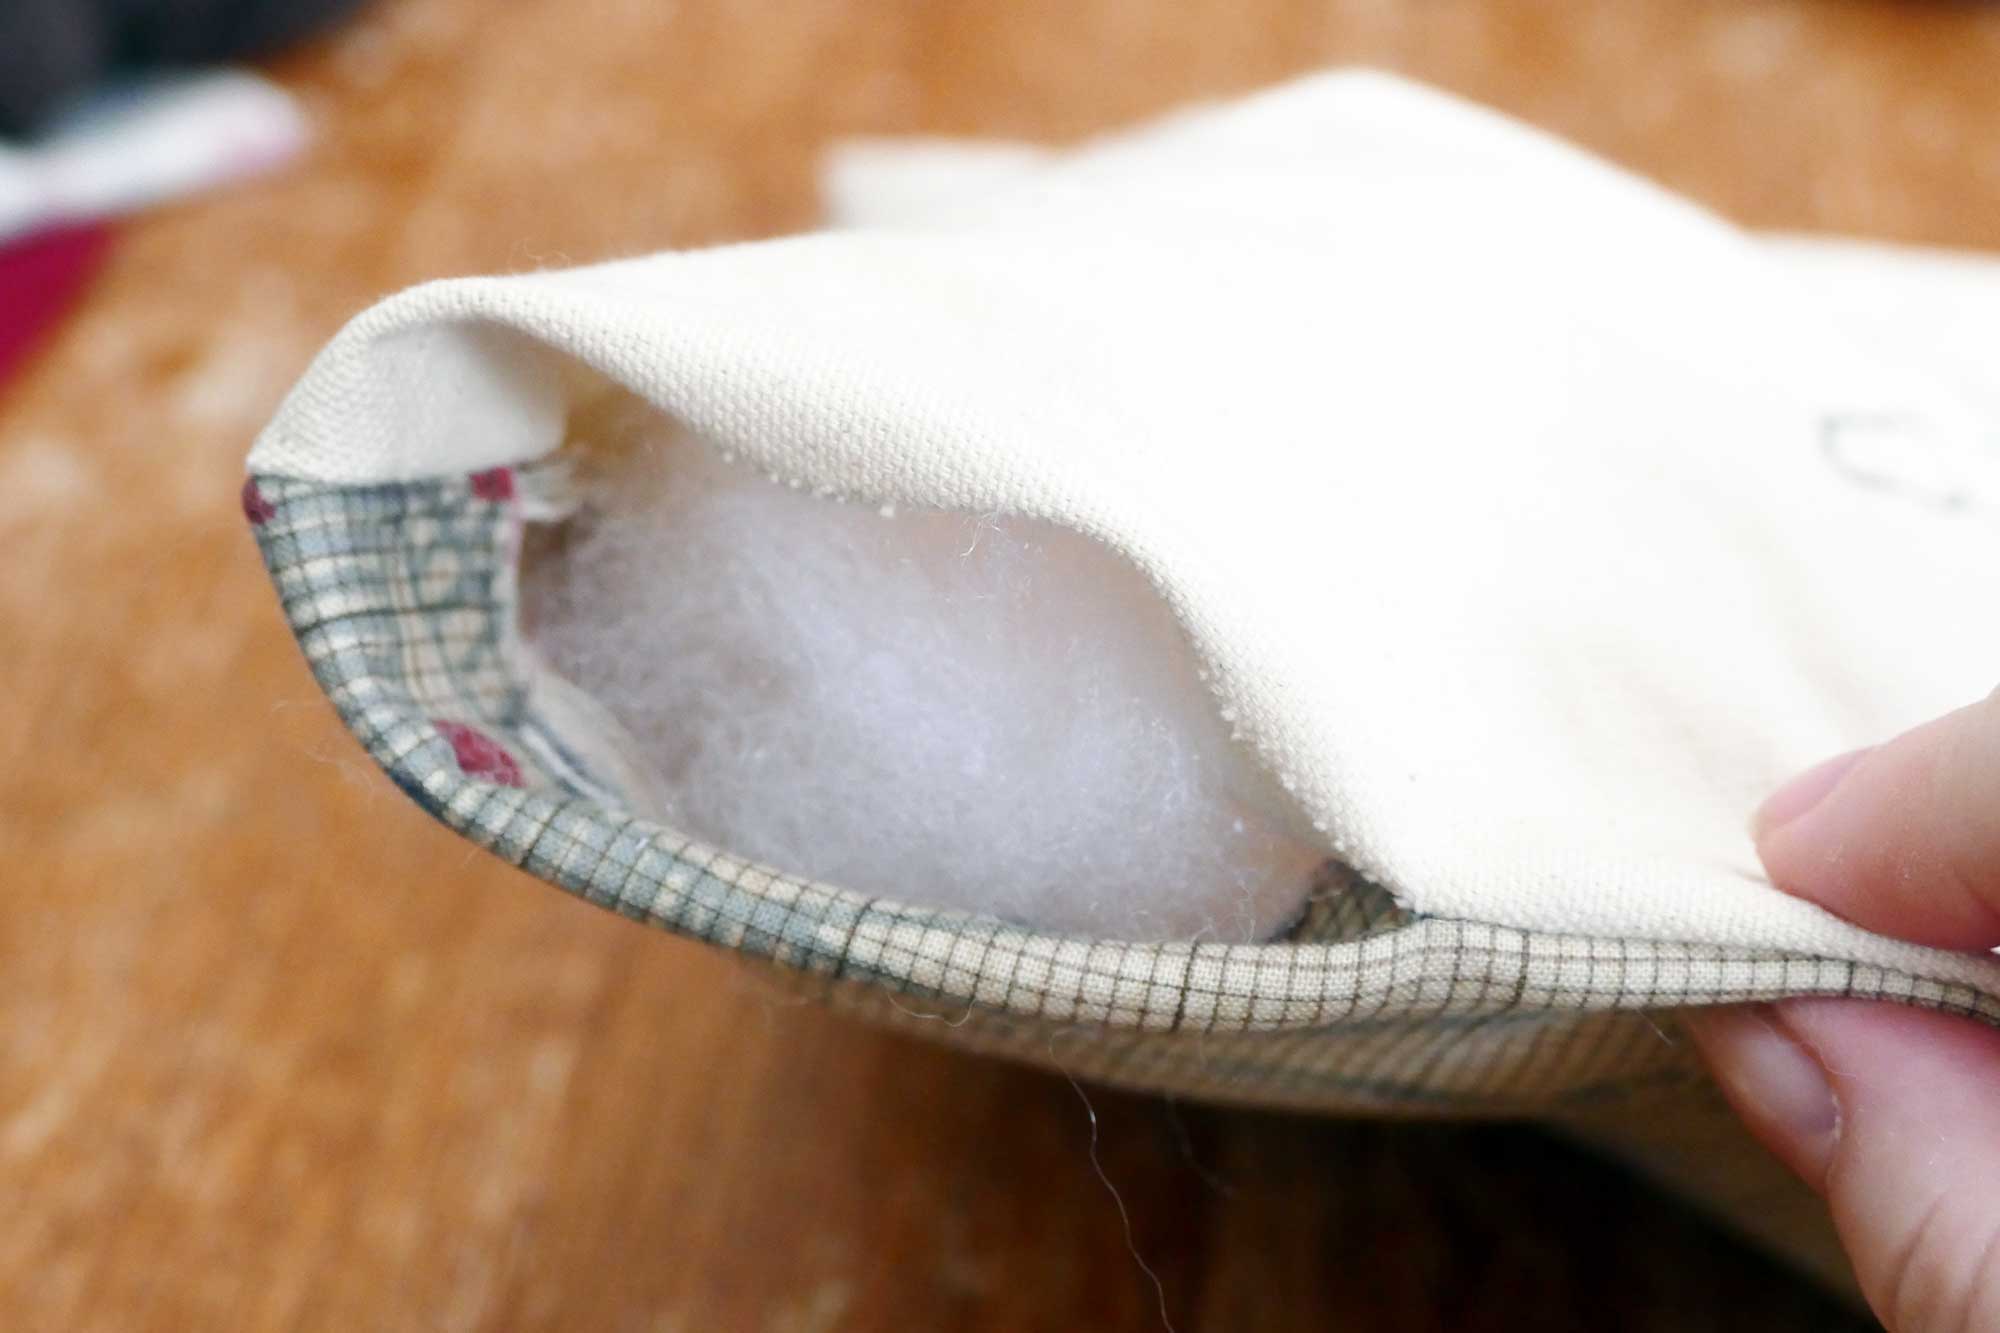
Step 11: Stuff your pillow through the open section. Be sure to get stuffing in the corners, too.
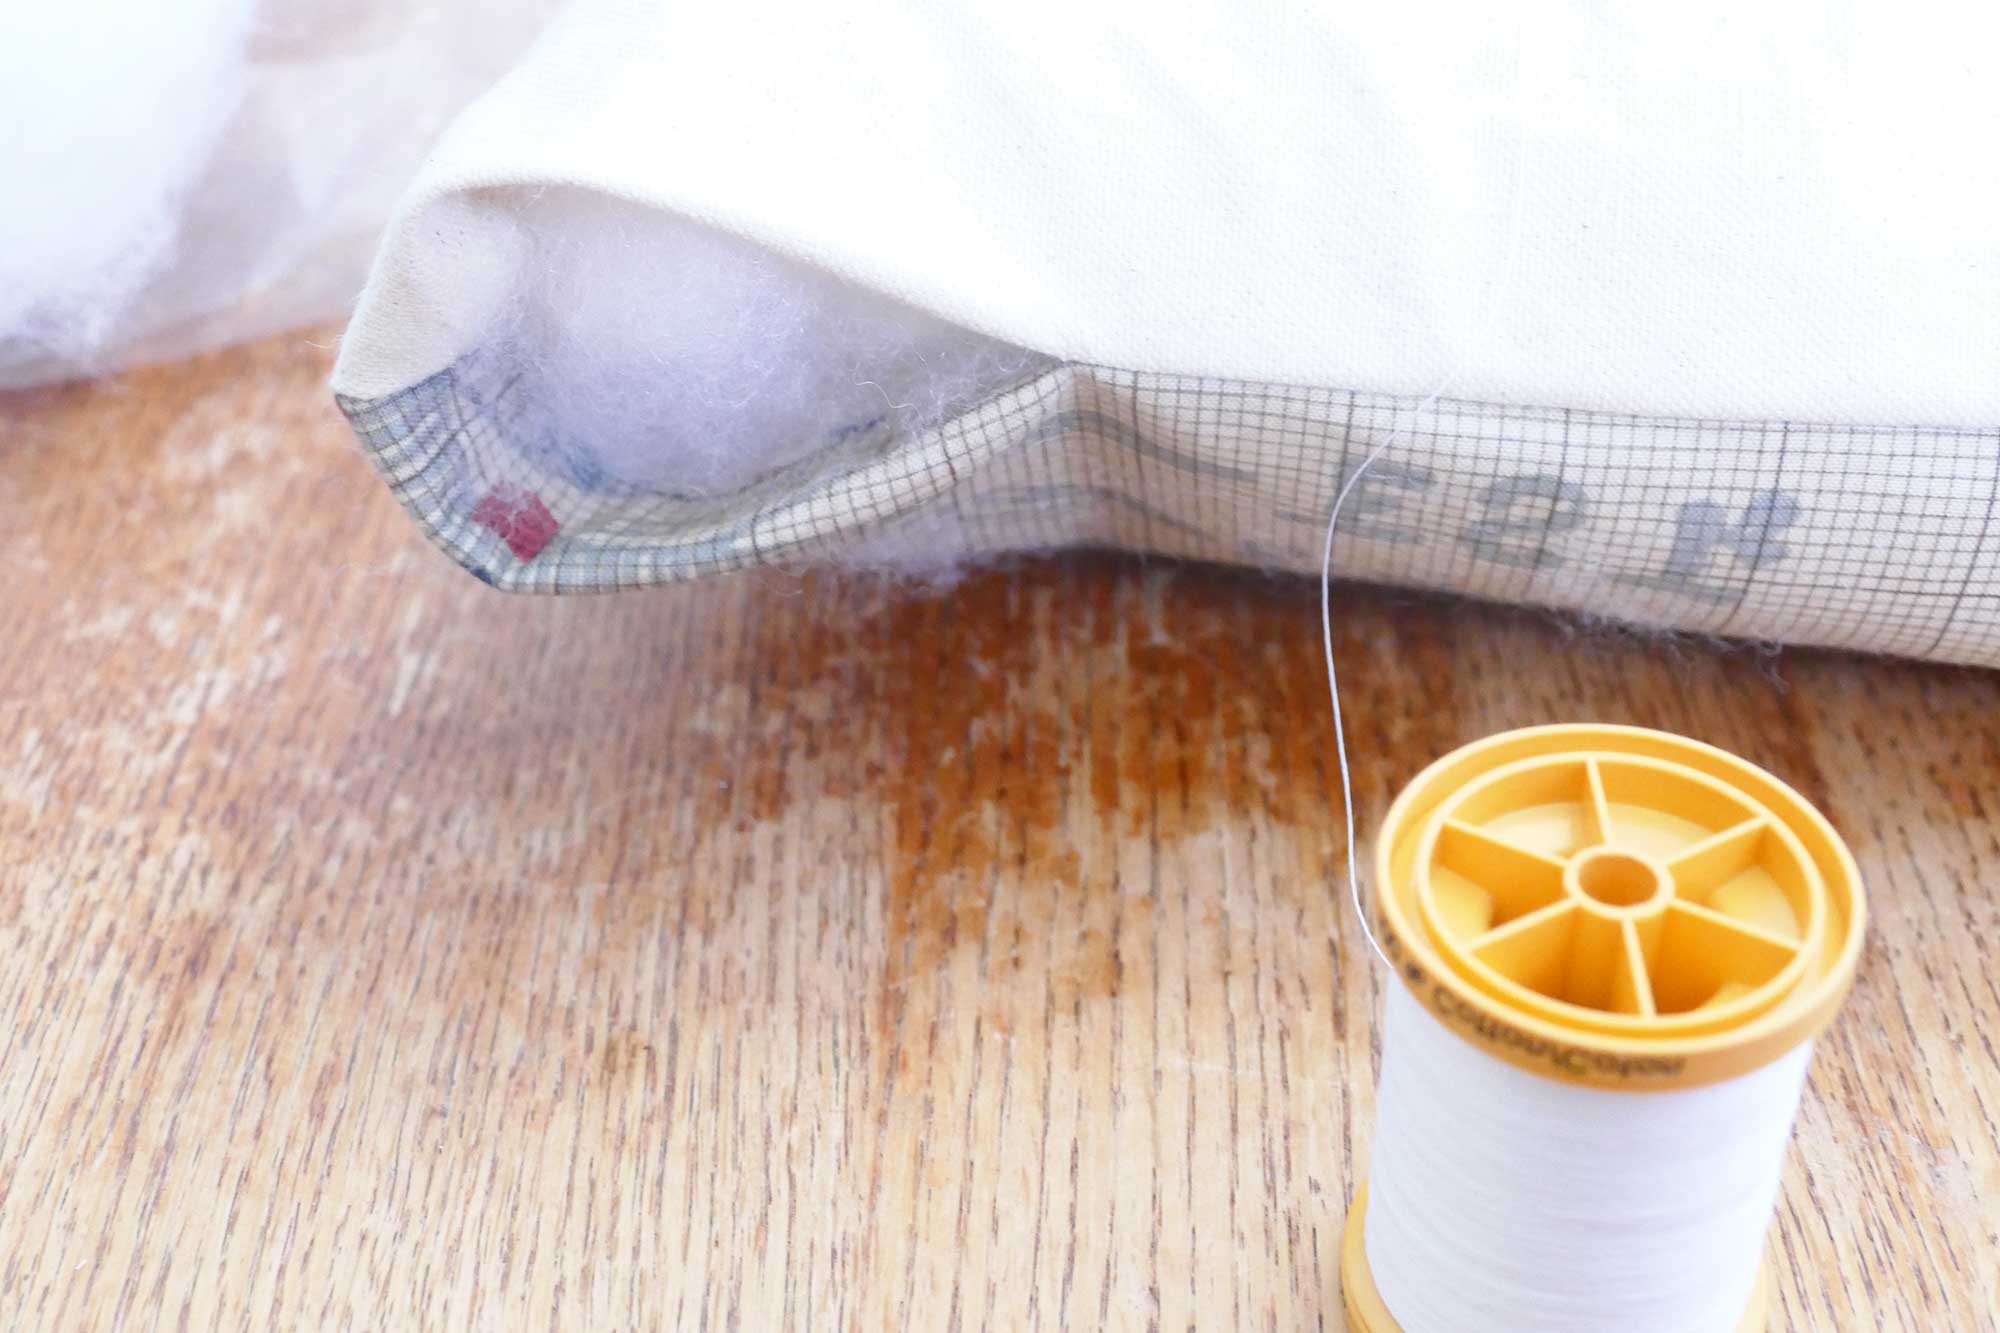
Step 12: Sew up your pillow with white thread. If you made a DIY fabric label, pin it in place in the open section and stitch it in as your close the pillow.

And you are done with your awesome DIY map pillow!
DIY Map Pillow Notes
You could use this technique to make world maps, state maps, and maps for other countries. Just look for the appropriate outline or template online and use that.
Another idea is to make a pillow that shows the places you’ve visited, or where your heart lives.
If you purchase your canvas and cotton at the fabric store as I did, you’ll probably just ask for half a yard of each and this will actually net you enough for TWO pillows! There’s enough fiber fill for two pillows, too.
These pillows make great gifts and conversation pieces!
Get the Map and Heart Template for the DIY Map Pillow
Love,

P.S. Check out my other fun DIY gift tutorials to help you make wonderful homemade and inexpensive gifts! I currently have tutorials on DIY teacup candles, DIY Sharpie mugs, DIY hand warmers, DIY “gold-dipped” crystal necklace, and DIY bath bombs!
Like this tutorial? Please pin it to your favorite Pinterest board!


I am getting the items so my daughter can make this for her grandmother. She’s going to love it! It’s adorable and such a cute idea. I’m giddy at the thought of her making this. Thank you!
Yay! So happy to hear it!
So cute! My husband and I live in DC but his parents live in PA and mine live in NY so this would be a perfect gift.
Sarah Jean || http://prettysimpleideas.com/
Thank you, Sarah! This would be a perfect gift for your parents!!
This is so creative and would make a fabulous gift!!!
Soph x
http://www.sophobsessed.com
This is so adorable! My best friend just moved away and this would be a perfect housewarming gift for her!
This is a super cute idea! I have a friend who would love to make several of these for friends and family who live out of state.
These are so cute and sentimental. Will make a great gift.
This is the perfect project for my nephews! They are just beginning to learn about the states and what a fun way to track out family travels.
This would make an awesome gift! I would love to try my hand at this pillow!
Awesome, Amber! I hope you make one. 🙂
This is a really sweet DIY gift idea. I’m not much of a sewer but your instructions make me feel like I could accomplish this one! Would have been a really sweet gift for my Grandparents when we were living in VA.
Awww how cute is that?! What a special, personalized gift that would make for someone who loves their state!
Love it’s like this. This is a great gift also. It definitely brings people together with this map.
Cute and very clever pillow. It would be fun to out little hearts where you have lived to where all your friends and family are!
Such a cool idea would love to give it a go if I ever get some free time.
Super cute idea. Can’t wait till my daughter is older to do something like this with her
I absolutely love this DIY idea! It’s so so cute and would make such a special gift! Also thanks to your easy to follow instructions and photos even someone like me could probably do this! ^^
A very cute idea for a pillow. Over Christmas I was given a task to name all 51 states – lol I got just 17. I should have a pillow like this. xx
This is absolutely adorable! I love being able to do things like this to pass along to my little one or to give as gifts!
wow this turned out amazing! I would definitely buy them if you were selling them, there is no way I would do this good of a job on my own haha!
Thanks so much, Charlotte!
I love this idea!!! I just know my that i have a very un-steady hand and wont be able to make a map as nice as you did!! LOL! I may have to do an iron on map!!! But I love the idea, we have family back home and this would be perfect!
Thank you!! It’s really not hard with the template — and then it’s just following the lines with the marker.
This is such a cute idea! I’m currently making pillows for my new home and think I’ll add this to my list. Thanks!
Great to hear, Jazz!
Whoa! This is amazing! I’m doing road trips next year and this might be one of the coolest ideas to try.
Yay, happy you like this idea, Debbie-Jean!
This is so cute! It would be a great Christmas gift!
xx,
Amanda || http://www.fortheloveofglitter.com
Thanks so much, Amanda!
This is such a cute DIY! I would love to make one of these for someone that I traveled with frequently. Thanks for sharing!
Thank you, Amy!
This is so cute! I can not believe that you made something like this yourself. Amazing!
Thank you, Robin! <3
are the Cricut markers waterproof to make this pillow?
We didn’t use Cricut markers for this tutorial, Jane, but the ones in our link say that they are “ideal for wearable art fabric embellishments and home decor” as long as you wash with a gentle cycle. Cricut markers are permanent, so they are probably waterproof but you might want to test them out on a small piece of scrap fabric before committing to making this entire design if waterproofing is critical to you! 🙂