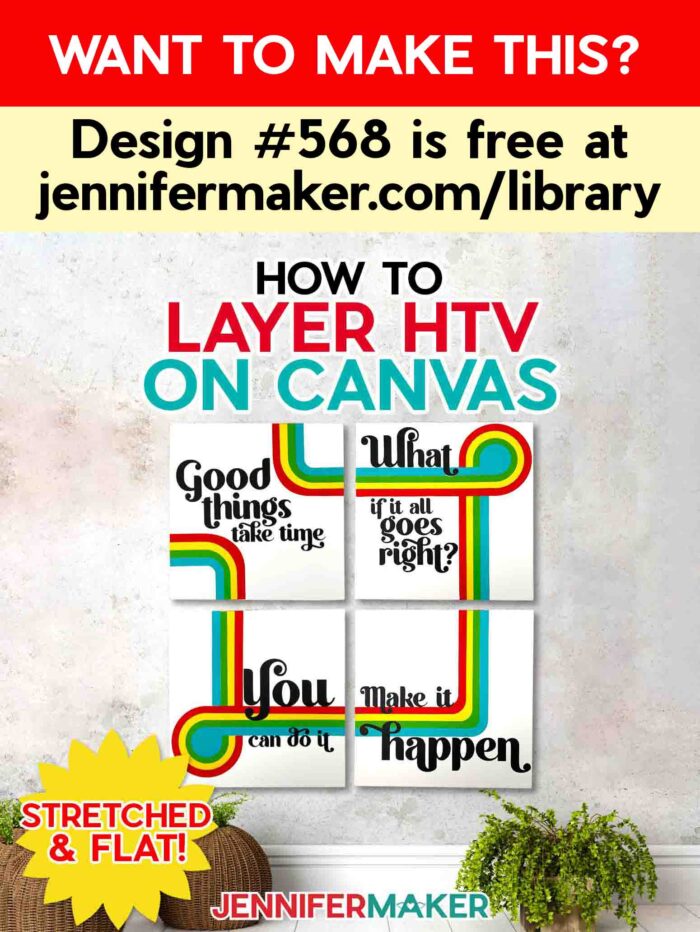
Learn how to make your HTV layers look great on canvas!
Have you tried heat transfer vinyl (also known as HTV or iron-on vinyl) on T-shirts, but want more ways to play with the material? I have some great tips for using HTV on canvas for you to try! I’ll show you how to prepare and press either canvas boards or stretched canvases, so you have options. You can use my free wall art designs, or follow this tutorial to create your own.

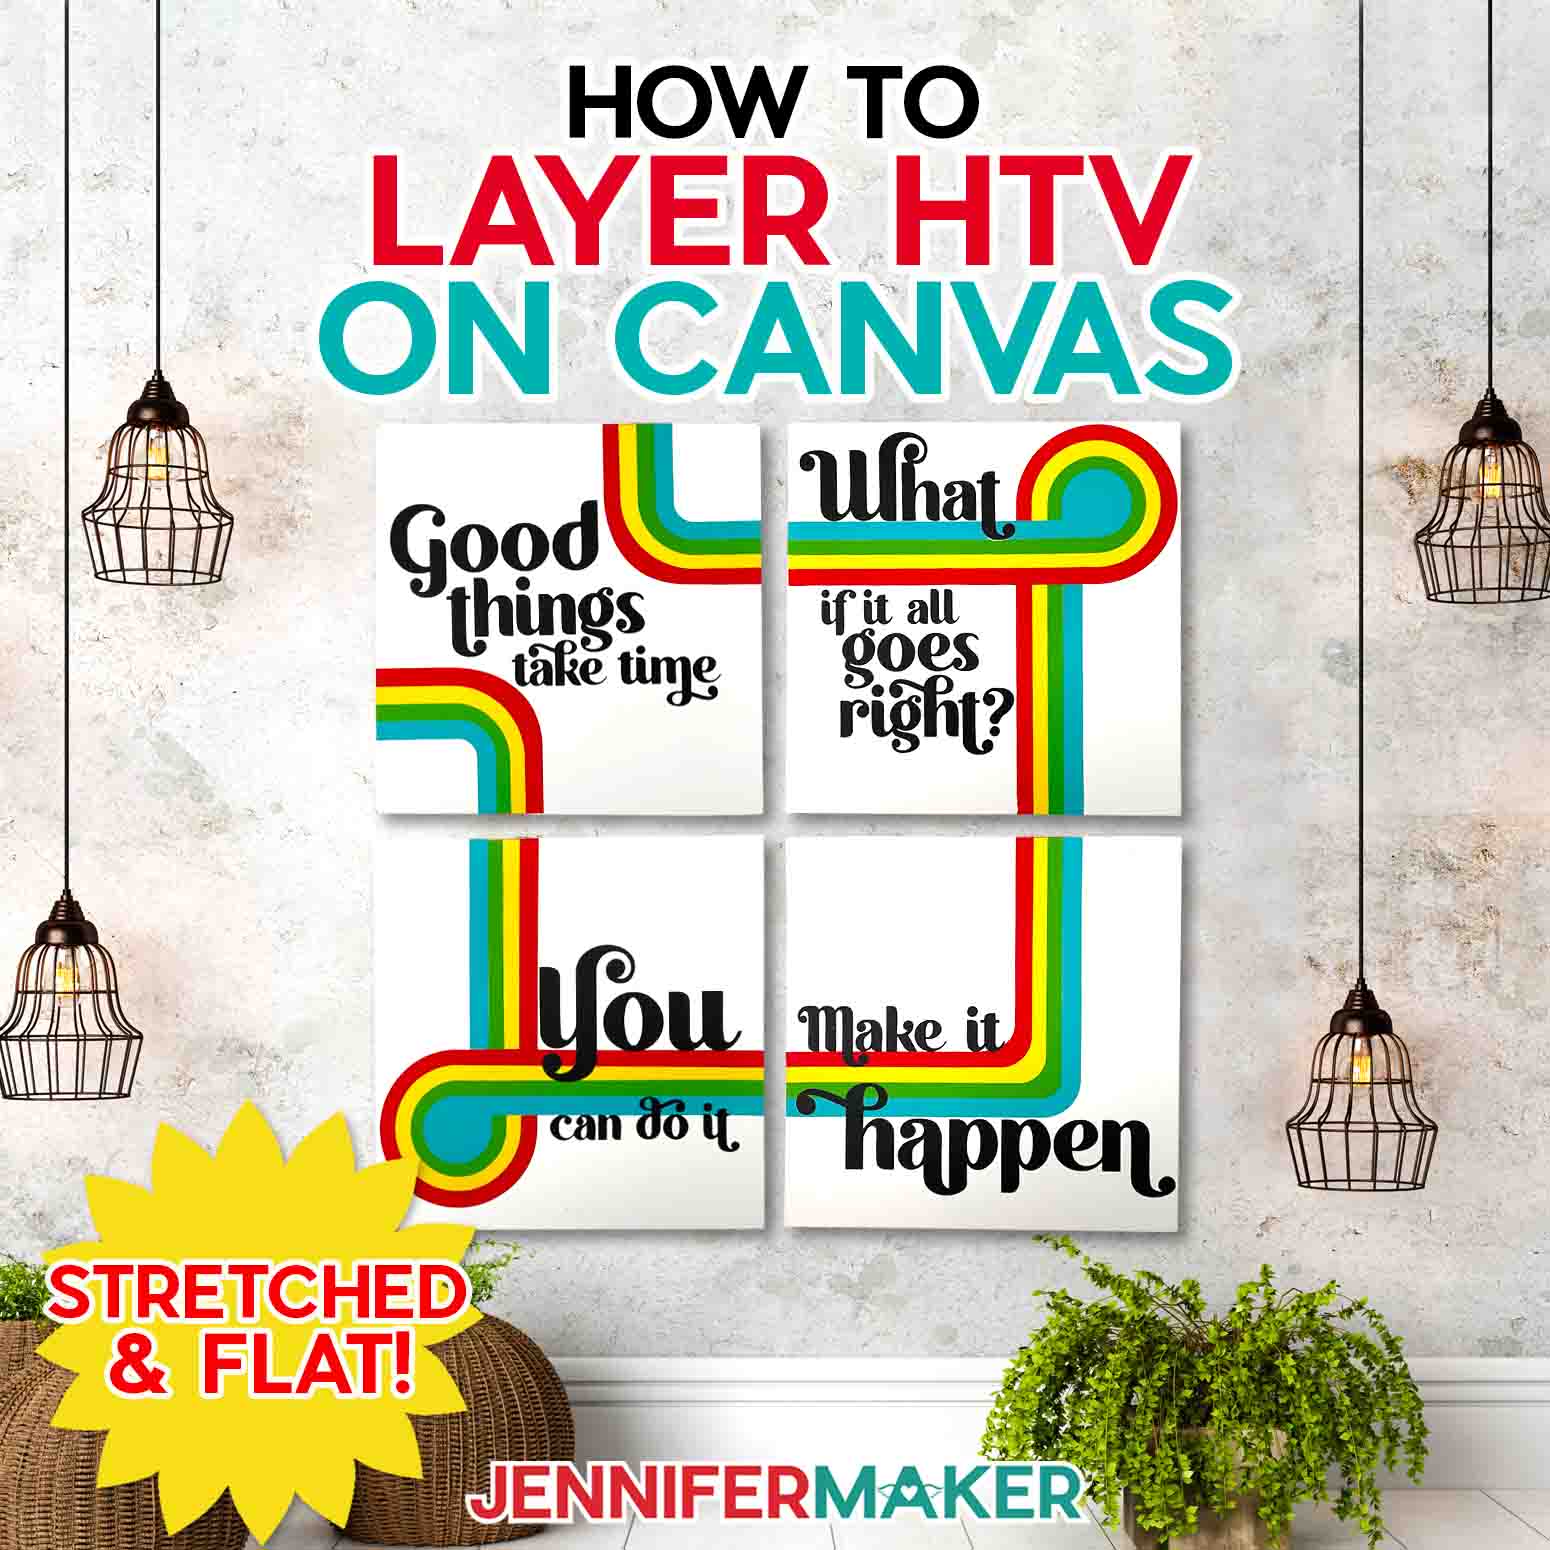
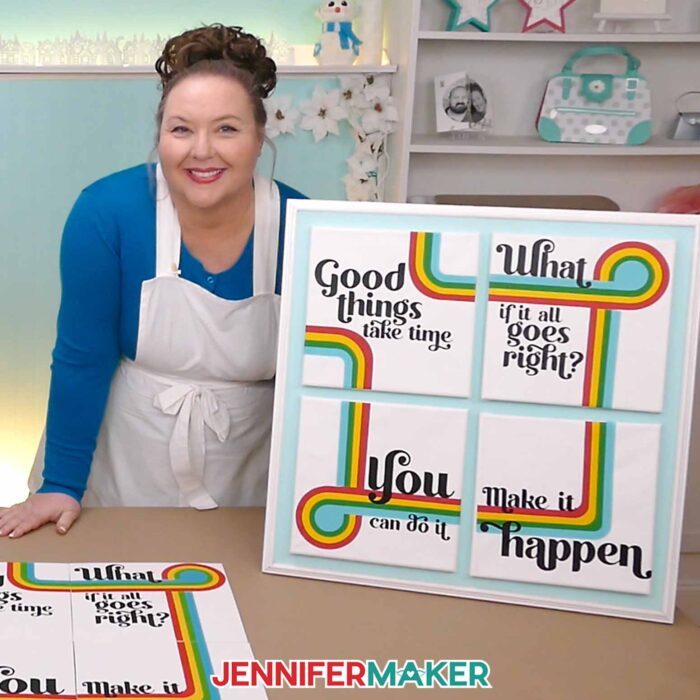
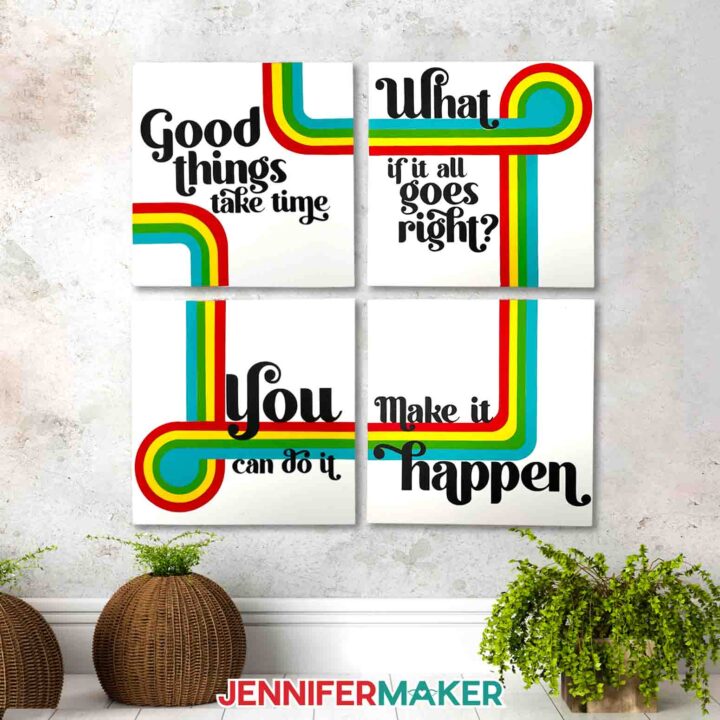
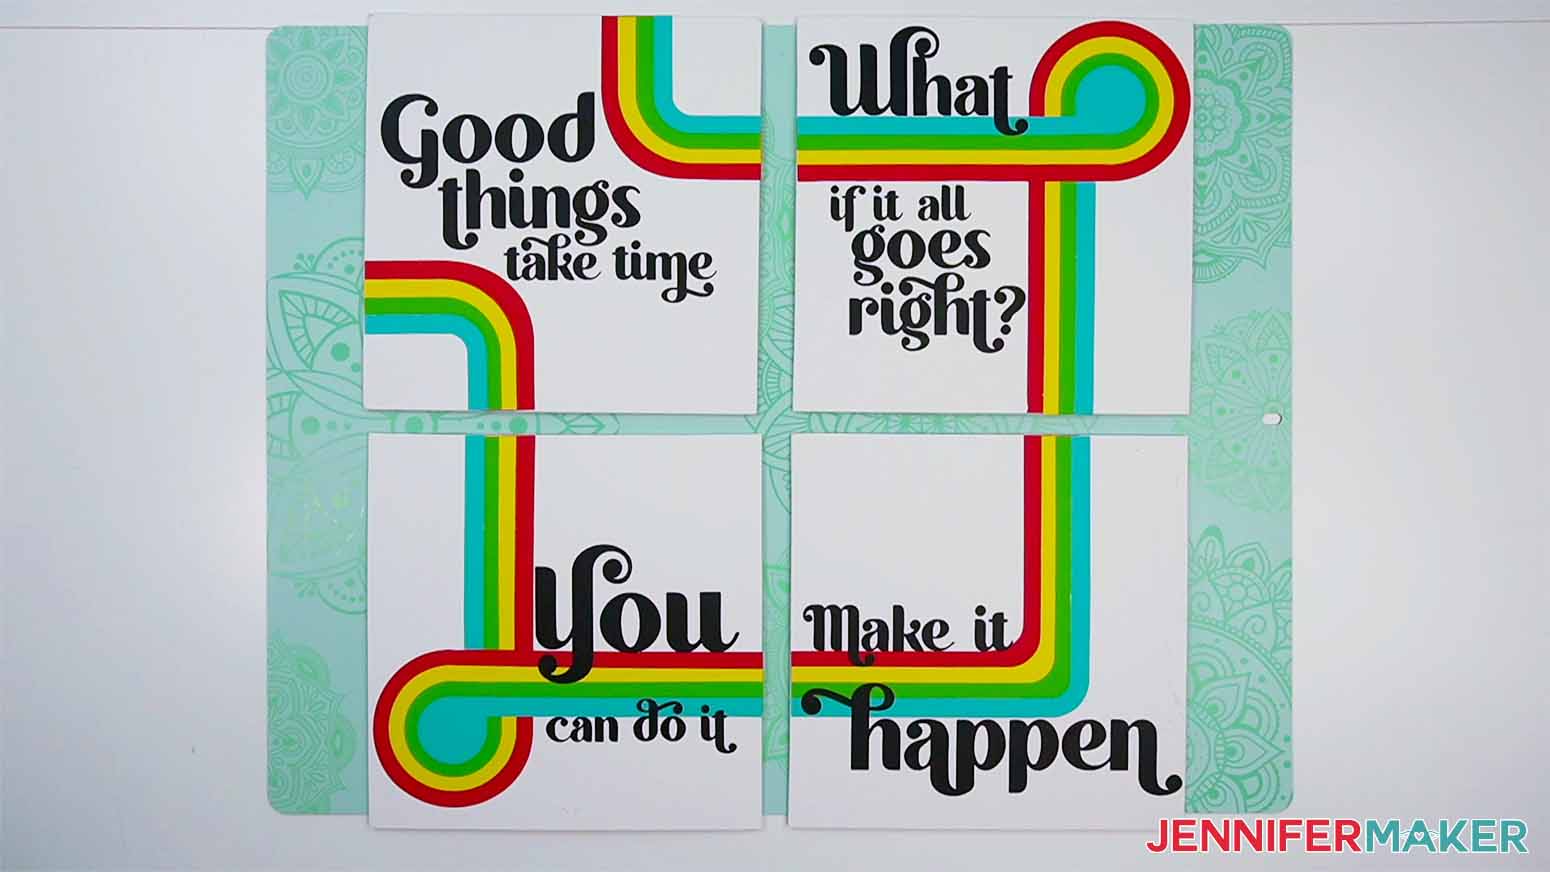
I had a lot of fun creating this free cut file collection for you! The four designs can be made together for a large. HTV on canvas project:

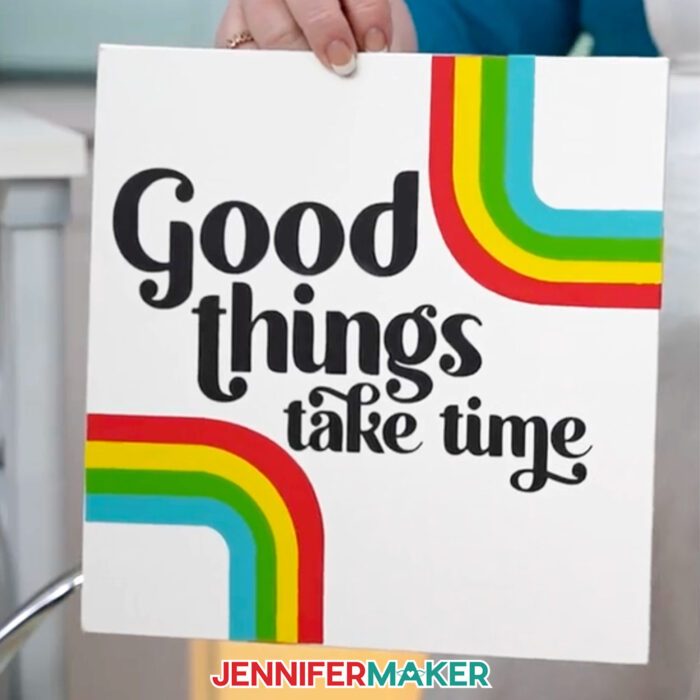
Or keep it simple with one panel, because the designs look great independently, too!

I’ve found that heat transfer material works better on canvas than adhesive vinyl, as long as you get the blank prepared and use the correct settings for your project. And that depends on the style of canvas you’re using. I’ll show you how to use HTV on canvas boards (on the table) and stretched canvases (hanging up).
The canvas boards are much easier to work with and are a great way to learn how to make layered wall art for the first time.
The stretched canvases stand out from the wall a little bit more. However. I found that the best way to get the vinyl design to transfer involved removing the canvas from the wooden frame and then re-attaching it. The process isn’t as hard as it sounds (I have all the tools and steps listed below, you probably have them already!) but it’s definitely more involved than just pressing the vinyl decals on the canvas board!
I also tested two different brands of HTV in red, yellow, green, blue, and black: Cricut’s Everyday Iron-on and HTVRont’s Heat Transfer Vinyl. I’ll show you how they both turned out so you can decide which to try for a canvas project. Just note that they do use slightly different pressing details, so don’t mix them up!
I used a Cricut Maker 3 to cut my designs, but you can use an original Maker, an Explore series machine, or a Cricut Venture. The deigns are a little detailed for smaller Cricut machines, but you can use my tutorial to create your own custom design!
And once you have the basics down, you can apply these techniques to many materials and HTV projects. You can learn all about glitter vinyl, foil HTV, and many more kinds in my Ultimate Guide to Vinyl.
I also have tons of iron-on vinyl tips and details in my HTV Cookbook!

But my best tip is that when you’re using a new type of vinyl, it’s a good idea to make a test cut of a small design to make sure the material, cutting mat, settings, and pressing process works how you expect. Don’t jump right to pressing on a canvas bag or other item first thing until you’re confident!
Let me show you how easy it is to layer HTV on canvas! This post contains some affiliate links for your convenience (which means if you make a purchase after clicking a link I will earn a small commission but it won’t cost you a penny more, there is no additional cost)! Read my full disclosure policy.
Materials to Layer HTV on Canvas
View my complete Amazon shopping list!
- Cricut Everyday or Value Iron-on Vinyl (I used Green Apple, Cherry, Teal, Yellow, and Black) -OR-
- HTVRont HTV in Green Apple, Red, Turquoise, Yellow, and Black
- 10″ x 10″ Canvas Panels -OR-
- 10″ x 10″ Stretched Canvas
- A way to cut your vinyl – I’m using the Cricut Maker 3, but you can also use the Cricut Maker, a Cricut Explore Series machine, or the Cricut Venture
- Cricut Green StandardGrip Mat, 12″ x 12″
- Cricut Brayer
- Cricut Scissors
- Weeding Tool
- Cricut EasyPress Heat Press 12″ x 10″ -OR-
- Cricut Autopress
- Cricut EasyPress Mini Heat Press -optional
- Cricut EasyPress Mat 16″ x 20″
- Butcher Paper (I prefer this over a teflon sheet or parchment paper)
- Ruler
- Pencil
- Pliers – for stretched canvas
- Flat Head Screw Driver – for stretched canvas
- Heat Resistant Tape
- Staple Gun – for stretched canvas
- Design #568 (My free SVG/PDF/DXF design files are available in my free resource library – get the password by filling out the form at the bottom of this page)
How to Make Your Own Wall Art With HTV On Canvas
How to Layer HTV on Canvas
Learn how to layer HTV on canvas to make wall art.
Materials
- 10 x 12 inches Cricut Value Iron-on Vinyl (I used Green, Red, Teal, Yellow, and Black) -OR-
- 10 x 12 inches Green Apple HTVRont HTV
- 10 x 12 inches Red HTVRont HTV
- 10 x 12 inches Turquoise HTVRont HTV
- 10 x 12 inches Yellow HTVRont HTV
- 10 x 12 inches Black HTVRont HTV
- 10 x 10 inch canvas panels -OR-
- 10 x 10 inch Stretched Canvas
- Design #568 (My free SVG/PDF/DXF design files are available in my free resource library - get the password by filling out the form at the bottom of this page)
Tools
- A way to cut your cardstock - I’m using the Cricut Maker 3, but you can also use the Cricut Maker, a Cricut Explore Series machine, or the Cricut Venture
- Cricut Green StandardGrip Machine Mat 12" x 12"
- Brayer
- Weeding Tool
- Scissors - optional
- Cricut EasyPress Heat Press 12" x 10" -or-
- Cricut Autopress
- Cricut EasyPress Mini Heat Press -optional
- Cricut EasyPress Mat 16" x 20"
- Pencil
- Ruler
- Pliers - for stretched canvas
- Flat Head Screw Driver - for stretched canvas
- Heat Resistant Tape
- Staple Gun - for stretched canvas
Instructions
STEP 1: GET MY FREE LAYERED VINYL DESIGNS
First, download my Vacation Sublimation designs from my free library – look for Design #568. Alternatively, you can use the Save This Project form near the top of this post and the design link will be emailed to you.
The folder includes files for four different designs. You can make just one, or make more and hang them to tile a larger piece of art.
I cut my vinyl with a Cricut Maker 3, but you can use an original Maker, an Explore series machine, a Cricut Venture, or any cutting machine that works with cut files. I don’t recommend making the designs smaller than 8” x 8” for the best results.
TIP: If you’re not sure how to download, unzip, upload SVGs, go to jennifermaker.com/svgs to learn how to unzip and upload SVG files.
PROJECT 1: LAYERED VINYL DESIGNS ON CANVAS BOARDS
STEP 2: PREPARE AND CUT YOUR DESIGN
BEFORE YOU BEGIN
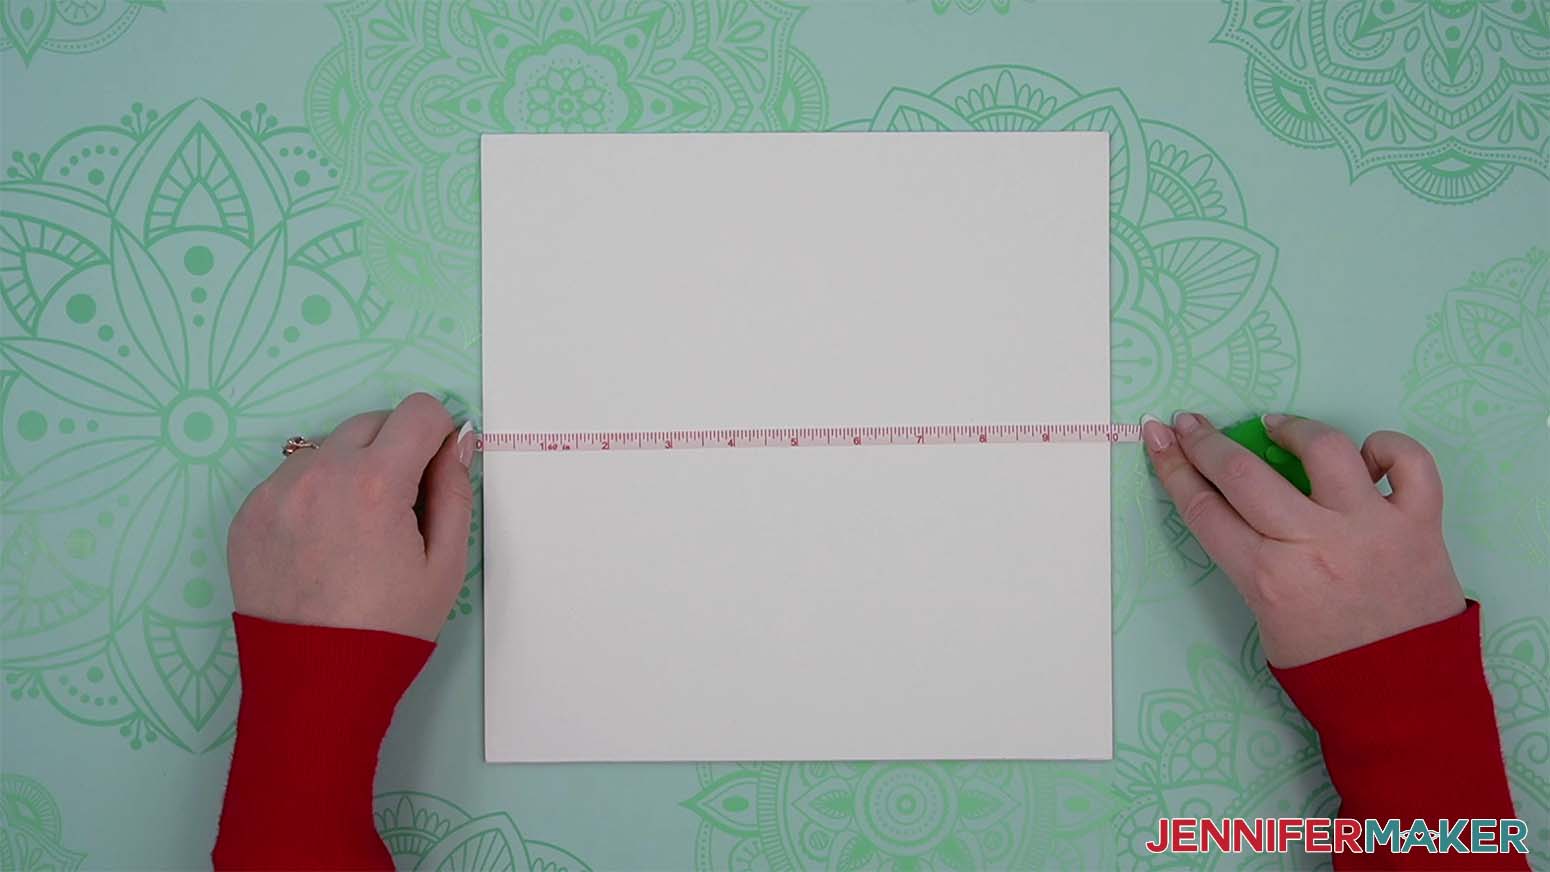
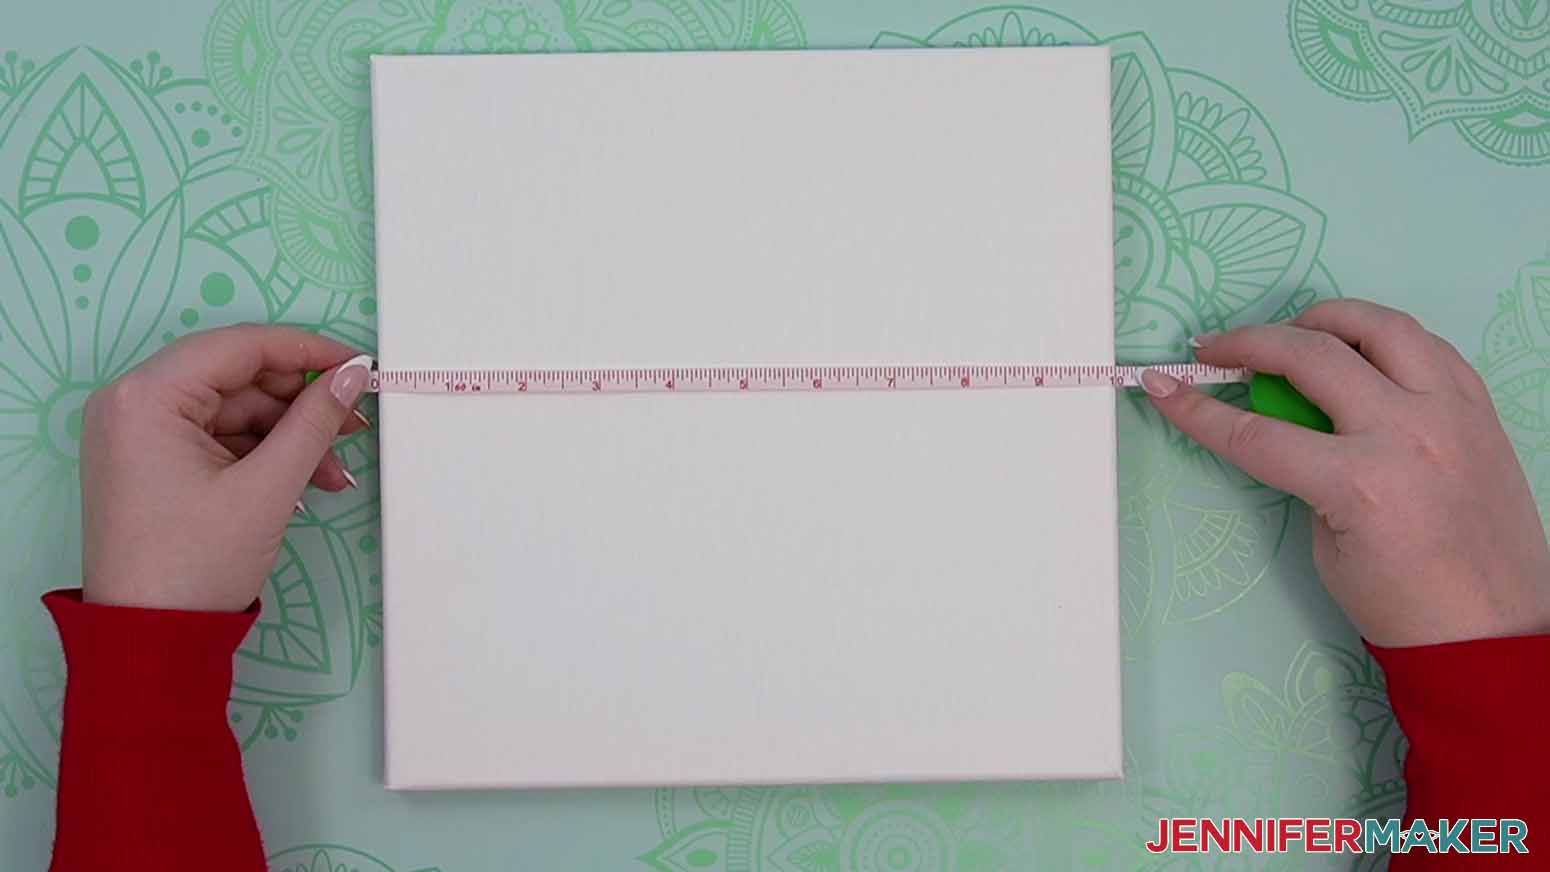
1. Measure your canvas board’s height and width in case the dimensions are different than listed.
CRICUT DESIGN SPACE
1. Open Cricut Design Space and click “New Project.”
2. Click “Upload” and then “Upload Image.”
3. Click “Browse.”
NOTE: There are four designs that make a collection. You can make one, or all, but I recommend preparing, cutting, and transferring them one at a time to avoid confusing your layers.
4. Select the SVG file you want to make.
5. On the Prepare to Upload screen, it will say “Cut image” with the design preview. Click “Upload.”
6. Find your design in Recent Uploads and add it to the Canvas.
7. Add the other three designs if you want to make them all.
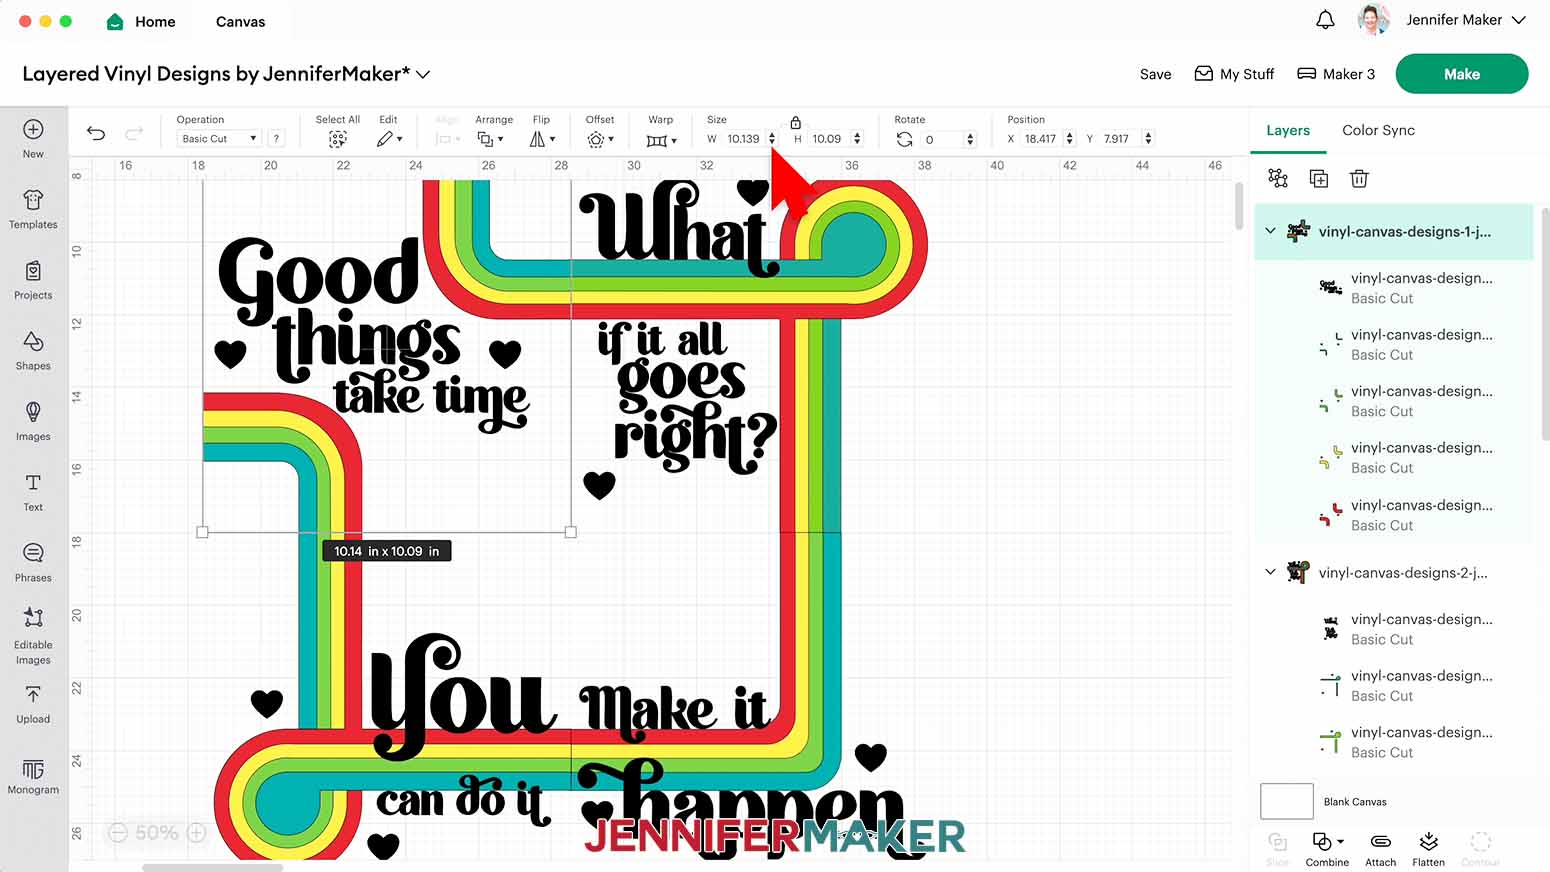
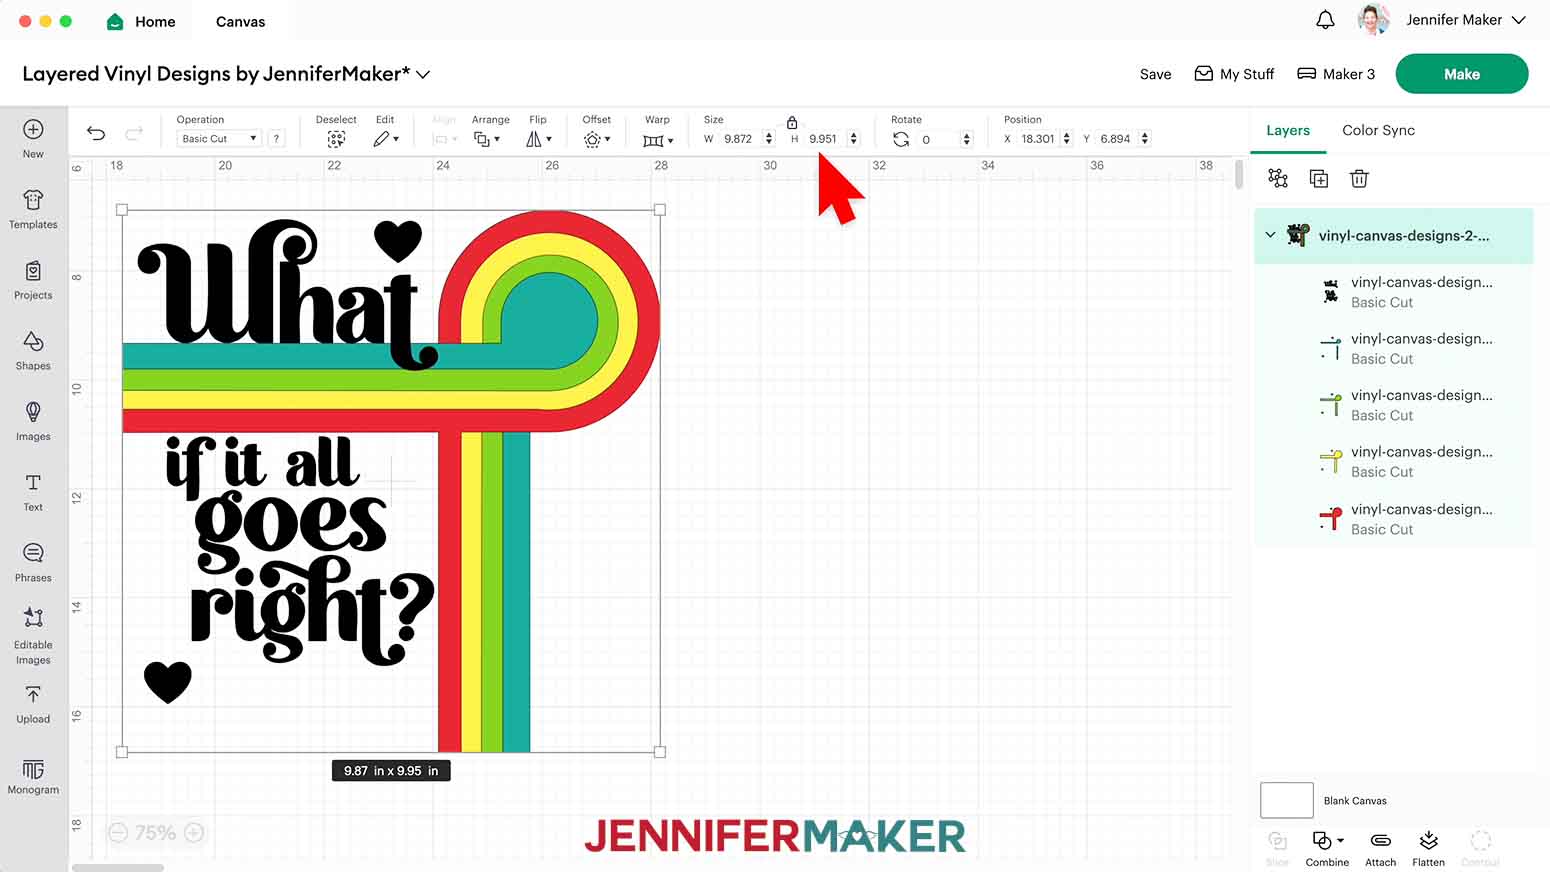
8. Here is how all four designs look on the Canvas.
9. Use the eye icons in the Layers Panel to hide the grouped layers for the other designs until you’re ready for them.
NOTE: The hearts are registration marks, so we’ll cut them and learn how to keep them from transferring.
10. If your canvas is a different size, keep the Size lock icon closed and adjust the dimensions, but remember that the designs are intended for square blanks. You can go down to 8” x 8”, but I don’t recommend going smaller.
11. Your layers are now ready to cut! Make sure the correct machine is selected in the top right.
12. Click “Make”
13. If prompted, click "On Mat," choose your mat size, and click “Confirm.”
14. On the Prepare Screen, turn on “Mirror” for all the mats.

15. Select the first mat, then click “Continue.”
CUTTING
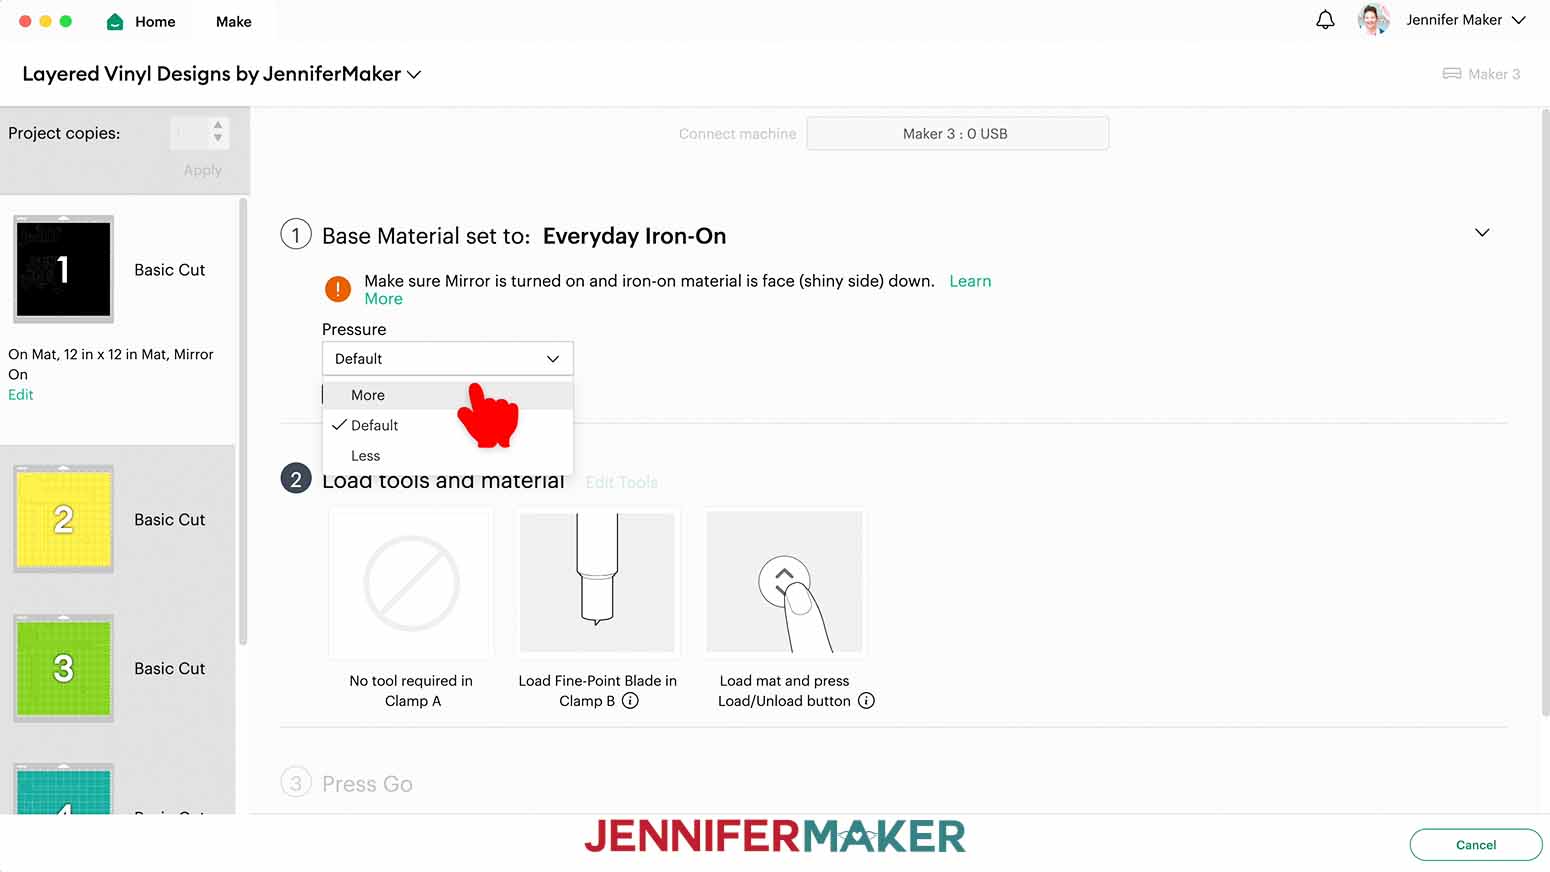
1. On the Make Screen, select the “Everyday Iron-on” setting.
2. Change the Pressure to “More” for a cleaner cut.
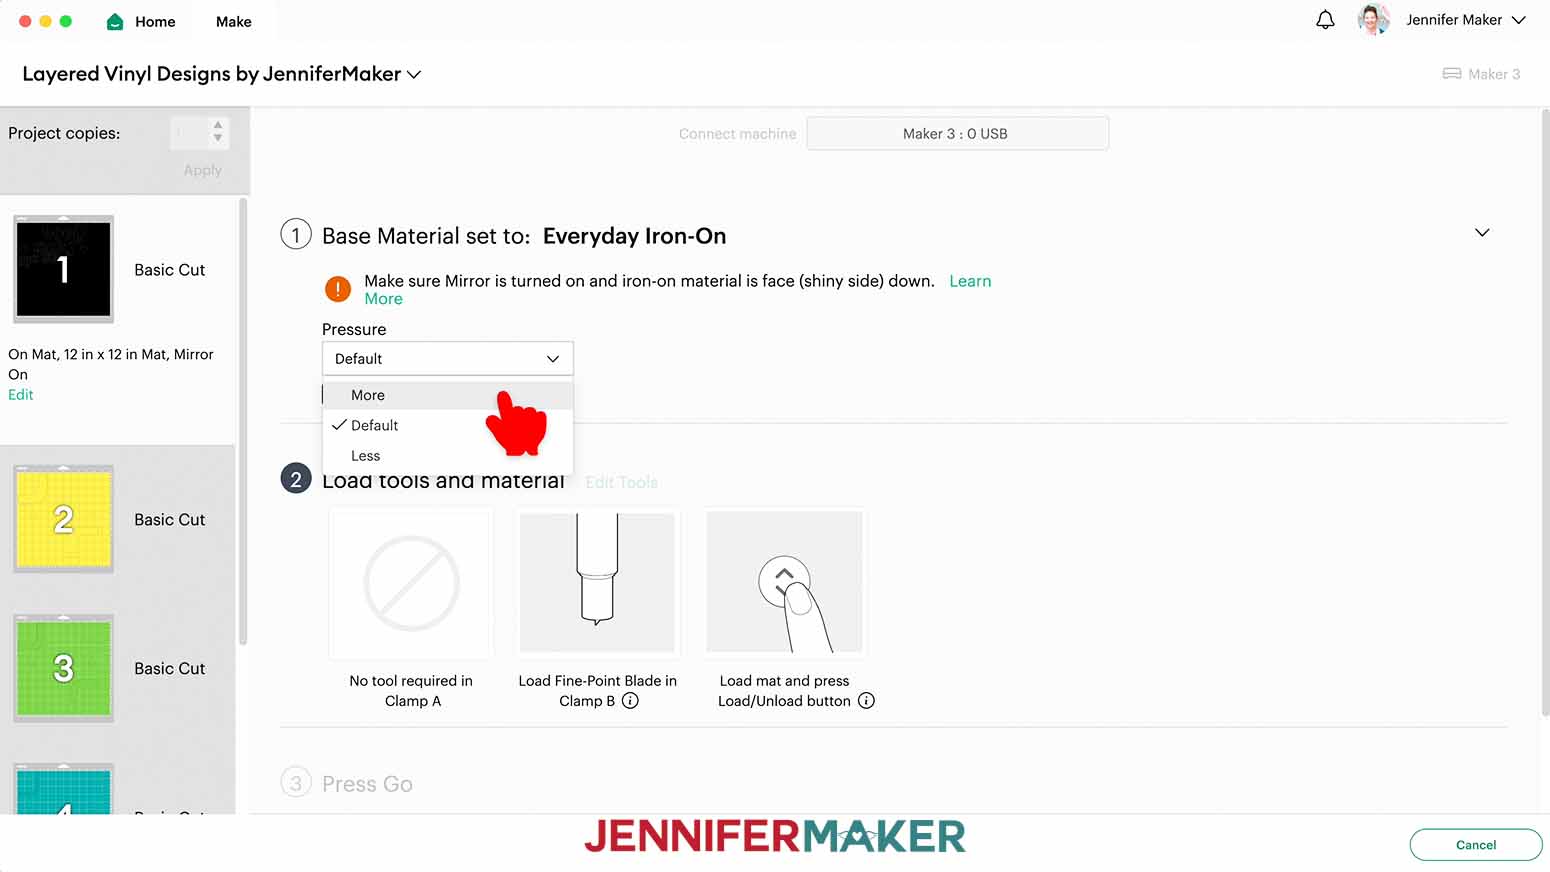
3. Check the “Remember Materials Settings” box to save time if you’re using the same vinyl for everything like me.
4. Cut your first color of vinyl to be just a bit bigger than the design area needed.
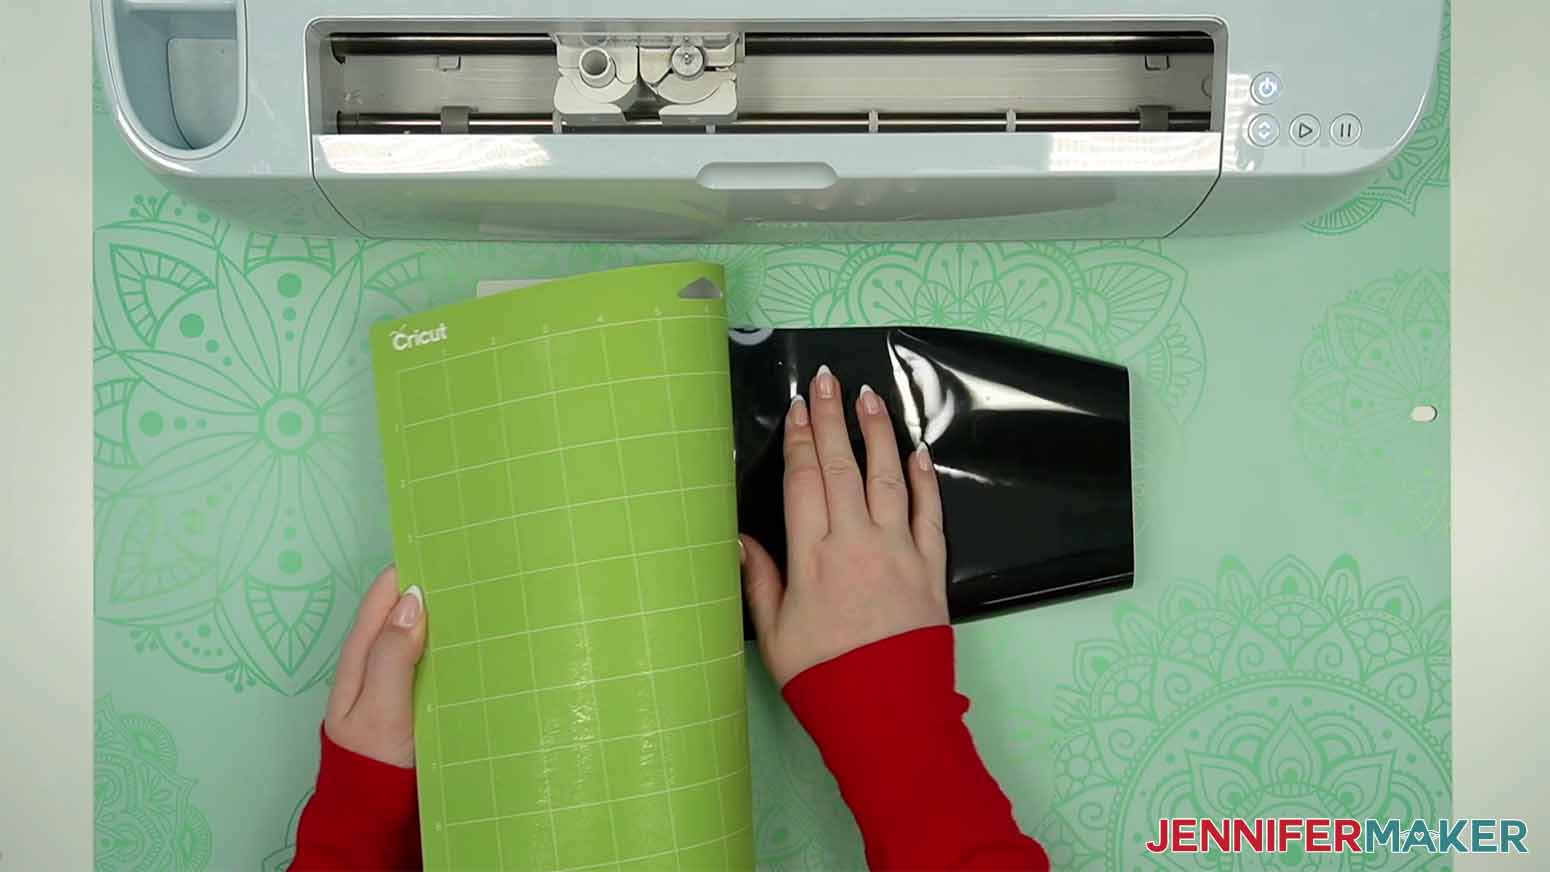
5. Place the first color of vinyl shiny side down on a green StandardGrip Machine Mat
TIP: If you can’t tell which side is the carrier sheet and which is the vinyl, use your weeding tool to scratch a corner and see which side tears. That’s the vinyl.
6. Use a brayer to secure the vinyl to the mat.

7. Check that your Fine-Point Blade is clean and in the clamp.
8. Press the flashing button to load the prepared mat into your Cricut.
9. Press the flashing button to begin cutting.
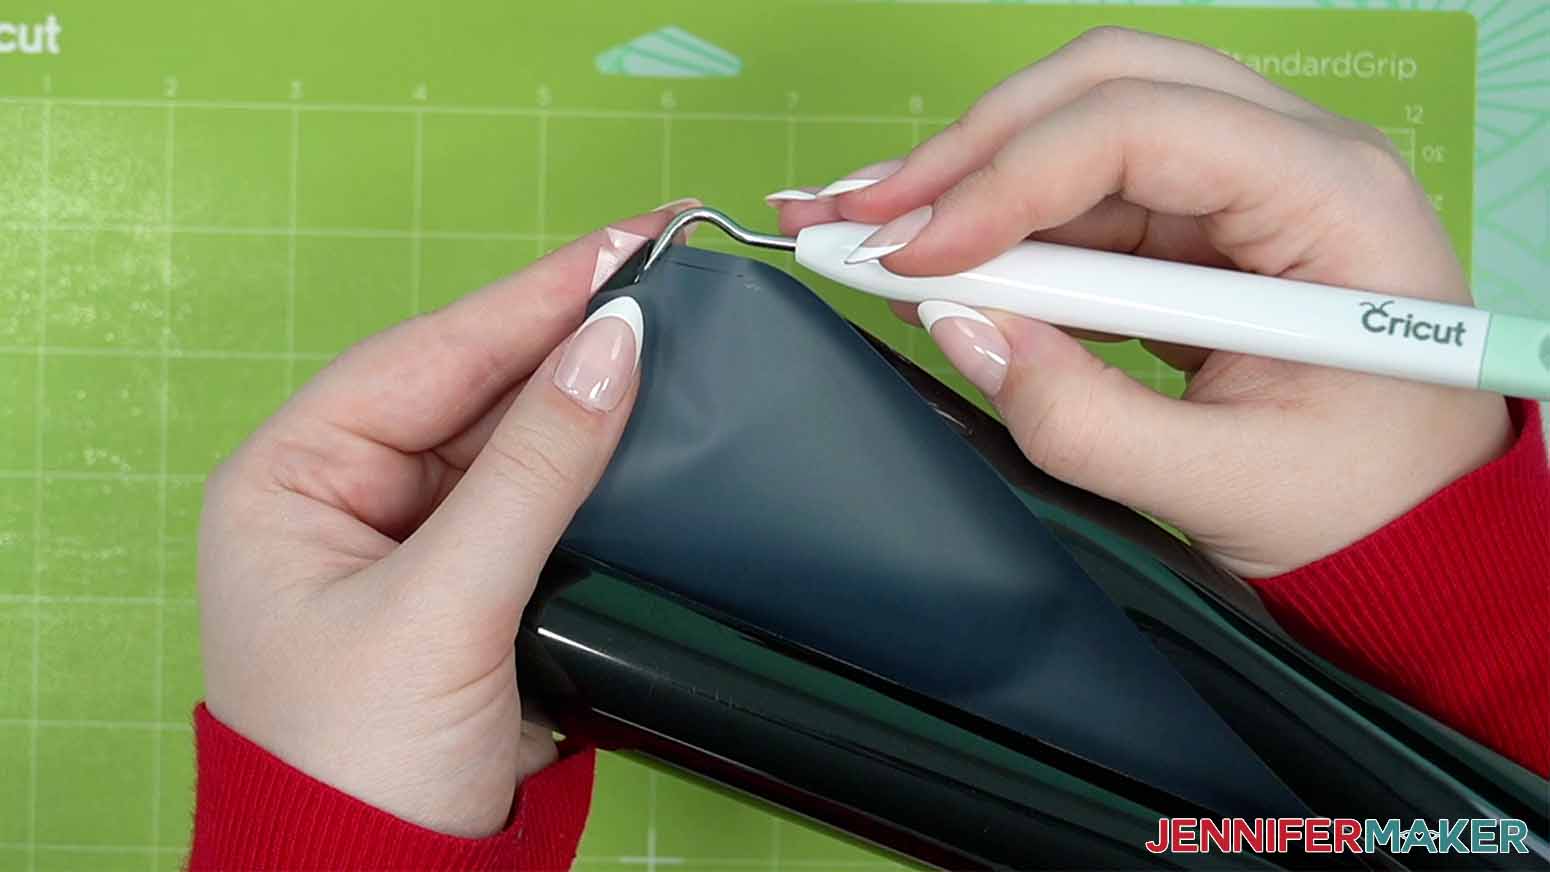
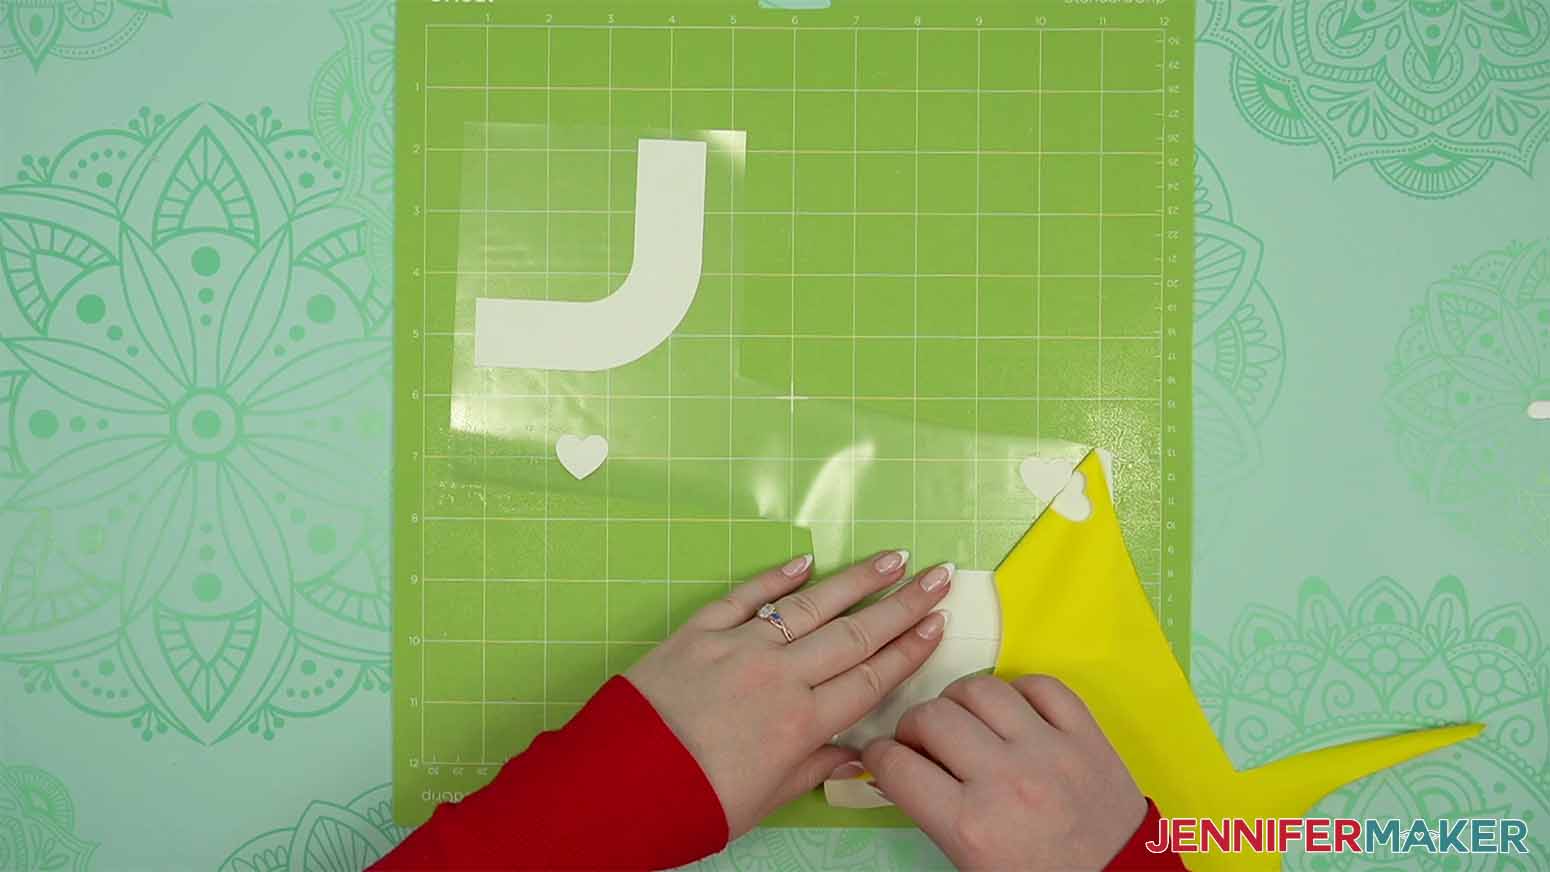
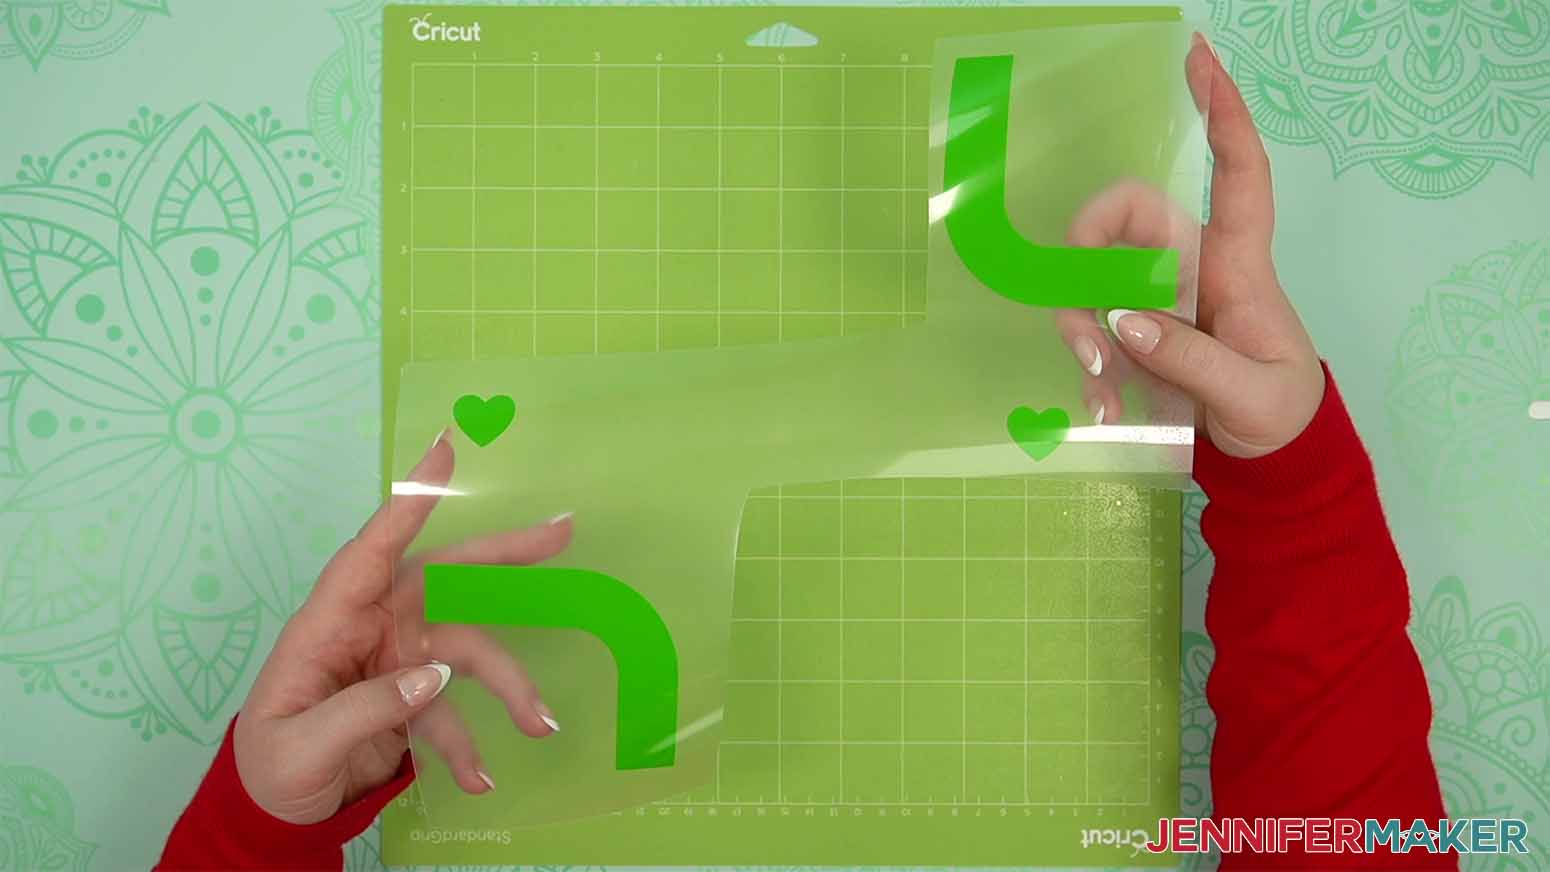
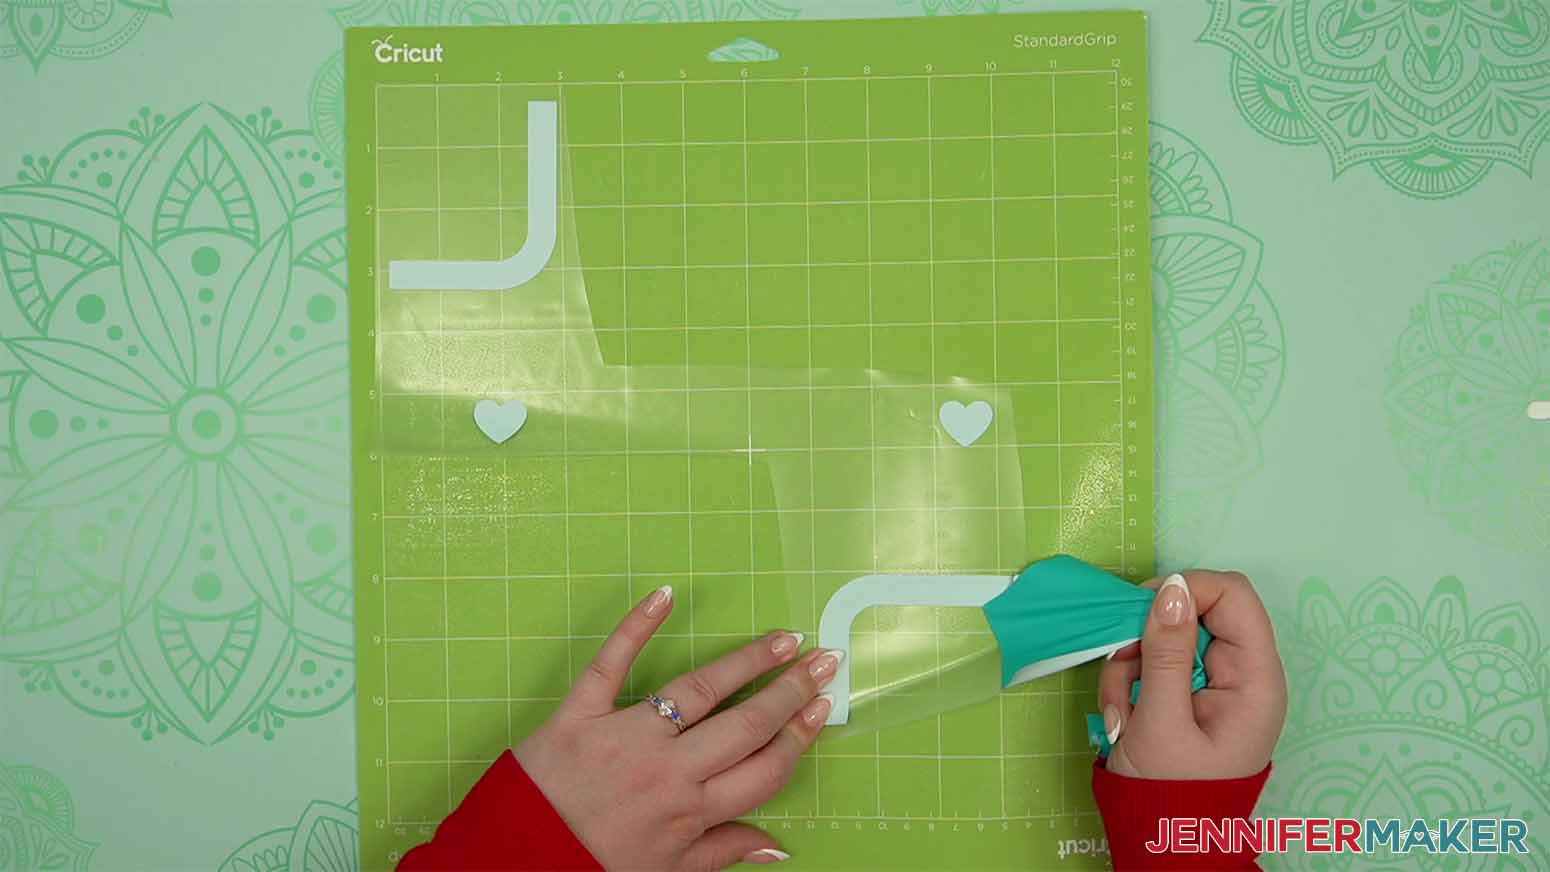
10. When it has finished cutting, unload the mat, flip it over onto your work surface, and roll it back to release the vinyl.
11. If there are uncut vinyl sections you can trim away without interfering with the design or registration marks, trim them away to store for small projects.

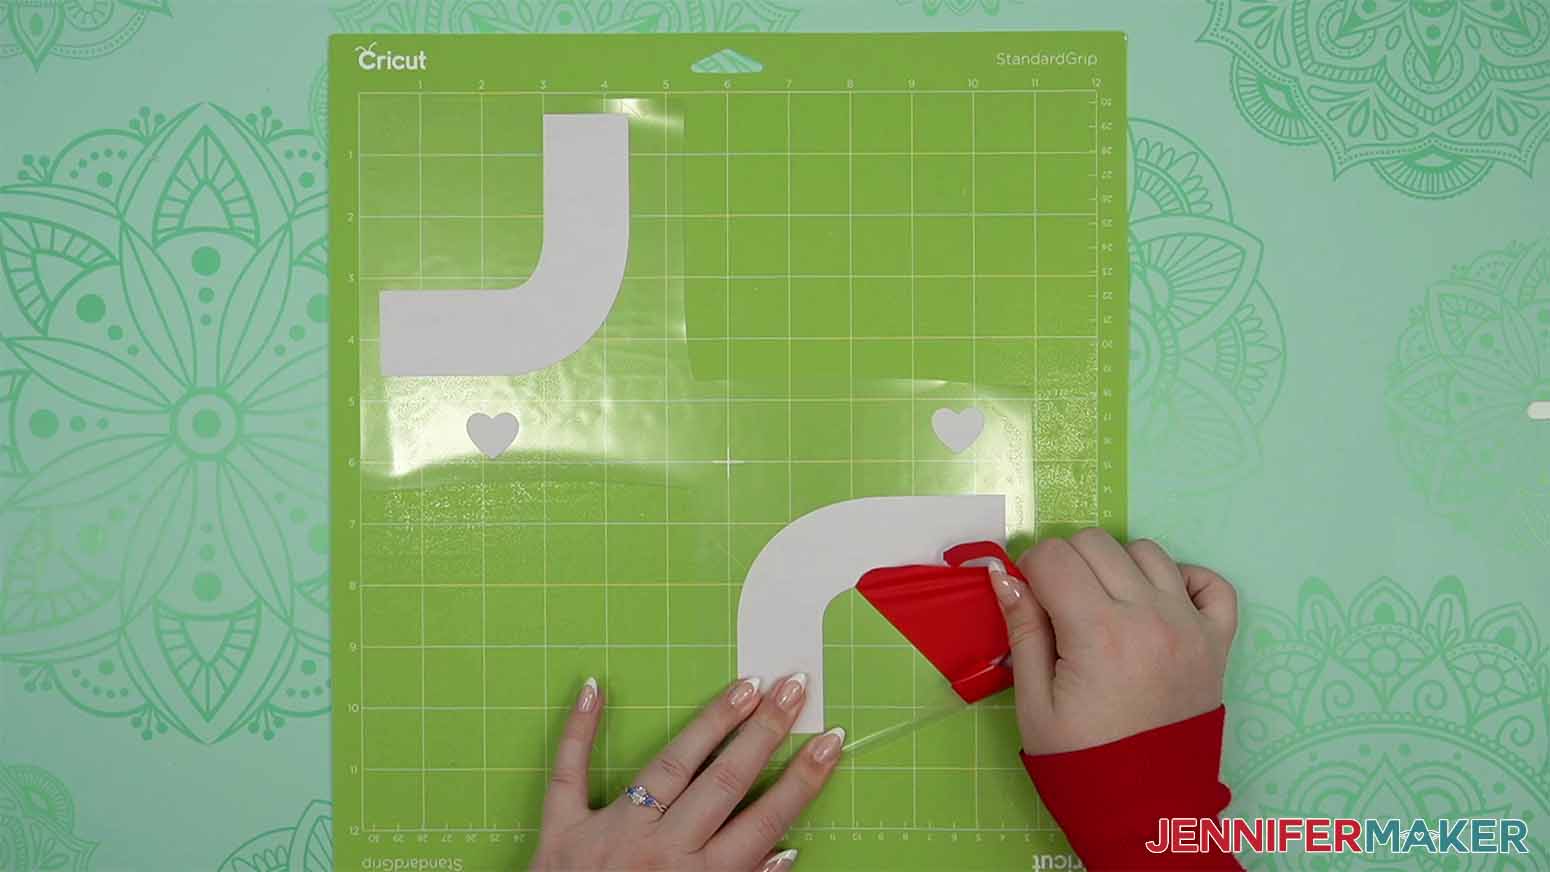
12. Put the design back on the mat, shiny side down.
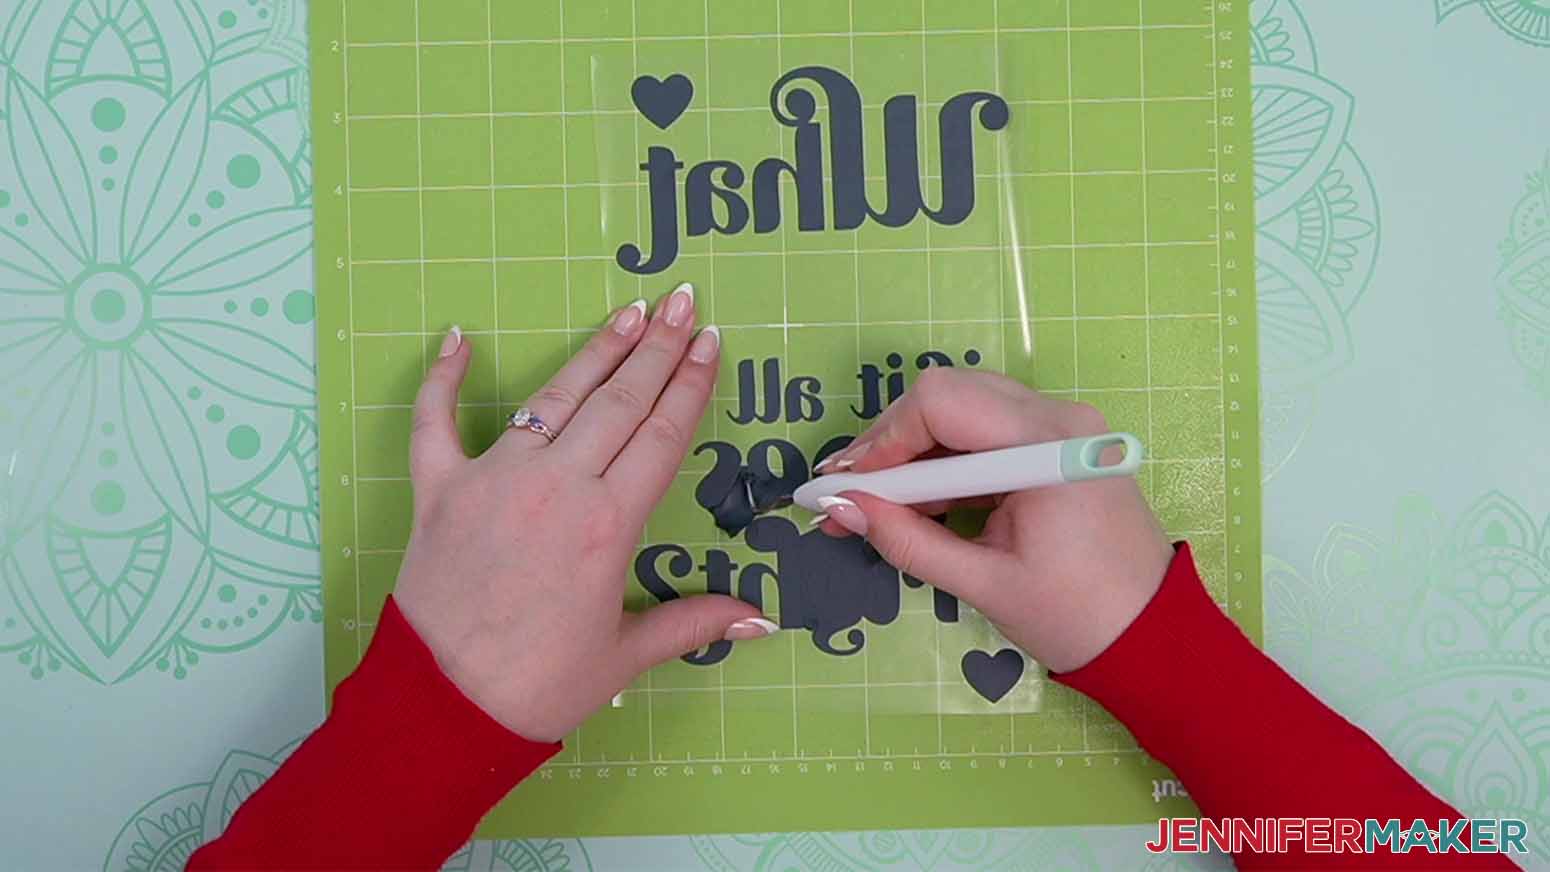
13. Use your weeding tool to remove the excess vinyl around the design and inside any letters.
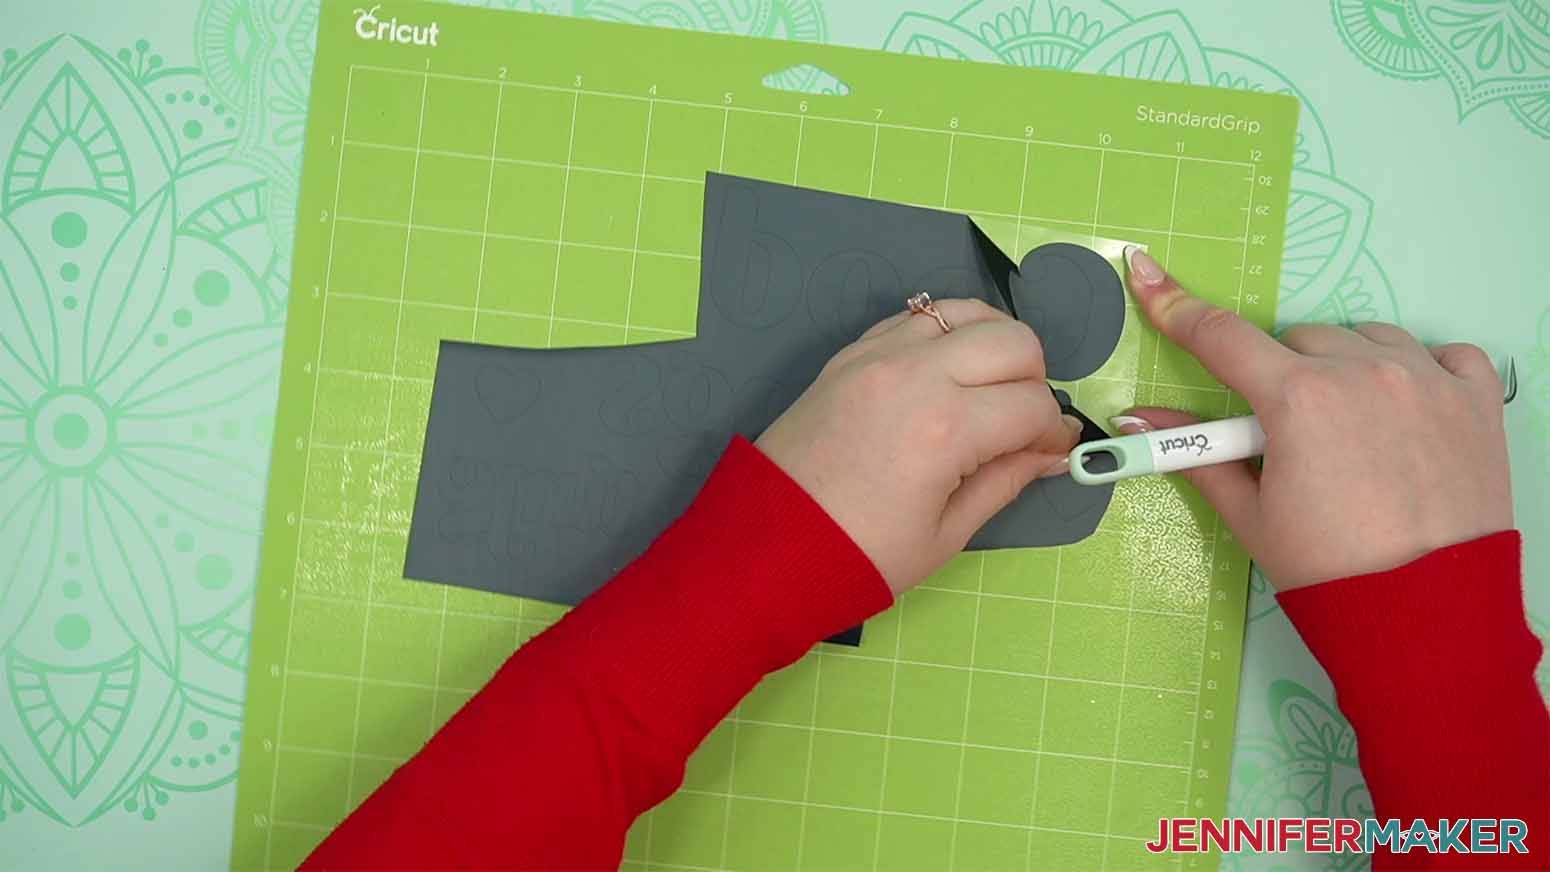
14. Remove the design from the mat and set it aside.
15. Repeat Steps 1-14 for the other mats using the correct colors.
STEP 3: APPLY VINYL LAYERS TO YOUR CANVAS BOARD
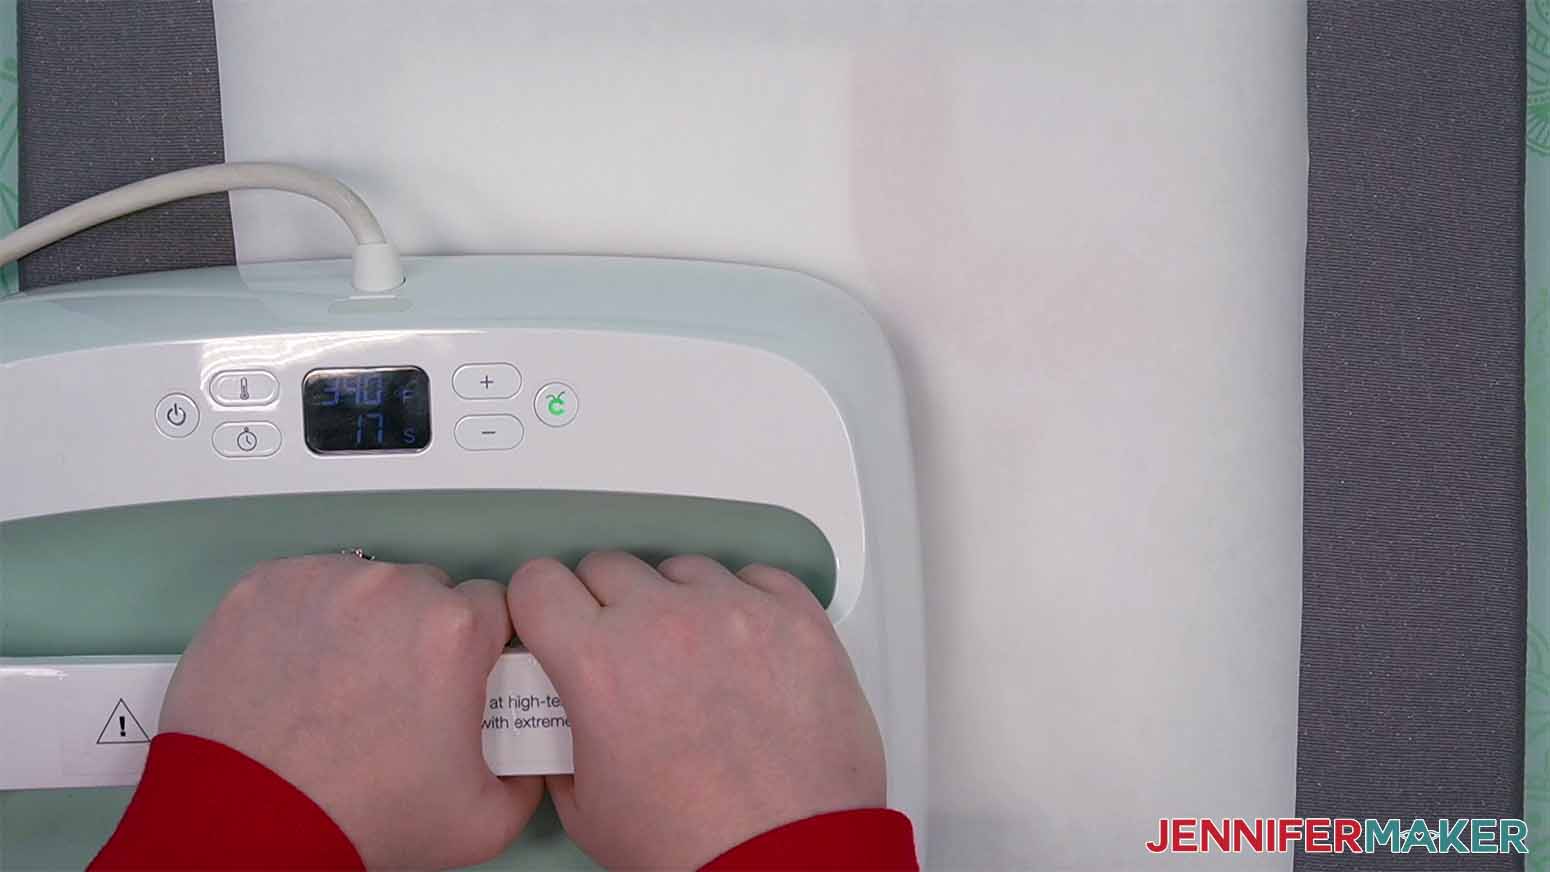
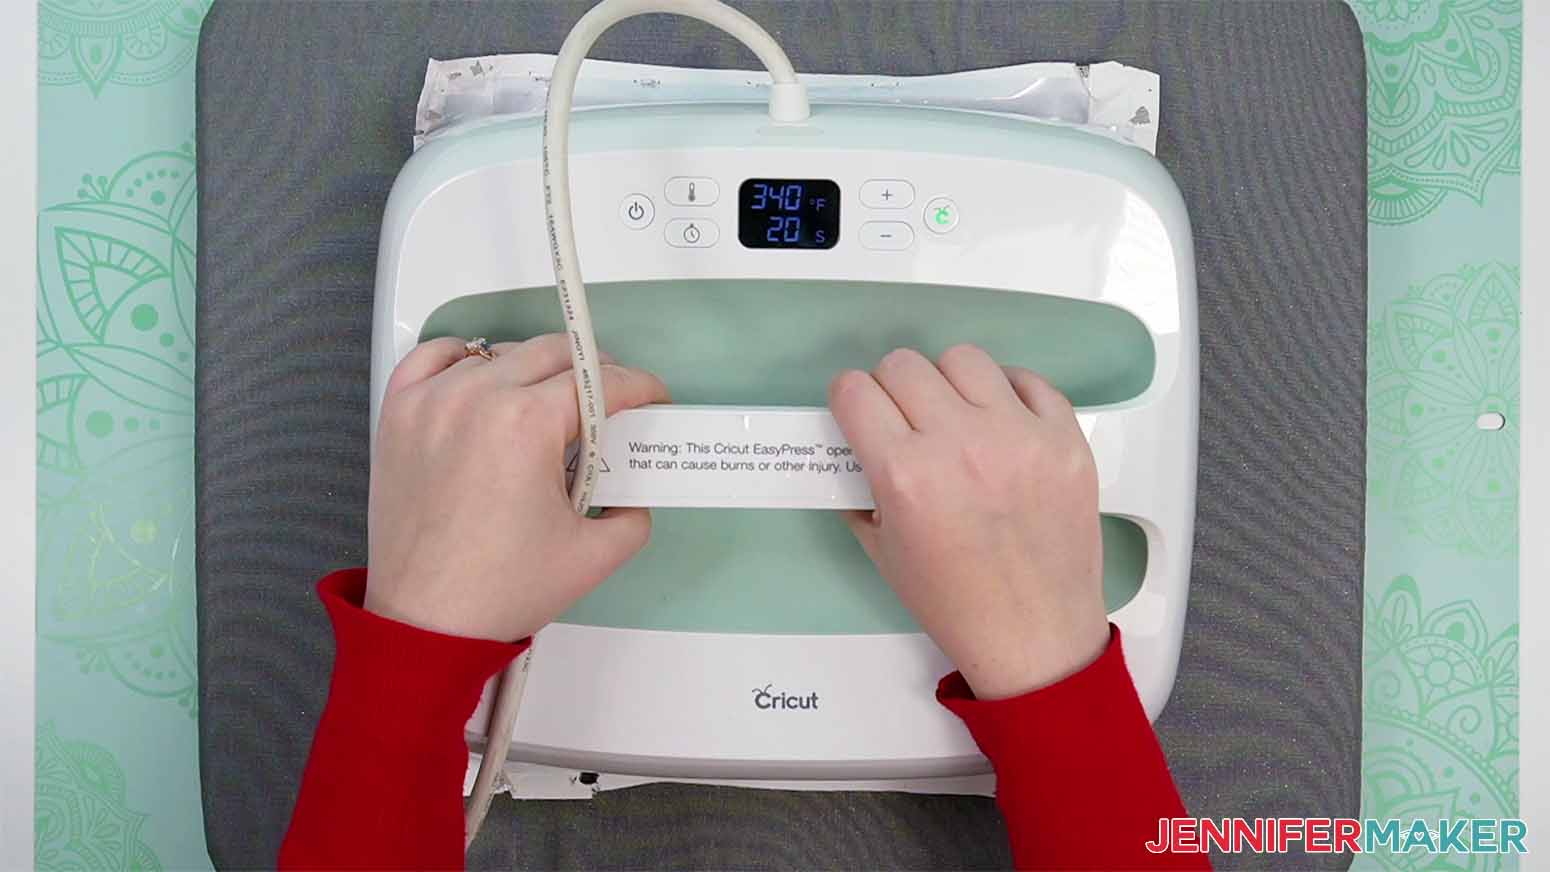
1. Pre-heat your heat press:
For HTVRont vinyl, set it to 340°F (171 C) and the timer for 20 seconds.
For Cricut EveryDay Iron-On Vinyl, set it to 310°F (154 C) and the timer for 15 seconds.
If you have a MiniPress, it’s helpful for heating small sections as needed. Set it to medium.
2. Use a lint roller to clean the canvas board.
3. Put the canvas face up on a pressing mat.
4. Once your press is at temperature, pre-heat the canvas for 5 seconds.
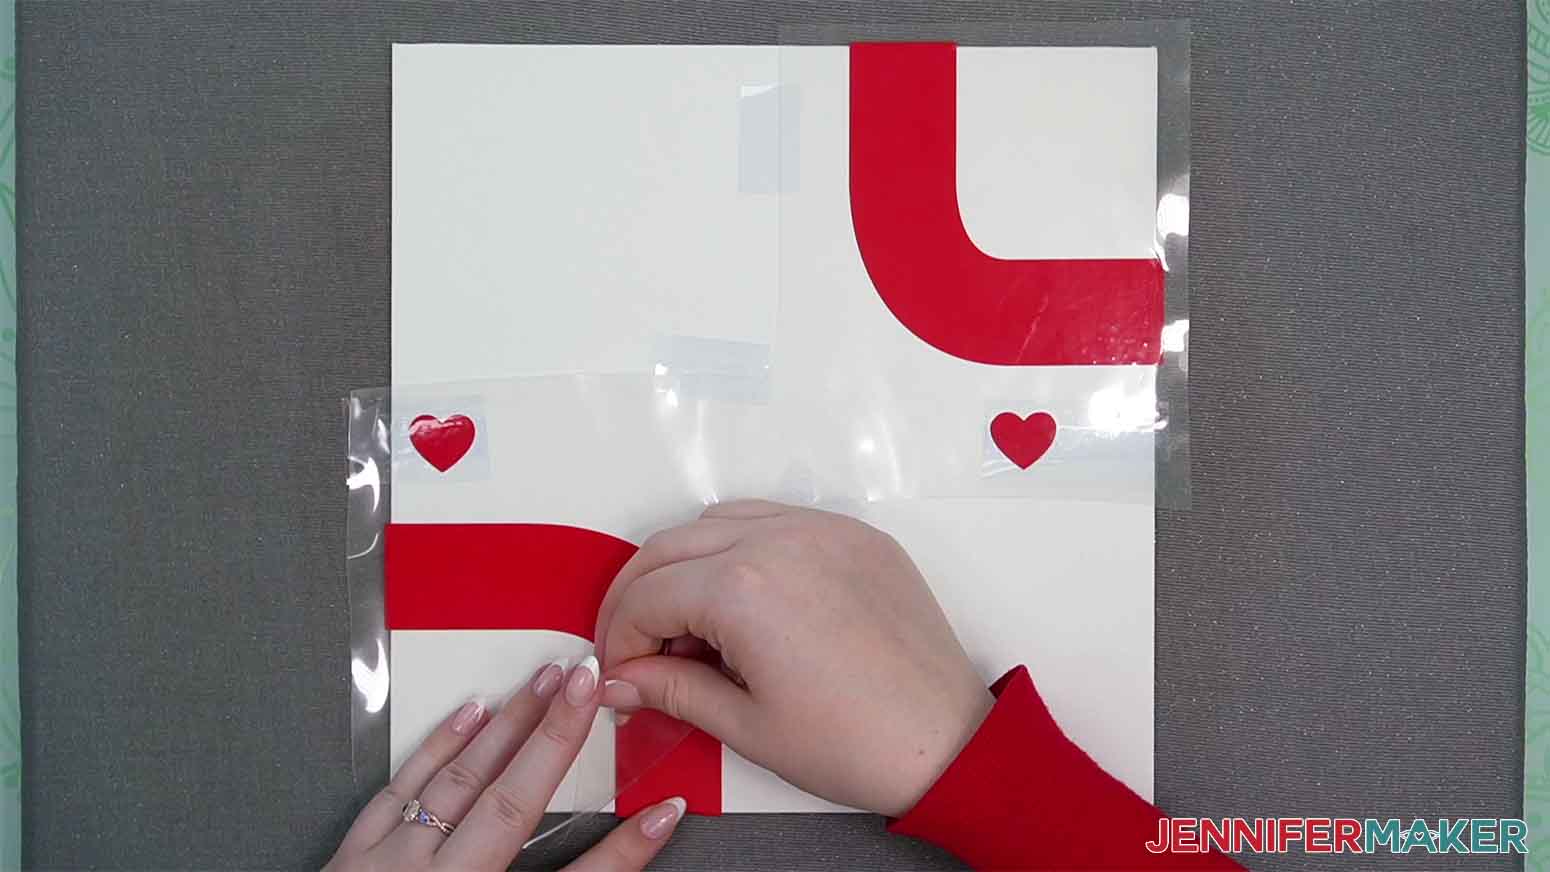
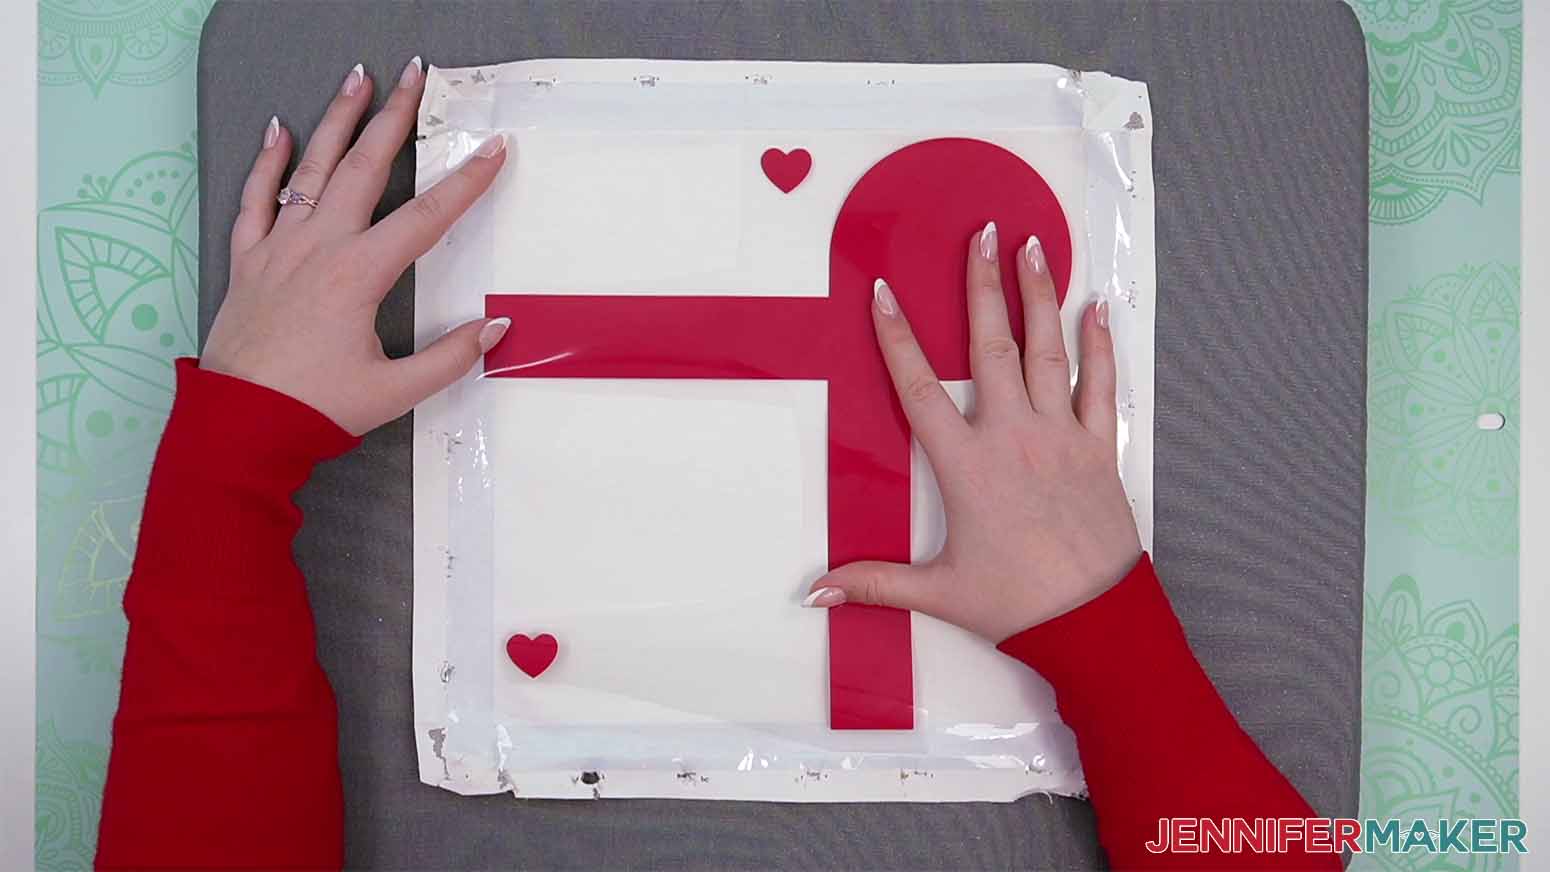
5. Lightly place the bottom layer vinyl side down on the canvas. It should look like your Design Space Canvas.
TIP: The bottom layer often has the most vinyl, but refer back to your Design Space Canvas if you’re unsure.
6. Align the design’s flat edges with the correct sides of the canvas to position the first layer.
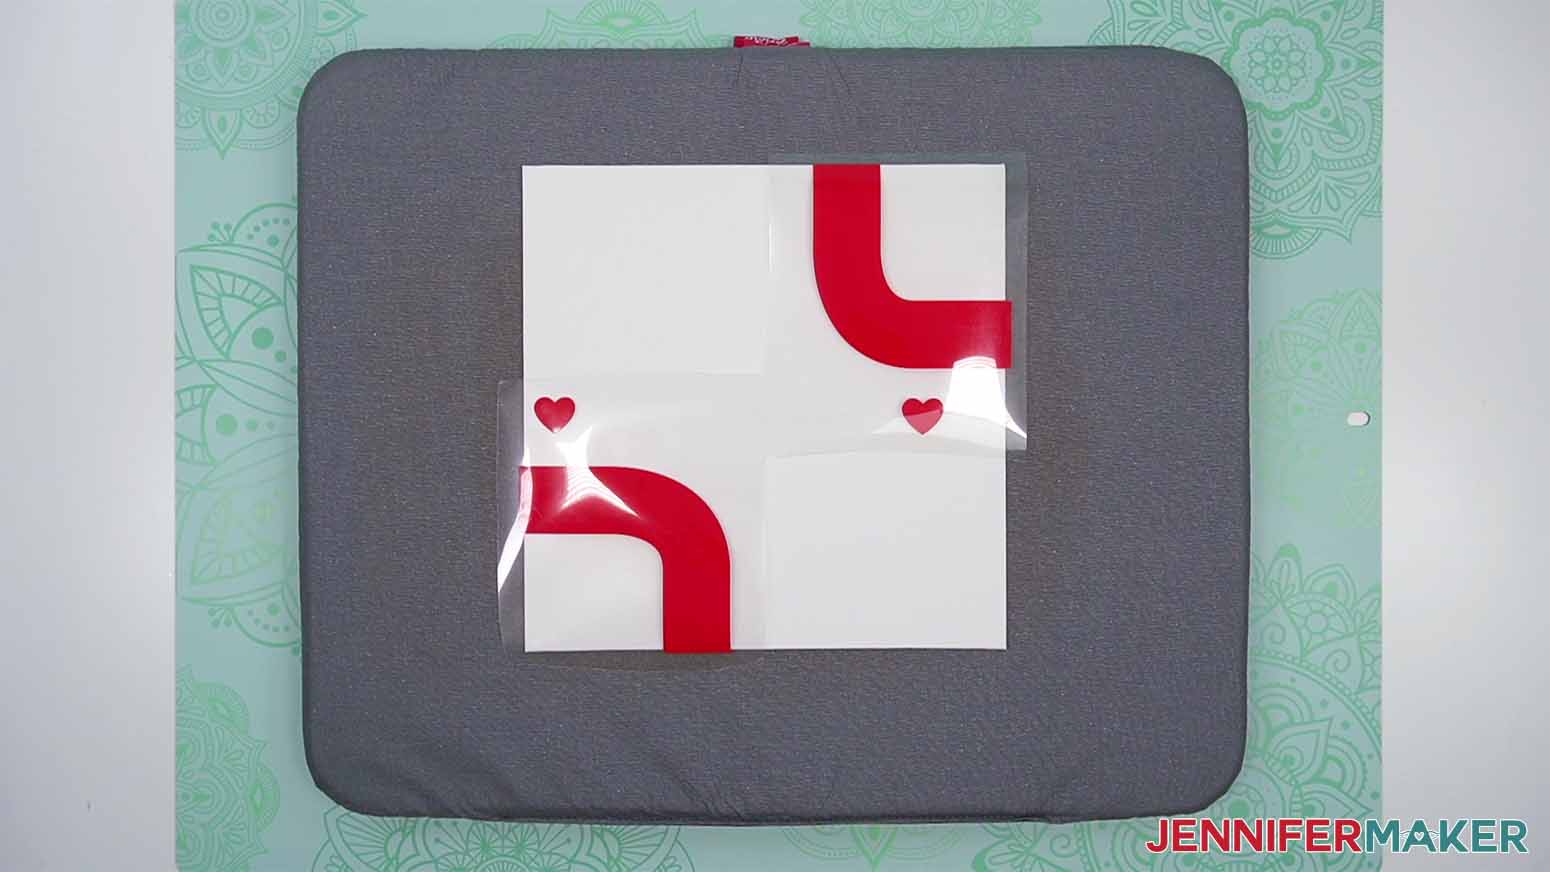
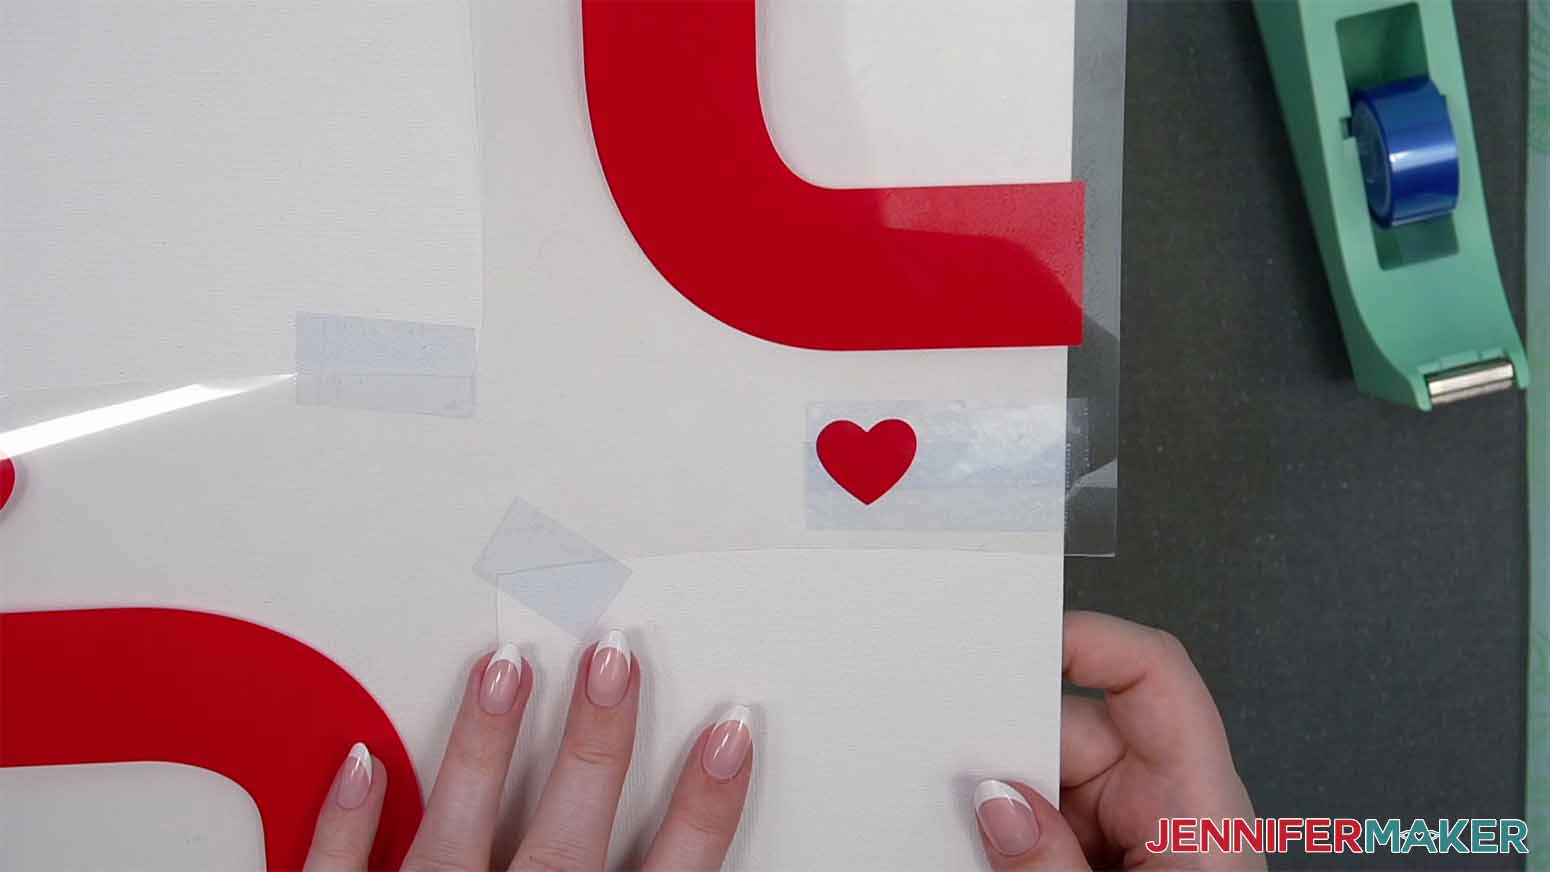
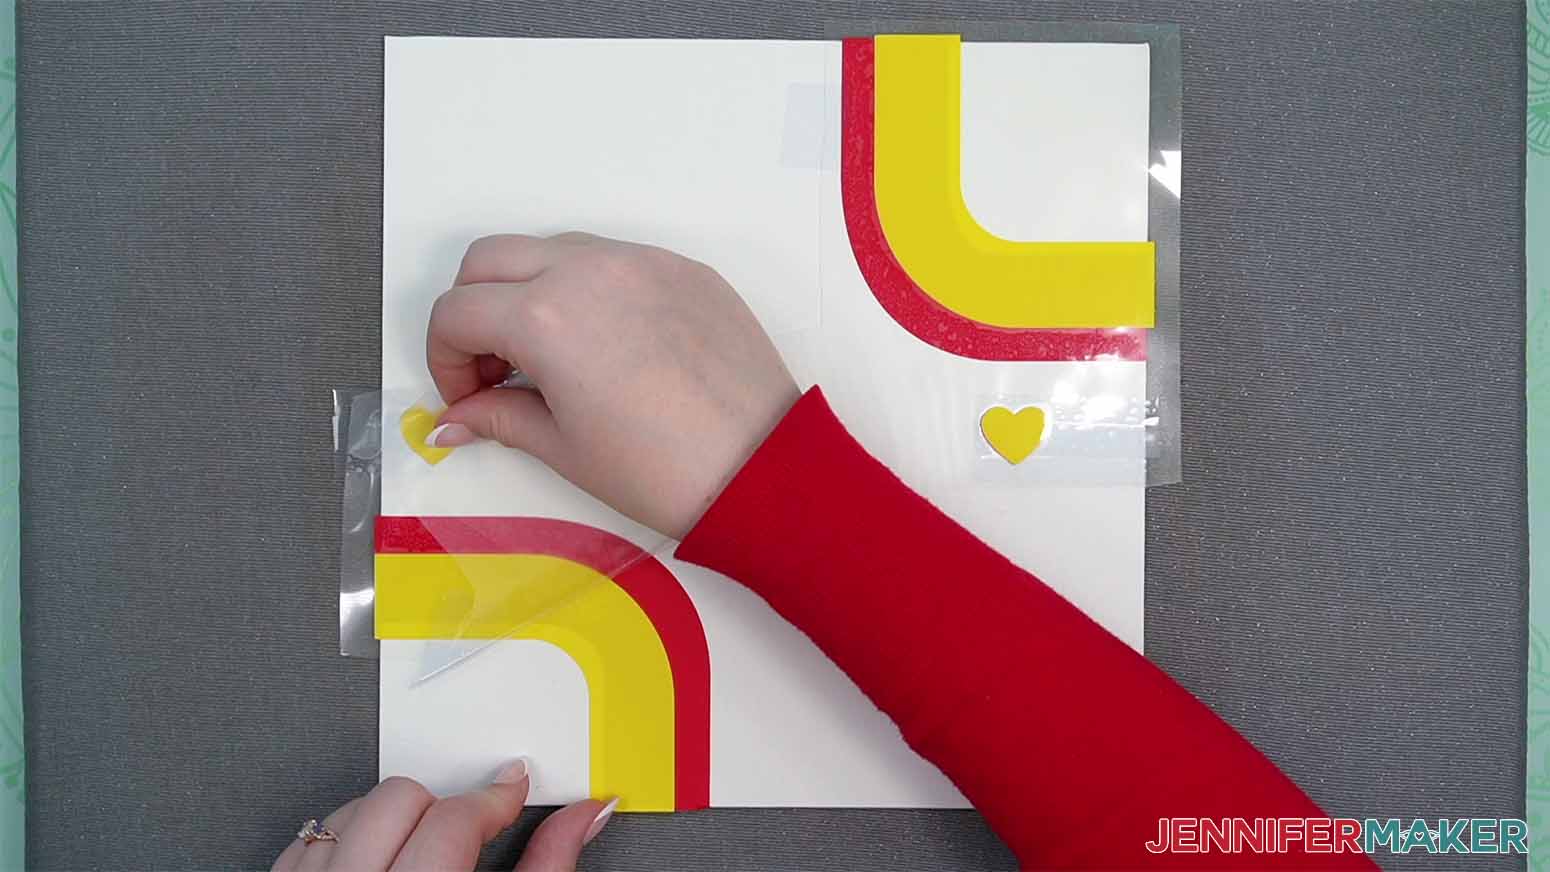
7. If you don’t want the heart registration marks to transfer, put pieces of heat-resistant tape under them on the canvas so it continues off the edge. Make sure the tape is well-adhered to the canvas and no vinyl will go over the edges of the tape.
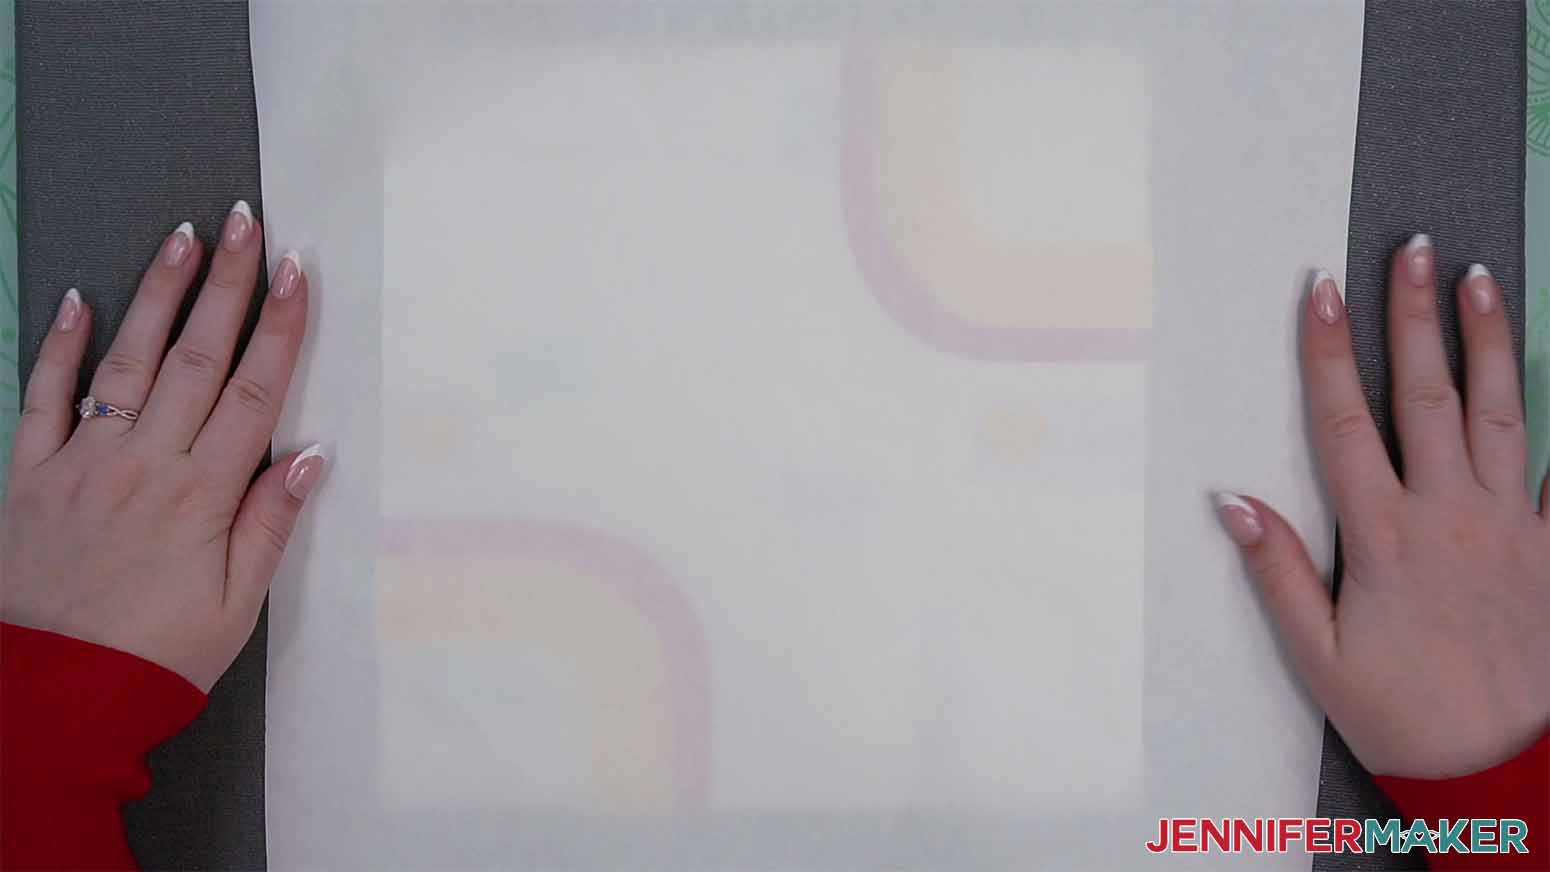
8. Place white cardstock or butcher paper as a cover sheet over the design to avoid overheating the vinyl or canvas.
9. When the press comes to temperature, heat the design with light to medium pressure for the time indicated.
TIP: If you can’t heat the entire design at once, try to heat it evenly in sections without much overlap.
10. When the time is up, remove the press and the cover sheet.
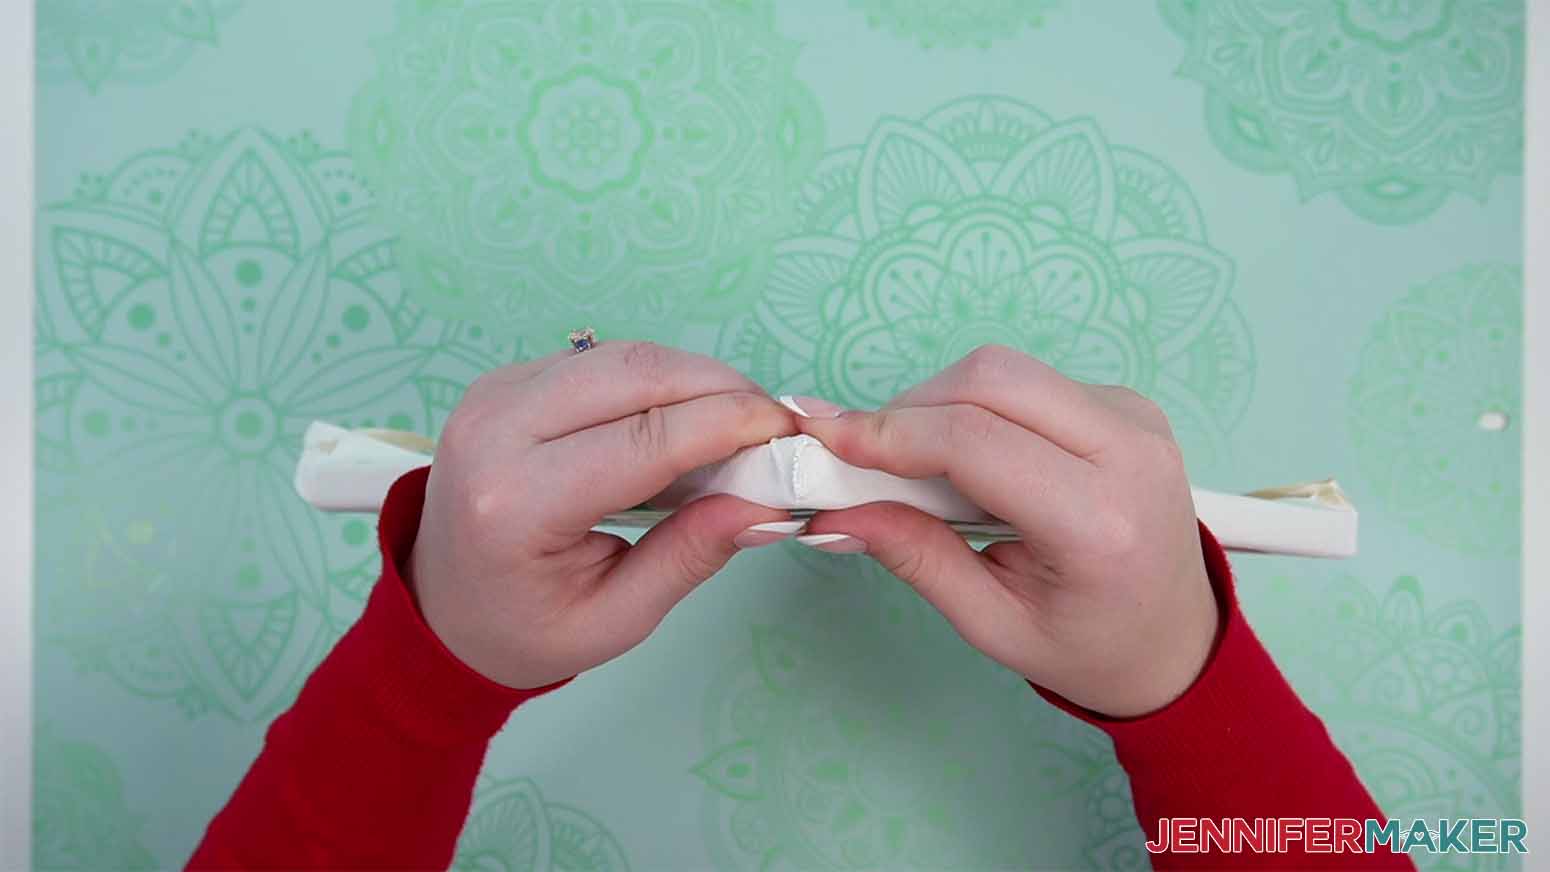
11. Let the vinyl cool so it’s not too hot to touch, then hold the tape with the registration heart in place and slowly peel up the carrier sheet. The heart should stay in place on the tape, don’t let it move!
NOTE: The vinyl isn’t completely bonded because we need to heat this layer several more times and don’t want to burn it. If vinyl comes up with the carrier, put the design back in place and heat it again before re-trying. This is where the MiniPress helps! Small wrinkles or unattached vinyl will likely work out while the other layers are added.
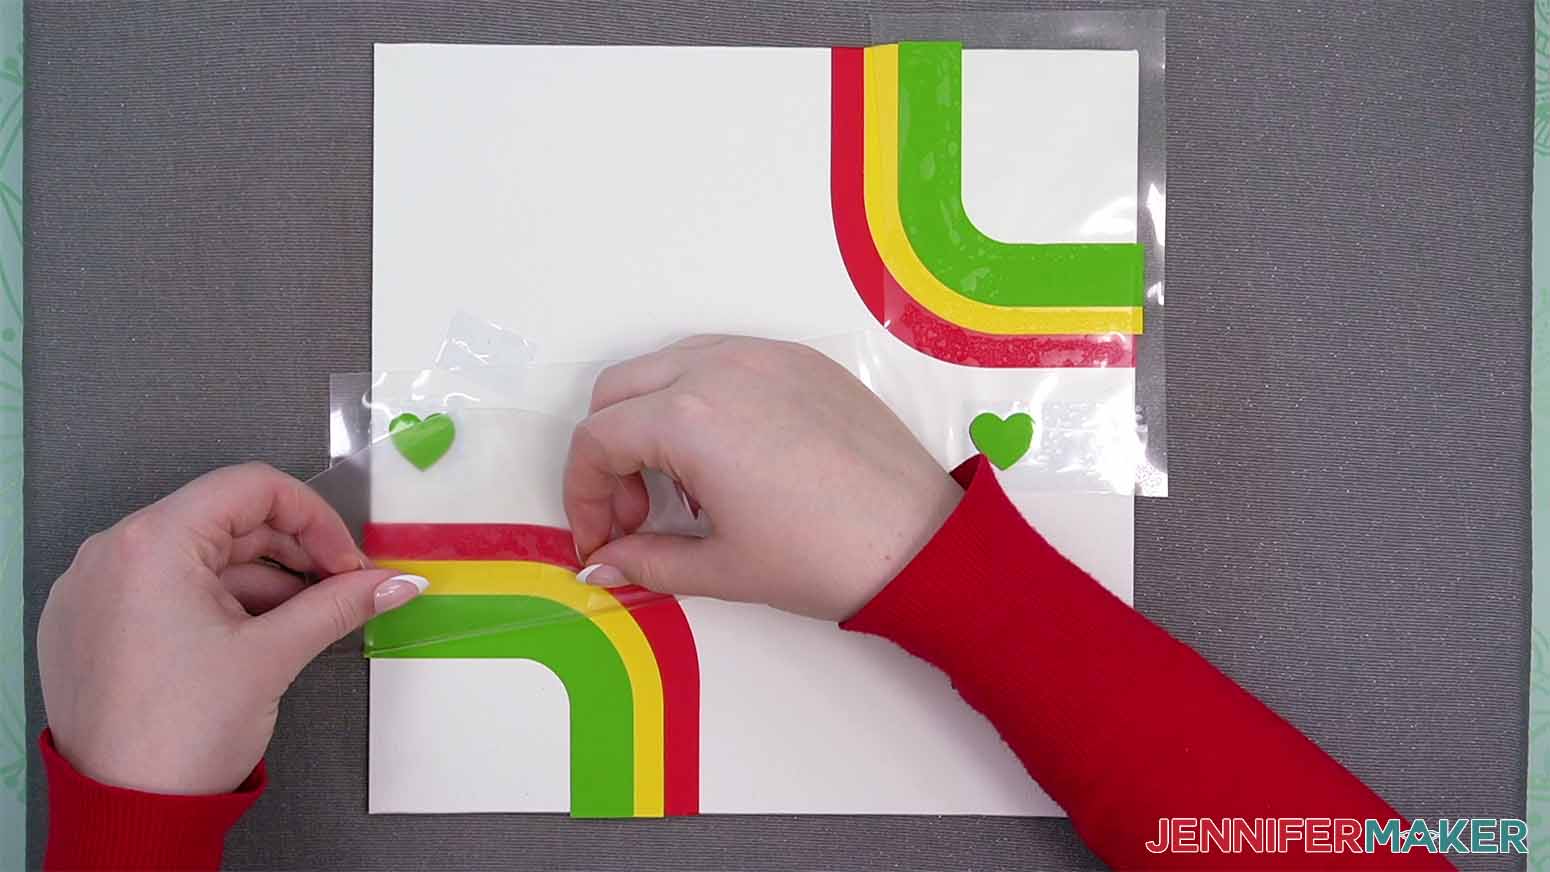
12. Use the registration marks and design edges to position the yellow design vinyl side down on top of the red layer.
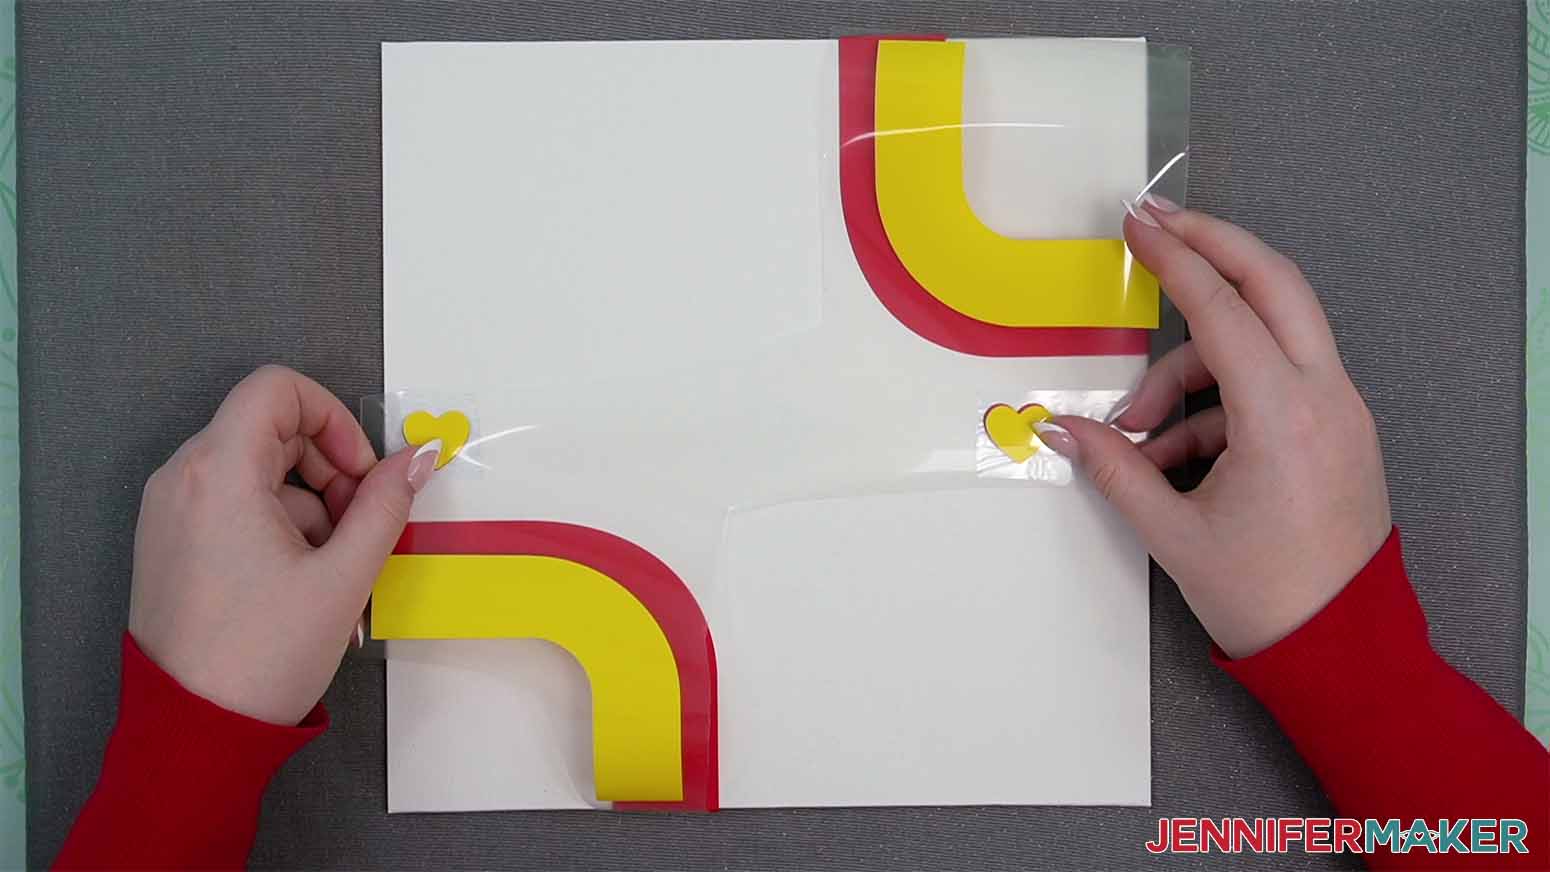
13. Prepare the layer the same way. If any of the yellow layer’s carrier sheet doesn’t cover the red vinyl, make sure your cover sheet protects it. Don’t let your heat press touch uncovered vinyl.
14. Heat Layer 2 the same way as Layer 1.
15. Remove the cover sheet and let the vinyl cool a bit, then hold the tape with the registration heart in place and peel up the carrier sheet.
16. Repeat the process to add the green layer.

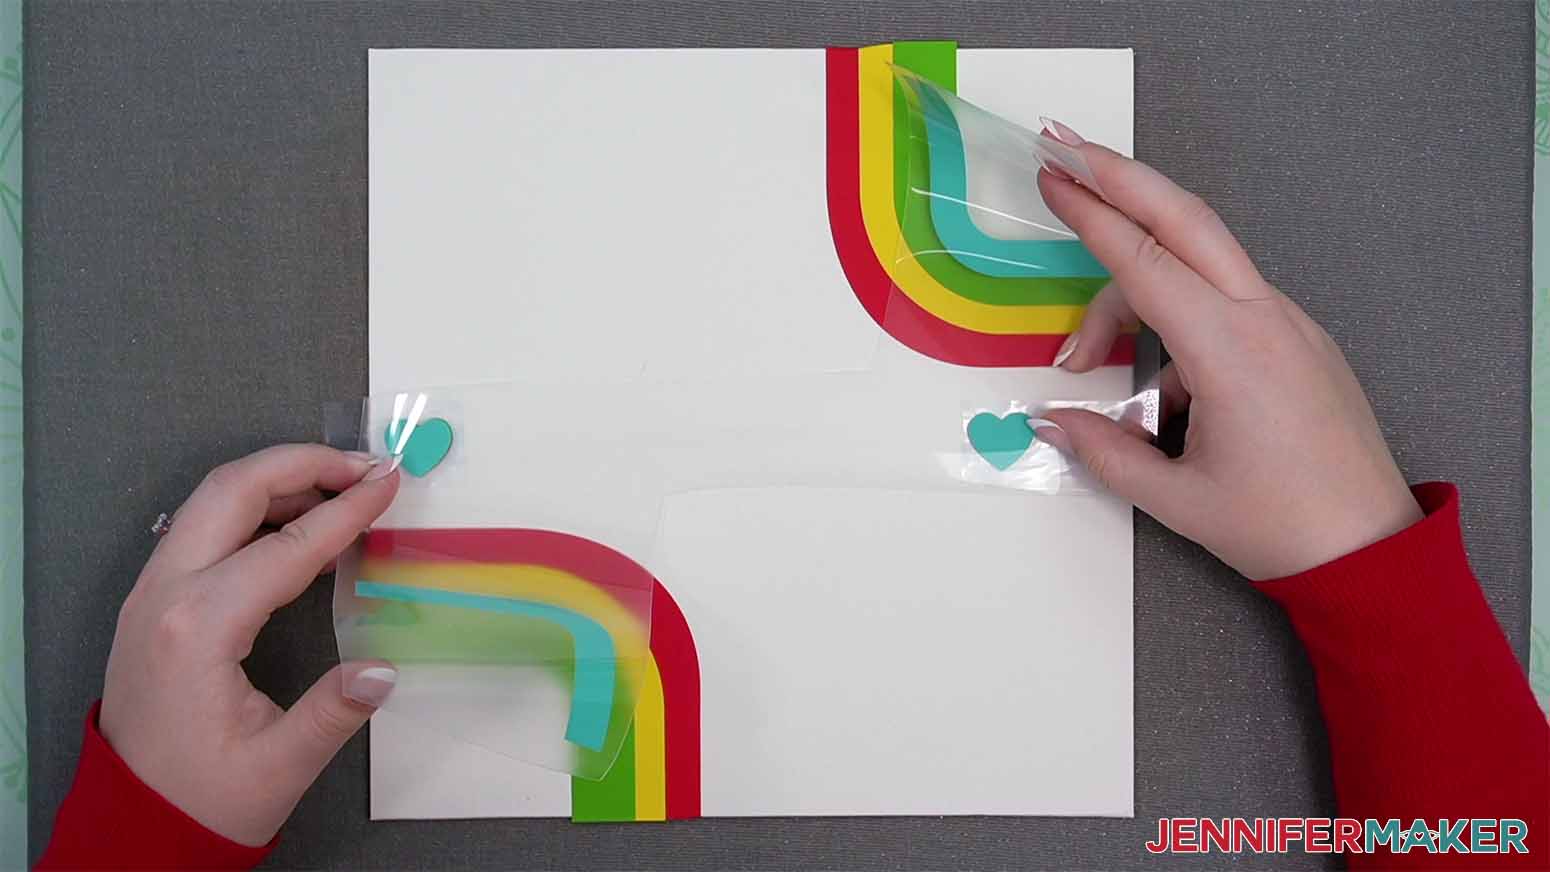
17. Repeat the process to add the teal layer.

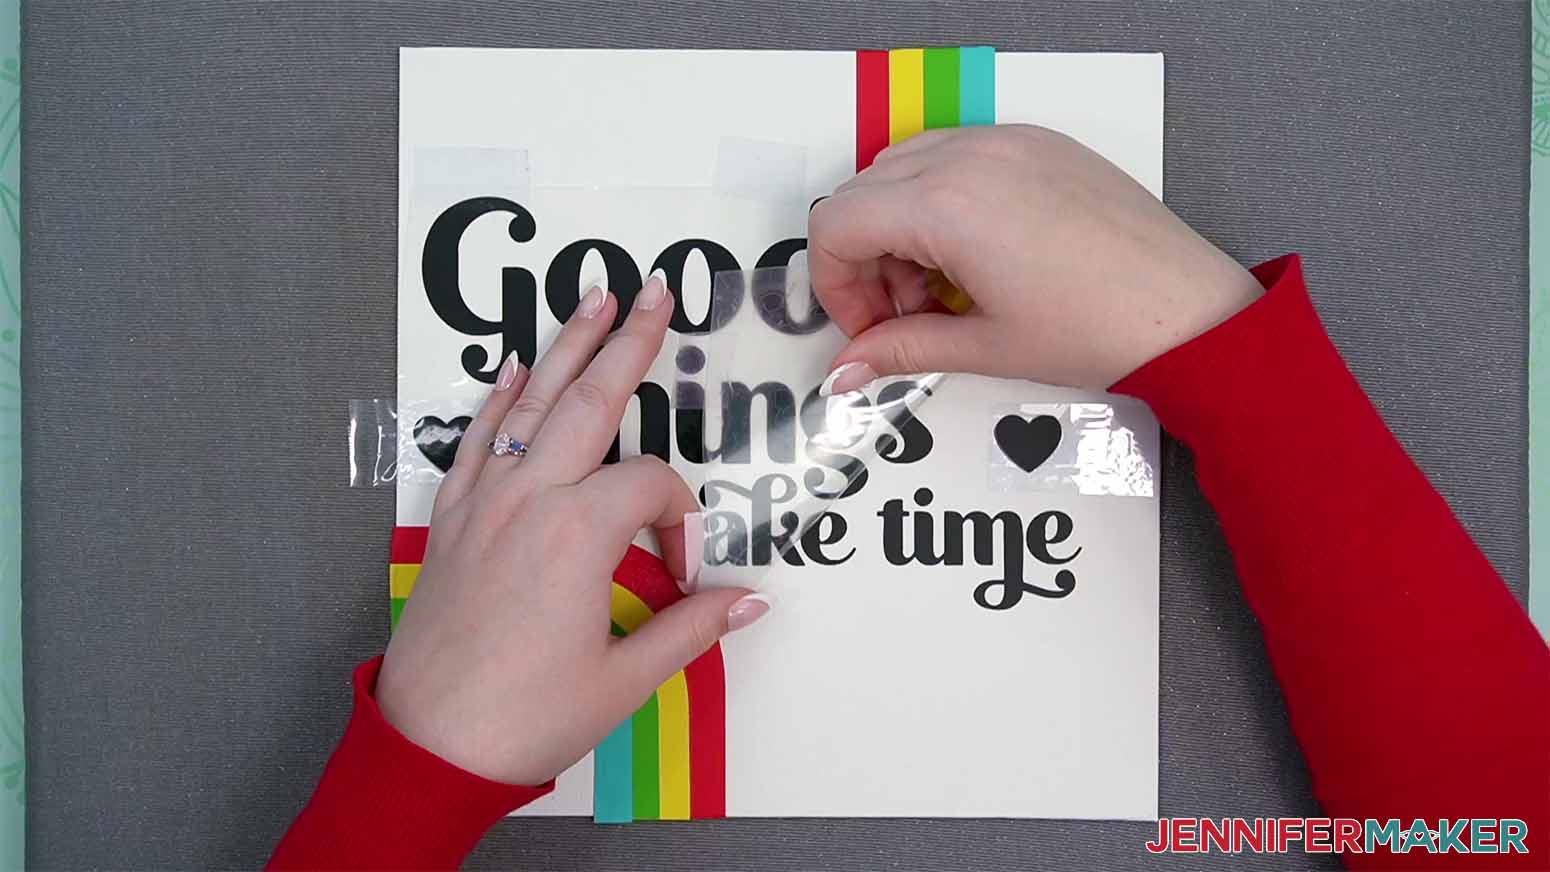
18. Prepare the black layer with lettering the same way.

19. Press the final layer:
For HTVRont vinyl, keep it at 340°F (171 °C) and set the timer for 20 seconds.
For Cricut EveryDay Iron-On Vinyl, increase it to 315°F (157 °C) and set the timer for 20 seconds.
20. Remove the cover sheet and let the vinyl cool a bit.
21. Peel off the carrier sheet, then the extra tape to remove the registration marks
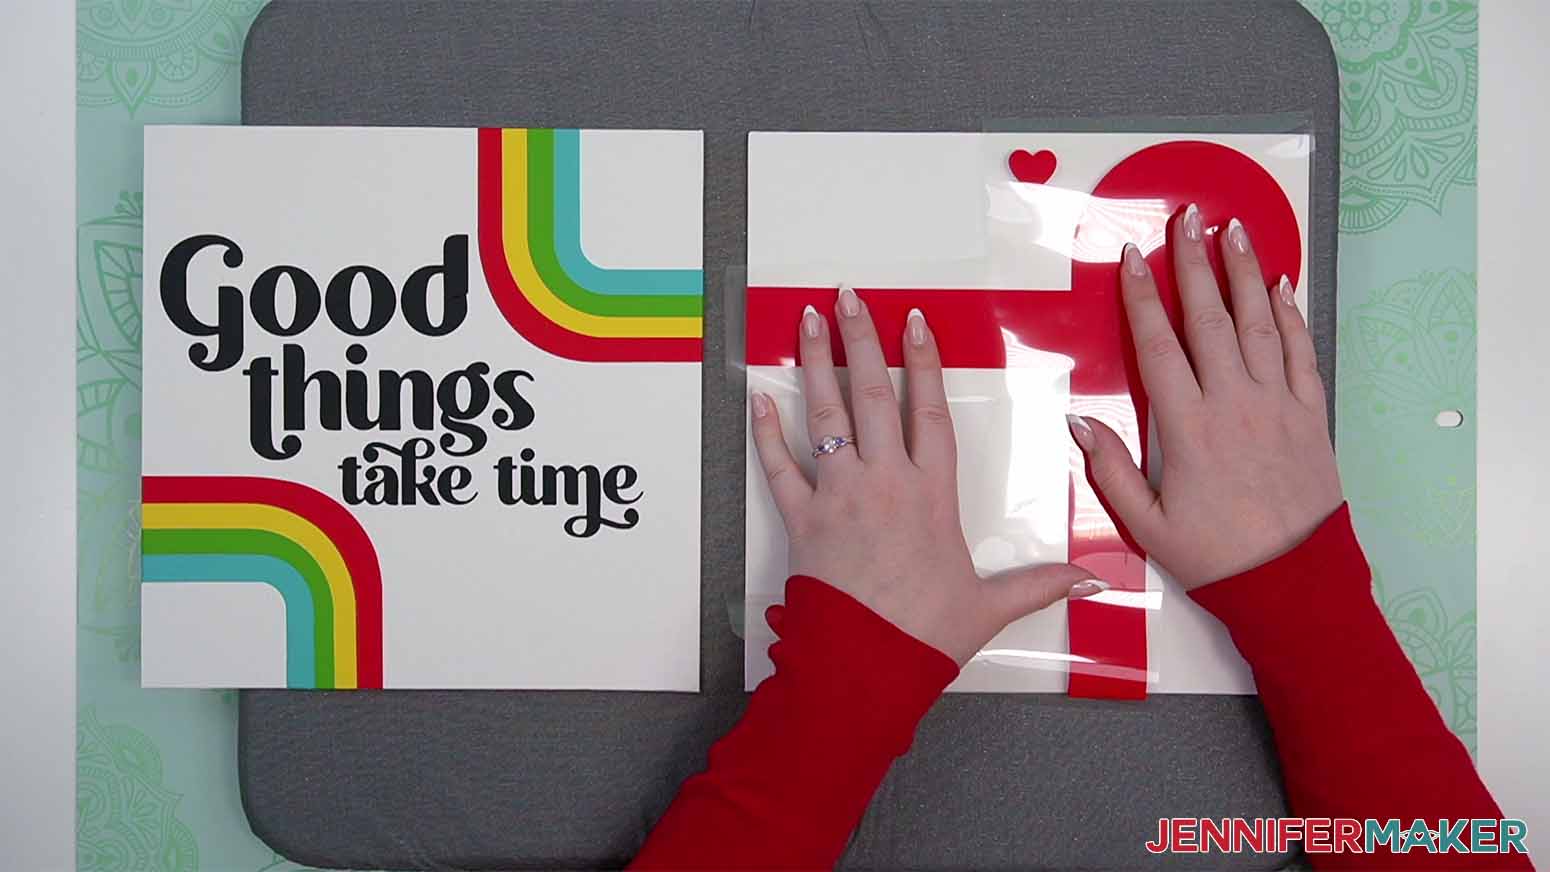
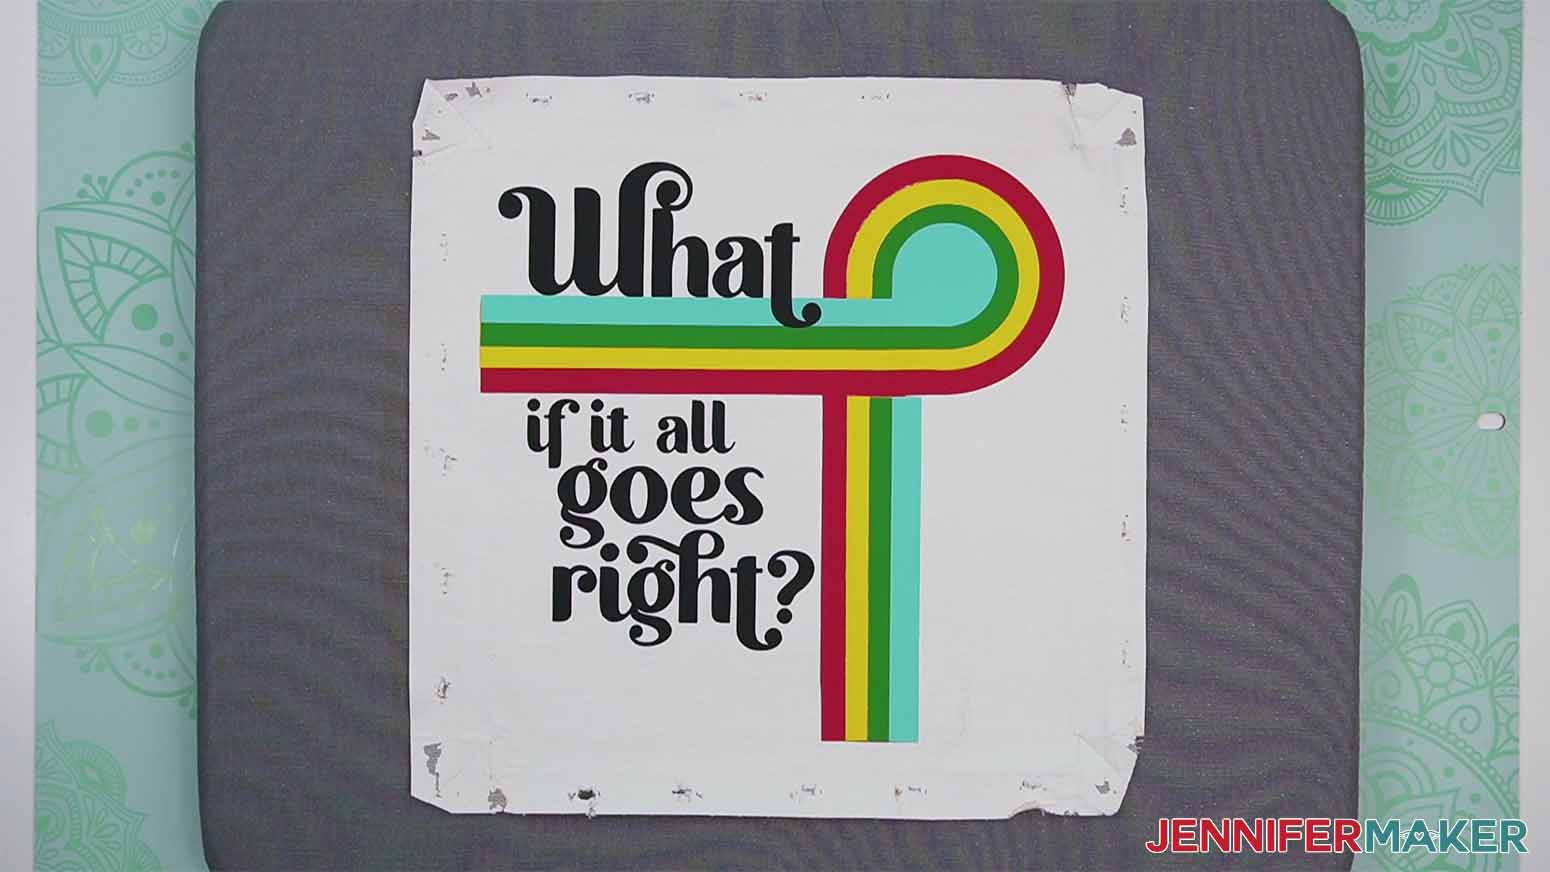
22. If you want to make the set, follow the same steps to prepare, cut, and weed the layers for your next canvas using the second design, which says “What if it all goes right.”
23. When you’re positioning the red layer, place the board next to the one you just finished to make sure the vinyl will look like it’s flowing from one to the other.
PROJECT 2: LAYERED VINYL DESIGNS ON STRETCHED CANVAS
NOTE: The stretched canvases take longer to prepare and aligning all four designs to make the contiguous look is difficult, so I recommend sticking to one panel for this project.
BEFORE YOU BEGIN
1. Measure your stretched canvas’s height and width in case the dimensions are different than those listed. You don’t need to worry about the depth.
2. Take a long piece of heat resistant tape and place it on an edge of the canvas to mark the canvas’ front edge.

3. Tape the other edges the same way. The tape creates a border we’ll use to align the vinyl later.
4. Place the canvas face down on your pressing mat.
5. Lightly trace the inside of the frame onto the backside of the canvas with a pencil.
6. Add a light "T" at the center of the top frame piece and the canvas right below it. Then add arrows the same way on the right and left sides in the middle.
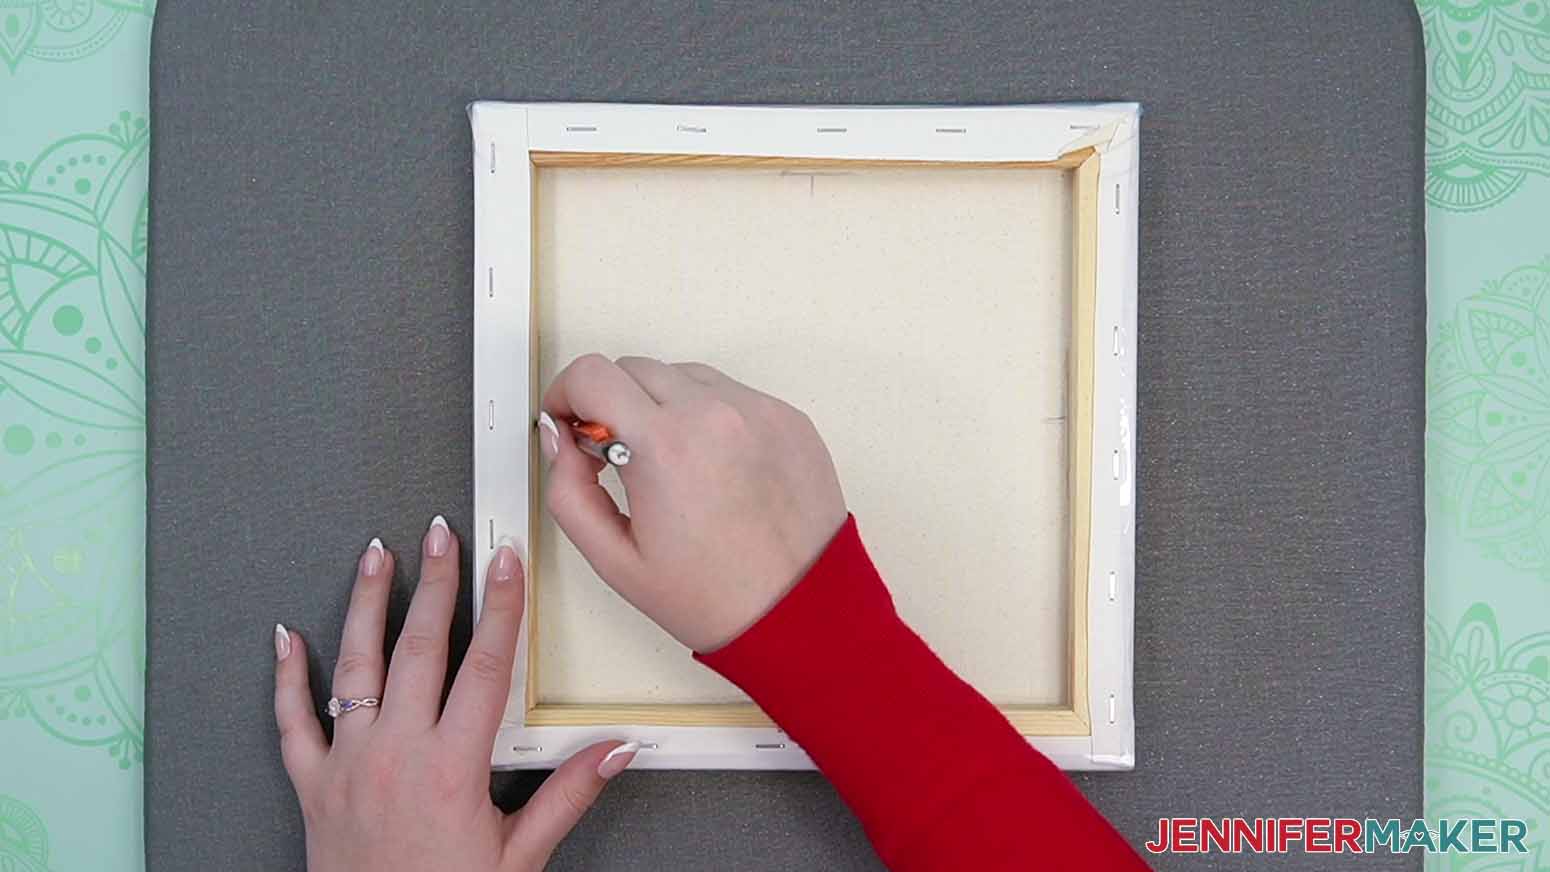
NOTE: These symbols will help with alignment when replacing the canvas.
7. With the screwdriver facing away from you, pry the staples up from the back of the canvas. Some might come right off, or you might have to use pliers on stubborn staples.
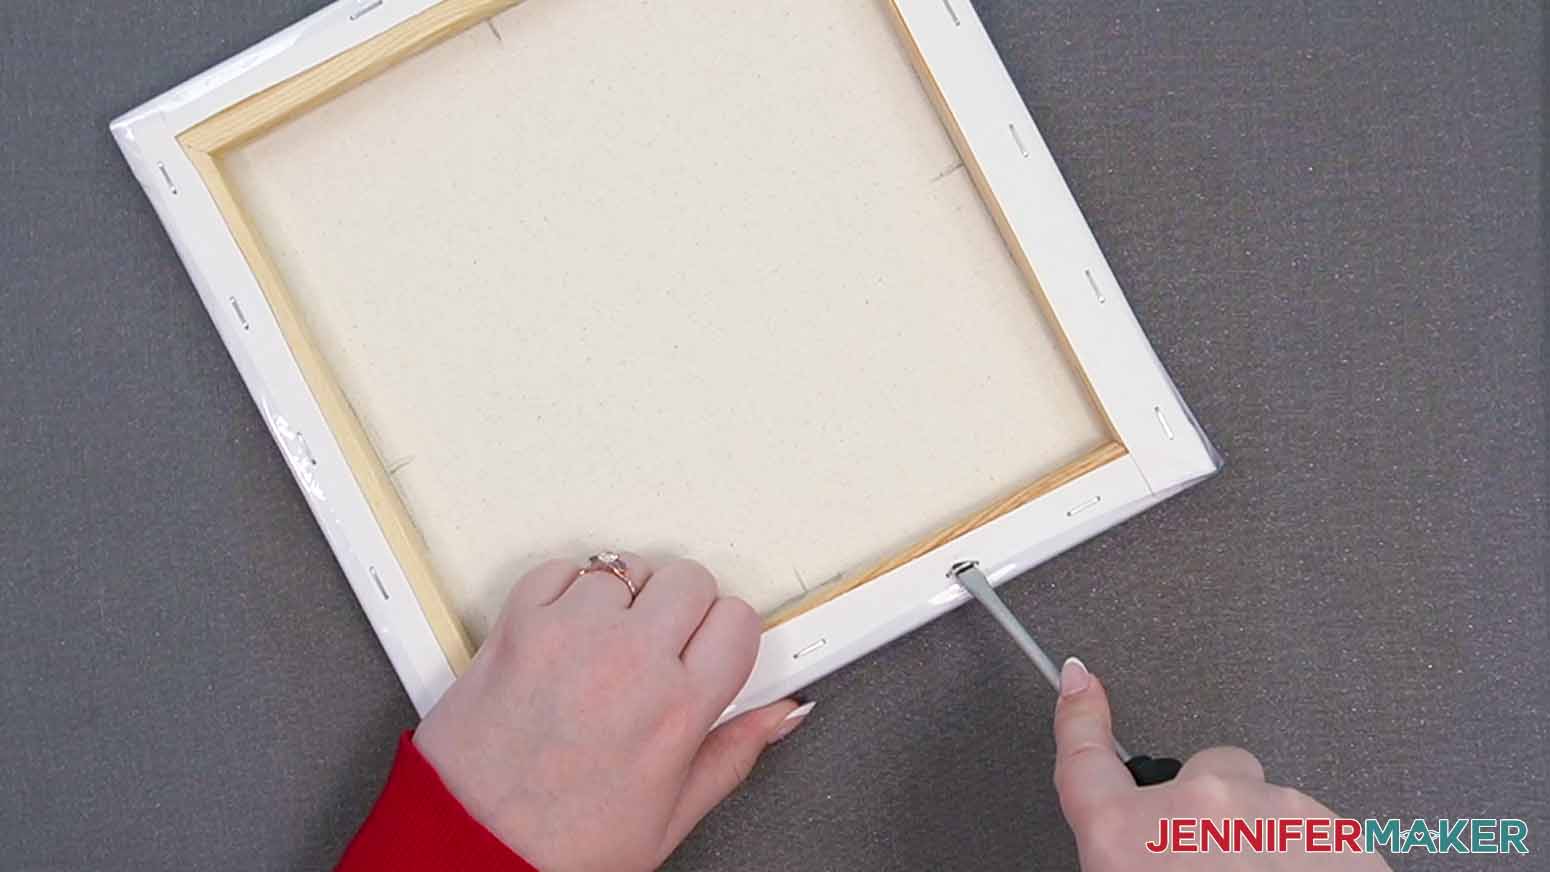
8. Set the frame aside.
STEP 2: PREPARE AND CUT YOUR DESIGN
CRICUT DESIGN SPACE
1. Open Cricut Design Space and click “New Project.”
2. Click “Upload” and then “Upload Image.”
3. Click “Browse.”
4. Select the SVG you want to use.
5. On the Prepare to Upload screen, it will say “Cut image” with the design preview. Click “Upload.”
6. Find your design in Recent Uploads and add it to the Canvas.
NOTE: The hearts are registration marks, so we’ll cut them and learn how to keep them from transferring.
7. If your canvas is a different size, keep the Size lock icon closed and adjust the dimensions, but remember that the designs are intended for square blanks. You can go down to 8” x 8”, but I don’t recommend going smaller.
8. Your layers are now ready to cut! Make sure the correct machine is selected in the top right.
9. Click “Make.”
10. If prompted, click "On Mat," choose your mat size, and click “Confirm.”
11 On the Prepare Screen, turn on “Mirror” for all the mats.
12. Select the first mat, then click “Continue.”
CUTTING
1. On the Make Screen, select the “Everyday Iron-on” setting.
2. Change the Pressure to “More” for a cleaner cut.
3 Check the “Remember Materials Settings” box to save time if you’re using the same vinyl for everything like me.
4. Cut your first color of vinyl to be just a bit bigger than the design area needed.
5. Place the first color of vinyl shiny side down on a green StandardGrip Machine Mat.
TIP: If you can’t tell which side is the carrier sheet and which is the vinyl, use your weeding tool to scratch a corner and see which side tears. That’s the vinyl.
6. Use a brayer to secure the vinyl to the mat.
7. Check that your Fine-Point Blade is clean and in the clamp.
8. Press the flashing button to load the prepared mat into your Cricut.
9. Press the flashing button to begin cutting.
10. When it has finished cutting, unload the mat, flip it over onto your work surface, and roll it back to release the vinyl.

11. If there are uncut vinyl sections you can trim away without interfering with the design or registration marks, trim them away to store for small projects.
12. Put the design back on the mat, shiny side down.
13. Use your weeding tool to remove the excess vinyl around the design and inside any letters.
14. Remove the design from the mat and set it aside.
15 Repeat Steps 1-14 for the other mats using the correct colors.
STEP 3: PRESS VINYL ON YOUR STRETCHED CANVAS
1. Pre-heat your heat press:
For HTVRont vinyl, set it to 340°F (171 C) and the timer for 20 seconds.
For Cricut EveryDay Iron-On Vinyl, set it to 310°F (154 C) and the timer for 15 seconds.
If you have a MiniPress, it’s helpful for heating small sections as needed. Set it to medium.
2. Use a lint roller to clean the canvas.
3. Put the canvas face up on a pressing mat.
4. Once your press is at temperature, pre-heat the canvas for 5 seconds. This also smooths out any wrinkles on the design area.
5. Lightly place the bottom layer vinyl side down on the canvas. It should look like your Design Space Canvas.
TIP: The bottom layer often has the most vinyl, but refer back to your Canvas if you’re unsure.
6. Align the design’s flat edges with the tape on each edge of the canvas
7. You can remove the tape marking the sides.
TIP: Heat-resistant tape is reusable, so don’t throw it away right away!
8. If you don’t want the heart registration marks to transfer, put pieces of heat-resistant tape under them on the canvas so it continues off the edge. Make sure the tape is well-adhered to the canvas and no vinyl will go over the edges of the tape.

9. Place white cardstock or butcher paper as a cover sheet over the design to avoid overheating the vinyl or canvas.
10. When the press comes to temperature, heat the design with light to medium pressure for the time indicated.
TIP: If you can’t heat the entire design at once, try to heat it evenly in sections without much overlap.

11. When the time is up, remove the press and the cover sheet.
12. Let the vinyl cool so it’s not too hot to touch, then hold the tape with the registration heart in place and slowly peel up the carrier sheet. The heart should stay in place on the tape, don’t let it move!

NOTE: The vinyl isn’t completely bonded because we need to heat this layer several more times and don’t want to burn it. If vinyl comes up with the carrier, put the design back in place and heat it again before re-trying. This is where the MiniPress helps! Small wrinkles or unattached vinyl will likely work out while the other layers are added.
13. Use the registration marks and design edges to position the yellow design vinyl side down on top of the red layer.
14. Prepare the layer the same way. If any of the yellow layer’s carrier sheet doesn’t cover the red vinyl, make sure your cover sheet protects the vinyl. Don’t let your heat press touch uncovered vinyl.
15. Heat Layer 2 the same way as Layer 1.
16. Remove the cover sheet and let the vinyl cool a bit, then hold the tape with the registration heart in place and peel up the carrier sheet.
17. Repeat the process to add the green layer.
18. Repeat the process to add the teal layer.
19. Prepare the black layer with lettering the same way.
20. Press the final layer:
For HTVRont vinyl, keep it at 340°F (171 °C) and set the timer for 20 seconds.
For Cricut EveryDay Iron-On Vinyl, increase it to 315°F (157 °C) and set the timer for 20 seconds.
21. Remove the cover sheet and let the vinyl cool a bit.
22. Peel off the carrier sheet, then the extra tape to remove the registration marks
STEP 4: REASSEMBLE THE STRETCHED CANVAS
1. Place the canvas face down on your pressing mat with the T at the top.
2. Line up the inside of the frame with the lines you drew earlier and the symbols.

3. Fold over the top side of the canvas, smoothing any wrinkles.
4. Use a staple gun to staple the canvas to the frame’s center on that side.

5. Pull the canvas tight to the back of the frame’s bottom and staple it directly across from the first one.

6. Continue to staple the remaining sides by pulling the canvas tight, stapling one side and then repeating the same steps on the opposite side.
7. Add two more staples on each frame piece, one on each side of the first staple.
htv-on-canvas-stretched-side-staples
8. The corners might stick out, but the fold lines should still be visible, so fold them in along the creases.
9. Staple the corner and continue on to the other three.
STEP 5: SHOW THEM OFF
Here is what both of my finished canvases look like:
Answers to Your Questions About Layering HTV On Canvas
Q: Can you do HTV on canvas?
A: Yes! HTV on canvas is a fun project to learn more about layering.
Q: What temperature do you heat vinyl on canvas?
A: Different brands and types of iron-on vinyl require different combinations of heat, pressure, and time. Always check the manufacturer’s instructions.
Q: Is it better to use HTV or permanent vinyl on canvas?
A: HTV bonds to the texture on the canvas, so I prefer it to using adhesive vinyl.
Q: Why won’t the HTV stick to my canvas?
A: It’s possible that your HTV needs to be heated longer. Try replacing the carrier sheet and pressing it again.
Q: How do you seal HTV on canvas?
A: You do not need to seal HTV on canvas.
Q: Do you have to paint canvas before applying HTV vinyl?
A: No, you don’t need to paint or prime the canvas before applying the iron-on vinyl.
Q. Do I have to use a Cricut?
A: No! My capable design staff and I always include several versions of each digital item. If you have a Silhouette Cameo, which uses Silhouette Studio, you can use the DXF cut files in Silhouette Basic Edition. If you have upgraded to Silhouette Designer Edition, Designer Edition Plus, or Business, you can use the SVG cut files. If you don’t have a cutting machine, you can print and then cut out my digital download PDF files, too and then use scissors or a craft knife to cut out your pieces. The ZIP file in my resource library includes these file types and more!
Q. Are your free SVGs just for personal use or also commercial use?
A: Yes, you can sell completed projects using these designs, we only ask that you give credit to JenniferMaker.com and do not sell the digital files. If you use them, please share photos with us! We love supporting small businesses!
Get my free SVG file to create a wall art with HTV on canvas!
I love seeing what you make with my designs and how you use them! Please share a photo of your HTV on canvas project in our Facebook group or tag me on social media with #jennifermaker.
Love,

Want to remember this? Save this Tutorial on How To Layer HTV on Canvas to your favorite Pinterest Board!