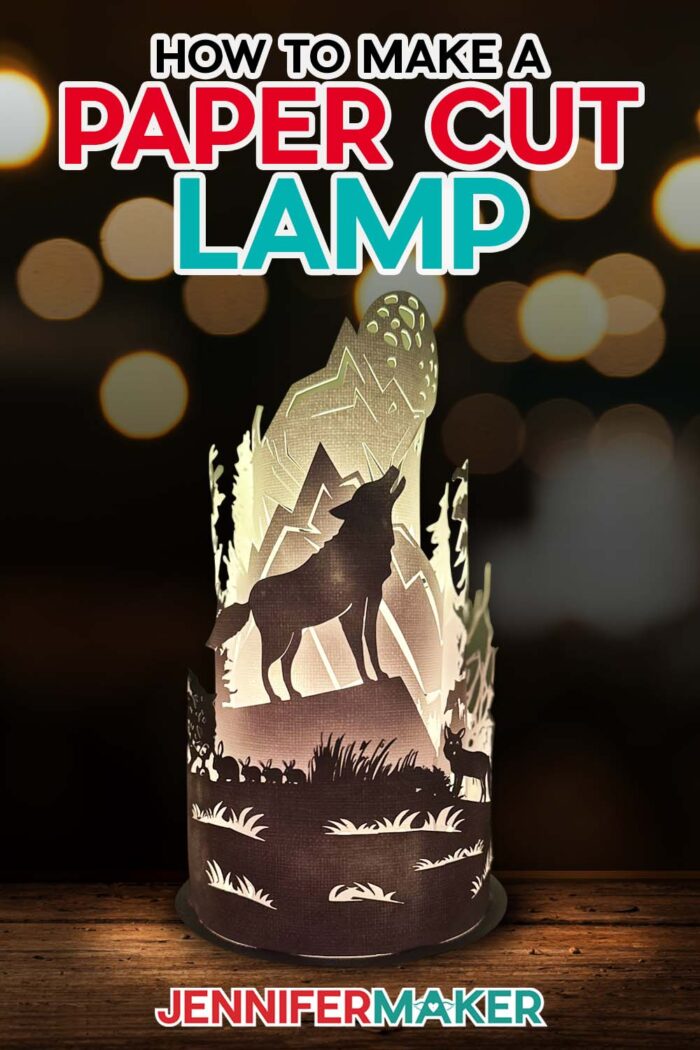
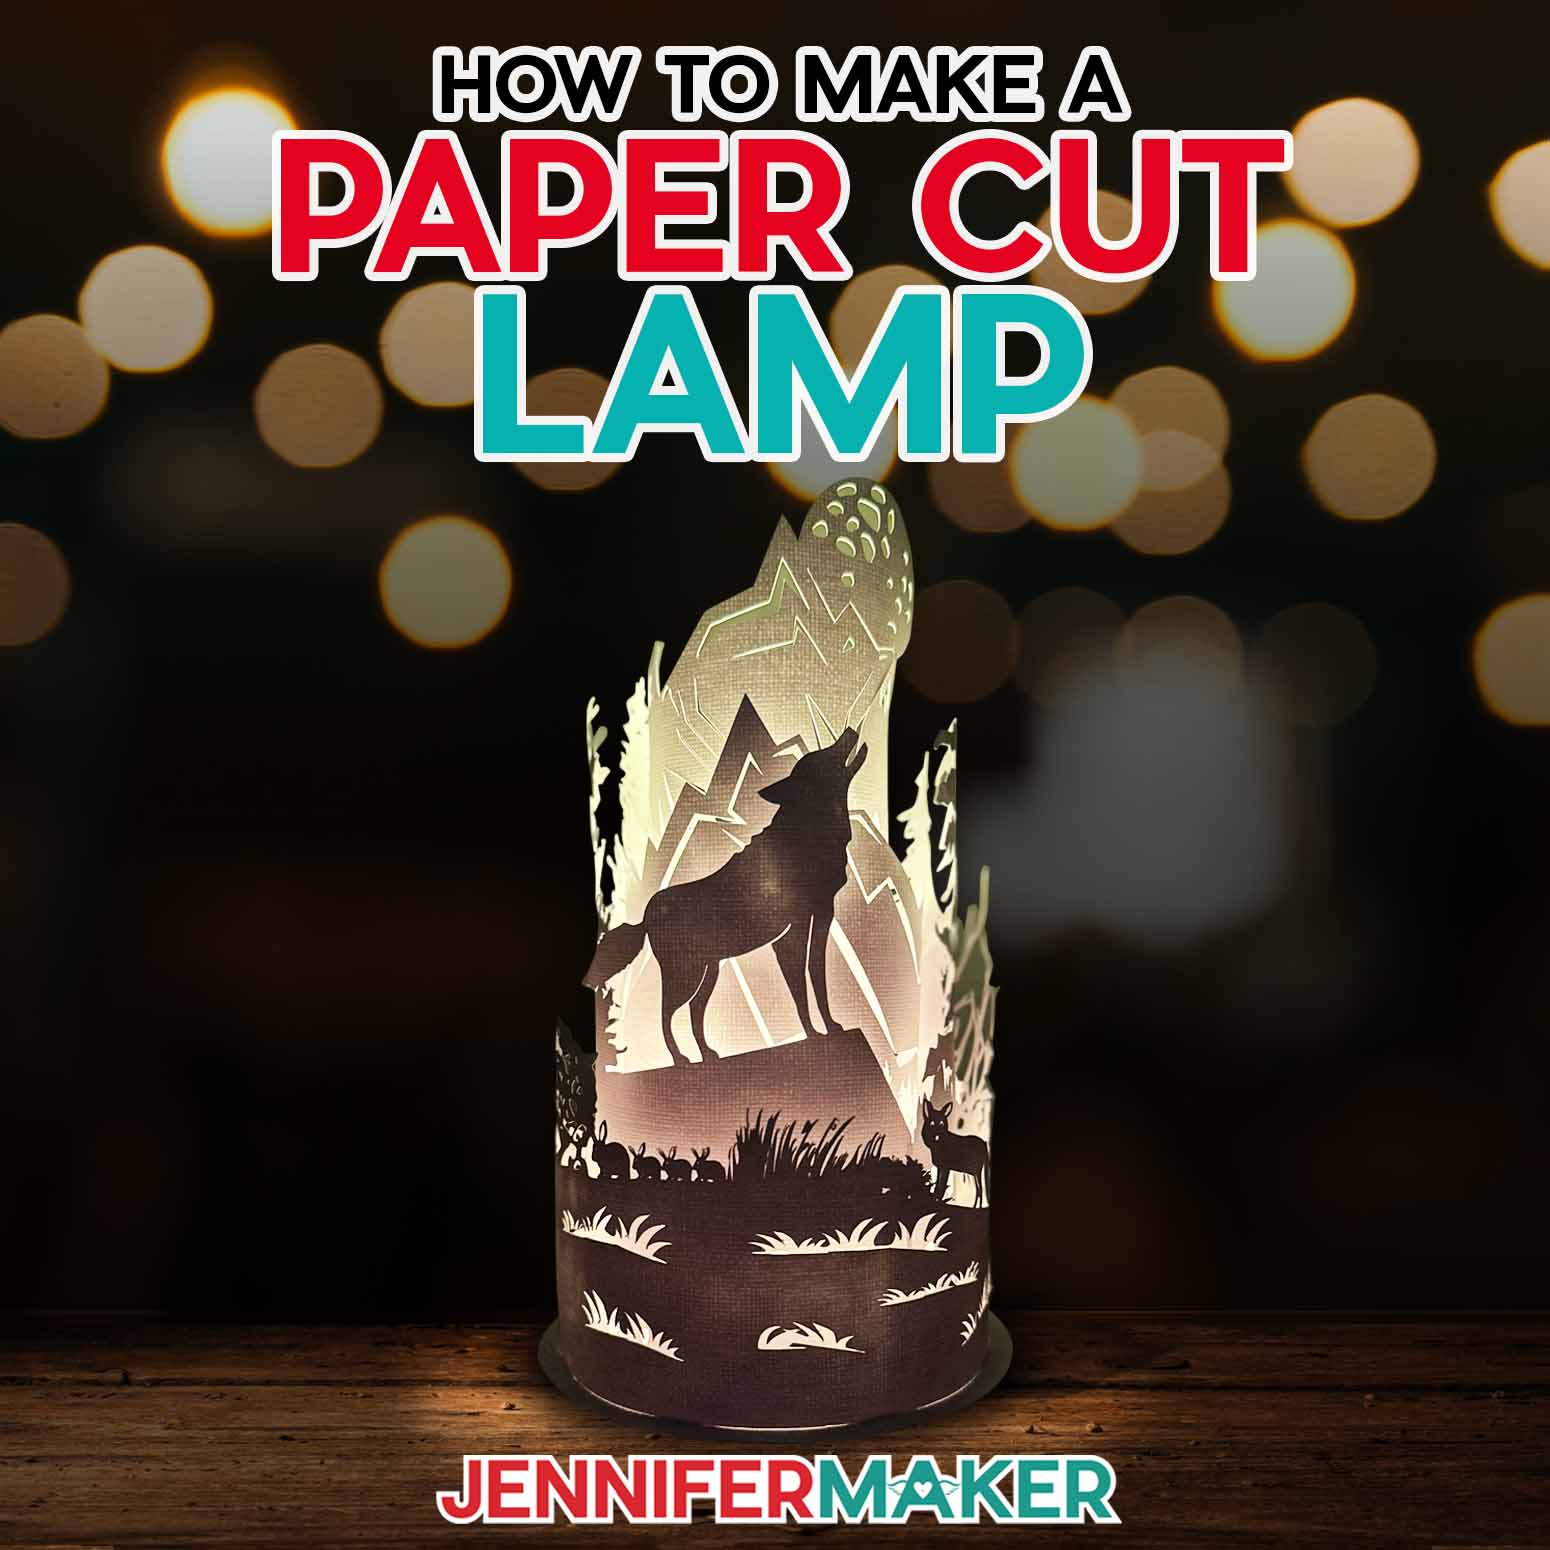
Make a wilderness-themed paper cut lamp to light up your decor!
A paper cut lamp is like a layered shadow box, but even more 3D! And since it’s a lamp, you don’t need more wall space! I’ll share some tips on creating the lamp’s column shape and free tools to keep the lights contained. This wildlife scene with trees, mountains, and a wolf right as the focal point works with many styles and would make a great gift for the nature-lover in your life.
Want to save this project? Enter your email below and we’ll send the project straight to your inbox.
Watch my complete step-by-step tutorial on making a paper cut lamp:

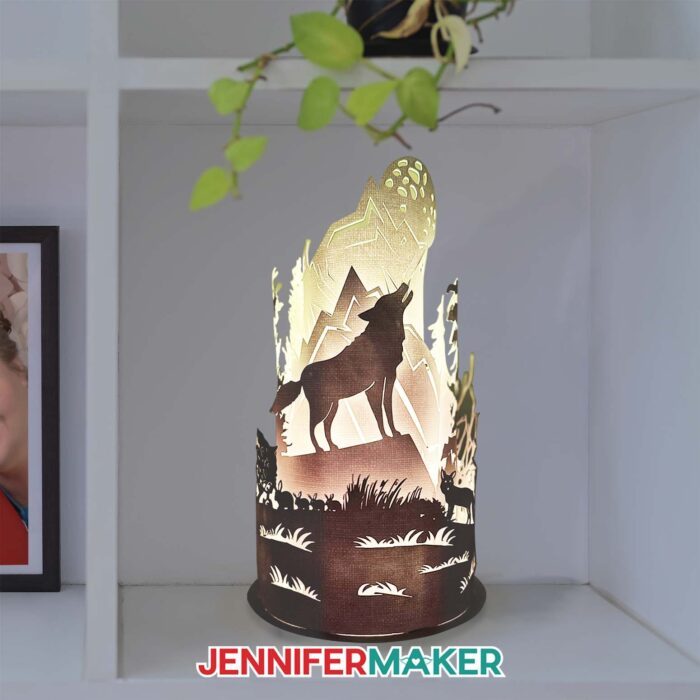
Shadow boxes are very popular but these circular paper cut lamp projects are a fun twist! I love the extra interest and depth created by shaping the layers of paper into nesting columns. Bringing a design out of the shadow box frame opens up many new possibilities.
The project has intricate cuts, needs to hold its shape, and doesn’t have a glass panel to protect it like a flat shadow box project. So, it’s important to use high-quality cardstock. I chose 80 lb paper with a bit of texture and used white for everything. You can certainly experiment with different colors for your desired effect!
This wildlife scene would make a beautiful night light, especially if you use lights with a remote. I used a short string of normal fairy lights, which you can place loose inside the paper cut lamp or in a jar. I’ll show you my favorite ways to keep the lights in place in the video. LED strip lights are a bit too powerful for this project, but you can try different kinds to see what you prefer.
Each cutting machine will handle the paper cut lamp design with slight variation, so I recommend making a test cut early on. I cut my layers with a Cricut Maker 3 using a blue LightGrip machine mat, but a green StandardGrip mat will also work. The fine-point blade handled the cuts well, but if you have trouble you can find tips in my tutorial on How to Get Cleaner Cuts. You can use any Maker or Explore machine, but the design is too large to cut on a Joy. Our usual papercrafting tools below will help prepare the delicate layers without ripping.
Assembling the paper cut lamp is pretty simple, but I have some tips on curving your layers for consistency. And since we’ve designed the layers to fit inside each other, you don’t need foam spacers like many paper cut light box projects. Normal clear tape and thin double-sided tape are all you need. No messing with sticky foam strips!
Ready to make paper cut lamp? I’m super excited to show you how! This post contains some affiliate links for your convenience (which means if you make a purchase after clicking a link I will earn a small commission but it won’t cost you a penny more)! Read my full disclosure policy.
Materials to Make a Paper Cut Lamp
View my Amazon shopping list with the exact items we used to make this project!
-
- Several sheets of 12″ x 12″ 80 lb white cardstock – I love this slightly textured paper
- A way to light up your lamp – I used 3.3′ Fairy Lights
- (Optional) A container for your lights, like a 4 oz mini mason jar or even a recycled spice jar about 2″ in diameter and 3.5″ tall!
-
- A method to cut your cardstock – I used the amazing Cricut Maker 3, but you can also use a Cricut Maker series, Cricut Explore series, or Venture with the Fine-Point Blade
- Cricut blue LightGrip mat, 12″ x 12″ – OR- Cricut green StandardGrip Mat, 12″ x 12″
- Brayer Tool
- Spatula
- Weeding Tool
- Scraper
- Tweezers
- Cricut Self Healing Cutting Mat
- Bearly Art Precision Craft Glue
- Scotch Magic Tape
- 1/4″ Double sided-tape
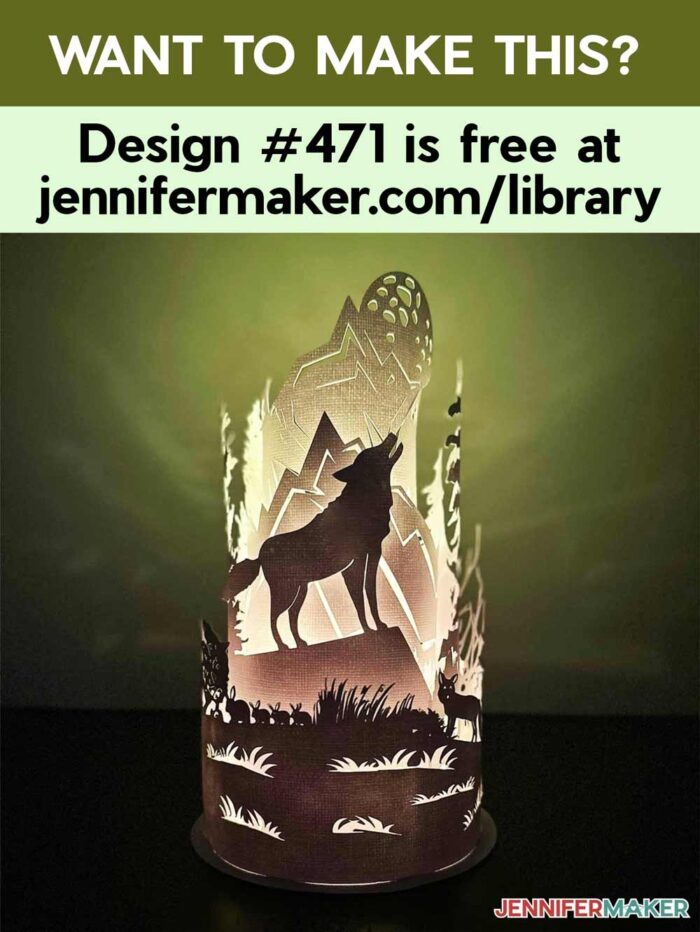
- Design #471 – My free SVG/PDF/DXF design files available in my free resource library – get the password by filling out the form at the bottom of this page
How to Make a Paper Cut Lamp
Paper Cut Lamp
Learn how to make your very own Paper Cut Lamp with incredible detail!
Materials
- White heavyweight cardstock - I love this slightly textured, white 12" x 12" cardstock from AC Cardstock - (80 lb)
- A way to light up your lamp. I love these Govee Fairy Lights
- (Optional) A container for your lights, such as a 4 oz mini mason jar or even a generic recycled spice jar!
- Design #471 (My free paper cut lamp design SVG/PDF/DXF available in my free resource library - get the password by filling out the form at the bottom of this page)
Tools
- A way to cut your cardstock, I used the amazing Cricut Maker 3 but you can also use the original Maker or an Explore series machine with the fine-point blade.
- Cricut blue LightGrip cutting mat - OR-
- Cricut green StandardGrip cutting mat
- Brayer
- Spatula
- Tweezers
- Weeding tools
- Scraper
- Scotch Magic Tape
- Double sided tape like this amazing 1/4" Ultra-Thin Permanent Double-Sided Tape from AJ Sign World
- Craft Glue - I used Bearly Art Precision Craft Glue
- Self healing mat (optional)
Instructions
STEP 1: GET MY FREE PAPER CUT LAMP FILES
First, download my free Paper Cut Lamp SVG/DXF/PDF design file from my free resource library. It's Design #470. Just go to the red bar at the top and look for Libraries, then either click Get a Password (if you don't yet have one) or click Enter the Library. You can find the pattern by searching the page for design 470 and then click it to download.
I’ll show you how to easily cut and assemble a paper cut lamp with intricate details!
TIP: If you're not sure how to upload an SVG cut file to Cricut design space, watch this helpful video training series I made. If you are on an iPad or iPhone, here is how to download and upload SVG files to the Cricut design space app.
STEP 2: PREPARE THE DESIGN FILES
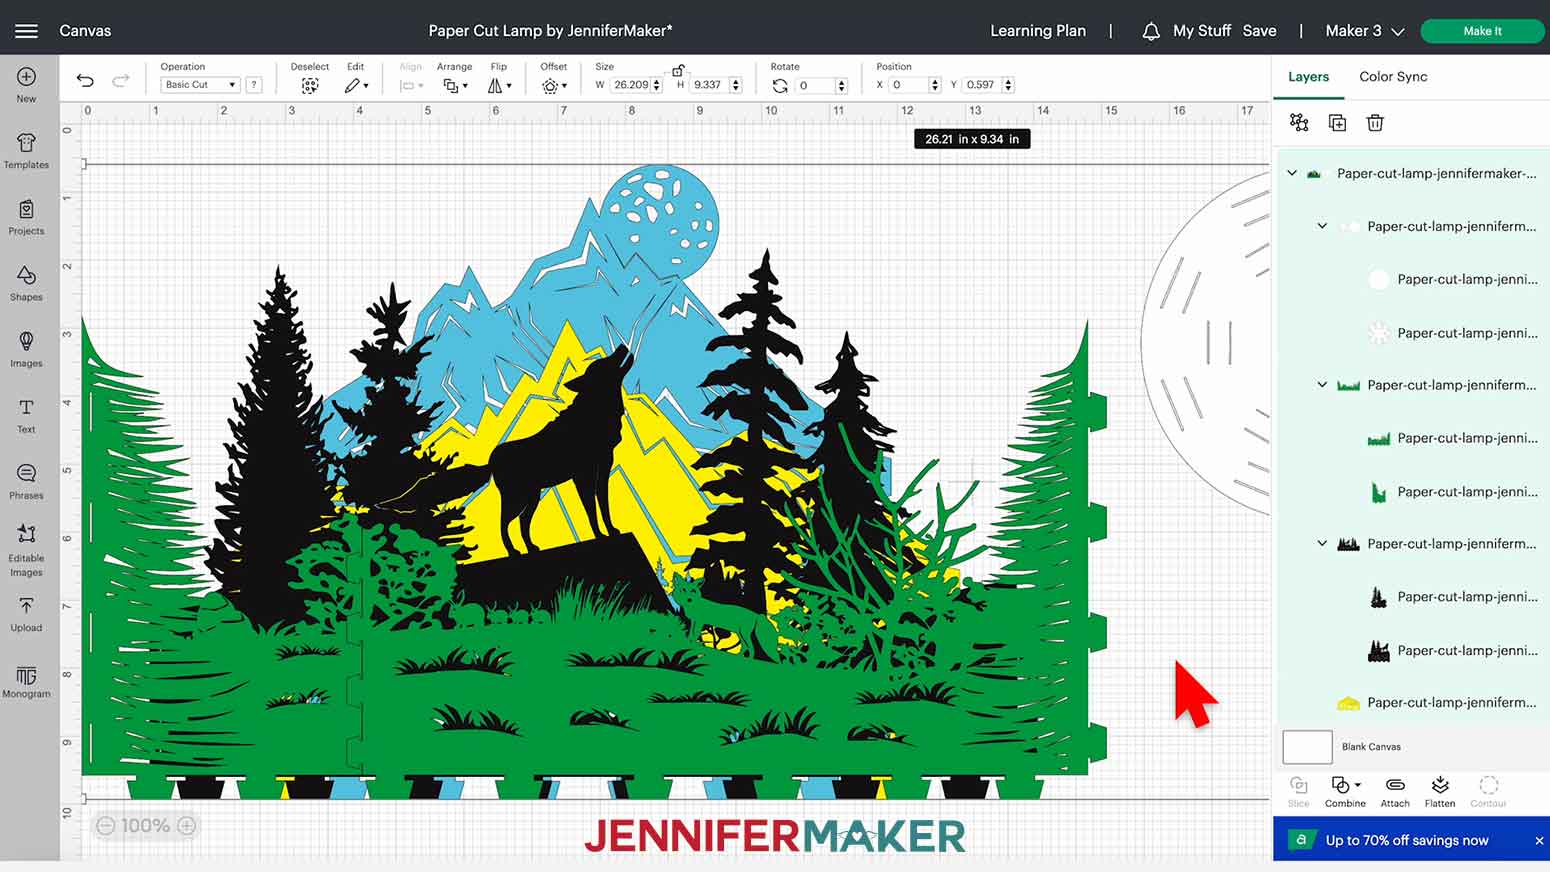
Upload the SVG file to Cricut Design Space and add it to your Canvas.
This is what my paper cut lamp file looks like in Design Space.
In the layers panel, click "ungroup"
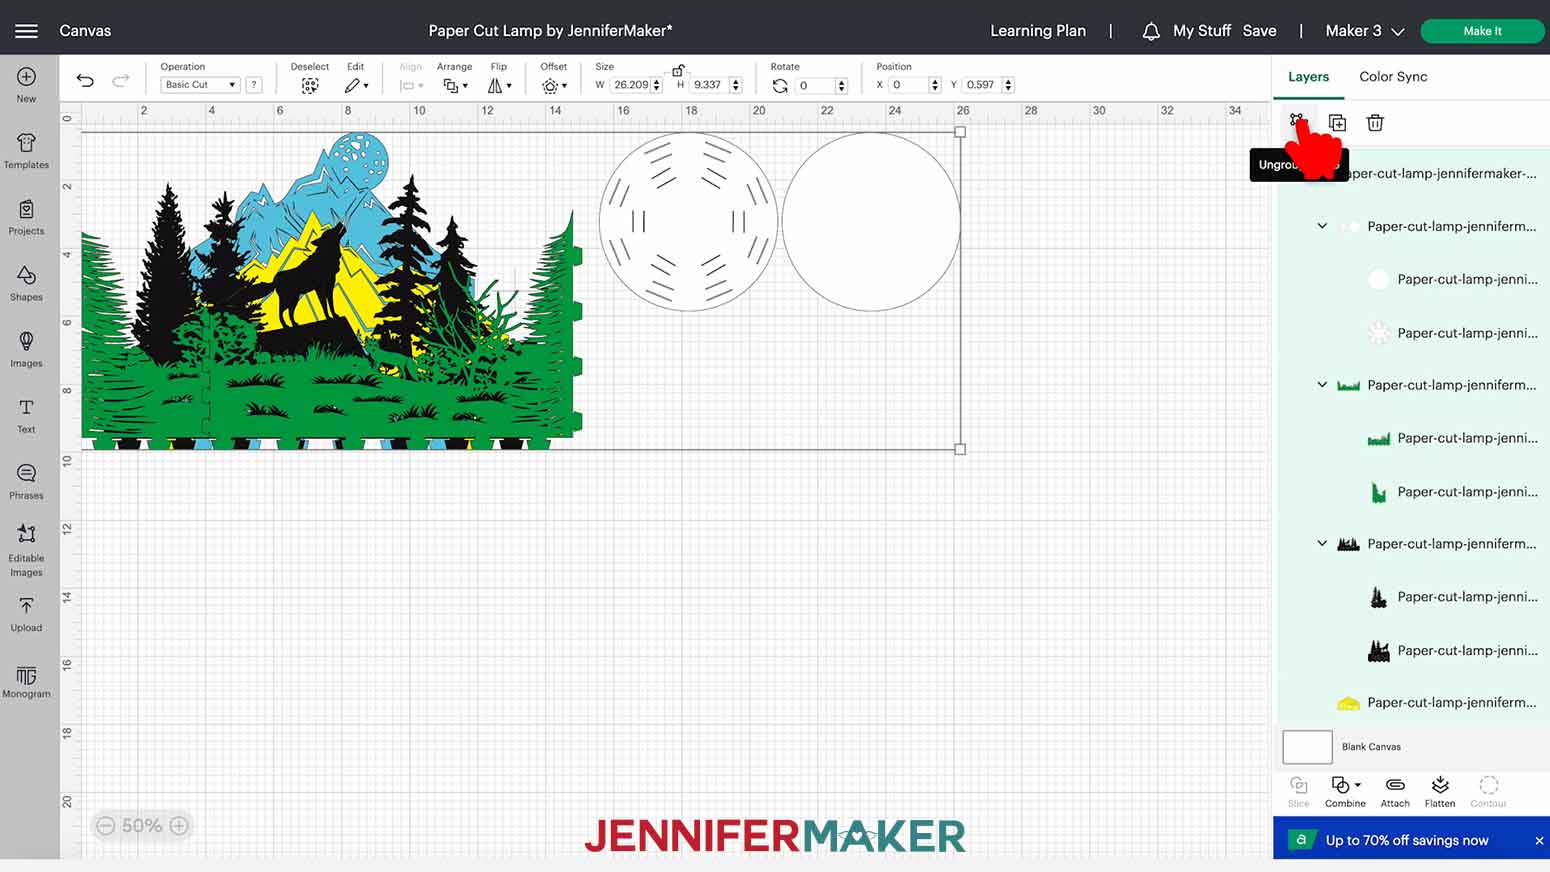
You will notice three of the layers contain grouped objects. I designed it this way so it would be easy to tell what pieces go together.
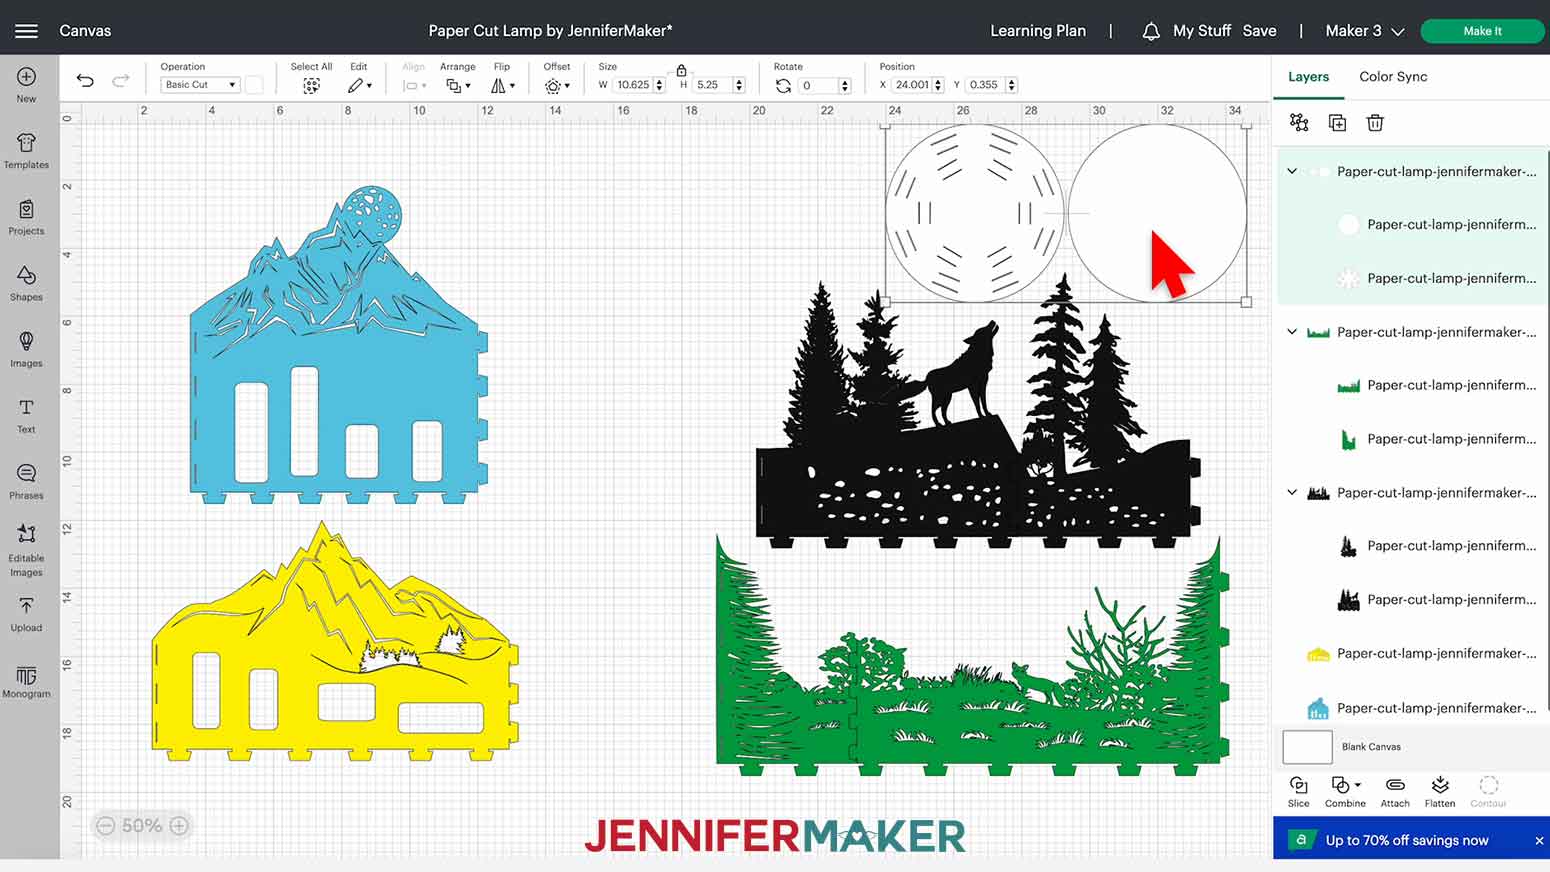
The paper cut lamp design will upload to the proper size and no further adjustments are needed. You can rearrange the layers on your canvas to see them individually if you’d like. Make sure the operation is set to Basic Cut, and that’s it for the Canvas! Now you’re ready to cut!

STEP 3: CUT THE LAMP LAYERS
Make sure the correct machine is selected. Click “Make It”.
If prompted, select "On Mat" and "12 in x 12 in" then click Continue.
On the "Prepare" screen, check all your mats look how they should. There should be a total of 7, 12 in x 12 in mats.
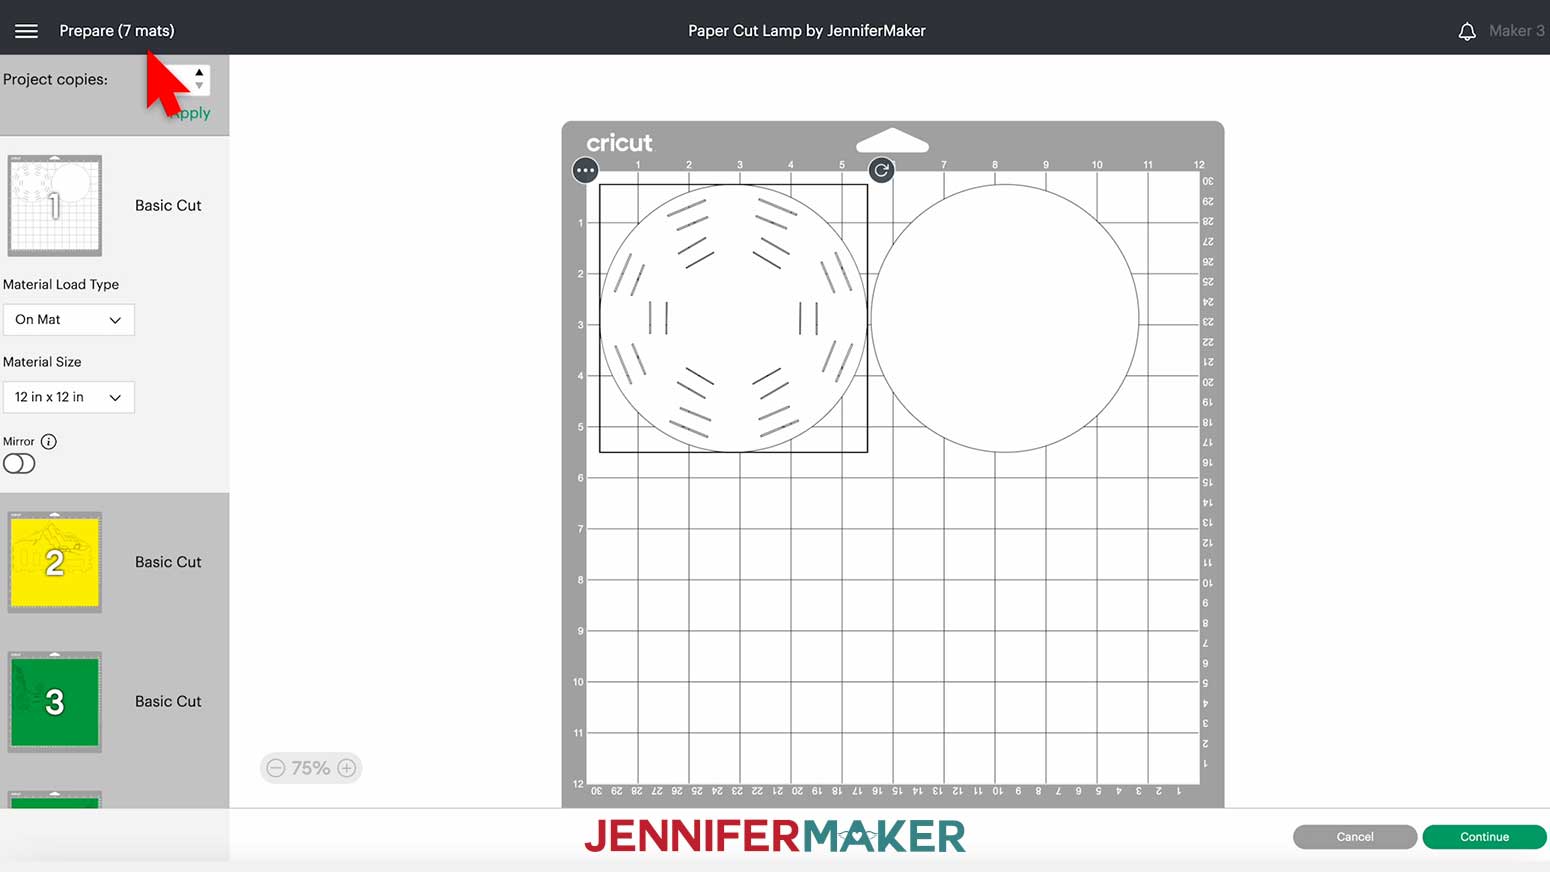
There is nothing else to change so click “Continue.”
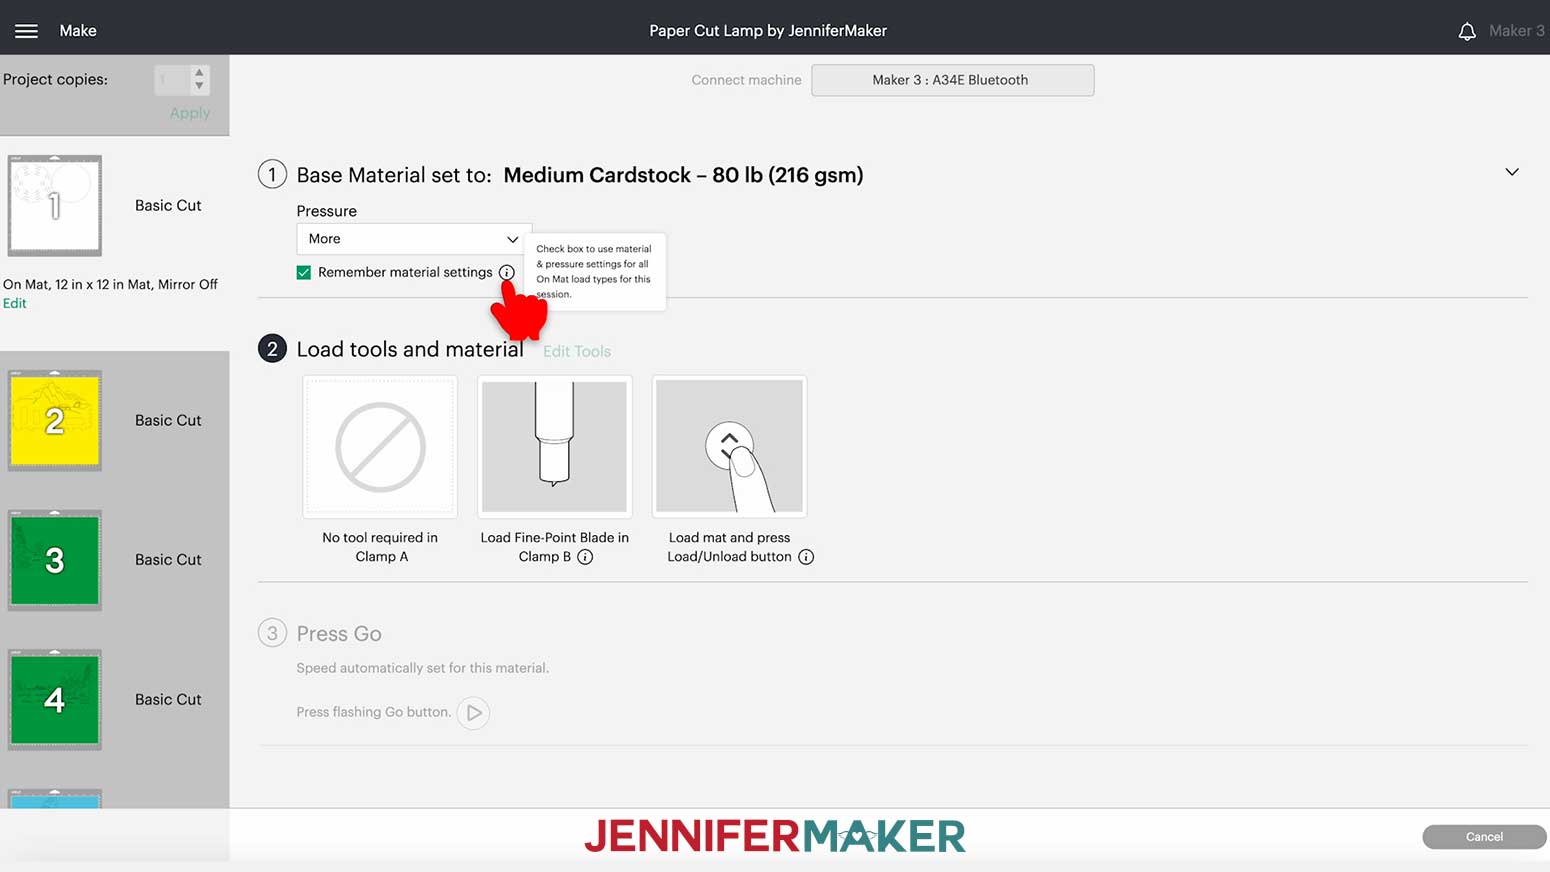
Click "Browse All Materials” to select our base material.
To find the appropriate cardstock setting, click "Browse All Materials" and type "cardstock" in the search bar. Then select the desired result, click "Apply," and adjust the Pressure as necessary. Here I am using 80 lb cardstock so I will select "Medium Cardstock" as my material and will change the Pressure set to "More" to get the cleanest cuts. I’ll also check the "Remember Material Settings" box since I’m using the same material for each mat.
Place your cardstock on a Blue LightGrip Machine Mat, 12" x 12", and use a brayer to make sure it's fully adhered. You can also use the Green StandardGrip machine mat. I found that the LightGrip worked just slightly better for cutting the intimate bits.

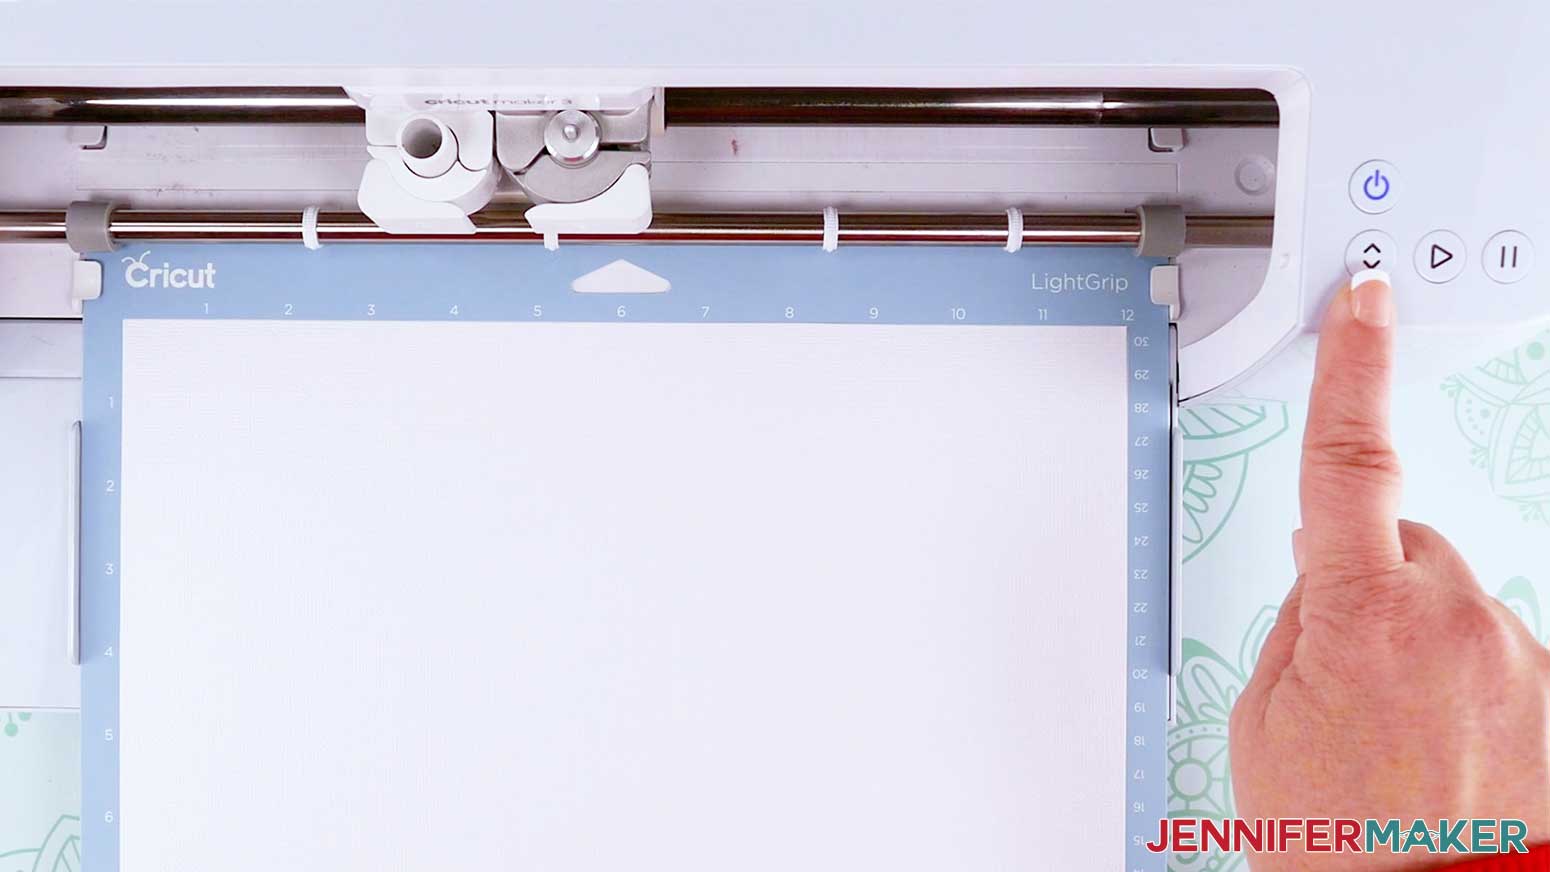
Ensure the fine point blade is loaded in Clamp B, then load the first mat into the machine and press the "Load/Unload" button. Then press the "Start" button.
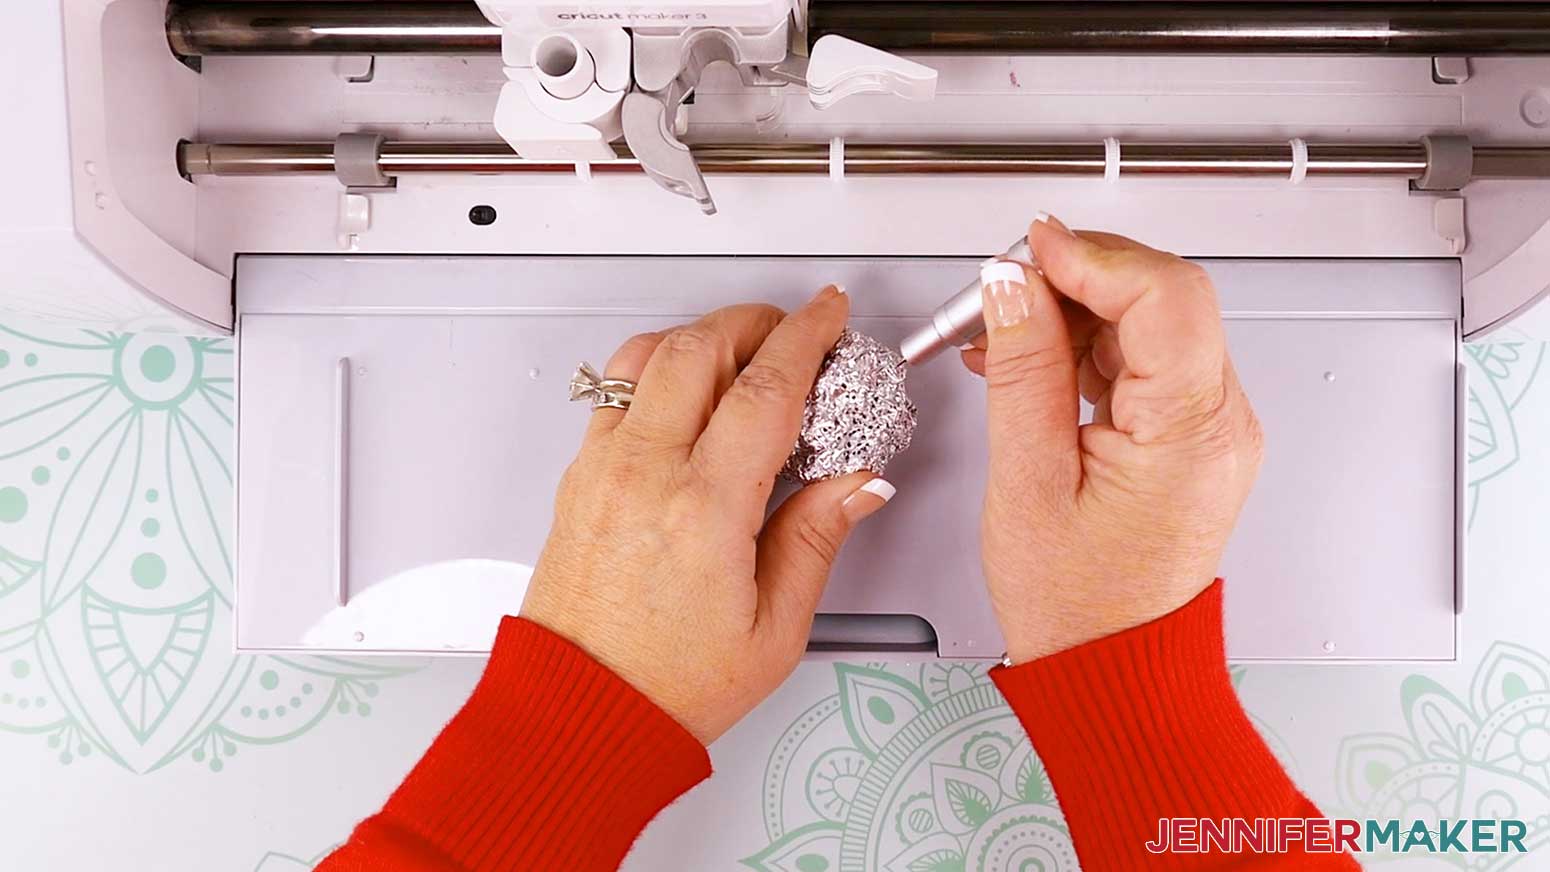
TIP: Clean your blade with a ball of foil every other cut for the cleanest results.
Repeat for all mats.
TIP: If you run into any issues cutting your cardstock, check out my Cricut Tips & Tricks for Cleaner Cuts.
Once you have all your layers cut, you will need to weed them.
STEP 4: WEED THE LAMP LAYERS
When the cut is finished, unload the mat, flip it over, and roll it back to release the cardstock. This helps prevent the material from curling and ripping. 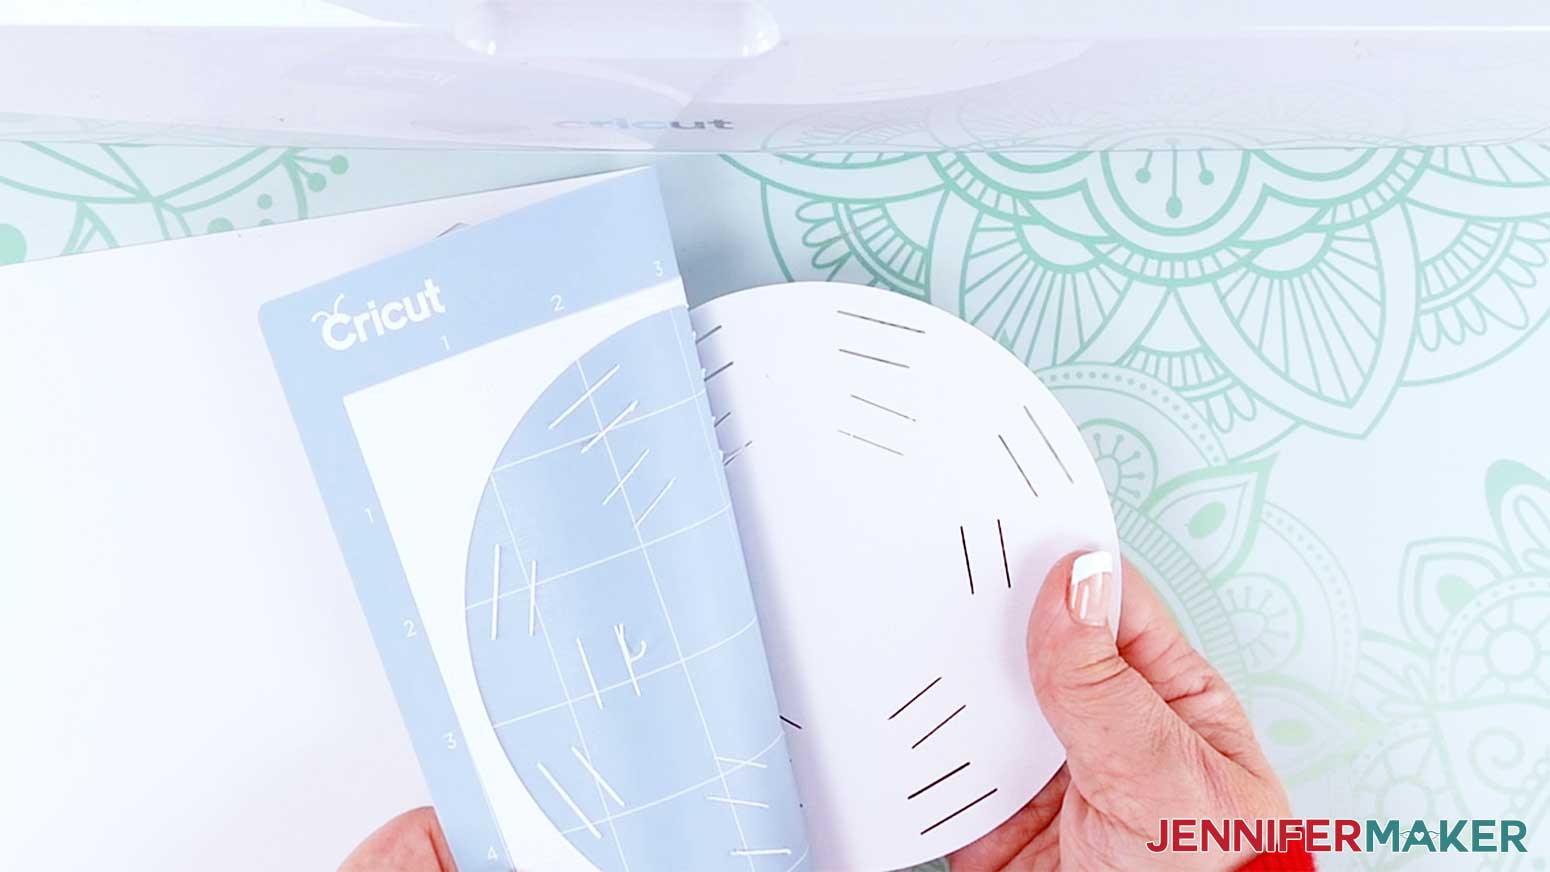
If the smaller bits do not release from the mat, use a spatula to carefully lift them off the mat. Remember to be gentle around the small, delicate edges of the design.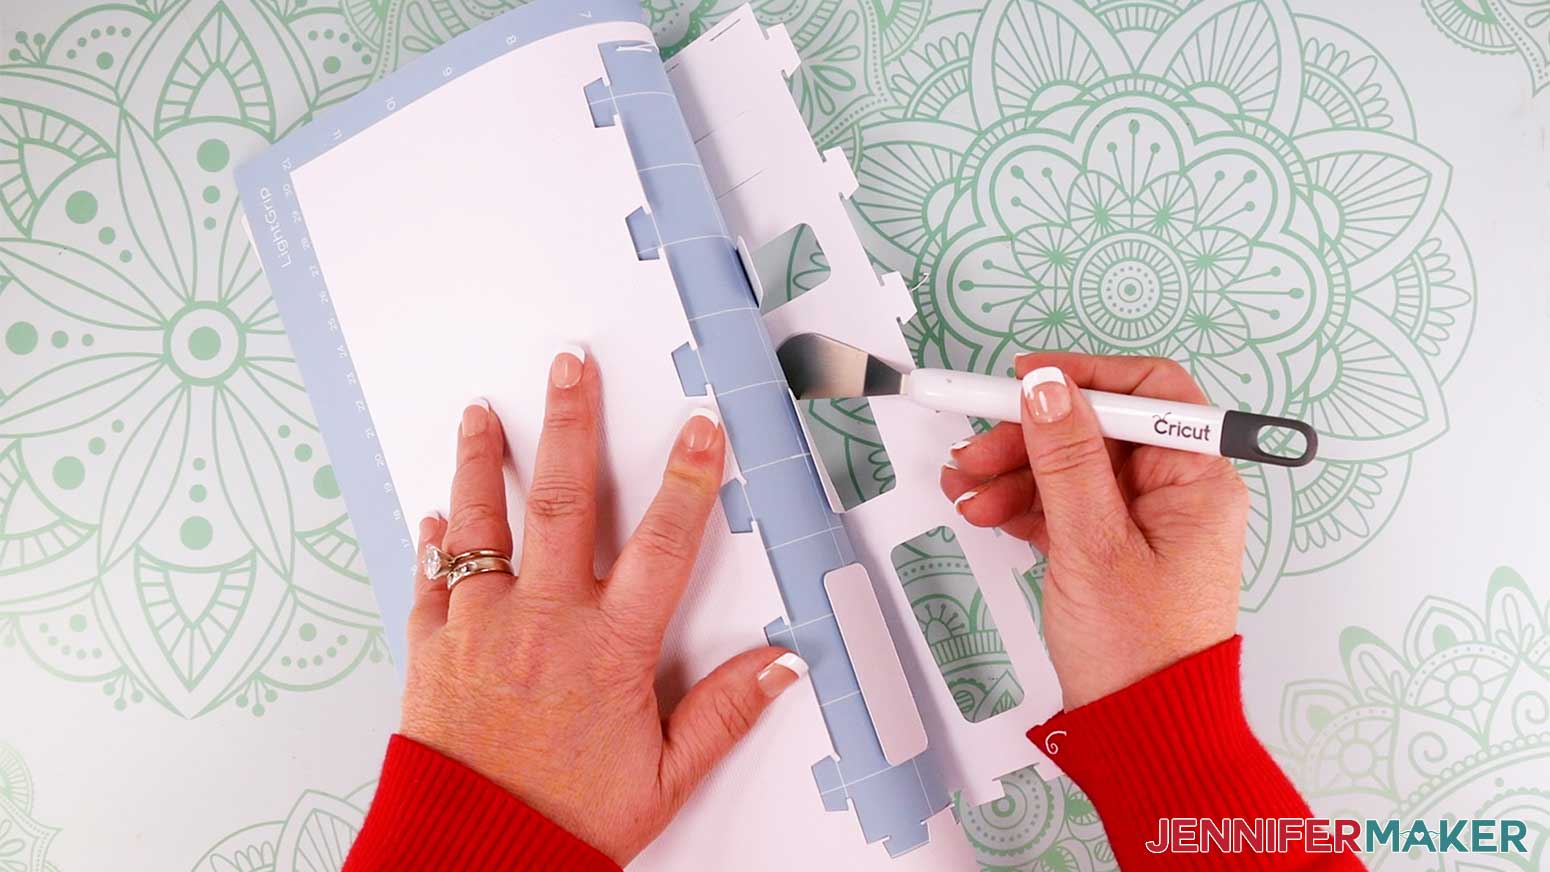
Repeat the process with the rest of the mats.
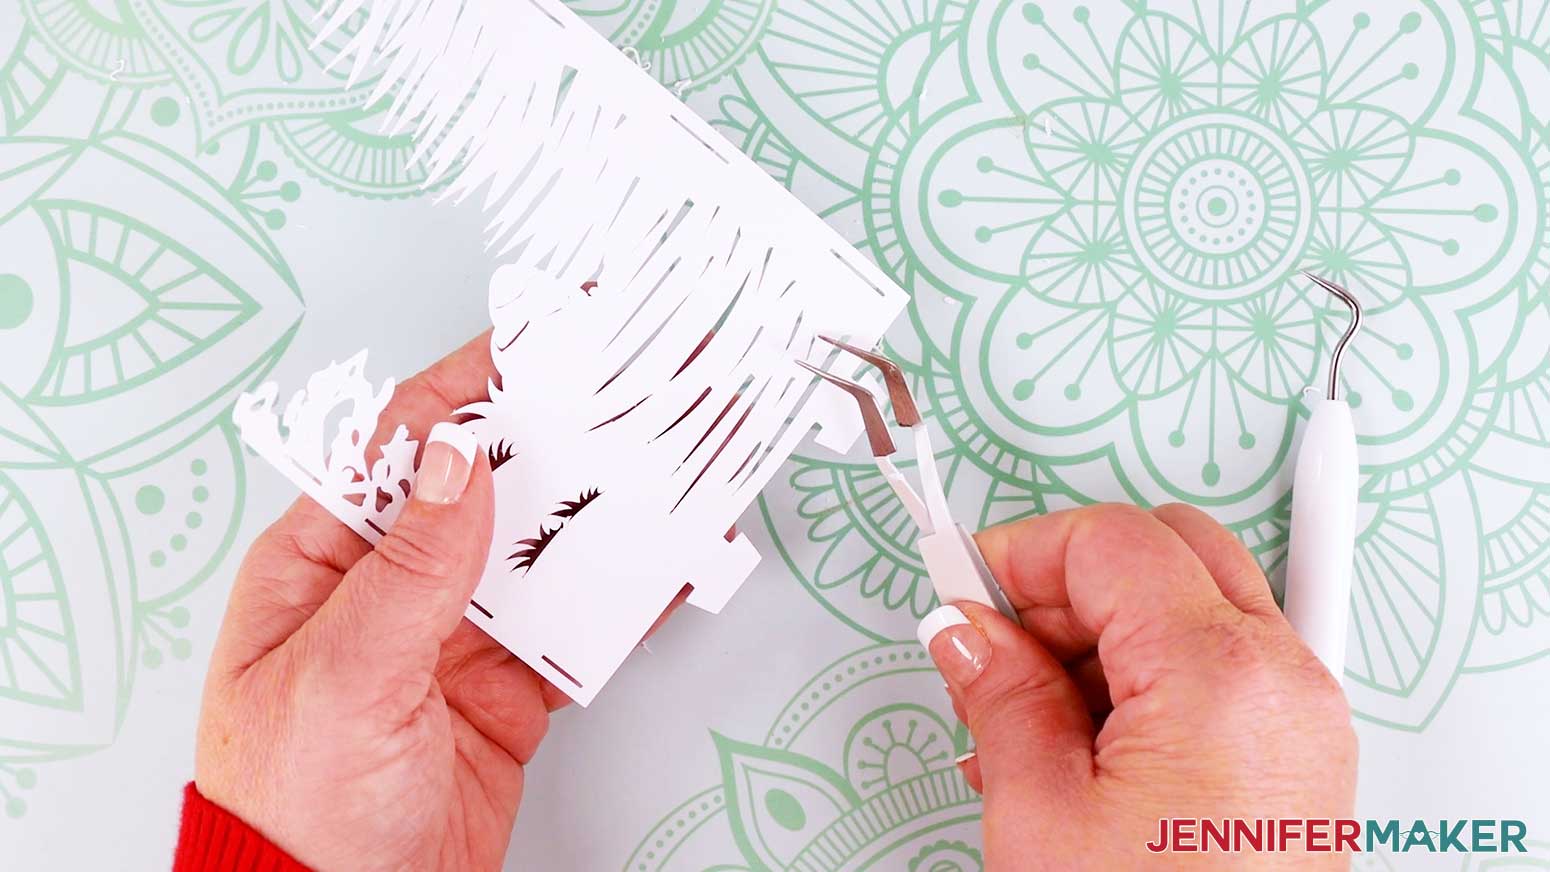
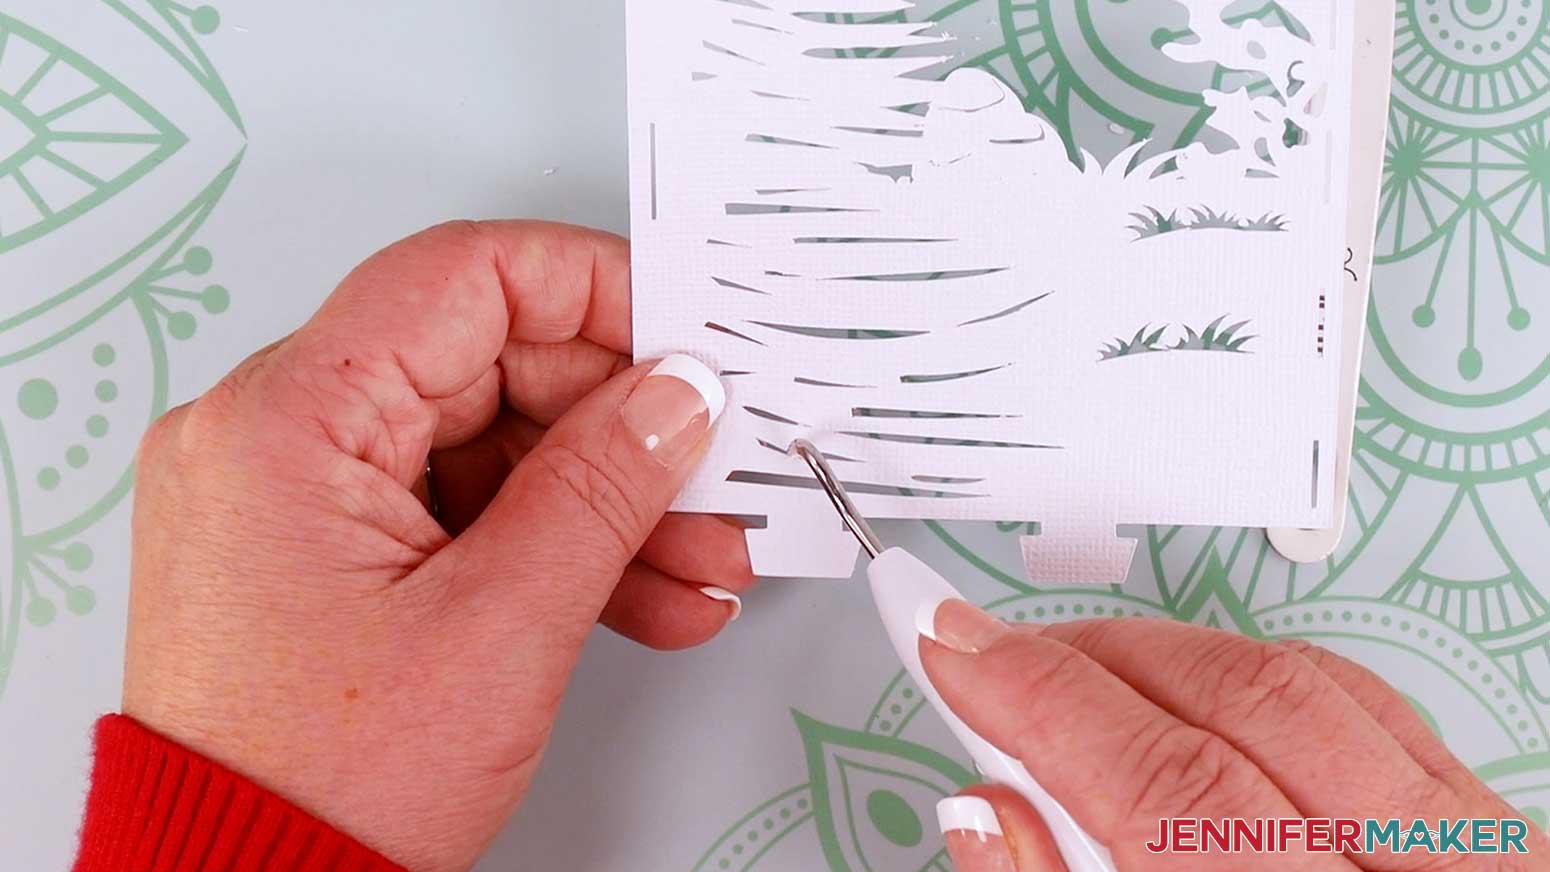
Once the design is completely released from the mat, check the back and front to make sure all cut areas are clean. Use a weeding tool or tweezers to gently pop out, or pull off any bits that are stuck.
TIP: Don’t worry too much if the edges of your trees or tufts of grass look a little frayed or get a bit bent in the process. It will add texture and dimension to the nature design. Plus, trees aren’t perfect in real life, right? 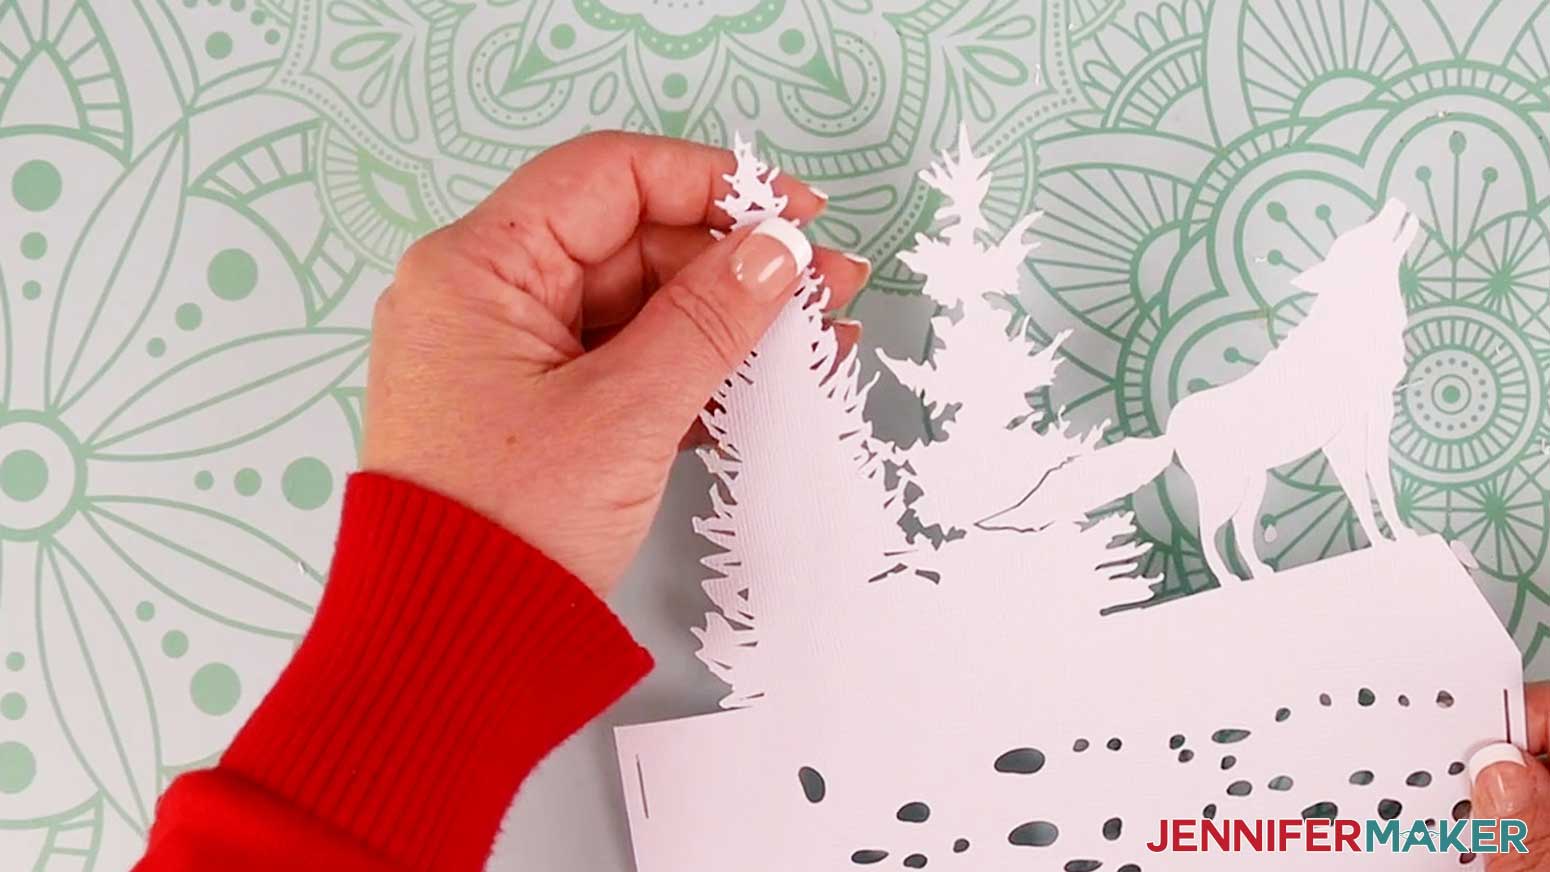
Now we are ready to put our lamp together!
STEP 5: ASSEMBLE THE LAMP
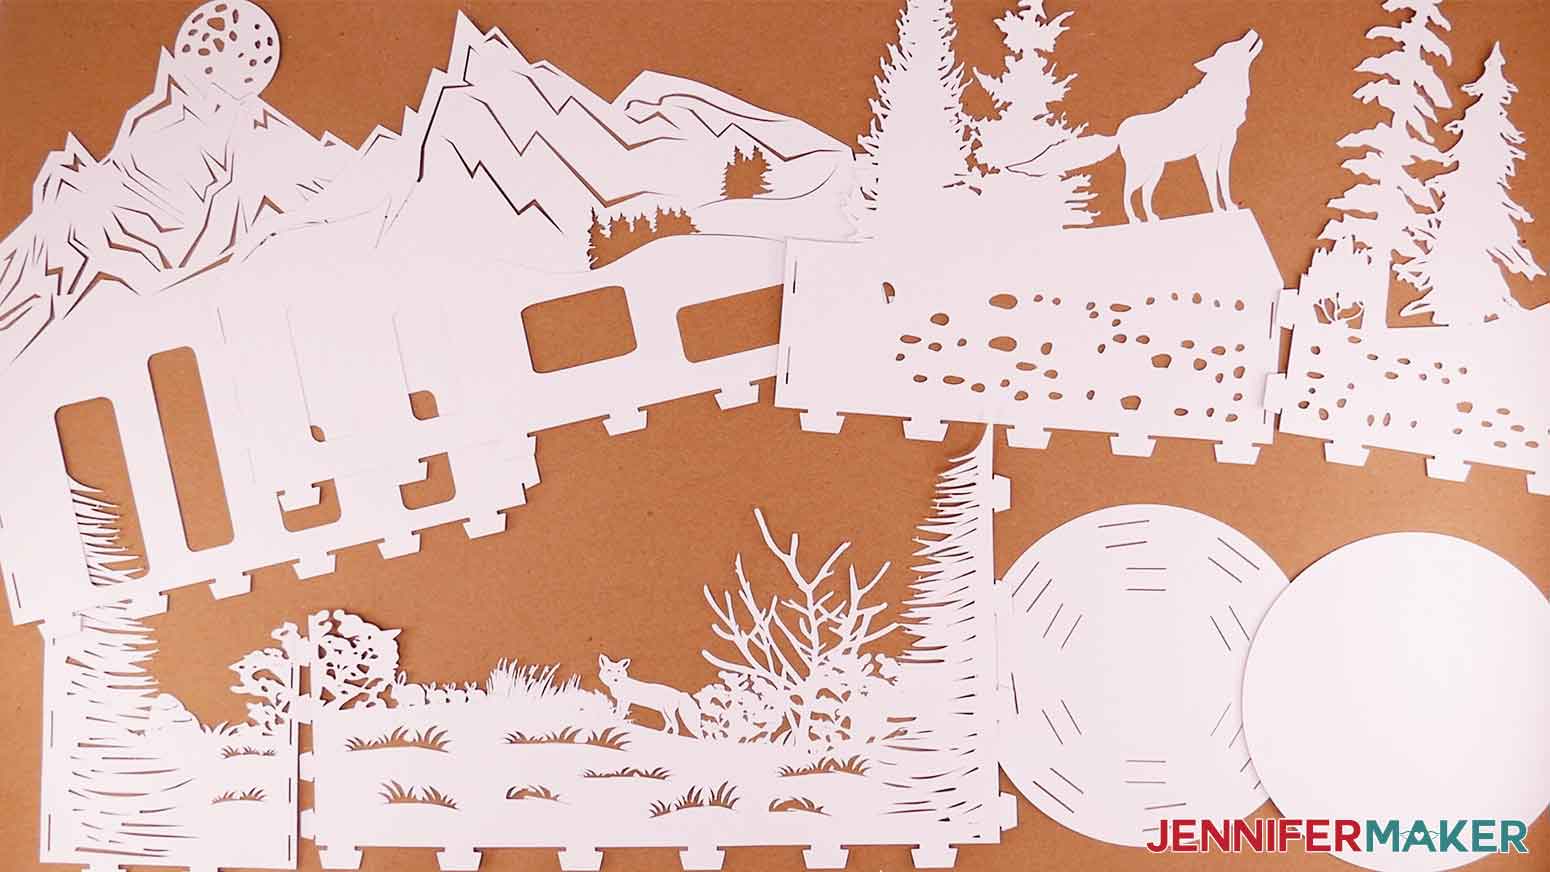
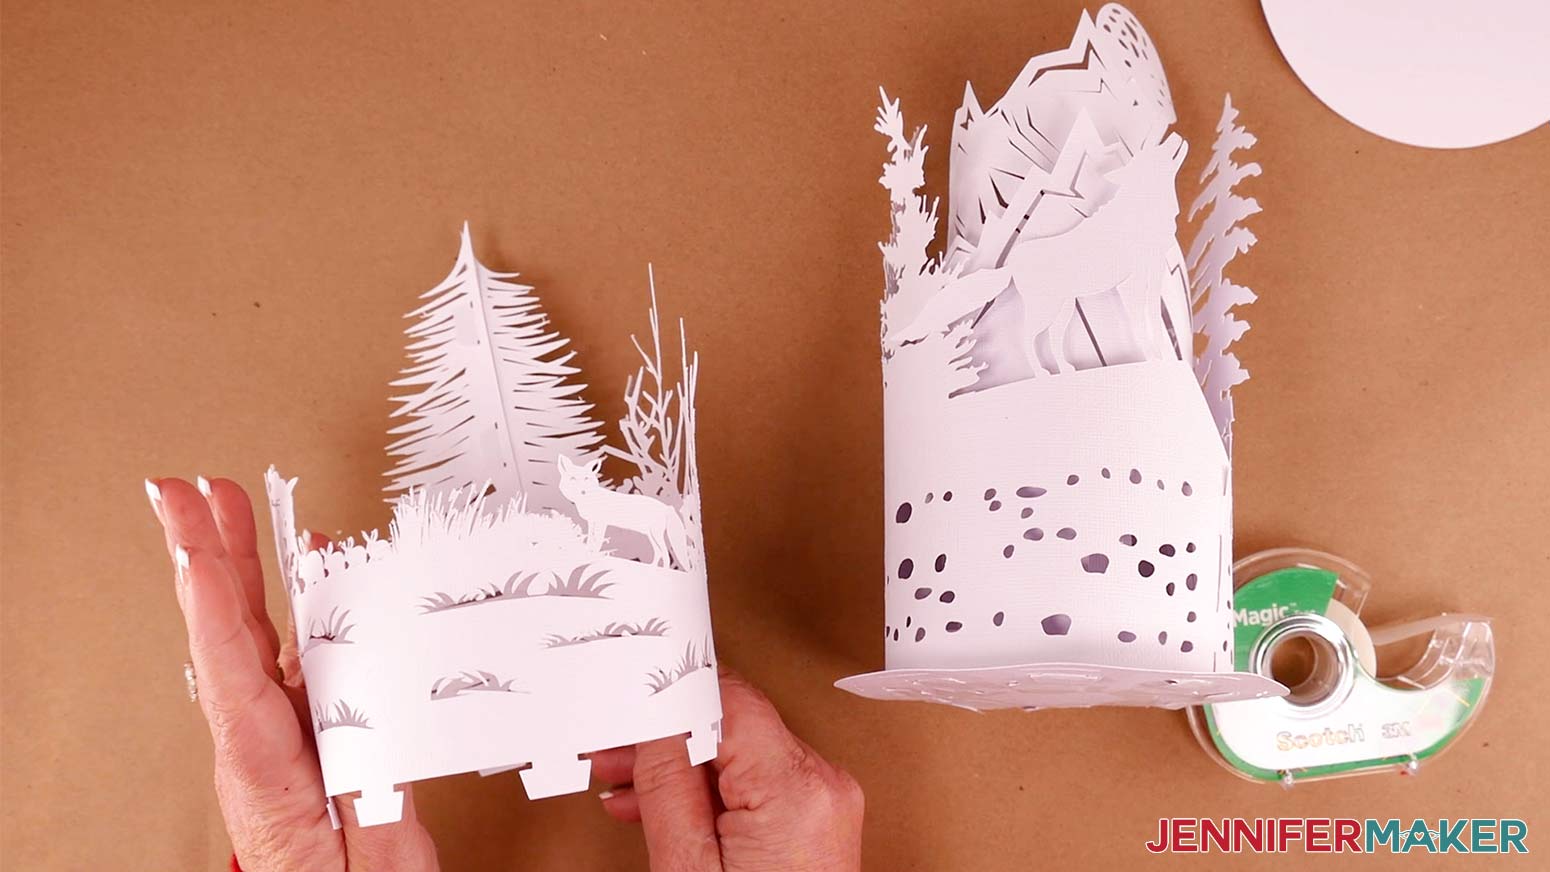
Here are what all the cut pieces look like - there are eight pieces,
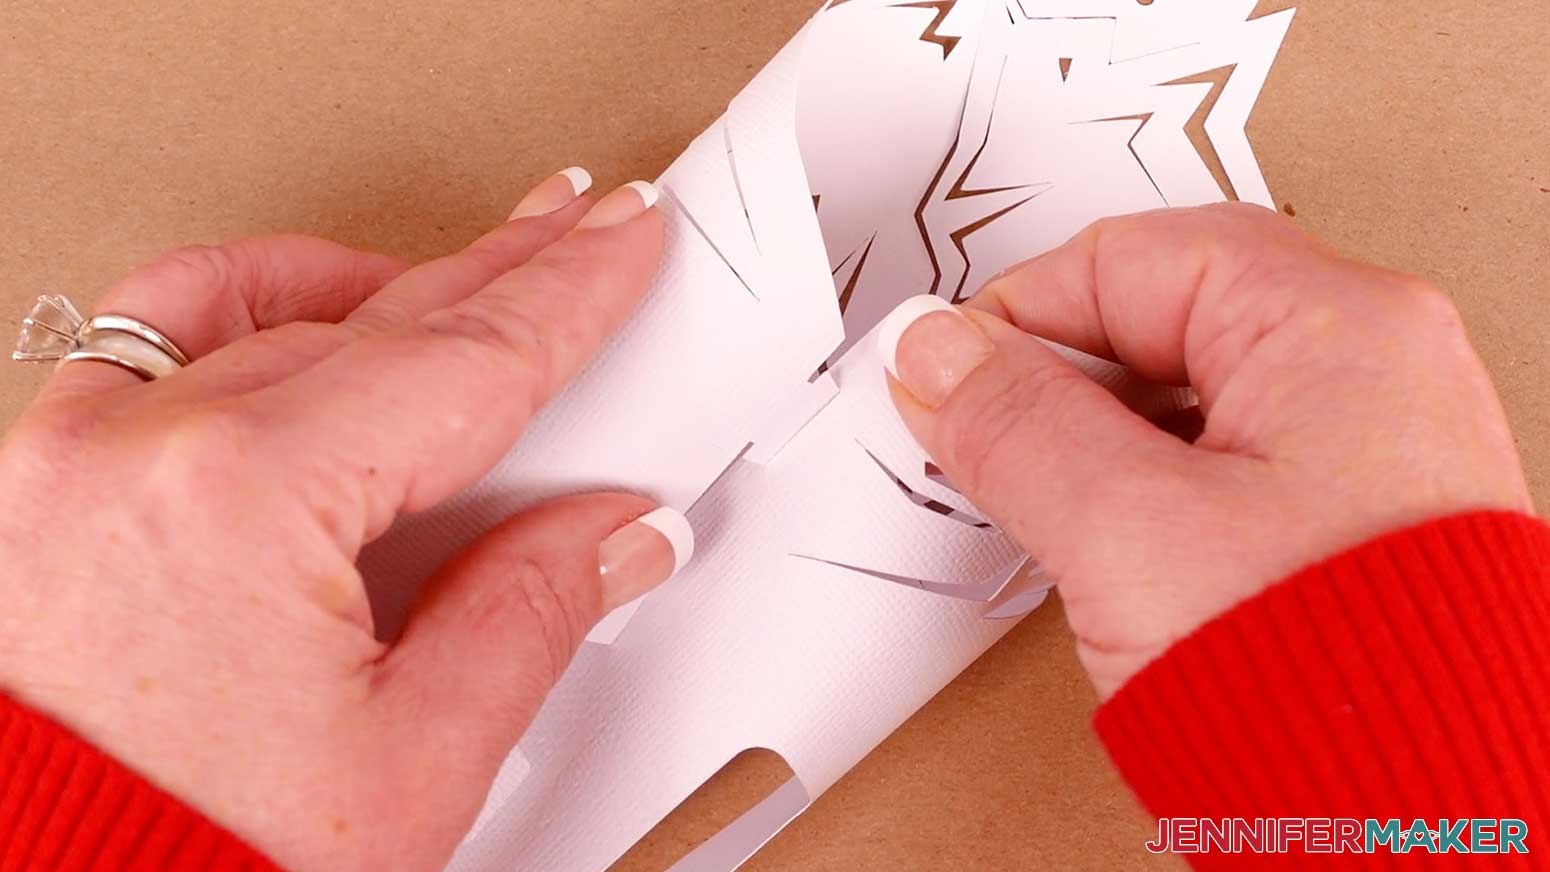
Starting with the innermost layer face down, gently use your brayer and your hand to gently roll along the paper lengthwise, creating a soft curve. This will help to pre-shape the cardstock into a cylindrical shape, giving it a perfectly smooth finish.
TIP: You can also get creative and use any cylindrical household item such as a can of hairspray or a roll of vinyl!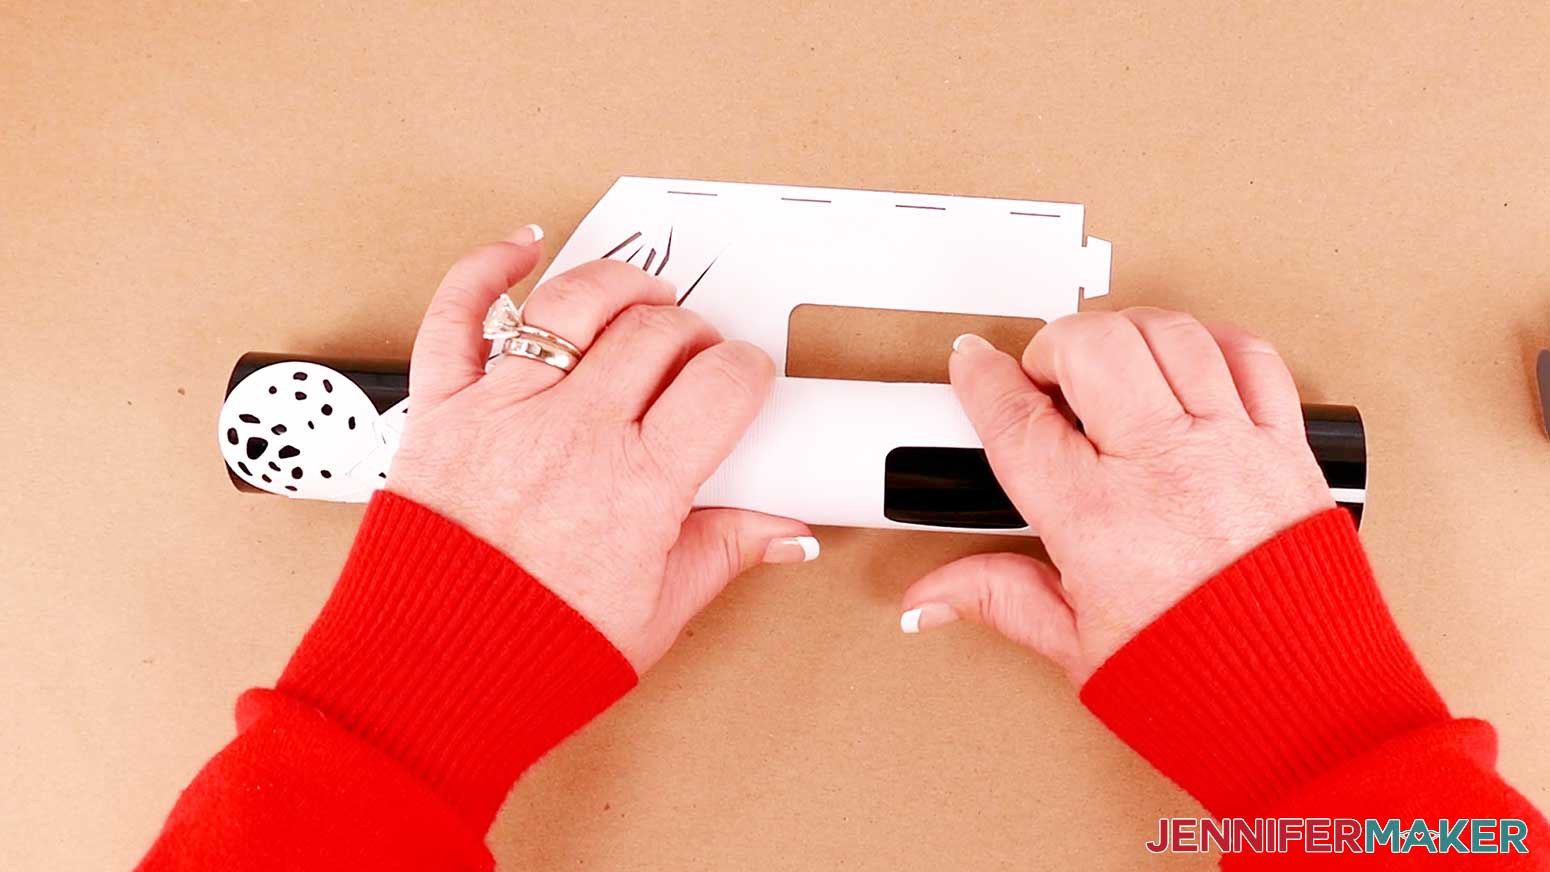
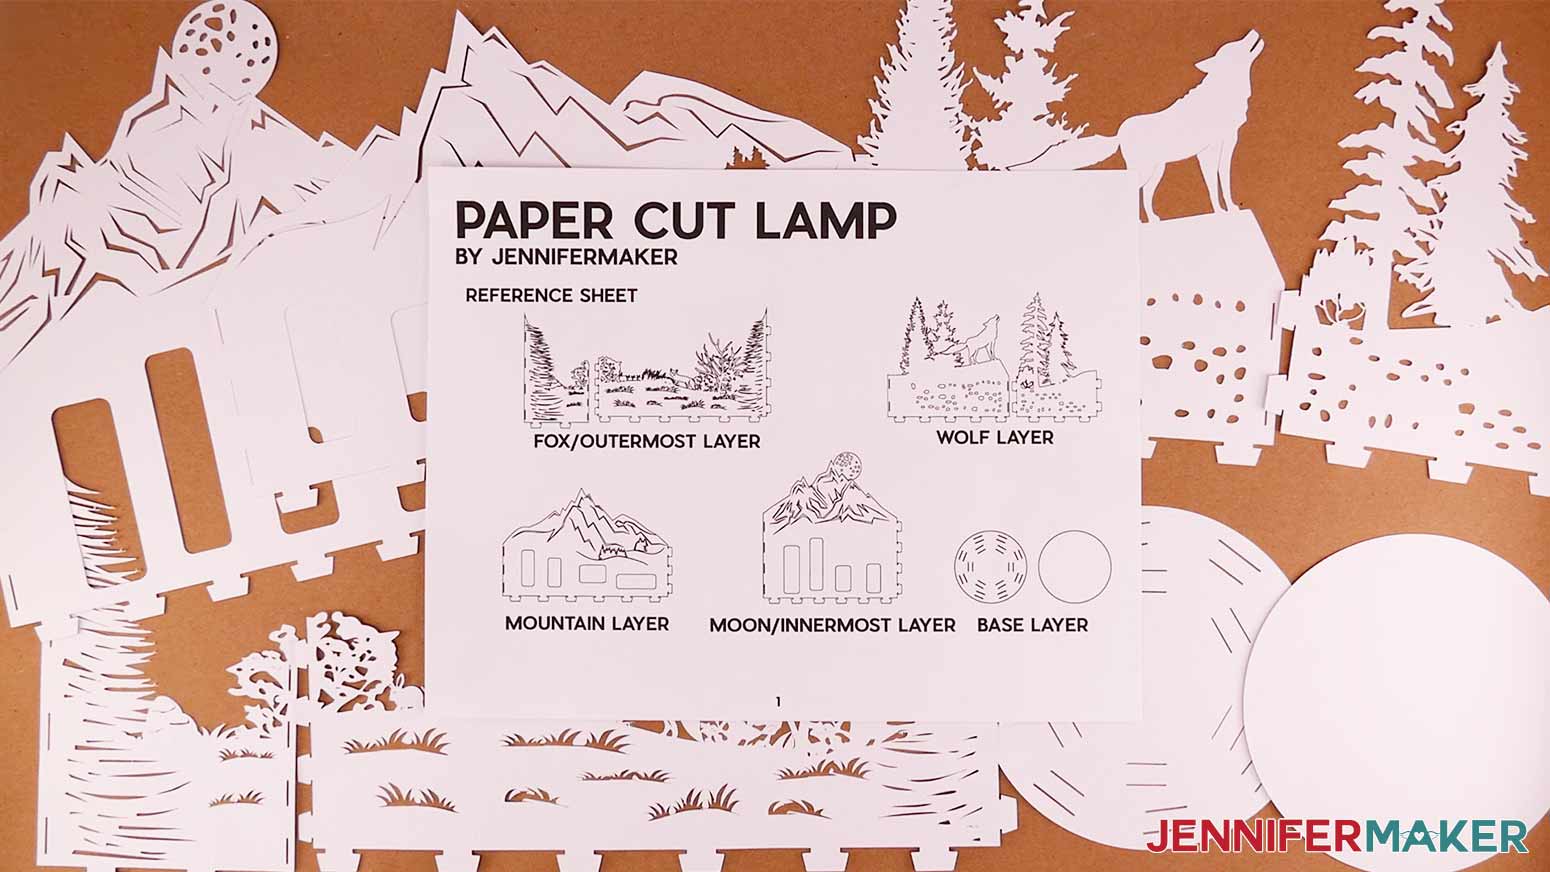
Refer to the printable reference sheet included in the design file while assembling your lamp. It will help keep all pieces in the proper order.
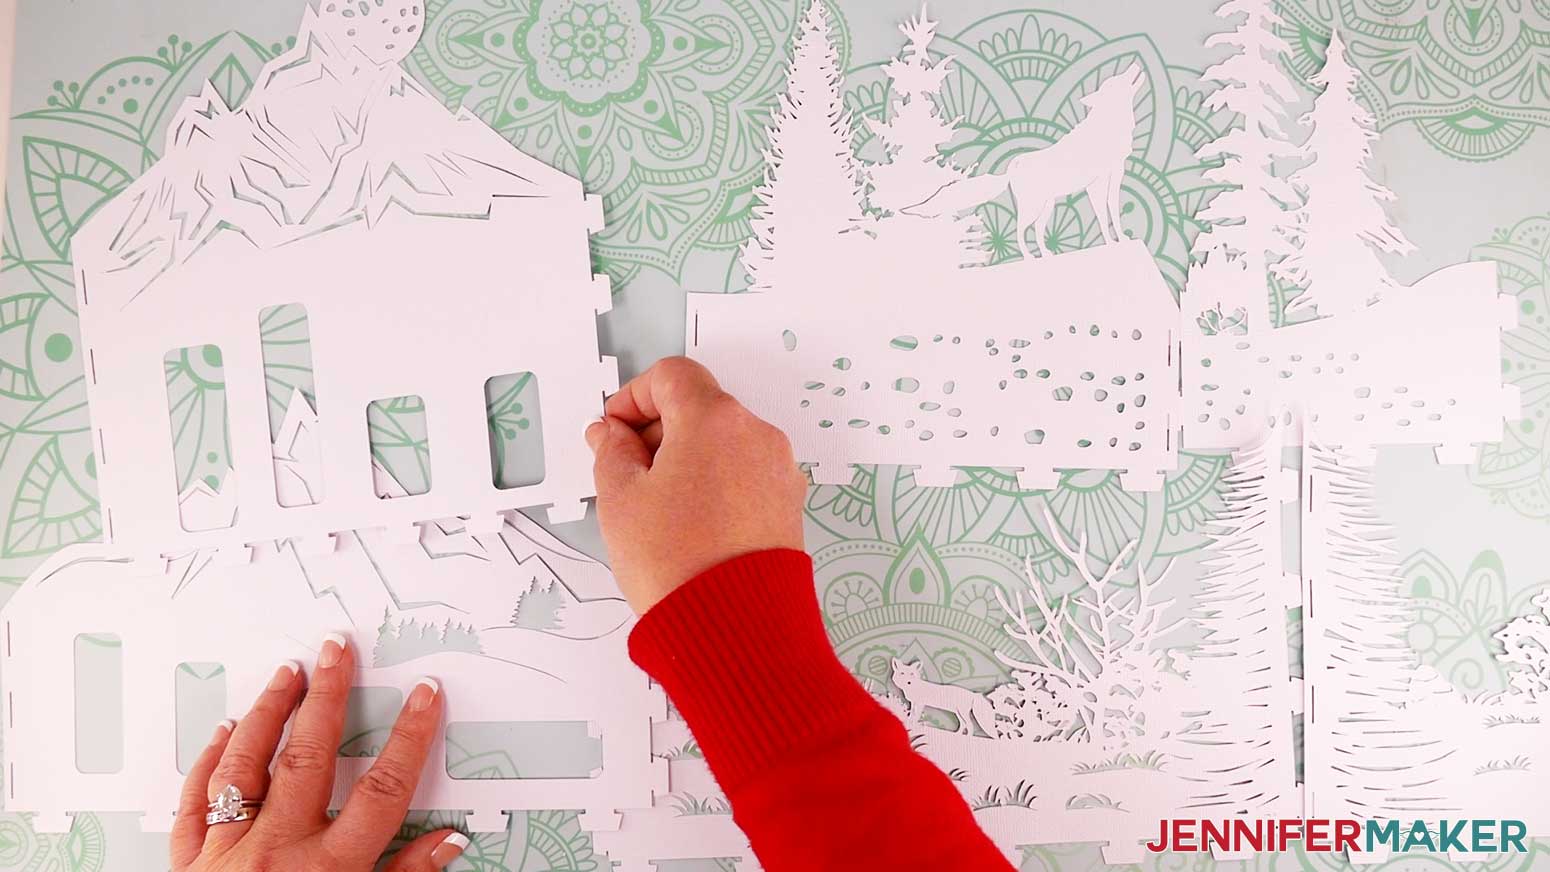
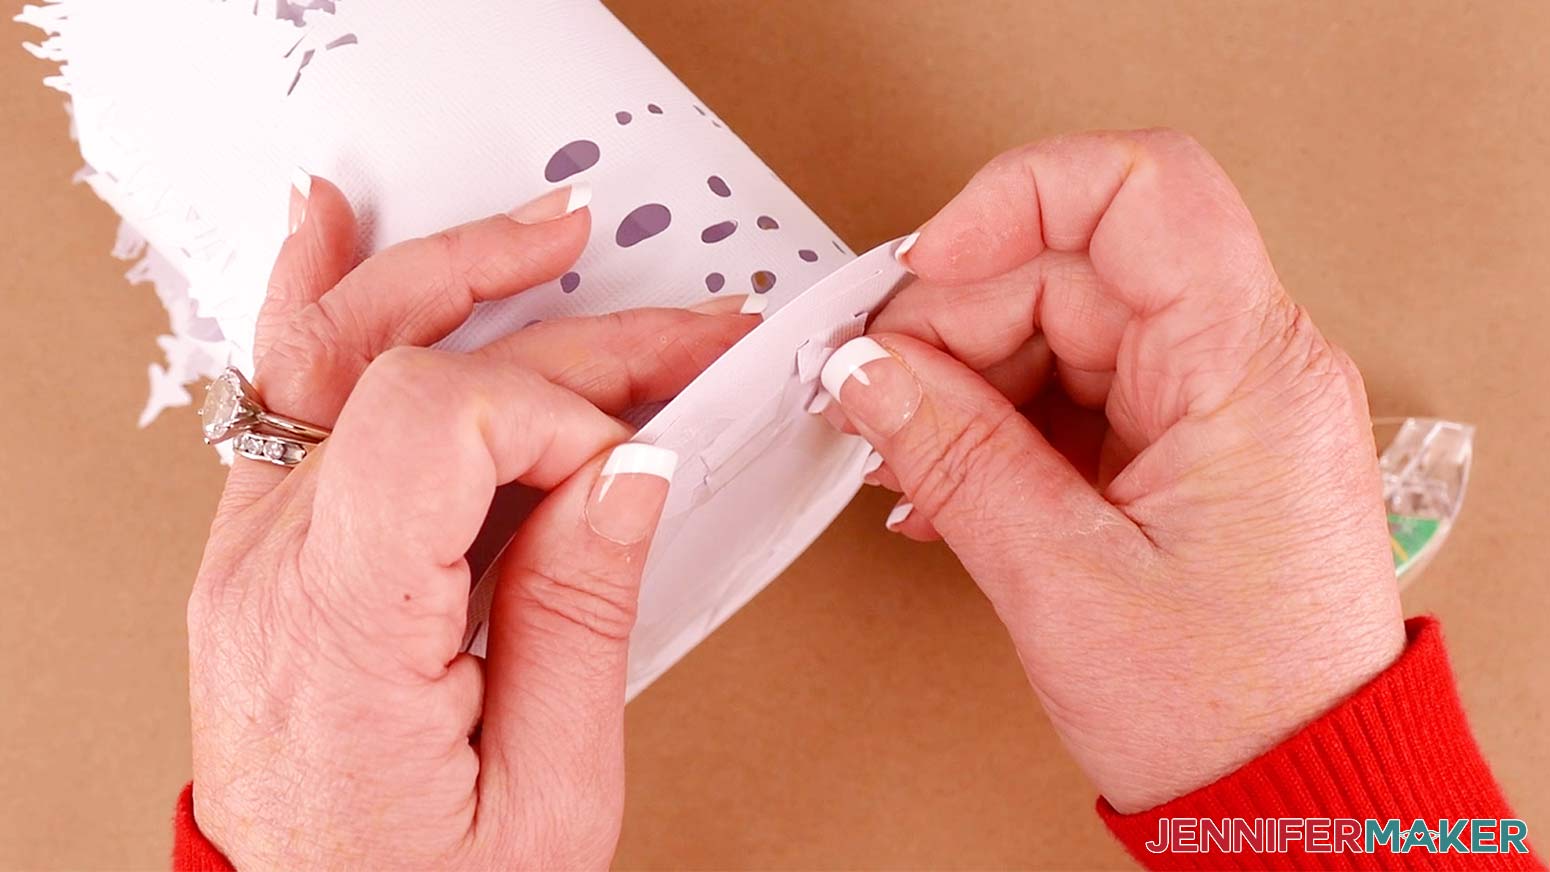
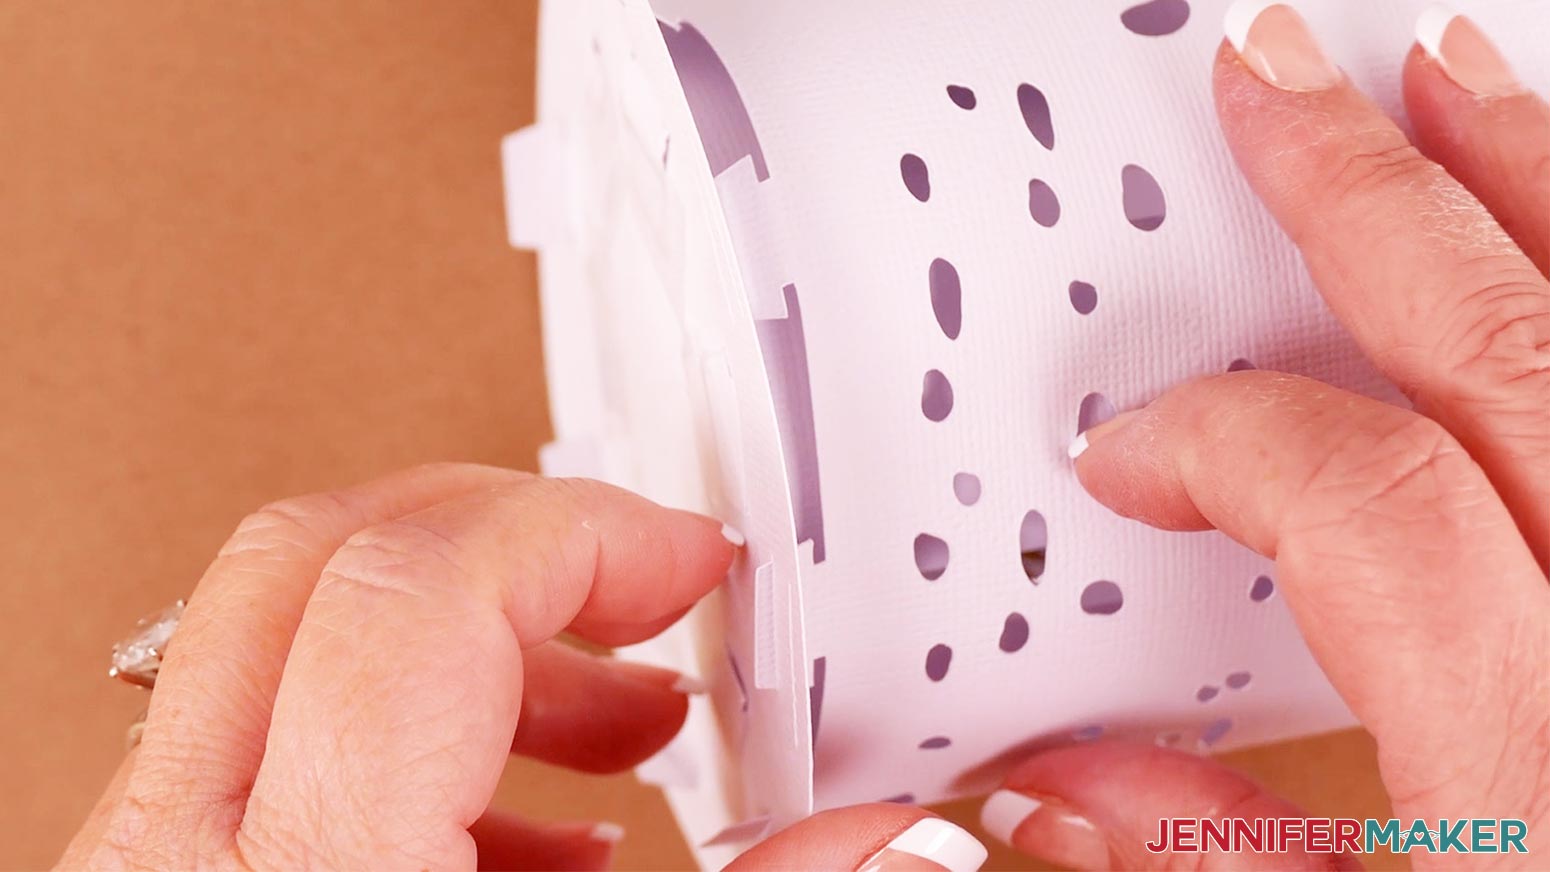
Next, gently but firmly, slide the tabs into their corresponding slot. It helps to shift them up or down in their slot to get the next one in. It might feel like a tight fit, but with a little patience, they will slide into place and your lamp a perfectly finished look!
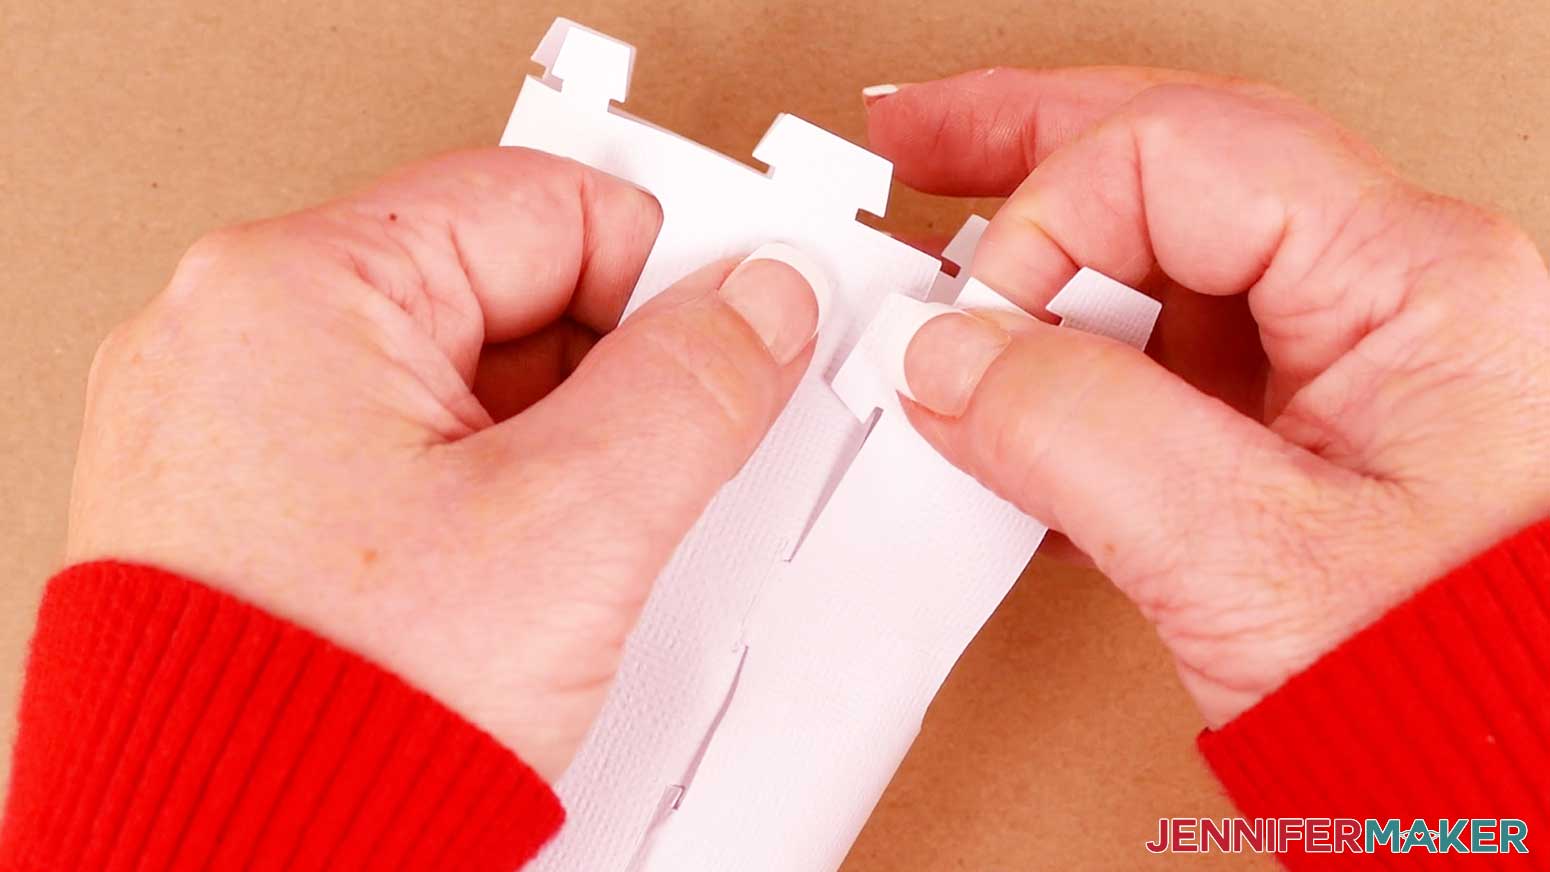
Repeat this process for all the layers, making note of the outer two layers, which have two sections each. Follow the same steps above for these.
Once all your layers are transformed into cylinders, it’s time to secure them to the base. Again, starting with the innermost layer, gently pre-fold the bottom tabs inwards, making sure the fold is flush with the base. Then straighten the tab back out. Repeat for all bottom tabs. This will help in achieving a seamless fit to the base. 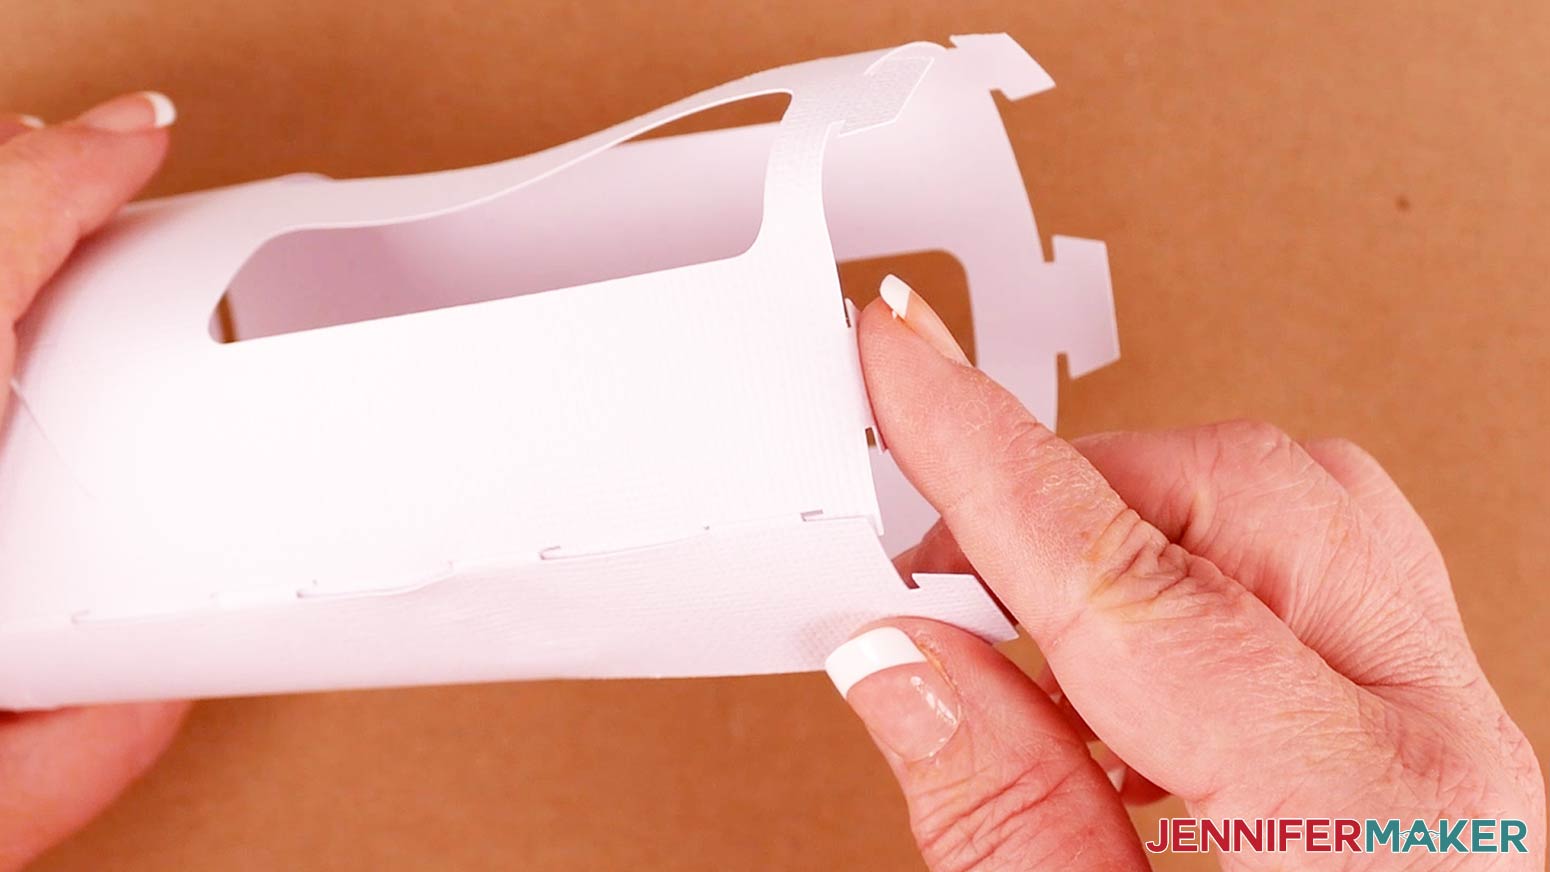
Starting one tab at a time, gently slide the tab into an innermost slot on the base. 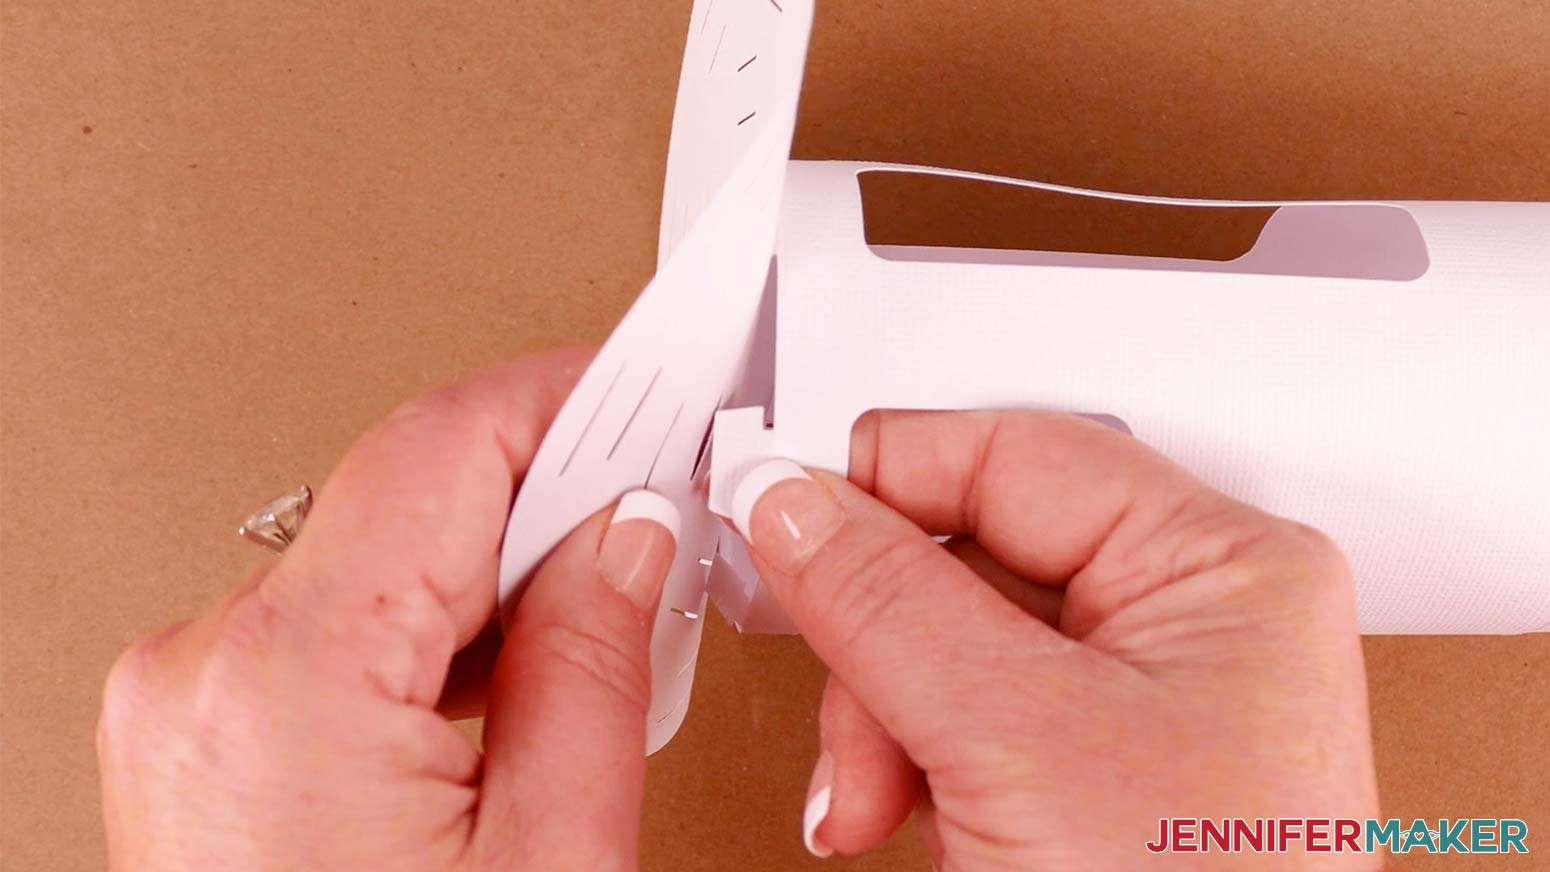
From the bottom, grab the tab to help pull it through. 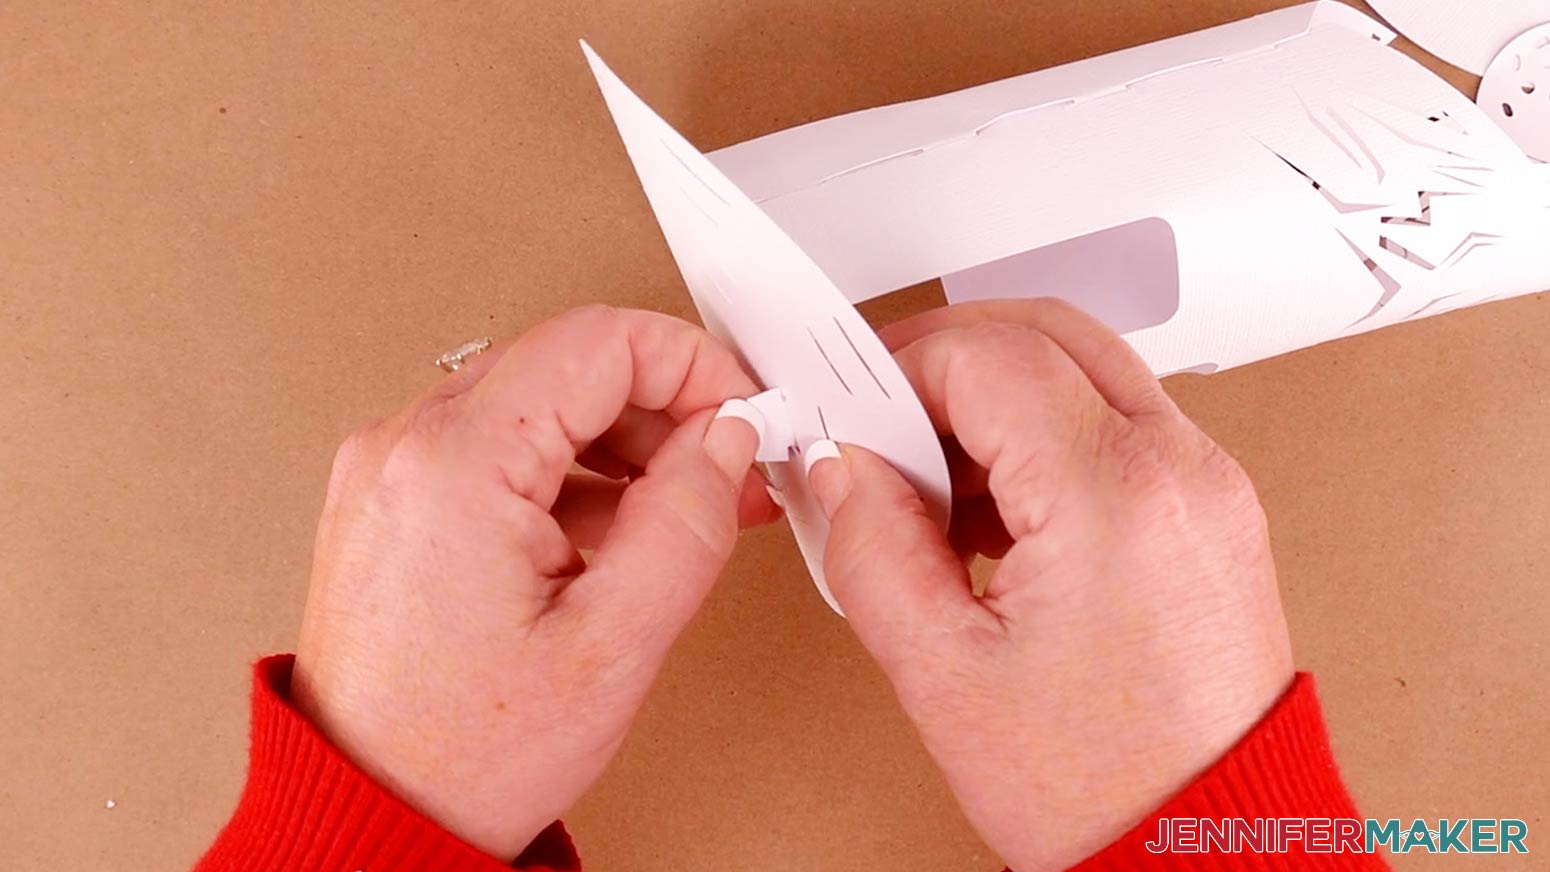
Tape a small piece of scotch tape to the tab and firmly but gently pull and tape it to the base. This will ensure the layer stays in place while you work the rest of the tabs in the same way, and they are all secure.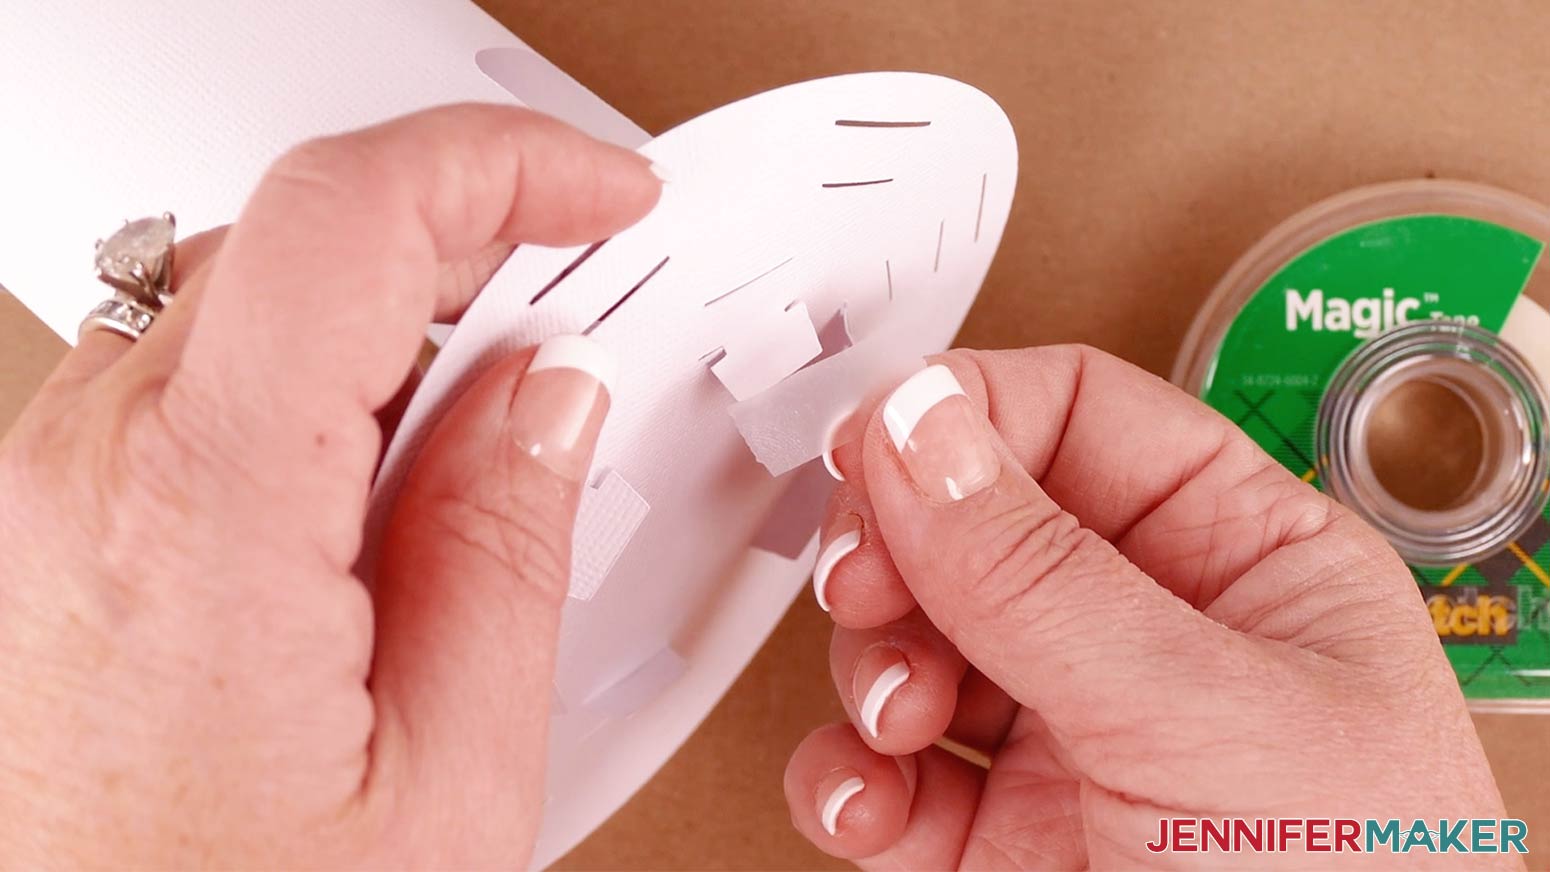
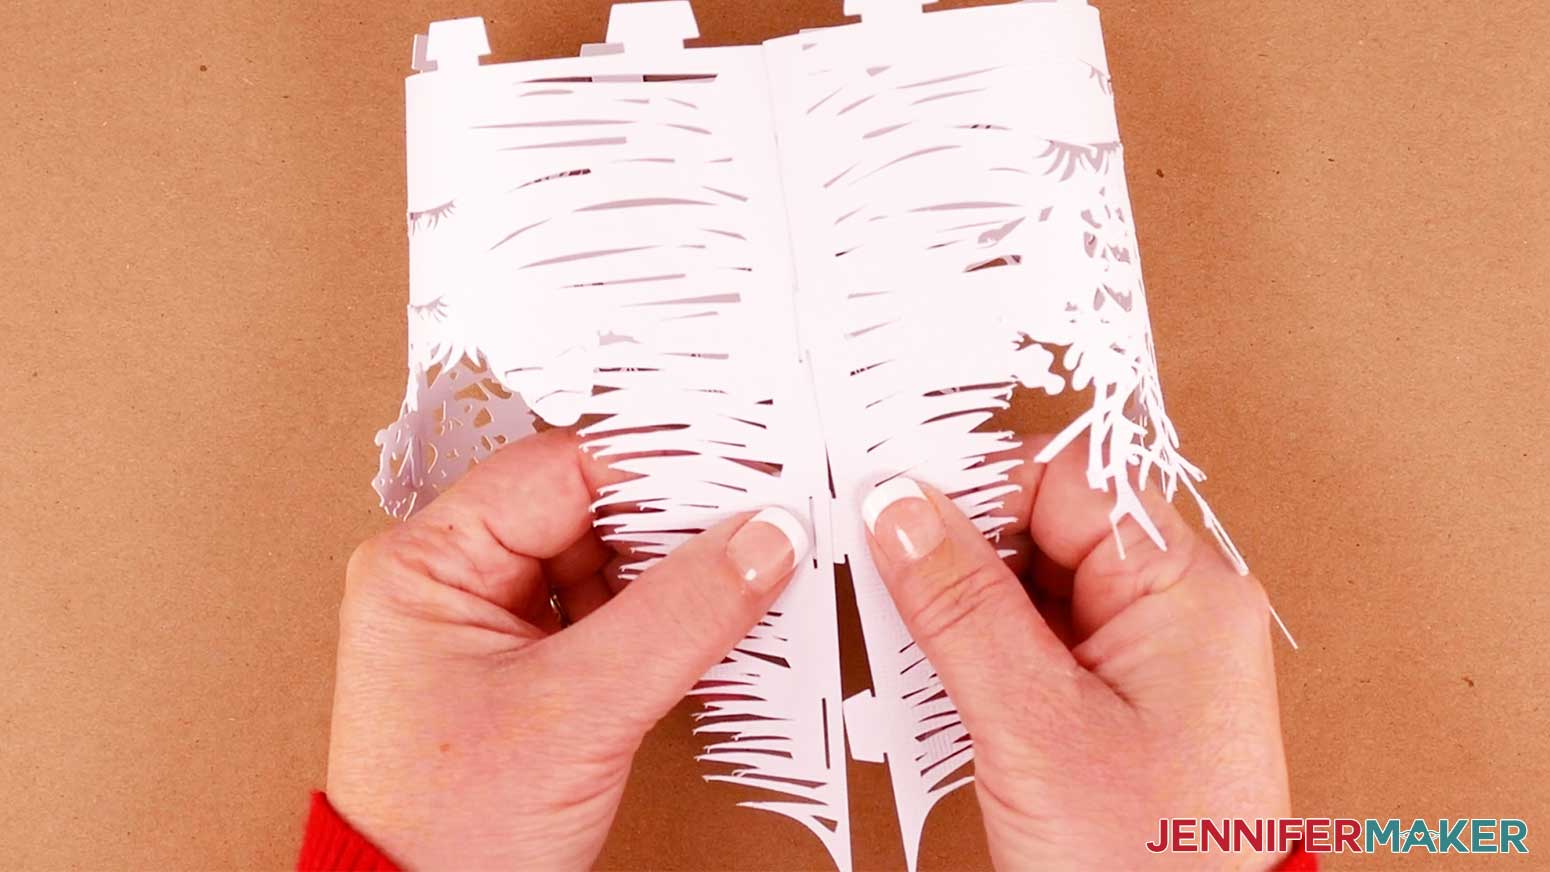
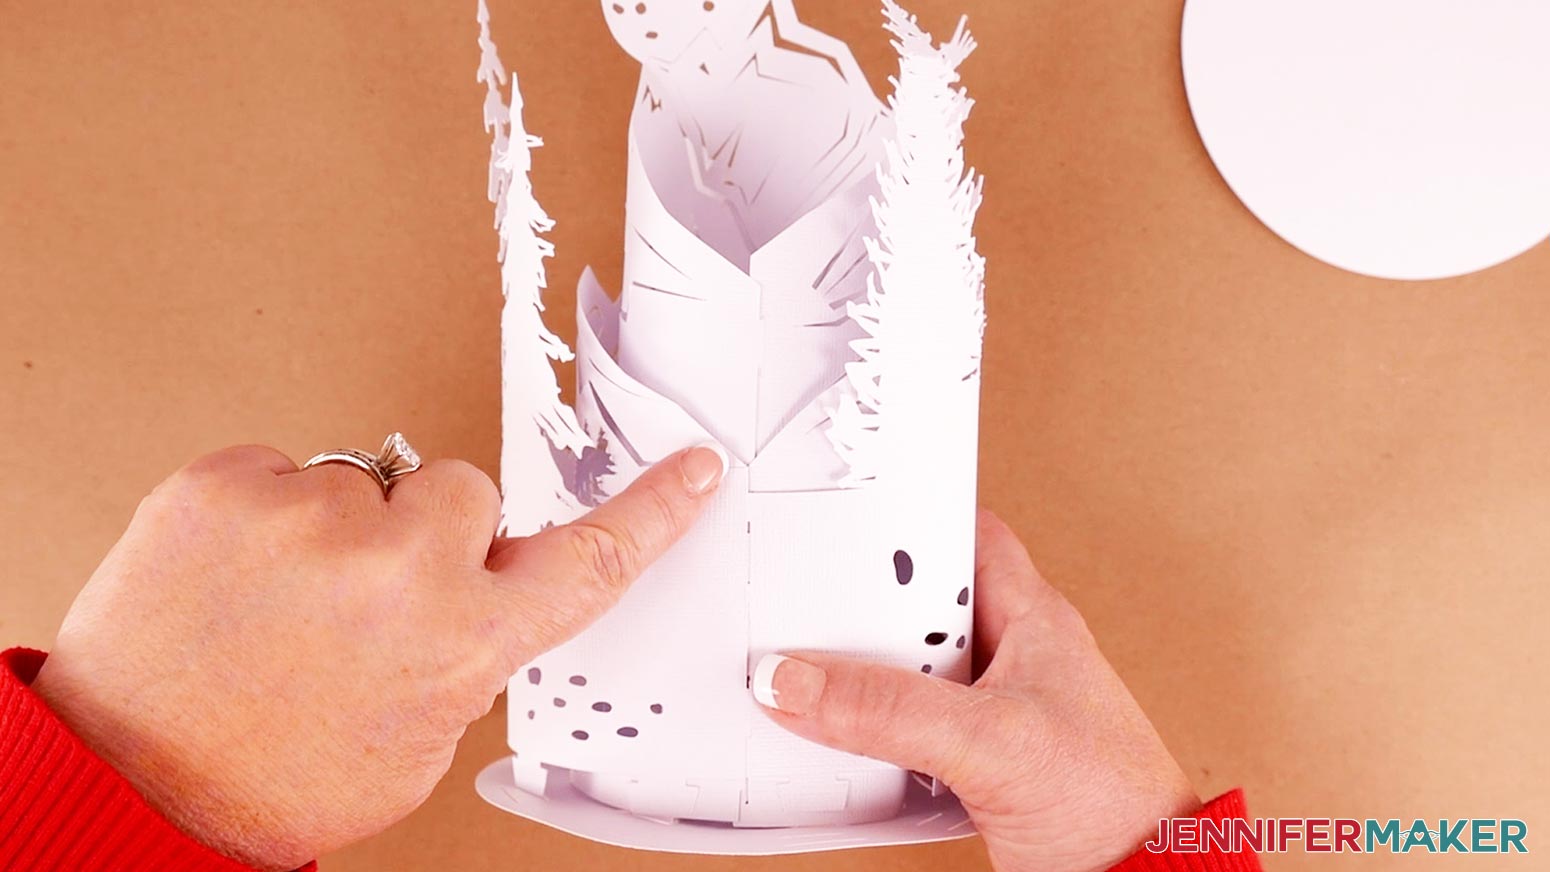
IMPORTANT: Make note of the back seams of your cylindrical layers. When attaching them to the base, be careful to make sure the back seams are aligned.
Repeat with the rest of your layers, working outwards. 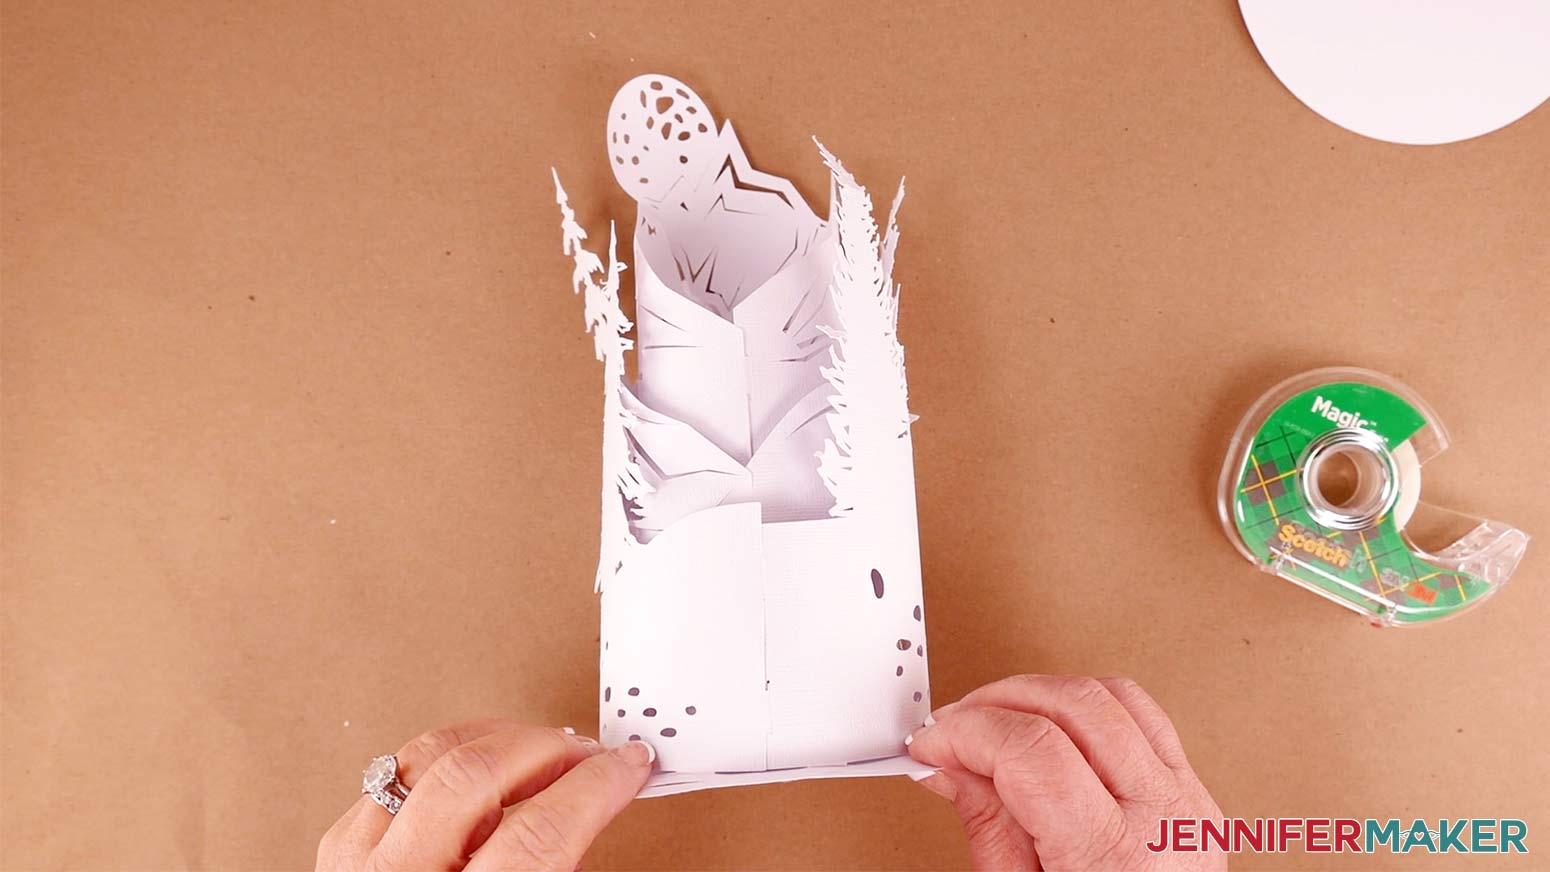

Once all layers are attached to the base, take the solid base circle and place it face down. Apply double-stick tape in strips.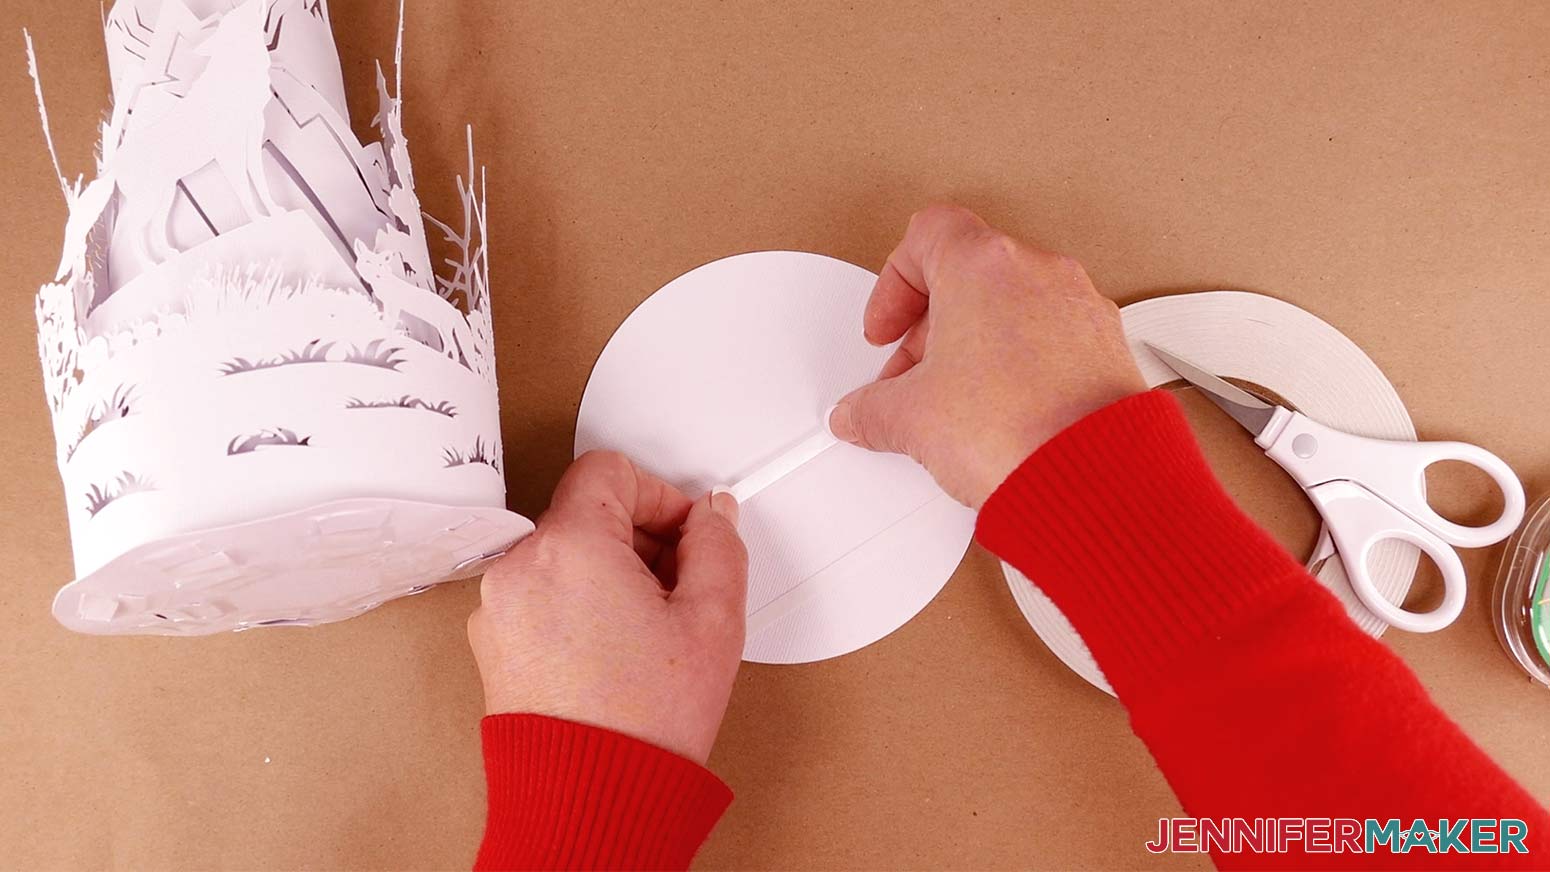
Use a weeding tool or tweezers to pull off the backing of the double stick tape. 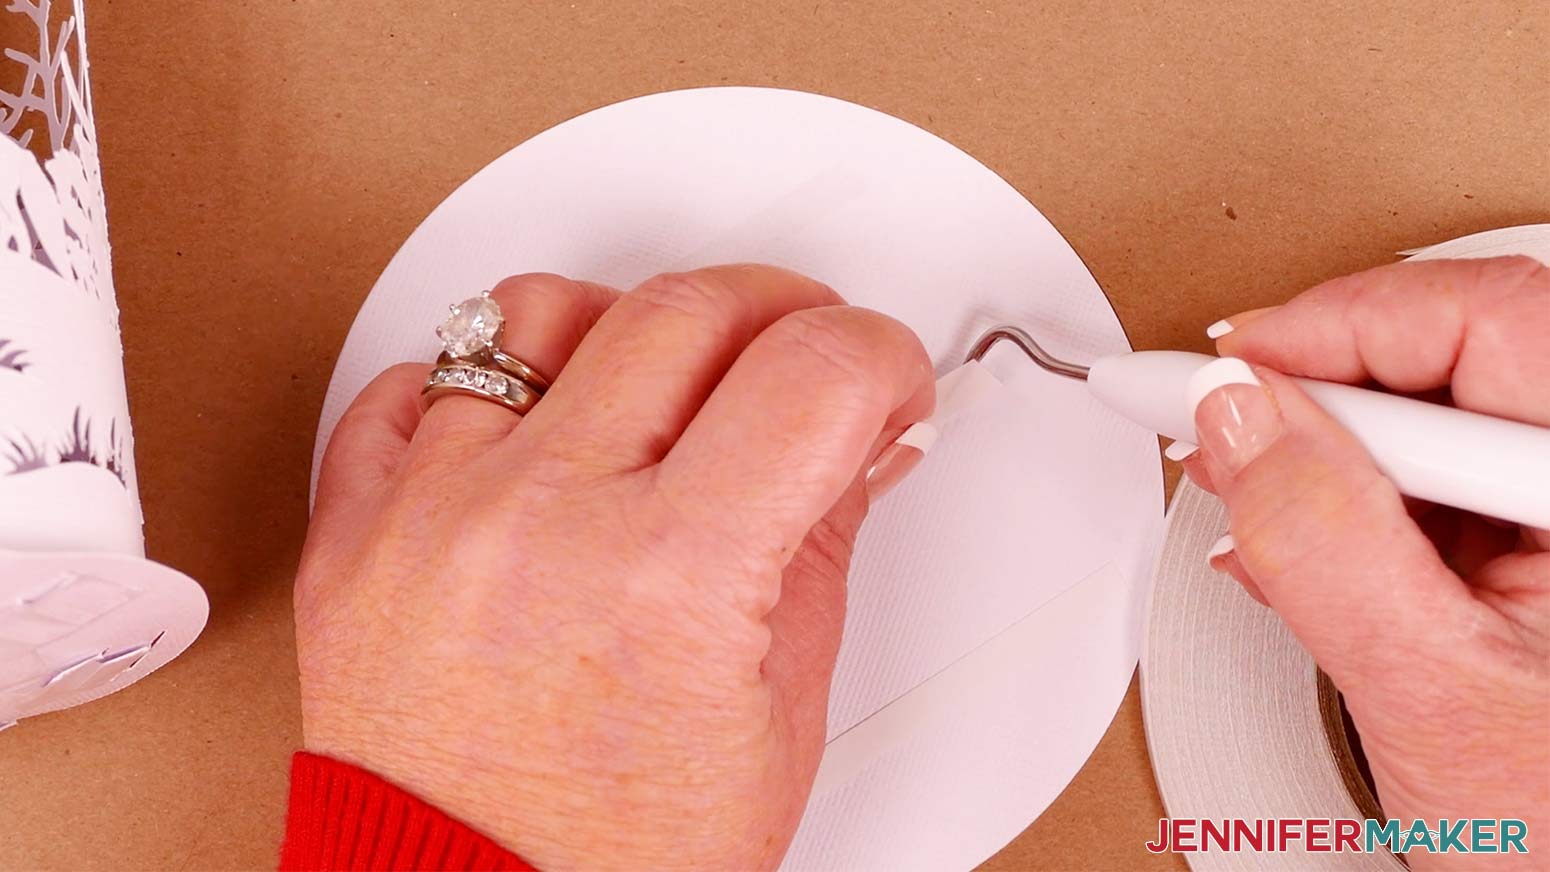
Now, using the precision tip of your Bearly Art Glue, apply small dots around the edge of the circle, and to the areas where there is no tape. This will help ensure your base and its edges are secure.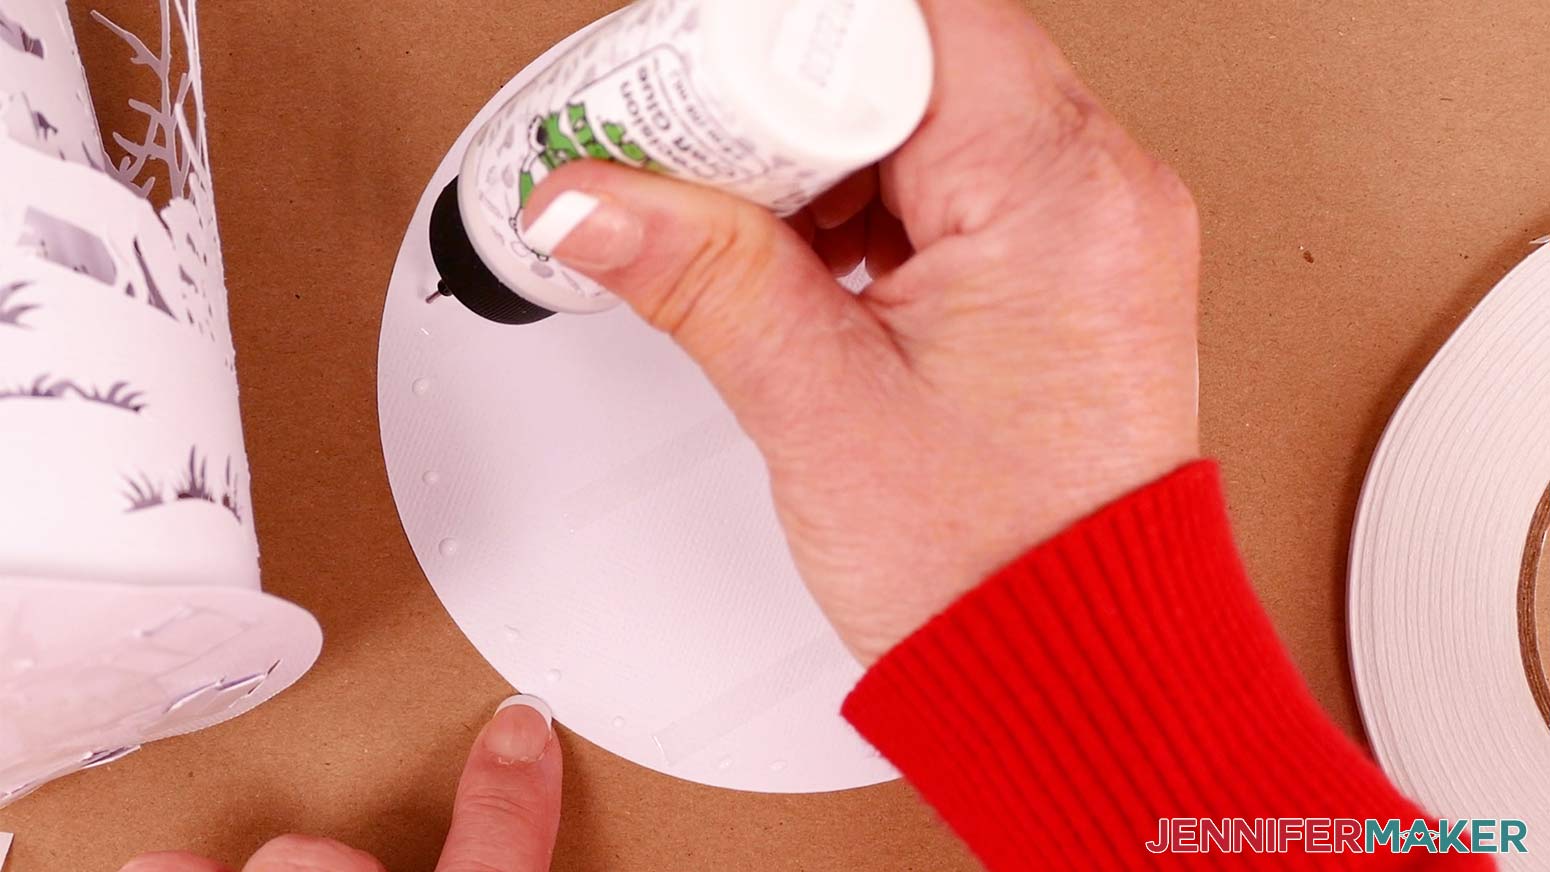
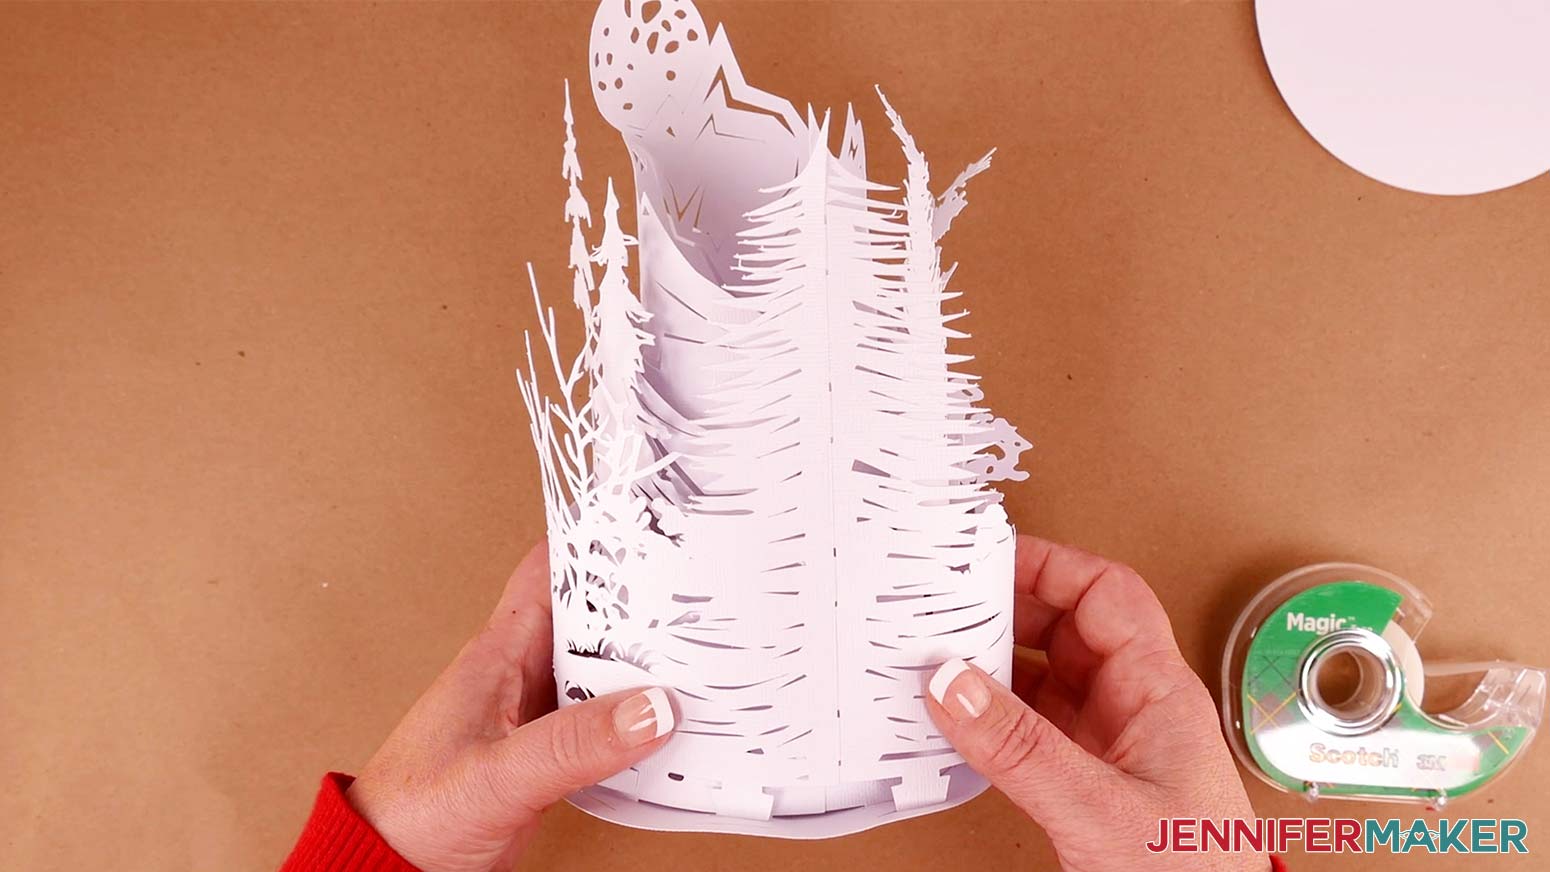
Take the assembled top portions of your lamp and carefully align and attach it to the solid base and push around the edges to secure it.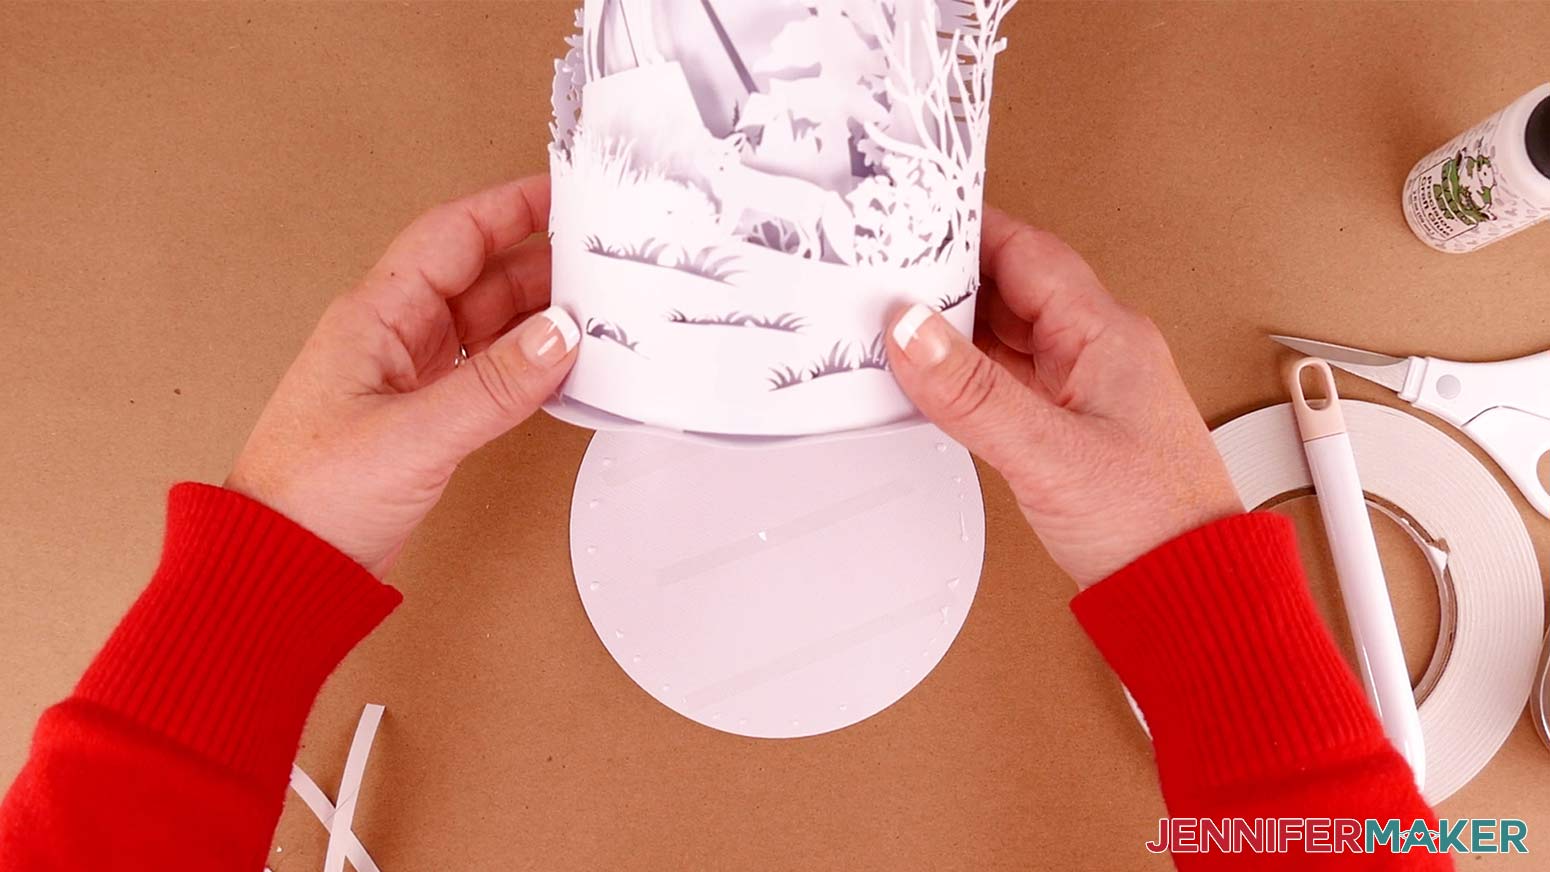
TIP: Use the handle end of your spatula or weeding tool to push down the center of the lamp to help stick it together.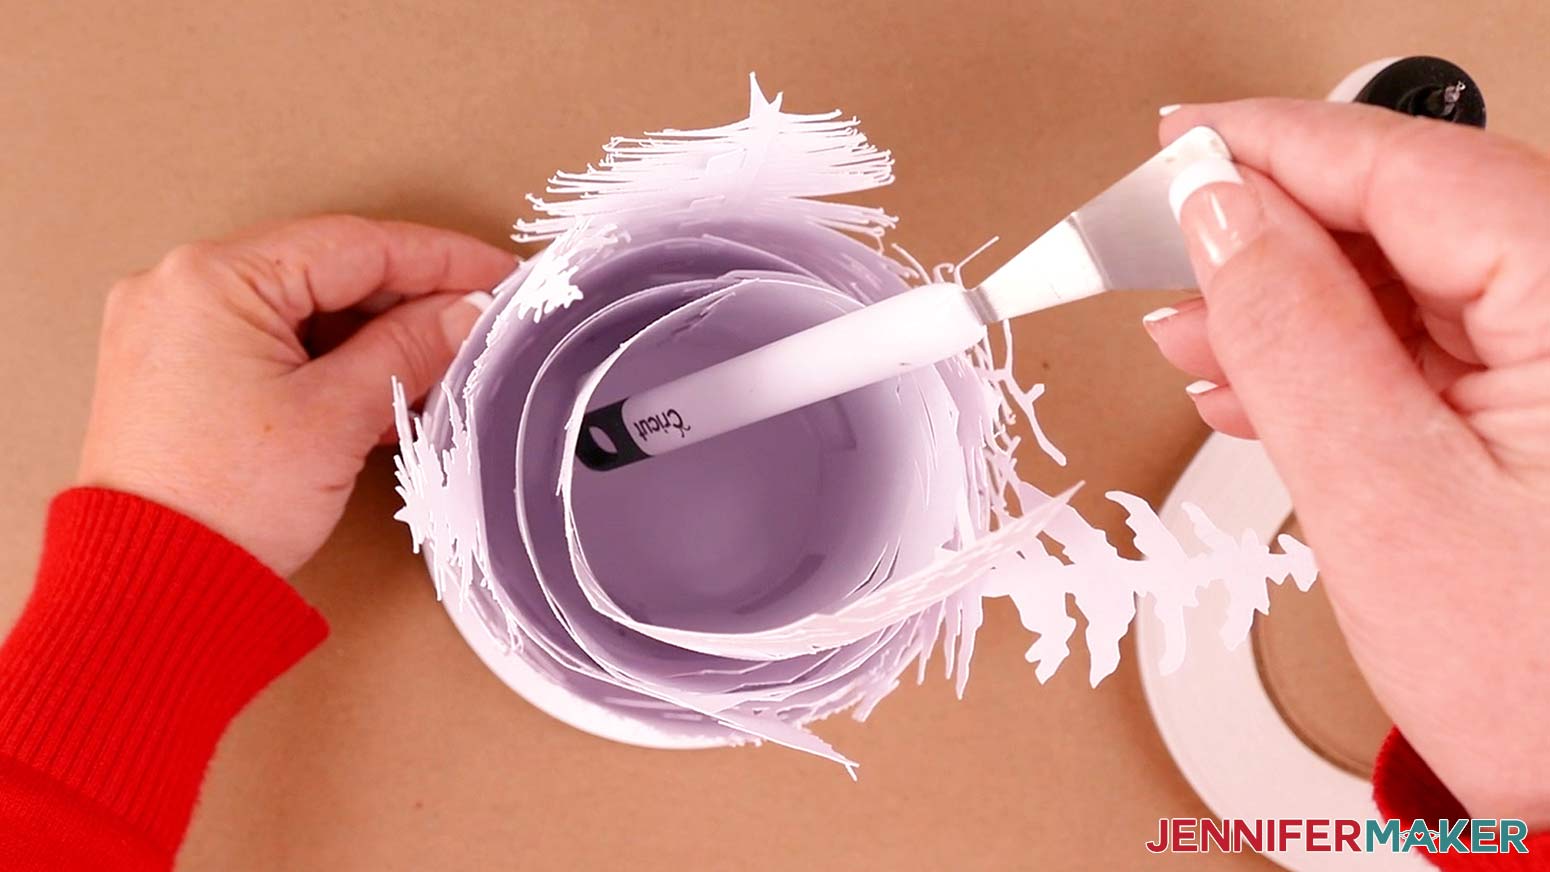
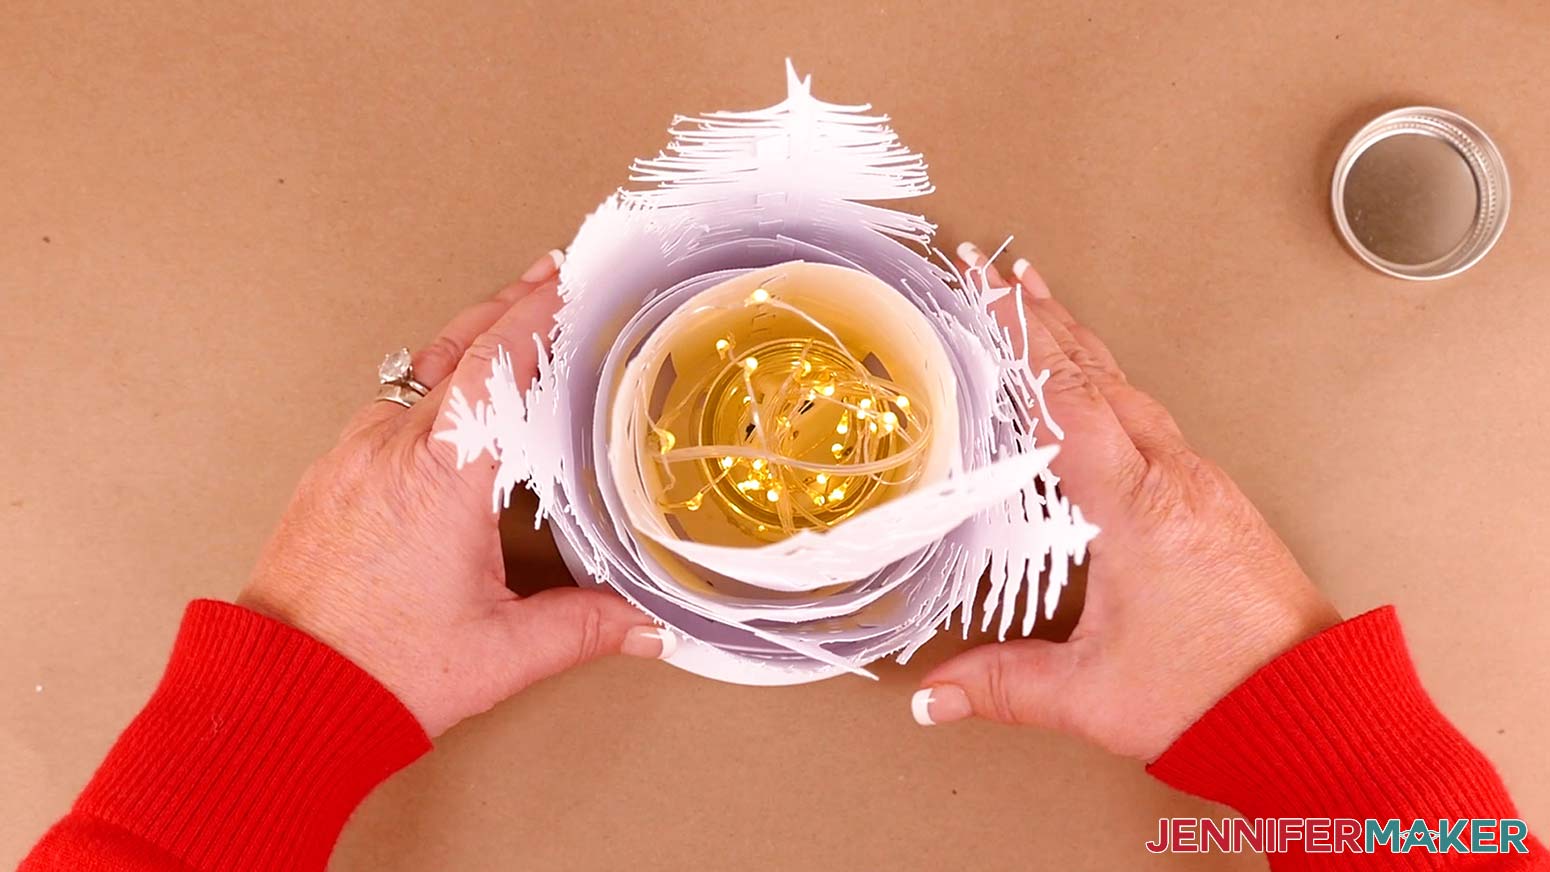
Now add lights to your paper cut lamp. Unwind 2 - 3 strands of fairy lights and stuff them into your mini mason jar (optional). Using a jar or vessel such as a mini mason jar helps to keep the fairy lights contained and from catching on the delicate edges of your paper lamp. The weight of the jar also helps keep your lamp steady. I like to try to make sure the lights are somewhat evenly spread out in the jar, with some poking out the top.
TIP: It helps to switch the strands of lights on before placing the jar in your lamp.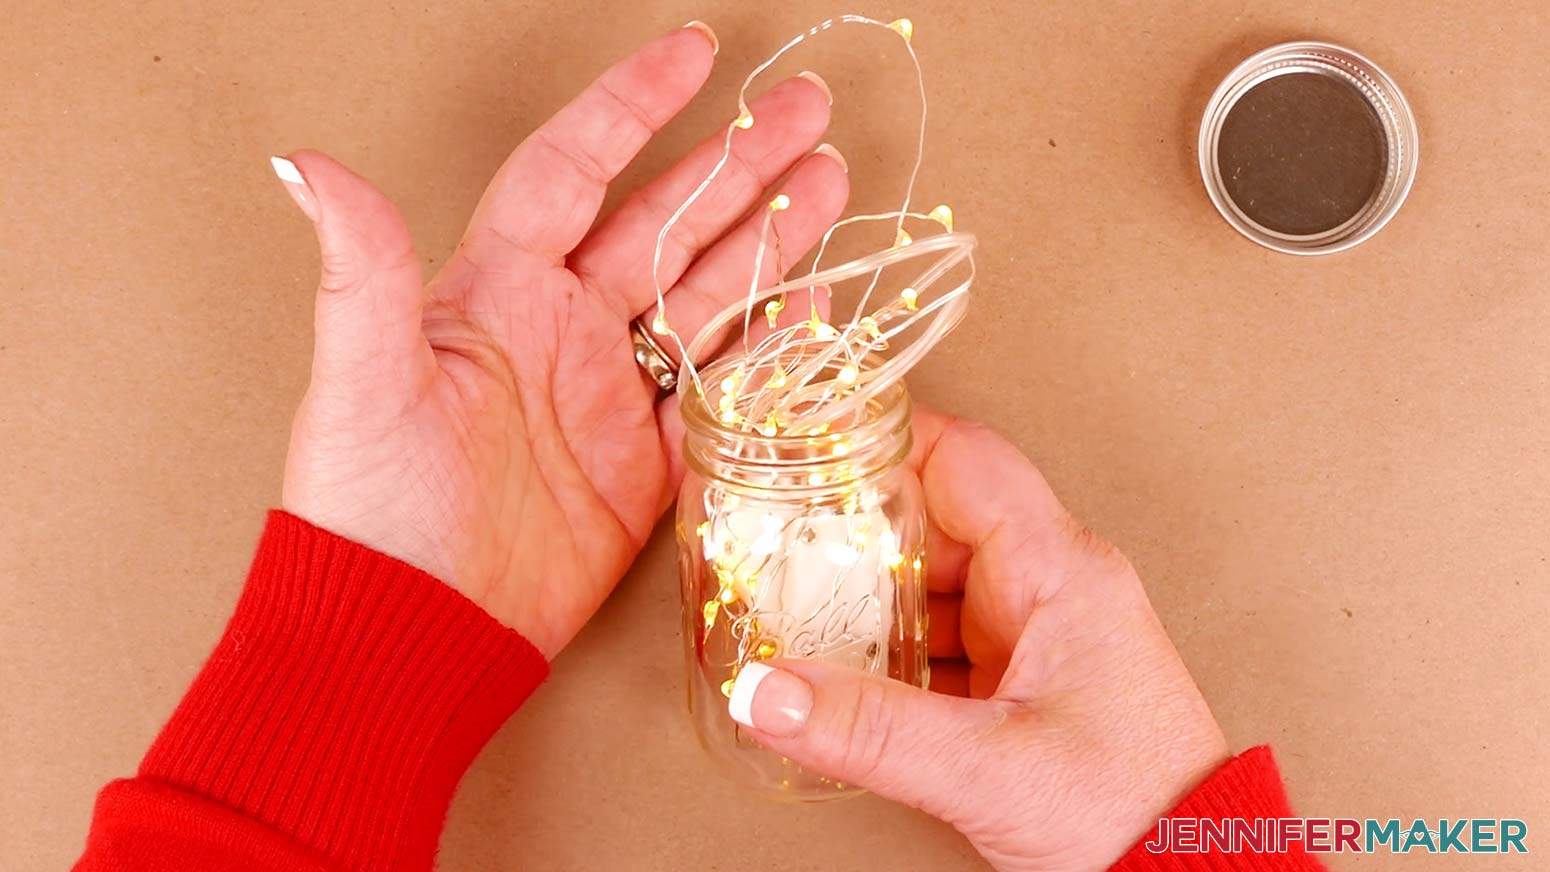
Drop the jar of lights into the center of your lamp.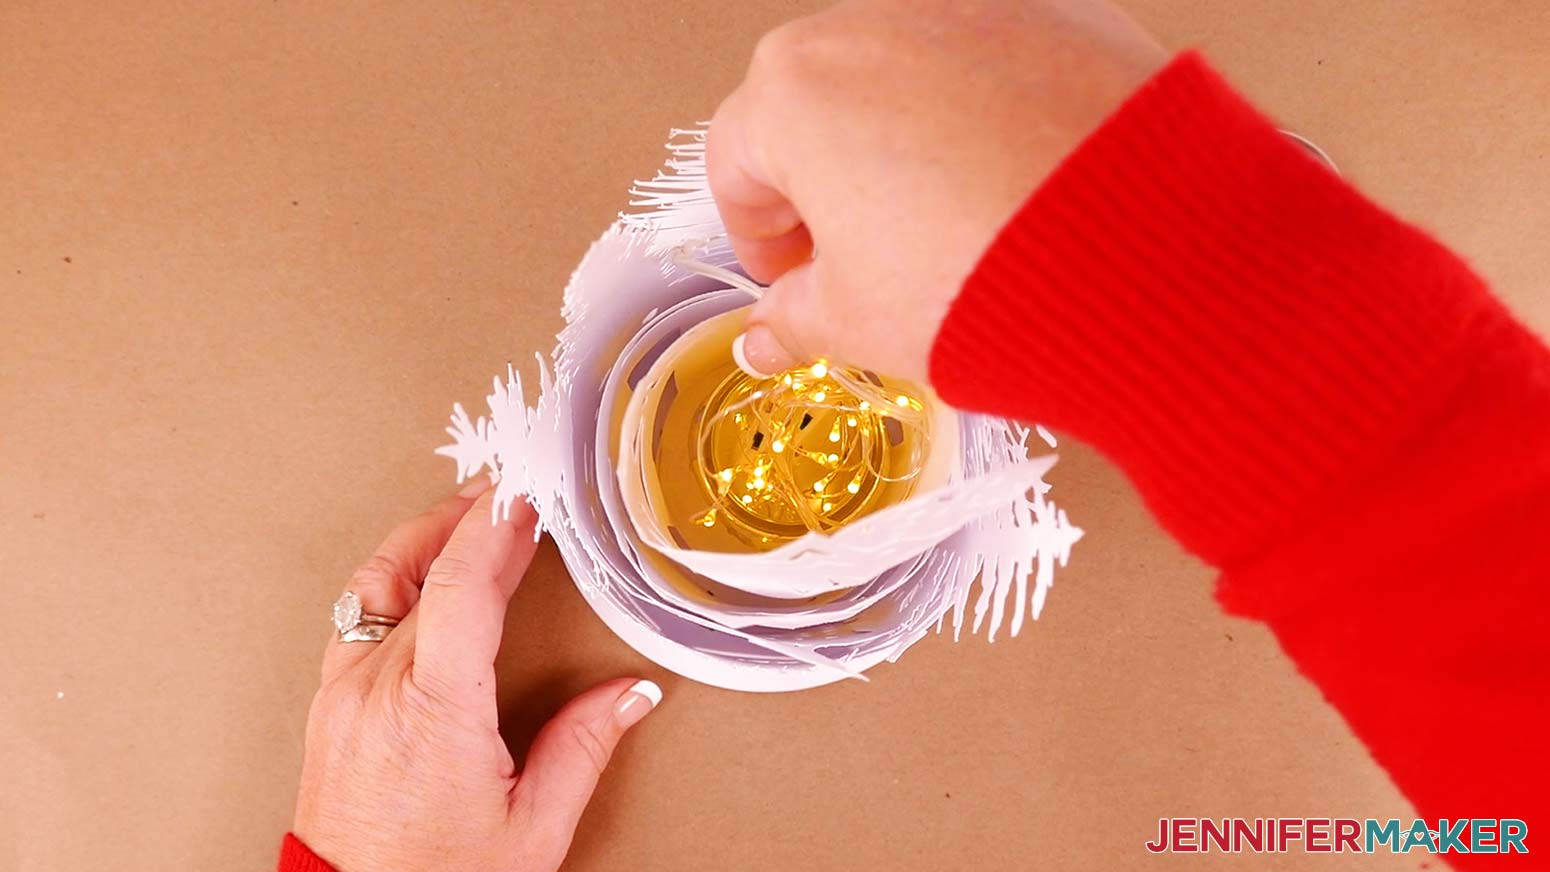
Done!
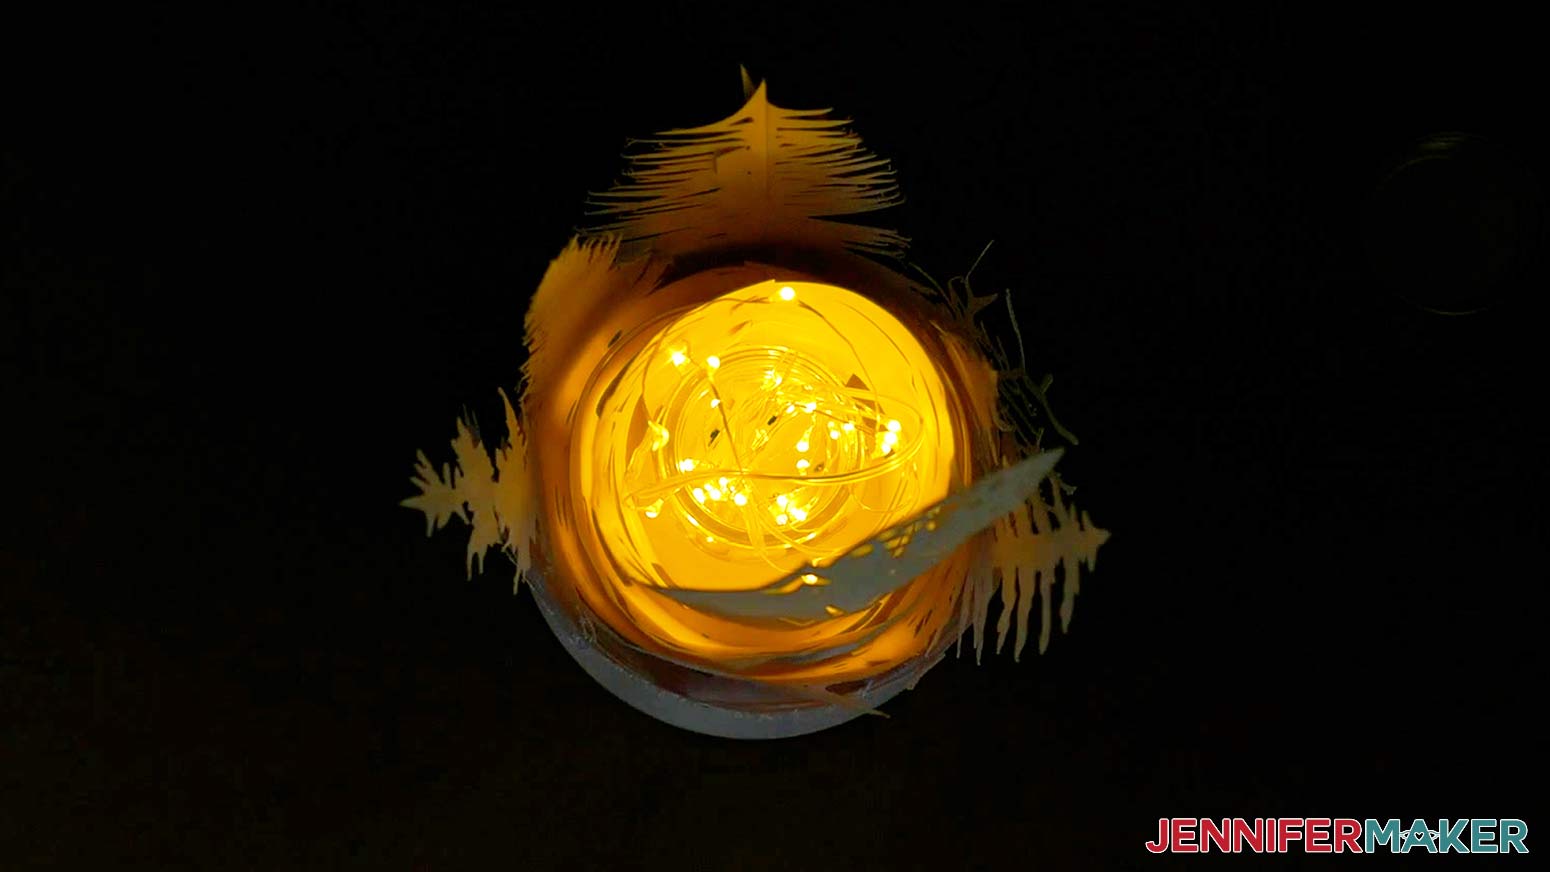
STEP 6: LIGHT UP YOUR LAMP AND SHOW IT OFF!
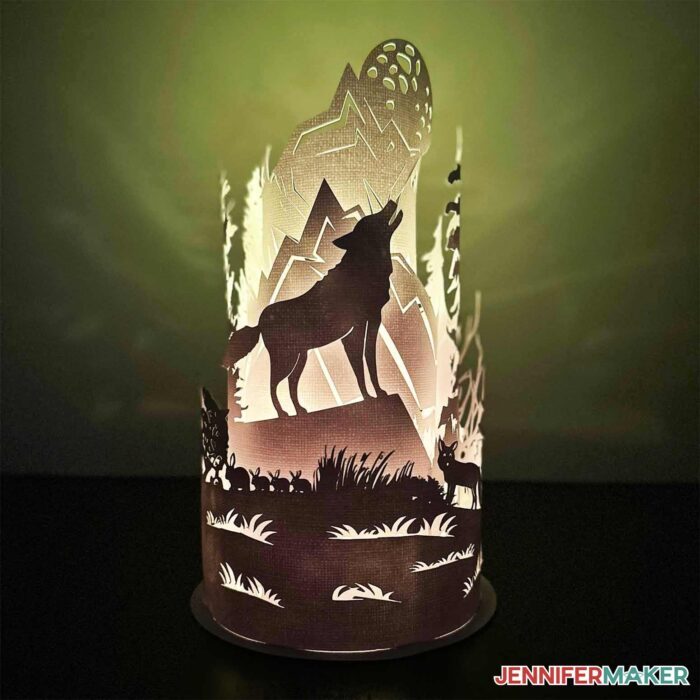
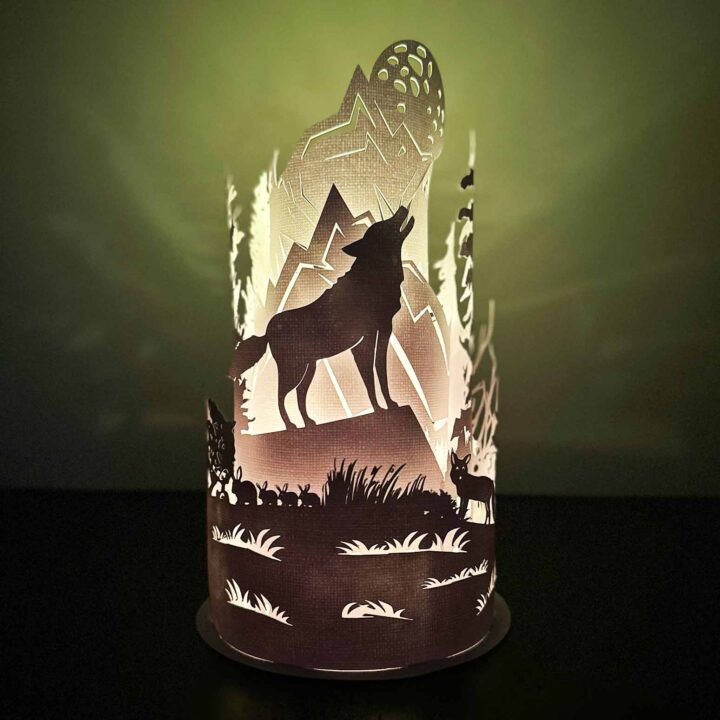
Place your new paper cut lamp in a dark or dim spot, and admire its beauty!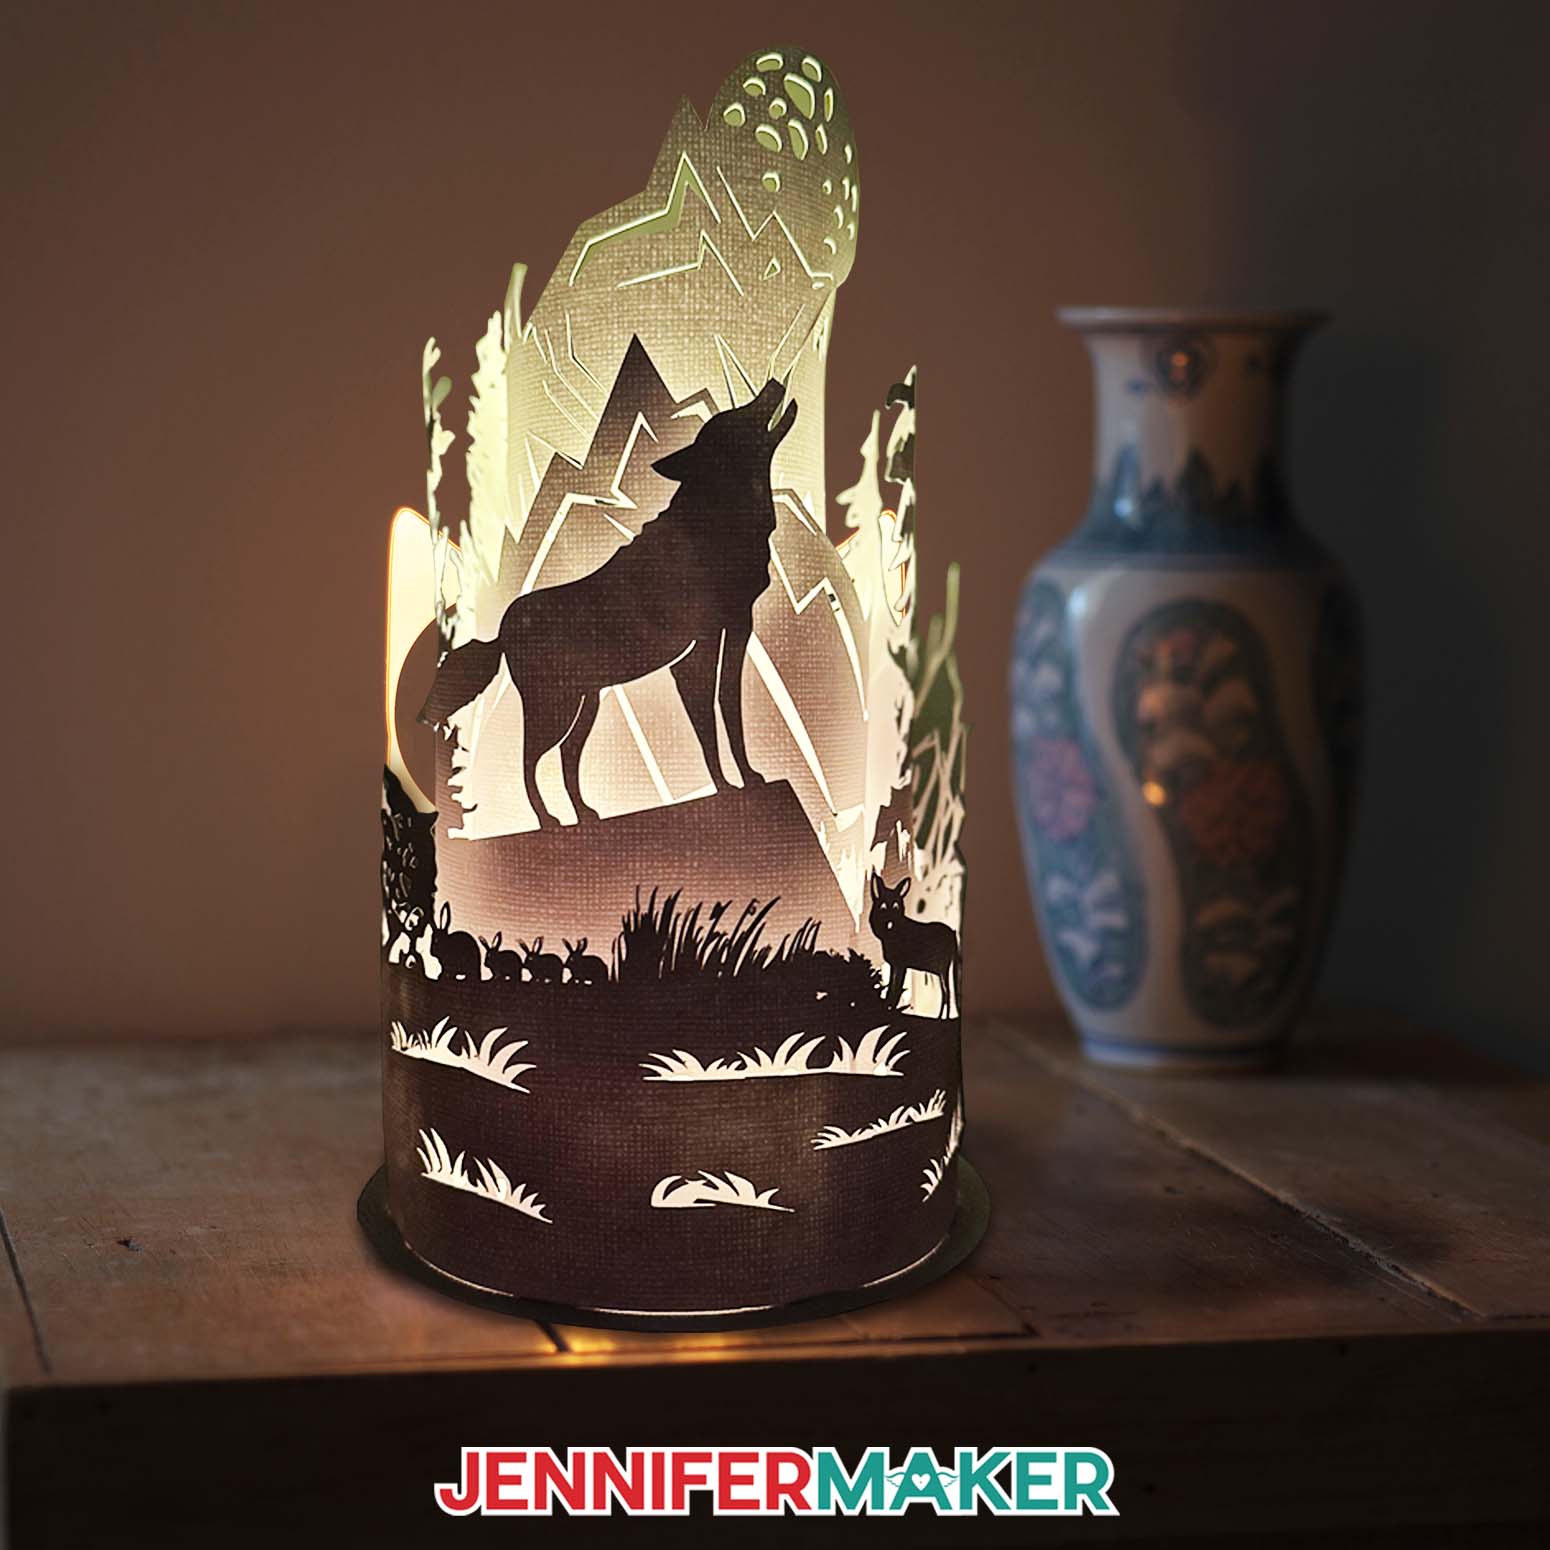
VARIATIONS:
You can also get creative and use a generic empty spice jar from your kitchen to contain your fairy lights. It's also a great way to up-cycle!
Answers to Your Questions About Making a Paper Cut Lamp
Q: How do you make a paper cut lamp?
A: You can follow my tutorial to make a paper cut lamp using your cutting machine and a few simple tools.
Q: What is a paper cut light box?
A: Paper light boxes are usually layered cardstock designs displayed in a shadow box frame with lights illuminating the scene.
Q: What paper is used for paper lamps?
A: Since a paper cut lamp needs to cut cleanly and hold its shape, I recommend using high-quality card stock in a medium weight. I used paper with a slight texture and really love the look!
Q: My cardstock keeps ripping on the intricate cuts. What can I do?
A: Be sure you’re using a clean and sticky machine mat, good quality cardstock, and a clean blade. See my Cricut Cutting Problems post for all the tips I use to get clean cuts every time.
Q. Do I have to use a Cricut machine?
A: No! We always include several versions of each digital item in the ZIP file. If you have a Silhouette Cameo, which uses Silhouette Studio, you can use the DXF file in Silhouette Basic Edition. If you have upgraded to Silhouette Designer Edition, Designer Edition Plus, or Business, you can use the SVG format with your Silhouette machine. If you don’t have a cutting machine, you can print and then cut out my digital download PDF files, too! The ZIP archive in my resource library includes these file types and more!
Q. Are your free SVGs just for personal use or do you offer a commercial license?
A: Yes, you can sell the physical item you make with my SVG files. We only ask that you give credit to JenniferMaker.com for the original designs and do not sell the digital files. If you use them, please share photos with us! We love supporting small businesses!
Q: Can I make this with a Cricut Joy?
A: No, the layers are too large to cut on a Joy mat and shrinking them to fit will lose a lot of the fun detail.
Get my free download of the Paper Cut Lamp SVG cut file here:
If you make a paper cut lamp using my free SVG file, I’d love to see it! Please share your results in my Cricut Crafters & Makers Facebook group where you’ll find hundreds of thousands of crafters like you, sharing their tips, projects, and inspiration.
Love,

Want to remember this? Save this Paper Cut Lamp Tutorial to your favorite Pinterest Board!