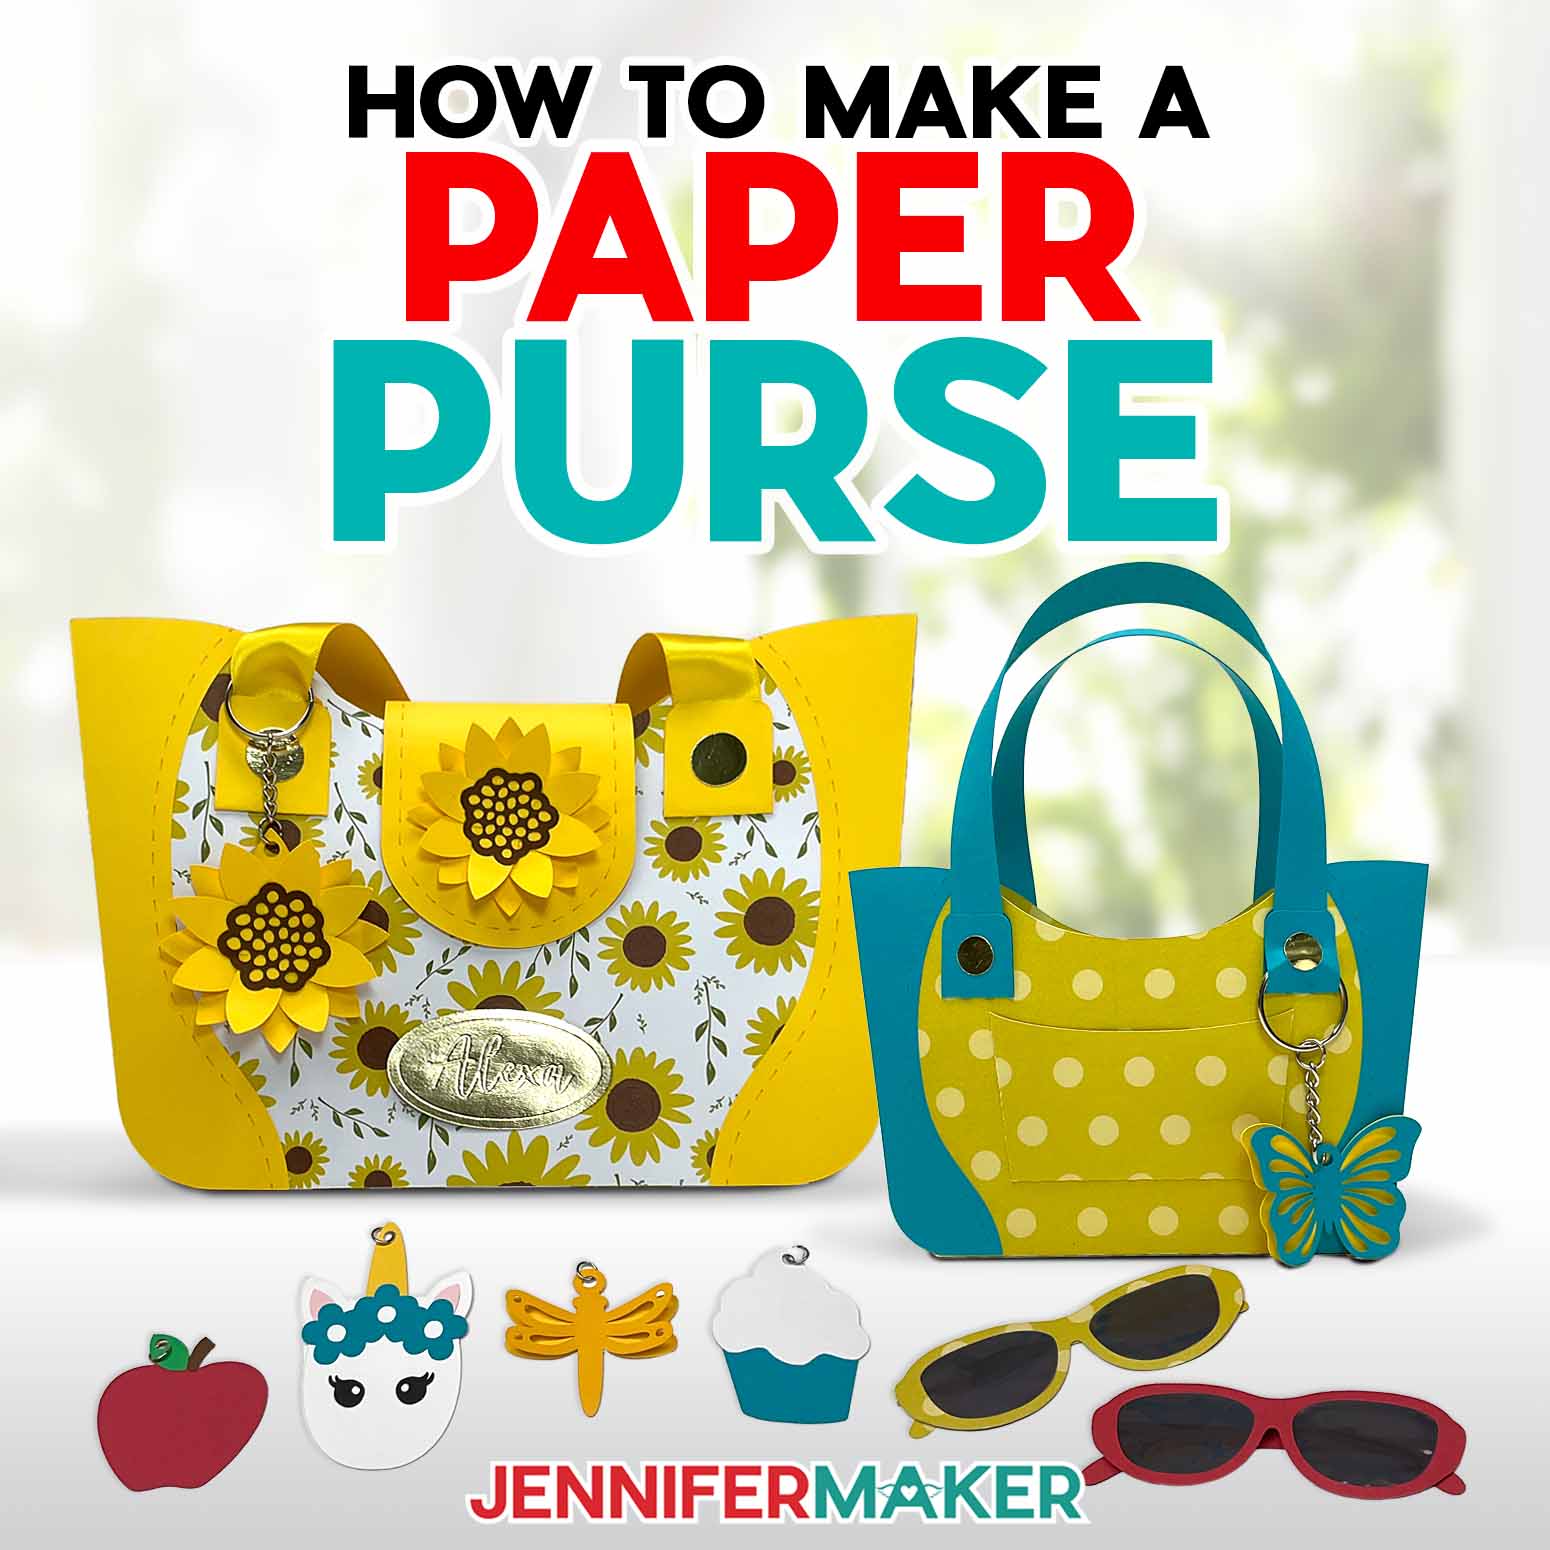
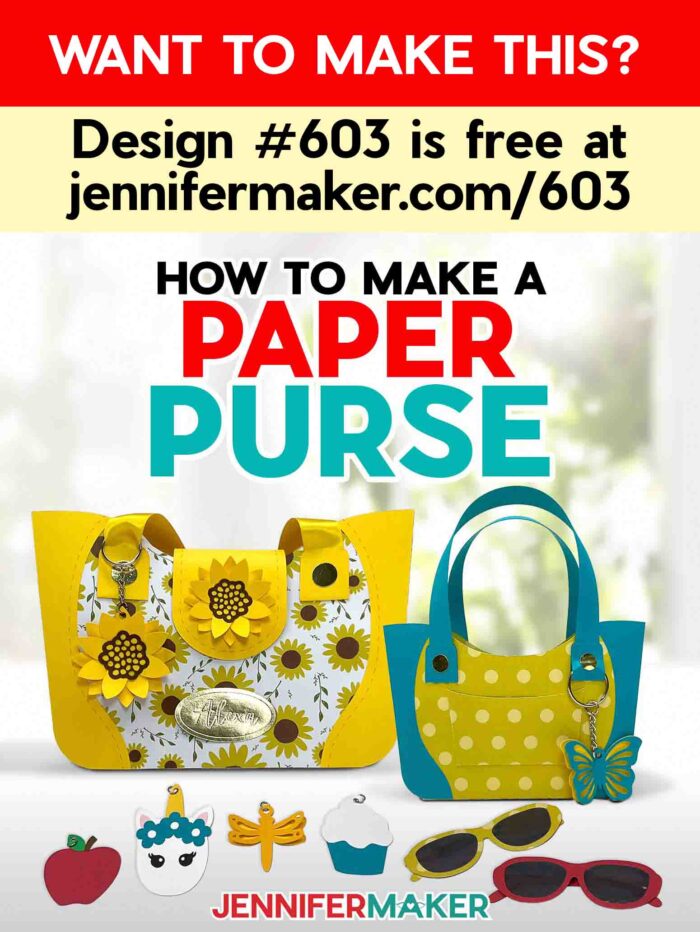
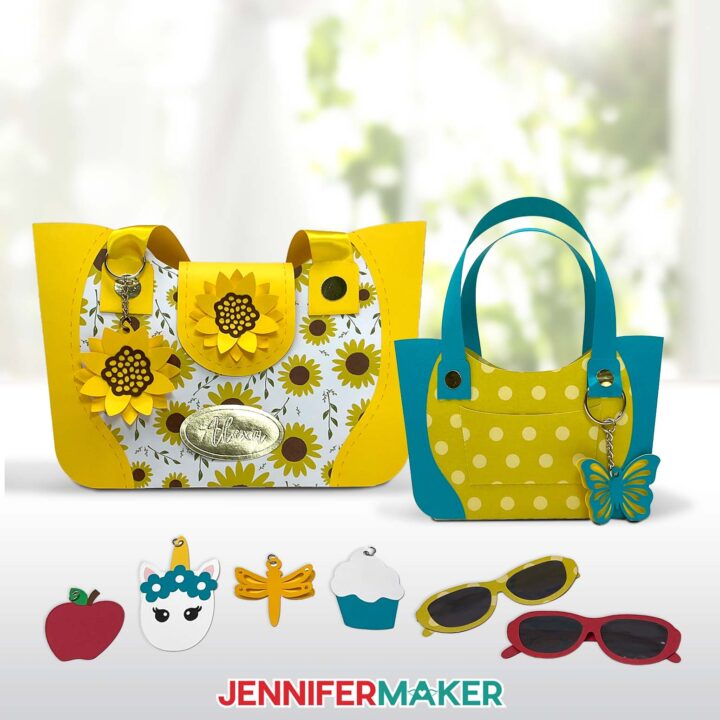
Learn how to make a 3D Paper Purse with realistic accessories!
I’m convinced — you can make anything out of paper. Whether it’s jaw-dropping home decor, a functioning timepiece, or a gift box that looks so realistic it’ll fool almost anyone … you can make it happen with cardstock and the right file (and tutorial). This time, I’ll show you how to make a paper purse almost entirely out of cardstock and a bit of glue! Add it to your collection with my earlier purse designs!
Watch the full step-by-step tutorial on how to make a paper purse coming soon to my YouTube channel!

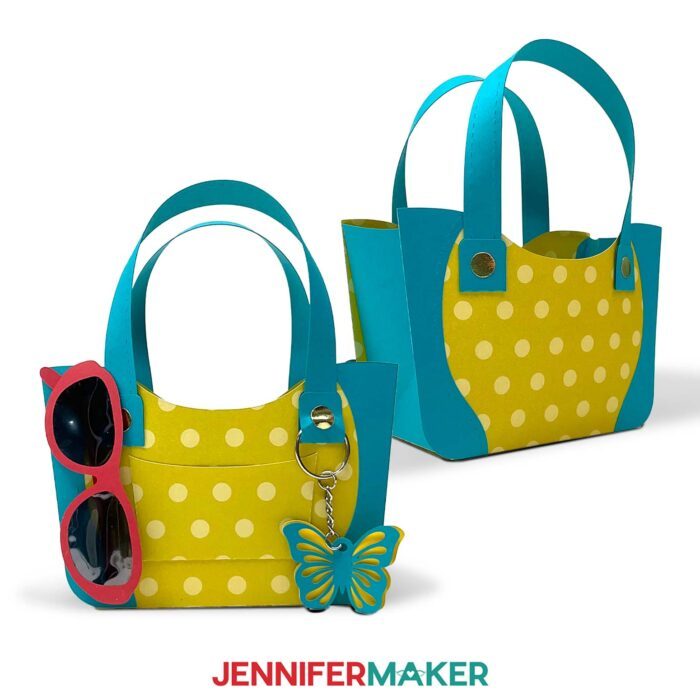
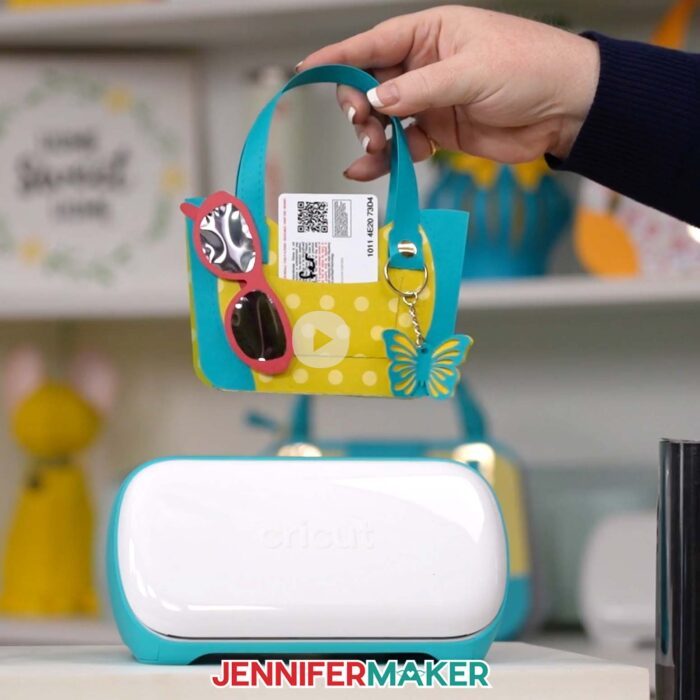
My 3D paper purses are not just chic and beautiful — they’re versatile, too! You can use them as gift bags, or even as part of a balloon bouquet, table centerpiece, or bridal shower favors. Or, maybe you just want to show the world how much you love crafting with a functional cardstock handbag! With the cute accessories and tiny details like a pocket on the back of the purse (perfect size for gift cards!) and Cricut-drawn stitches, you might even convince folks it’s the real deal.
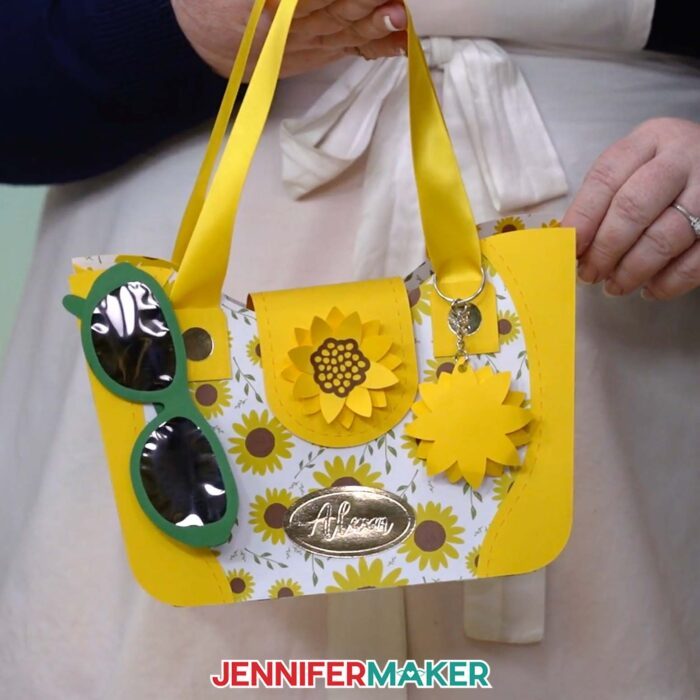
Want to learn how to make a paper purse? I can help with that! You all loved my last 3D paper purse “collection,” and now I’m back with a new design to share – plus a tutorial video and a bunch of embellishment options you’re going to love, like keychains and even realistic cardstock sunglasses. I used window tint film to create the lenses, and I’ll show you exactly which setting to use so they cut beautifully. They look so posh hanging from the front of the purse along the top edges.
First I’ll show you important techniques for preparing the score lines (to make fold lines) and stitch marks in Cricut Design Space. We’ll use a Cricut-compatible pen to have your machine draw stitches on certain elements. As far as paper purse crafts go, could these BE any more realistic-looking?
I’ll use a Cricut Maker 3 and a Cricut Joy to show you how to cut the 3D paper purse in two different sizes. And good news — you can use any other Cricut or cutting machine to cut them, too! The smaller Cricut Joy-sized version of the purse comes together just like the large version, but with a few little differences I’ll show you in the tutorial video — like the need for a longer green machine mat.
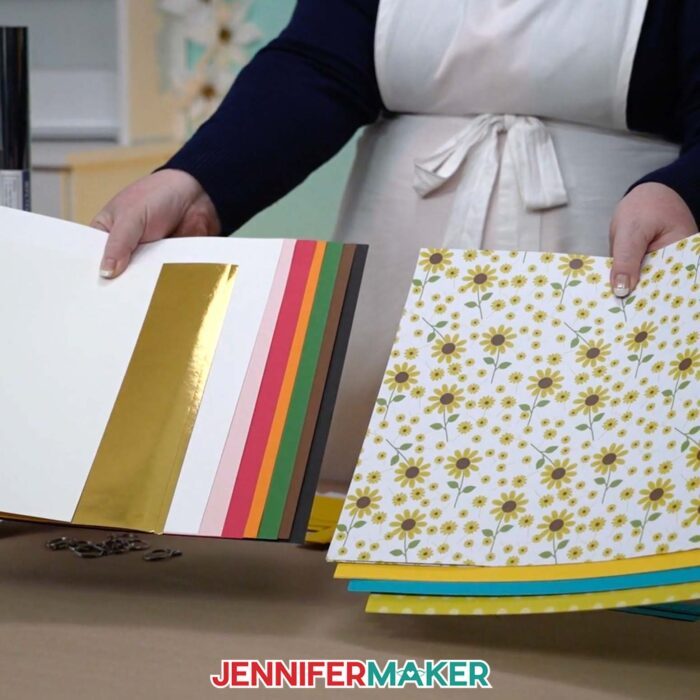
To make your own paper handbags, first you’ll need some cardstock. I used 65 pound solid, patterned, and foil cardstock to create my purses, with 110 pound cardstock inside the bottom of the bag as reinforcement. Make sure to use solid-core cardstock so the edges look nice and finished – which is important for ANY good handbag, right? It’s all about those high-end details!
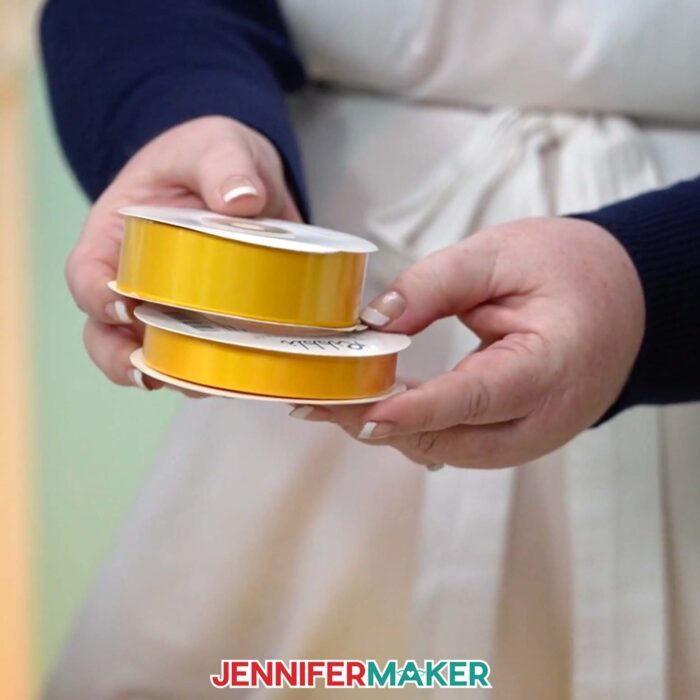
And speaking of details, you can even swap each paper strap in the cut file for a piece of ribbon that coordinates with the bag. It’s an easy switch and the instructions are down below in the written tutorial! The ribbons are my favorite since they’re softer and more flexible, but the cardstock straps work really well, too!
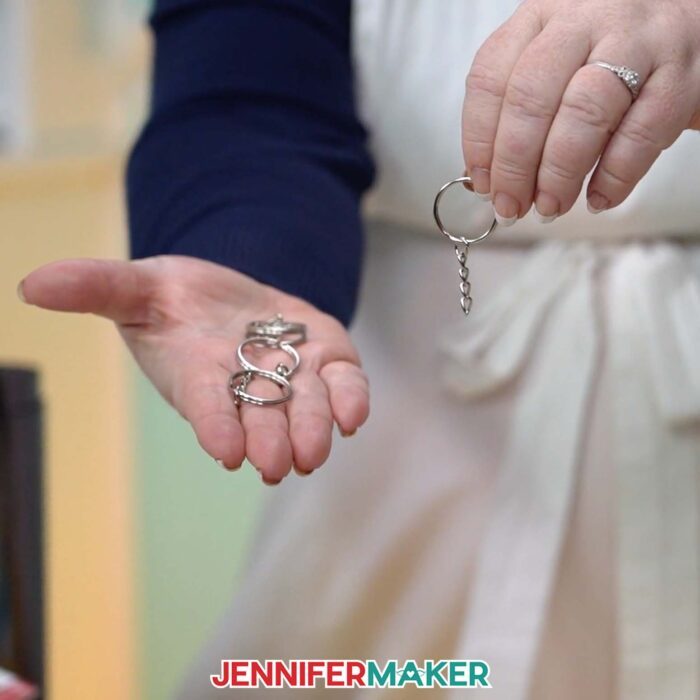
There are a few other materials you’ll need for the embellishments, like a keyring and chain with an open jump ring for the keychain. The keychains are easy to make, and come together with a few twists of some jewelry pliers and needle-nose pliers. I’ll show you exactly how I did it in the tutorial!
The rest of the materials you’ll need to make my 3D paper purse (plus links to where to find them) are in my materials list below.
My DIY paper purse is not just a gift bag — it’s a beautiful craft any handbag aficionado will be thrilled to receive! It’s so fun to customize the cardstock colors, patterns, and textures to fit a unique style or aesthetic, and I can’t wait to see how yours turn out!

Let me show you how to make a paper purse! This post contains some affiliate links for your convenience (which means if you make a purchase after clicking a link I will earn a small commission but it won’t cost you a penny more, there is no additional cost)! Read my full disclosure policy.
Materials to Make a 3D Paper Purse
View my Amazon shopping list for the exact items I used!
-
Ten to Fourteen (10-14) Sheets of 8.5″ x 11″ or 12″ x 12″ 65 lb. Solid Core Cardstock (any colors)
-
One to Two (1-2) Sheets of Patterned Cardstock (I used this Whaline Sunflower 11.8″ x 11.8″ Cardstock)
-
One (1) Sheet of 8.5″ x 11″ 65 lb. Gold Foil Cardstock (for accents)
-
One (1) Sheet of 8.5” x 11” or 12” x 12” Heavy Cardstock (optional to reinforce the purse’s bottom)
-
One (1) Set of 3/8″ Clear VELCRO Dots (optional to fasten the flap closure)
-
One (1) Set of Keychain Accessories (optional for attaching keychains)
-
One (1) 6″ x 3″ Piece of Window Tint Film (optional for sunglasses lenses)
-
Two (2) Pieces of 5/8″ Wide Ribbon (optional for small purse handles) -OR-
-
Two (2) Pieces of 1″ Wide Ribbon (optional for large purse handles)
-
A way to cut your cardstock – I’m using the Cricut Maker 3, but you can also use the Cricut Maker, a Cricut Explore Series machine, the Cricut Venture, the Cricut Joy Xtra, or even the Cricut Joy
-
Cricut Fine Point Pen (optional for drawing stitching details)
-
Weeding Tool (for popping out small cutouts from intricate areas)
- Design #603 (My free SVG/PDF/DXF design files are available in my free resource library – get the password by filling out the form at the bottom of this page)
How to Make a Paper Purse
Make a Paper Purse
Learn how to make a paper purse gift bag with fun accessories entirely out of cardstock!
Materials
- Ten to Fourteen (10-14) Sheets of 8.5" x 11" or 12" x 12" 65 lb. Solid Core Cardstock (any colors)
- One to Two (1-2) Sheets of Patterned Cardstock (I used this Whaline Sunflower 11.8" x 11.8" Cardstock)
- One (1) Sheet of 8.5" x 11" 65 lb. Gold Foil Cardstock (for accents)
- One (1) Sheet of 8.5” x 11” or 12” x 12” Heavy Cardstock (optional to reinforce the purse's bottom)
- One (1) Set of 3/8" Clear Hook and Loop Dots (optional to fasten the flap closure)
- One (1) Set of Keychain Accessories (optional for attaching keychains)
- One (1) 6" x 3" Piece of Window Tint Film (optional for sunglasses lenses)
- Two (2) Pieces of 5/8" Wide Ribbon (optional for small purse handles) -OR-
- Two (2) Pieces of 1" Wide Ribbon (optional for large purse handles)
- Design #603 (My free SVG/PDF/DXF design files are available in my free resource library - get the password by filling out the form at the bottom of this page)
Tools
- A way to cut your cardstock - I’m using the Cricut Maker 3, but you can also use the Cricut Maker, a Cricut Explore Series machine, the Cricut Venture, the Cricut Joy Xtra, or even the Cricut Joy
- Cricut Green StandardGrip Machine Mat 12" x 12"
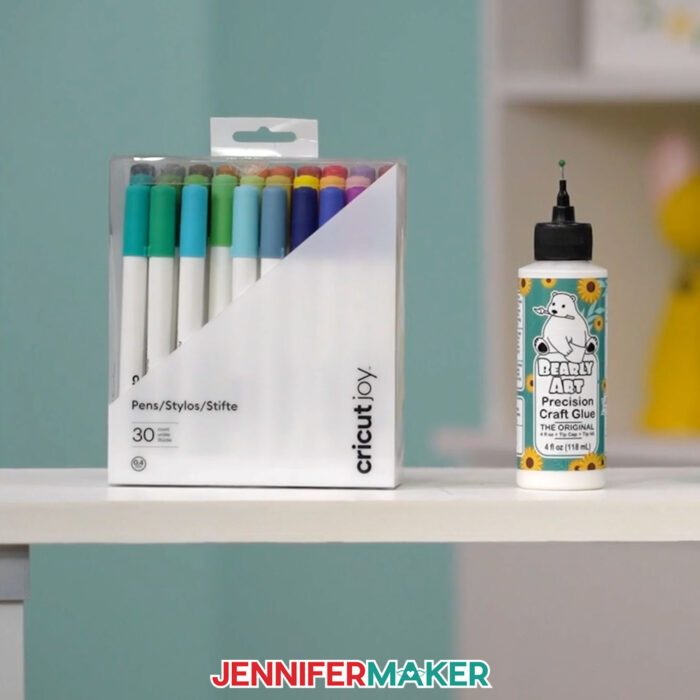
- Craft Glue (I used Bearly Art Precision Glue)
- Scoring Stylus (optional for files with score lines) -OR-
- Single Scoring Wheel (optional for files with score lines)
- Cricut Fine Point Pen (optional for drawing stitching details)
- Brayer
- Scraper
- Spatula
- Weeding Tool (for popping out small cutouts from intricate areas)
- Tweezers (optional for gluing intricate layers into place)
- Jewelry Pliers (optional for attaching keychains)
- Scissors (optional for cutting ribbon)
- Paper Towel (optional for dabbing excess glue)
Instructions
STEP 1: GET MY FREE 3D PAPER PURSE DESIGNS
First, download my How to Make a Paper Purse designs from my free library – look for Design #603. Alternatively, you can use the Save This Project form near the top of this post and the design link will be emailed to you.
There are seven design files in the SVG folder. There are score versions of each of the large and small purses for use with a scoring tool, no-score versions of each with dashed cut lines to create the foldable creases, as well as no-score/no-draw versions of each. There’s also an accessories file with cute things to add to your purse.
There is also a DXF folder with cut files, and a PDF folder with versions you can cut by hand.
In this tutorial, I will show you how to prepare and assemble the large ”score” purse SVG with a Cricut Maker 3. I’ll also show you how to use your Cricut to draw the stitch marks. There are some differences with the assembly of the smaller, Joy-sized version of the purse that I’ll highlight, too.
TIP: If you're not sure how to upload, go to jennifermaker.com/svgs to learn how to unzip and upload SVG files.
STEP 2: PREPARE AND CUT YOUR 3D PAPER PURSE DESIGN
CRICUT DESIGN SPACE
- Open Cricut Design Space and click “New Project.”
- Click “Upload” and then “Upload Image.”
- Click “Browse.”
- Select the purse SVG file of your choice. I’ll demonstrate with the large purse that has score lines and stitch lines, titled “3d-paper-purse-score-jennifermaker-SVG.”
- On the Prepare to Upload screen, it will say “Cut Image” with the design preview.
- Click “Upload.”
- Follow steps 2-6 to upload the accessories SVG file.
- Select the purse and accessories in Recent Uploads and add them to the Canvas.

- Zoom out so you can see everything.
- Move the files apart.
- Select each file and Ungroup it.
- Decide which elements from the accessories toolkit that you’d like to use, and delete the ones you don’t want.
NOTE: If you’re making sunglasses, make sure you keep the ear pieces with the score lines if you’re using the score version of the purse file, or the ear pieces without score lines if you’re using the no-score version. There are also two glasses frame pieces – keep both, as one will go on each side of the assembled sunglasses.
NOTE: If you’re planning to make ribbon straps for your purse, delete the eight long strap pieces. - Now let’s convert the score lines. In the Layers Panel, click the arrows to expand each grouped layer (avoiding the purse straps, flap closure, and side accent pieces for now, since we’ll convert them to drawn stitch layers later).
- Click the top layer in each expanded group - it should show red in the Color Box.
TIP: If the red layer is a dashed line, it’s a stitch layer. We will convert those to “Pen” later. - Change its Operation to “Score.”
- Select the whole group that the score layer belongs to.
- Click “Attach.”
- Repeat steps 13-17 with the remainder of the score layers. Be sure to leave the straps, flap, and side accent pieces for now, as these are stitch layers.
- Now find the straps, flap, and side accent piece groups. Hold shift and select the top layer within each group. The Color Box will be red for all of them. There are eight strap stitch layers, one flap stitch layer, and four side accent piece stitch layers.
- Change their Operation to “Pen.”
- Click the Color Box next to the Operation menu and select the pen type and color you’d like to use. I recommend using a Fine Point pen.
- Select the first strap’s group.
- Click “Attach” to attach the Draw and Basic Cut layers in that group.
TIP: Whenever you’ve done a large amount of changes to your project, it’s a good idea to save your work. - Repeat steps 22-23 with the remaining strap groups, the flap group, and the four side accent piece groups.
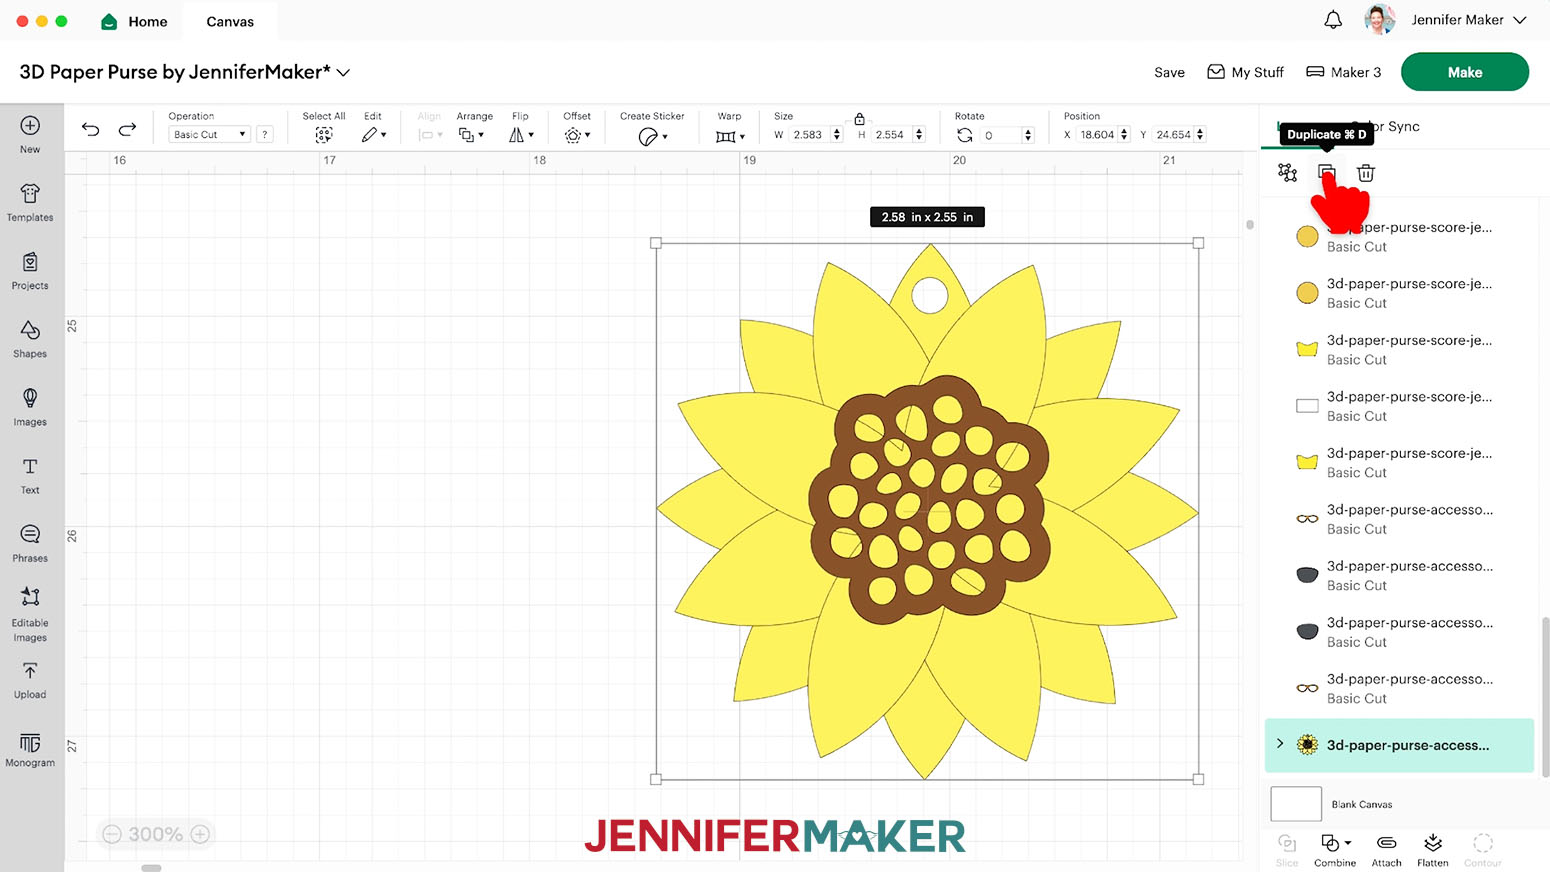
NOTE: Some of the elements may have disappeared from the Canvas. They’re still there, but they may be behind other objects. Look through the Layers Panel to find them and bring them to the front of the Canvas if you’d like. - If you’d like to create additional embellishments to glue directly to the purse, you can use the keychain elements, but remove the hole for hanging from a keychain. Find the element you’d like to turn into an embellishment (I’ll demonstrate with the sunflower), and duplicate it.
- Click the arrow on the duplicated element to expand its layers.
- Select the layer with the hole for the keychain.
- Click “Contour.”
- Click the circle to hide the hole.
- Click the X to exit the Contour window. Now you have another sunflower without a hole that you can attach directly to the purse flap, the body of the purse, or anywhere else you want.
- You can resize the new embellishment if you like, by selecting the whole element and (with the lock icon closed) clicking and dragging a corner handle. I resized my embellishment a little smaller so it fits on the purse flap.
- When all your elements are ready to cut, select the correct machine from the top right drop-down menu.
- Click “Make.”
- On the Prepare screen, change the Material Size for each mat to match your paper if needed.
- Click back on the first mat, then click “Continue.”


CUTTING
- On the Make screen, set your Base Material settings for each mat. I used the following settings:
65 lb Solid Core, Patterned, and Foil Cardstock - “Medium Cardstock - 80 lb (216 gsm)” with More Pressure
Window Tint Film (with protective sheet peeled off) - “Stencil Film - 0.4mm” with More Pressure
110 lb White Cardstock - “Heavy Cardstock - 100 lb (270 gsm)” with More Pressure - If you’re using the “no score” version, skip ahead to step 3. If you’re using the Scoring Stylus, insert it into the clamp now. If you’re using the Single Scoring Wheel, insert it into the clamp when prompted.
- Place your first mat’s cardstock face up on a green StandardGrip machine mat.
NOTE: If you’re using a Cricut Joy or Joy Xtra with the small purse file and smaller sheets of material, place your mat’s material in the top left corner of the mat, just like you would with a 12” x 12” mat.
NOTE: If you’re using patterned cardstock and it has a pattern that needs to face a specific direction (such as one with words), make sure the purse pieces are facing up on your mat preview in Design Space and you load your patterned cardstock with the pattern/words facing up (toward the top of the mat). - Use a brayer to make sure it’s fully adhered.
- Check that your Premium Fine-Point Blade is clean and in the clamp.
- Press the flashing “Load/Unload” button to load the prepared mat into your Cricut.
- Press the flashing “Go” button to begin cutting.
- When it has finished cutting, unload the mat, flip it over onto your work surface, and roll it back to release the paper. Lay the cut pieces right side up on your work surface.
TIP: Use the spatula to help lift delicate parts. If you have any issues with your cuts, go to jennifermaker.com/cleaner-cuts. Use a scraper tool to remove the small bits left on your mat after you remove the cut pieces. - Follow steps 3-8 to continue cutting the rest of your cardstock mats.
- Before cutting the window tint film, peel off the clear protective sheet from the one side of the film. Then adhere the film to your mat with that side face up. Follow steps 3-8 to cut that mat.
TIP: Be sure to place the right material on each mat. - Here are what my cut pieces look like. There is a large front purse piece, large back piece, pocket piece, flap piece, four side accent pieces, bottom piece, bottom reinforcement piece, two side pieces, four handle attachment pieces, four button pieces, six sunglasses pieces, four smaller sunflower pieces, and four larger sunflower keychain pieces. If you’re using cardstock straps, you’ll have eight additional strap pieces.


STEP 3: ASSEMBLE YOUR 3D PAPER PURSE
- Gather the pieces with crease lines that require folding: The pocket piece, bottom piece, two side pieces, and the four handle attachment pieces.
- Fold the handle attachment pieces in half on the crease lines.
- Use your scraper tool for a sharp crease.
NOTE: If your paper is two-sided, fold the handle attachment pieces so the pattern or “pretty side” is on the outside of the fold. - The side pieces have three crease lines. On one side piece, fold inward along the longer crease down to where all three crease lines meet.
NOTE: If your paper is two-sided, fold the side pieces so the pattern or “pretty side” is on the outside of the fold.
TIP: Use your scraper tool for a sharp crease. - Fold one of the diagonal crease lines in the same direction as the longest crease.
- Repeat step 5 for the other diagonal crease.
- Fold the two tabs on the long edges of the side piece in the opposite direction as the other folds.
- Repeat steps 4-7 for the other side piece.
- On the pocket piece, fold all three tabs in the same direction. If your paper is two-sided, fold the tabs away from the pattern or “pretty side”.
- On the bottom piece, fold the tabs all in the same direction. If your paper is two-sided, fold the tabs away from the pattern or “pretty side”.
- Lay the bottom piece on your work surface horizontally, with the tabs pointing up.
- Position each side piece on either side of the bottom piece, with the tabs pointing up and the two diagonal folds closest to the bottom piece.
- Apply craft glue to the outside of the bottom piece’s left tab.
- Line up the bottom piece so the tab matches up with the shape of the creases on the side piece.
- Press the glued tab down onto the side piece to adhere it.
- Before it’s dry, bend the fold where the side piece and bottom piece meet, to make sure they’re flush. Make any adjustments if necessary.
- Repeat steps 13-16 with the bottom piece’s right tab.
- Grab the front and back pieces and the four side accent pieces.
- Make sure the side accent pieces are face (stitch side) up and matched to the correct spots on the front and back pieces.
- Apply glue to the back of a side accent piece.
- Adhere it to its correct spot on the front or back piece. Make sure the edges are flush.
- Repeat steps 20-21 with the remaining three side accent pieces.
- Grab the pocket piece and one of the large purse pieces. I will attach mine to the outside back of the purse.
- Apply glue to the outside of the pocket’s tabs.
- Position the pocket on the center of the back piece and press down on the tabbed areas to adhere it.
TIP: Make sure the bottom of the pocket is parallel to the bottom of the purse. - Slide a finger into the pocket to make sure no glue leaked out and sealed it shut.
- Position the bottom edges of the front and back purse pieces face down along the long edges of the bottom piece.
- Line up the straight bottom edge of the front piece with the bottom piece, under the tab.
- Apply craft glue to the outside of the bottom piece’s tab.
- Press the tab onto the straight edge of the front piece to attach it.
- Before the glue is dry, bend the fold where the front piece and bottom piece meet, to make sure they’re flush. Make any adjustments if necessary.
- Repeat steps 28-31 to attach the back piece to the bottom piece.
- Apply glue to the outside of one of the left side piece’s tabs.
- Fold the left side piece and the adjacent front or back piece up so the glued tab meets the inside of the piece.
- Align the edge at the top of the glued tab with the edge at the top of the front or back piece.
- Use your fingers to press along the glued tab on the inside and outside of the purse to attach the pieces together.
NOTE: The front or back piece will hang over the side of the purse toward the bottom. - Repeat steps 33-36 with the remaining three tabs on the side pieces, attaching them to the front and back pieces.
- Place the bottom reinforcement piece inside the purse body and press it down against the bottom to give the bag extra strength.
- Gather the paper straps and the strap attachment pieces.
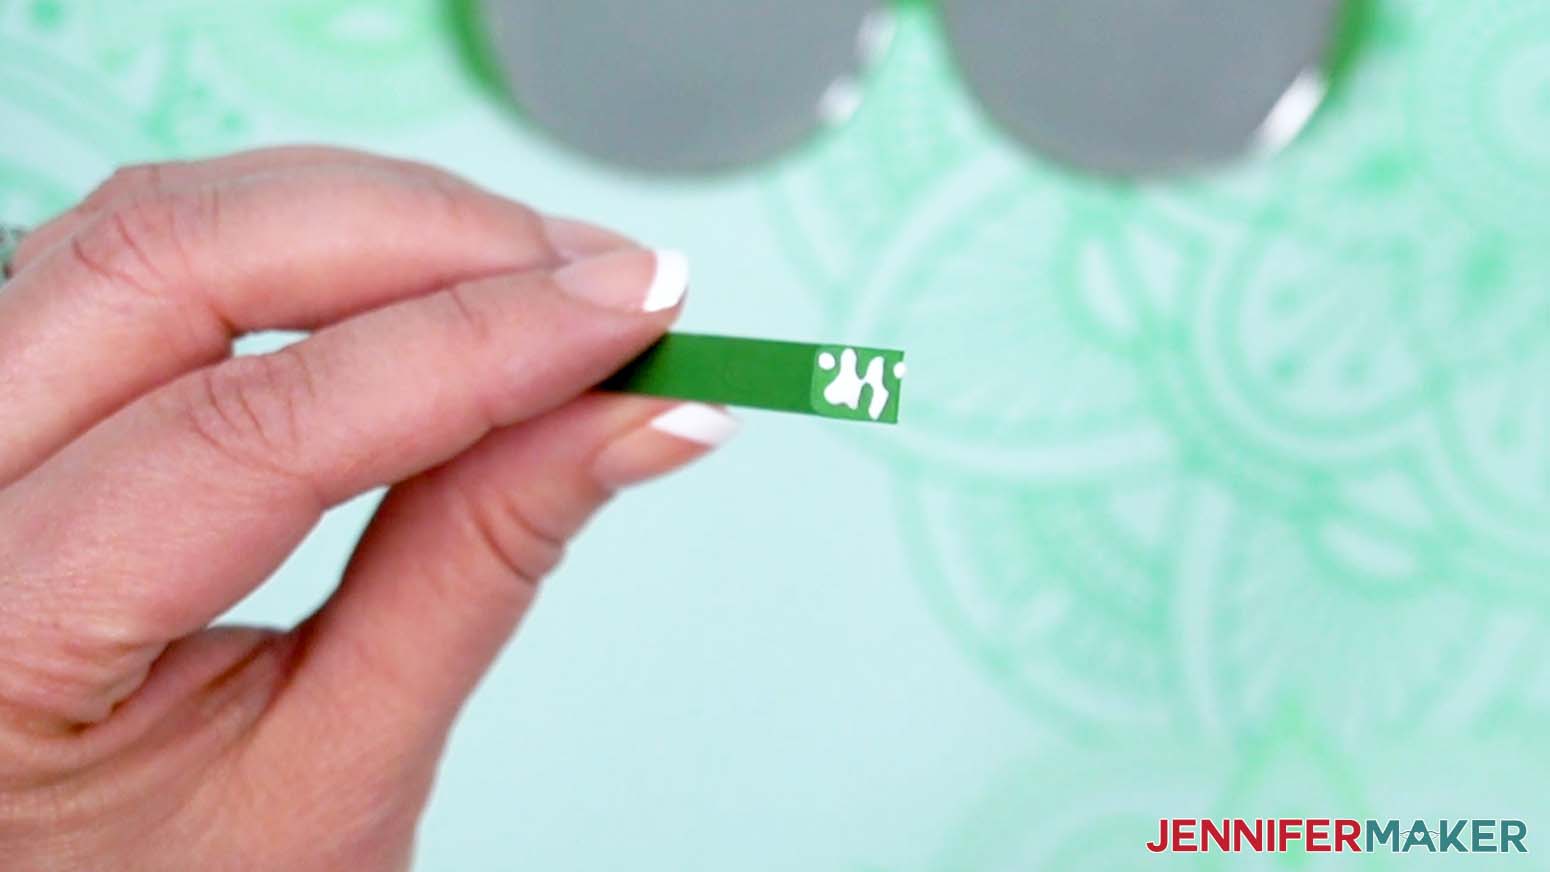
NOTE: If you’re making the large purse straps, you’ll need to attach the short strap pieces together to make four full-length straps. Find a piece with a blank area on one end next to the stitching. Apply glue to the stitched side on the area without stitch marks. Grab another strap piece with stitching down the entire length of the piece, and place one end (stitch side up) onto the glue, making sure the sides line up. - Apply glue to the back side of one of the full-length straps (the side without stitching).
- Adhere the glued strap to the back side of another full-length strap. Press them together to adhere them well. The two attached straps will be stronger than one, allowing the bag to hold more weight.
- Repeat steps 40-41 with the other two full-length straps.
- Apply glue to one half of the inside of one of the folded handle attachment pieces. Apply the glue in the center to the end, keeping away from the edges.
- Place one end of the strap on the glue. Press with your fingers to adhere.
- Apply more glue on top of the strap on the same half of the handle attachment piece.
- Fold the handle attachment piece over at the crease and press firmly with your fingers to securely attach the strap within the folded sides.
- Apply glue to the back of one of the button accent pieces.
- Adhere the button to the center of a handle attachment piece.
NOTE: Be sure to apply the buttons so they’ll show when the handle attachment pieces are adhered to the outside of the purse. Lay the strap or ribbon on your work surface the same way it will attach to the bag to help visualize where to attach them. - Repeat steps 43-48 for the remaining handle attachment pieces and buttons. If you're making a keychain to slide onto your handle, make sure to wait to adhere the last handle attachment piece to its handle until after your keychain is ready.
NOTE: If you'd like to make and attach a keychain to your purse's handle, see "Step 4: Add Embellishments to Your Paper Purse" below. If you're not making a keychain, skip to step 52. - To attach your keychain, grab your metal keyring and slide it onto the handle end that is not yet adhered to a handle attachment piece.
- Repeat steps 43-48 with the last handle attachment piece.
- The handle with the keyring will go on the front of the purse. Apply craft glue to the back of one handle attachment piece and press it into place onto the front piece, near the opening of the purse. The bottom straight edge of the handle attachment piece should be parallel to the bottom of the purse.
- Apply glue to the back of the other handle attachment piece, then attach it across from the first handle attachment piece on the front of the purse.
- Repeat steps 52-53 with the other handle on the back of the purse. Try to position the handle attachment pieces in the same spots as you positioned them on the front of the purse.
- Grab the flap piece and apply glue to the bottom inch of the straight end on the side with the stitching.
- Center the glued end of the flap on the inside of the purse’s back piece. Press it down to adhere it.
- Adhere two hook and loop closure dots together to form a pair.
- Attach the adhesive of one side of the hook and loop dot to the inside of the flap, about 1” from the rounded end.
- Curve the flap down so it’s overlapping the front of the purse.
- When it’s centered on the front of the purse and the opening of the purse is closed to your liking, press against the hook and loop dot pair so the adhesive on the other dot sticks to the front of the purse.
- Press on both sides to adhere it well.
- Open up the flap and press each side of the hook and loop closure into the flap and into the front of the purse to make sure they’re adhered really well.


VARIATION: RIBBON STRAPS
- If you’d like to use ribbon straps instead of paper ones, unroll about 18” of ribbon and hold it against the front of the purse where the handle will go. Adjust the length depending on how long you want the handles. The ribbon should overlap the top edge of the front piece of the purse by about 2”.
- Once the ribbon is the desired length for your handle, use scissors to cut it. Mine was about 17” inches long.
- Unroll the ribbon roll parallel to the piece you just cut, and cut a second piece the same length as the first.
- Apply glue to one half of the inside of one of the folded handle attachment pieces. Apply the glue in the center to the end, keeping away from the side edges.
- Place one end of the ribbon on the glue. Press with your fingers to adhere.
- Apply more glue on top of the ribbon and cardstock on the same half of the handle attachment piece.
- Fold the handle attachment piece over at the crease and press firmly with your fingers to securely attach the ribbon within the folded sides.
- Apply glue to the back of one of the button accent pieces.
- Adhere the button to the center of a handle attachment piece.
NOTE: Be sure to apply the buttons so they’ll show when the handle attachment pieces are adhered to the outside of the purse. Lay the strap or ribbon on your work surface the same way it will attach to the bag to help visualize where to attach them. - Repeat steps 4-9 with the next TWO handle attachment pieces, and the second piece of ribbon. Leave the last handle attachment piece off for now if you're adding a keychain.
- If you made one, add your keychain following step 50 in the main purse assembly above. Then repeat steps 4-9 with the last handle attachment piece.
- Return to step 52 in the main purse assembly above.


STEP 4: ADD EMBELLISHMENTS TO YOUR PAPER PURSE
SUNFLOWER KEYCHAIN AND EMBELLISHMENT
- Grab the four larger sunflower keychain pieces, the key ring, and the small metal jump ring.
- Apply glue to the center of one of the four-petal pieces, avoiding the petals.
- Adhere it to the center of the eight-petal piece, staggering the petals so all twelve are showing.
- Apply glue to the center of the other four-petal piece.
- Adhere it to the center of the two attached pieces, staggering the petals so all sixteen of them are showing.
- Apply glue to the back of the seed piece, avoiding the cutouts.
- Place it on the center of the assembled flower, and press to adhere.
- Use your fingers or a paper towel to dab away any glue that seeps through the cutouts.
- Gently curl the petals up to add a three-dimensional effect to the flower. You can use a pen to help curve the cardstock, or use your fingers.
- Slide the jump ring through the hole in the sunflower’s petal. Use a pair of jewelry pliers and needle-nose pliers to open it if needed.
- Slide the jump ring onto the end of the chain on the keyring.
- Use a pair of jewelry pliers and needle-nose pliers to close the jump ring. Be sure the ends of the ring are as close as possible so the cardstock sunflower cannot slip out.
NOTE: Make sure to attach the keyring to your purse's handle before adhering the last handle attachment piece. - Repeat steps 2-9 to assemble the smaller sunflower embellishment (if you made one).
- Apply glue to the back of the assembled sunflower, avoiding the petals.
- Attach the sunflower onto the purse wherever you'd like. I'll attach mine to the center of the closed flap on the front of the purse. Press firmly from both sides to adhere it.


SUNGLASSES
- Grab the six sunglasses pieces.
- Take the two lens pieces and determine which side is the front. If you used tinted film like me, the darker side is the front.
- Match each lens up with its corresponding side of the glasses.
- Turn one of the sunglasses frame pieces and the lens pieces face down.
- Apply glue around one side of the frame piece, around the lens cutout.
- Use your fingers to press and adhere the corresponding lens piece to the glued area.
- Repeat steps 5-6 with the lens on the other side.
- Grab an ear piece, and with the curved end pointing toward you, fold on the crease line so the tab points to the right.
- Apply glue to the outside of the tab.
- Press to adhere the tab on the left edge of the sunglasses frame. It will overlap the lens – that’s okay.
- Grab the other ear piece and fold its tab so it’s pointing in the opposite direction as the first.
- Apply glue to the outside of the tab.
- Press to adhere the tab on the right edge of the sunglasses frame.
- Apply glue to the back of the remaining sunglasses frame piece, avoiding the cutouts.
- Line up the edges on the back of the assembled sunglasses pieces, covering up the glued tabs, then press to adhere.
- When the glue is dry, fold the sunglasses ear pieces inward (like a real pair) and press along the edges to crease them further.
- Hang the finished sunglasses on the edge of the purse opening.


VARIATION: BUTTERFLY AND DRAGONFLY KEYCHAINS
- Gather the cardstock butterfly or dragonfly keychain pieces, a jump ring, and a key ring with chain.
- Apply glue to the back of the body area of the detailed piece with cutouts. Avoid applying glue to the wings and jump ring hole.
- Turn it over and press to adhere it to the center of the solid piece.
- Once it’s dry, bend up the top layer of the wings with cutouts for a three-dimensional effect.
- Slide the open jump ring through the hole on the layered cardstock butterfly or dragonfly.
- Slide the open jump ring, with the keychain, onto the last link on the keyring and chain.
- Use jewelry pliers and needle-nose pliers to close the jump ring. Be sure it’s closed tightly so the cardstock doesn’t slip out.
- Before attaching the paper or ribbon strap to the purse, slide the keychain onto the strap.


VARIATION: APPLE KEYCHAIN
- Gather the cardstock apple keychain pieces, a jump ring, and a key ring with chain.
- Apply glue to the back of the leaf piece, avoiding the hole for the jump ring.
- Turn it over and press to adhere it to the leaf shape on the apple.
- Follow steps 2-3 to adhere the stem piece to the apple, right next to the leaf.
- Slide the open jump ring through the hole on the apple keychain’s leaf.
- Slide the open jump ring, with the apple keychain, onto the last link on the keyring and chain.
- Use jewelry pliers and needle-nose pliers to close the jump ring. Be sure it’s closed tightly so the cardstock doesn’t slip out.
- Before attaching the paper or ribbon strap to the purse, slide the keychain onto the strap.

VARIATION: CUPCAKE KEYCHAIN
- Gather the cardstock cupcake keychain pieces, a jump ring, and a key ring with chain.
- Apply glue to the back of the frosting piece, avoiding the hole for the jump ring.
- Turn it over and press to adhere it to the top of the cupcake piece, lining up the holes.
- Slide the open jump ring through the hole at the top of the cupcake keychain.
- Slide the open jump ring, with the cupcake keychain, onto the last link on the keyring and chain.
- Use jewelry pliers and needle-nose pliers to close the jump ring. Be sure it’s closed tightly so the cardstock doesn’t slip out.
- Before attaching the paper or ribbon strap to the purse, slide the keychain onto the strap.

VARIATION: UNICORN KEYCHAIN
- Gather the cardstock unicorn keychain pieces, a jump ring, and a key ring with chain.
- Apply glue to the back of the horn piece, avoiding the hole for the jump ring.
- Turn it over and press to adhere it to the horn shape on the unicorn’s head.
- Apply glue to the back of the two ear pieces. One of them will have the point facing right with the concave section at the bottom, and one will have the point facing left.
- Turn each one over and press to adhere it to its matching ear section on the unicorn piece.
- Apply glue to the back of the flower piece, avoiding the cutouts.
NOTE: The flowers are symmetrical, so either side can be the front. - Turn it over and press to adhere it at the top of the unicorn’s head. Place it so the center flower slightly overlaps the bottom of the horn, and the outer flowers extend past the unicorn’s head and ears on either side.
- Apply glue to the back of the two eye pieces, avoiding the cutouts. One of them will have the eyelashes facing right, and one will have them facing left.
- Turn each one over and press to adhere it to the center of the unicorn’s face. Make sure they are aligned with each other horizontally, and are the same distance from the left and right sides of the face.
- Slide the open jump ring through the hole on the layered cardstock unicorn keychain.
- Slide the open jump ring, with the unicorn keychain, onto the last link on the keyring and chain.
- Use jewelry pliers and needle-nose pliers to close the jump ring. Be sure it’s closed tightly so the cardstock doesn’t slip out.
- Before attaching the paper or ribbon strap to the purse, slide the keychain onto the strap.

STEP 5: SHOW IT OFF
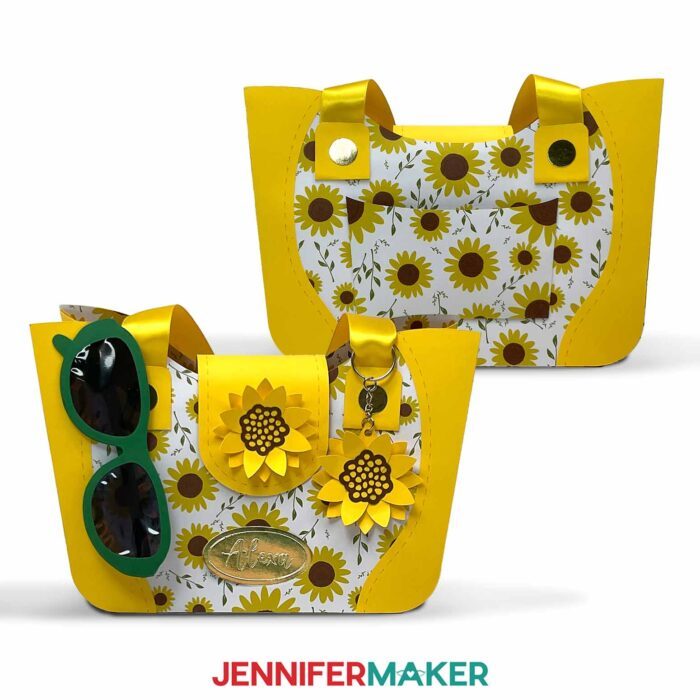
Here’s what my finished 3D paper purse gift bag with sunflower embellishments looks like!
Notes
Assembled Sizes:
Large Regular-Size Purse: 9”W x 6.5”H x 4”D
Small Joy-Size Purse: 5.75”W x 4”H x 2.5”D
Font Used: Cream Candy (Free Alternative: Goldie Rainbow)
Answers to Your Questions About How to Make a Paper Purse
Q: Can you make paper bags with Cricut?
A: You sure can! Learn how to make a paper purse by following the gift bag tutorials on my blog (here’s some here, here, and here). Just download my free files, follow my simple steps, and you’ll be making paper gift bags with your Cricut in no time!
Q: How do you make a paper purse step by step?
A: It’s easy to learn how to make a paper purse! Just follow the steps in this tutorial to make this style bag with accessories, or check out my other 3D paper purse tutorials here and here!
Q: What paper is best for making gift bags?
A: When making a 3D paper purse or another gift bag, I recommend using 65 pound cardstock. It’s durable and strong, but easy to fold and curve into the shapes necessary to build the bag.
Q: What is the thin paper in gift bags called?
A: Typically gift bags are stuffed with tissue paper to hide the gifts inside!
Q: Can I print on paper gift bags?
A: If your printer can accommodate cardstock, then sure! You can use your printer and Cricut Design Space’s Print Then Cut feature to print on the gift bag pieces, then cut and assemble them according to their respective tutorial.
Q: Can you show me how to make a simple paper bag?
A: Yes I can! If making an elaborately detailed 3D paper purse gift bag isn’t your thing, I’ve got a nice and simple collection of gift bag designs (with files and a tutorial) available here, and a simple gift bag with pick closure here!
Q: Do you have any other gift bags I can make?
A: If you still haven’t found what you’ve been looking for, check out some of these awesome gift bag and gift box projects:
- Baseball Cap Gift Box
- Personalized Wine Gift Bags
- Easy Heart Box
- Sublimated Gift Bags
- Heart Explosion Box
Get my free SVG files to make a 3D Paper Purse!
I love seeing what you make with my designs and how you use them! Please share a photo after you learn how to make a paper purse in our Facebook group or tag me on social media with #jennifermaker.
Love,

Want to remember this? Save this Tutorial on How to Make a Paper Purse to your favorite Pinterest Board!