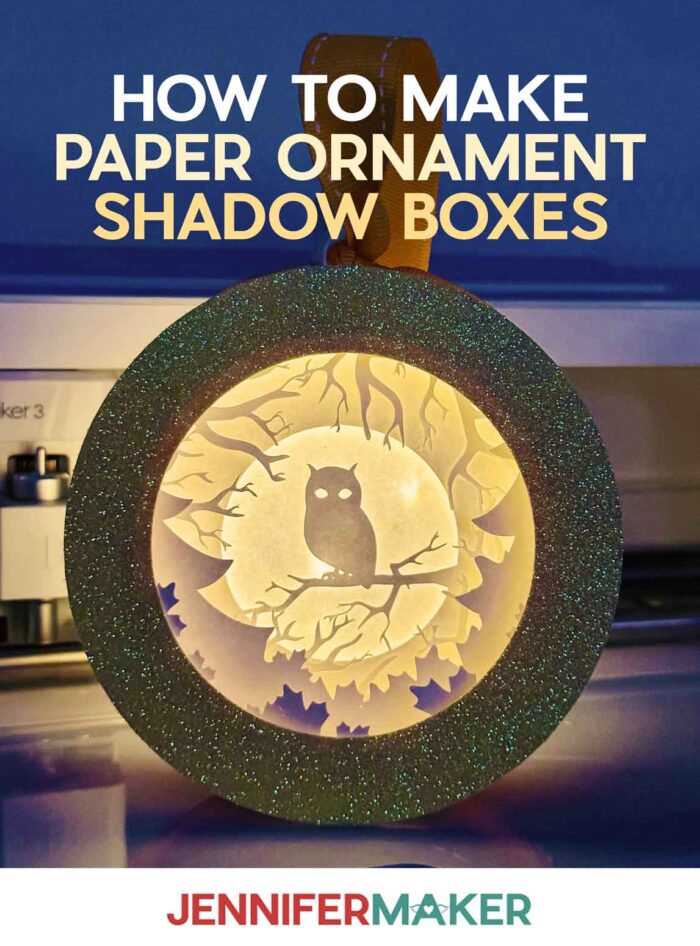
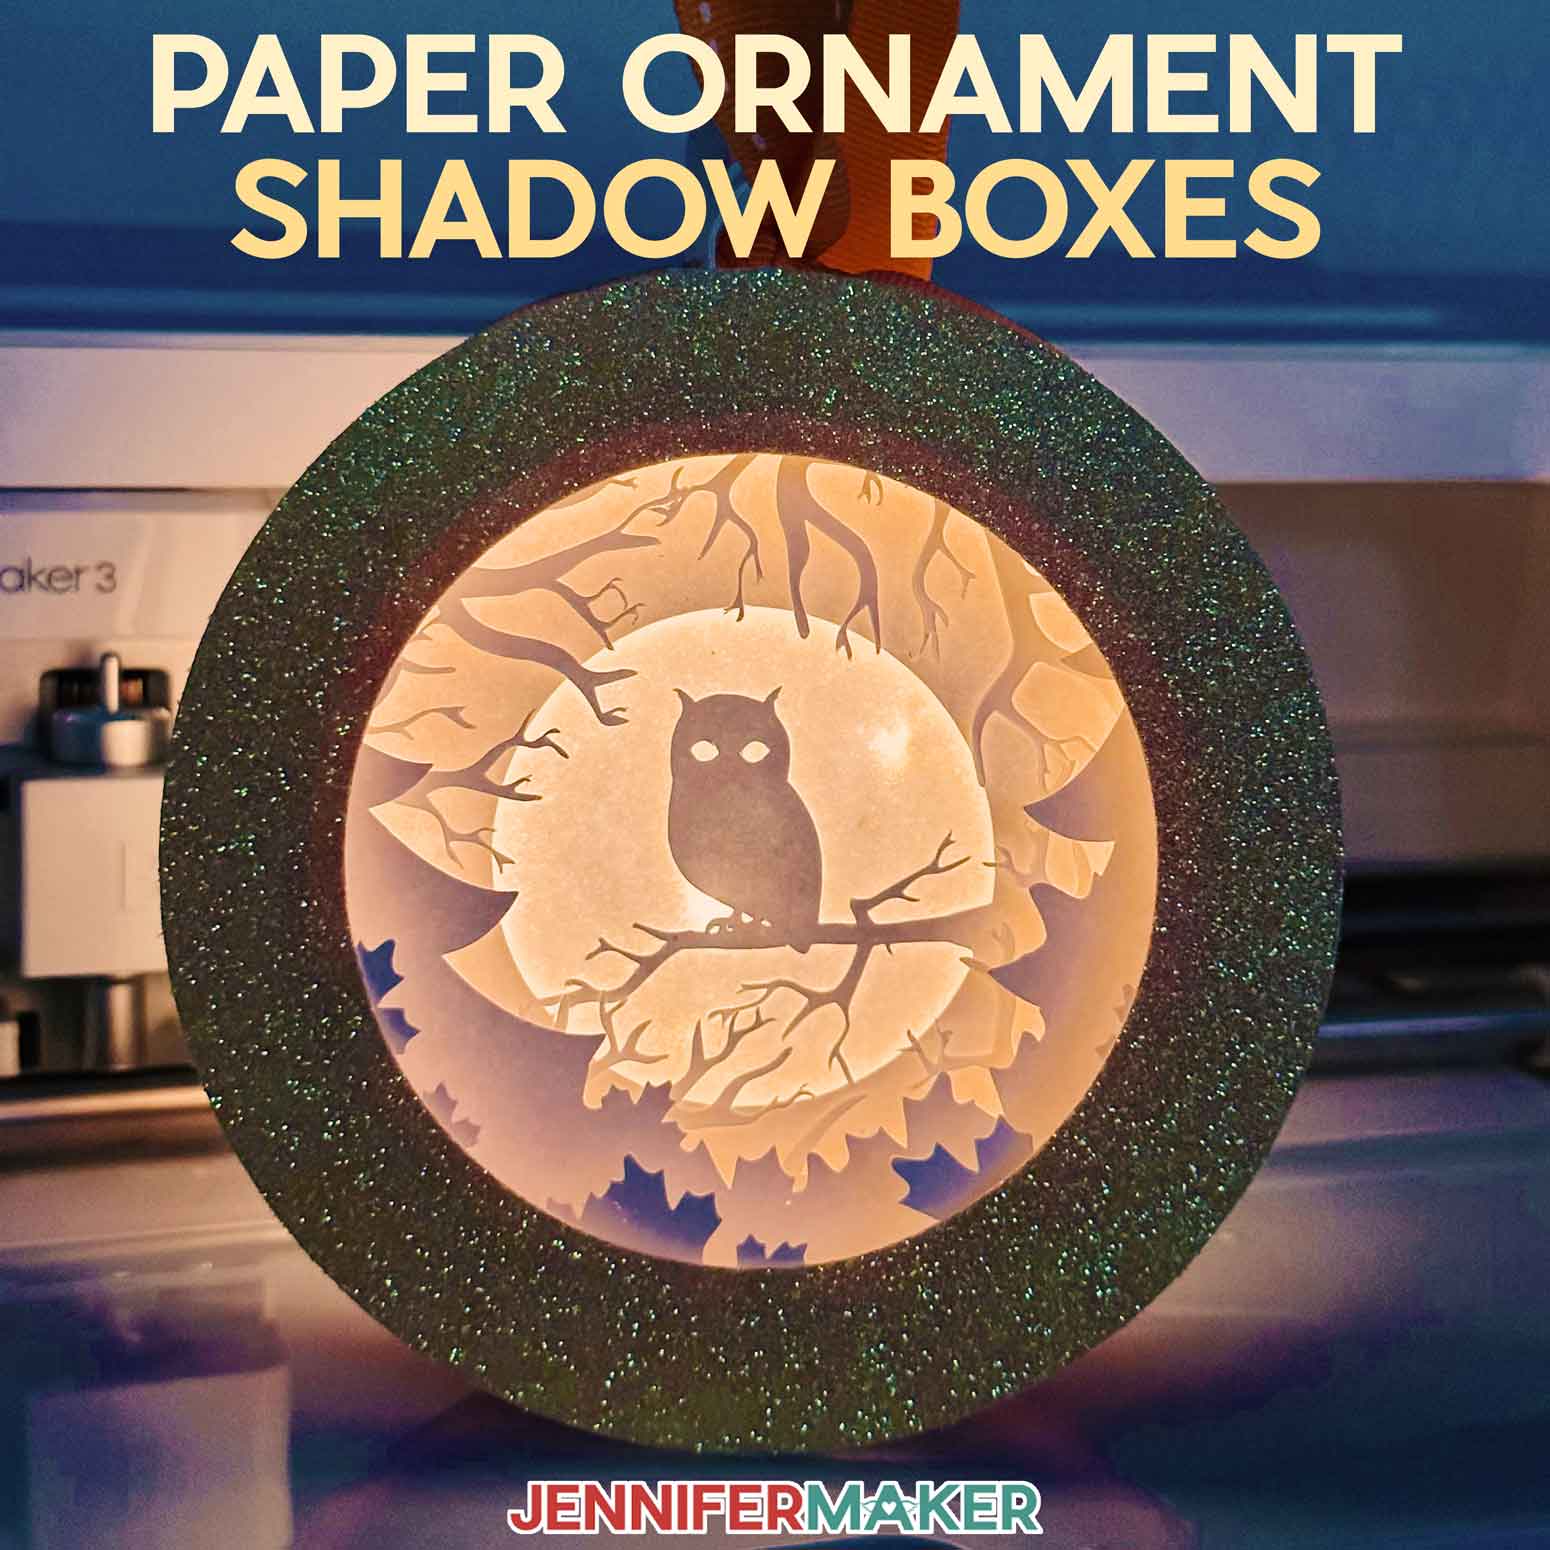
Learn how to create round ornament shadowboxes from just cardstock — no glue or tape required!
In celebration of and gratitude for reaching one million subscribers on YouTube, I’ve made a gift for you — a unique paper shadowbox that you can display and hang like an ornament! And, best of all, they require no glue or tape — just some cardstock and a ribbon to hang them with! This is my special gift to the community for your love and support of JenniferMaker! Thank you for subscribing to my channel if you already have. If not, I appreciate every subscriber. It’s free and easy to subscribe!
Want to save this project? Enter your email below and we’ll send the project straight to your inbox.
Watch the video celebrating YOU, our one million subscribers, along with a demonstration of this fun craft on our YouTube channel:
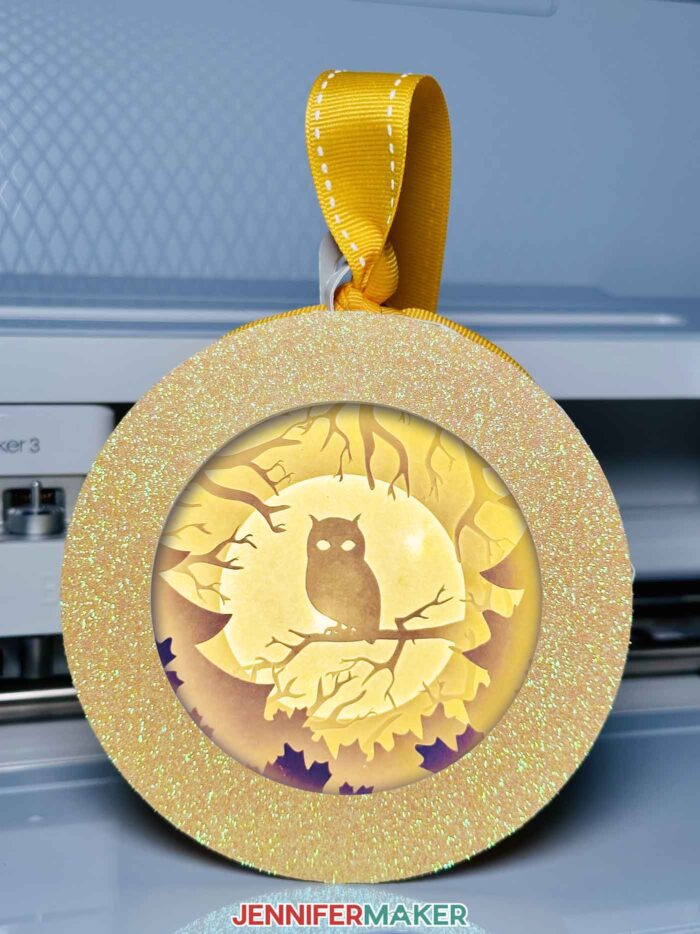
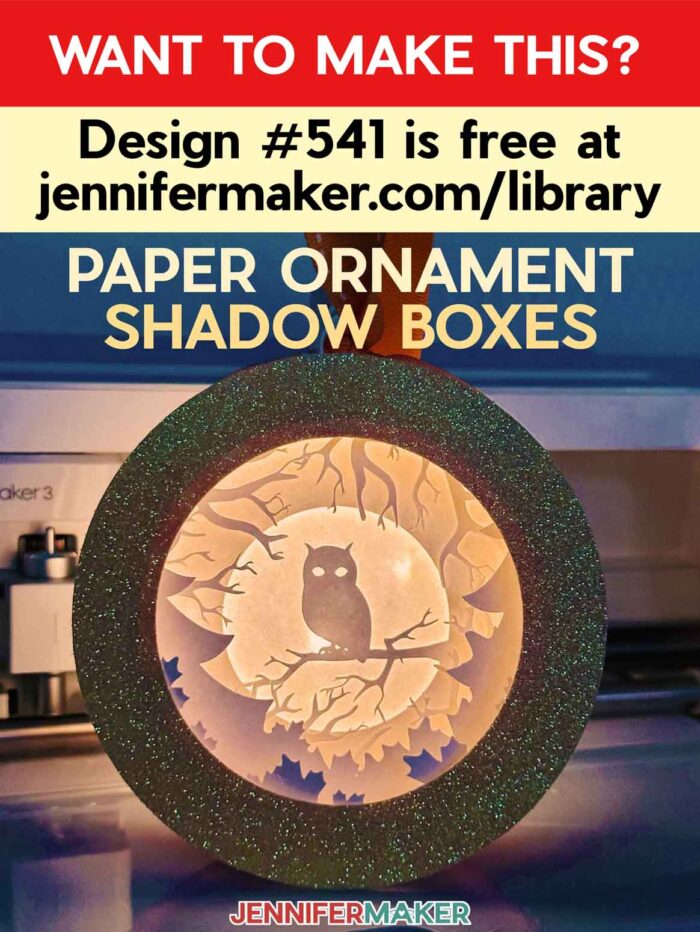
First Shadowbox Ornament: The Owl
This shadowbox features an owl in the woods, surrounded by autumn trees and leaves. This is the very same owl you and millions have seen in my SVGs Made Simple video series, which is mentioned in nearly every single YouTube video I make. So I thought it was fitting to give him a new home to celebrate his special significance. Besides, I love owls, and I know you do, too!

There will also be FIVE MORE designs, which I will make and share with you over the coming months before the end of the year. I will explain in this post exactly how to get them as they become available, and all will be completely free. Collect ’em all!
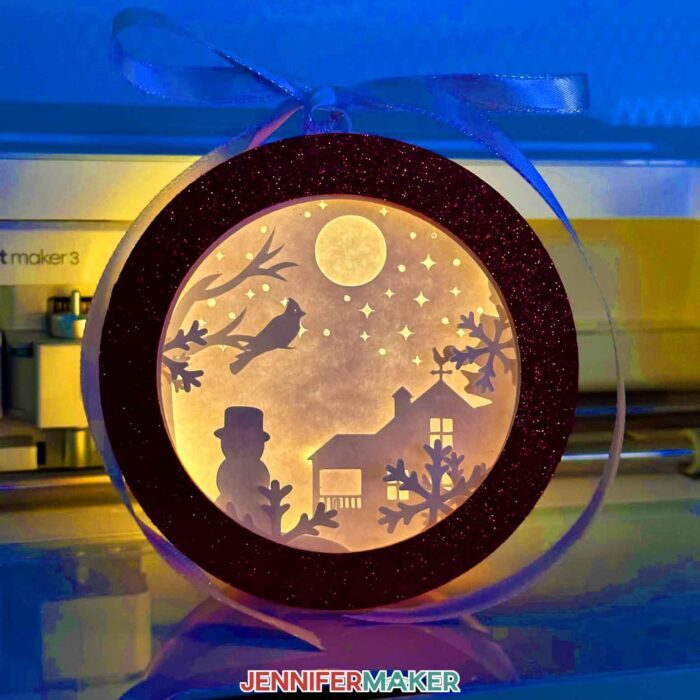
Second Shadowbox Ornament: The Cardinal and Farmhouse
Here is the second shadowbox ornament — a cardinal, farmhouse, and snowman. The farmhouse is from our opening title sequence on our videos (it’s also in this project), The cardinal is from a Maker Academy Weekend 2022 project, and the snowman is from a Maker Academy Weekend 2023 project. And there is a star in the sky for everyone of this year’s Maker Academy Weekend projects! This design was shared with everyone who got a free ticket in Maker Academy Weekend 2023 event. As that event is now over, the cardinal/farmhouse ornament design is now part of design #541 in our library.
Third Shadowbox Ornament: The Flowers & Butterflies
This is the third shadowbox ornament — a peony, sunflower, and butterflies. The peony is here because it was my first-ever YouTube video on the JenniferMaker channel. I added the sunflower because it was my favorite project from my first year (and also a first-year video). The butterflies are there for the same reason — a tribute to my popular butterfly card from my first year. This design is part of project #555 in my free library!
Fourth Shadowbox Ornament: The Gifts
This shadowbox ornament with wrapped gifts under the tree was released November 17-27, 2023 as part of our Black Friday/Cyber Monday celebrations.

Fifth Shadowbox Ornament: The Angel
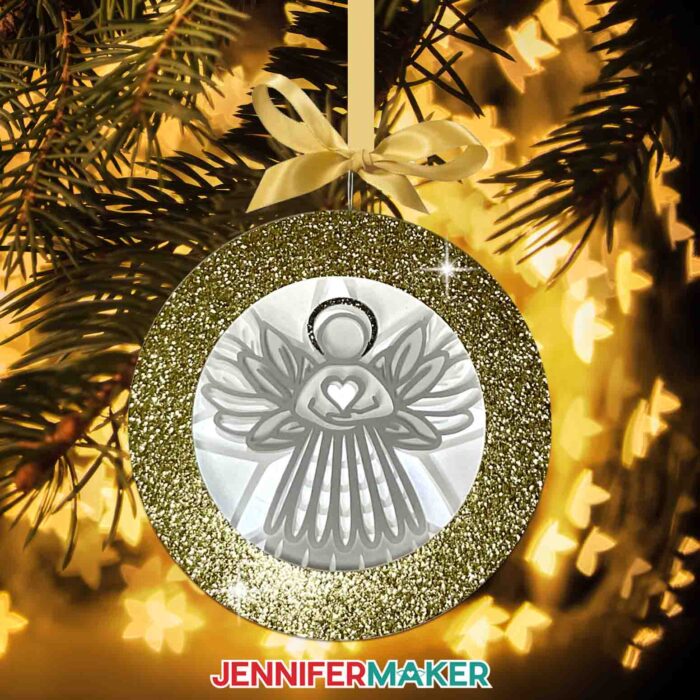
This shadowbox ornament with an angel launched in December as part of Merry Maker Mingle 2023. You can get it in Design #555 in my free library!
Sixth Shadowbox Ornament: The Stars
The Stars shadow box ornament is now available. You can get it in Design #555 in my free library!

This post is a work in progress, and I’ll be sharing more information here as I share more details. Bookmark it and return frequently to learn more! Be sure you’re on my mailing list to hear about any new designs. They may or may not appear in my library!
Ready to make your own light-up paper ornament? This post contains some affiliate links for your convenience (which means if you make a purchase after clicking a link I will earn a small commission but it won’t cost you a penny more)! Read my full disclosure policy.
Materials & Tools to Make a Paper Ornament Shadowbx
- White 65 lb. cardstock — you can use pretty much any size, so 8.5″ x 11 will work, too!.
- (Optional) Glitter or fancy cardstock for the decorative frame, any weight
- (Optional) 24″ of Ribbon
- LED Fairy Lights
- A method to cut your cardstock: I used the amazing Cricut Maker 3 but you can also use the Cricut Maker, Cricut Explore 3, the Cricut Explore, Cricut Venture, Cricut Joy Xtra, or Cricut Joy
- Premium Fine Point Blade — clean and free of adhesive or gunk
- StandardGrip 12″ x 12″ Green Machine Mat — should be clean and sticky
- Spatula
- Weeding ToolScraperScissors
- Brayer
- Design #541 – My free paper ornament shadowbox SVG/DXF/PDF design files (available in my free resource library—get the password at the bottom of this post)
How to Make a Paper Ornament Shadowbox
Below are simple directions, but I think this project benefits from a video, which I am doing! But here are the basic steps if you prefer to read them.
- Get design 541 from my library and upload your preferred design. (If you’re not sure how to upload, check this guide.) There are three SVGs — one does not need a scoring tool, while the other one (with “score” in the name) needs a scoring stylus or tool. (The third version is just for Joy users.) The no-score version will take longer to cut, while the score version is quicker but requires either a scoring tool or stylus. If you choose the “score” version, first ungroup everything, then be sure to change the score lines to “Score” under the Operation menu and then attach them to their layers.
- Cut your cardstock on the Medium Cardstock – 80 lb. setting with More pressure. Alternately, you can use the Intricate Cuts setting if you have an Explore, Maker, or Venture. Be sure you use a clean Premium Fine Point Blade, a sticky green StandardGrip machine mat, and good quality cardstock. See my materials list above for what I used.
- Once your pieces are cut, flip the machine mat over onto your work surface and roll the mat back to gently release the cardstock without tearing or curling. Use a spatula to lift any delicate parts.
- Lay out all pieces face up on your work surface. Refer to the design in Cricut Design Space to see which orientation pieces should go in.
- Match up the strips — there are two strips that make up a longer strip for the top frame and two strips that make up a slightly shorter strip for the bottom frame. The top frame strips have an extra slot, while the bottom frame strips have two small rectangles toward the ends.
- Attach the two longer strips together to make the top frame strip. The tab at the end of one strip goes into the slot on the other strip’s end. Be sure to fold in the edges of the tab before pushing it into the slot, then unfold the tabs to lock it in place. Repeat for the two shorter strips.
- Fold the tabs on the sides of each strip — you want to fold them away from the smooth side of the strip. Also be sure to fold in the locking tabs as well.
- Fold the edges of the two large round pieces — the cardstock will naturally fold at the slots.
- Insert the longer strip into the round piece with the large circle cut-out. Push the folded tabs into the slots, inserting them so that the smooth edge is on the outside. After each tab is inserted into a slot, unfold the tabs to lock it in place. If you have difficulties unfolding and locking it, make sure it is pushed in all the way. Continue until all tabs are slotted and locked, then slot the end of the strip into the start, keeping tabs inside. This becomes the top frame.
- Insert the shorter strip into the round piece with the rounded rectangular in the same manner as step 9. This becomes the bottom frame.
- Fold the tabs inward on all of the layer pieces, with each tab forming a little spacer automatically.
- Stack the layers in order inside the smaller frame (the one you made in step 10), making sure everything is lying flat and in the right orientation and order. Try to keep the rounded rectangular cut-out in the smaller frame parallel with the bottom of your design as you stack.
- Fold the small hanger in half, then fold up the tabs on the side. Insert the hanger into the slot in the top frame. You will need to fold down one of the tabs inside to fit it in — once inserted, re-fold the tab inside, locking everything in place.
- Put the top frame on the bottom frame, like a lid on a box. Make sure the hanger is at the top of your design. You will need to push the top frame down to get it the last little bit.
- Turn the assembled ornament over and feed your LED light strand through the opening in the back. Tuck the battery pack so that the switch is accessible.
- If you made a decorative frame from glitter or fancy paper, fold its tabs in, then insert its tabs in at the top and bottom of the top frame to keep it in position.
- Optionally wrap ribbon or string around your ornament, or just tie it to the hanger at the top.
Answers to Your Questions About How to Make an Ornament Shadowbox
Q: What kind of cardstock do I need?
I recommend white 65 lb. cardstock for this project so your lights shine through your layers. Thicker cardstock works, but your layers will be harder to illuminate.
Q: I know the ornament doesn’t need tape or glue, but can I add it?
Yes, totally — just glue your tabs down as you go along. Glue will make your ornament shadowbox more sturdy for sure. Just remember, a little glue goes a long way. I recommend Bearly Art Precision Craft Glue with the precision tip.
Q: What kind of lights can I use?
I only recommend mini LED lights because they will be enclosed in small space. Do not use any light that may heat up for these DIY projects. I think warm white lights look best in shadowboxes like these, but the choice is up to you!
Q: What do I do if my battery runs out?
You can easily pull the strand out and replace it with a new one as needed.
Q: How can I display my ornament?
Hang them on a tree or ornament stand. Or let them sit on a mantle or desk — I designed these as decagons (10-sided shapes) so they would have a flat bottom and sit on their edge without rolling all over the place.
Q: I noticed you have the number “1” in your photo. Can I make that too?
Yes, I used the “1” from this 3D Alphabet project. Note that I did resize it to be a little smaller so it would match the ornaments’ heights.
Q: Can I design my own ornament shadowbox?
Yes, collect all six ornament designs, send me an email at [email protected], and I’ll tell you where to find the blank ornament shadowbox template!
Get my free SVG files to make a Paper Ornament!
I’d love to see YOUR paper ornament shadowboxes and how you display them! Please share a photo in our Facebook group or tag me on social media with #jennifermaker.
Love,

Want to remember this? Save this tutorial on making a Paper Ornament Shadowbox to your favorite Pinterest Board!