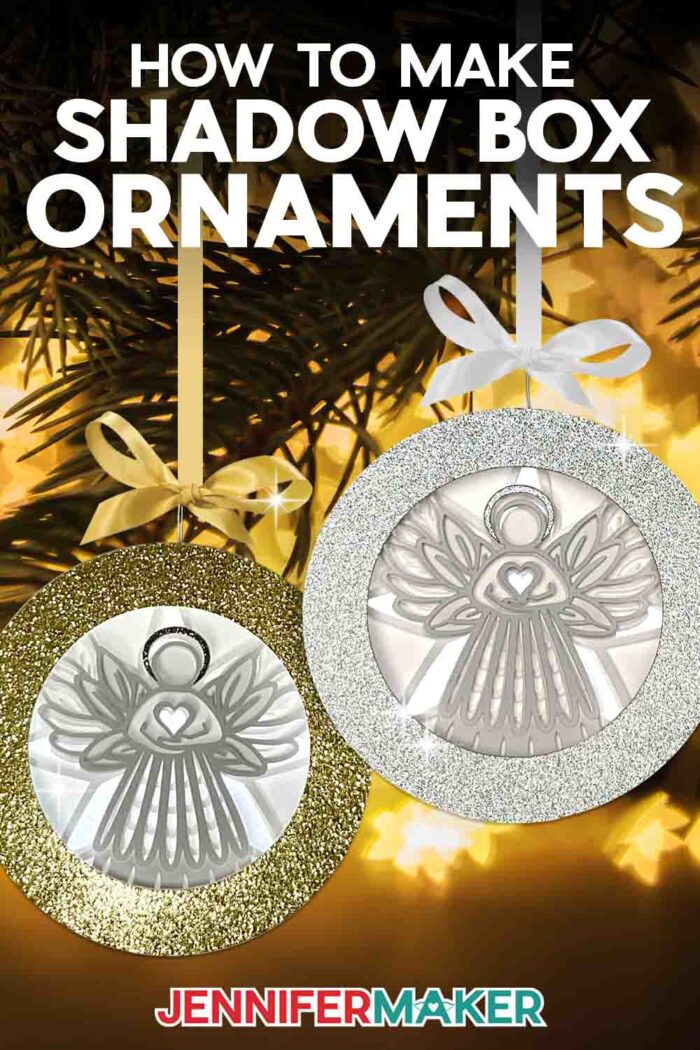
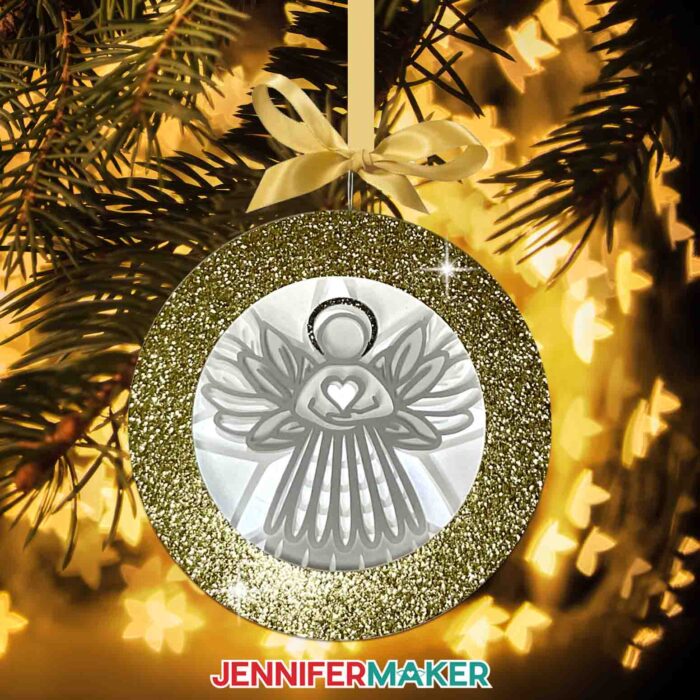
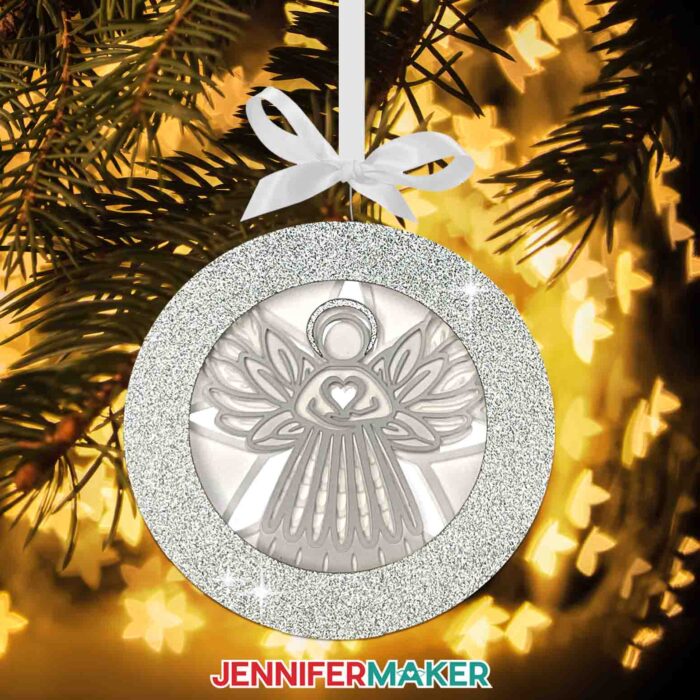
Learn how to create an angel shadow box ornament from cardstock and an LED light — no glue!
A few months ago, I had the honor of reaching one million subscribers on YouTube! This was such an exciting milestone for me, that I wanted to give something back. So I designed a series of unique paper shadowboxes to display as seasonal decorations or ornaments on your Christmas tree! I’ve been releasing them over the past couple of months, and now it’s time for my Angel Shadow Box Ornament to make her debut! Inspired by my favorite angel project, this beautiful shadowbox ornament with its lovely intricate design is truly a stunner — and it only takes a few supplies and a little time to make.
Watch the full step-by-step angel shadow box ornament tutorial:
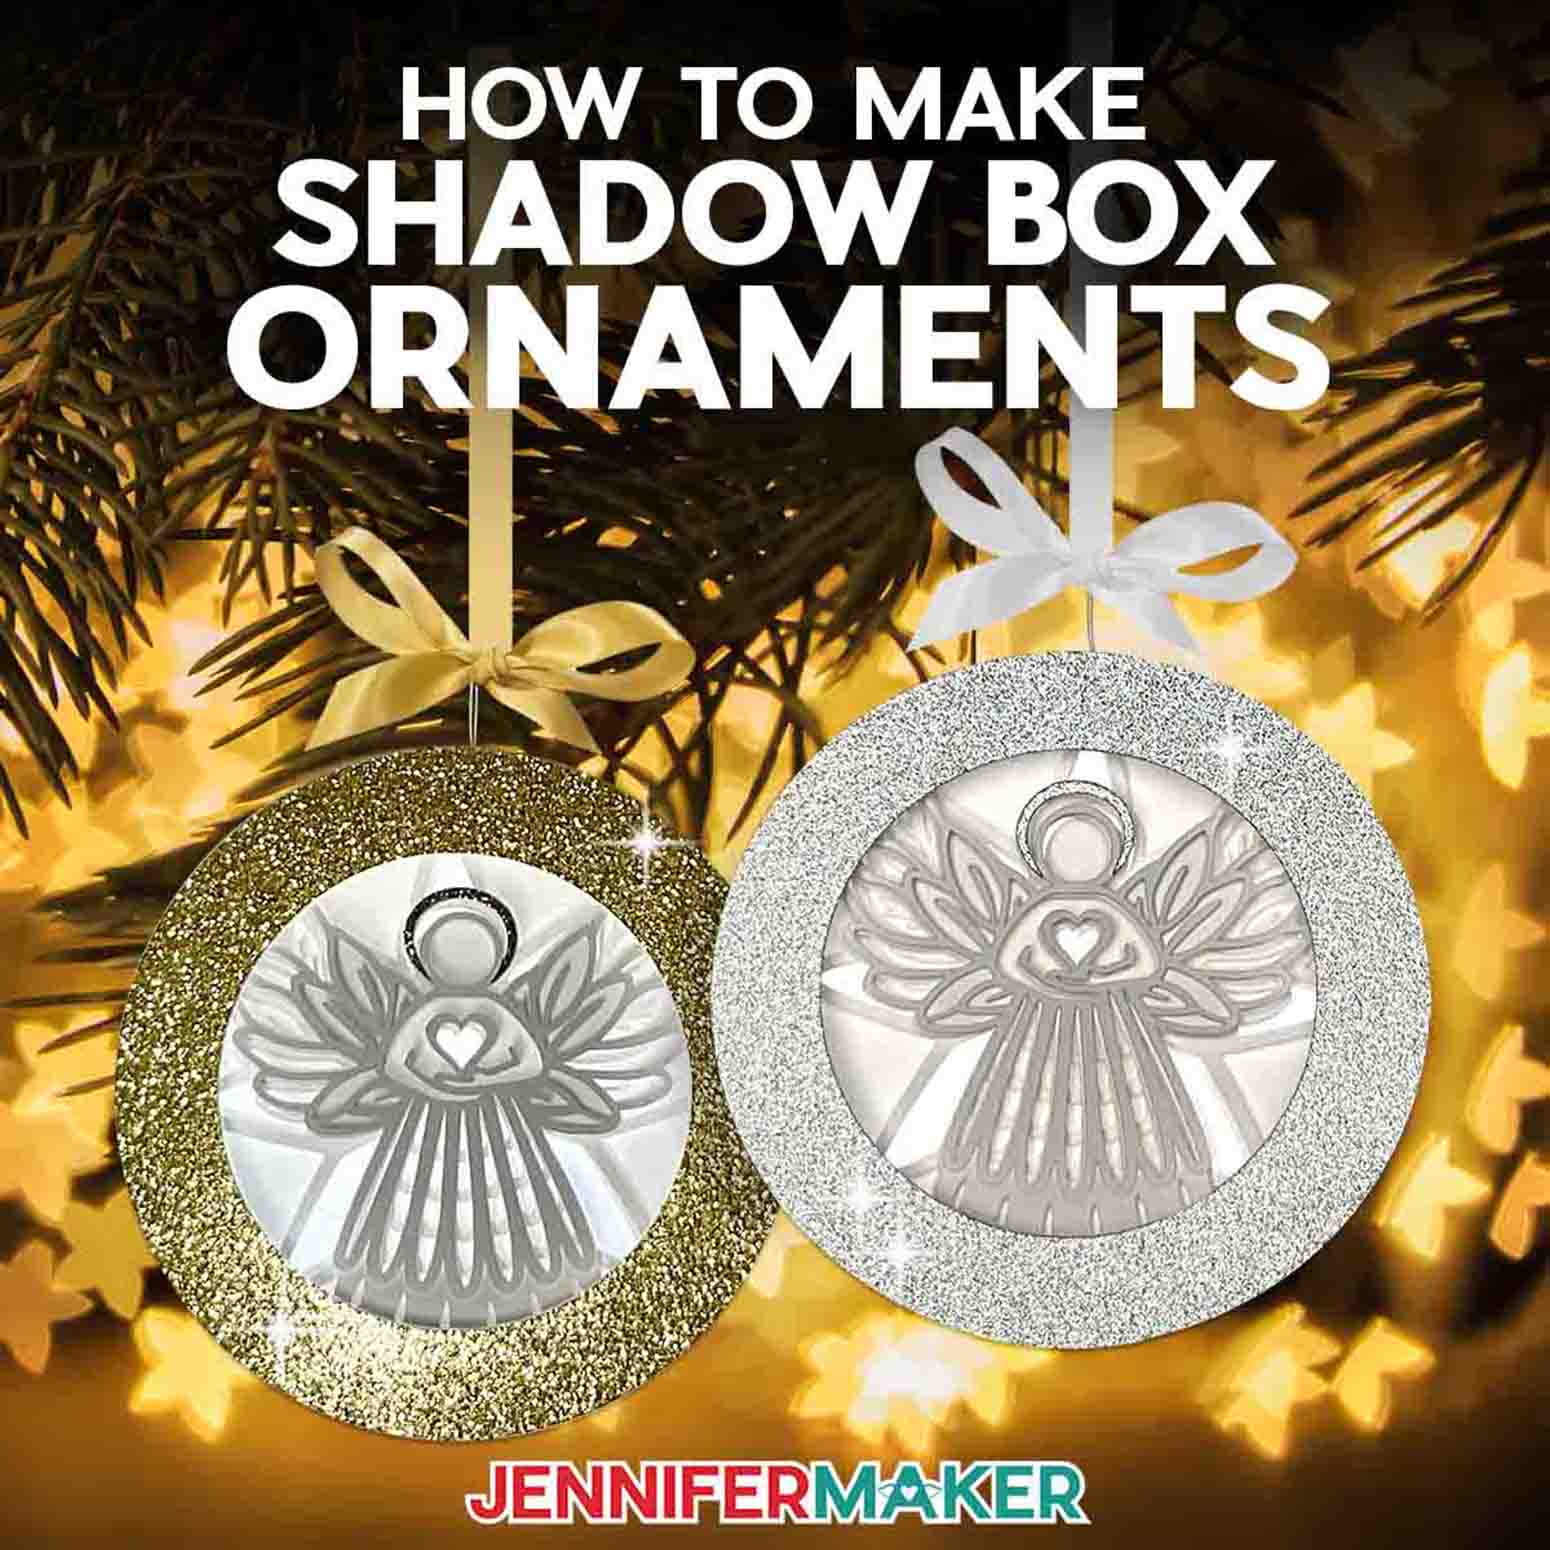

I just love angels, and I love shadow boxes too — so this is one amazing combination! With this festive season upon us, it’s the best time of year to create glowing miniature shadow boxes tiny enough to hang on a Christmas tree.
My shadow box ornaments require no glue, no tape, just some good old-fashioned cardstock! Lit up, they make beautiful gifts and can add a beaming touch of Christmas magic to your holiday decor! And these ornaments are more durable than you might imagine; never, ever underestimate the power of a solid papercraft design.
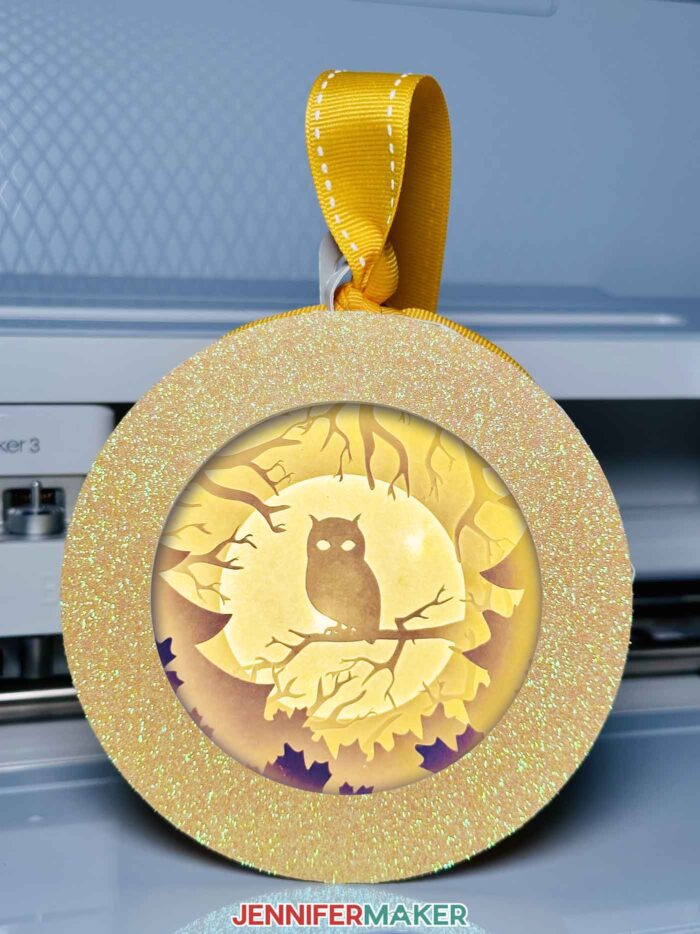
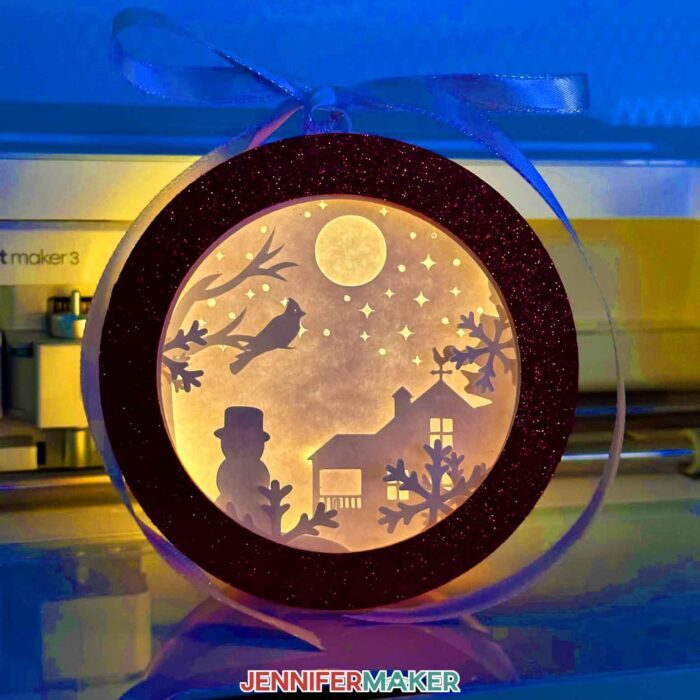
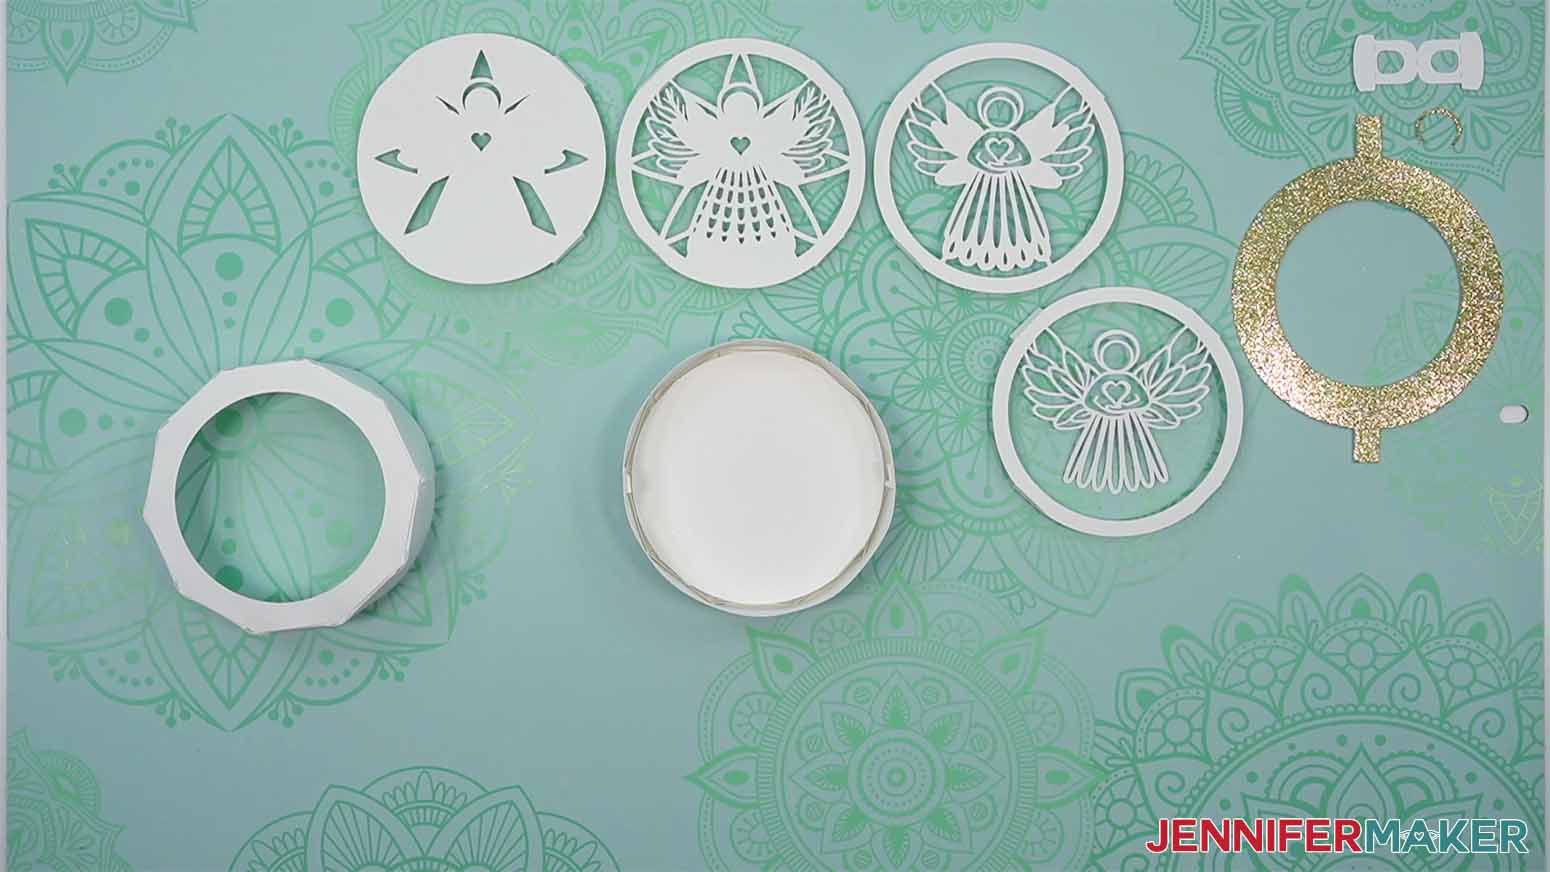
Inside the download file for this project, you’ll find not just my pretty angel design, but three other paper shadow box designs, too! I’ve got an owl in the woods, a cardinal with a farmhouse and snowman, and an ornament with wrapped gifts under a tree.

There are versions of the files without score lines, as well as versions that require a scoring tool. I’ll show you how to prepare both the score and no-score versions of the Angel design in Cricut Design Space, then show you how to cut and assemble it using a cutting machine.

I used a Cricut Maker 3 for this project, but you can also use an original Cricut Maker, a Cricut Explore Series machine, the Cricut Venture, the Cricut Joy, or the Cricut Joy Xtra, or another machine that uses cut files to make your ornament..
I’ll cut my ornaments from white, 65 lb cardstock, and add an optional frame made from glitter cardstock. If you’re cutting multiple ornaments, I highly recommend cleaning your blade between projects, or even between layers. Cleaning mine really made a positive difference in the quality of my intricate cuts.
You’ll need a green StandardGrip machine mat, a brayer, and a spatula tool to remove the delicate pieces like the angel’s halo and long flowing dress from the mat. A weeding tool, scissors, and tweezers are helpful to have near your work surface, too, for removing these intricate designs from their mats. Lastly, you’ll need some ribbon to hang your creation! I recommend limiting display to indoor decorative use for best results and longevity throughout the holiday season.
These shadow box ornaments are my special gift to our community to thank you for your love and support of JenniferMaker! And thank you so much for subscribing to my channel if you already have. If not, I appreciate every subscriber!
These ornaments have been SO much fun to design and create, and I hope you enjoy them as much as I have! They’re a perfect gift for a close friend or family member that doesn’t cost much — which can be extra helpful around the holidays. Use them for Christmas decorations, use one as a nightlight in a child’s room or bathroom, or decorate your fireplace mantel — remember, they’re flat-bottomed, so they won’t roll!
There are also two more ornament shadow box designs — my flowers design, which has a Peony from my very first YouTube video, and a shooting star design to celebrate Cricut Kickoff, my FREE course to help you get your Cricut set up for success. Both of these designs are included in the download as well (#555 in my free library).
Ready to make your own angel shadow box ornament? This post contains some affiliate links for your convenience (which means if you make a purchase after clicking a link I will earn a small commission but it won’t cost you a penny more)! Read my full disclosure policy.
Materials & Tools to Make Angel Shadow Box Ornaments
View my Amazon shopping list with the exact items we used to make this project
- Two (2) Sheets of 12″ x 12″ 65 lb. White Cardstock -OR-
- Three (3) Sheets of 8.5″ x 11″ 65 lb. White Cardstock
- One (1) Sheet of 8.5″ x 11″ or 12″ x 12″ Glitter Cardstock (optional for the decorative frame and halo, any weight)
- 24″ of 1/4″ Wide Ribbon (optional for hanging)
- Scoring Stylus (optional for files with score lines) -OR
- Single Scoring Wheel (optional for files with score lines)
- Tweezers (optional)
- Bearly Art Precision Craft Glue (for optional halo piece)
- LED Fairy Lights
- A method to cut your cardstock: I used the amazing Cricut Maker 3 but you can also use the Cricut Maker, Cricut Explore 3, the Cricut Explore, Cricut Venture, Cricut Joy Xtra, or Cricut Joy
- Premium Fine Point Blade — clean and free of adhesive or gunk
- StandardGrip 12″ x 12″ Green Machine Mat — should be clean and sticky
- Spatula
- Weeding Tool
- Scraper
- Scissors
- Brayer
- Design #555 – My free angel shadow box ornament SVG/DXF/PDF design files (available in my free resource library—get the password at the bottom of this post)
How to Make Angel Shadow Box Ornaments<

Shadow Box Ornaments
Learn how to create round shadow box ornaments from just cardstock - no glue or tape required!
Materials
- Two (2) Sheets of 12" x 12" 65 lb. White Cardstock -OR-
- Three (3) Sheets of 8.5" x 11" 65 lb. White Cardstock
- One (1) Sheet of 8.5" x 11" or 12" x 12" Glitter Cardstock (optional for the decorative frame, any weight)
- 24″ of 1/4" Wide Ribbon (optional for hanging)
- One (1) Strand of LED Fairy Lights
- Design #555 (My free SVG/PDF/DXF design files are available in my free resource library - get the password by filling out the form at the bottom of this page)
Tools
- A way to cut your cardstock - I’m using the Cricut Maker 3, but you can also use the Cricut Maker, a Cricut Explore Series machine, the Cricut Venture, the Cricut Joy, or the Cricut Joy Xtra
- Cricut Green StandardGrip Machine Mat 12" x 12"
- Scoring Stylus (optional for files with score lines) -OR-
- Single Scoring Wheel (optional for files with score lines)
- Brayer
- Spatula
- Weeding Tool
- Scraper
- Scissors (optional for cutting the ribbon)
- Tweezers (optional)
- Bearly Art Precision Craft Glue (optional for halo piece)
Instructions
STEP 1: GET MY FREE SHADOW BOX ORNAMENTS DESIGNS
First, download my Shadow Box Ornaments designs from my free library -- look for Design #555. Alternatively, you can use the Save This Project form near the top of this post and the design link will be emailed to you.
In the SVG folder, you’ll find a “score” and “noscore” version of my angel design to cut on a cutting machine. There’s also a folder “For Joy Users” with a Cricut Joy-sized version. There’s even a “blank” design that you can customize!
Upload the files you need to Design Space to get started.
TIP: If you’re not sure how to upload, go to jennifermaker.com/svgs to learn how to unzip and upload SVG files.
STEP 2: PREPARE YOUR DESIGN
CRICUT DESIGN SPACE
1. Open Cricut Design Space and click “New Project.”
2. Click “Upload” and then “Upload Image.”
3. Click “Browse.”
4. Select the SVG file.
5. On the Prepare to Upload screen, it will say “Cut Image” with the design preview.
6. Click “Upload.”
7. Find your design in Recent Uploads and add it to the Canvas.

8. Ungroup the design.

9. If you do NOT want to use the accent frame piece, delete or hide it now.
10. If you’re using a file WITHOUT score lines, the file is ready to cut. Skip ahead to step 15.
11. If you’re using a file WITH score lines, find a group of two layers and select the top Score layer.
12. Change it to “Score” in the Operation menu.

13. Click the group to select both layers, then click “Attach.”

14. Repeat steps 11-13 with the remaining two-layer groups.
15. Make sure the correct machine is selected in the top right.
16. Click “Make.”
17. If prompted, click “On Mat,” choose your mat size, and click “Confirm.”
18. On the Prepare screen, make sure the Material size matches what you are using.
19. Select the first mat and click “Continue.”
CUTTING
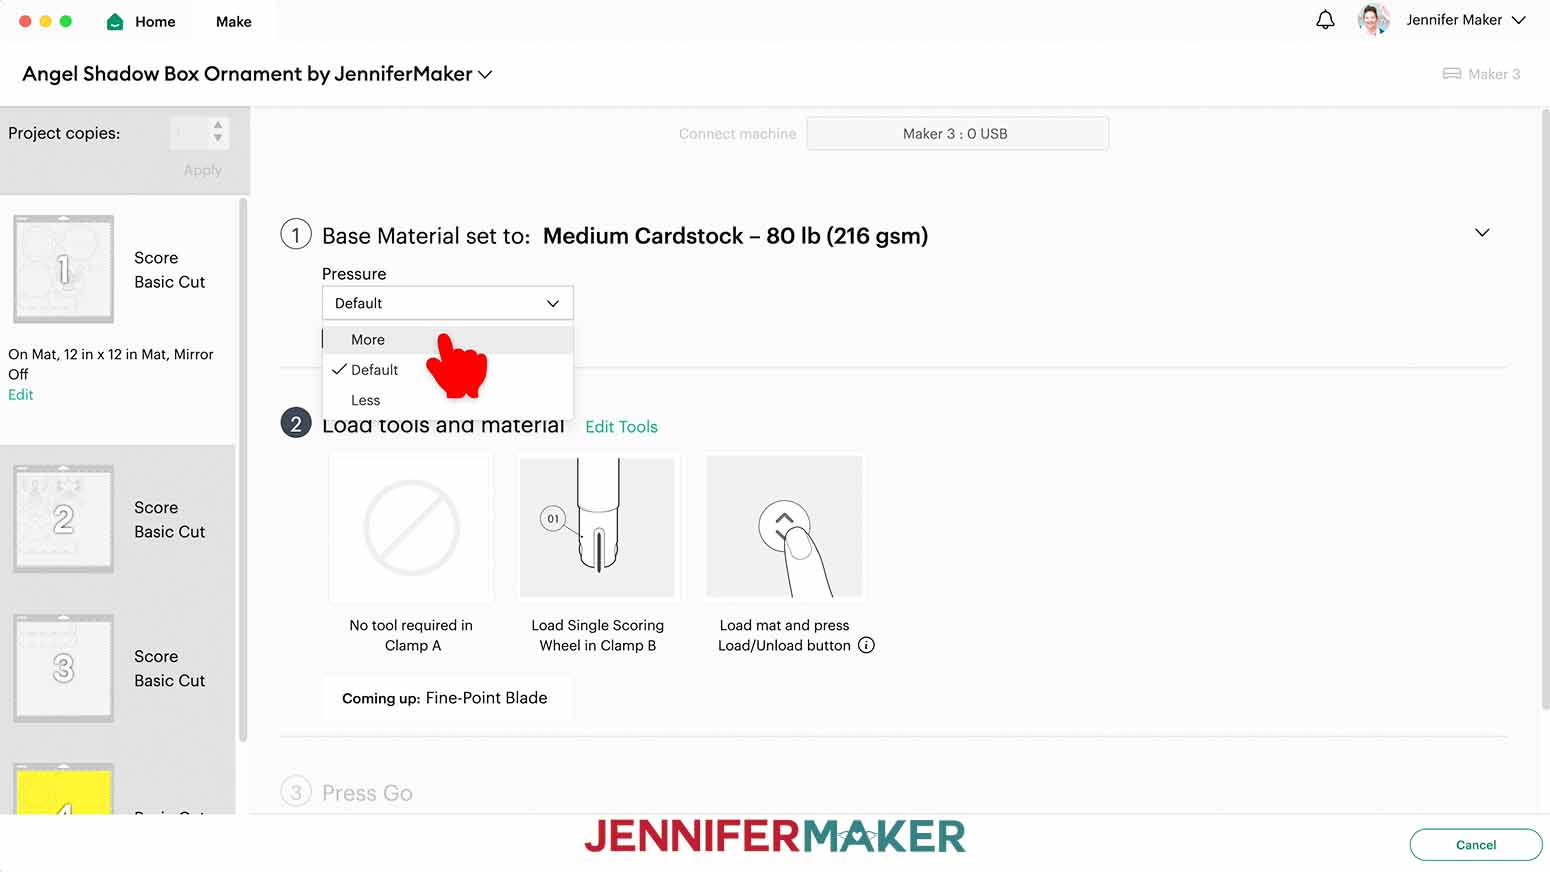
1. On the Make screen, set the Material to “Medium Cardstock - 80 lb (216 gsm).”
2. Change the Pressure to “More” for a cleaner cut.
3. Place your cardstock face up on a green StandardGrip machine mat and use a brayer to make sure it’s fully adhered.
4. Check that your Fine-Point Blade is clean and in the clamp.
5. Press the flashing “Load/Unload” button to load the prepared mat into your Cricut.
6. Press the flashing “Go” button to begin cutting.
7. When it has finished cutting, unload the mat, flip it over onto your work surface, and roll it back to release the paper.
TIP: Use the spatula to help lift delicate parts. If you have any issues with your cuts, go to jennifermaker.com/cleaner-cuts.
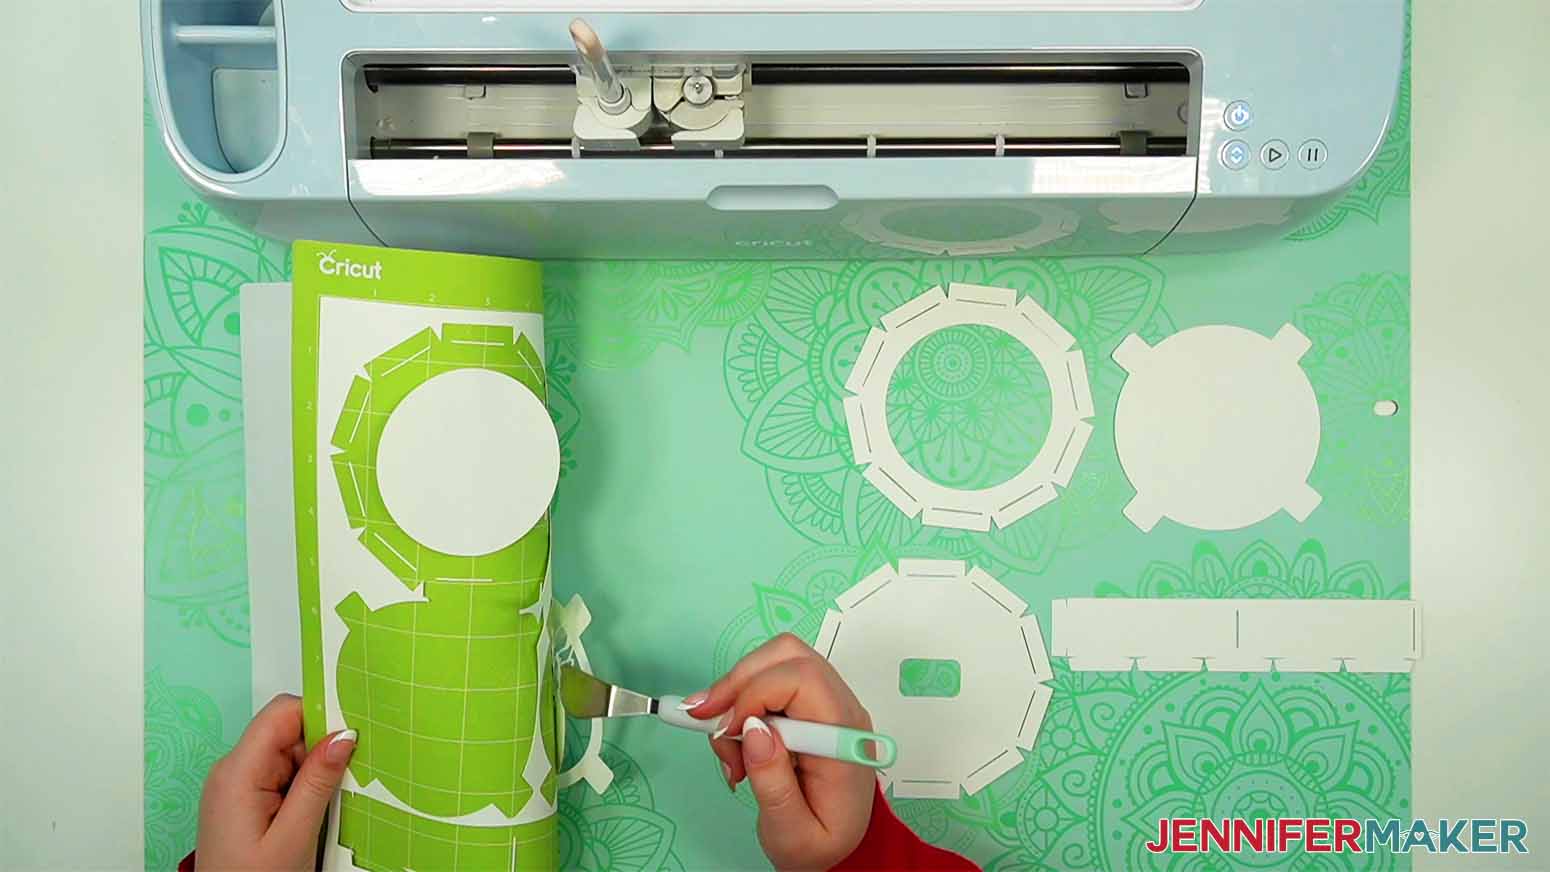
8. Follow steps 3-7 to continue cutting the rest of your white cardstock mats.
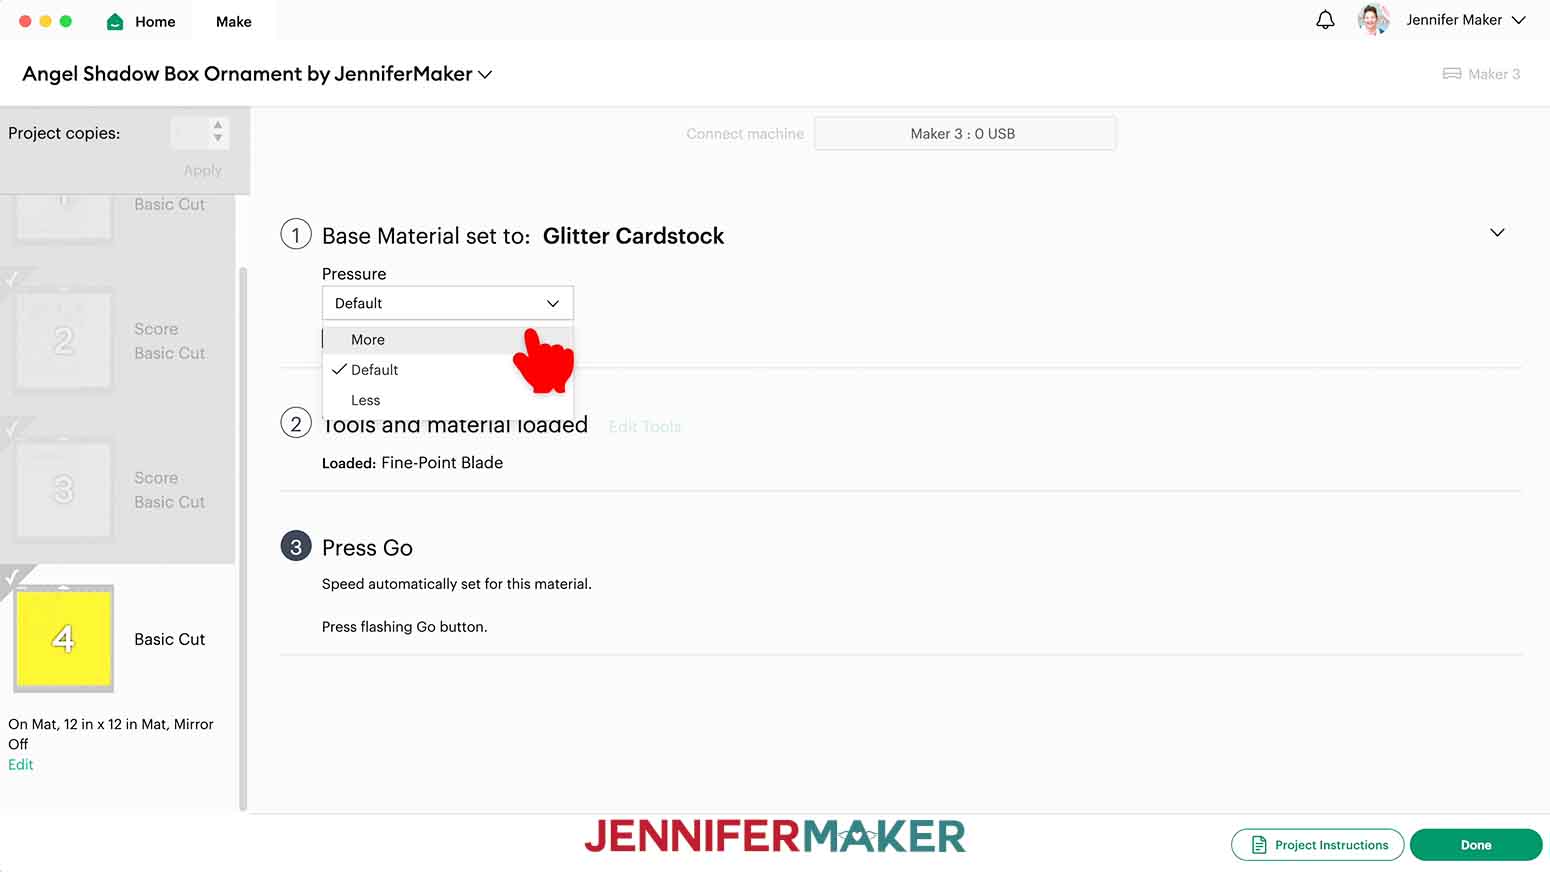
NOTE: If you’re cutting the optional glitter cardstock frame piece, select the “Glitter Cardstock” base material setting and choose “More” Pressure on that mat.
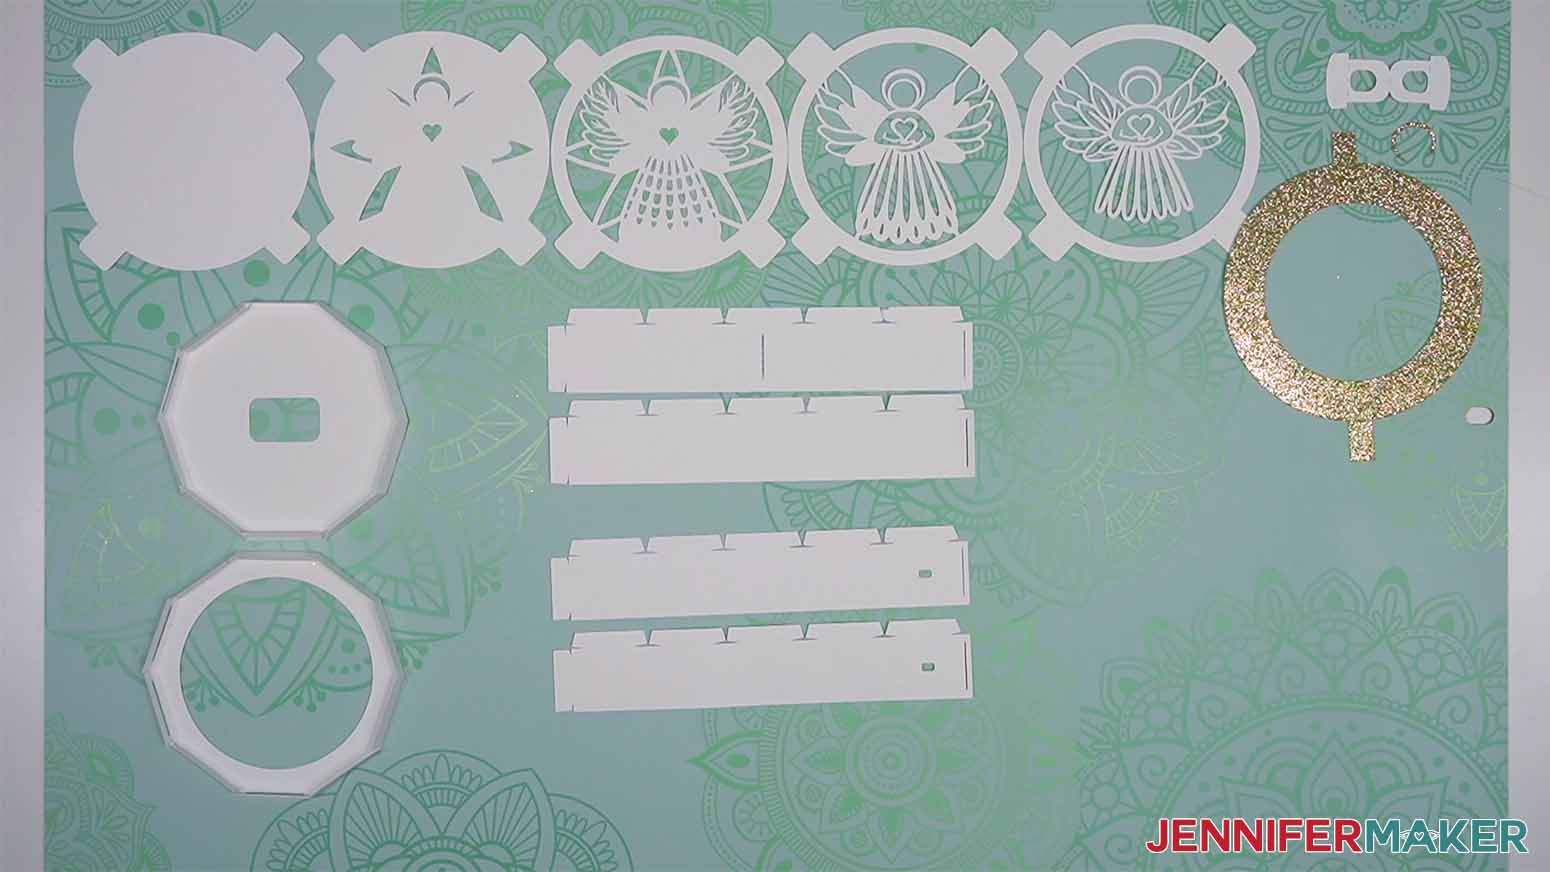
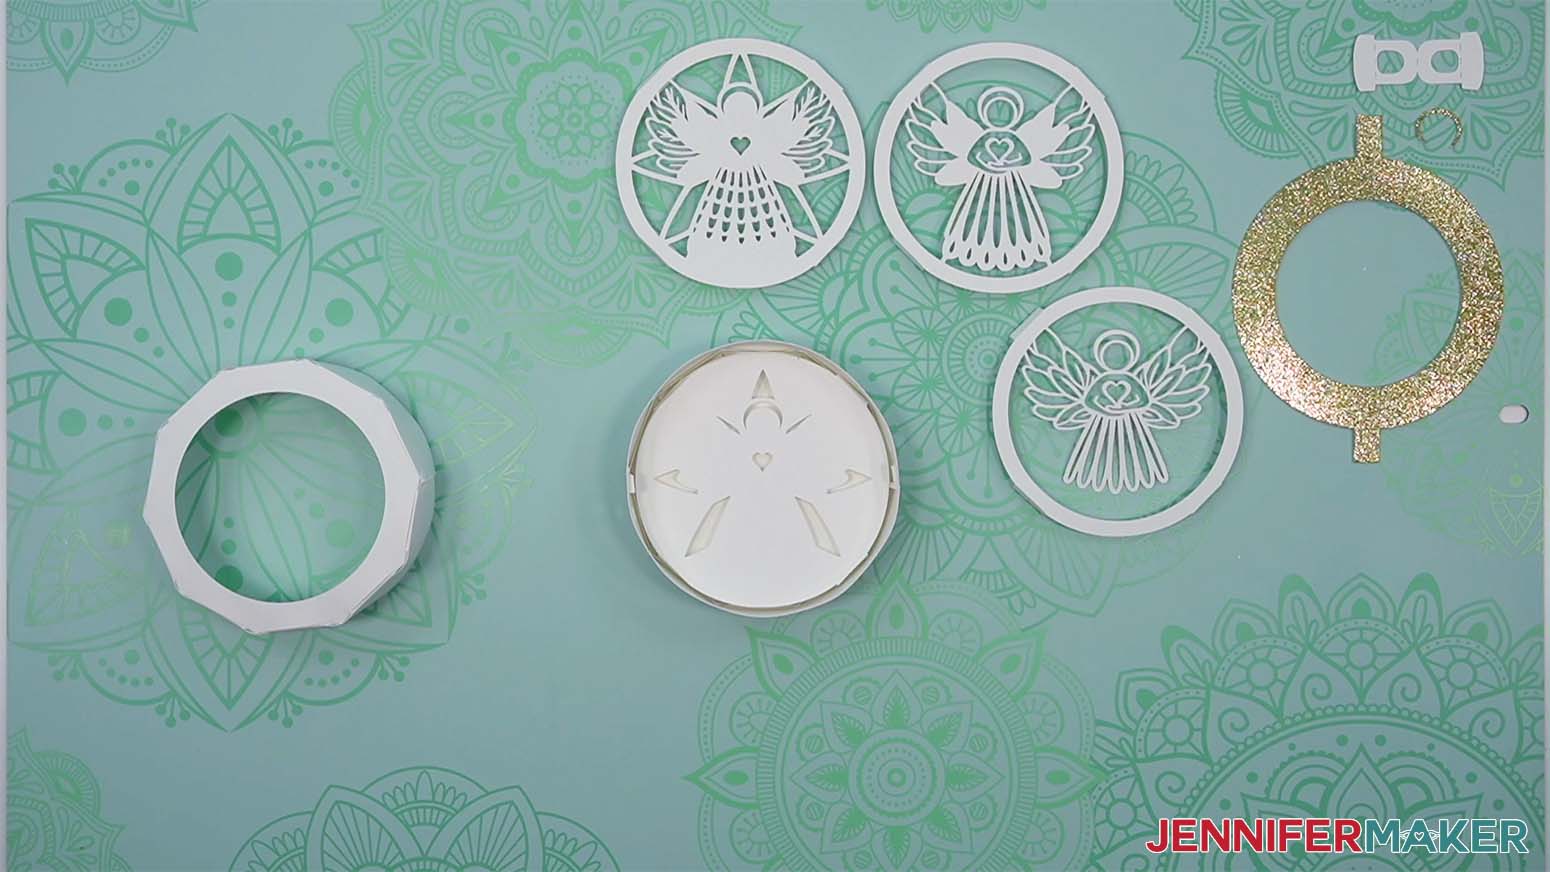
9. Lay out all your pieces face up. Refer to the Design Space screen if you’re not sure where a piece will go.
STEP 3: ASSEMBLE YOUR SHADOW BOX ORNAMENT
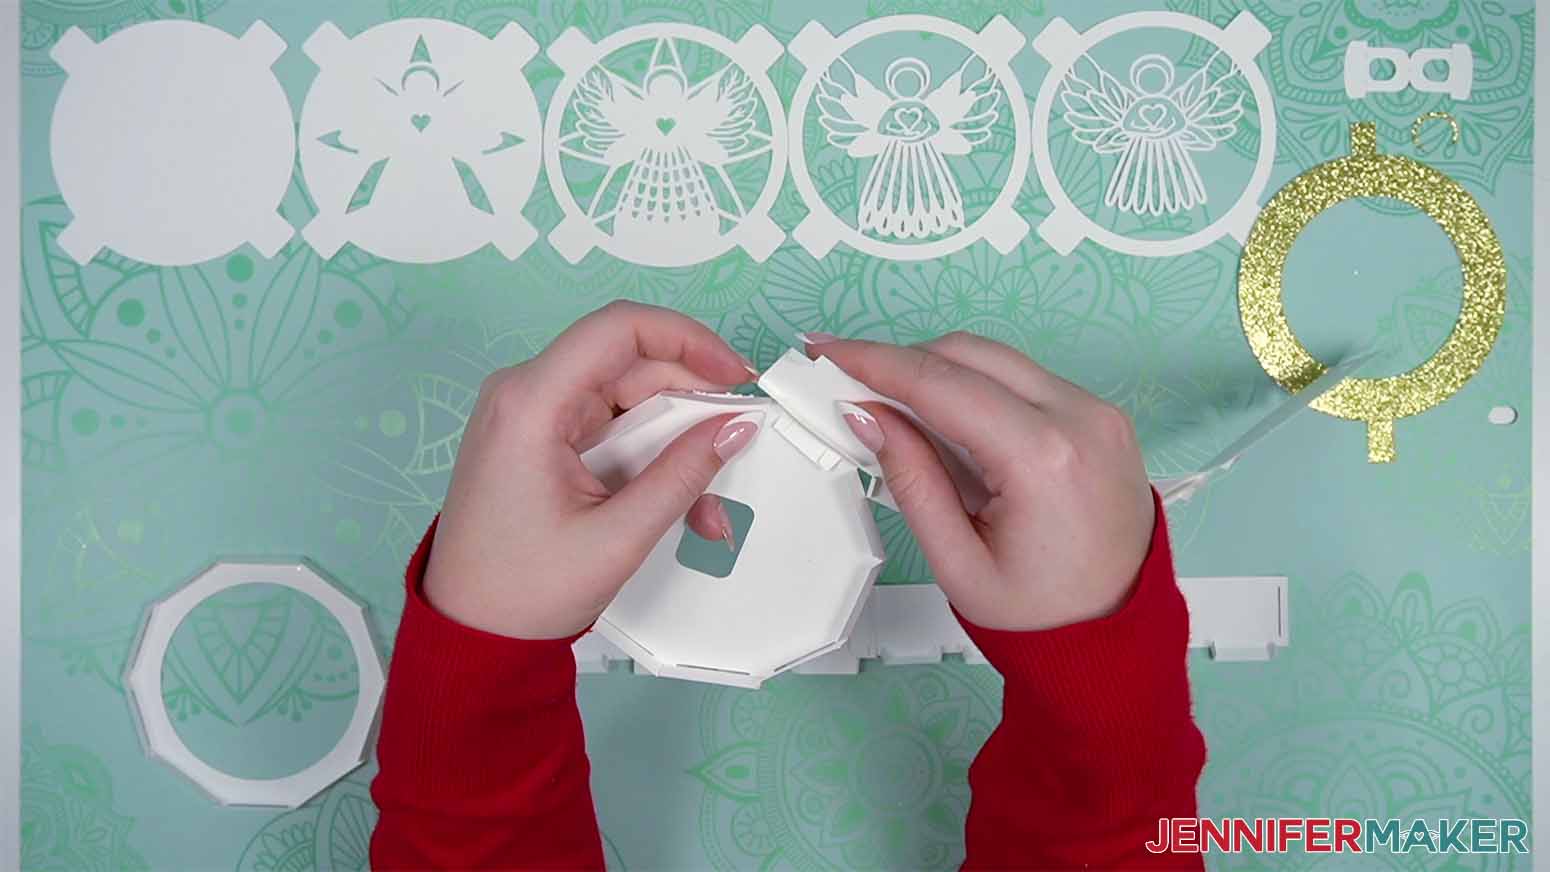
1. Grab the top and bottom ornament pieces and fold all the tabs in the same direction, where they meet the edge of the circle.

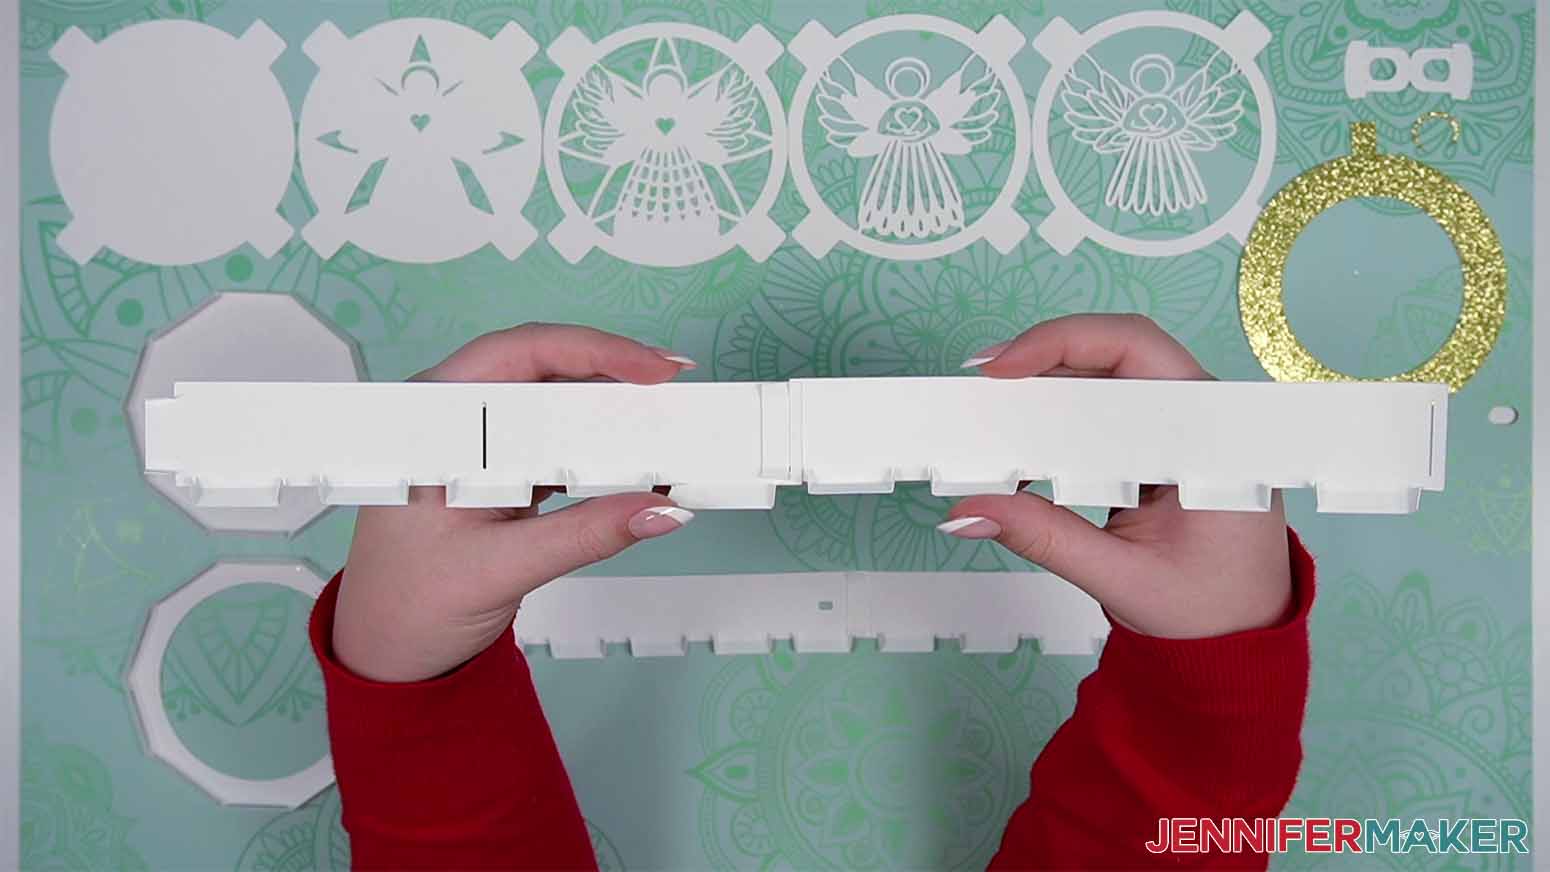
2. Grab the four strips. Match two of each kind and orient them the same way on your work surface.
3. Take one of the smaller strips with the tiny rectangle cutouts and fold the small top tabs in.

4. Fold all of the larger tabs in the same direction.

5. Bend the smaller tabs on each large tab inward in the same direction.
6. Follow steps 3-5 to fold the other smaller strip the same way.
7. Follow steps 3-5 to fold the other two larger strips without the tiny rectangle cutouts the same way.
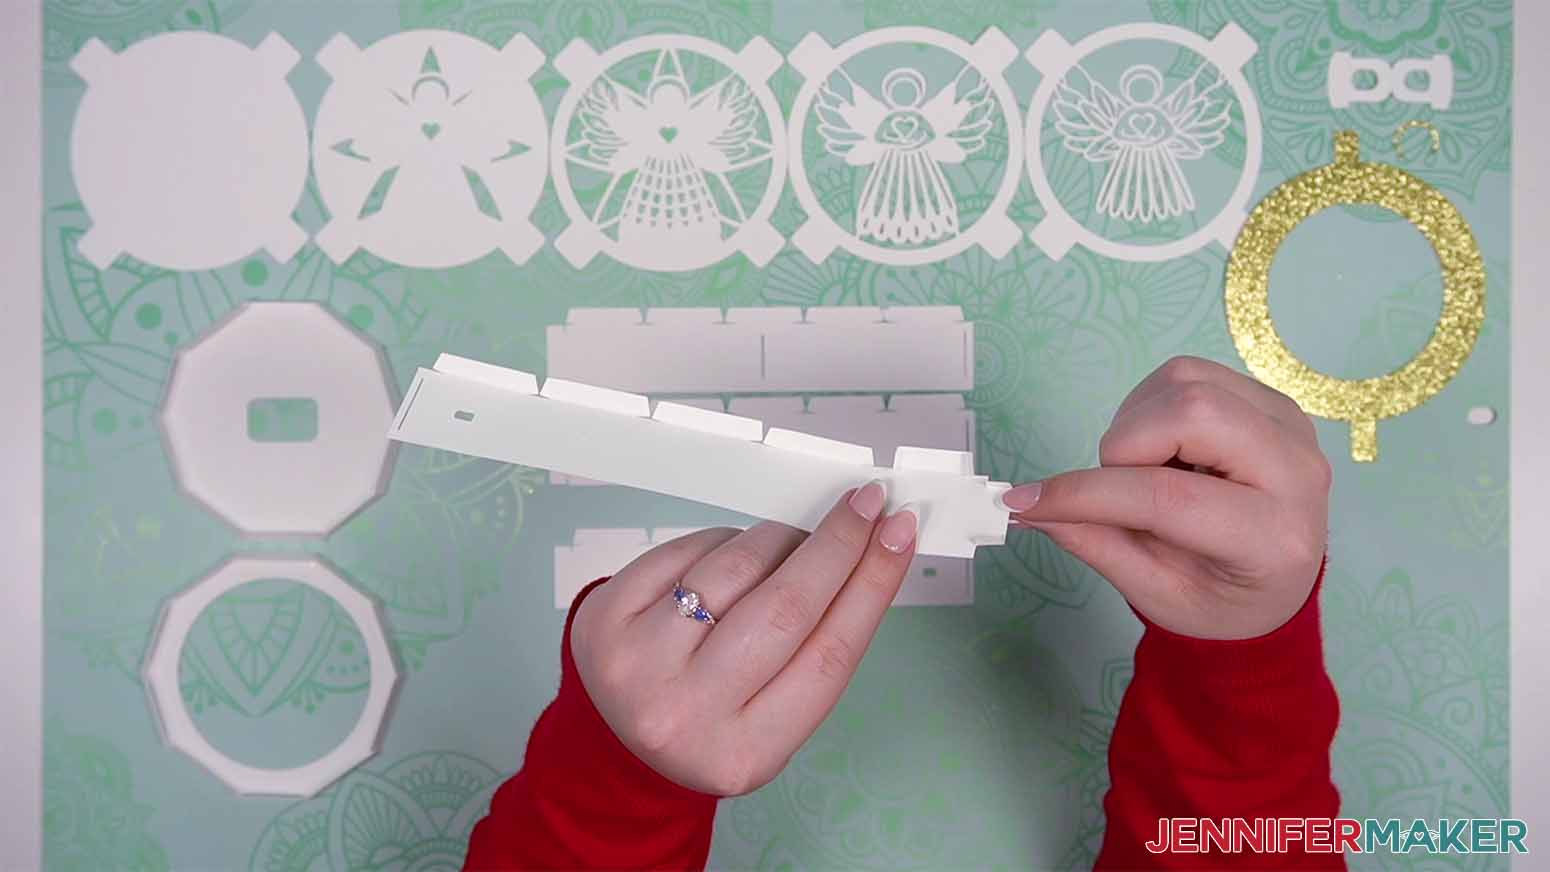
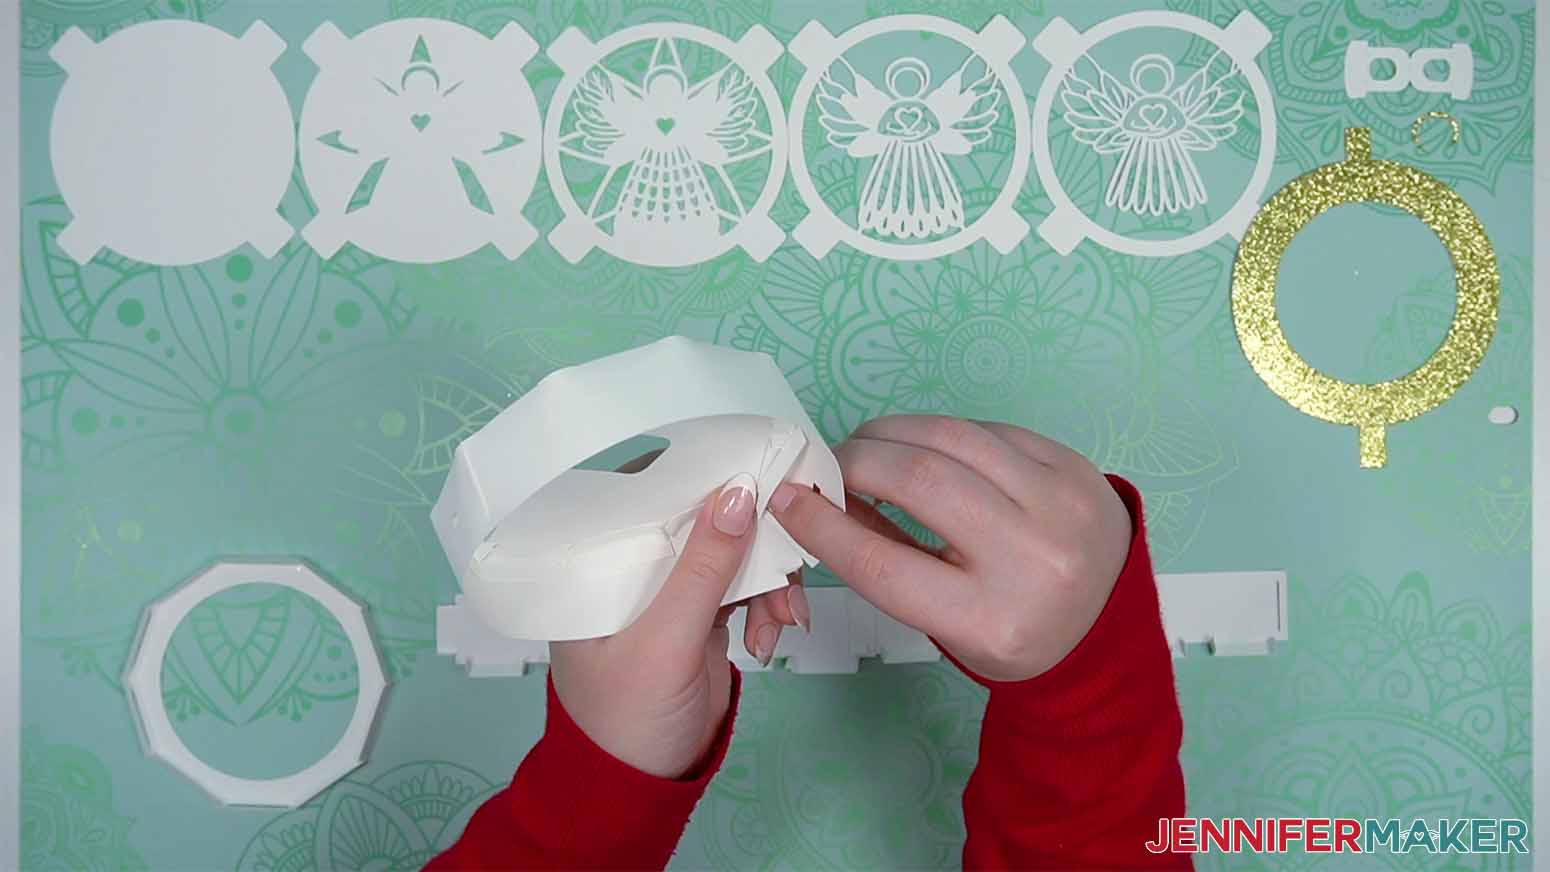
8. Take the two smaller strips, with the folds pointed towards you, and align them so the tab on one meets up with the slot on the other.

9. Insert the tab fully into the slot so it’s on the same side as the folded pieces, then unfold the small tabs to lock it in.

10. Follow steps 8-9 to connect the other two larger strips to one another.
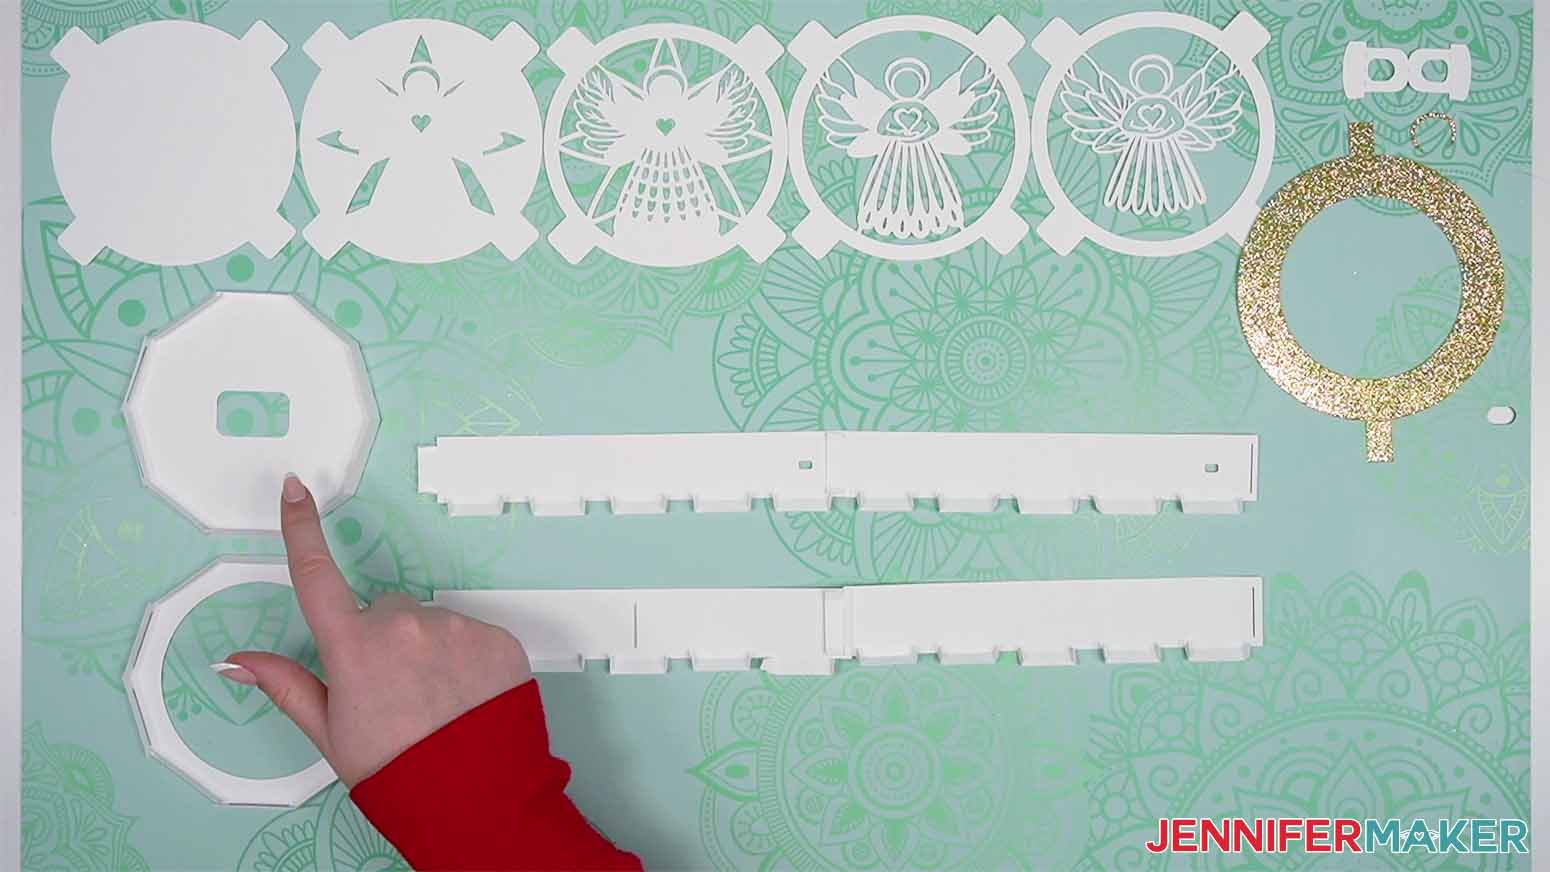
11. Match up the smaller strip with the tiny rectangle cutouts with the round piece that has a rectangle cutout in its center.
12. Match up the larger strip with the round piece that has a circle cutout in its center.
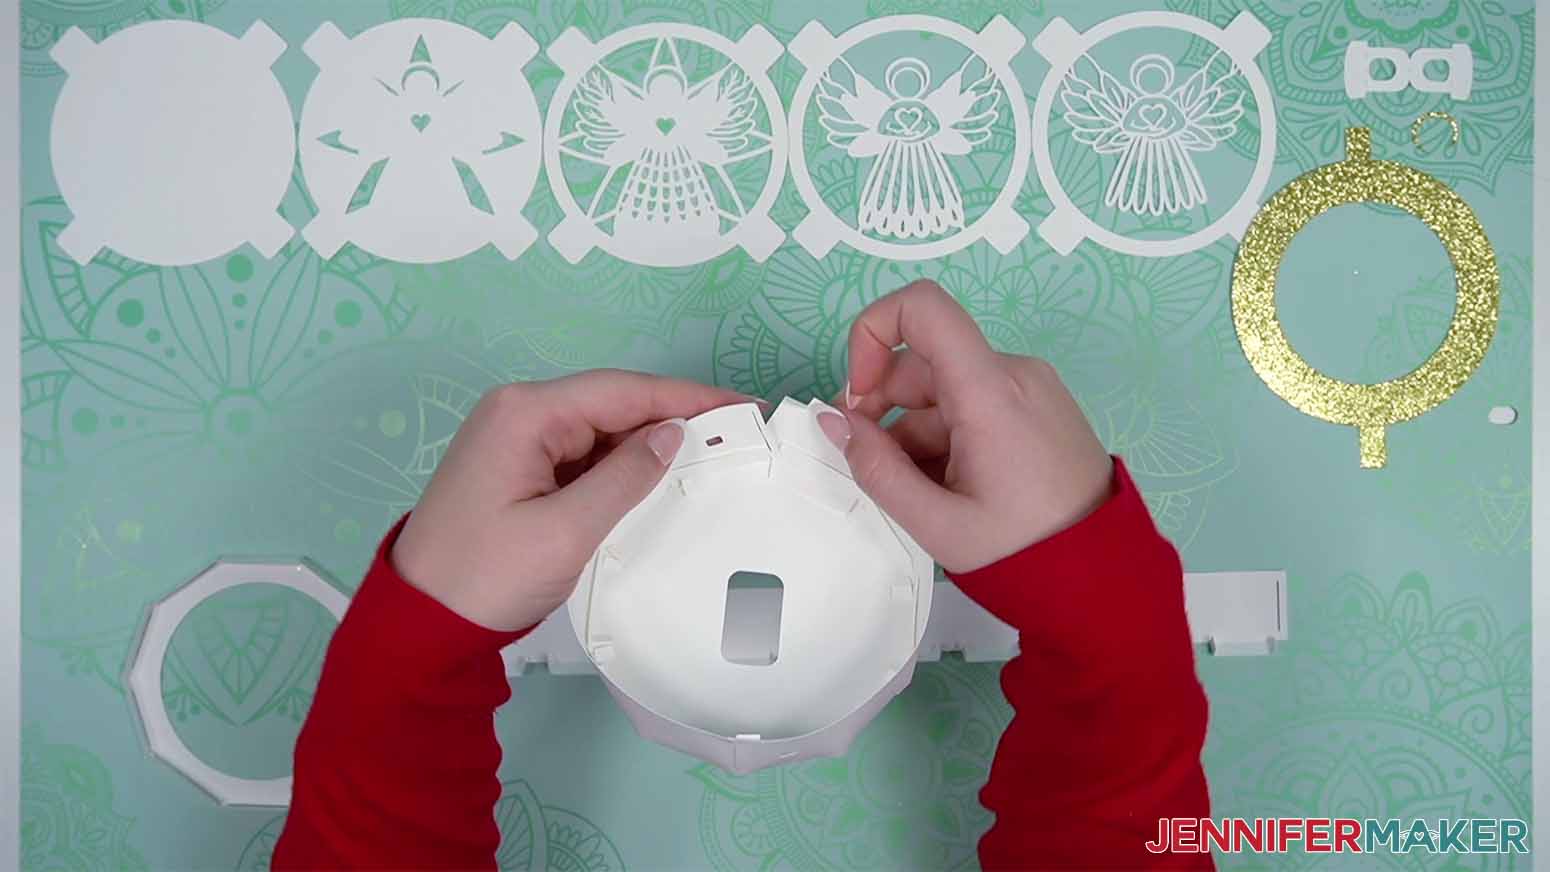
13. Find the tab at one end of the long side of the strip. Fold its small tabs down and use your thumb to hold them in place.
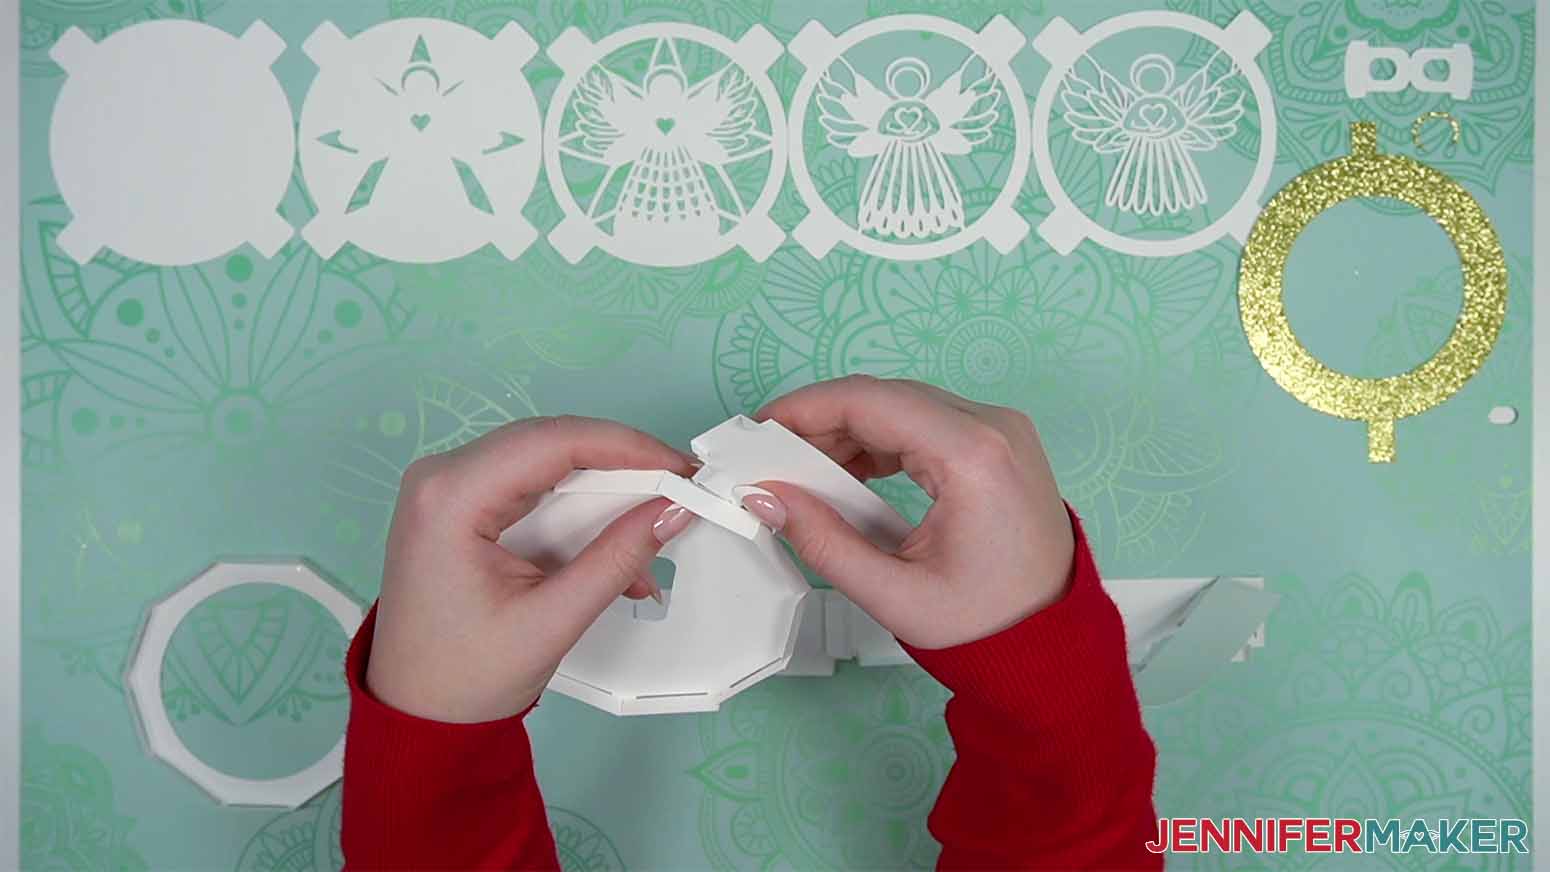
14. With the tabs on the round piece folded toward you, insert the strip's tab you're holding through a slot on the round piece so that tab is also pointing toward you.
15. Once it’s fully in, unfold the small tabs to lock it in place. Make sure the attached strip section covers the tab attached to the round piece.

16. Continue inserting the larger tabs into the slots on the round piece in order, unfolding the smaller tabs as you go.

TIP: Keep checking to make sure the attached strip is facing the correct direction before moving on to the next tab.
17. The part with the joint might be tricky, but it will go in.
18. When you’ve finished inserting all the tabs, the end tab should be on the outside, with the slot on the inside. If yours is opposite, pull the tab out so it’s on the outside.
19. Insert the tab into the slot.

20. Unfold the smaller tabs to lock it in. You may need to push some of the inner tabs inside the round piece down to make room to unfold the smaller tabs.

21. Follow steps 13-20 to attach the other strip and round piece together.

22. Try to put the two shapes together like a box. The piece with the small rectangle cutout is the back of the ornament, and the piece with the large circle cutout is the front.

23. Now gather your other layers.
24. Find the solid piece and fold in each tab.

25. Fold the additional score lines on each tab in the same direction to create a rolled effect that I’ll call “legs.” The legs will work as spacers between the layers, creating a 3D effect.
26. Repeat step 25 to fold the other layers’ tabs.
27. Insert the solid back layer so the folded tab “legs” point down.
TIP: Don’t try to put your lights in now – those go in at the end.
28. Position the back piece so the rectangle cutout is horizontal and straight on your work surface.
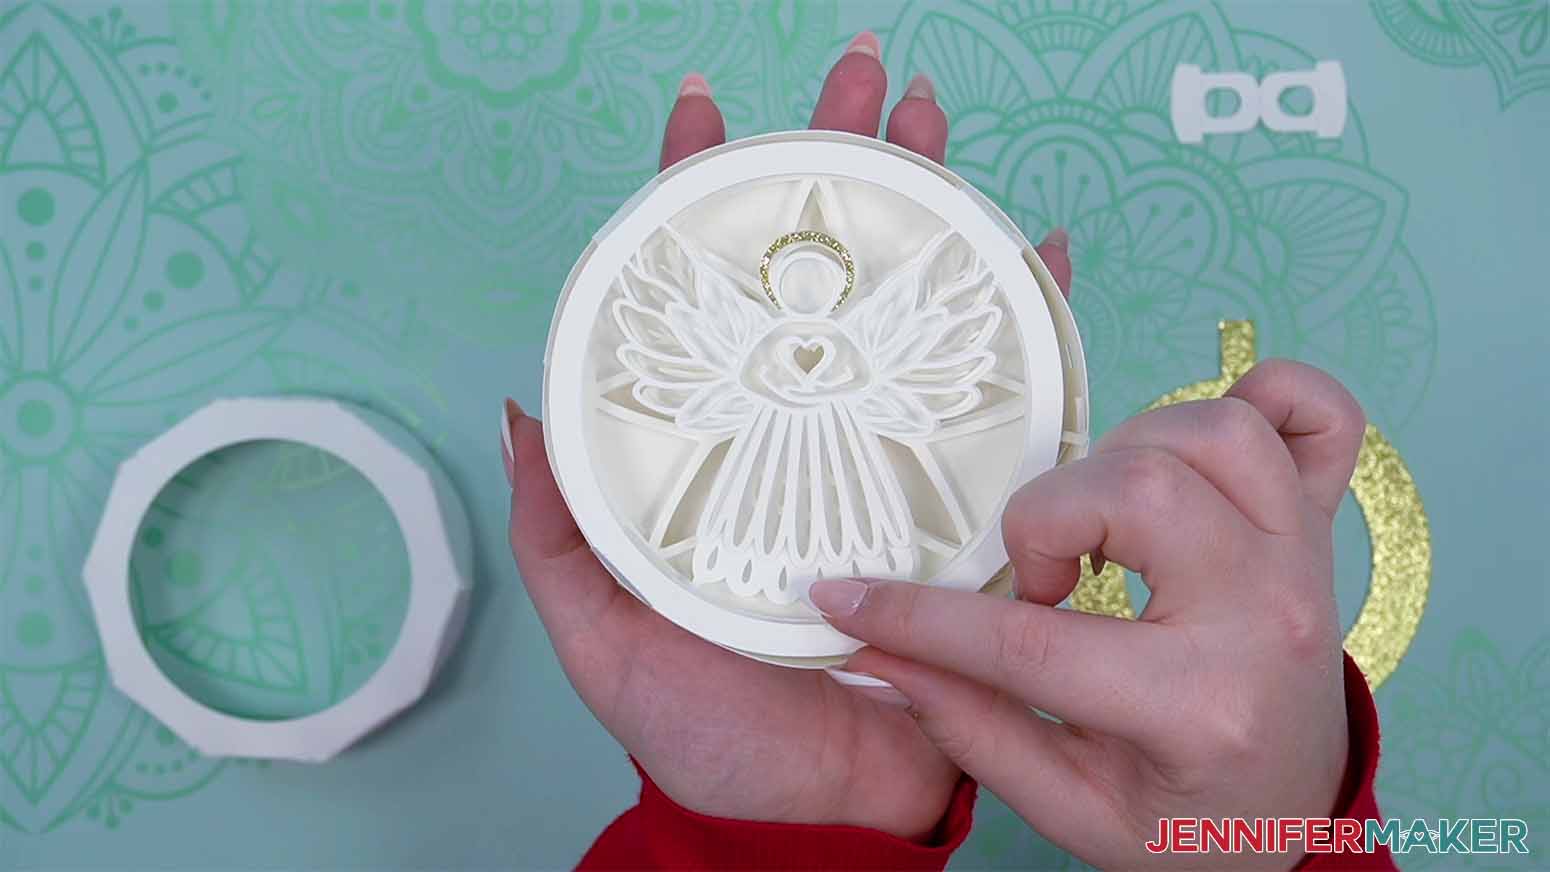
29. Using your Design Space Canvas as reference, place the next layer in the box face up with the top pointing straight up.
30. Insert the rest of the layers the same way.
31. If any layers rotated, gently turn them back into place.
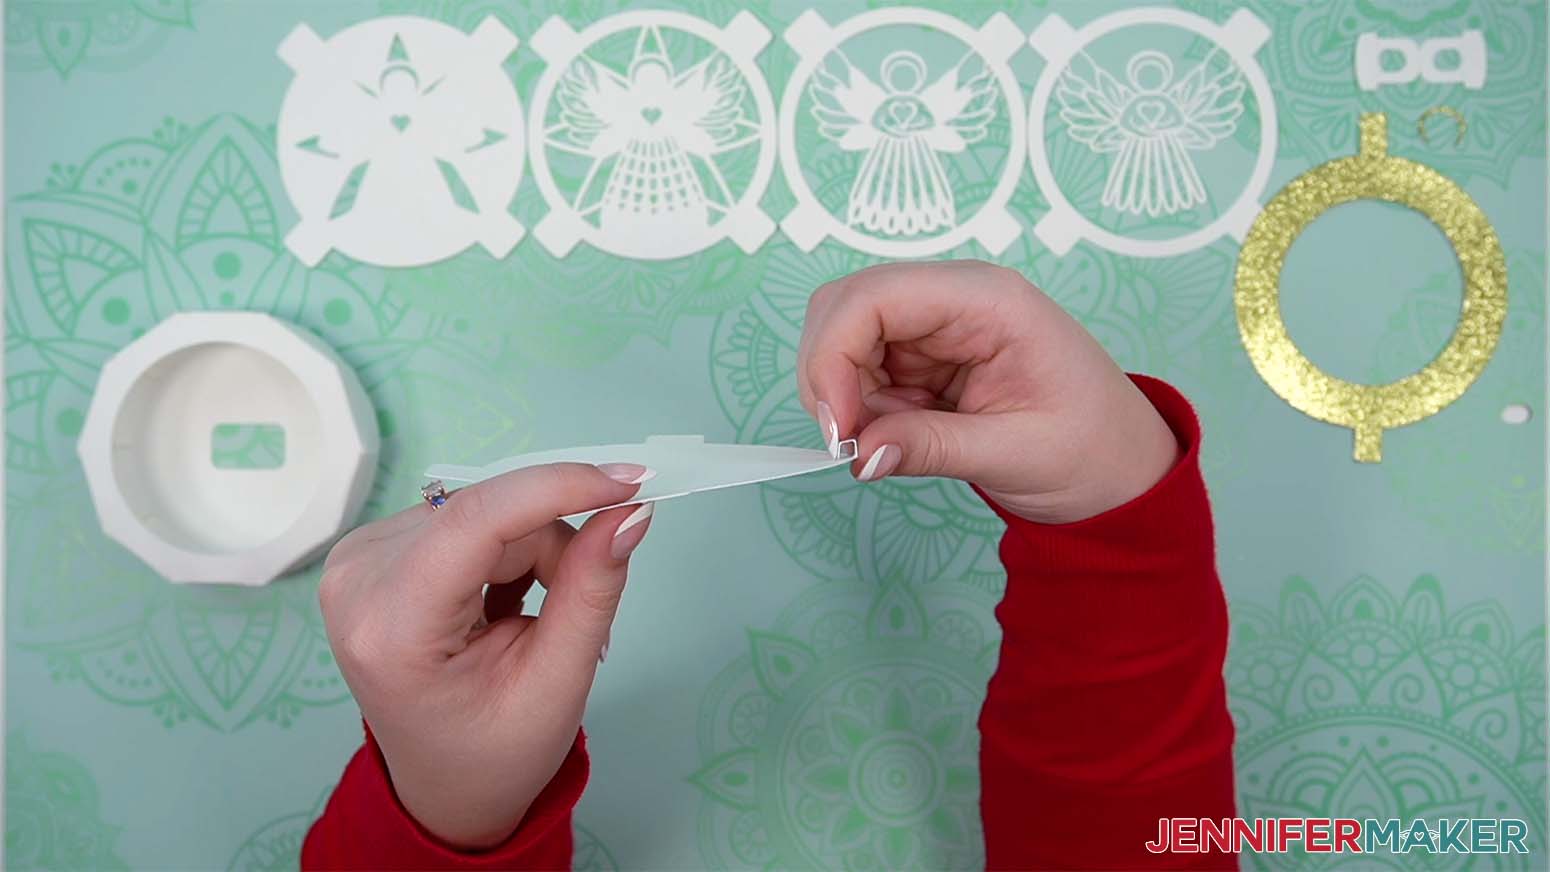
32. Fold the small hanger piece in half along the dashed line.
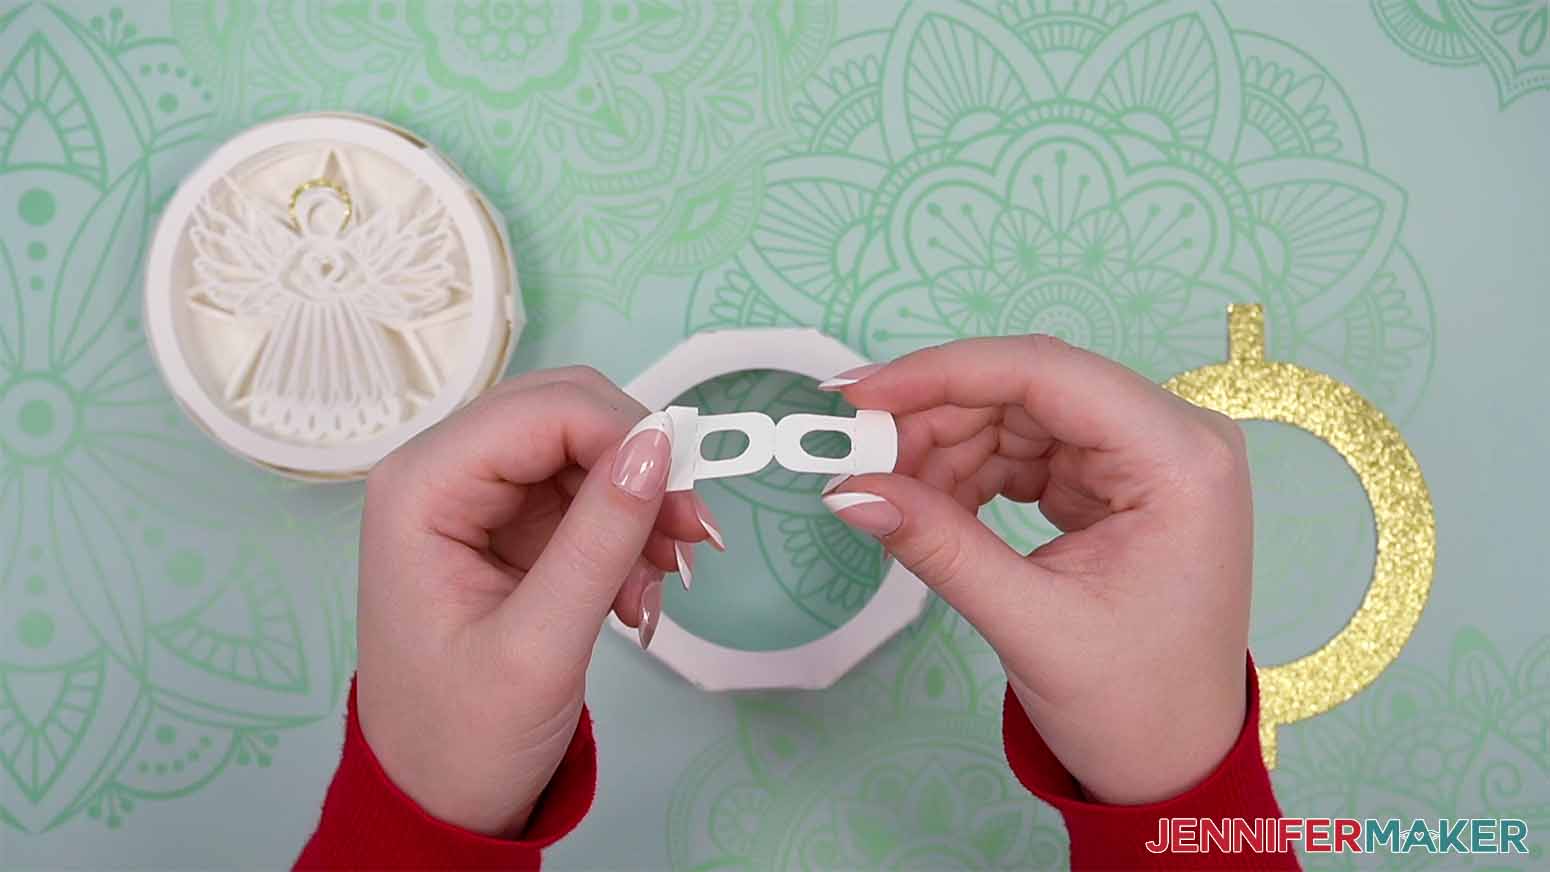
33. Fold the other dashed lines in the opposite direction.
34. Inside the front frame piece of the ornament “box,” locate the slot and hold down the tab underneath it.

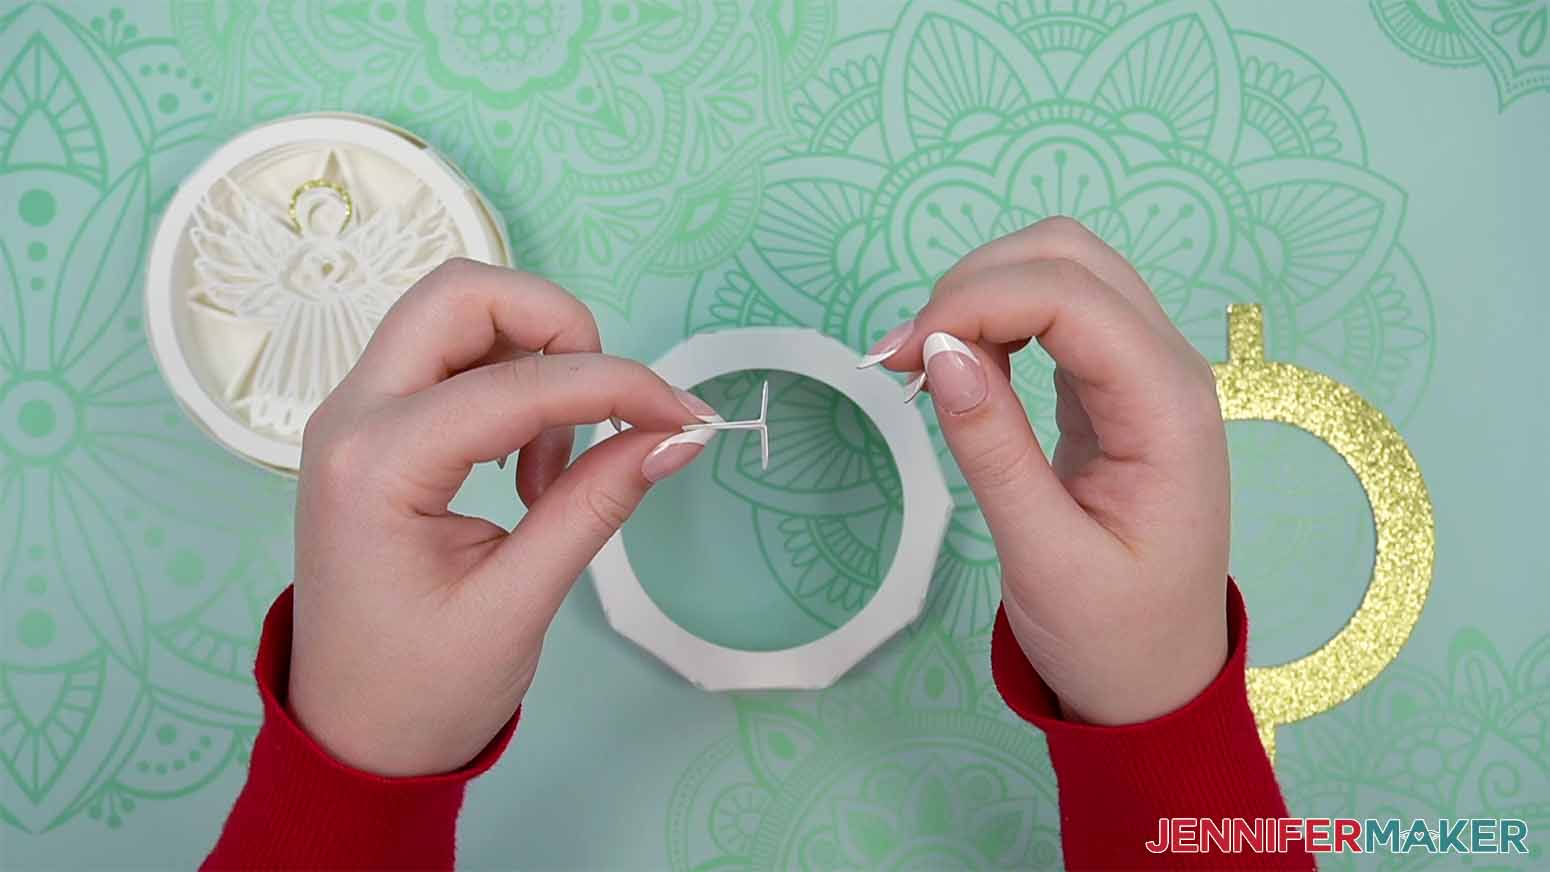
35. From the inside of the front frame piece, push the hanger piece through the slot. The folded base keeps it from slipping through.

36. Align the hanger with the top of the shadow box design and put the front frame on top.

NOTE: You may notice a gap, where the “box” doesn’t look completely closed. This is because of the “legs.” It may push down, or it may not. If it doesn’t, use clear Scotch tape around the inside of the front frame to hold the inserted tabs down and out of the way.

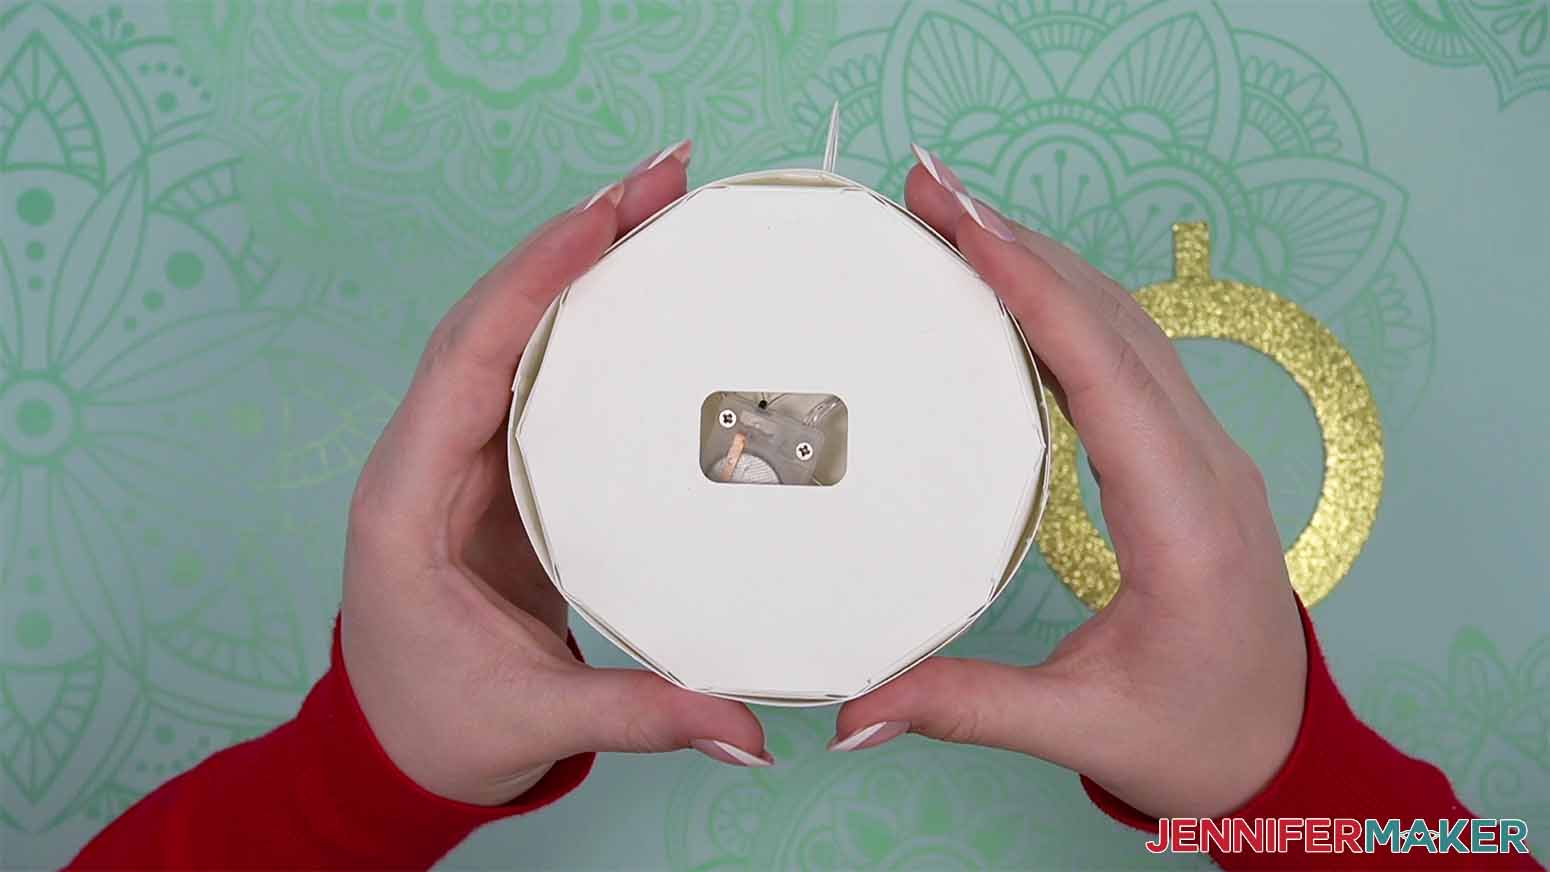
37. Unwrap and test your LED lights to make sure they work.
38. With the ornament face down, feed the lights into the rectangular hole. Rotate the ornament as you go to help evenly distribute the lights.

39. Tuck the end all the way inside the hole or let it hang out a little bit for easy access.
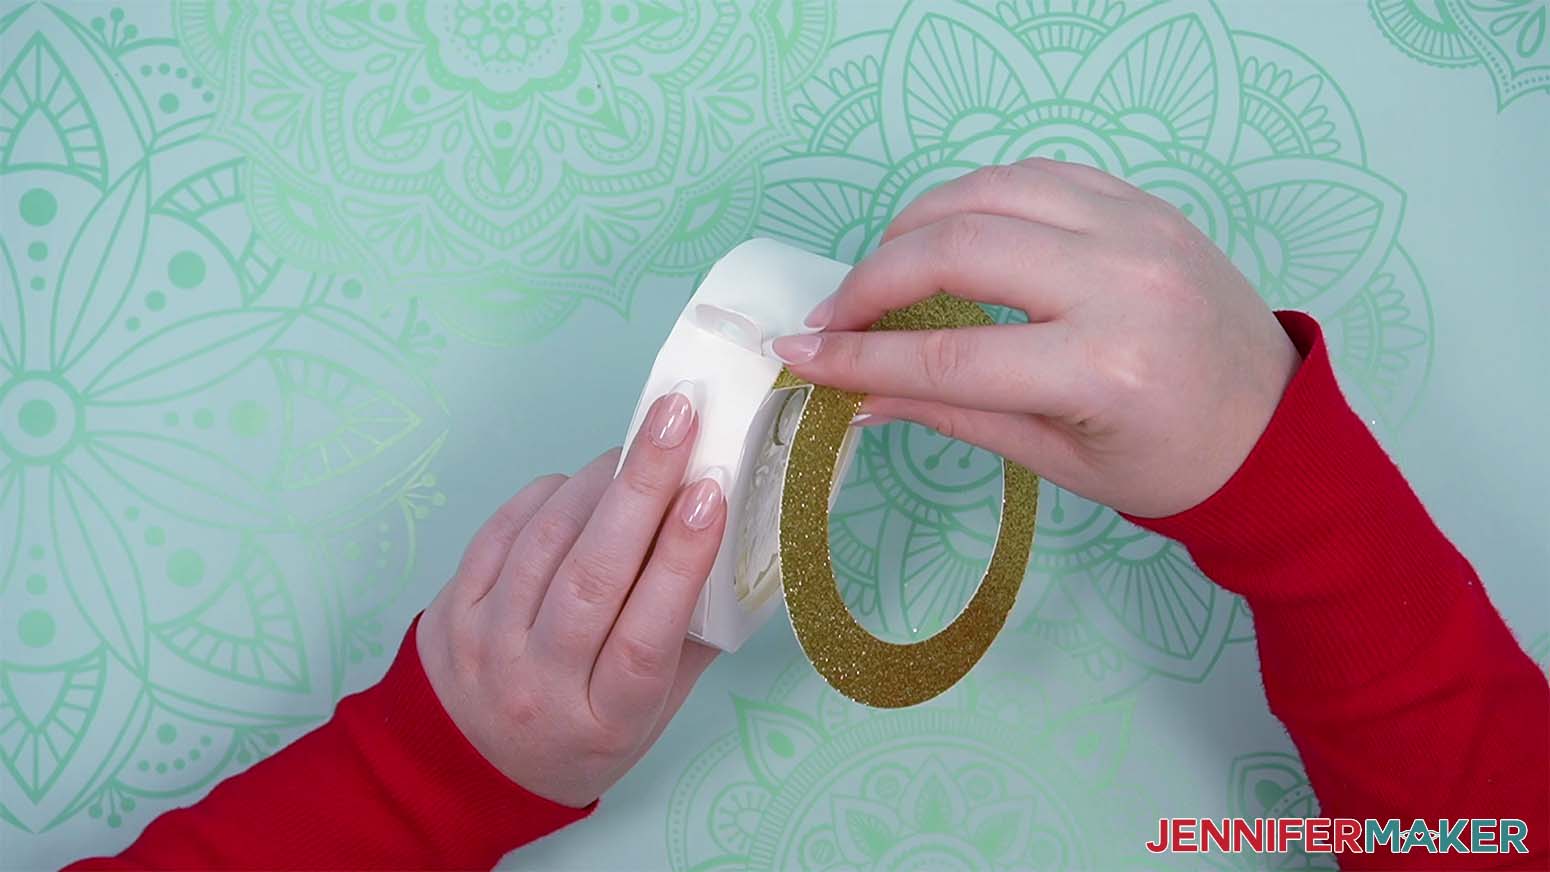
OPTIONAL: To add the accent frame, bend the tabs back and insert them into the top and bottom slots on the front of the ornament.
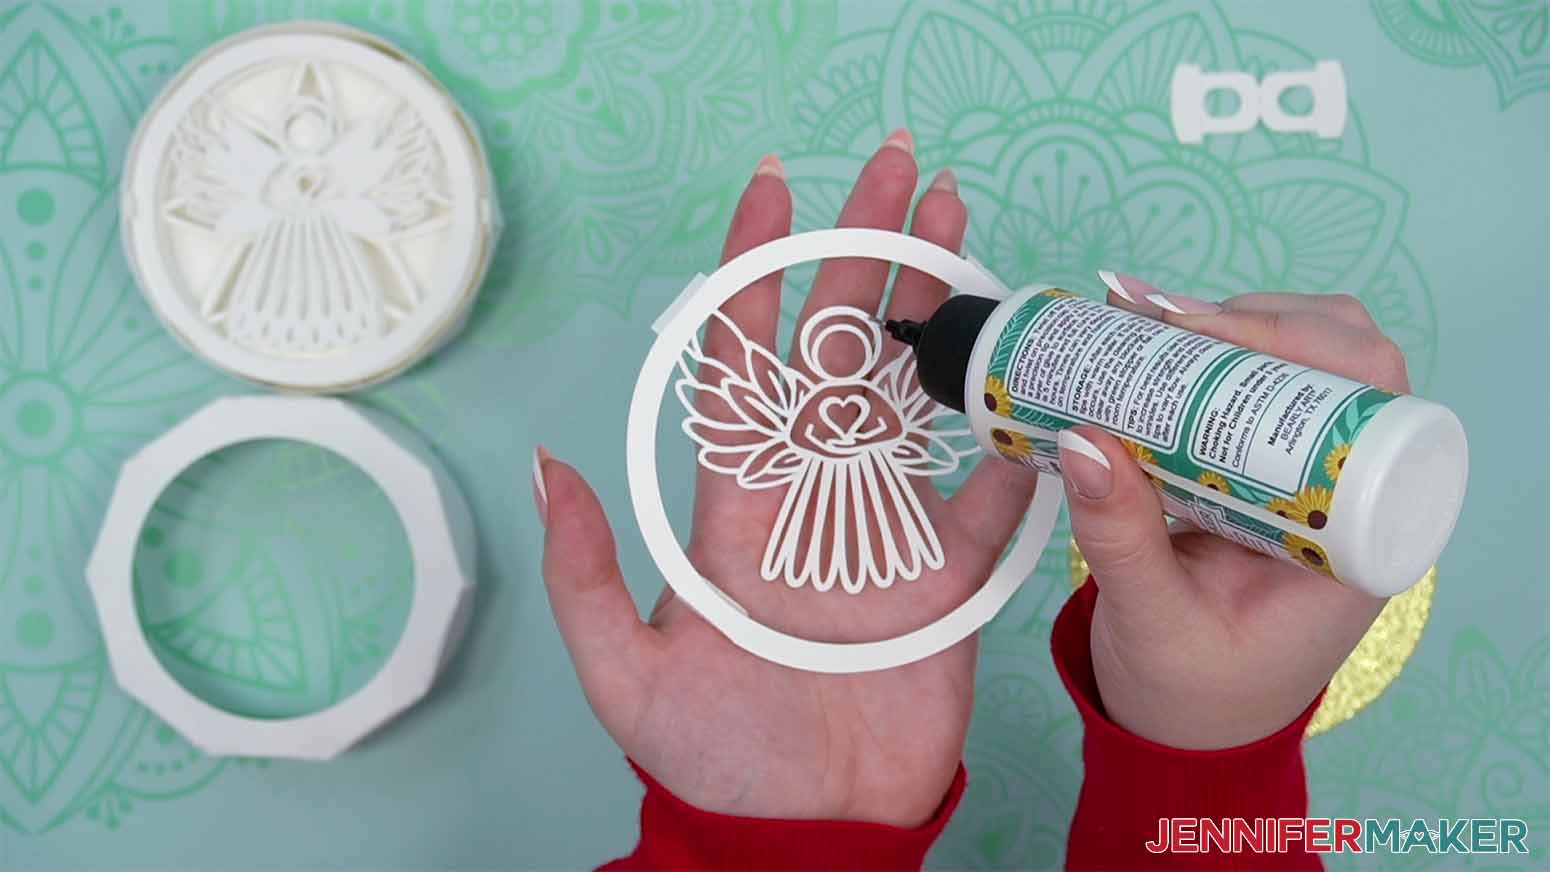
OPTIONAL FOR ANGEL: To add the halo piece, put a few dots of craft glue on the front of the halo section on the angel's front layer and carefully attach the small halo piece to it.
STEP 4: SHOW IT OFF
Here are what my finished angel paper shadow box ornament looks like!

And the owl!

And the snowman!
And the Christmas scene!

Stay tuned for more!
Notes
Finished Size: Approximately 4.5" W x 5.375" H x 1.25" D
Answers to Your Questions About How to Make Angel Shadow Box Ornaments
Q: What kind of cardstock do I need?
A:I recommend white 65 lb. cardstock for this project so your lights shine through your layers. Thicker cardstock works, but your layers will be harder to illuminate. I used white cardstock, because light permeates it much more easily, but you can experiment with different colors, too — lighter colors do work better, though.
Q: I know the ornament doesn’t need tape or glue, but can I add it?
A: Yes, totally — just glue your tabs down as you go along. Glue will make your shadowbox ornaments more sturdy for sure. Just remember, a little glue goes a long way. I recommend Bearly Art Precision Craft Glue with the precision tip.
Q: What kind of lights can I use?
A: With any decorative objects made of paper like shadowboxes, lanterns, and luminaries, I only recommend mini LED lights. Do not use any light that may heat up for these DIY projects. I think warm white lights look best in shadowboxes like these, because they give a beautiful rustic light that feels so cozy — but the choice is up to you! And pay attention to the product features on your LED lights. Some take watch batteries, and some use cheaper options like AA batteries. Sometimes, you can even find LED lights that even have a built-in timer, so you never have to remember to turn them on and off.
Q: What do I do if my battery runs out?
A: If your LED light’s batteries die, the ornament is designed so you can easily pull the strand out and replace the battery pack with fresh batteries when needed.
Q: How can I display my ornament?
A: Hang them on a tree or ornament stand in your living room, attach them to a wrapped gift, hang them in your home’s entrance, or let them sit on a mantel or table. You can even use them as a cute seasonal nightlight for your kids’ room. I designed these not as smooth circles, but as decagons (10-sided shapes) so they would have a flat bottom and sit on their edge without rolling all over the place!
Get my free SVG files to make a Shadow Box Paper Ornament!
I love seeing what you make with my designs and how you use them! Please share a photo of your shadow box ornaments in our Facebook group or tag me on social media with #jennifermaker.
Love,

Want to remember this? Save this tutorial on making Angel Shadow Box Ornaments to your favorite Pinterest Board!