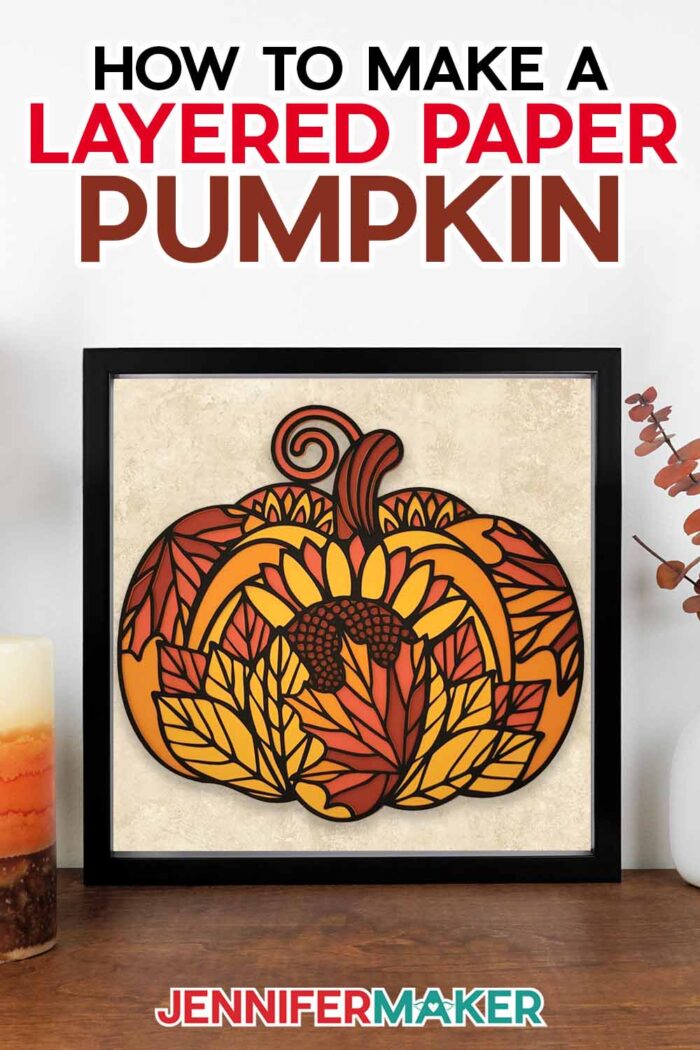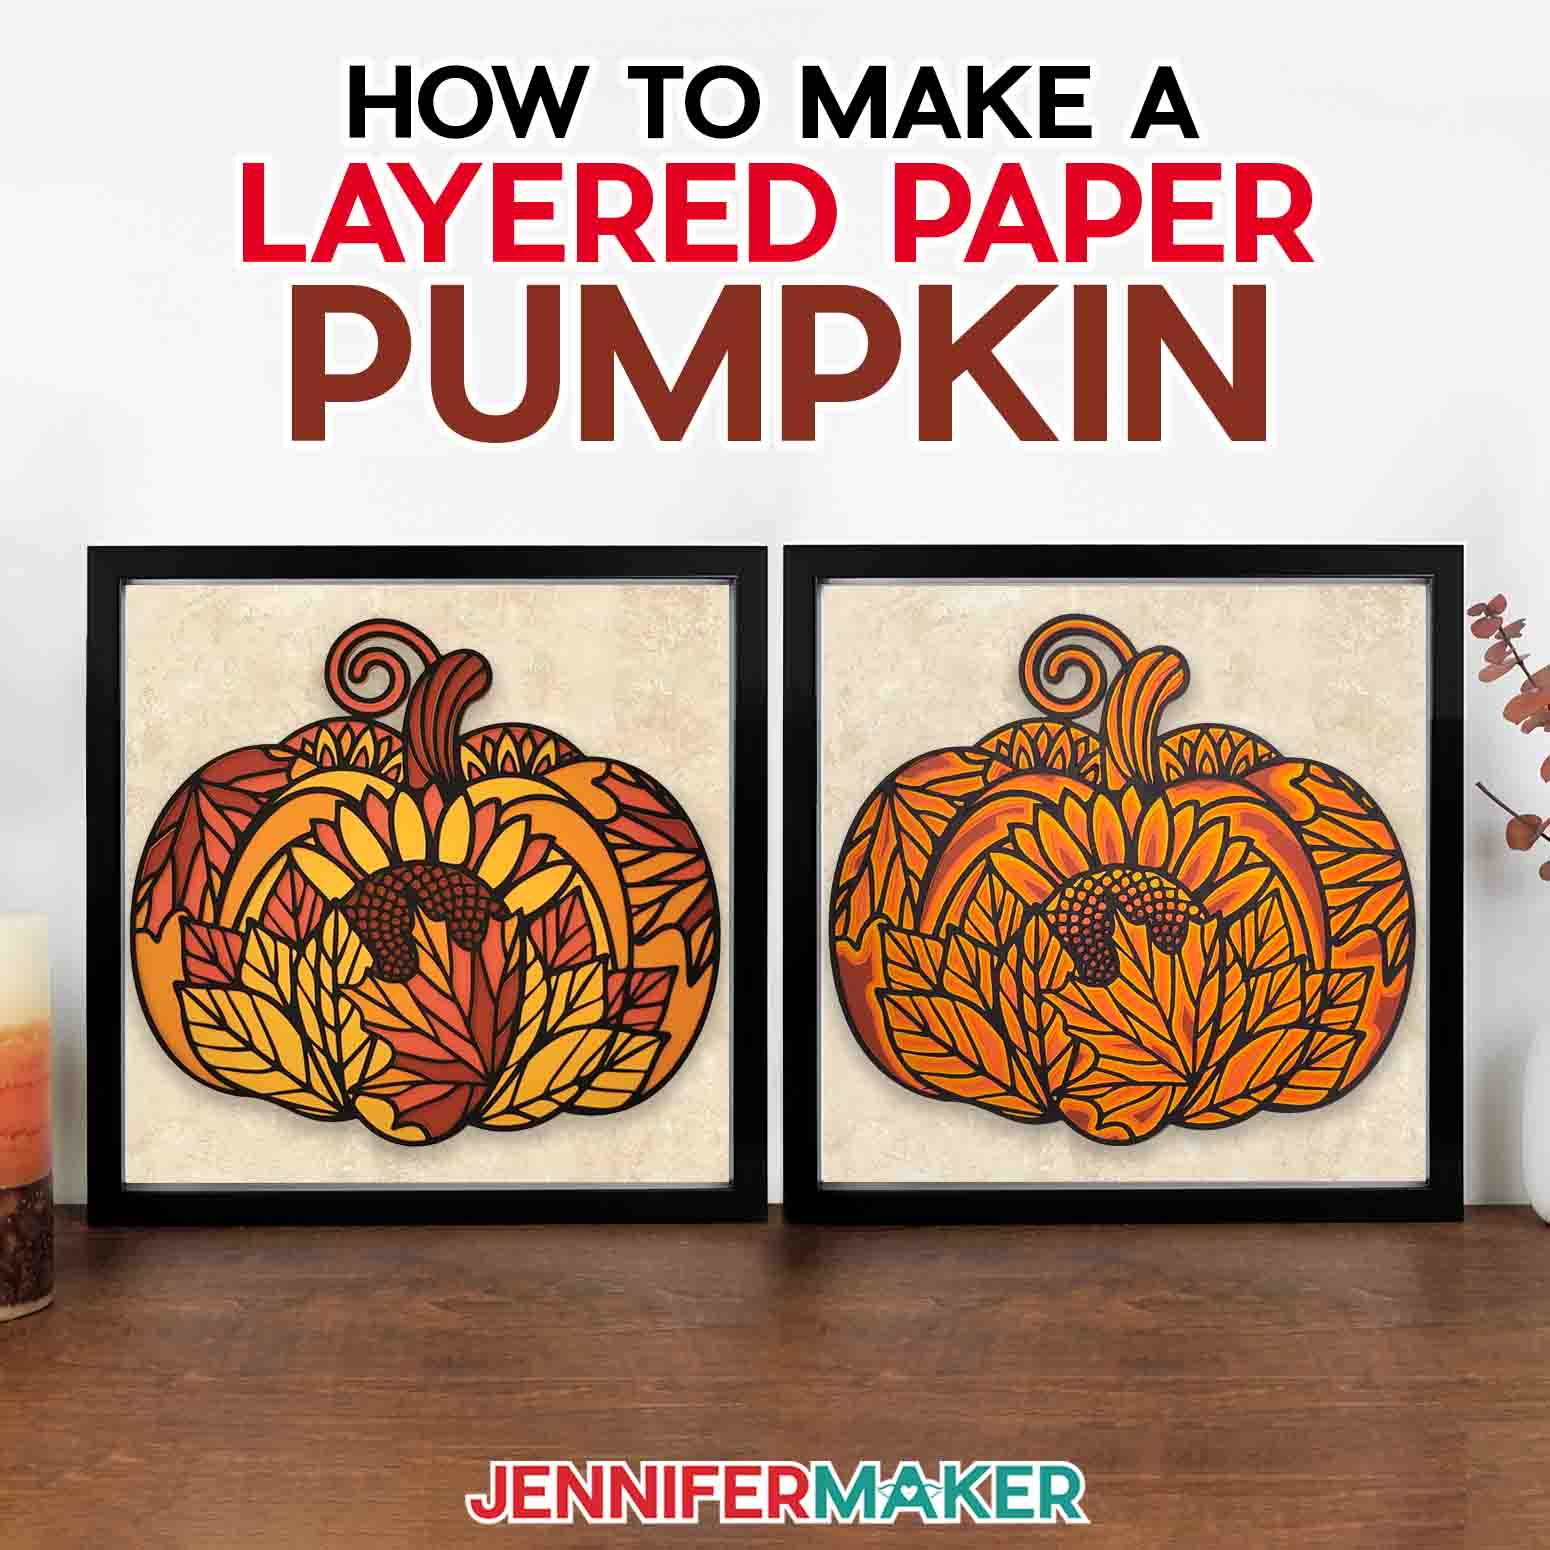
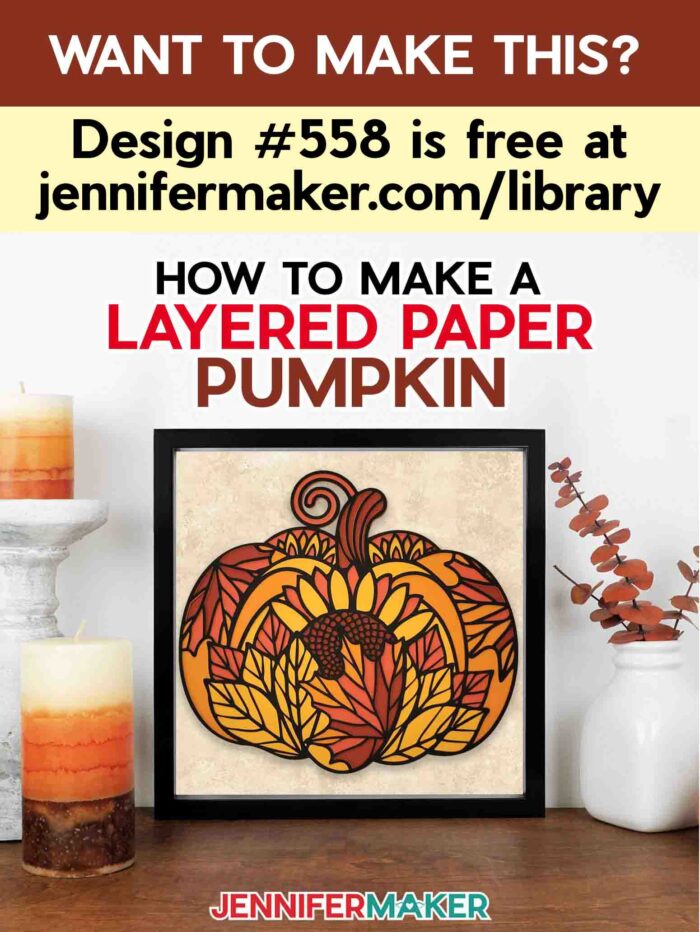
Create an intricate layered paper pumpkin for seasonal decor!
I don’t know about you, but I can’t cut an intricate cardstock design as nicely as my cutting machine! But, I can create the designs and have two new layered paper pumpkin options for your fall decor! These were inspired by my floral heart project. These pumpkins are a great way to practice getting cleaner cuts and aligning layers!
Want to save this project? Enter your email below and we’ll send the project straight to your inbox.

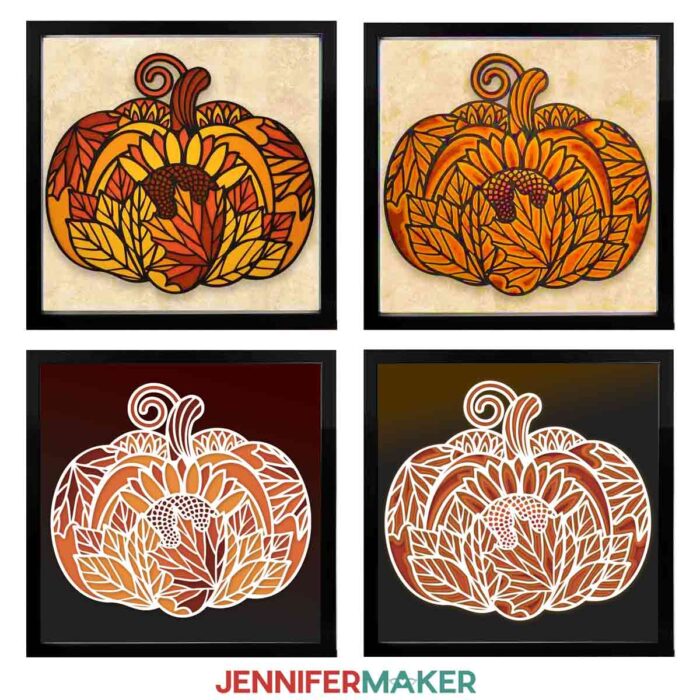
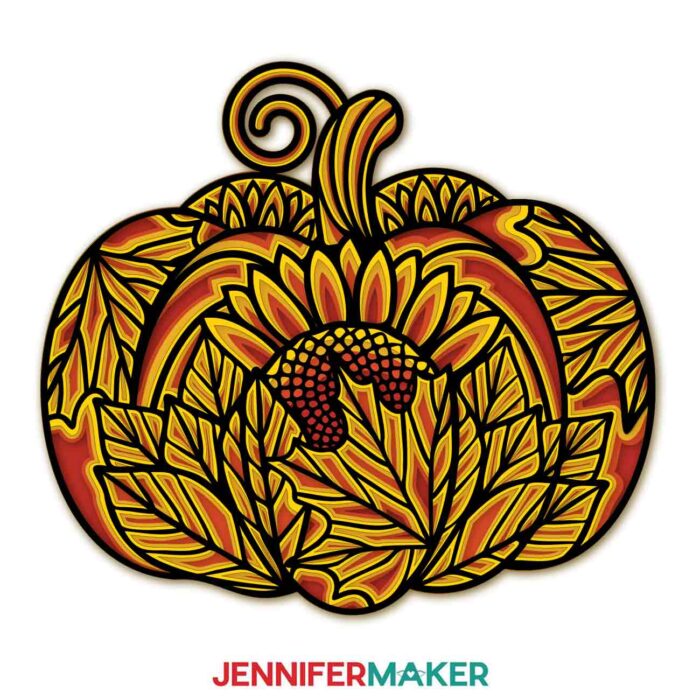
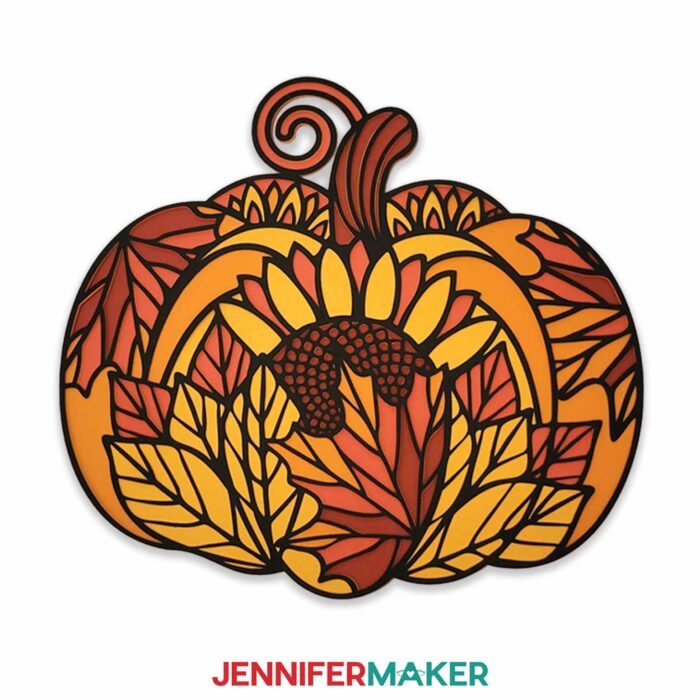
I have two pretty variations for you to choose from for this pumpkin papercraft — one is a color block, where different sections are different colors, and the other is a gradient, with the layers of cardstock clearly visible for depth and interest. In this image, you can see the color block pumpkins on the left and the gradient pumpkins on the right. Which one do you like the best?
I’ve shared lots of tips on getting intricate cuts with a Cricut, but one of the most important things to remember is to use high-quality cardstock. Cheaper cardstock is made from short fibers, so it can rip instead of cut. Torn paper is not much fun, so save yourself time, frustration, and even money with good quality paper, like those in my material list. They make a beautiful intricate pumpkin with flowers and leaves!
Also, not all machines cut the same and there are a lot of variables in paper crafts! I used the “Light Cardstock – 65 lb.” setting with “More Pressure” and a Fine-Point Blade in my Cricut Maker 3 and got good results for this design. But, you may need to experiment and adjust for your machine’s slight variations or different paper. Even your room’s humidity can impact a cut, so I always recommend trying a test cut to start. The bolder, less-detailed pumpkin is a good test! You can also use a Cricut Maker, Cricut Explore, Cricut Explore Air 2, Cricut Explore 3, or Cricut Venture.
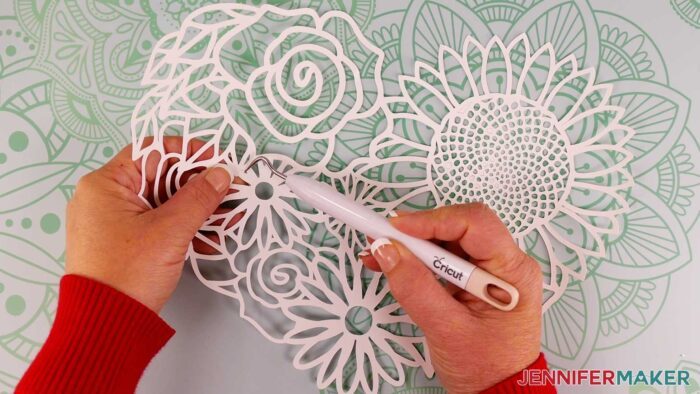
When you’re ready to cut, use a clean cutting mat and make sure the paper stays put! I used a green StandardGrip machine mat and a brayer. When a cut is done, remember to bend the mat away from the cardstock and use a spatula to gently lift the delicate areas. You can avoid curling and tearing that way! I have more tips in the floral heart project cutting video.
But before you add the next sheet to the mat, remove ALL the paper pumpkin bits left behind. Any paper between the mat and paper can make your blade jump or even tear the cardstock. I gently run a scraper or other flat tool (like an old gift card) over the mat after each cut. If any pieces stay stuck in the design, your weeding tool can help poke them out without ripping the intricate layers. Just like we did for the heart!
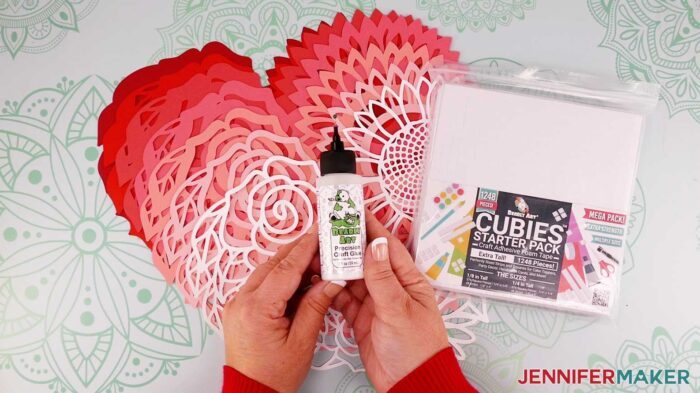
When you’re ready to put the layers together, you can use good paper craft glue, adhesive foam spacers, or a combination of the two! I used my favorite Bearly Art Precision Craft Glue to get the adhesive just where I wanted it on the top detail layer.
Also, you can watch my floral heart video for assembly tips. Even though they’re different patterns, the tips (align the edges and take your time) apply to the pumpkins. You can even make several perfect pumpkins for a paper pumpkin patch!
Ready to make beautiful layered paper art with my pumpkin SVGs? I’m super excited to show you how! This post contains some affiliate links for your convenience (which means if you make a purchase after clicking a link I will earn a small commission but it won’t cost you a penny more)! Read my full disclosure policy.
Materials to Make a Layered Paper Pumpkin
- 65 lb, 12″ x 12″ cardstock – I used oranges and yellows from one pack and black for the outline layer
- A method to cut your cardstock: I used the amazing Cricut Maker 3, but you can also use a Cricut Maker series, Cricut Explore series, or the Cricut Venture
- Fine-Point Blade
- Deep-Point Blade – optional, but useful if the Fine Point Blade is tearing textured or thick cardstock
- Green StandardGrip Mat (12″ x 12″)
- Brayer Tool
- Spatula
- Weeding Tool
- Scraper
- Scissors -OR- Cricut TrueControl Knife -AND- Self Healing Cutting Mat in case stubborn pieces need some help
- Craft Glue and/or Adhesive Foam Squares
- 12″ x 12″ Shadow Box Frame
- Ruler – optional
- Design #558 – My free SVG/PDF/DXF design files available in my free resource library – get the password by filling out the form at the bottom of this page
How to Make a Layered Paper Pumpkin Decoration
Follow the steps in my Floral Heart project and apply them to your pumpkin!
Answers to Your Questions About Making a Layered Paper Pumpkin
Q: What is layered paper?
A: Layered paper DIY projects can describe many different techniques. But for most of my designs, it refers to cutting design layers from cardstock with a cutting machine, then using adhesives to put them together in order to create a decoration.
Q: Do you have other pumpkin crafts?
A. I have a whole host of other pumpkin and Halloween crafts for you to check out! Like paper pumpkin kits, a 3 D pumpkin lantern made from just paper, smashing pumpkins, pumpkin SVGS, and even (felt) pumpkin pie!
Q: How do you make layered papercut art?
A: You can make my layered paper pumpkin designs using Cricut Design Space to prepare the SVG for cutting with a Cricut before gluing the layers together. You can also use my files with other cutting machines and software.
Q: What is paper cutting art?
A: Paper cutting is often intricate designs cut into paper to create decorative projects. Depending on the desired look, techniques, and materials, some artists cut the designs by hand and others use cutting machines.
Q: How do I keep my layers stuck together?
A: I used a combination of craft glue, and double-sided foam adhesive squares in different areas of my layered paper pumpkin projects. For the really delicate top layer, glue works best.
Q: My cardstock keeps ripping on the intricate cuts. What can I do?
A: Be sure you’re using a clean and sticky machine mat, good-quality card stock, and a clean blade. See my Cricut Cutting Problems post for all the tips I use to get clean cuts every time.
Q. Do I have to use a Cricut machine?
A: No! We always include several versions of each digital item in the ZIP file. If you have a Silhouette Cameo, which uses Silhouette Studio, you can use the DXF file in Silhouette Basic Edition. If you have upgraded to Silhouette Designer Edition, Designer Edition Plus, or Business, you can use the SVG format with your Silhouette machine. If you don’t have a cutting machine, you can print and then cut out my digital download PDF files, too! The ZIP archive in my resource library includes these file types and more!
Q: How do you make 3d pumpkins for a bulletin board?
A: You can make my layered paper pumpkin and mount it on a bulletin board however you like!
Q. Are your free SVGs just for personal use or do you offer a commercial license?
A: Yes, you can sell the physical item you make using these floral heart SVG files, we only ask that you give credit to JenniferMaker.com for the original designs and do not sell the digital files. If you use them, please share photos with us! We love supporting small businesses!
Get my free download of the Layered Paper Pumpkin SVG cut files here:
If you make a layered paper pumpkin using either free SVG file, I’d love to see it! Please share your results in my Cricut Crafters & Makers Facebook group where you’ll find hundreds of thousands of crafters like you, sharing their tips, projects, and inspiration.
Love,

Want to remember this? Save this Layered Paper Pumpkin SVG Tutorial to your favorite Pinterest Board!