 Happy Snow Day! We got, oh, maybe 7-8 inches of snow last night here in Ann Arbor on top of the 7 inches we already had. We’re all snowed in for the day, so we’re going to have some crafty fun! In fact, I made today’s project LIVE on my Facebook page! So Day 14’s gift in my MAKE IT MERRY: 25 Days of Maker Projects Christmas is a super cute mesh Snowman Wreath you can enjoy all winter long!
Yesterday, as I dropped off my daughter for school, I heard on the radio about a winter storm warning in effect. Oops! An hour later, it had begun snowing. We were out of milk, bread, and …. crafting supplies! That’s right, I got in my car and headed out to get the necessities, guys. And it was busy out there, at both Target and Michaels! I’ll tell you, snow does NOT stop folks in Michigan from doing much of anything.
As I’m standing in the craft store, I thought ahead on projects for the week, just in case the snow was really bad. (We are expecting more this weekend!) Greg had asked me to make a snowman wreath. I searched on Pinterest and was rewarded with image of a super cute Snowman wreath made out of curly Deco Mesh. I’ve never used Deco Mesh, but this seems like a great time to try. I bought all the supplies I needed and headed home.
Back in my warm and cozy craft room, I discovered that this snowman wreath idea is super popular with crafters online. I changed mine up a bit to match my materials. I wanted less fluff, more curls, so I’ll be showing you a different technique to roll the mesh. Plus, I made Frosty’s top hat from paper, as well as his face, so I’ll show you how to do that, too.
Let me show you how to make this Mesh Snowman Wreath! This post contains some affiliate links for your convenience (which means if you make a purchase after clicking a link I will earn a small commission but it won’t cost you a penny more)! Read my full disclosure policy.
Materials for the Deco Mesh Snowman Wreath Tutorial
- White iridescent mesh ribbon, about 120-150 feet (3-4 rolls) of 10″-12″ or 5.5″ (I used both sizes, and I will show you how you can do that below) — do not use the 20-21″ size
- Wire wreath frames (I bought several sizes — 16″, 12″ and 8″ — and nested/wired them together, or get one pre-made for snowman wreaths)
- White spray paint (optional, used if you need to change your floral wreath frame from green to white like I did)
- White pipe cleaners
- 65 lb. Cardstock (black, orange, and an accent color for the hat)
- Glue
- A way to cut the cardstock (I used a Cricut )
- Design #77 – My free SVG cut files or patterns for the Snowman hat and face (available in my free resource library—get the password at the bottom of this post)
How to Make Your Mesh Snowman Wreath
NOTE: Watch my live video on my Facebook page here!
First, prepare your wreath frame. I nested three wire wreath frames inside one another and wired them together. I used floral wire to secure them together, but your pipe cleaners (or zip ties) would suffice, too.
If you have a green floral frame, paint it white now so it has time to dry.
Now make your snowman hat and face. You can get Design #77 which are the patterns for both (available as SVG/DXF/PDF) in my free resource library. If you’re going to cut them out on your cutting machine, upload the file to your design software. If you’re not sure how to upload an SVG cut file to Cricut Design Space, watch this helpful video training series I made.
Cut out your card stock for the hat and face.
To make the hat, check out my Mini Top Hat Tutorial. It’s essentially the same thing, except you’re going to make half a hat! You could make a full hat and cut it in half, yes, but I wanted a bigger hat so I went for just a half. Feel free to decorate and embellish as you wish!
The nose is simply a cone. Roll it up and glue it into a cone shape. (Note: When I first made this in my live video, I taped it. Later, I realized tape was the wrong choice as you could see it too easily if you’re short like me. Glue is better!)
Attach pipe cleaners into the holes provided in the hat, nose, eyes, and mouth as shown below.
Now let’s make the mesh curls! Take your mesh and cut off pieces about 10″ long. This holds true whether you are using the 5″ mesh or the 10″ mesh. You can even do this with 12″ mesh, as I know that’s what they sell at Michaels.
To curl your mesh, first fold in the two cut ends until they meet in the middle.
Now roll up your mesh into an approx. 1″ diameter tube.
If you have 10-12″ mesh, fold your roll in half and twist a pipe cleaner to secure your curled mesh about 1″ up from the fold.
If you have 5-6″ mesh, twist a pipe cleaner around the middle.
Do this two more times, adding the curled mesh to your first one and twist your pipe clean around it to secure it.
Continue making these bunches until you’ve used up all of your mesh. You’ll want about 36 bunches.
Now simply attach the mesh onto your wreath frame using the tails of your pipe cleaners around each bunch. The curls face outward. Smoosh them all in together to get the curls to face in the right direction.
If you have any errant curls, just use pipe cleaners to train them into place.
You’re almost done! Secure the eyes and nose to your Snowman Wreath using the pipe cleaners you attached to them earlier. The nose gets put inside the curls, while the eyes rest on top of the curls.
Now attach the top hat at a jaunty angle using the attached pipe cleaners.
And that’s it! Hang it on your front door and enjoy until the snow melts.

Get my free cut files for the Mesh Snowman Wreath
I am SO excited about this wreath because I can keep it up on my front door well after the holidays! If you make a snowman wreath, please share a photo with me at [email protected] or tag me on social media with #jennifermaker.
Come back tomorrow to open the Day 15 gift of my MAKE IT MERRY: 25 Days of Maker Projects Christmas! You can be notified of when there is a new gift ready to open on my blog, just fill out this form!
Love,

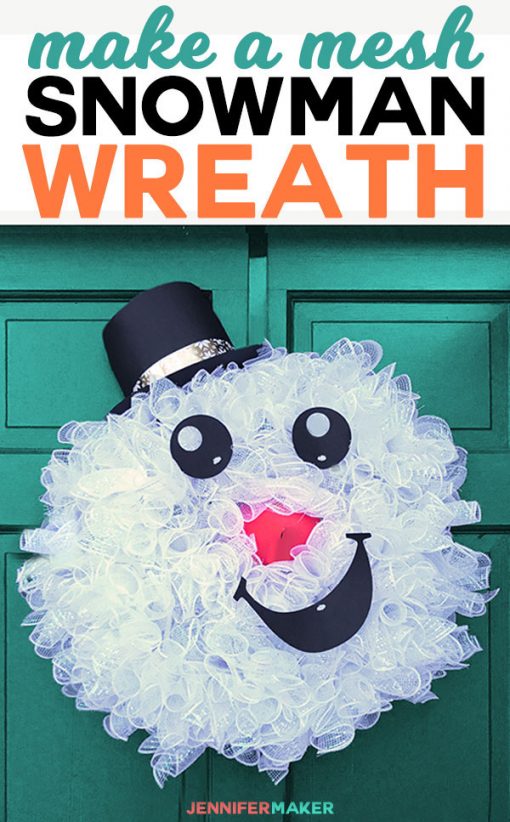
Want to remember this? Save the Mesh Snowman Wreath Tutorial to your favorite Pinterest board!