Learn how to make an SVG files in Inkscape to create your own cut files whenever you want!
I lovelovelove to create SVG files and I’ve shared thousands of them with you freely here on my blog. Many of you ask me how you, too, can make an SVG file in Inkscape and I can show you how! While I teach a FULL course on how to create custom SVGs in my CUT ABOVE SVG Design Course (now open for enrollment this week), sometimes you just need a quick look at what is possible and a head start. This tutorial will show you a simple way to create a custom, free-form shape in Inkscape and save it as an SVG that you can upload to your favorite design software, including Cricut Design Space, to cut on a cutting machine!
What’s so special about SVG files?
SVG stands for “scalable vector graphics” and it is the best way to make your own custom designs for cutting machines like the Cricut. A SVG file has the power to resize and never lose its clean lines or sharpness. Even better, you don’t have to be a talented artist to create them, thanks to the ability to modify them easily in Inkscape.
SVG files are vector-based images that you can make in vector software like Inkscape. The beauty of vector software is that you have total control over your design and can reposition lines until you are satisfied. This vector format allows those of us without a steady hand and fine art skills the ability to make straight lines, curved lines, and everything else look good! I am not talented at drawing either. Check out the two images below made by me — one is my best freehand, the other is a vector image done in Inkscape. Night and day difference!

Inkscape SVG files differ from a PNG file or a JPG file in the way the image information is stored. Inkscape SVGs are vector based, scaling up or down easily to create smooth cuts with your cutting machine blade. PNG and JPEG files are pixel-based bitmap images, and do not scale well — and your blade often cuts them out jagged as a result. That’s because PNGs, BMPs, and JPG images are all raster images (also known as bitmap images), and not ideal for cutting machines.
SVG format files can be made in many different programs, including Inkscape and Adobe Illustrator. Inkscape is popular because it is FREE to use!
The biggest drawback to Inkscape is its steep learning curve. But you can do simple things in it right away!
So let me show you how to create some simple SVG files in Inkscape the easiest way!
Step 1. Install Inkscape on your Computer
Inkscape is totally free open source software available for both Windows and Mac. The first thing you need to do is download and install the free software for Inkscape if you have not already done so.
Watch my full step-by-step Windows installation video here on my YouTube channel:
Download Inkscape free at https://jennifermaker.com/windows-inkscape or https://jennifermaker.com/mac-inkscape
Step 2. Open Your Image File in Inkscape
Open up Inkscape and go to the File menu and choose Open. Find a PNG or JPG or BMP image file you’d like to make a SVG file from in Inkscape. If you don’t have one in mind yet, here’s a free one — just click here to download it.

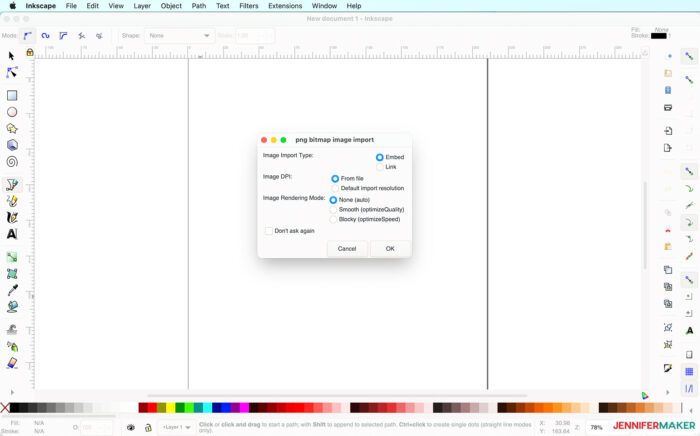
If you’re asked how to import the file, just leave everything as the default and click OK.
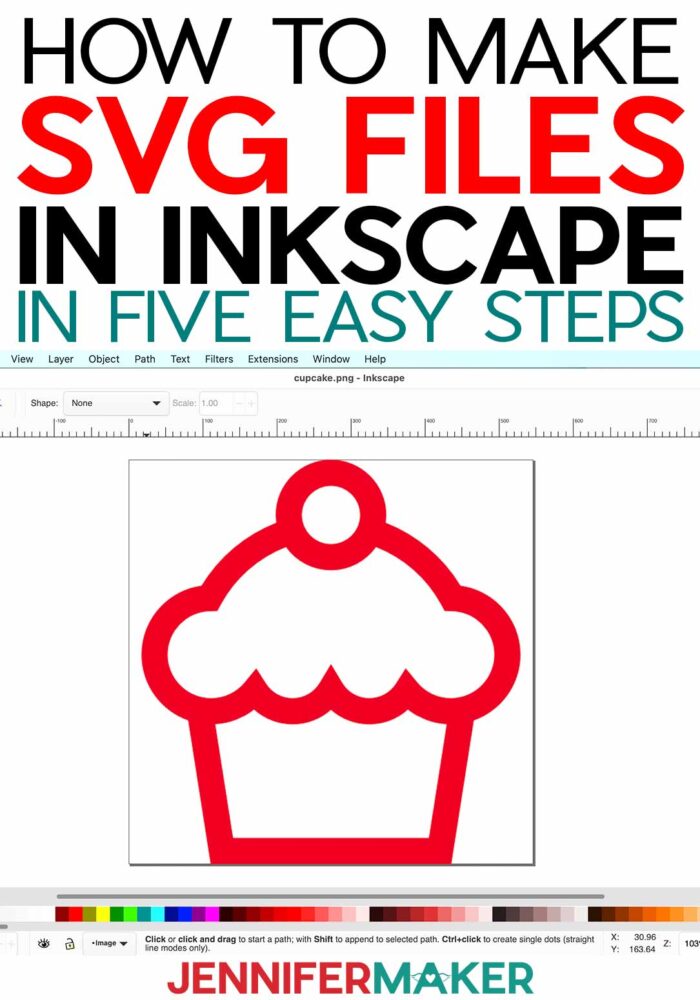
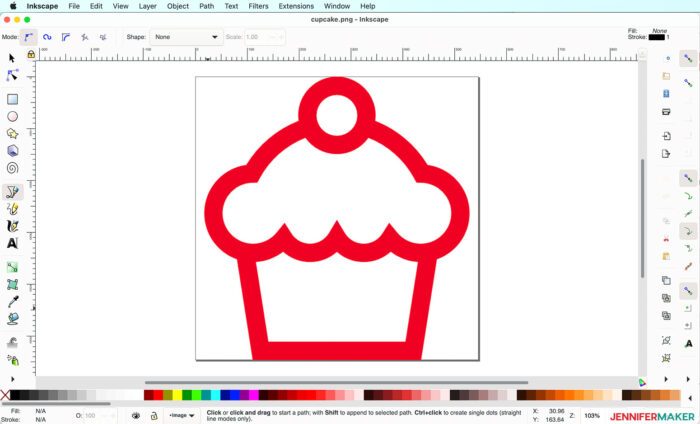
Here’s what the cupcake PNG file looks like in Inkscape:
Step 3. Select and Trace Your Raster Image
Go to Edit > Select All to select your image. Black arrows will appear around your image once it is selected.

Now go to Path > Trace Bitmap.

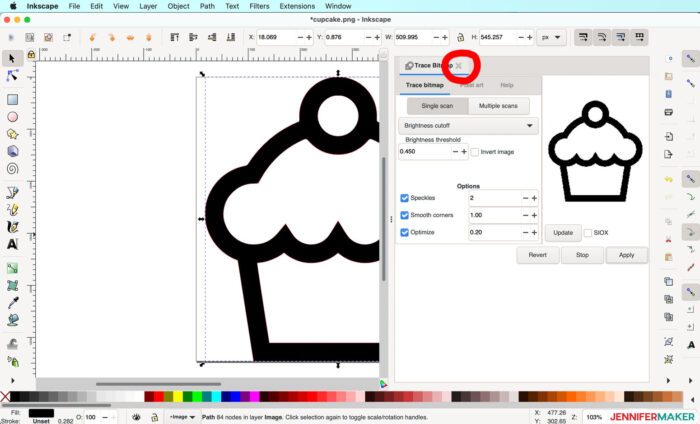
In the panel that appears on the left, click Update so you can see what your SVG image will look like. The default settings are usually good as is, but you can adjust these if you wish. When you are satisfied, click Apply.
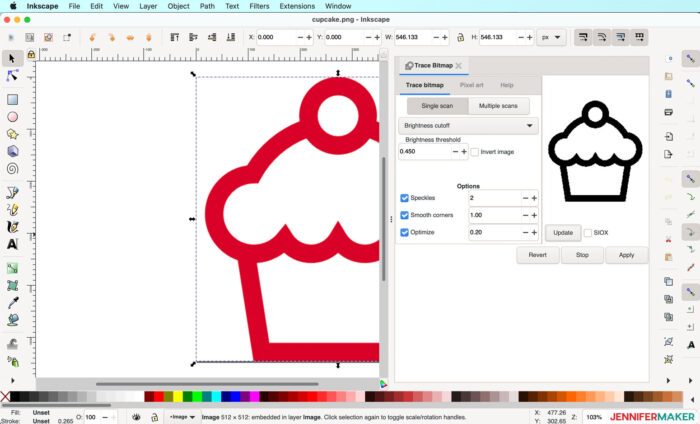
Close the Trace Bitmap panel with the X highlighted here.
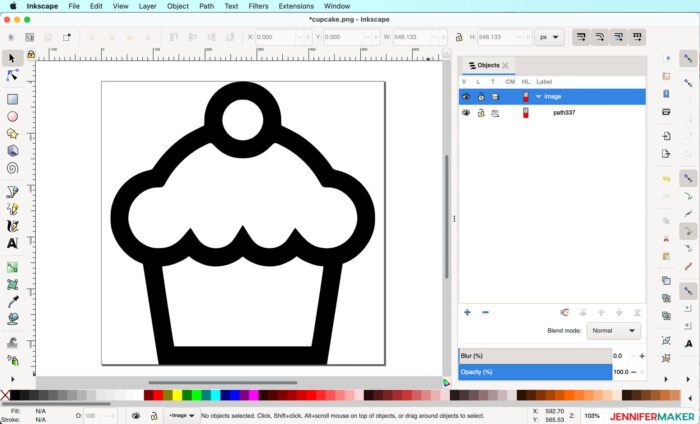
Go to Objects > Objects to open the Objects Panel. Select the layer that begins with “image…” (this is your original raster image) and delete it by pressing the “Delete (DEL)” key on your keyboard.

Alternately, you can right-click on the image in the Objects panel and choose Delete to get rid of your raster graphics. Or just click and drag the black traced image to the side so you can see the original image, then just select that on your canvas and delete it. Just be sure to delete your original objects, as those should not be saved with the SVG cut file.
And that’s it! This is your new vector image!
Tracing existing images like this is really the easy way to make a SVG cut file.
Step 4: Edit Your Vector Image
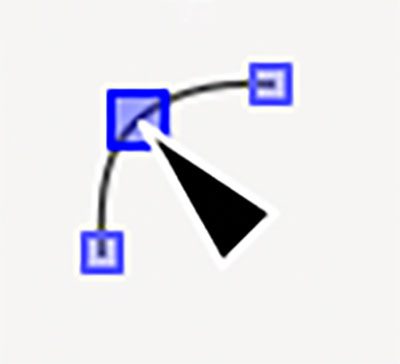
If you need to adjust any of the lines, you can click your Edit Paths (Direct Selection) tool and click on the lines to move the nodes. That tool looks like this and is located in your left-most toolbar.
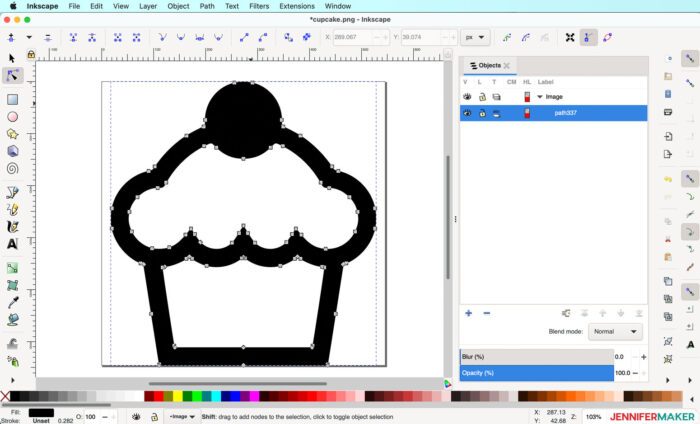
Using this tool, you can change the shape of anything. I used the tool to select the nodes in the cherry and remove them so it looks like the cherry was solid!
Step 5: Save Your Vector File in Inkscape as a SVG
The final step is to save your file as an Inkscape SVG. Go to File > Save As and make sure “Inkscape SVG” is selected. You can also choose “Plain SVG” instead. There are other SVG options, but they aren’t usually that important. I use the default. Either way you save it, this will save your image in the SVG file format.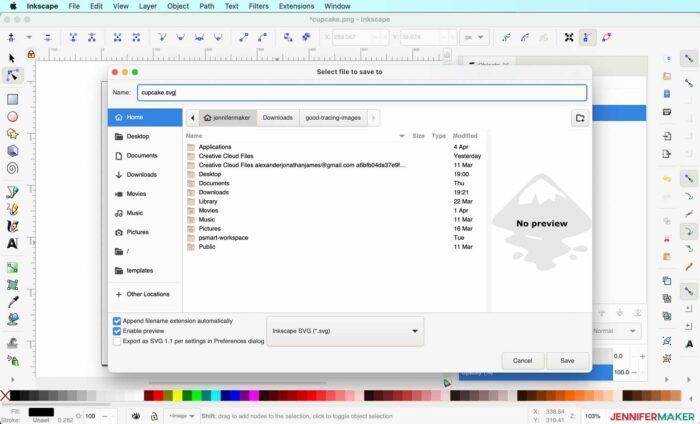
Now you can go to design software, such as Cricut Design Space, and upload your SVG file. If you’re not sure how to upload SVG files, check out my SVGs Made Simple series!
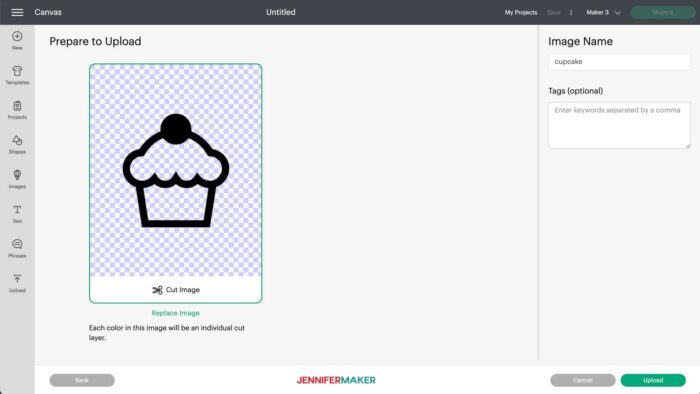
Now just click Upload and cut it on your Cricut machine.
And that’s all there is to making your own SVG files! I hope these simple steps have put you on the right path! Make your own SVGs is fun and rewarding.
Of course, you can go far beyond this and use simple shapes to make more complex shapes, draw freehand with the pen tool, and do even fancier things. I teach how to do that in my CUT ABOVE course!
Get more information on the CUT ABOVE SVG Design Course
If you are eager to learn more about designing SVG cut files in Inkscape yourself, you can learn how in my CUT ABOVE SVG Design Course.
Enrollment is NOW open for the first time this year, but have a fairly short window to join. I do this on purpose so I can limit the number of students that enroll — this allows me to give them more personal attention. For now, you can get on the waitlist to know when it opens back up!
If you’re not yet heard of the CUT ABOVE Design Course, I can show you through this course how to create SVG files that work with minimal fuss and bother, allowing you to create beautiful and cuttable designs on a whim. Use your designs for your personal projects, share them with friends and family, or even sell them to earn extra money!
This eight-part course will teach you:
- How to download and install SVG creation software (both Illustrator and Inkscape are covered in this course — both work on Mac OS or Windows)
- How to create a simple shape
- How to create a complex shape
- How to create text
- How to trace an image
- How to modify your vector shapes
- How to properly size and group your projects before saving
- How to save your files as .SVG (as well as .DXF and .PNG) and share your files with others
Learn from someone who has been where you are.
I created the CUT ABOVE program because I’ve been where you are. So let me tell you my story. I got a Cricut, I made a few projects, and then I quickly decided I wanted to create my OWN designs. I wasn’t content to just download what other people had designed — I had ideas, and I wanted to see them come to life. So after I made my first paper flower from an SVG, I started to play around. I opened the SVG in my illustration program — which I already had installed because I am a graphic designer. And I quickly realized how easily it was to modify and create, and I had the POWER I had to make precisely what I wanted.
That day, I designed my first paper flower — a peony with petals based on real peony petals from my garden. I was HOOKED. I began designing LOTS of paper flowers — roses, magnolias, tulips, daisies, sunflowers — you name it, I was tracing petals and creating 3D paper flowers that were AH-mazing, if I do say so myself. I was getting more creative and more adventurous as I went along, because I was learning by doing.
Then, about two months after I began my paper flower design extravaganza, I was contacted by a book publisher. They asked if I would write a book about paper flowers. I almost just said no, I can’t do that — I’m not experienced enough. But the truth is, that by this time, I was feeling pretty good about making paper flowers. Thanks to my ability to design them and cut them out quickly right away, so that I could tweak and refine them, I was actually well along at this point. And I’ve authored 60 books already over the course of my career, so I’m experienced at writing and teaching others who to do what I’ve learned. So I said yes, I’ll write a book and tell everyone what I know about making paper flowers.
A part of me thought it was just a dream. How can being able to design cut files translate into a book deal. But, sure enough, I turned in my book draft and received a check in the mail.
Amazing. I am still pinching myself after all these years.
But the real joy here for me, is not a book or a check. It’s that now, because I learned how to make my own designs for my Cricut, I can MAKE ANYTHING. You name it, I can do it. When my child comes to me and says, I really like this stuffed animal and I want to make one like it. Can you make me a pattern on the Cricut, mom? I can. I did it just last night — we made a lion plushie on the Cricut that I designed in my software. And that is a feeling like none other.
You can do this, too. And I can show you how.
MY CUT ABOVE COURSE IS OPEN FOR ENROLLMENT UNTIL TONIGHT ONLY!
I’d love to see your SVG cut files! If you make a SVG file with this tutorial and cut it out, please share a photo in our Facebook group, email it to me at [email protected], or tag me on social media with #jennifermaker.
Love,

Want to remember this? Save the Inkscape SVG File Tutorial to your favorite Pinterest Board