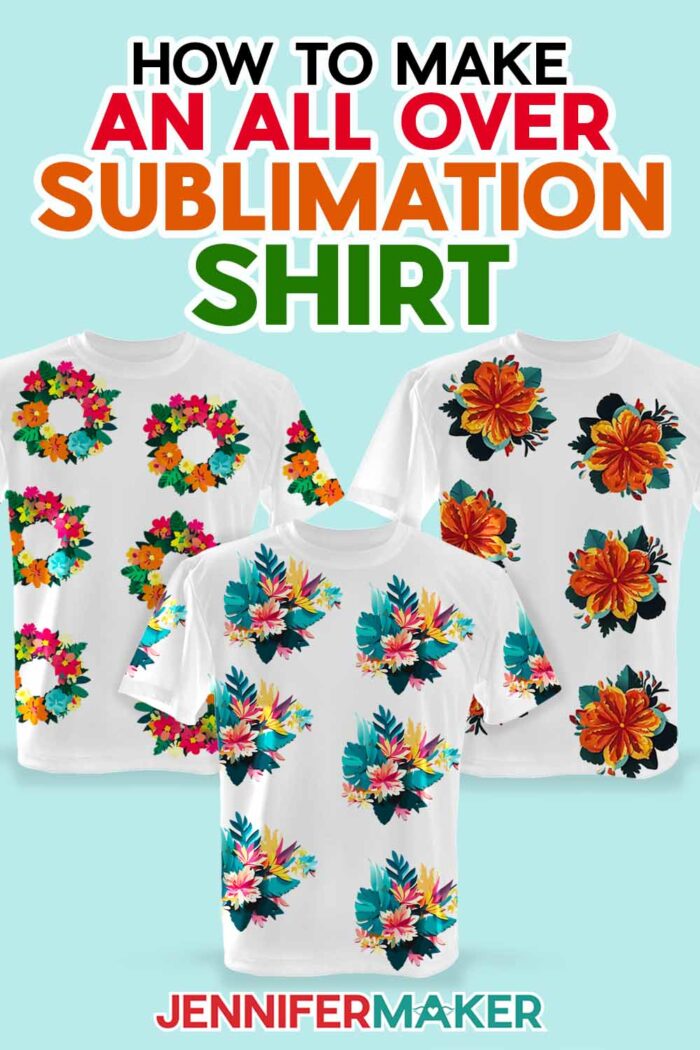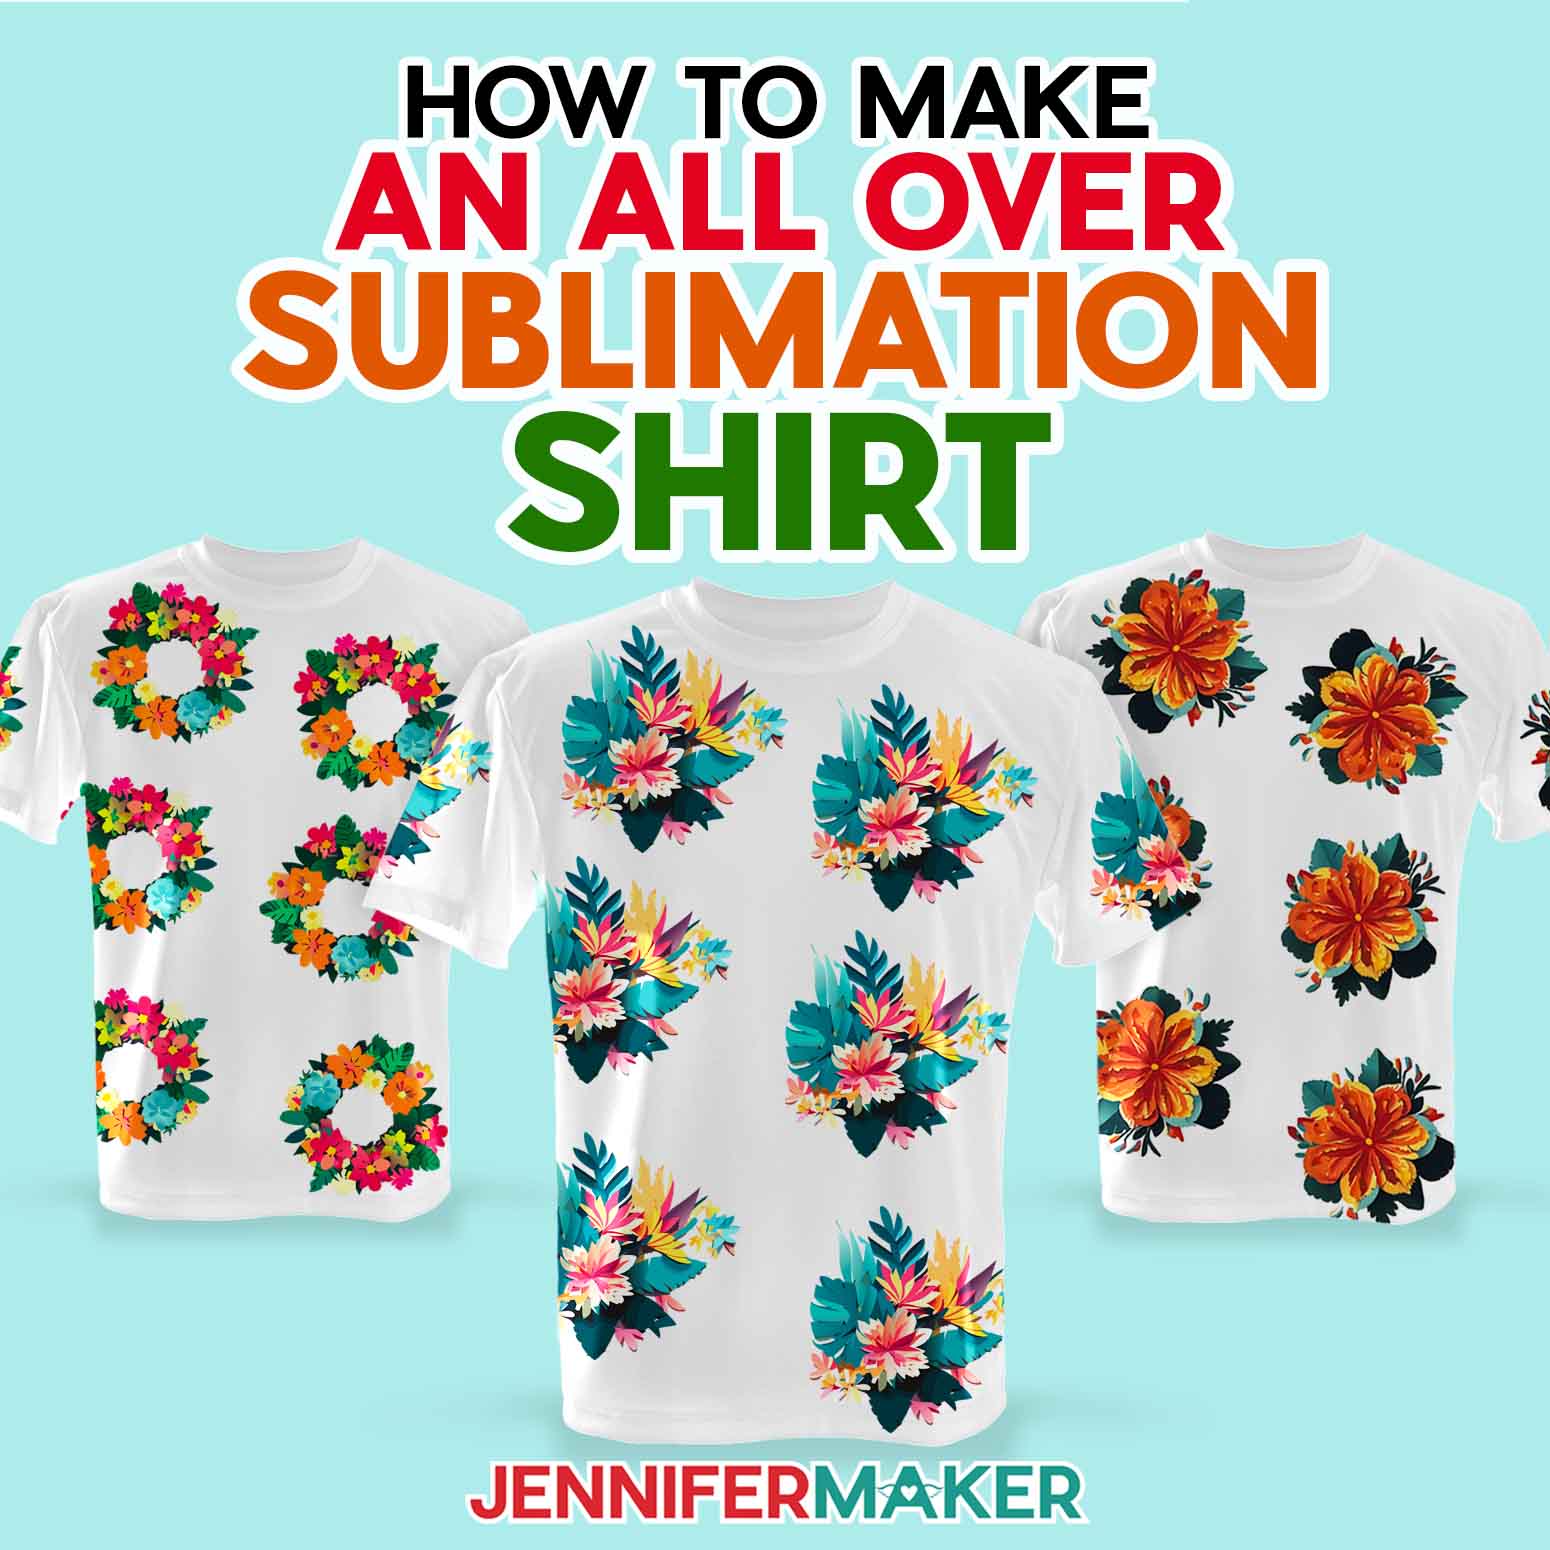
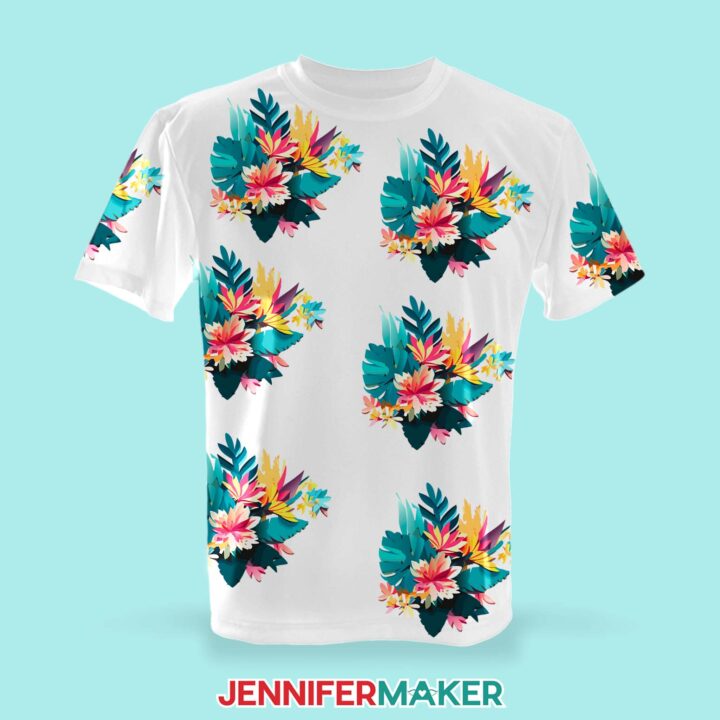
Learn how to create an all over sublimation shirt!
Sublimation is such a perfect way to add full color designs to custom T-shirts, because you’re not limited to available vinyl colors or patterns (although I totally love a good HTV shirt!). Plus, you’re not limited to one spot, especially if you follow my tips to make an all over sublimation shirt project. I’ll show you how to add your images to the front, back, sleeve, and even right over the seam on a T-shirt!
Watch the full step-by-step all over sublimation shirt tutorial:

Sublimation is so much fun because it’s a really flexible printing process and application once you get the basics down! And after you’ve made a few shirts with basic designs, you’re absolutely ready to try and all over sublimation shirt like these!
There are a few ways to make sublimation transfers, but I’ll show you how to edit them in Cricut Design Space (make sure you have the latest version). You can get the software for free and good news, you don’t need a cutting machine to use its powerful tools! We’ll use a T-shirt template to plan the design, resize some images for variation, and use more of the full page during printing to save time and materials. I’m using the Desktop application, but you can also use the Cricut app on your mobile device.
I used white Cricut shirts, but there are a whole host of sublimation T-shirt blanks available. Just make sure yours has at least 65% polyester since the ink needs polymers to bond to. The higher the polyester amount, the better! And remember, sublimation ink is translucent, so use white fabric to make sure your vibrant colors show perfectly. I created the images with the help of AI software, then edited them in Photoshop to make them look their best.
You’ll need a sublimation printer with compatible ink, a heat press, sublimation paper, heat resistant tape, and the other basic sublimation craft supplies listed below.
In addition to a pressing mat, I really recommend picking up some pressing pillows to get the best results for your all over sublimation shirt. The pillows will help protect already-transferred ink, and smooth out the seams or neck area if you want to decorate right over them. The seams are the most difficult part, but always remember that small imperfections are normal in handmade pieces. If you can’t find pressing pillows, simply make your own! Scroll down to the Q & A section below to learn how.
Let me show you how to make an all over sublimation shirt! This post contains some affiliate links for your convenience (which means if you make a purchase after clicking a link I will earn a small commission but it won’t cost you a penny more, there is no additional cost)! Read my full disclosure policy.
Materials to Make An All Over Sublimation Shirt
View my Amazon shopping list for the exact items I used!
- High quality sublimation T-shirt (I used men’s small shirts, but you can use any, including unisex polyester T-shirts)
- Sublimation Ink
- Sublimation Printer
- Butcher Paper
- White Cardstock
- Heat Press
- Pressing Mat -AND-
- Pressing Pillows (or make your own using the directions in the Q & A below)
- Heat Resistant Tape
- Lint Roller
- Scissors
- Fan
- Design #580 (My free SVG/DXF/PDF design files are available in my free resource library – get the password by filling out the form at the bottom of this page
How to Make Your Own All Over Sublimation Shirt
All Over Sublimation Shirt
Learn how to make an all over sublimation shirt.
Materials
- Cricut White Polyester T-Shirt (I used an Adult Small)
- A-SUB 125g Sublimation Paper 8.5" x 11"
- White Butcher Paper
- 12” x 12” White Cardstock
- Optional: Polyester Material for Practice
- Design #580 (My free PNG/PDF design files available in my free resource library - get the password by filling out the form at the bottom of this page)
Tools
- Sublimation Printer - I used a converted Epson EcoTank ET-4700 Inkjet Printer
- Sublimation Ink
- Heat Press - I used the Cricut EasyPress 2
- Fan for Ventilation
- Heat Resistant Tape
- Lint Roller
- Cricut EasyPress Mat -AND-
- Teflon Pressing Pillows
- Scissors
Instructions
STEP 1: GET MY FREE FLORAL DESIGNS
First, download my All Over Sublimation Shirt designs from my free library – look for Design #580. Alternatively, you can use the Save This Project form near the top of this post and the design link will be emailed to you.
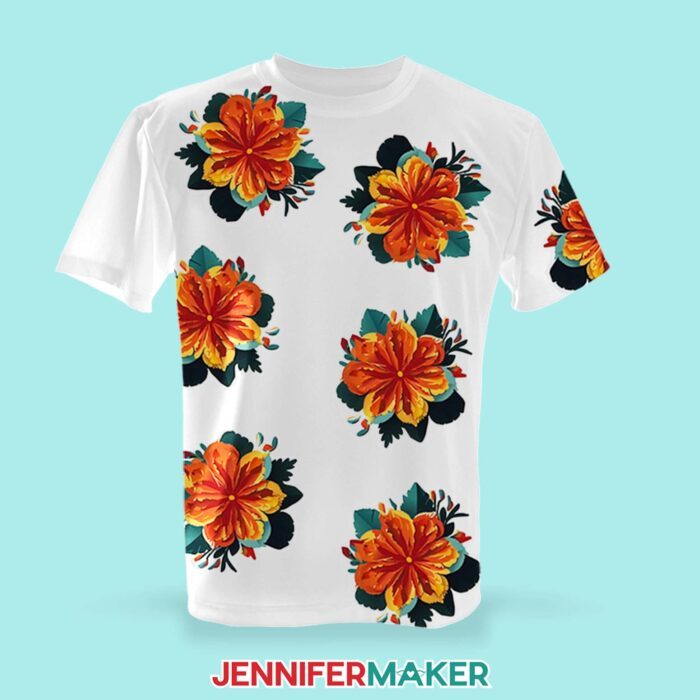
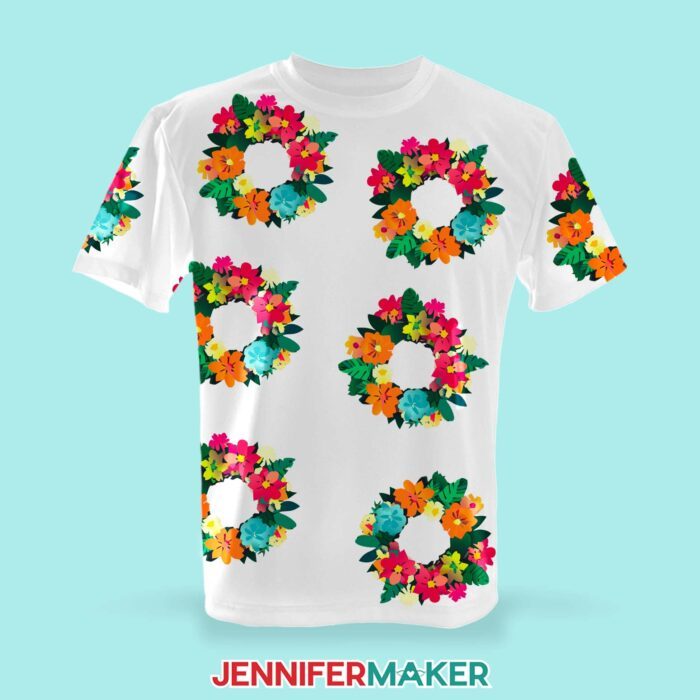
There are three designs in the folder: a flower, a flower bunch, and a wreath. You can customize and print them using Cricut Design Space.
I used an AI art generator to create the designs, then made them even more fantastic with image editing software. If you want to learn more about the process, check out my workshop on creating and using AI-generated art in your crafts.
TIP: If you’re not sure how to upload, go to jennifermaker.com/svgs to learn how to unzip and upload files to Cricut Design Space.
STEP 2: PREPARE AND PRINT YOUR DESIGN
CRICUT DESIGN SPACE
1. Open Cricut Design Space and click “New Project.”
2. Click “Upload” and then “Upload Image.”
3. Click “Browse.”
4. Select your preferred flower PNG.
5. On the Upload Image screen, click “Complex” and “Continue.”
6. Click “Apply and Continue.”
7. Select “Print Then Cut Image” and click “Upload.”
8. On the next screen, select your image and click “Add to Canvas.”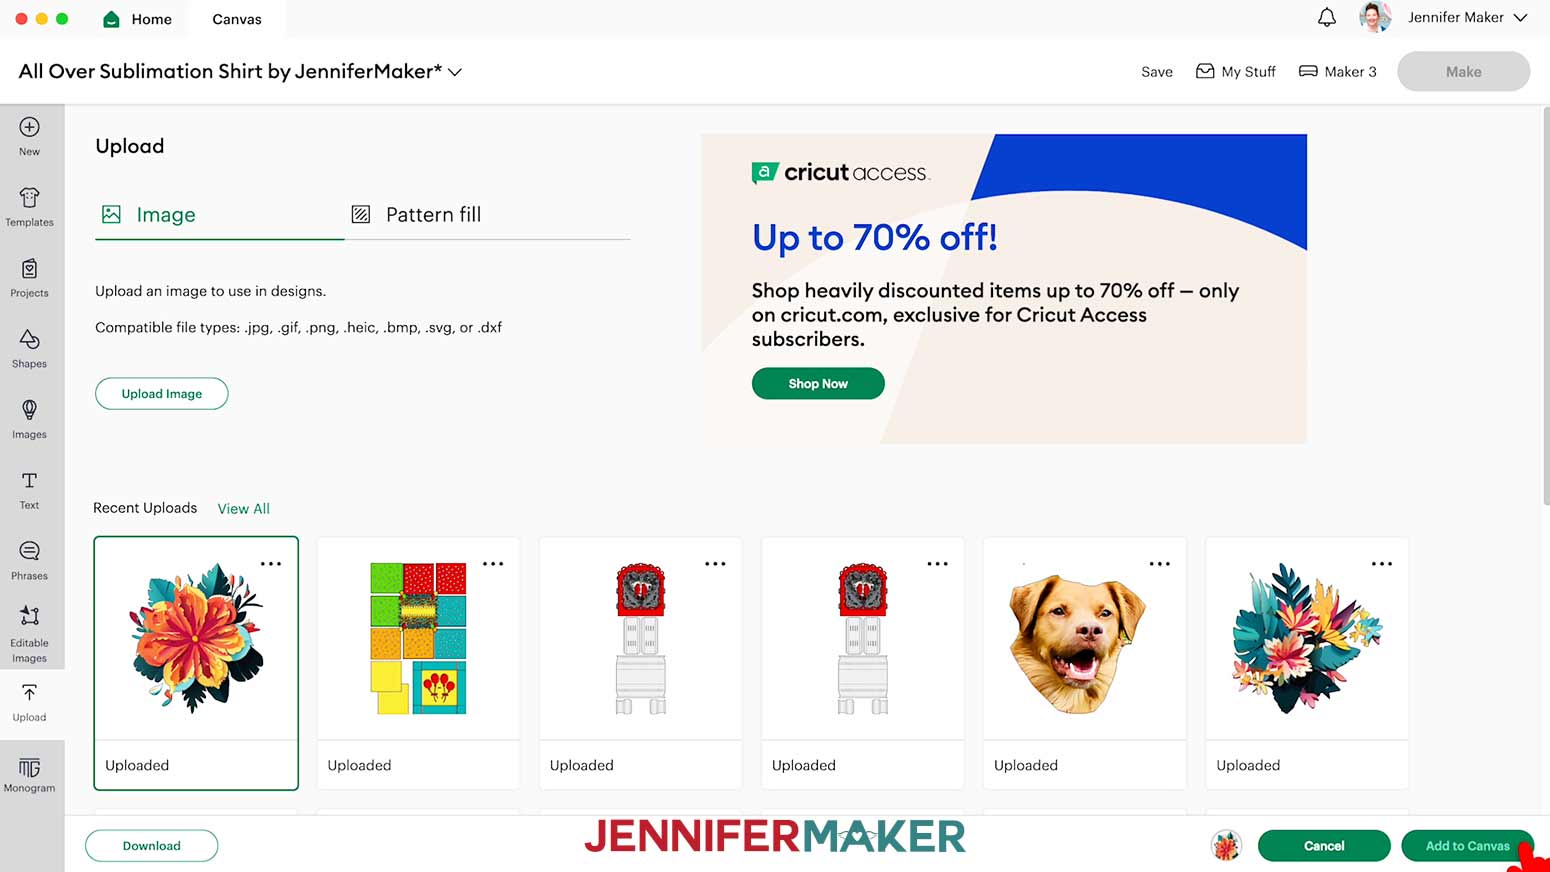
9. With the design selected and the Size Lock icon closed, resize it to about 5.25” wide or smaller. Depending on the amount of images you want to place on the shirt, you can adjust the sizing to your preference.
NOTE: You may see a low resolution warning even after resizing your image, and that's OK. It will print just fine at the size needed for an All Over Sublimation T-shirt. However, I don't recommend enlarging these images for larger projects.
10. Click the “Duplicate” icon to make the amount of design repeats you want for the shirt. I will create 20 designs to cover my shirt’s front and back.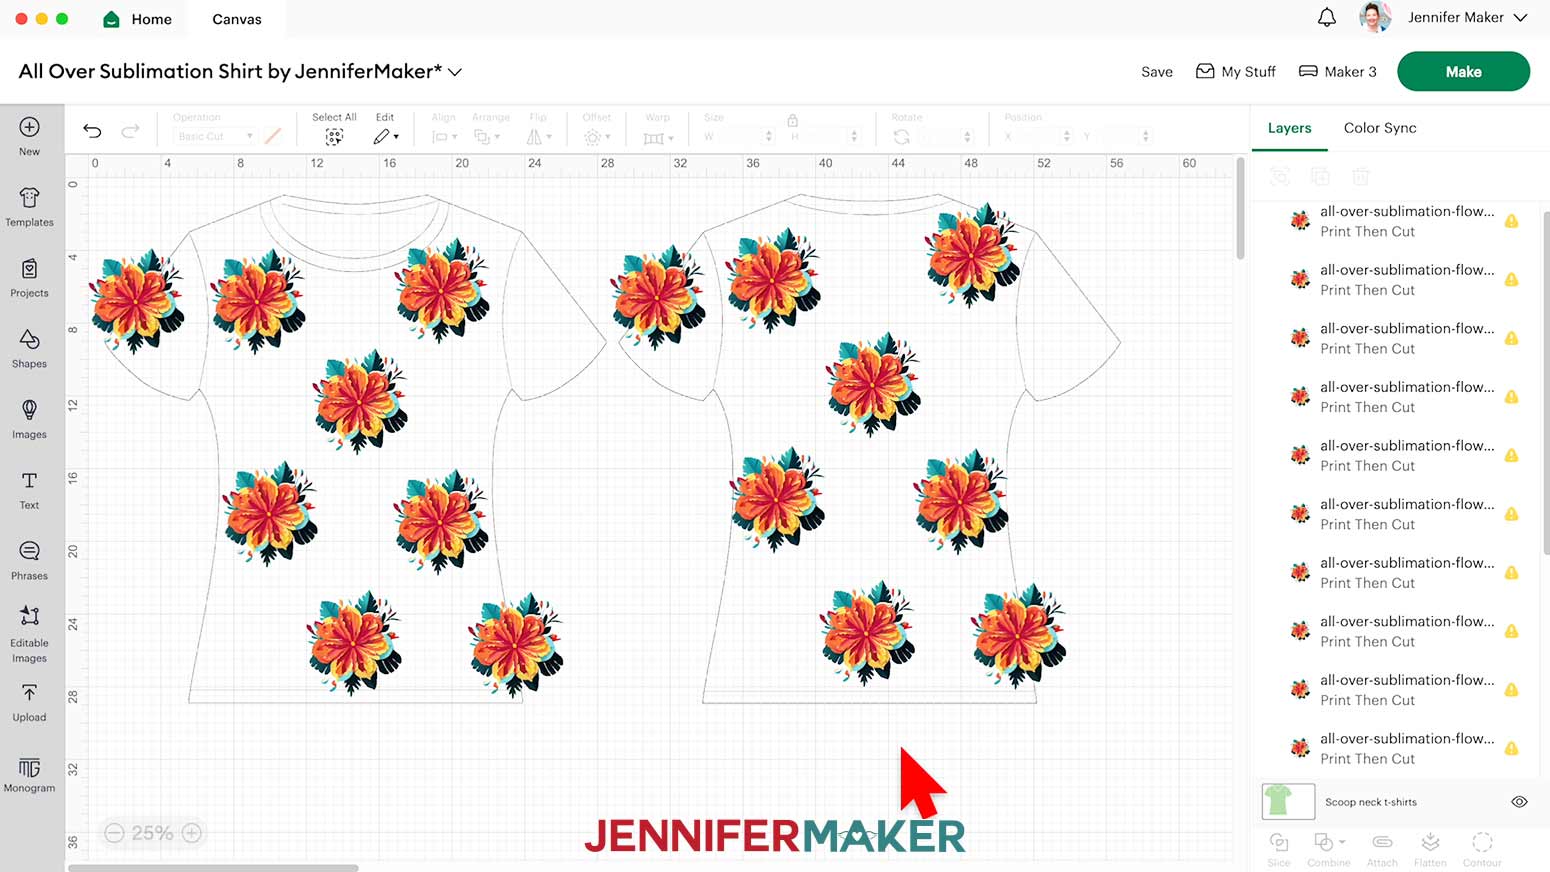
11. You can flip the direction a flower is facing by selecting it and then clicking "Flip" and "Flip Horizontal."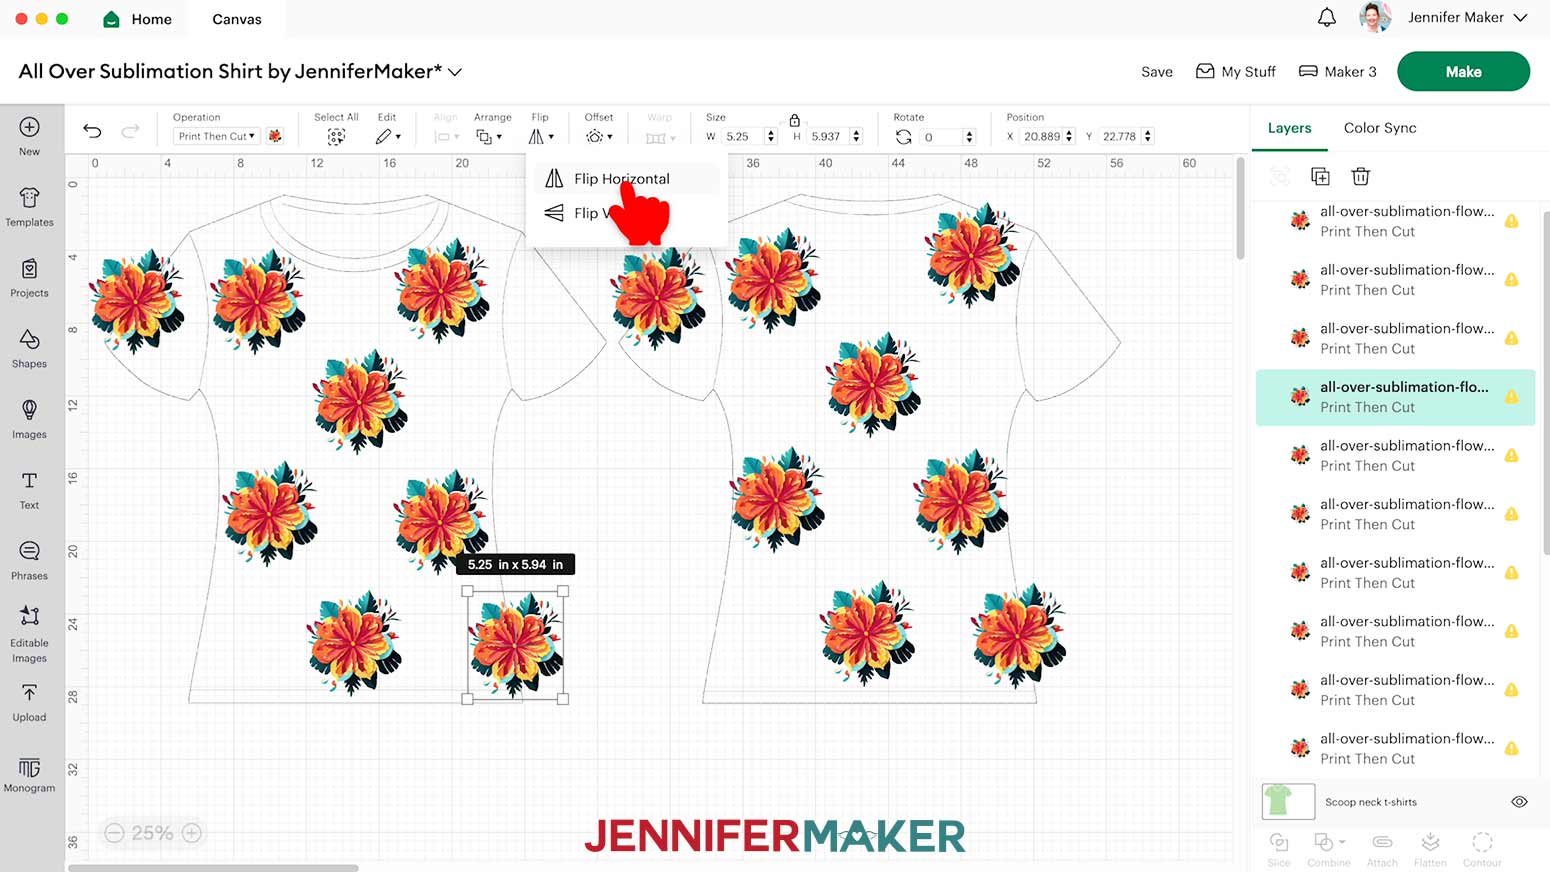
12. Also, with the Lock icon closed, resize a few of the duplicates to be larger or smaller to add interest. Your designs are ready for printing.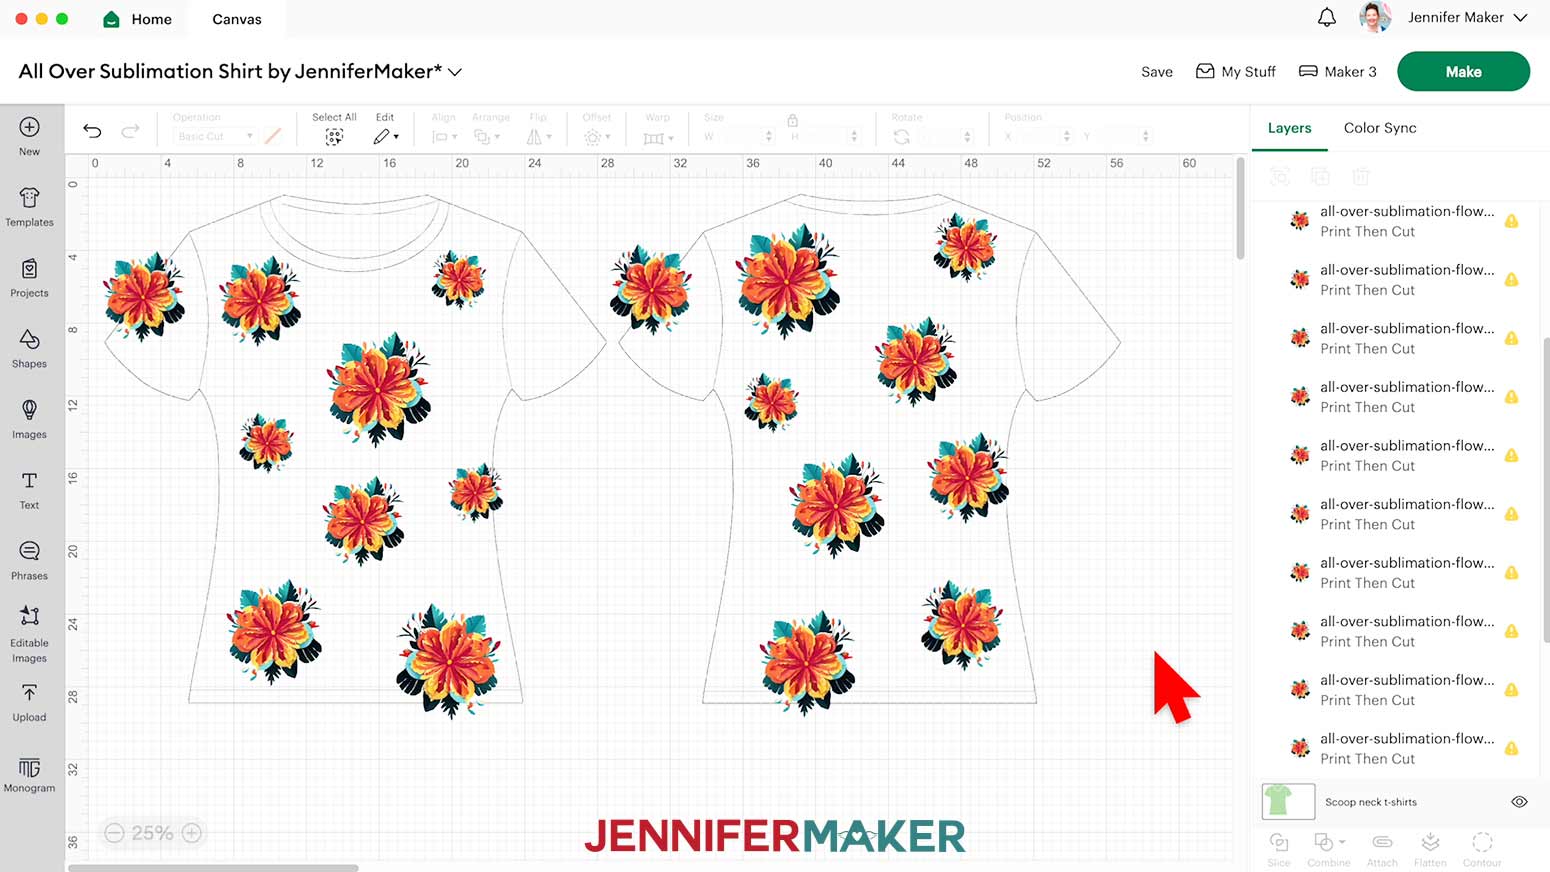
13. Make sure the correct machine is selected in the top right.
14. Click “Make.”
15. If prompted, click "On Mat," choose your mat size, and click “Confirm.”
16. On the Prepare Screen, make sure your Material Size is set to “8.5 in x 11 in (Letter).”
17. If your designs are small enough that more than one can fit on a sheet, select one and click the icon with three dots.
18. Click “Move Object.”
19. Select a mat with open space in the popup.
20. Click “Confirm.”
21. On the newly combined mat, drag the designs apart so you can cut or tear them apart later.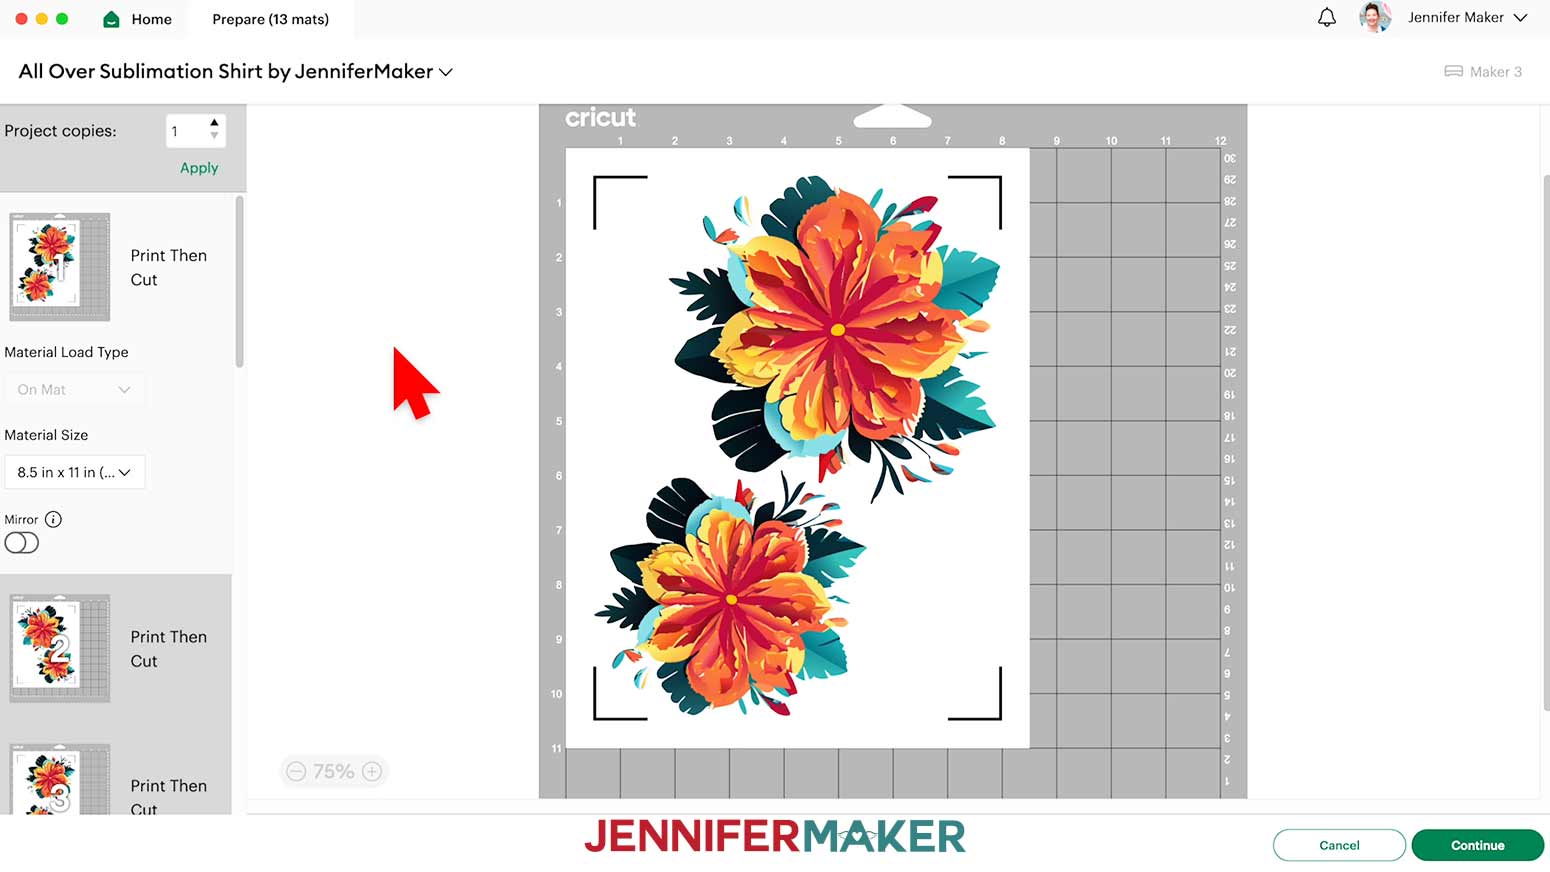
22.Click “Mirror” for each mat since we’ll apply the designs face down.
23. Select the first mat again and click “Continue.”
PRINTING
1. On the Make Screen, click “Send to Printer.”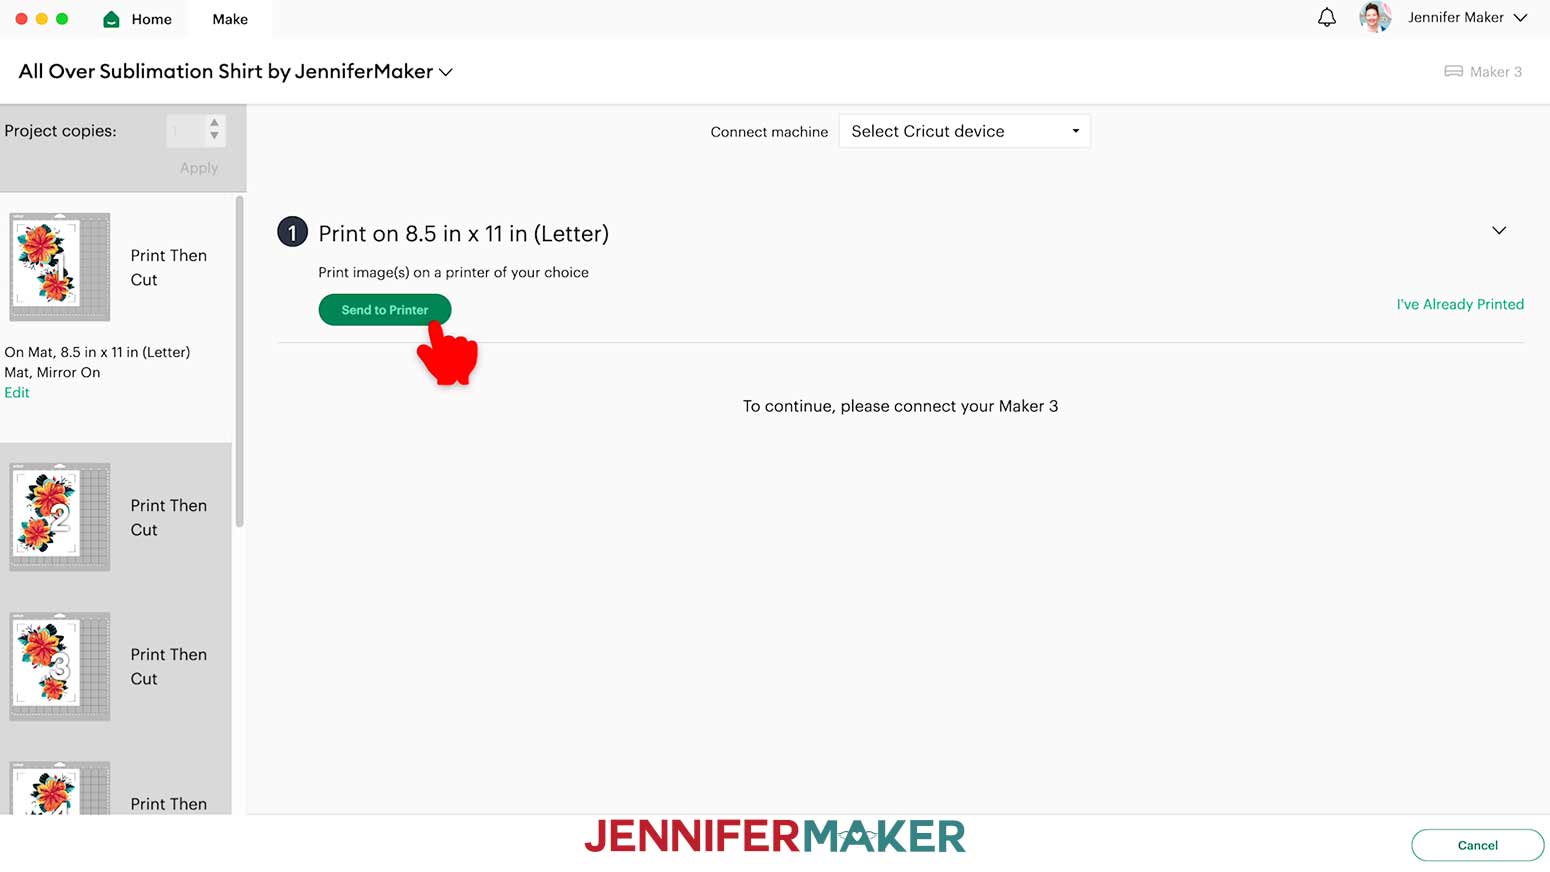
2. Select your printer from the Printer dropdown.
3. Toggle “Add Bleed” off.
4. Toggle “Use System Dialog” on.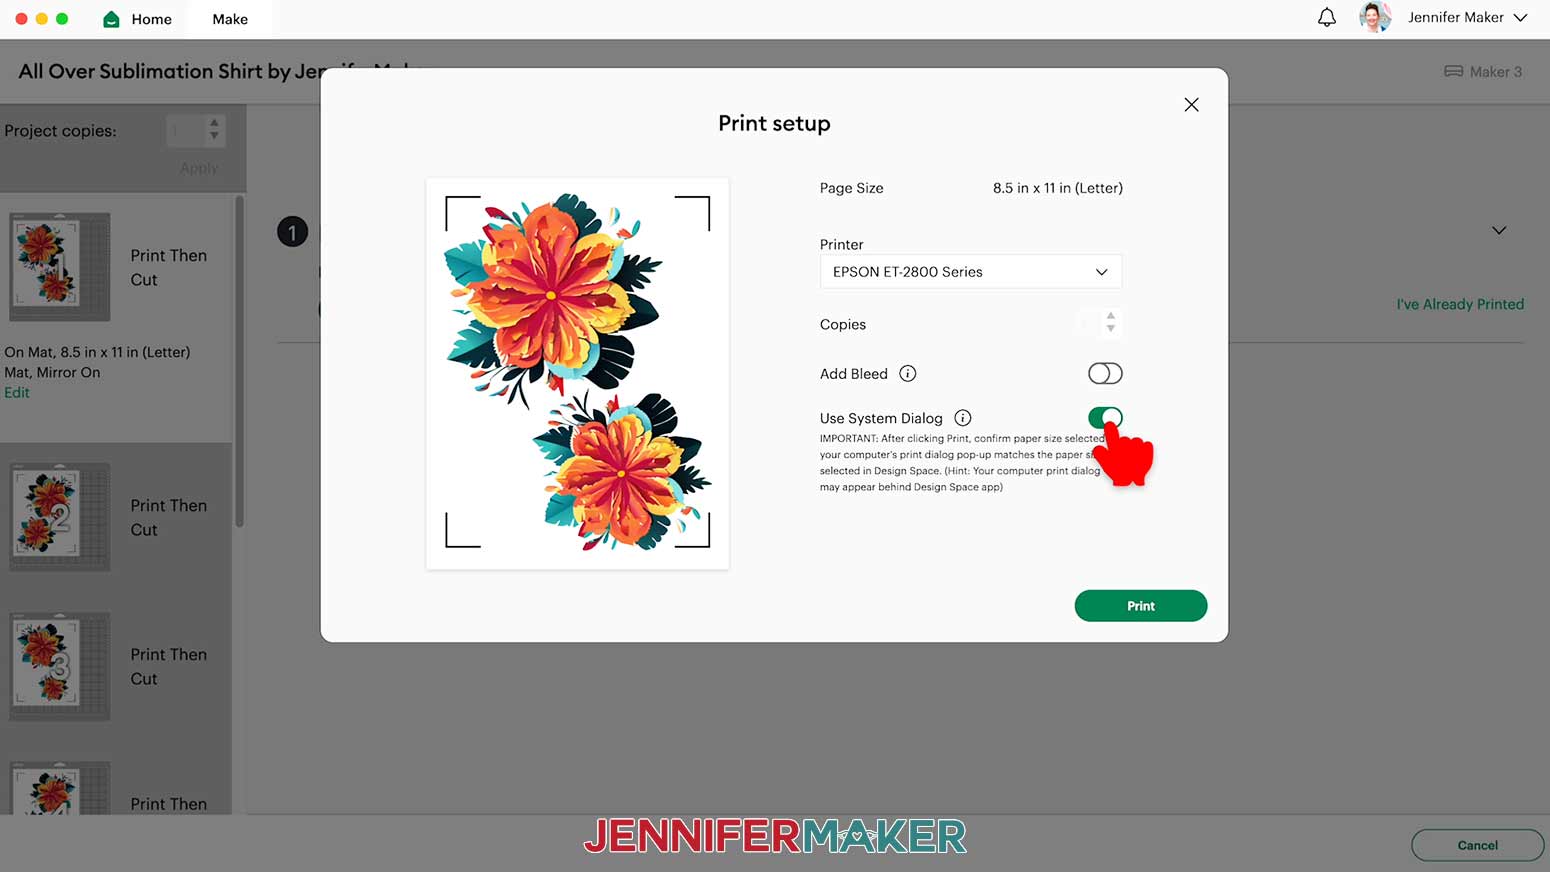
5. Click “Print.”
TIP: You may need to minimize or move your Design Space window to see the print dialog window. It sometimes appears behind Design Space. There is a chance the system dialog box will not work on all printers. Each printer is different, so consult your printer's user guide for additional support.
6. The print dialog box should have the correct printer selected, the Media set to “Premium Photo Matte,” and the Quality set to “Best.” “Flip Horizontally” should be unchecked. 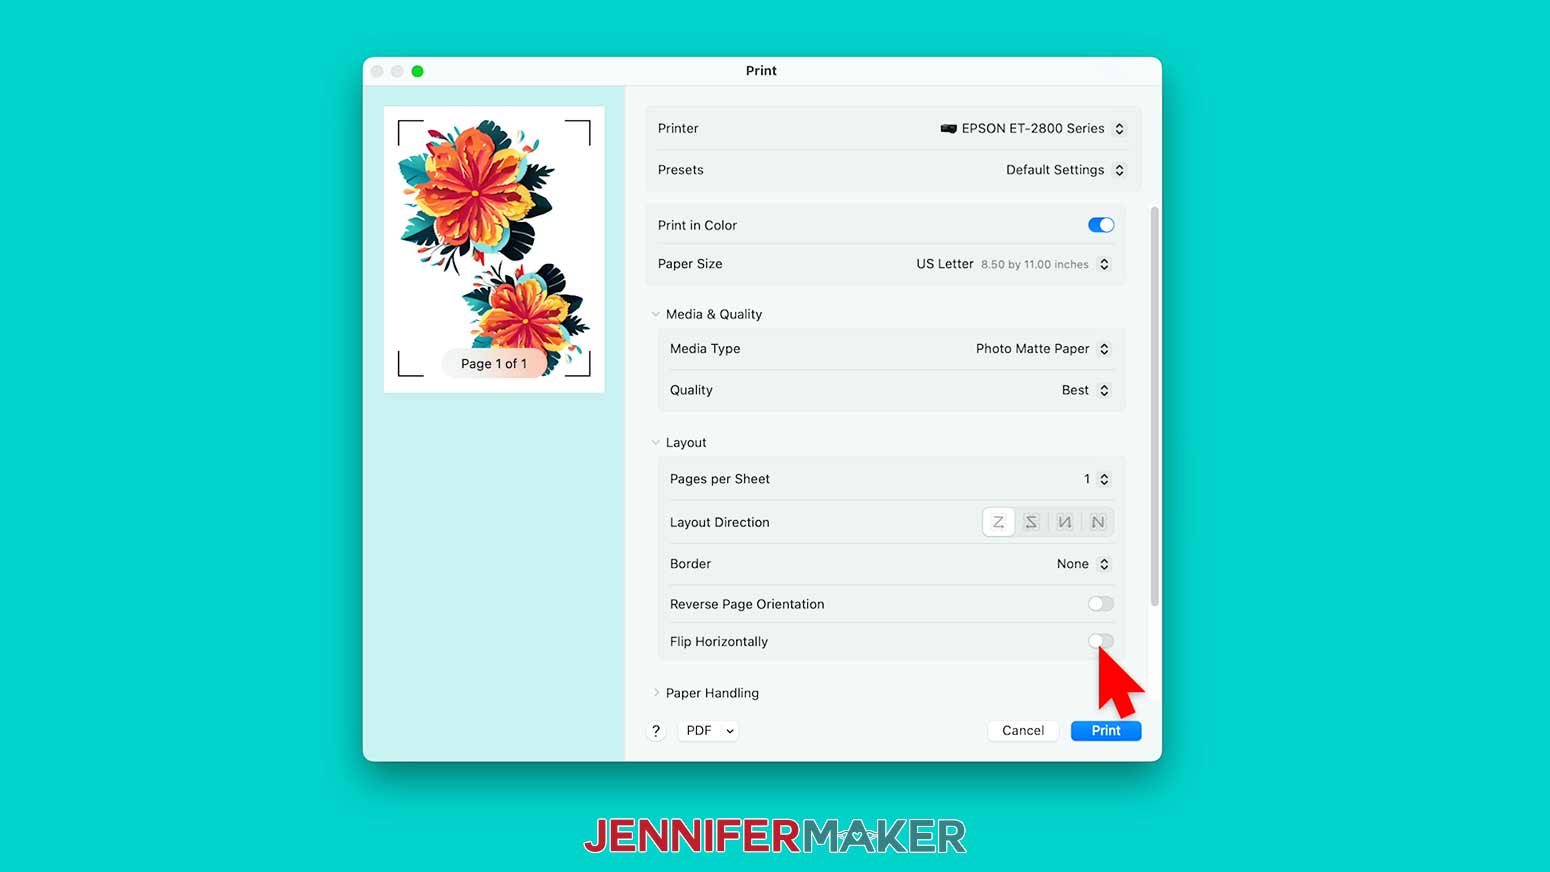
NOTE: Your screen and settings may look different, but use mine as a guide to pick the closest options you have available.
Make sure the sublimation paper is loaded correctly in your printer.
7. Click “Print.”
8. Set the print aside to let it dry. Be careful not to smudge it.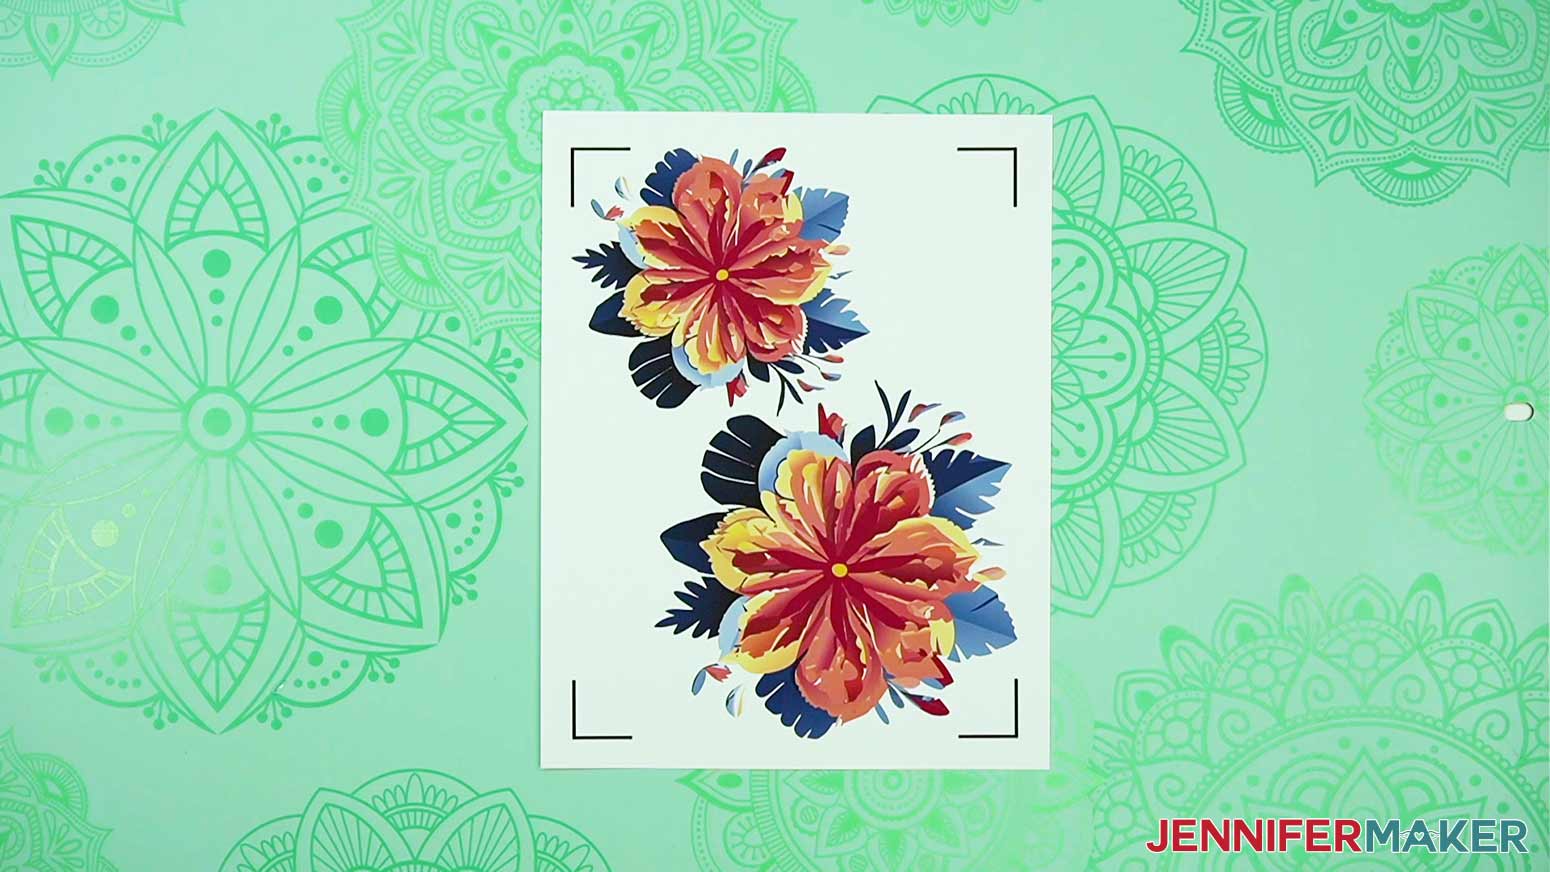
9. Repeat for the other designs.
NOTE: We’ll cut the designs by hand, so you’re done with Cricut Design Space.
CUTTING
1. Cut your designs apart with scissors so you have one per sheet.
2. The paper’s edge can leave an indent during pressing. Tearing the paper, or feathering around the designs, helps, but be careful close to the ink.
NOTE: Make sure you remove the black registration marks when cutting or tearing around your designs.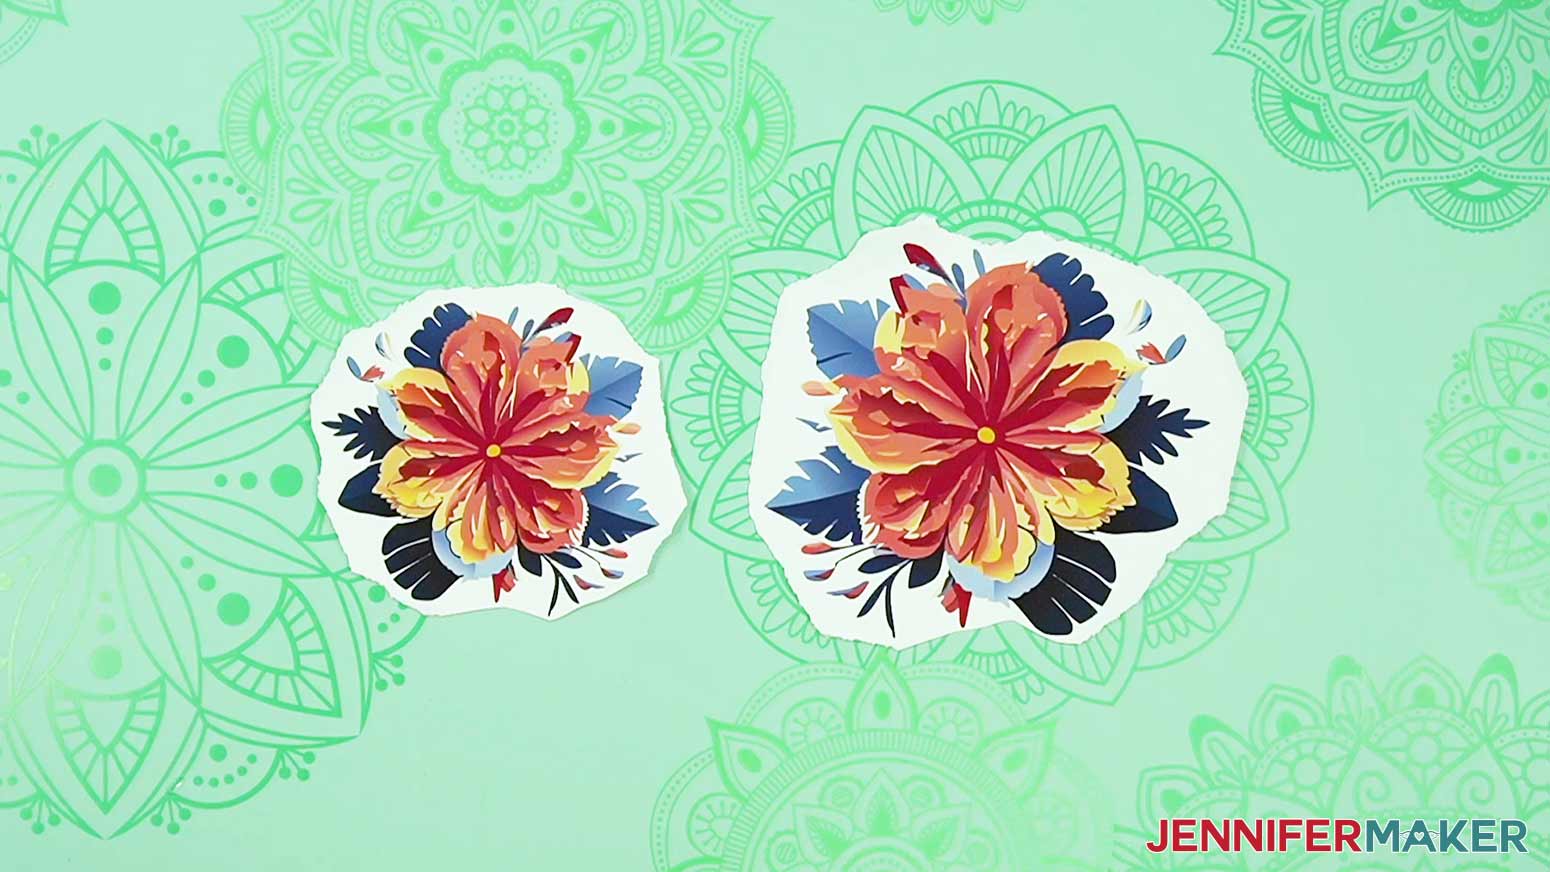
STEP 3: PREPARE AND PRESS THE ALL OVER SUBLIMATION SHIRT
CAUTION: Good ventilation is important any time you use sublimation. Have your windows open and a fan going to help the fumes dissipate quickly. And don’t breathe in very close to the project while it’s still warm.
NOTE: Your design’s colors will be influenced by the printer profile you use and will not exactly match what is on the printed paper. It’s a good idea to sublimate a test design on some scrap white polyester fabric using these steps before moving to your final project.
1. Set your heat press to the correct temperature and time. According to my Sublimation Cookbook, the EasyPress 2 needs to be set at 385℉ (196℃) for 40 seconds with light pressure for polyester fabric.
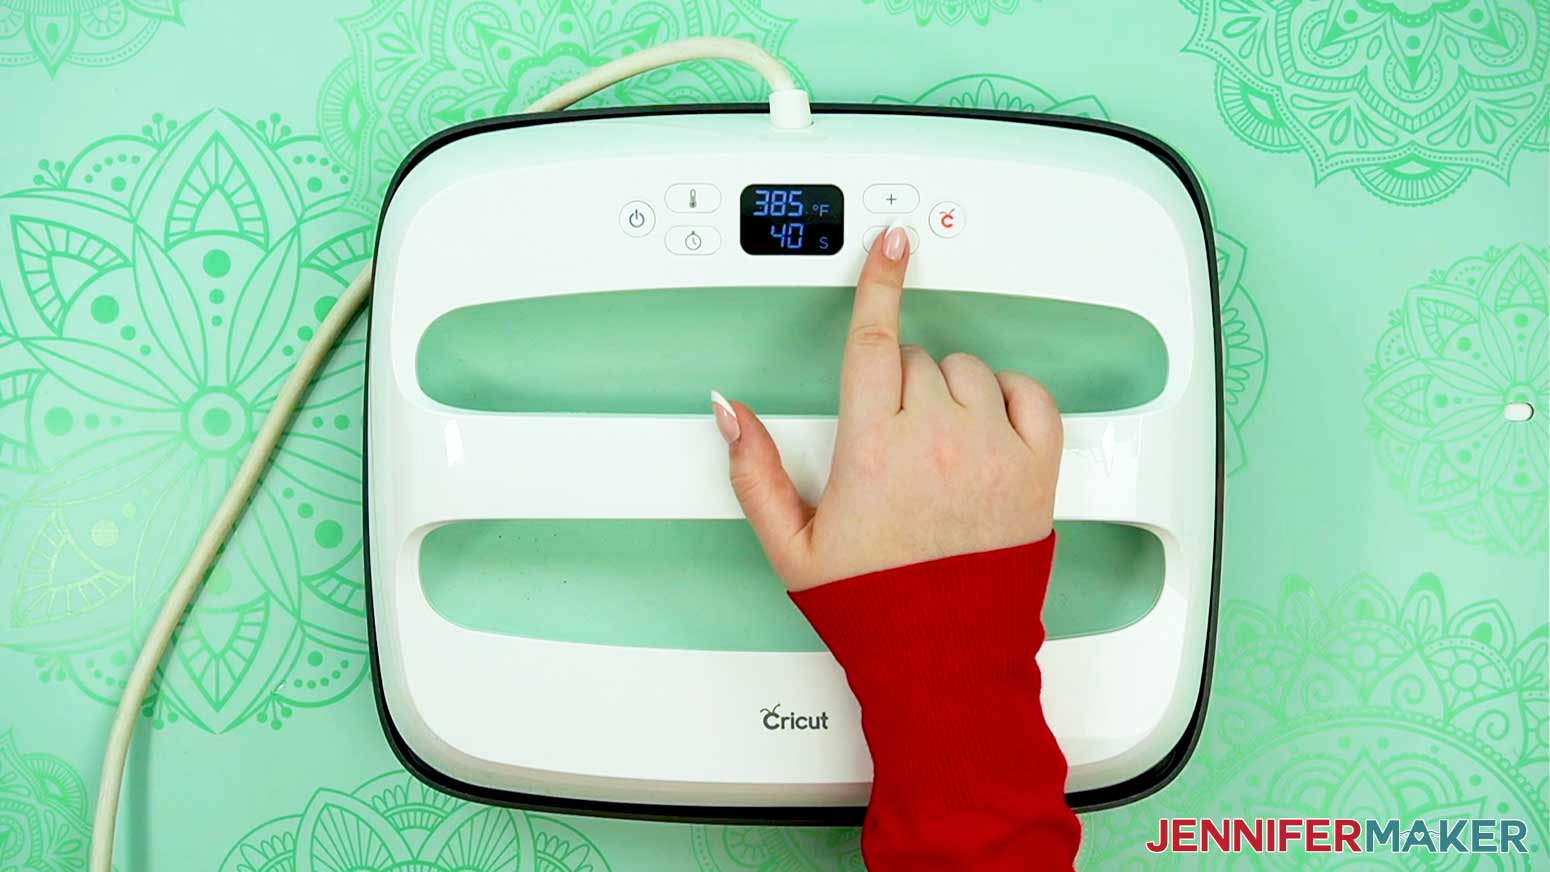
NOTE: When pressing along the seams, use medium to firm pressure for a better result.
2. Lint roll the T-shirt all over to remove dust or debris.
3. Lightly press the shirt all over for 10 seconds to remove excess moisture from the material, and smooth out any extra wrinkles.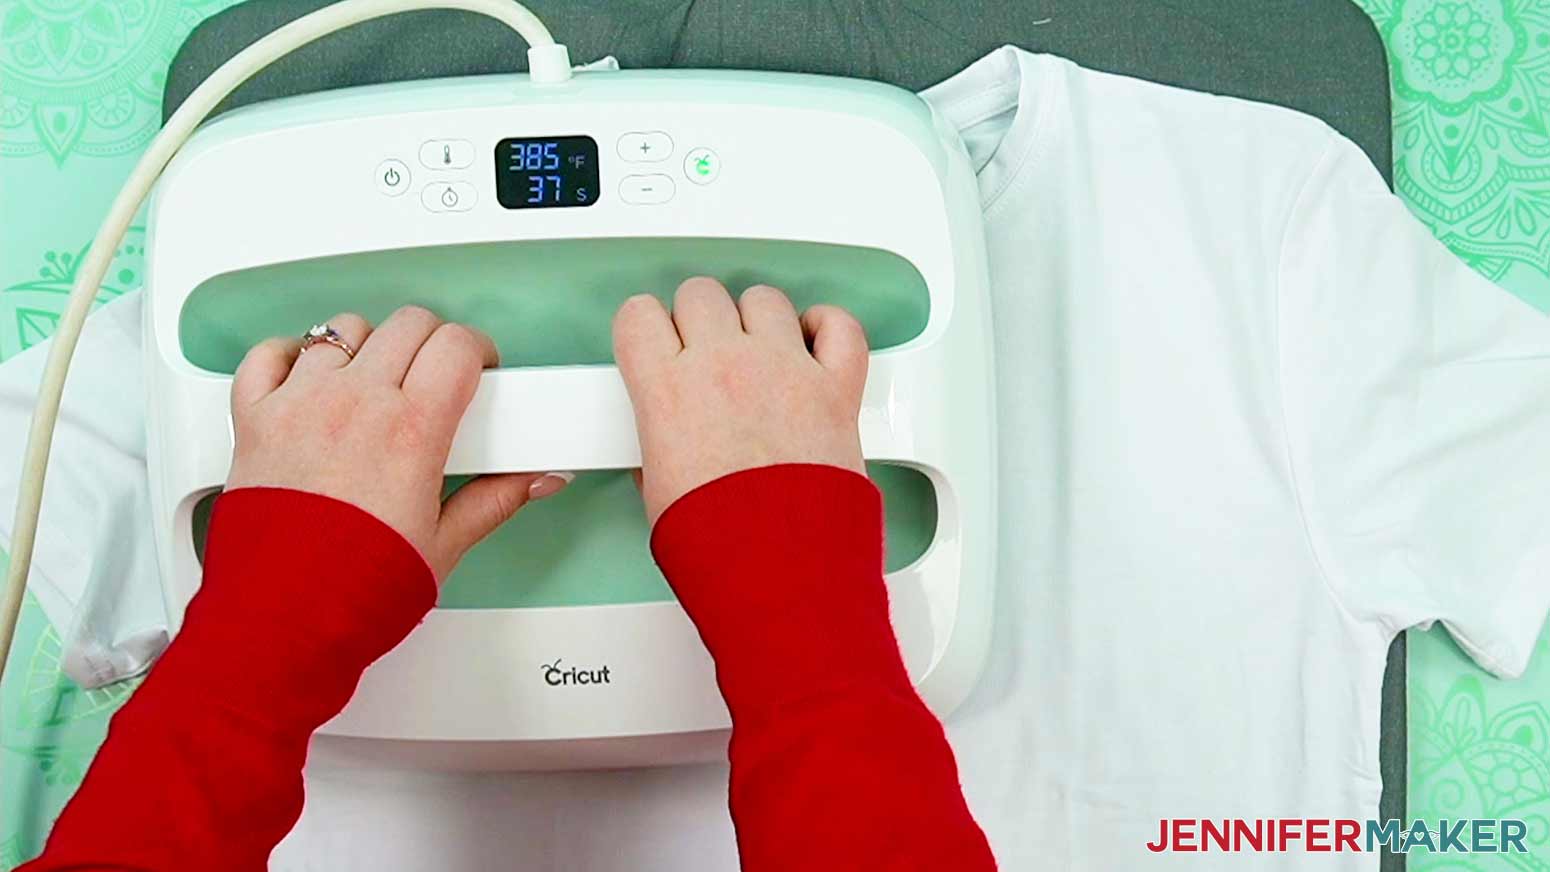
4. Insert a pressing pad with a fresh piece of white, uncoated cardstock on top in between the shirt’s layers under your first design area.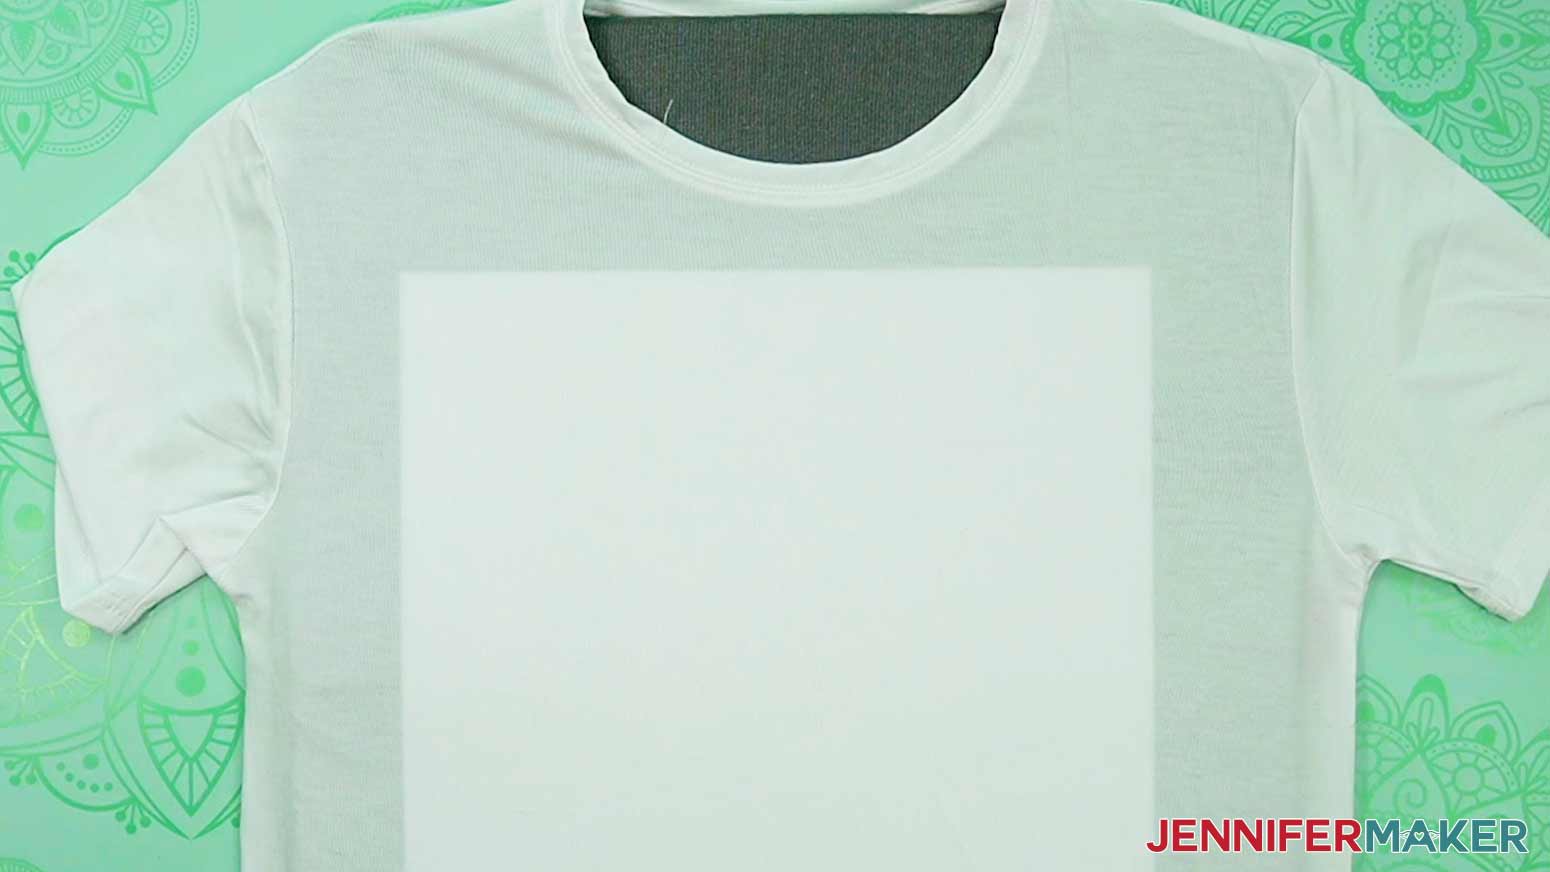
5. Tape the first printed design face down on top of the shirt with heat resistant tape.
NOTE: Start with your end goal in mind (a pattern, centered, offset, random, etc.) in mind. Beginning in the middle and radiating out from there makes it easier to avoid reactivating earlier designs when adding new ones.
6. Place a piece of butcher paper on top of the shirt and taped design.
TIP: If your designs are small, you can re-use your piece of butcher paper on your next press by folding it with the surface that touched the design facing inward to trap any excess ink.
7. Press the design with light pressure for 40 seconds at the correct temperature.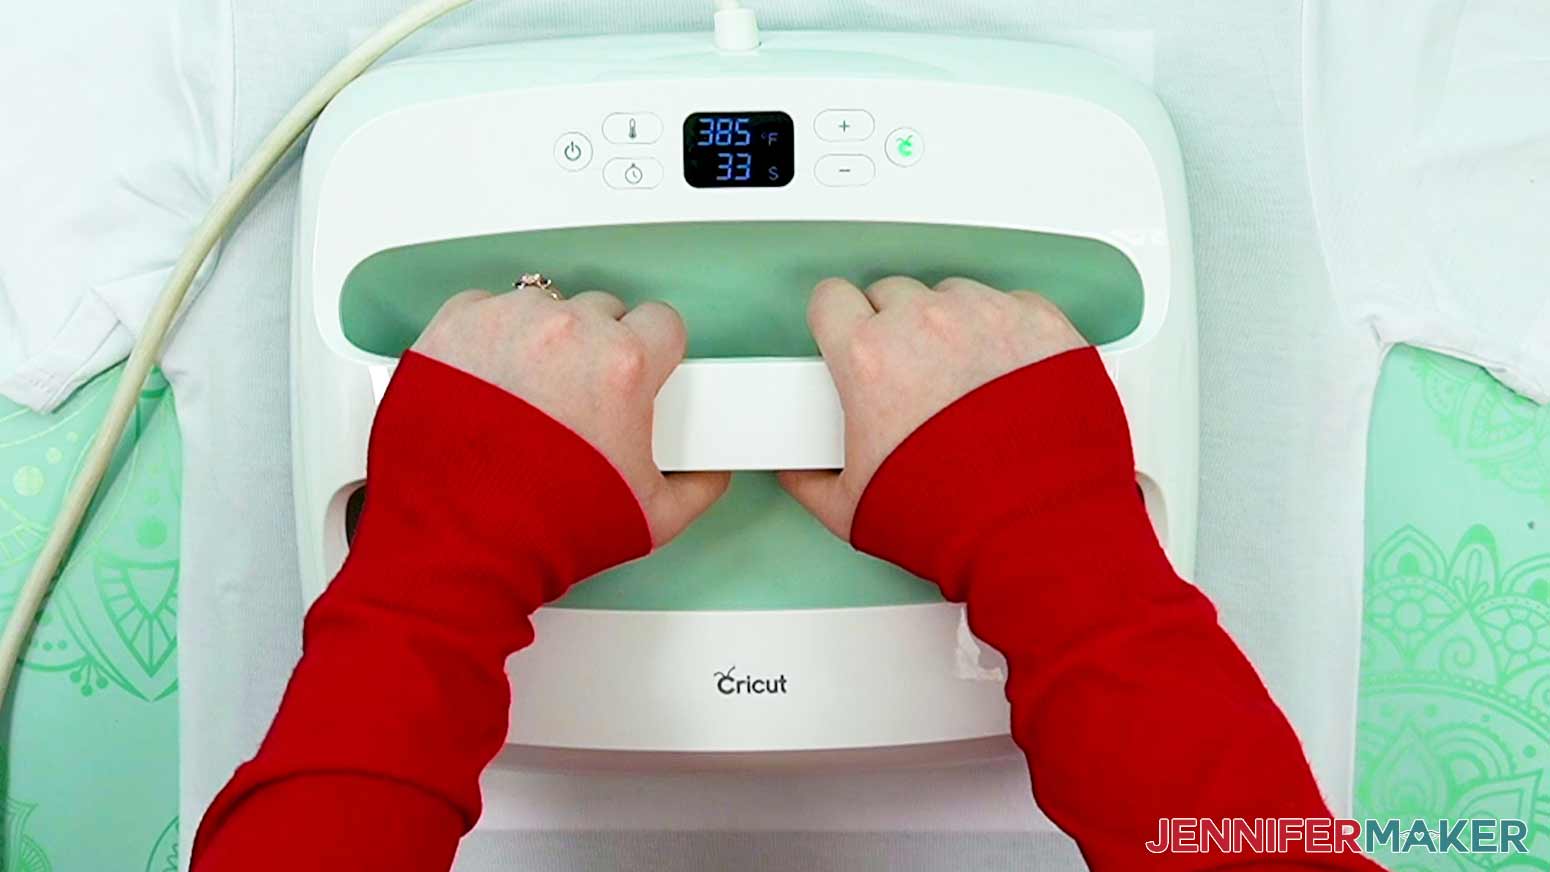
8. After pressing, allow the design to sit for approximately 10 seconds to help prevent ghosting.
9. Remove the tape and transfer sheet to reveal the first design on your shirt.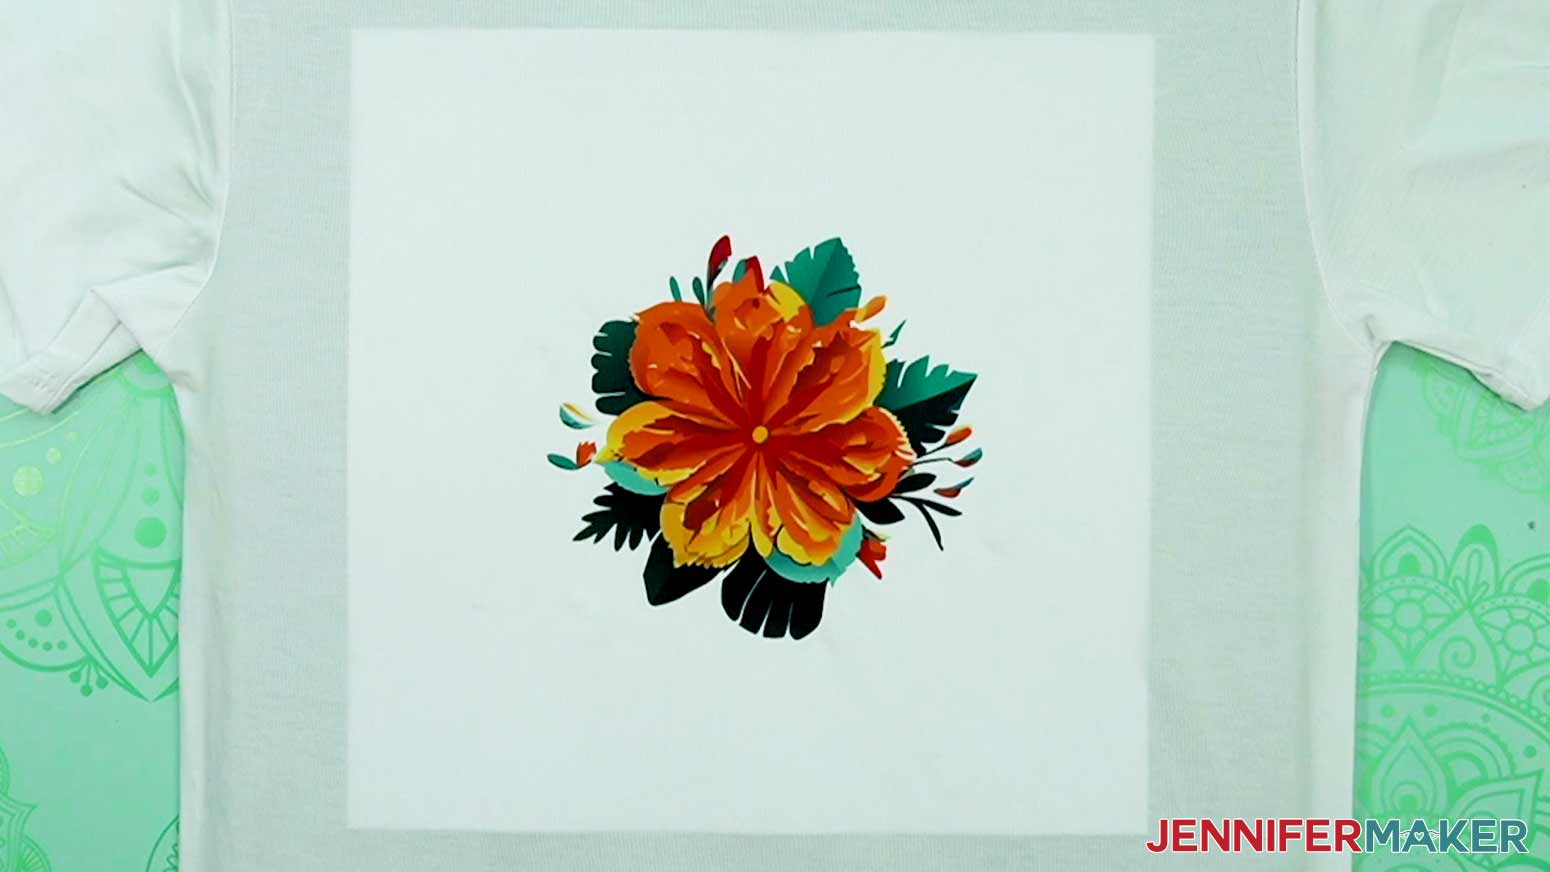
10. Add more design repeats all over the shirt’s front, avoiding the seams and sleeves for now.
NOTE: Remember to move the pressing pillow and pressing pad as needed, always secure the design with heat-resistant tape, cover it with fresh butcher paper, and don’t let your heat press get too near existing designs or the ink could reactivate.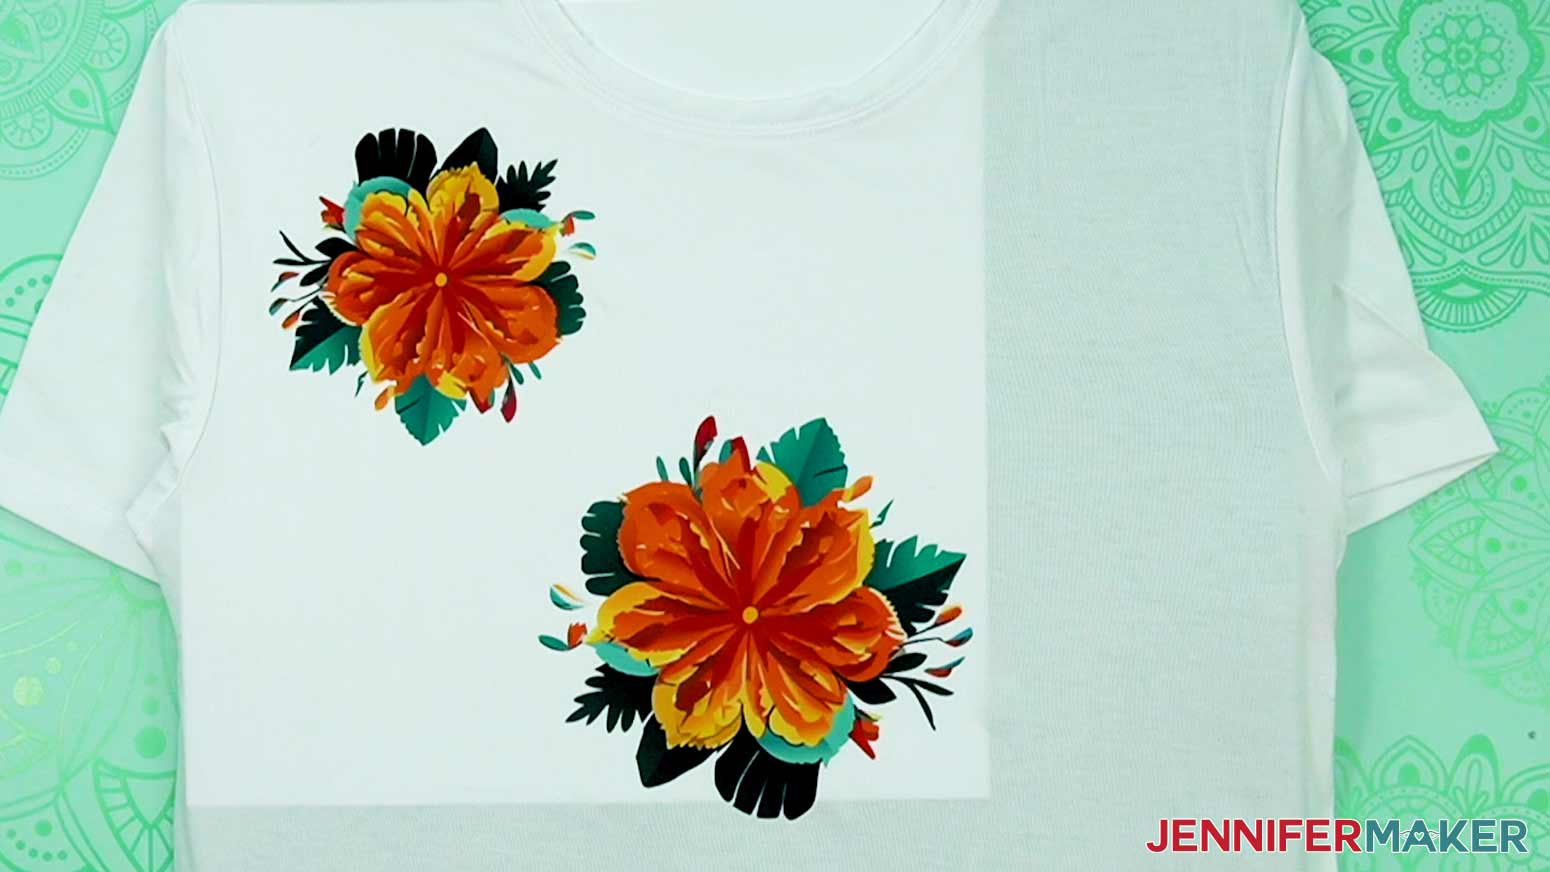
11. Flip the shirt over and put fresh white cardstock on the pressing pillow under the shirt’s back.
12. Repeat the process to add more designs on the back. Be very sure the pressing pillow stays between the front designs and your heat source to avoid reactivating the pressed ink.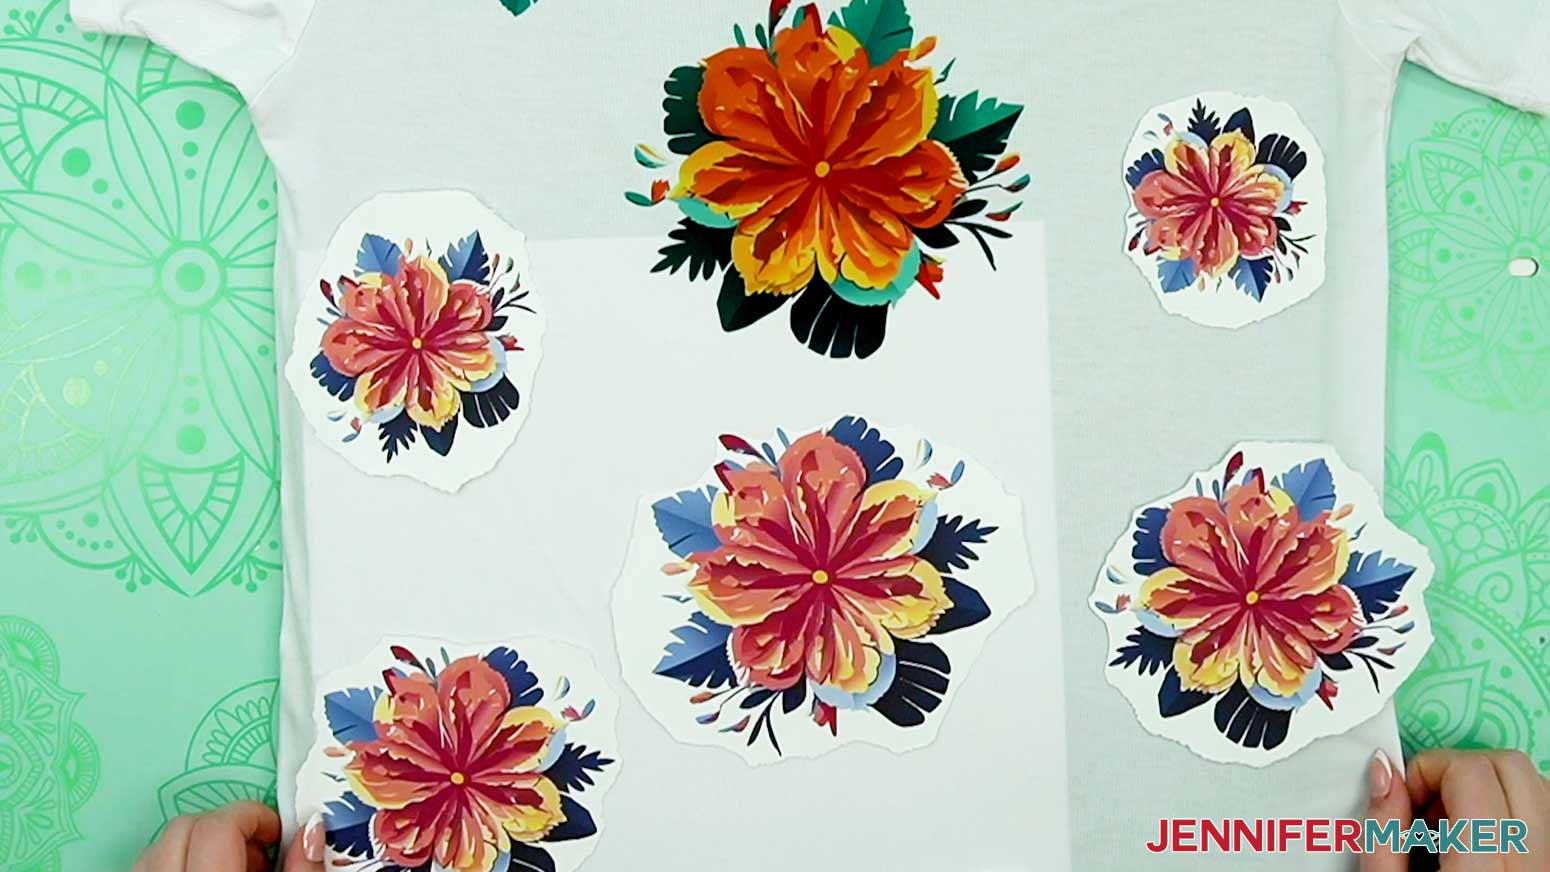
PRESS THE SLEEVES
1. To decorate a sleeve, smooth out any wrinkles and press the sleeve to get rid of a crease if needed.
NOTE: If the design is small, you can put a small pressing pillow inside the sleeve.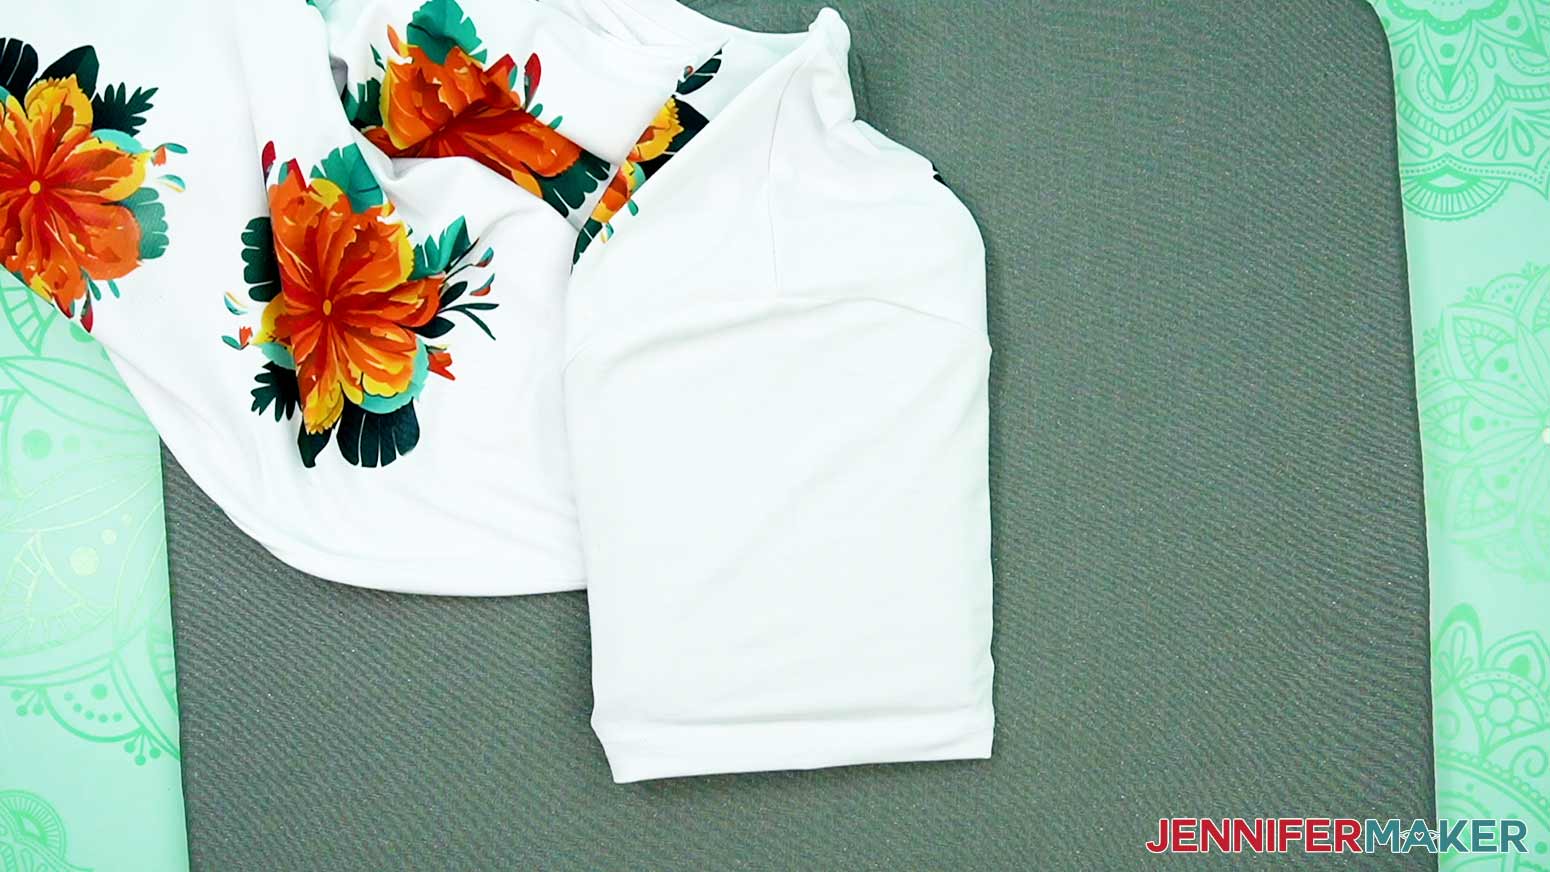
But if the pressing pillow is smaller than your design, fold clean white cardstock so it fits in the sleeve, then slide it in between the layers to keep the fabric flat and protected.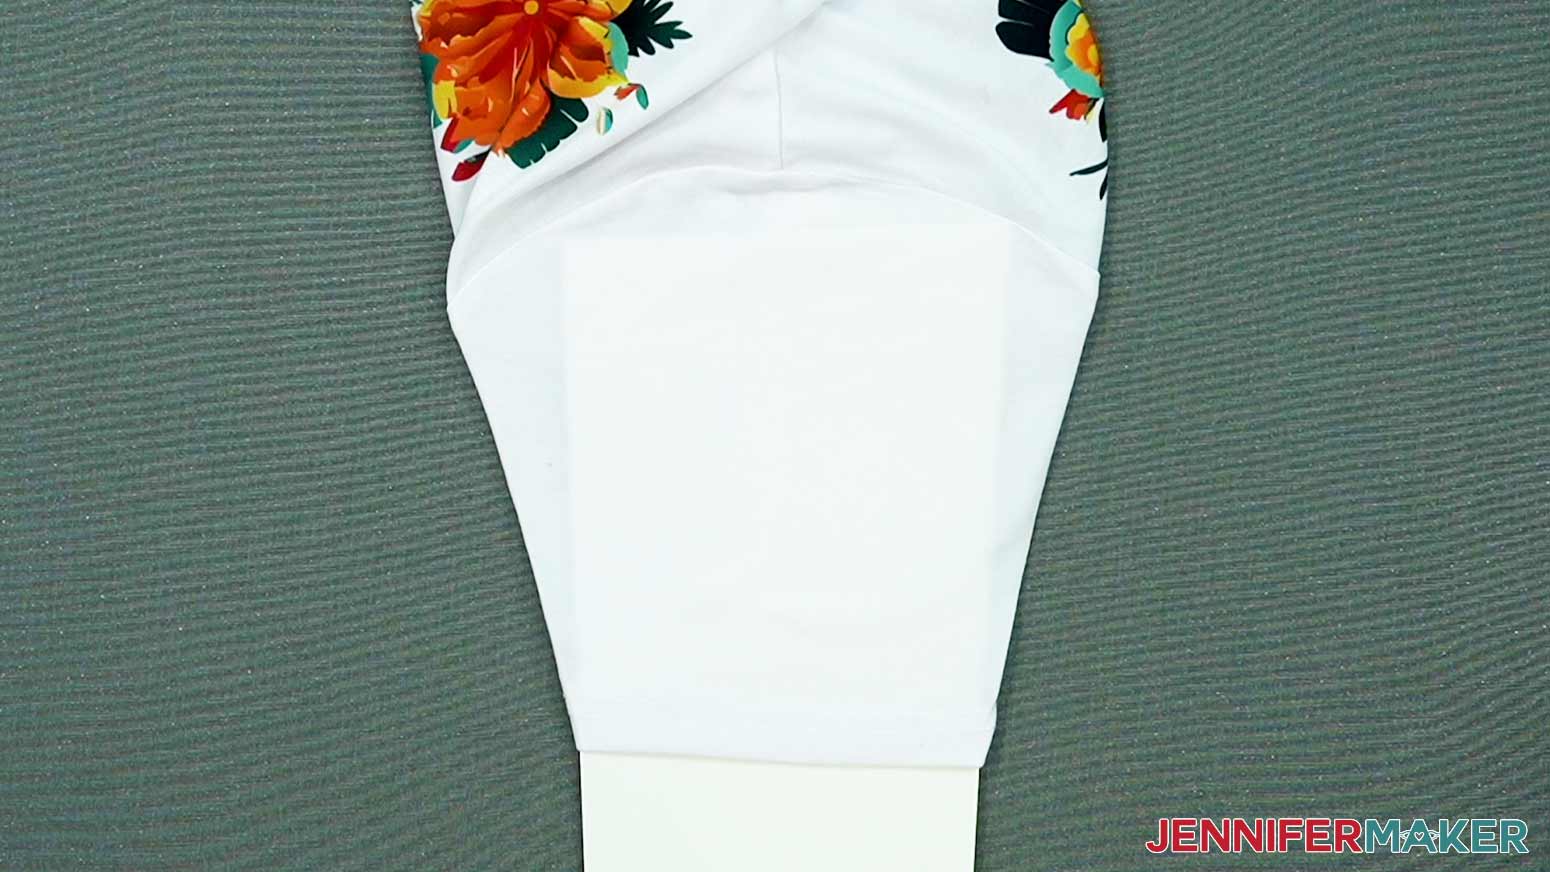
TIP: If the existing designs or seams are too close to the pressing area, put the large pressing pad under the sleeve or whole shirt. That can protect the ink and help smooth any seams.
2. Place the printed image face down on the sleeve, and tape it down.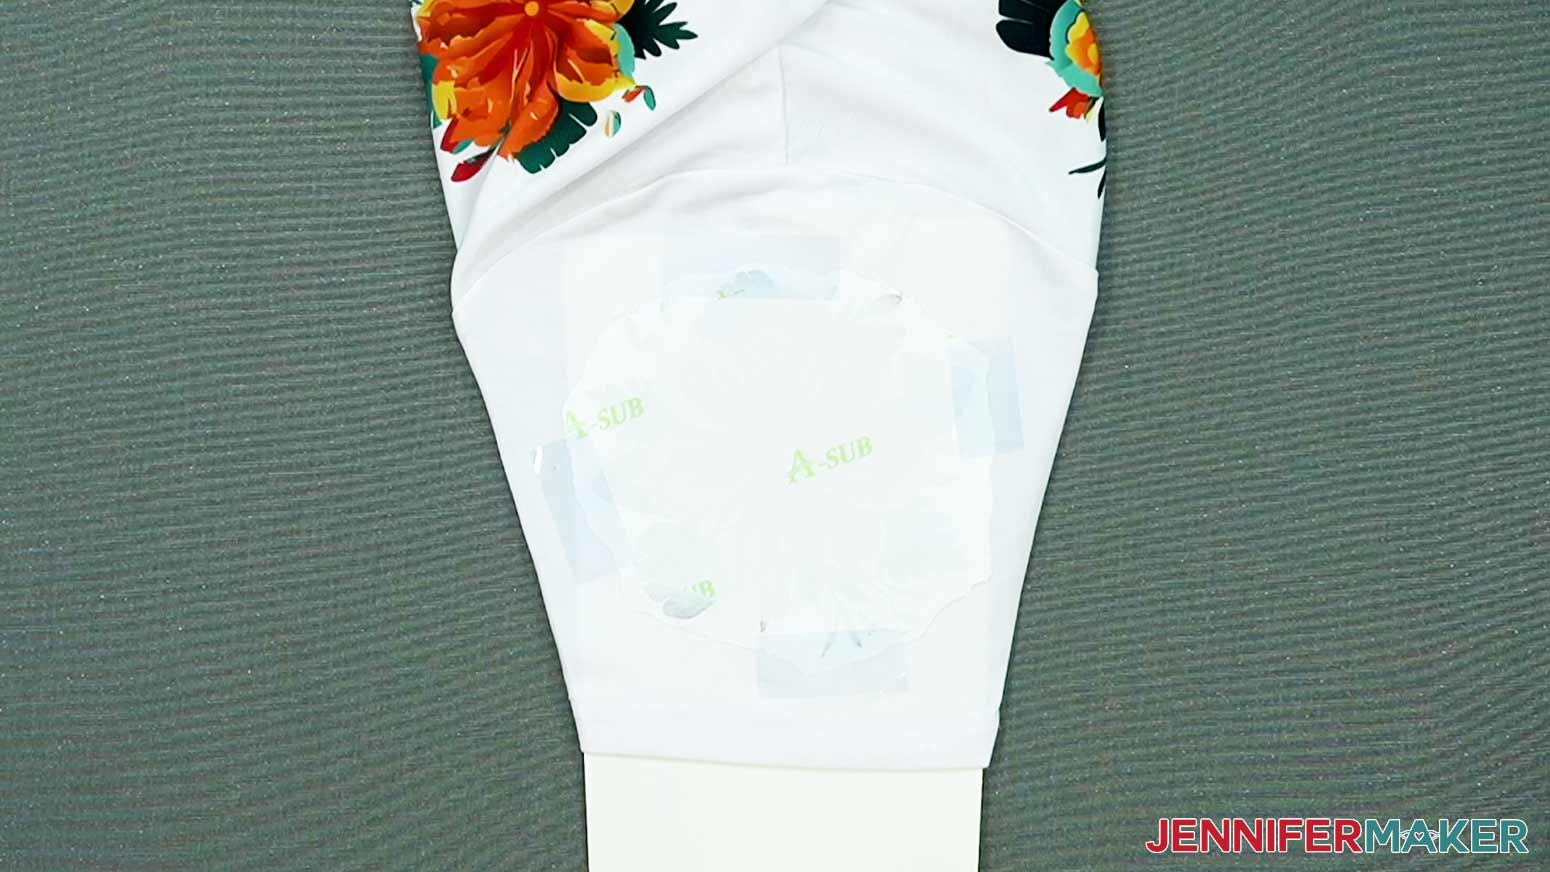
3. Place a piece of butcher paper on top of the sleeve and taped design.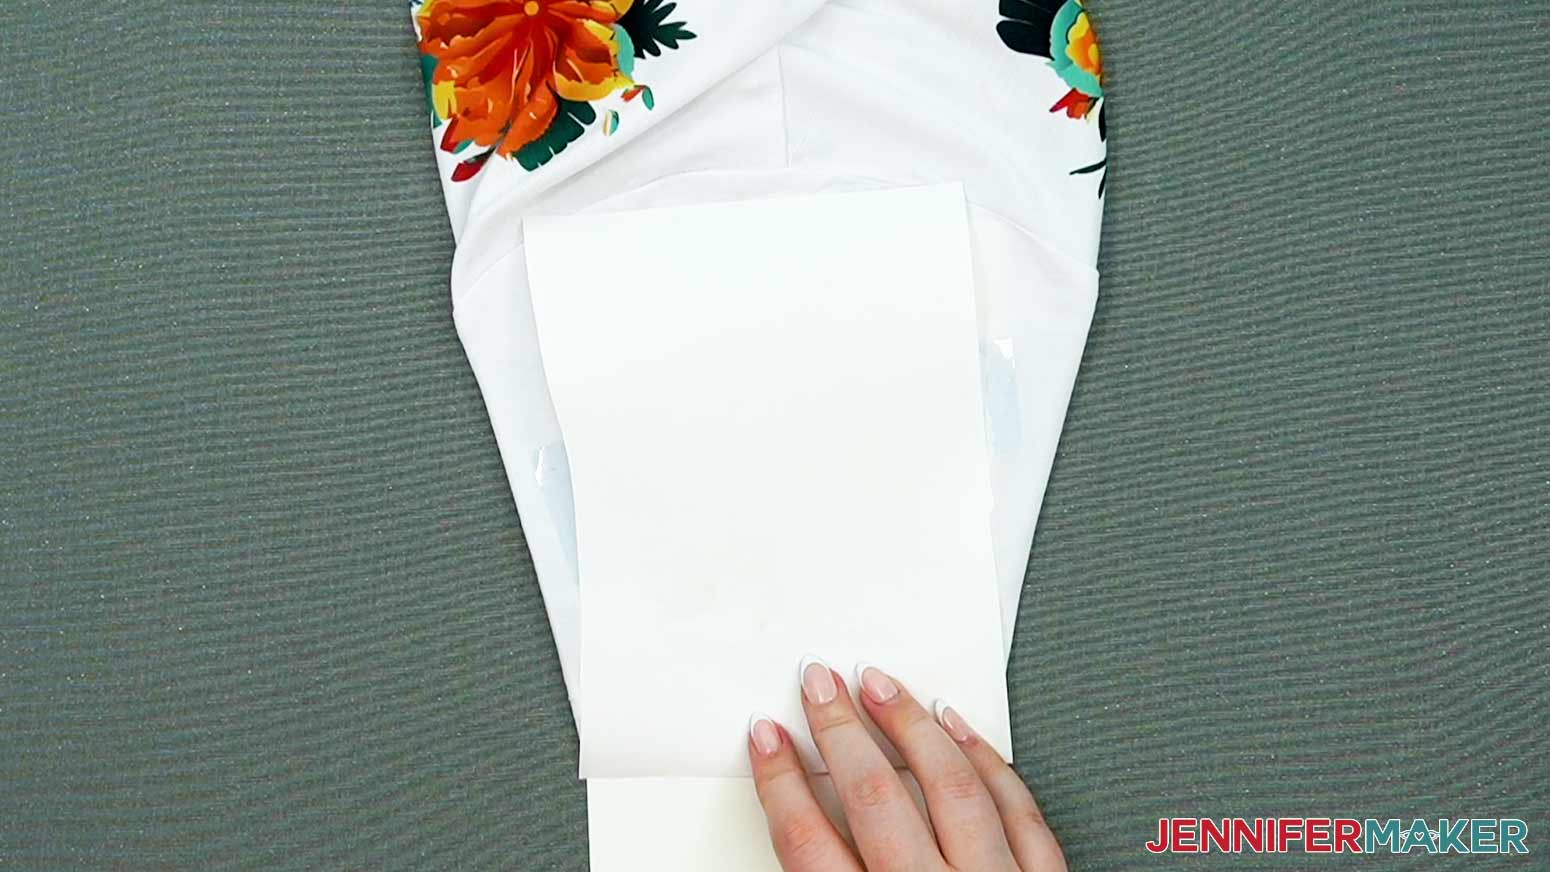
4. Press the design with light pressure for 40 seconds at the correct temperature.
5. After pressing, allow the design to sit for approximately 10 seconds to help prevent ghosting.
6. Remove the taped design and the cardstock from inside the sleeve to reveal your finished sleeve.
7. Follow steps 1-7 to decorate the other sleeve if you want!
PRESS OVER A SEAM
1. To add a design over a seam, move the pressing pillow and protective cardstock under the seam and press it completely flat, avoiding the previous prints.
NOTE: The seams are the most difficult, and you will likely have some bleeding where the ink drifts along the indent.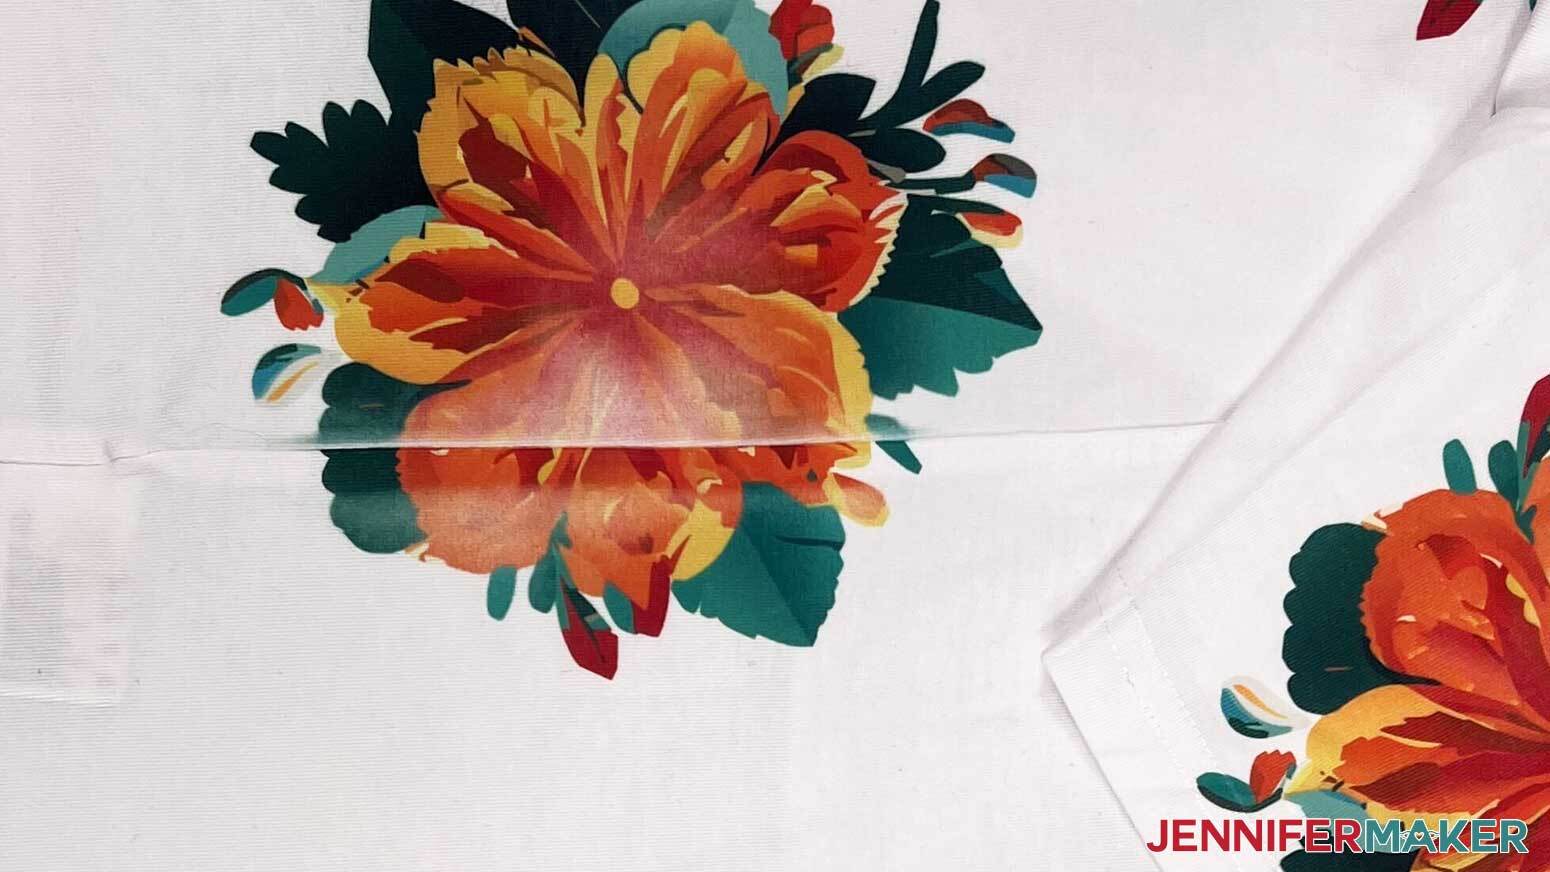
2. Prepare and position the design just like the others, but press even harder with heavy pressure to try to trap more of the ink right where you want it to be.
STEP 4: SHOW IT OFF!
Here is what my finished all over sublimation shirt looks like!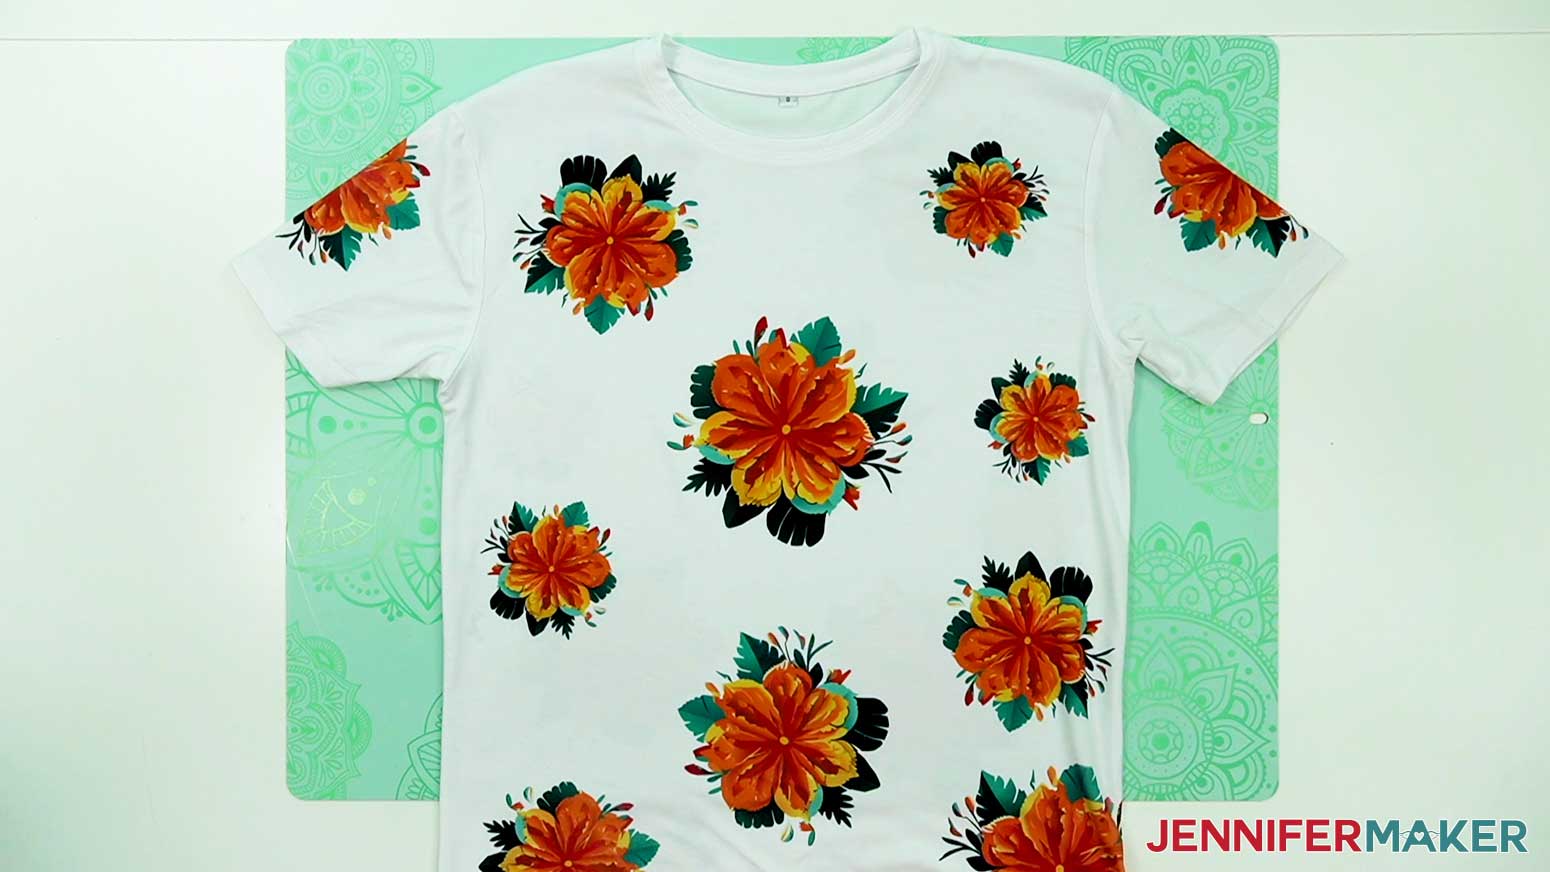
Notes
Finished Size: Depends on the T-shirt used
Care: Wait at least 24 hours before washing. Turn the shirt inside out, then machine wash with cold or warm water and a mild detergent. Hang dry or dry with low heat.
Answers to Your Questions About Making An All Over Sublimation Shirt
Q: Is there a way to create custom all over sublimation photo shirts?
A: You can learn how to create your own customized all over sublimation photo shirt in my ADVANCE program. Learn more about ADVANCE here!
Q: What kind of shirt is best for sublimation?
A: There are many blanks available for custom sublimation shirts. I’ve tried a lot of them and have results and recommendations for you!
Q: Can you sublimate on any shirt?
A: If it’s meant for sublimation, yes! Remember, the shirt should have at least 65% polyester content and white will not interfere with the design.
Q: How do you do all over sublimation?
A: You can add a sublimation design all over by creating repeats and carefully transferring them to your shirt. Once you have the process down, you can create your own custom design by combining images, too! Just make sure you use the correct temperature and time for your materials and tools, which are also outlined in my Sublimation Cookbook.
Q: Can I make my own pressing pillows? How do you make a pressing pillow?
A: It’s pretty easy to make your own pressing pillow, which is specially helpful for projects like these with seams. Simply cut a few pieces of felt to about the size of your area to be pressed. Place them in a sandwich of Teflon sheeting and staple the sides, leaving about an inch around the felt. Trim the Teflon if needed, and voila! You have DIY pressing pillows.
Q: How do I care for a sublimation shirt?
A: You’ll want to wait about twenty-four hours before cleaning your custom T-shirt. Then turn it inside out and wash it on gentle with mild detergent. Hang it to dry for the best results. Unlike screen printing, the design becomes part of the fibers, so the image should last as long as the garment!
Q: Why is my sublimation print color so dull?
A: Sublimation prints look much duller on the paper than they do after they’re sublimated, so don’t worry if your printed image looks faded or different colors than you expect — the vibrant colors will show when you’re done!
Q: Why is my sublimation not transferring evenly?
A: You may need to tweak your settings if you’re using materials other than the ones in my materials list. The sublimation printing process and transferring has a lot of variables, so follow my notes first on a test cloth, then try adjusting your temperature, time, or pressure if you need to.
Q: What does ghosting mean in sublimation?
A: Ghosting can occur when a freshly sublimated object is moved around too much while it’s still hot. If the object and the sublimation transfer is still hot, the image is still sublimating. To avoid this, simply wait until your sublimated item has cooled off before handling or removing the paper, and don’t move it around more than you need to while it’s sublimating. It’s a natural effect of the sublimation process because the ink is in a gaseous state until it’s cooled.
Q: What if I don’t have a sublimation printer?
A: You can have someone else print the designs for you! There are many Etsy sellers (and others in the global marketplace) who will print your designs and send them to you. Just check their customer reviews, see if they have a minimum order quantity, and make sure their typical production time fits your goals.
Q: Are your free PNGs and SVGs just for personal use or also commercial use?
A: Yes, you can sell completed projects using these designs, we only ask that you give credit to JenniferMaker.com and do not sell the digital files. Keep in mind that this production process does take longer since you’re creating and transferring multiple designs, so budget for more production time, especially if you offer made-to-order items. If you use them, please share photos with us! We love supporting small businesses and creative entrepreneurs. I hope you get many 5-star reviews!
Get my free PNG files to create an all over sublimation shirt!
(If you do not see the signup form above, click here.)
I love seeing what you make with my designs and how you use them! Please share a photo of your all over sublimation shirt in our Facebook group or tag me on social media with #jennifermaker.
Love,

Want to remember this? Save this All Over Sublimation Shirt Tutorial to your favorite Pinterest Board!