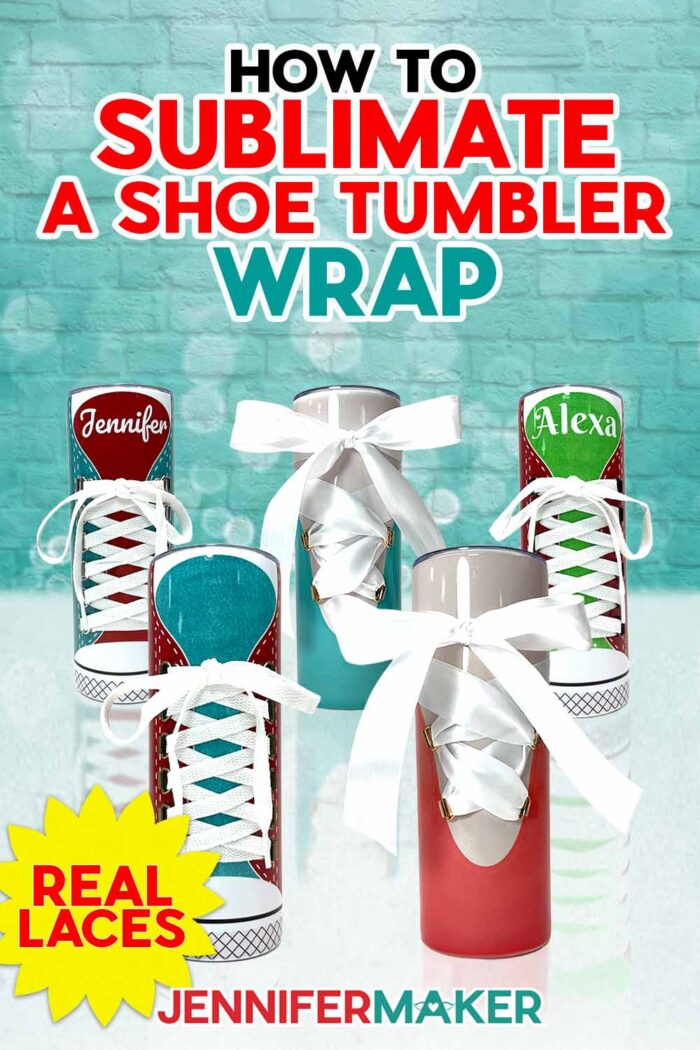
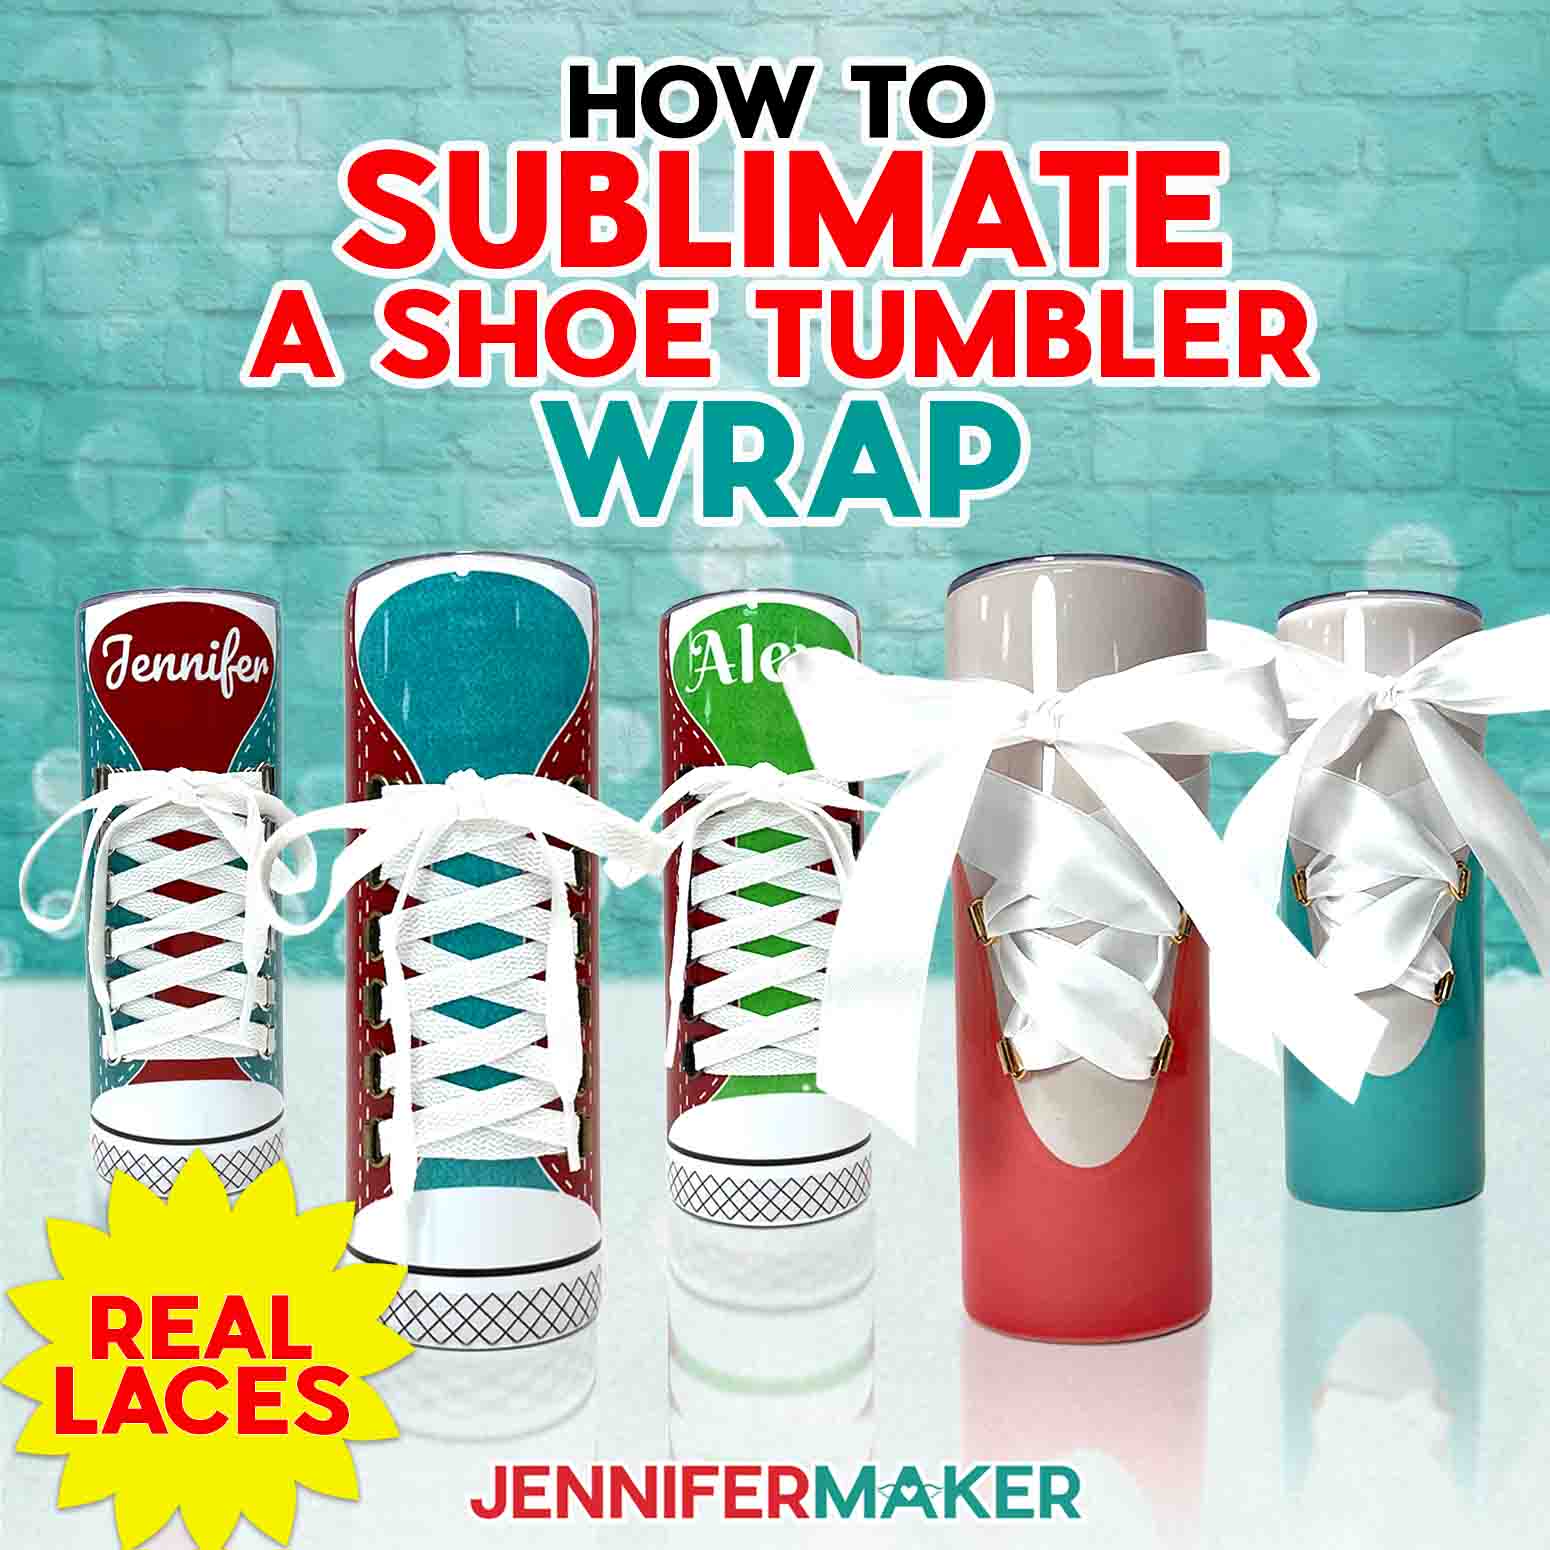
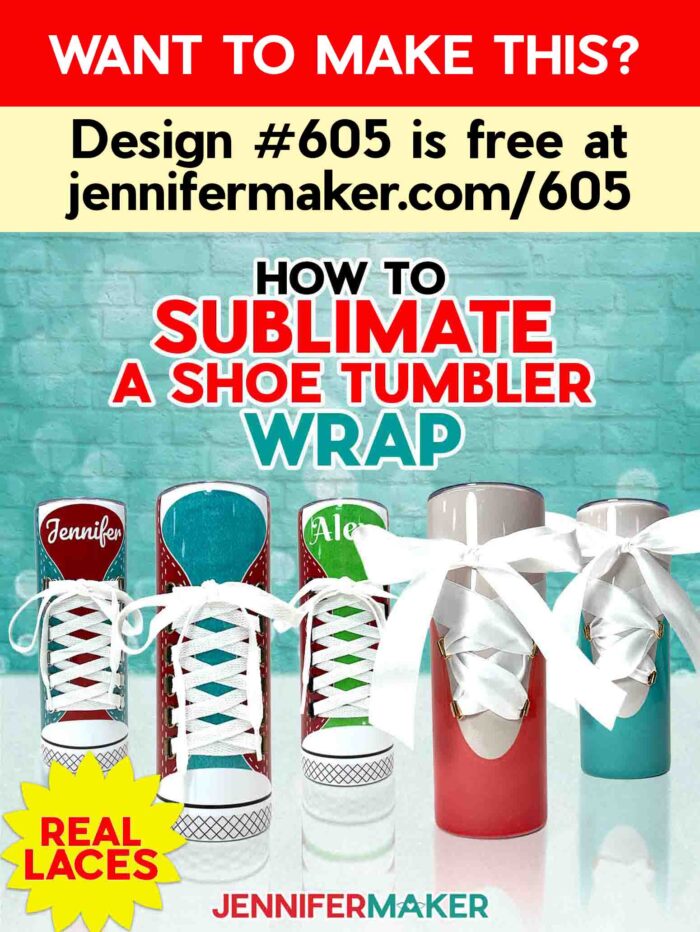
Learn how to add real laces to shoe tumbler wraps!
Sublimation tumblers are known for their durable, smooth surfaces with vibrant colors. But the popular designs with 3D elements like laces really caught my attention! I’ve found that using the right combination of lacing anchor positioning, adhesive, and a good dose of patience are the keys to shoe tumbler wrap success! So I made a sneaker design and ballet slipper version with those elements in mind. Follow my tutorial to make your own shoe tumblers that will hold up to use and cleaning for years!
Additional content for this project (templates and customization tutorials) is available in the ADVANCE program! Learn more about ADVANCE here.

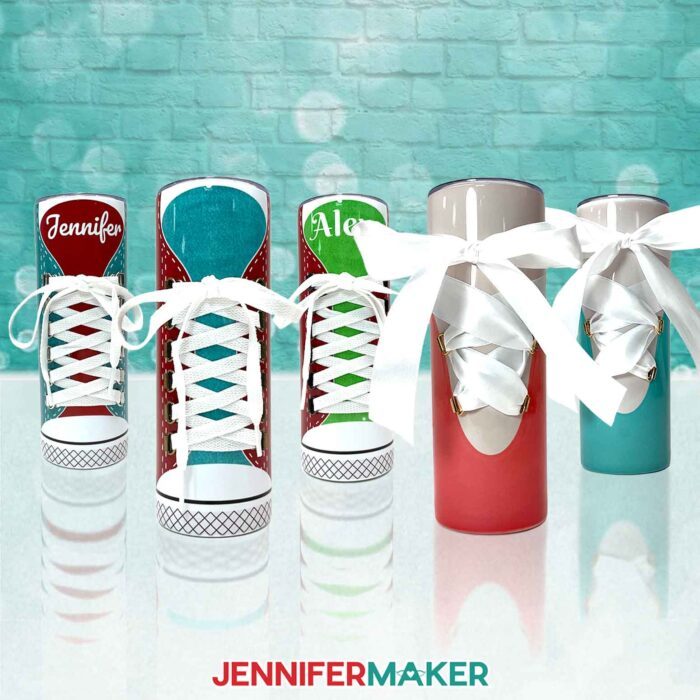
These shoe tumbler wrap designs are cute on their own, but adding removable laces really kicks them up a notch!
The sneaker design uses several eyelets to recreate the lacing look of real shoes, so getting their placement perfect is really important. I’ll show you how to use painter’s tape to make it easy!

I tried a few different methods for securing the laces to the shoe tumbler wrap designs. I recommend using D-ring lacing eyelets from a shoe repair kit with E6000 adhesive for the easiest positioning, lacing, and cleaning. I’ll show you how to use specific spots in the designs to position them perfectly!

And don’t worry, the metal pieces are mostly covered by the laces or ribbon, so they don’t interfere with the designs, even on the ballet slippers. I’ll show you a handy way to secure the ribbons using hook and loop dots that make them easy to remove. You can even make different sets to swap in!
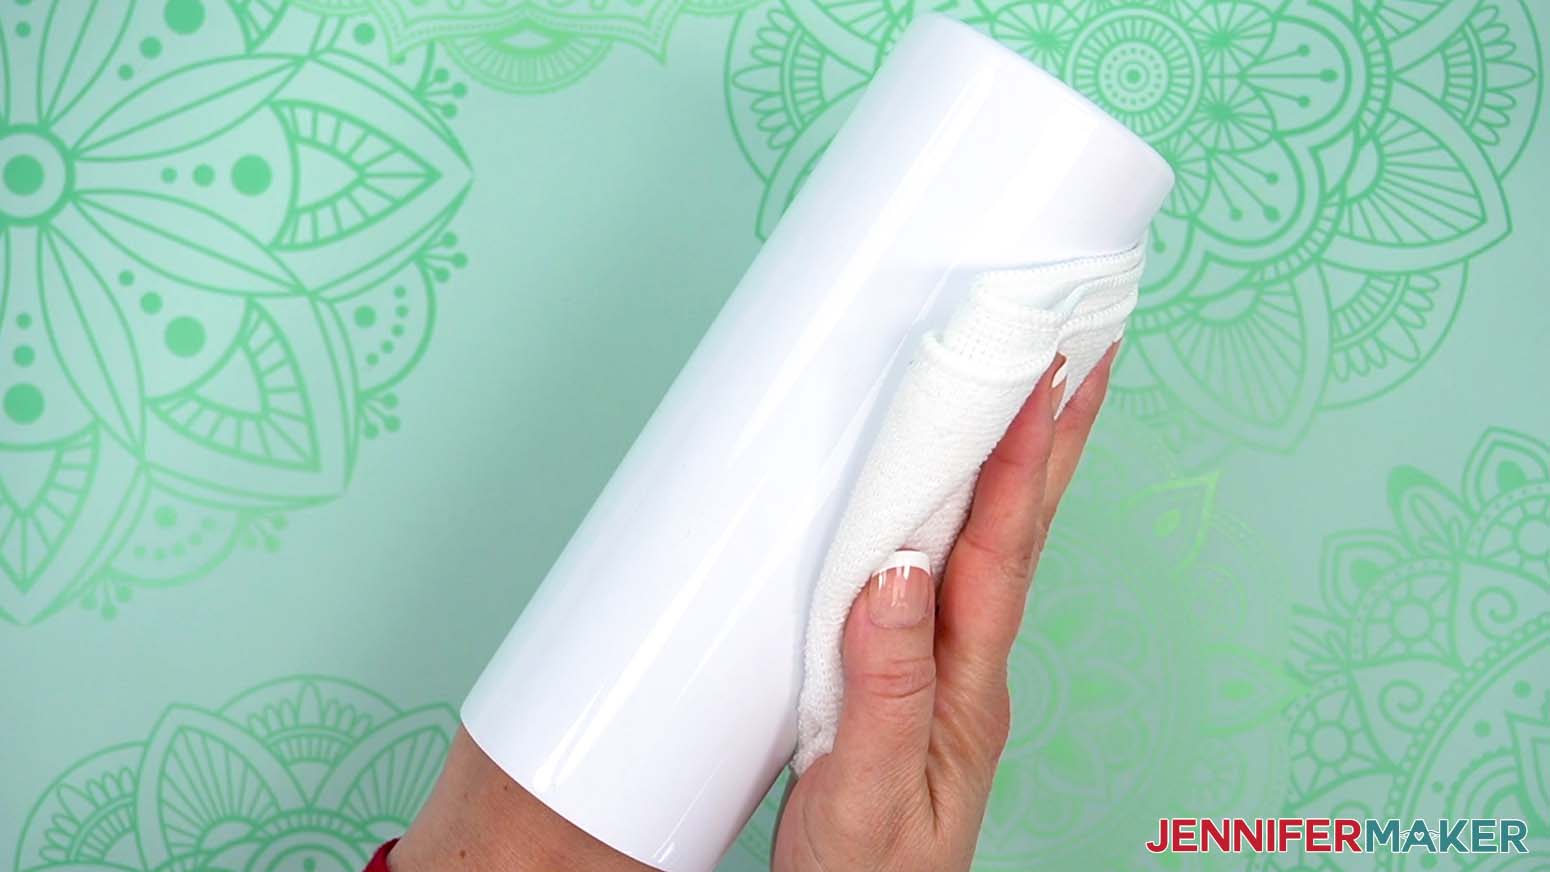
The E6000 does take a few days to fully cure, but I have lots of tips to keep your project moving forward, like using a towel to support the tumbler and guidance on when it’s safe to move the project. Do remember to turn on a fan when using E6000 and other adhesives, as well as when you’re sublimating!
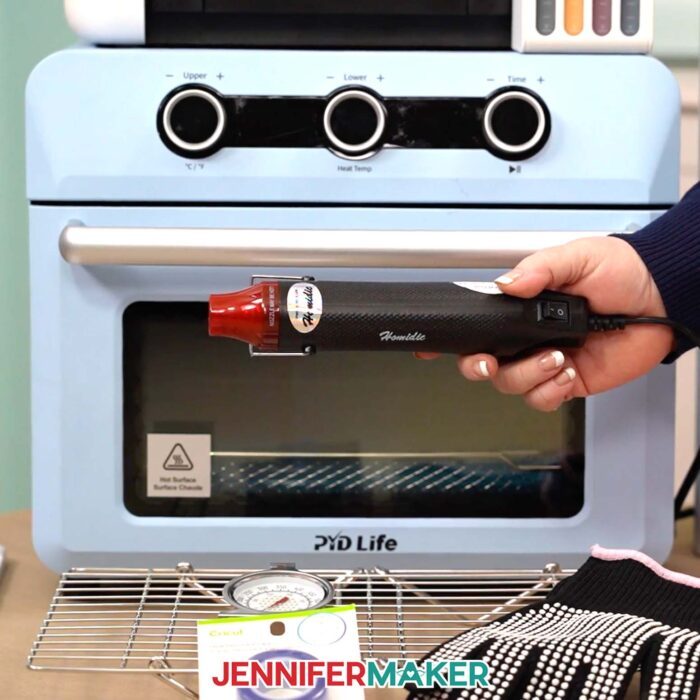
Of course, before you add the 3D elements, you need to sublimate your tumbler. I used a combination of shrink-wrap tubes, a heat gun, and a craft-specific convection oven to sublimate my designs with the best results. I’ll show you how to prepare the design files in Google Docs to perfectly fit your blank and avoid seam issues. My supply list below has links to everything you’ll need for the perfect transfer. If you want to learn more about sublimation methods, my Sublimation Cookbook is a tool to get you started!
Did you notice names and different patches on a few of the shoe tumbler wrap projects? They’re examples of how you can customize a digital file with the right tools and skills, which I can teach you in my ADVANCE program. With just a few minutes, you can create a one of a kind tumbler! Learn more about ADVANCE here!
Let me show you how to add real laces to a shoe tumbler wrap! This post contains some affiliate links for your convenience (which means if you make a purchase after clicking a link I will earn a small commission but it won’t cost you a penny more, there is no additional cost)! Read my full disclosure policy.
Materials to Sublimate A Shoe Tumbler Wrap with Real Laces
View my Amazon shopping list to see exactly what I used!
- Sublimation Printer – I used a converted Epson EcoTank ET-2800
- Sublimation Ink
- Sublimation Paper – I used 8.5″ x 11″ A-SUB Sublimation Paper
- 20 oz. Straight Side Sublimation Tumbler
- 8.5” x 11” Sublimation Paper
- D-Ring eyelets from a shoe repair kit in different colors or a set of gold lacing eyelets
- E6000 Glue with Precision Tips
- 48″ Length Shoelace – Flat style (sneaker)
- 7/8″ Wide Double Faced Satin Ribbon (ballet slipper) -AND-
- Hook and loop dot tape (to secure the ribbon)
- Convection Oven only for sublimation
- Oven Thermometer
- Heat Resistant Gloves
- Heat Resistant Tape
- Heat Shrink Wrap (if your tumblers don’t come with them)
- Heat gun
- Heat Resistant Pad
- Fan
- Looped Tape Measure
- Scraper
- Scissors -OR-
- Paper Trimmer
- Painter’s Tape
- Disposable Gloves
- Butcher Paper (to protect your work surface)
- Isopropyl Alcohol
- Lint Free Cloth
- Star Pinchers, optional to help hold the shoe tumbler wrap in place during taping
- Stop Fraying Glue (optional for ribbon)
- Design #605 (My free SVG/PDF/DXF design files are available in my free resource library – get the password by filling out the form at the bottom of this page)
How to Sublimate a Shoe Tumbler With Real Laces
Shoe Tumbler Wrap With Real Laces
Learn how to add laces or ribbon to a sublimation tumbler to make a cute shoe tumbler wrap!
Materials
- 20 oz. Straight Side Sublimation Tumbler
- 8.5” x 11” Sublimation Paper
- D-Ring Eyelets for Shoes - Variety Pack (only using the lacing eyelets) -OR-
- D-Ring Eyelets for Shoes - Gold (only using the lacing eyelets)
- 48" Length Shoelace - Flat style -OR-
- 7/8" Wide Double Faced Satin Ribbon -AND-
- Hook and Loop dots
- Design #605 (My free SVG/PDF/DXF design files are available in my free resource library - get the password by filling out the form at the bottom of this page)
Tools
- Sublimation Printer - I used a converted Epson EcoTank ET-2800 Inkjet Printer
- Sublimation Ink
- Sublimation Convection Oven
- Oven Thermometer
- Fan for Ventilation
- Heat Resistant Gloves
- Heat Resistant Tape
- Heat Shrink Wrap (if your tumblers don’t come with them)
- Heat Gun
- Scraper
- Looped Tape Measure
- Scissors -OR-
- Paper Trimmer
- Painter's Tape
- Disposable Gloves
- E6000 Glue with Precision Tips
- Butcher Paper
- Isopropyl Alcohol
- Lint Free Cloth
- Optional: Star Pinchers
- Optional: Stop Fraying Glue (for ribbon)
Instructions
STEP 1: GET MY FREE SHOE TUMBLER WRAP DESIGNS
First, download my Shoe Tumbler Wrap designs from my free library – look for Design #605. Alternatively, you can use the Save This Project form near the top of this post and the design link will be emailed to you.
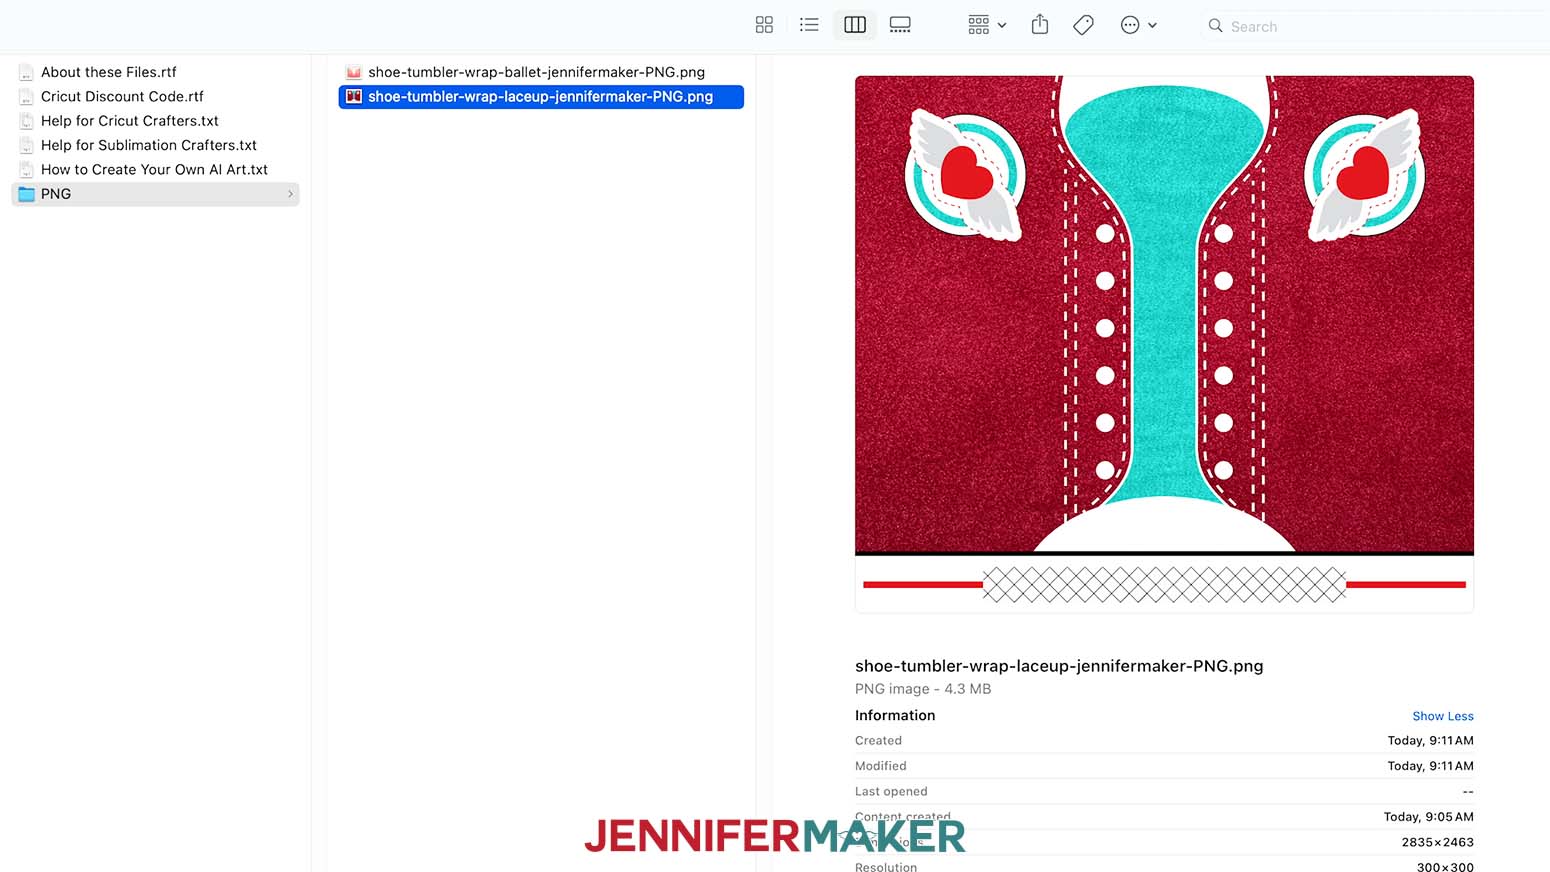
In the PNG folder, you’ll find one lace-up shoe design and one ballet shoe design.
TIP: If you’re not sure how to download zip files, go to jennifermaker.com/svgs because the steps are similar for PNGs and Google Docs.
STEP 2: PREPARE YOUR SHOE TUMBLER WRAP DESIGN
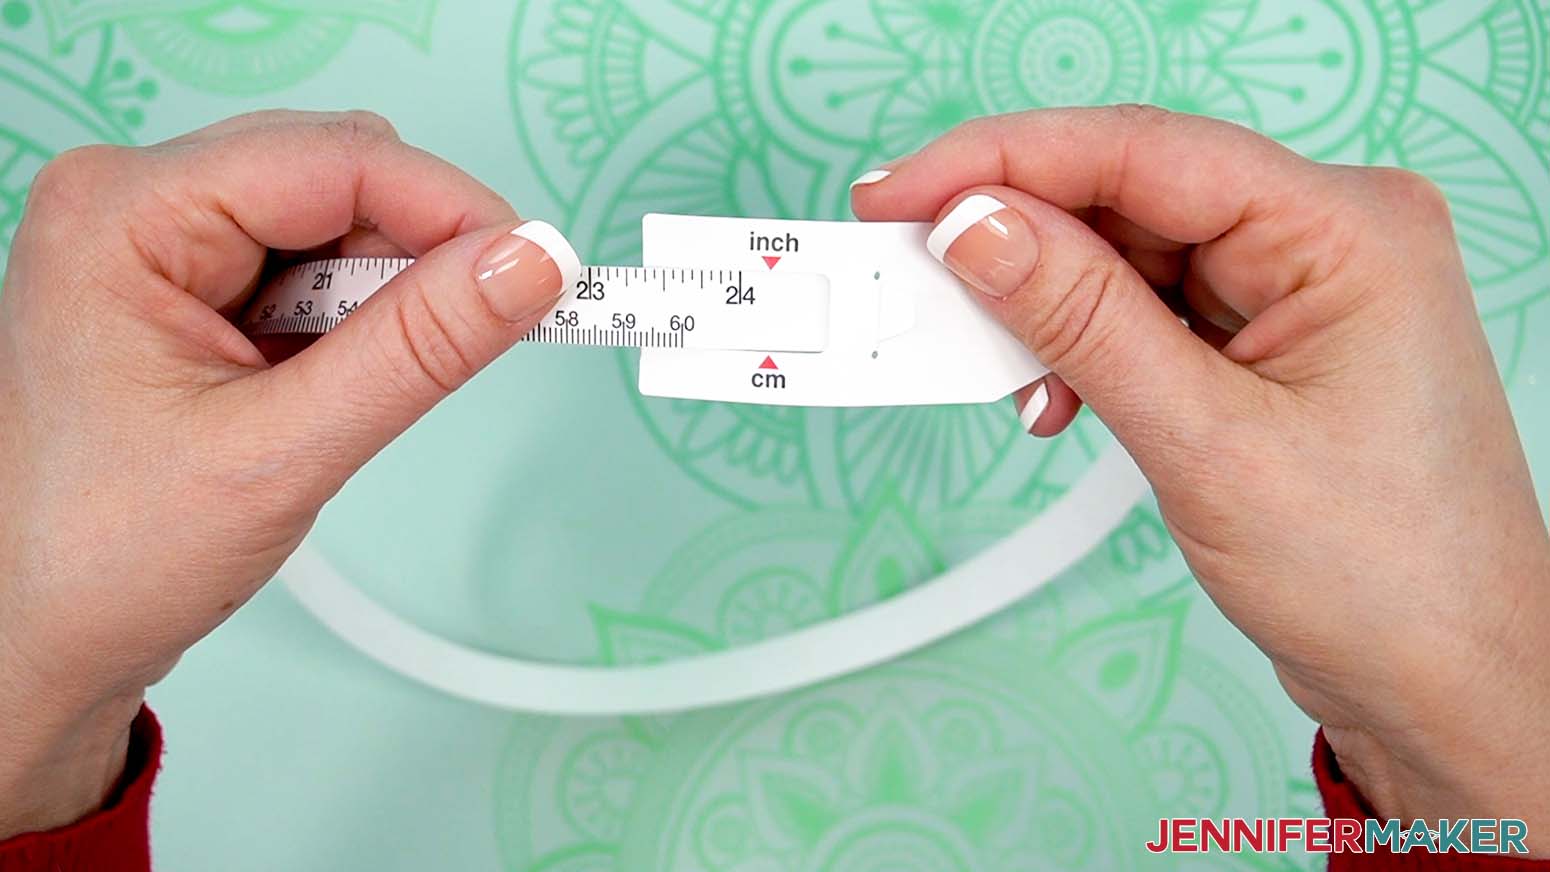
- Use a looped tape measure to find your tumbler’s circumference, or the measurement around the cup.
TIP: Feed the small edge through the window like a belt, then put it around the tumbler.
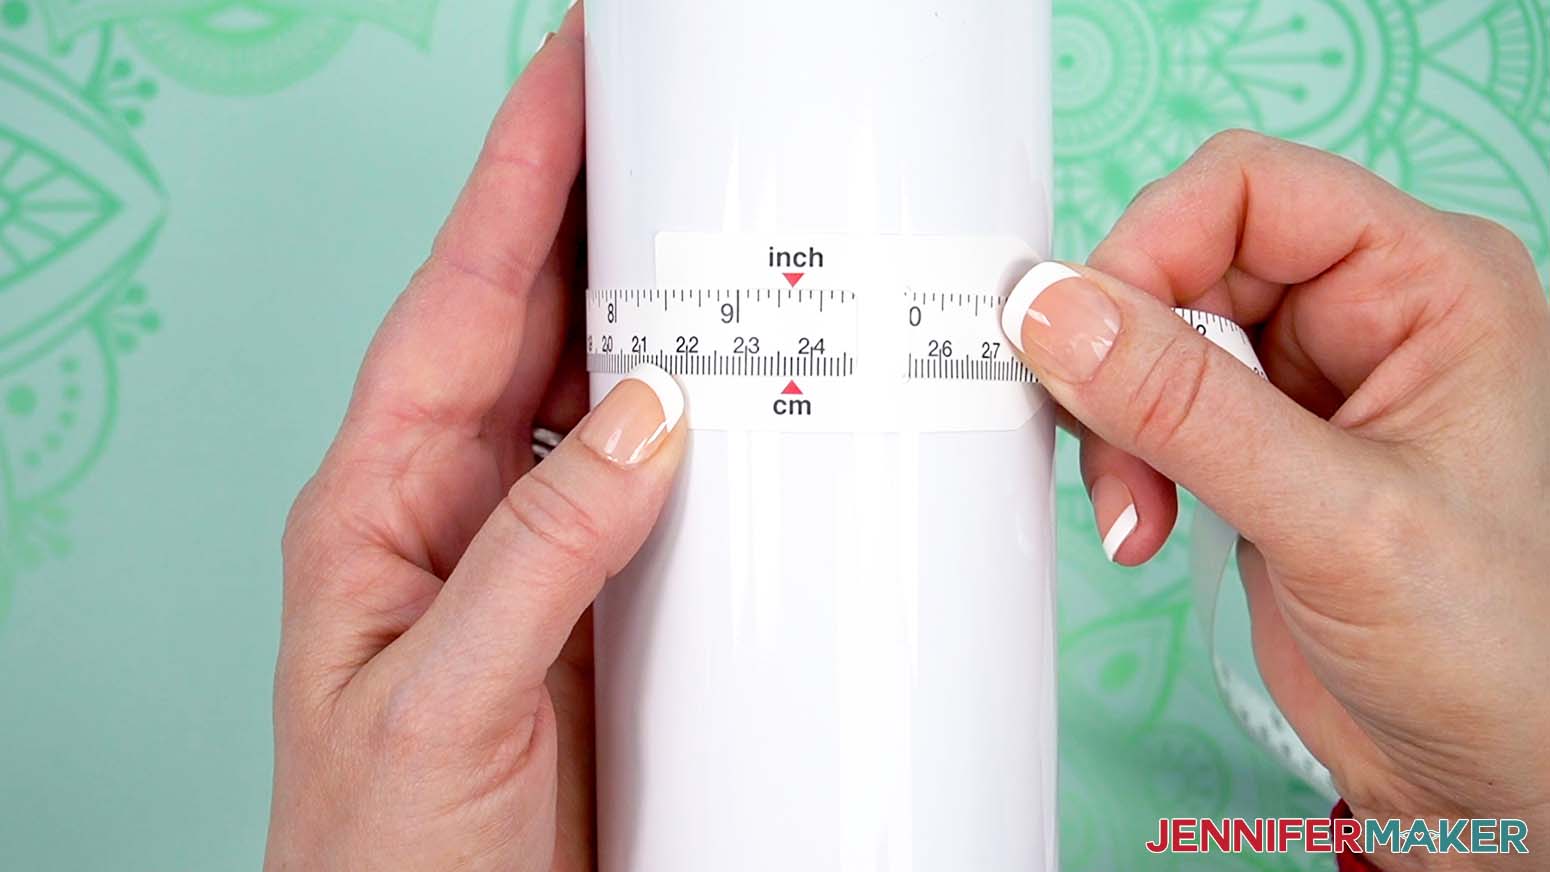
- Carefully pull the tape’s edges away from each other, keeping it straight and making the tape tight. The number at the arrows is your circumference!
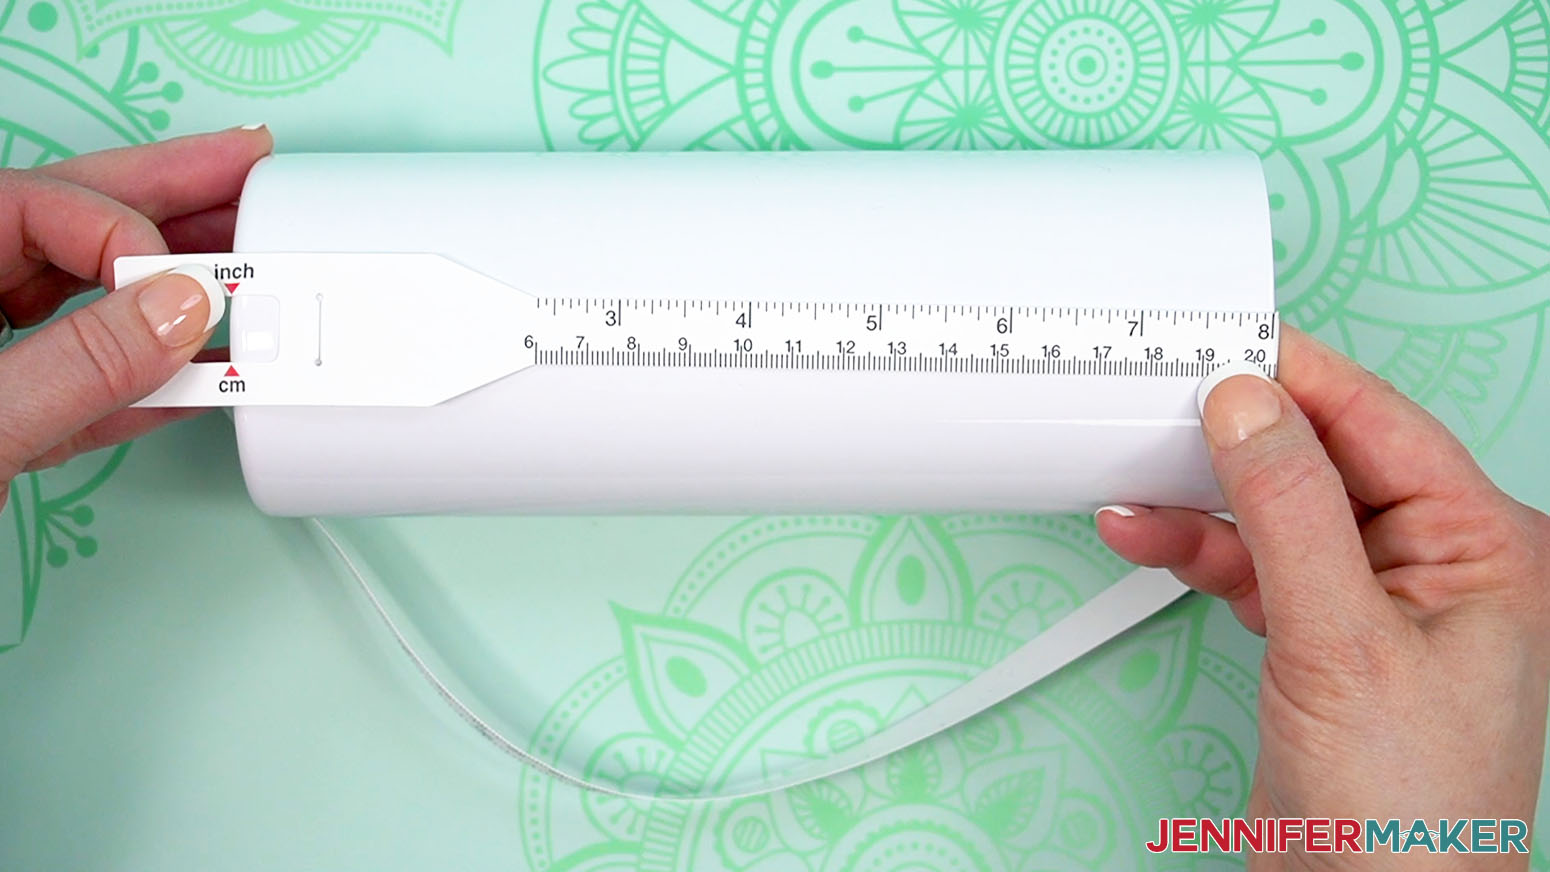
- Take the tape off, undo the loop, and use it to measure the height.
NOTE: Keep it straight and don’t include any area without the sublimation coating, like a metal lip. - Mine is 8" tall and 9.3” around, so my design area is 9.3” wide and 8” tall, without accounting for the seam.
- Add 1/8 - 1/4” (.125” - .25”) to your height measurement to make sure you’ll cover the entire white area, and add 1/16 - 1/8” (.0625” - .125”) to the width to allow for a slight overlap at the seam.
NOTE: I planned to make my tumbler design at 9.45” wide and 8.21” tall for use with the 20 oz. straight tumbler from my materials list. - Open Google Docs in the Google Chrome web browser on your computer.
NOTE: You will need a free Google account to use the free Google Docs software.
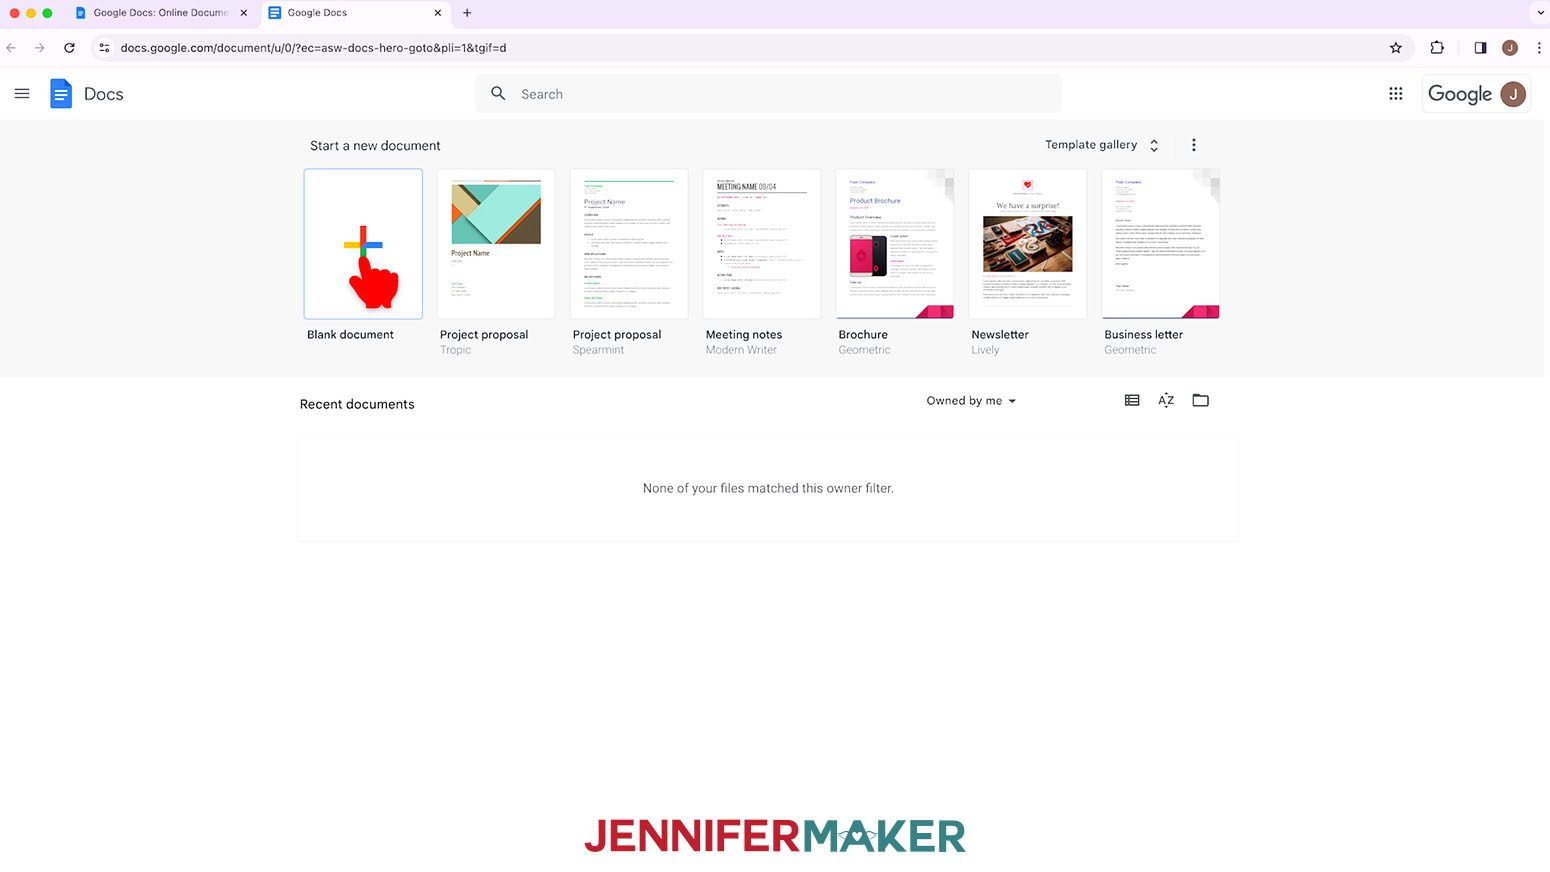
TIP: You can also download and open the Google Docs app, but be aware that you won’t be able to install or access any printer profiles from a mobile device, and you’re also limited in features, so I do not recommend it on a mobile device. - Click “Blank document” to open a new document.
- Go to the File menu and select “Page setup.”
- Check the box next to “Landscape” to better match the blank.
- Change your margins to “0” to use more of the page.
- Change your Paper Size to match your sublimation paper size. I’m using 8.5” x 11” or letter-size paper.
- Click “OK” to apply the settings.
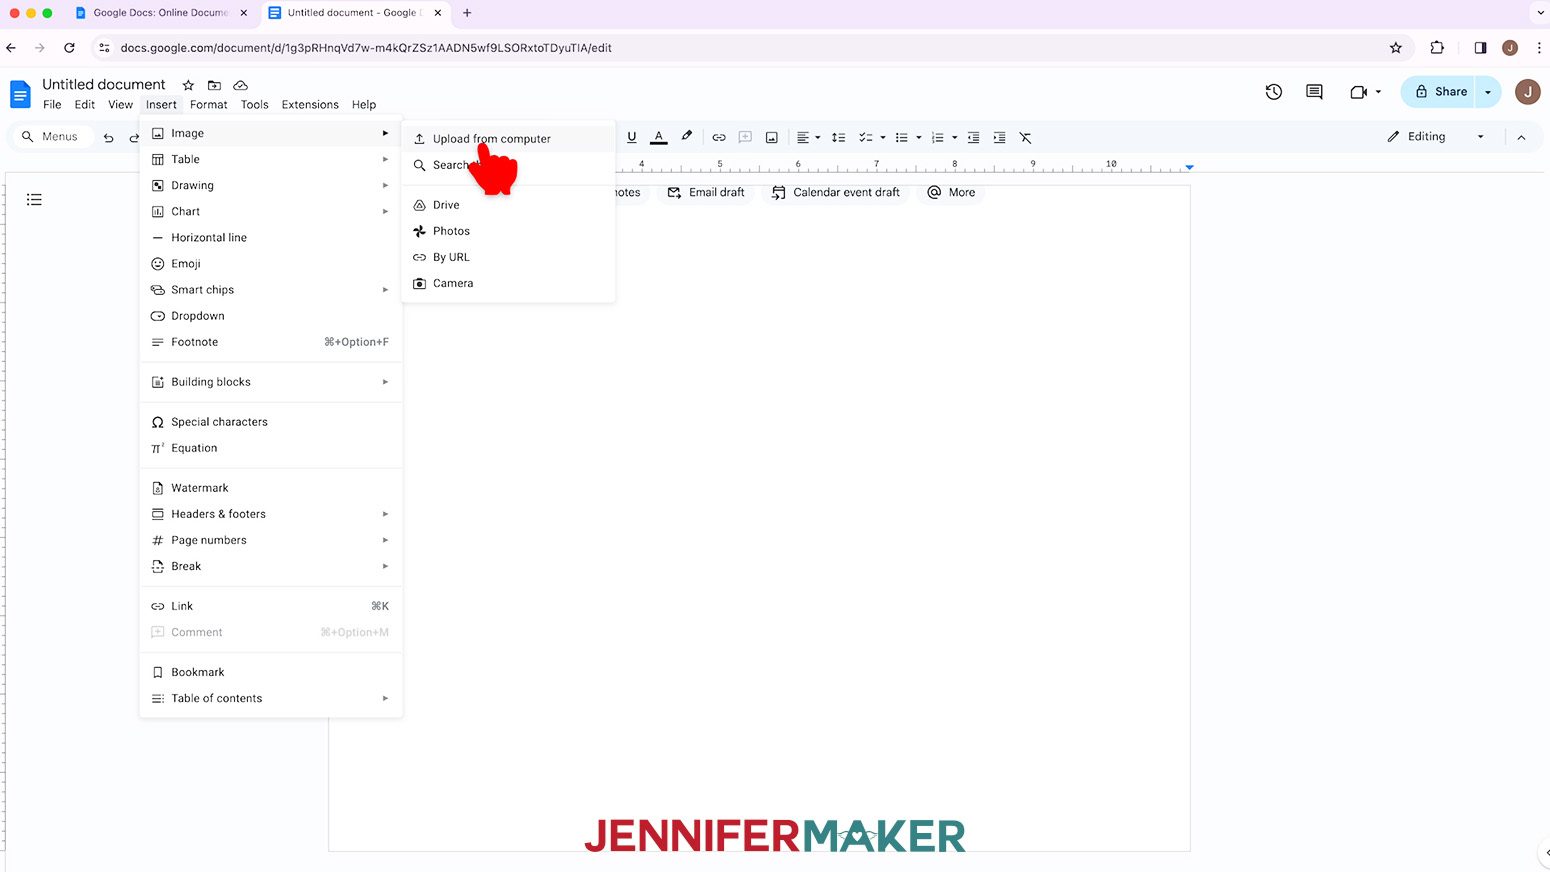
- Go to the Insert menu, select “Image,” and select “Upload from Computer.”
- Select the sublimation design you want to use.
TIP: It’s probably in your Downloads folder. - Click “Open.”
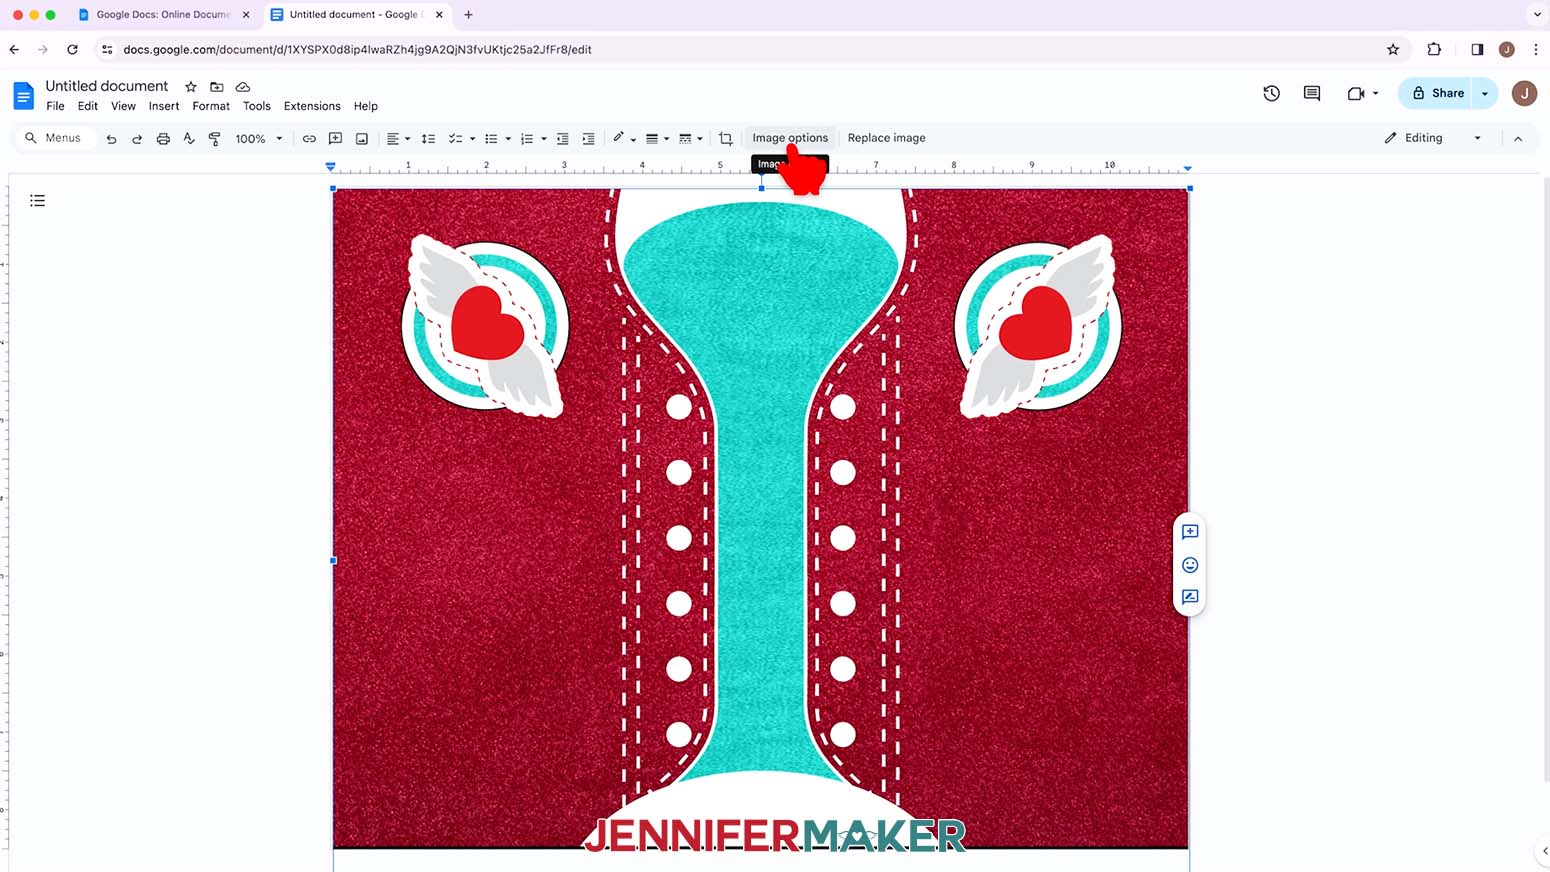
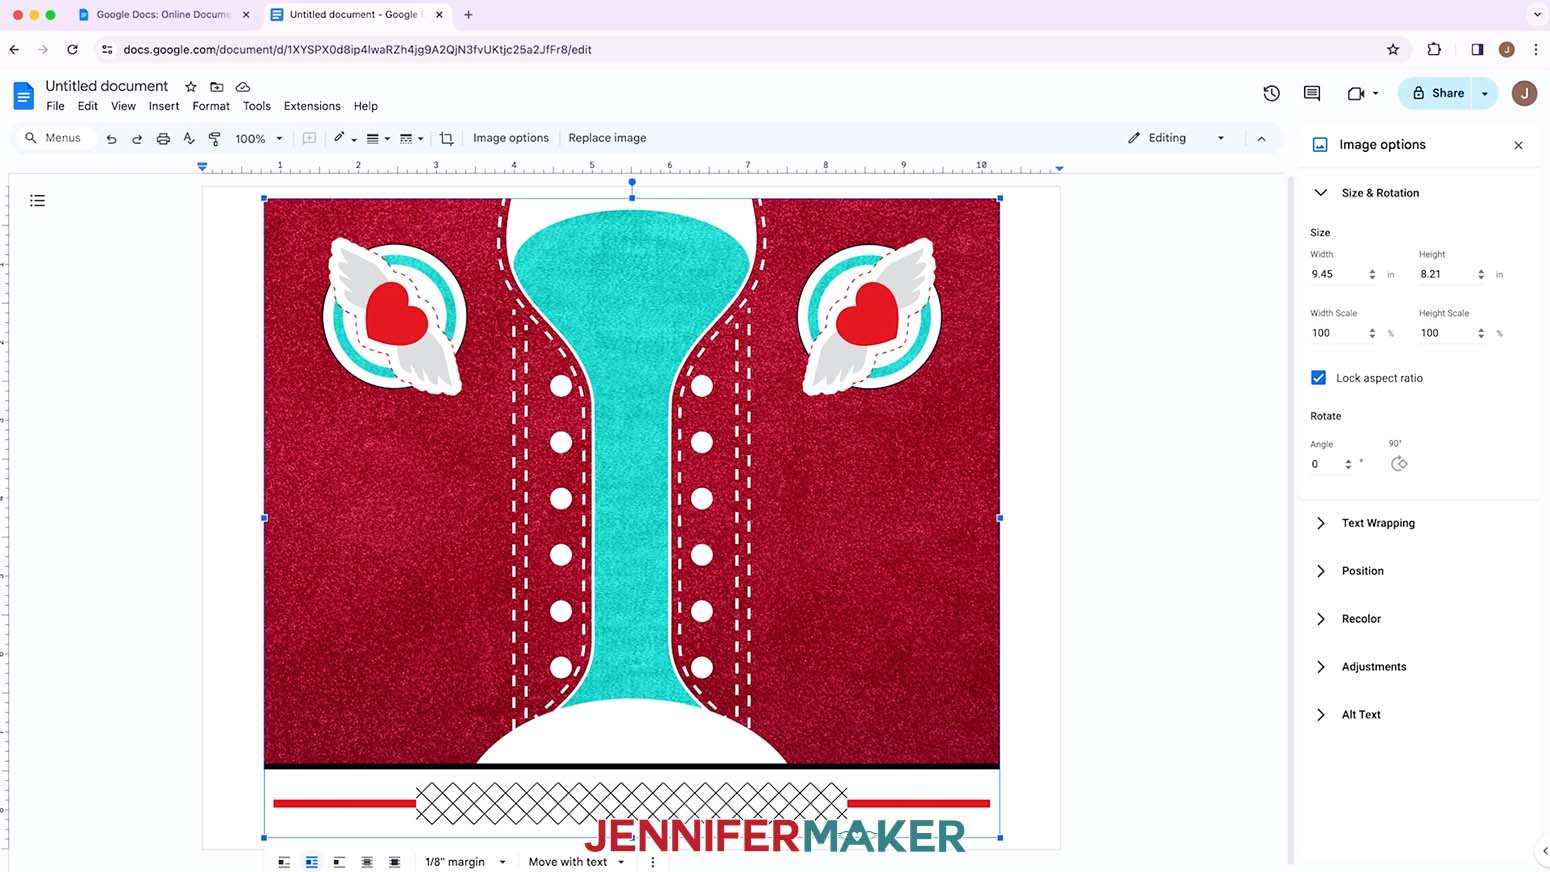
- To resize the design, right-click the image and select “Image Options.”
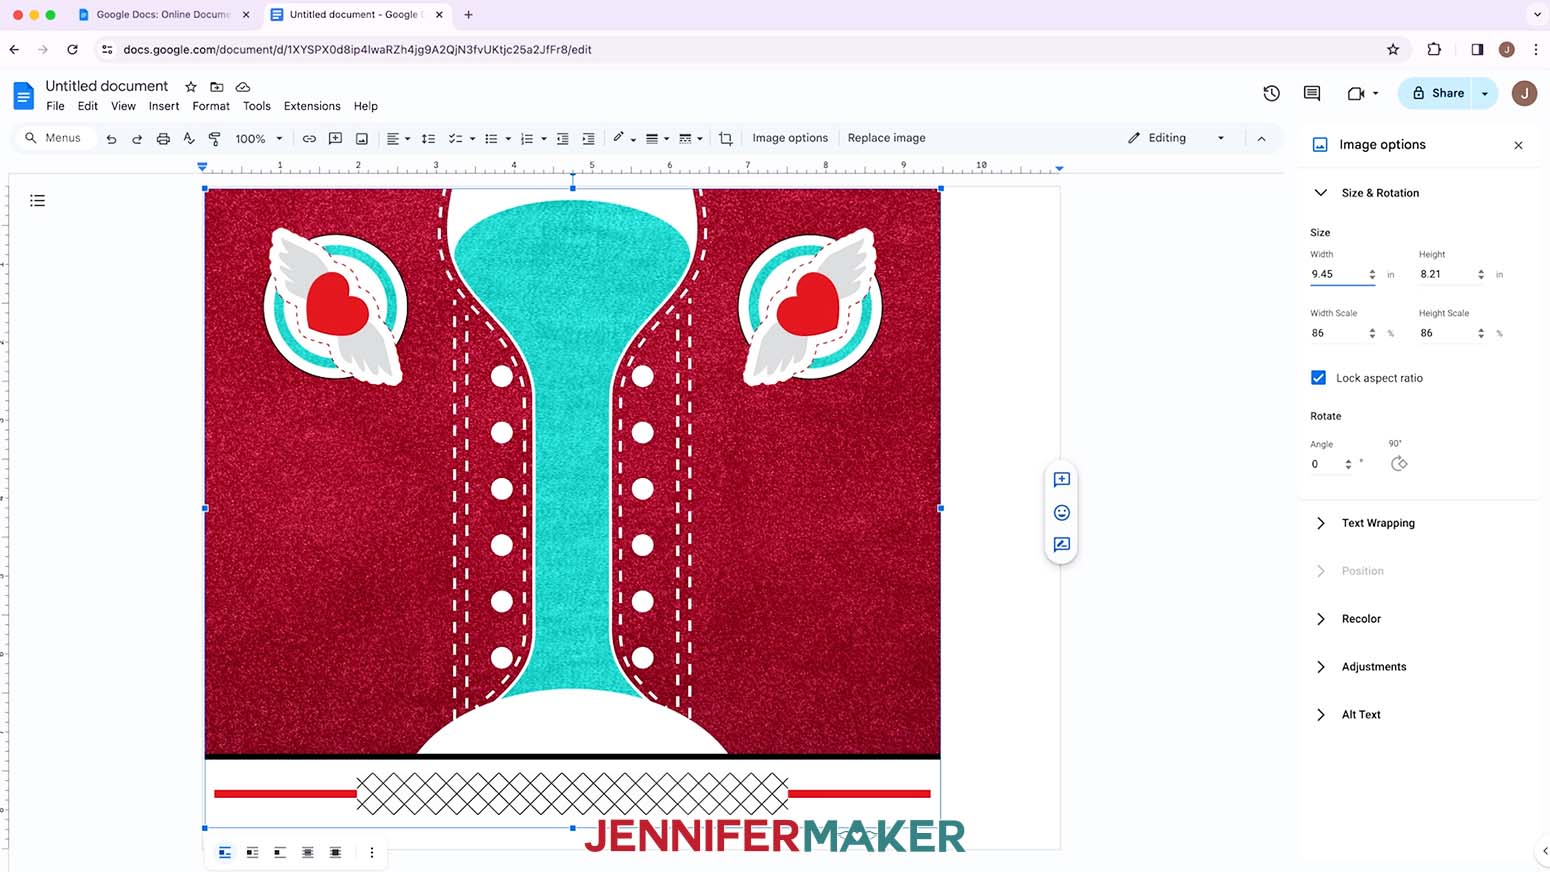
- Select “Size & Rotation.”
- Keep the “Lock aspect ratio” box checked to maintain the design’s proportions.
- Change the “Width” field to the measurement you recorded when measuring the tumbler, including the addition for the seam overlap. The Height will automatically adjust proportionately.
NOTE: I made mine 9.45” x 8.21.” - Click the image and select the “Wrap text” icon from the menu that appears below it.
- Click and drag the image to the center of your page, as that ensures it won’t get cut off at the edges and you have plenty of space for cutting the edges.
- Double-click the area that says “Untitled document” at the top and type a name for the file.
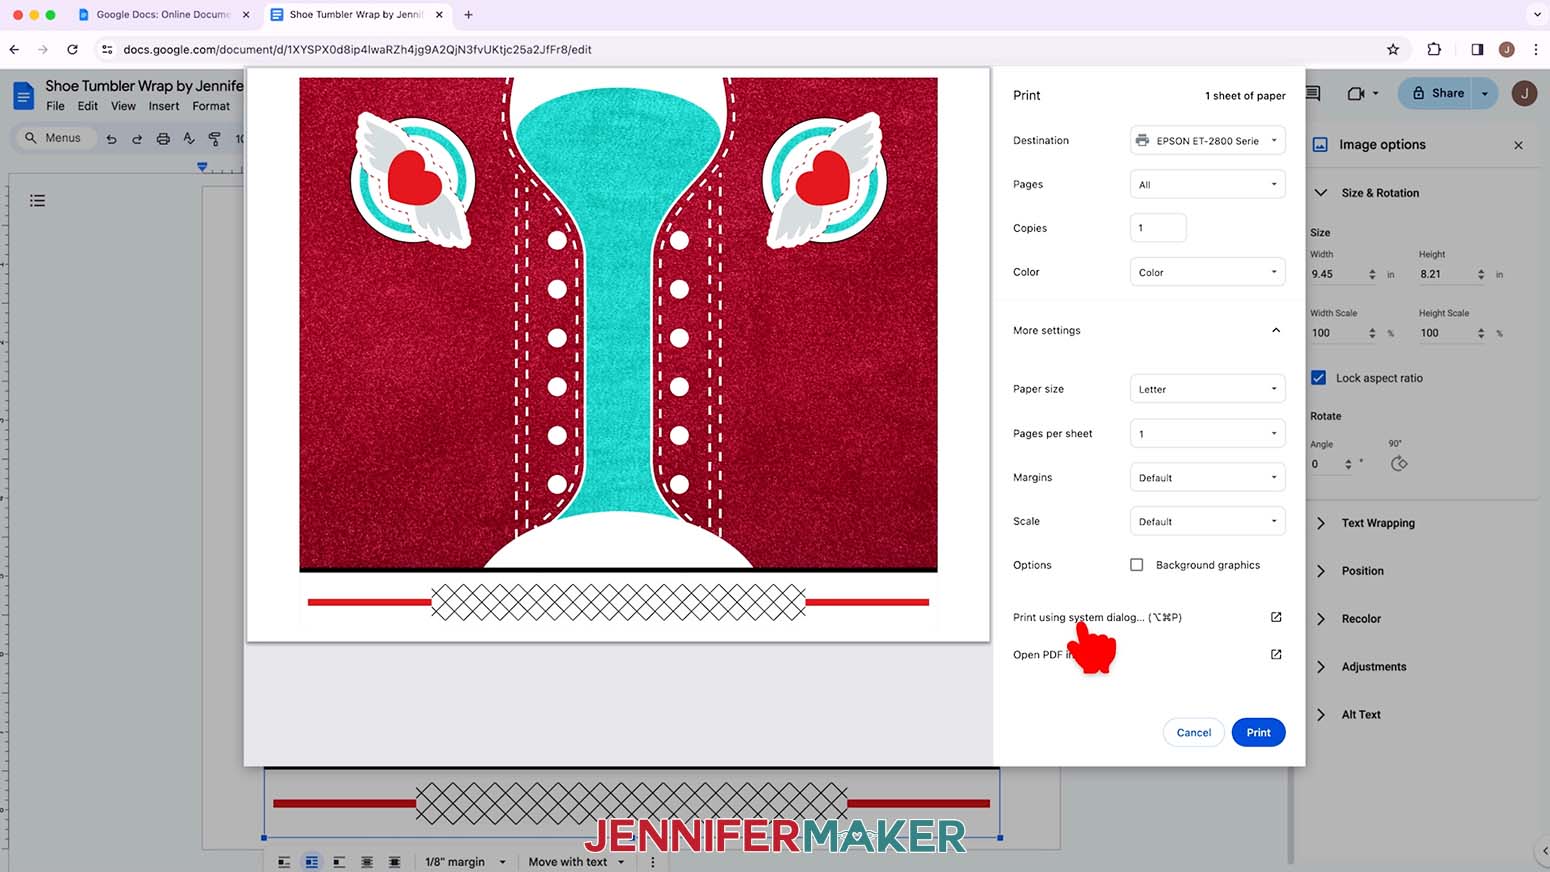
- Go to the File menu and choose “Print.”
- Select your printer under “Destination.”
- Click the arrow beside “More Settings” and select “Print Using System Dialog.”
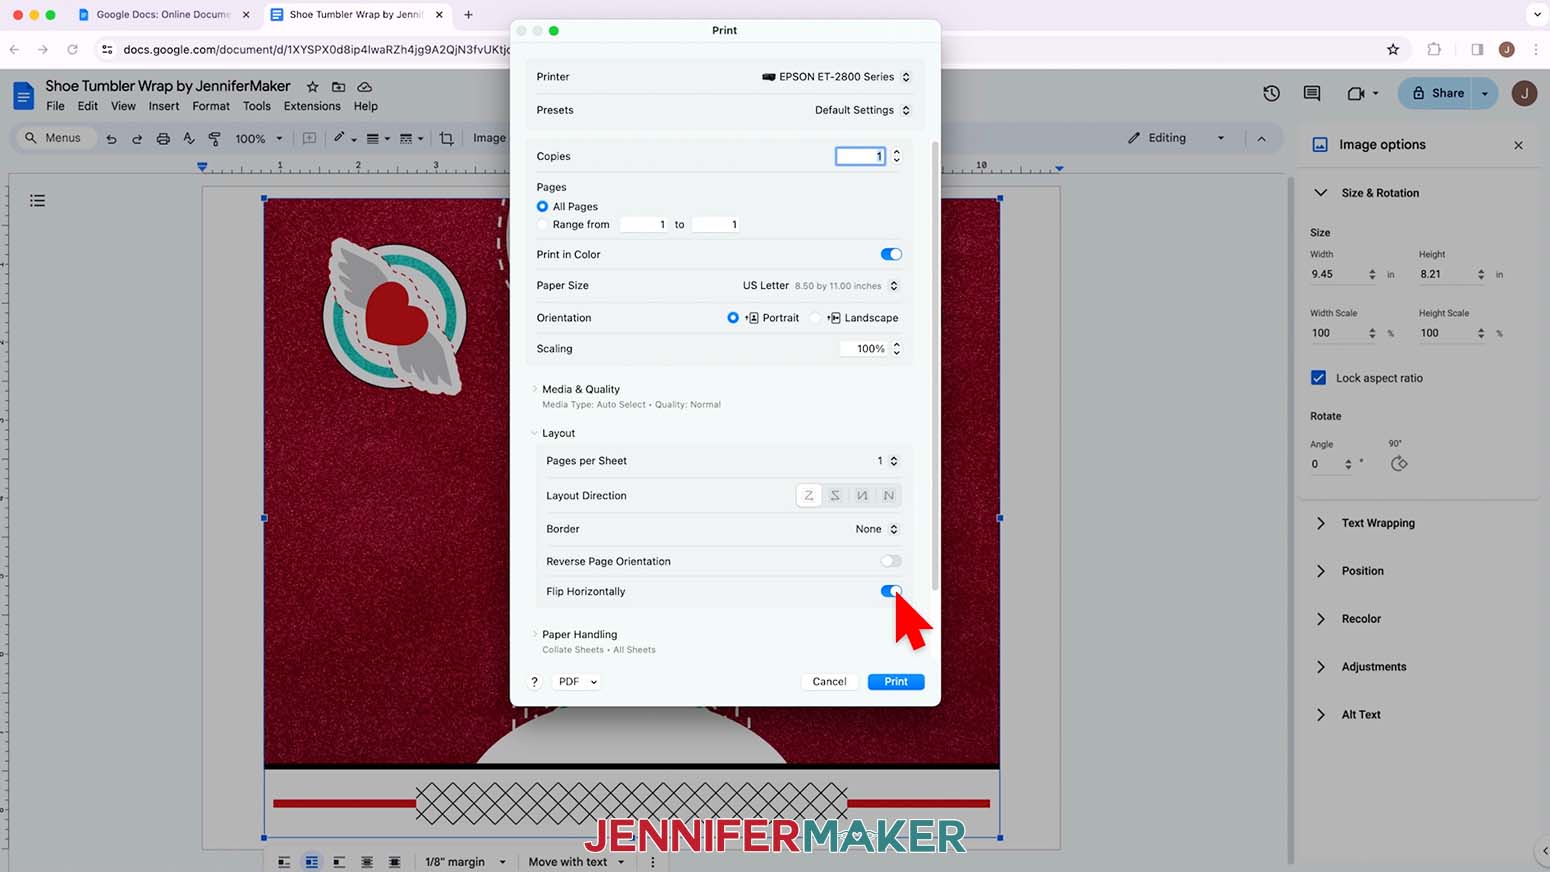
- Your print menu may look different - make sure you “mirror” the print and select the highest quality matte paper setting.
- Load sublimation paper correctly into your sublimation printer.
NOTE: Check the packaging for information on how to load the paper. - Click “Print.”
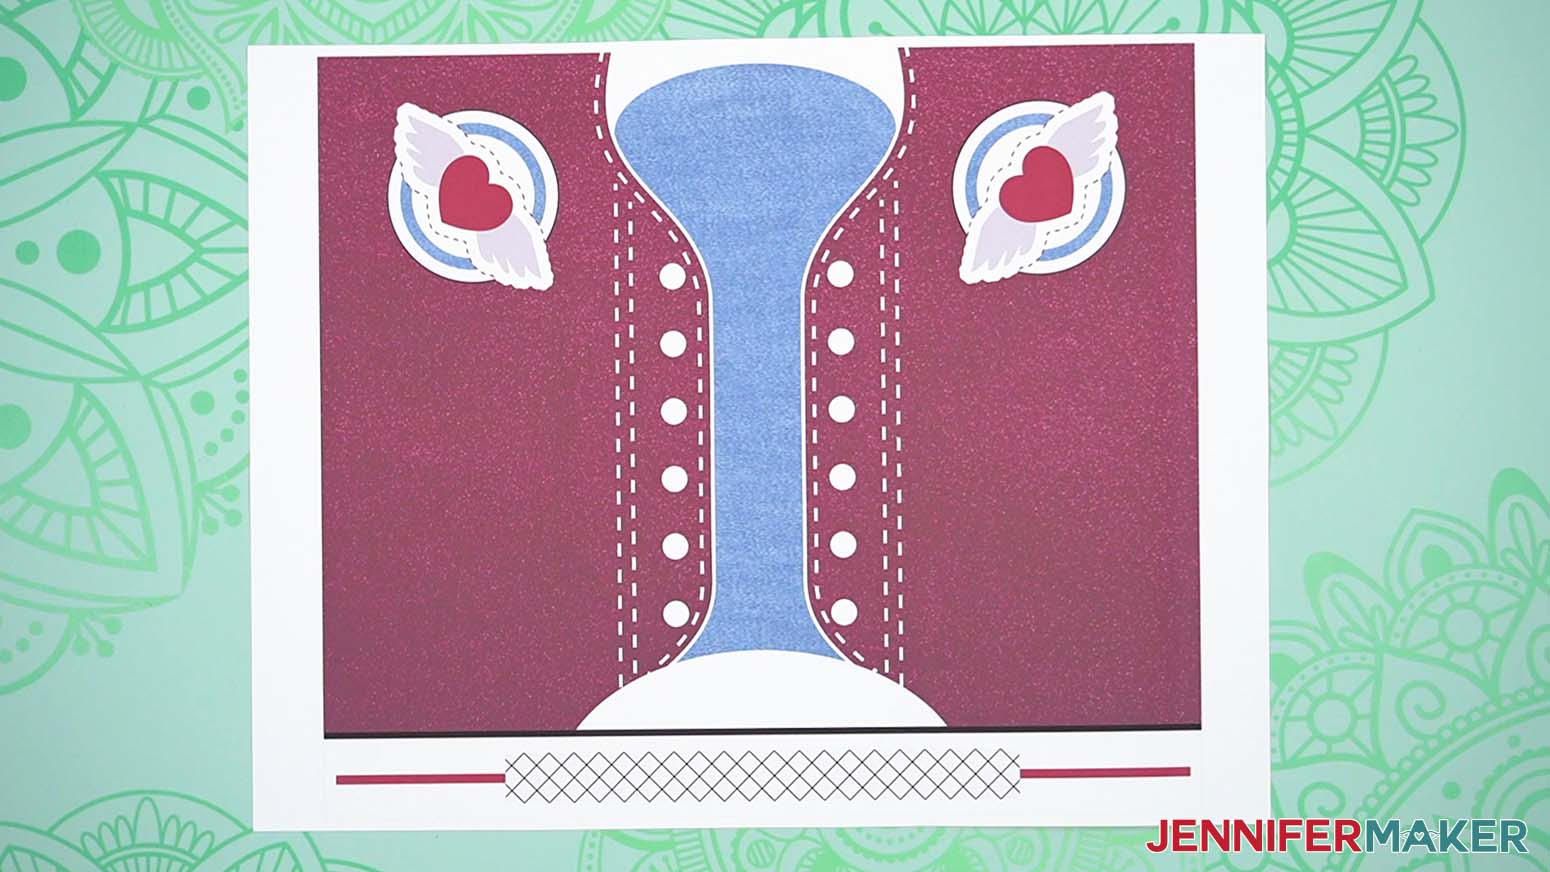
- Allow the print to dry before handling it, as the ink can smear.
NOTE: The printed designs will appear lighter before pressing.


STEP 3: SUBLIMATE YOUR SHOE TUMBLER
IMPORTANT: As with all sublimation projects, turn on a fan and open a window to improve your ventilation before beginning.
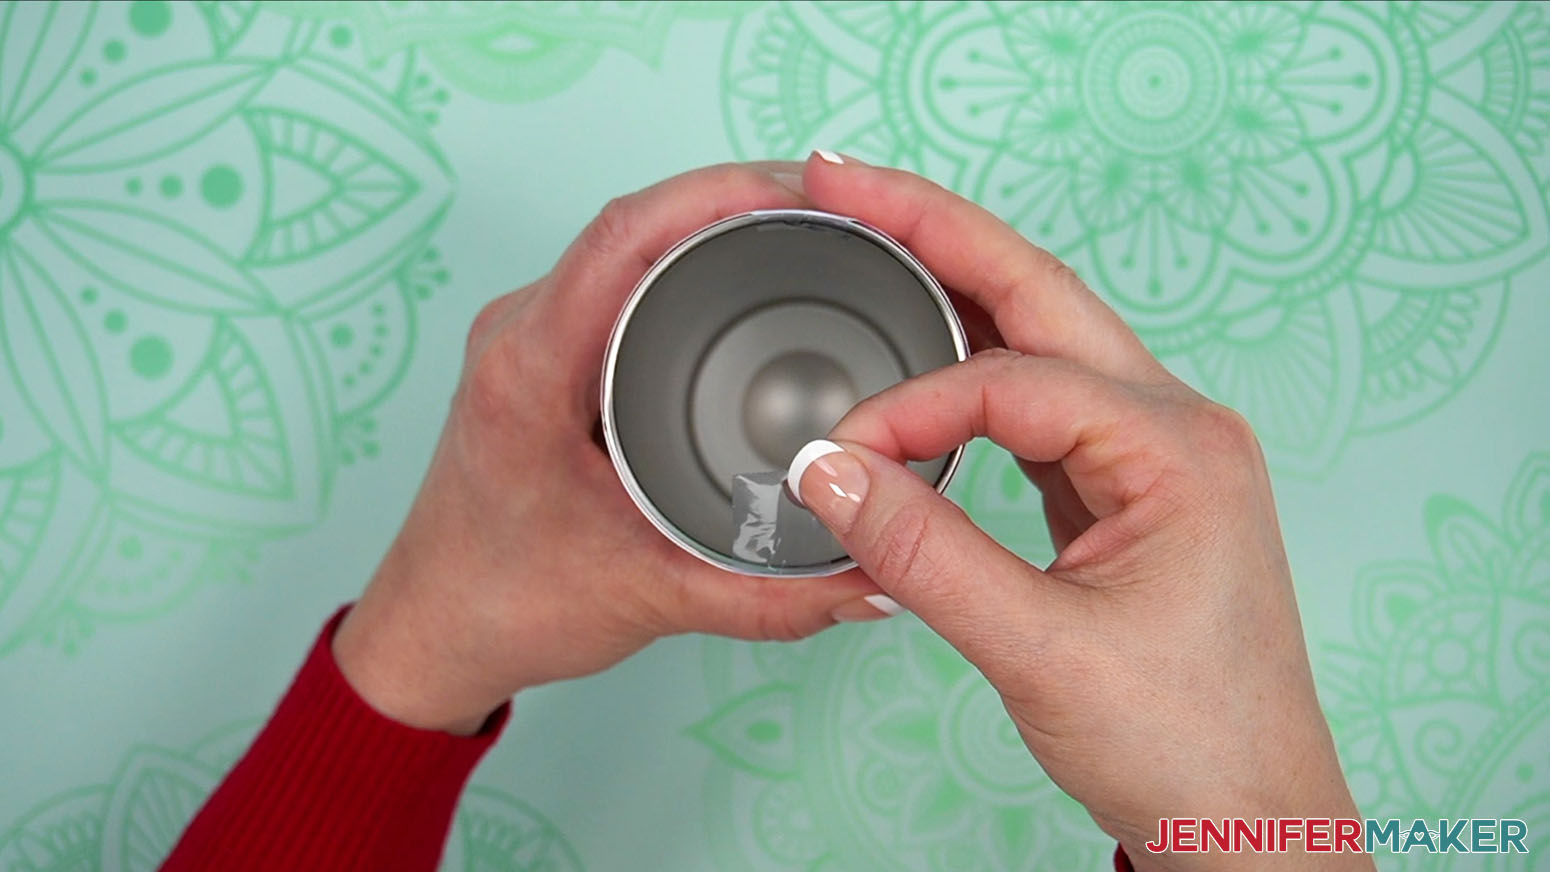
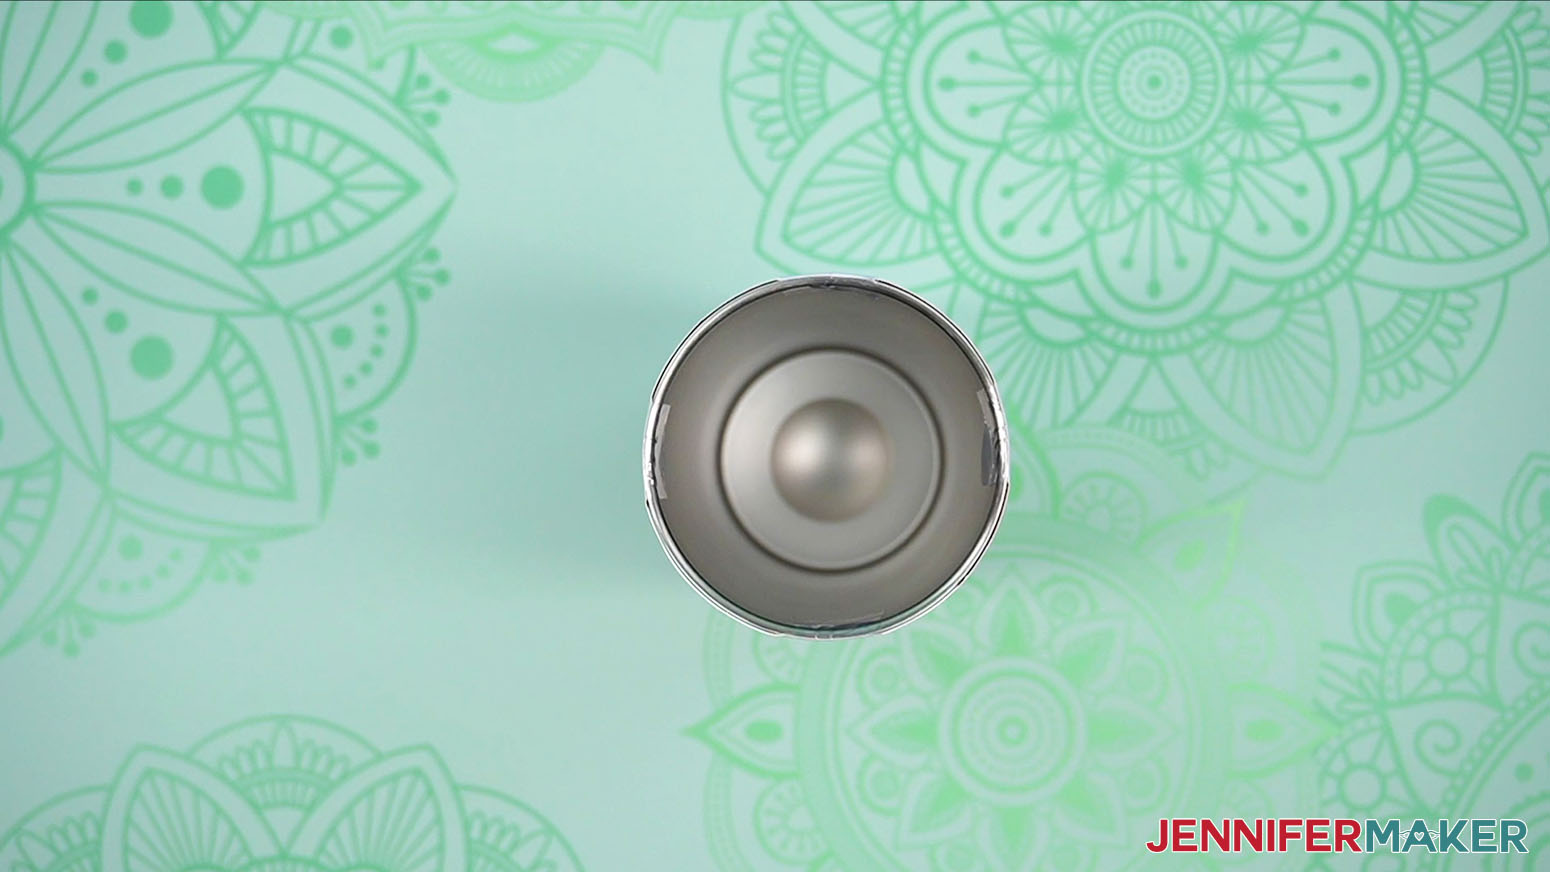
- Use a lint-free cloth or a coffee filter with some rubbing alcohol to clean the tumbler for a better transfer.
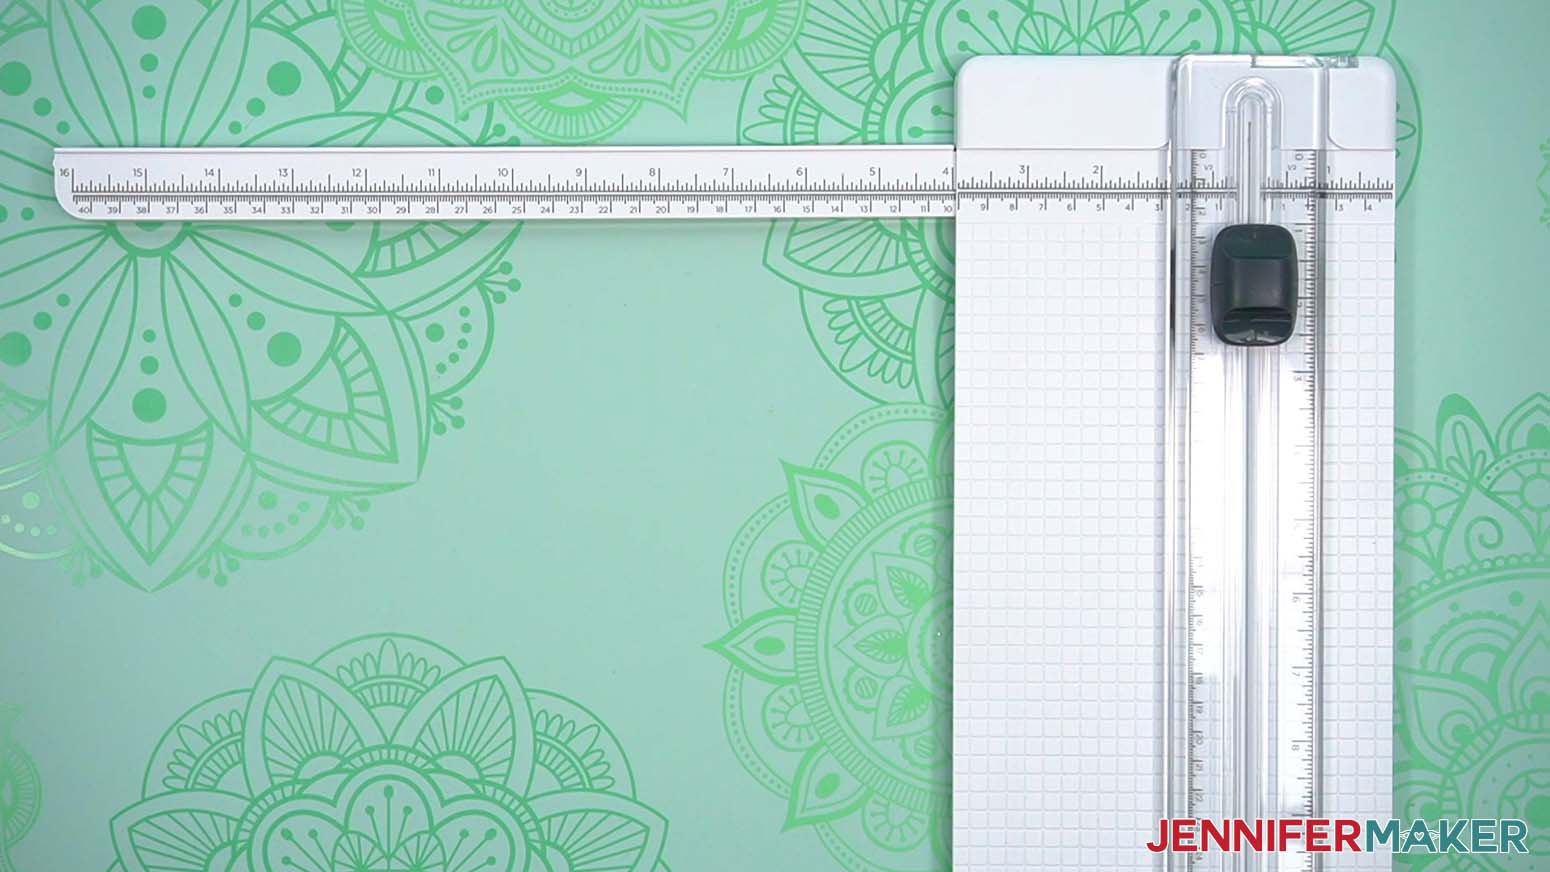
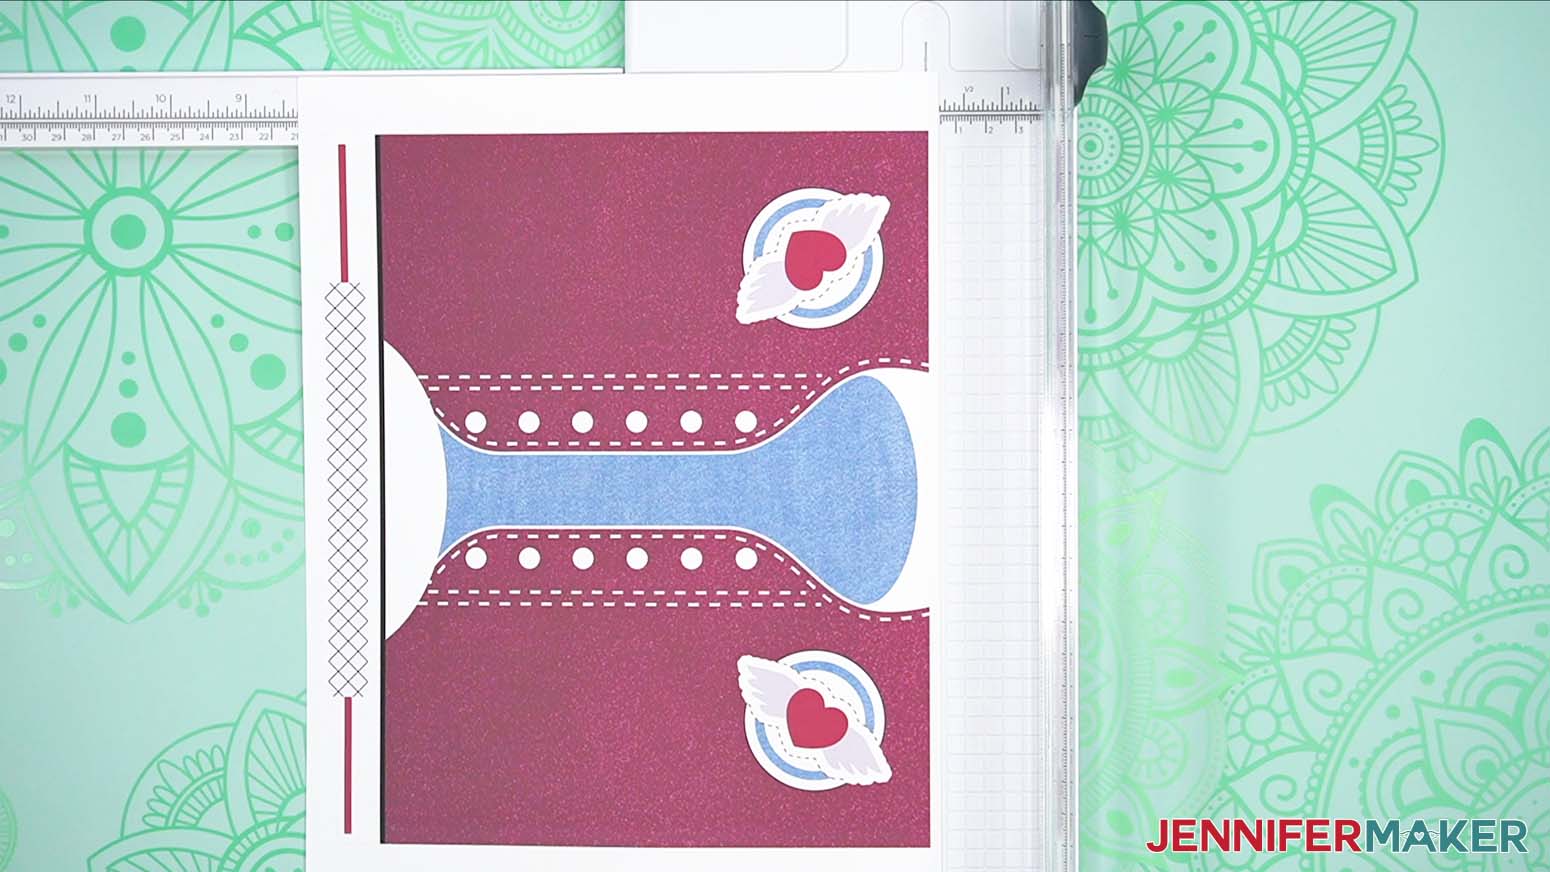
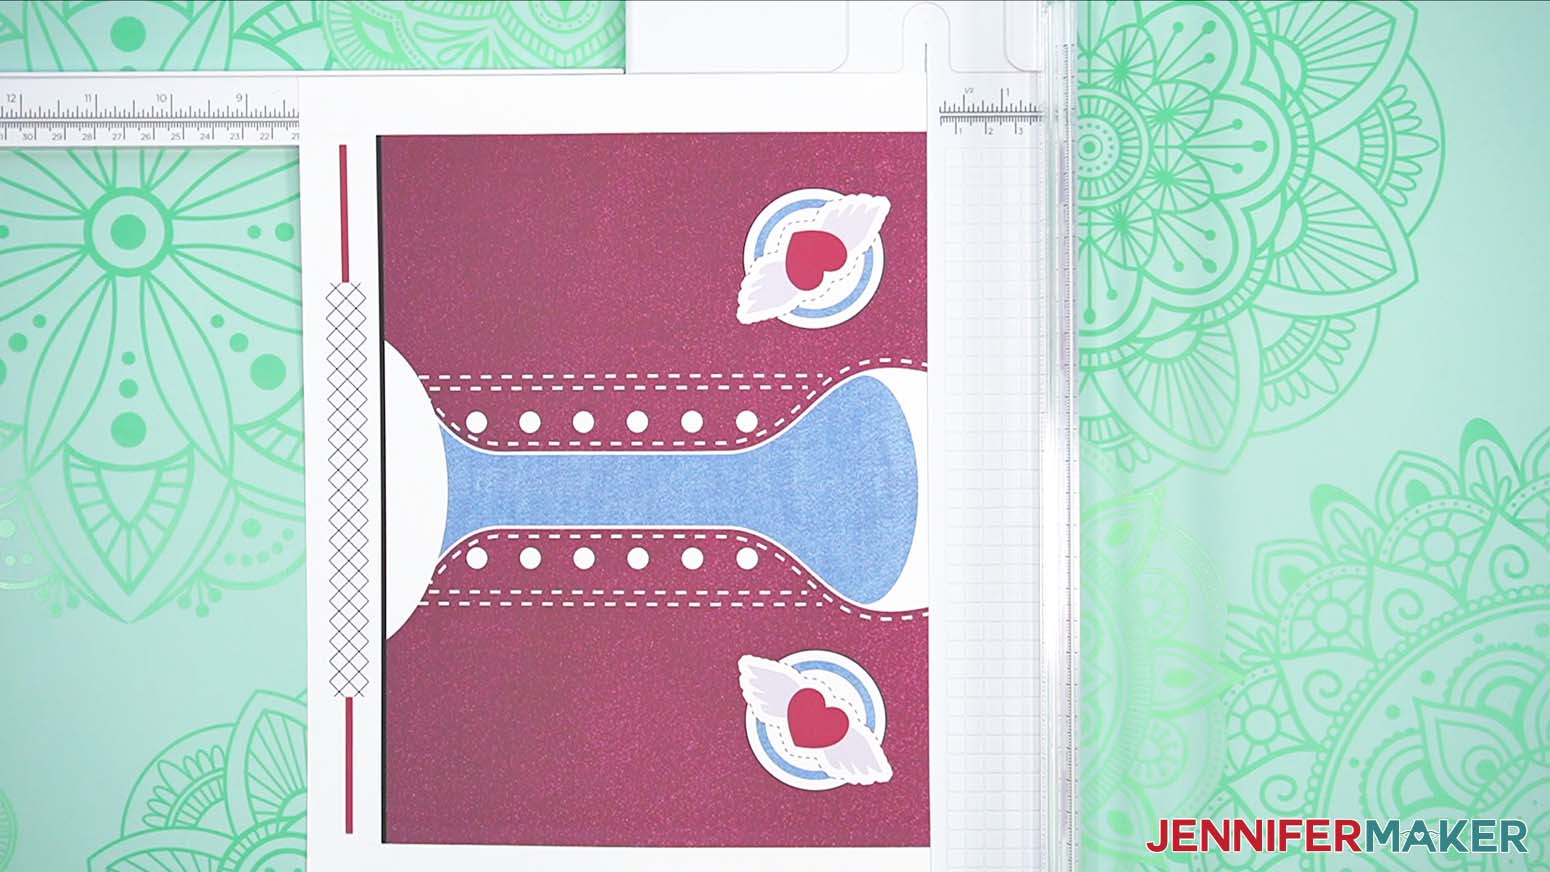
NOTE: Since we want to avoid a gap or distracting seam when we wrap the design around the tumbler, there's a special way to trim the design. You can use scissors, but a paper trimmer will make straight cuts that are easier to use. - Place the printed image face up so the upper edge of the ink is along the cutting line.
- Press the paper up against the top guide to make sure the cut will be straight.
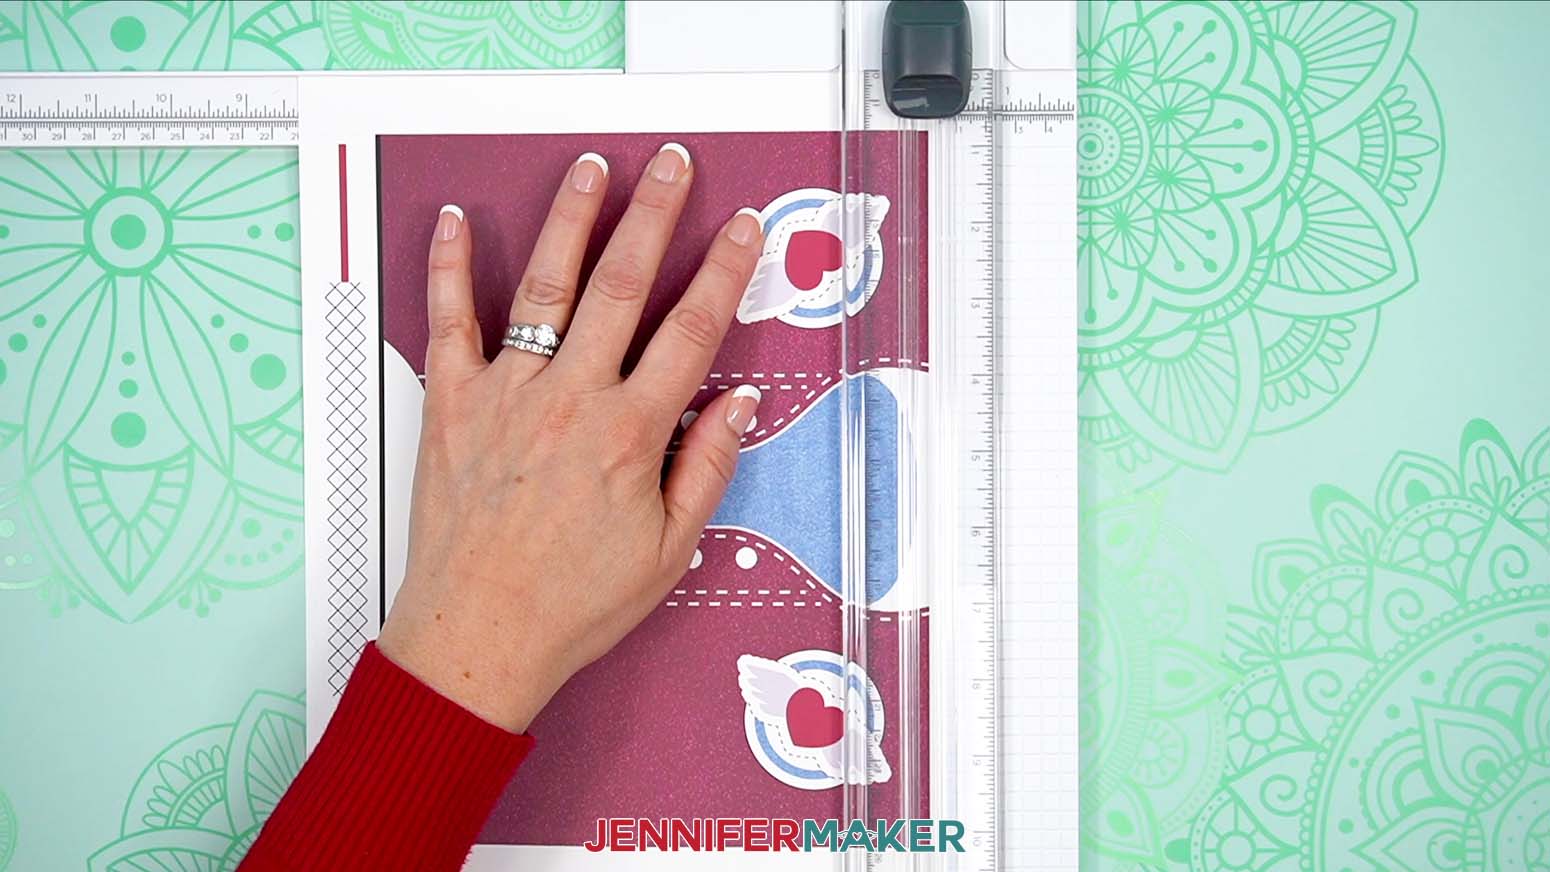
- Hold the paper in place and lower the fold-down ruler with the blade onto your material.
NOTE: You can press down on the ruler to keep the material in position, just don’t get close to the blade. - Use your other hand to press and drag down on the blade and draw it down the straight line in a smooth motion.
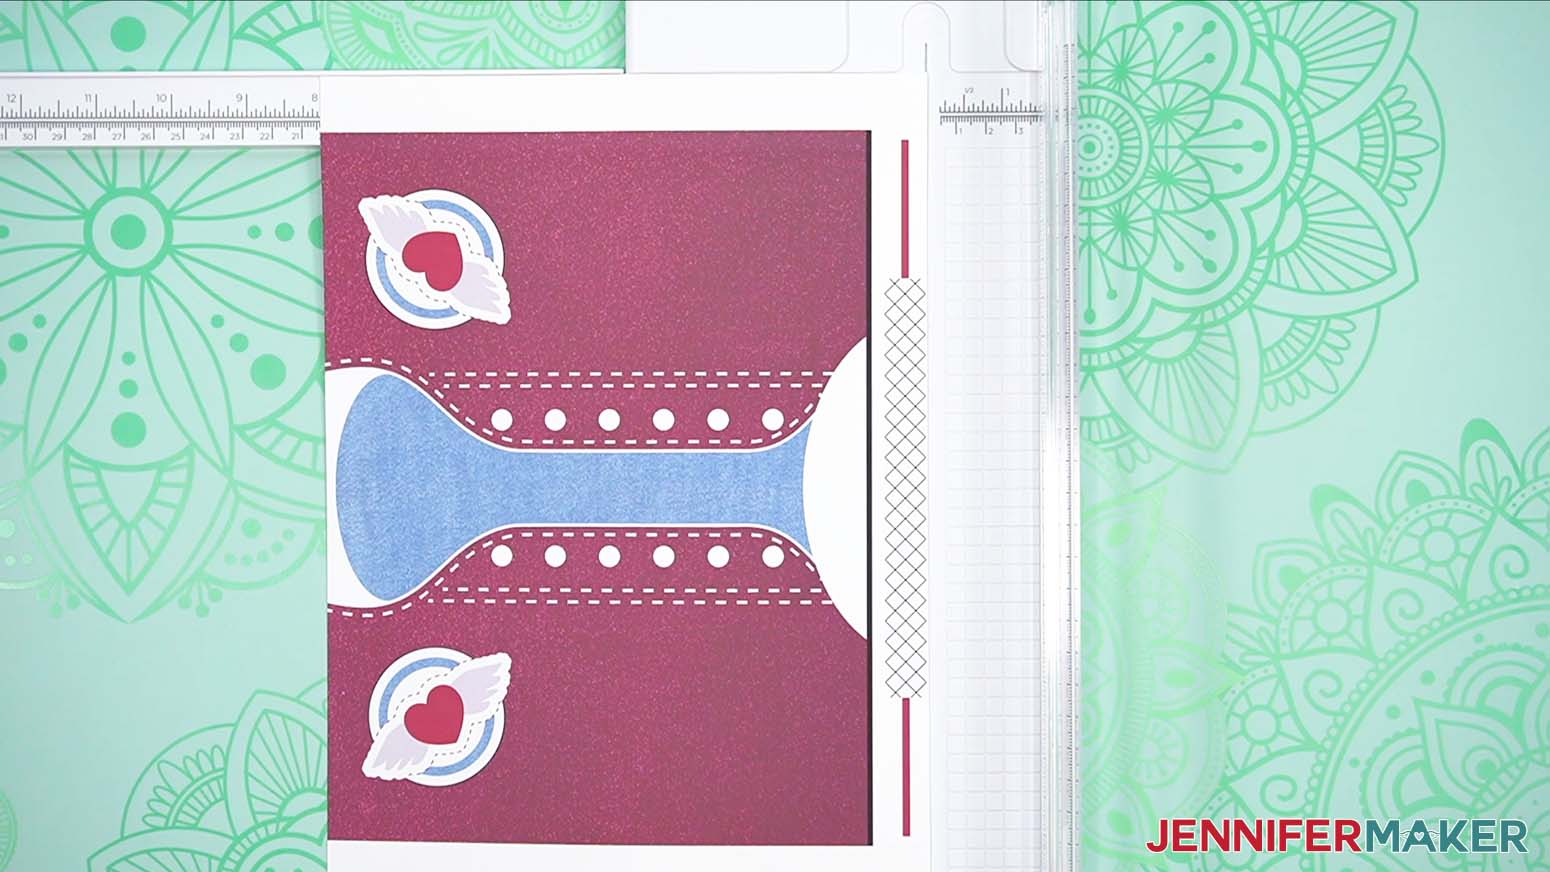
- Then, lift the ruler and rotate the paper 180 degrees so the bottom section is ready to cut.
- Line it up the same way and repeat the cut.
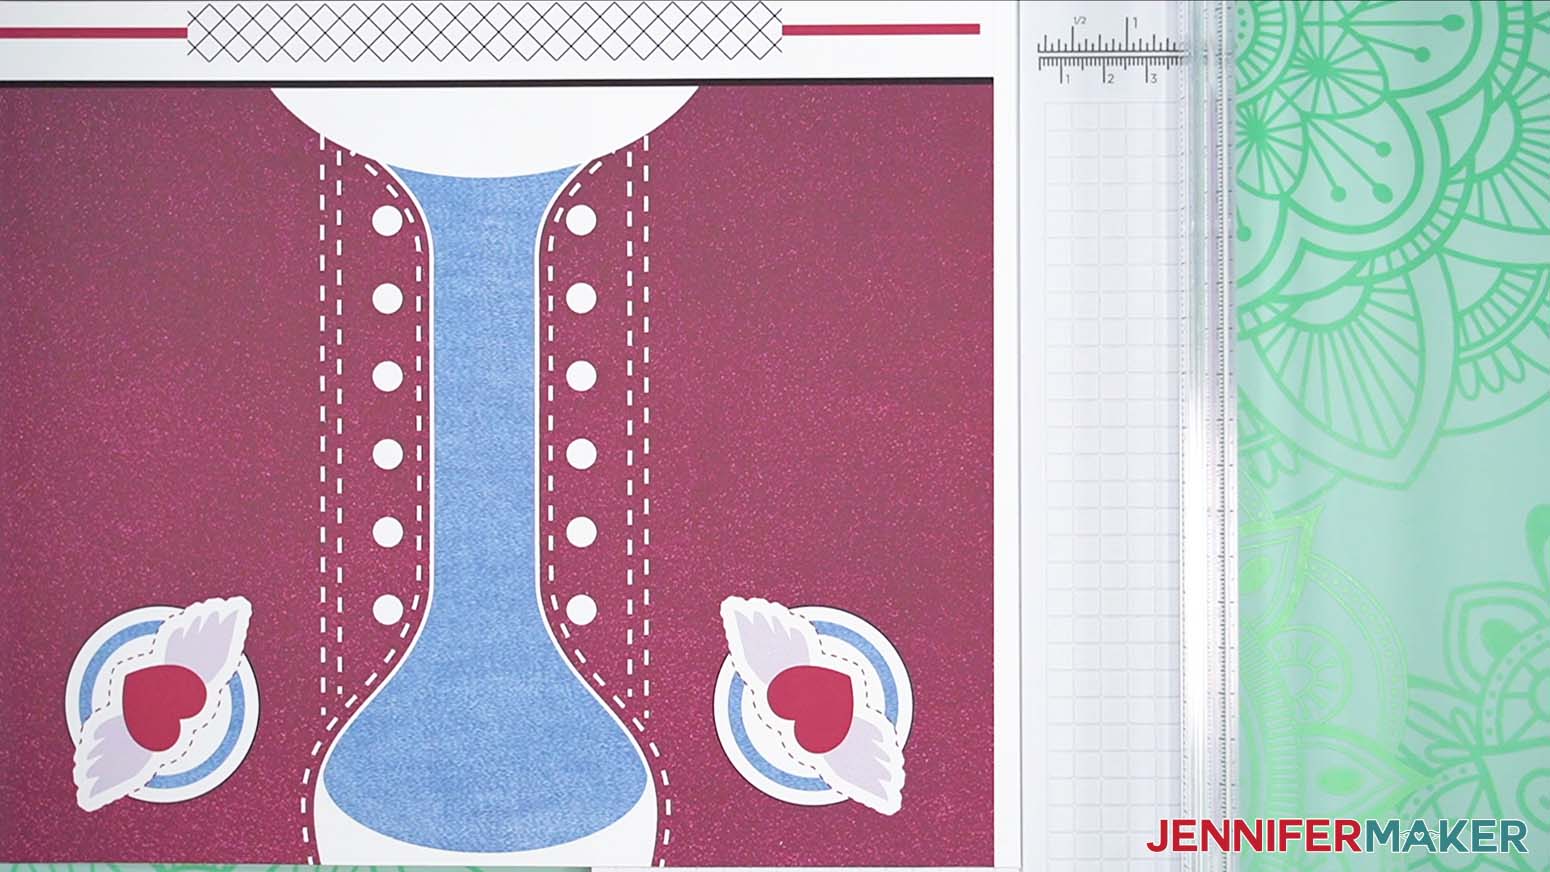
- Decide which hand you'll use to apply the tape on the seam and trim all the white away on that edge.
- Leave about ¼” white next to the final edge, which you’ll use to pull the wrap tight with tape later.
- Grab your heat-resistant tape and cut a few pieces that you can easily pick up.
- Place the tumbler on your work surface with the open edge at the top.
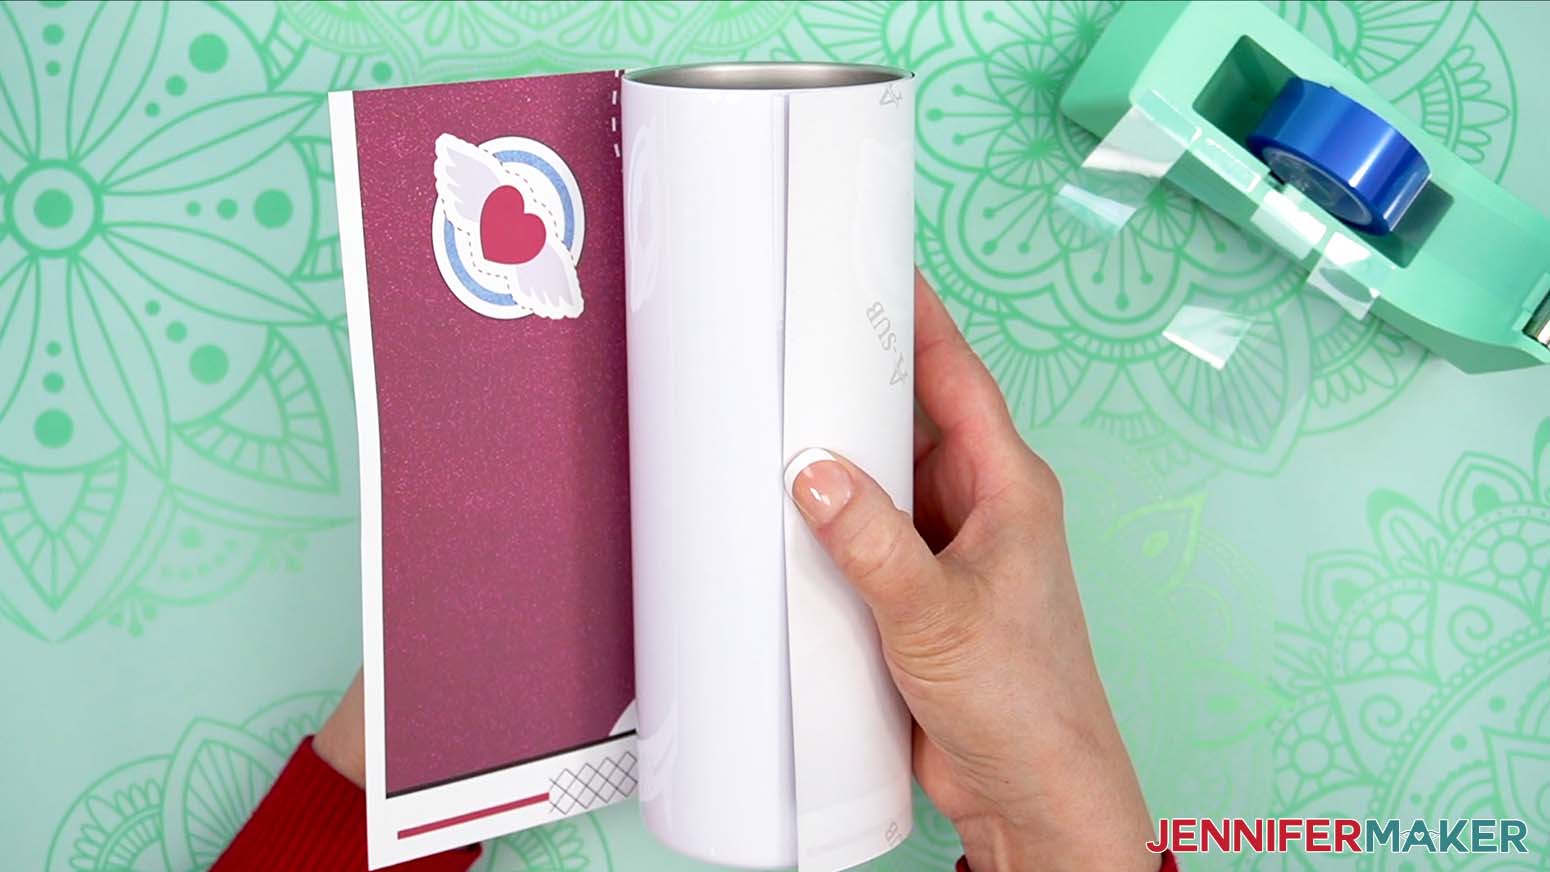
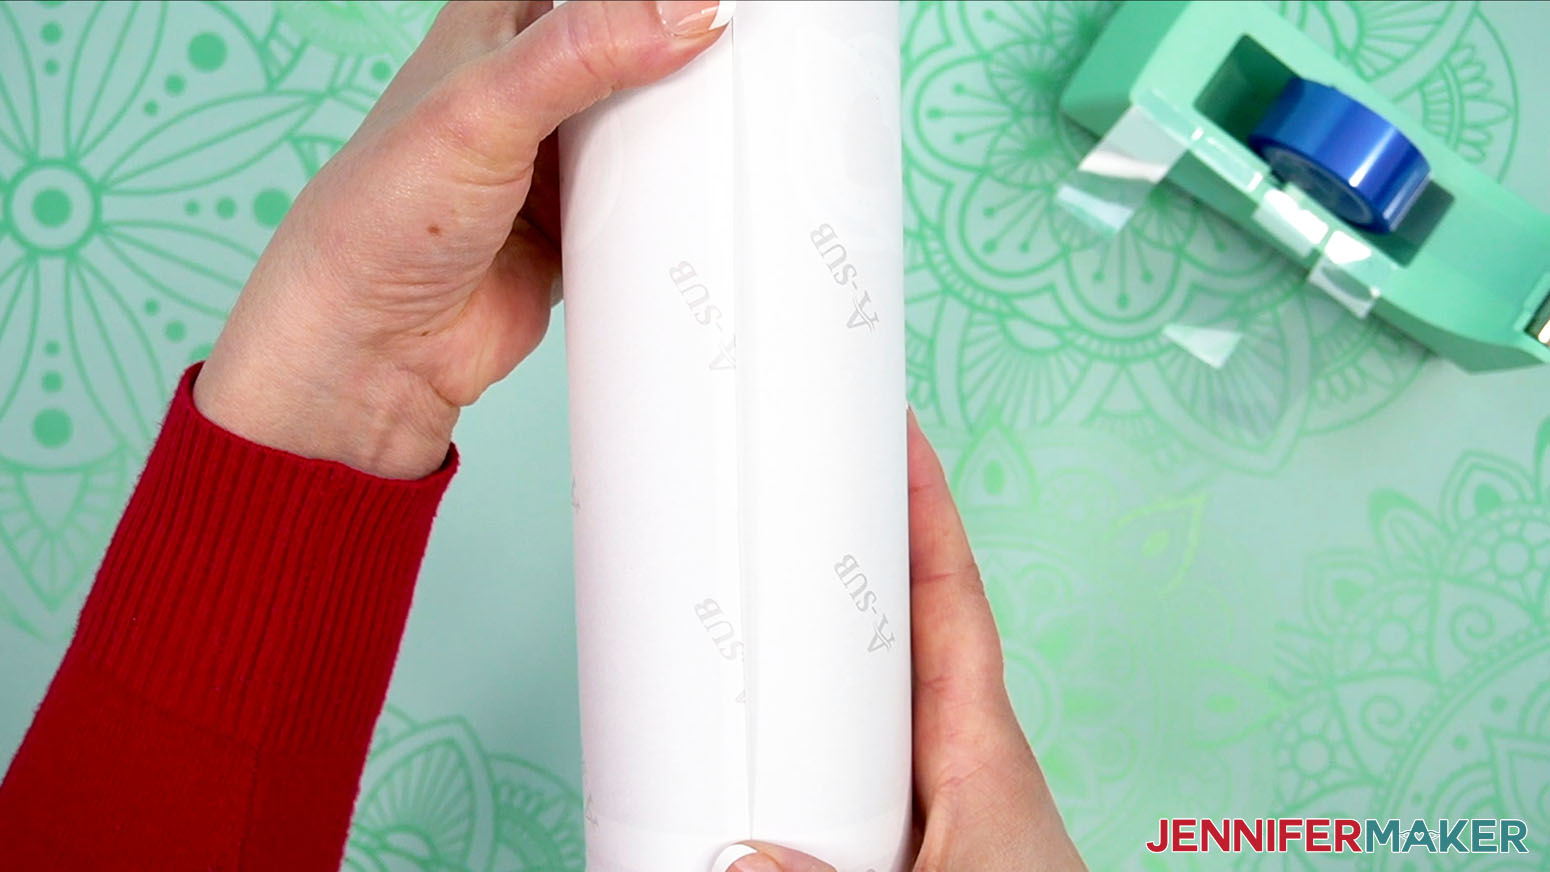
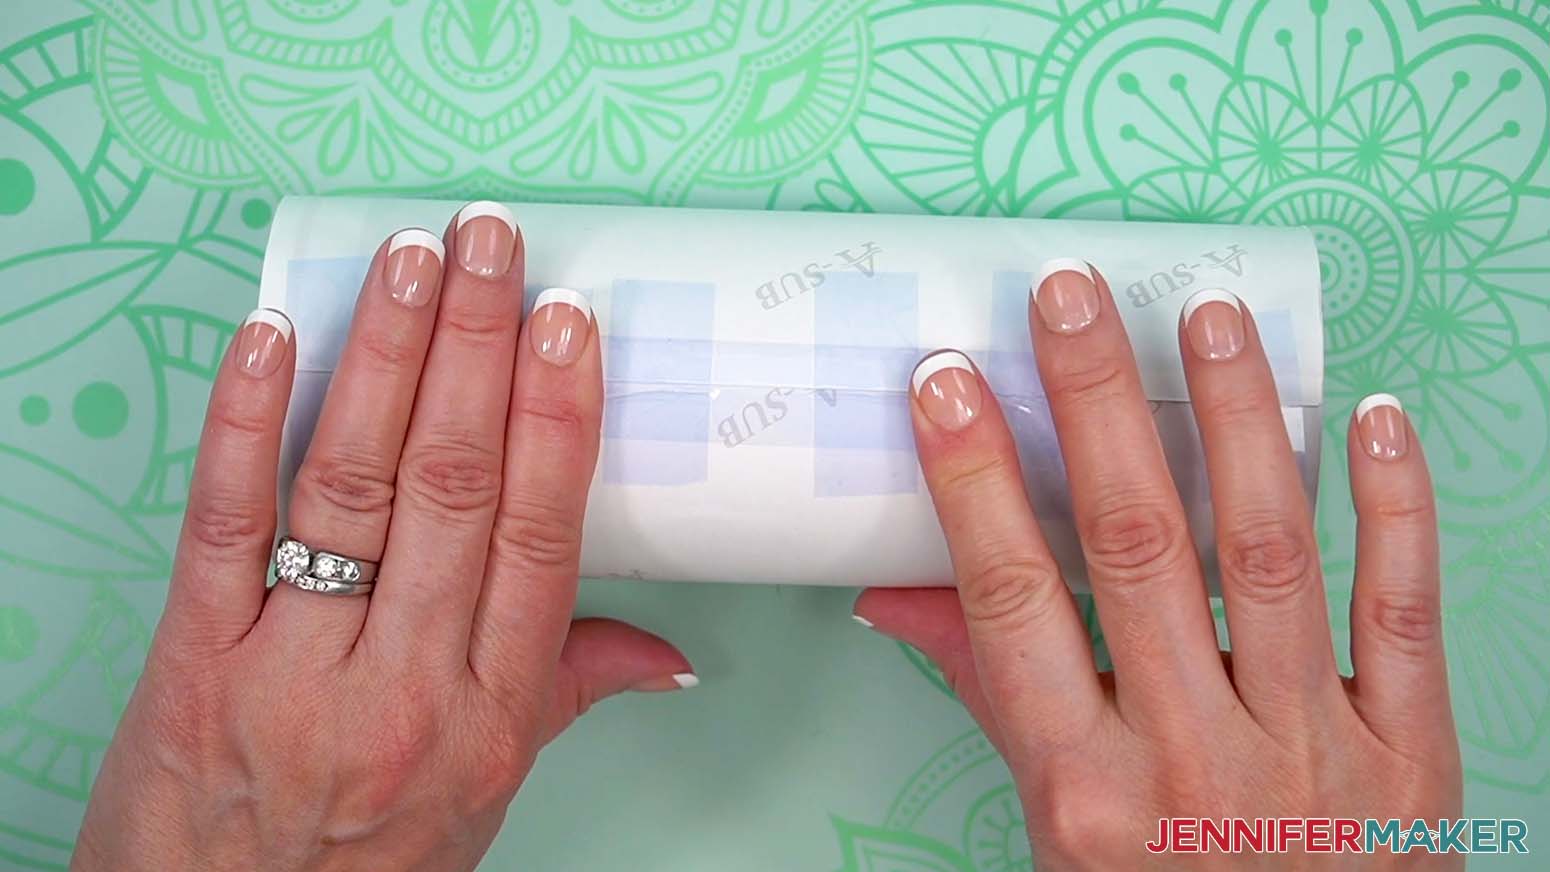
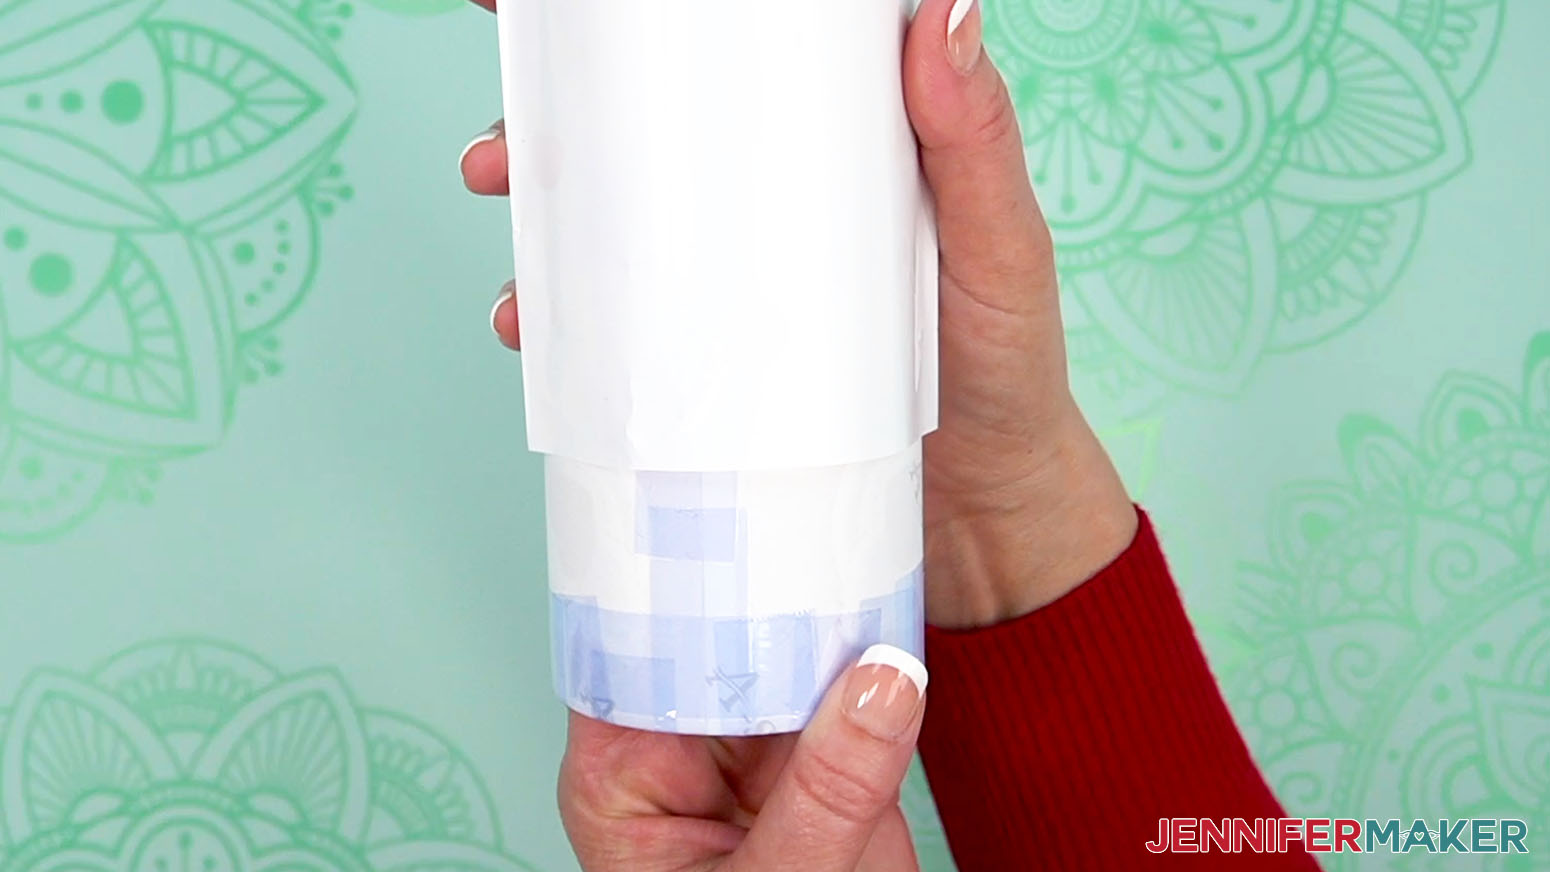
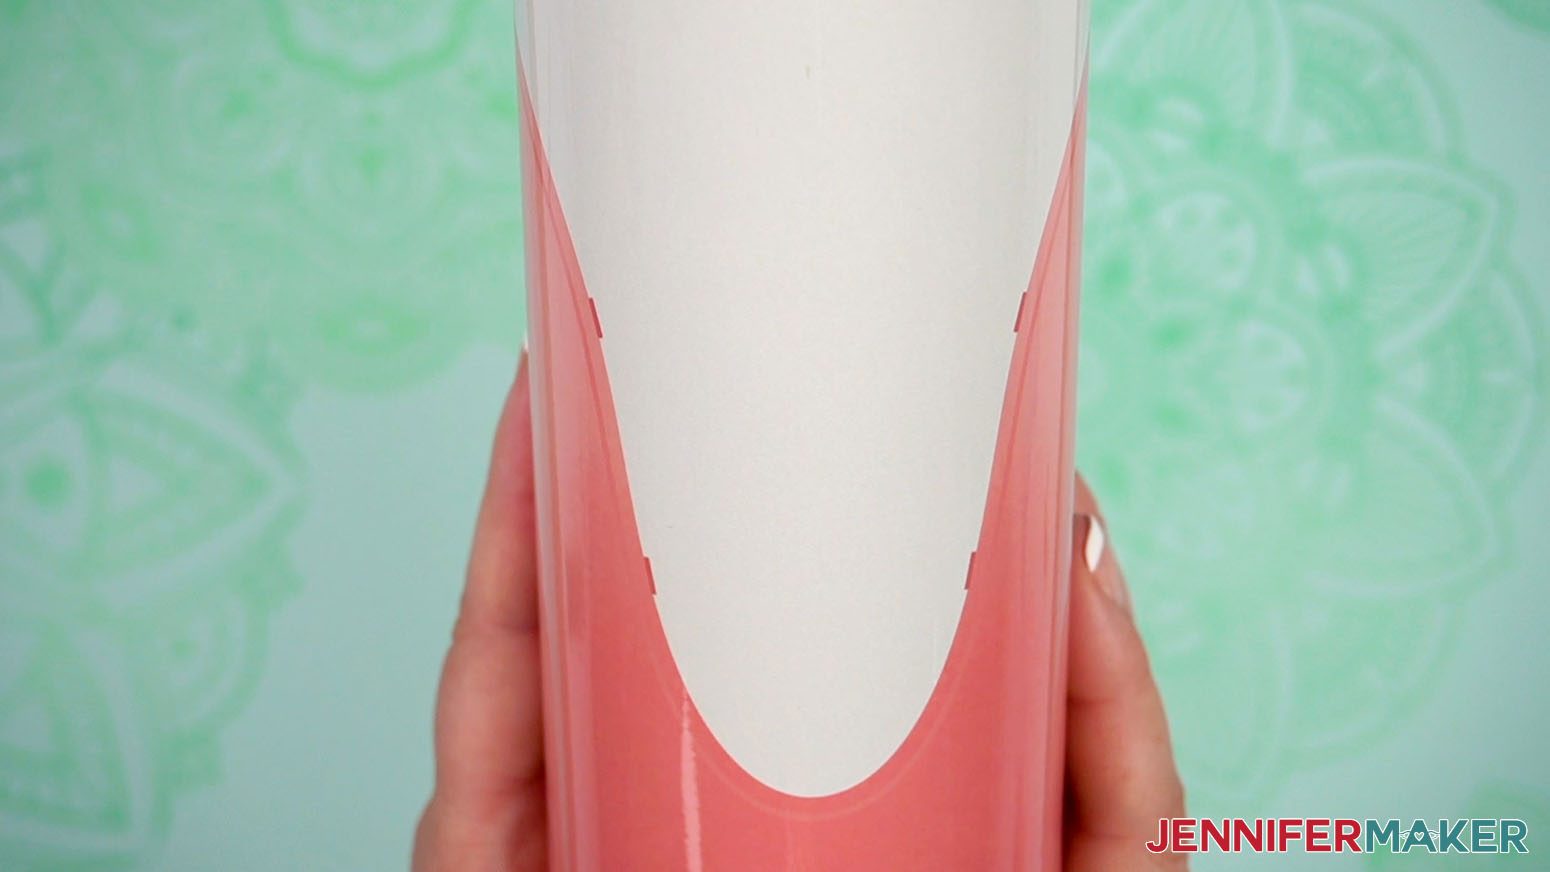
- Make sure the print is correctly oriented and wrap it around the cup so the ink touches the surface.
- Where the edges overlap, put the side with the white showing on the outside of the layers.
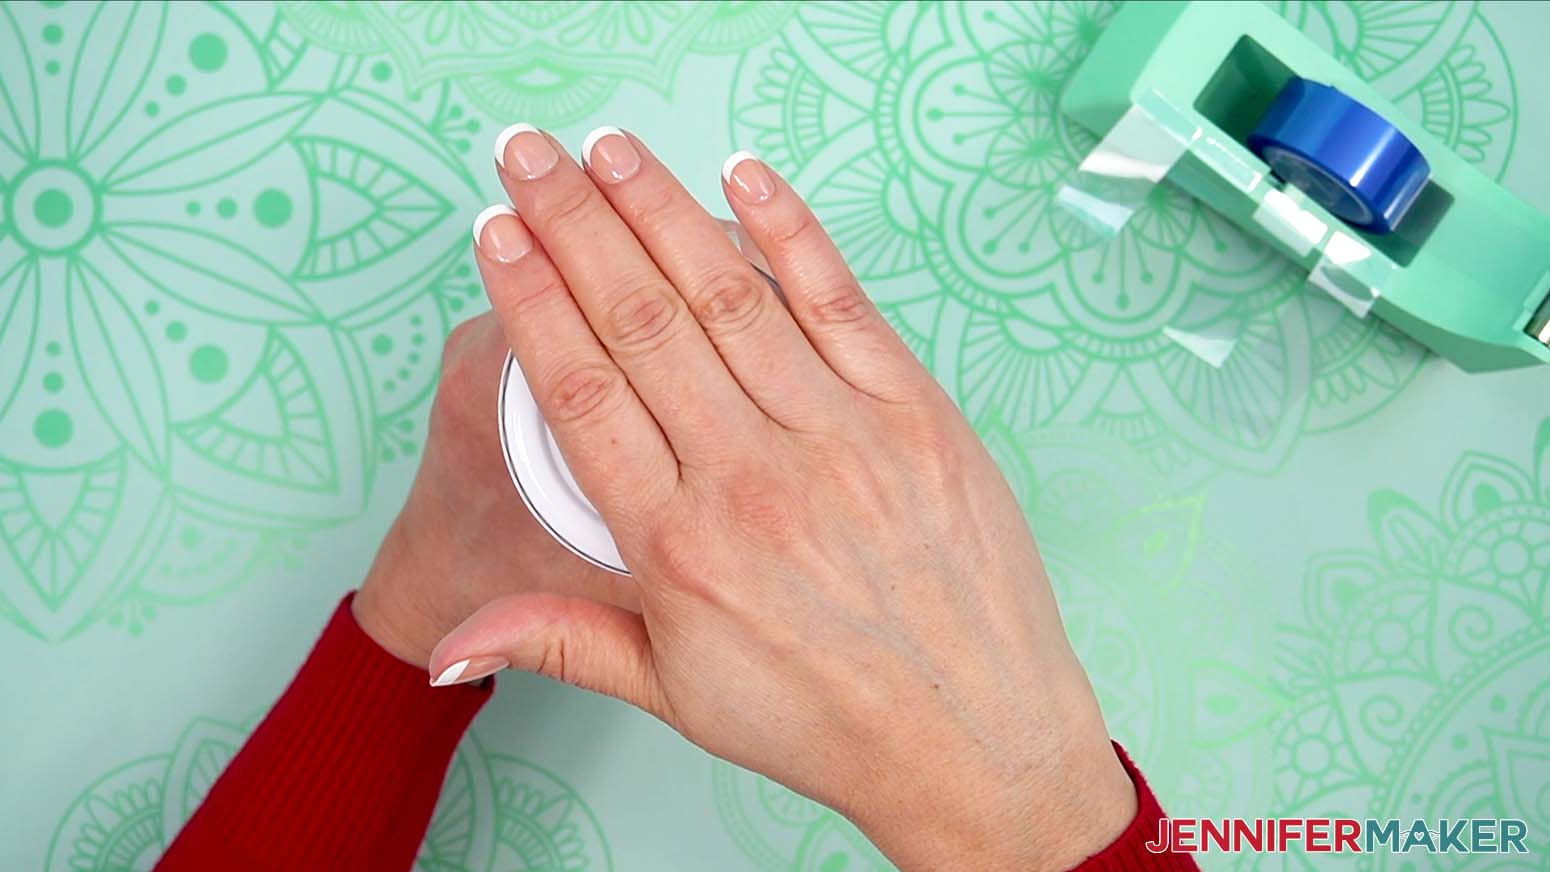
- Hold the wrapped print in place and gently tap the tumbler on the table from the bottom and top.
TIP: That will help straighten out the design and seam. - Don't let the print shift and gently lay the tumbler on its side with the seam up.
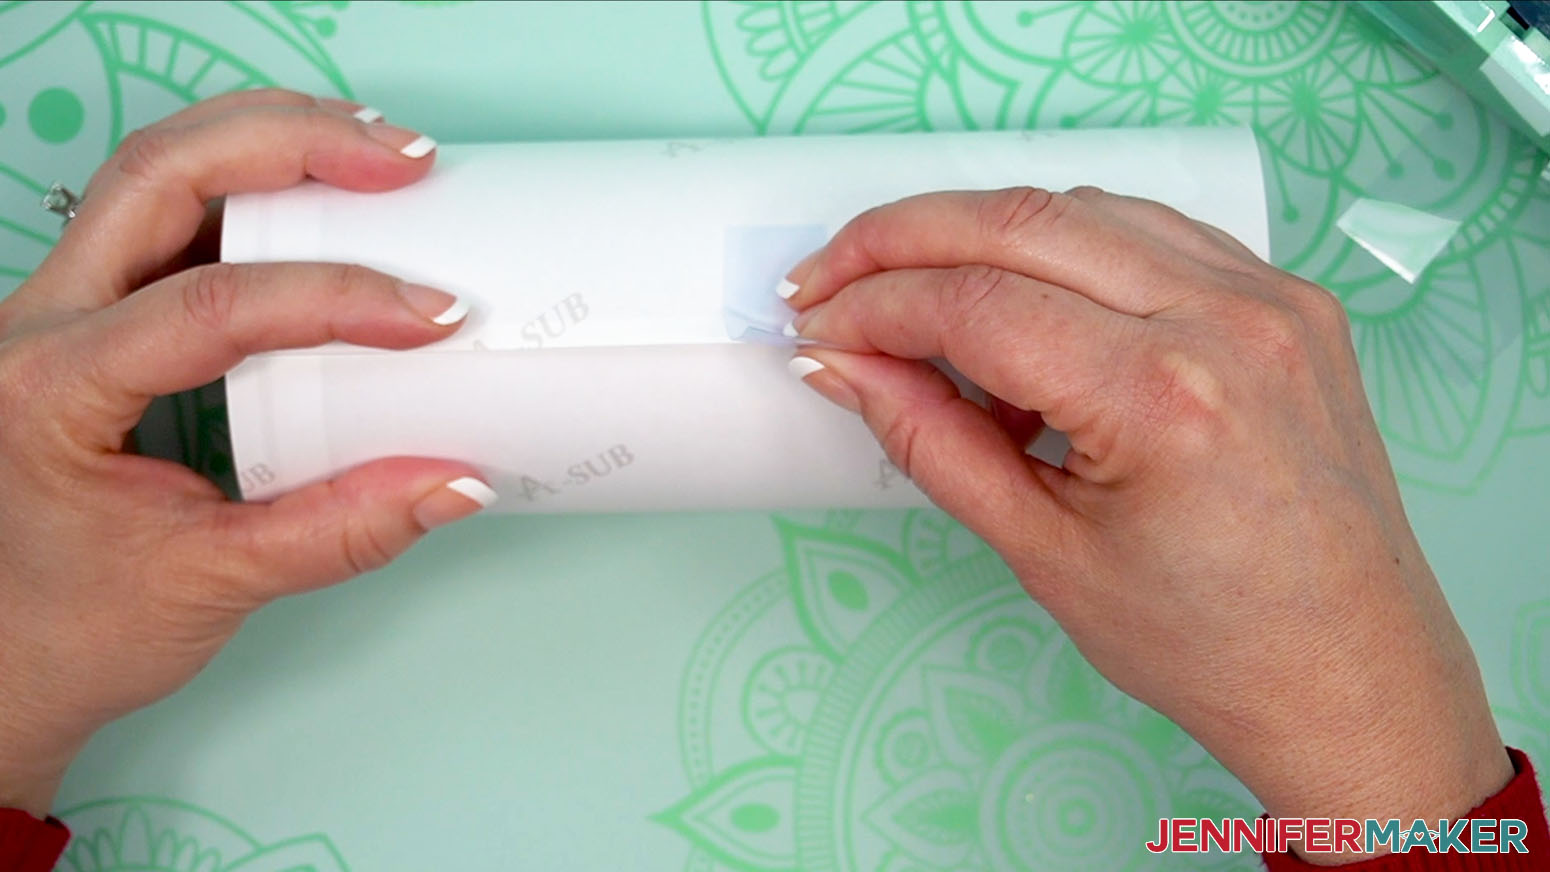
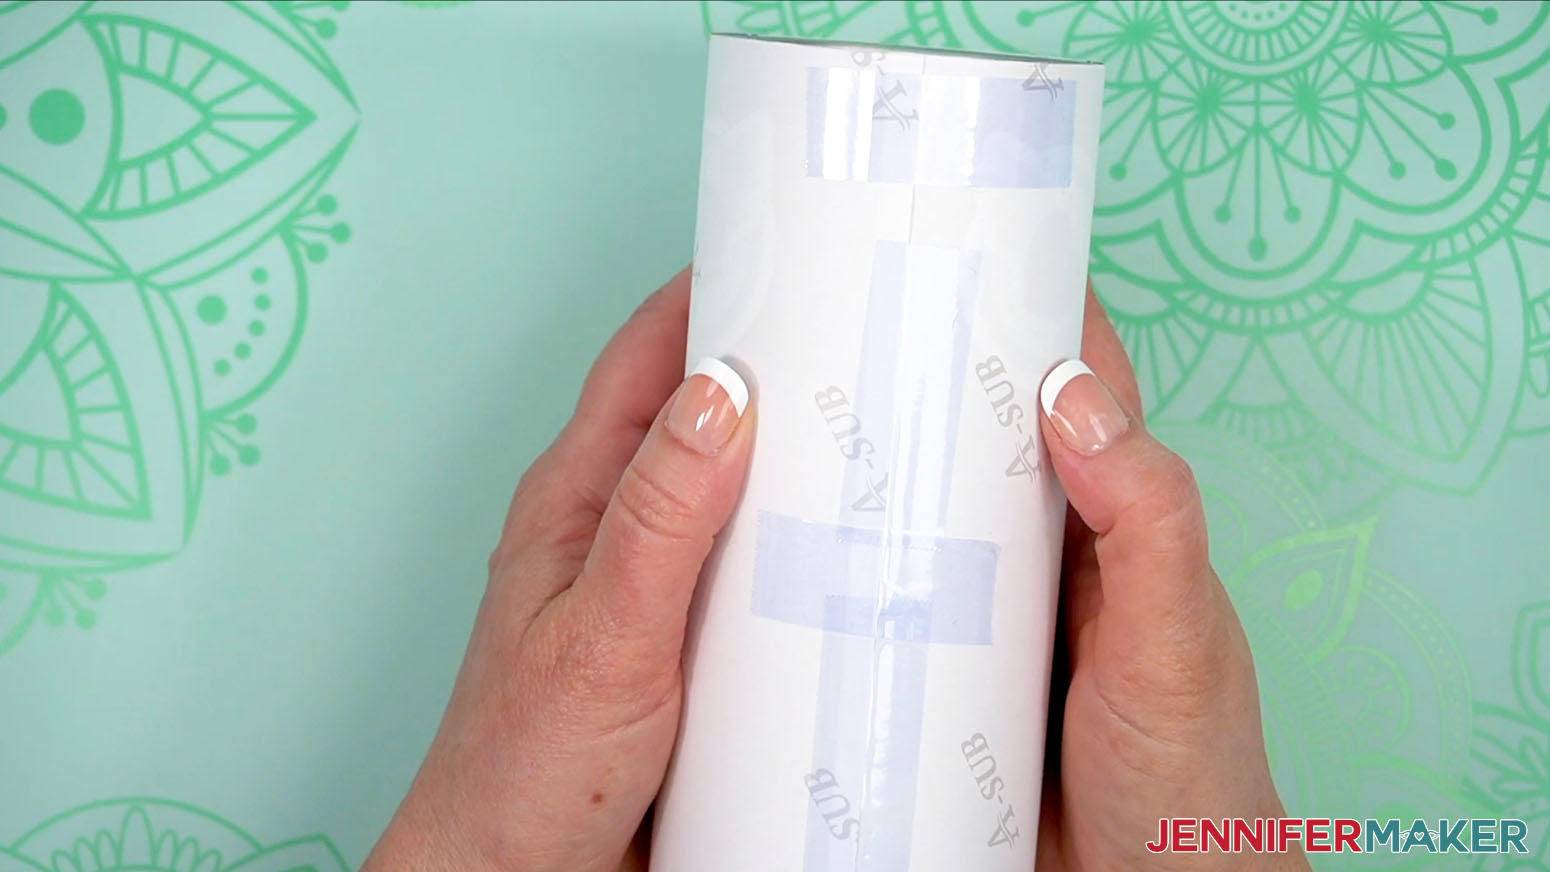
NOTE: Our next goal is to secure the print to the tumbler as tightly as possible. If there are gaps between the surface and design, you might get white spots or other defects in the final result. Using pinchers can help hold everything in place. - Place a piece of heat-resistant tape securely on the white edge, but don't let it touch the paper on the other side of the seam yet.
- Use one hand to hold the lower layer of the design tight against the tumbler.
- Pull the loose section of tape as tight as possible, then press it in place on the lower layer.
- Add two more pieces of tape using the same method in between the first piece and the top and bottom edges of the design.
- Add more tape perpendicularly to bridge the three pieces and completely cover the seam in between them.
- To check if the paper is tight enough, try to press hard on either edge of the paper and smooth them toward the taped seam. If anything ripples or comes away from the tumbler, remove your tape and try again.
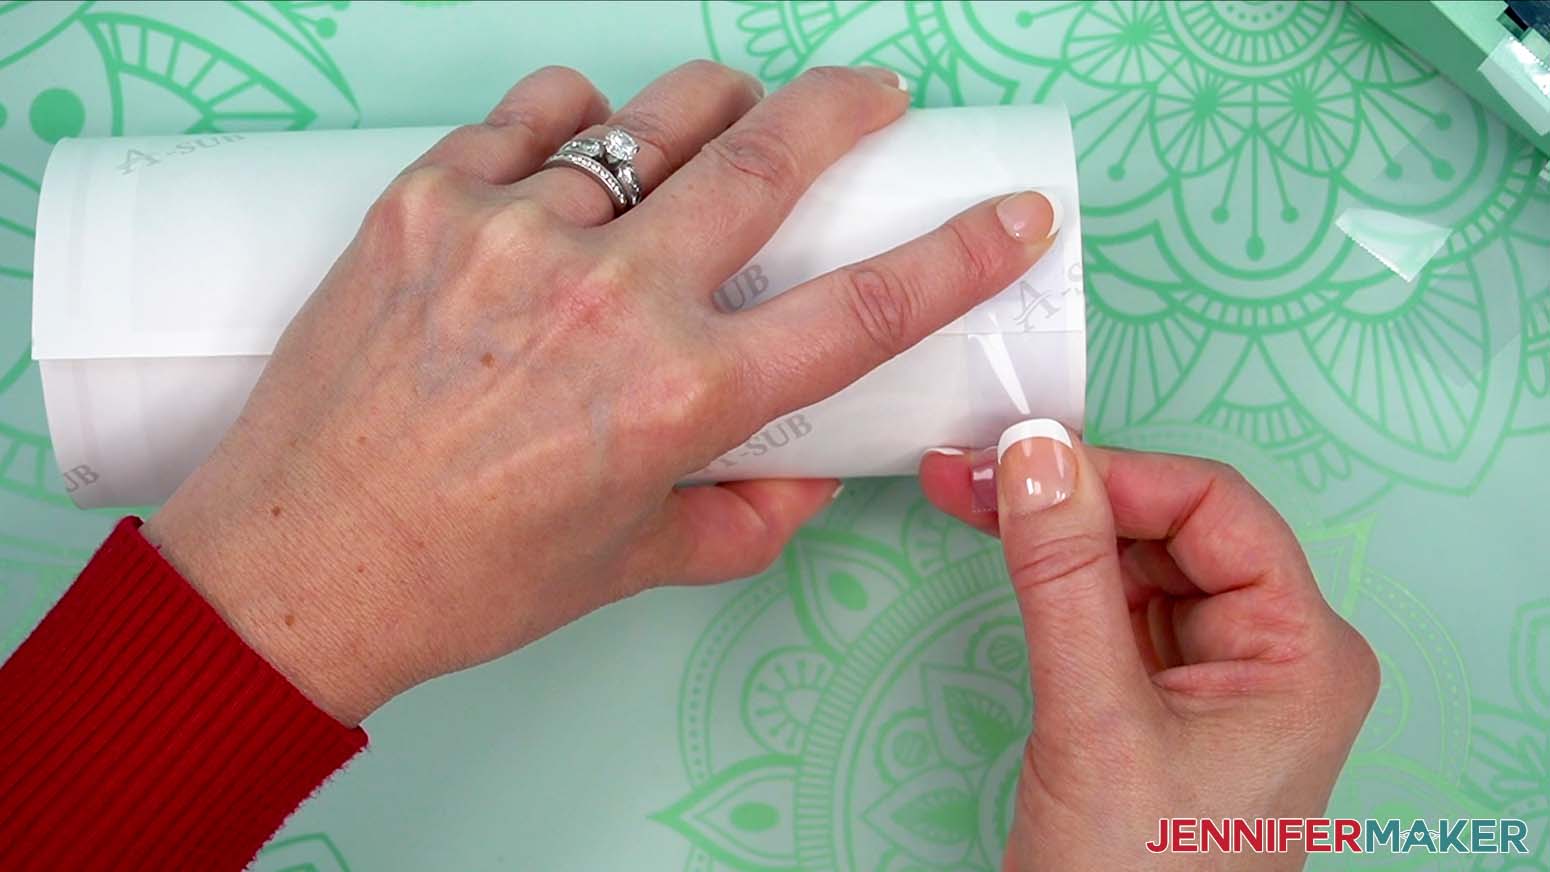
- Once the paper is secure, add tape to cover the top remainder of the seam, allowing some to extend past the edge.
- With your thumb on the adhered tape, pull the extra tape as hard as you can over the edge and secure it inside the tumbler.
- Repeat for the bottom seam portion, securing the paper to the underside as well.
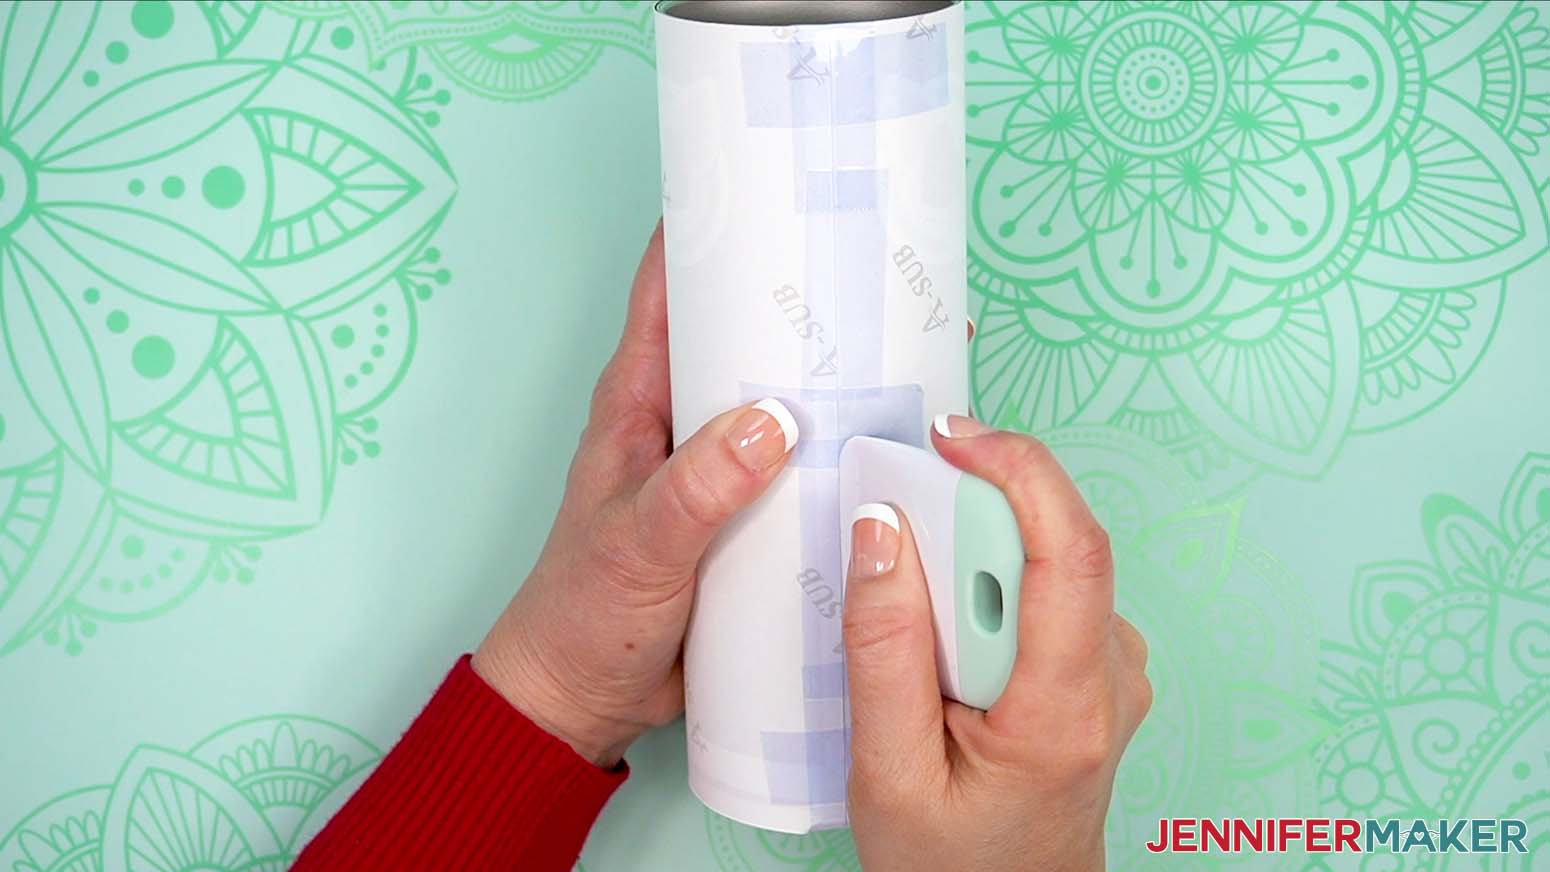
- Use a scraper or your fingernail to burnish the seam thoroughly.
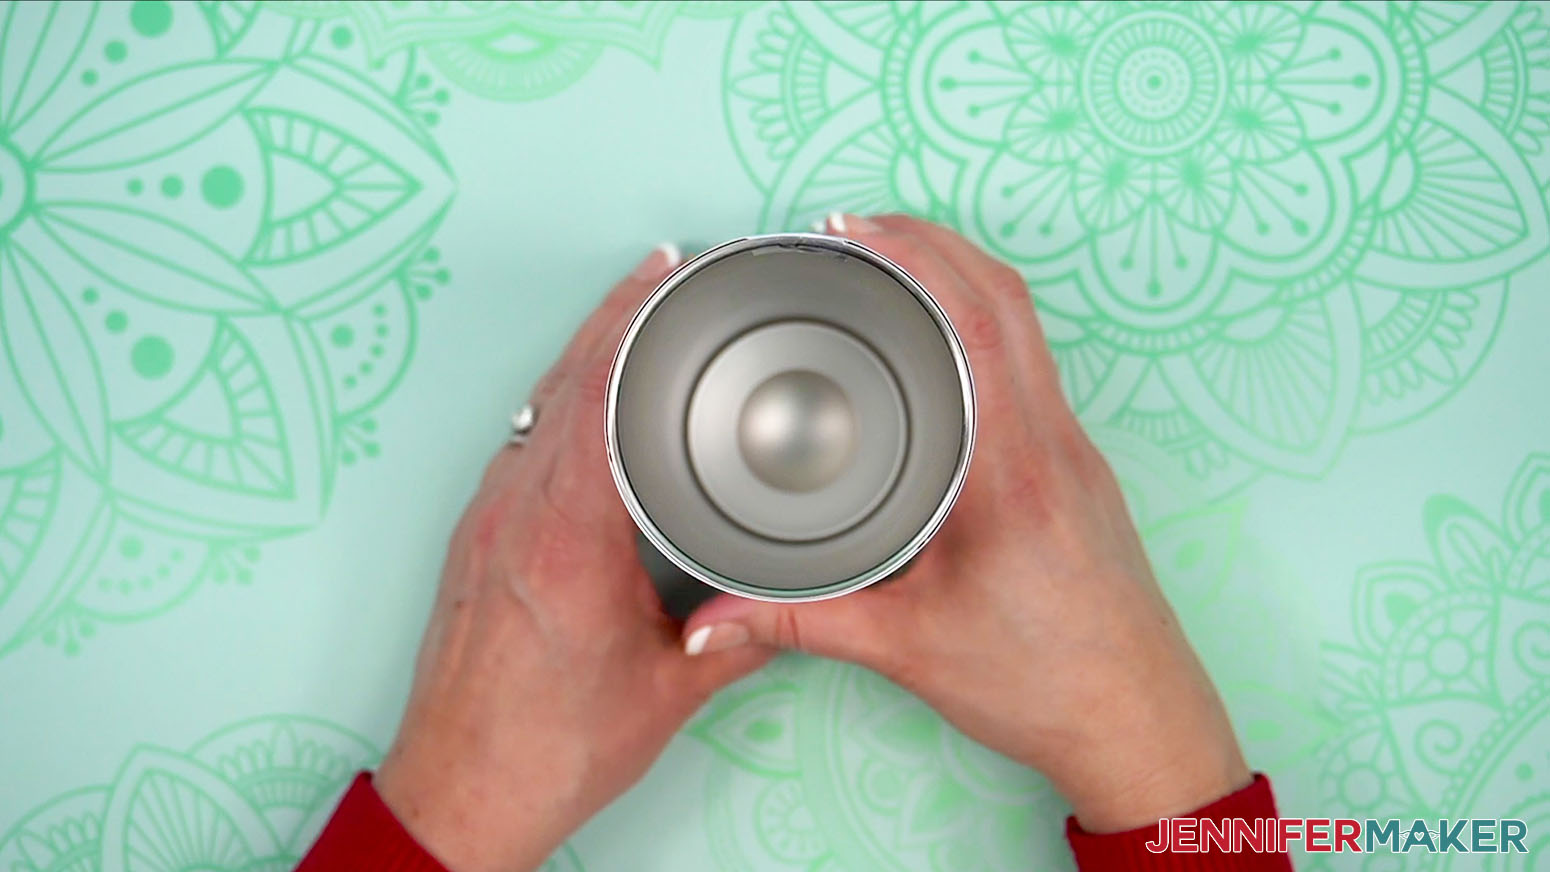
TIP: It’s important to work out all the air pockets to get a perfect transfer. - Place the tumbler open end up and look down at it from the top. Think of it like a compass and place the original seam in the North direction.
- Just like we did for the top of the seam, place tape at the South location, letting it extend past the edge.
- Keep your thumb on the taped paper and pull the extra tape tightly, securing it to the tumbler's inner surface.
- Smooth the tape with the scraper to remove any air pockets.
- Repeat for the East and West points.
- Then, fill in the intermediary directions, like Northeast, until the entire top rim is secured.
- Repeat for the bottom edge.
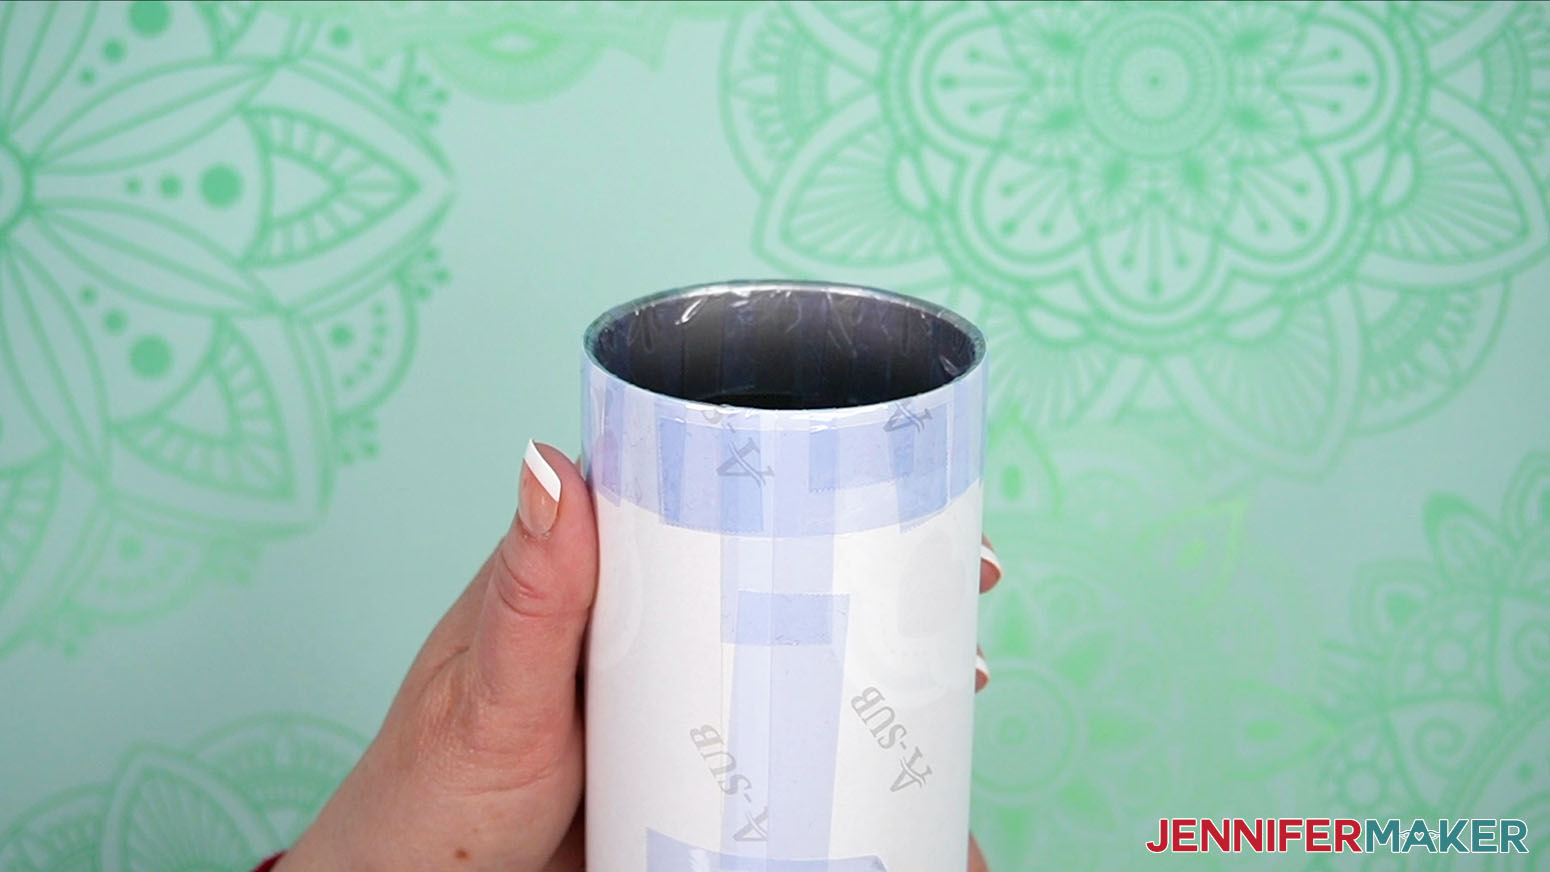
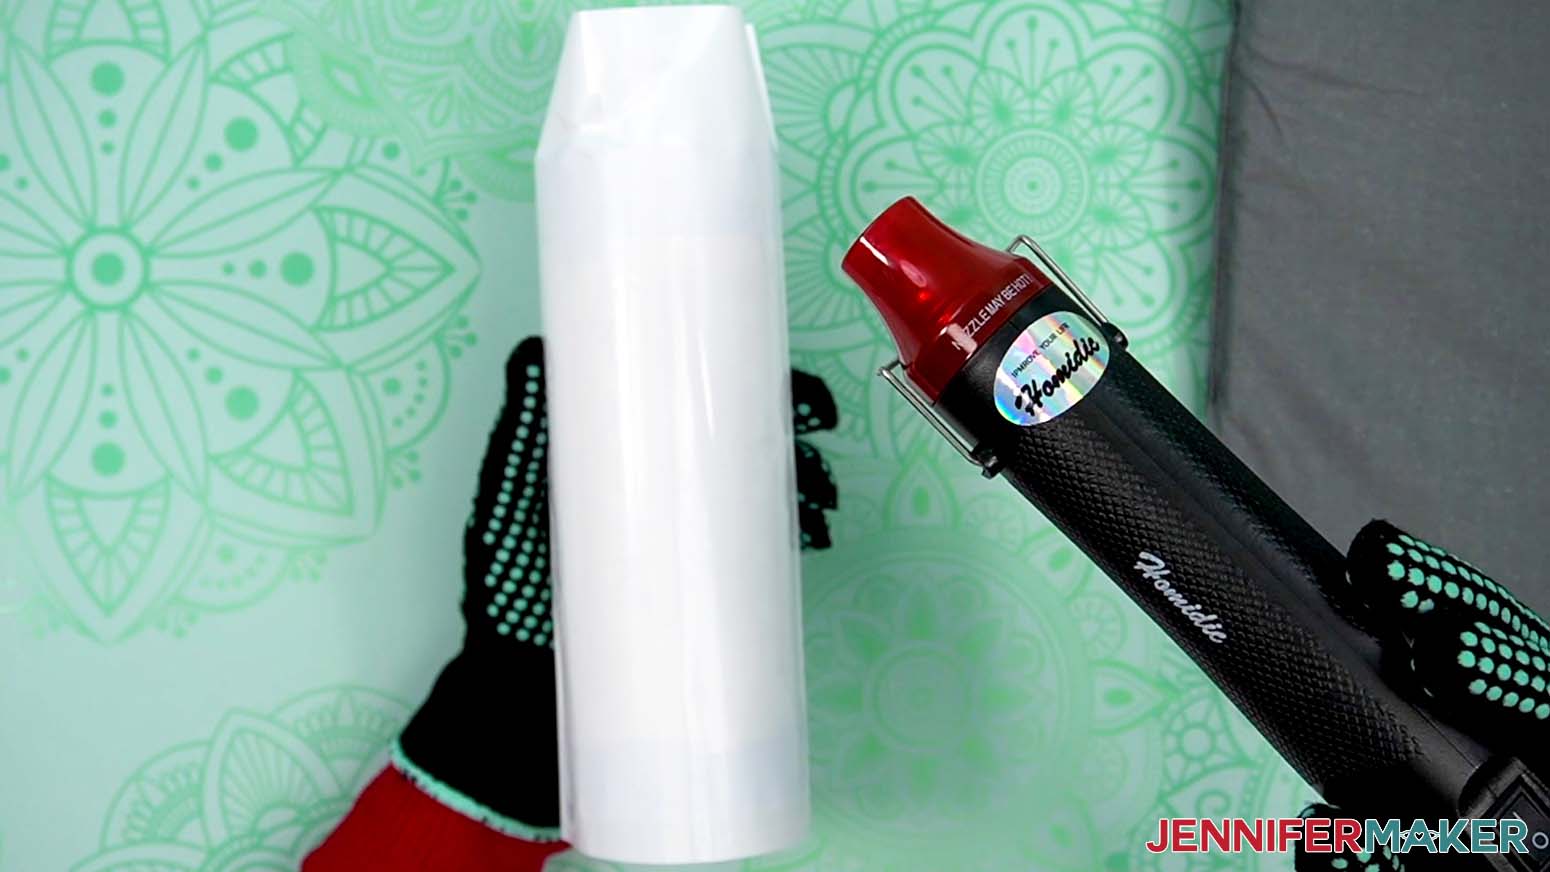
TIP: On the bottom, use an extra long piece of tape to mark where the seam is, which you can reference when you need to turn the tumbler in the convection oven. - Open up a shrink-wrap tube and pull it over your tumbler.
TIP: Some sublimation tumblers come with shrink-wrap tubes, but not all do. If you order them separately, be sure they’re the right size to easily fit your tumbler’s width. - Put on your heat-resistant gloves and set a heat-safe item like a pressing pad nearby.
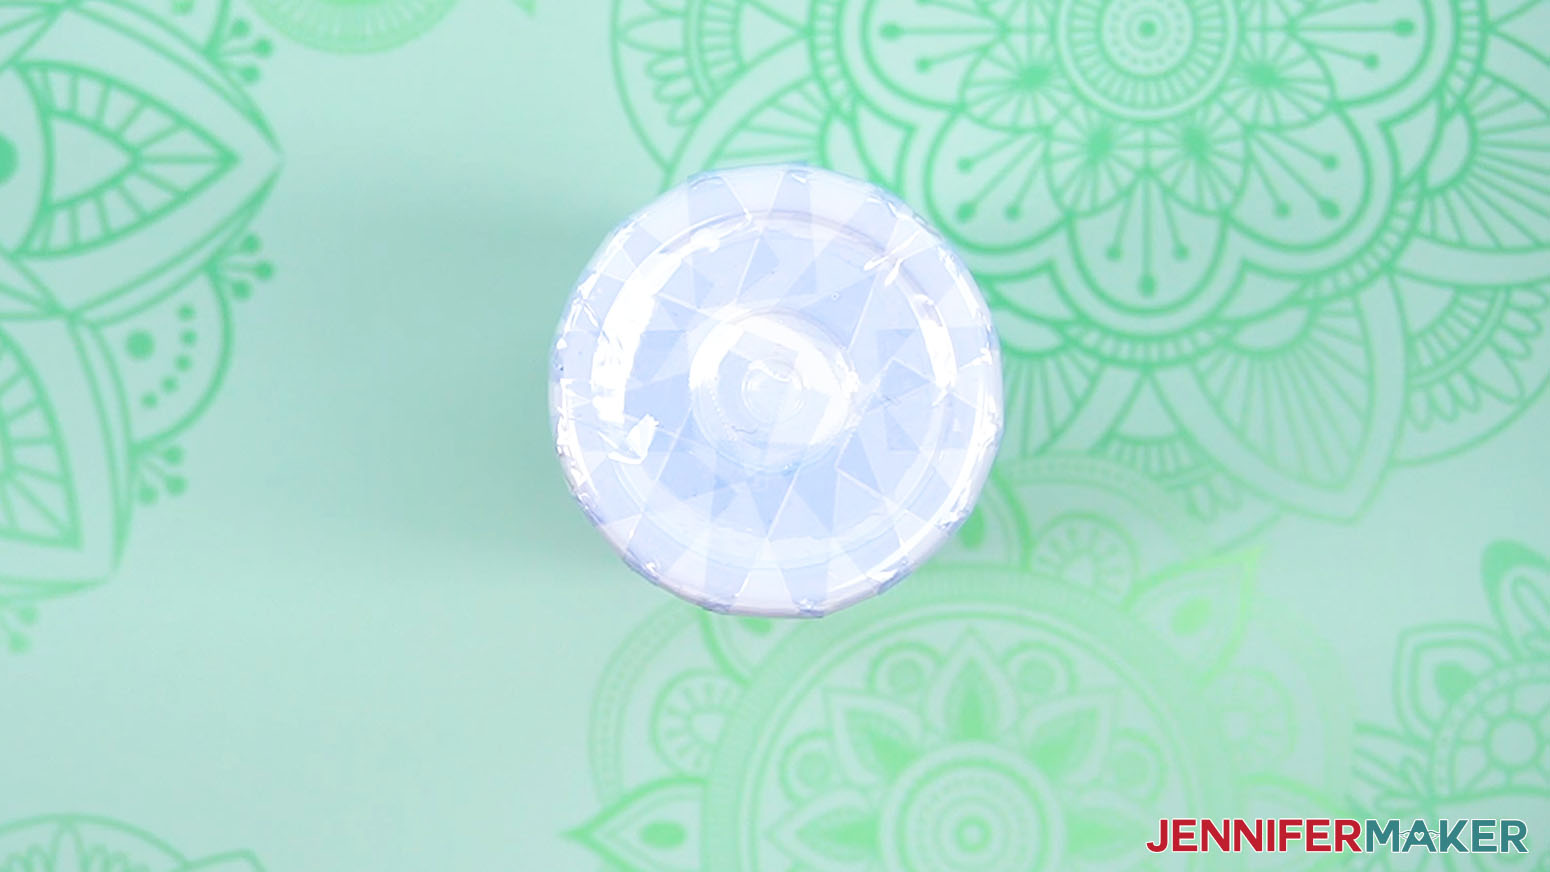
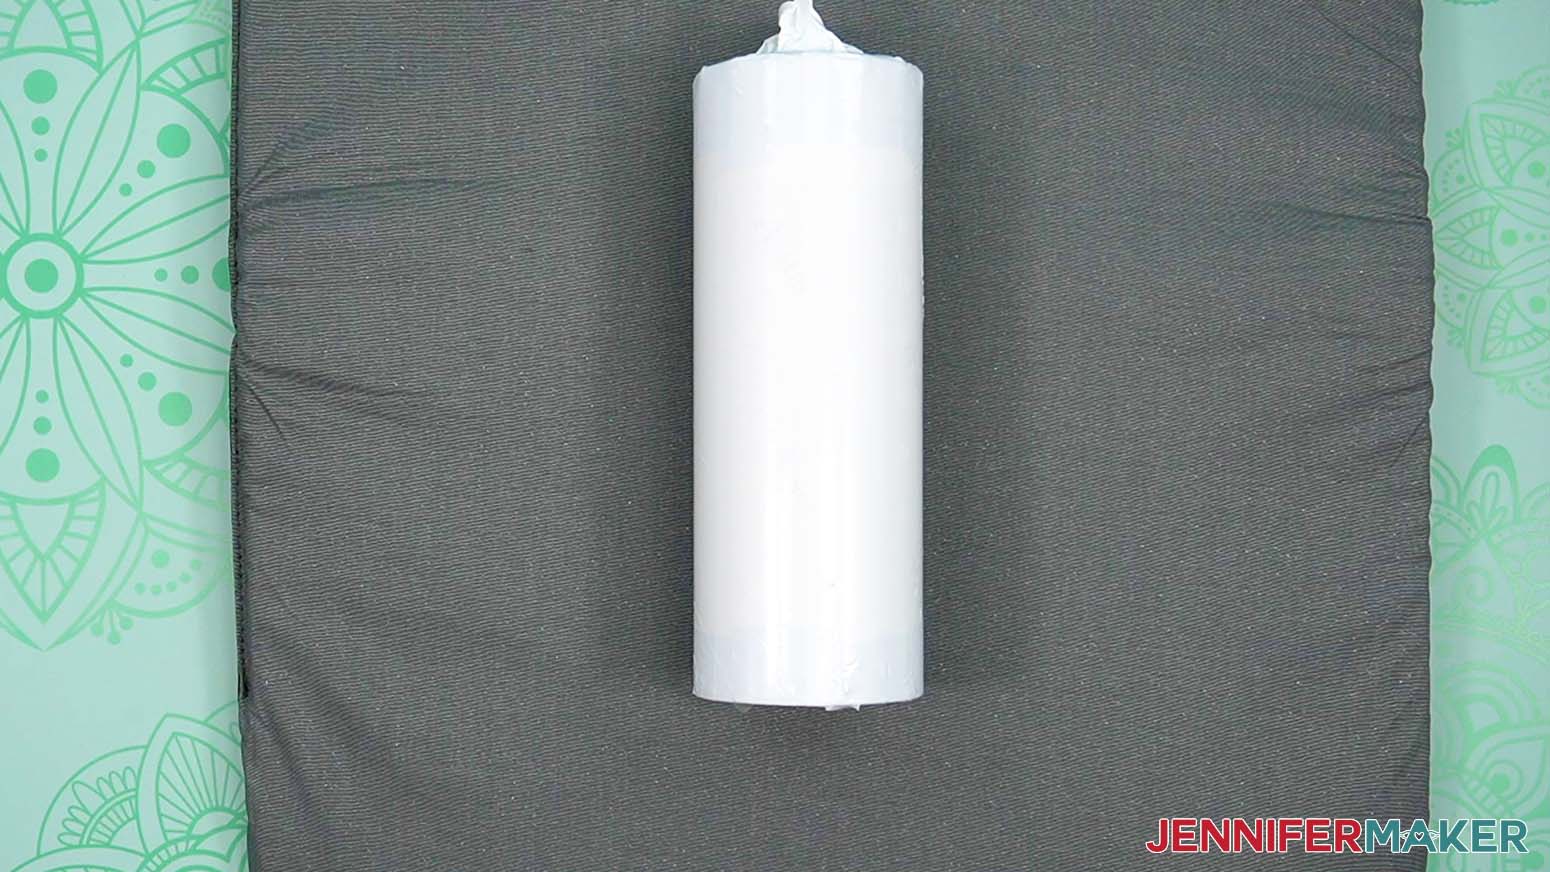
- Use your heat gun on a low setting to slowly heat the wrap so it conforms to the tumbler.
- Make sure most of the wrinkles are smooth, but don’t make it too tight or it will pull apart in the oven.
- The tumbler will be warm, so set it on the pressing pad when you’re done.
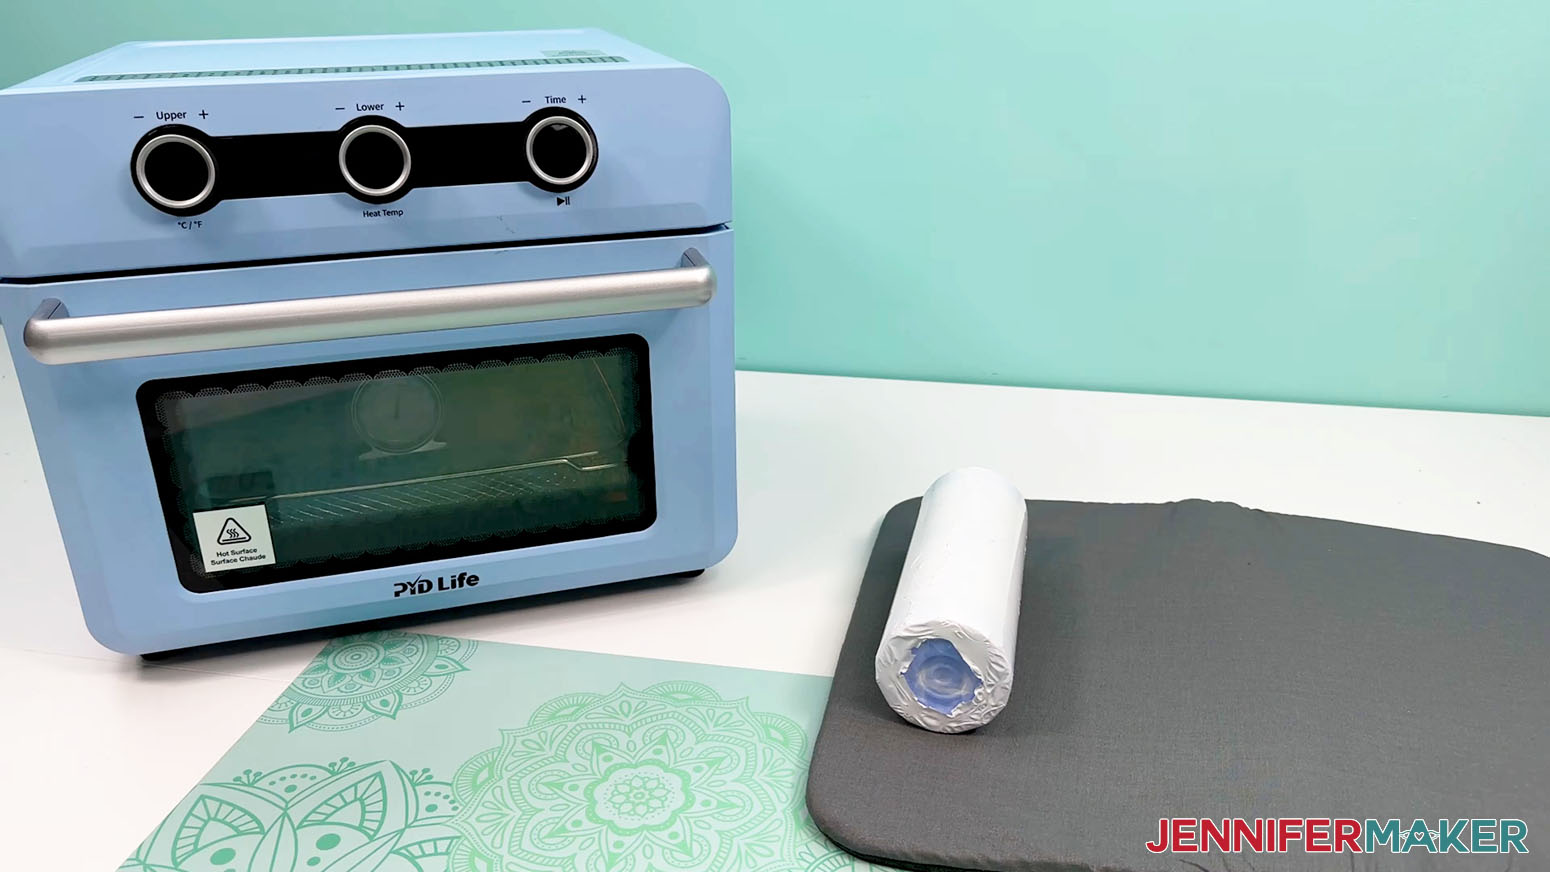
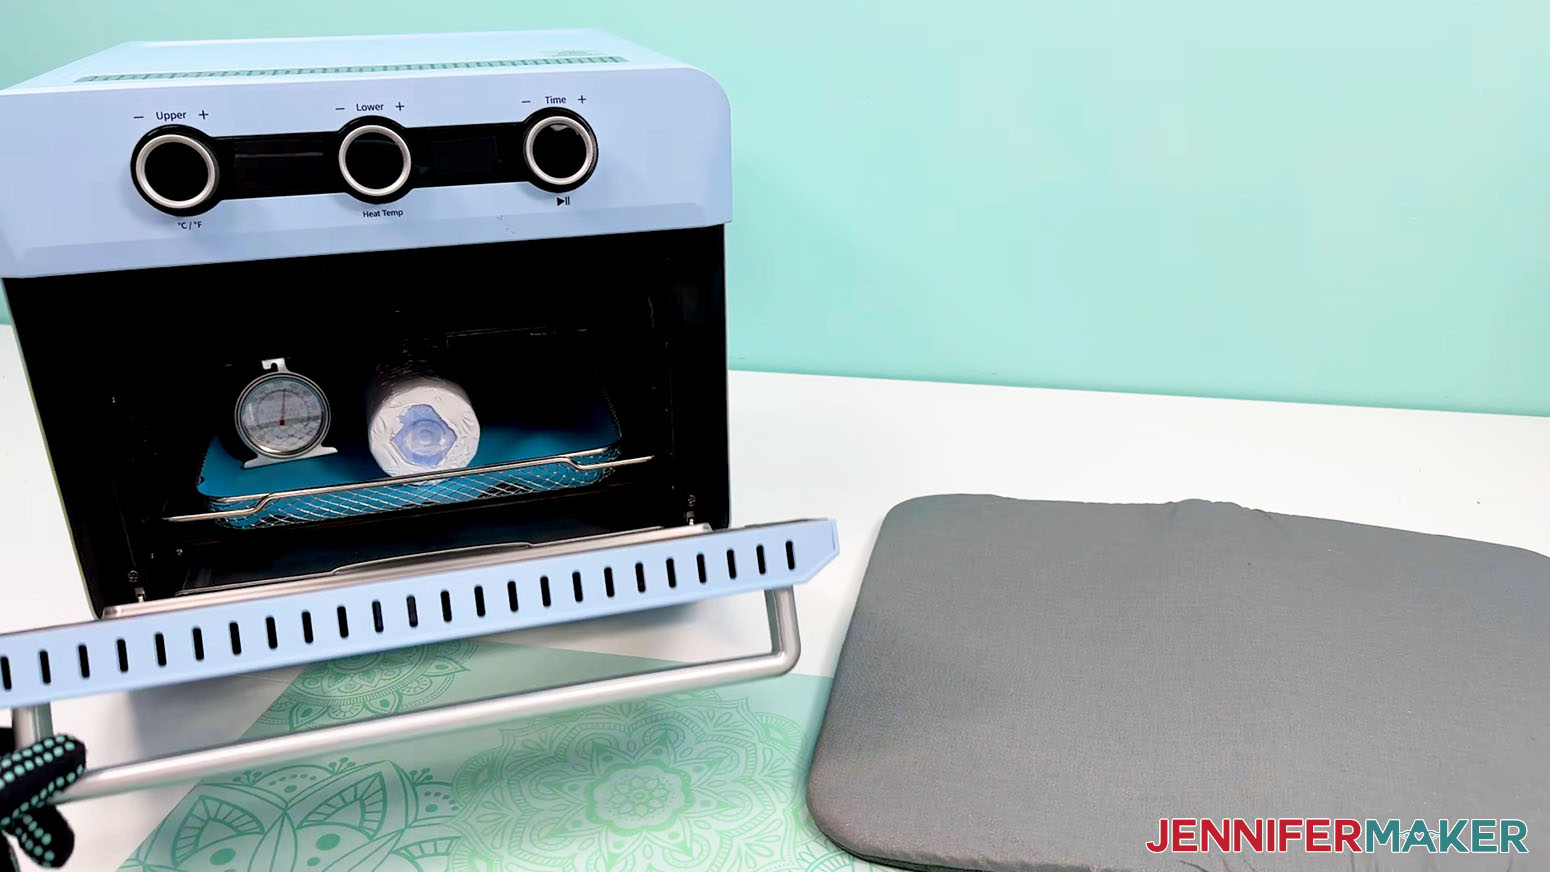
- Place a silicone baking mat onto the sublimation convection oven’s wire tray to keep the tumbler from rolling later.
- Put an oven thermometer right in the center to make sure the temperature is correct.
- Heat the convection oven to 375℉ (191℃).
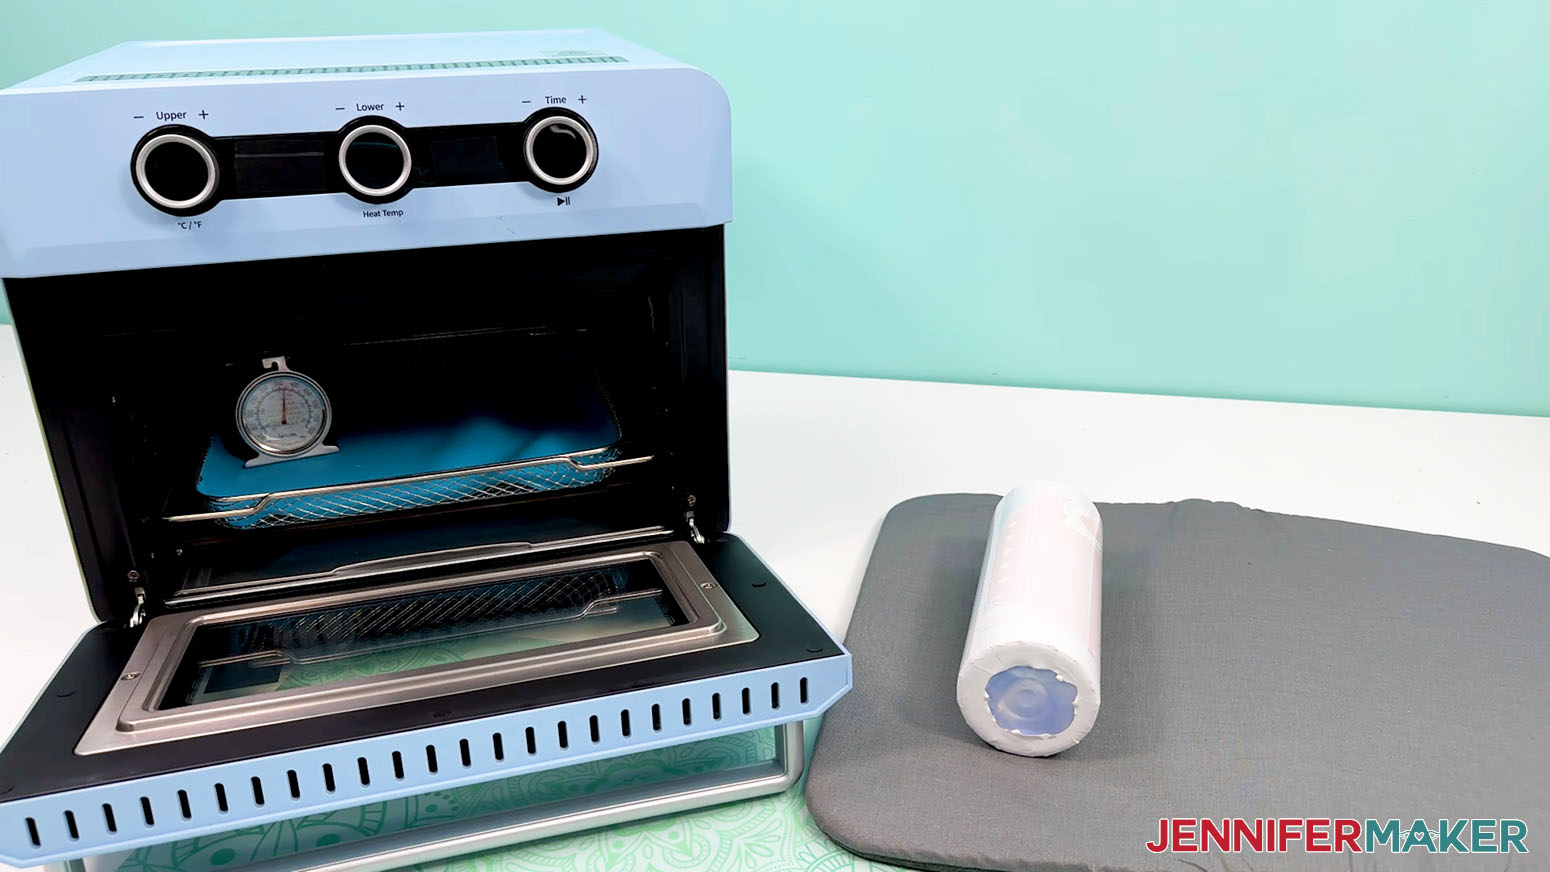
- When the convection oven is at the right temperature, put on your heat-resistant gloves and place the tumbler on its side on the baking mat.
- Heat the prepared tumbler in the oven for six minutes, giving it a quarter turn every minute and a half to even out the heat.
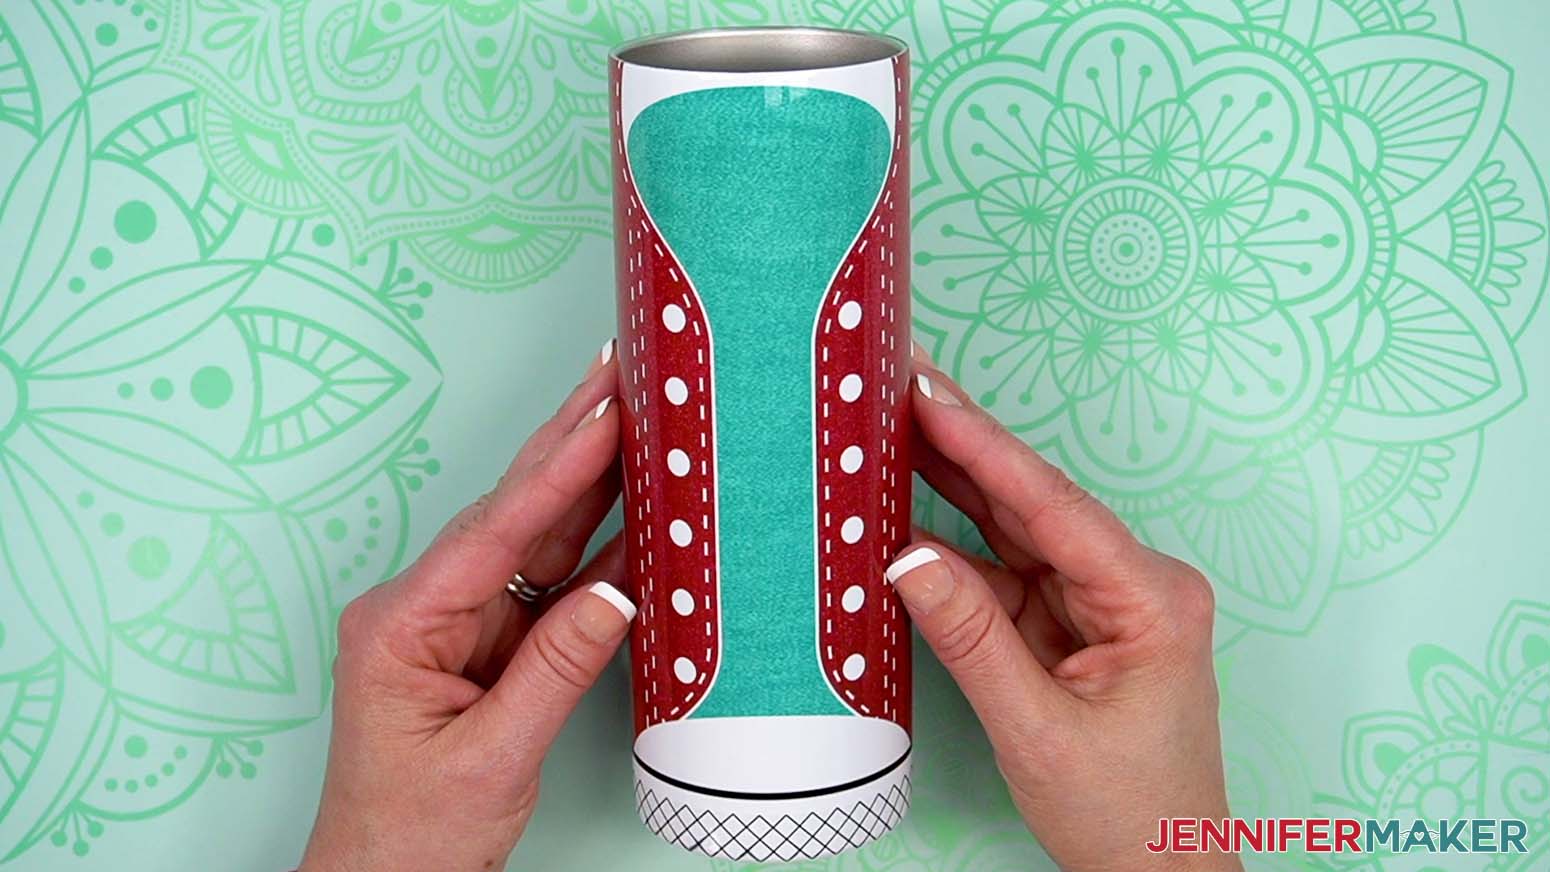
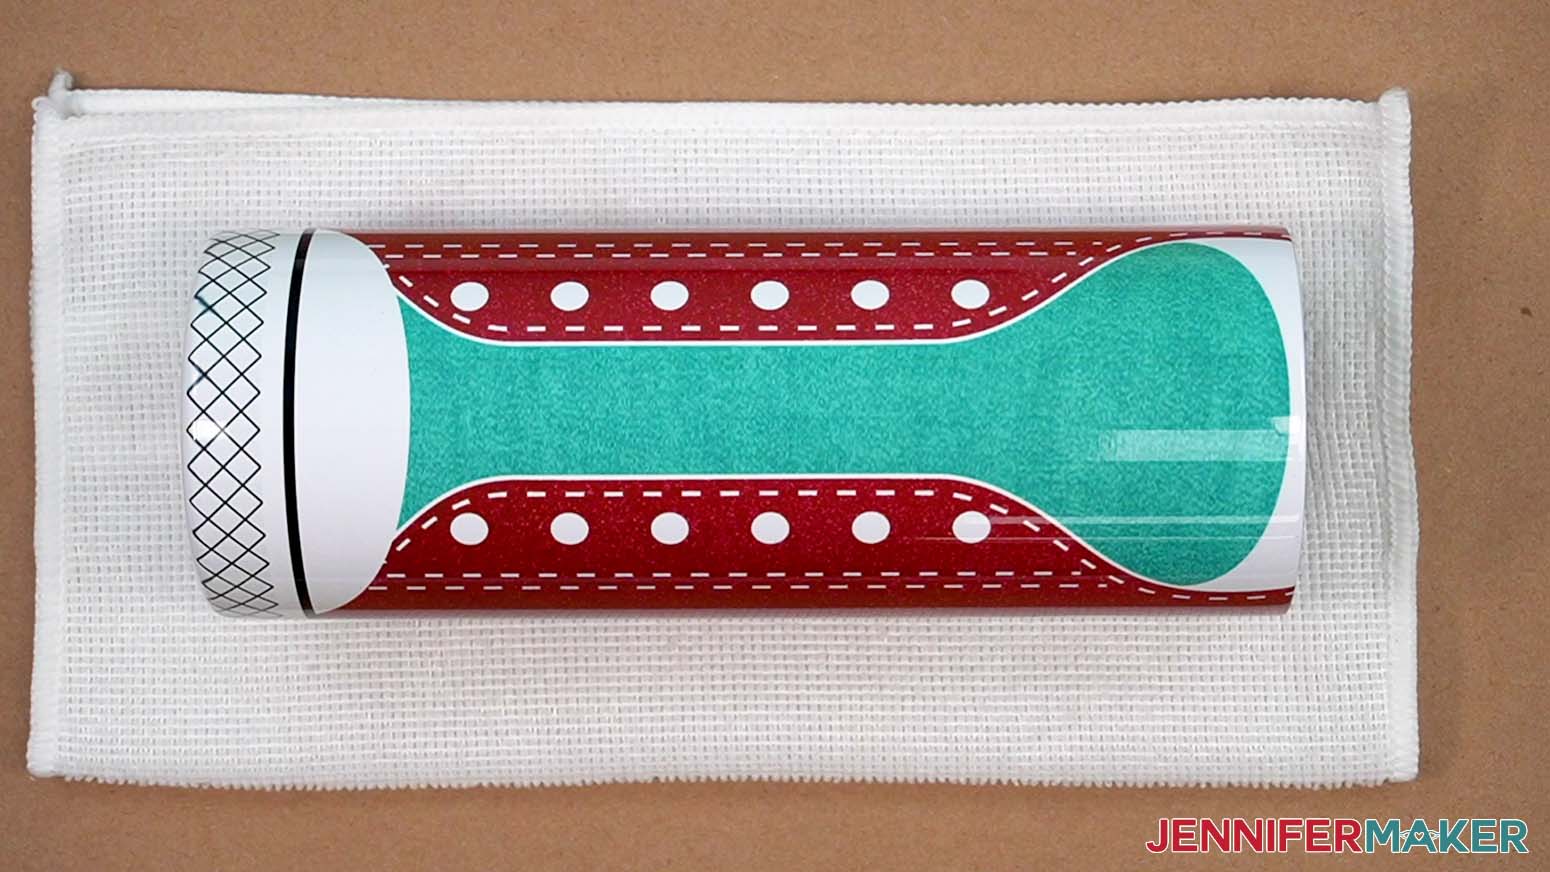
- When the time is up, keep your heat-safe gloves on and remove the tumbler from the oven, placing it on a heat-safe surface to cool for a few minutes.
- Remove the wrap, tape, and design while the tumbler is still slightly warm.

STEP 4: ASSEMBLE YOUR SHOE TUMBLER WRAP
OPTION 1: LACE-UP SHOE
- Before working with strong adhesives like E6000, open a window and turn on a fan to improve your ventilation.
- Cover your work surface with butcher paper to protect it from the glue.
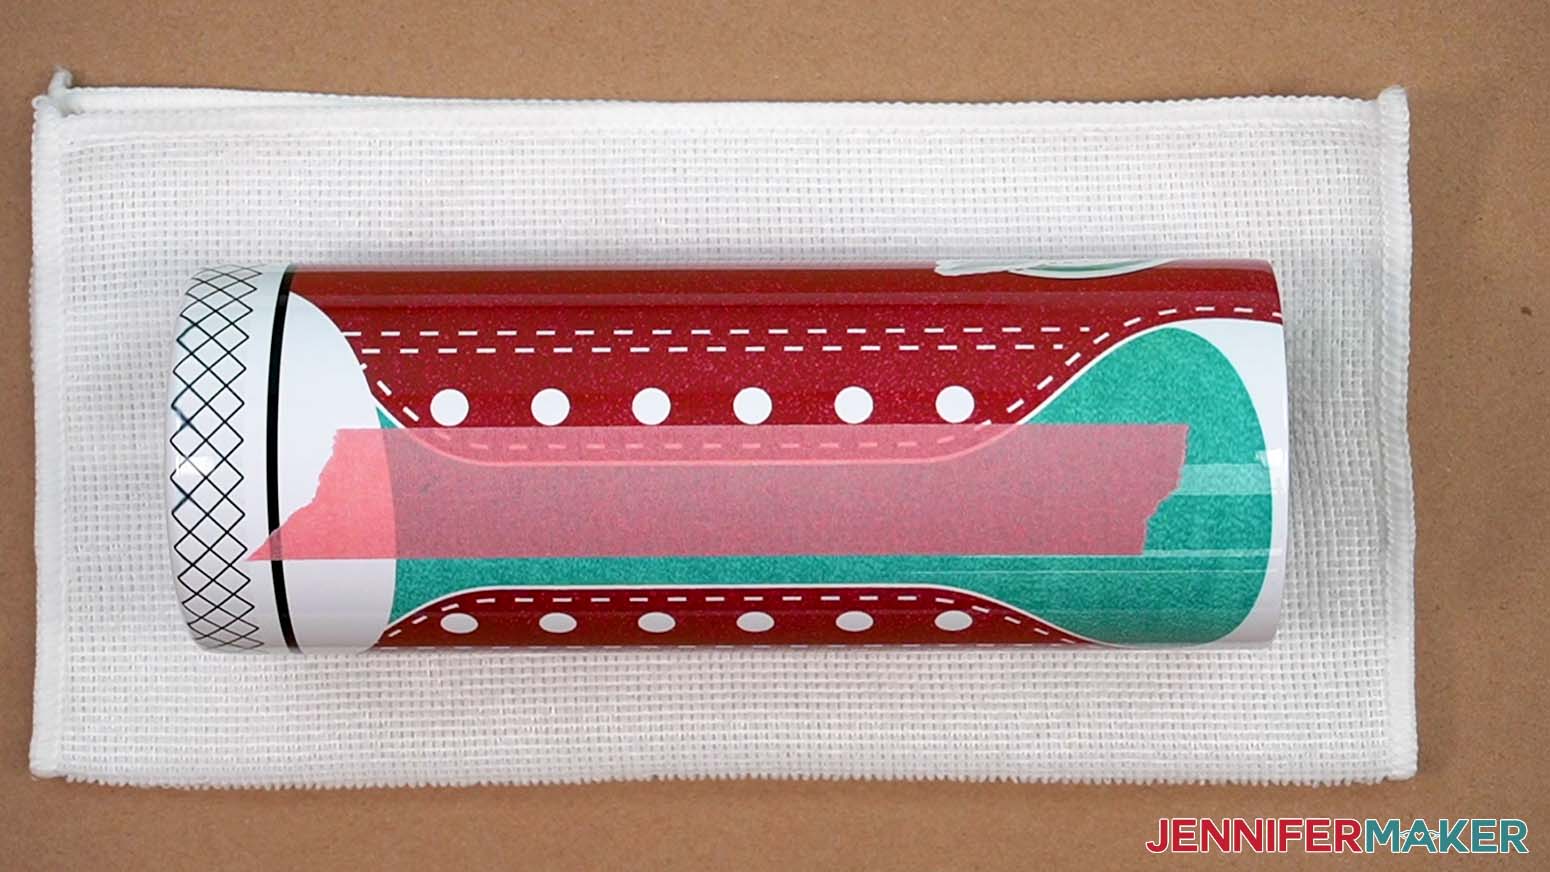
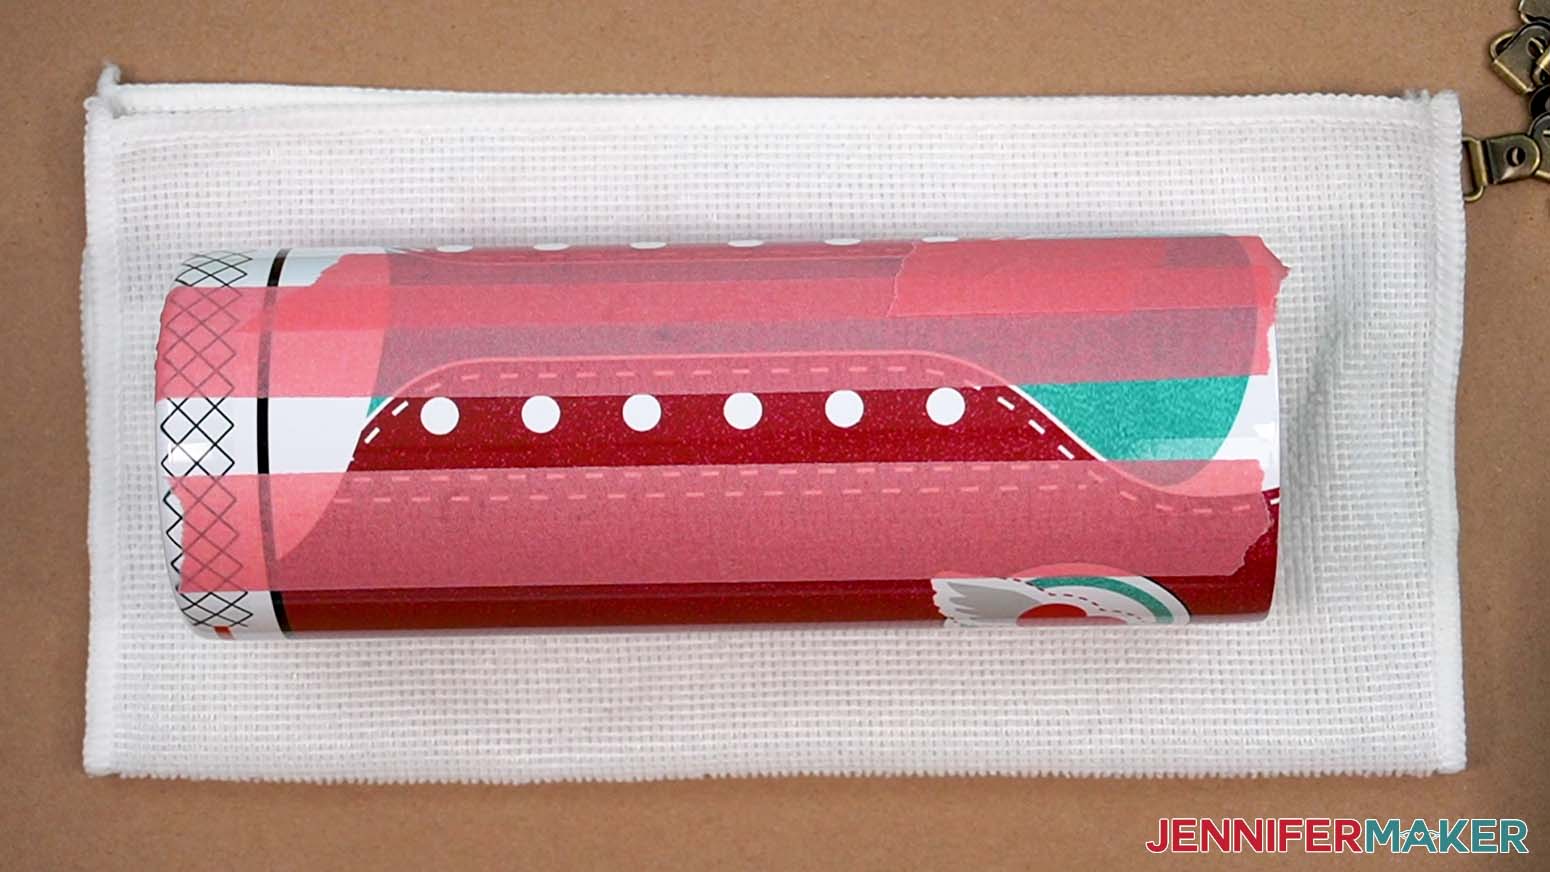
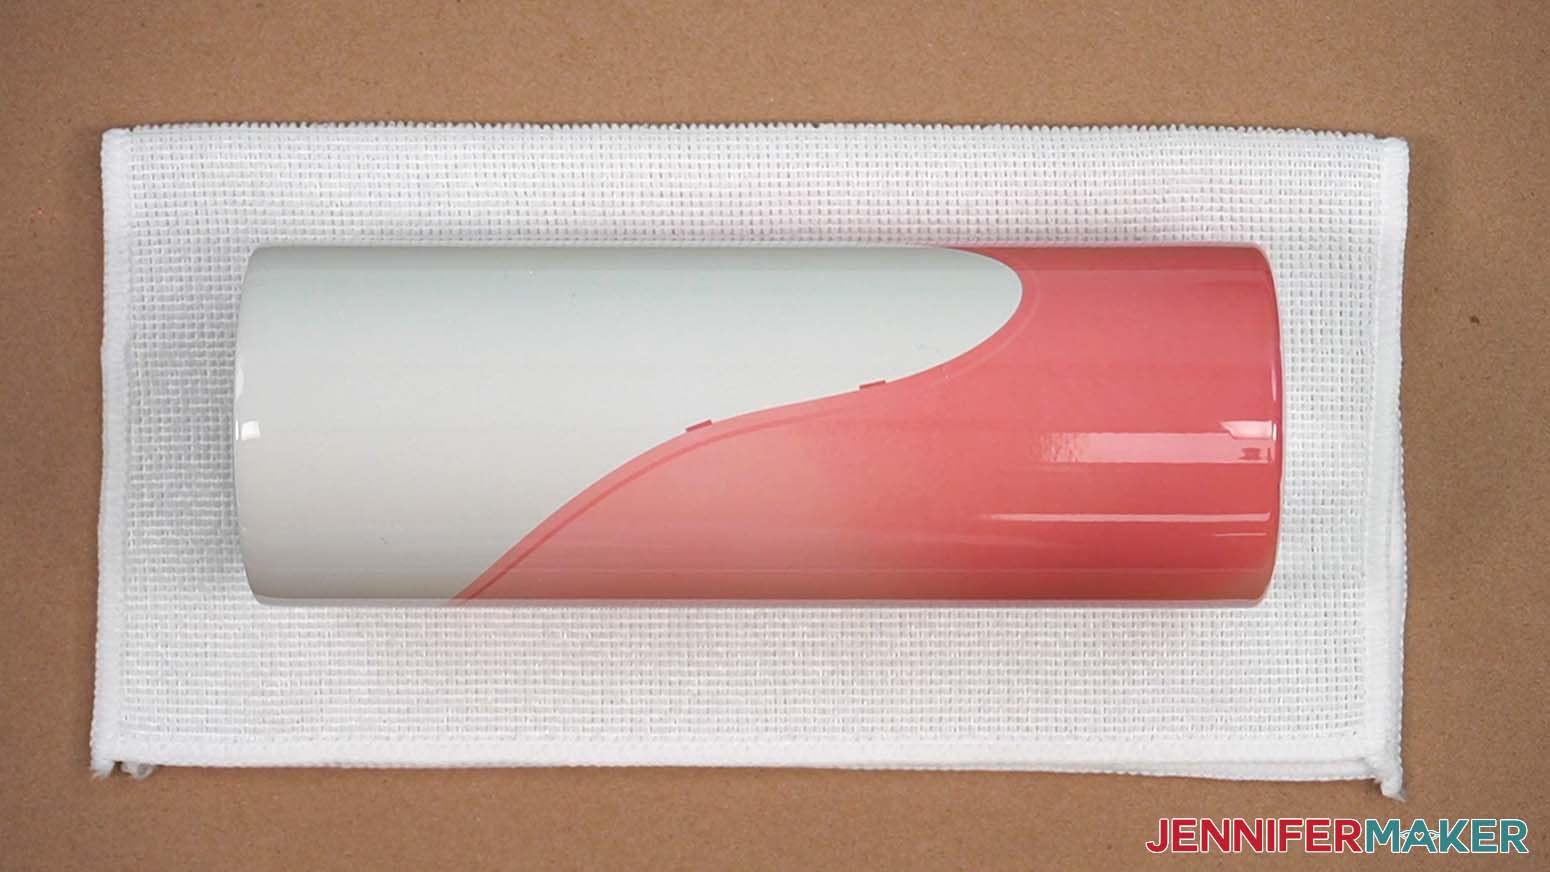
- Place a folded thick towel on your work surface.
TIP: You will use the towel to keep the tumbler from rolling, so make sure you can squish it down. - Put the cooled tumbler on the towel with the lacing holes face up.
- Add a piece of painter’s tape along the tumbler’s length just barely to the inside of one lacing hole row.
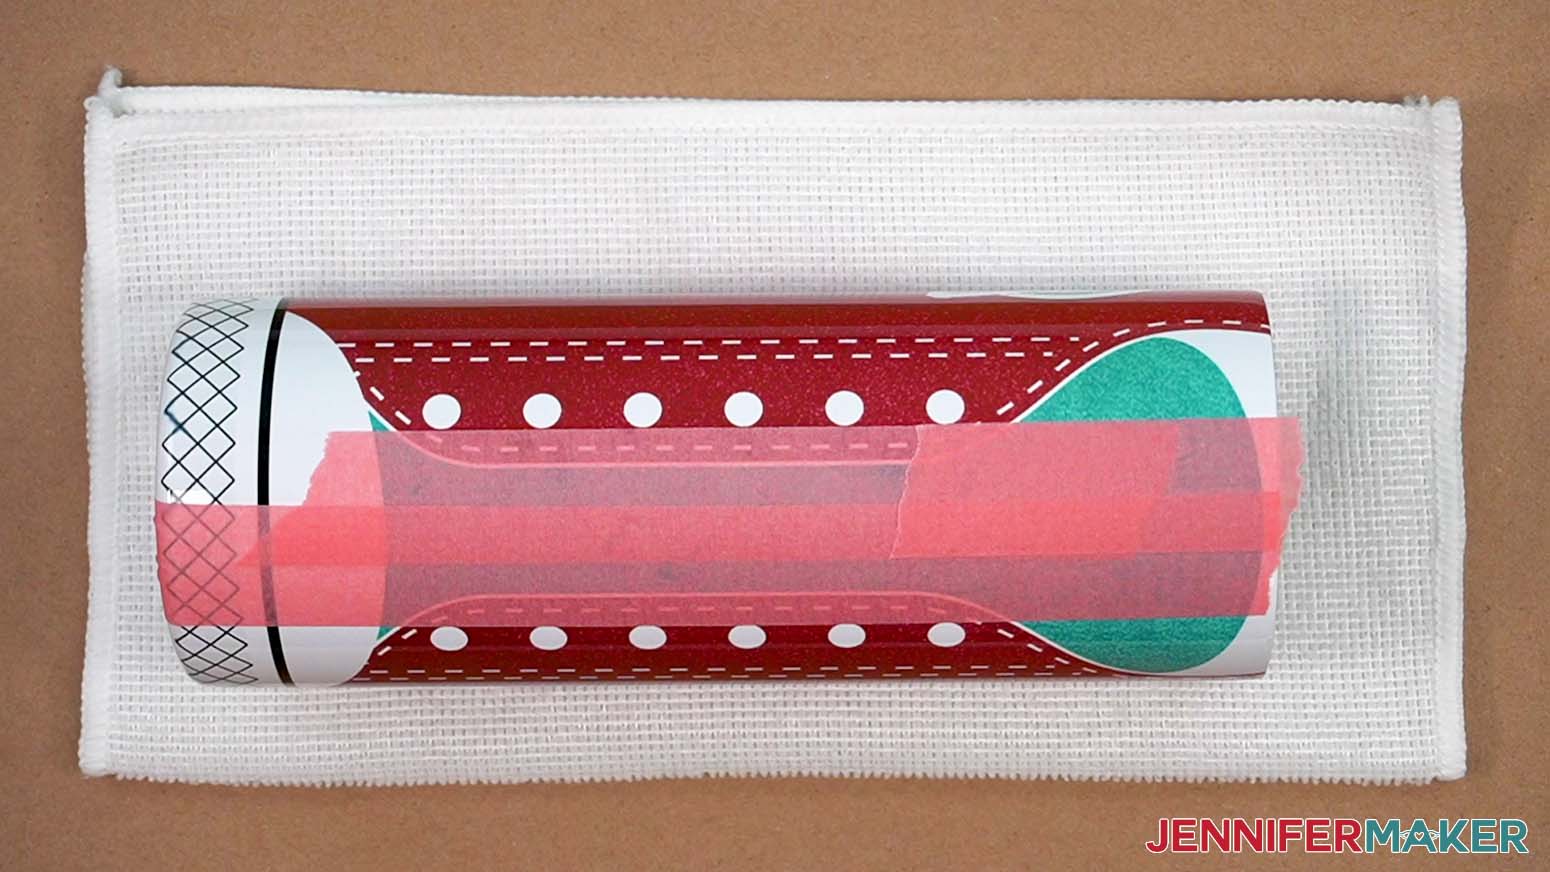
- Add another piece of tape just inside the other row of lacing holes.
- If there is any uncovered tumbler between the pieces, use more tape to cover it completely.
NOTE: The tape will keep the E6000 from spreading into the tongue area. - Add another long piece of tape to the outside of a line of lacing holes so the stitching lines are just barely covered.
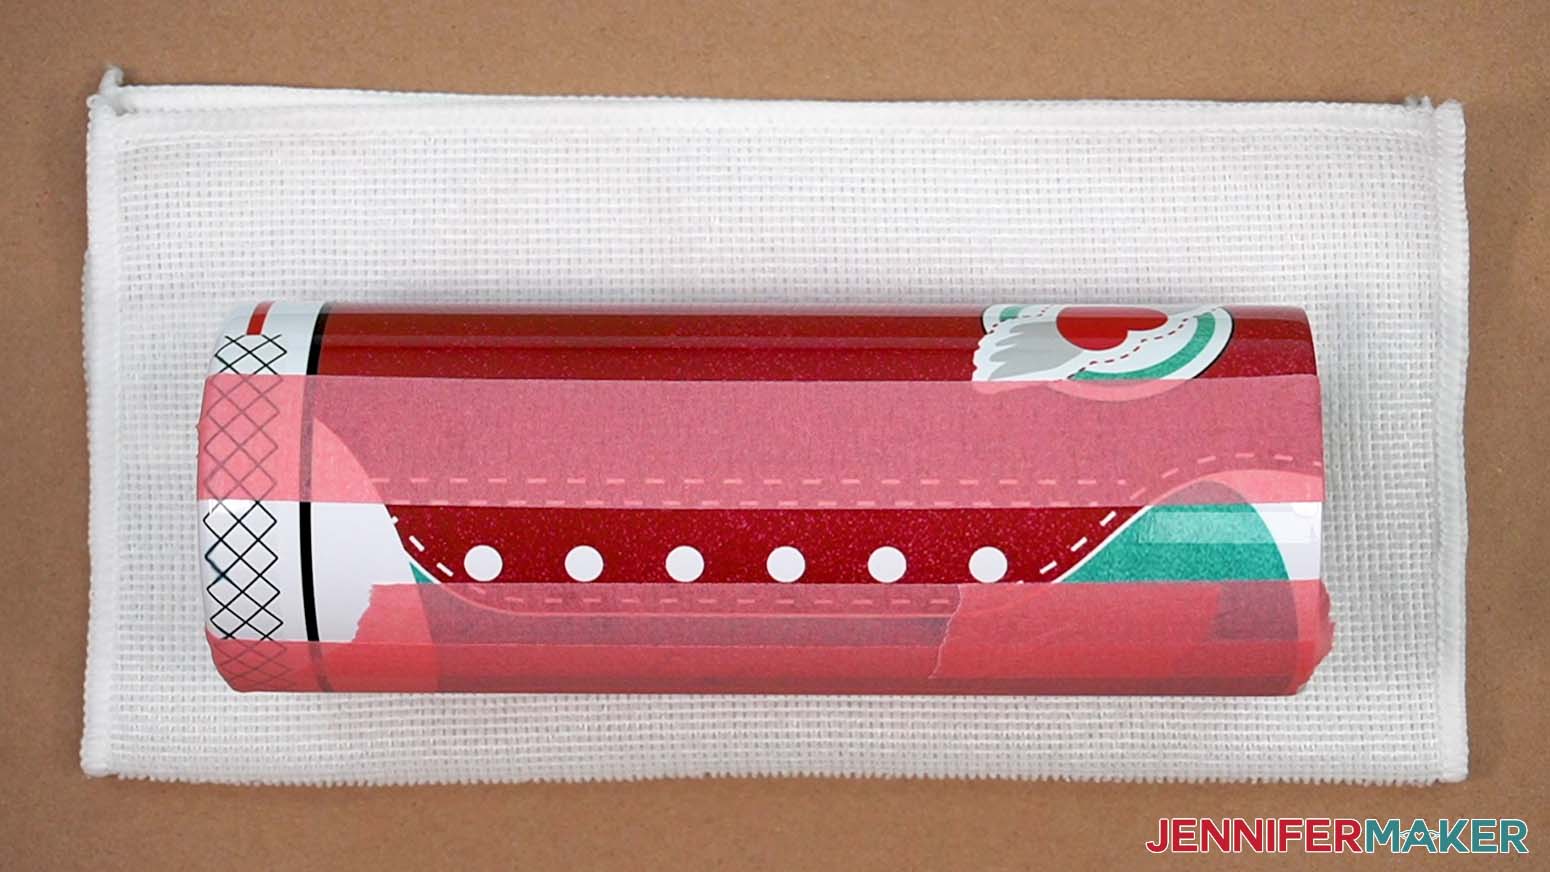
TIP: The lacing eyelets I’m using have a base and an attachment with a small D-ring. The width between the tape pieces over each section of lacing holes should be the same width as the base. - Add a final piece of painter’s tape to cover the stitching on the other side, too.
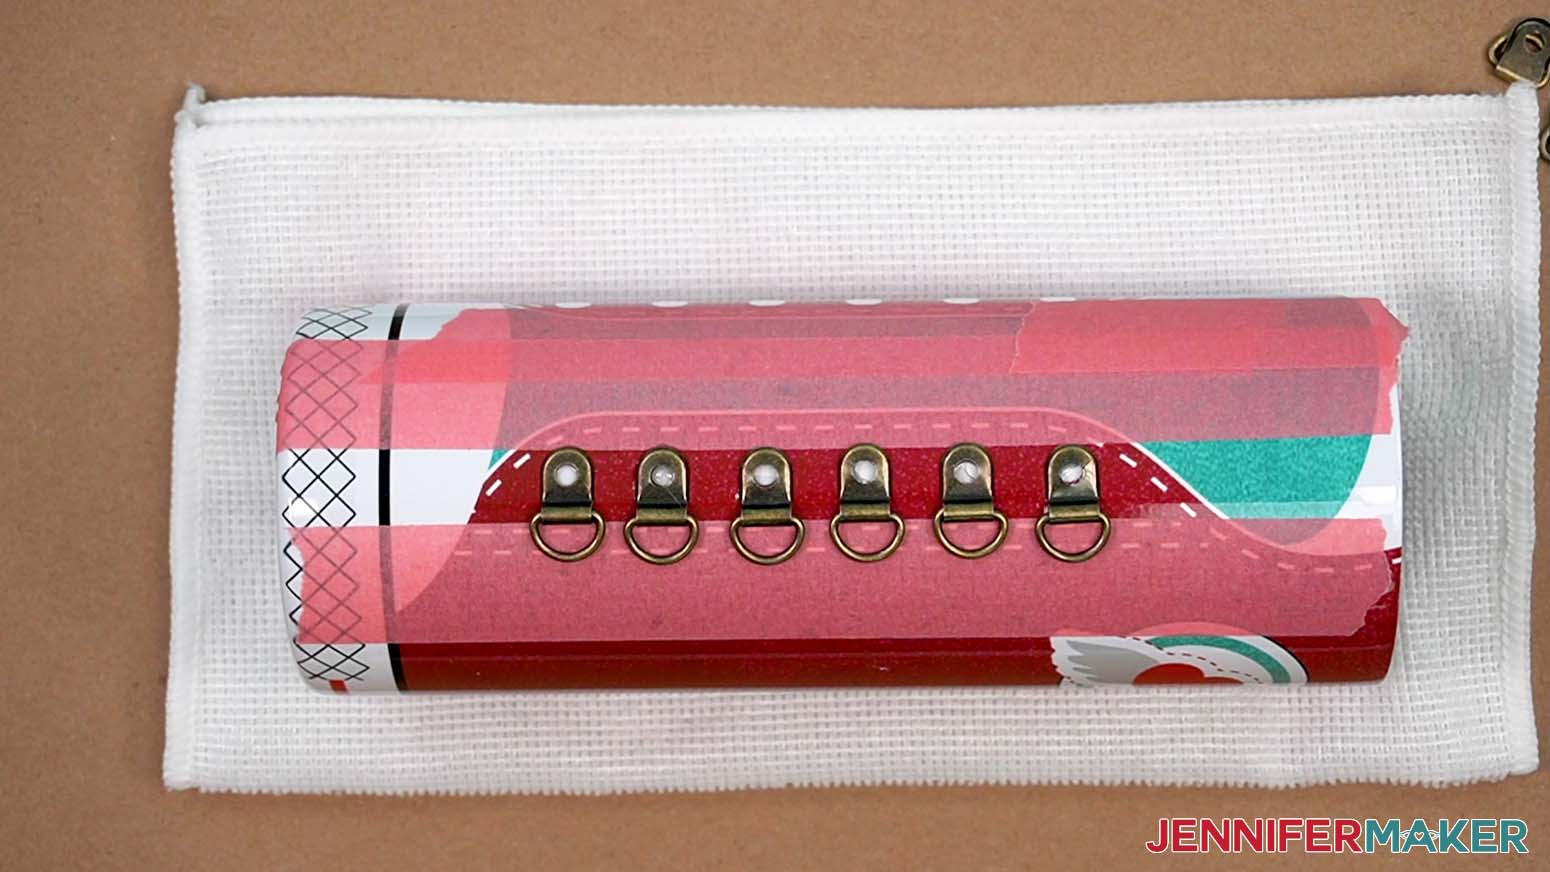
- Rotate the tumbler so one line of lacing holes is face up at the center.
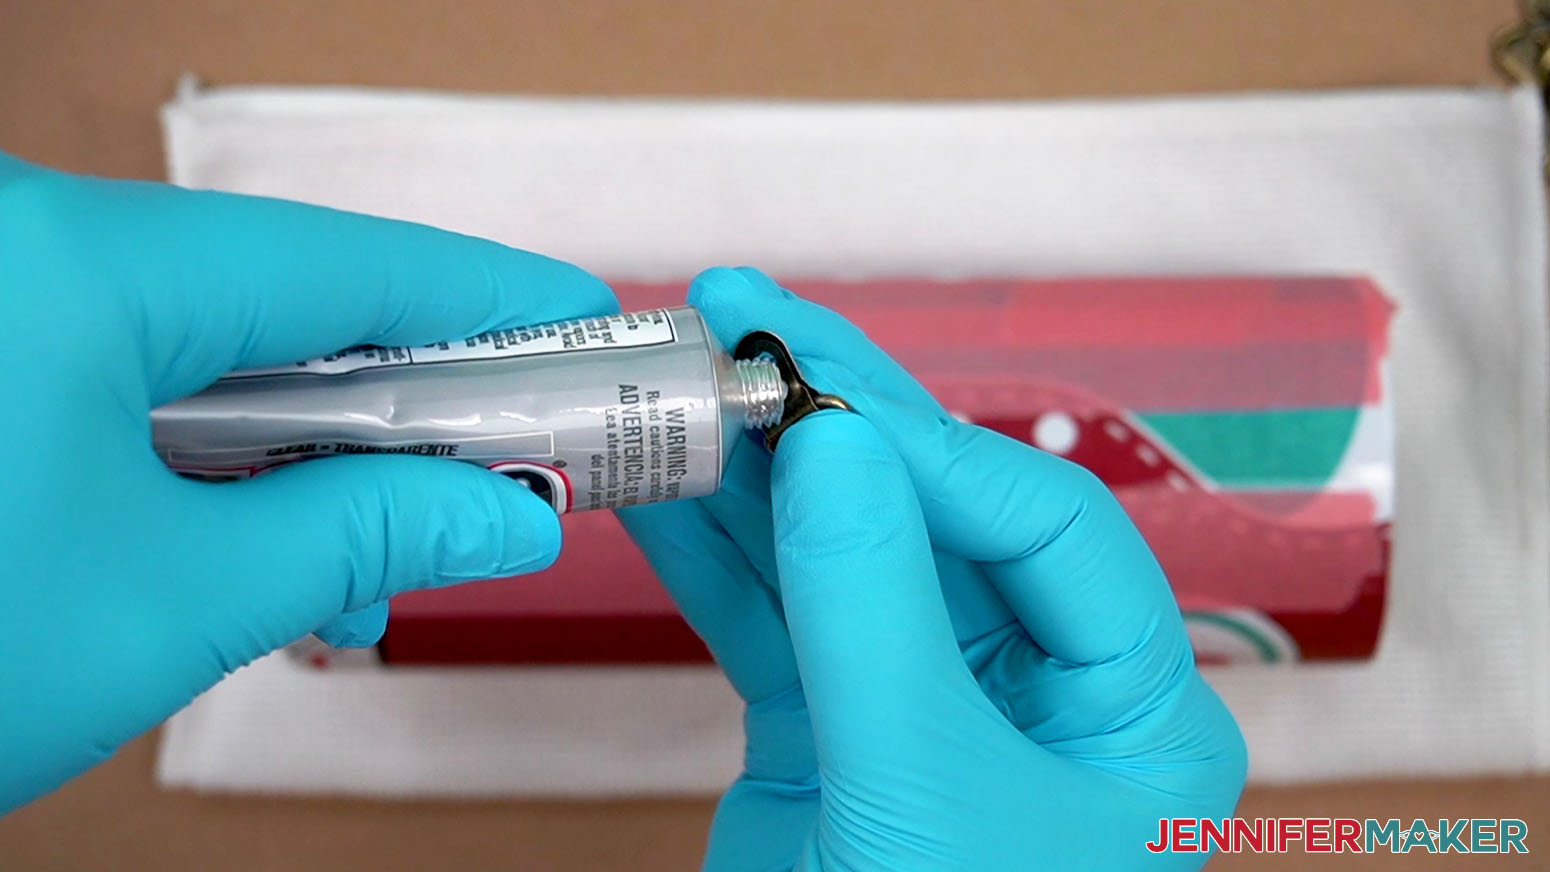
NOTE: The metal bases can slide on the tumbler as the E6000 sets, so rotating the tumbler on the towel to create a flatter surface helps. - Put on your disposable gloves to protect your skin from the E6000.
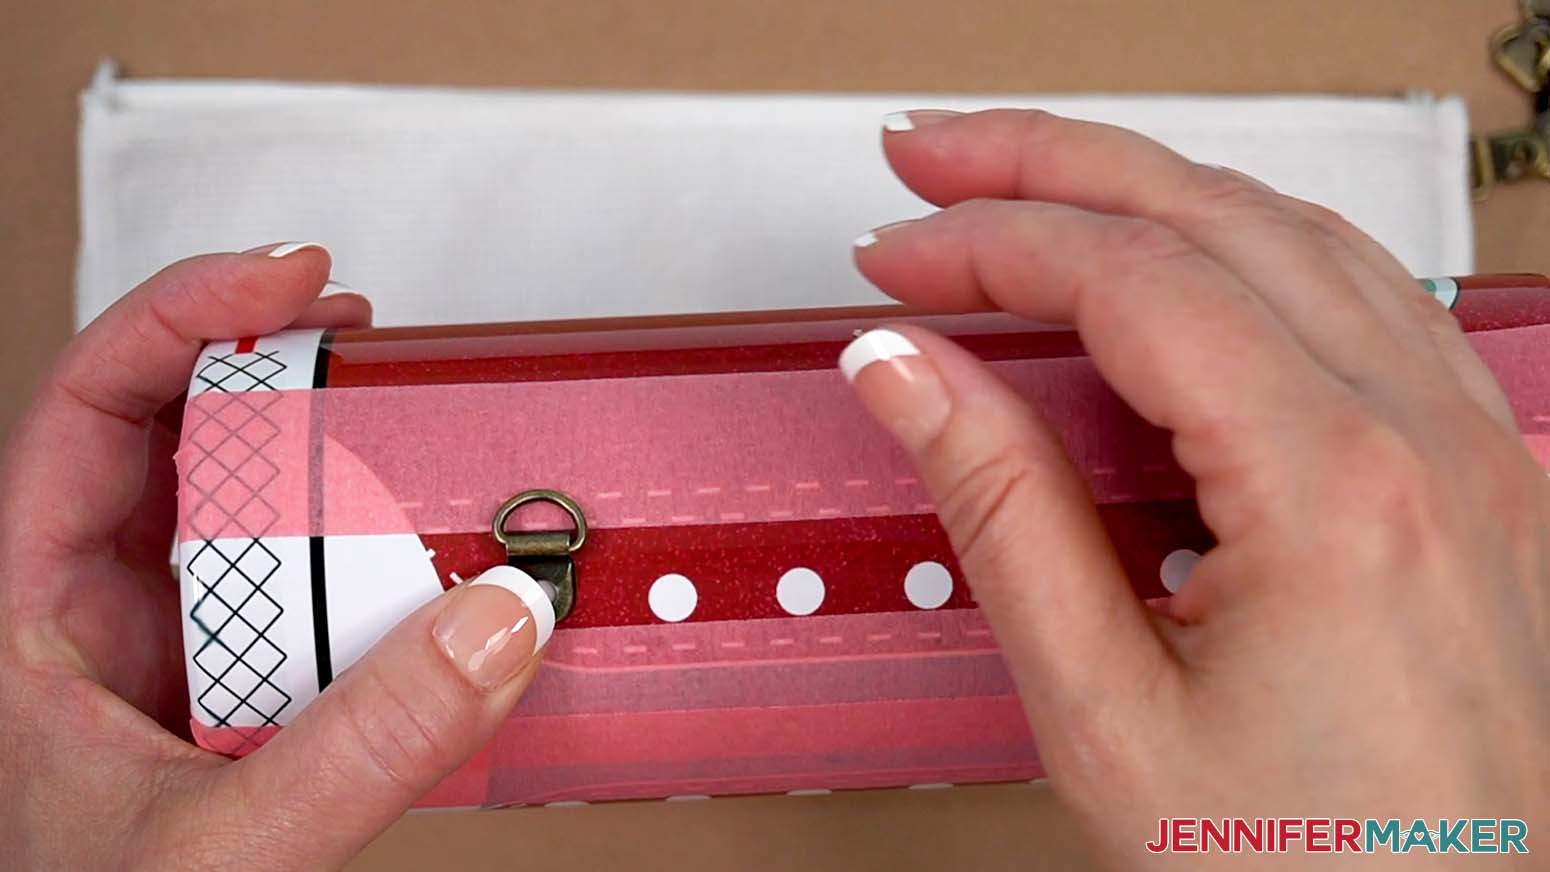
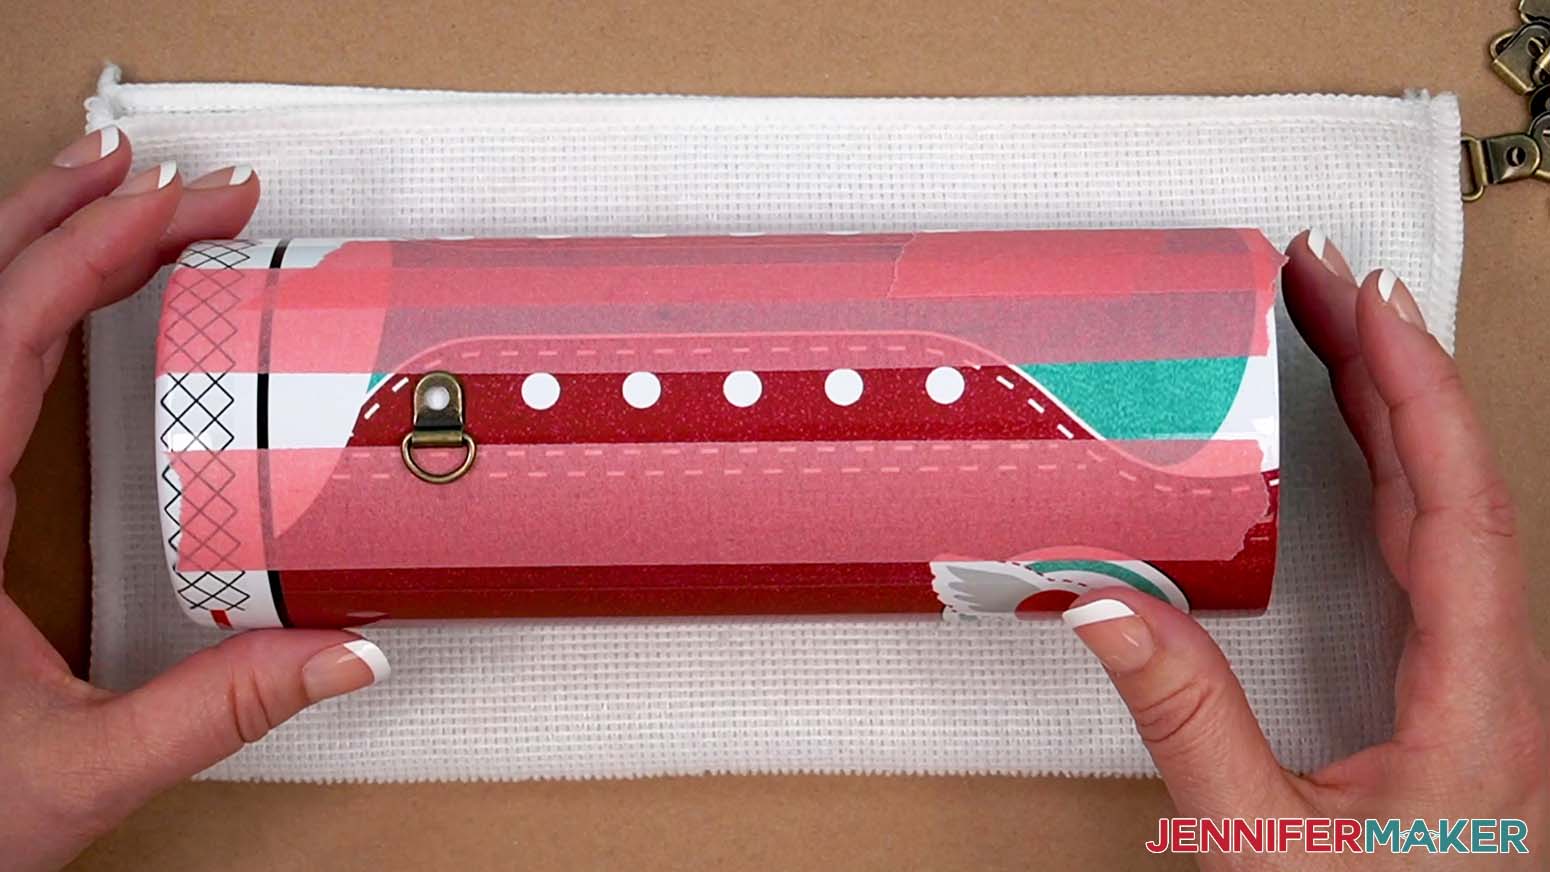
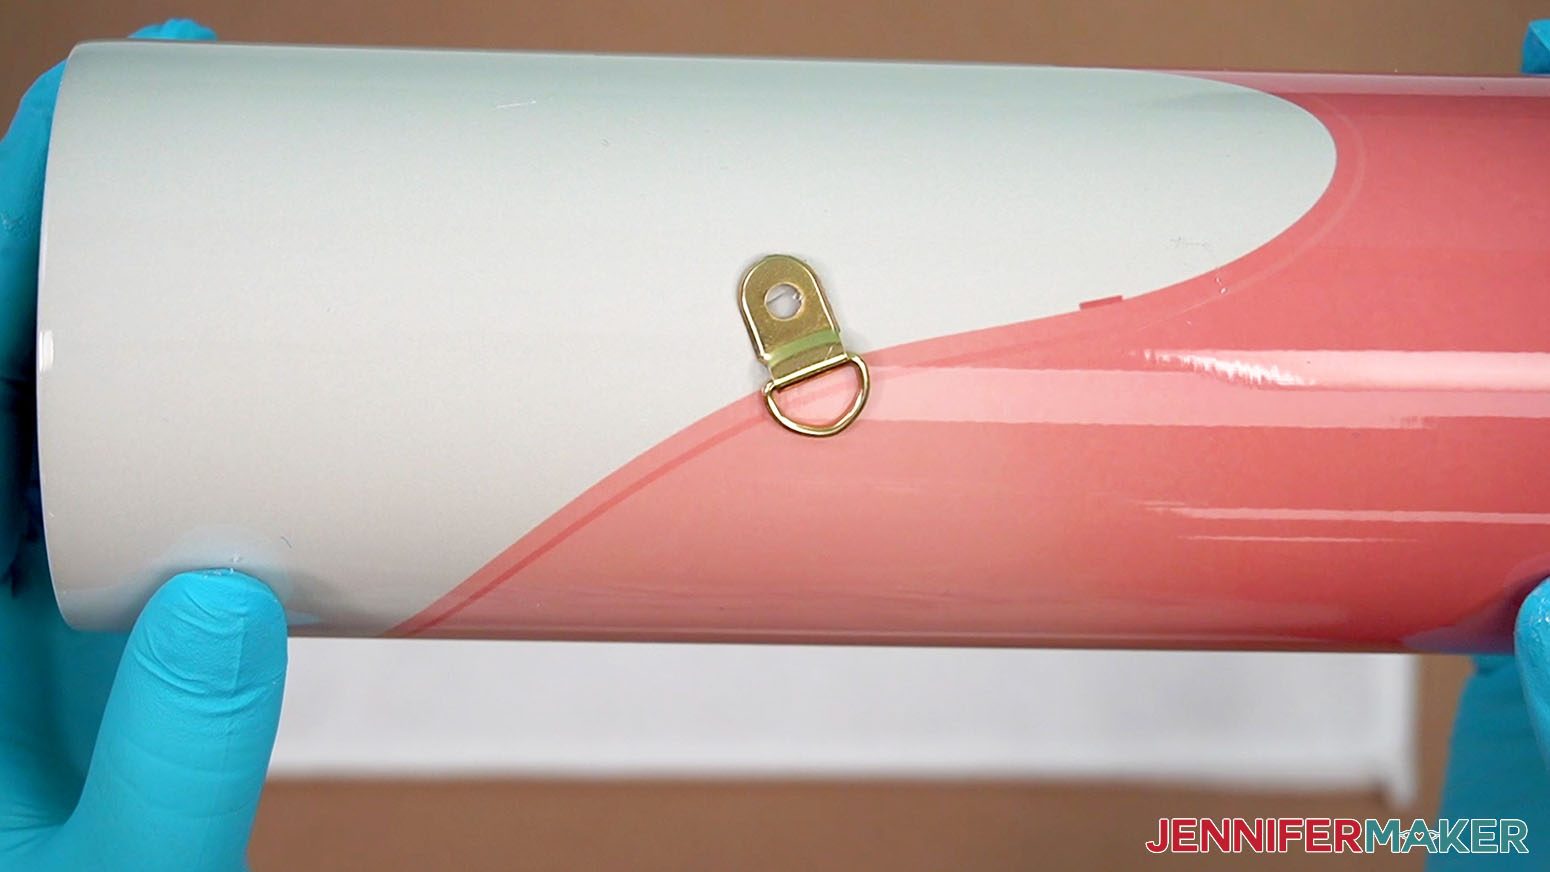
- Apply E6000 to the bottom of an eyelet base.
NOTE: The glue dries clear and will be hidden by laces, so add enough to cover the base’s back, which will help adhere the flat metal to the curved tumbler. - Press the base in place over the first lacing hole so the D-ring sits on top of the outer protective tape.
NOTE: Make sure the D-ring is on the “outside” of the design and can move freely. - Tap the base in different spots to help it bond to the tumbler.
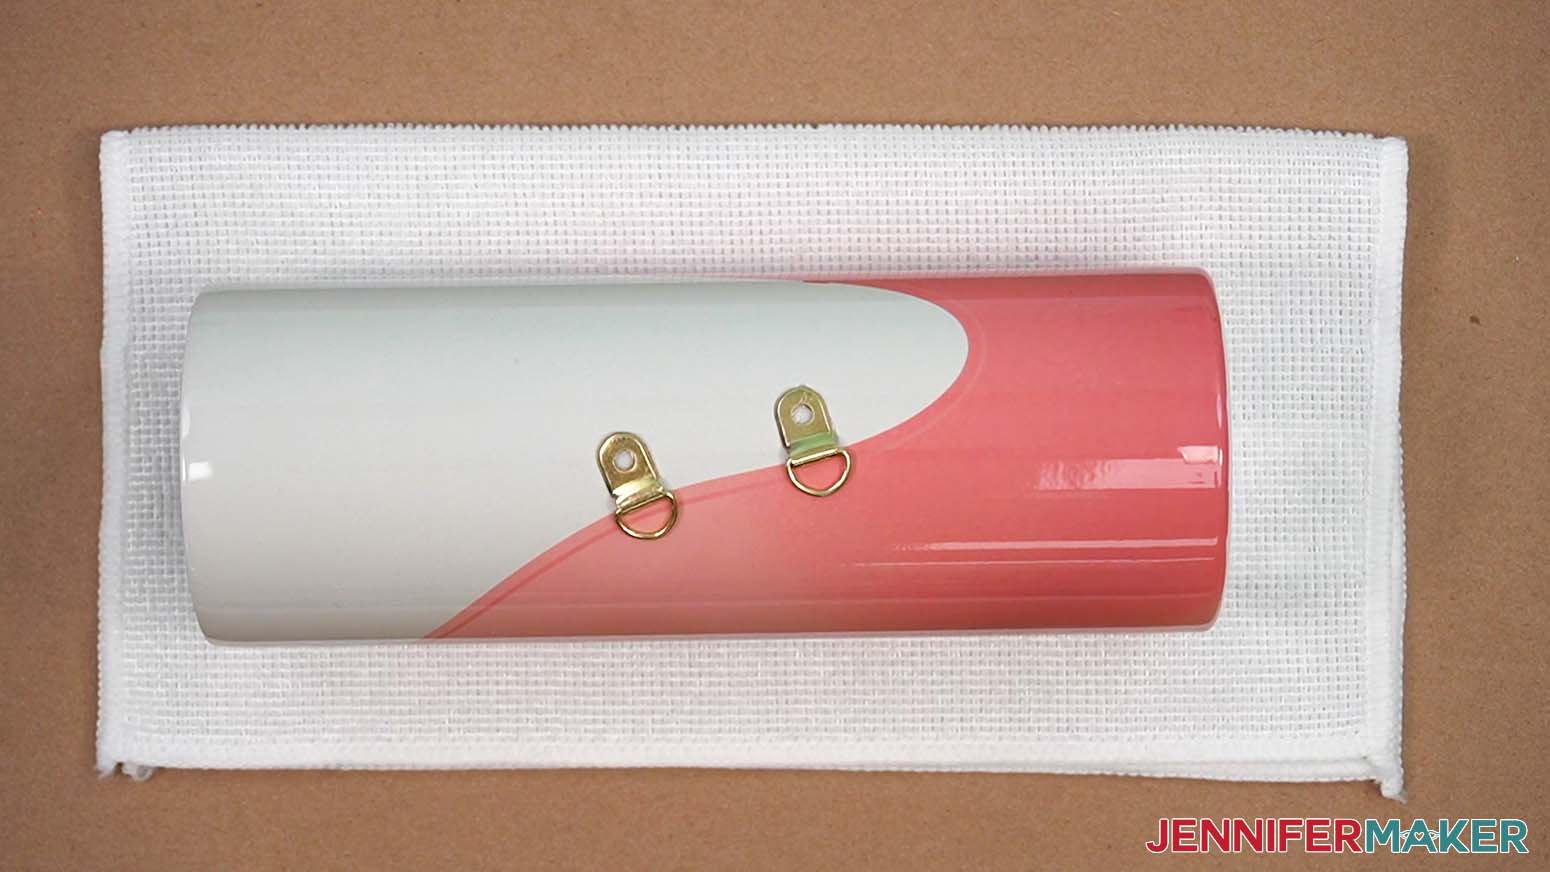
NOTE: The bases are flat, so they won’t perfectly match the tumbler’s curved surface, but as long as the glue touches both surfaces under most of the metal, it will stay secure. - Add the other five lacing eyelets to the design holes on this side.
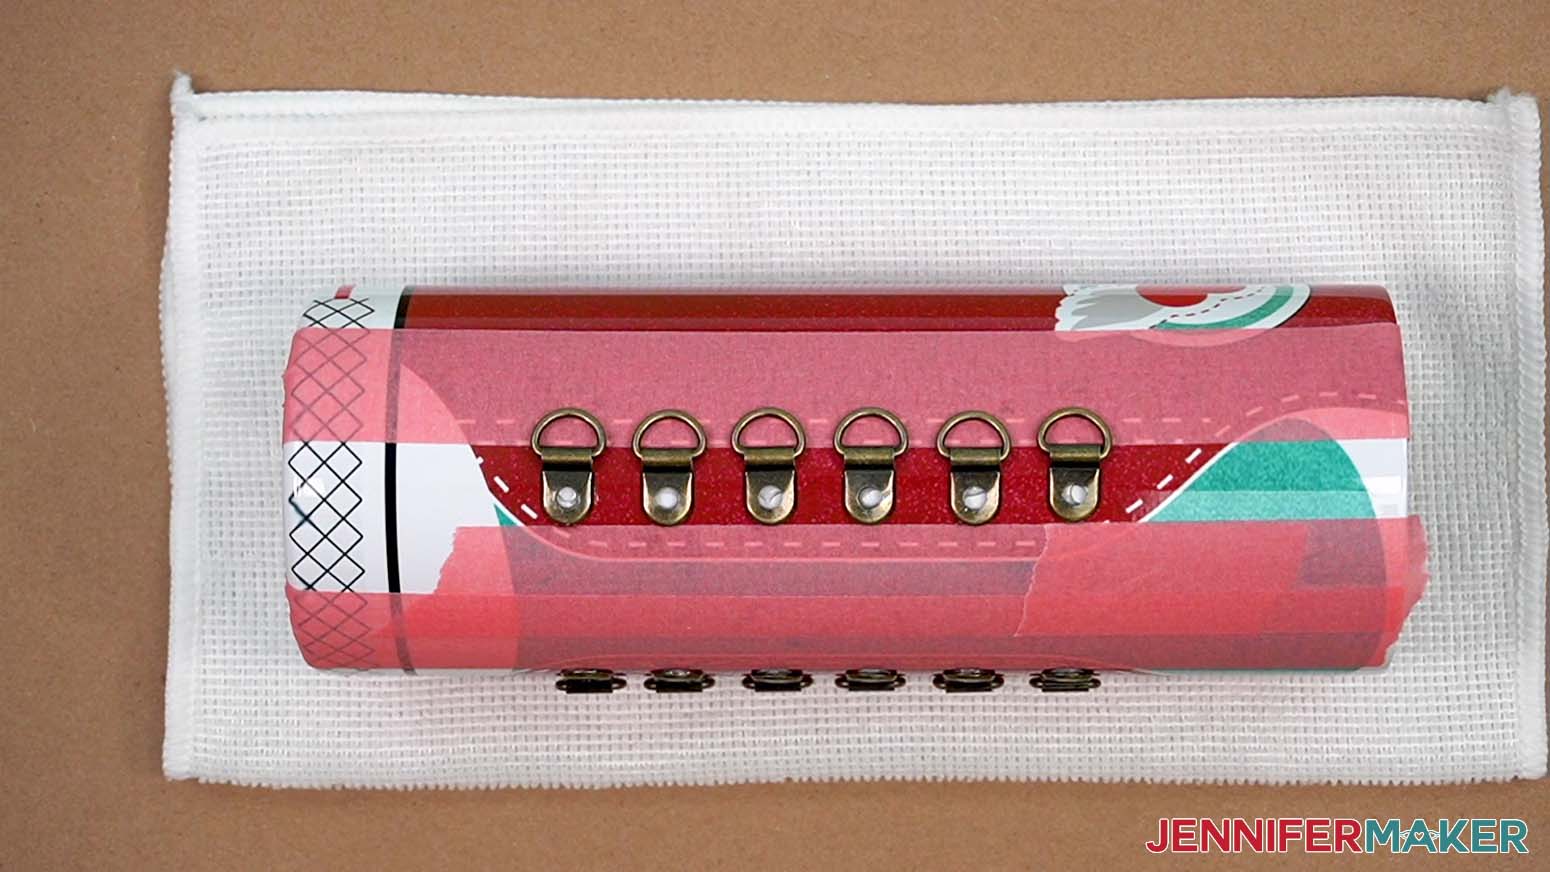
TIP: The E6000 takes about five minutes to set enough that the bases won’t slide if you move the tumbler, so don’t jostle the other pieces while adding new pieces. - Once the eyelets have set for a few minutes so they don’t slide, carefully rotate the tumbler so the other line of lacing holes is at the center facing up.
- Repeat the process to glue the remaining eyelets in place.
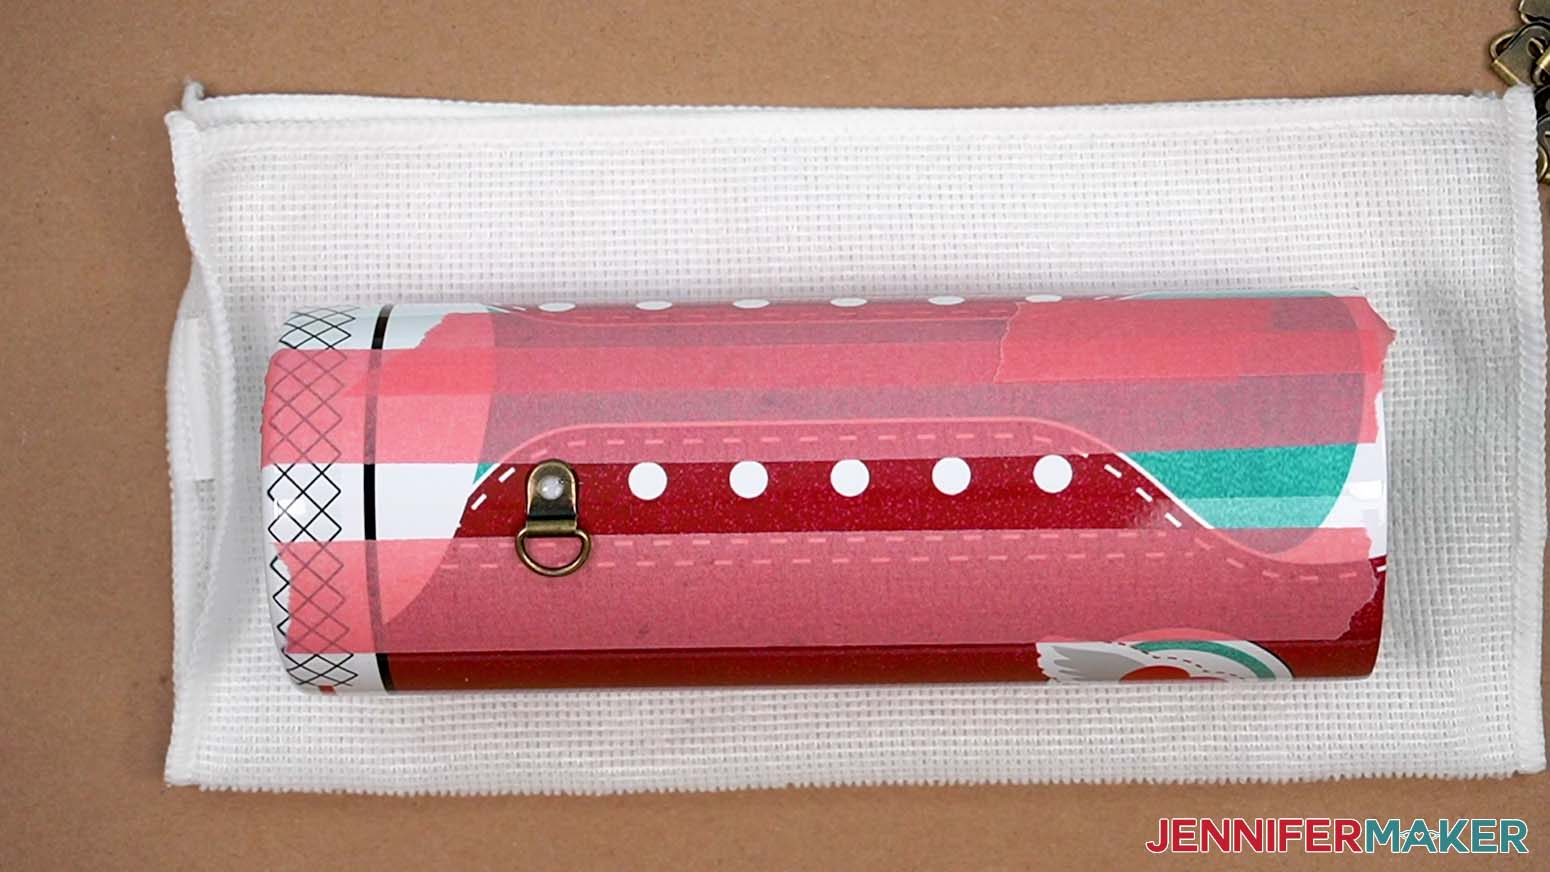
- Let the tumbler sit for about 15 minutes.
- Before the glue dries, gently remove the painter’s tape without bumping the eyelets around.
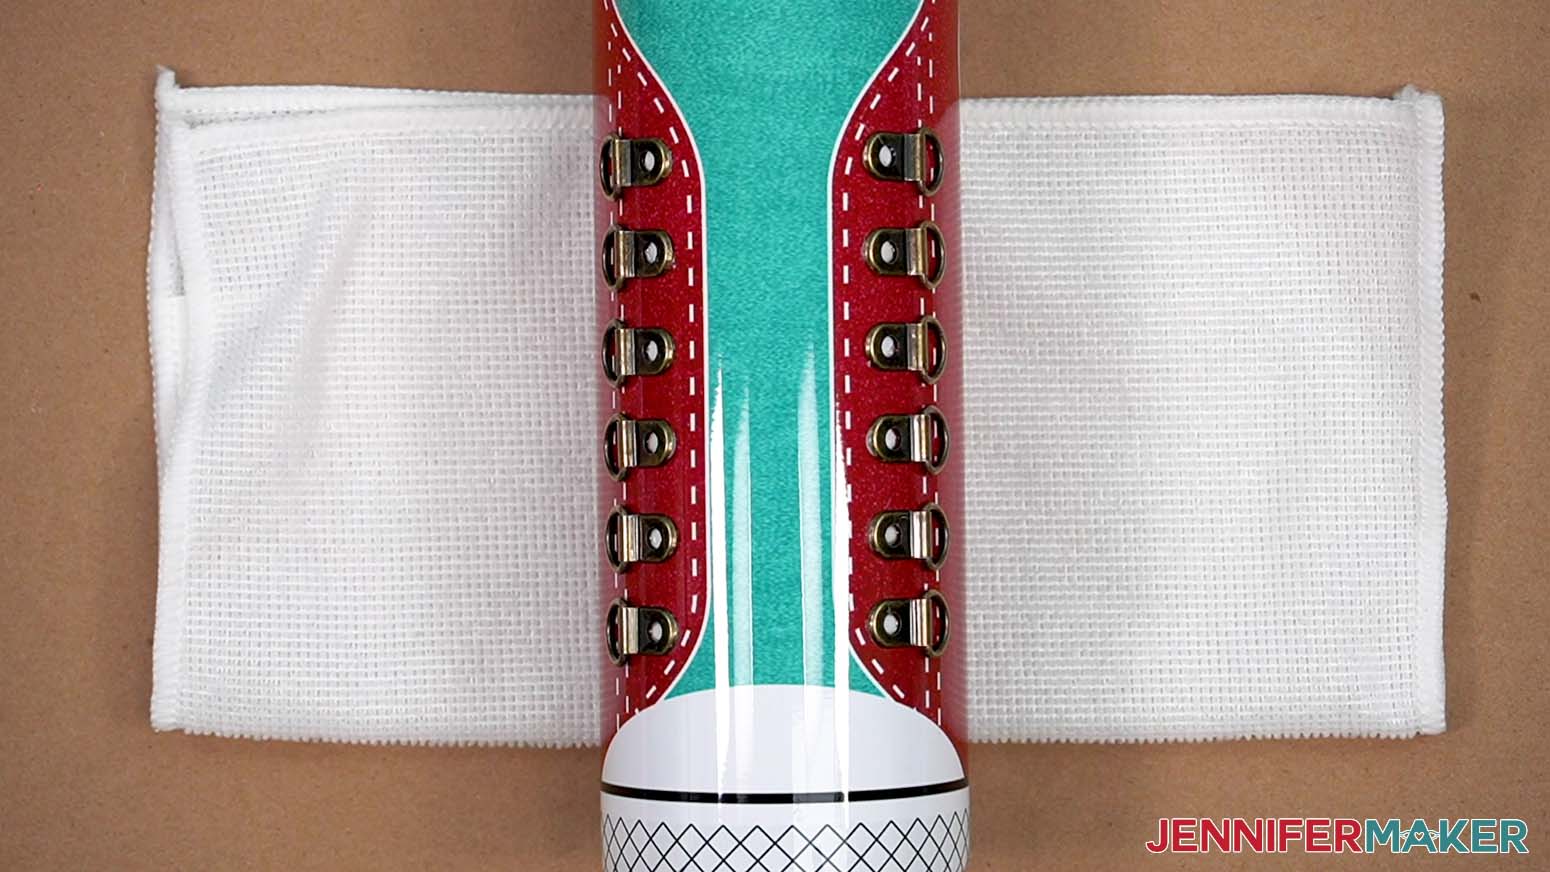
- Allow the eyelets to set for at least two hours before moving any pieces.
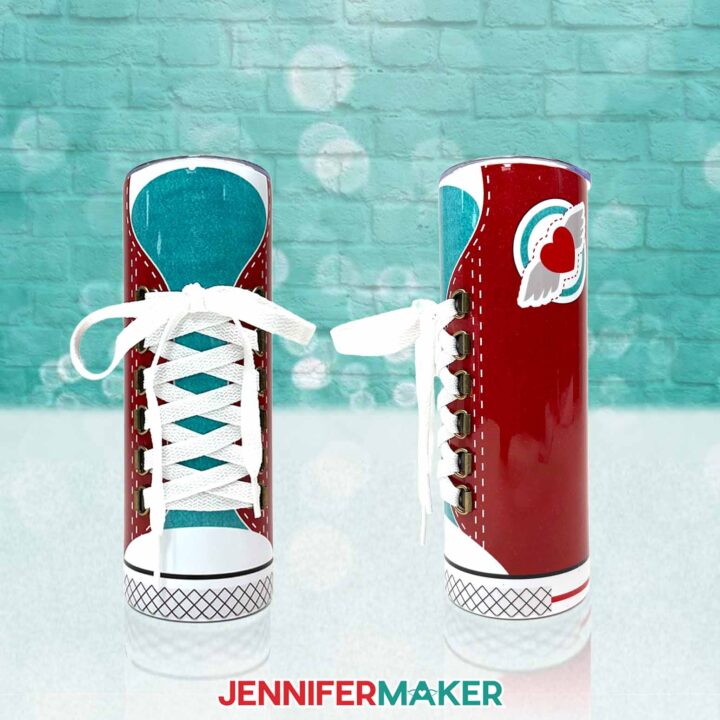
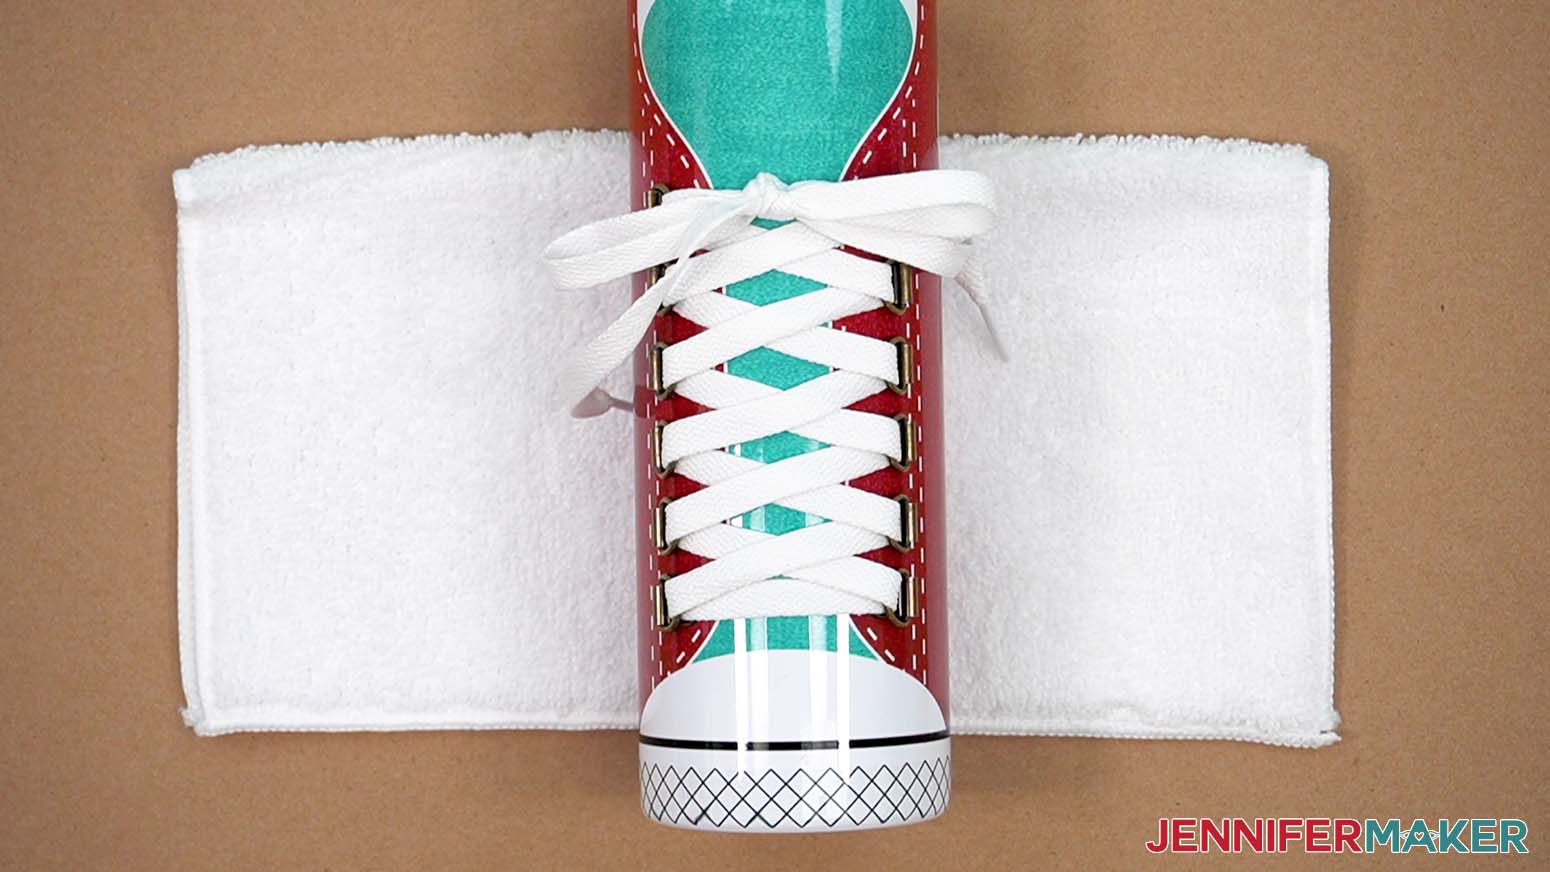
NOTE: The full curing time for E6000 is 24-48 hours, but it will be set enough after a few hours to add the laces. Wait 48 hours for full curing before using the tumbler. - Add a shoelace to the eyelets by lacing up and tying in your favorite method. Make sure the laces don’t twist!
NOTE: I used flat 48” shoelaces, which shaped to the tumbler well and left enough length to tie a bow at the top. - When it’s time to wash your tumbler, remove the laces and hand wash the cup.
OPTION 2: BALLET SLIPPER
- Before working with strong adhesives like E6000, open a window and turn on a fan to improve your ventilation.
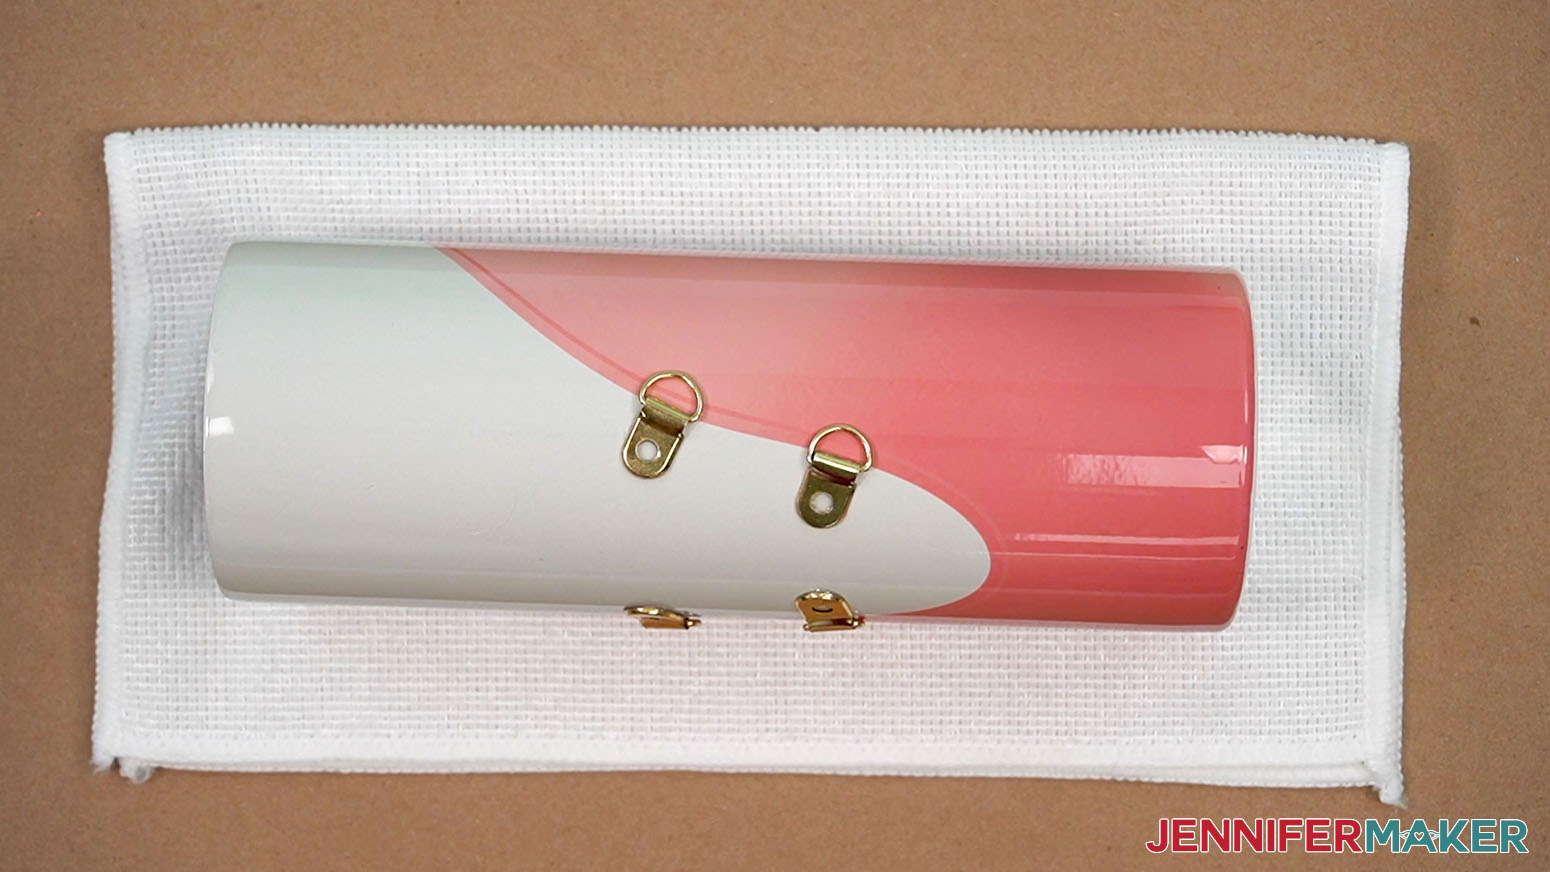
- The slipper has five spots that need eyelets: two on both sides of the front, and one on the back. Each is noted by a small rectangle of the slipper color.
- Protect your work surface with butcher paper.
- Place a folded thick towel on the paper.
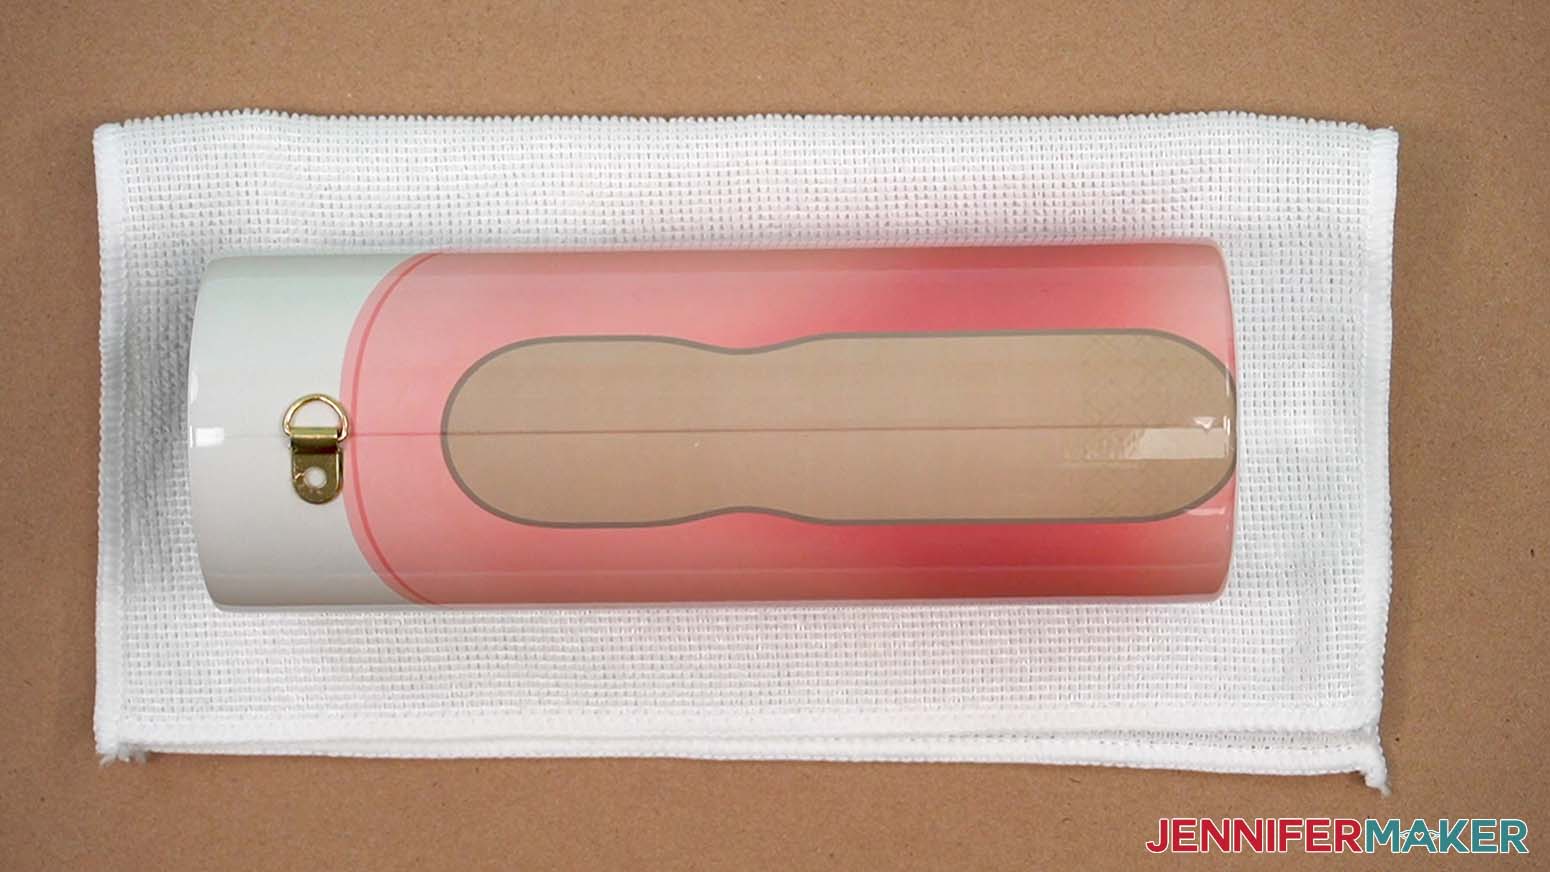
TIP: You will use the towel to keep the tumbler from rolling, so make sure you can squish it down. - Put the cooled tumbler on the towel with one side of the slipper’s front centered.
- Add glue to the back of an eyelet base.
- Place the eyelet’s base on the tumbler so the D-ring’s tube lines up with the small rectangle of slipper color.
NOTE: The laces will cover the eyelets, so it’s ok that they seem very visible right now. - Let the first eyelet sit for a few minutes.
- Use Steps 6 and 7 to adhere the second eyelet to the lower rectangle on the same slipper edge.
- Let the eyelets sit for 15 minutes so the E6000 will keep them from sliding.
- Gently rotate the tumbler so the other edge of the slipper’s front is centered.
- Use Steps 6 and 7 to adhere the third and fourth eyelets.
NOTE: Make sure the eyelets are at the same angles as the ones across the design. - Let the glue set for 15 minutes.
- Rotate the tumbler to show the back.
- Adhere the last eyelet in the middle of the seam at the top so the D-ring hinges left to right, not up and down.
- Let the tumbler sit for 15 minutes.
- Set the tumbler upright and allow the glue to dry for a minimum of two hours.
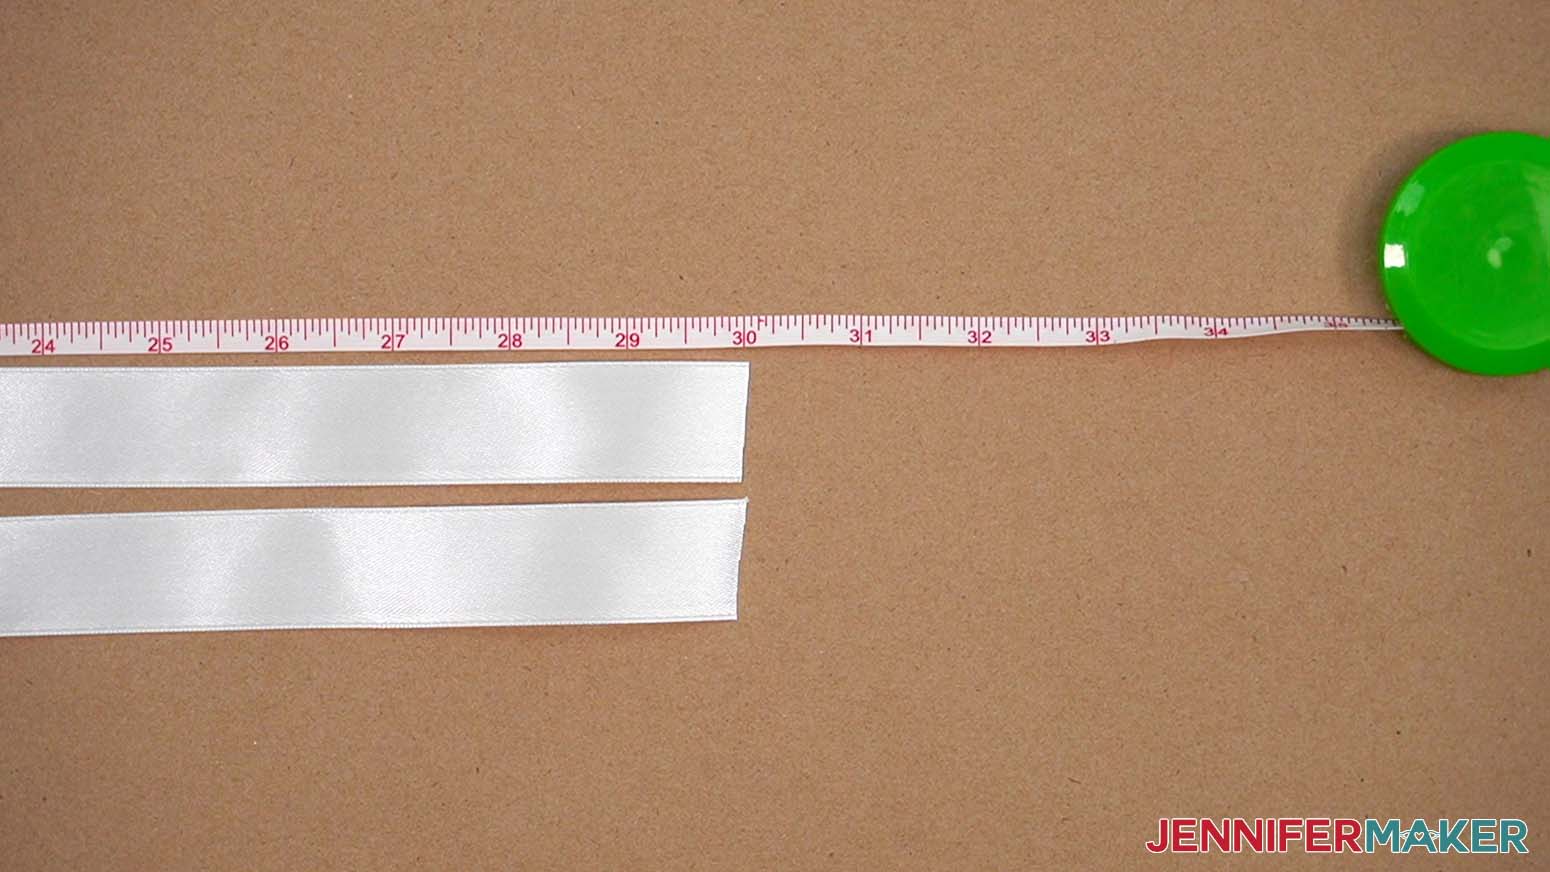
NOTE: The E6000 will take about a day to completely cure, but a few hours are enough to add the laces. - Cut two lengths of ribbon about 30” each.
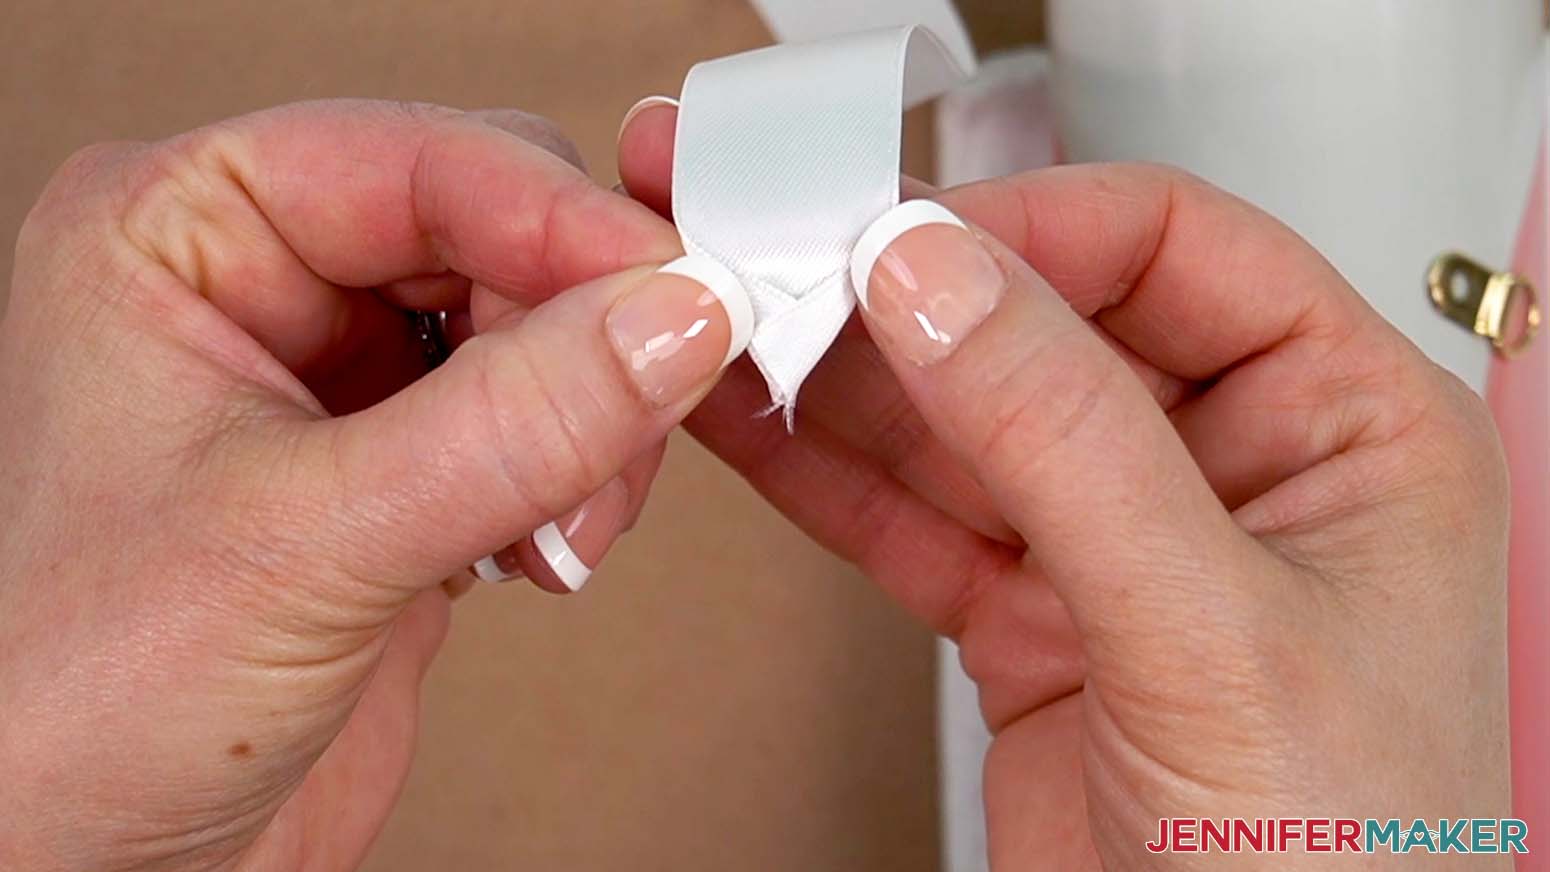
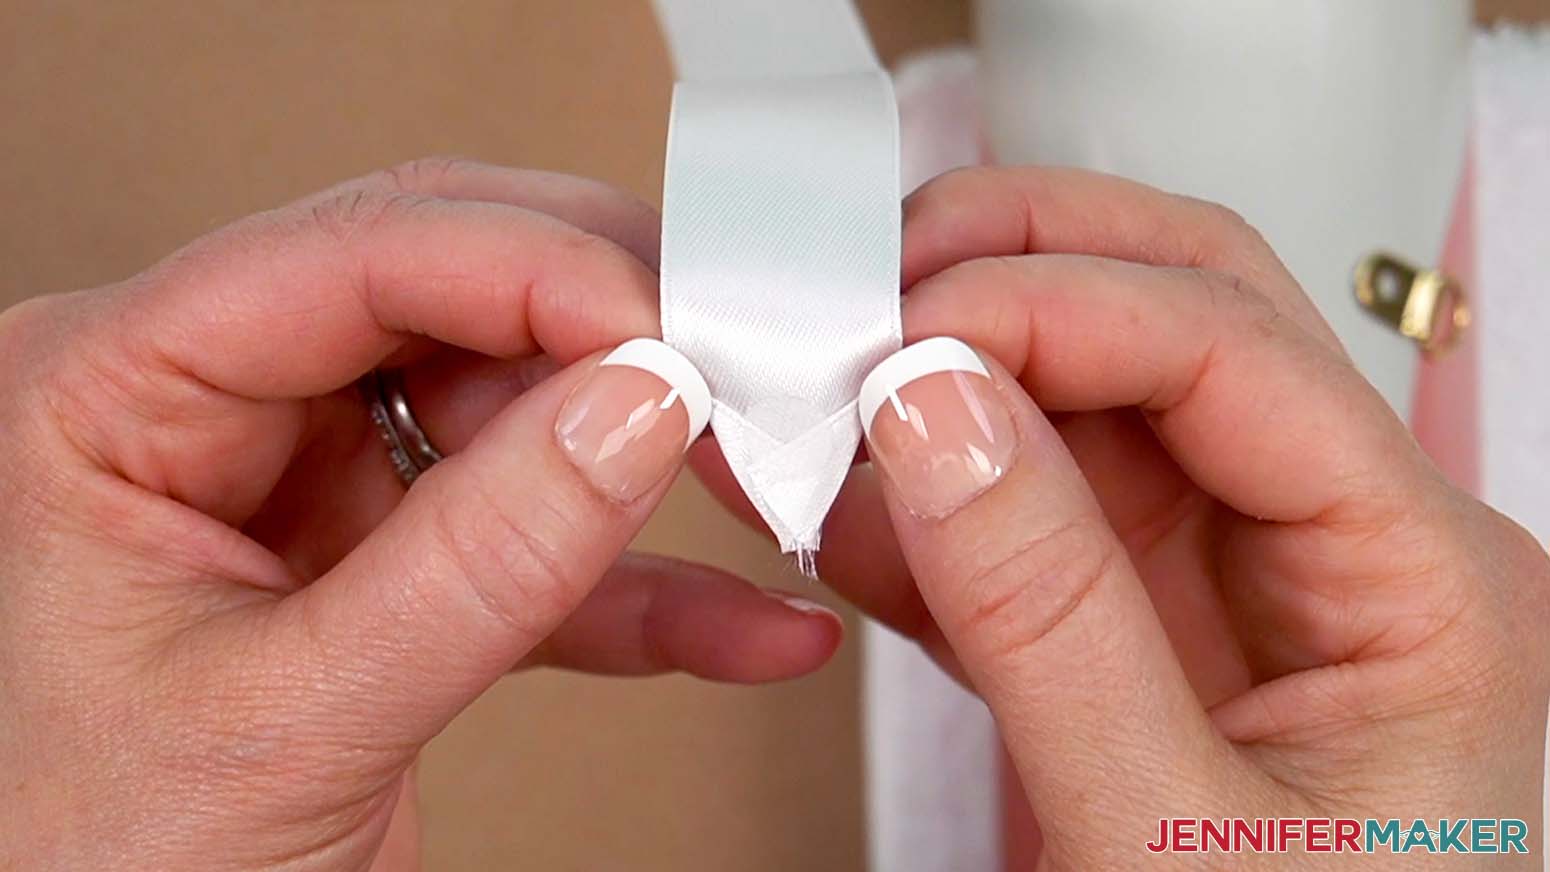
TIP: I used ⅞” wide ribbon. - Fold the corners of one end in and slightly overlap them to make a triangle.
- Take one side of a hook and loop dot off its backer and secure it overlapping the folded ribbon’s seam.
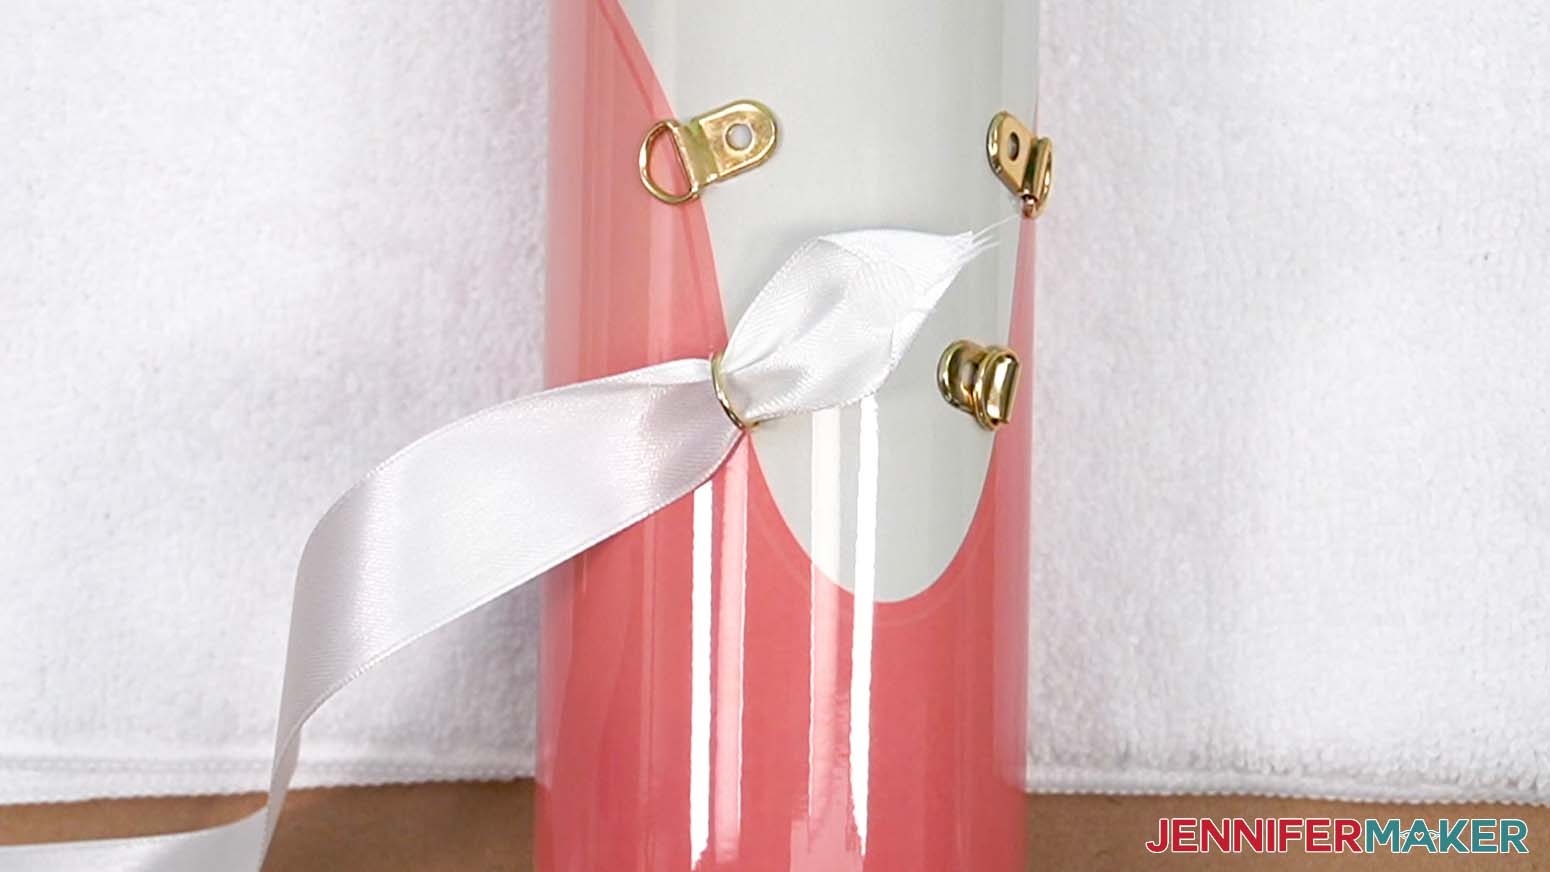
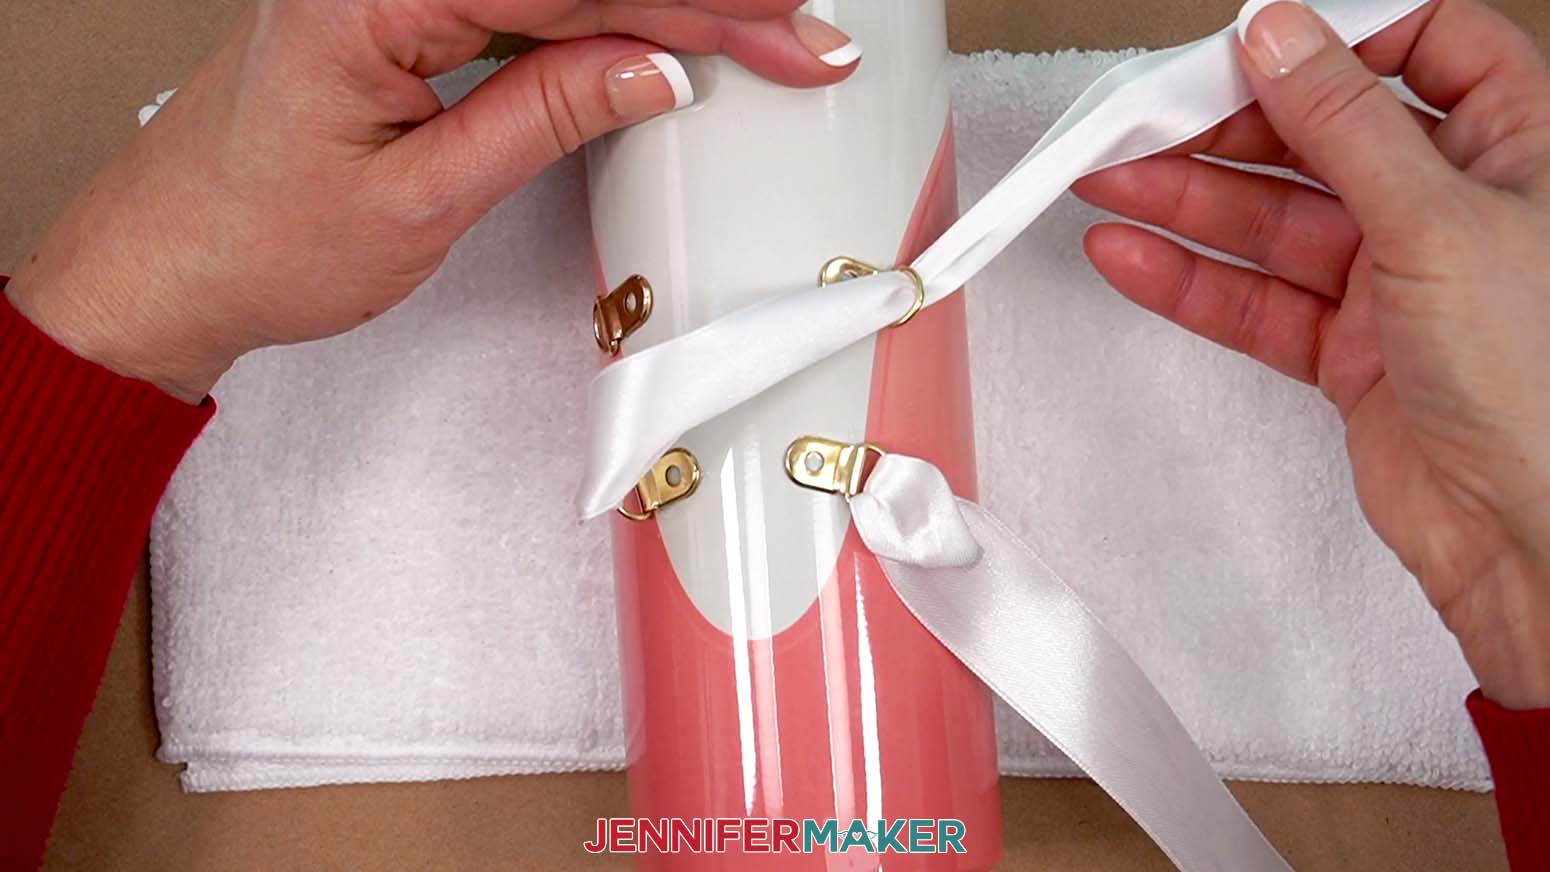
- With the dot facing up, slide the triangle through a bottom eyelet from the outside in toward the design’s white open section.
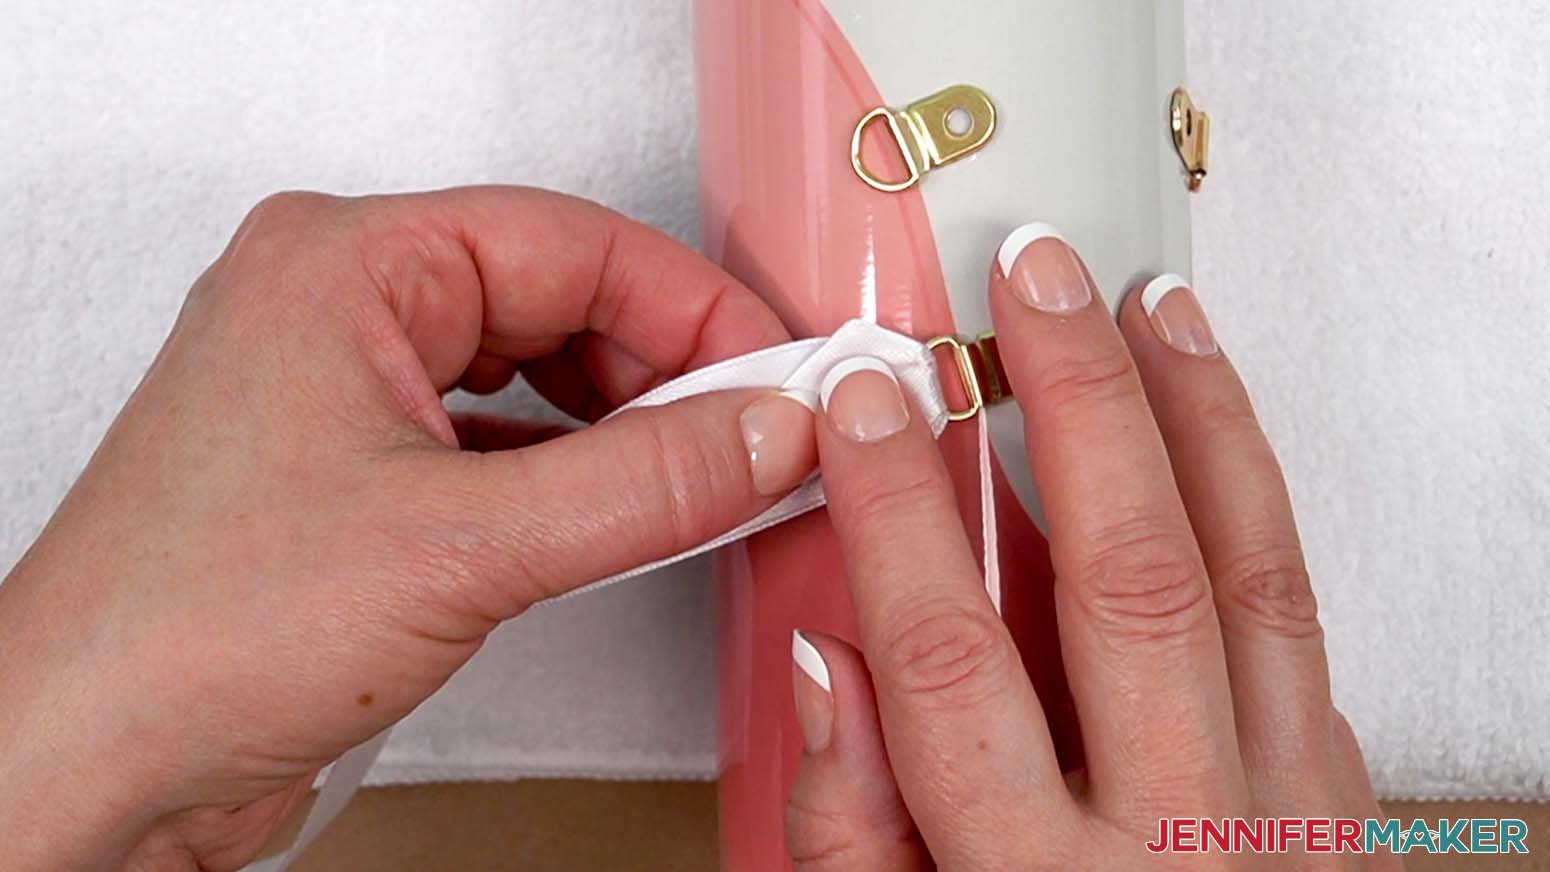
TIP: If your hook and loop dots are thicker, it may be easier to place the closure after feeding the ribbon through the eyelet. - Fold the triangle back over the D-ring to see where the other side of the hook and loop set should go on the plain ribbon.
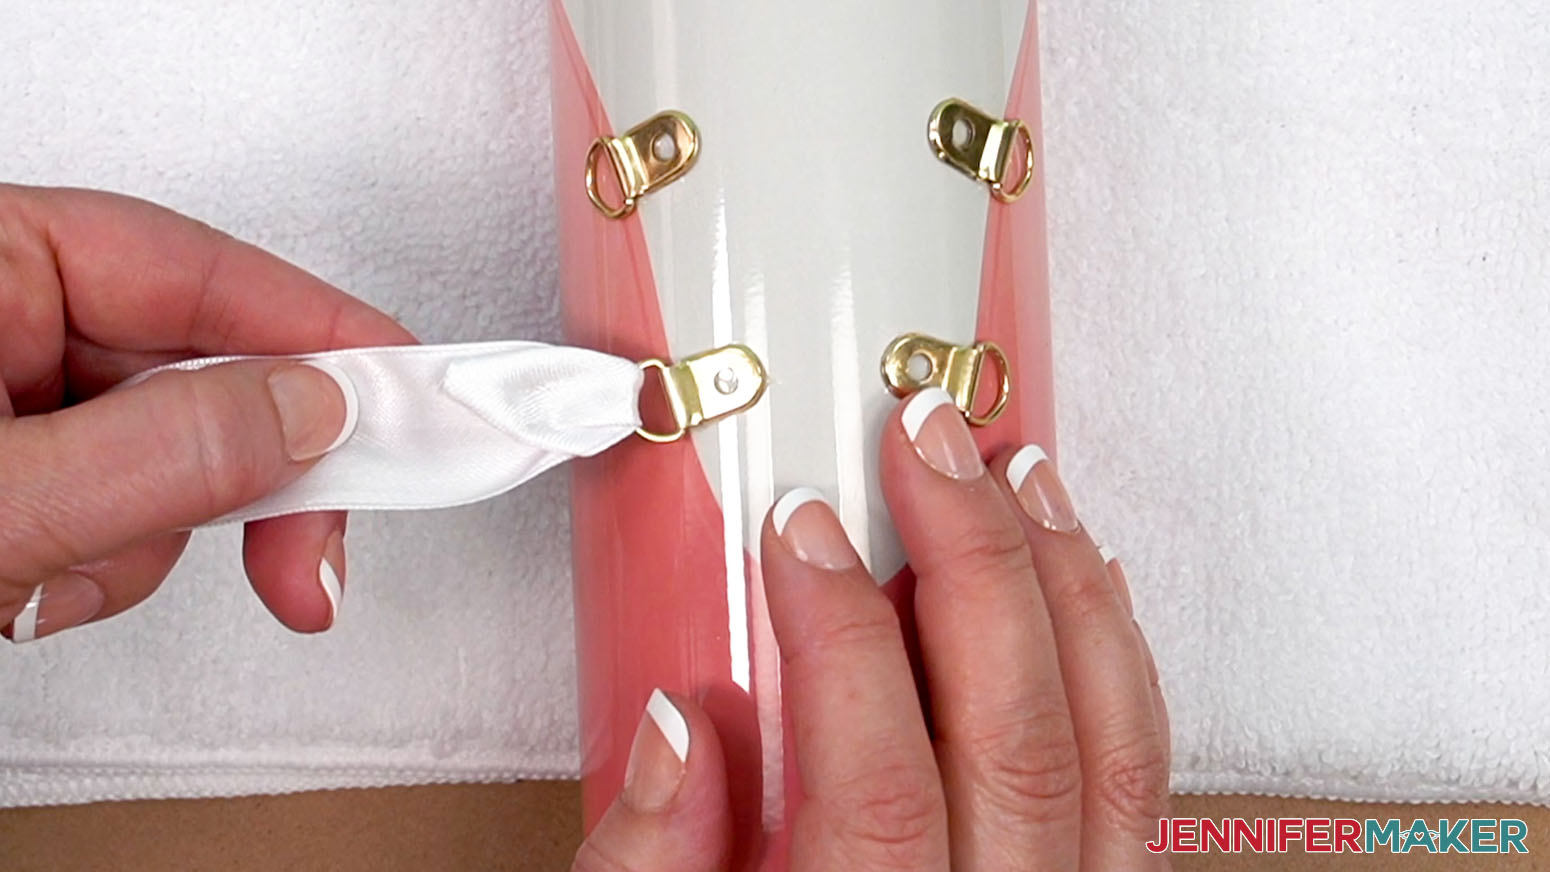
TIP: Adjust the ribbon’s angle before picking the spot for the second dot. - Place the other side of the hook and loop dot where it will meet the first piece and hold the ribbon at the correct angle, then fold the triangle end back so the closure pieces meet.
- Use Steps 19-23 to prepare and add the second ribbon to the other bottom eyelet.
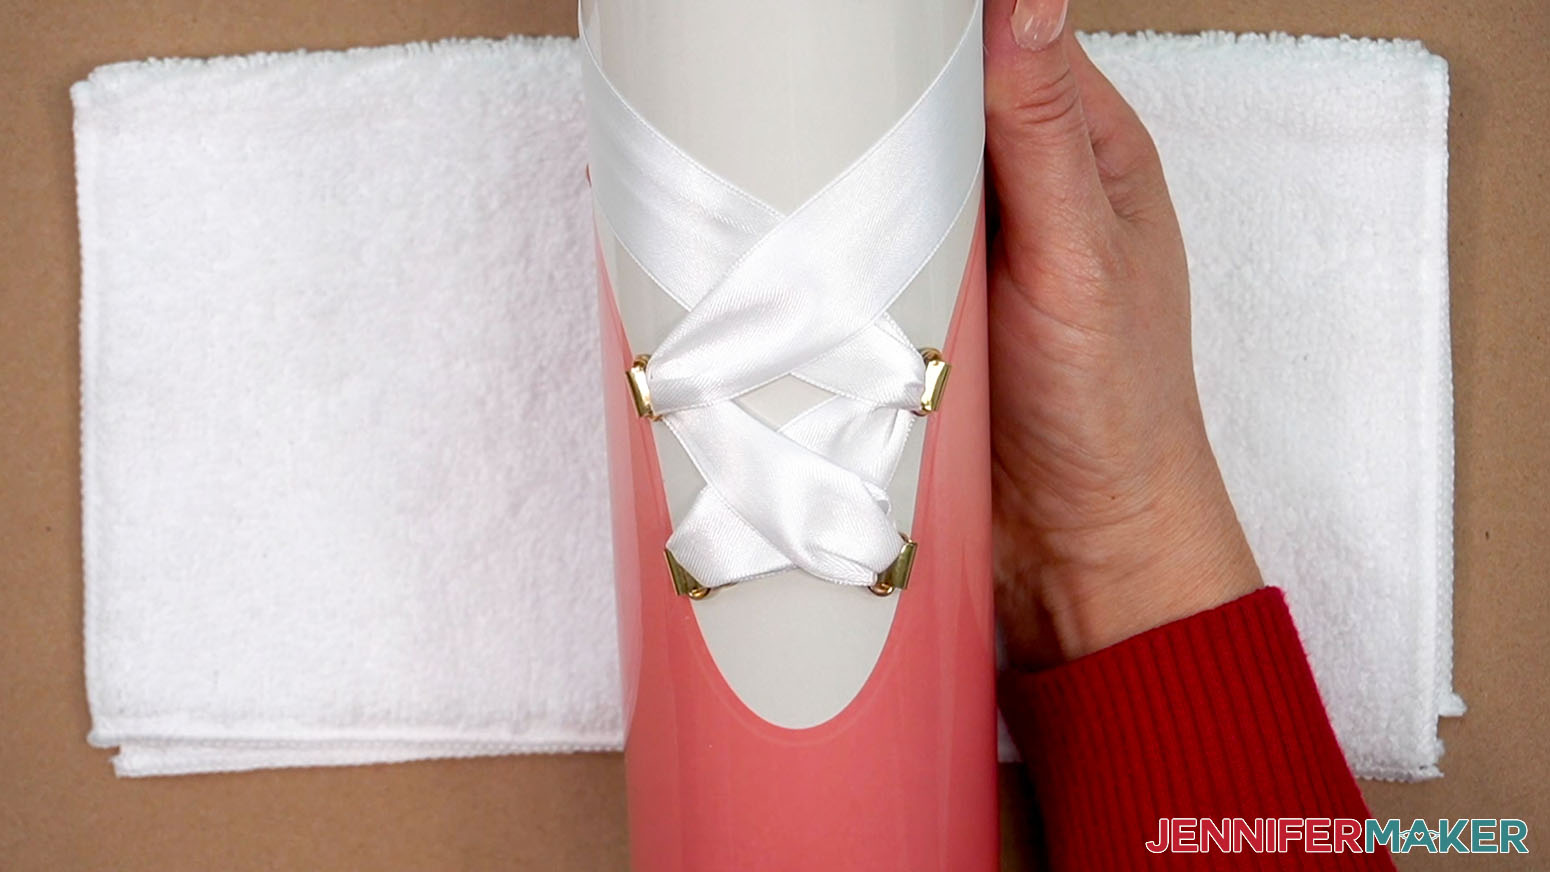
- Lace up the eyelets in front by crossing the ribbons from one side to the other.
- Cross the ribbons again at the top.
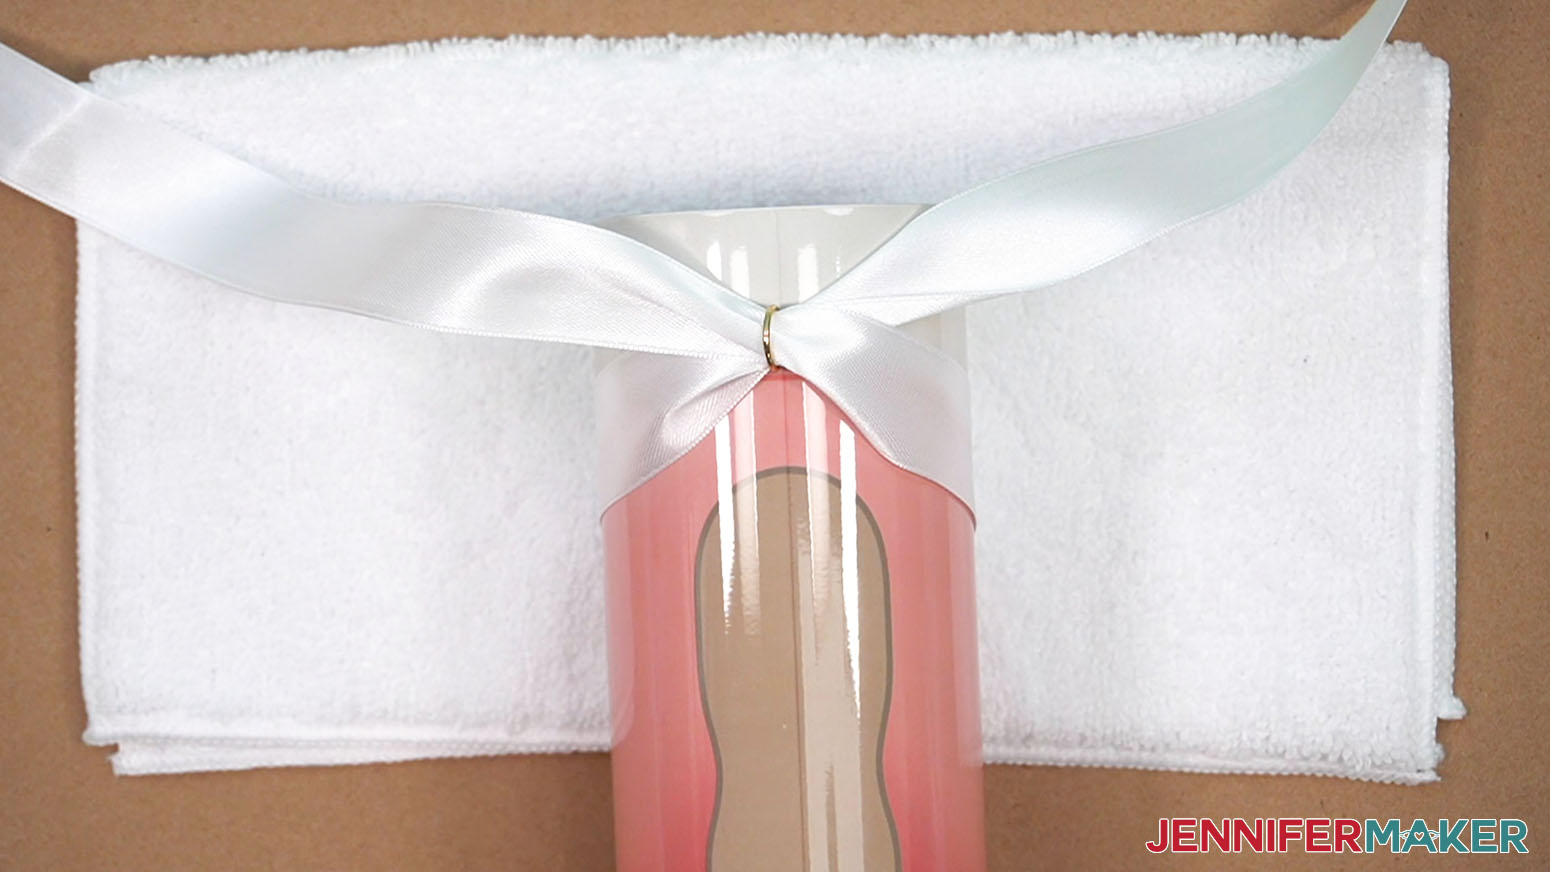
- Rotate the tumbler to feed the ribbons through the back eyelet one at a time so the D-ring doesn’t twist them.
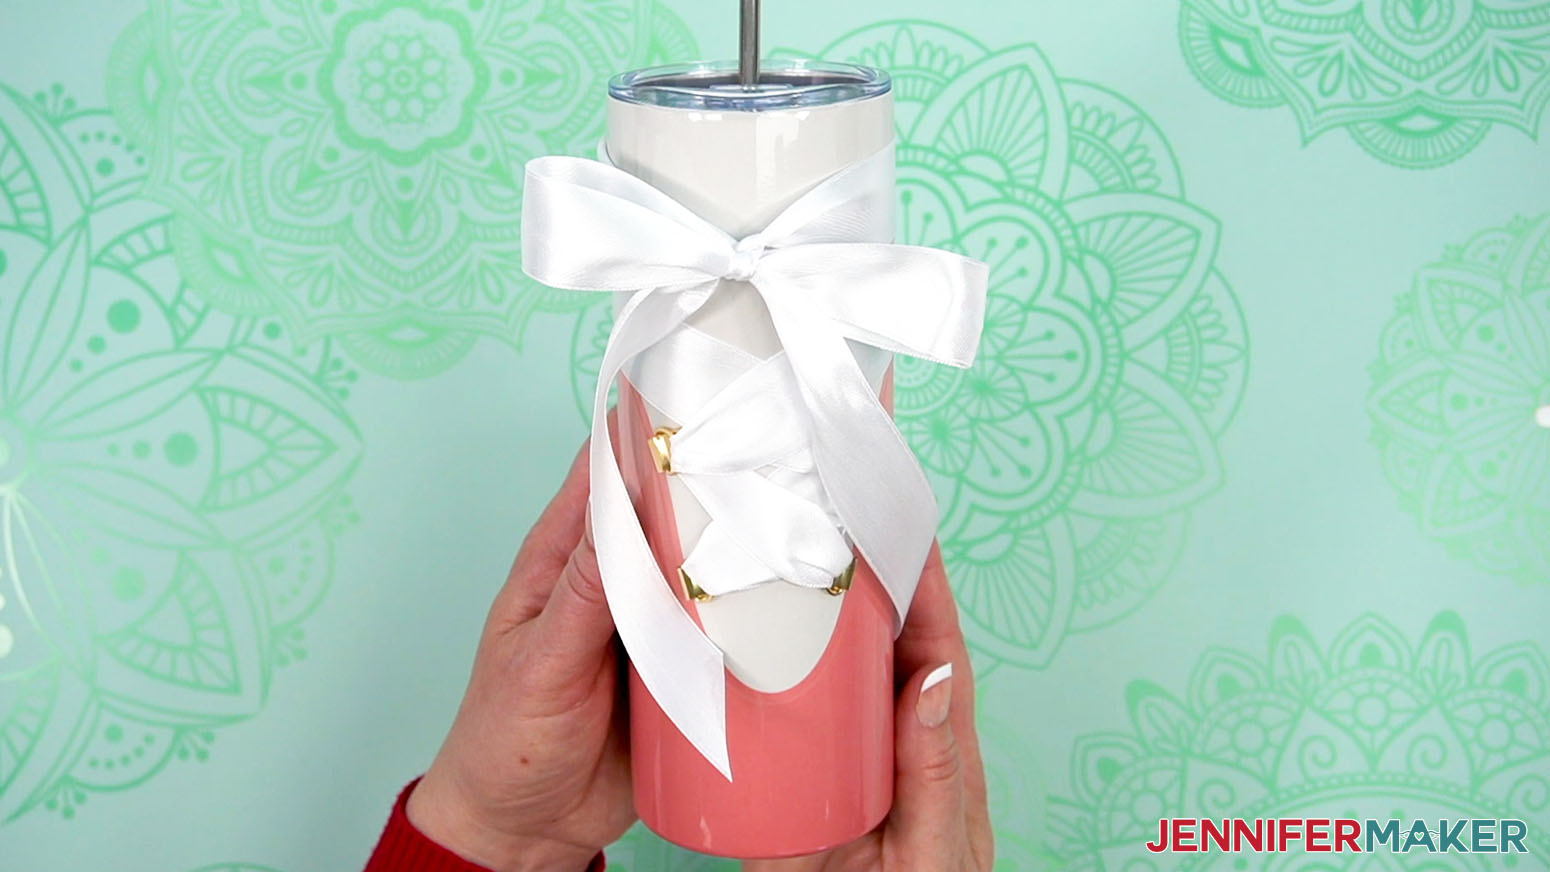
- Bring the ribbons back to the front and tie them in a bow.
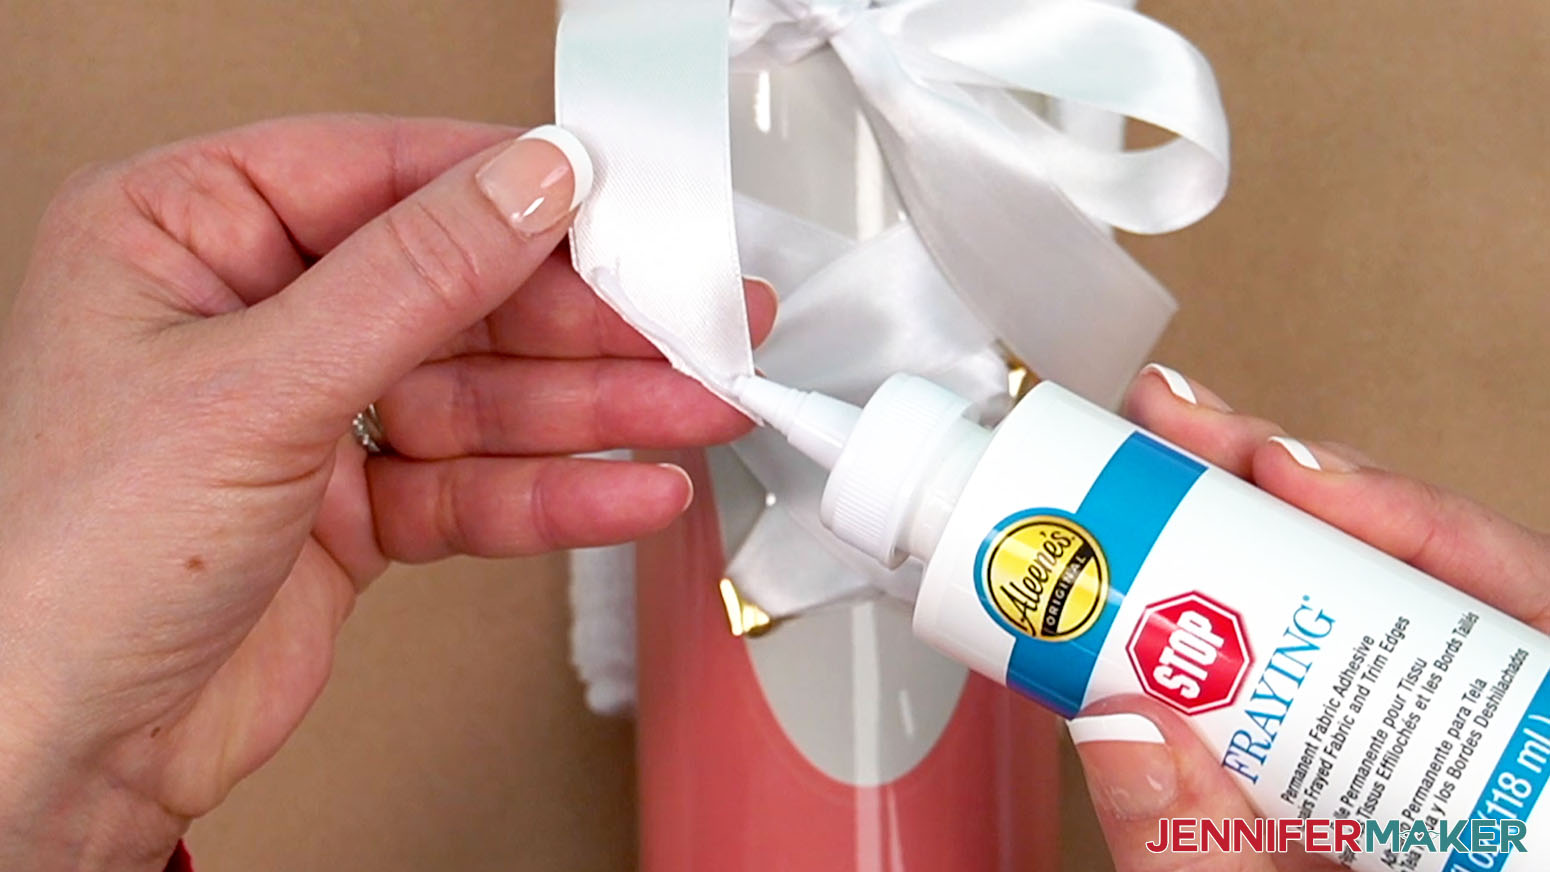
- Trim the ends of the ribbons to your preferred length.
TIP: If your ribbon frays easily, you can use Stop Fraying Glue to help. Simply coat the bottom edge of the cut ribbon and allow to dry.

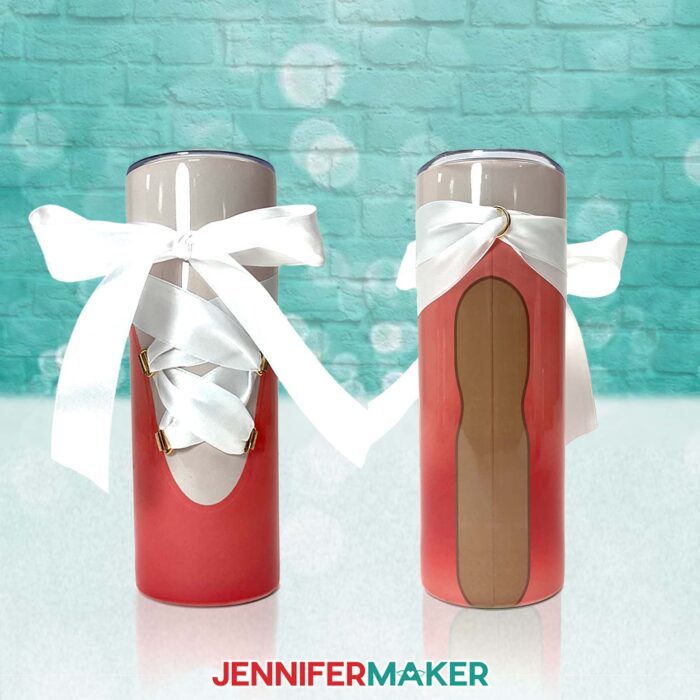
STEP 5: SHOW IT OFF
Here are the finished sublimation shoe tumblers!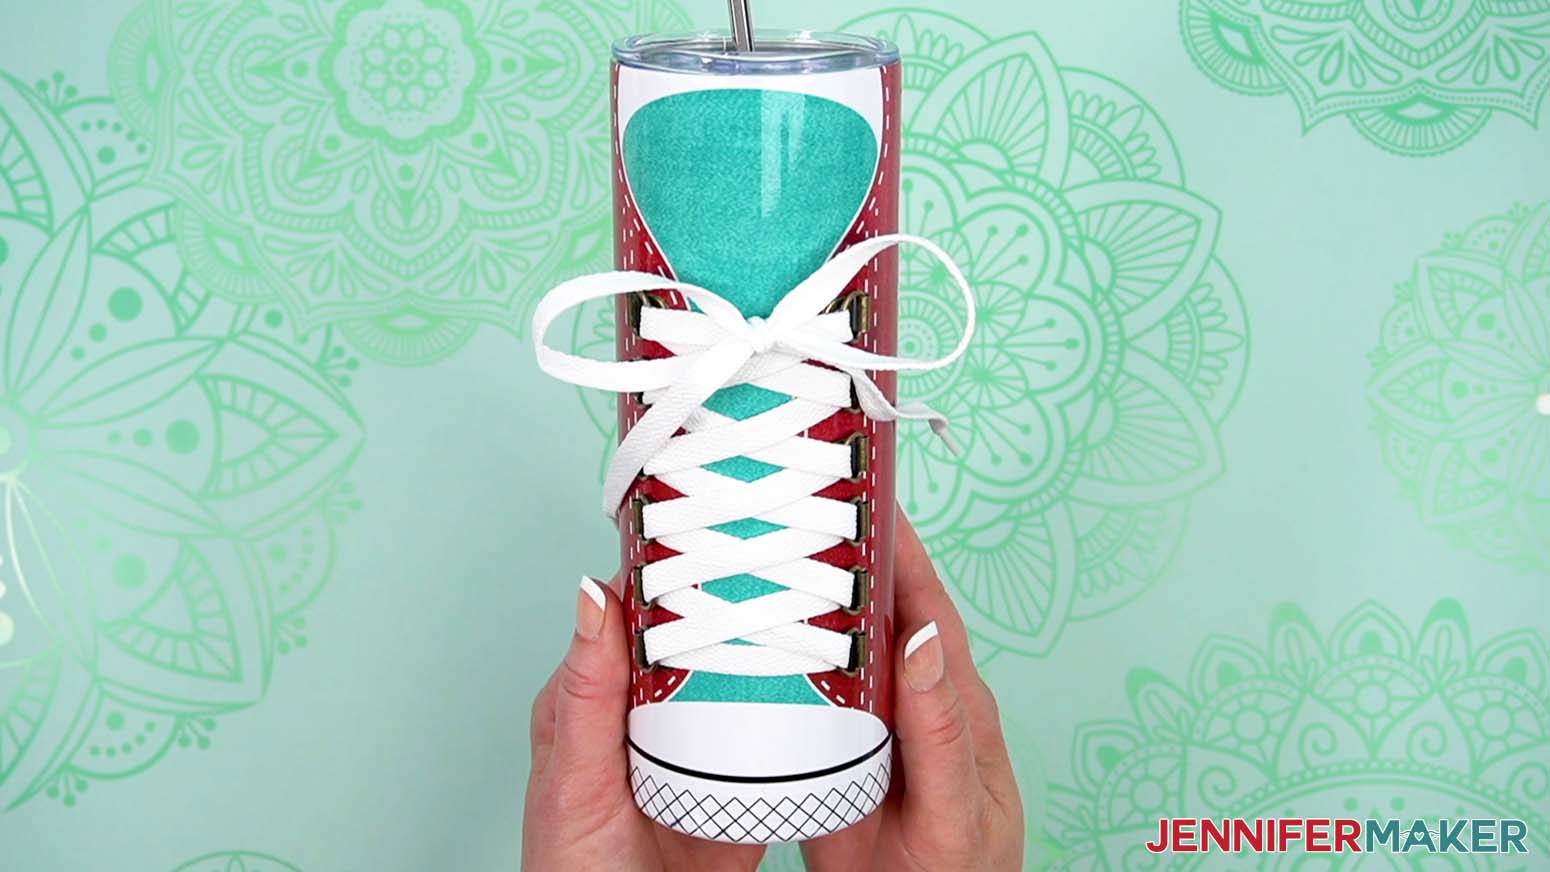
Notes
Print Sizes:
Lace-up Shoe 9.45 x 8.21
Ballet Slipper 9.45 x 8.21
Care instructions: Remove laces or ribbons, hand wash with gentle soap, warm water, and soft cloth, allow to air dry
Quick Answers to Your Questions About How to Sublimate a Shoe Tumbler With Real Laces
Q: Where is the customizable shoe design?
A: The customized sublimation images are examples of tumblers you can design yourself in my ADVANCE program. The sneakers with names and different patch icons were made in Google Drawings using my customizable digital download files. You can easily make your own personal versions and similar designs in my ADVANCE program without being a graphic design pro! Learn more about ADVANCE here for further information!
Q: What is E6000?
A: E6000 is an industrial-strength adhesive safe for home use with proper ventilation and skin protection. It is clear and waterproof once cured, making it a perfect option for securing lacing eyelets to a shoe tumbler wrap.

Q: Can you sublimate on any tumbler?
A: No, you must use a physical product made to work with sublimation transfers or ink. I use high quality 20 oz tumblers with a white polymer coating. Plain stainless steel will not work correctly with sublimation ink or other sublimation craft supplies.
Q: How do I care for a sublimation tumbler?
A: After the E6000 has cured for at least a few days, remove the laces or ribbon and handwash your shoe tumbler. Use mild soap and a soft cloth to avoid scratching the tumbler’s surface, which will damage the design.
Q: Why is my sublimation print color so dull?
A: Sublimation tumbler wraps look much duller on the paper than they do after they’re sublimated, so don’t worry if your printed PNG file looks faded or different colors than you expect. The vibrant colors will show when transferred to the sublimation blanks!
Q: Why is my sublimation not transferring evenly?
A: You may need to tweak your settings if you’re using materials other than the ones in my materials list. The sublimation printing process and transferring has a lot of variables, so it’s a good idea to have a backup tumbler in case of mistakes.
Q: What does ghosting mean in sublimation?
A: Ghosting can occur when a freshly sublimated object is moved around too much while it’s still hot. If the object and the sublimation transfer is still hot, the image is still sublimating. To avoid this, simply wait until your sublimated item has cooled off before handling or removing the paper, and don’t move it around more than you need to while it’s sublimating. It’s a natural effect of the sublimation process because the ink is in a gaseous state until it’s cooled.
Q: What is the best adhesive to glue 3D elements to a shoe tumbler?
A: After consulting many customer reviews and my own testing, I had the best results with E6000 adhesive.
Q: Where can I buy sublimation blanks?
A: If you order blanks online, look for sellers and items with 5-star reviews or a high average rating. A responsible company will have expert support from friendly representatives to answer any questions or provide requested information to interested buyers. If you’re in the United States, ordering from businesses that ship from within the country can be faster than shopping across the global marketplace. And when you open the package, make sure the physical item is in original condition and sublimation appropriate. You can often sign up for a seller’s mailing list to hear about sales and insider news like how to get free shipping!
Q: What else can I sublimate?
A: Good news! Depending on the blanks and digital designs you have available, the possibilities of sublimation are nearly endless! I’ve sublimated garden flags, mouse pads, mugs and more, but there are a whole host of items I’d like to try like license plates. If you have a physical end product in mind, check my free library for a downloadable file to fit it!
Q: Can I sell my shoe tumblers or other designs I downloaded from your blog and made or are they just for personal use? Do you have a commercial use or small business use license?
A: Yes, you can sell handmade pieces or made-to-order items using these designs (with limitations) — please read about licenses here so you know what you can and cannot do. If you use them, please share photos with us! We love supporting small businesses and creative entrepreneurs!
Get my free PNG files to make your sublimation shoe tumbler wrap!
I love seeing what you make with my designs and how you use them! Please share a photo of your sublimation shoe tumblers in our Facebook group or tag me on social media with #jennifermaker.
Love,

Want to remember this? Save this Tutorial on How to Sublimate a Shoe Tumbler Wrap to your favorite Pinterest Board!