
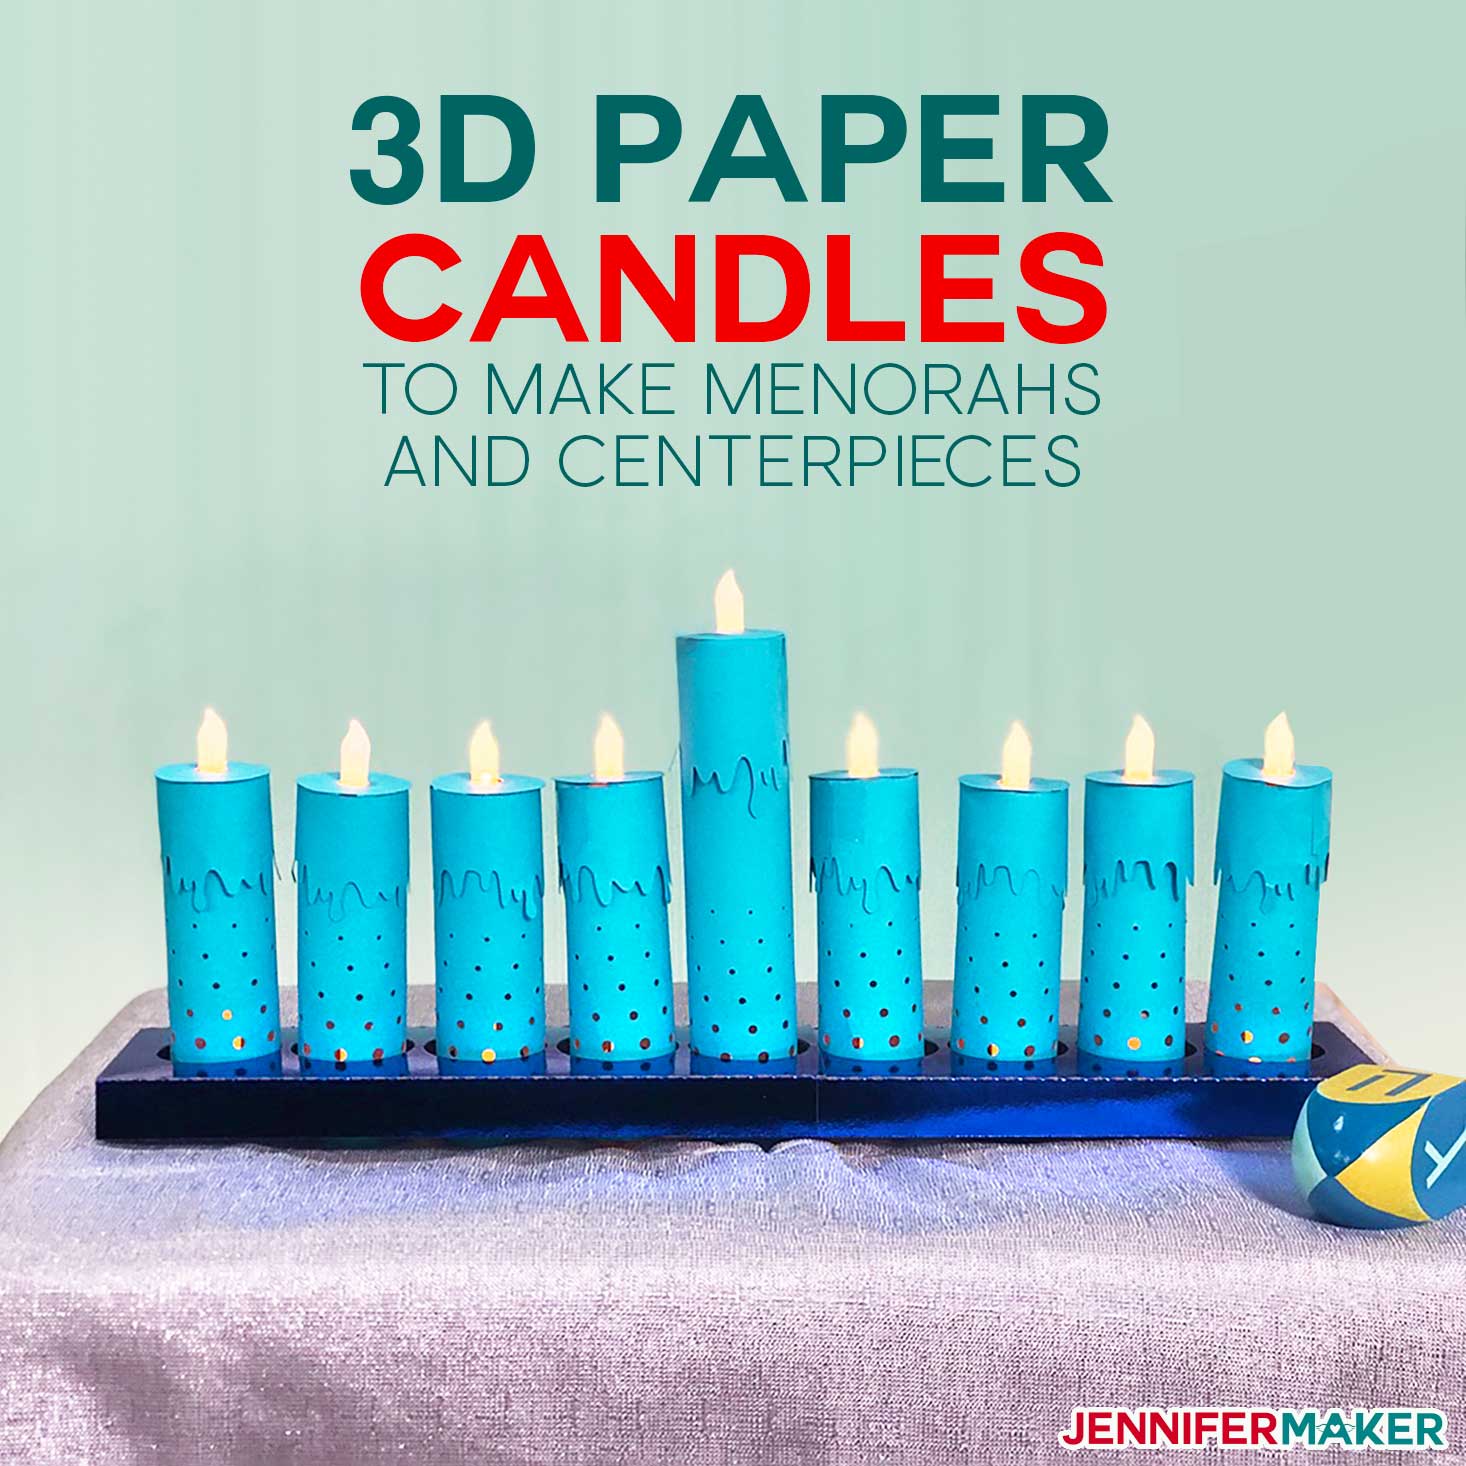
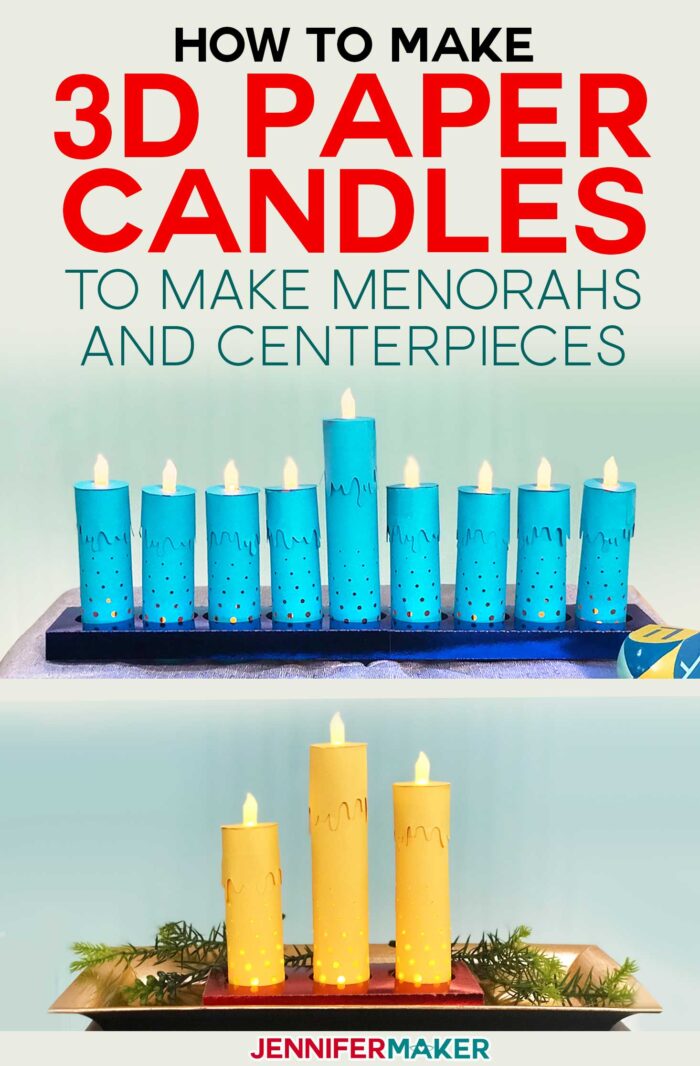
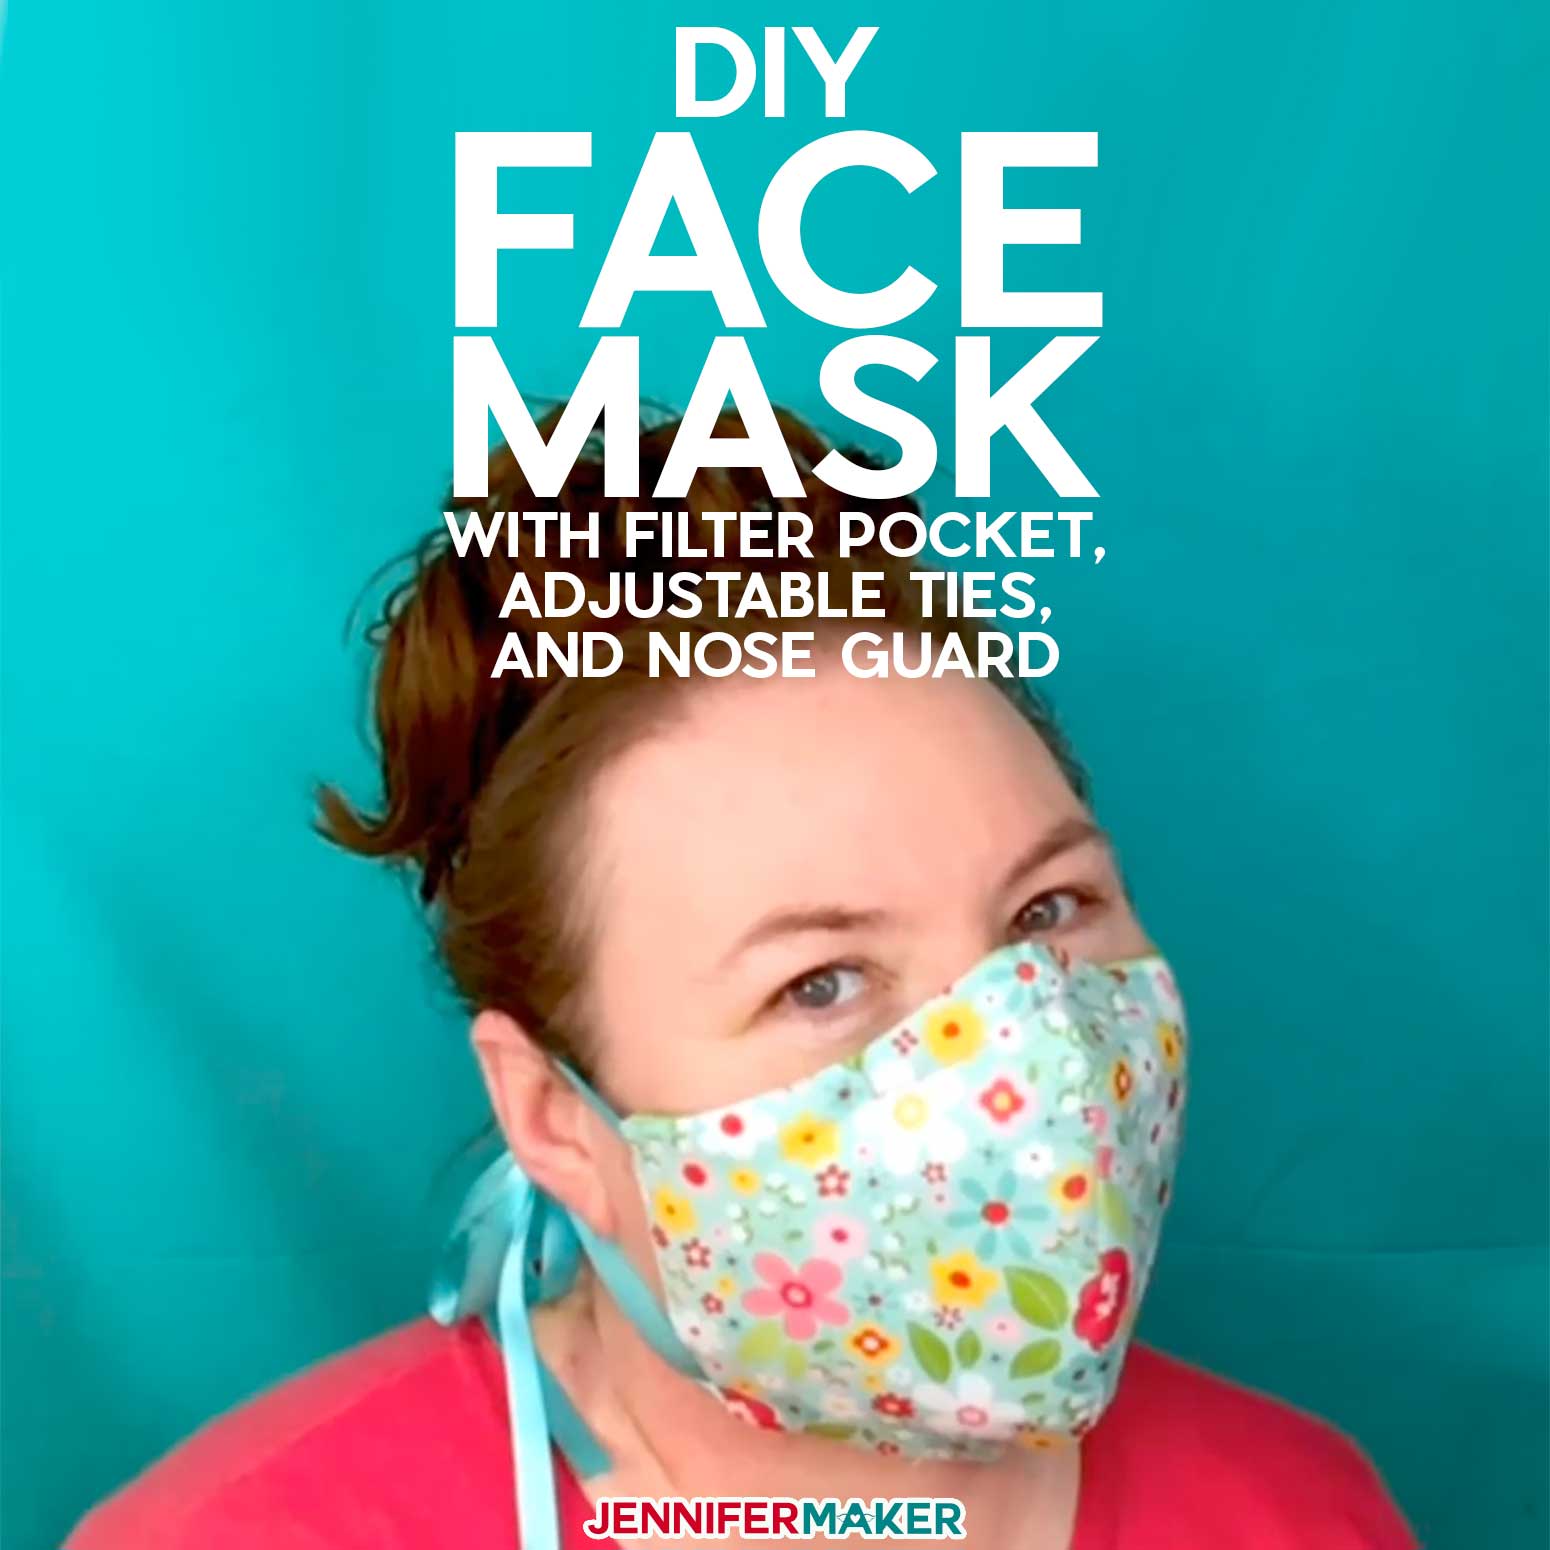
Learn how to make beautiful 3D paper candles to celebrate Hanukkah and decorate your table!
Did you know Hanukkah is the same week as Christmas this year? For families who celebrate both holidays this makes it a bit easier to do both. We have had a lot of requests for Hanukkah projects so I thought I would share an easy Hanukkah project with you! So for Day 16 of The Great Maker 25-Day Gift-Away Challenge, I am showing you how to make easy 3D paper candles with LED tealights for a paper menorah or centerpiece.
See exactly how to make this easy Hanukkah papercraft that will light up any holiday table in my tutorial video (or keep scrolling if you prefer a step-by-step photo tutorial):
I love candles and candlelight, but honestly, I love the safety and convenience of LED lights even more. It’s hard to relax and enjoy the ambiance when you’re worried about burning something … plus, I am always misplacing my matches. So these days, I’m all about the LED lights instead of real candles. And that’s why I designed these sweet and easy paper candles using nothing more than cardstock and some simple LED tealights.
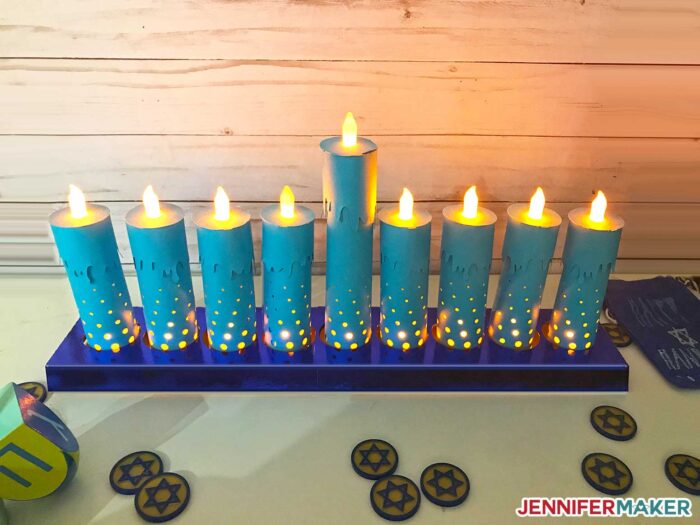
Now, my real motivation behind making these paper candles was to create a menorah papercraft, as Hanukkah is coming up in less than a week (Dec. 22-30). But this is more than just a menorah… it’s also a collection of clever little treat boxes. Every paper candle opens up so you can access the treats — I put some gold covered chocolates in here — and also access the switches to “light” the candle once the sun has set. Traditionally, you would want to keep them all off, then light the shamash candle first (that’s the center one), then light the other candles from left to right, starting with the newest candle.
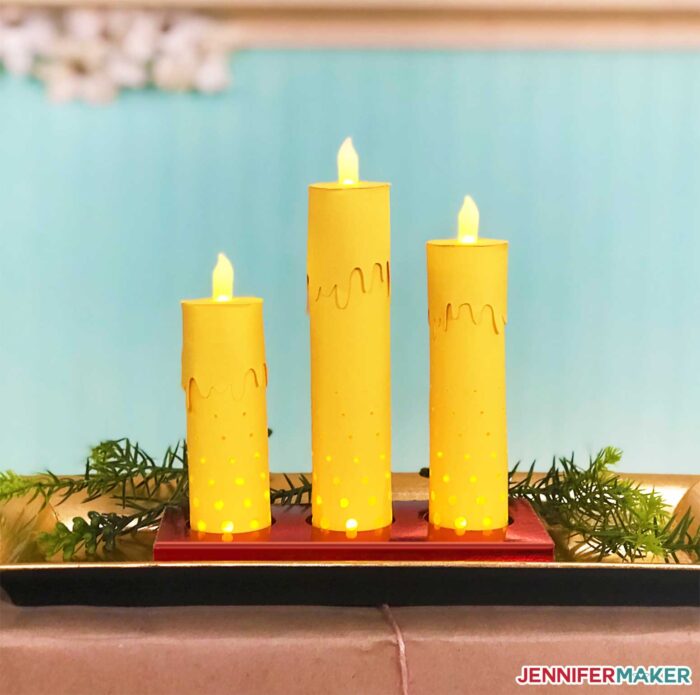
Of course, the 3D paper candles can be used for anything you might want a taper or small pillar candle for and don’t want to worry about a real candle. I’ve also arranged three different sizes of paper candles into a centerpiece here so you can see what I mean.
These paper candles also be great for caroling, memorial services, advent wreaths, Christmas trees, paper lanterns, and even Harry Potter themed parties! Use them however you wish!
Making the paper candles is quite easy — all you need is a some cardstock, a couple of LED tealights for your candle flame, some tape, a little bit of glue, and a way to cut your paper, such as a pair of scissors, a craft knife, or a Cricut cutting machine.
So let me show you where to get the free pattern then I’ll show you how to assemble a paper candle!
Ready to make your own easy Hanukkah candles? I’m excited to show you how! This post contains some affiliate links for your convenience (which means if you make a purchase after clicking a link I will earn a small commission but it won’t cost you a penny more)! Read my full disclosure policy.
Materials to Make Easy 3D Paper Candles that Will Light Up Your Holiday Table
View my Amazon shopping list with the exact items we used to make this project!
- 65 lb. Card stock – I used blue (for the menorah), yellow (for the centerpiece), and foil Kraft board (for the menorah and centerpiece bases)
- LED tealight candles
- Tacky glue
- Tape
- A weeding tool
- Standard Grip Cutting mat (the 12″ x 12″ size)
- A way to cut your cardstock for the paper candles (I used the amazing Cricut cutting machine!)
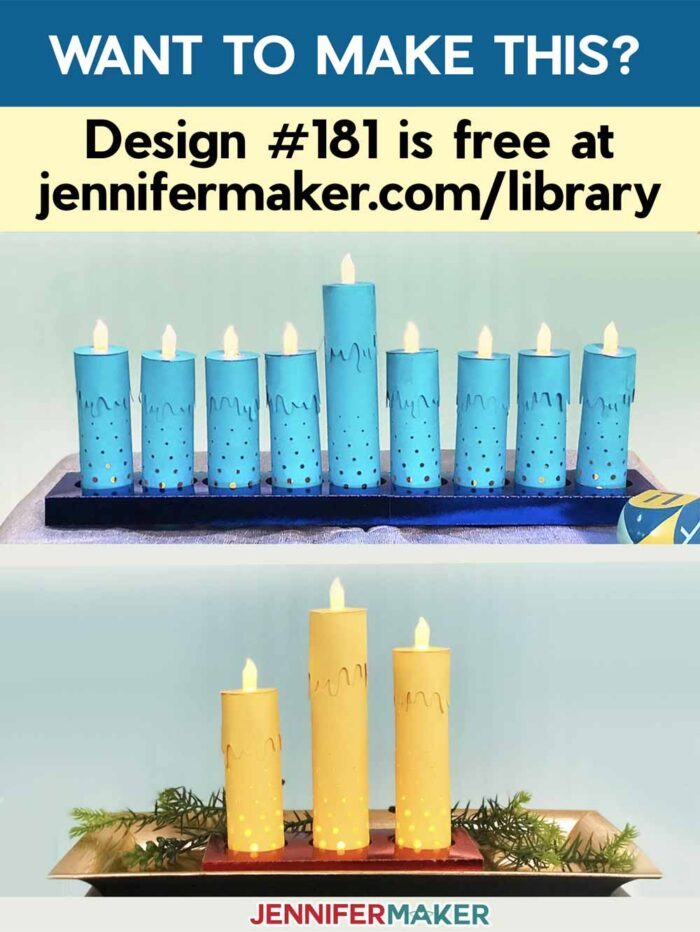
- Design #181 – My free SVG design files and template (available in my free resource library—get the password by filling out the form at the bottom of this page)
How to Make Easy Paper Candles into a Menorah or Centerpiece
Step 1: Get My Free Paper Candles SVG File
My free 3D paper candles pattern and SVG cut file (Design #181) contains three different sizes of candles, as well as two different bases — one for a 9-candle menorah, and one for a 3-candle centerpiece.
Get the free paper candles design (Design #181) from my free resource library (get the password to the library in the form at the bottom of this post).
Note: I have a file just for the menorah and one just for the centerpiece so you don’t have to worry about having all of the pieces you need.
Watch my video to see this step in detail.
Step 2: Prepare Your Paper Candle Design File for Cutting
Here is what the 3D paper candle cut file will look like when you upload it to Cricut Design Space:
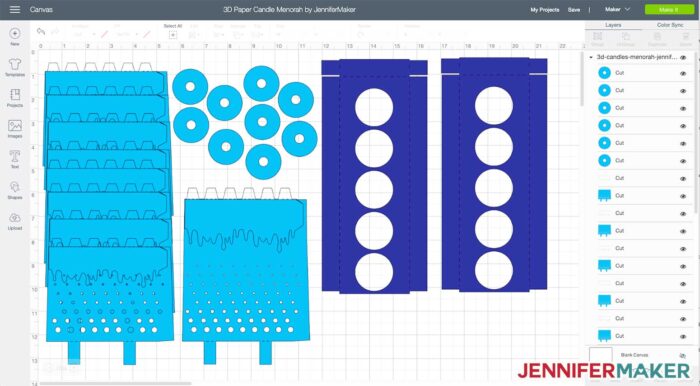
Tip: If you’re not sure how to upload an SVG cut file to Cricut Design Space, watch this helpful video training series I made. If you’re on an iPhone or iPad, here’s how to download and upload SVG files to the Cricut Design Space app.
There’s nothing you need to do with the file, unless you want to change the number or sizes of candles. Otherwise, it should be good to go!
Watch my video to see this step in detail.
Step 3: Cut Out Your Paper Candle
Using a green StandardGrip cutting mat, place your cardstock on the mat, load it into your Cricut, and press the flashing button to start the cut. I cut my candles out on 65 lb. cardstock. I cut my bases on Foil Kraft Board, but cardstock would also be fine for these.
Watch my video to see this step in detail.
Step 4: Weed Your Paper Candle
Once your paper candle is cut, unload your mat, flip the mat over onto your work surface, and gently peel the mat away from the cut cardstock. This will minimize curling and ripping. Learn more about this from my Cricut Tips post.
Tip: After you’ve removed your cardstock from your cutting mat, use a Cricut scraper to remove all the little pieces stuck to it quickly!
If you’re lucky (and your cutting mat is sticky enough), most of the little pieces will stay on your cutting mat. If they do not, you’ll need to weed the little pieces out. You can use a weeding tool to poke the remaining little pieces out.
Watch my video to see this step in detail.
Step 5: Prepare an LED Tealight
Take the plastic tab out of the battery compartment (if it’s there) and toggle the tealight on. Always make sure your LED light is functioning before you go to the trouble of turning it into a paper candle. Prepare at least two tealights as my design calls for two tealights per candle.
Watch my video to see this step in detail.
Step 6: Wrap the Paper Candle Around Your Tealights
The paper candle pattern comes in three pieces — the candle top, the “wax drips”, and the candle sides.
Beginning with the wax drip section, bend the tabs in and then wrap the paper around your first tealight with the tabs folded over the top of the light. Put a small piece of tape where the two edges overlap on the side of the tealight.
Place glue on the tabs on top of the tealight and slide your candle top down onto the glued tabs. Press and hold in place until the glue sets, then set aside.
Pick up your second tealight and wrap the candle sides around it so that your tealight is positioned at the BOTTOM of the candle tube. I recommend you wrap the paper around the tealight rather than trying to form a tube yourself as this will produce a more evenly curved surface. Put a small piece of tape where the two side edges overlap at the bottom beside the tealight.
Fold the two tabs at the bottom underneath the tea light and tape in place. Make sure you can access the switch for the LED tealight after you’ve taped it. (If not, untape, adjust, and retape.)
Hold the top of the candle tube and squeeze a little so it’s just a bit more narrow at the top than at the bottom, then tape the seam together where the two sides overlap.
Now, just place your candle top on your candle tube. I recommend you match up the seams so they are both together.
You should be able to turn your “candle” on and off by accessing the switches on both tea lights. And you can put treats inside the candles, too!
Watch my video to see this step in detail.
Step 7: (Optional) Make a Candle Base for Your Menorah or Centerpiece
If you’d like to turn your 3D paper candles into a menorah or centerpiece, you’ll also want to cut out and fold the appropriate base.
Once the base is cut out, just fold the sides along the dashed lines, then fold the tabs in at the corners and tape down. If you’re making a menorah base, you’ll put two longer bases together and overlap the center hole to create a base long enough to accommodate all nine candles.
And that’s it! See how easy that is? And what’s great about this design is that you can replace the tealights whenever you need to — they’re not permanently affixed to the paper. Just pop them out and pop new ones in.
Watch my video to see this step in detail.
Get my free easy paper candles with LED lights templates and cut files
I’d love to see your 3D paper candles, Hanukkah menorah, centerpieces, and all the other fun ideas you come up with to use these! If you make one, please share a photo in our Facebook group, or tag me on social media with #jennifermaker.
Love,

Want to remember this? Save the 3D Paper Candles for Menorah and Centerpieces Tutorial to your favorite Pinterest board!


Hi Jennifer
Thanks for this file so easy to do. I will definitely try this this week and show you how it turned out over on the FB group.
I cannot get the menorah candles to print. It seems as if they are stacked on eachother and the base does not show up at all when printed.
Hi there! So sorry about this! We have corrected the file and it should be good to go! Thank you for letting us know!