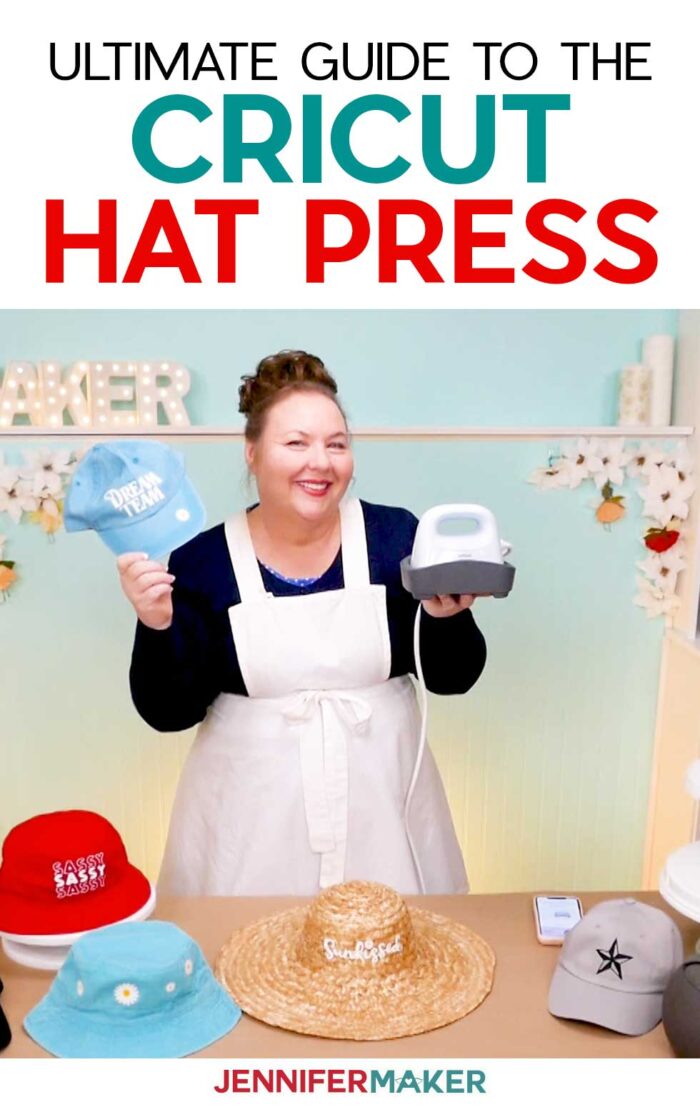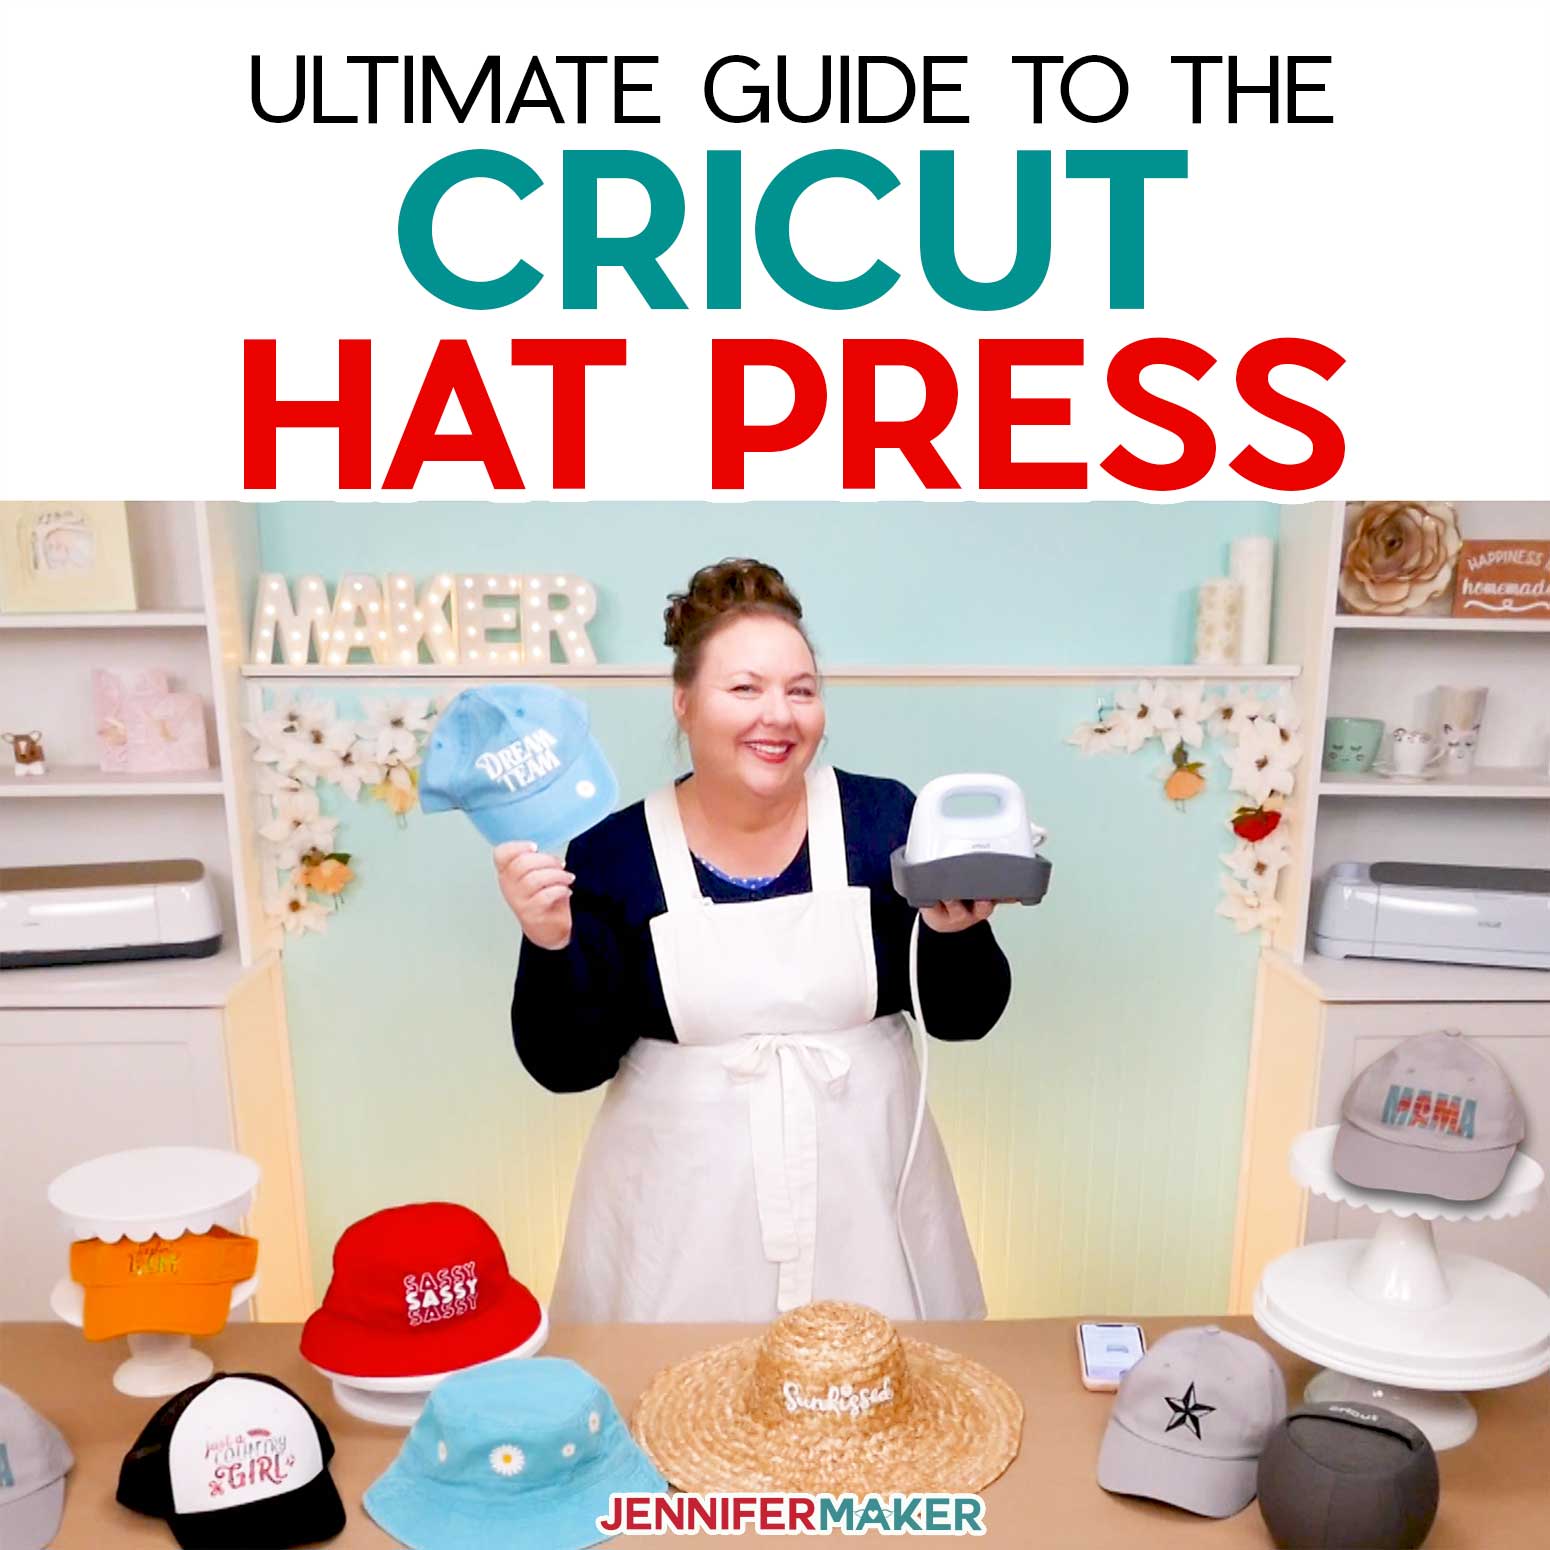
What can you make with the new Cricut Hat Press? Iron-on vinyl hats, Infusible Ink hats, sublimation hats, and MORE!
Fun fact: I love hats. But I’ve haven’t created a tutorial on how to personalize a hat with iron-on vinyl or Infusible Ink because it’s hard to apply anything to a hat without flattening and deforming it. And while there are hat-specific heat presses out there, they are big and bulky and they never seemed worth the effort. But then Cricut came out with a Hat Press, and in true Cricut fashion — it’s sleek, simple, and super easy to use. Cricut Hat Press combines a patent-pending curved heat plate with a versatile hat pressing form for a seamless hat making experience. The pressing form fits a variety of adult-sized hats, like sun hats and ball caps, to provide a firm surface for curved materials. Cricut Hat Press comes with customizable heat settings by material and three presets, heating up to 400°F (205°C) to work with all major brands of iron-on (HTV), Infusible Ink, and sublimation products.
Tip: The Cricut Hat Press is now available at my affiliate link — click here!
Check out the Cricut Hat Press video as I cover unboxing, setup, and SEVEN easy first projects!
This post contains some affiliate links for your convenience (which means if you make a purchase after clicking a link I will earn a small commission but it won’t cost you a penny more)! Read my full disclosure policy.
I want to thank Cricut who sent me a Hat Press in advance without any expectation of a positive review so I could learn how it works and teach you everything we learned! When I am done with the first video and tutorial series, I will be donating this Hat Press to a charitable organization that needs to make awesome things, and I’ll be buying my OWN — I always buy my own tools and materials so I can truly understand their value and worth, because I’m spending my own money.
What’s Special about the Cricut Hat Press?
The Cricut Hat Press has a curved heat plate specifically designed to decorate hats without deforming them. It works with a special hat form that tucks into the hat to give you a smooth and firm surface to press against. Instead of trying to heat a curved surface with a flat tool, you can now preserve your project’s shape in a much safer process.The Hat Press also works with the Cricut Heat app to send the directions right to press to remove all of the guesswork, but you can still use the hat press manually if you prefer.
In my tutorial, I used Cricut Hat Press with iron-on vinyl and Infusible Ink on several hat styles — everything from bucket hats and visors to ball caps and trucker hats. I even used it to add the iron-on vinyl flowers to the top of a stuffed elephant’s head! I’m super impressed with how the Hat Press allowed me to add Infusible Ink and Iron On Vinyl to all of these curved and rounded surfaces without hurting them!
What comes in the box with the new Hat Press?
- The Cricut Hat Press & User Guide
- Cricut Hat Pressing Form
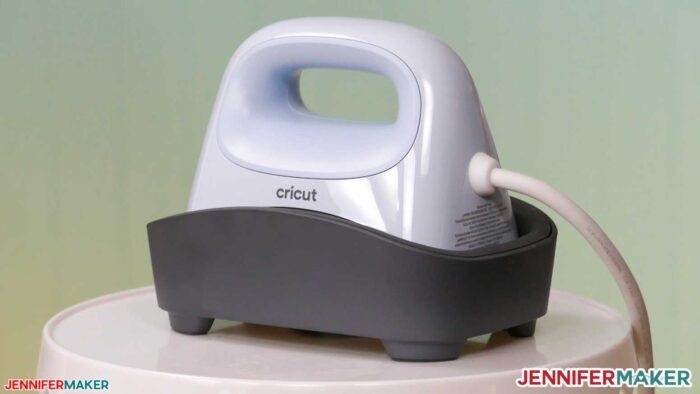
- Safety Base
- Iron-On Vinyl for practice project
- Strong Heat-Resistant Tape
- Quick Start Guide
Note: The Hat Press does not ship with a hat.
What is the Cricut Hat Pressing Form?
The form really sets the Cricut Hat Press apart from other heat presses! The Pressing Form has a firm polyester core surrounded by ground walnut shells in a polyester and cotton cover. The firm core lets you press firmly on the form, while the walnut shells provide give for the hat’s curves and wick moisture from the project.
How much space and power do I need for the press?
The Hat Press requires just 380-470 watts of power, depending on your electricity situation.
The Hat Press unit weighs just 2.4 lbs, making it easy to transport and use!
The unit dimensions are:
- 6.5″ (16.51 cm) Wide
- 5.1″ (12.95 cm) Tall
- 4.3″ (10.92 cm) Deep
The Hat Pressing Form weighs 3 lbs and is:
- 7.5″ (19.05 cm) Wide
- 5.2″ (13.2 cm) Tall
- 6.5″ (16.51 cm) Deep
Does the Cricut Hat Press have different settings?
Yes, the press offers Low, Medium, and High temperature settings. Cricut’s general recommendations for the options include:
Low – Best for more sensitive base or heat-transfer materials that use temperatures in the 255 F – 295 F (125 C – 145 C) range and sets a 60 second timer.
Medium – Fits most base and transfer materials that use temperatures in the 300 F – 355 F (150 C – 180 C) range and sets a 60 second timer.
High – For use with Infusible Ink and heavy duty base materials that use temperatures in the 360 F – 400 F (185 C – 205 C) range and sets a 90 second timer.
Cricut says that the Hat Press does not fluctuate its temperature within each range, but instead uses a steady number they have tested and approved to work with most materials requiring each setting.
How do I get started?
Follow the tutorial in my video to activate your Cricut Hat Press and try some fun first projects!
Do I have to use the Internet and Cricut Heat App with the Hat Press? How much does it cost?
It’s free! You will need the Cricut Heat app and an Internet connection to set up the press. After activating the press in the app using a compatible iPhone, iPad, or Android device, you can control your Hat Press either manually or through the Cricut Heat app using a Bluetooth connection.
What materials can I use with the Cricut Hat Press? Can I use non-Cricut materials and blanks?
You don’t have to stick with Cricut brand materials and blanks. Iron-on vinyl (heat transfer vinyl / HTV), Infusible Ink transfer sheets and pens, and sublimation transfers will all work and you can use any blank that fits your heat transfer material. Be sure to use compatible materials!
For my playtest projects, I used:
- A stuffed elephant with Cricut Everyday Iron-On Vinyl in white and pink
- A black and white Cricut Trucker Hat and Infusible Ink Transfer Sheets
- A gray Cricut Ball Cap with Infusible Ink Transfer Sheets
- A red bucket hat with white iron-on vinyl
- A blue baseball hat with white and yellow iron-on vinyl
- An orange visor with black iron-on vinyl and green holographic sparkle iron-on vinyl
- An 18″ straw hat with white and yellow iron-on vinyl
- Cricut Strong Heat-Resistant Tape
Do I need special supplies for the heat press?
Cricut recommends their new Strong Heat-Resistant Tape for securing your design to the hat during heating. The Hat Press works best if you apply even pressure and glide the heat plate back and forth, which could shift a design without the stronger tape. The press comes with a roll of tape, and you can purchase more.
Cricut has also released Hat Blanks designed specifically to work with the Hat Press. Ball Caps or a Trucker Hats are available for $9.99 each, three for $19.99, or 12 for $69.99.
What size designs can I apply with the Hat Press? Do I need to watch out for seams?
The Cricut Hat Press works best with designs up to 2.25″ x 4.25″ placed so that you can heat half an inch around them without hitting the brim or other other vulnerable materials
Your design can go over seams, but avoid pressing in areas with eyelets, mesh, or plastic pieces. You can apply iron-on vinyl to a hat brim, but the higher heat required for Infusible Ink may warp the inner form.
How do I get the best results with the Hat Press?
I found the best results by using the Hat Pressing Form and taking time to prep my materials. Flipping the hat’s sweatband down, lint rolling away debris, and using the curved press to smooth the hat’s material to the Pressing Form’s shape gave me perfect canvas. Also, I cut my carrier sheet pretty close to the design edges so I could place it right where I wanted. Snipping notches in the carrier also let me curve the design a bit to follow the hat shape. Gliding the press avoids making marks on the hat. And the Strong Heat-Resistant Tape really does keep everything in place!
Will there be discounts for the heat press?
Cricut Access subscribers can use their discounts through the Cricut shop! Learn all about Cricut Access here. My Cricut shop discount code will not work on the Hat Press (nothing with a cord is eligible) but you can use it to get free shipping and a discount on any materials or tools you purchase at the same time.
Is the Cricut Hat Press worth $149?
If you want to decorate hats or similar curved items, then yes, I think so! But you get to decide for yourself!
Isn’t the EasyPress Mini or a home iron just as good?
For many projects, yes! But to safely get consistent results and nice-looking hats, the Cricut Hat Press is easier to use and more efficient.
What projects do you have for the new Cricut Hat Press?
Lots! Designs up to 2.25″ (5.7 cm) tall by 4.25″ (10.79 cm) wide will work with the Hat Press.
I have designed several new projects, available as Design #377 in my free resource library!
Materials to Set Up the Cricut Hat Press and Make Hats
Here is my Amazon shopping list for these first projects
- Cricut Hat Press
- iPhone, iPad, or Android mobile device with reliable Internet and Bluetooth connectivity enabled.
- Cricut Heat app
- Cricut Strong Heat-Resistant Tape
- A method to cut your vinyl — I used the amazing Cricut Maker 3 but you can also use the Cricut Maker, Cricut Explore 3, the Cricut Explore, or the Cricut Joy — you can use the standard fine-point blade for this project.
- Everyday Iron-On Vinyl — I used Cricut Everyday Iron-On Vinyl in black, white, yellow, orange, and petal pink.
- Cricut Holographic Iron-On Vinyl in green
- Infusible Ink Transfer Sheets and included butcher paper
- A fan and proper ventilation for sublimation during Infusible Ink projects.
- Cricut Green StandardGrip Machine Mat 12” x 12”
- Stuffed elephant
- Cricut Trucker Hat and
- Cricut Ball Cap
- Red bucket hat
- Blue baseball hat
- Orange visor
- An 18″ straw hat
- Weeding tool
- Lint Roller
- Sturdy workspace — I am working on IKEA tables.
- Design #377 – My free layered iron-on vinyl designs (available in my free resource library—get the password at the bottom of this post)
How to Set Up Cricut Hat Press and Make a Hat
Follow these steps to activate a new Cricut Autopress and test it out on several hats and a stuffed animal! Unbox your Hat Press and set it up on a sturdy workspace. Make sure you have enough space for your materials, easy access to a power outlet or appropriate extension cord, and are within seven feet of your mobile device. Remember, the Hat Pressing Form contains sterilized walnut shells. If you have allergy concerns, please consult your doctor before unwrapping the form. On your mobile device, search your application store for "Cricut Heat" and download it. Open the Cricut Heat app and sign in using your Cricut ID. A pop-up will ask you to allow the app to use your device's Bluetooth capability to connect to enabled heat presses. Click "Ok, I understand" to continue and follow the prompts. Click "Set Up New Hat Press" to make the app search for available heat presses. Plug in your Hat Press, remove the wrapping, place it in the safety base, and turn it on so the app will be able to see it. When your Hat Press appears on the screen, tap "Connect" to begin the activation. The app will show you which email address the press will be registered to and ask you to agree to their terms of use and privacy policy. Tap the agree box and then "Activate." Keep your press powered on, keep your device open to the Cricut Heat app, within seven feet of it, and make sure your Bluetooth stays on. It may beep a few times while downloading updates, but that's normal. When the activation is complete, the app will show a success message and the press will beep before turning off. Tap "Done" and you're ready to press! The first time you use Cricut Heat for a project, the app will walk you through some very helpful tutorials. I recommend following them to learn more about the app's functions. While you can use the Cricut Hat Press without the Cricut Heat app, I'm going to demonstrate several projects using the app. It makes the process so easy! First, try the Everyday Iron-On Vinyl star design that came with your Hat Press on a Cricut Ball cap. On the Cricut Heat main screen, tap on your Hat Press and then on "Start New Project" on the next screen. Tap "Select" next to Transfer Material and choose Everyday Iron-On. On the Applied to screen, tap "Ball Cap" under Cricut Blanks. Confirm your settings then click "Next" to continue to the Project Overview screen. The app tells us exactly what to do under Recommended Settings and What You Need. Gather your press, design, cap, pressing form, and Strong Heat Resistant Tape. For detailed instructions, tap "Detailed Instructions." Tap "Send Setting to Hat Press" and prep your materials while the press heats up. Open the hat and remove the cardboard insert. Fold down the sweatband and place the form inside the cap. Make sure it fit snug by tightening the back strap and smooth your material. Use a lint roller to remove any dust. Preheating smooths the material and removes moisture from the fabric. To preheat, place the hat and form on the workspace with your design area facing up. hold the form by the bottom strap. When the press is at the correct temperature, the Go button turns green. Place the press on the hat, hit the go button, and move the heat plate back and forth for five seconds to cover the whole area. Place the star shiny side up on your hat. The Hat Press can apply vinyl over seams, but avoid eyelets, mesh, or metal elements. Tap "Detailed Instructions" for good tips on your first press. Since we'll be moving the heat press, we need to tape the design in place with Strong Heat Resistant Tape. Hold the form with one hand, place the press on the design and hit "Go" to begin. Apply light pressure until the timer ends. For a small design like this, you don't have to move the press back and forth. Not that the times for materials are different when using the Hat Press. Place the press back in its base. After the liner is cool to the touch, slowly remove the tape and liner. Remember to follow the care directions for your first project! For this example, that means waiting 24 hours before washing the hat, hand washing with cold water and no bleach, line drying, and no dry cleaning. When you're done with a project, unplug the press and make sure it is totally cool before putting it away. Since Infusible Ink is a sublimation process, you must have adequate ventilation around your Hat Press. Preferably, open a window and set up a low fan to increase air circulation so you don't inhale any fumes. Choose an Infusible Ink design, or use my "Just a Country Girl" design, which is in the "hat-decals-jennifermaker" file in Design #377. I used the denim pattern for "country" and paisley for the rest. Cut out and weed your design. Use transfer tape to move "country" from its carrier sheet to the available space on the larger design. Tap "Start New Project" and set your material to Infusible Ink transfer sheets and your Cricut Blank to "Trucker Hat." Tap "Next" and gather your press, form, butcher paper, lint roller, design, hat, and Strong Heat Resistant Tape. Tap "Send settings to hat press" to start heating the press. Place your hat on the form and use a lint roller to remove dust. When the press reaches 400, place a pice of butcher paper over the hat and preheat for five seconds with light pressure over the whole design space. Prepare your design by trimming extra transfer tape. Position the design at least a quarter to half an inch above the brim. Tape it down. Since Infusible Ink can look blotchy if the design moves, make sure it's REALLY secure to the hat's curve. Place butcher paper over the design and press. Hit the Go button, use light pressure, and move back and forth until the 90 second timer beeps. The sublimation process will still be active, so let the item sit for a few seconds as the fumes disperse. And since the ink is still transferring from the carrier sheet, we don't want to jostle anything to avoid ghosting where the design lifts from the fabric too early. Carefully remove the butcher paper and set it aside. Once everything is cooled to just a bit warm, peel off the paper to reveal the beautiful design! Tap "Done" in the upper right corner. TIP: on the Hat Press main page, you can see recent project settings under "Last Used" and tap those to save time on matching projects. Since Infusible Ink is a sublimation process, you must have adequate ventilation around your Hat Press. Preferably, open a window and set up a low fan to increase air circulation so you don't inhale any fumes. Choose an Infusible Ink design or use my "Mama Bear" design, which is in the "hat-decals-jennifermaker" file in Design #377. Cut and weed your design. I layered red and blue on my transfer tape. Choose "Infusible Ink Transfer sheet" and "Ball Cap" then tap "Send Settings to Hat Press." Prep your Ball Cap using the same steps as the Trucker Hat in Project 2. Use plenty of tape! Follow the app prompts to preheat and press for 90 seconds. Remove the butcher paper and allow the design to cool for a bit as the app says this is a warm peel material. Enjoy your new hat! Choose an Iron-On Vinyl design or use my "Dream Team" and daisy designs, which are in the "hat-decals-jennifermaker" file in Design #377. I'm using white vinyl for the words and layered whit with yellow for the flower. Cut (make sure to mirror!) and weed your designs. Start a new project. Tap "Select" next to Transfer Material, choose "Everyday Iron-On Vinyl," and then "100% Cotton" for your blank. Tap "Next." Tap "Send Settings to Hat Press." Note, my press actually has to cool off since it was at 400 for the Infusible Ink and only needs to be at 330°F. Secure your hat on the form and plan your design placement while you wait. When the press beeps that it's at the correct temp, preheat the hat for five seconds to smooth the material and remove moisture. Place your design nice and straight and then tape it down. You can reuse tape as long as it's still sticky! Place the press on the design, hit the "Go" button, and glide with light pressure until the 90 second timer beeps. Wait until the design is cool, then slowly peel the carrier sheet. Great job! To add a daisy to the brim, Iron-On Vinyl is your best option. Since Infusible Ink requires a much higher temperature, it can melt the brim's inner form. Decide on your daisy placement, making sure you can safely hold and press the spot. We can use the same settings as the cap's front, so tap "Make Again" in the top left of the app. Preheat the chosen spot for five seconds, then tape the flower down and press it using the timer. Since it's a small spot and the brim's curve doesn't quite match that of the press, I used the edge and kept it still. Wait until the design cools and peel it off. Choose an Iron-On Vinyl design or use my "Sassy" design, which is in the "hat-decals-jennifermaker" file in Design #377. I'm using white vinyl. Cut (make sure to mirror!) and weed your design. Since a bucket hat doesn't have a brim to indicate the front, check where the tag is and prepare to place your decal directly across from it. Of course, if you want to use a different spot, go for it! Place the hat on the form, making it as snug and smooth as you can. Since this project has the same materials as the blue hat, tap "Make Again" to use the same settings. Or, you can tap "Done" and select it from the Last Used section and hit "Send to Heat Press." Lint roll your hat and prepare to preheat. Choose an Iron-On Vinyl design or use my "Feein' Lucky" design, which is in the "hat-decals-jennifermaker" file in Design #377. I'm using black Everyday Iron-On Vinyl and green Holographic Sparkle Iron-On Vinyl. Cut (make sure to mirror!) and weed your design. Secure your visor on the pressing form, making the front as smooth as possible. Select the same settings from Last Used and preheat the hat. Place the black layer on the visor and tape it in place. Lint roll to remove dust.nFollow the prompts to press and peel the design. Our second layer is a different material, so tap "Done" to change your settings. Tap "Start New Project," select "Holographic Sparkle Iron-On Vinyl" and "100% Cotton, then hit "Next" and "Send Settings to Heat Press." Since the visor is already warm, tap "skip" to avoid preheat and let the press get to the correct temperature. Line up your "Lucky" design and tape it down well. Make sure there is carrier sheet or tape over all of your vinyl. Press the design by following the prompts and peel after it cools. I always try out experiments with new tools, and love learning from them! Straw hats are very textured, so the result is not as smooth as a normal hat, but this is still super cute. Choose an Iron-On Vinyl design or use my "Sunkissed" design, which is in the "hat-decals-jennifermaker" file in Design #377. I'm using white and yellow Everyday Iron-On Vinyl. Cut (make sure to mirror!) and weed your design. I placed the hat on the form a little differently, folding the brim down to make the target area flatter and easier to access. Cricut Heat doesn't have a "Straw" blank setting, so we need to figure out a setting to use. Tap "Start New Project" and set your Transfer Material as Everyday Iron-On. I chose "100% Cotton" as my blank since straw is an organic material. Hit "Send Settings to Heat Press" and plan your design placement while it heats up. Tape your design in place. I used a lot of tape to try to smooth out the design and keep it in place, but it was a challenge due to the bumpy straw. Do your best! Follow the app prompts to press your design. Once it's cool, gently peel the tape and carrier sheet off. The design will be more fragile than one on a smooth hat, but I like the result! While Cricut only recommends using the Hat Press for hats, I wanted to try it on another curved surface that is difficult to decorate: stuffed animals! Choose an Iron-On Vinyl design that will fit on your stuffed animal. Remember to keep it smaller than 2.25" x 4.25" to fit the press. I'm using white and pink Everyday Iron-On Vinyl for a cute layered flower design. Cut (make sure to mirror!) and weed your design. Set the Hat Pressing Form aside and plan your design on the animal's head. Trim the carrier sheets pretty close to the designs to make curving them easier. Tap "Start New Project," set your Transfer Material to "Everyday Iron-On Vinyl" and your blank to "Polyester" or your animal's material. Tap "Next" and "Send Settings to Hat Press." To be safe, tape some butcher paper over the target placement and preheat for five seconds, moving the press with light pressure. Tape your design's first layer in place and tape it down very well. Cover it with butcher paper and follow the prompts to press for 60 seconds. Gliding the press felt like it moved the design since I didn't have the firm pressing form to stabilize everything, so I kept the press pretty still. Let the layer cool and peel off the tape and carrier sheet. Tap "Make Again" and repeat the process for the second layer. The Hat Press worked well on the curved stuffed animal! Power on the Cricut Hat Press and it will heat to the first level, Low, as indicated by one of the three wavy lines that lights up. This setting uses a 60 second timer. Press the power button again to move to Medium (another 60 second timer), and a third time to move to High (90 second timer). When the press beeps, it has reached the setting's target temperature. For an Everyday Iron-On project, I recommend you use the Medium setting. Prepare your design and hat as we did in the first project. Press the Hat Press' power button twice to have it heat up to Medium. Use the Cricut Heat Guide to find the necessary preheat and peel process so you're ready. Preheat the surface and place your design. Once your hat press hits the surface, hit the Go button to start the timer. Again, glide the press over the surface with even pressure until the timer ends and the press beeps. Follow your material's cooling and peeling instructions. Fonts:
Cricut Hat Press Set Up and Test Projects
Materials
Tools
Instructions
Step 1: Set Up and Activate the Cricut Hat Press
Step 2: Start Pressing!
Project 1: Star Test Design from the Hat Press Box
Project 2: Cricut Trucker Hat and Infusible Ink
Project 3: Cricut Ball Cap and Infusible Ink
Project 4: 100% Cotton Ball Cap Front and Brim with Everyday Iron-On Vinyl
Project 5: 100% Cotton Bucket Hat with Everyday Iron-On Vinyl
TIP: Red fabrics tend to darken when they're heated up. Don't worry, the hat will go back to normal once it cools.
Follow the directions to preheat, apply your design, tape it, and press to transfer. Let it cool and then peel to remove your sassy hat!Project 6: 100% Cotton Visor with Layered Iron-On Vinyl
Project 7: Straw Hat and Everyday Iron-On Vinyl Experiment
Project 8: Layered Everyday Iron-On Vinyl on Polyester Stuffed Animal Experiment
Note: Using the Cricut Heat Press Without the Cricut Heat app
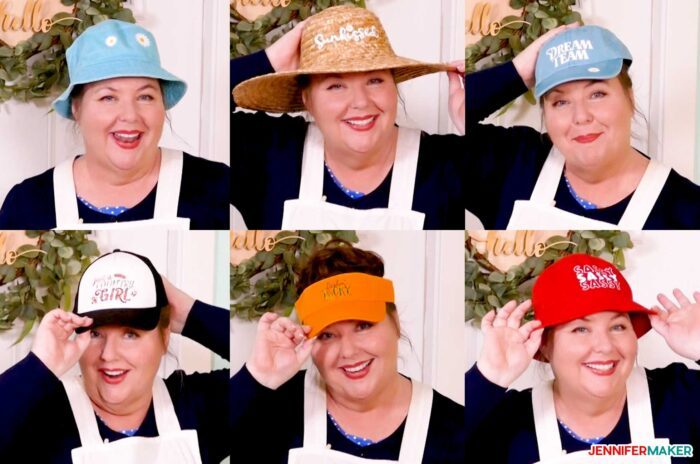
Final Step: Show Them Off!
I had a great time experimenting with the Cricut Hat Press and love the results! I'd love to see your projects, too!Notes
Sunkissed: Modified Beachwood
Feelin' Luck: my handwriting and modified Beachwood Sans
Always Choose Joy: Beachwood Sans and Beachwood
Teamwork: Pier Sans Bold, Tingler, and custom text
Dream Team: Custom text
Sassy: Chick Stacked Trendy Block Font
Just a Country Girl: Orchid Key
Answers to Your Questions about the Cricut Hat Press
How do I get the new Cricut Hat Press?
You can get the Cricut Hat Press in the US, UK, and EU right now through the Cricut Shop and from other retailers.
What colors does the Hat Press come in?
The Hat Press comes in “Zen Blue,” which is a very light blue that matches the Cricut Maker 3 and Bright 360 Lamps.
Is the Cricut Hat Press safe to use?
Safety is one of the main reasons Cricut developed the Hat Press! They saw many people trying to press designs on to hats using flat surfaces, which can lead to damaged designs, materials, and even burns. With the Hat Pressing Form and the curved plate that glides easily, the new Hat Press lets you press projects effectively without touching heated surfaces or crumpling your hat.
Also, the Cricut Hat Press has an auto-off feature, which turns off the machine after 13 minutes without use. The press will beep 30 seconds before it shuts off so you can reactivate it if you have more crafting to do.
Does the Cricut Hat Press take a long time to heat up?
It can reach 400 °F (205 °C) in three minutes, just the right amount of time to tape your design to the hat!
Do I need a Teflon sheet or other heat plate protection for the Cricut Hat Press?
No, you don’t — you can use one if you like, but you can also just use parchment paper or a piece of liner material to protect your iron-on vinyl.
Can I use Infusible Ink with the heat press?
Yes! The Cricut Hat Press reaches 400 °F (205 °C), so it is powerful enough to use Infusible Ink Transfer Sheets and similar materials.
Can I use the Cricut Hat Press on tumblers?
I haven’t tried it, but don’t think the Hat Press will evenly heat a tumbler or other hard surface without the same arc as the heat plate.
Does the Cricut Hat Press let me do sublimation projects?
Yes, the Hat Press can transfer sublimation designs.
What size designs can I transfer using the Hat Press?
The Hat Press works best with designs up to 2.25″ x 4.25″
How much is the Hat Press?
The Cricut Hat Press retails for $149 USD — you can buy the Hat Press here at my affiliate link.
How much do blanks for the Cricut Hat Press cost?
You can buy Cricut Ball Cap or Trucker Hat blanks for $9.99 each, a 3-pack for $19.99, or a 12 pack for $69.99. A roll of Strong Heat Resistant Tape is $6.99.
Is my mobile device compatible with the new Cricut Heat app?
Cricut’s new heat press application has the same system requirements as Design Space. So, if you can use Cricut Design Space on your Bluetooth-enabled iPhone, iPad, or Android device, you’re ready to download and use Cricut Heat!
How do I update my Hat Press?
The Hat Press checks for firmware updates during activation and whenever you connect it to the Cricut Heat app using a device connected to the Internet.
Can I use a computer instead of a mobile device to activate the Hat Press?
No, the Hat Press cannot connect to a computer. It must be activated and registered by connecting to a mobile device with adequate system requirements using Bluetooth.
Why isn’t my Hat Press connecting to my mobile device?
First, make sure your device’s Bluetooth connection is open and available. You may also need to move closer to the device. The connection will b strongest within 7 feet.
Can I use other brands of vinyl with the new Cricut Hat Press?
Yes, the Hat Press will work with all good-quality heat transfer vinyl and similar brands.
Are the Cricut Hat Blanks normal hats?
The Grey Cricut Ball Cap is 80% polyester and 20% cotton. The Cricut Trucker Hat is 100% polyester and has a white front and black mesh body. While many hats with similar materials will likely work with the Hat Press and heat-transfer materials, Cricut only guarantees success with their blanks. I had perfect results with my experiments, though!
Is the Pressing Form required?
Cricut only guarantees successful transfers when you use the Pressing Form, but it will not always be possible. I’m looking forward to experimenting with alternatives!
How do I wash the Hat Pressing Form?
You don’t! If your form gets dirty, wipe it quickly with a clean, dry towel and it dry naturally. Cricut says to not wash, bleach, dry, use high heat, steam, or dry clean the pressing form.
Is the Hat Pressing Form safe for people with nut allergies?
Here’s what Cricut says: “The Cricut Hat Press includes a Hat Pressing Form that contains walnut shells. Cricut has applicable ALLERGY WARNING information posted on their product details page, outer packaging, internal shrink-wrapping of the Hat Pressing Form, and permanently affixed on the care instructions label on the Hat Pressing Form itself. While Cricut does not currently believe that hats are unsafe to wear after heat pressing using the Hat Pressing Form, they highly recommend you consult with your allergy specialist if you have any concerns about the severity of any allergies. In case of any irritation, immediately wash skin with soap and water; if irritation persists, seek immediate medical attention.”
Can I use parchment paper with Infusible Ink hat projects?
Cricut recommends using butcher paper to protect your tools when applying Infusible Ink to hats and includes a sheet with each box. The Cricut Heat app will specify how many layers and in which order your should stack your sheets for each project. For example, they recommend three layers of butcher paper between an Infusible Ink Pen or Marker design and your Hat Press.
Get my free SVG files to make these projects using the Cricut Hat Press!
As always, I’d love to see your Cricut Hat Press projects! I know you’ll come up with some amazing things with the new features. Please share your ideas and photos in our Facebook group or tag me on social media with #jennifermaker.
Love,

Want to remember this? Save this Cricut Hat Press Ultimate Guide to your favorite Pinterest Board!