
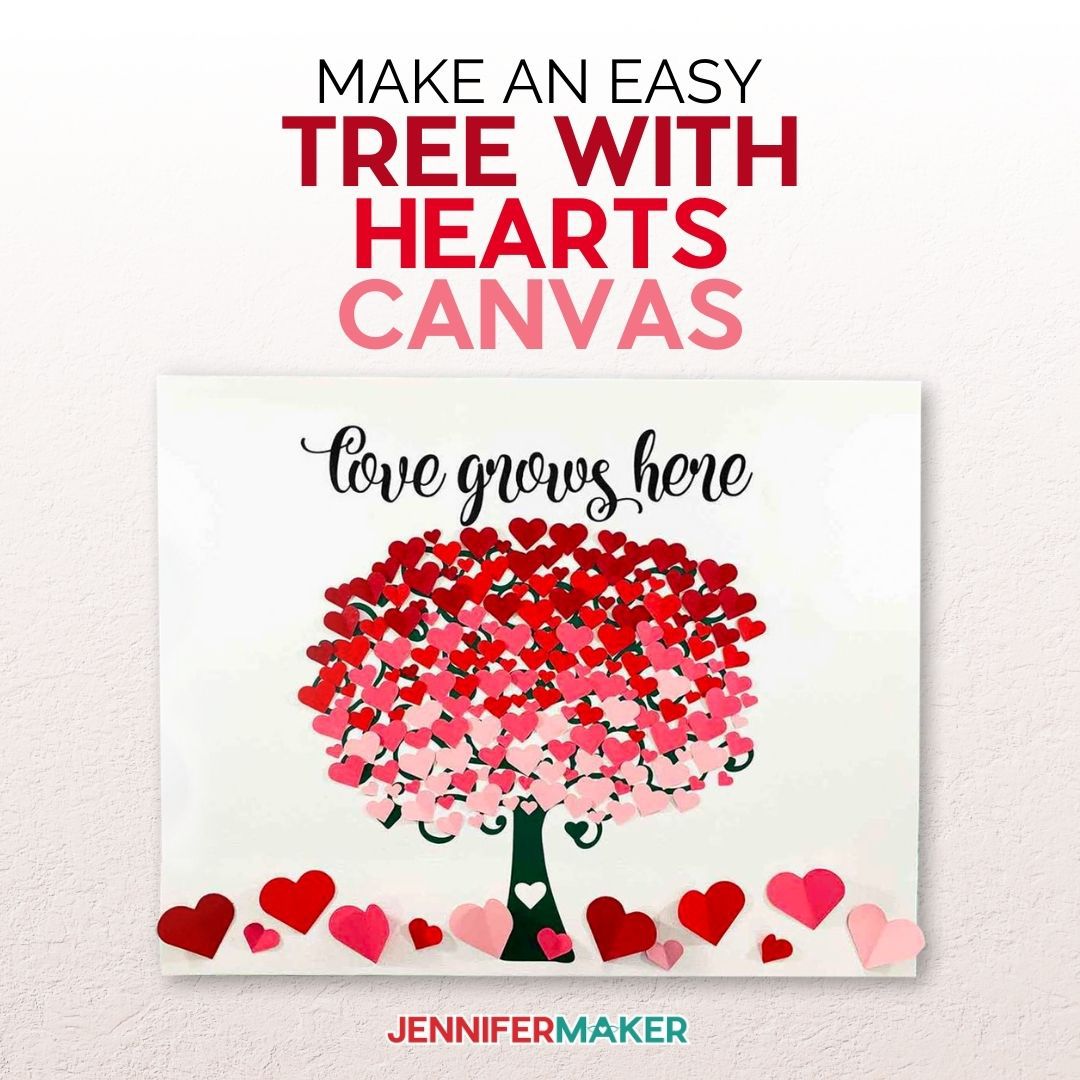
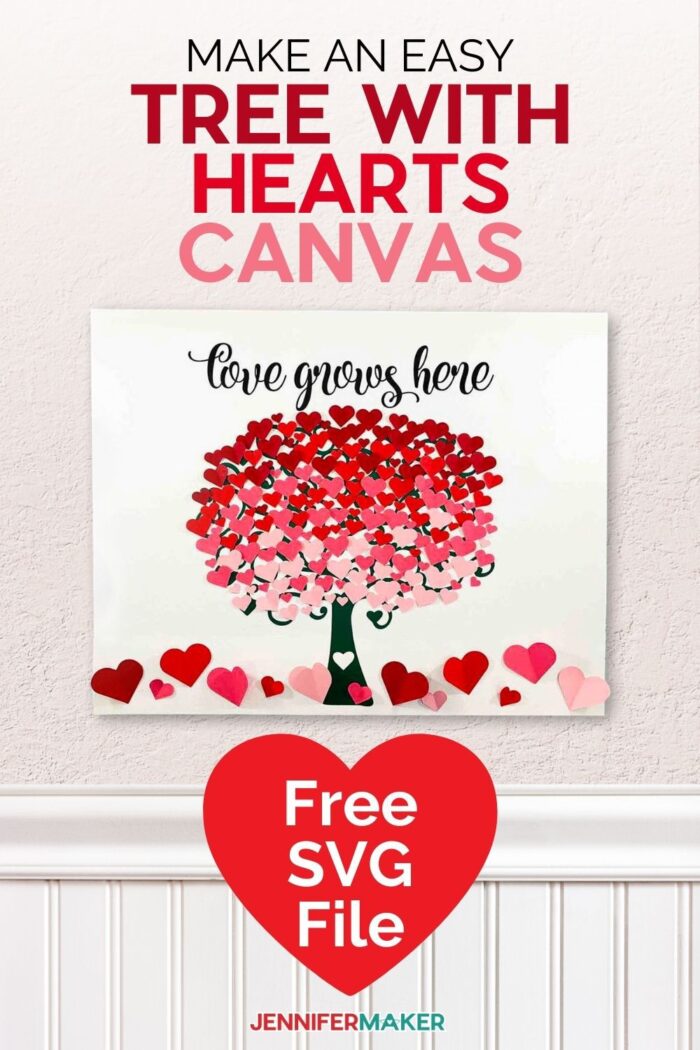
Learn how to use this beautiful and easy tree with hearts SVG as canvas art to show your love year around! This pretty wall art makes lovely home decor or a special gift.
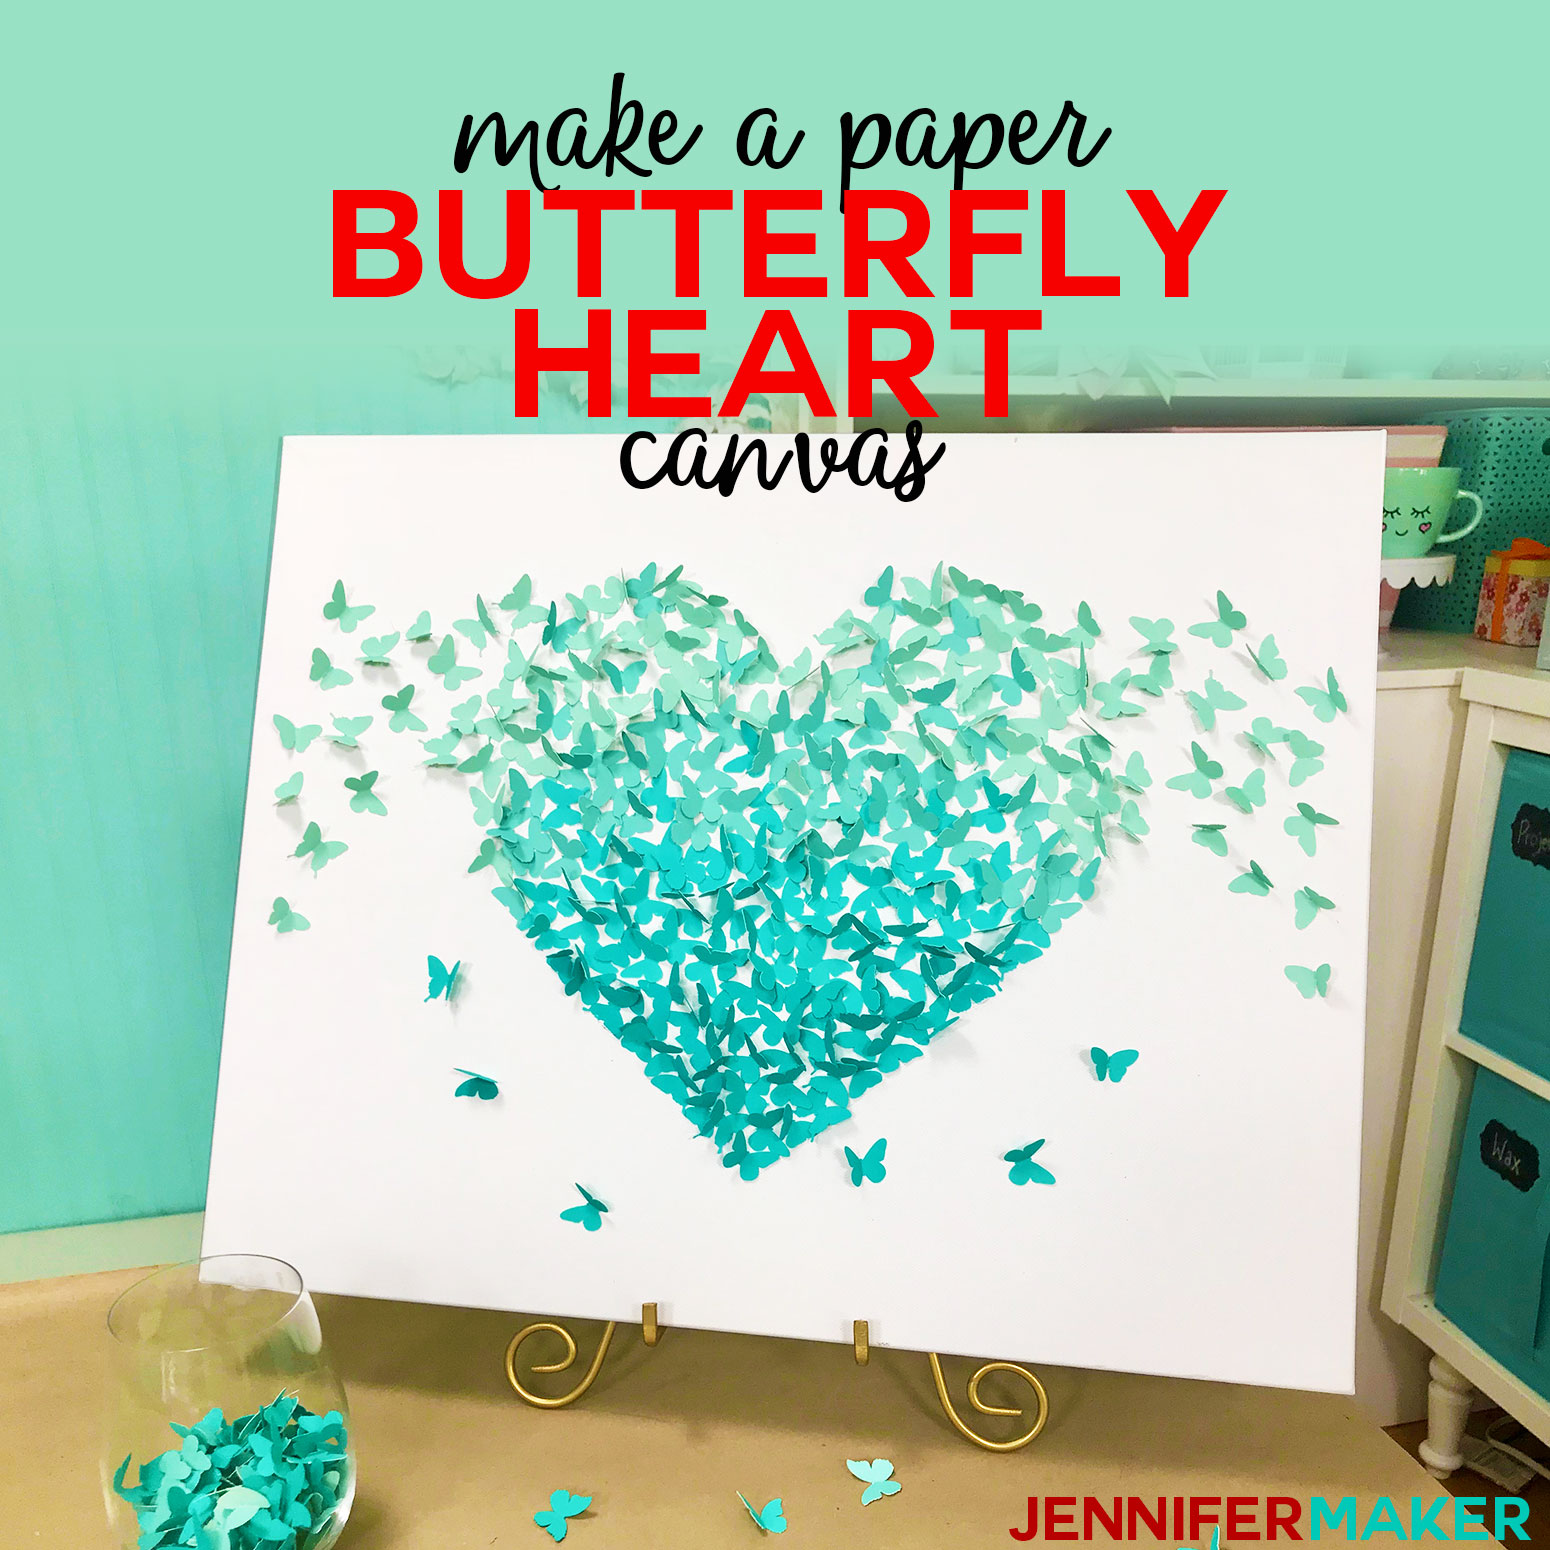
This paper heart tree canvas is a perfect addition to the two other canvas art pieces I have made: the butterfly and flower girl. My paper butterfly heart canvas is absolutely adorable! I keep it out in my craft room year-round and it always makes me smile. Since this project was so popular, I created my stunning paper flower girl canvas wall art. It’s really fun to play around with different shapes and designs and this time I wanted to embrace love, kindness, and family. This vinyl tree with hearts SVG is lovely and it is surprisingly easy to make and decorate with paper hearts, too!
Watch the full video tutorial on how to make this pretty paper heart tree!

I love projects that look very complicated to make, but are actually quite simple. This is one of those projects. It is so much easier than it looks. I am frequently asked if a project is good for beginners, and without a doubt, this tree with hearts SVG is a wonderful place to start for any level of crafter. If you haven’t used vinyl, this is a great project to begin with because you don’t need a lot of supplies! What makes it even better is that you can customize it to fit your decor or your mood.
All you need is one or two sheets of permanent vinyl for the tree with hearts SVG design, along with a way to transfer it (like a sheet of transfer tape). I designed the tree with hearts SVG so it can be cut on a cutting machine like a Cricut Maker or Explore … I even made a special version that is sized to be cut on the Cricut Joy!
In addition to that, you’ll want about four sheets of cardstock in various shades of red and pink — I’m using several sheets of paper from a solid core pack I had on hand. Solid core cardstock means the paper is the same color throughout the paper — front, back, and inside — and is not white on the edges. Cricut, Michaels, and Amazon all have packs of solid core cardstock that you can use for this project, or even better, you can use what you already own! This is a great way to use some of your supplies. I cut out the paper hearts using my Cricut cutting machine, but you could also use scissors of course (though it might take a while).
You’ll also need a canvas, board, or sign to which to attach your tree and paper hearts. I’m using a 16″ x 20″ stretched canvas. If you go a lot smaller than this, the difficulty level will increase because the vinyl will get harder to weed.
You’ll also want to seal the canvas with something before you attach your tree with hearts vinyl, as it will make it much easier to transfer your vinyl to it. You can use paint, Mod Podge, or spray adhesive. Just be sure to let your sealed canvas dry before you apply your vinyl.
And finally, you’ll need a way to attach your paper hearts to your canvas. I found it easiest and fastest to use tacky glue, but you can also use hot glue or glue dots. If you fold your hearts in half before you apply them to your canvas, you can add great dimension without having to use a 3d adhesive!
So let me show you where to find my tree with hearts SVG design, and then I’ll show you how to cut and assemble your paper heart tree canvas! This post contains some affiliate links for your convenience (which means if you make a purchase after clicking a link I will earn a small commission but it won’t cost you a penny more)! Read my full disclosure policy.
Materials to Make a Valentine Heart Tree Canvas
See my Amazon shopping list for this project here!
- Two (2) sheets of permanent adhesive vinyl (I used one 12×12 sheet of green vinyl for the tree & black vinyl for the text)
- Four (4) sheets of 65-80 lb. cardstock in whatever colors you want (I used shades of red)
- A way to transfer vinyl onto your canvas (such as standard grip transfer tape)
- Something to put your tree with hearts on — I used a 16″ x 20″ Frame Stretched Canvas
- A way to glue your hearts onto your canvas, such as tacky glue
- (Optional) A way to seal your canvas so it’s easier to get the vinyl to stick (like spray adhesive)
- Weeding Tool
- Scraper
- Tweezers
- Measuring Tape
- Cricut blue Light Grip or green StandardGrip Cutting Mat
- Cricut Fine Point Blade
- A way to cut your cardstock and vinyl (I used the Cricut Maker cutting machine but this project can also be cut on a Cricut Explore or Cricut Joy)
- Font Used: Kite Script from Font Bundles
- Design #278 (My free SVG/PDF/DXF design files are available in my free resource library – get the password by filling out the form at the bottom of this page)
How to Make A Tree with Hearts SVG Canvas
Easy Tree with Hearts Canvas
Here are my step-by-step directions to make the easy Paper Heart Tree canvas wall art using my tree with hearts SVG.
Materials
- Two (2) sheets of permanent adhesive vinyl (I used one 12x12 sheet of green vinyl for the tree & black vinyl for the text)]
- Four (4) sheets of 65 lb.-80 lb. solid core cardstock (I used shades of red and pink)
- A way to transfer vinyl onto your canvas (such as standard grip transfer tape)
- Something to put your tree with hearts SVG onto -- I used a 16" x 20" Frame Stretched Canvas
- A way to glue your cardstock hearts onto your canvas, such as tacky glue
- (Optional) A way to seal your canvas so it's easier to get the vinyl to stick (like spray adhesive)
- My free SVG design files (available in my free resource library—get the password by filling out the form at the bottom of this page)
Tools
- A way to cut your vinyl and cardstock (I used the Cricut Maker cutting machine, but you can also use a Cricut Explore or Cricut Joy cutting machine, scissors, or a craft knife)
- Cricut blue Light Grip or green Standard Grip Cutting Mat
- Weeding Tool
- Scraper
- Tweezers
- Measuring Tape
- Font Used: Kite Script from Font Bundles
Instructions
Step 1: GET MY FREE TREE WITH HEARTS SVG & SIMPLE PAPER HEARTS DESIGN
My tree with hearts SVG silhouette, the"love grows here" quote, and the paper heart in just the right size for this project are free for you to use. You can get them either as a printable PDF or as an SVG cut file to use in a cutting machine like a Cricut. The pattern file contains the design to make a pretty paper heart tree canvas with optional text: "love grows here". Download the Easy Paper Heart Tree design from my free resource library (get the password to the library in the form at the bottom of this post).
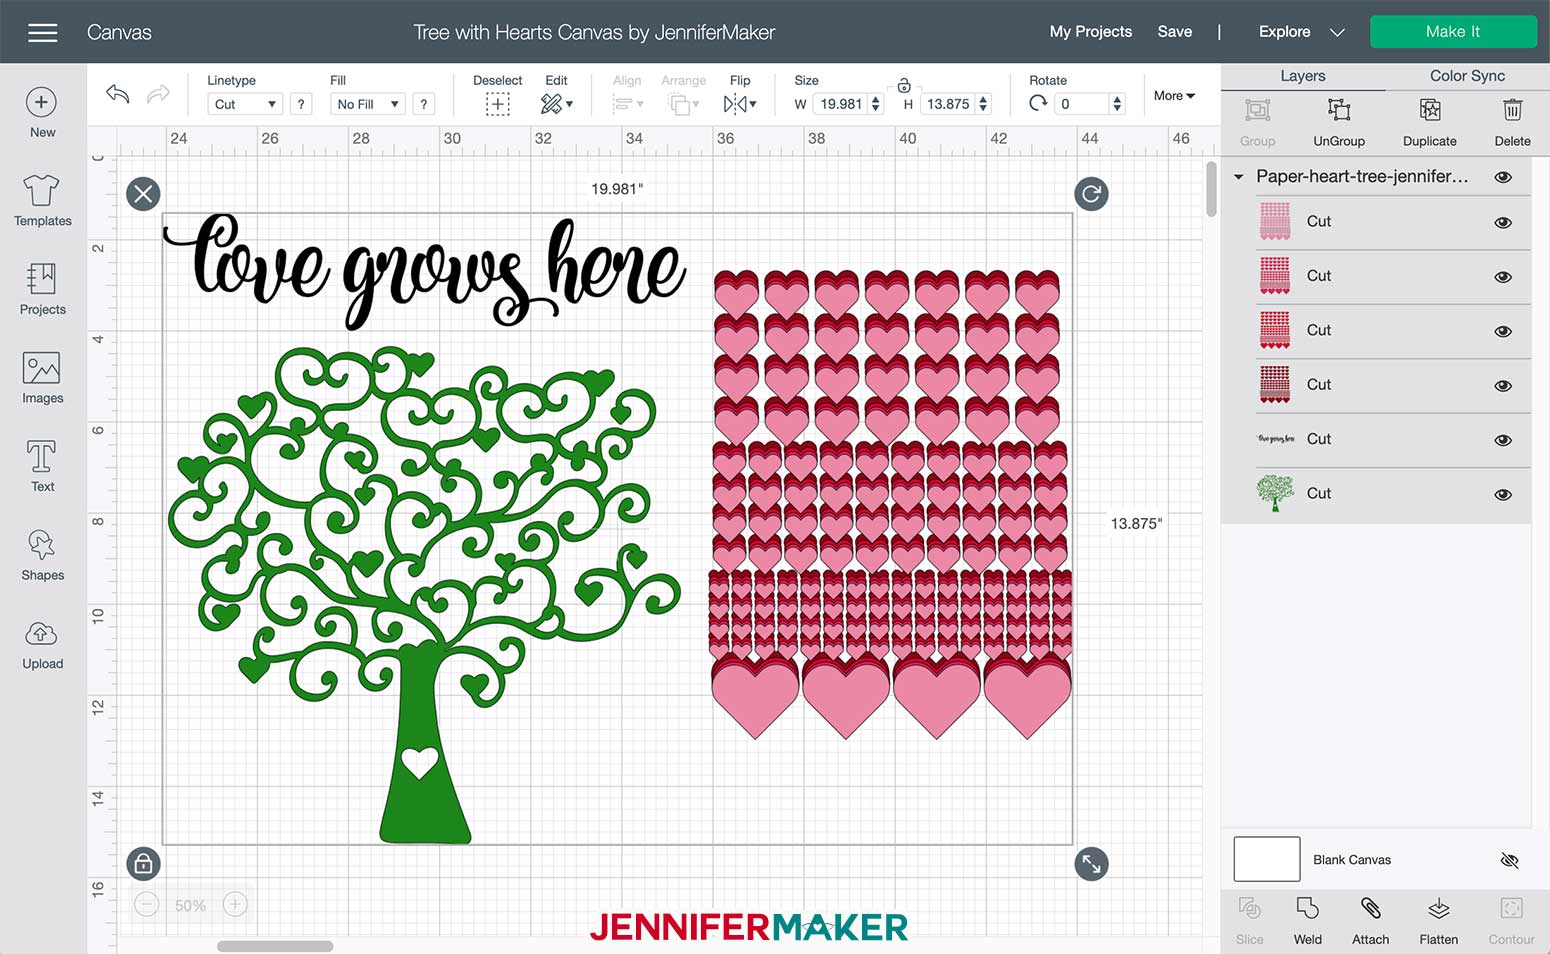
Here’s what the uploaded SVG cut file will look like once uploaded to Cricut Design Space:
Tip: If you’re not sure how to upload an SVG cut file to Cricut Design Space, watch this helpful video training series I made. If you’re on an iPhone or iPad, here’s how to download and upload SVG files to the Cricut Design Space app.
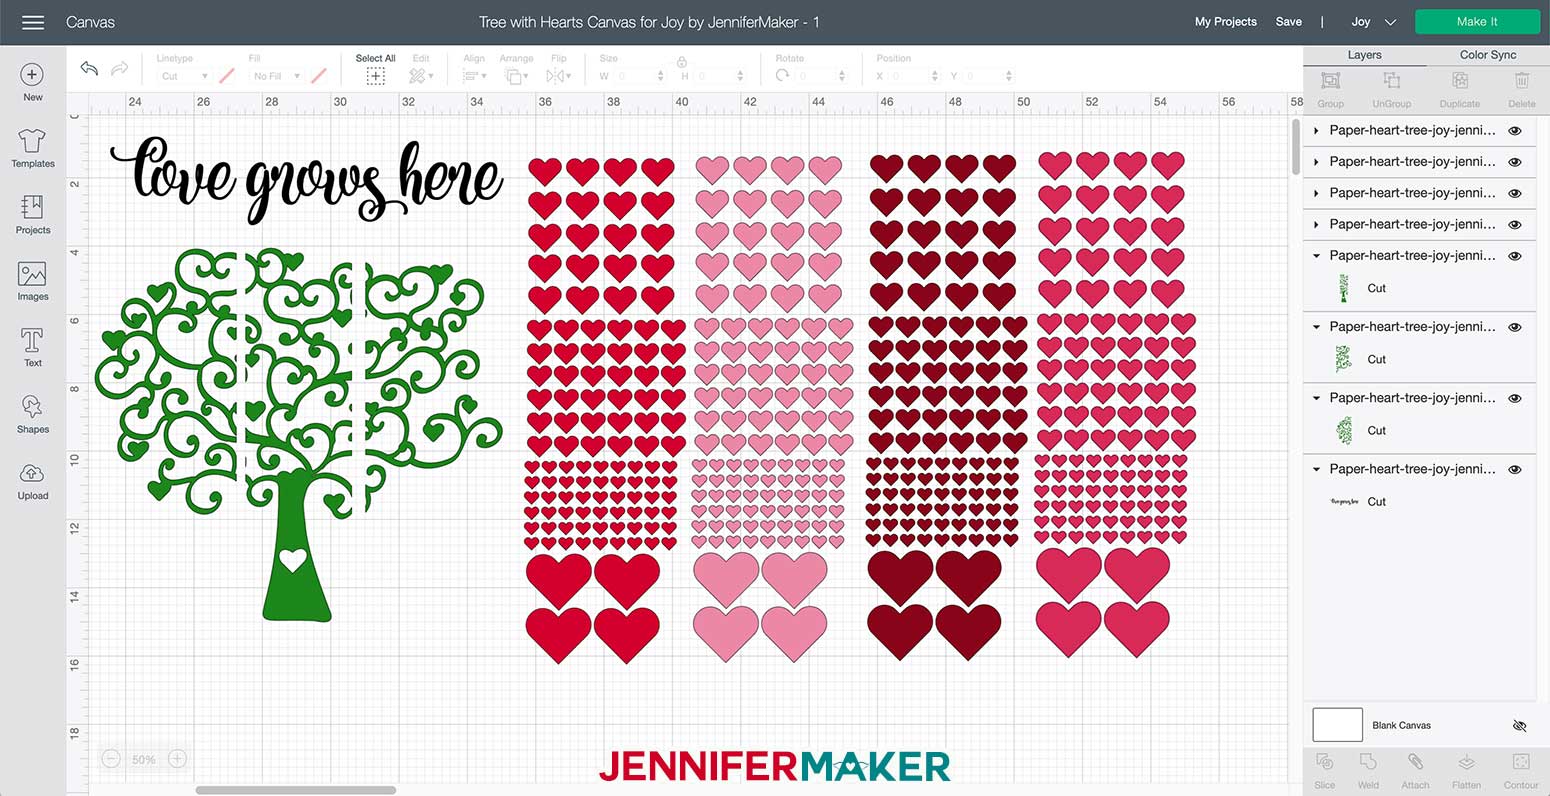
Cricut Joy users: There is a special version of this design in the ZIP file for you -- look for the one called "paper-heart-tree-for-joy." This version is pre-sliced so it fits on the Joy.
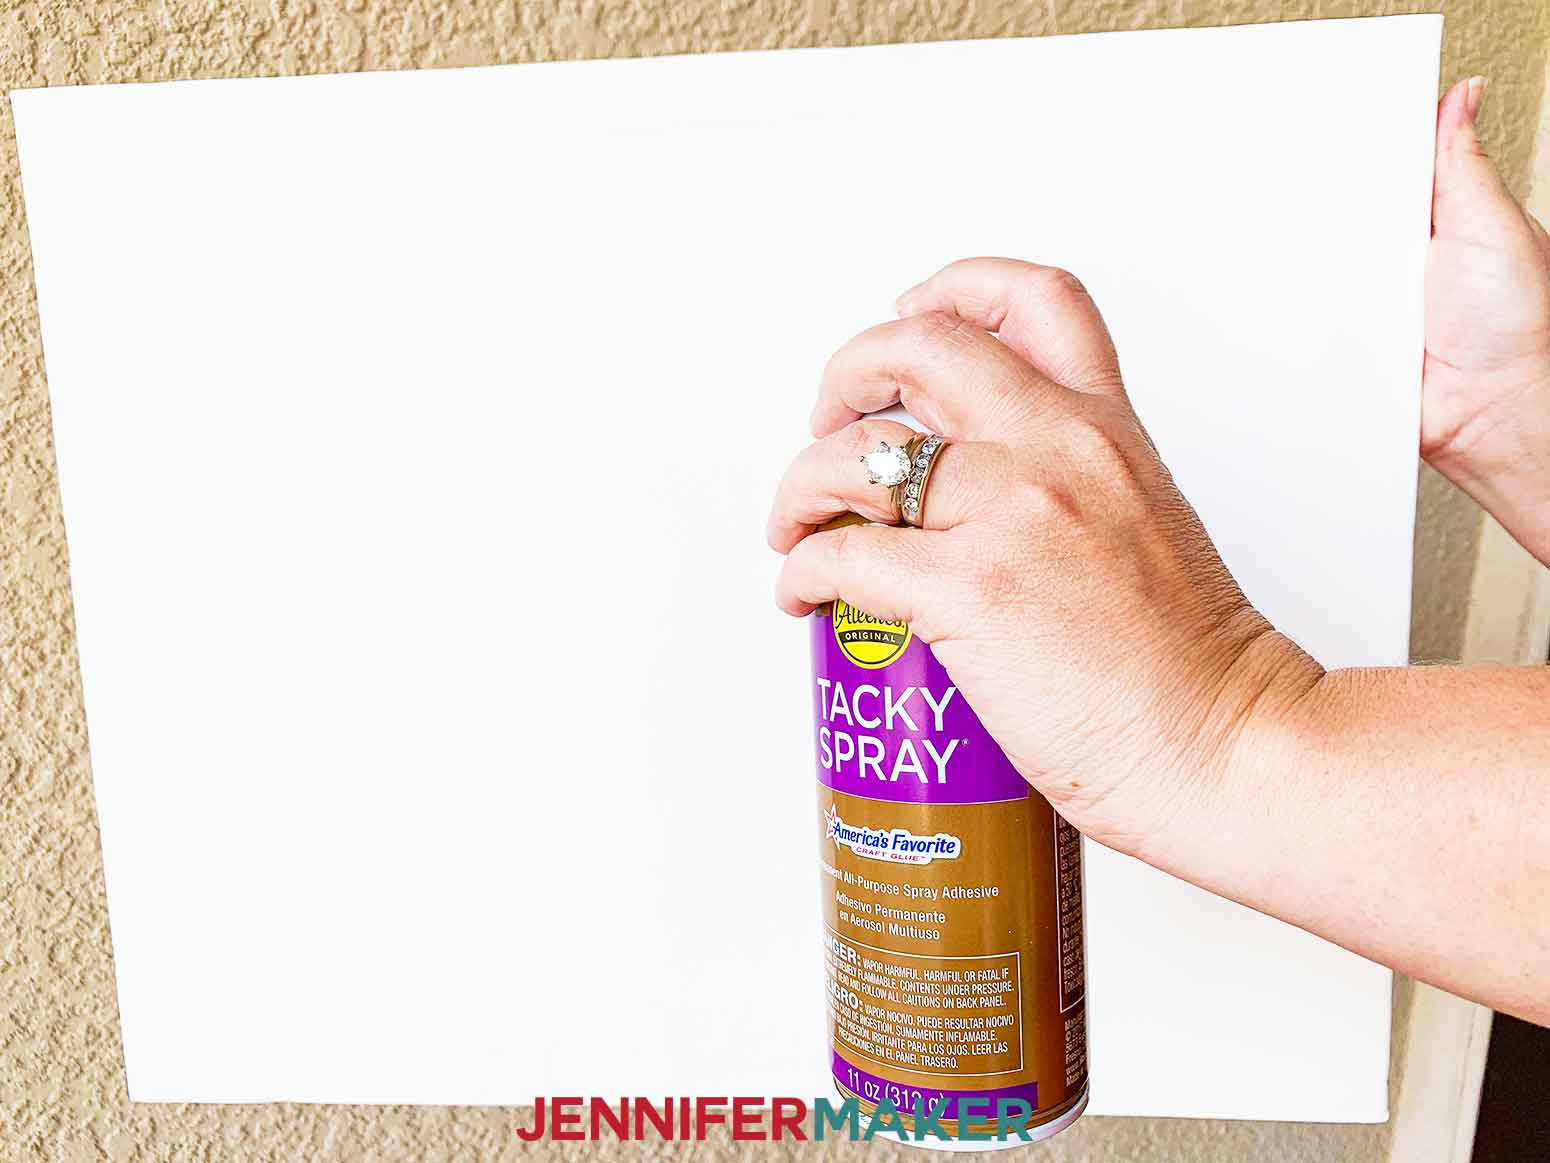
Note: If you're going to seal your canvas before you apply your vinyl (it will make the vinyl stick much better), this is the time to do it. You can paint it with acrylic paint, cover it in matte Mod Podge, or cover it with spray adhesive. In all cases, be sure to let it dry long enough. The fastest method is to use spray adhesive, as that dries in under an hour. (This is the method I used.)
STEP 2: CUT OUT YOUR TREE, WORDS, AND PAPER HEARTS
I have the tree with hearts SVG decal, "love grows here" quote and the paper hearts sized to look good on stretched canvas in size 16" x 20". I recommend you keep everything at the same size as you find it in my files for the best results. If you would like to resize to something smaller, like an 8" x 10" canvas, that will work too, just keep in mind the files (tree, hearts and words) will be half the size and more difficult to weed/handle. Thus, I do not recommend that beginners resize this project.
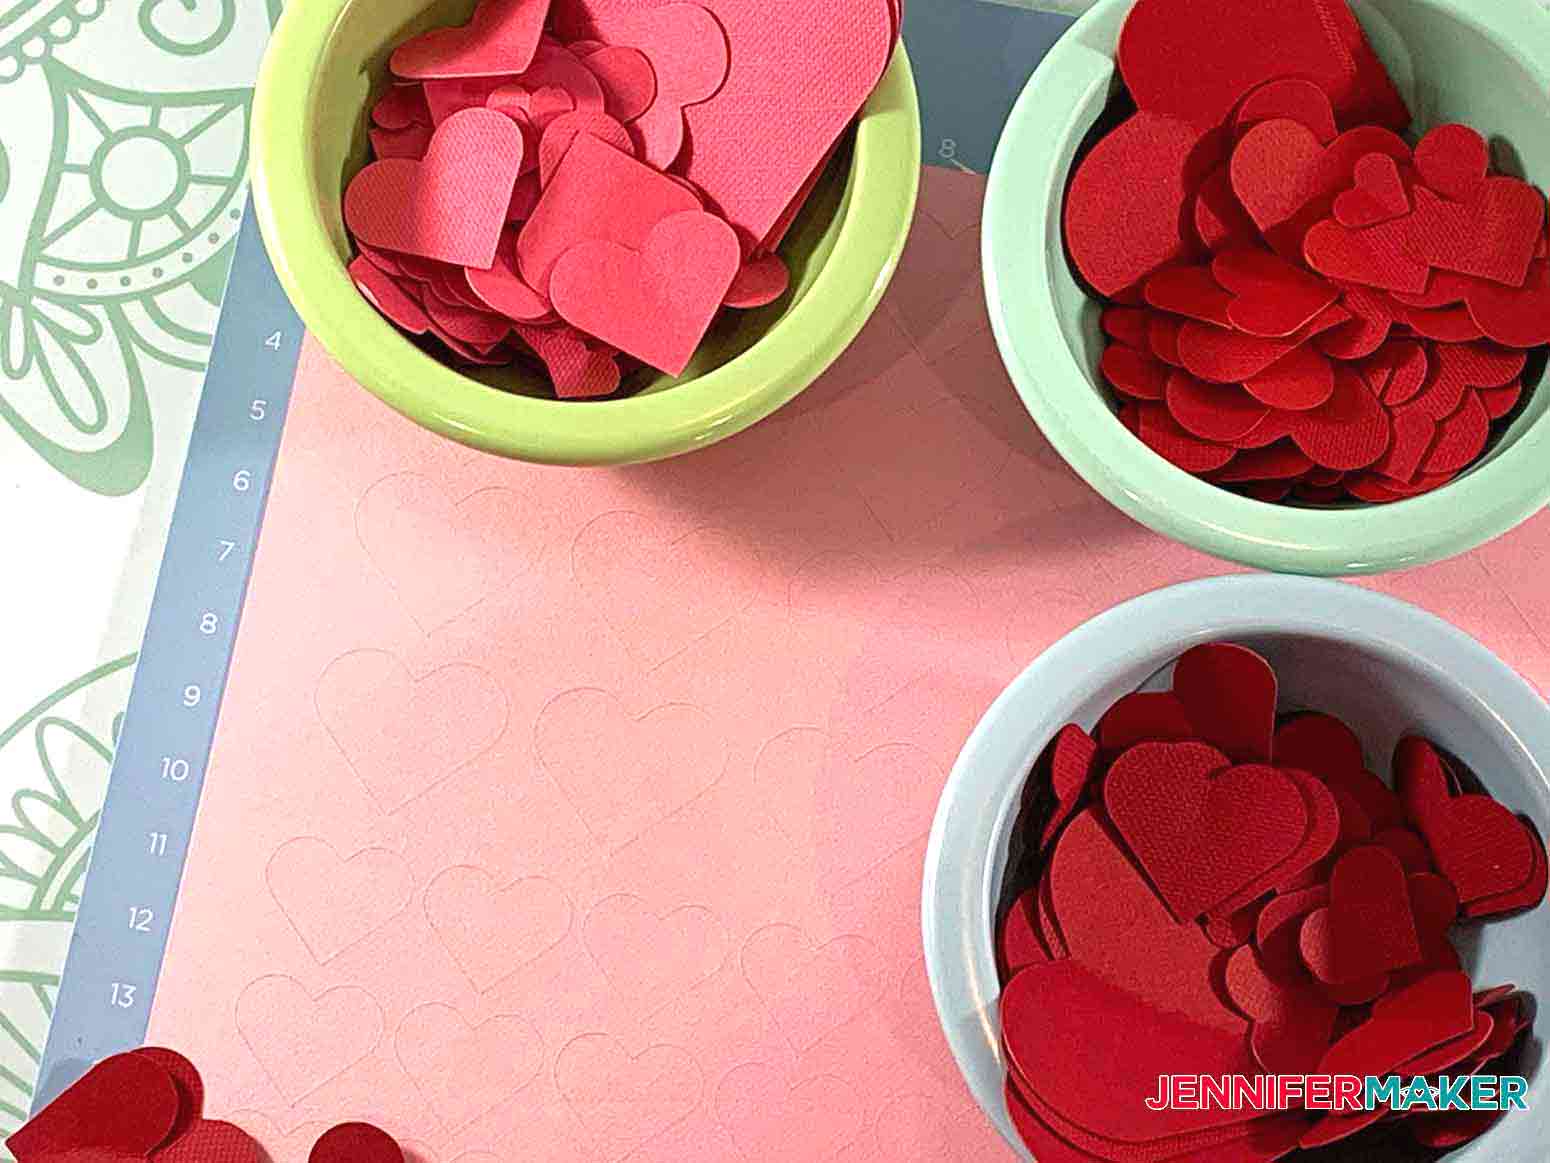
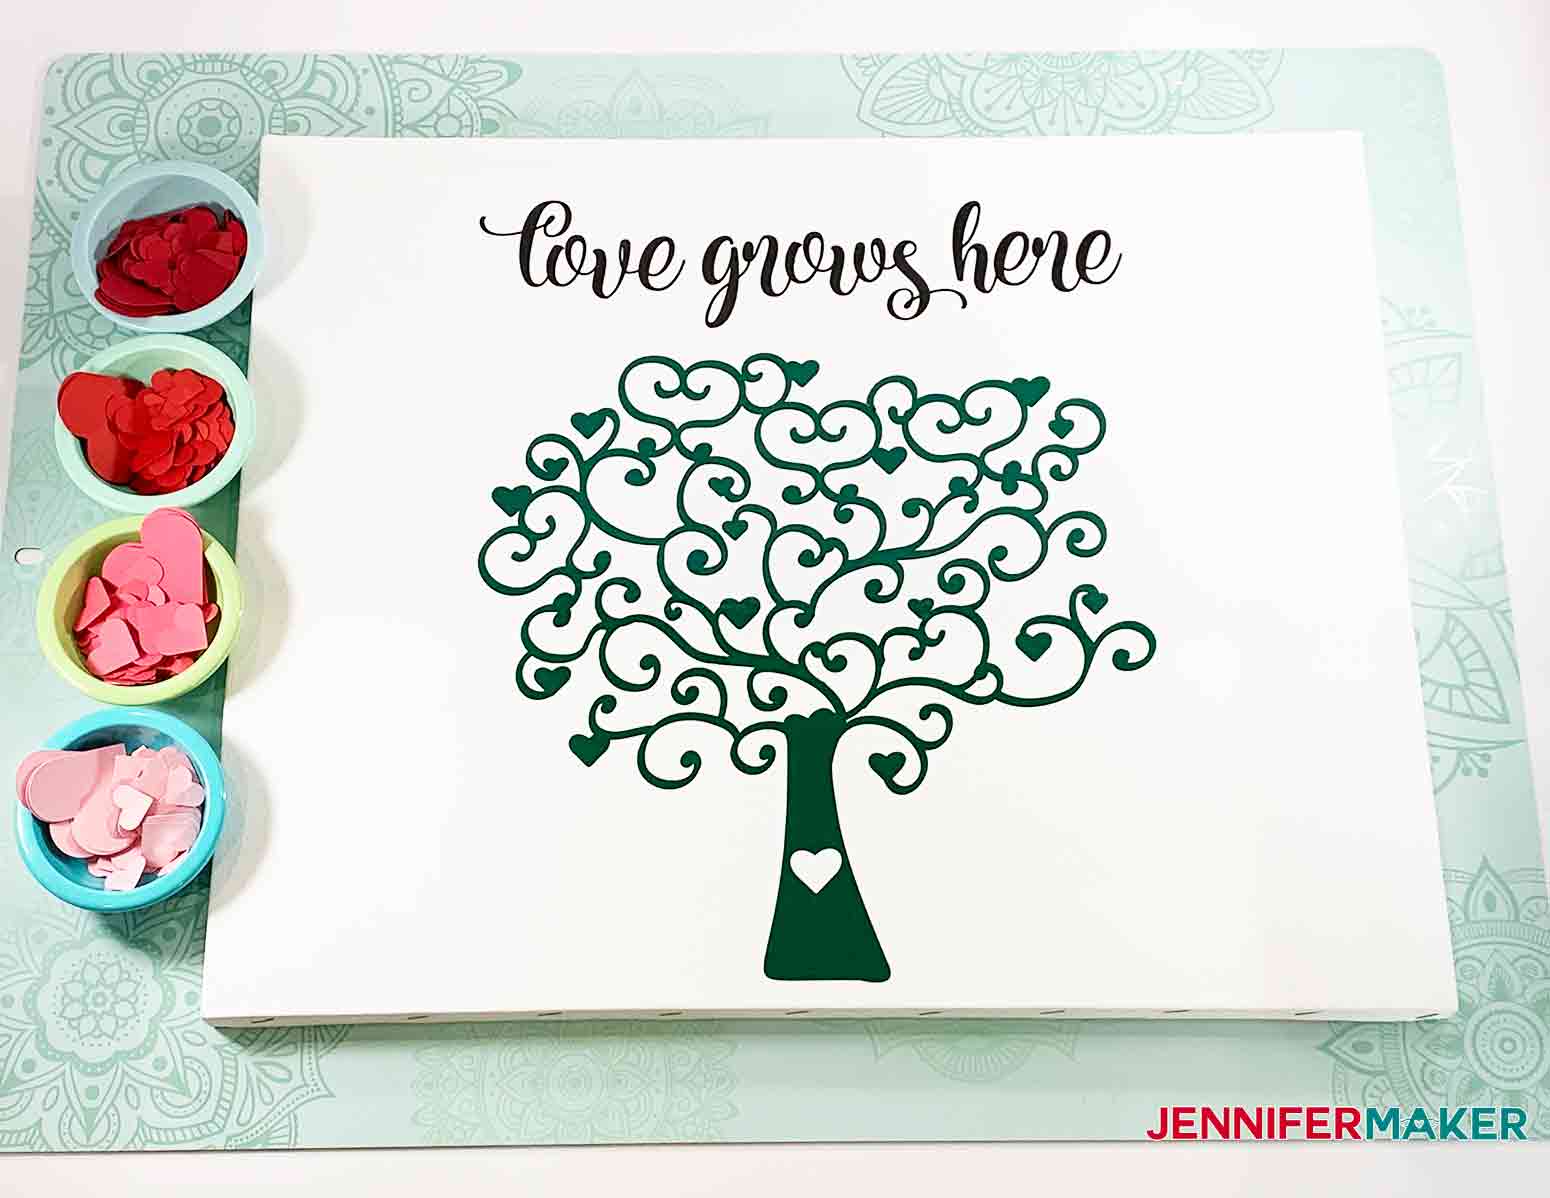
Cut four copies of the paper heart designs on four different sheets of cardstock (I recommend you pick four shades of the same color, such as four shades of red or four shades of yellow). Use the "Medium Cardstock" setting for these paper hearts.
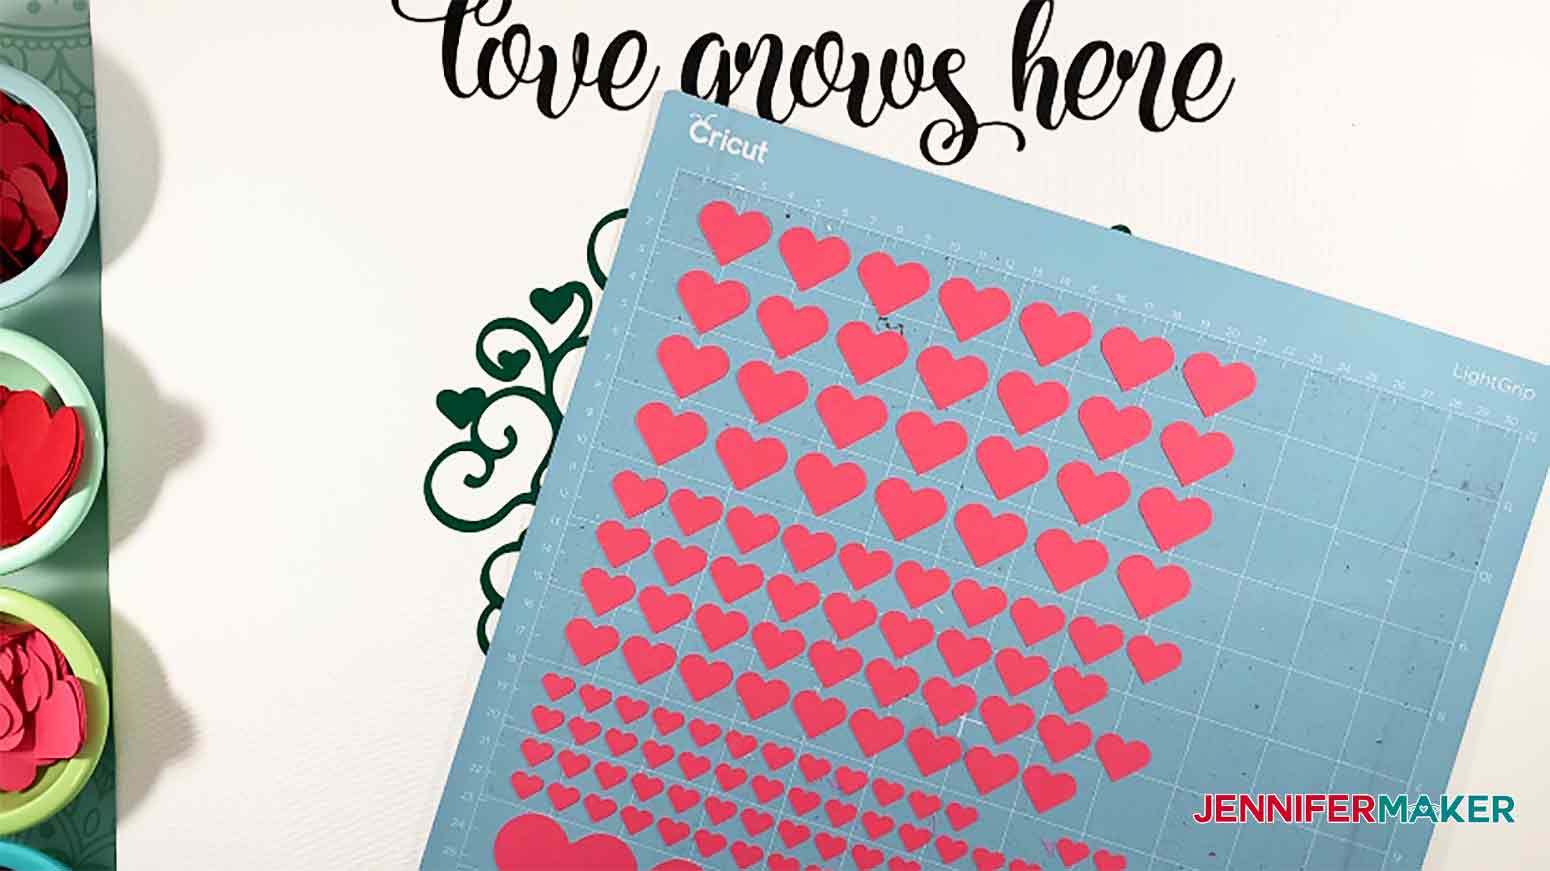
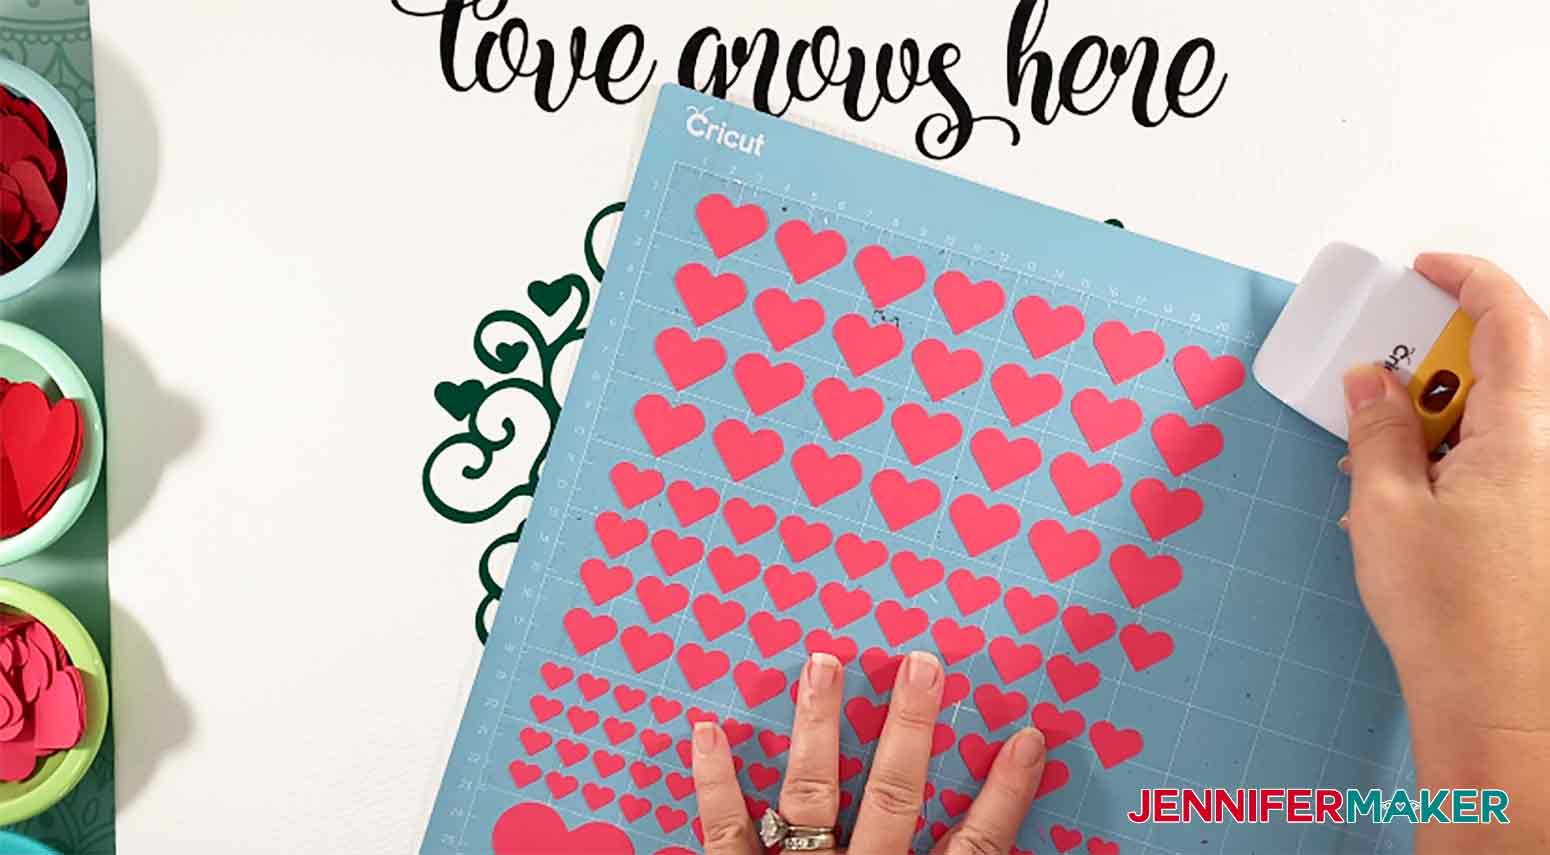
It will seem like a lot of hearts, but you'll probably use most of them. You can always use the extra for confetti.
Cut your permanent vinyl on the right side (don't mirror it) and use the "Premium Vinyl" setting.

Once your vinyl is cut, weed out the areas you won't transfer to your canvas (so everything in between the branches).
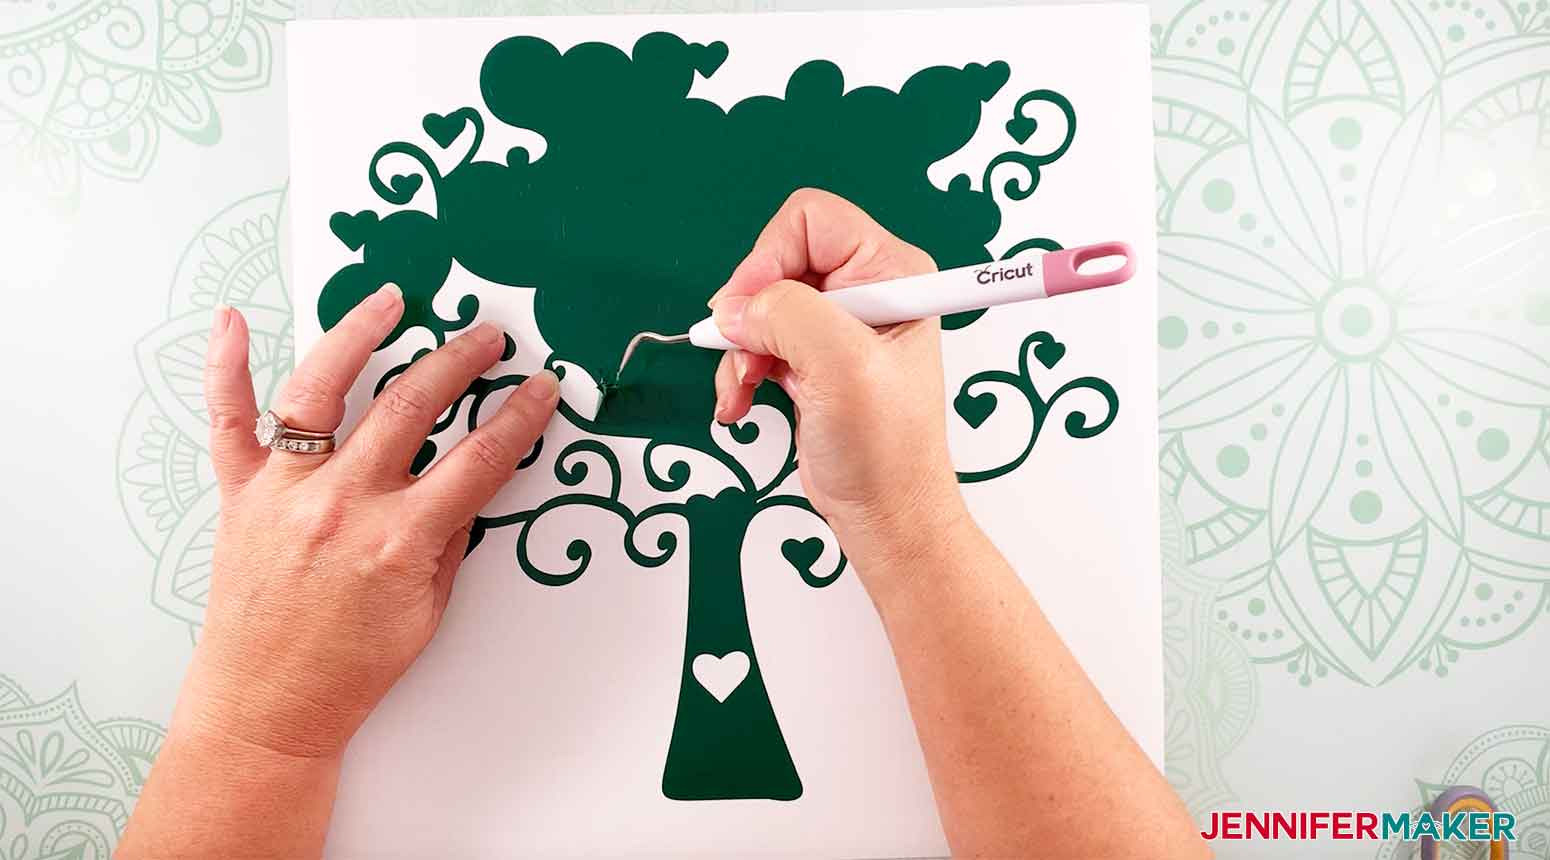
Cricut Joy users: You'll need to transfer your tree with hearts SVG vinyl in three sections. Just do your best to match them up and don't fret if it is not exact, because the paper hearts will cover any mistakes.
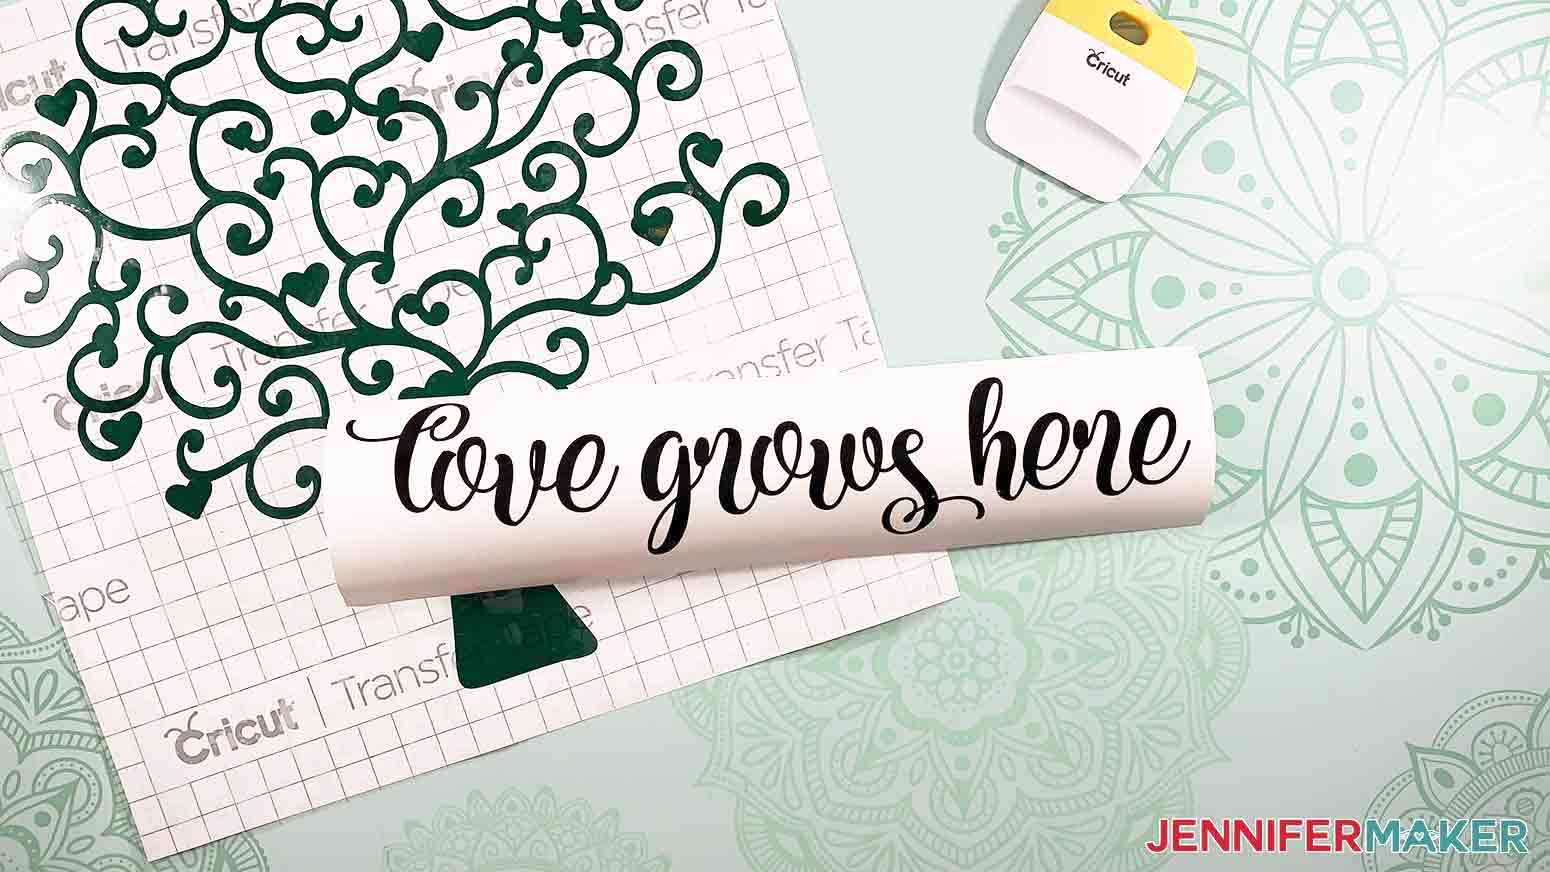
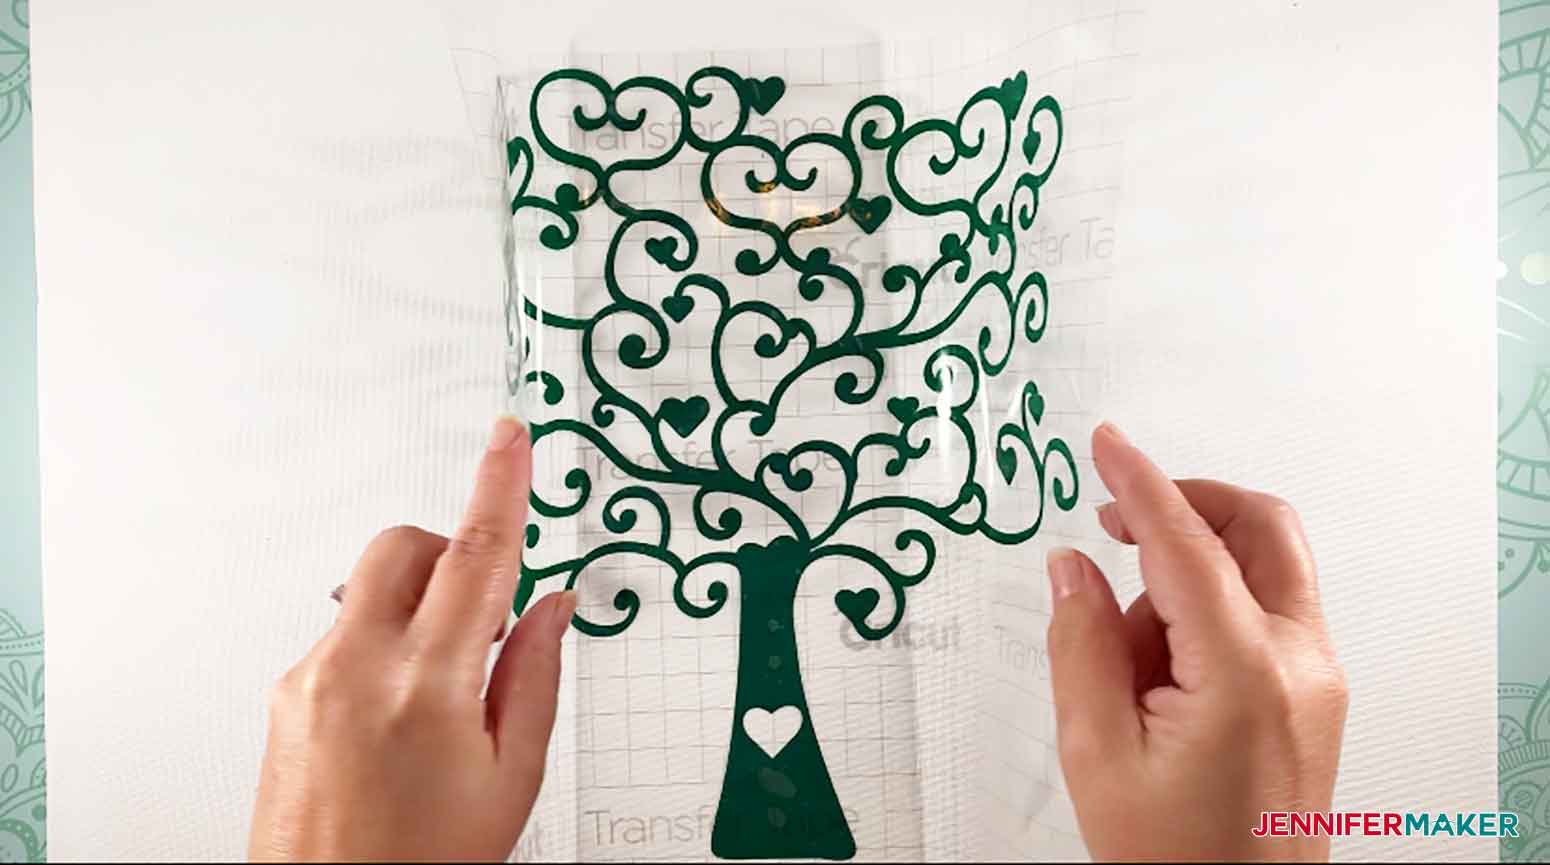
Transfer your vinyl to a transfer sheet or transfer tape. I recommend you reduce the tack on your transfer tape first by sticking it to your shirt or a paper towel -- this will make it less sticky and easier to remove when you put it on your canvas.
STEP 3: PUT IT ALL TOGETHER INTO A BEAUTIFUL CANVAS
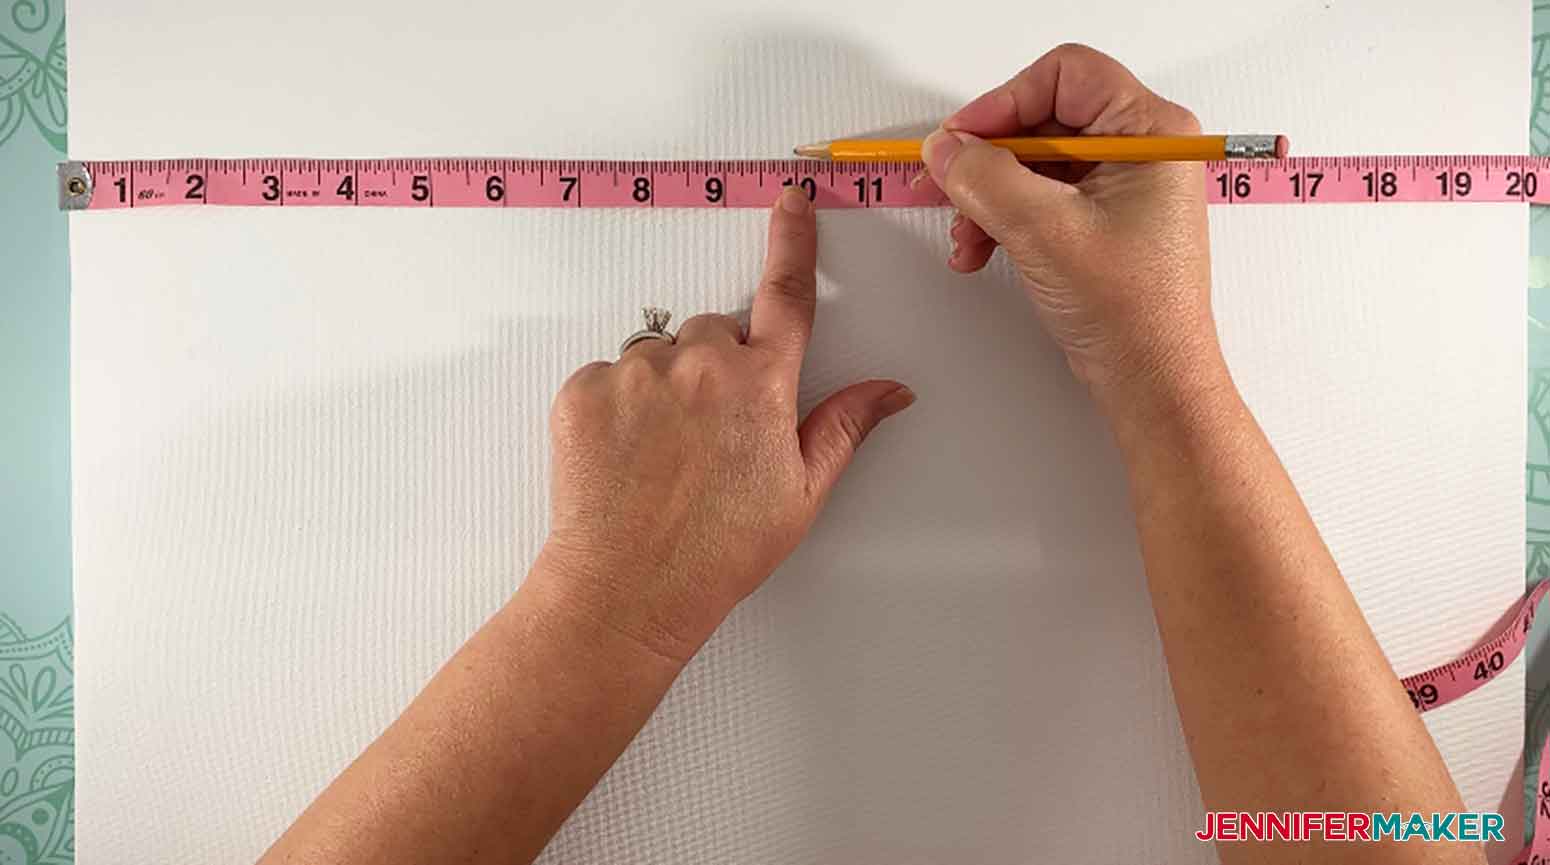
First, use your measuring tape to mark the center of your canvas.
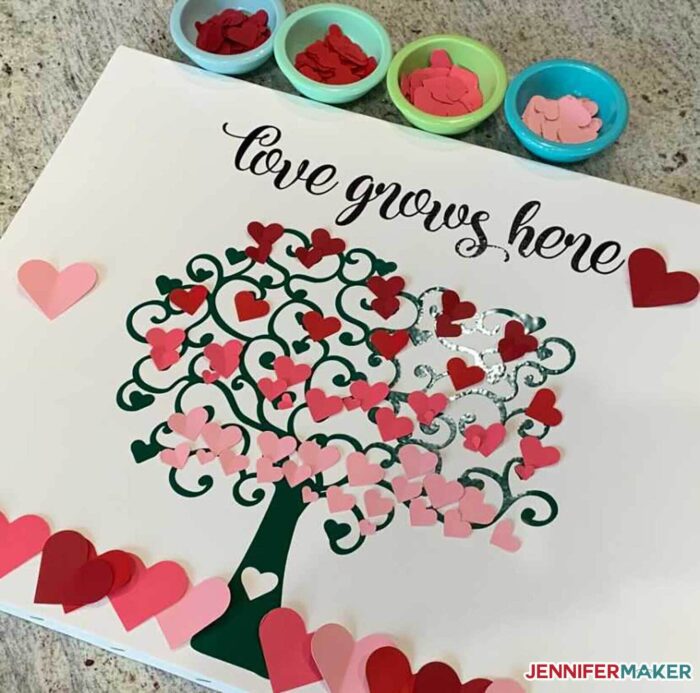
Next, transfer your vinyl to your sealed canvas. To do this, I first centered the transfer tape with the decal onto my canvas and pressed down. Then I put a paperback book underneath the stretched canvas so there was support underneath and then used my scraper on all areas with vinyl to adhere it well to the canvas. Finally, I carefully removed the transfer tape -- I only had to coax the vinyl off in a few places.

You can stop here and just have a pretty heart tree on a canvas ... or keep going!
Add the paper hearts! For a really pretty tree with hearts, I suggest giving your hearts some shape and depth by creasing each one down the middle. I just pressed my fingernail down the center of each heart and it did the trick.
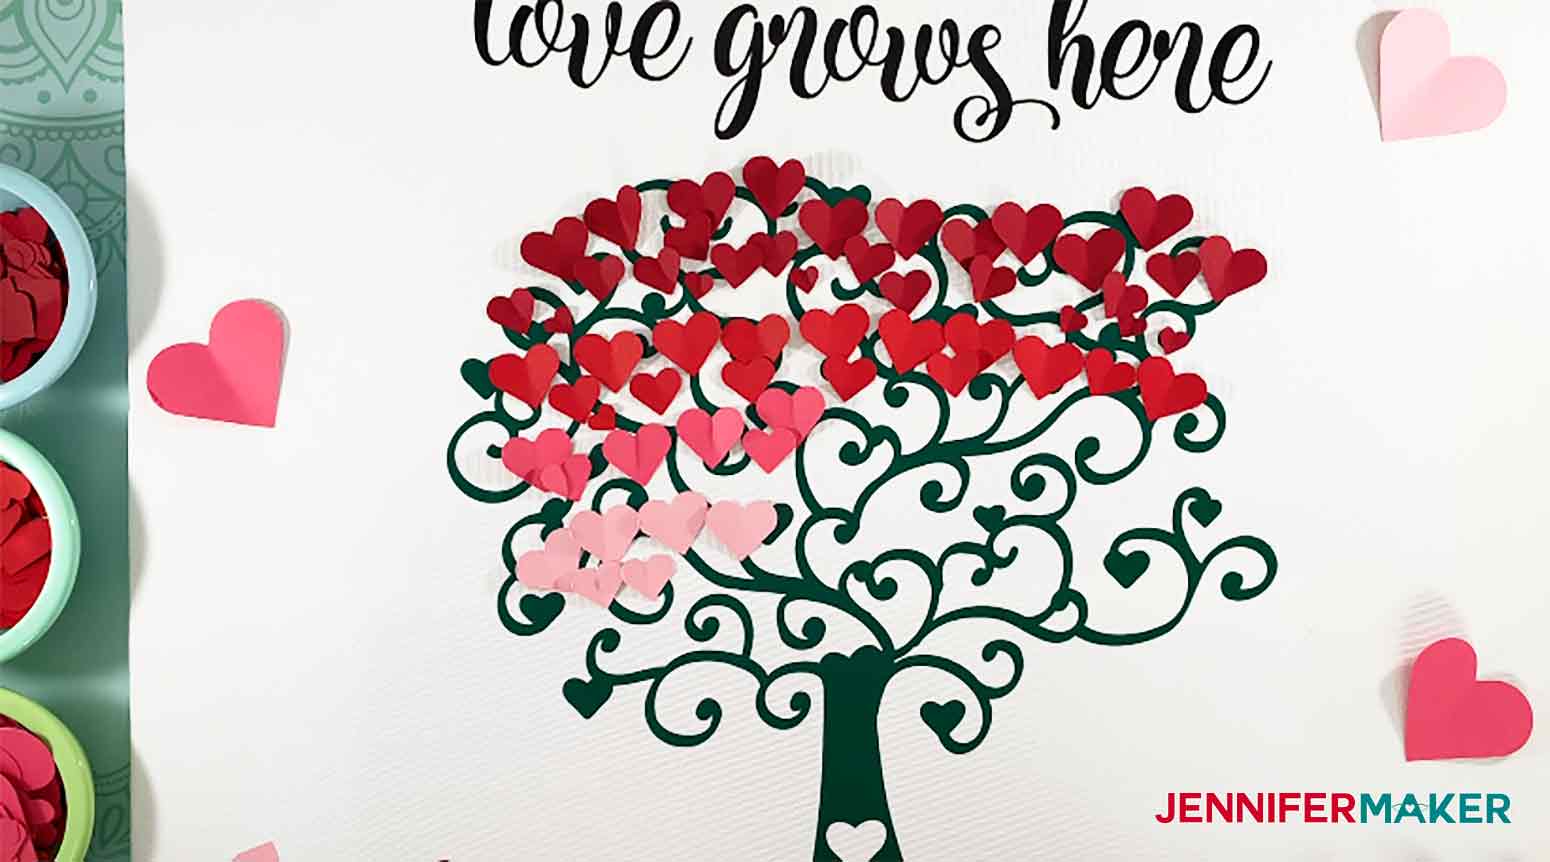
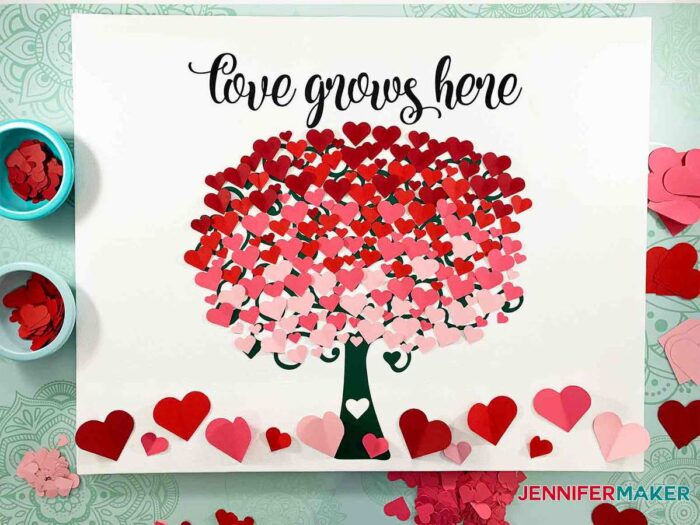
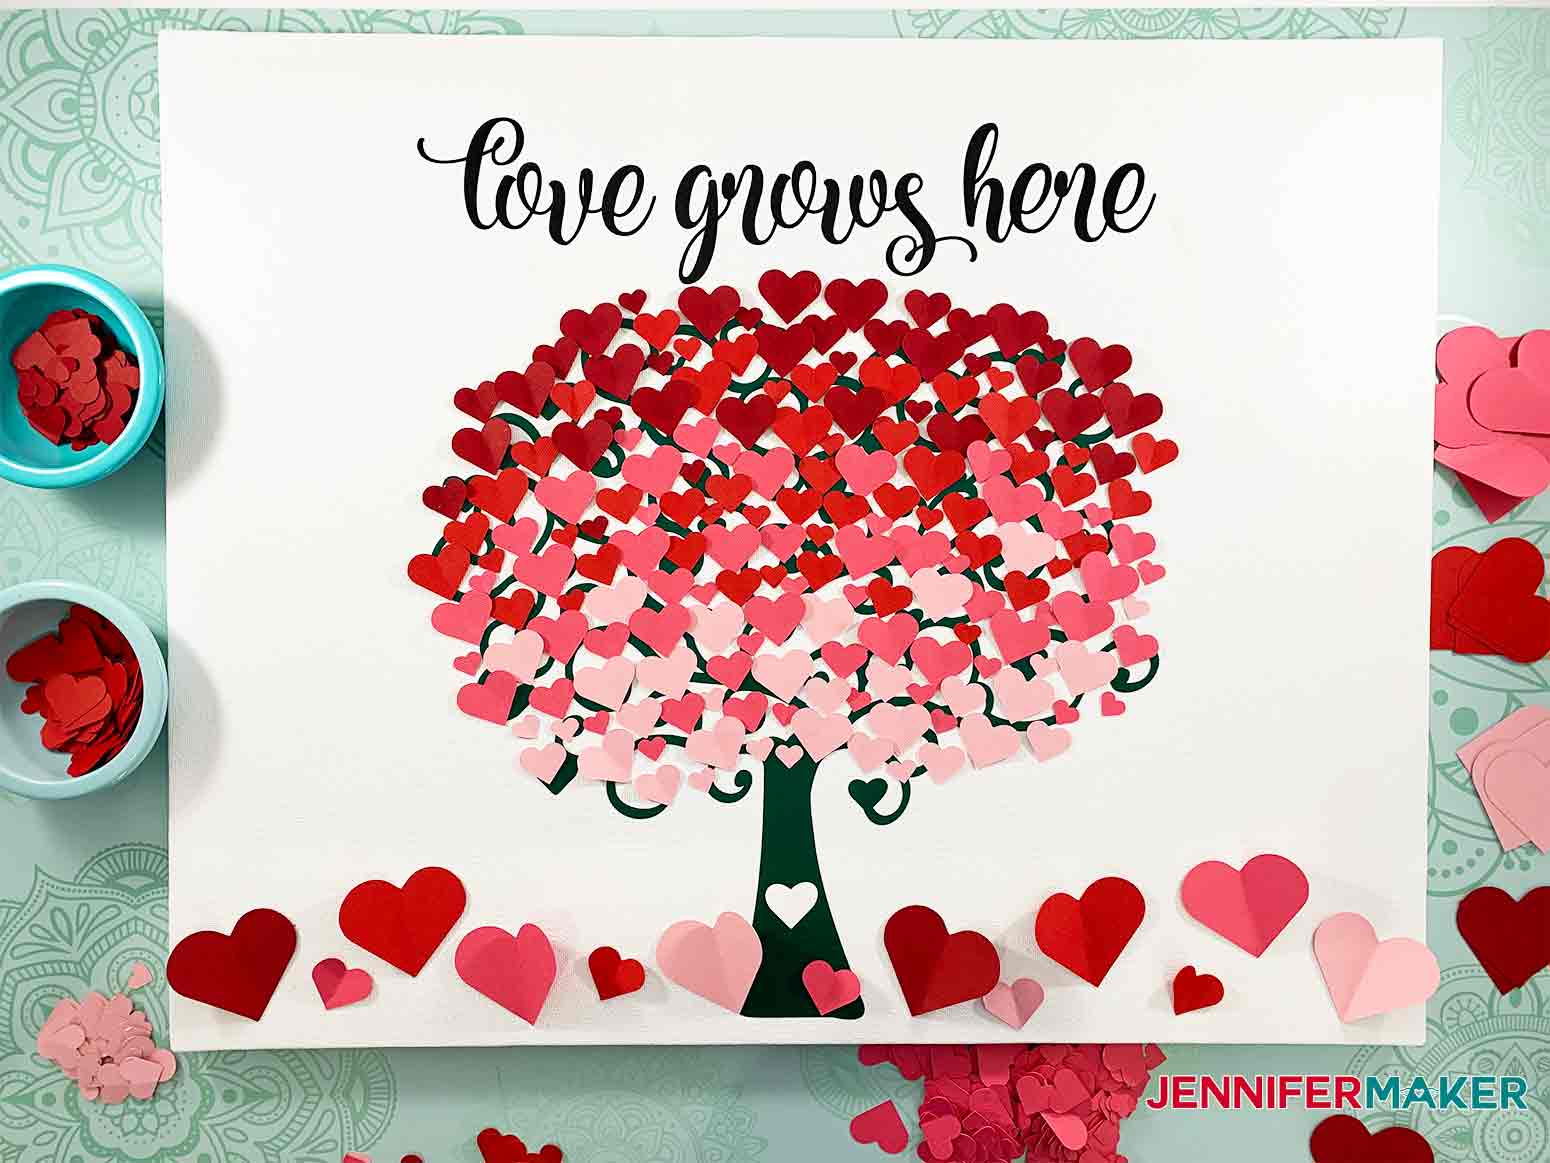
Place your hearts on your canvas in the way you think you'd like them BEFORE you glue them so you have an idea of what design looks best. I put my paper hearts on my canvas with the darkest color at the top, graduating down to the lightest colors. You'll get a more gentle mix between the layers if you add a little of each color above and below its layer. If you want to replicate my look, avoid super straight lines of hearts -- mix it up!
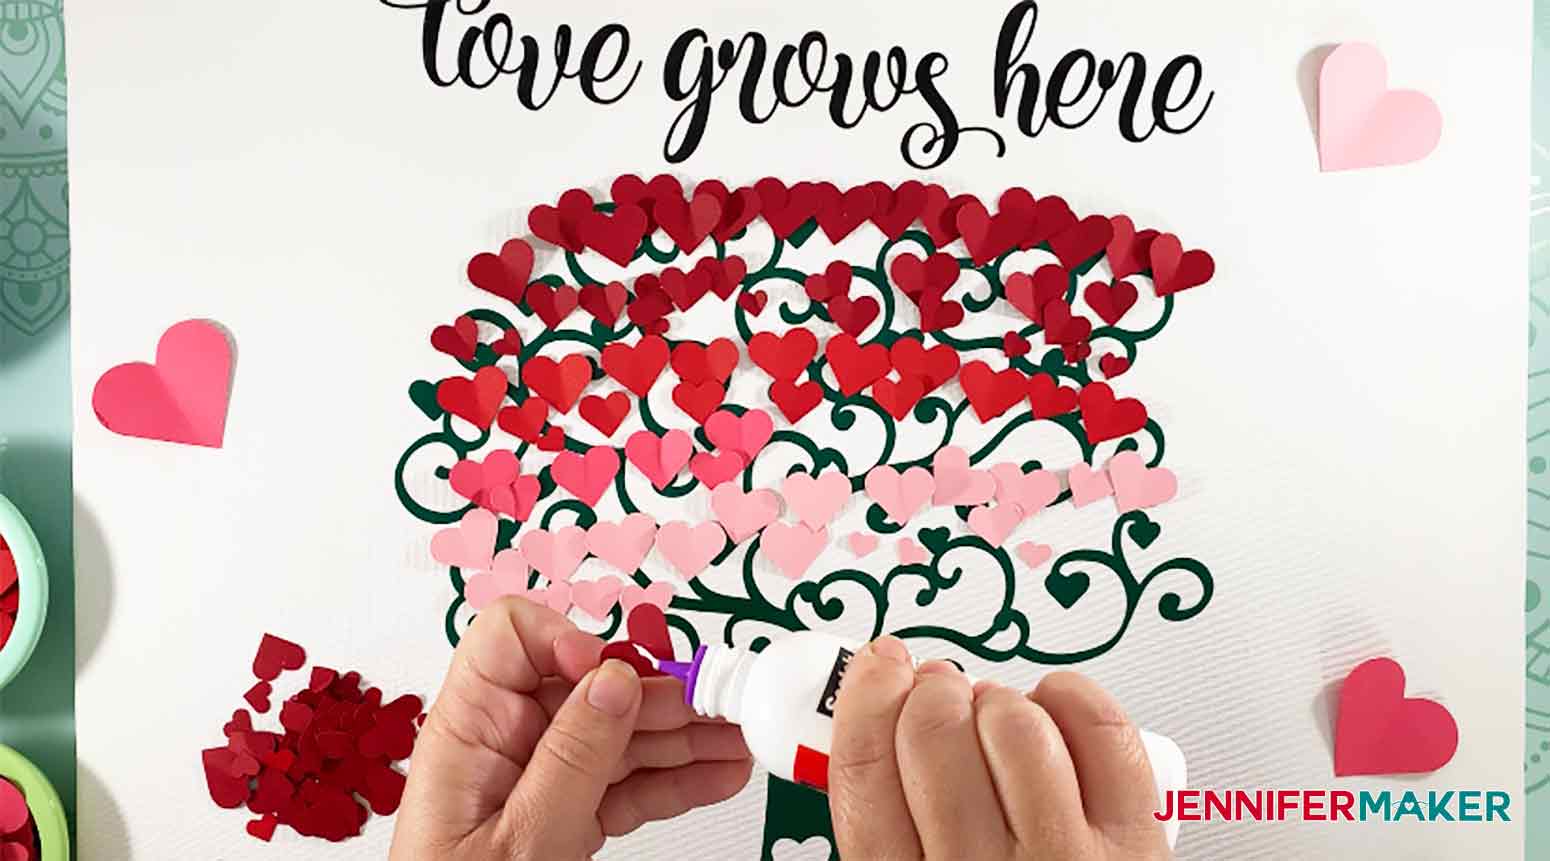
Once your paper hearts are in the general arrangement you'd like, glue them all down to the tree with hearts vinyl on your canvas. I found it easiest and fastest to use tacky glue, but you can also use hot glue or glue dots.
STEP 4: SHOW IT OFF!
When you're all done, hang your tree with hearts canvas on a wall to admire or give it as a gift to someone special!
Notes
SVG DIMENSIONS IN DESIGN SPACE
Paper Heart Tree: W 11.738" x H 15.924"
Paper Flowers Simple: W 7.999" x H 9.894”
Quote: “love grows here” - Font: Kite Script size: 11.5” x 2.579”
SIZE OF FINISHED PROJECT AS SHOWN
16" x 20" canvas used for project with quote
Acknowledgements:
Special thanks to the JenniferMaker Design Fairy Team, specifically Design Fairy Debbie, for helping me design, assemble and make the Easy Paper Heart Tree.
Answers to Your Questions About Making a Paper Heart Tree Canvas
Q: Can you resize this project?
Yes, you can. Please keep in mind that if you resize down to an 8″ x 10″ canvas, that will work too, BUT the files (tree, hearts and words) will be half the size and more difficult to weed/handle. If you need help resizing, please read my guide to resizing SVGs.
Q: What kind of paper should I use?
You can use any cardstock. I used 80 lb. cardstock, but 65 lb. cardstock will work just as well. You can even use 110 lb. cardstock, but it may be harder to cut and fold.
Q: Do I have to seal the canvas?
It will be easier to get the tree with hearts vinyl to stick if you seal the canvas before starting this project, but it can be done without sealing. If you don’t seal the canvas first, just realize that the vinyl will be a little more stubborn about sticking to the canvas and will take more time and patience to complete.
Q: How do you glue the hearts to the canvas?
You can use any glue you have on hand. I used tacky glue, but glue dots, a hot glue gun, or any other adhesive will work.
Get my free SVG files to Tree with Hearts Canvas
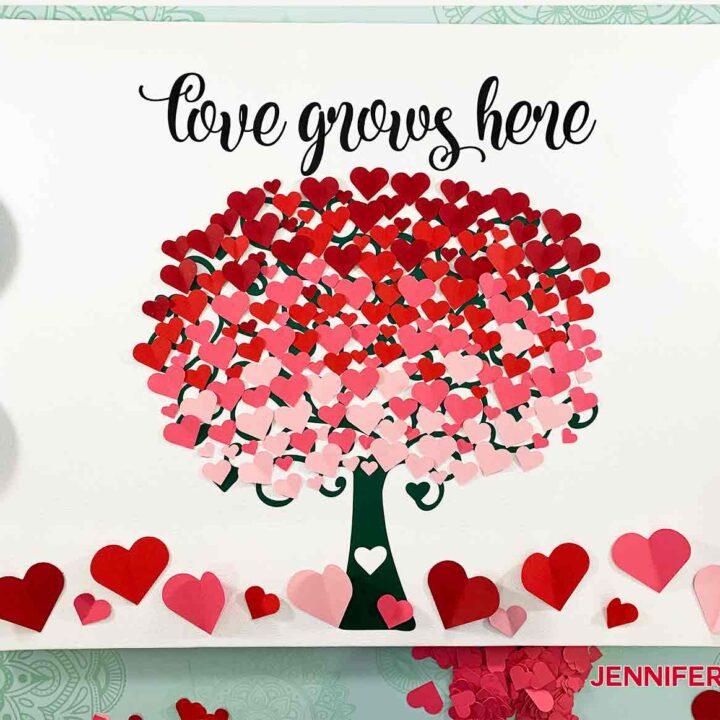
I love this paper heart tree canvas and it looks so pretty hung on a wall. The tree with hearts SVG can be a fun decoration for Valentines Day or used to hang on a wall any time of year! Please do share a photo of your paper heart tree canvas in our Facebook group or tag me on social media with #jennifermaker.
Love,

Want to remember this? Save this Tree with Hearts Canvas tutorial to your favorite Pinterest Board!


Hello Jennifer,
I love this heart tree so much.
Thanks for this tutorial.
Karin from Germany
You’re welcome, thank you so much!
I LOVE THE TREE. IT SPEAKES TO MY HEART.
Thank you!
hi what size are the hearts individual?
There are 4 different size hearts – the largest are 2 x 2 inch, the next 1 x 1 inch, the next 1/2 x 1/2 inch, and the smallest are about 1/4 x 1/4 inch.
Do you have a step by step video of the making of this paper heart canvas tree? In would love a video so I can do this along side my young daughter. Thank you
I will be working on a video this week and I will update the post as soon as it’s ready! Thank you!
I’m having trouble finding 80 lb card stock. I want to make the easy luminary boxes and all Michaels has is 65 lb and 110lb. I’m new to Cricut. Is there anything I need to know about types of card stock?
You can absolutely use 65 lb. cardstock! The weights will tell you how thick the cardstock is and different thicknesses might work better on some projects than other thicknesses. In this project, you will be absolutely fine using 65 lb. cardstock!
Could you print the hearts out of vinyl and make it one dimensional? I find paper gets droopy and damaged when you try to store the projects and use multiple years.
Yes, you can use vinyl if that’s what you prefer!
I knew when I saw this beautiful tree of hearts canvas it would be my next project! After watching all the the Cricut tutorials for beginners, I felt confident enough to give it a try. This was my first biggest vinyl/paper project using my new Cricut maker and like the few smaller projects I’ve tried making with Jennifer’s excellent training videos, my tree of hearts came out perfect! Thank you, Jennifer.
That’s wonderful, I am so happy to hear this and am thrilled your project turned out perfect. Please feel free to share it in my Cricut Crafters & Makers group, too!
Where can I find what font was used for the Love Grows Here quote?
Thank you
Hi, the font used is Kite Script from Font Bundles
Can you re-size to a 12×12 canvas?
Yes, you can. Please keep in mind that if you resize down to an 8″ x 10″ canvas, that will work too, BUT the files (tree, hearts and words) will be half the size and more difficult to weed/handle. If you need help resizing, please read my guide to resizing SVGs.
Loved working in this project dont know how to post photos
I’d love to see your photos over in my Facebook group, Cricut Crafters & Makers!
Hi Jennifer! Just wondering do you ha e a video tutorial on this tree canvas project?
I am working on having one up very soon!
I loved this project. It’s my first Jennifer Maker project and you’ve made it SO easy. Great tip to prepare canvas in advance. Both the lettering and tree transferred very easily.
Thank you for this project and making me look like the crafting goddess that I aspire to be.
I am so happy you enjoyed this project, Linda!
Hi i tried this I primed the canvas with pva glue and let it dry. I then used Cricut vynyl for the tree but it just did not. Stick. I will start it over. I think I’m going to use htv wil this work?
HTV or iron-on vinyl will work as well, Rita.