
Share the love!
Get early access to the supply and tool lists for many of our planned projects during the 2022 Merry Maker Mingle.
Please note that these projects may change entirely, may be swapped out, or may have their supplies and tools changed or updated, so please use this as a general guide only. When we feel confident about what we’re making each day, the links below leads to an Amazon shopping list and a preview of the project, supplies, and tools so you can see the items we used to create each project. Note that each project’s list can be printed independently if you find that useful — just click the “Print” button on each list! This post contains some affiliate links for your convenience (which means if you make a purchase after clicking a link I will earn a small commission but it won’t cost you a penny more)! Read my full disclosure policy.
Quick Links to Information in this Post
ToggleComing soon!
 Day 1: Gingerbread Village Countdown
 Day 1: Gingerbread Village Countdown
Amazon Shopping List
Techniques: How to make intricate cuts in cardstock, cut wax paper, assemble a cardstock project, add tea lights or fairy lights to illuminate a project
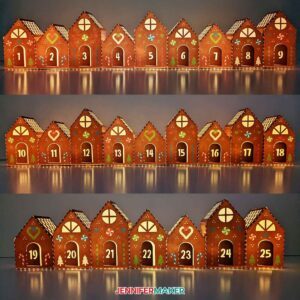
Learn how to make 25 cute Print Then Cut gingerbread houses for your very own Gingerbread Village Countdown for the holidays! Finished Sizes: Small Houses: 3.1" high x 2.2" wide x 2.2" deep Medium Houses: 3.5" high x 2.1" wide x 2.1" deep Large Houses: 4" high x 2.2" wide x 1.9" deep Font Used: Wonderful Display Font (for the house numbers)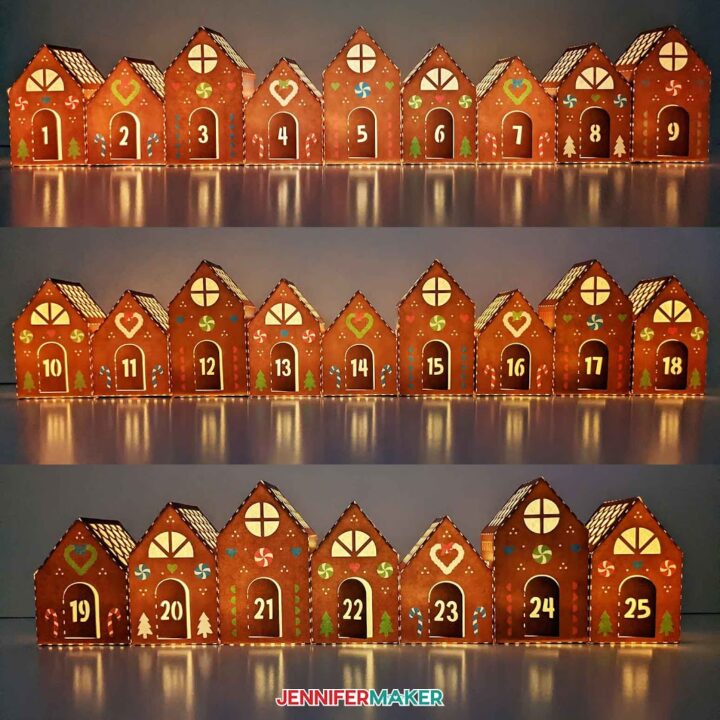
PREVIEW of Gingerbread Village Countdown
Materials
Tools
Instructions
This tutorial is now available at https://jennifermaker.com/gingerbread-village-countdown
Notes
Day 2: DIY Cut Out Characters
 Day 2: DIY Cut Out Characters
Amazon Shopping List
Techniques: How to slice a large image into mat-sized pieces, make intricate cuts in cardstock, burnish edges so they appear to disappear, cut corrugated plastic, reassemble mat-sized pieces into a large design
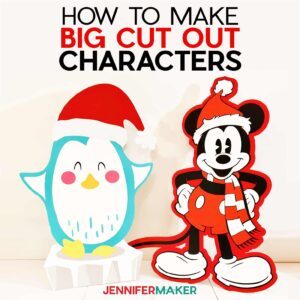
Learn how to make very large DIY cut out characters larger than your mat that stand up! Get the instructions for this project over at https://jennifermaker.com/diy-cut-out-characters *For our international readers: please note that if you are not able to find Mickey Mouse in Design Space, it is because the Disney-licensed image is likely not available outside of the U.S. due to licensing.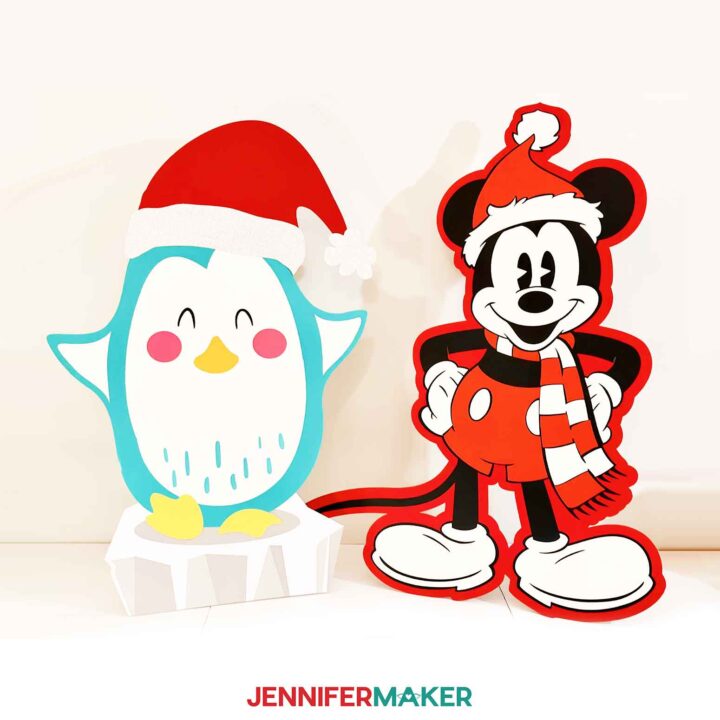
PREVIEW of DIY Cut Out Characters
Materials
Tools
Instructions
Notes
Day 3: How to Sublimate Large Designs
 Day 3: How to Sublimate Large Designs
Amazon Shopping List
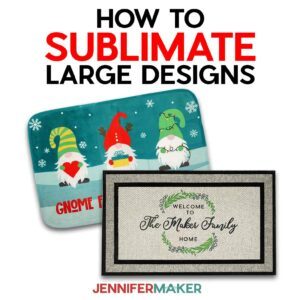
Techniques: How to customize an image in Google Docs, tile a large design, reassemble your tiled images, sublimate without a seam, choose the best doormat
Learn how to sublimate large designs on doormats! This project's tutorial is now available at https://jennifermaker.com/how-to-sublimate-large-designs Typefaces used: Wonderful Display, Biosha Script, Pier Sans.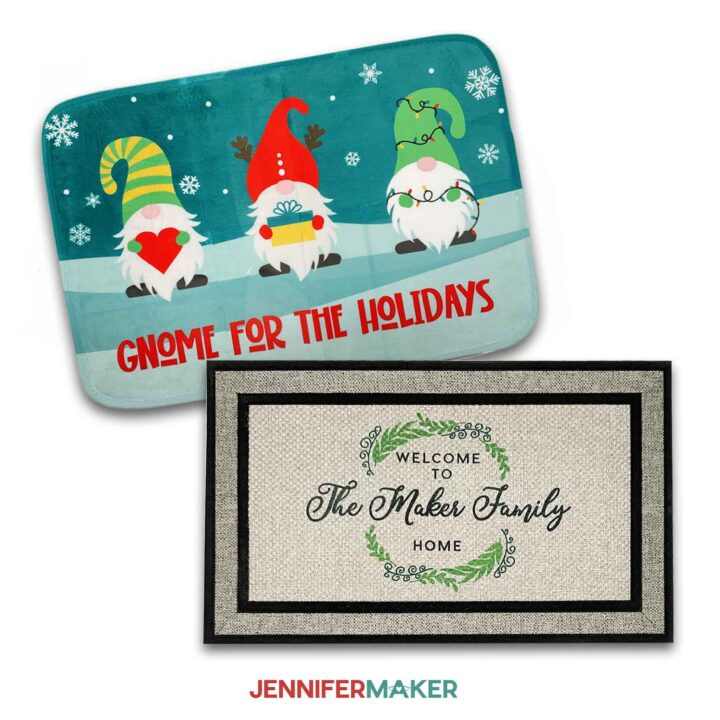
PREVIEW of How to Sublimate Large Designs
Materials
Tools
Instructions
Notes
Alternates: Nortch, Goldie Rainbow, Okine Sans.
Day 4: DIY Christmas Decorations Under $10
 Day 4: DIY Christmas Decorations Under $10
Amazon Shopping List
Techniques: How to customize an image in Google Docs, tile a large design, reassemble your tiled images, sublimate without a seam, choose the best doormat
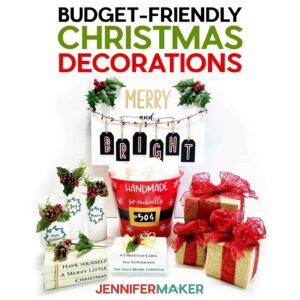
Learn how to make high-end-looking DIY Christmas decorations for under $10 each! Get the full step-by-step instructions for this project over at https://jennifermaker.com/diy-christmas-decorations FONTS Snowball Bucket: Wreath: Tingler Script Stacked Books: Adorn Serif / Free Alternative: Waldorf Astoria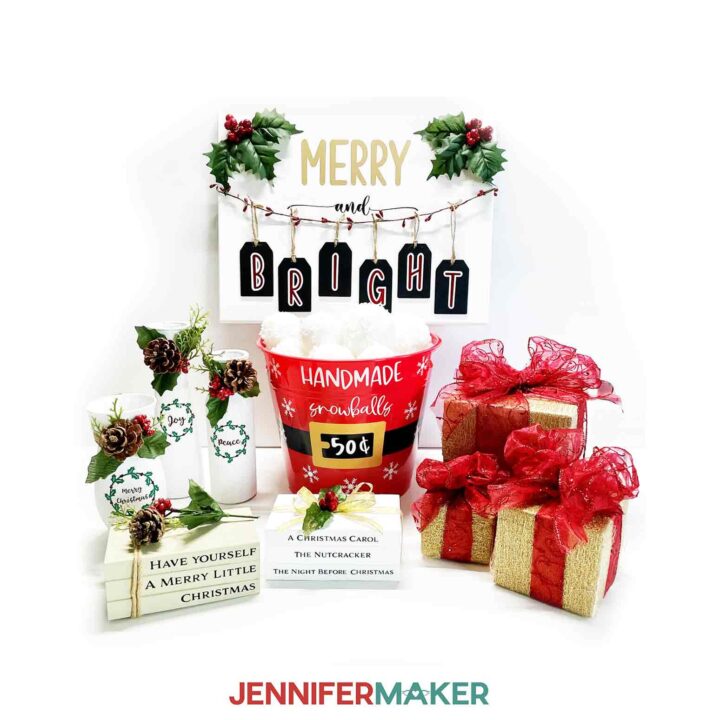
PREVIEW of DIY Christmas Decorations
Materials
Tools
Instructions
Notes
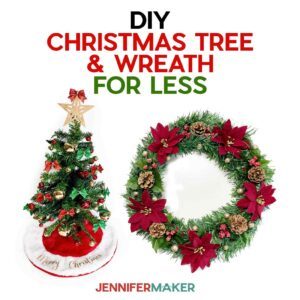
Day 5: DIY Christmas Wreath & Tree from the Dollar Tree
 Day 5: DIY Christmas Wreath & Tree from the Dollar Tree
Amazon Shopping List
Techniques: How to curve text, size a design to fit something, cut iron-on vinyl, apply iron-on vinyl, make budget items look high end.
Learn how to make a breautiful DIY Dollar Tree Christmas Tree and Christmas Wreath! Get the full step-by-step instructions for this project over at https://jennifermaker.com/diy-christmas-wreath-dollar-tree FONT Merry Christmas - Christmas Jellyshake / Free Alternative: Marchila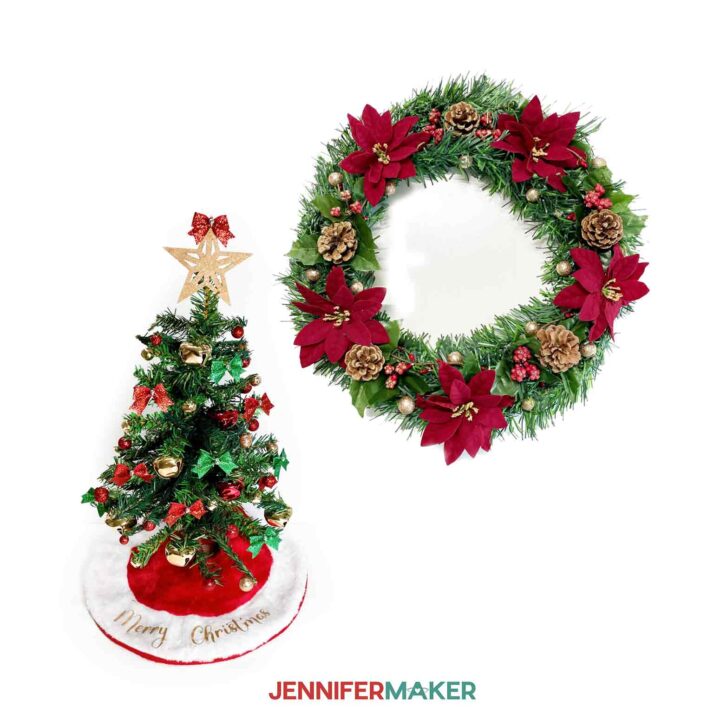
PREVIEW of DIY Christmas Wreath Dollar Tree
Materials
Tools
Instructions
Notes
Day 6: Dollar Tree Canvas Ideas
 Day 6: Dollar Tree Canvas Ideas
Amazon Shopping List
Techniques: How to make a reverse canvas, cut vinyl, apply vinyl, paint a frame.
The full tutorial for this project is at https://jennifermaker.com/dollar-tree-canvas-ideas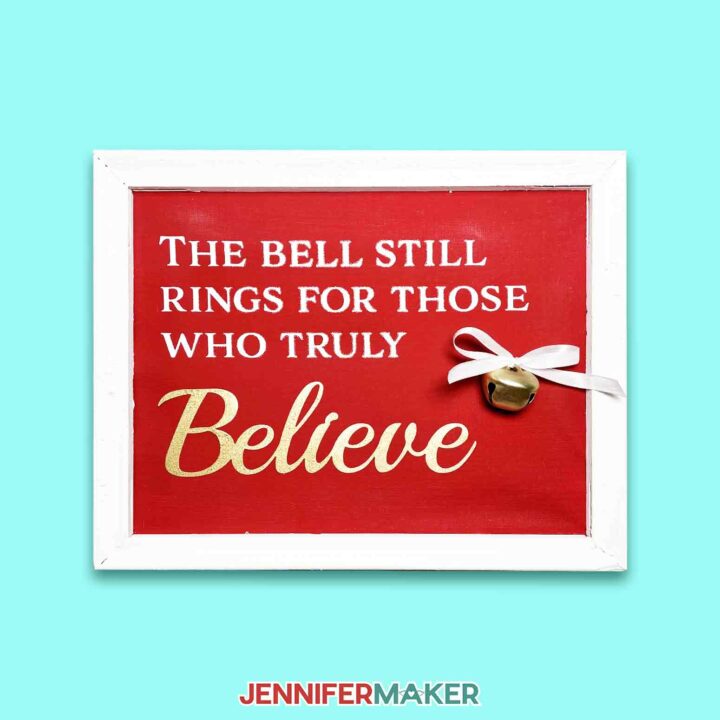
PREVIEW of Dollar Tree Canvas Ideas
Materials
Tools
Instructions
Day 7: Sublimation T-Shirts
 Day 7: Sublimation T-Shirts
Amazon Shopping List
Techniques: How to sublimate on DTF film and use transfer powder so you can put designs on 100% cotton shirts
How to use DTF (direct to film) technology to sublimate in full color on cotton shirts! * Find a Sublimation design you want to use. If you want to use my cardinal design, you'll find it in the library as design #446. * Get your film ready. Check to see if it feeds through your printer by printing a blank sheet. If it does not, tape it to a piece of copy paper at the top leading edge. * Get your work area ready * Put on your protective gear -- respirator, gloves, goggles, and apron, and be sure you have good ventilation. * Print your sublimation design on the matte, non-shiny side of the film * Immediately put powder on the ink and wipe off excess, then put powder away. Keep your protective gear on. * Heat your powder/ink on the film. I did it by hovering my heat press set to 385°F over my film (without touching) for 10 seconds. You could also do it in a convection oven that you aren't using for 2-3 minutes at about 285°F. * Cut your design out of the film with at least 1/2" margin around it -- this helps you avoid getting extra ink anywhere. * Pre-heat your shirt and position your sublimation film FACE DOWN. • Cover your shirt with butcher paper to protect your press from blow out. * Press at 385°F for 40 seconds • Wait until the film cools down, then peel the film off. Enjoy!
DTF Sublimation on Cotton Shirts
Materials
Tools
Instructions
Step 1: Get a Sublimation Print Ready
Step 2: Prep Your Area
Step 3: Print and Powder Your Project
Step 4: Sublimate Your DTF Design

Day 8: Glitter Wine Glasses
Amazon Shopping List
Techniques: How to mark a straight line on a glass, how to stick and seal glitter, how to apply vinyl to glass
Learn the easiest, least messy way to add glitter to the bottom of stemless wine glasses and vinyl decals to the top to create fun custom designs. This project will debut on December 8 as part of our Merry Maker Mingle Celebration, an annual craft countdown with free designs, tutorials, games, prizes, and FUN! Finished Size: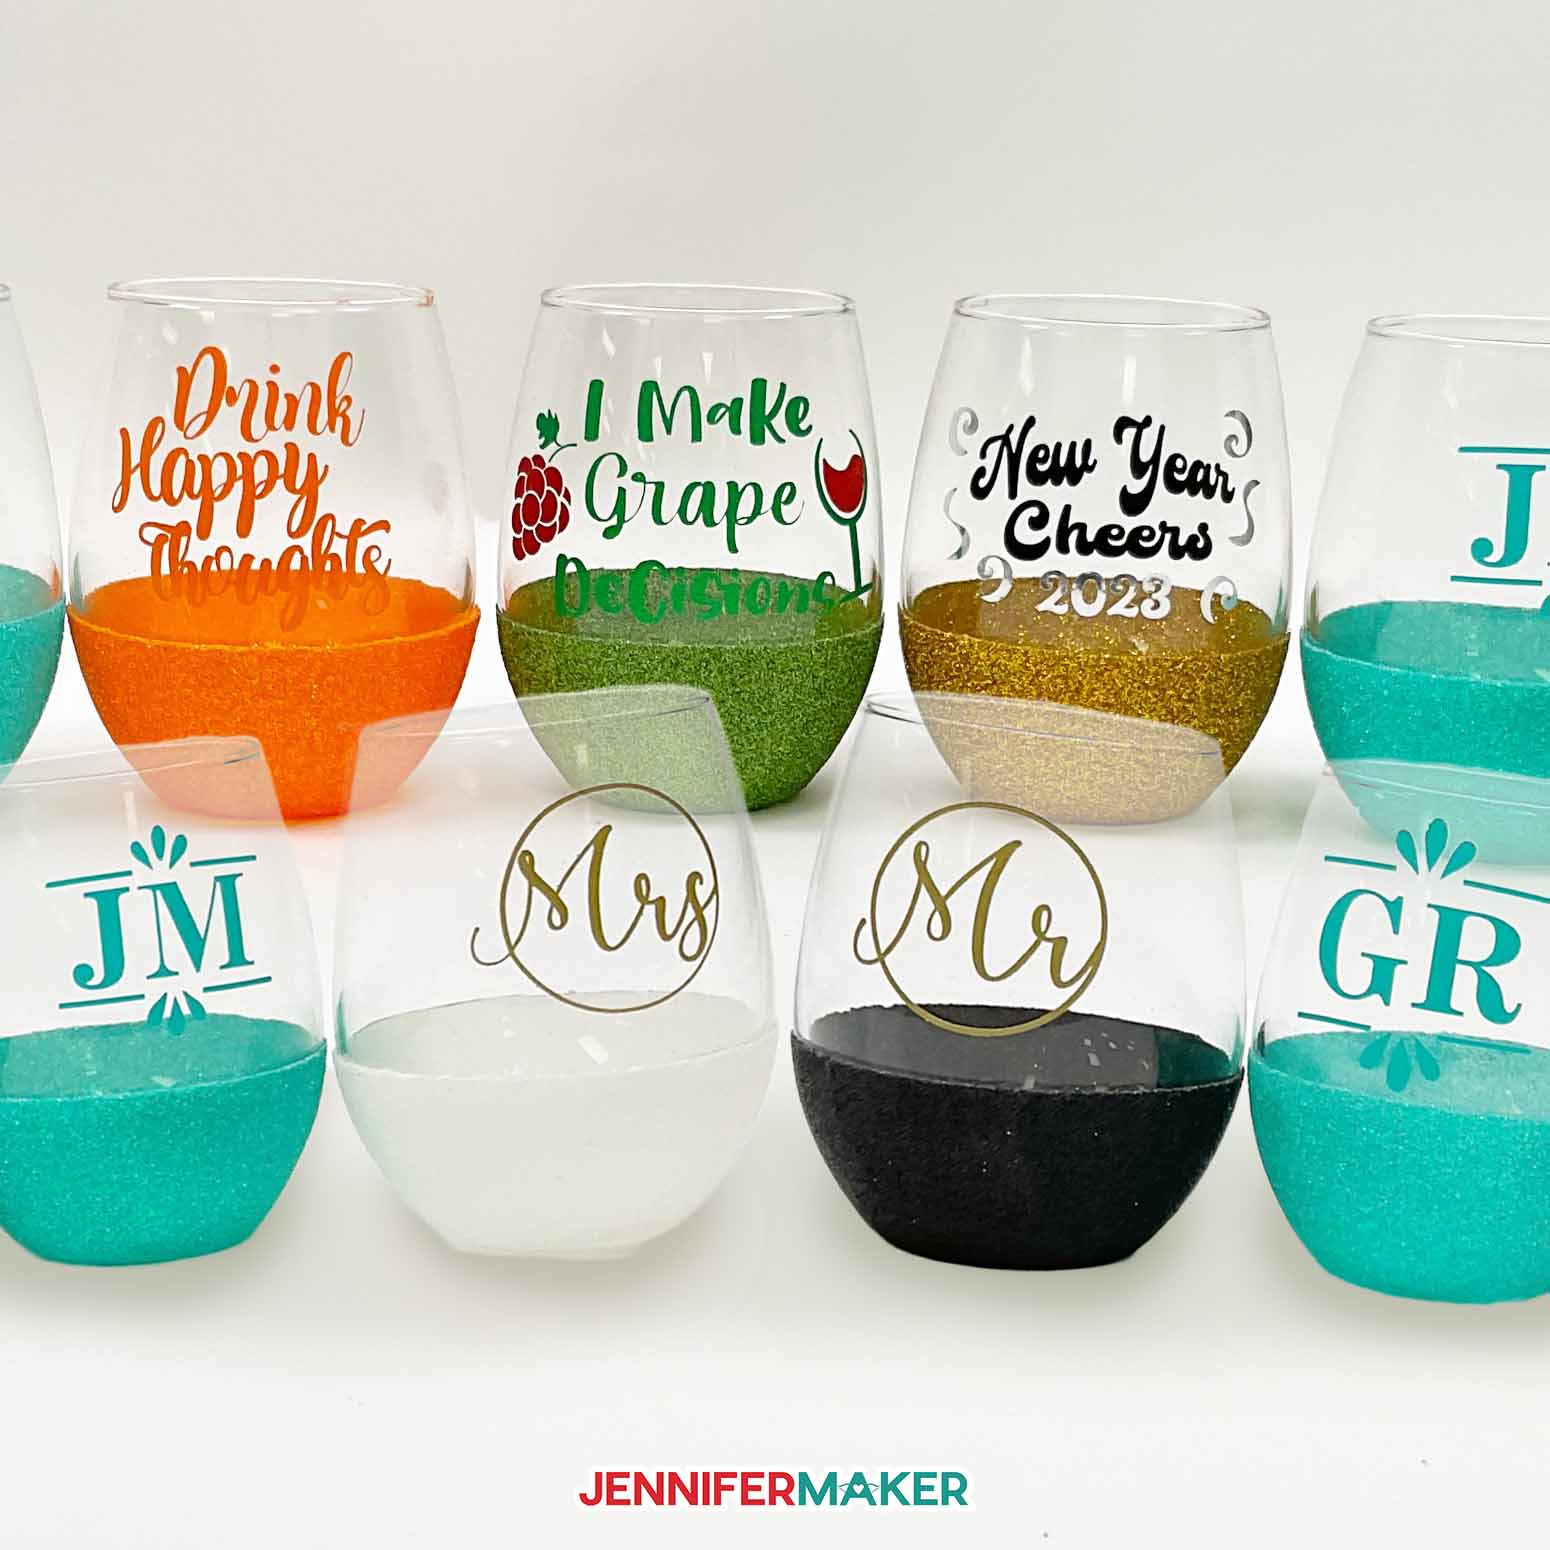
PREVIEW of How To Glitter Wine Glasses
Materials
Tools
Instructions
Notes
15oz Stemless Wine Glass 4.6" tall
Fonts Used:
Grape: Wellona Script
I Make ___ Decisions: Hello November Sans Regular
New Year Cheers: Brenson Charlotte
Drink Happy Thoughts: Kite Script

Day 9: Mason Jar Gift Ideas
Amazon Shopping List
Techniques: How to draw on writeable labels, how to apply washi tape straight, how to pack a jar in the best way
Prepare and personalize Mason jar gift ideas using Cricut Writable Vinyl and pens instead of a printer! This project will debut on December 9 as part of our Merry Maker Mingle Celebration, an annual craft countdown with free designs, tutorials, games, prizes, and FUN! Typefaces used: Cream Candy, JM Tall, JM Penwriting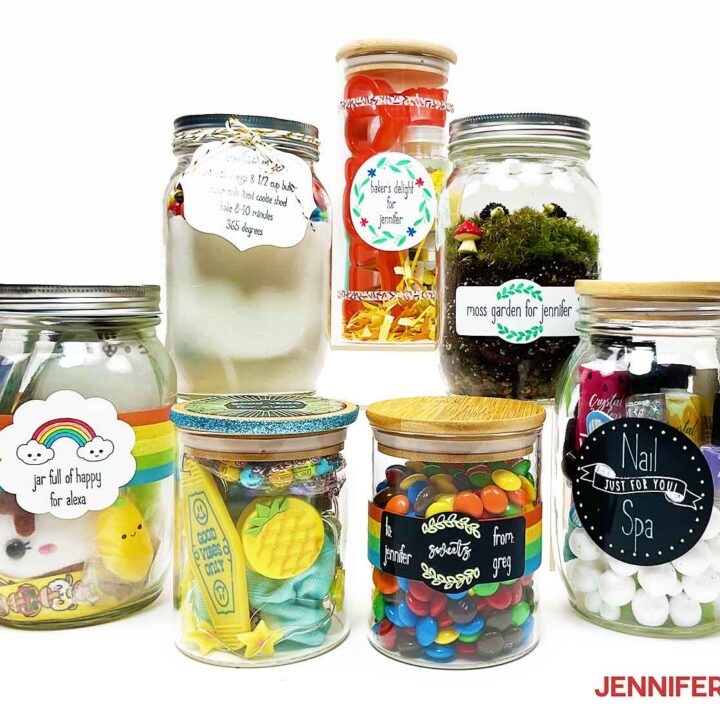
PREVIEW of Mason Jar Gift Ideas
Materials
Tools
Instructions
Notes
Alternative: Goldie Rainbow

Day 10: Etched Wine Bottles & Glasses
Amazon Shopping List
Techniques: How to make a stencil, how to apply a stencil to glass, how to etch, how to light up a bottle
Learn how to make beautiful reverse etched wine glasses and glass bottles for the holidays! This project will debut on December 11 as part of our Merry Maker Mingle Celebration, an annual craft countdown with free designs, tutorials, games, prizes, and FUN! Finished Sizes: Bottle: 3" wide by 11.5" tall Glass: 3" wide (at base) by 7.75" tall Fonts Used: Falling Leaves Print (Christmas design) Sweetie Almeera Script (Christmas and Hanukkah designs) Andala Script (name on Christmas design) Cricut Sans (letter on Hanukkah design)
PREVIEW of Etched Wine Glasses and Glass Bottles
Materials
Tools
Instructions
Notes

Day 11: How to Weed Intricate Vinyl!
Amazon Shopping List
Techniques: How to weed intricate vinyl with reverse weeding or Cricut BrightPad Go
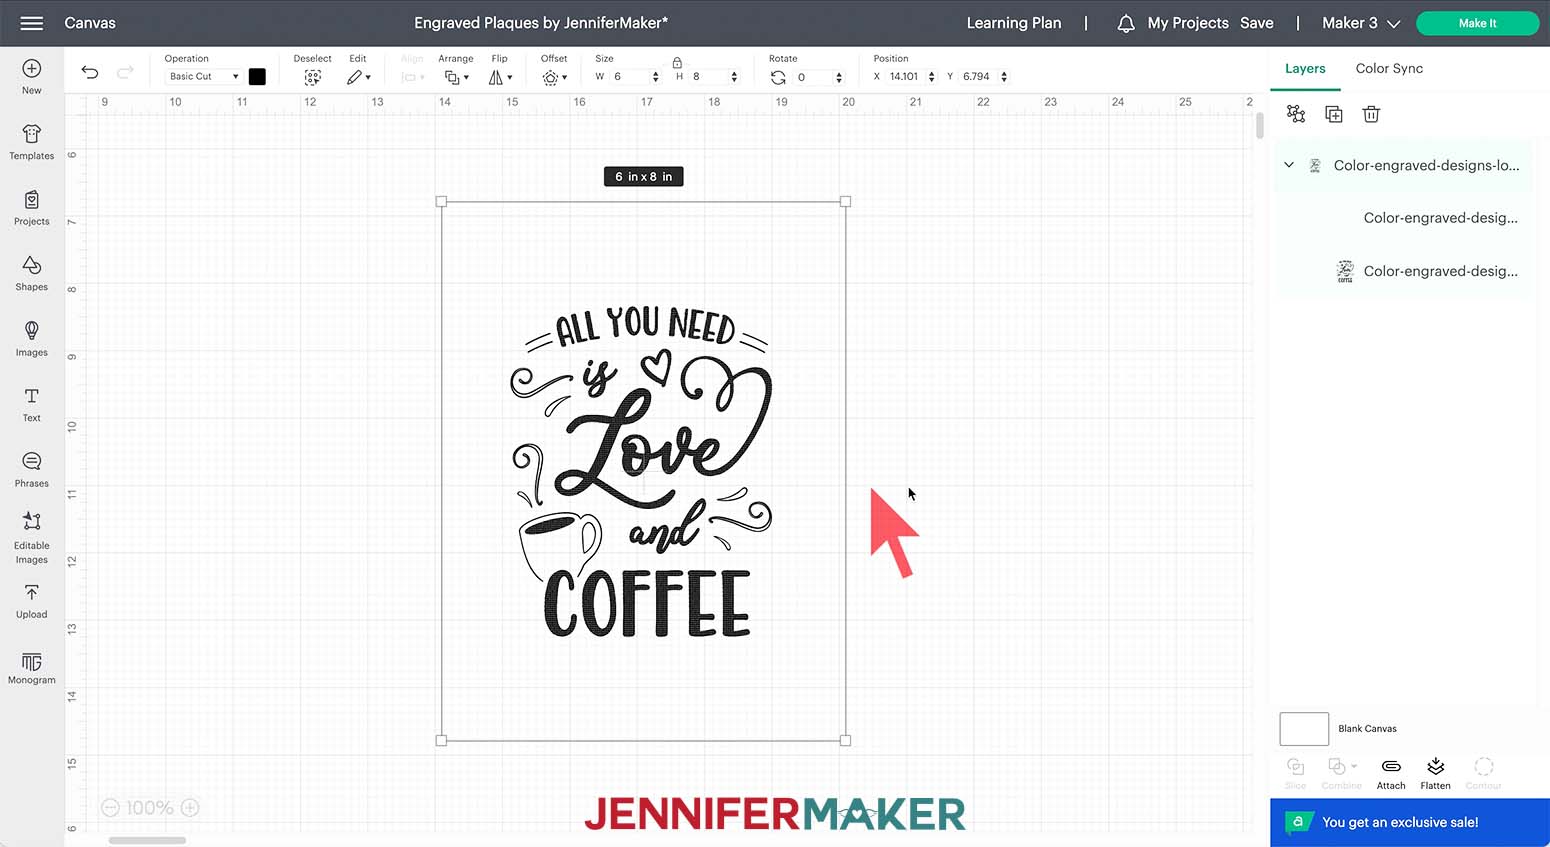
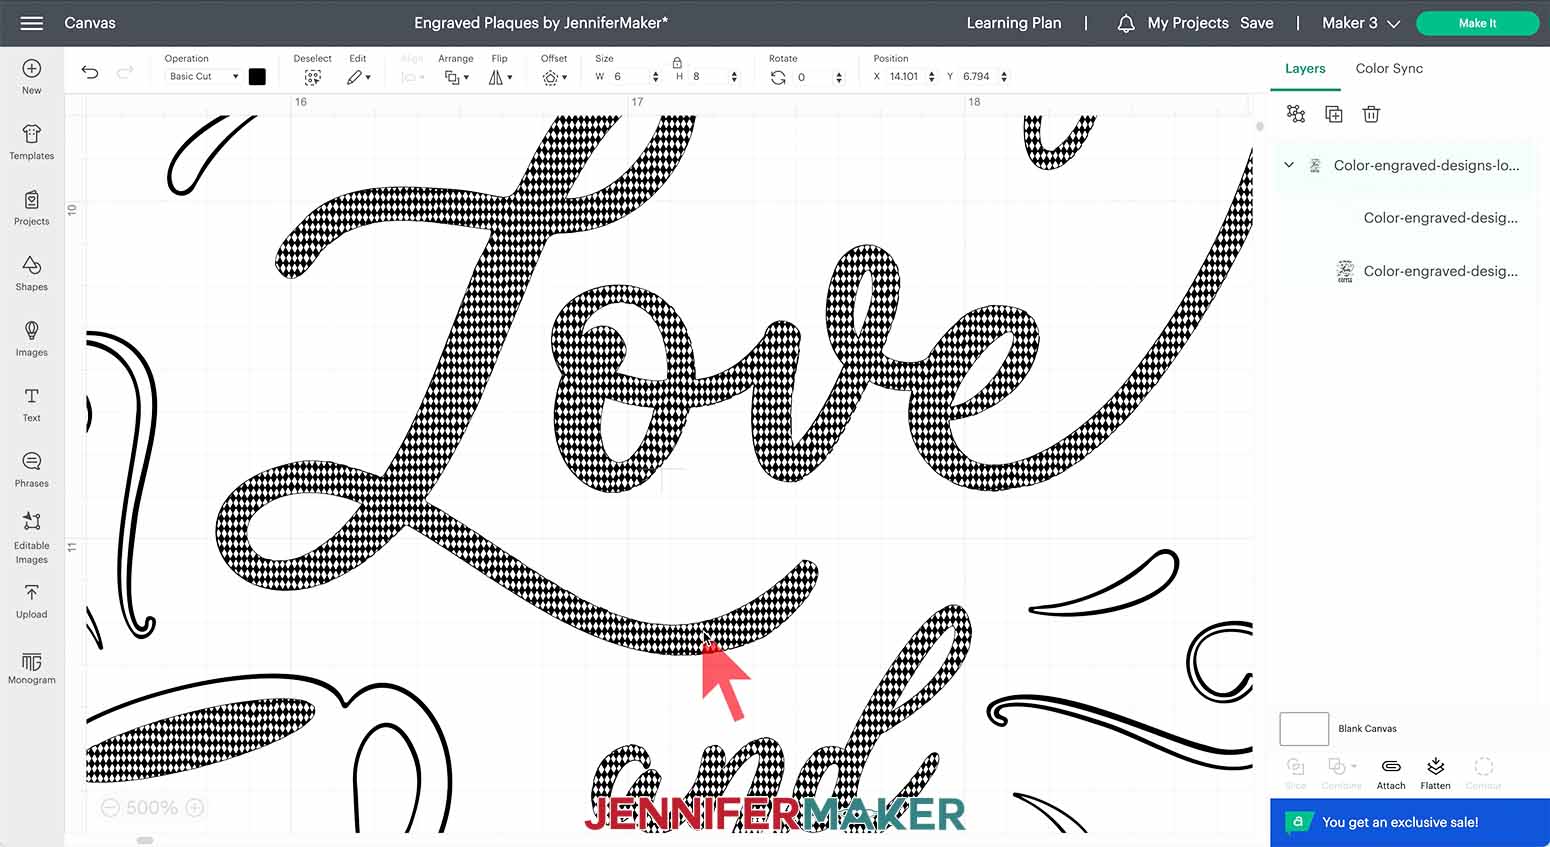
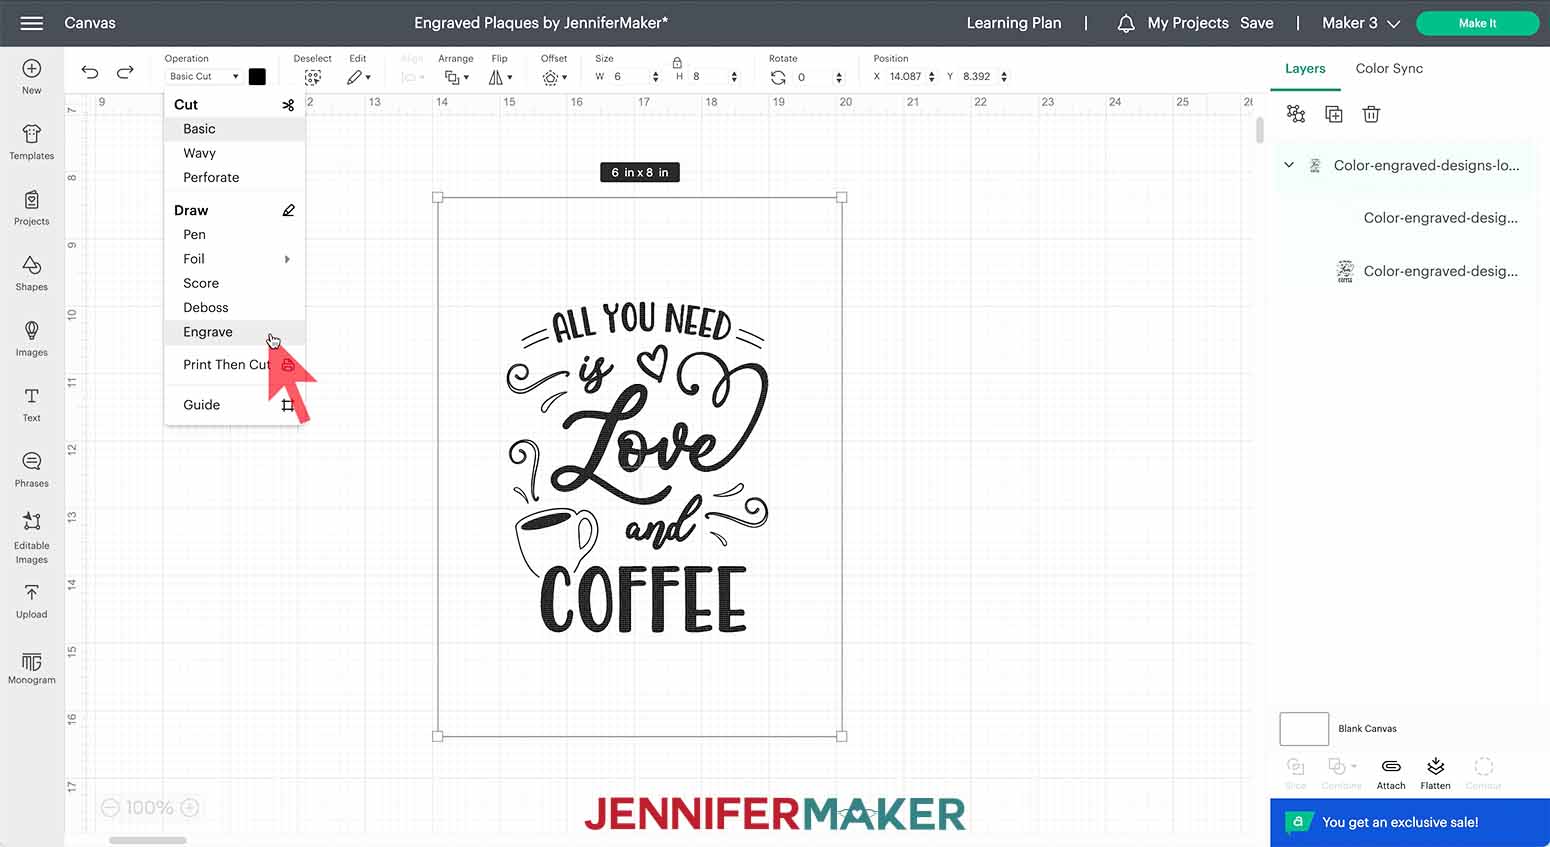
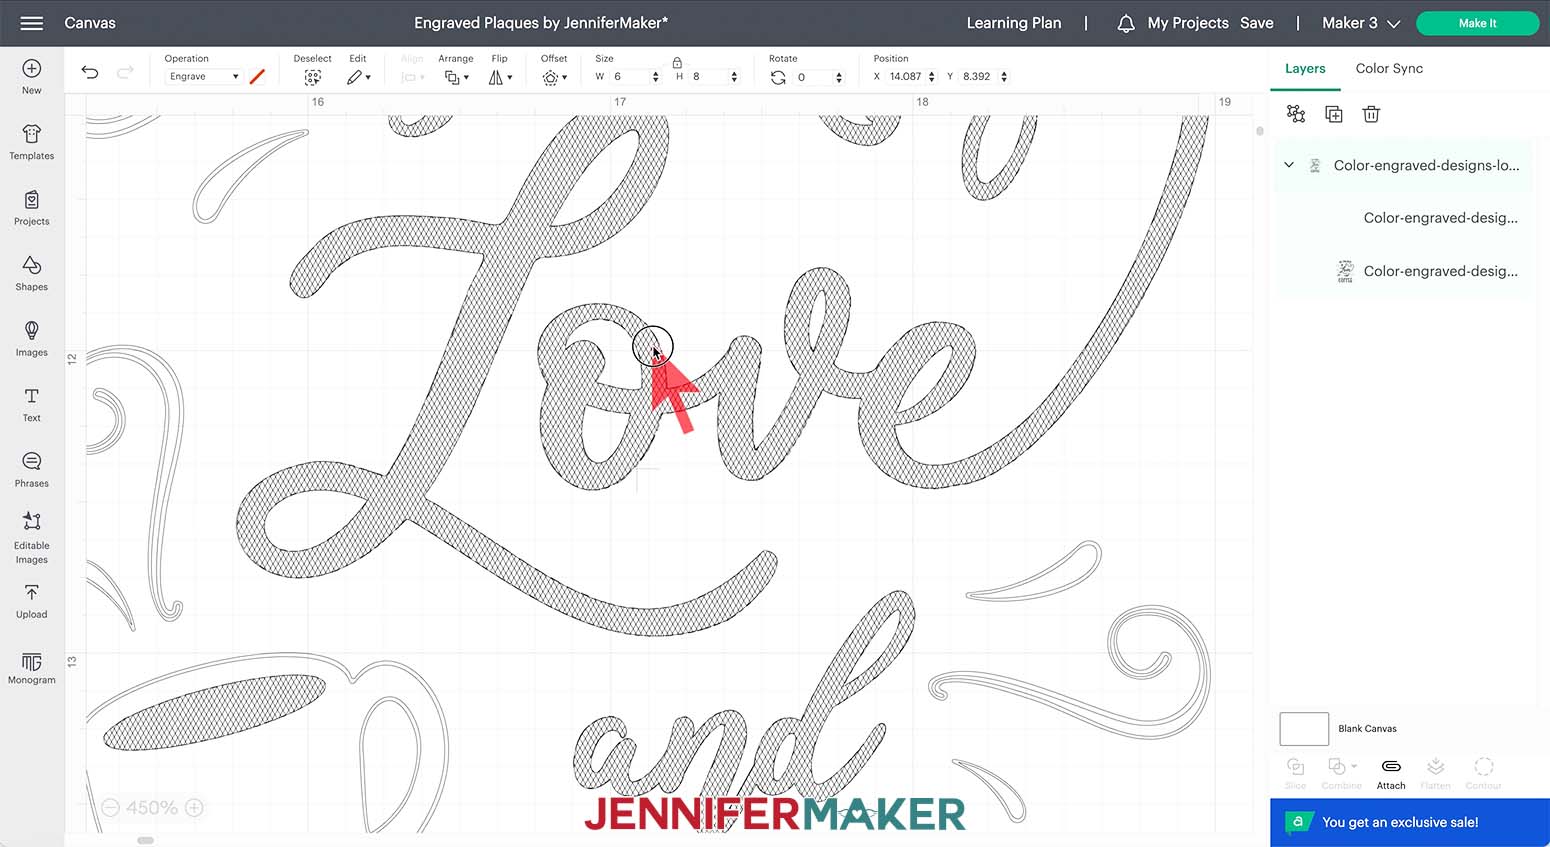
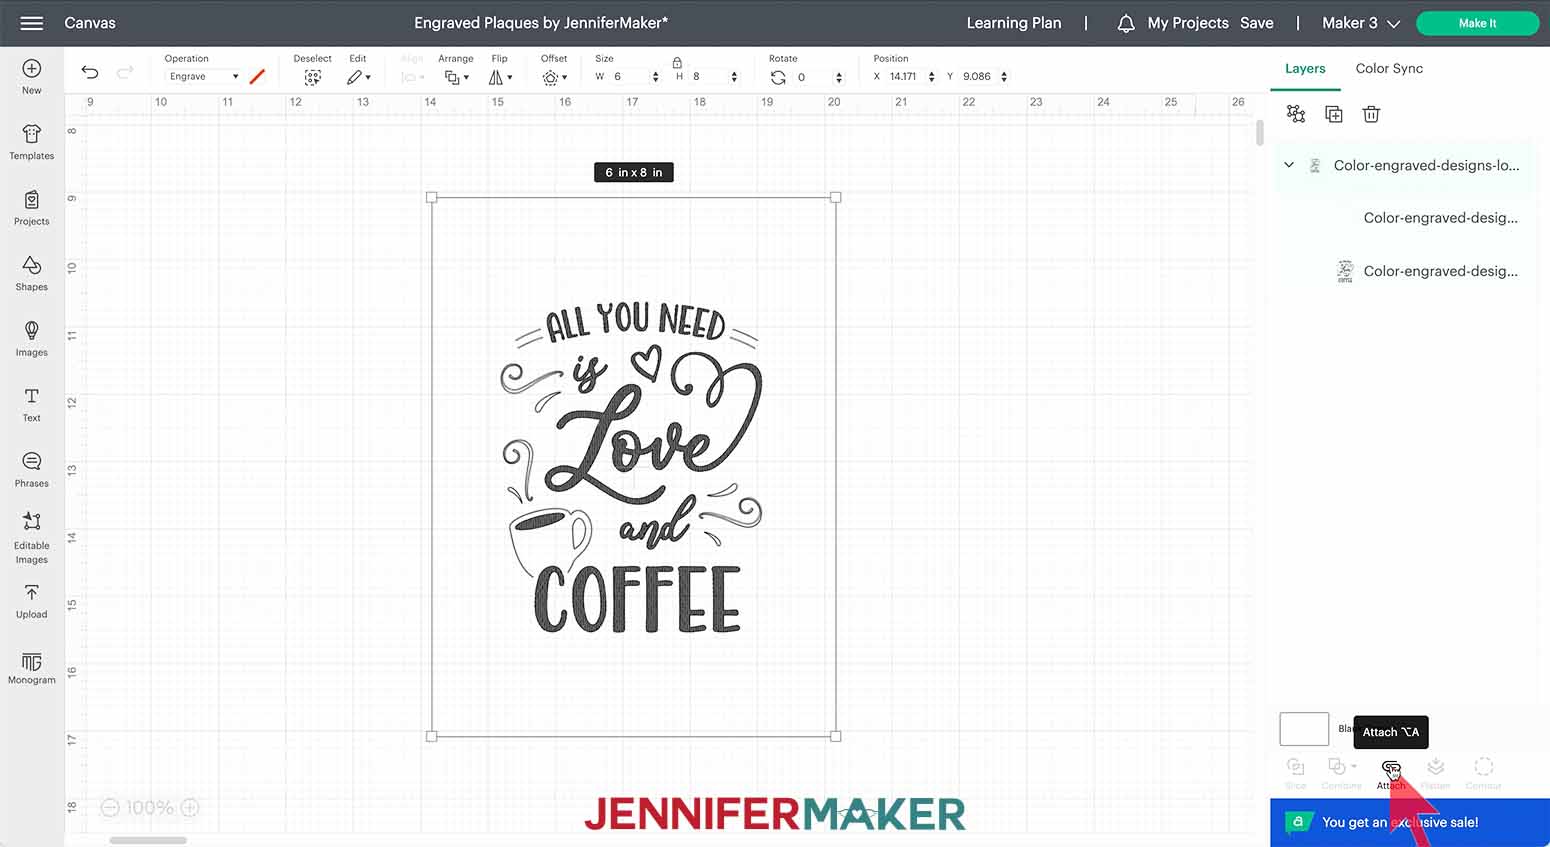
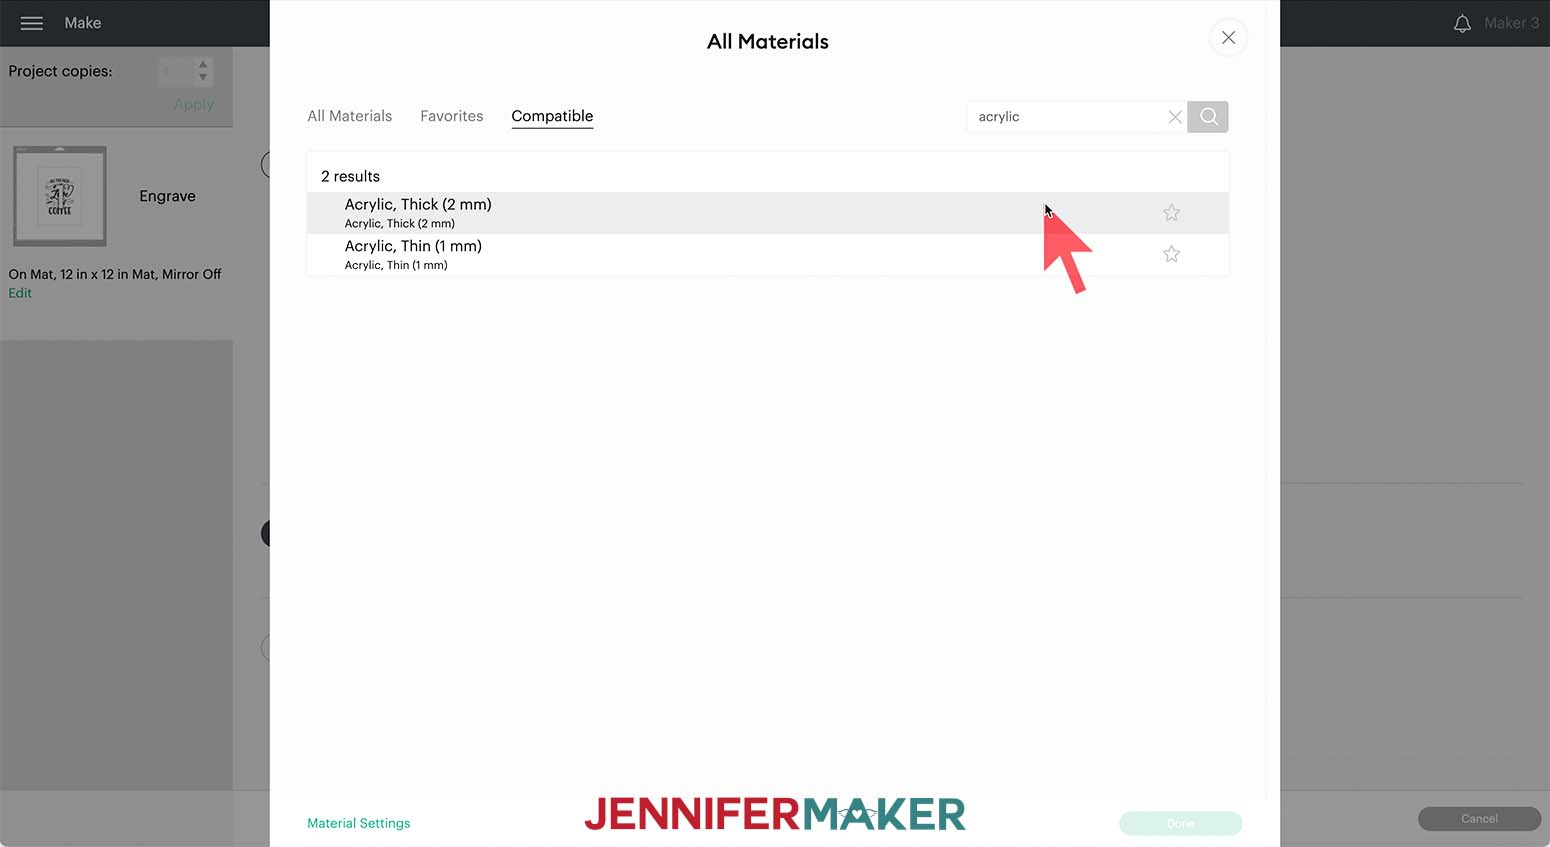
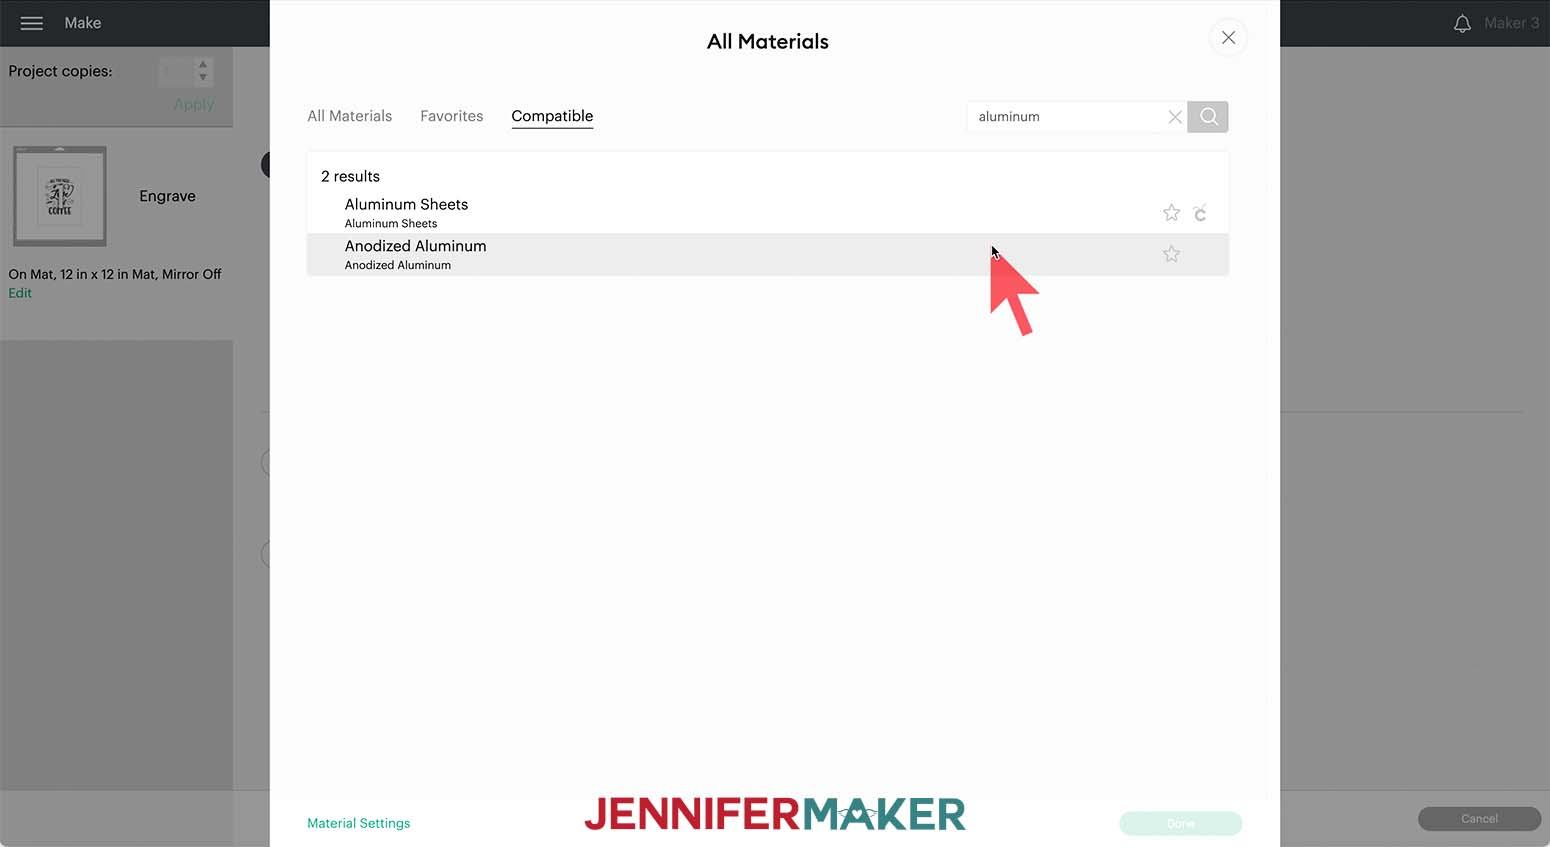
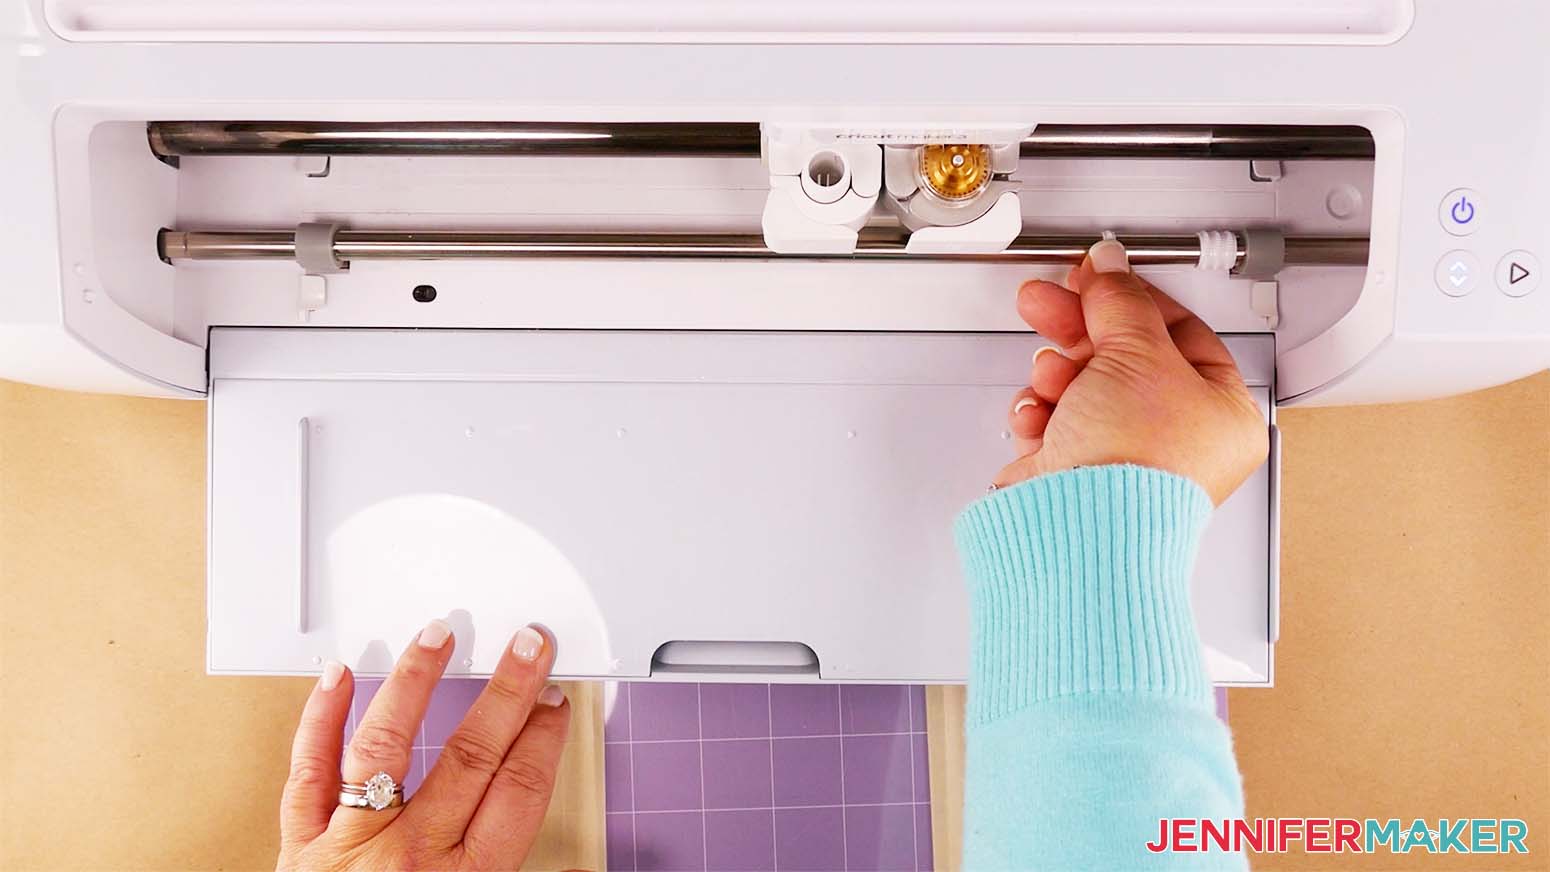
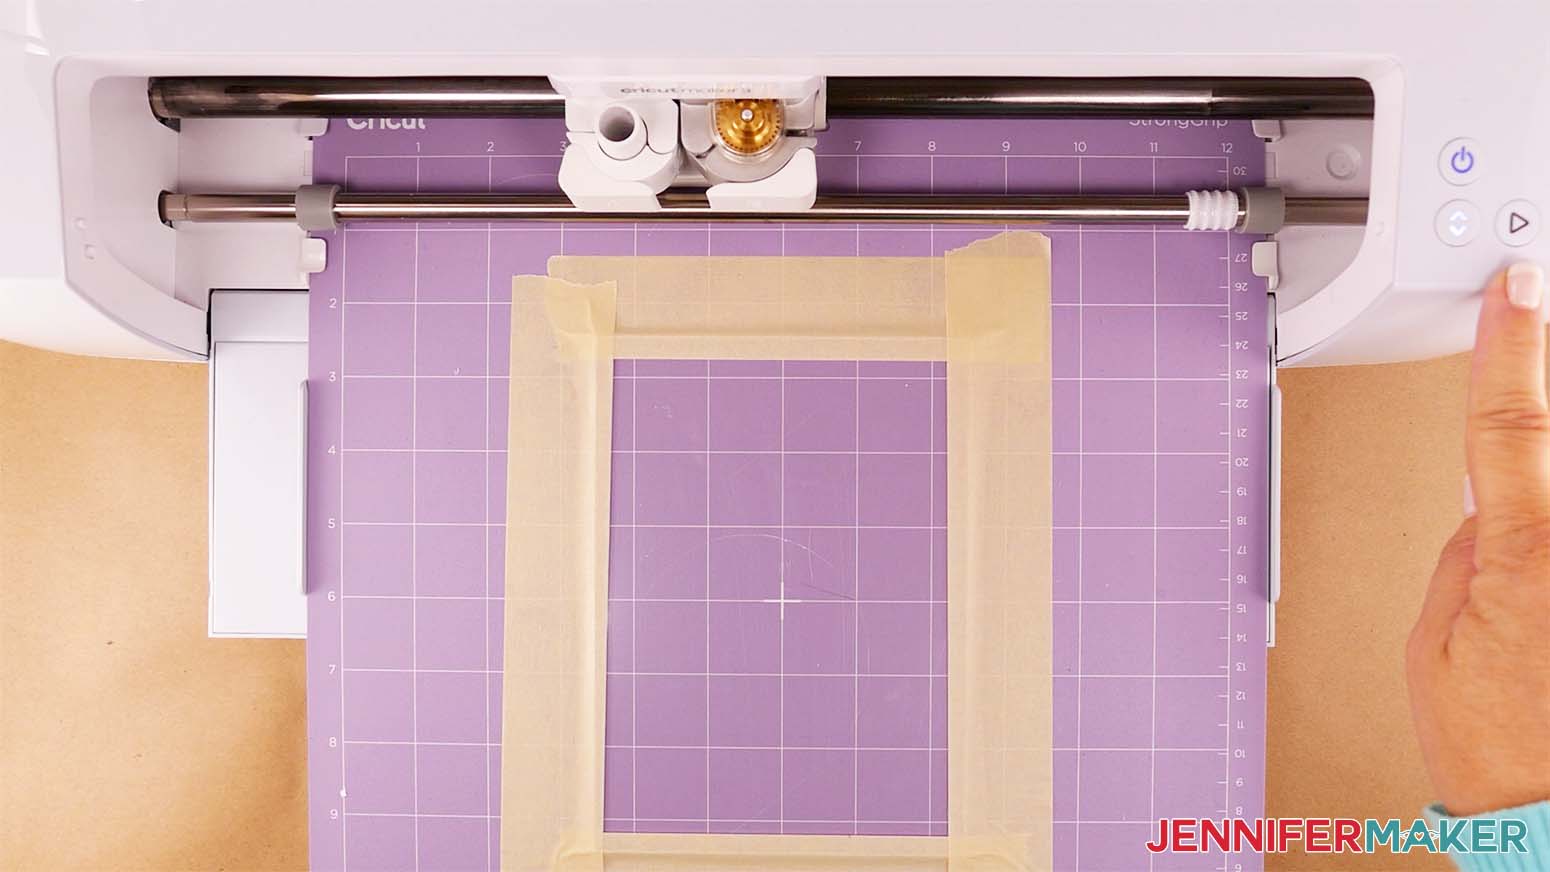
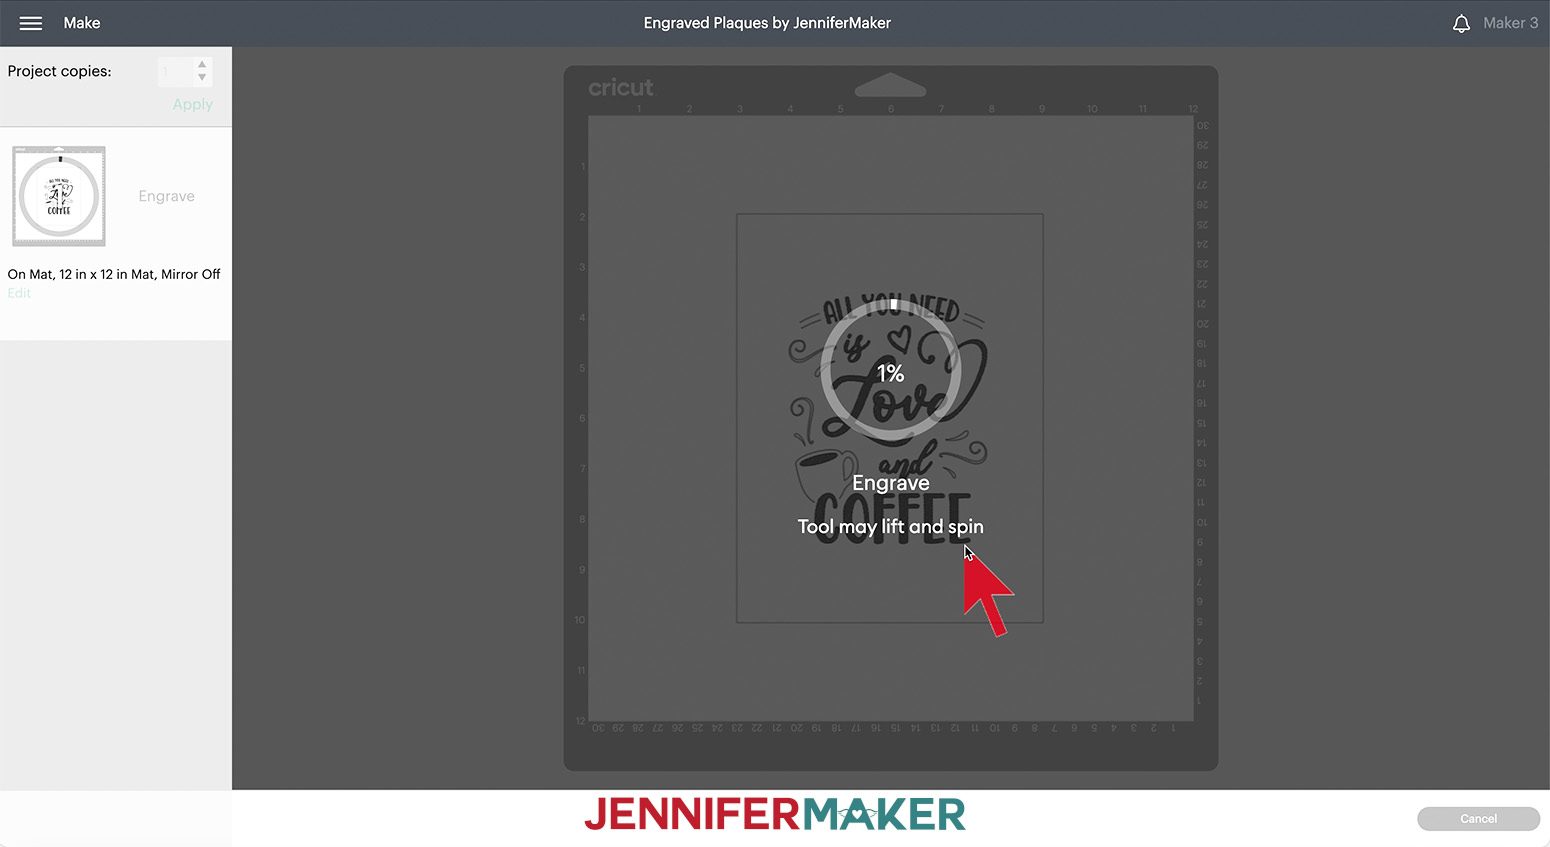
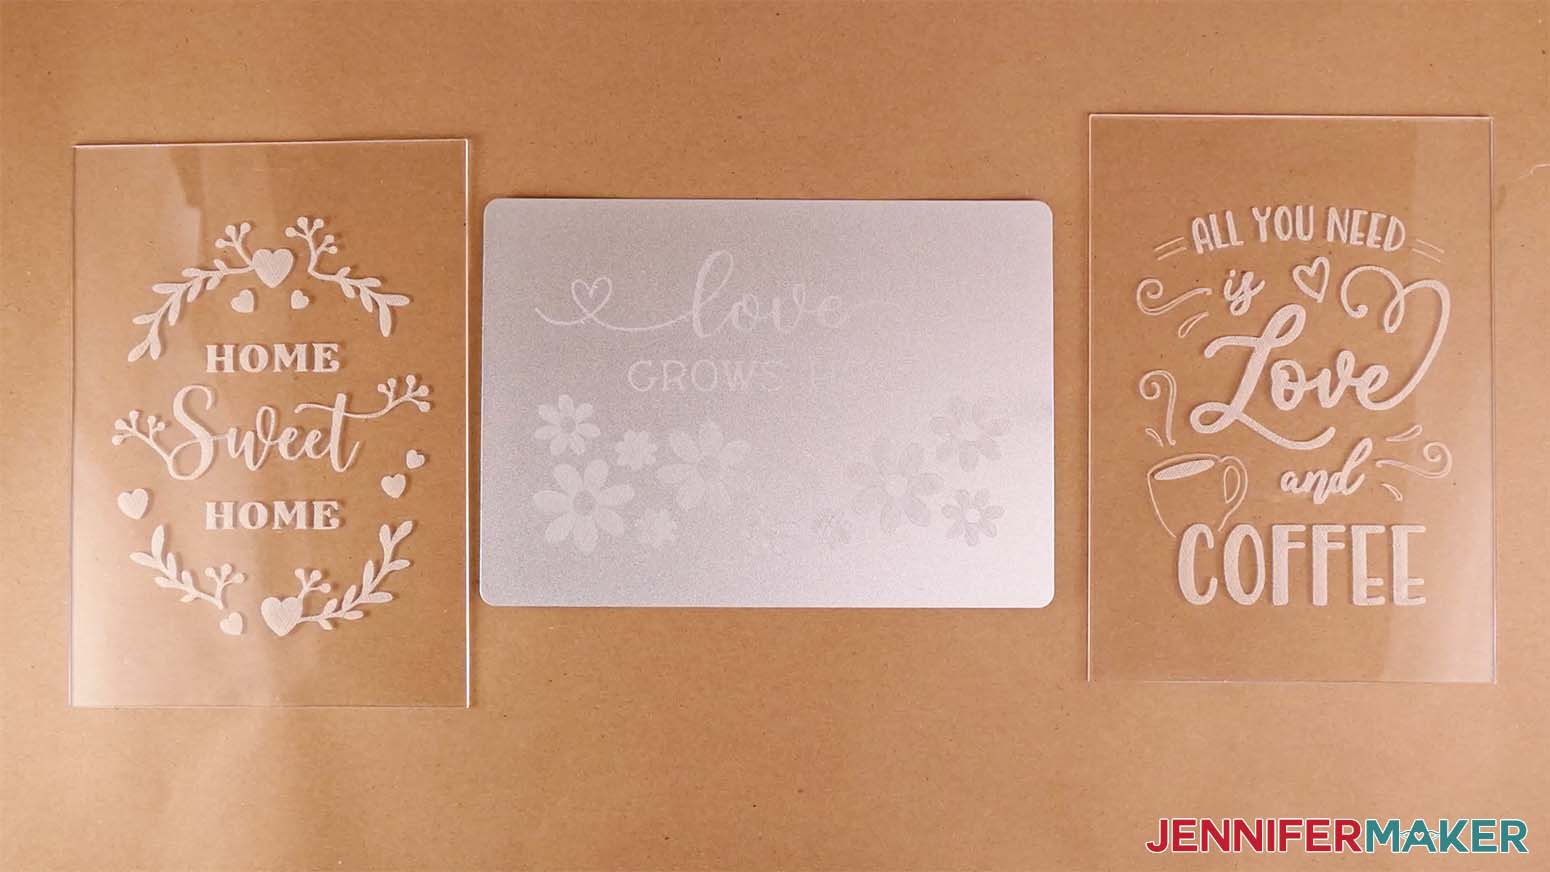
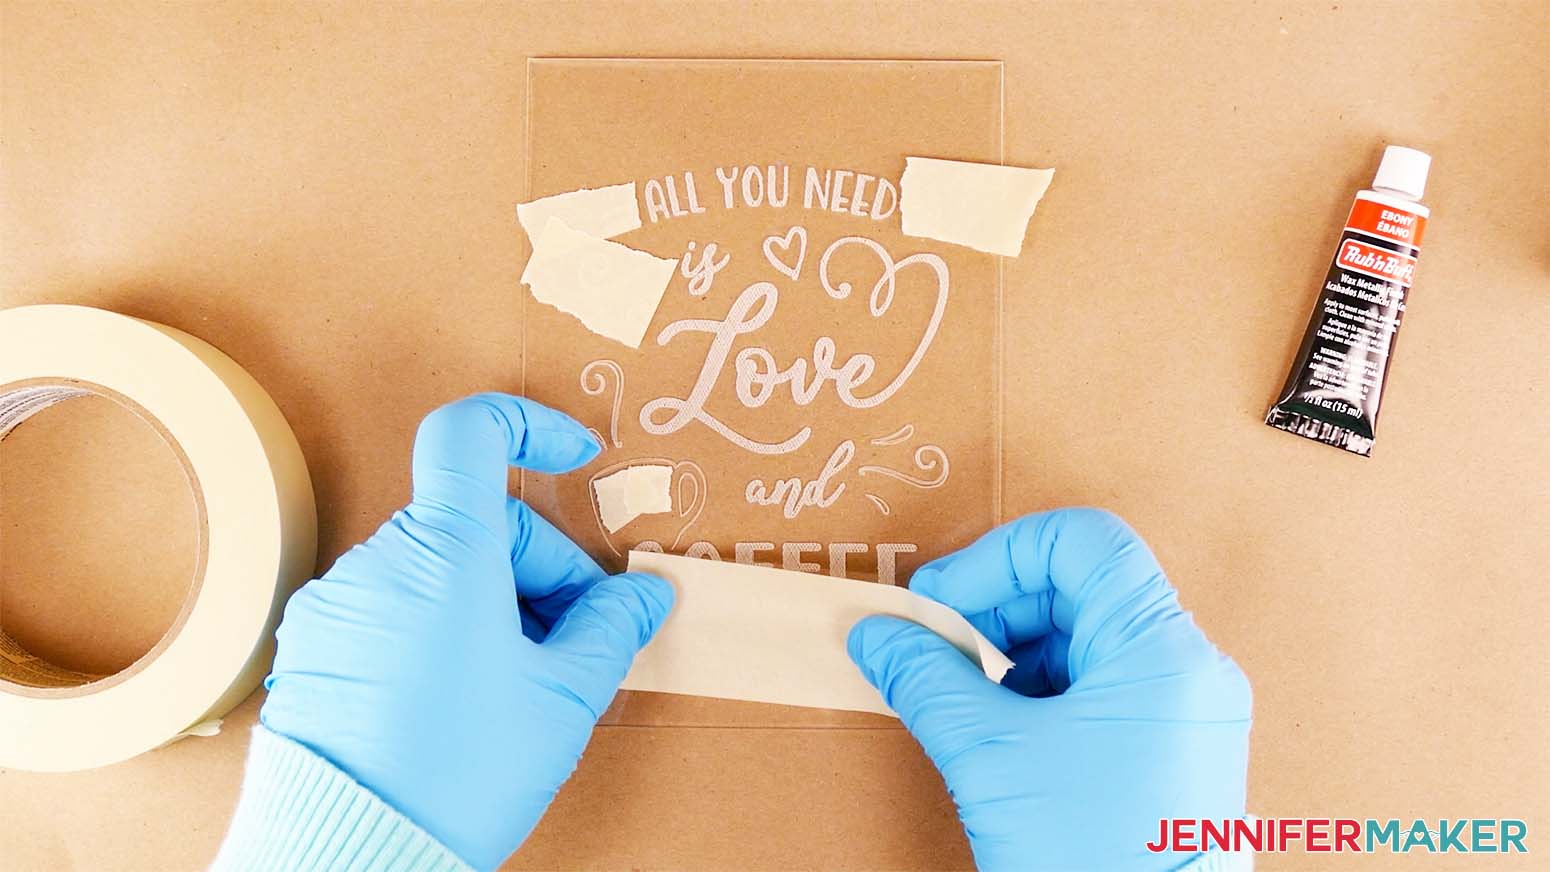
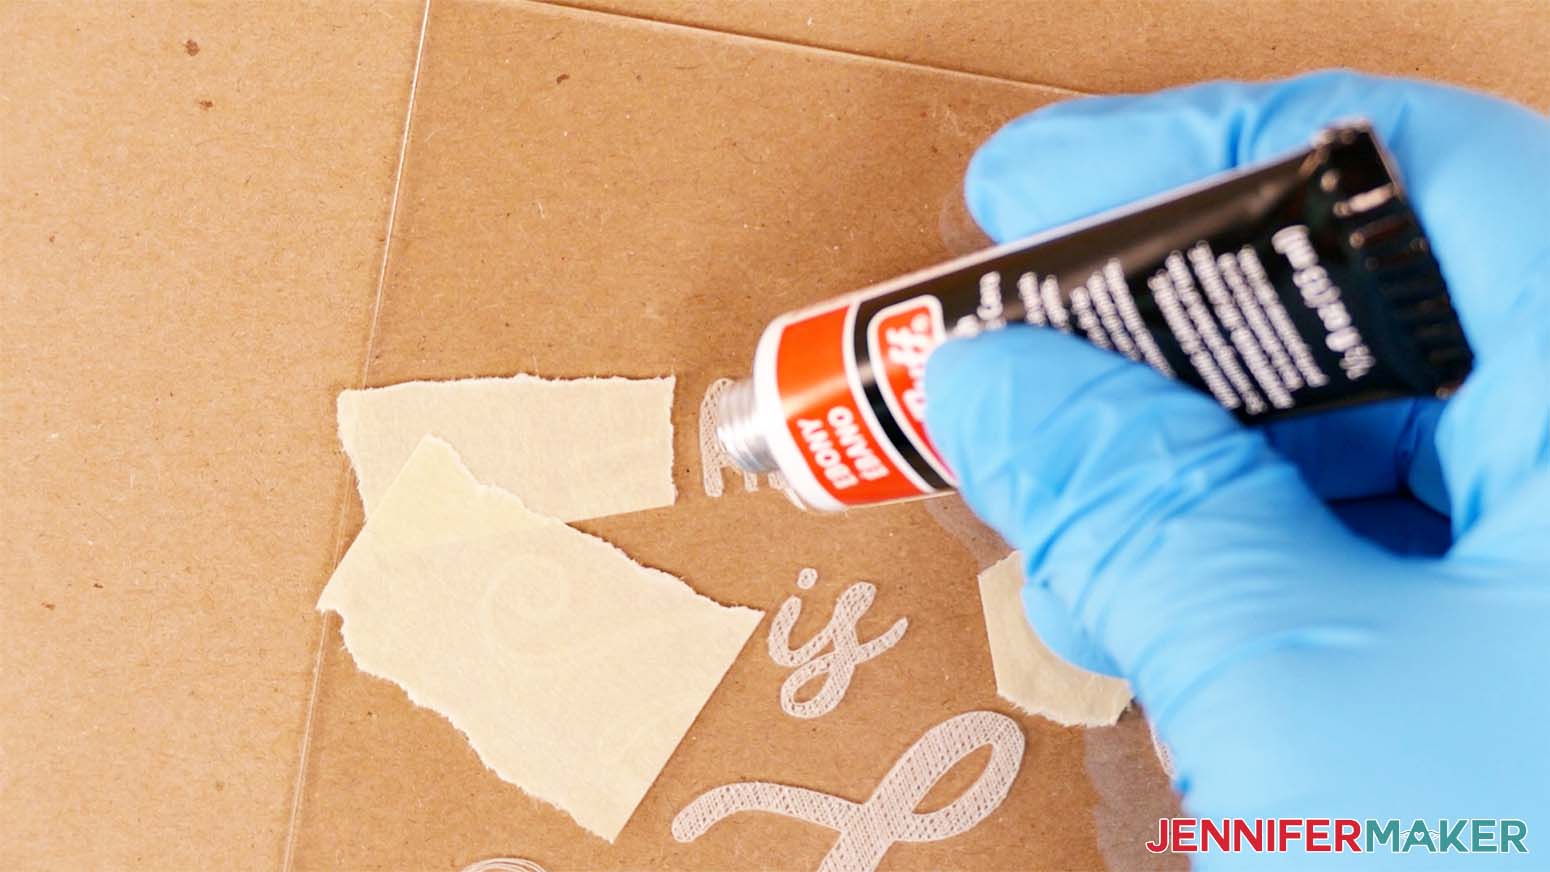
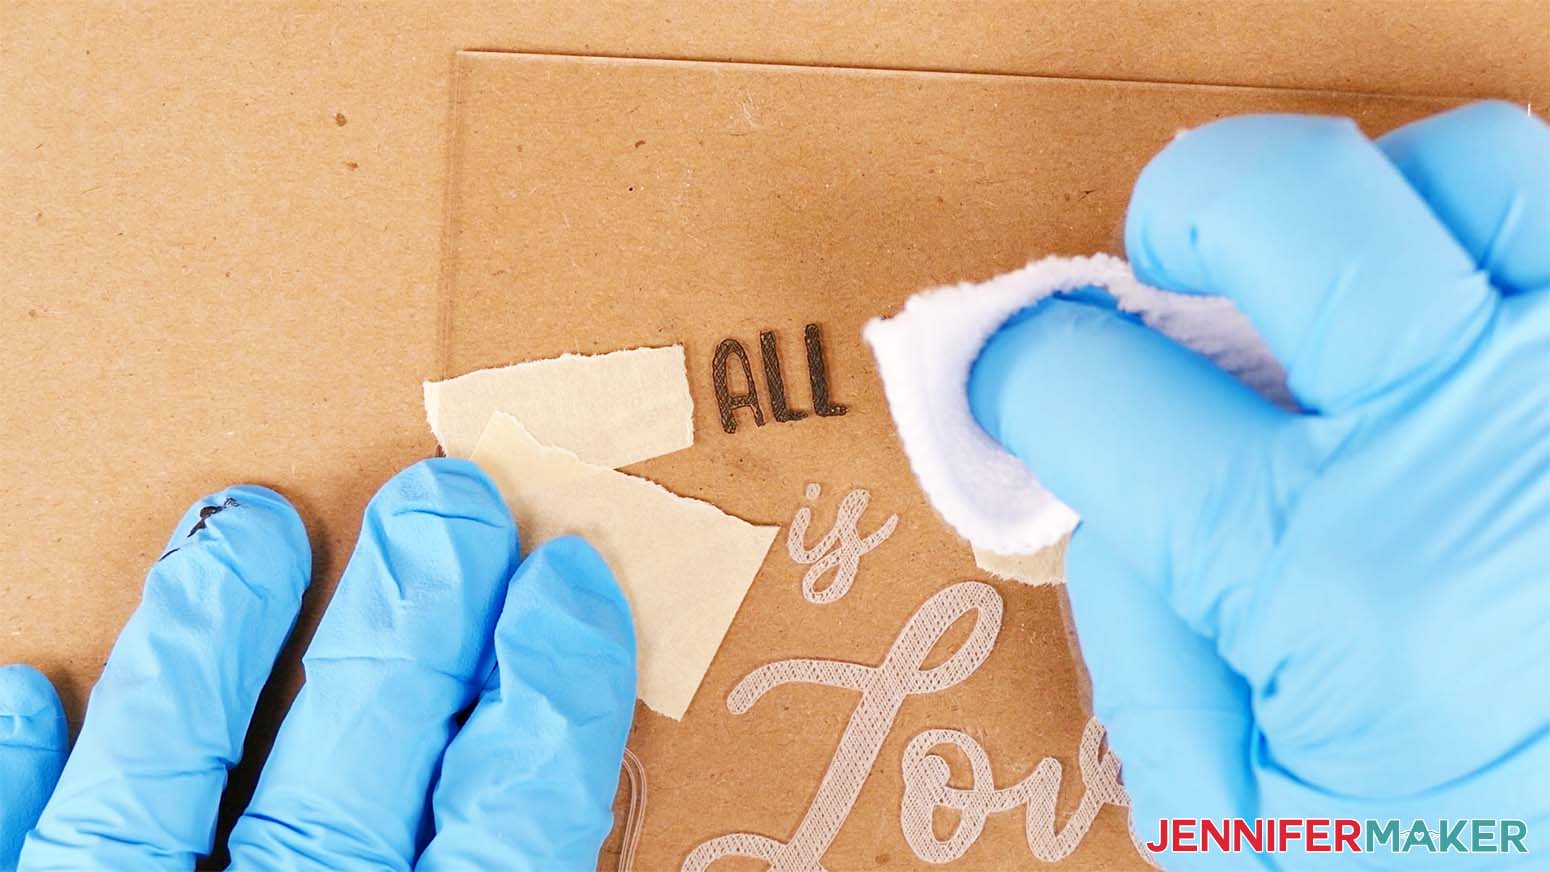
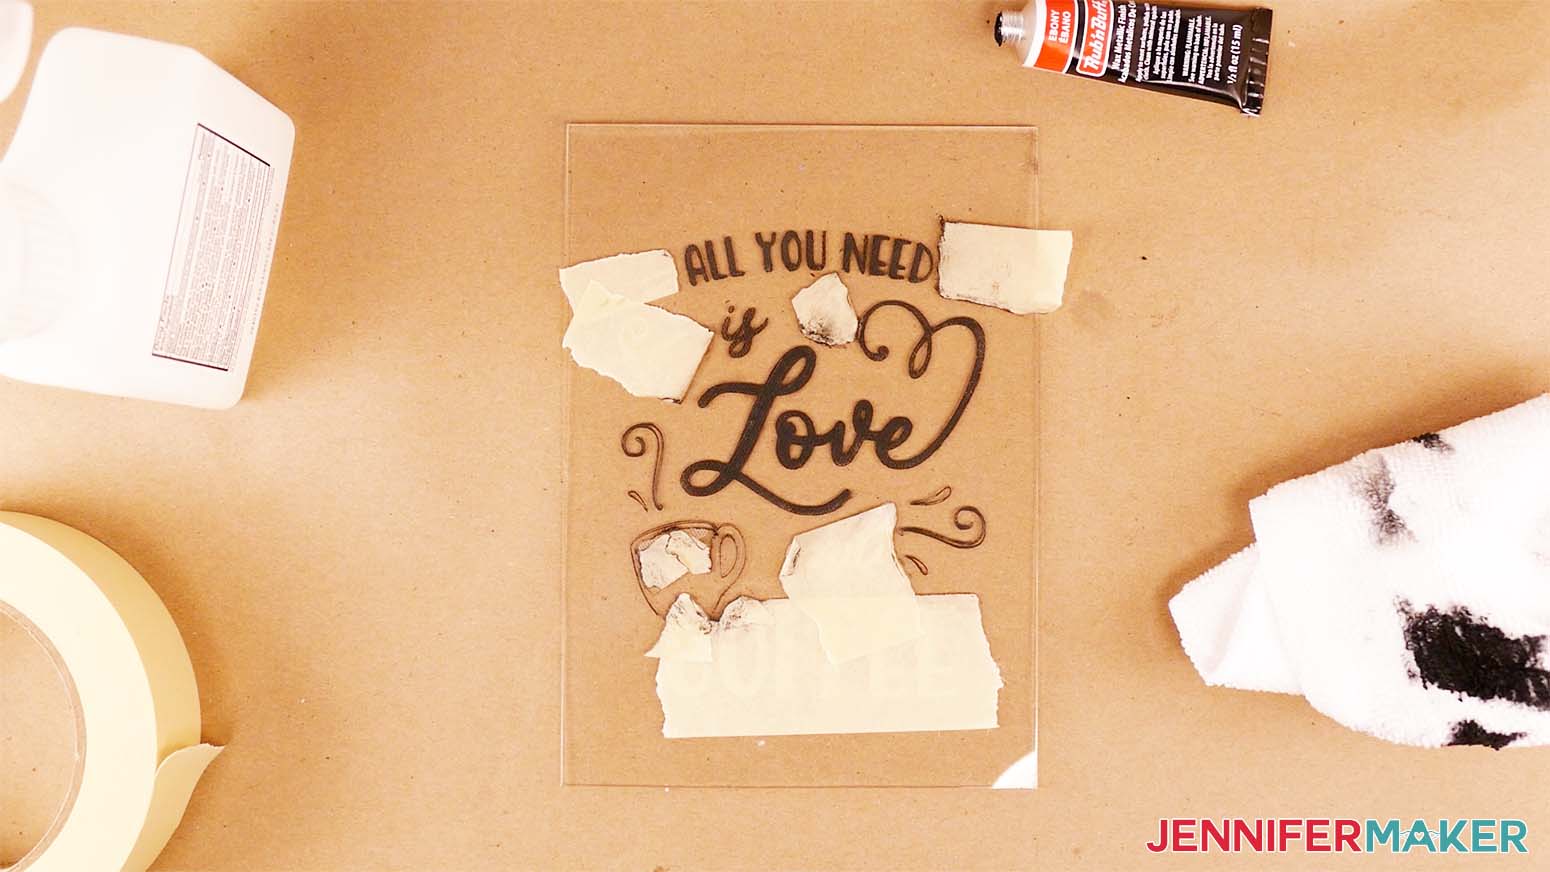
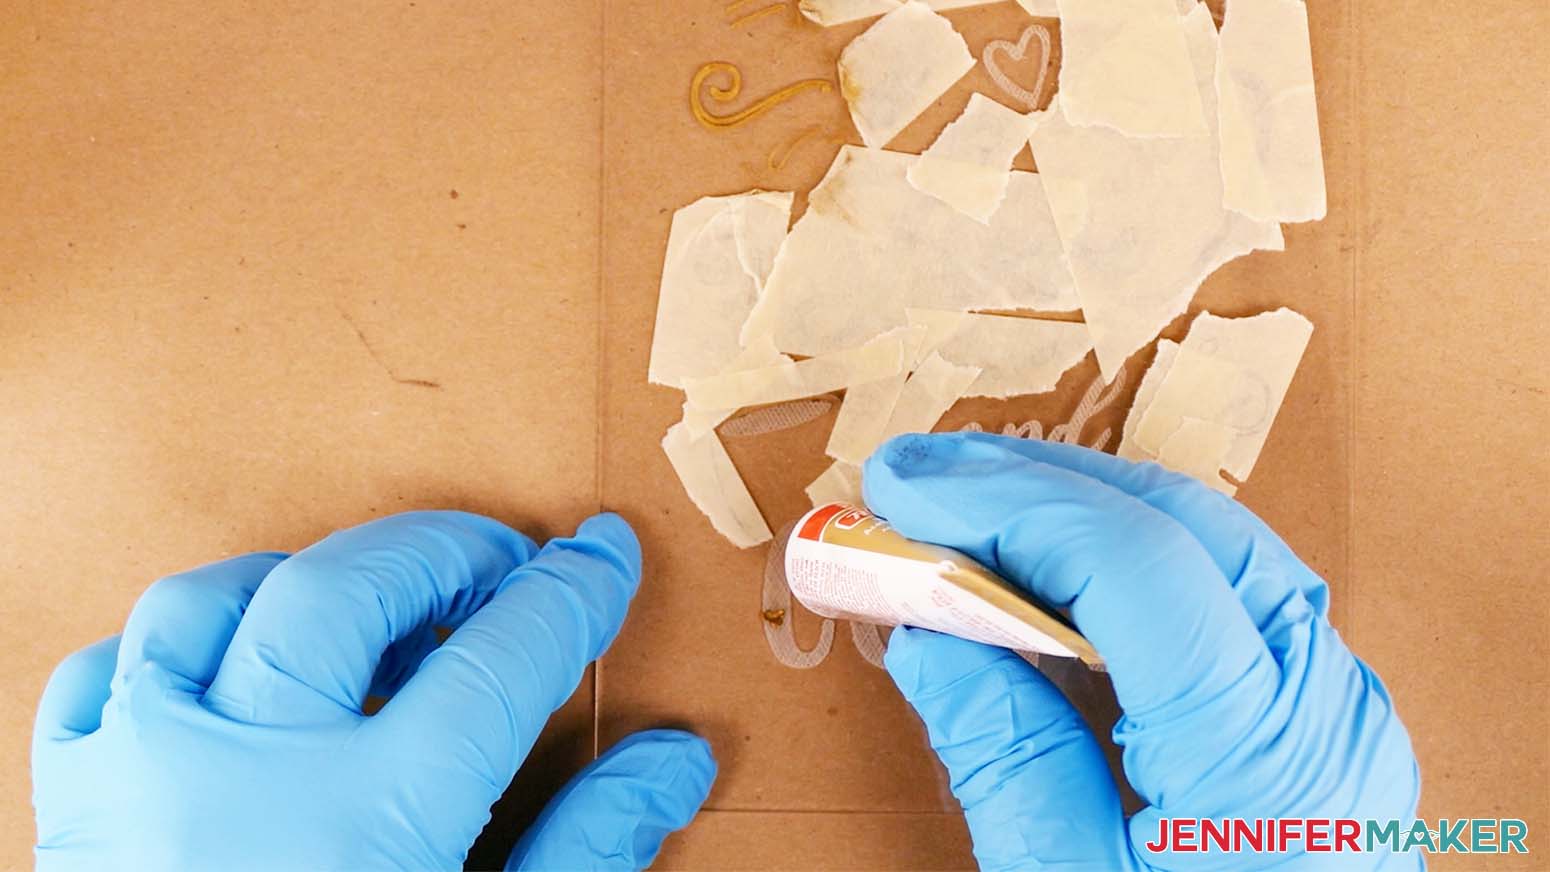
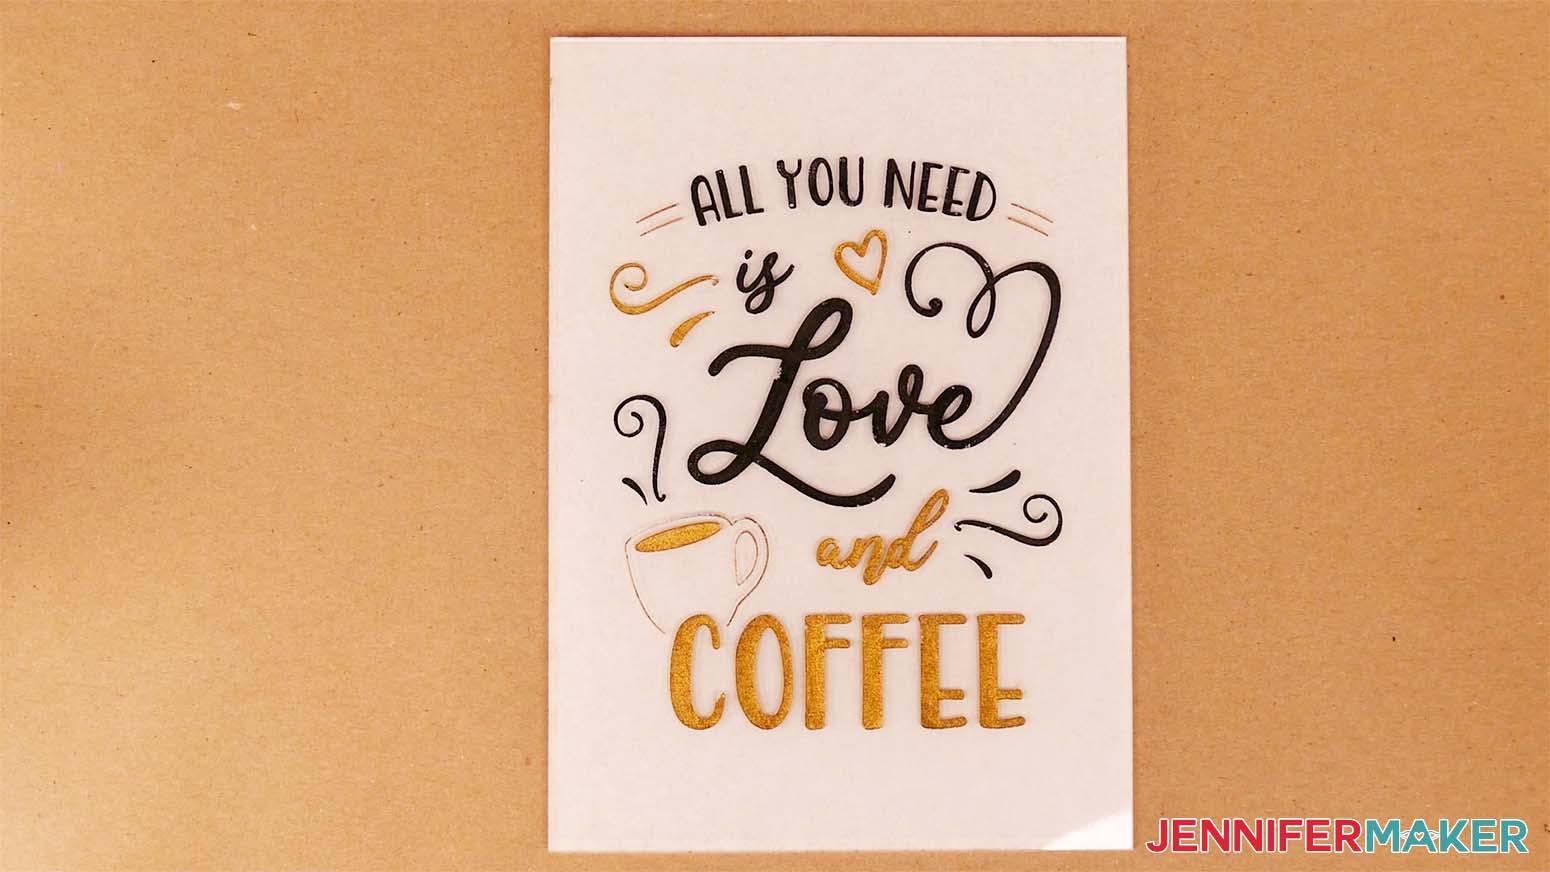
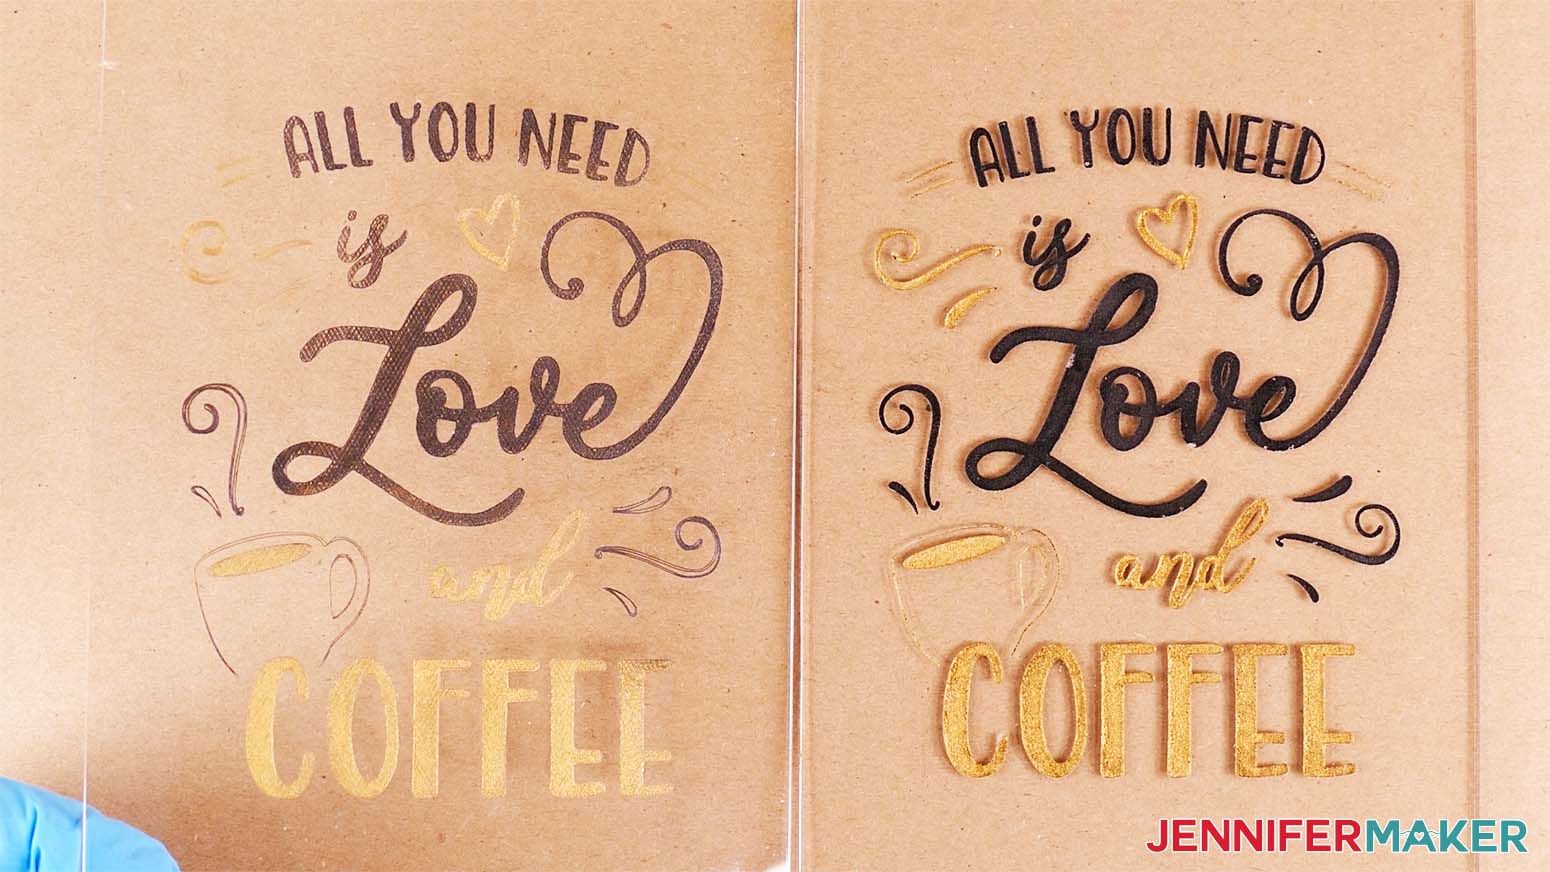
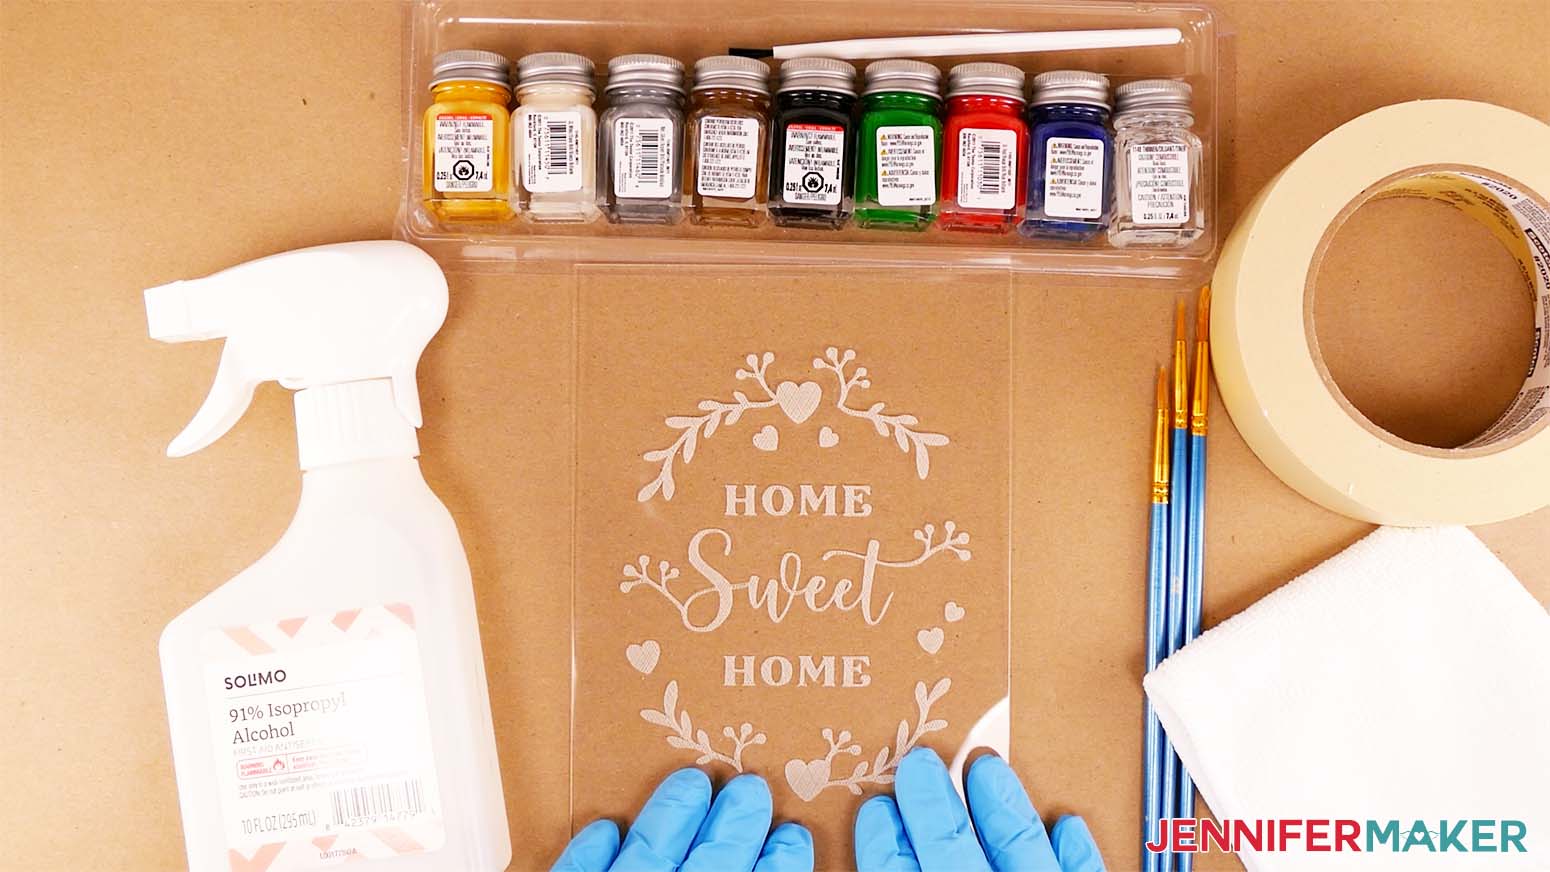
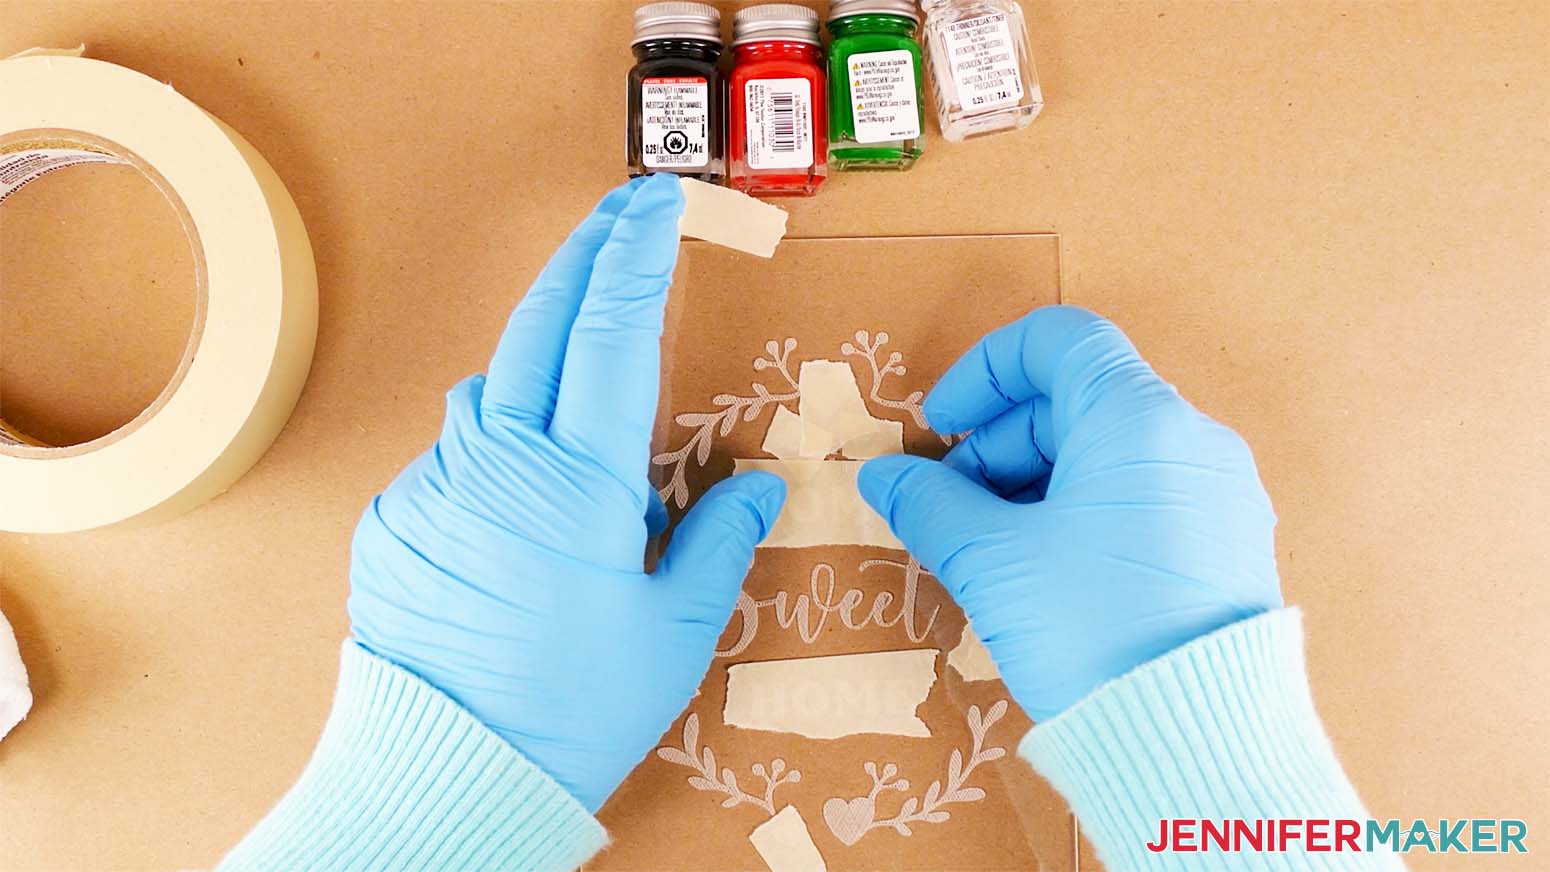
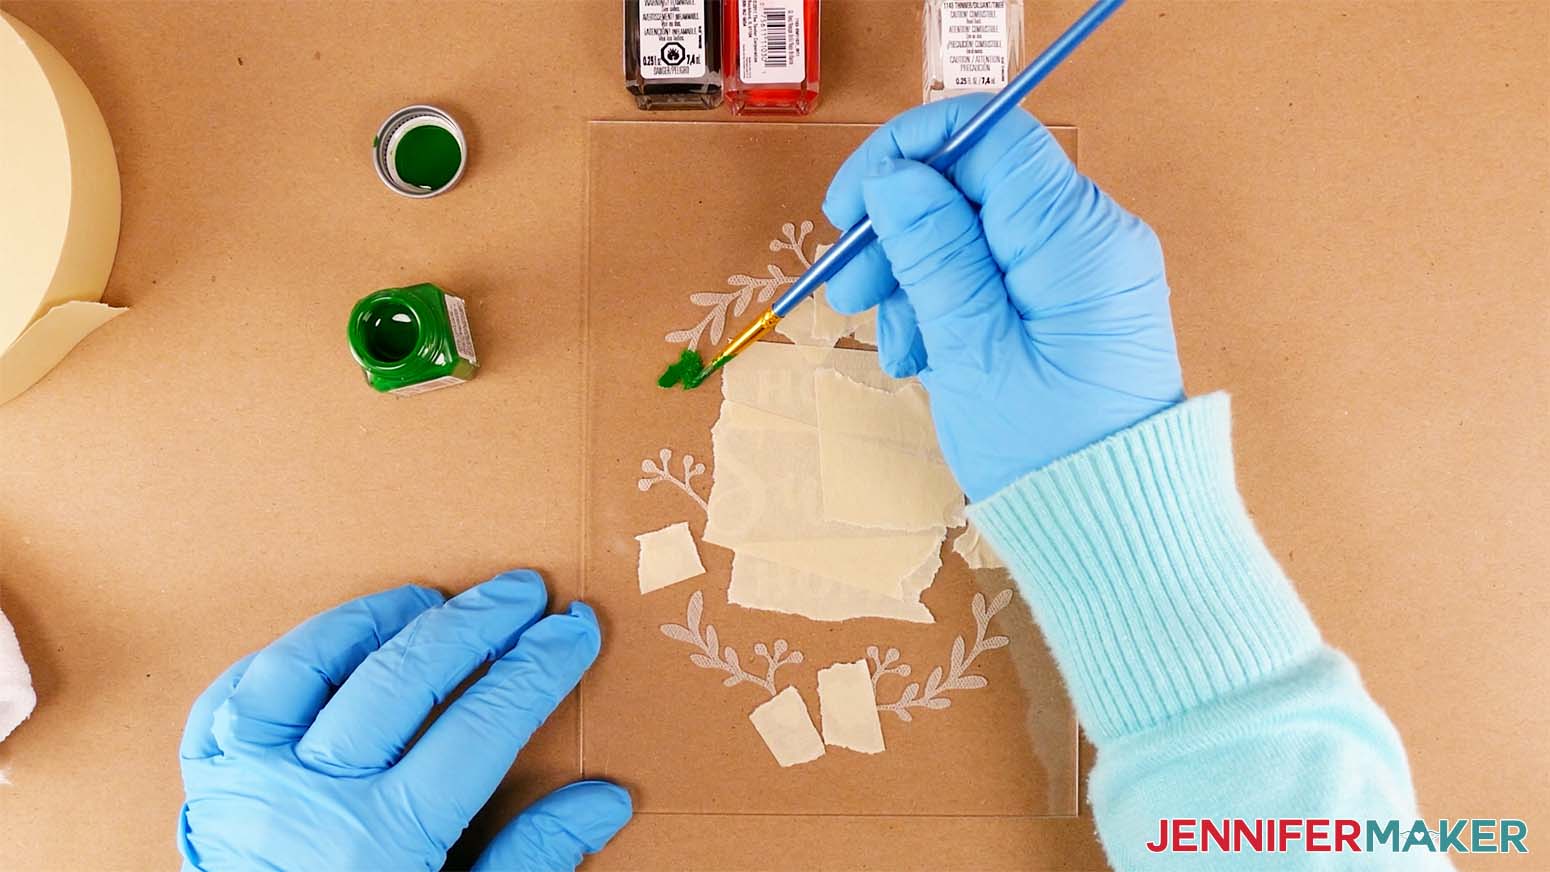
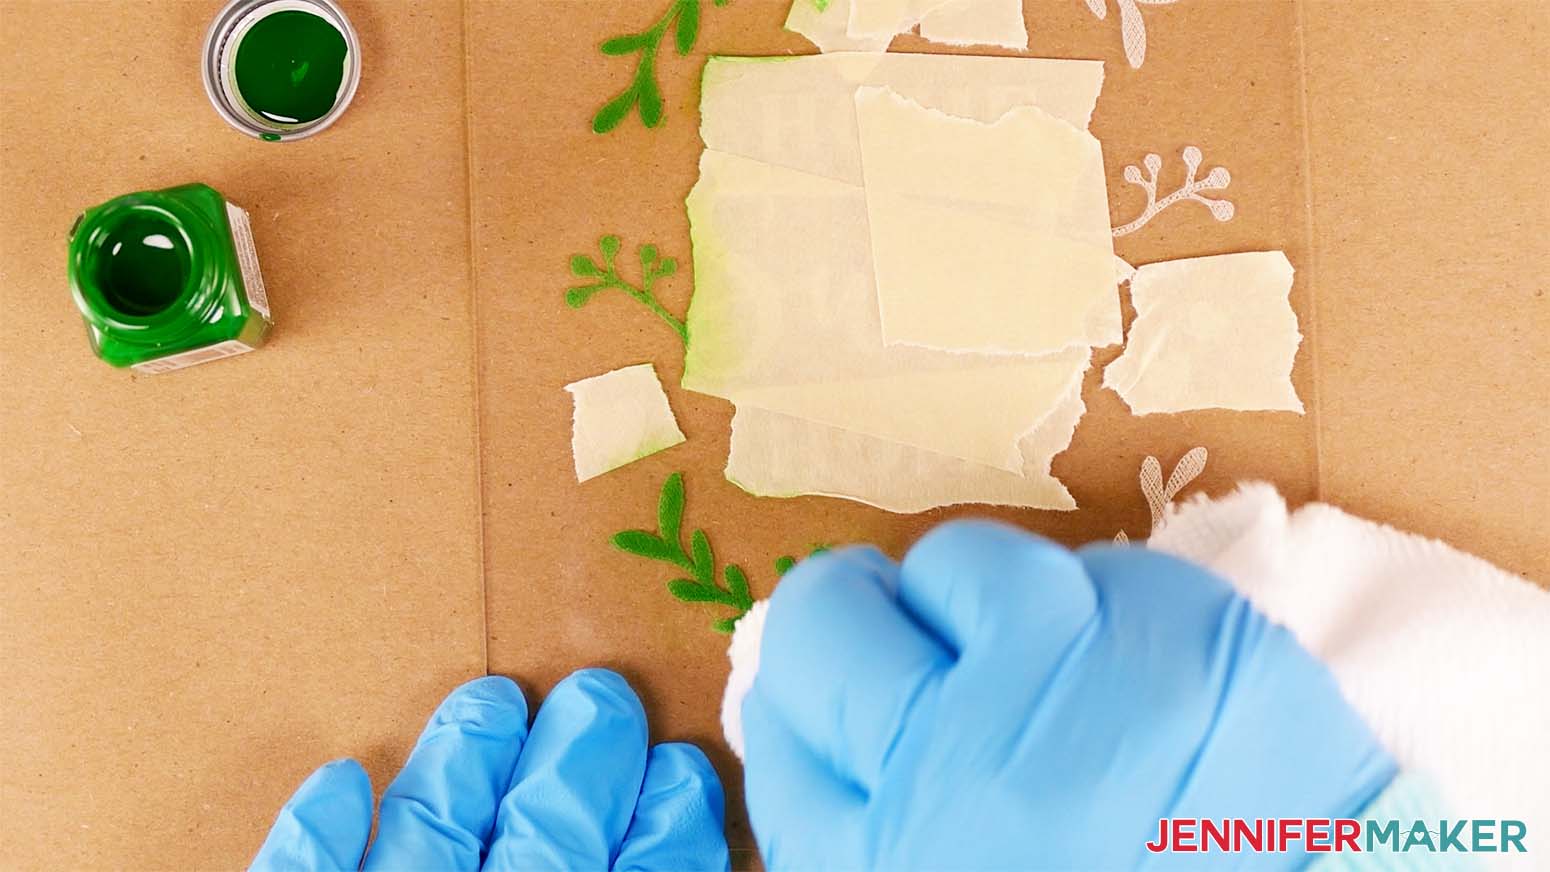
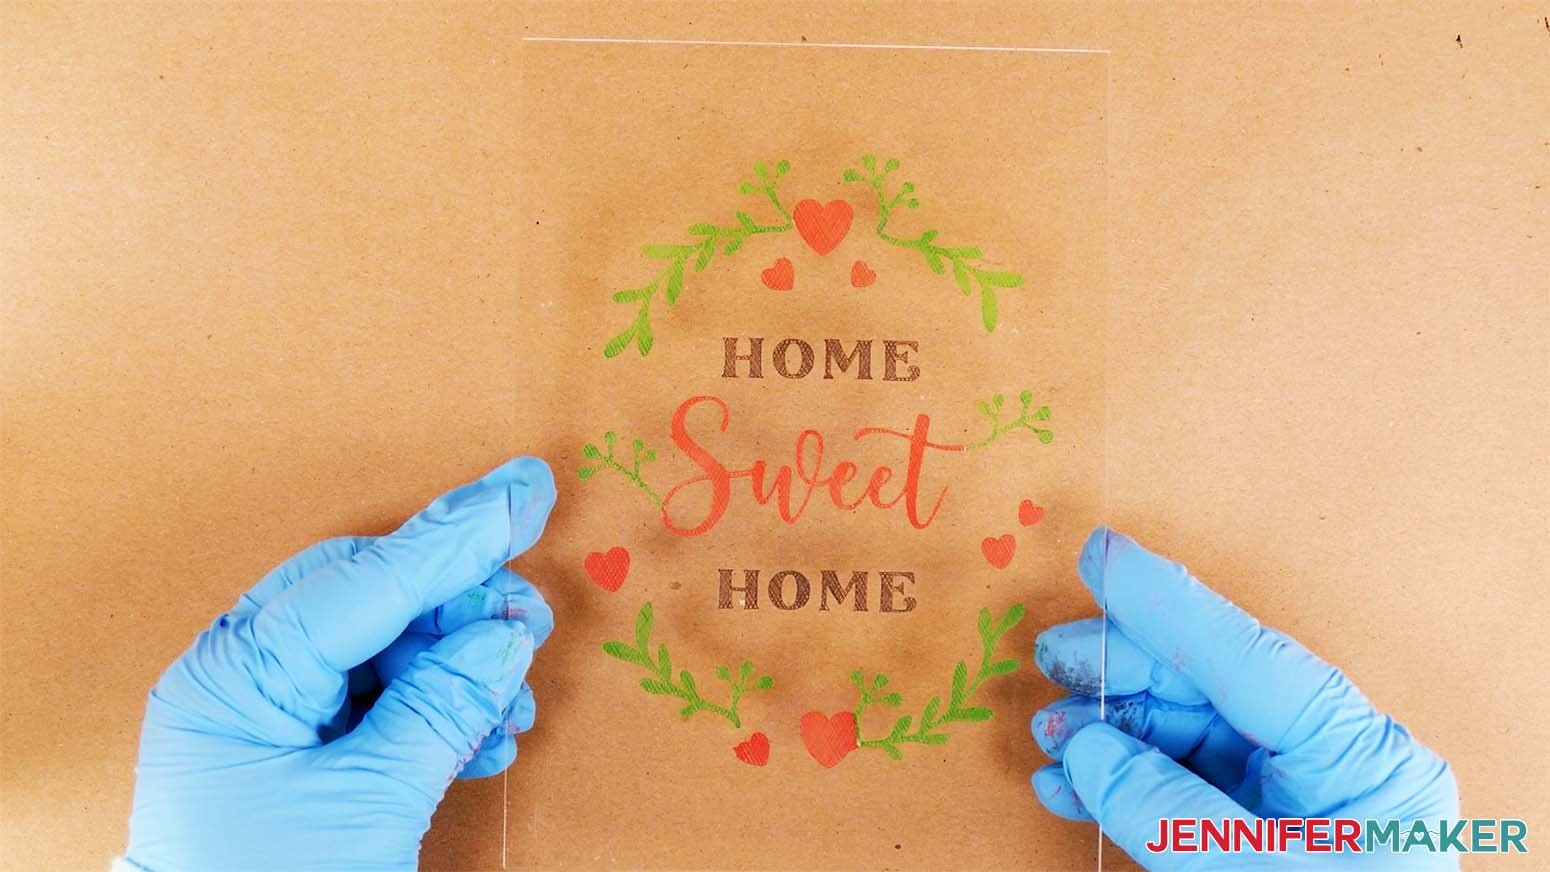
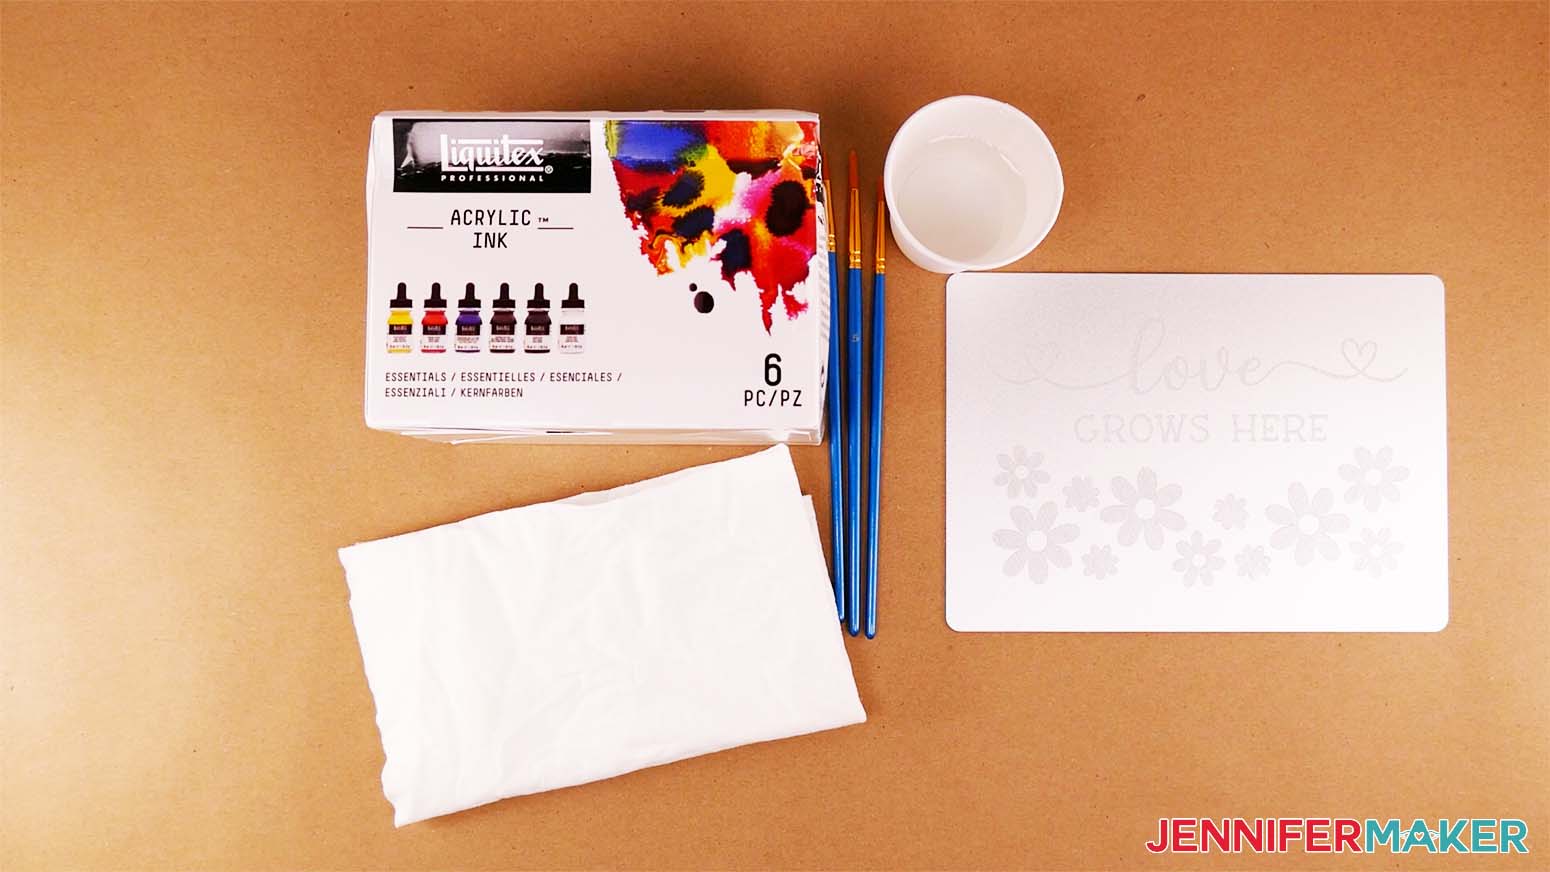
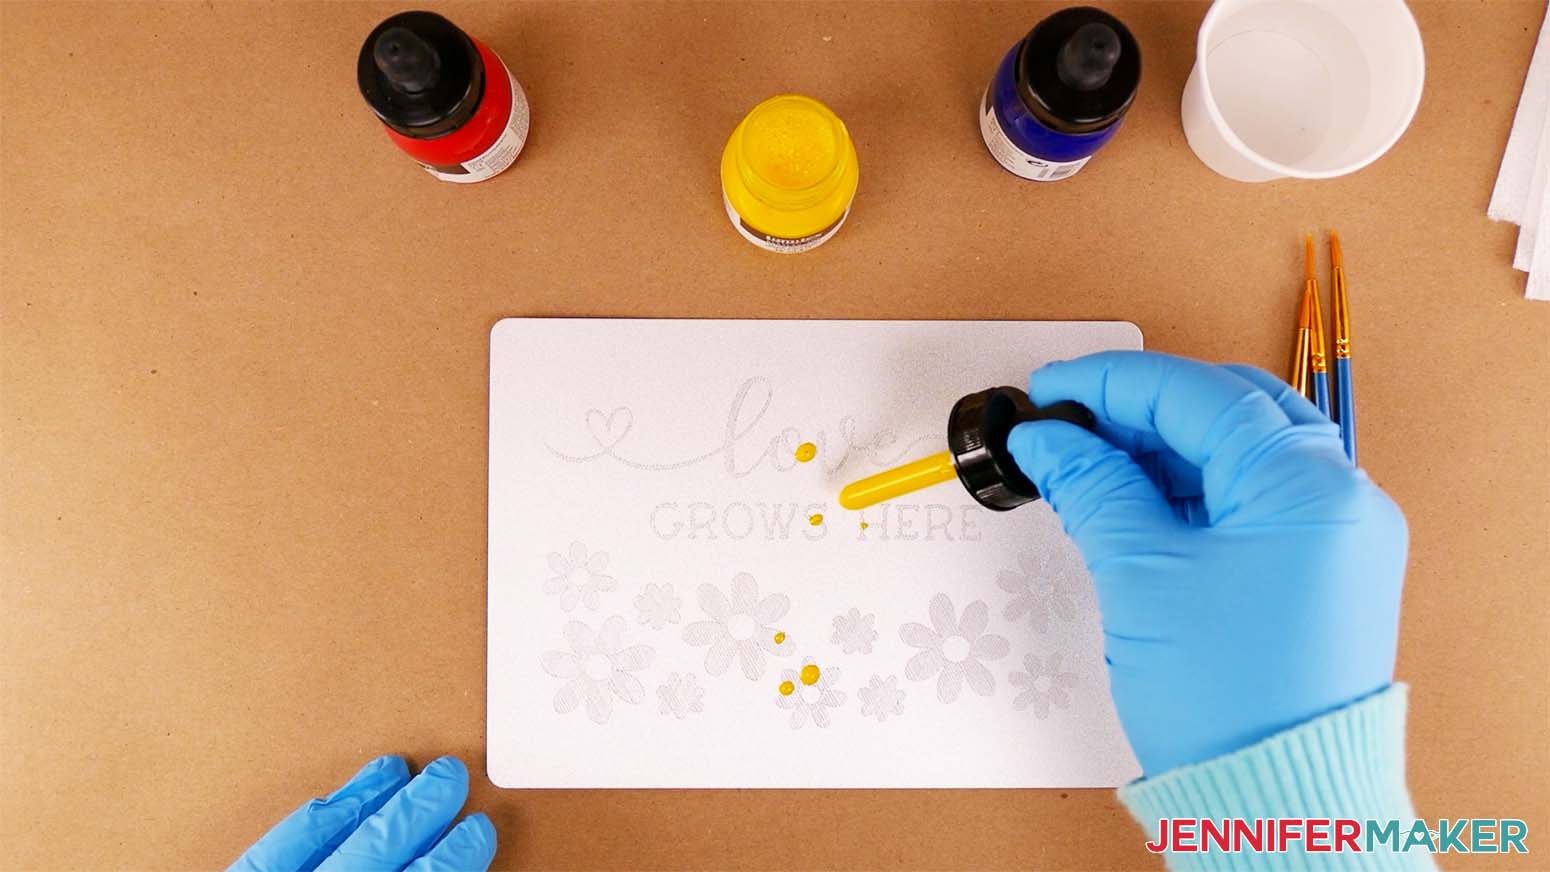
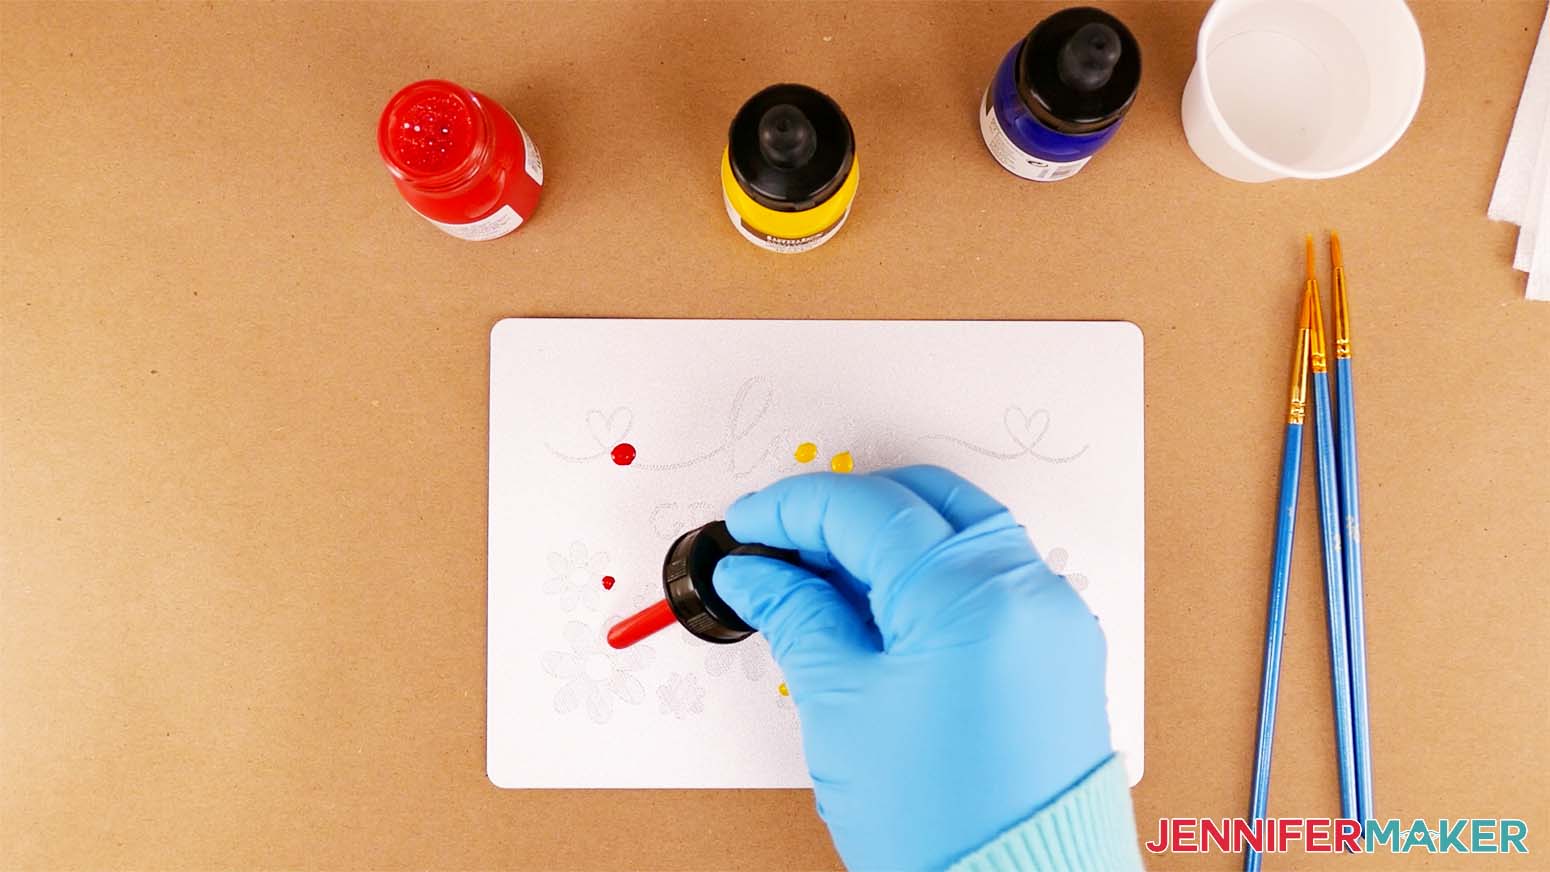
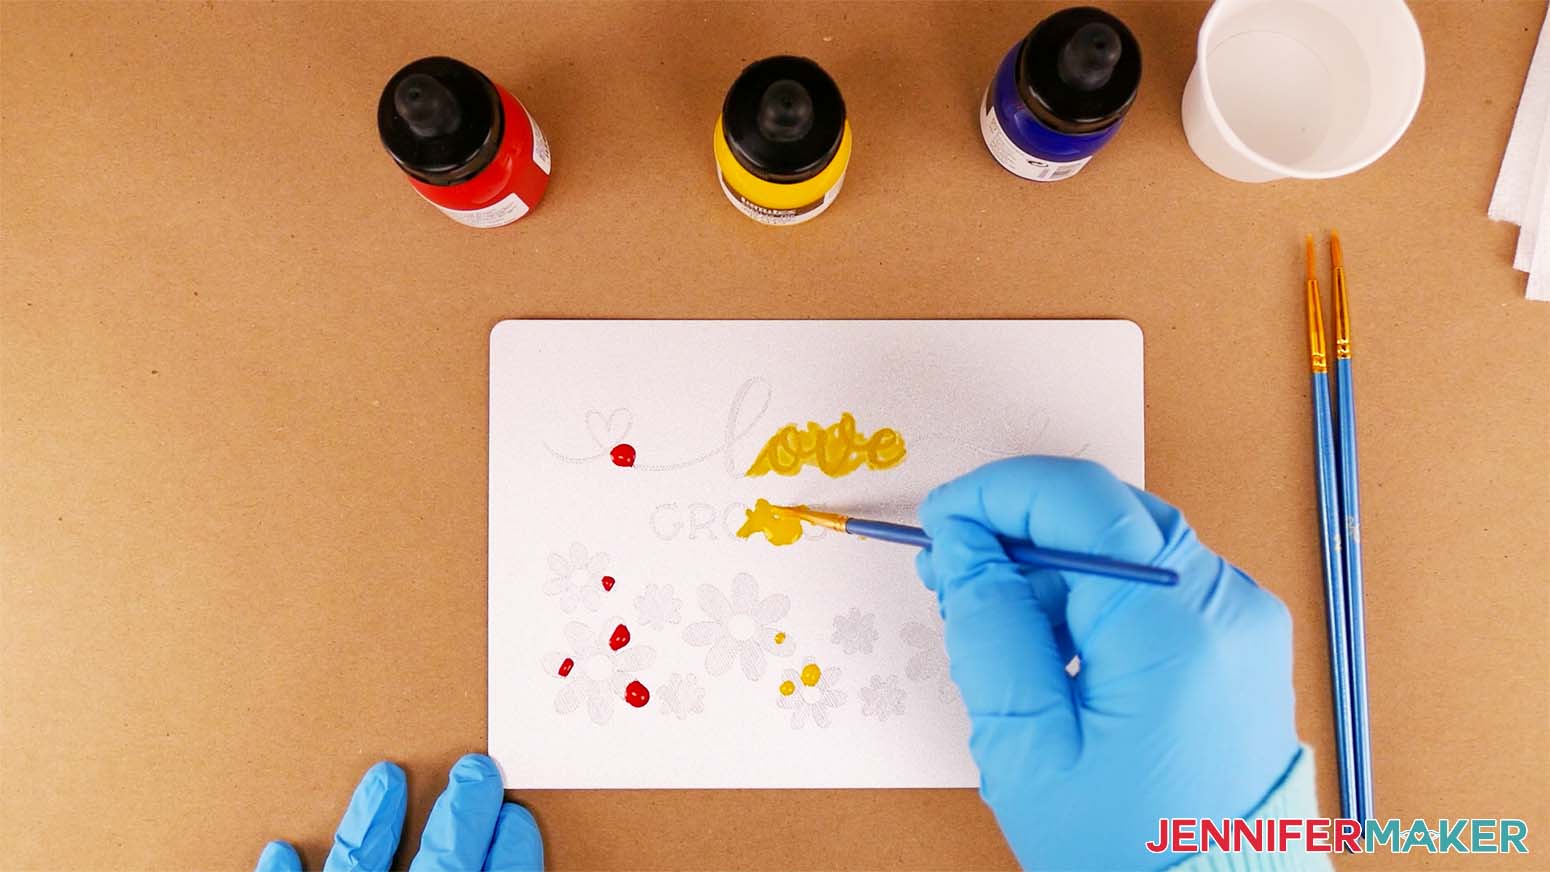
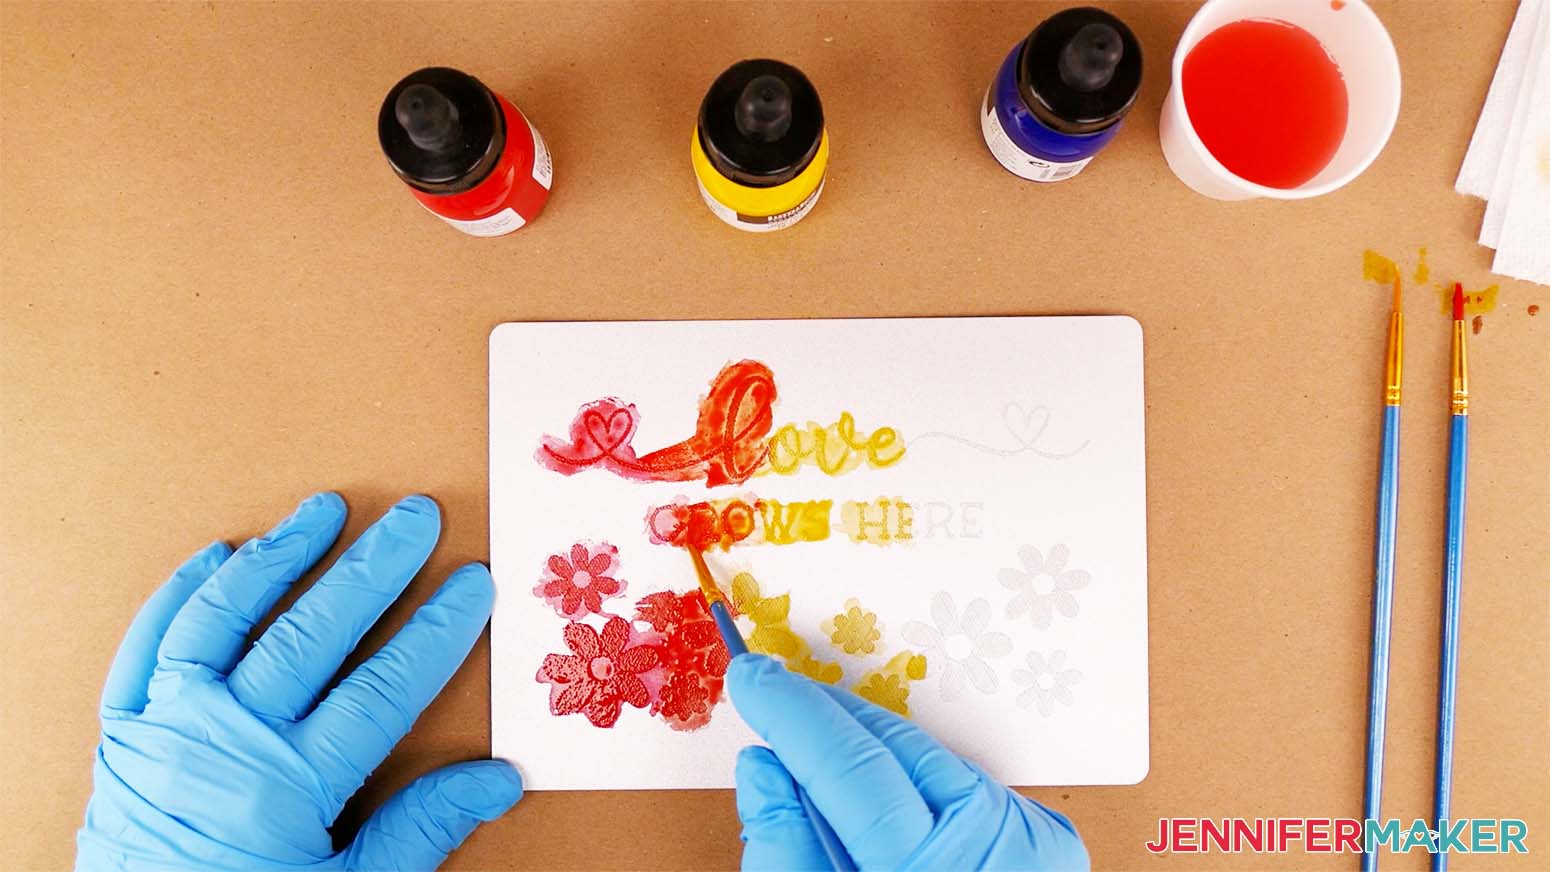
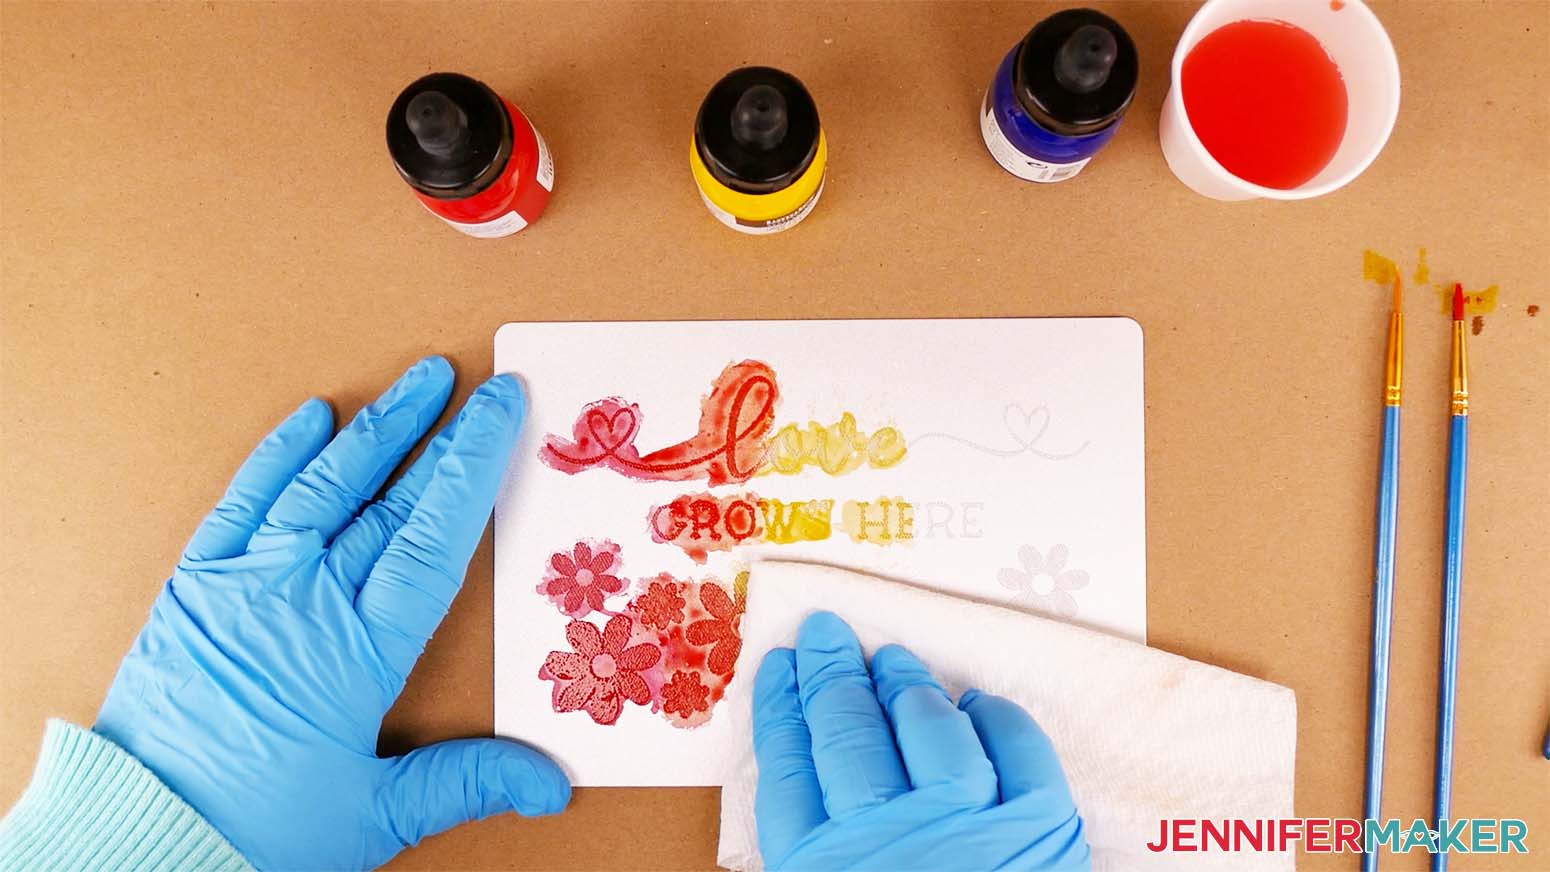
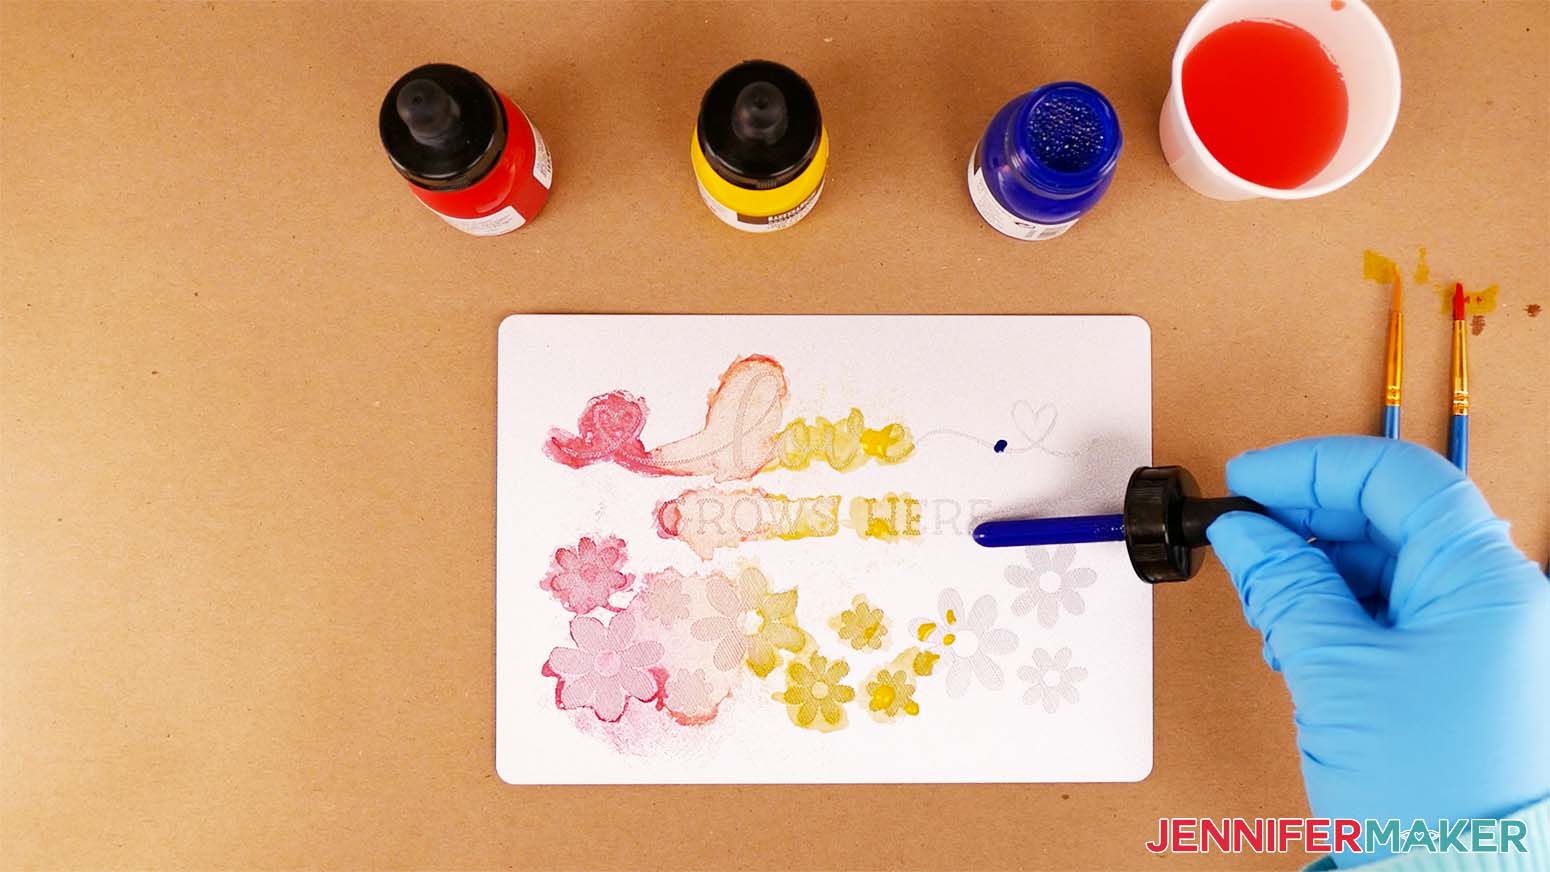
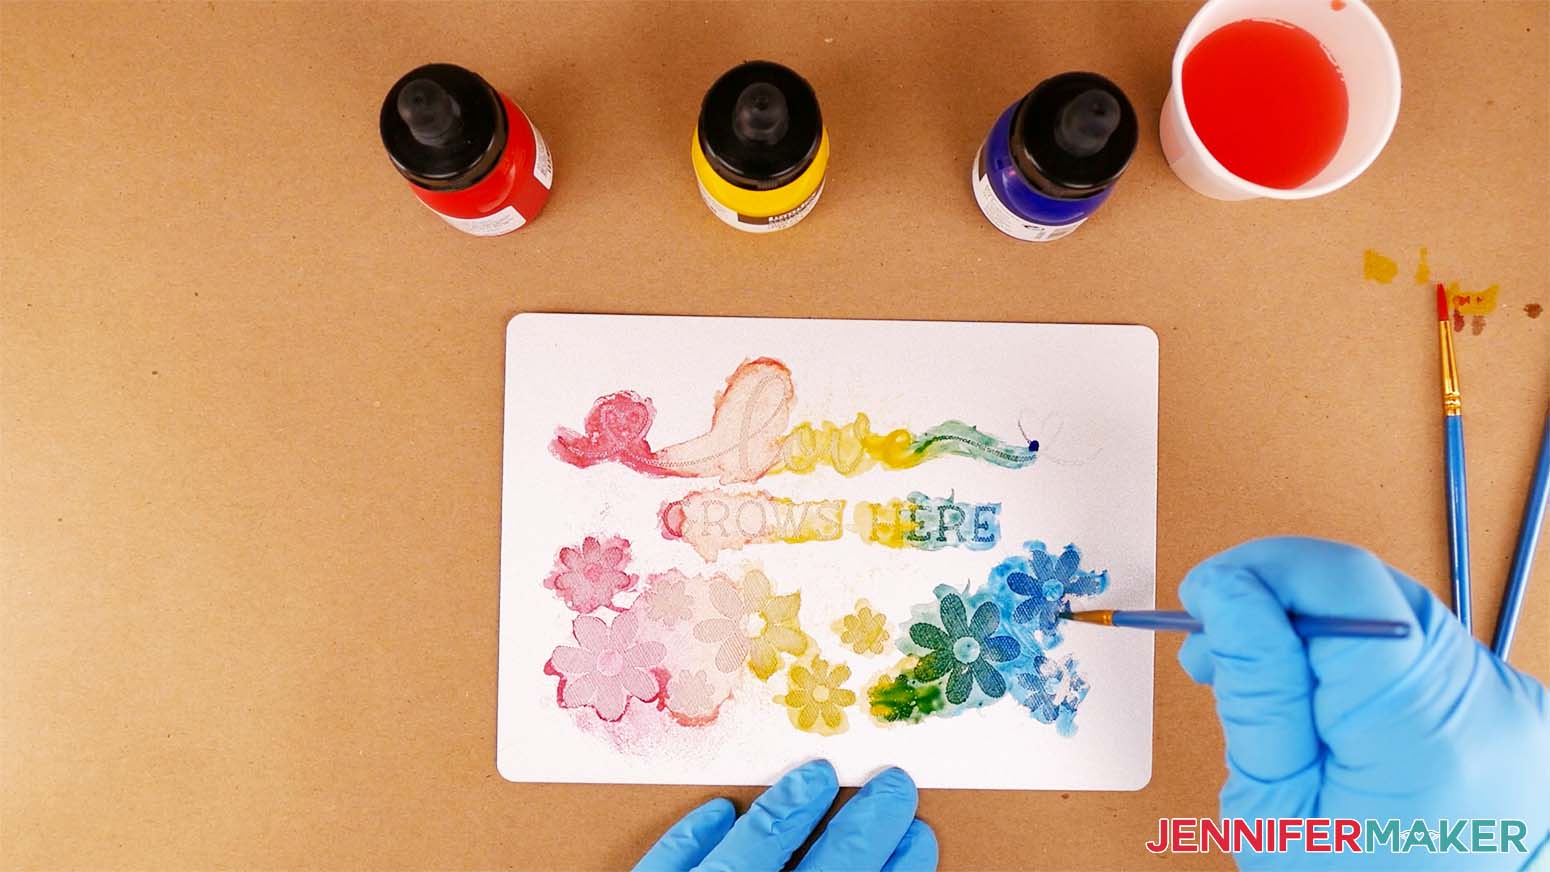
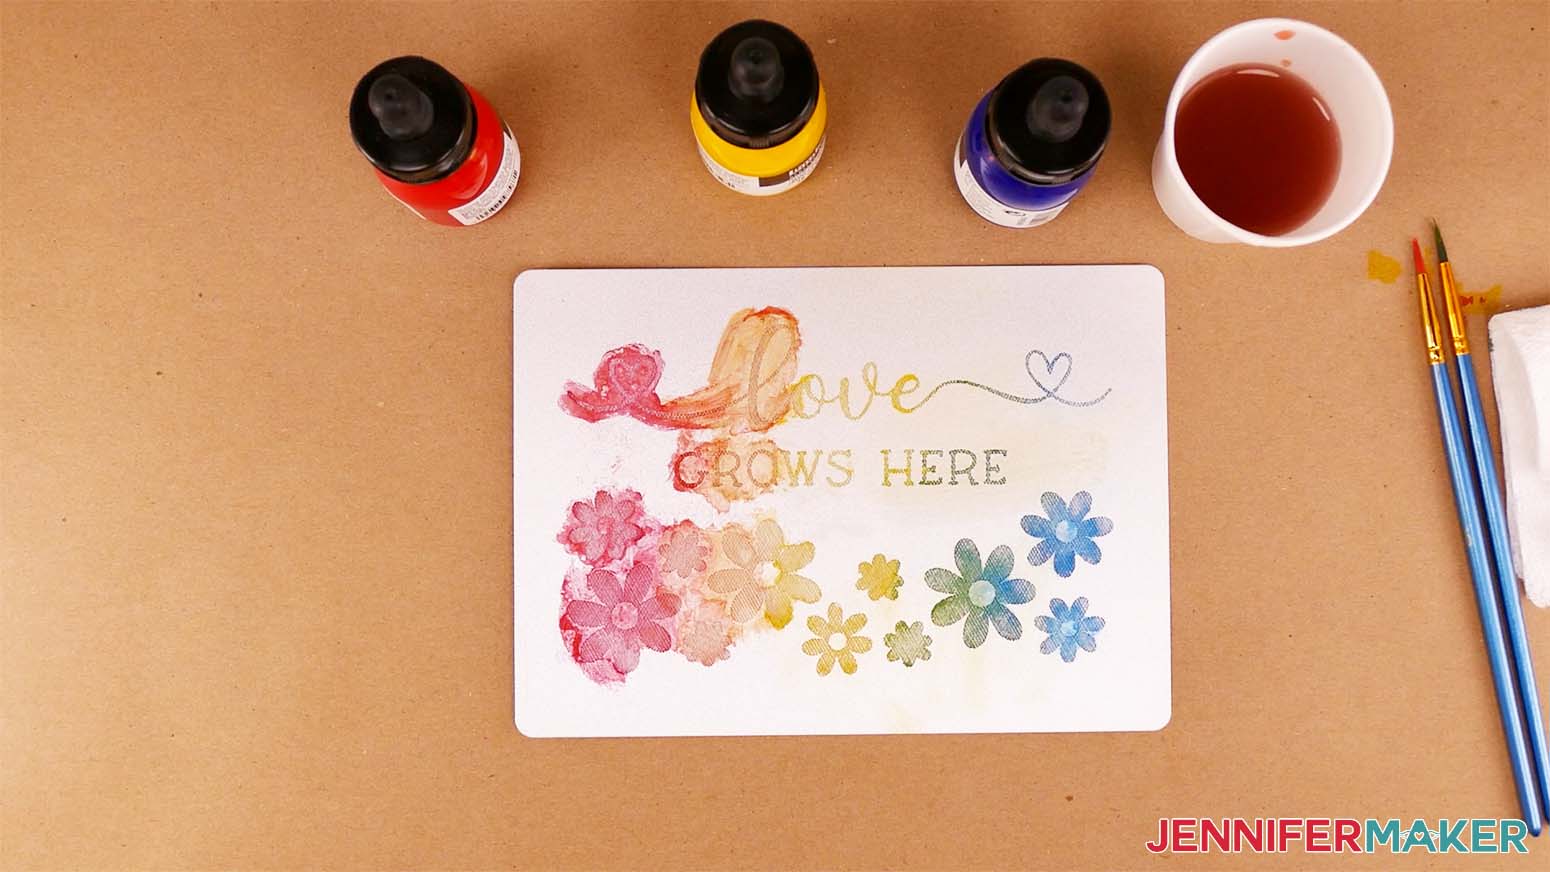
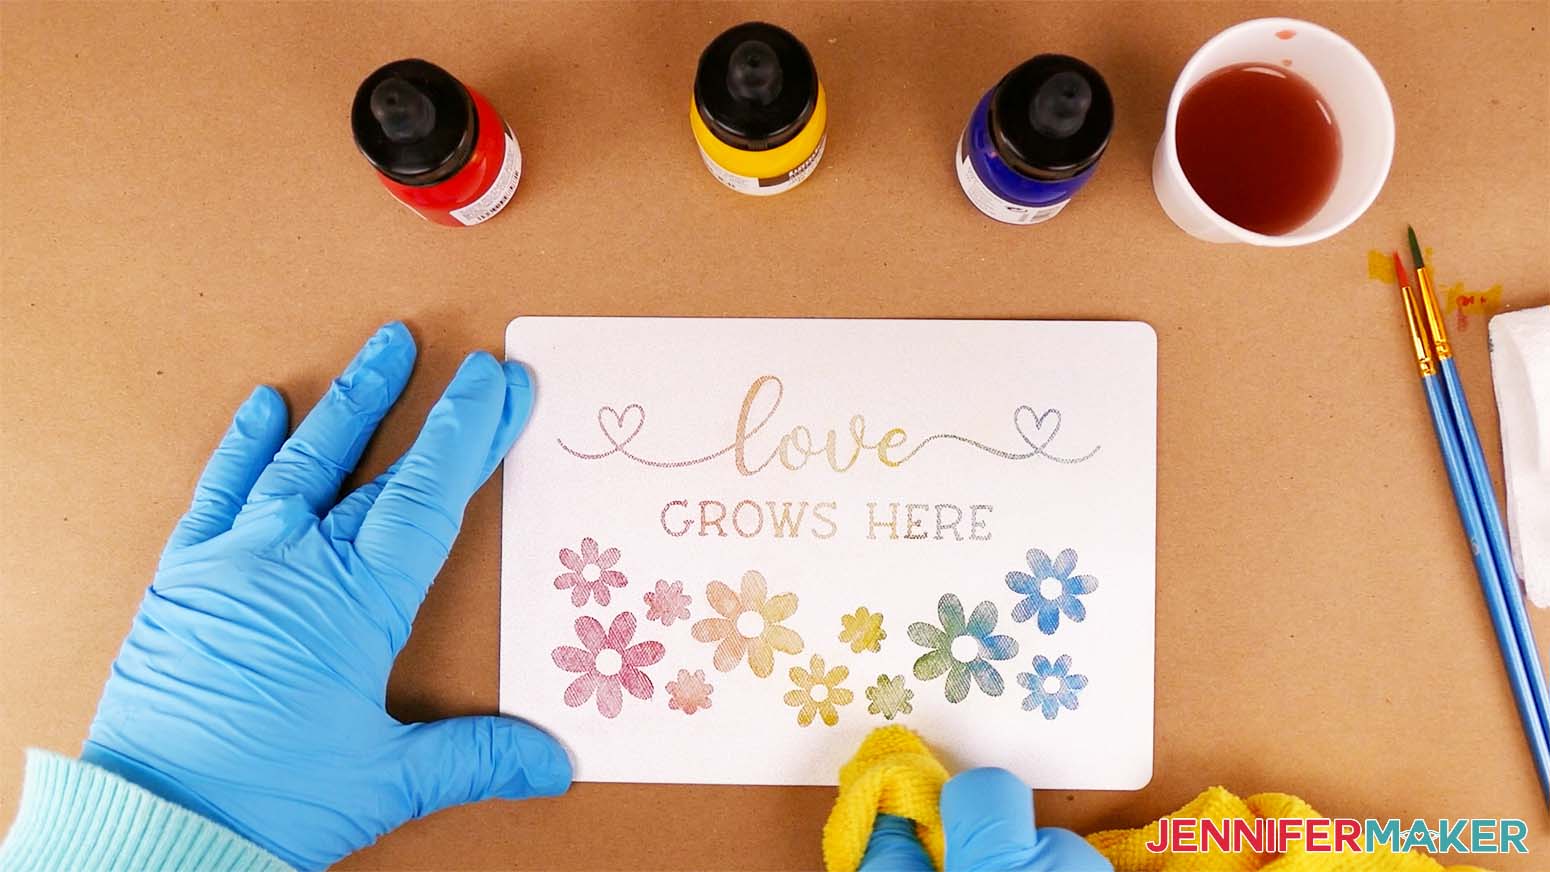
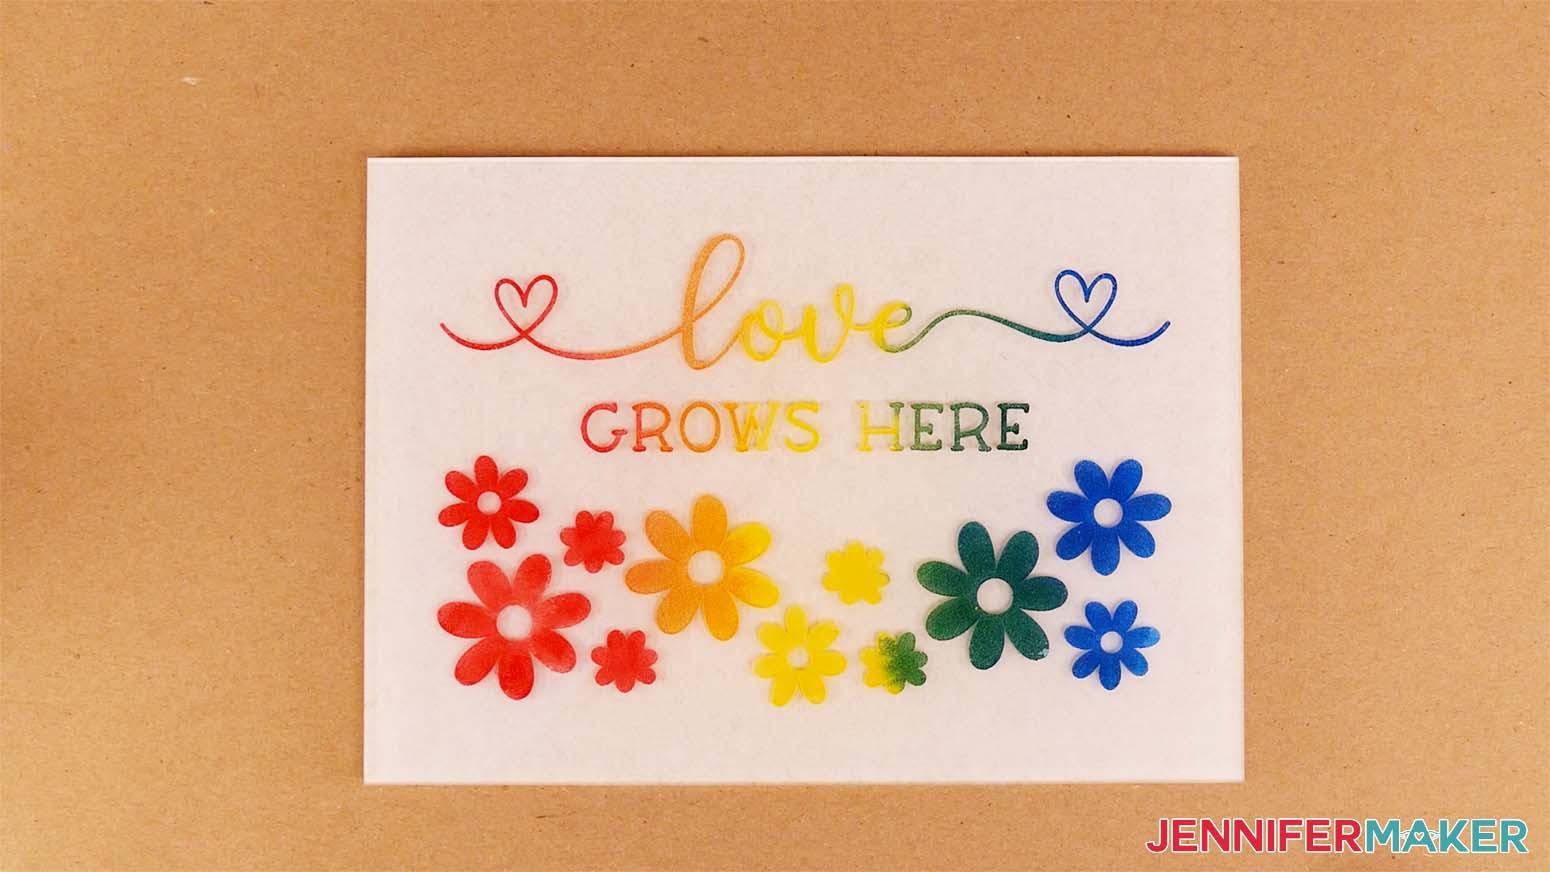
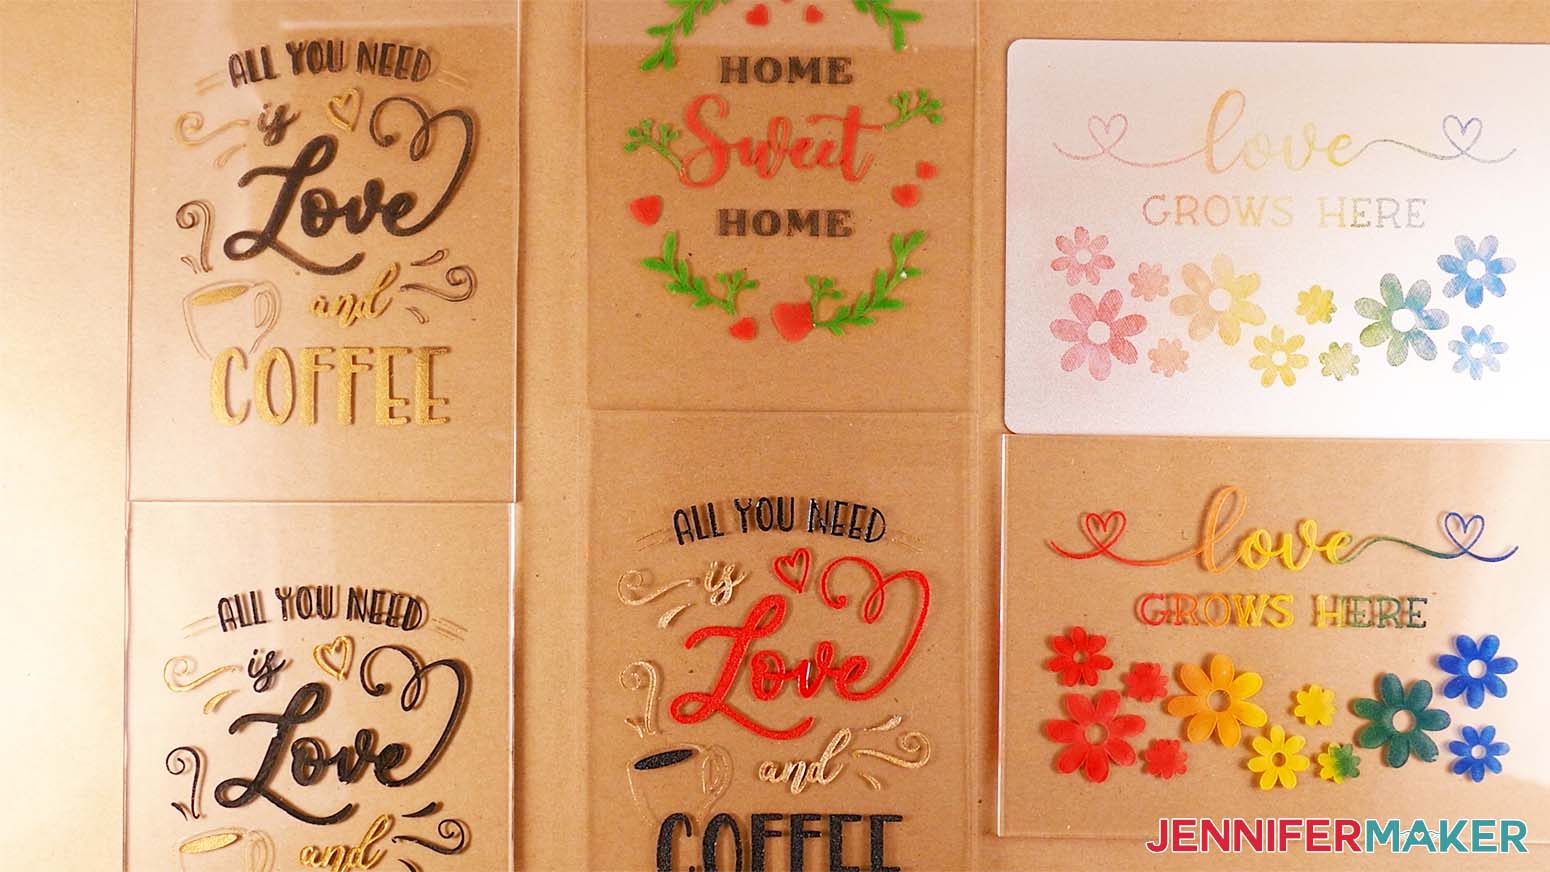
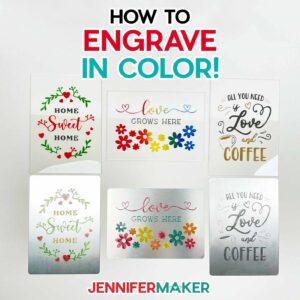
Learn how to color engraving on acrylic and metal plaques. First, download my free Color Engraving SVG/DXF/PDF files from my free resource library. It's Design #453. There are three different designs for you to choose from: Home Sweet Home, All You Need is Love and Coffee, and Love Grows Here. I’m going to demonstrate my three favorite coloring methods on some 5” x 7” acrylic and metal plaques -- I’ll use a different method with each of the three designs. First, upload your chosen design to Cricut Design Space and add it to your Canvas. TIP: If you're not sure how to upload an SVG cut file to Cricut Design Space, watch this helpful video training series I made. If you're on an iPhone or iPad, here's how to download and upload SVG files to the Cricut Design Space app. This is what each of my engraving files looks like on my Canvas. If you zoom in really close, it looks like there is a tiny diamond pattern inside parts of the design and letters. We’re going to transform those into something really important in just a moment. You’ll also notice a rectangular outline around each design. We’ll use this to help position our designs on the mat so they engrave in the perfect spot on our plaques. NOTE: The rectangular outline in the file may engrave a faint line onto your mat. I engraved several plaques this way using the same mat with no issues. However, if you’d like to keep your mat looking nice and clean, you can choose to remove the outline before engraving. Just select that layer in the Layers Panel and click the Eye icon to hide it or the Delete icon to remove it. Centering will just take extra work. With the image selected, click the field under Operation and select "Engrave." Here’s that transformation I just mentioned. If you zoom back in on the design, you’ll see that diamond pattern has changed into lots of criss-crossed diagonal lines. This is called hatchfill, and it’s used to make your engraved design appear big and bold rather than just an outline. It really makes coloring our designs SO much easier. You’ll love the result, I promise! You can learn more about using this technique to draw, foil, or engrave custom projects with your Cricut by visiting my Handwriting to Cricut Projects tutorial! Before deselecting your image, click “Attach” at the bottom of the Layers Panel. This will make sure the outline stays centered with the design for perfect placement on the mat. Make sure you have the right machine selected (either Maker or Maker 3) and click "Make It." If prompted, click "On Mat," "12 in x 12 in," and "Confirm." On the Prepare screen, center the image on the mat at the 6" horizontal and vertical marks. Use the rectangle to help align the design with the grid. I’ve sized the rectangle so it’s a bit larger than the 5” x 7” plaque. This way, it won’t engrave the edges of your plaque. For the horizontal "Love Grows Here" design, you’ll have two grid squares on the left and right of the rectangle, and three above and below. After your image is centered on the mat, click “Continue.” Now we need to select the material settings. If you’re engraving an acrylic plaque, go to "Browse All Materials," search for "acrylic," and select "Acrylic, Thick (2mm)." Then click “Done.” Change the pressure to "More." If you’re engraving a metal plaque like the anodized aluminum ones in my materials list, search for “aluminum” and select “Anodized Aluminum.” Then click “Done” and change the pressure to “More.” IMPORTANT: Due to the hatchfill and size of the finished designs, each of the files take a little over an hour to engrave. Make sure that you are prepared by ensuring you have a good internet connection and that you turn off any auto sleep or screen saver functions on your computer. These functions will stop the engraving process and you will need to start over. It’s also a good idea to connect your machine directly to your computer instead of using a Bluetooth connection. Put your engraving tool in Clamp B, and move the four white star wheels all the way to the right. Then, make sure your acrylic or metal plaque is no more than 2 mm thick, otherwise it might not fit under your cutting machine's rollers. If your plaque has a protective film, remove it from the side you will engrave. Next, center the plaque on your Cricut StrongGrip mat, uncovered side up. Use the cross in the center of the mat as your centering guide. Once centered, tape around the plaque's edges using painter's or masking tape to keep it still during the engraving process. NOTE: If you're engraving a metal plaque, you won't be able to see the cross in the center of your mat, so you can use the grid lines to help position your plaque in the center. Just make sure you have an equal number of grid squares on the left and right of the plaque, and an equal number of squares above and below it before pressing it down and adding tape. Load your prepared mat and hit the flashing button to begin the engraving. Since engraving is a more involved process than cutting, I recommend watching your machine during the engraving in case any issues arise. During the engraving, you may notice this message on your computer screen. It's just a note to let you know that if your engraving tool starts lifting and spinning, you shouldn't be alarmed -- that's totally normal. When your machine has finished engraving, unload the mat and use a soft cloth to brush the debris into a trash can. To remove debris from your machine, use a soft cloth or small vacuum attachment. Don't forget to clean the debris off of your engraving tool. TIP: You can also use painter's tape or masking tape to lift and remove the debris from your plaque. This works particularly well for the metal engraving debris. Remove the plaque from the mat and carefully peel off the painter's tape. Brush off any more debris. Remove the back protective film if it's still attached to the plaque. This is what my engraved plaques look like. Now for the fun part! Let’s color our designs! I tried several coloring methods and found three that worked really well and looked awesome on the acrylic and metal plaques: Rub n Buff Finish, Enamel Paint, and Acrylic Ink. I’ll show you how to color your designs using each of these methods. First, I’ll use Rub n Buff on my engraved acrylic "Love and Coffee" plaque. You can follow the same process for a metal plaque. Rub n Buff is actually a type of wax that has metallic or pigment powder added to it. I’ve used Rub n Buff on a few other projects and really like the classy look it creates. Check out my Color Glass Etching tutorial to see some examples! For this method, you’ll need clean nitrile gloves, a dry cloth or towel (preferably one that you won’t mind getting messy), rubbing alcohol, butcher paper, and painter’s or masking tape (if you’re using more than one color). If you're using more than one color, first cover the parts of the design you don't want to be the first color with tape. I’m going to use the Ebony and Gold Leaf colors, and I’ll start with the Ebony, which is black. I’m going to cover the parts of my design that I don’t want to be black. Cover your work surface with butcher paper and put on your gloves. Squeeze and apply a tiny amount of Rub n Buff onto your prepared design and buff it into the engraved areas with the cloth. I don’t recommend using paper towels to buff the color in because the rough engraved areas cause the towels to disintegrate into a mess of paper debris pieces. Ask me how I know. You can wipe the excess off of the plain acrylic, but the wax dries quickly, so you may need to dampen the cloth with water or rubbing alcohol to remove it completely. This method works best if you work on small sections at a time, such as just one or two letters. NOTE: The longer the Rub n Buff stays on your acrylic or metal plaque, the harder it is to remove. So it's best to remove the excess quickly before adding more. Keep applying Rub n Buff and wiping away the excess until you’ve colored all of the exposed sections of your design. Here’s what my plaque looks like after applying the black Rub n Buff. TIP: If you decide that you want your color to be a bit darker, you can always apply a second coat of wax before removing the tape. Now let’s move on to the gold! Remove the tape from your uncolored sections and clean off any wax that might have gotten trapped underneath. Then, after making sure your plaque is dry, apply tape on top of the black colored areas so they don’t get any gold mixed in. Repeat the same process to apply the gold Rub n Buff to the rest of your design. Now remove the tape, wipe off any remaining Rub n Buff from the plain acrylic, and let it dry. Here’s what my finished gold and black plaque looks like. Isn’t it just so pretty? I even engraved the same design on my Glowforge and colored it using the same method to see how it would compare to the Cricut engraved plaque. Since Rub n Buff is permanent on its own, you won’t need to seal your finished plaque with anything, and it’s ready to display! I really like the results of using Rub n Buff, but I also wanted to try some coloring methods with lots of color options. Enamel paints come in all kinds of colors and are really fun to use! I’m going to use the red, green, and black colors on my “Home Sweet Home” engraved acrylic plaque. You can follow the same process for a metal plaque. For this method, you’ll need clean nitrile gloves, some paint brushes, the bottle of paint thinner that comes with the set in my materials list, a dry cloth or towel (preferably one that you won’t mind getting messy), rubbing alcohol, butcher paper, and painter’s or masking tape (if you’re using more than one color). I found it helpful to have a separate paint brush for each of the colors I used. This way, I could finish painting first and worry about clean up later. You may also want to open a window or turn on a fan because the paints do have an odor. Start by shaking your first bottle of paint to make sure it’s well mixed and ready to use. Cover your work surface with butcher paper and put on your gloves before opening the bottle, as it can be messy. Cover the parts of the design you don't want to be the first color with tape, just like we did with the Rub n Buff. I’m going to start with the green, so I’ll cover all the parts I don’t want to be green first. Open your first bottle of paint and make sure it looks mixed up. If it looks somewhat separated, try mixing it with your brush first. Then, apply a small amount of paint to a small section of your design. You don’t have to worry about painting within the lines because we’ll wipe away any excess with our cloth. Before adding more paint, wipe the excess off the plain acrylic using your cloth. You can also spread some of the excess paint into nearby engraved areas using a buffing motion, similar to how we buffed the Rub n Buff into our design. If the paint starts to dry or is hard to remove, try dampening your cloth with rubbing alcohol to remove it completely. Note that water will not remove this type of paint. Be careful not to get too much alcohol into the engraved areas, as it can lighten the color of your paint while it’s still wet. This is another method that works best if you work on small sections at a time. You can also apply more than one coat of paint to increase the color’s saturation. Here’s what my plaque looks like after applying the green paint. Once you’re finished with your first color, remove the tape from your uncolored sections and clean off any paint that might have gotten trapped underneath. Set your used paint brush aside. Or, if you want to use the same brush for your next color, clean it in the paint thinner (the clear bottle from the set). You can put your brush directly into the bottle, or you can pour a small amount into a disposable cup and rinse your brush in that. Note that you can’t clean enamel paint off of your brushes using water. Now let’s apply the red paint! After making sure your plaque is dry -- I waited five to ten minutes after applying my first color -- apply tape on top of the colored areas so they don’t get any other colors mixed in. Then cover any blank engraved areas that won't be red with tape as well. Follow the same process as above to apply color to all the uncovered areas of your design, one small section at a time. Here’s what my plaque looks like after applying the red. Finally, we’ll apply the black using the same process. I applied black last because it’s the darkest color. You can apply your colors in any order you wish, but if you’re using the same brush for all colors, I recommend starting with the lightest color and ending with the darkest. Now remove all the tape, wipe off any remaining paint from the plain acrylic, and let it dry. Here’s what my finished plaque looks like after applying all the paint. Don’t you just love the vibrant colors? Enamel paints are permanent after they dry. I recommend letting your plaque dry overnight to make sure the paints are completely set. After that, it’s ready to display! Acrylic inks aren’t as permanent as the other two coloring methods, but they’re super easy to mix and blend to create really pretty “watercolor” effects or custom colors. I’m going to blend the red, yellow, and blue inks on my “Love Grows Here” engraved aluminum plaque to make a colorful rainbow over the entire design. You can follow the same process for an acrylic plaque. For this method, you’ll need some paint brushes, some paper towels, a dry cloth or towel (preferably one that you won’t mind getting messy), a cup of water, butcher paper, and some clean nitrile gloves (if you don’t want to get ink on your hands). I found it helpful to have a separate paint brush for each of the colors I used. This way, I could finish painting first and worry about clean up later. Start by shaking your first bottle of ink to make sure it’s well mixed and ready to use. Cover your work surface with butcher paper and put on your gloves before opening the bottle. Acrylic ink is water-based and washes off easily, so you don’t need to wear gloves. It just makes things a little less messy! Then, open your first bottle and use the dropper to drop ink over the areas of the design where you want each specific color to be. I started with the yellow because it’s the lightest. You only need to apply a few drops, as the ink is very easy to spread into the engraved areas with a brush. You can always add more ink later if you want the color to be darker or more vibrant. If you're blending colors like I am, you'll want to add a few drops of each of the colors you're blending before you grab your brush to spread the ink. To make my rainbow, I started by adding a few drops of yellow in the center of the design and a few drops of red on the left. When spreading the ink with your brush, start with the lightest color first. I started with the yellow. Cover all the engraved areas that you want to be your lightest color before moving on. This will help keep the darker colors from accidentally bleeding into the lighter ones. Use your brush to spread the ink so it covers every nook and cranny of the engraved areas. Don't worry about staying inside the lines. You can easily wipe off the excess later. To make orange, I carefully spread some of the yellow ink into the areas right next to the drops of red. The ink colors will naturally want to mix together when they touch. Once you've created a shade of orange you're happy with, spread it into the nearby areas of your engraving before moving on to the red. If you want the orange to be lighter, add another drop or two of yellow. If you want it to be darker, add a drop or two of red. After you've brushed the ink onto all the areas you want to be that color, use a paper towel to gently blot up any pools of excess ink. Then, move on to your next color before wiping the rest of the excess off of the plain metal or acrylic. After I finished the left half of my rainbow, I switched to a different paint brush and put my previous brush in a cup of water while I finished working. To finish my rainbow, I added several drops of blue ink on the right side of my engraved design. I also added a few more drops of yellow to help make the green color. Then, you can spread and blend the inks like you did on the left half of your design. Feel free to add a few more drops of one color or another to get just the right shades. Once you're happy with your colors, use a paper towel to blot up any excess pools of ink and let the plaque sit for five to ten minutes. This lets the inks dry a little, which makes the colors adhere to the engraved areas a bit better. Now you can wipe away the excess ink with a clean cloth dampened with water. Gently wipe around the edges of your design to remove the ink on the plain metal or acrylic. You won't need to scrub or buff like we did with our previous techniques. The more gently you wipe, the better. TIP: If you accidentally use too much pressure and remove some of the ink from an engraved area, you can just add more ink, let it sit, and then wipe away the excess again. Once you've removed all the excess ink and are happy with your colored design, let it sit for 24 hours to allow the inks to fully dry. Here’s my finished rainbow plaque. It looks just like a watercolor painting, doesn't it? I just love all the color possibilities there are with these inks! The fun thing about this technique is that every plaque will look a little bit different, making each one its own unique work of art! I even engraved the same design on my Glowforge and colored it using the same method to see what it would look like. I think it turned out great, don't you? You’re done! Here are what my finished engraved and colored plaques look like. Aren’t they beautiful? Now you can display your plaque on a table, shelf, or counter (perhaps right next to your coffee maker if you made the “Love and Coffee” design) using stands like the wooden ones that come with the acrylic plaques in my materials list. You can also use some adhesive or mounting strips to hang your plaque on a wall or door. Some of the other coloring methods I tested were dry erase markers, metallic oil-based paint pens, and India ink. The dry erase markers and India ink were very easy to wipe away and not as permanent as I would have liked. The paint pens were more permanent but harder to use because the excess was very difficult to wipe away. I picked my three favorites because they were easy to use, lasted the longest, and came in a wide range of colors. Feel free to let me know if you experiment with other coloring methods! During my tests, I found that plain anodized aluminum plaques worked better with my coloring methods than ones with shiny or painted coatings. You can, of course, experiment with different types of metal to see what works for you! If you want your acrylic inks to last longer on your finished plaque, you can seal the plaque with a clear sealant, such as the lacquer spray in my materials list. This is a good idea if you're going to display your plaque in an outdoor area or a place with high humidity. Before sealing your plaque, make sure your inks are completely dry and wipe your plaque with a clean, lint-free cloth or towel to remove any dust or bits that could get trapped under the spray sealant. You can also wear some clean gloves when handling your finished plaque to keep from getting fingerprints on it. Make sure to follow the directions on your spray bottle and spray your plaque outside or in a well-ventilated area, such as a garage. Be sure to shake the bottle really well before using it and apply several coats, one at a time, to get the best results. Also make sure to follow the temperature guidelines when using your lacquer spray. Finished Size: 5" x 7" Fonts Used: Transcity (Home Sweet Home design) Cream Candy (Home Sweet Home design) Beachwood Sans (Love and Coffee design) Biosha Script (Love and Coffee design) Oh juliya (Love Grows Here design) DTC Barn Acre (Love Grows Here design)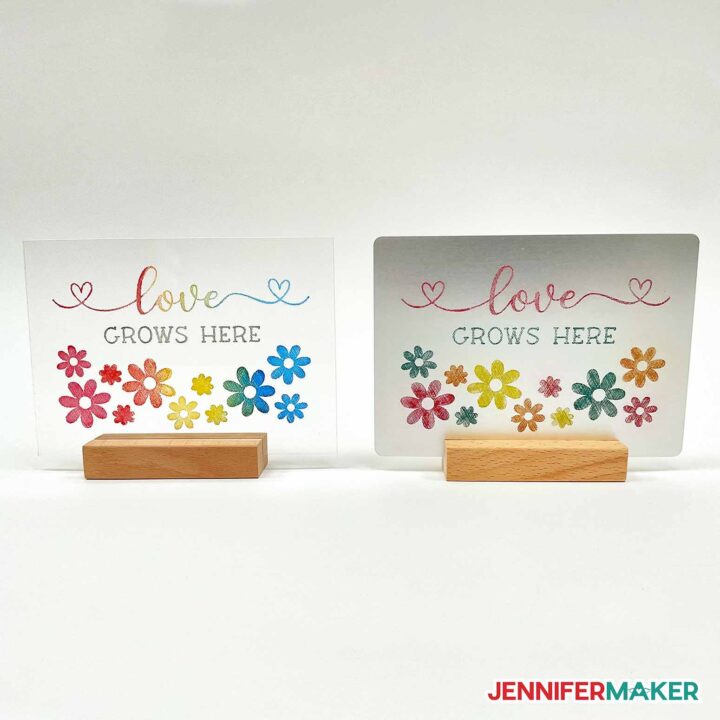
Color Engraving
Materials
Tools
Instructions
STEP 1: GET MY FREE COLOR ENGRAVING DESIGNS
STEP 2: PREPARE AND ENGRAVE YOUR DESIGN
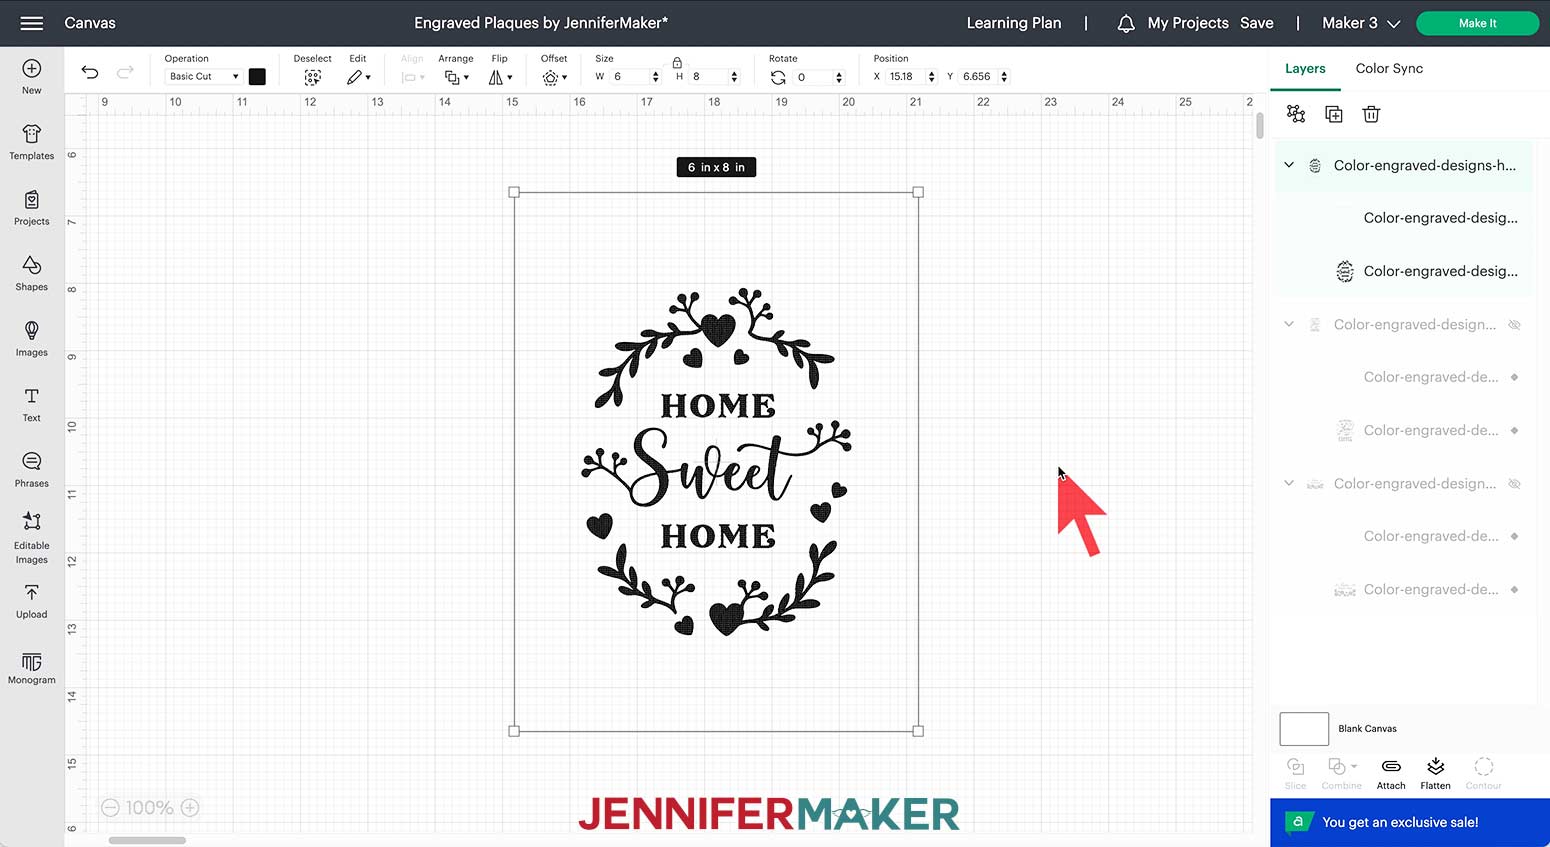
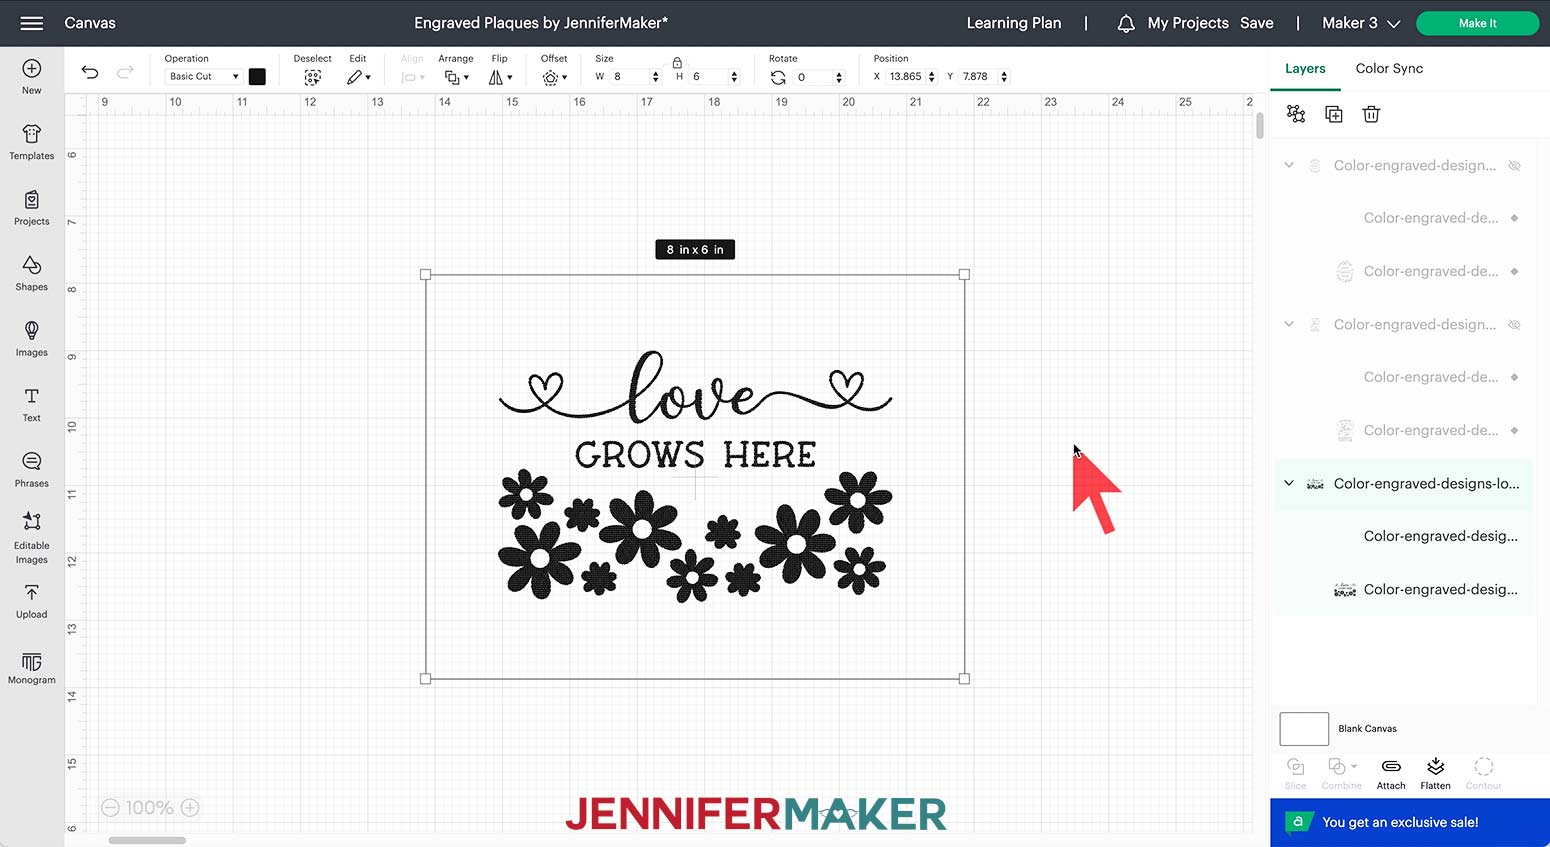
When correctly centered, the vertical designs ("Home Sweet Home" and "Love and Coffee") will have three grid squares on the left and right of the rectangle, and two grid squares above and below it.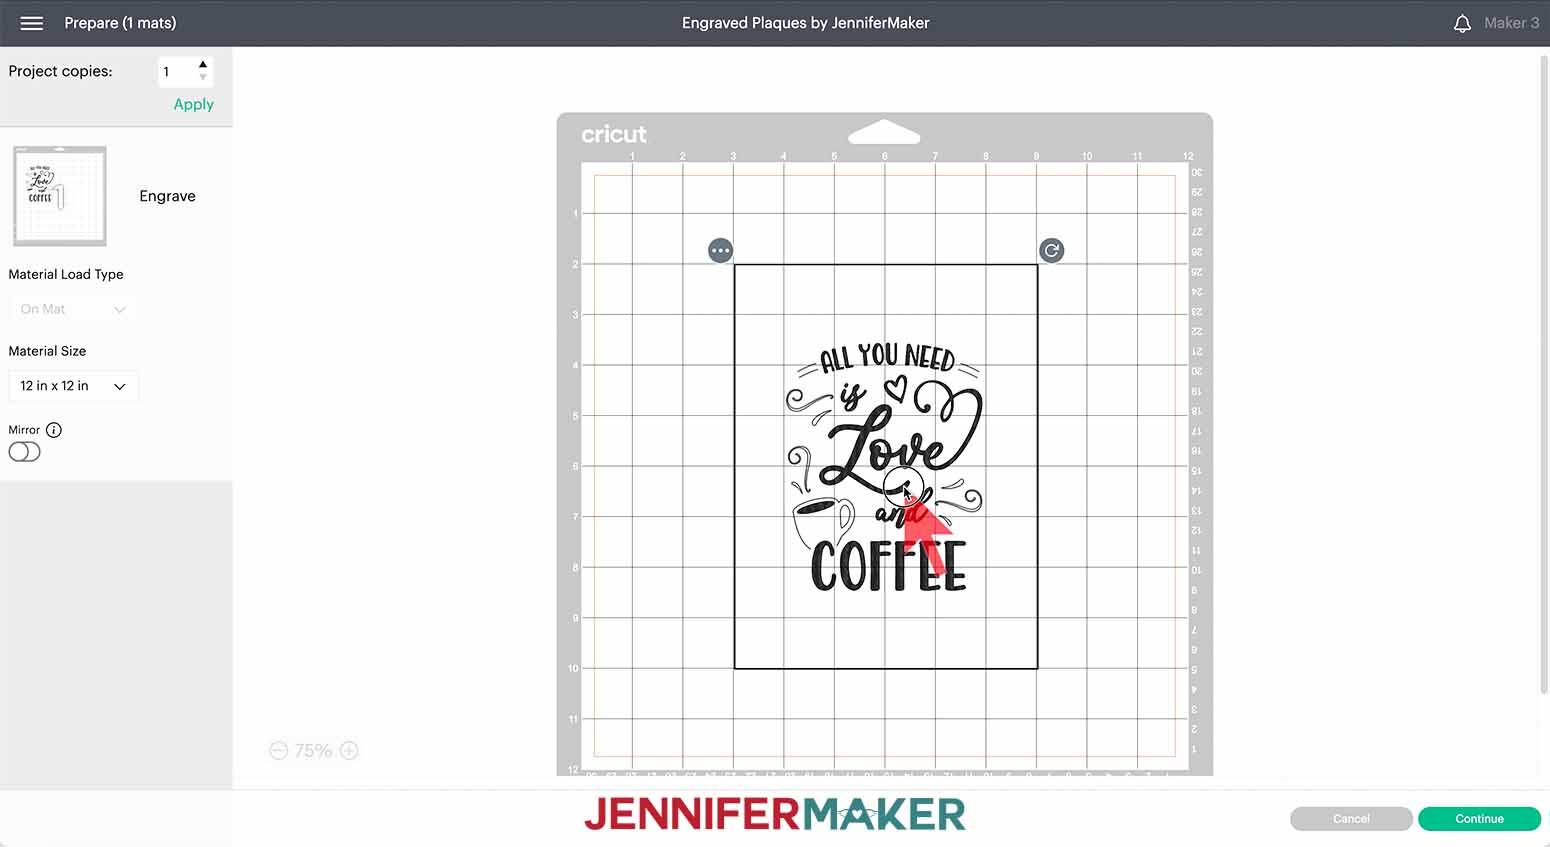

STEP 3: COLOR YOUR ENGRAVED DESIGN
Method 1: Rub n Buff Wax Metallic Finish

Method 2: Enamel Paints
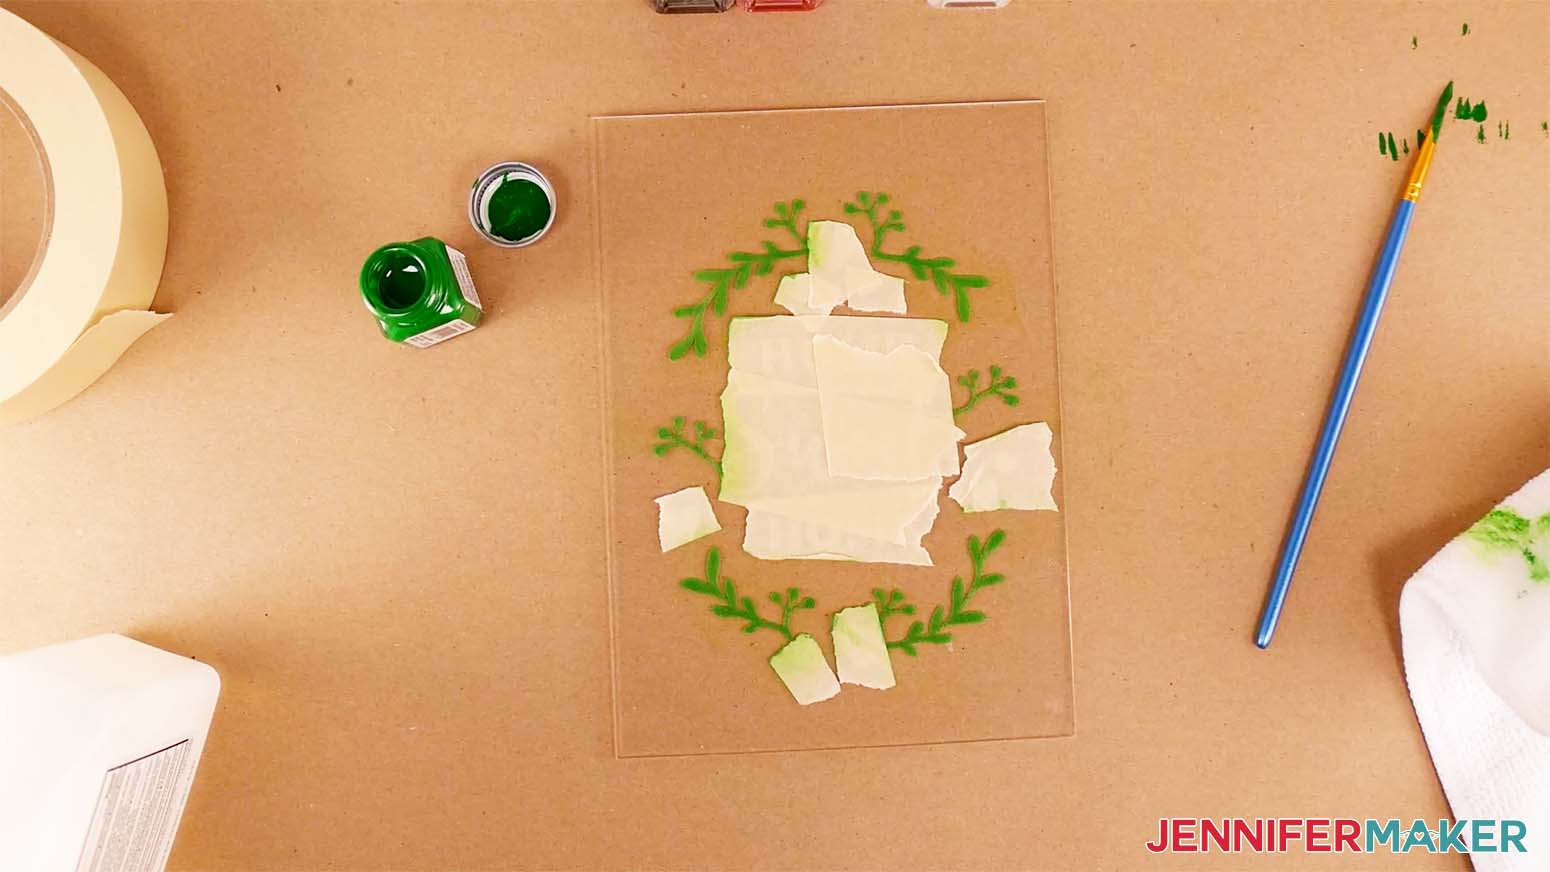
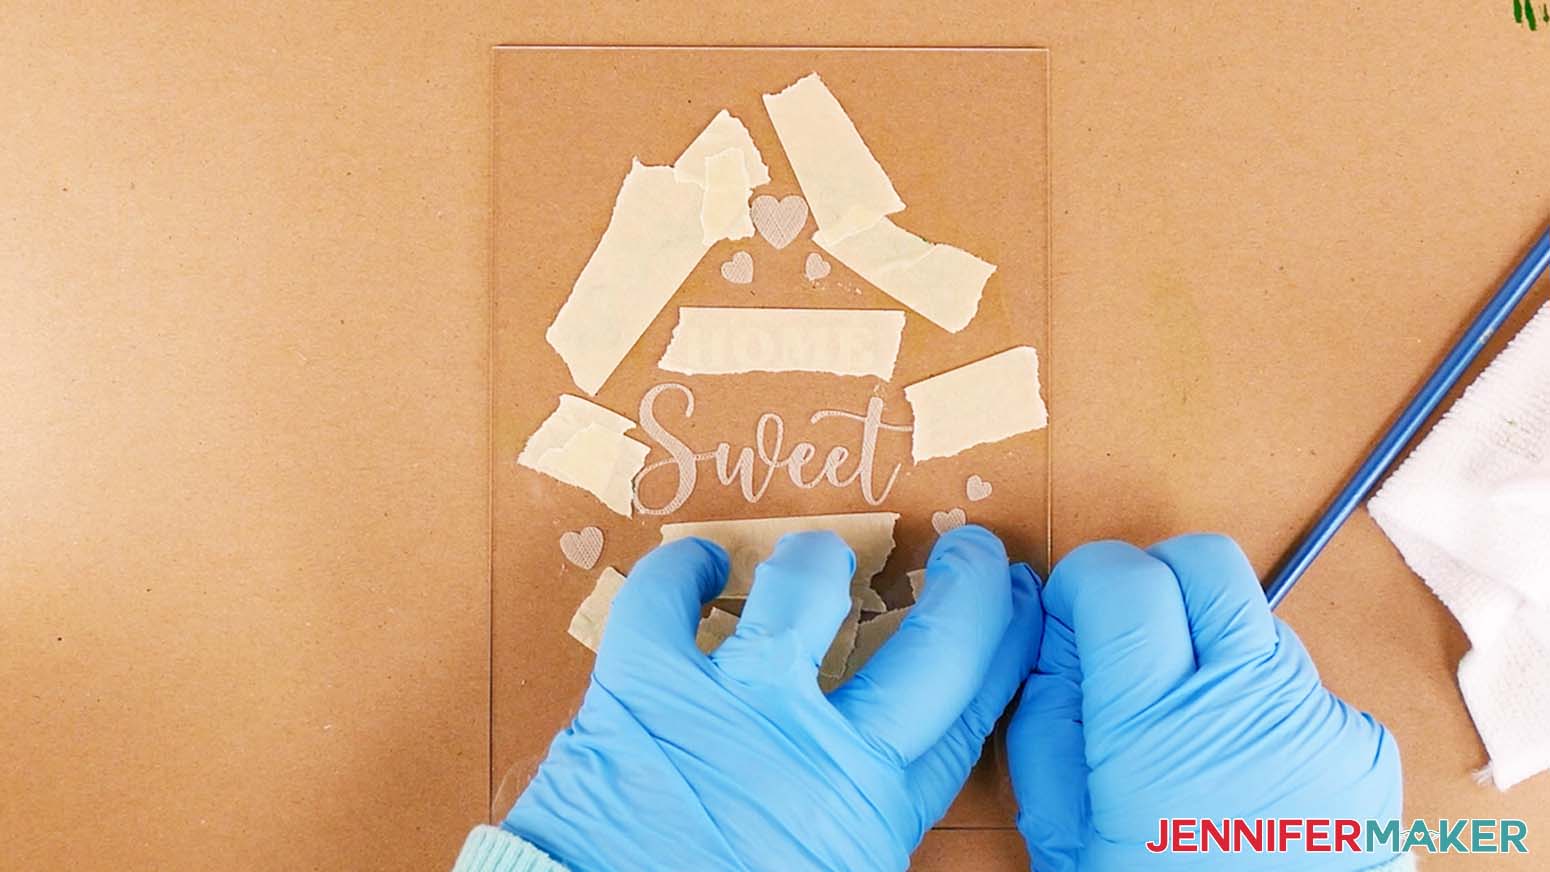
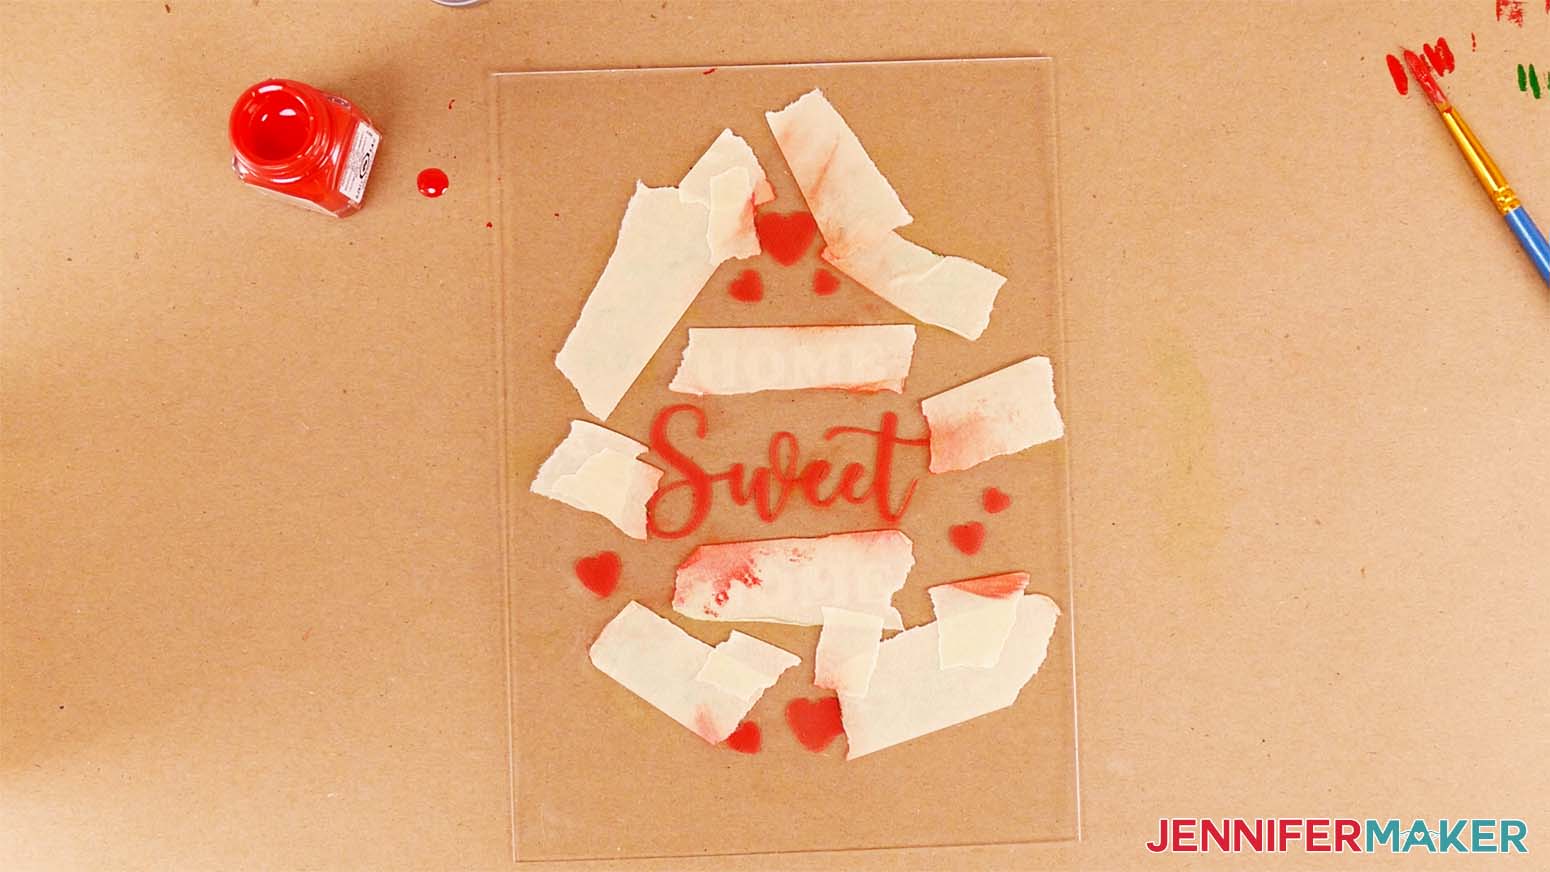
Method 3: Acrylic Inks
STEP 4: SHOW IT OFF!
Notes
Day 12: How to Make Plushies!
Amazon Shopping List
Techniques: Designing and sewing a cute Plushie
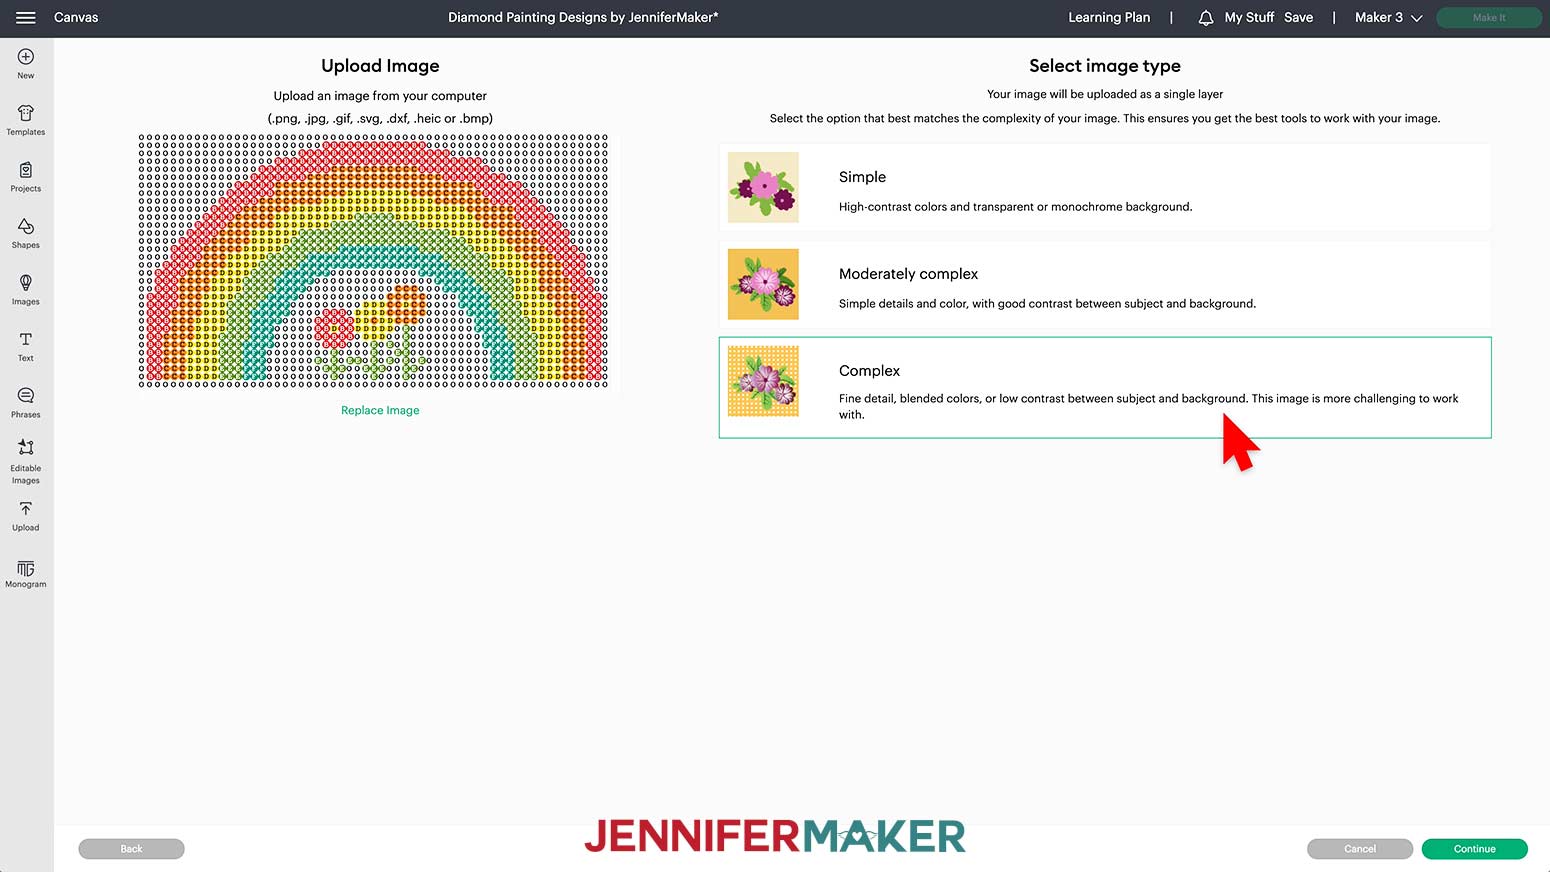
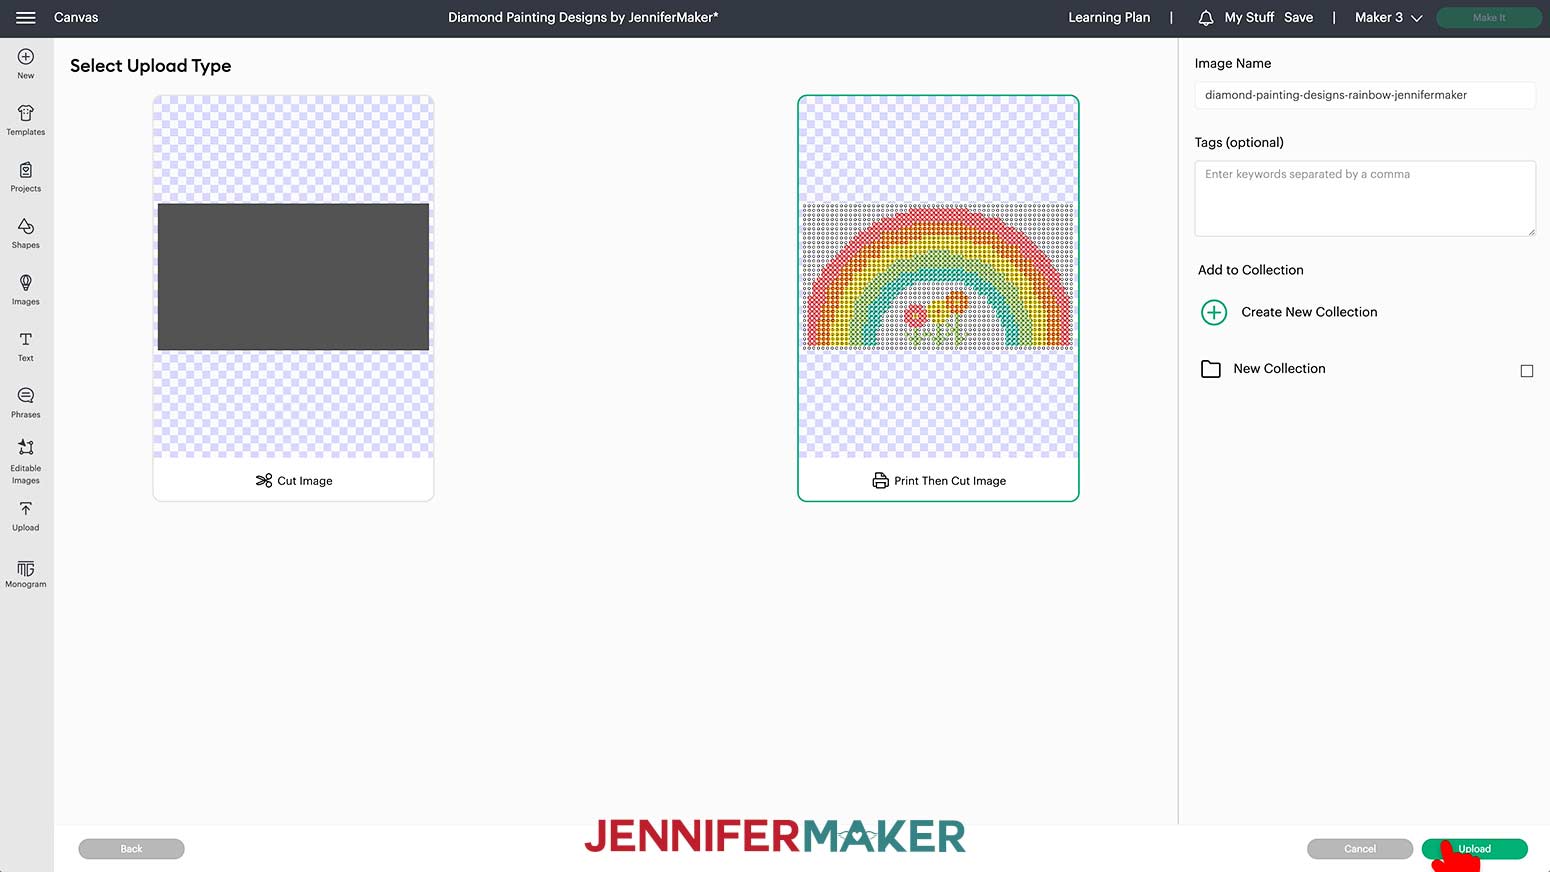
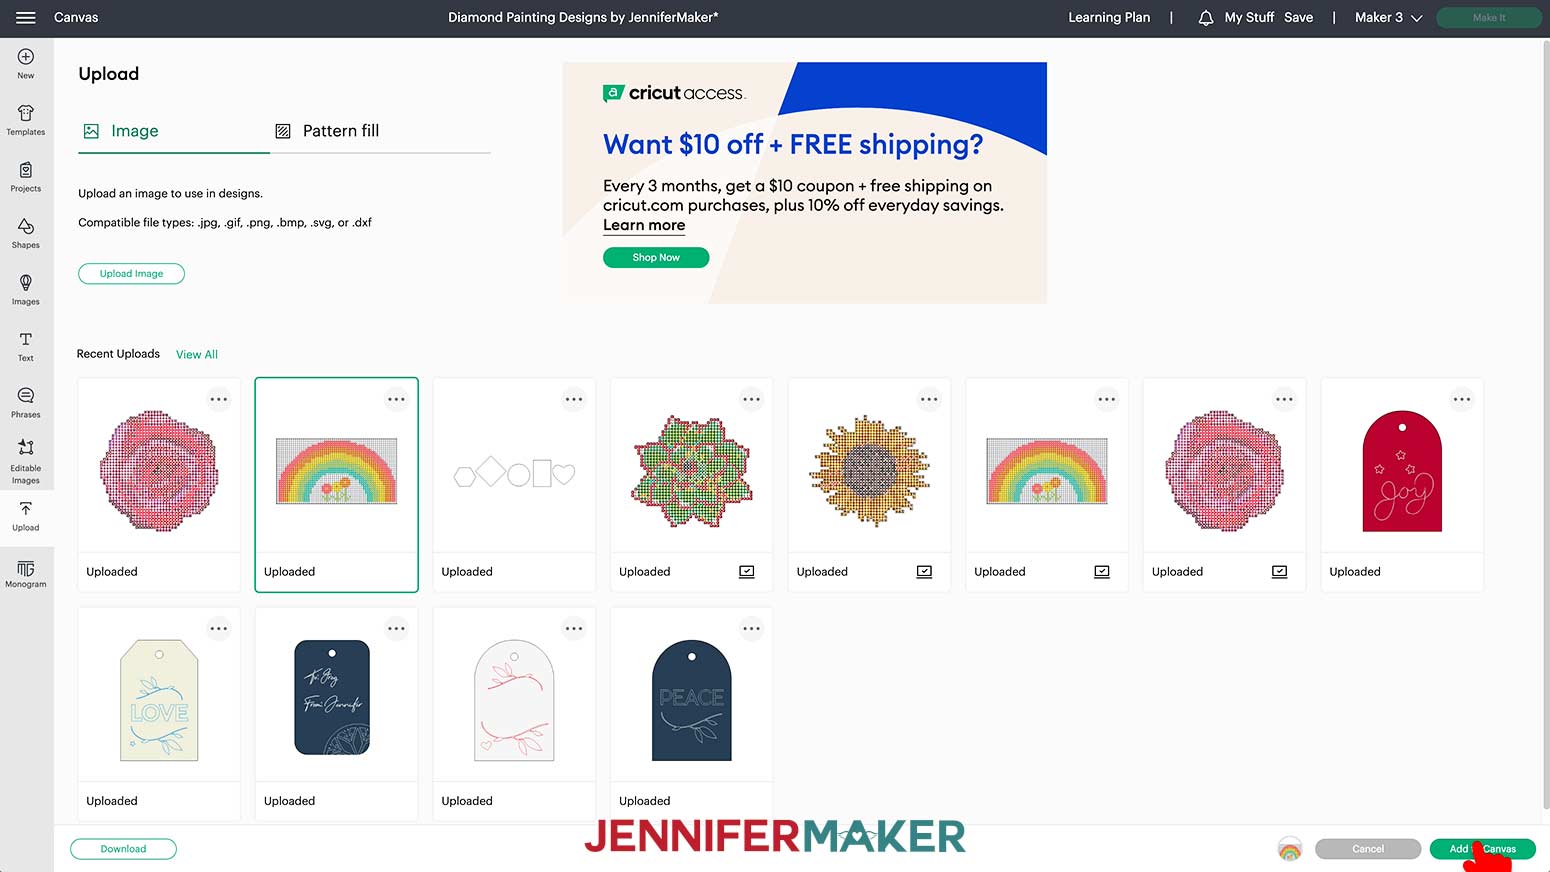
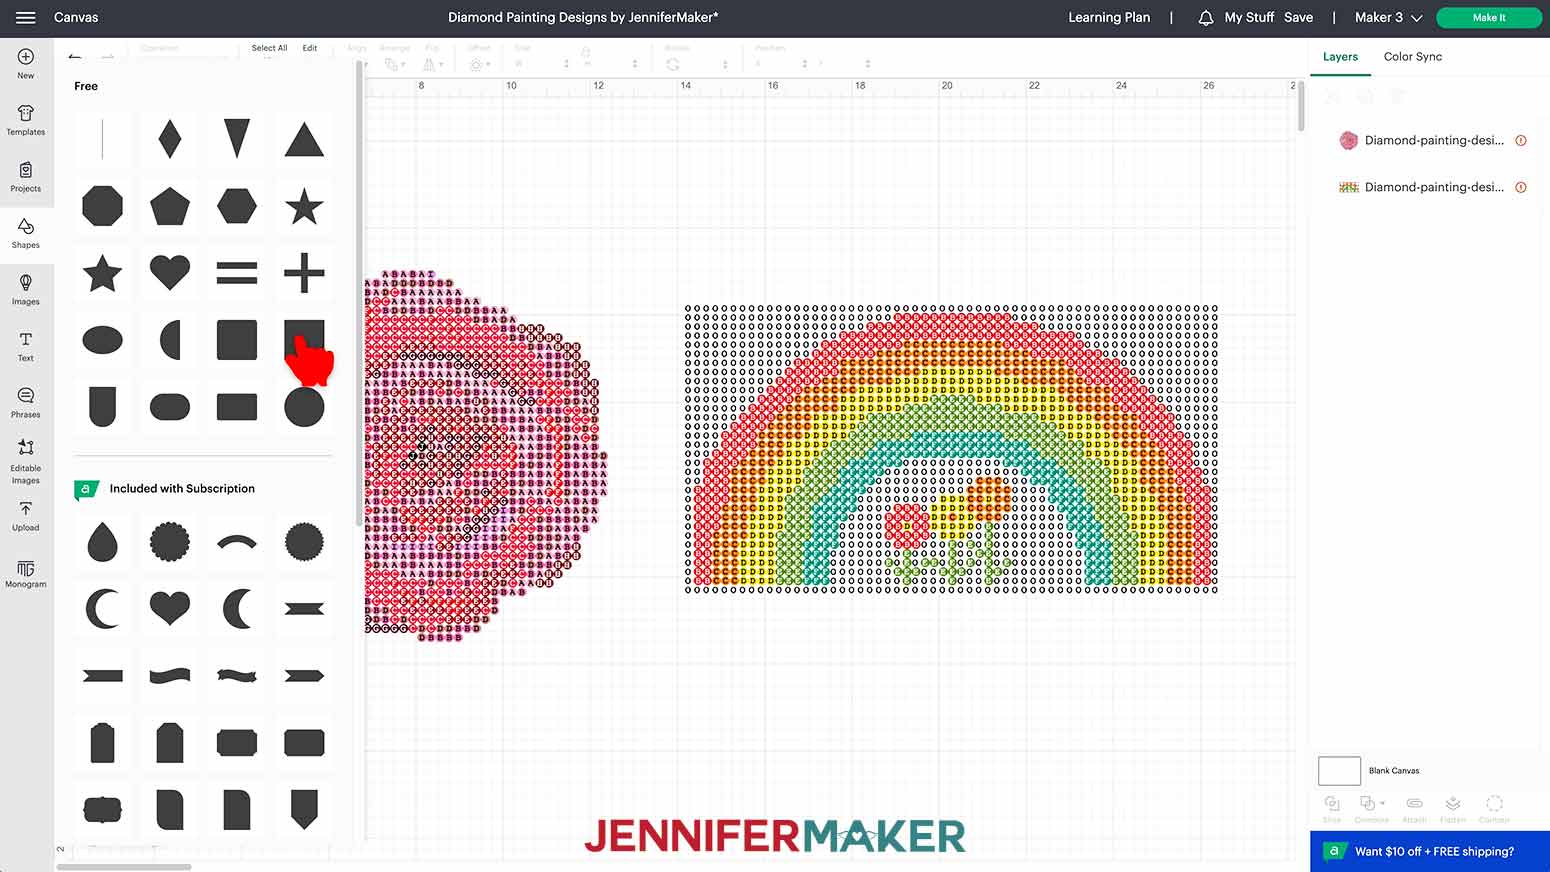
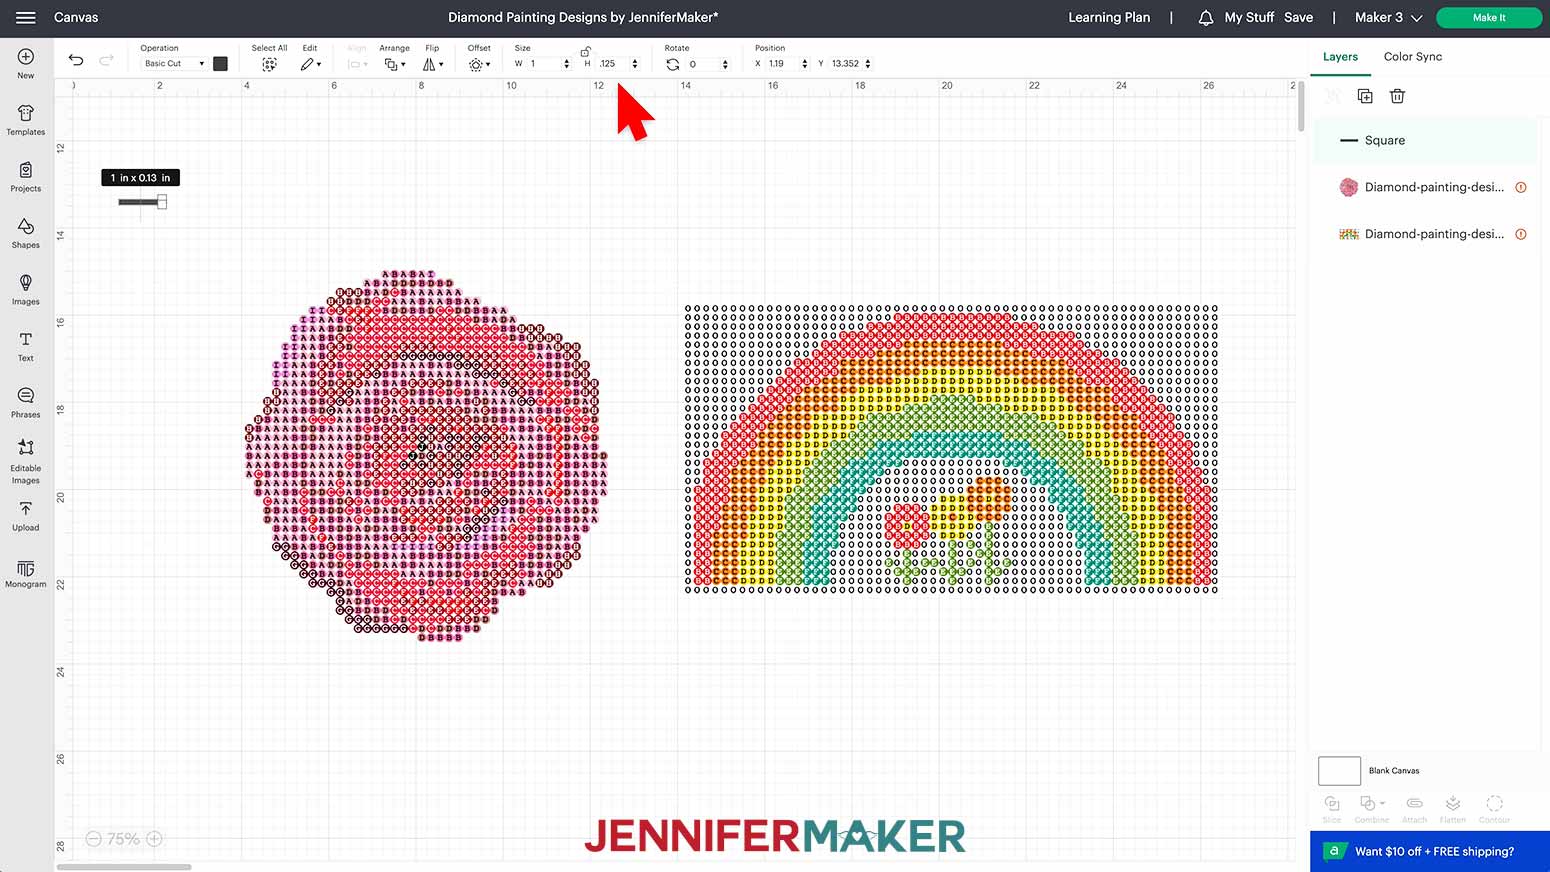
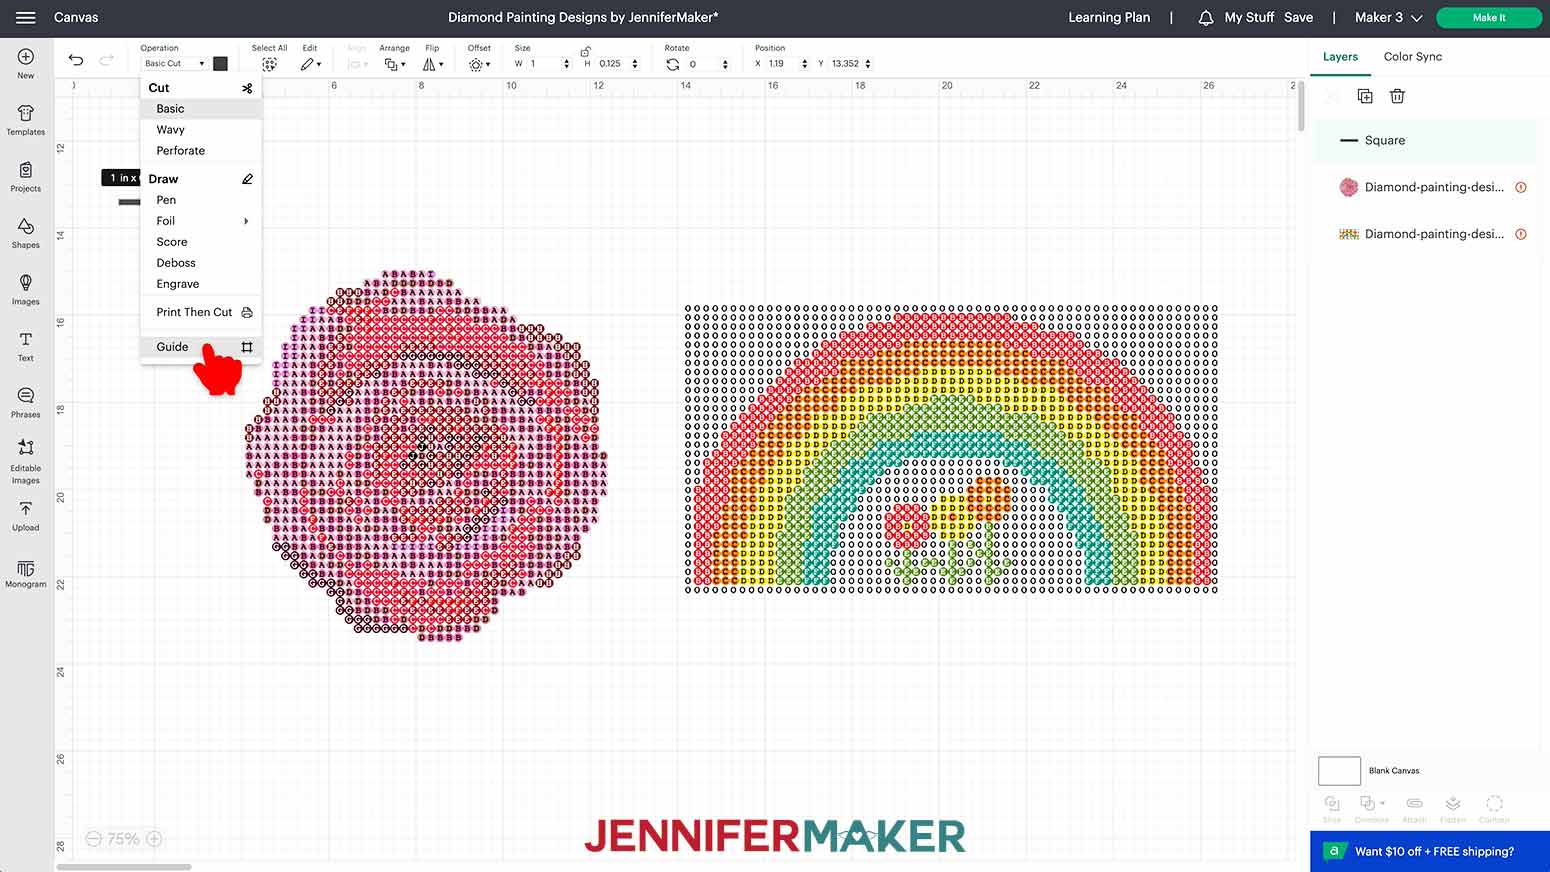
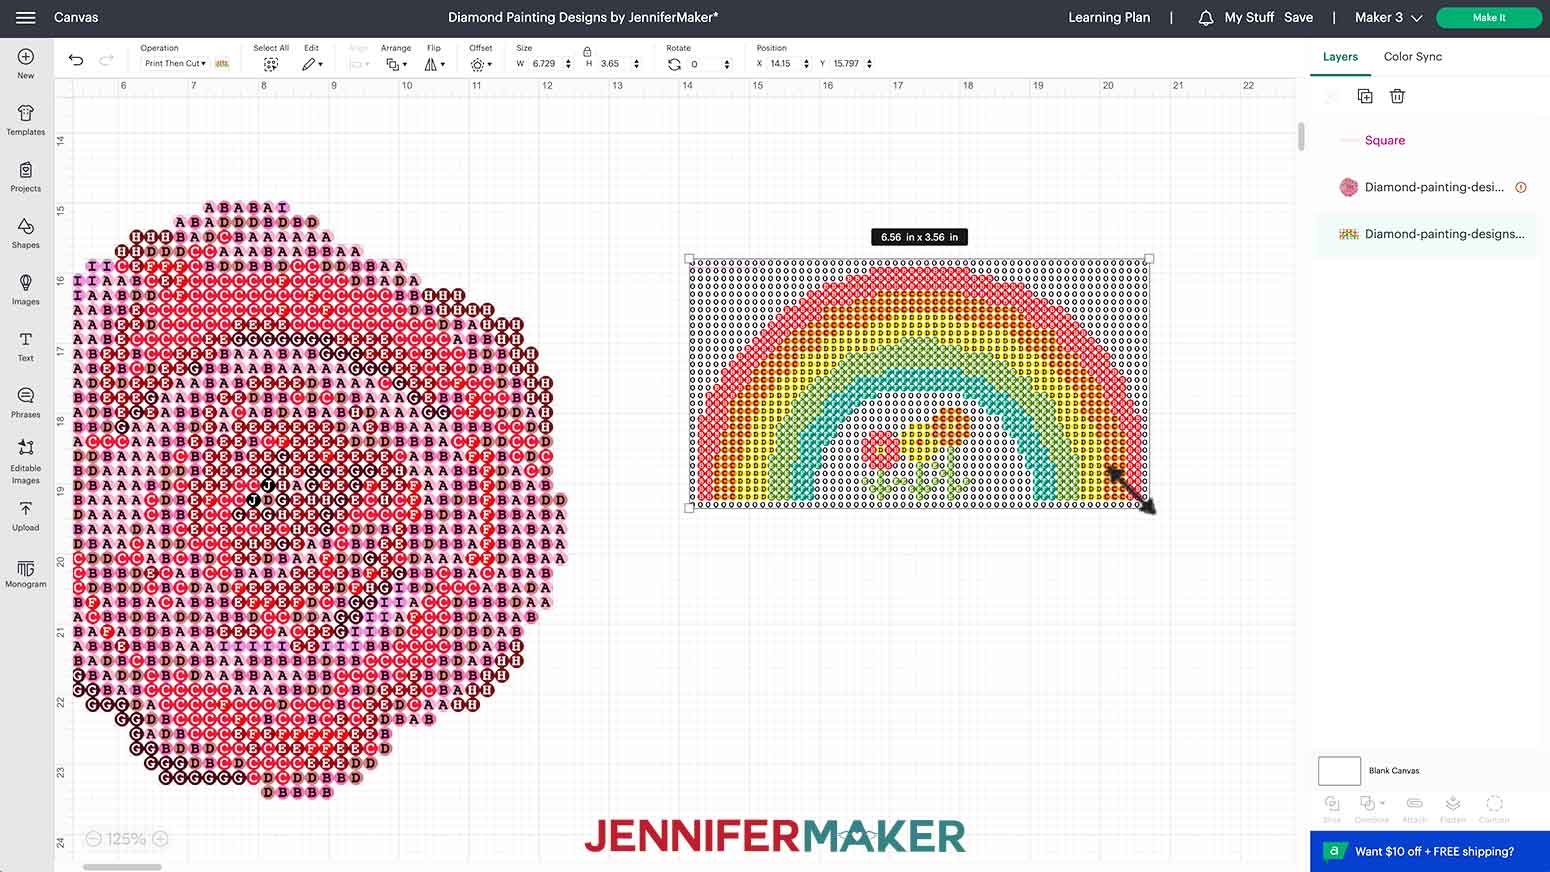
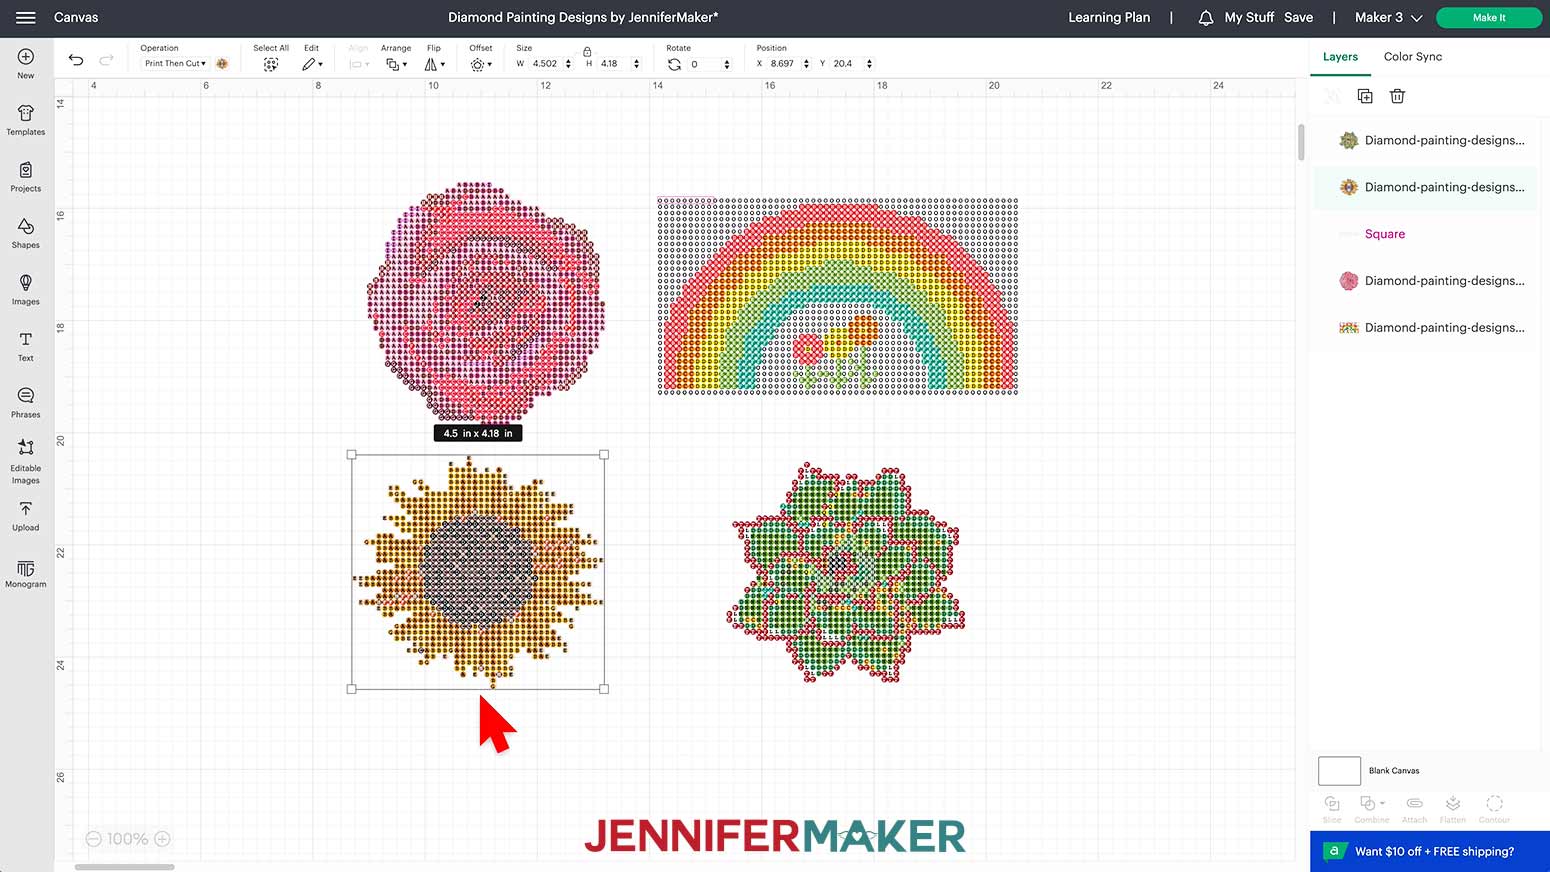
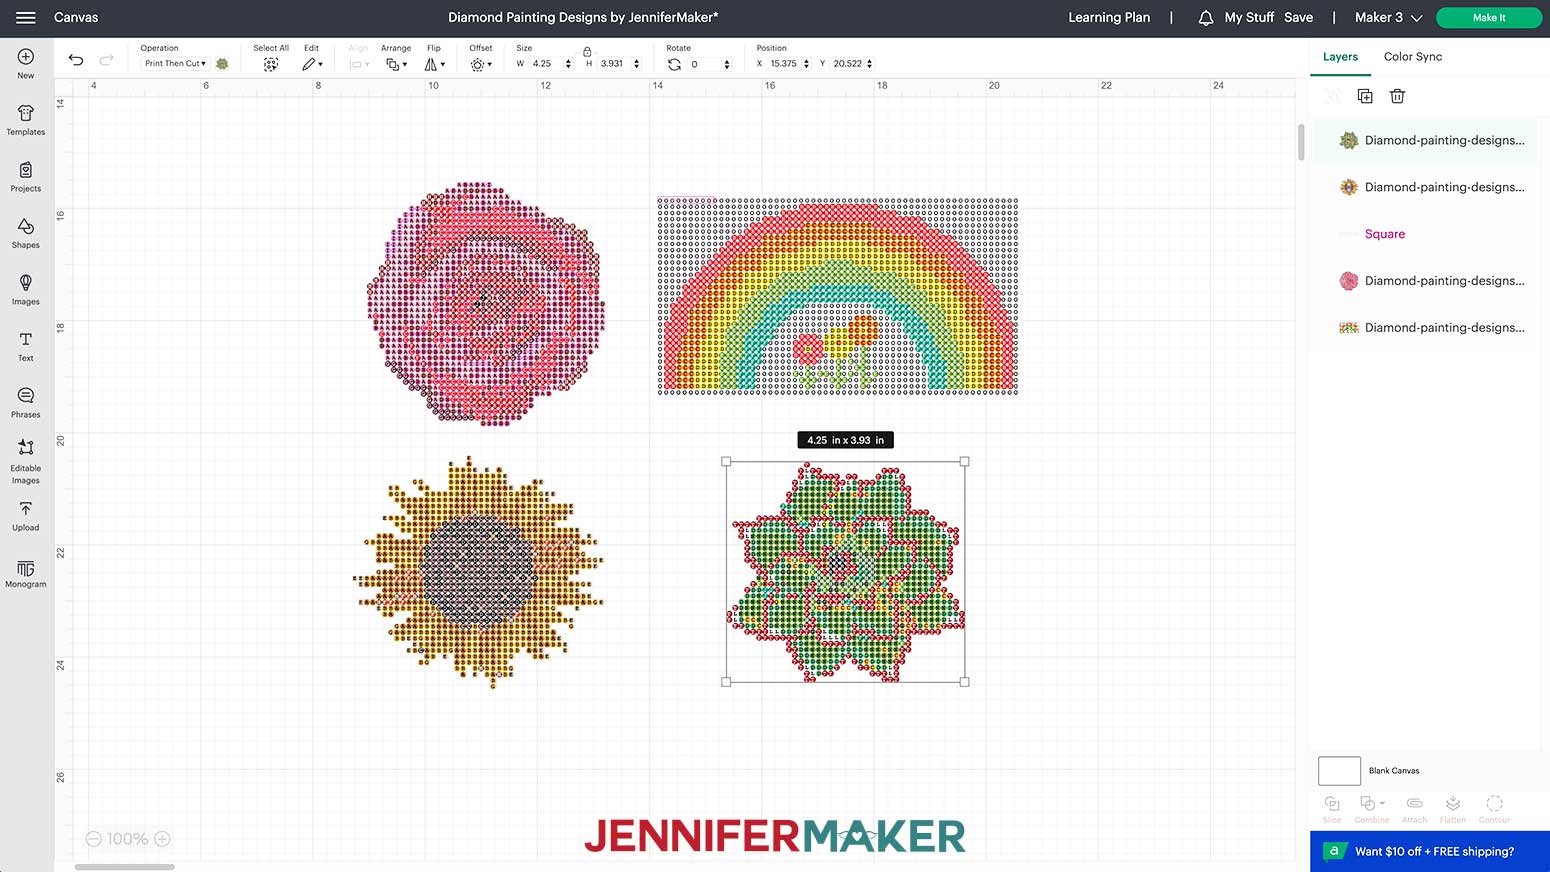
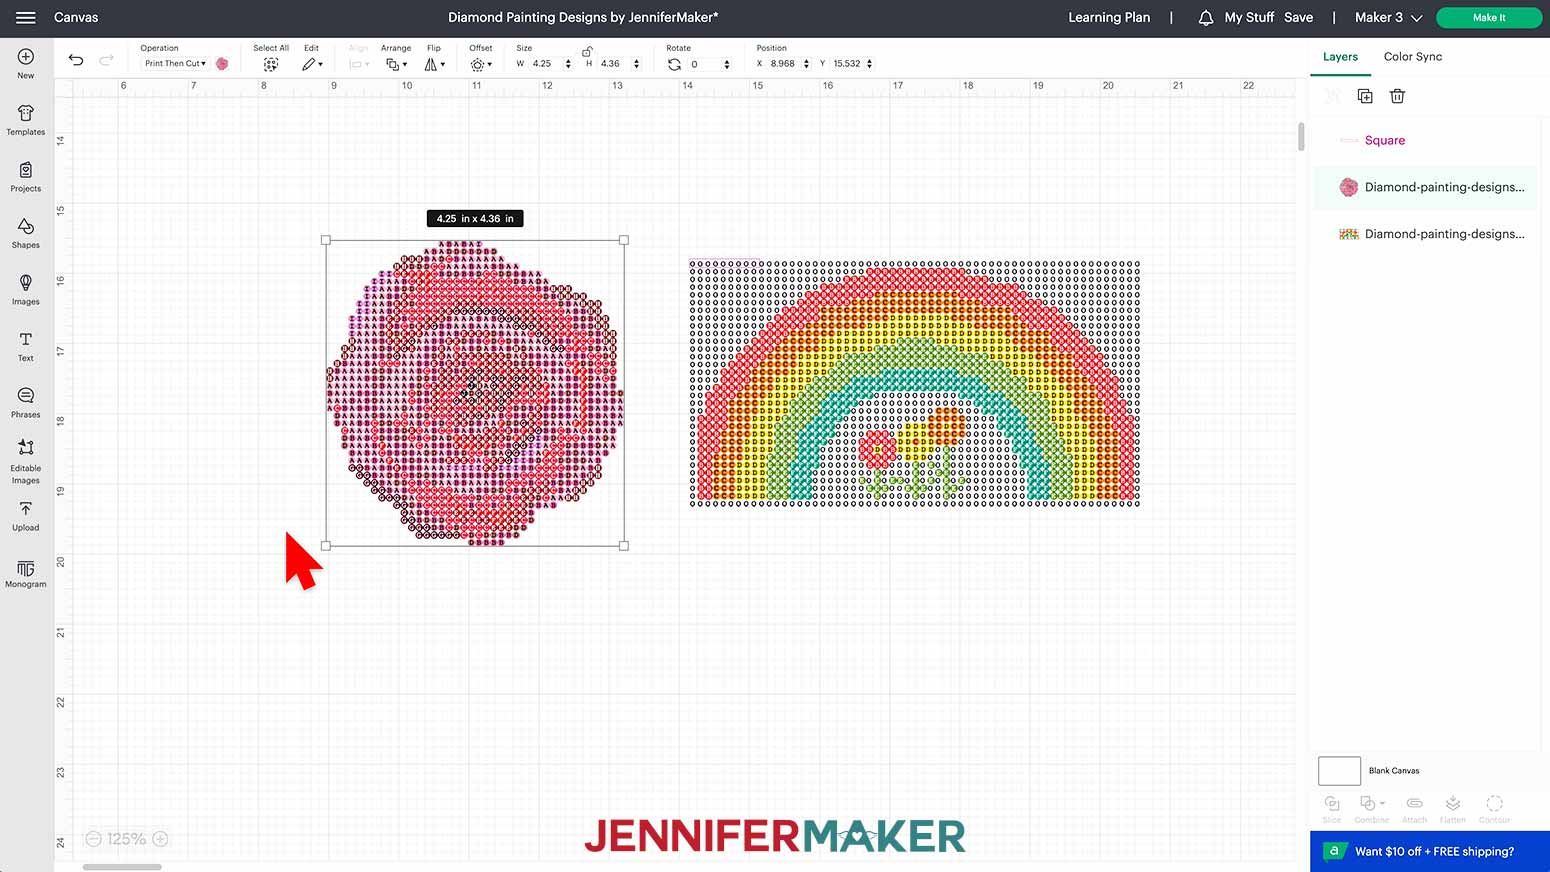
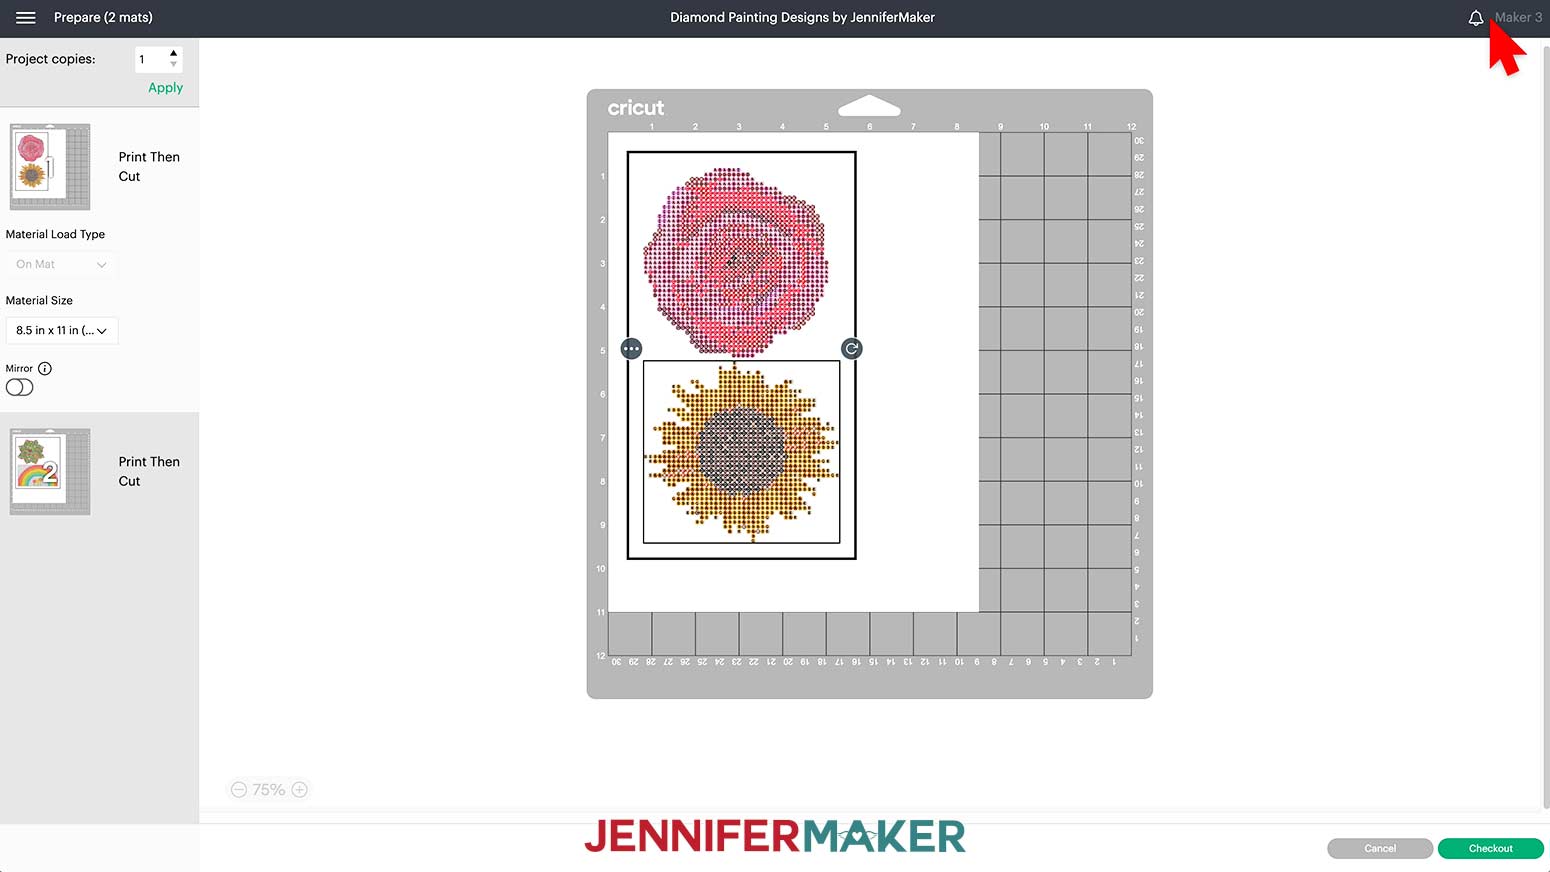
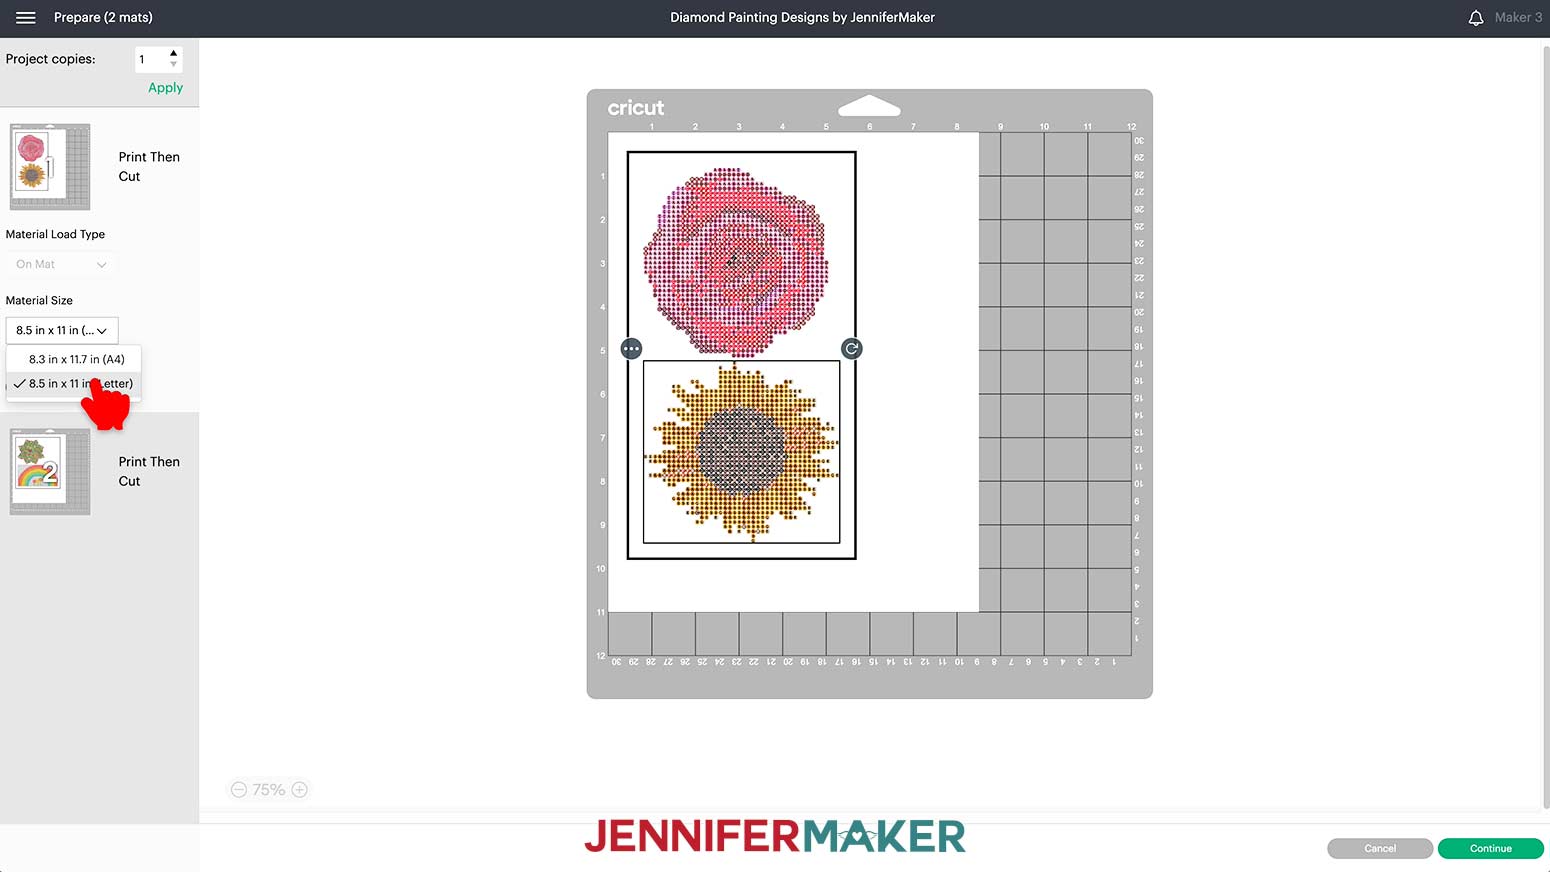
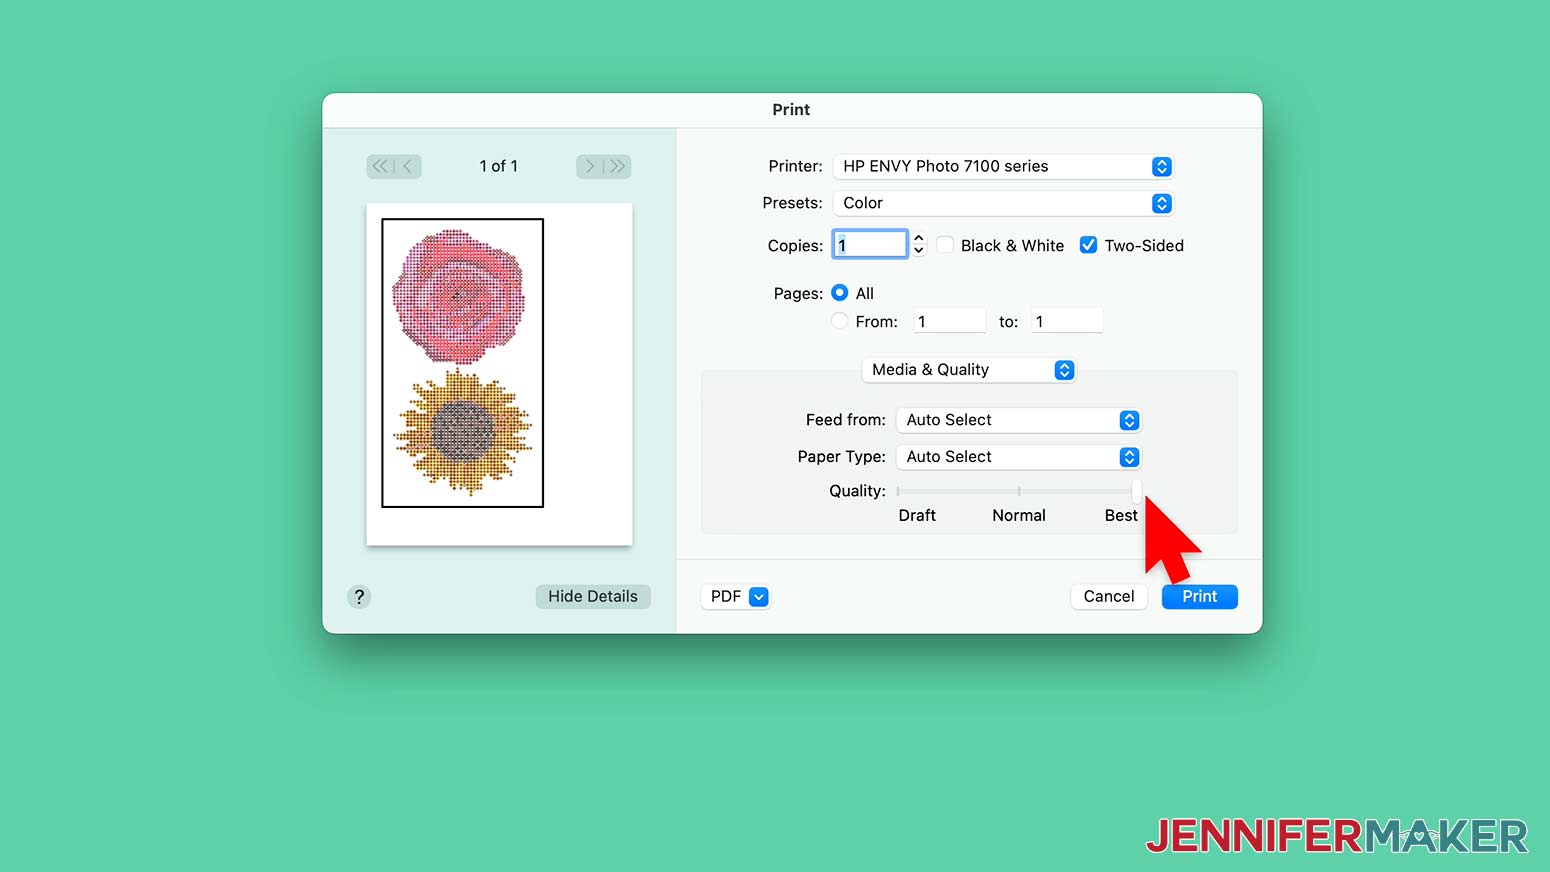
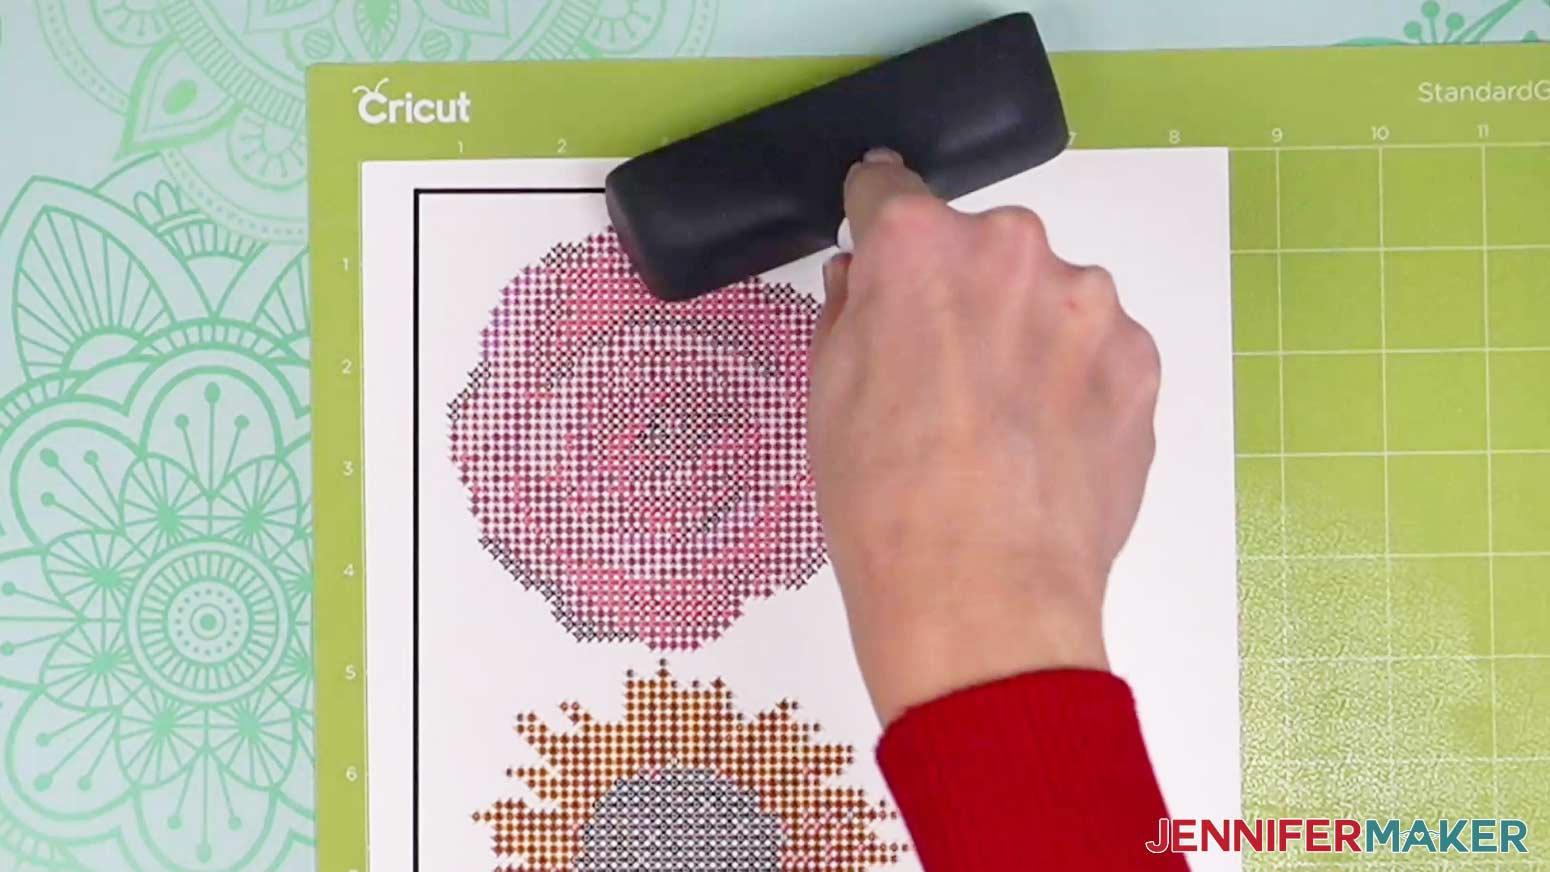
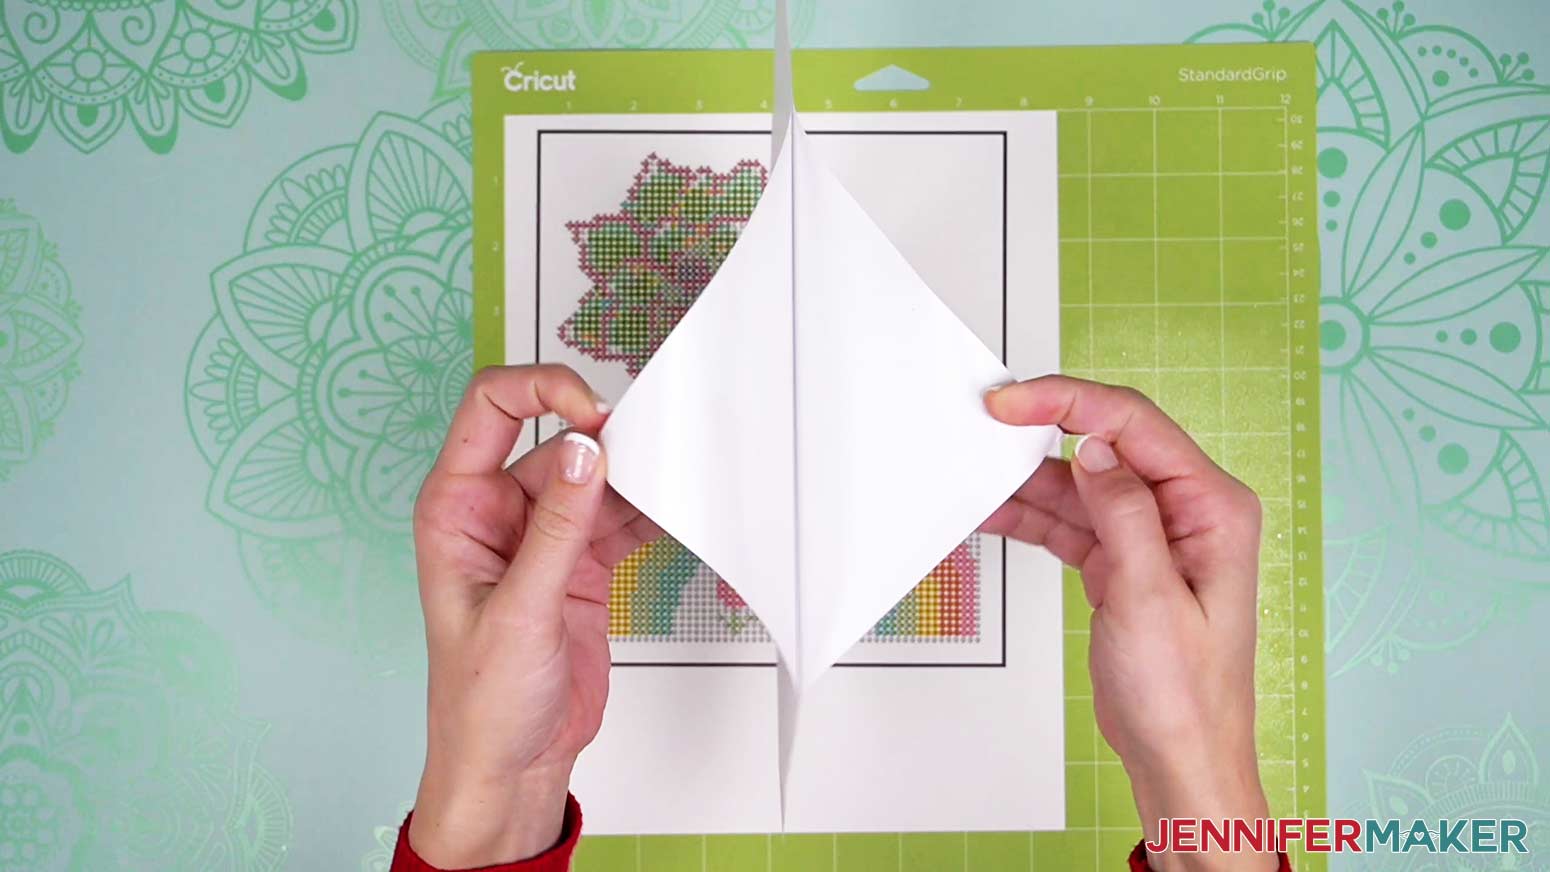
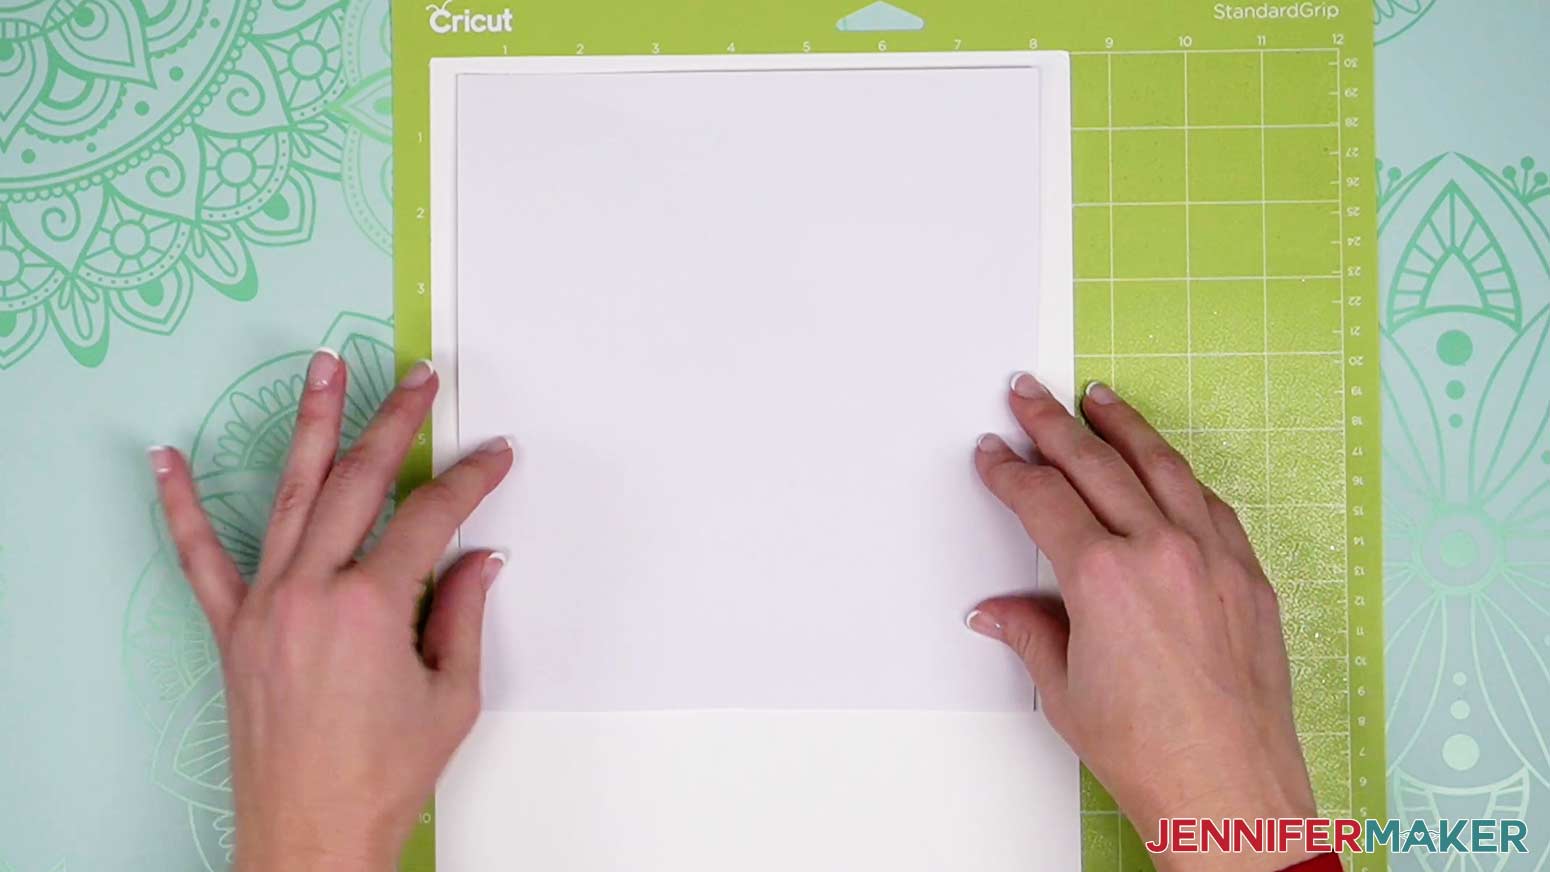
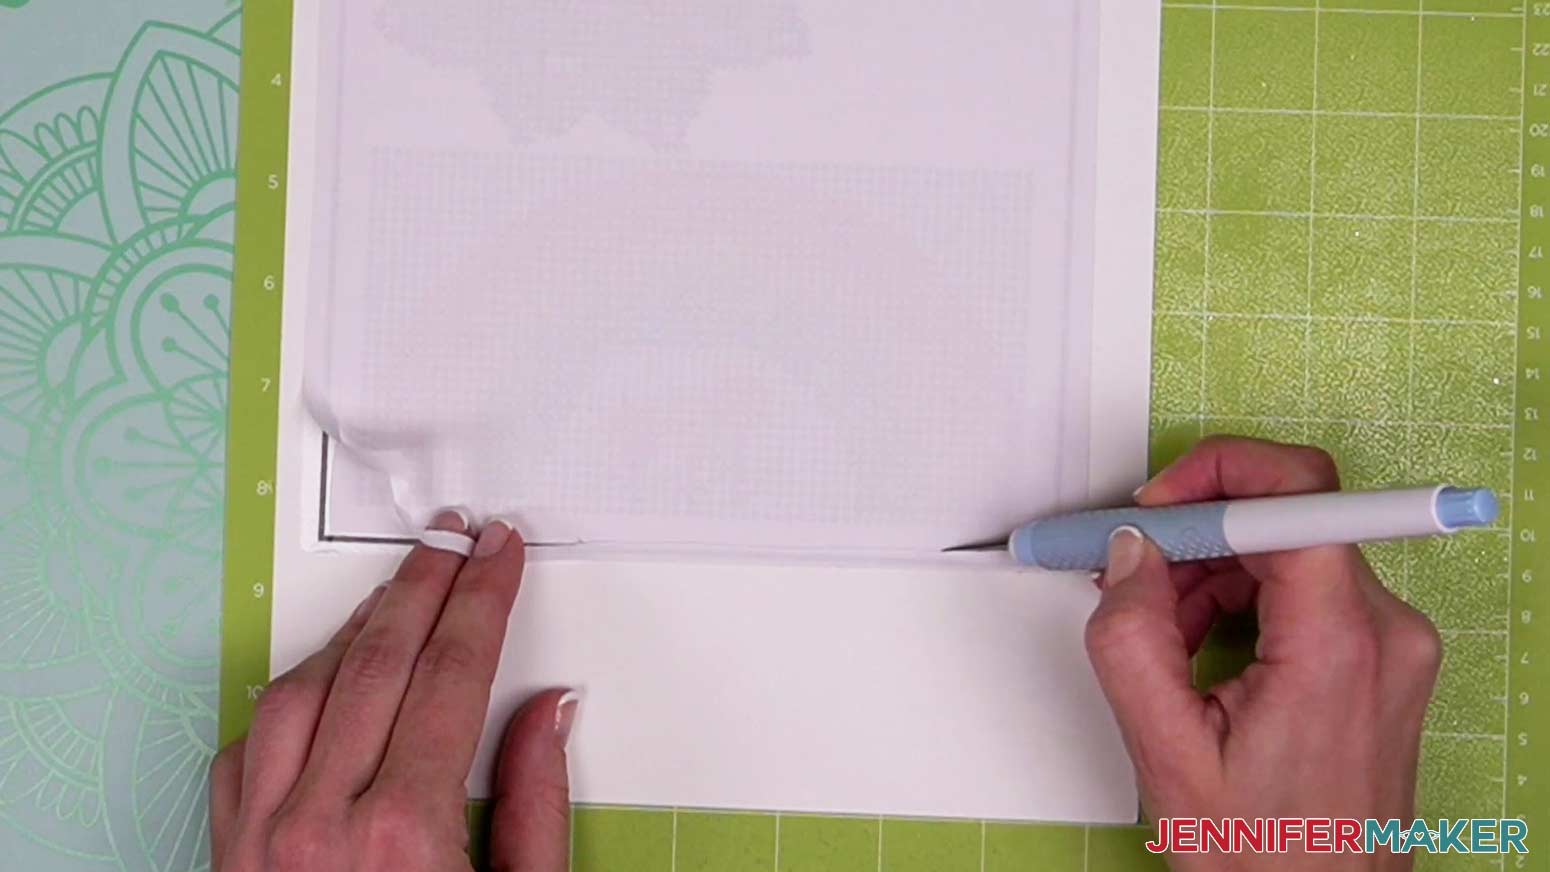
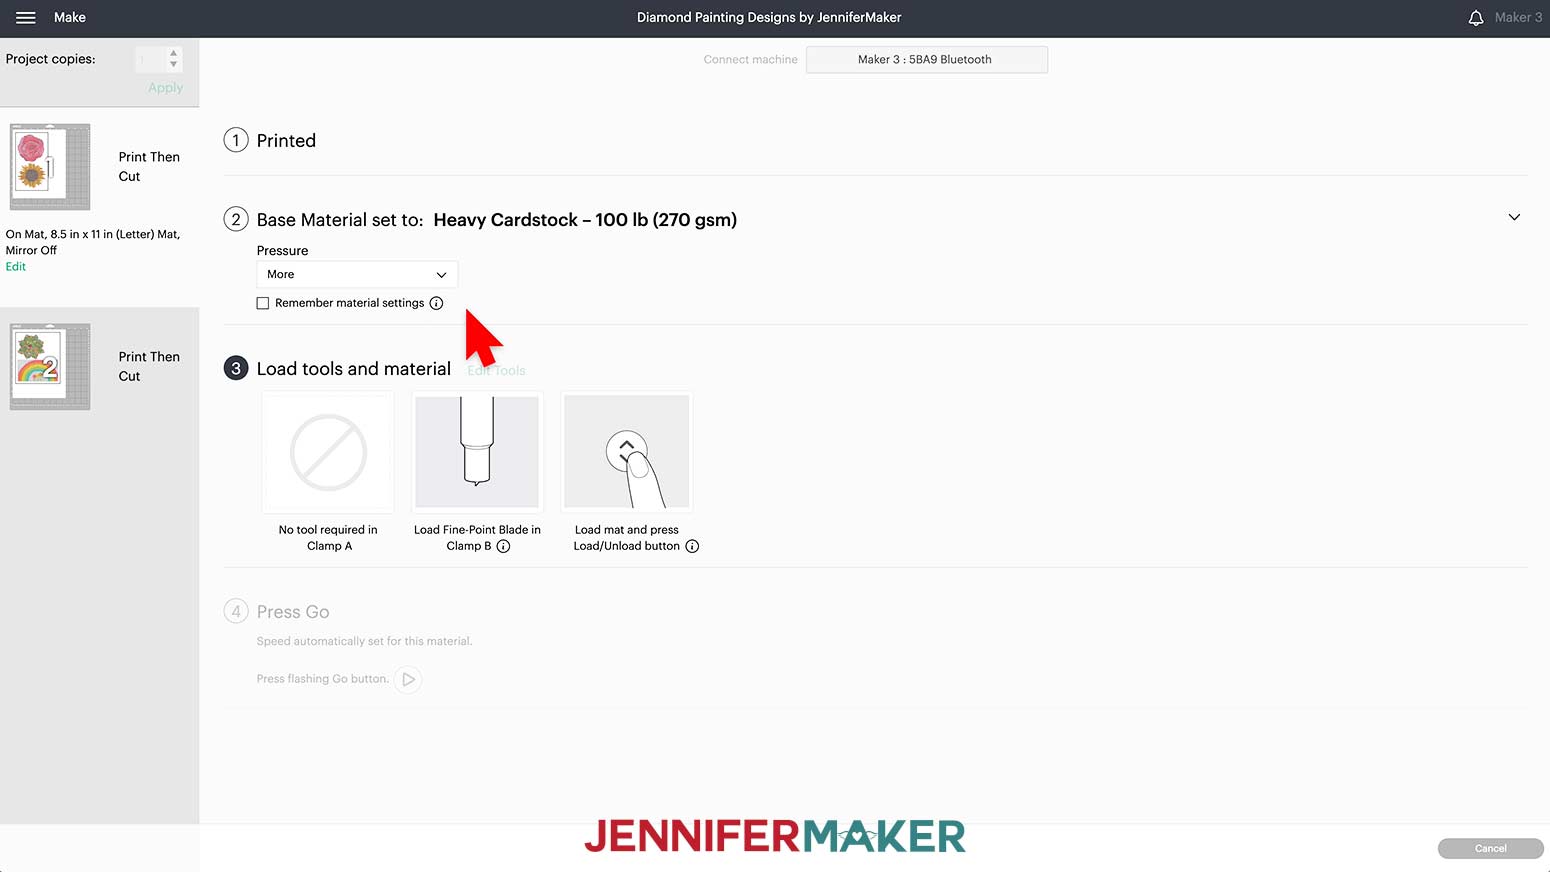
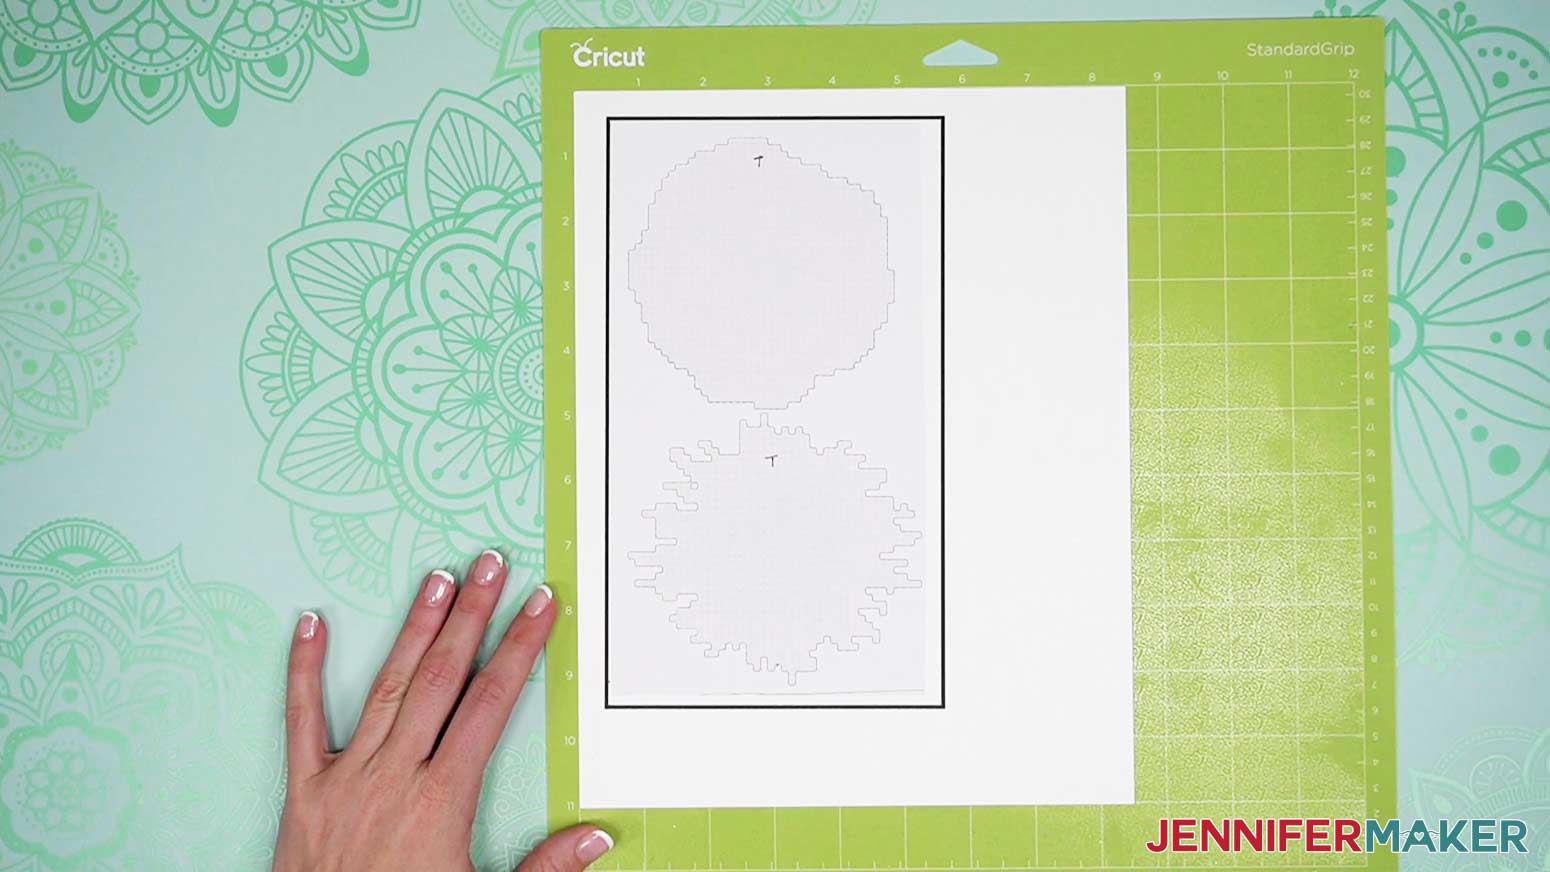
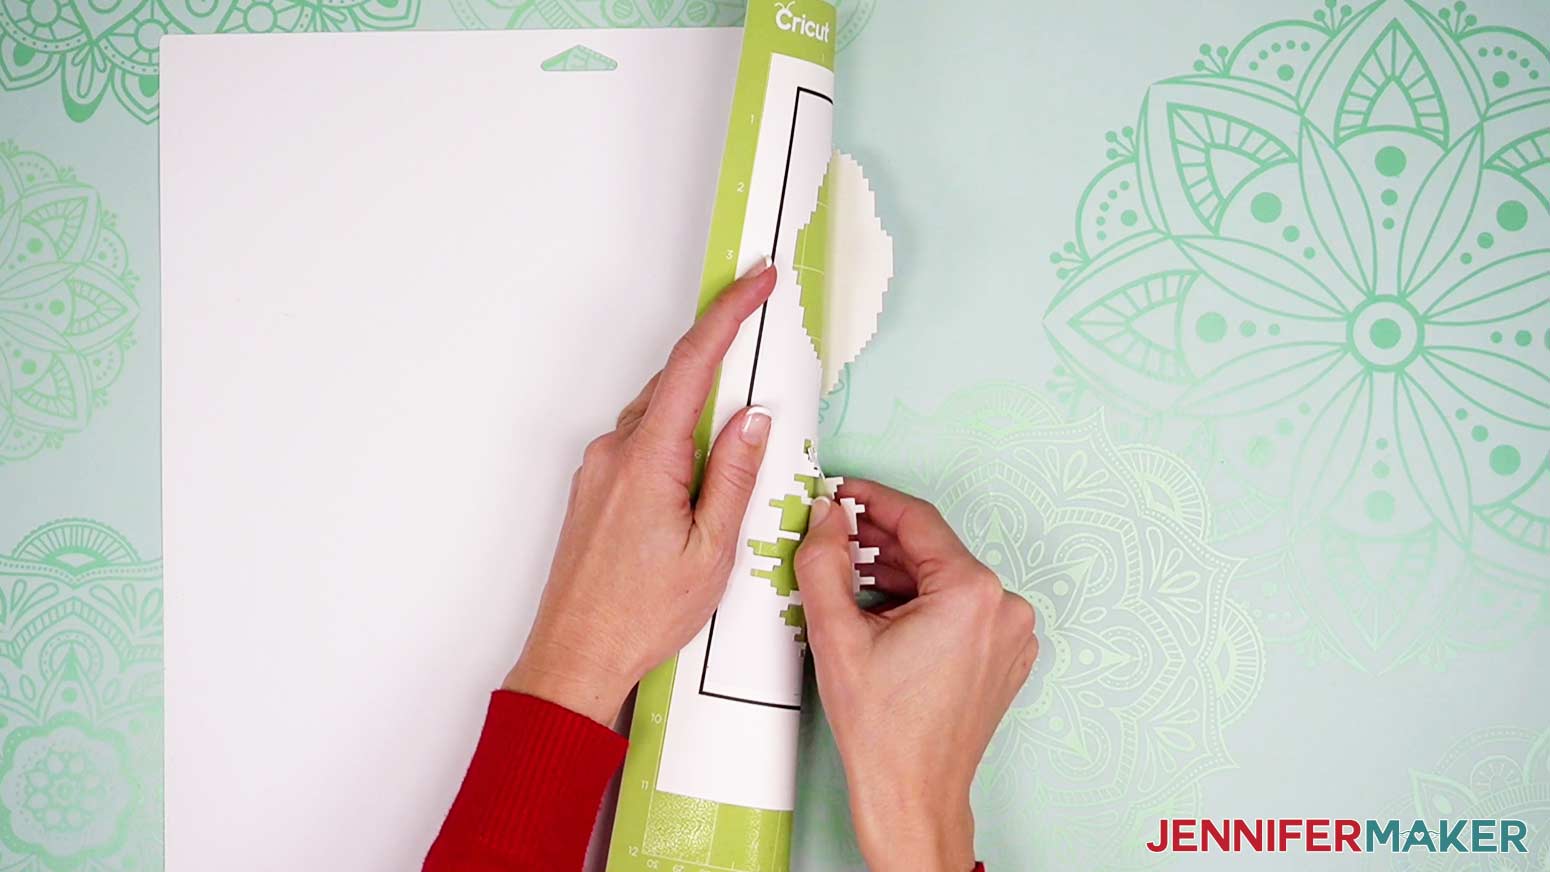
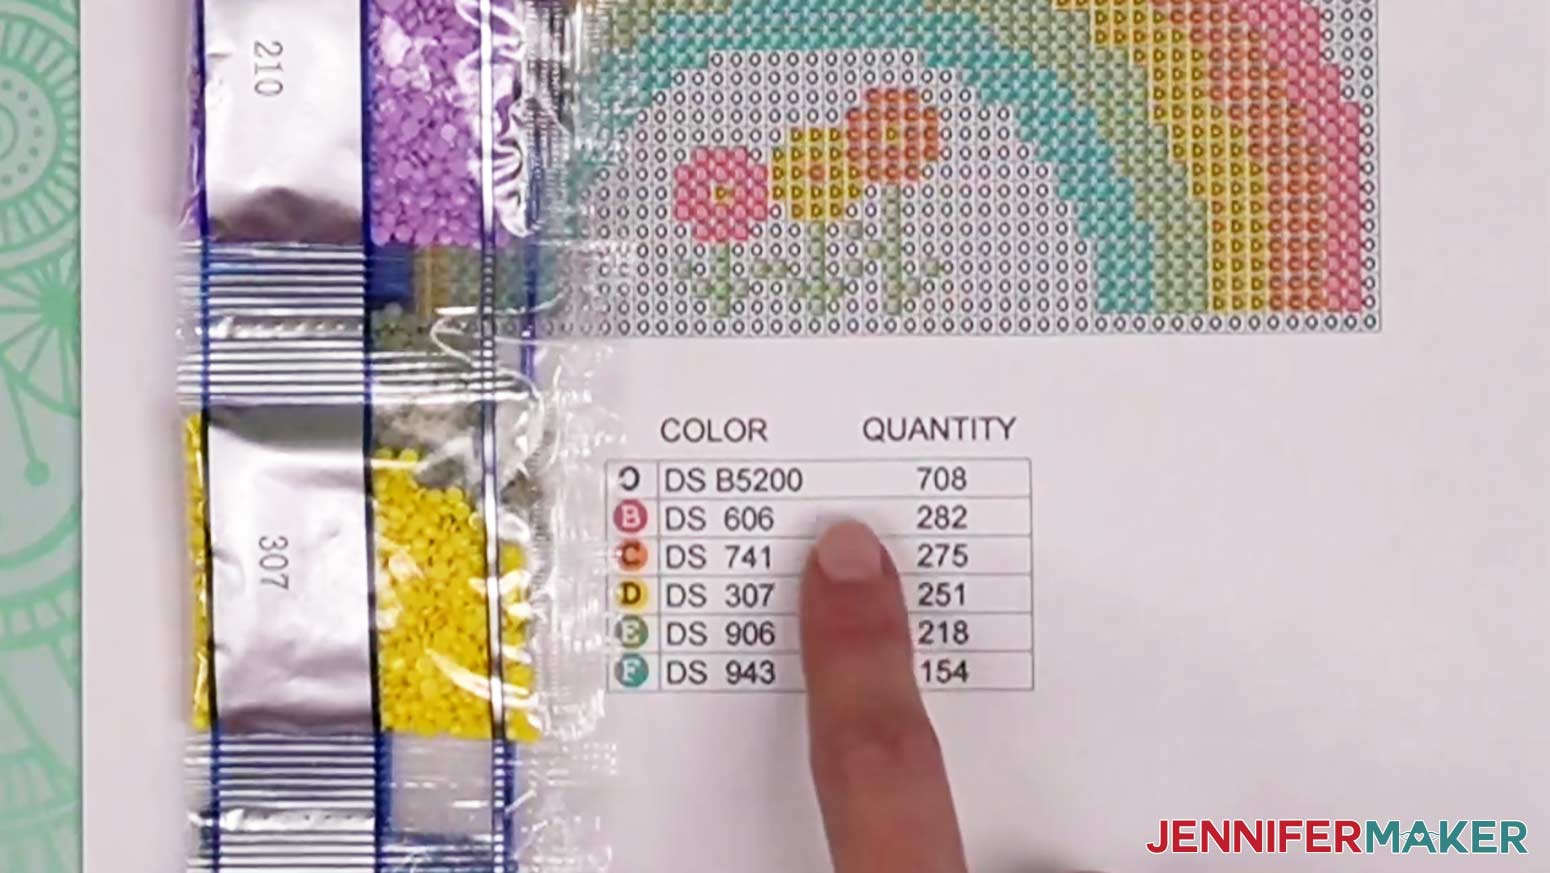
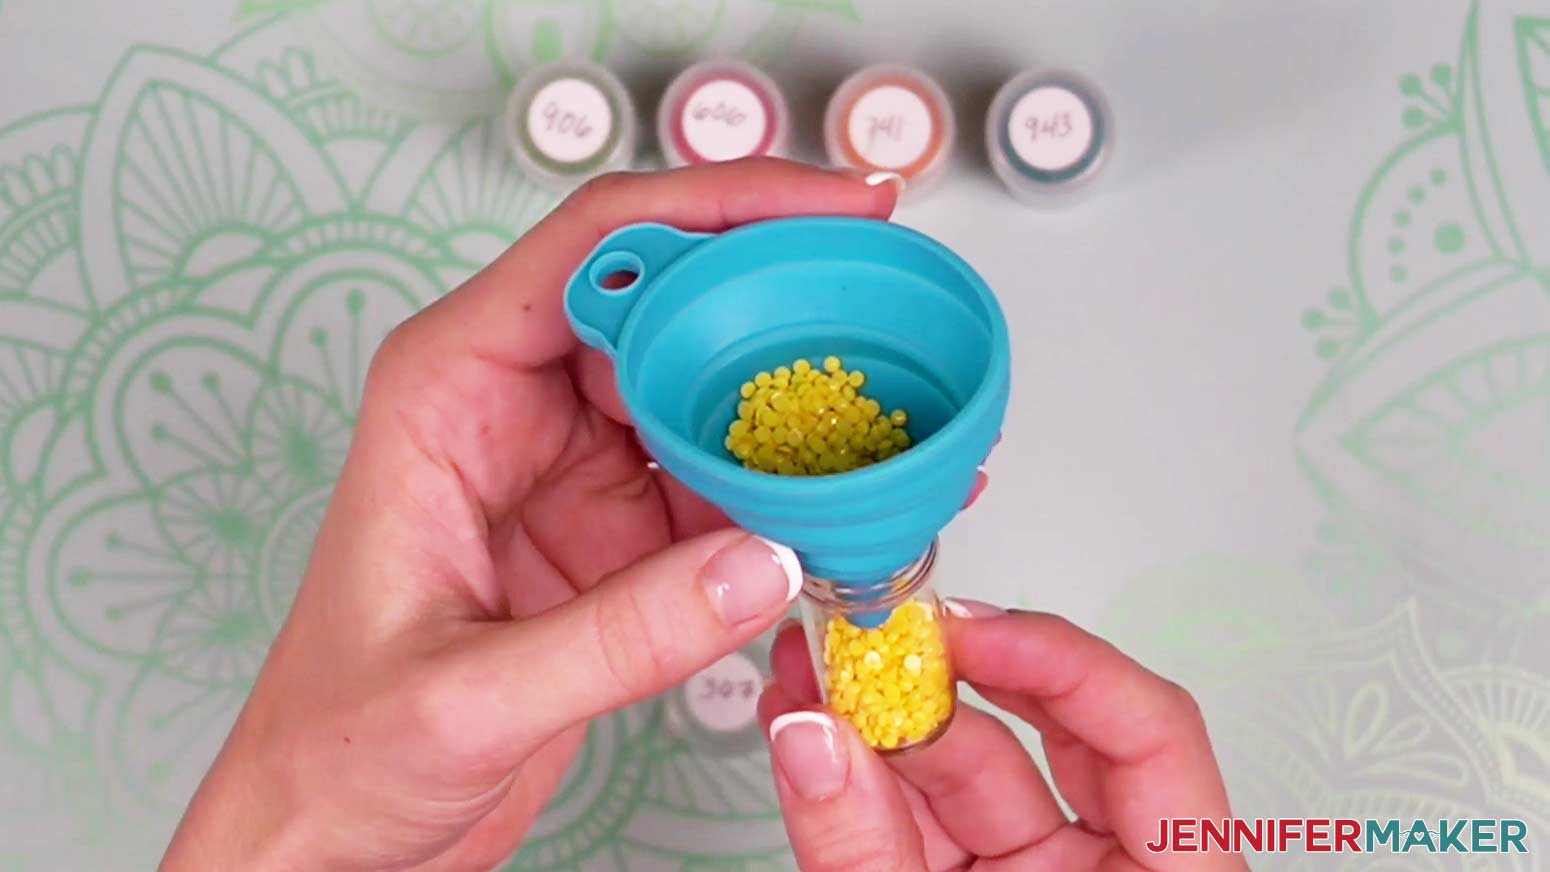
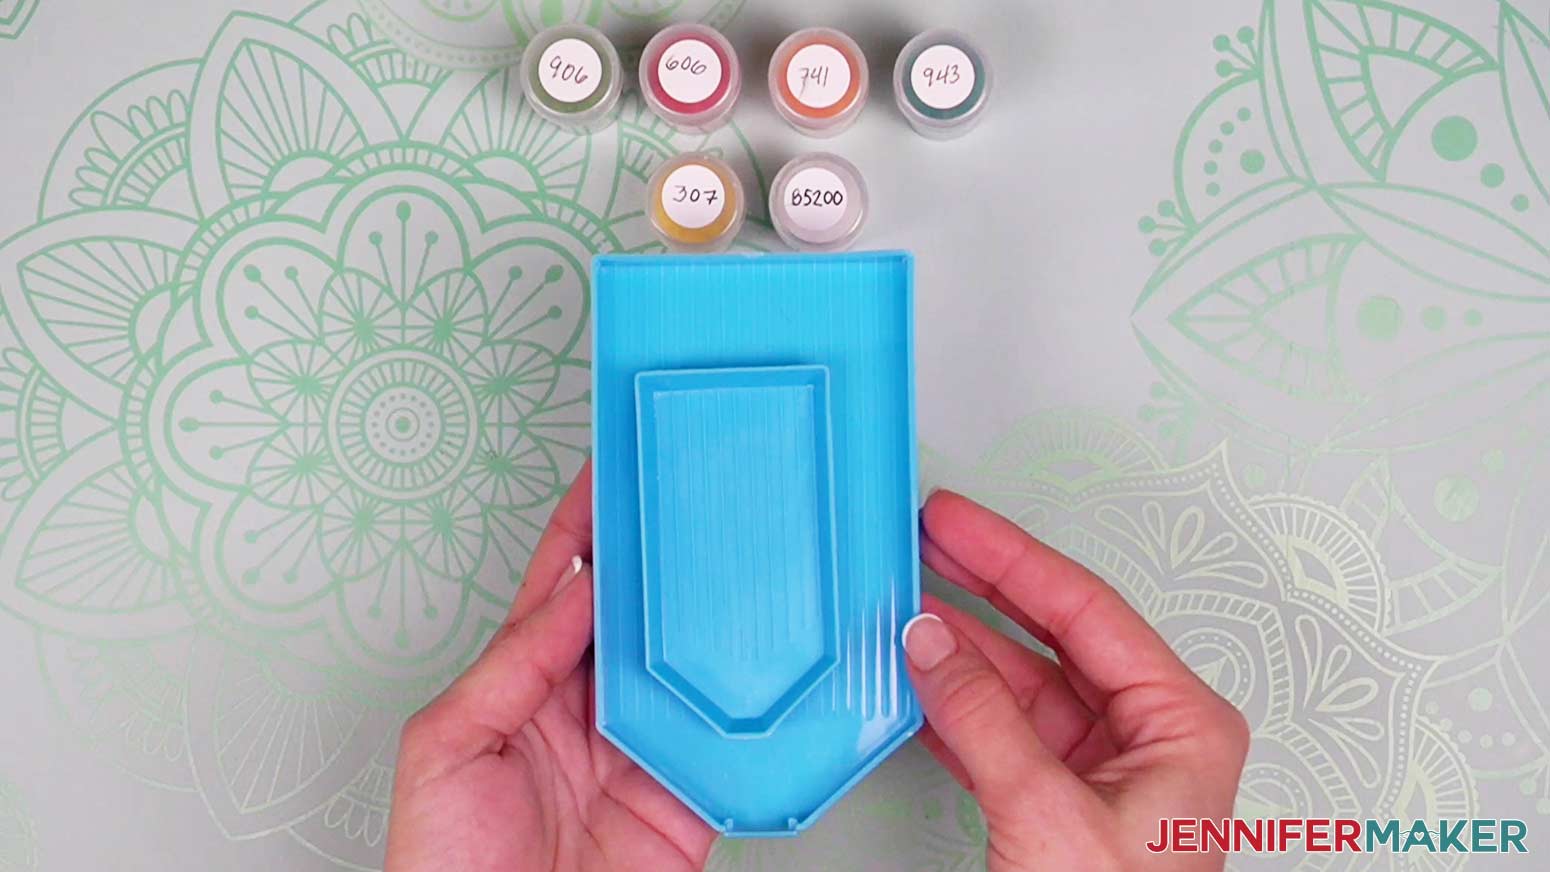
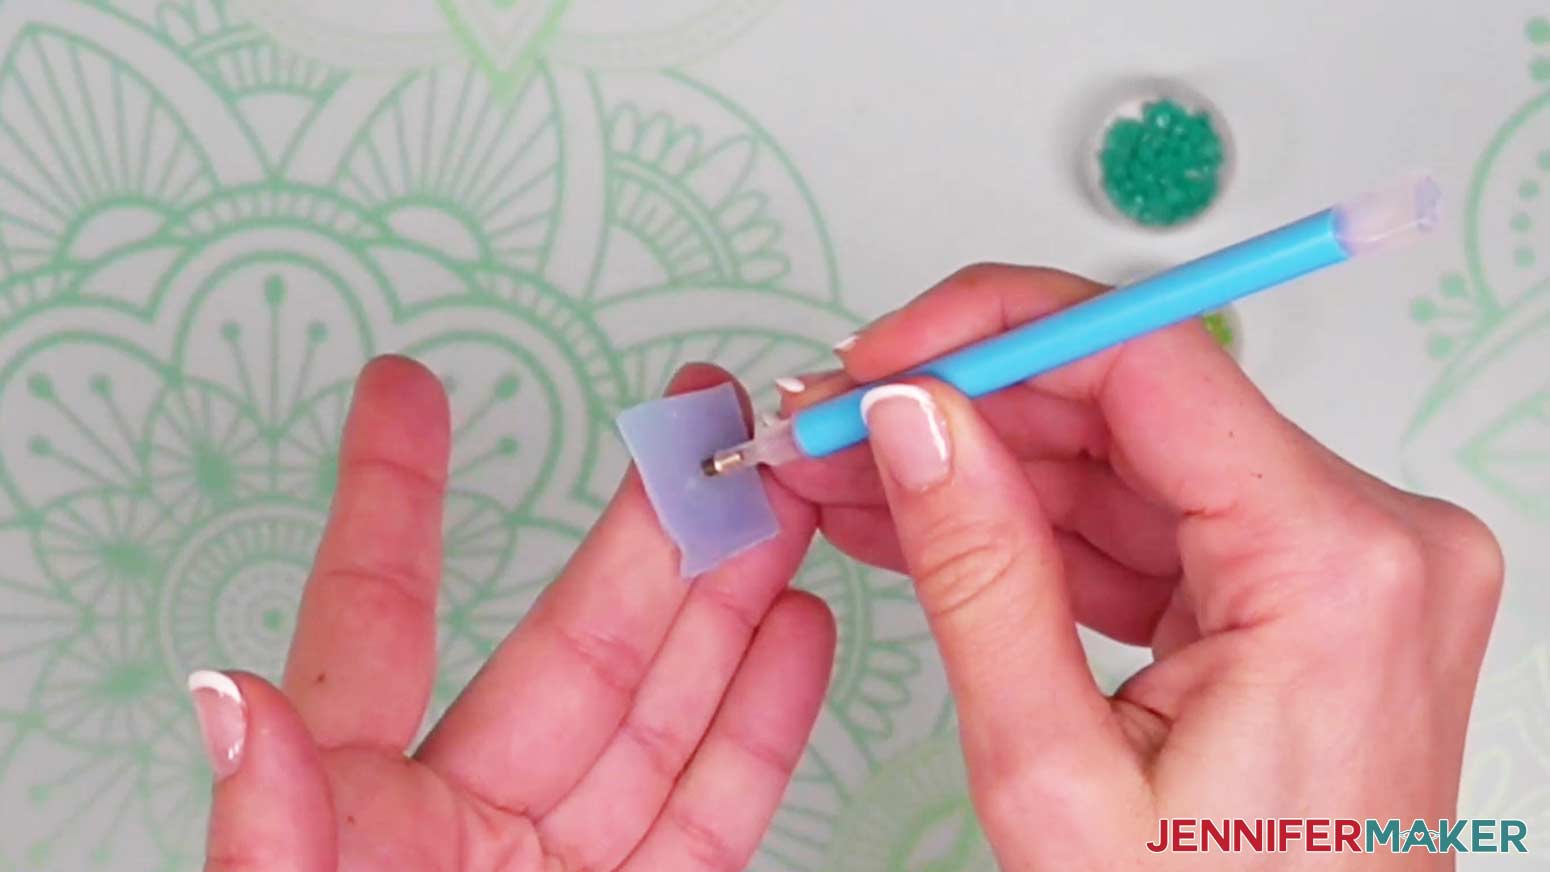
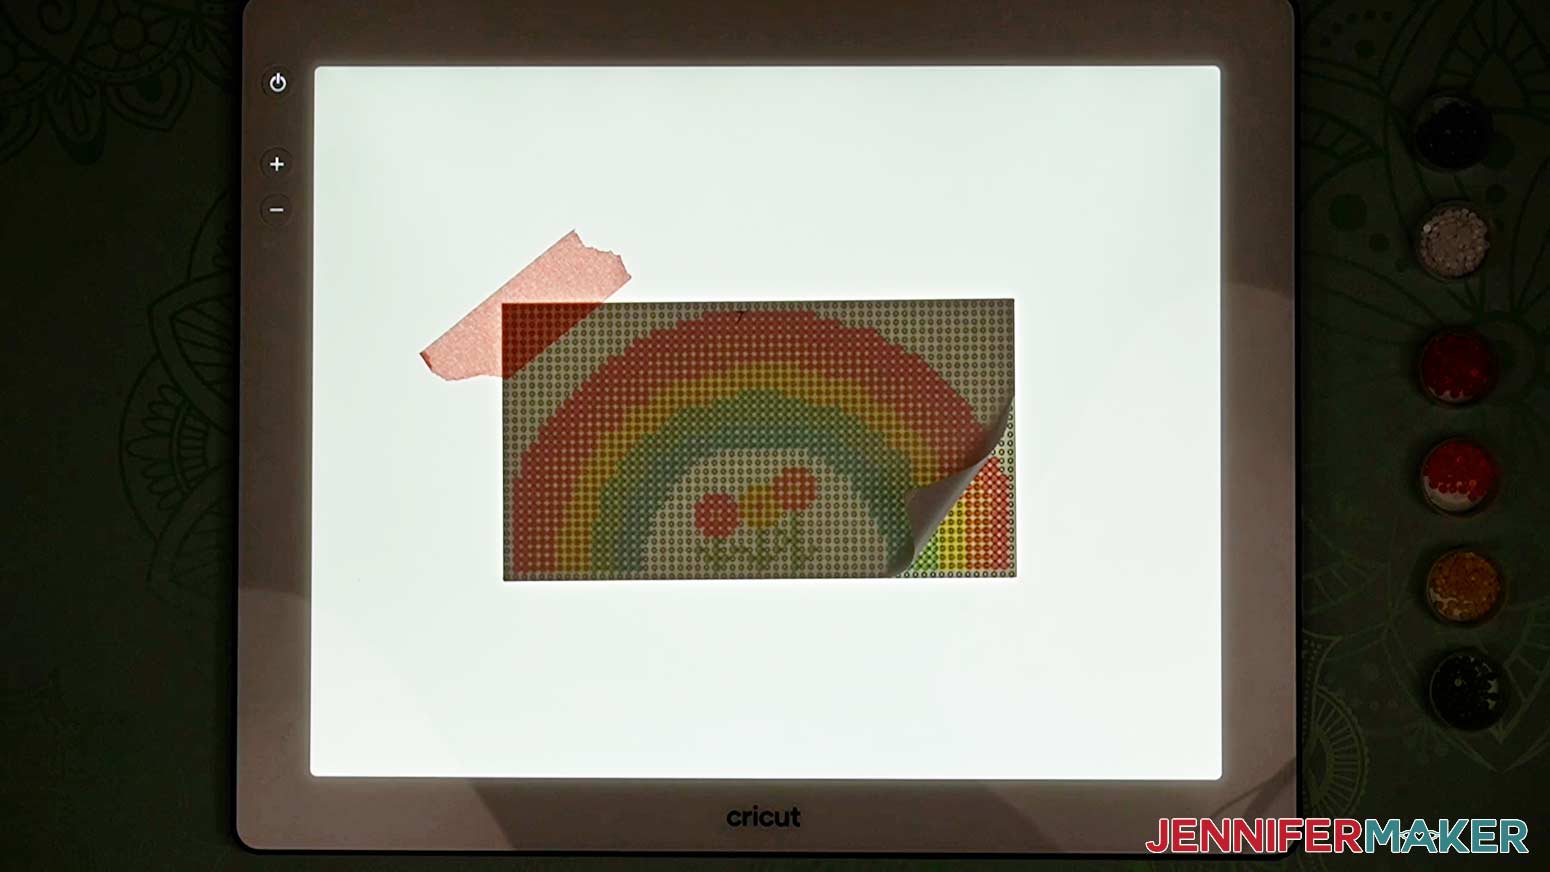
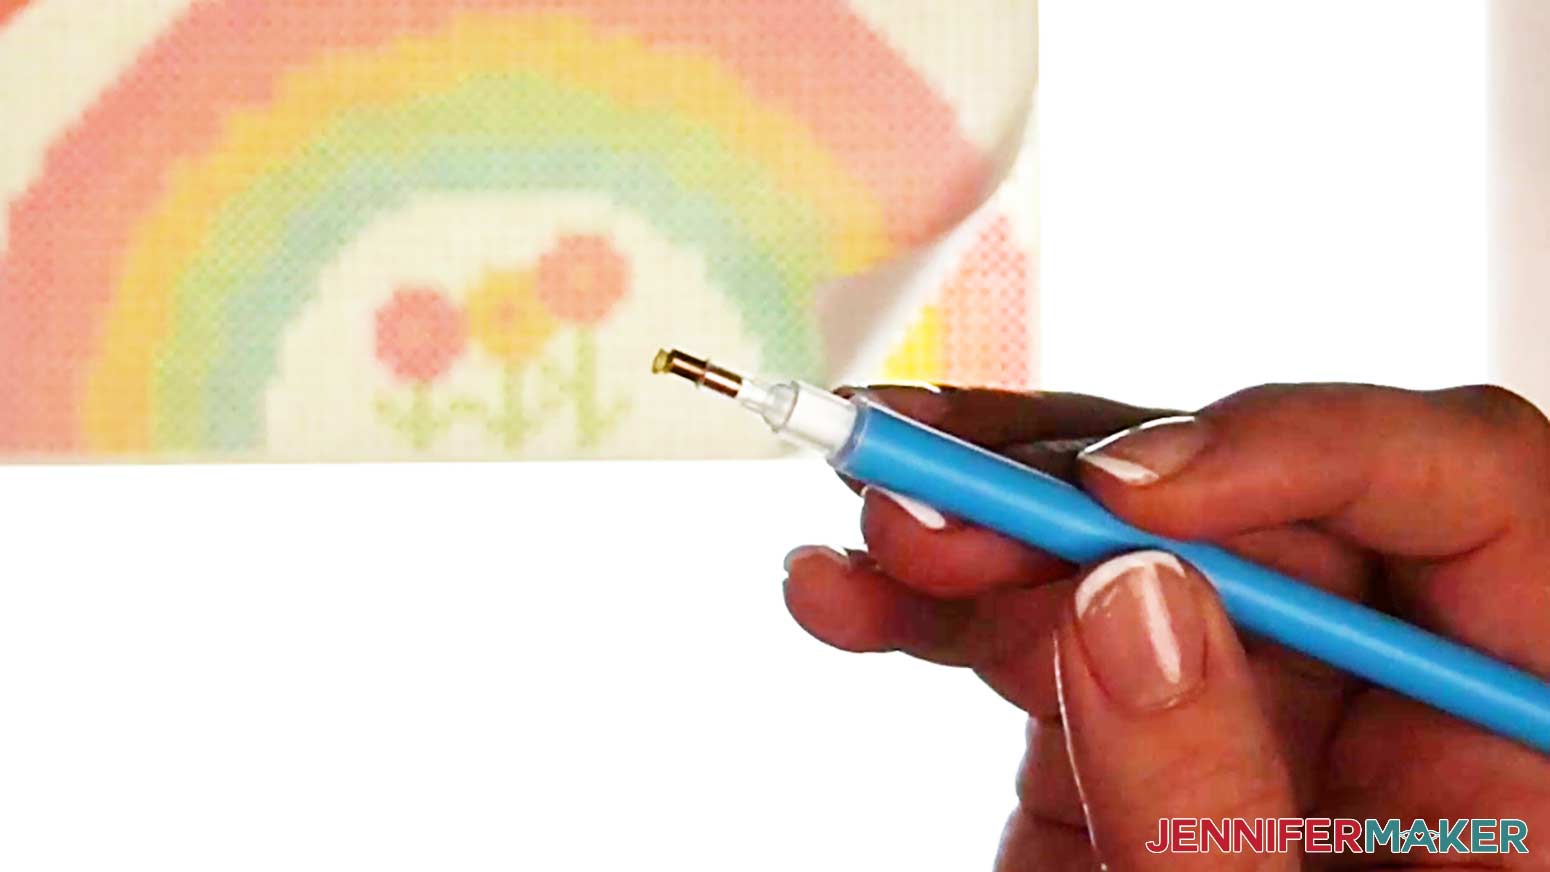
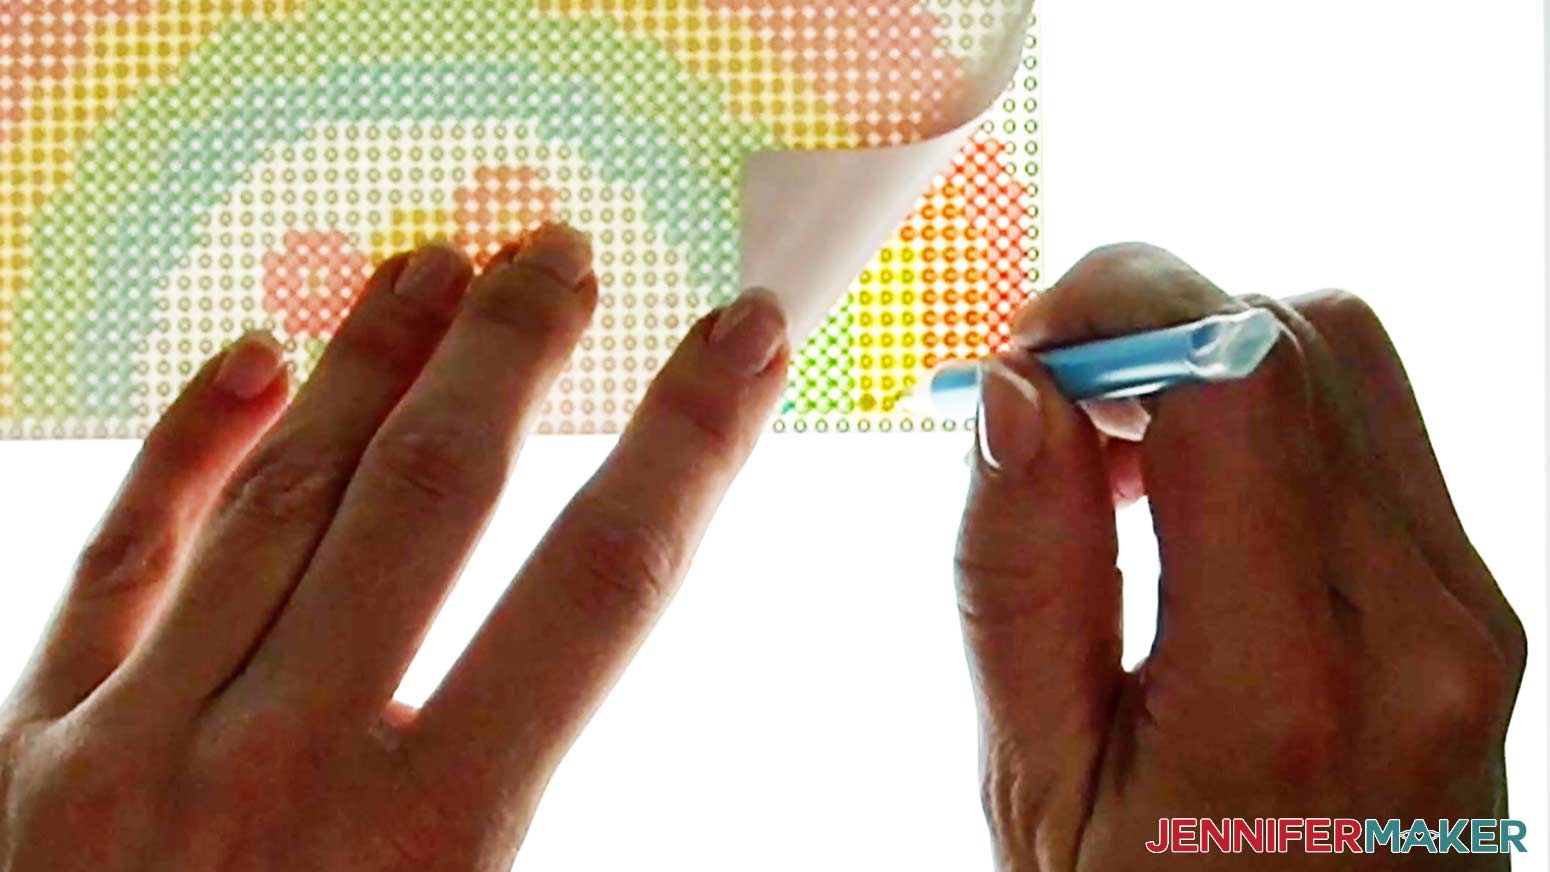
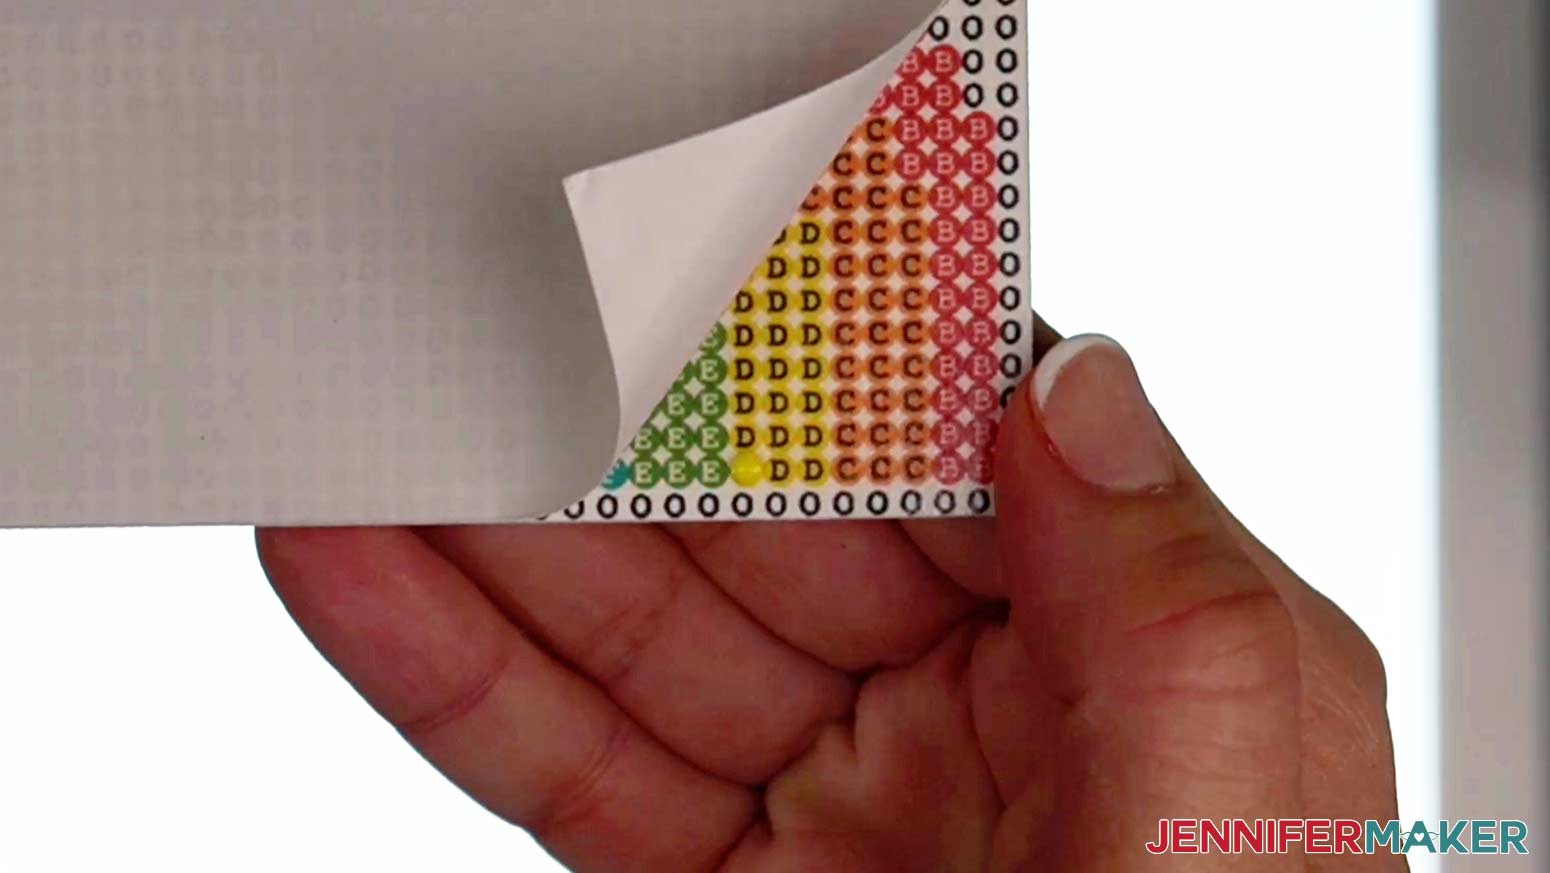
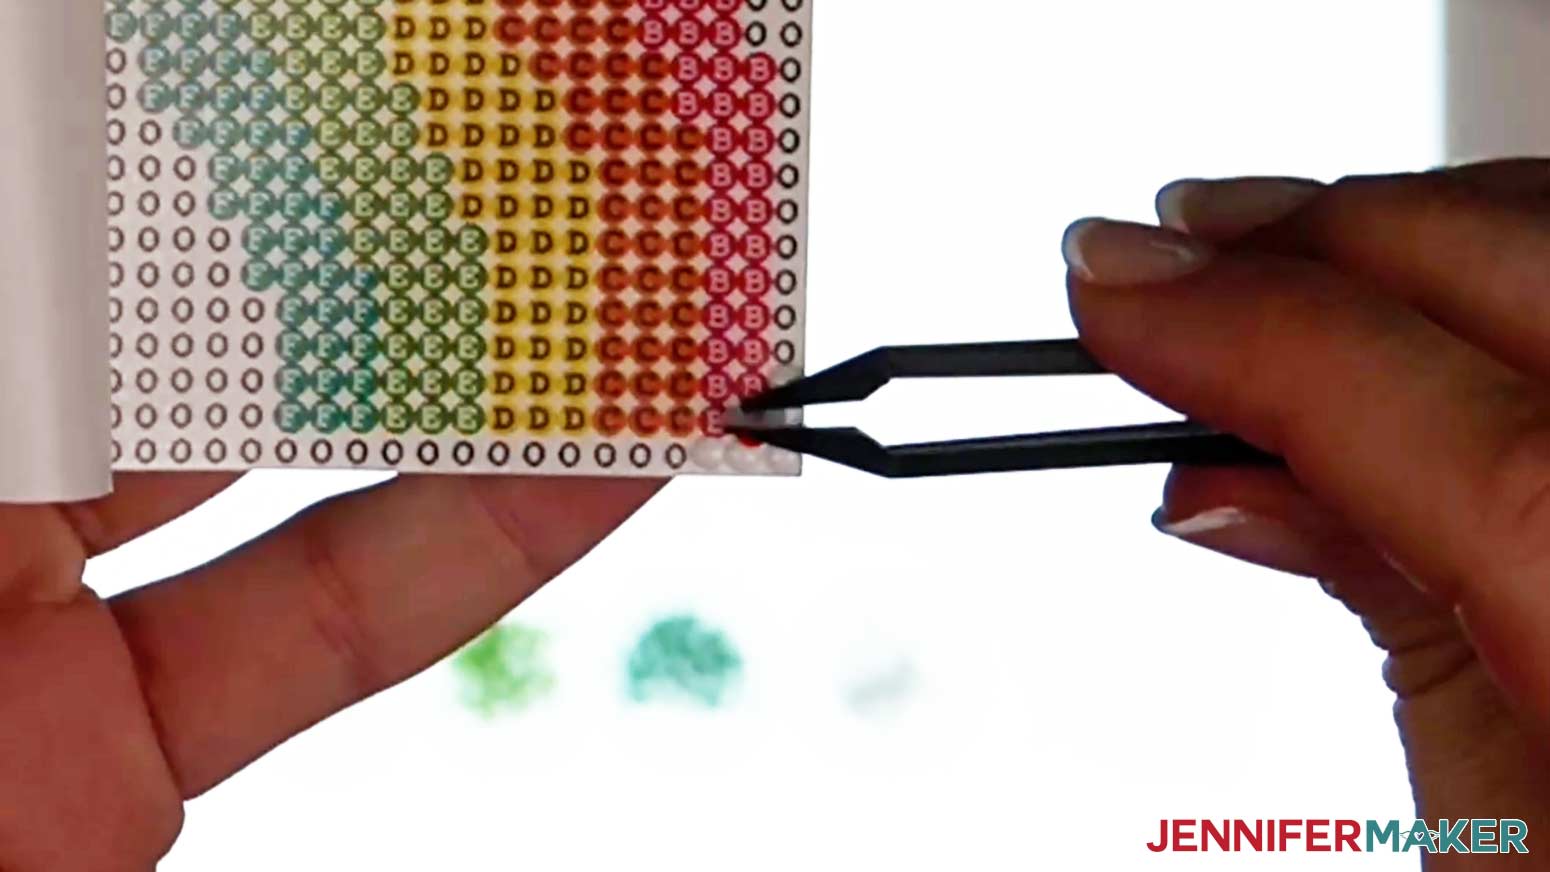
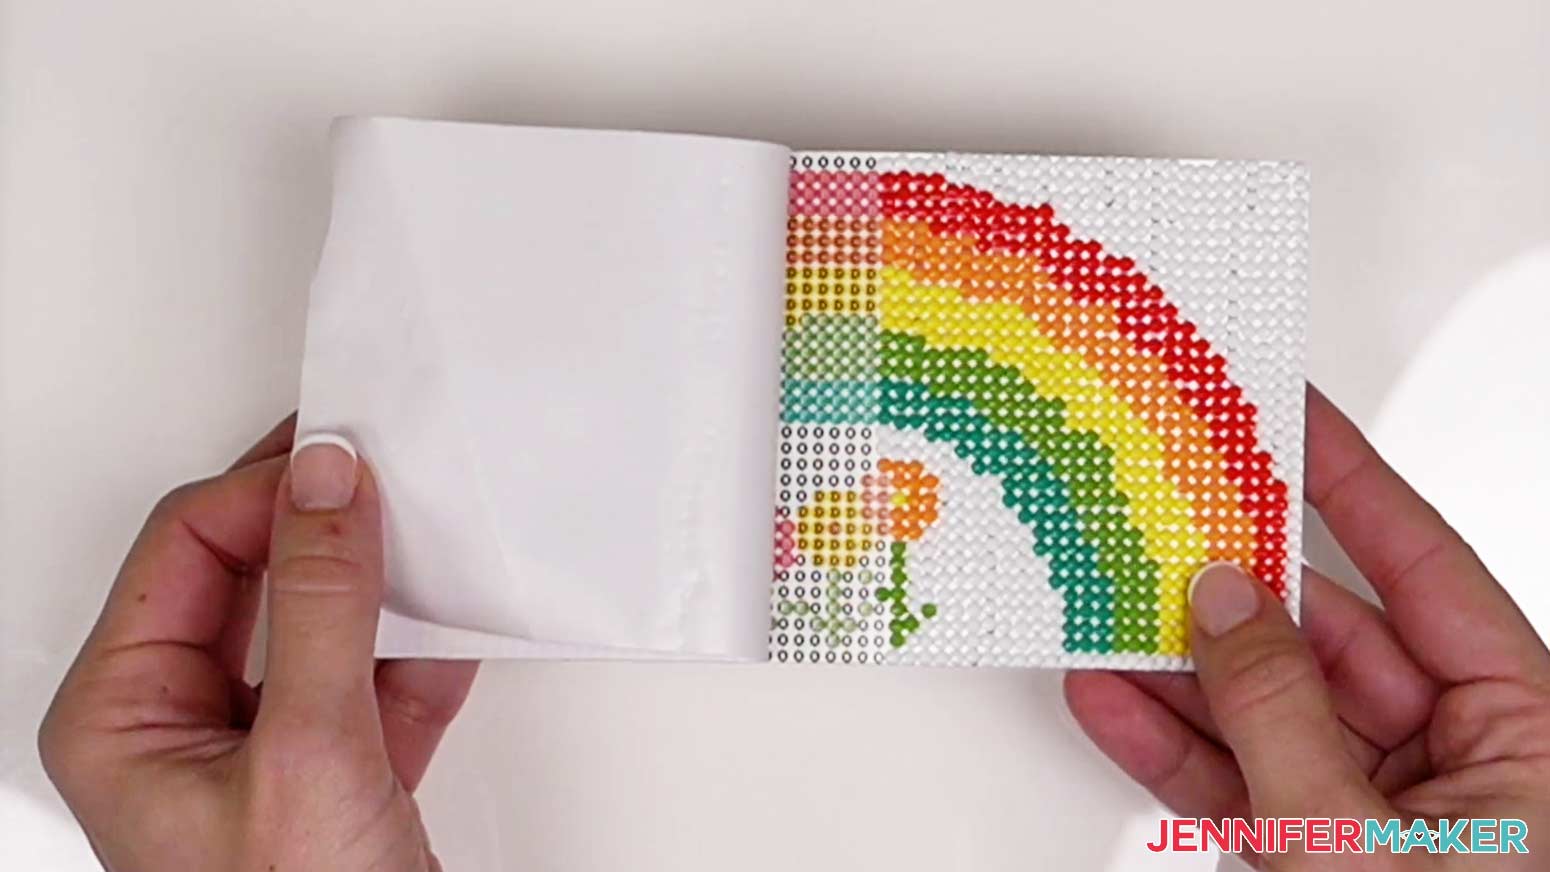
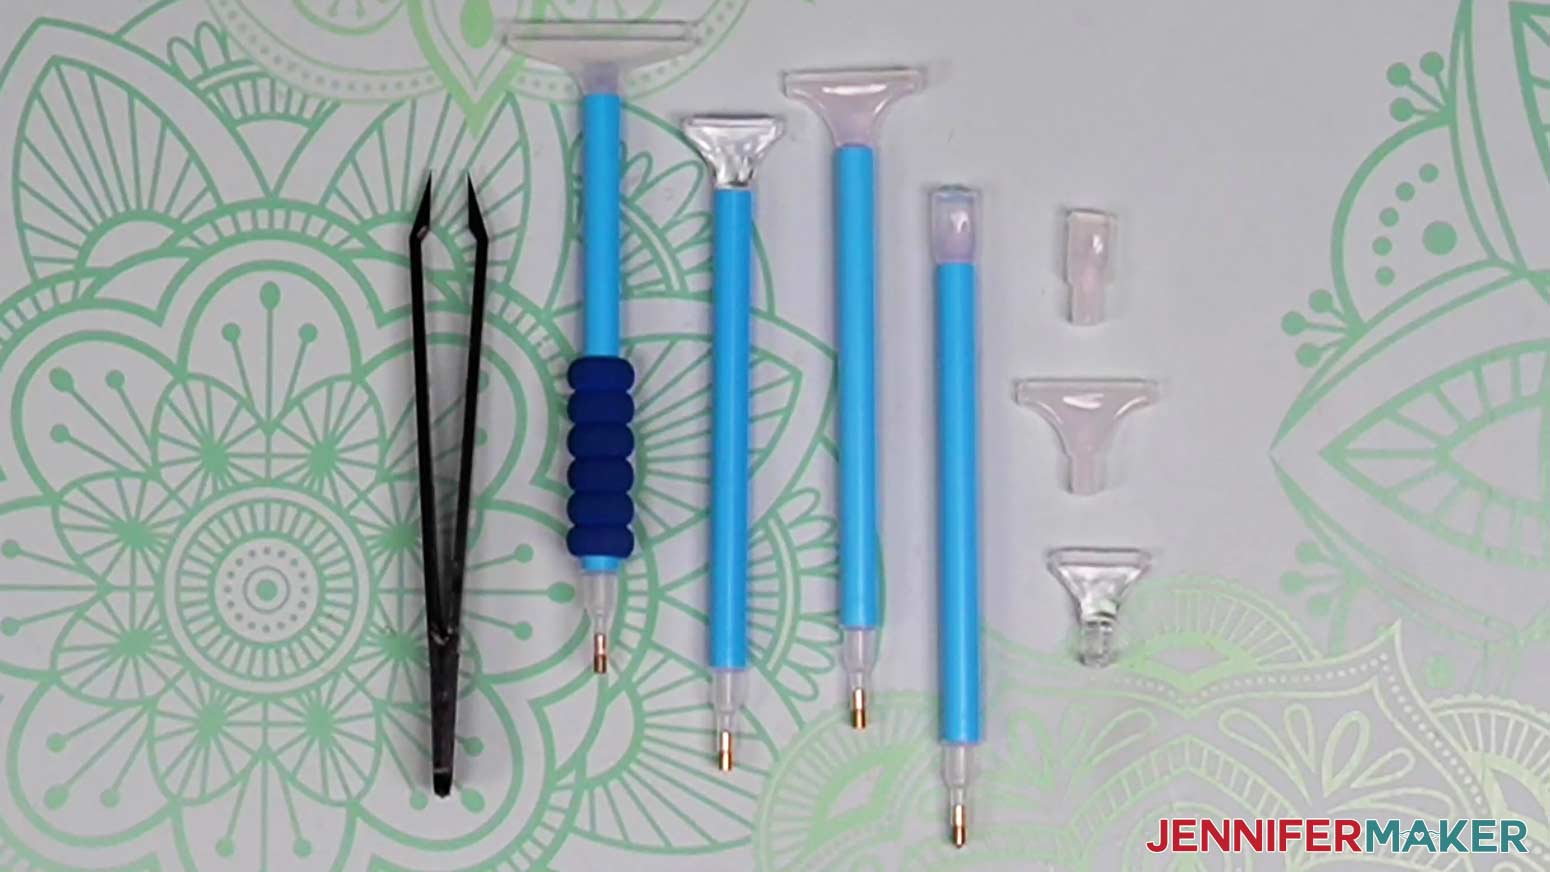
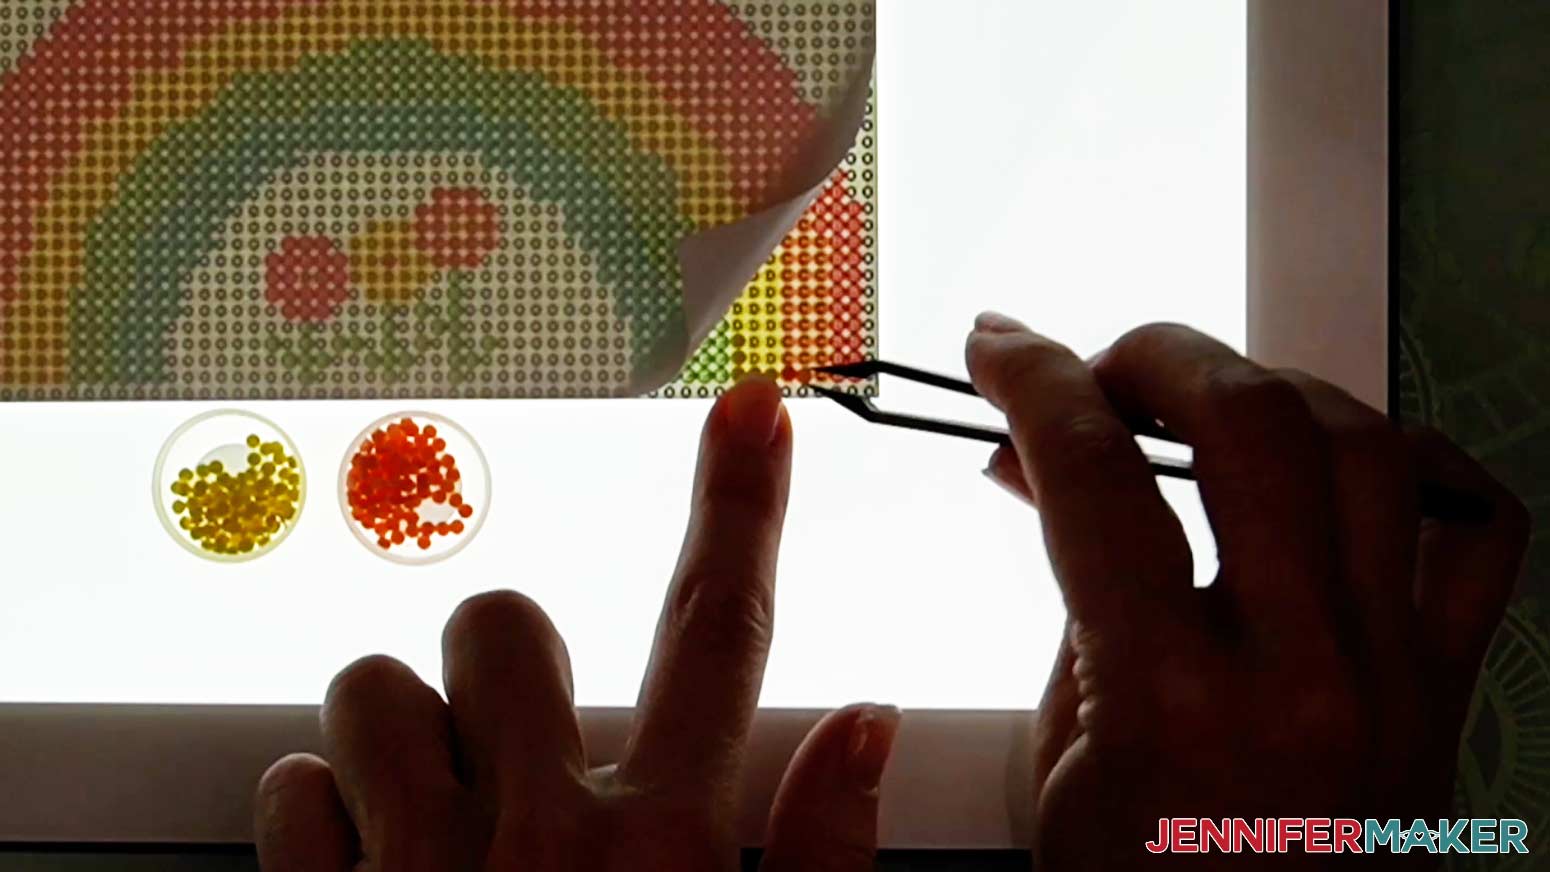
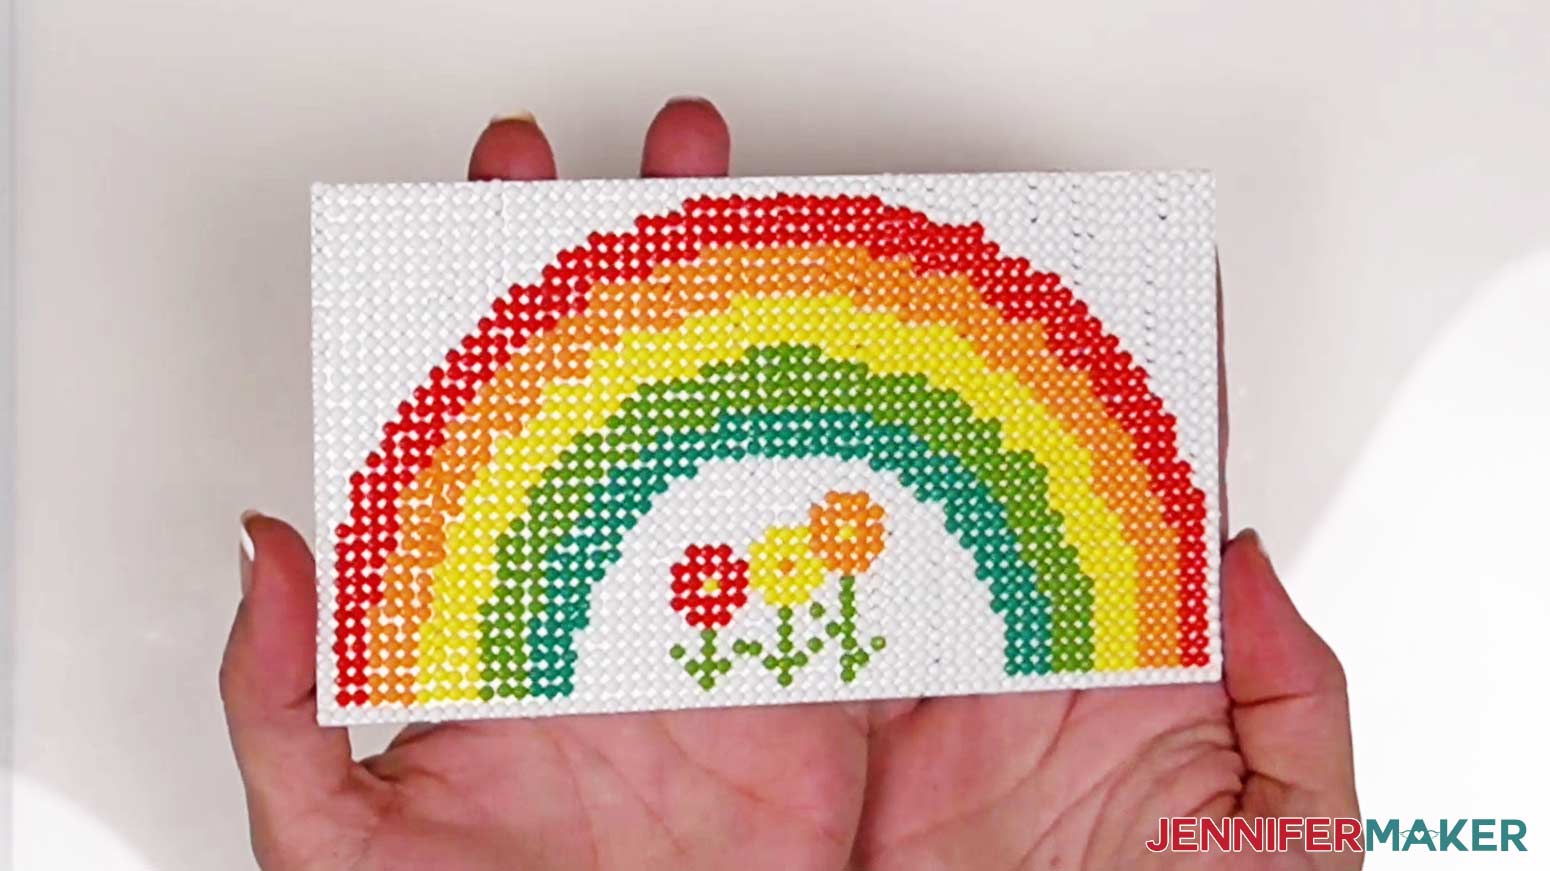
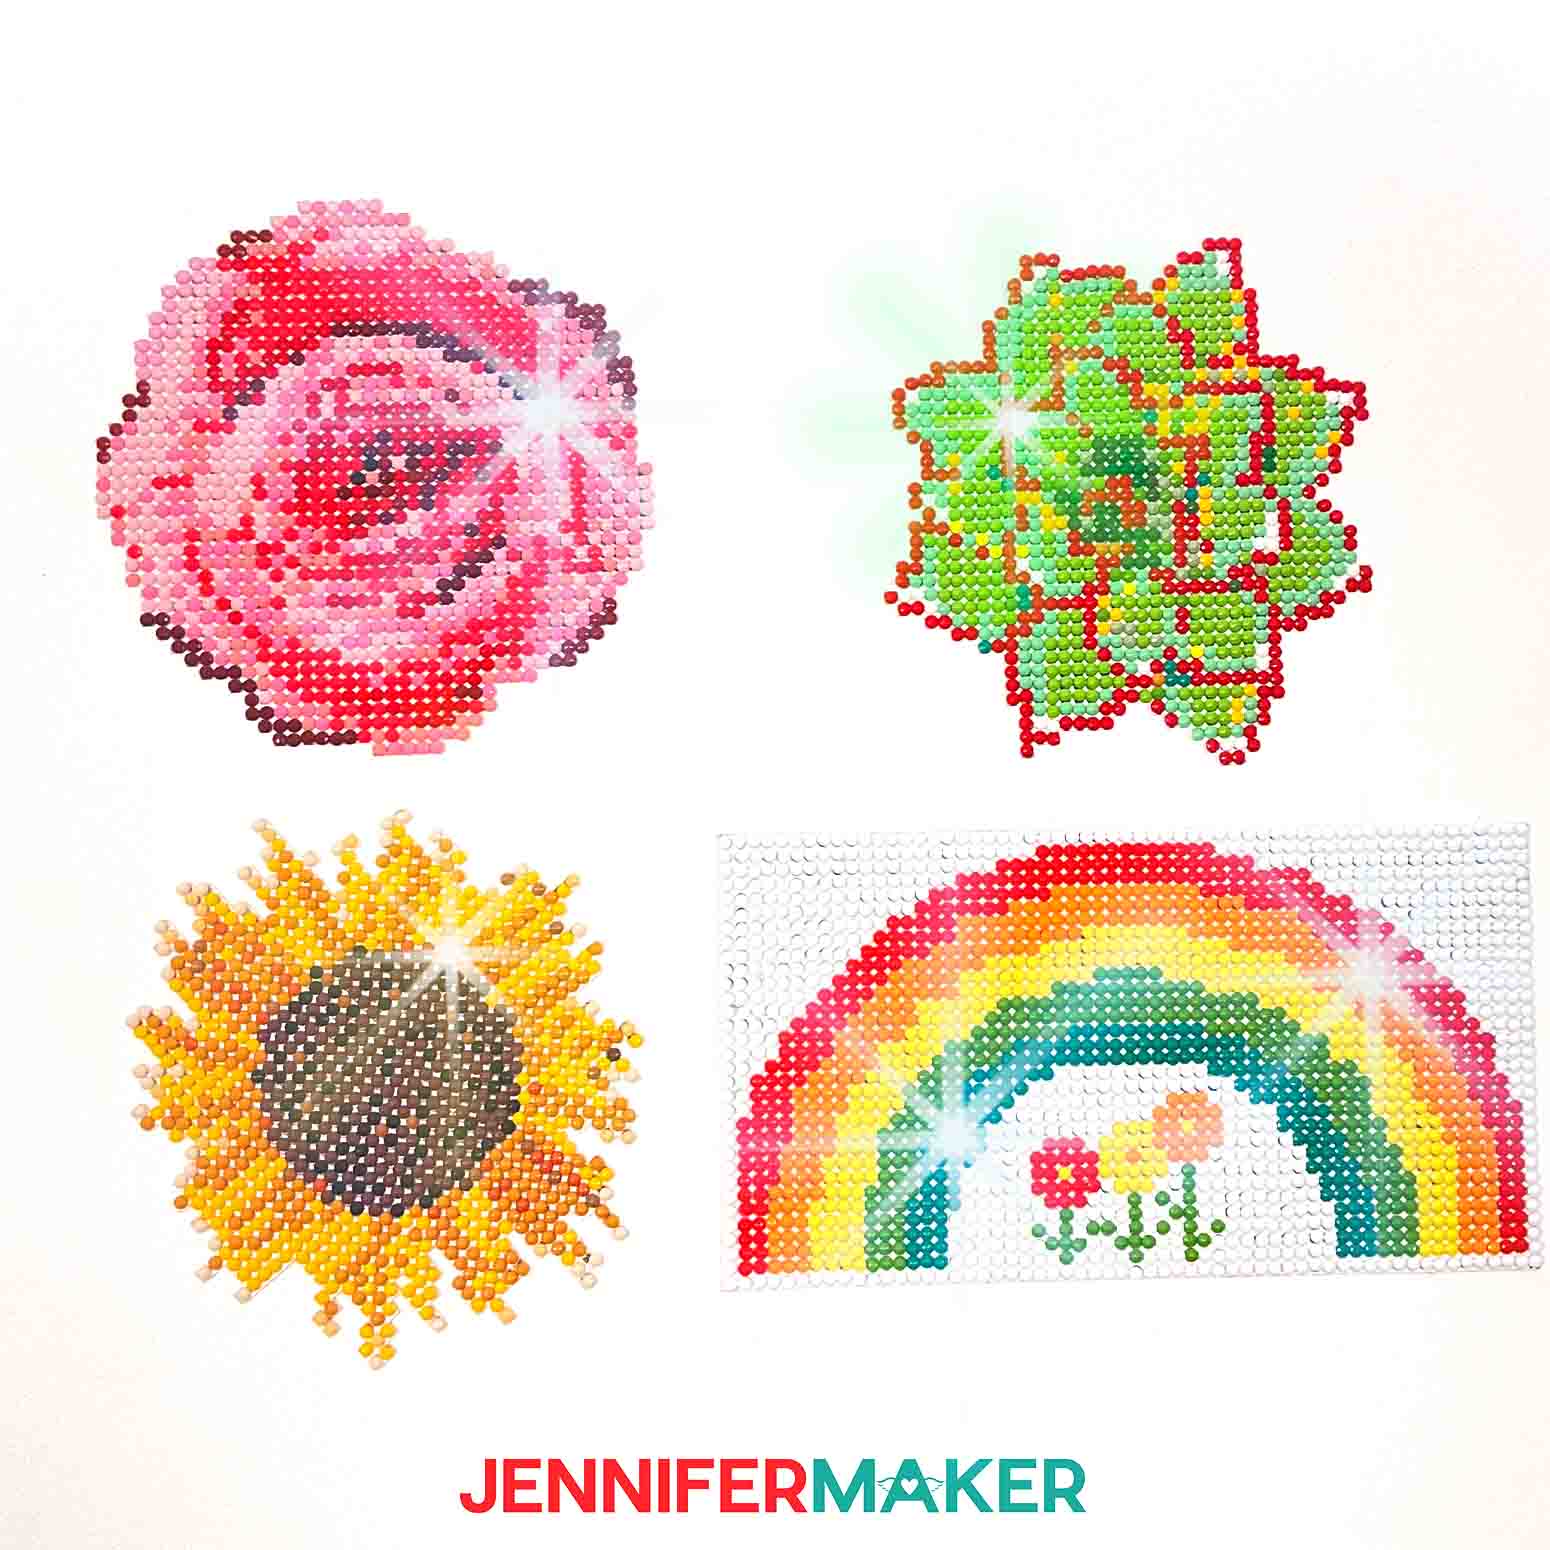
Learn how to make your own diamond painting art pieces that can be displayed by themselves or used as embellishments on other crafting projects! Diamond painting is a fun easy craft that produces bright, colorful, and shiny images after all the “diamonds” have been added to the adhesive surface of the paper or canvas. You can make your own diamond paintings using a color printer, an adhesive sheet or glue, and your Cricut! First, download my Diamond Painting PNG/PDF files from my free resource library. It's Design #462. The PNG files include a Succulent, a Rose, a Sunflower, and a Rainbow. The Rainbow design is the best design to start with if you’ve never done diamond painting before, but all the designs can be done by beginners and are small enough to complete in a few hours each. Diamond painting designs are very similar to cross stitch designs in that the crafter follows a pattern to know what colors to apply to the design and where to apply them. The PNG files will print the pattern onto cardstock, but the PDF files will explain which colors are needed and where they go so be sure to download and print them at the same time as the PNG files. There are two versions of PDF files - one with grid lines and one without. Feel free to use either version as a color chart. The PNG files can also be printed and filled in without using Print Then Cut on a Cricut, but they do need to be printed at the right size I’ve listed below, and will need to be cut around by hand, if needed, for the final intended use. The PDF pages are also able to be printed and filled in without the use of a Cricut, but make sure to not allow the printer to "fit to size" or scale the pages in any way. The charts are already sized correctly on each page for this project. The PDF file without the grid lines is best to use as a base. The grid lines will show around the round drills. TIP: I created my diamond painting charts using cross-stitch design software. This tutorial does not explain design creation, but you can easily find software to allow you to do the same! I’ll show you how to prepare each of the images for Print Then Cut, and then show you how to fill in the designs with diamonds! First, upload the PNG of each design to Design Space. To do so, click “Upload” on the bottom left of the menu next to your canvas, then click “Upload Image.” Next click “Browse” and select the Rainbow PNG file. A Select Image Type menu will appear along with a preview of the image on the left side of the screen. You'll see the design, but also the letters and numbers we'll use to tell which color "diamond drills" (the colorful dots or squares) go where to create the image. Select the “Complex” option to make sure to preserve the colors and details. Choosing the “Simple” option can sometimes result in color changes you aren’t expecting when you want to keep all the colors that are already in the image. Click “Continue.” My files do not need any backgrounds removed, so Click “Apply & Continue” on the next screen. Design Space will now show you two images: the one on the left is the outline of the image, and the one on the right is the Print Then Cut image we need to use. Select the Print Then Cut version, and click “Upload.” Select the image in the preview area, then click "Add to Canvas." If you're making the others, follow these steps to add each of the other three designs to the Canvas. The designs will appear on the canvas at a larger size than necessary because PNG files are saved with a lot of detail and that usually translates into larger size images to hold all the information. We’ll need to make each image the correct size before proceeding. The following steps can be applied to any diamond painting design that is uploaded to the Design Space canvas to ensure sure they are sized correctly. Approximately 9 to 9.5 drills fit in an inch wide for most designs. It’s not an exact number because of slight variations in manufacturing, but we can use this average size to make a guideline to resize the PNG design. To make a guideline, first add a square shape to the canvas by clicking the “Square” in the “Shapes” menu on the left-hand side of the canvas. Now, with the square selected on the canvas, make sure the lock is open above the size menu then change the size of the square to 1” x .125”. Change the square to a guideline by clicking “Guide” under the Operation menu. Move the guideline over a spot with circles and zoom in so you can see how many of the symbols fit within the guide rectangle. Select the image and click and drag in from a corner to reduce its size until approximately 9 to 9.5 symbols fit inside the guideline. Reducing each of the images to fit the right number of circles in the guideline will make them close to the following sizes: Rainbow – 6.5” wide Sunflower – 4.5” wide Succulent – 4.25” wide Rose – 4.25” wide. Once all the images have been reduced to the proper size, they are all ready to print! Check that the right machine is listed in the top corner, then click "Make It!" Your designs will appear on mats with extra border markers around them. The Cricut will use the border markers to know where to cut when the images are loaded. All four images can print and cut onto two mats. Make sure the correct Material Size is selected for each mat. I found 8.5” x 11” 65lb cardstock works perfectly to print to and to hold the diamond drills on these small designs. Leave “Mirror” turned off and click “Continue” Click “Send to Printer”. A Print Setup box will open to allow you to make some choices about how to print your mats. Make sure the correct printer is selected, the correct number of copies you wish to print are entered, and the “Add Bleed” setting is turned off. Unless you want to make changes to the way a page prints in your printer’s own print menu, also leave “Use System Dialog” turned off. TIP: If you experience print quality issues, you may need to turn on “Use System Dialog” to edit the quality settings to a higher quality for your printer. Before clicking “Print”, make sure the cardstock is loaded in your printer. If you experience difficulties with printing on the 65 lb cardstock, and your printer has a load slot for thicker materials, use the special load area for thicker materials. Click “Print” Your mat will print to your printer. Once the print is complete, place the first piece of cardstock on your green StandardGrip mat and make sure it has adhered well by pressing it with your brayer. Before cutting the images, choose adhesive sheets or glue as the way to adhere the diamond drills to the cardstock. I prefer the adhesive sheets because there is no glue mess or waiting for glue to dry, but diamond glue kits are available that are specially formulated for ease of use with diamond painting crafts. (If you choose to use diamond glue, skip the following adhesive sheet application directions, and begin cutting your images.) The adhesive paper needs to be added to the cardstock before cutting so it will cut into the same shape as the image. This can be done in two different ways. Then, remove the backer from one side to expose the adhesive. Apply the exposed adhesive side to the image on the cardstock using the same method as applying transfer tape to vinyl. Shape the cut piece of adhesive paper into a “taco” and center it over the images. Lay down the center first and press out from the middle to each side. Use a brayer to make sure there are no bubbles in the adhesive layer, and that it has well adhered to the cardstock. OR 2. Cut a piece of adhesive paper that is slightly larger than the registration marks and adhere it to the cardstock in the same method as above. Once applied, the adhesive sheet is thin enough to allow the colors of the bounding box and the images to be seen under the adhesive paper, but because the Cricut needs to more clearly see the marks, part of the cover of the adhesive must be removed. To do so, use a craft knife to cut around the inside of the bounding box taking care not to cut over the images. Peel away the extra part of the cover to expose the adhesive that is over the bounding box, leaving the images protected with the remaining piece of the cover. The adhesive over the bounding box will be exposed, but it will not interfere with the Cricut cutting process. Whichever approach you picked, your mat is ready to cut. The Cricut must cut through both the adhesive and cardstock layers, so I used “Heavy Cardstock – 100 lb.” as the “Material” setting with “More Pressure”. I did test “Medium Cardstock – 80 lb.” but the cuts were inconsistent for me. Every machine is different, so you may need to test settings before finding one that works correctly. Load the mat into your Cricut and press the flashing button to begin. TIP: If you run into any issues cutting your materials, check out my Cricut Tips & Tricks for Cleaner Cuts. Once the cutting is complete, and before unloading your mat, check to see if the cut went all the way through. If not, press Start for another pass. When the cut is all the way through, use a pencil or pen to make a small “T” shape mark at the top of each image design on the backer. This mark will allow you to easily tell which side of the piece is the backer that needs to be removed to expose the adhesive later. Remove the cut pieces from the mat by turning the mat over and rolling it away from the cardstock. Continue to print, load, cut, and remove mats until all the pieces are cut. Always be sure you load the correct printed sheet to match the mat on the screen before pressing the arrow button! The “diamond” bits are called drills. There are different types available that can give your finished project different looks. For this project, we are using round drills, but square drills are also available. Round drills are generally easier to pick up and place and reflect light a little better than square drills, so they appear shinier. The drawback to round drills is that you will see a little of the cardstock behind the image as the round drills don’t fit perfectly together as square drills do. The following instructions are for filling in a design while using the adhesive sheets. If you decide to use glue instead, follow the instructions that came with your glue kit for applying the glue to the cardstock. I’ll use the Rainbow and Flowers design to demonstrate. Grab the pattern's color chart to see how many of each color drills you'll need. The chart will show a letter or symbol that represents the color on the chart, a number for the color instead of a color name, and a quantity that shows how many drills are needed for that specific color. TIP: Most drills on the market match their color numbers to the numbers given to colors of DMC Embroidery thread. It is possible to use an embroidery chart to make a diamond painting if it is printed at the right size! Gather all the colors you will need for the design. They are usually supplied in bags or small containers with color numbers printed on the outside. If the bags are in manufacturer bags that need to be cut open (like the drill kit I recommend) make sure to have resealable containers handy to label and store unused drills. Pour a small handful of each drill color into flat containers that allow the drills to spread out. The trays that come with most tool kits are specially made to allow the drills to lay flat into rows, so they are ready to be picked up. Many colors are very similar to each other so leave a label or the closed container next to each tray to identify the color. Now it’s time to load some wax into the end of a diamond pen tool. This is a long thin tube that has a hollow tip. If you are using the wax for the first time, there is a plastic protective film on top that needs to be removed. Press the metal tip to into the wax and when you lift it there will be sticky wax in the tube. That helps pick up the drills. Carefully peel back part of the cover on the adhesive to expose the sticky area and design. It’s best to only uncover a few lines at a time so the adhesive stays clean on the other parts of the image. Now, look at the letters or symbols printed on the exposed area and find the drills you'll need. If you have trouble seeing the letters or symbols (because they are small!) place the design on a Cricut BrightPad. The light shines through the cardstock to make the printed parts show more clearly. Decide if you want to fill in all drills of the same color in a specific area, or fill in the line from left to right regardless of the colors used. I find it easier to move from left to right over the design picking up each color that is needed as I go, rather than leave holes in the design to be filled in by other colors, but it is entirely your choice. Choose a color and pick up a corresponding drill using the wax end of the pen. The round drills fit right into the opening. Carefully press the drill into the spot on the design that matches its color and location. When the pen tool is pulled away, the drill is left behind and stuck to the adhesive on top of the cardstock! Sometimes, the pen tool may be overfilled with wax and will leave a bit behind with the drill. Make sure to wipe the wax away from the adhesive or the next drill will not want to stick. Continue filling in all the letters or symbols with the correct color drills in one area before exposing the adhesive on the next few lines. Special pen tips allow you to pick up more than one drill of the same color at a time for faster filling, but I found I prefer to use the single drill tip for more precise alignments. You can experiment to see what you prefer! Slowly work your way through the whole design. It can take hours to fill in each design so be patient and place each drill as precisely as possible. These designs are small to allow for Print Then Cut, so it may be difficult to hold the cardstock in place with one hand while placing the drills with the other. Sitting the cut cardstock shapes back down on to a cutting mat may help hold things in place. (The only drawback is that you will not be able to use the BrightPad and will have to light the design in more direct ways, if necessary.) Alternatively, you can use painter's tape to adhere the image to the BrightPad. If you happen to place the wrong color into a spot, you can remove it with the edge of a fingernail or tweezers if you are careful to not scrape away the adhesive underneath! After all the drills have been filled in, the piece is ready to mount to your project, or give as a gift! These designs are the perfect size to use as applique pieces on cards, as elements in shadow boxes, and as gifts! Final Size:
Diamond Painting for Beginners
Materials
Tools
Instructions
STEP 1: GET MY FREE DIAMOND PAINTING DESIGN FILES
STEP 2: PREPARE THE DESIGN FILES


STEP 3: PRINT THEN CUT THE DIAMOND PAINTING DESIGNS
1. Measure the design to find the dimensions that are larger than the printed image, but smaller than the registration marks. Cut the adhesive paper to match.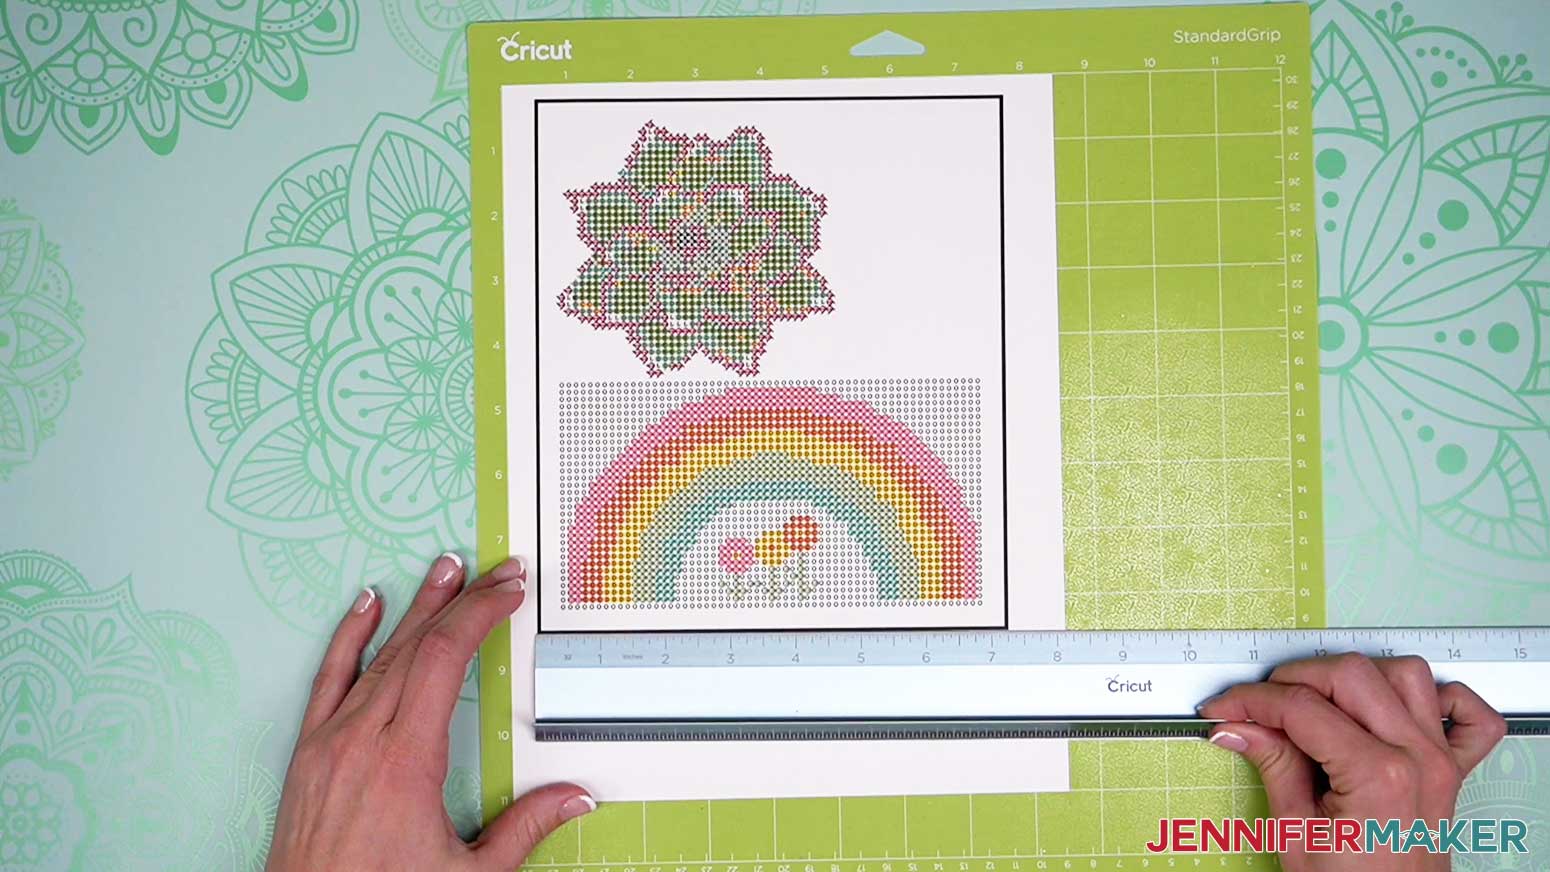


STEP 4: FILL IN YOUR DESIGN
STEP 5: SHOW IT OFF!
Notes
Rainbow – 6.5” x 3.53”
Sunflower – 4.5” x 4.18”
Succulent – 4.25” x 3.93”
Rose – 4.25” x 4.36”

Day 13: DIY Shrinky Dinks Keychains and Earrings!
Get the the “Gift List” to be notified about each daily gift and our live videos, plus have the opportunity to enter our giveaway. Sign up free here.
Day 14: How to Engrave in Color!
Get the the “Gift List” to be notified about each daily gift and our live videos, plus have the opportunity to enter our giveaway. Sign up free here.
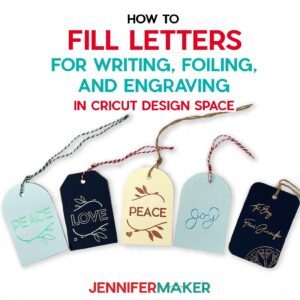
Day 15: How to Fill Letters for Writing, Foiling and Engraving!
Get the the “Gift List” to be notified about each daily gift and our live videos, plus have the opportunity to enter our giveaway. Sign up free here.
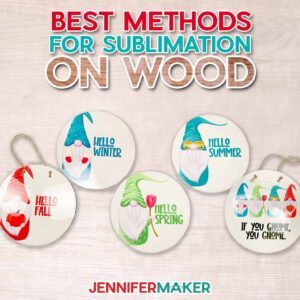
Day 16: Best Methods for Sublimation on Wood!
Get the the “Gift List” to be notified about each daily gift and our live videos, plus have the opportunity to enter our giveaway. Sign up free here.
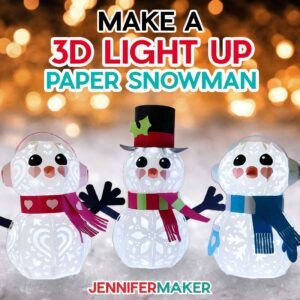
Day 17: Light Up Paper Snowman!
Get the the “Gift List” to be notified about each daily gift and our live videos, plus have the opportunity to enter our giveaway. Sign up free here.
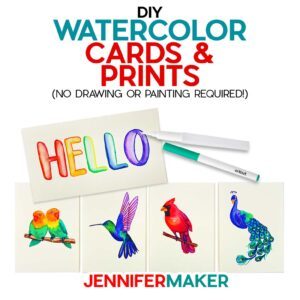
Day 18: DIY Watercolor Cards & Prints!
Get the the “Gift List” to be notified about each daily gift and our live videos, plus have the opportunity to enter our giveaway. Sign up free here.
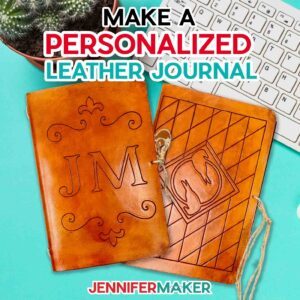
Day 19: DIY Leather Journal!
Get the the “Gift List” to be notified about each daily gift and our live videos, plus have the opportunity to enter our giveaway. Sign up free here.

Day 20: Easy Acrylic Photo Keychains!
Get the the “Gift List” to be notified about each daily gift and our live videos, plus have the opportunity to enter our giveaway. Sign up free here.

Day 21: Engraved Keychains!
Get the the “Gift List” to be notified about each daily gift and our live videos, plus have the opportunity to enter our giveaway. Sign up free here.
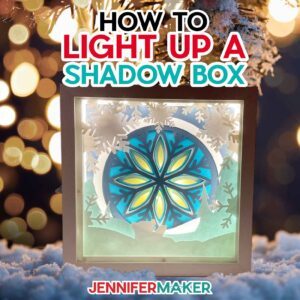
Day 22: Light Up a Shadow Box!
Get the the “Gift List” to be notified about each daily gift and our live videos, plus have the opportunity to enter our giveaway. Sign up free here.

Day 23: Diamond Painting for Beginners!
Get the the “Gift List” to be notified about each daily gift and our live videos, plus have the opportunity to enter our giveaway. Sign up free here.

Day 24: DIY 3D Letters with Shaker!
Get the the “Gift List” to be notified about each daily gift and our live videos, plus have the opportunity to enter our giveaway. Sign up free here.
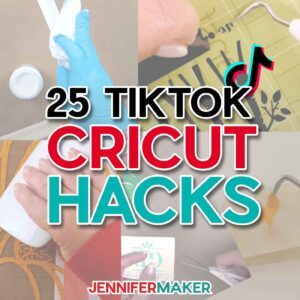
Day 25: 25 TikTok Cricut Hacks
Get the the “Gift List” to be notified about each daily gift and our live videos, plus have the opportunity to enter our giveaway. Sign up free here.