

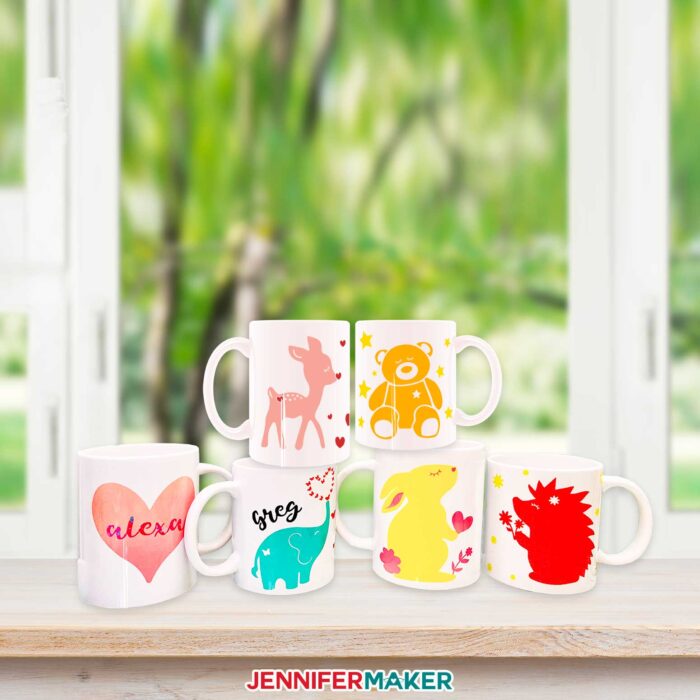
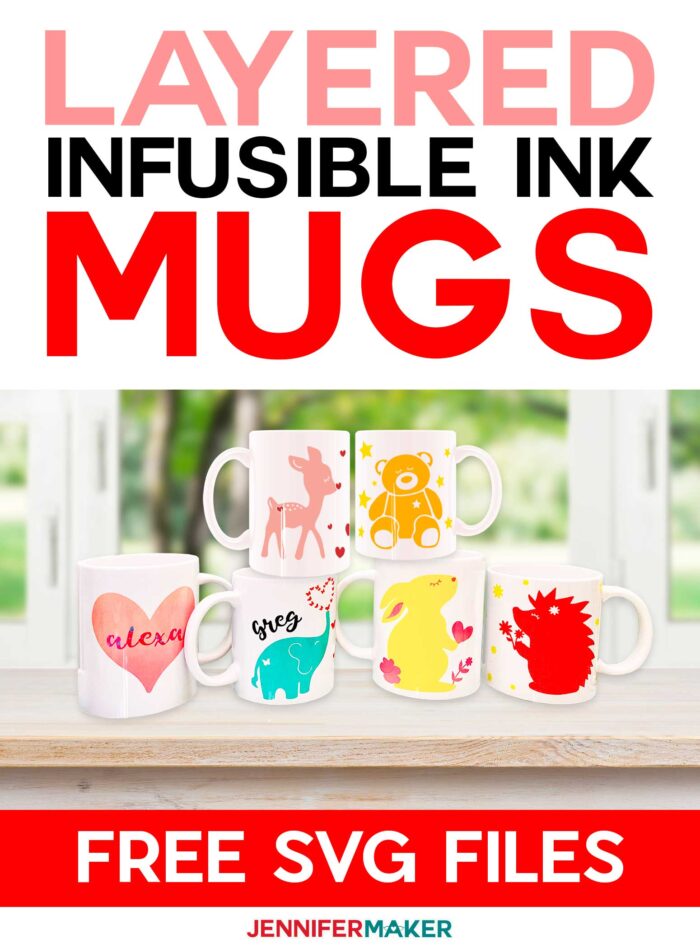
Learn the trick to making layered Infusible Ink mugs with multiple colors and practice with my easy-to-layer cute animal mugs made with the Cricut Mug Press.
I lovelovelove color, and I know you do, too! Black and white mugs are okay, I guess… but what I really want are COLORFUL mugs! And not just one color, but lots of colors. So when I got the Cricut Mug Press to use with Cricut Infusible Ink, I knew I wanted to try layering color. The only catch is that Infusible Ink is transparent, like so many other inks. So layering one color on top of another can give you unpredictable results. So in this layered Infusible Ink mug tutorial, I’m going to show you how to use the slice and set method of creating colorful Infusible Ink mugs that come out smashing! If you want to give these as gifts, I have the cutest mug boxes to hold your layered mugs!
See my full step-by-step tutorial to making layered Infusible Ink mugs with the Cricut Mug Press:

For this project, you’ll want two or more colors of patterns of Cricut Infusible Ink — it can be the large size sheets or the mug press size sheets. I’ll be using both in this tutorial!
You’ll also want something to cut your Infusible Ink — I’m using my Cricut Explore Air 2 to cut them, but you can use the Cricut Maker, Cricut Joy, or any cutting machine that will cut it. A green standard grip mat and a fine point blade are all you need to use with it.
Your mug should be a white, straight-walled ceramic mug with poly coating — the 12 oz and 15 oz Cricut mugs work perfectly here. I’m using the 15 oz mug size in this tutorial.
You’ll also want the Cricut Mug Press, which is optimized to work with Infusible Ink. This is a SUPER easy mug press that produces amazing results in minutes.
It’s also useful to have some heat-resistant tape to keep your layered Infusible Ink design in place and a heat-resistant mat to allow your pressed mug to cool upon.
This post contains some affiliate links for your convenience (which means if you make a purchase after clicking a link I will earn a small commission but it won’t cost you a penny more)! Read my full disclosure policy.
Materials to Make a Layered Infusible Ink Mug
- Cricut Infusible-Ink compatible mug, 12 oz or 15 oz (you can use non-Cricut sublimation mugs)
- Infusible Ink transfer sheets in two or more colors or patterns
- Cricut Mug Press
- Green Standard Grip Cutting Mat
- Heat resistant pad
- Lint roller
- Font used for Alexa: Tingler font
- A way to cut your Infusible Ink for the mug (I used the amazing Cricut cutting machine!)
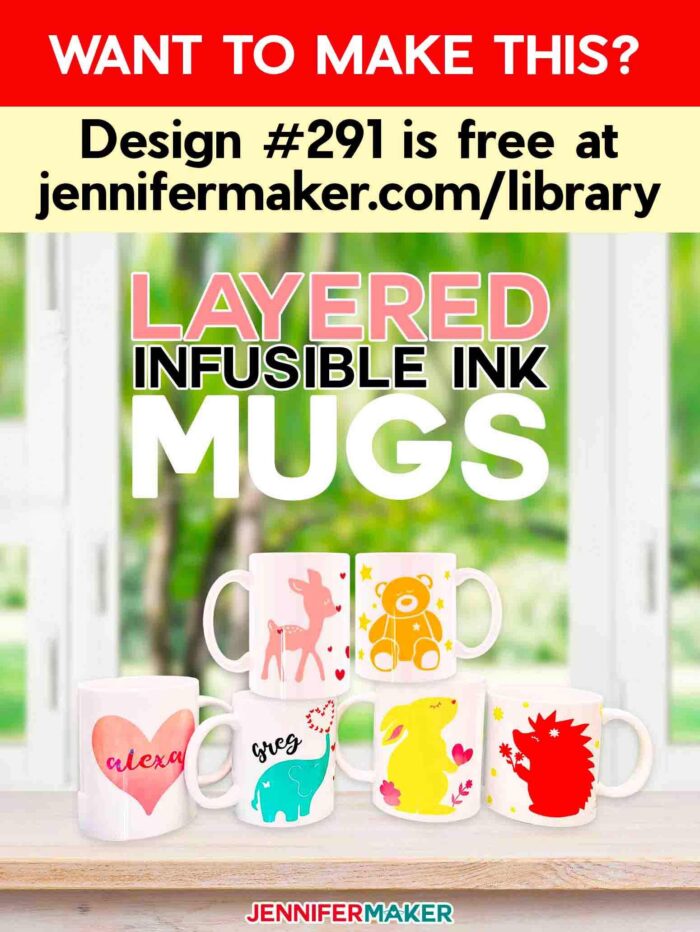
- Design #291 – My free cute animal mug designs (available in my free resource library—get the password at the bottom of this post
How to Create a Layered Infusible Ink Mug on the Cricut Mug Press
Cute Animal Mugs with Cricut Infusible Ink
Learn how to make colored and layered Infusible Ink mugs with the Cricut Mug Press
Materials
Tools
Instructions
STEP 1: FIND OR MAKE A MUG DESIGN
To make a layered Infusible Ink mug, you need a mug design with two or more layers. You will find some premade designs in Cricut Design Space by clicking on Images, then search for "mug" and scroll until you spot one you like. If you want to make your own from scratch but do not know how, my Custom Cut workshop explains the process of converting a flat image into a layered image. The most important thing to know is that Infusible Ink is layered with the slice and set method, which is explained here.
Slice and set means you slice colors out, rather than overlap them. This is important for getting true color representation, as Infusible Inks are transparent. If you simply overlay colors on other colors, you will get weird color combinations.
To make it easy for you to understand the technique of layering Infusible Ink with slice and set, I've created several cute and colorful animal design files that are ready to go, plus they are all perfect for easy layering with Infusible Ink. I've done the slicing for you! To find these free layered designs, look for design #291 in my free library. You can find the files by searching the page for the design number and then click it to download the SVG cut files, as well as DXF and PDF patterns.
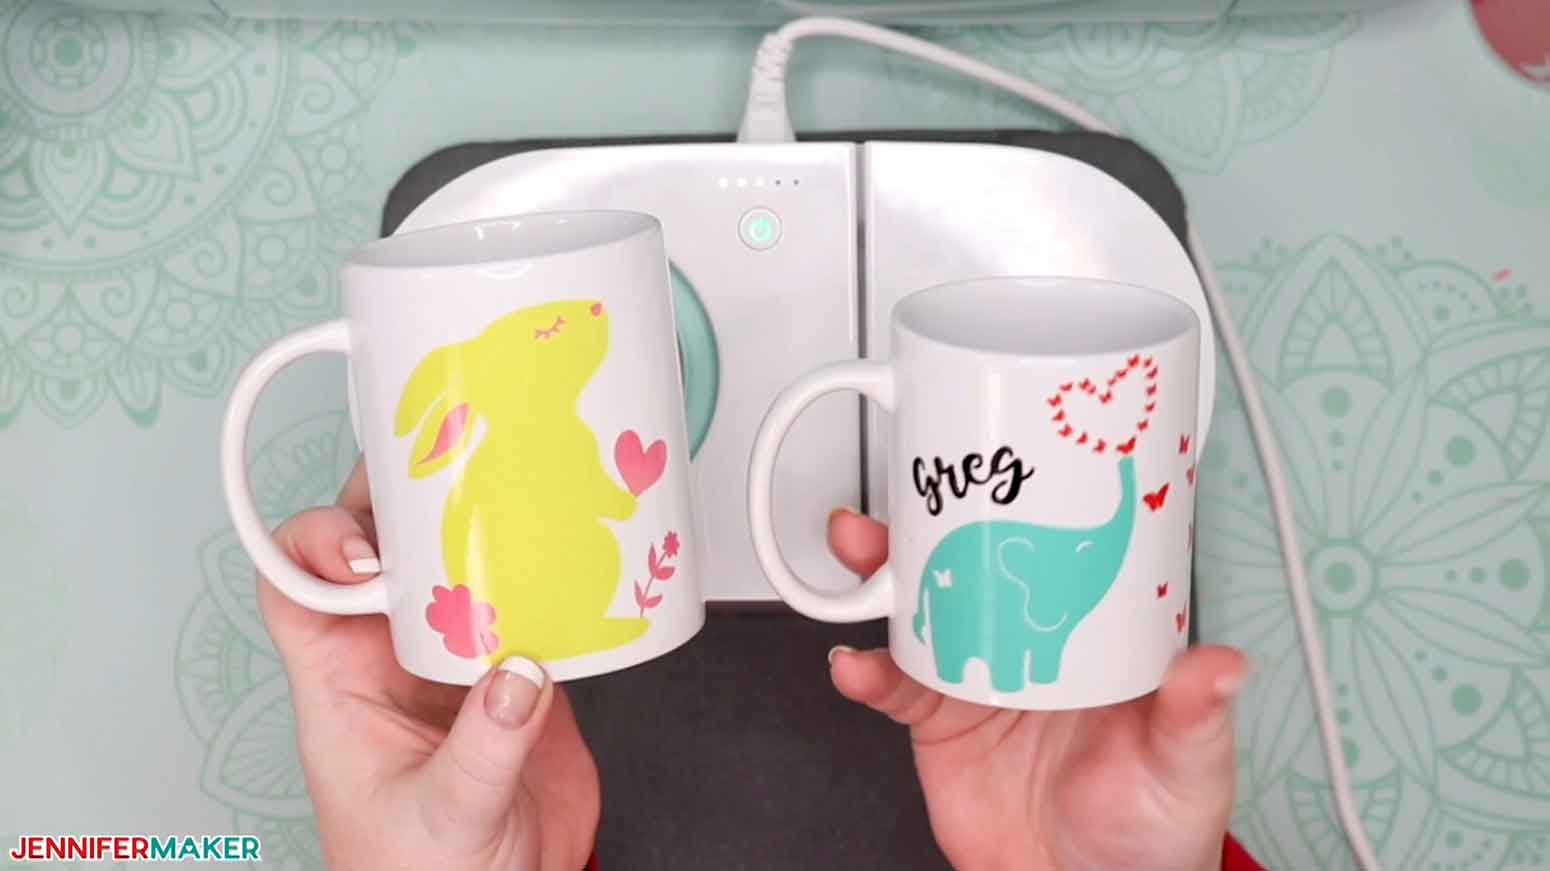
Inside the folder are many different cute animal designs, including an elephant, a deer, a hedgehog, a bunny, and a teddy bear!
Upload the SVG cut file for the animal you like best to Cricut Design Space. If you’re not sure how to upload a SVG cut file to Cricut Design Space, watch this helpful video training series I made.
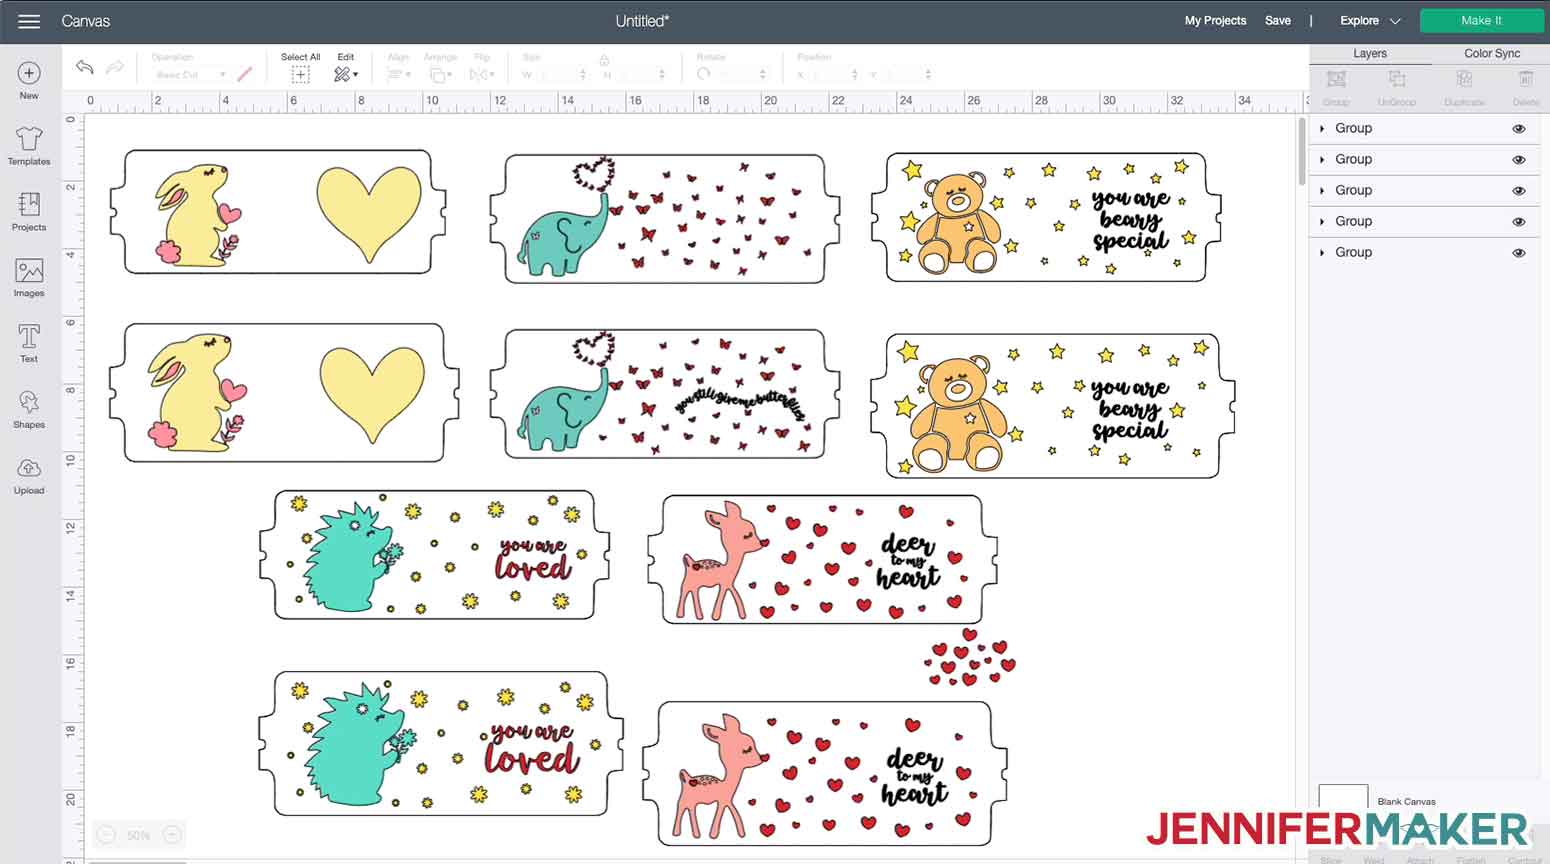
There are TWO sizes of mug designs in all of my files — the smaller one on top is sized for the 12 oz Cricut mug, while the larger one on the bottom is sized for the 15 oz Cricut mug. Hide or delete the size you do not need by selecting the layer and clicking the eye icon (to hide it) or the trash can icon (to delete it).

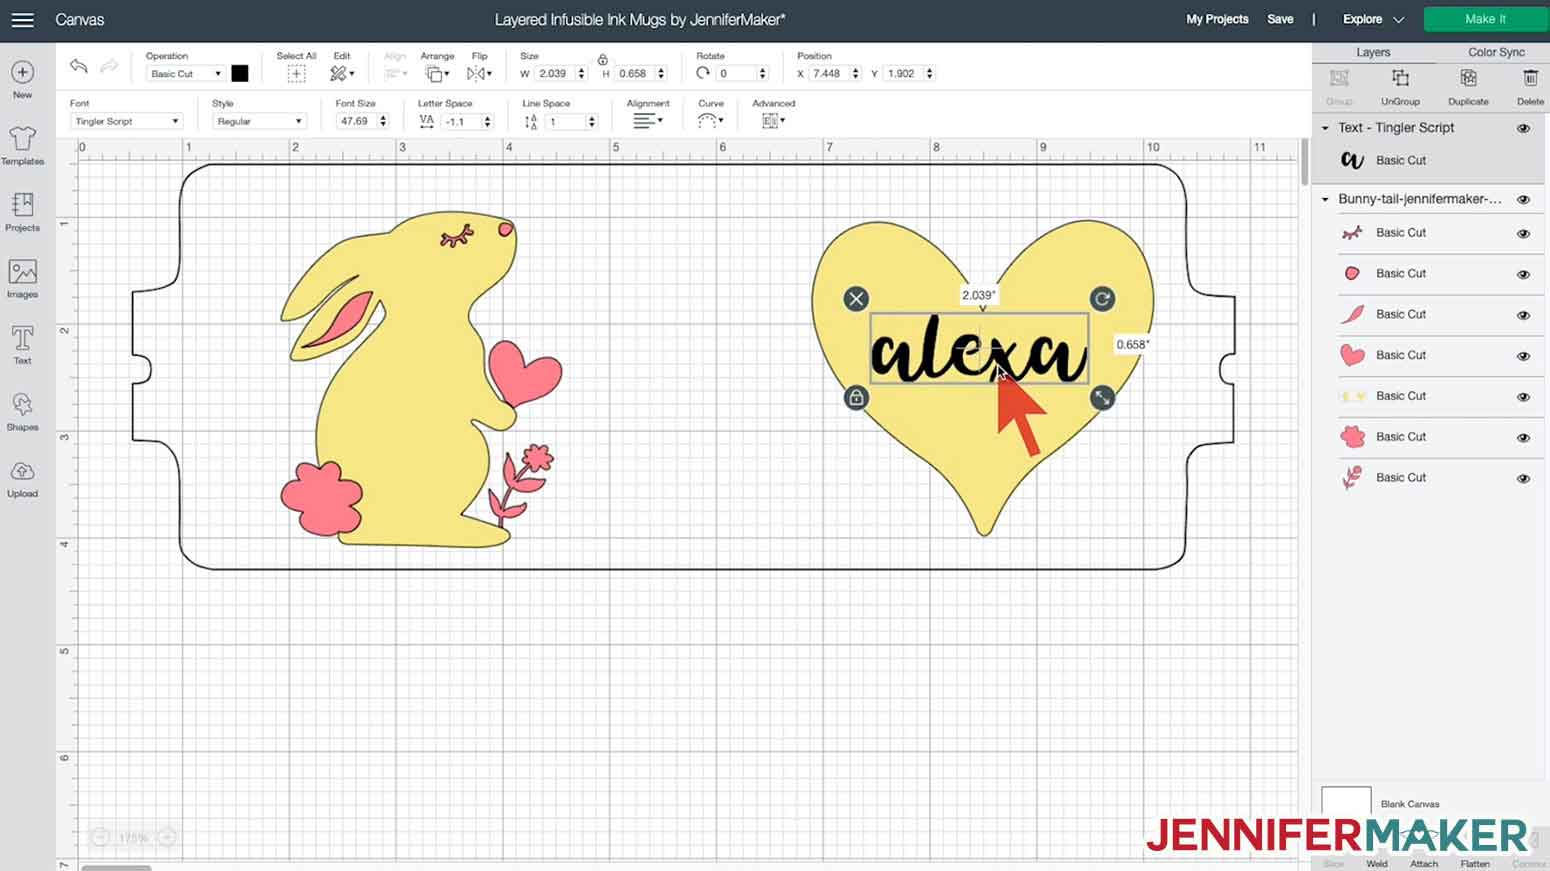
You're free to click on the Make It button now, but if you'd like to add a name to the heart, first ungroup all layers, then click on Text on the left side and type in a name or word, then choose a font and adjust the letter spacing and size as you like it until you're happy.
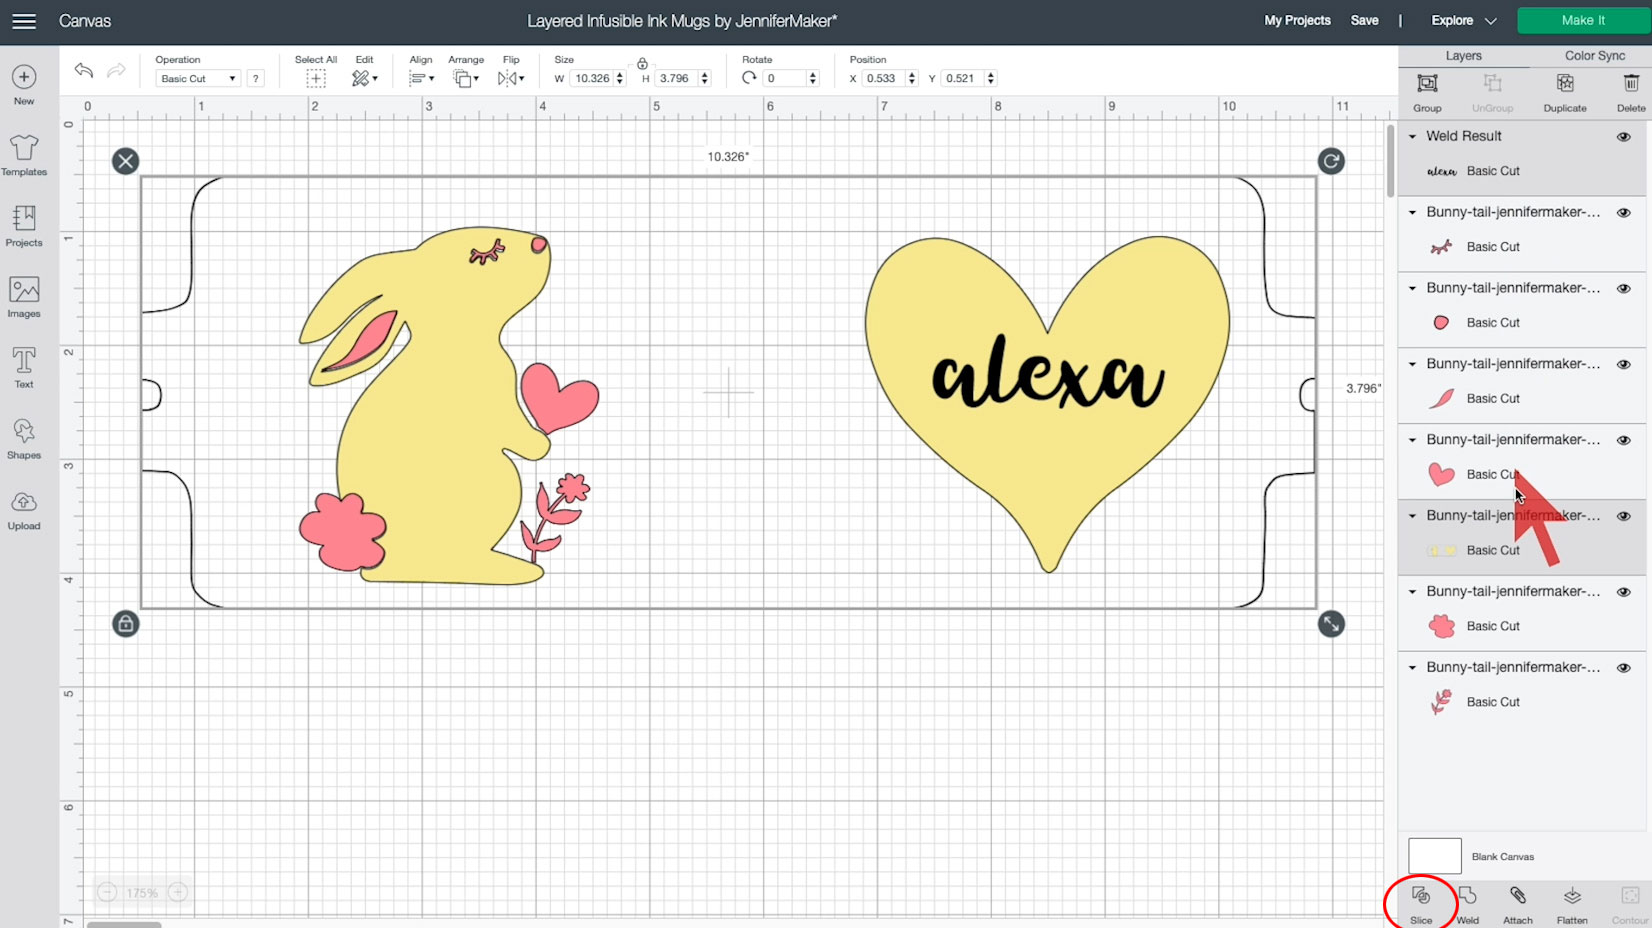
Now you want to slice the word out of the heart -- to do this, select the word and the heart -- you should see just two layers selected on the right side. Click Slice.
This will give you new two layers. Delete the black one, and change the other one to whatever color you want -- I'm choosing pink.
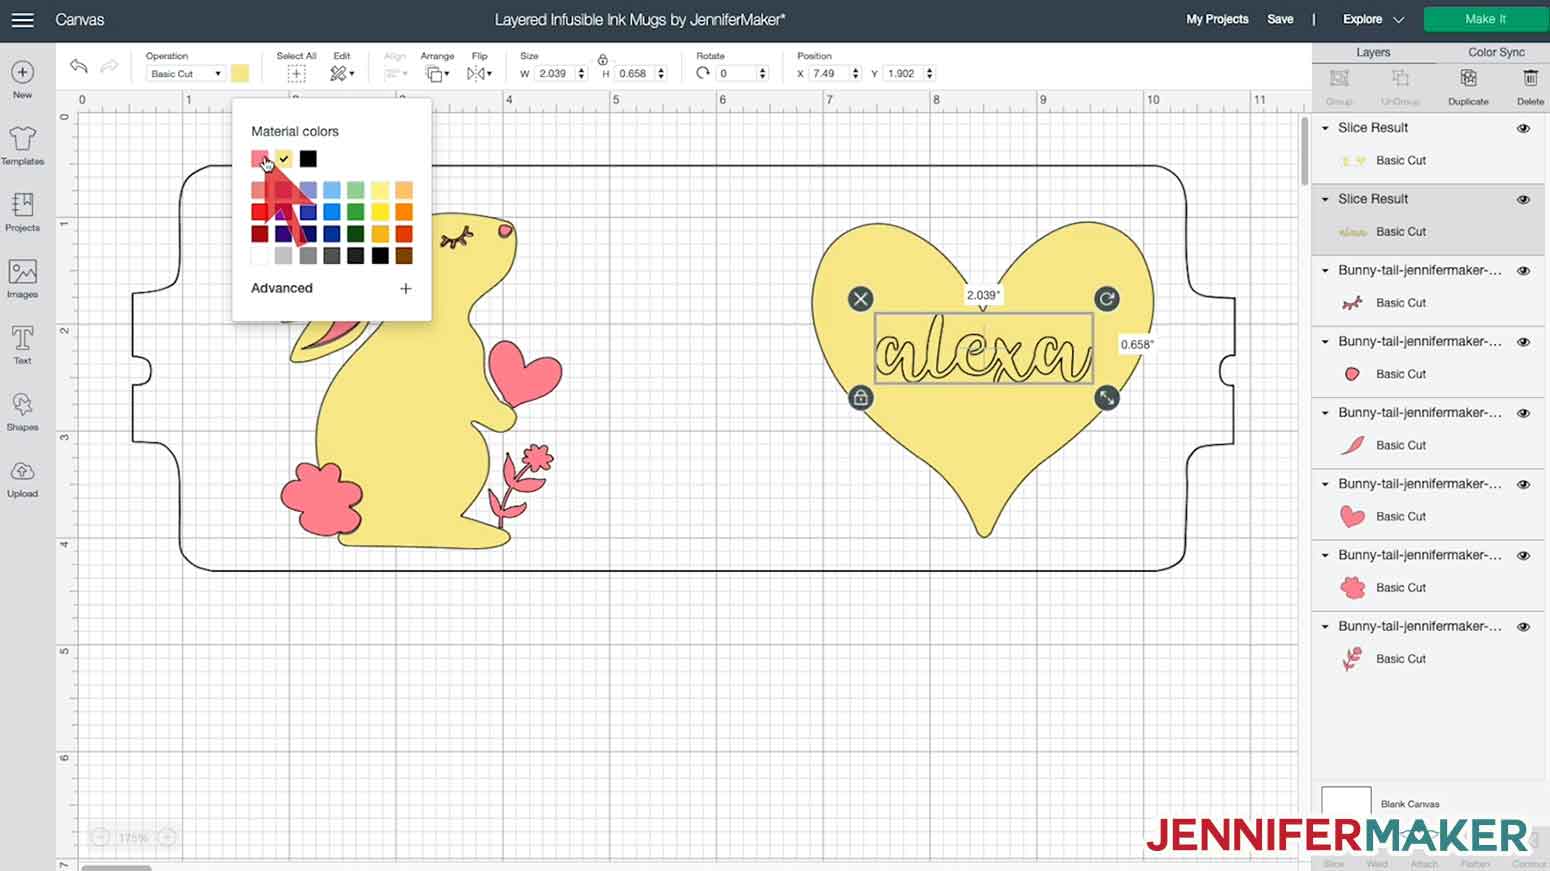
Feel free to change the colors if you want to preview how colors will look together. To do this, click on a layer in the panel on the right side and choose a new color from the Color menu at the top of the screen.
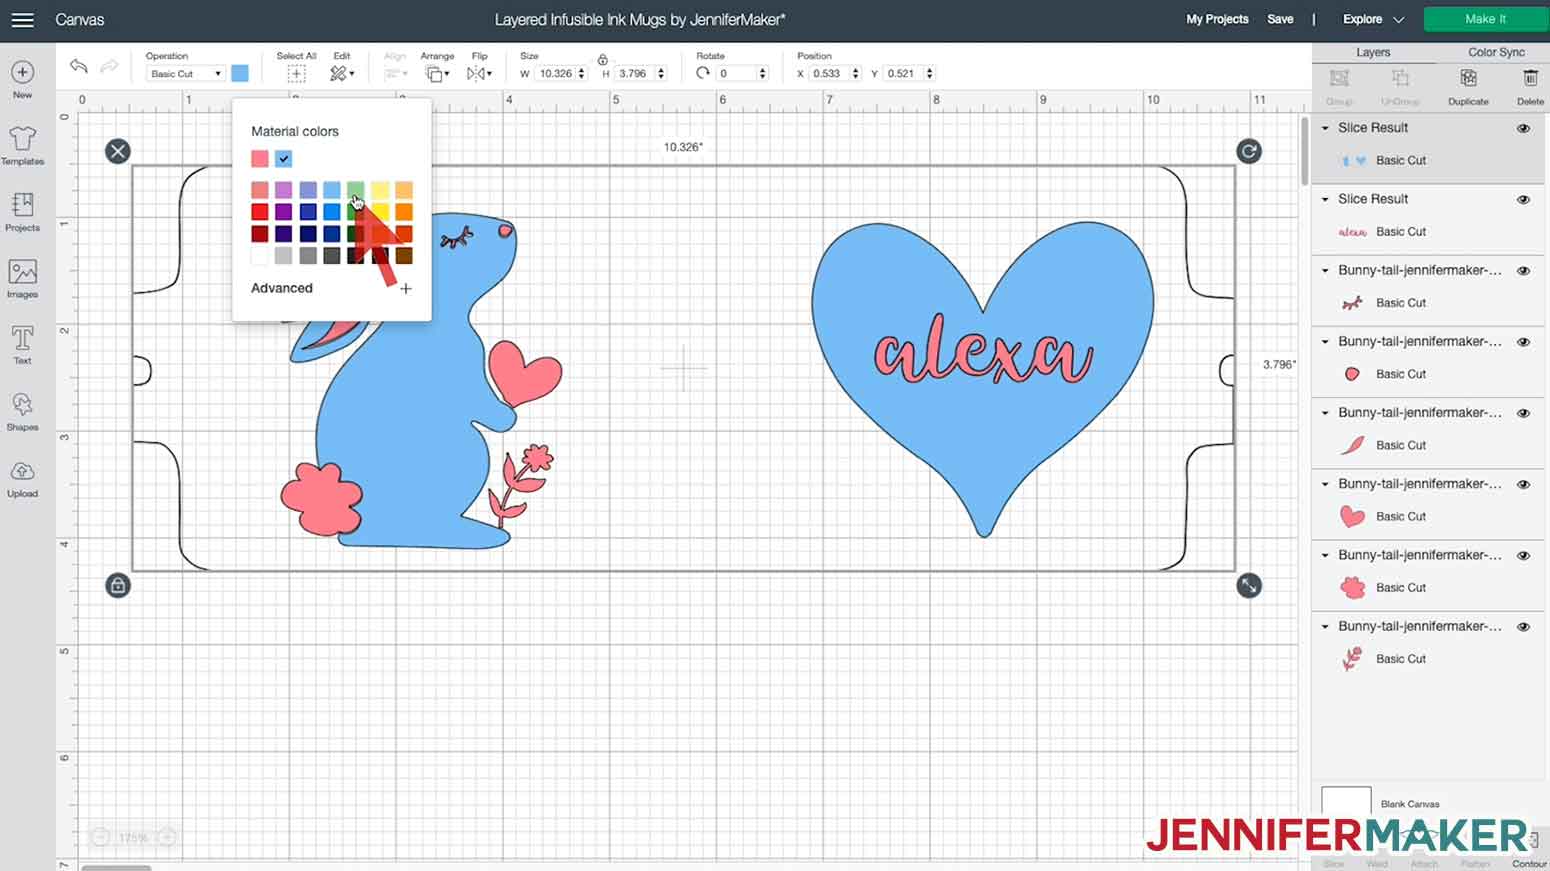
And that's it -- you can click Make It now.
STEP 2: CUT OUT YOUR INFUSIBLE INK
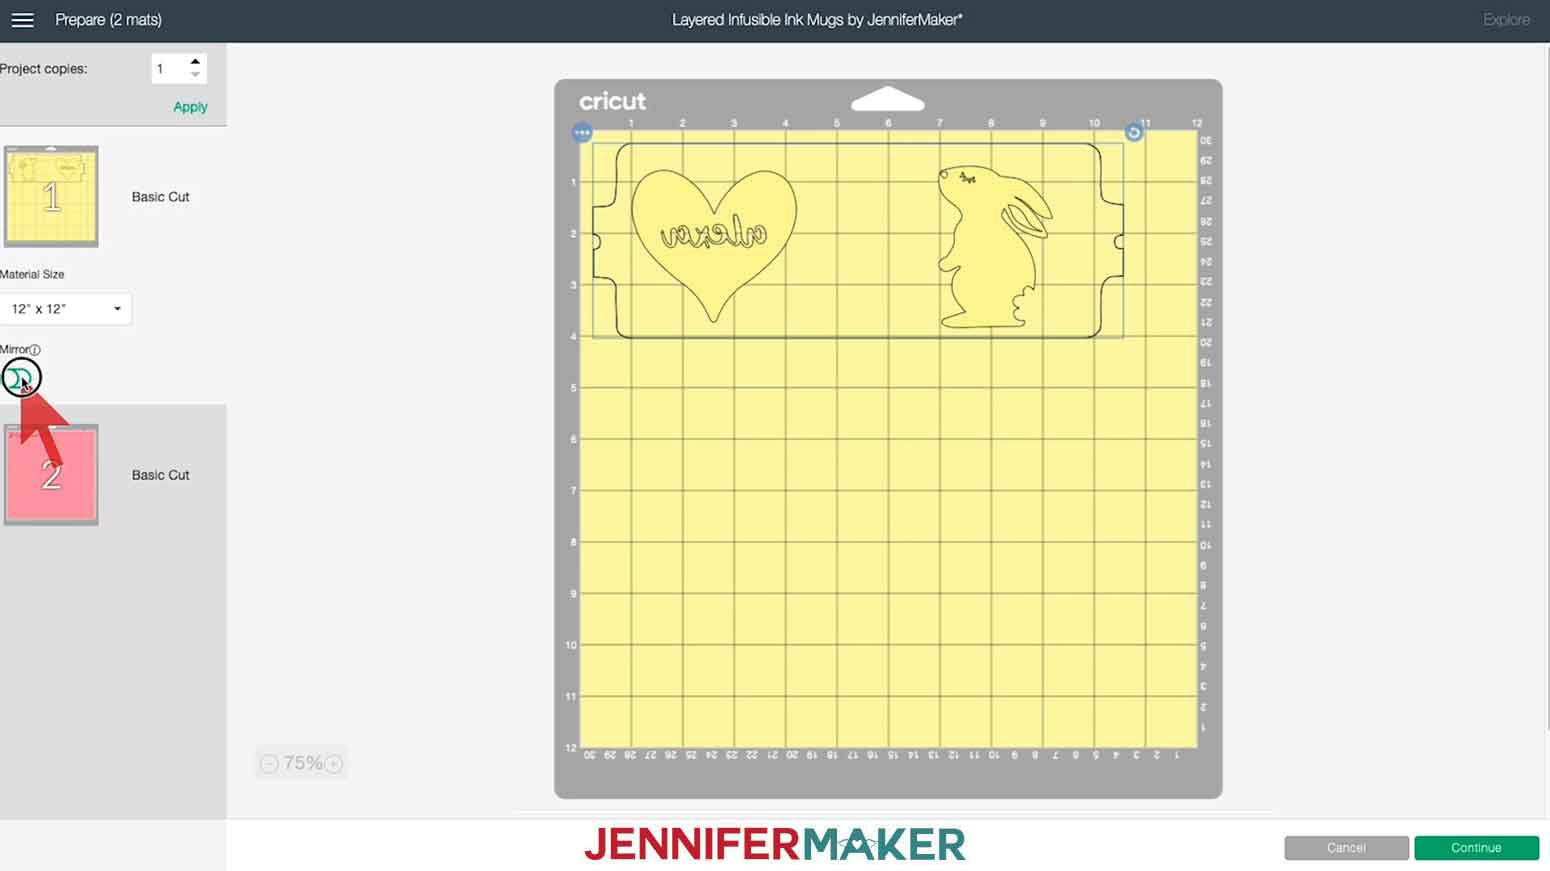
Once you have your mug design, click on Make It in the upper right corner.
On the Prepare screen, be SURE to MIRROR your design. All Infusible Ink designs for the Cricut Mug Press should be mirrored. Just click the toggle on the left side until it turns green, then click Continue.
Now click on Browse All Materials and search for Infusible Ink. I also recommend more pressure to be sure it cuts through the Infusible Ink transfer sheets.
Place your Infusible Ink transfer sheet matte color side UP (which means shiny carrier sheet side down) on your cutting mat. Make sure the fine-point blade is loaded into the Cricut.
![]()
Note: I recommend you wash and dry your hands immediately before handling Infusible Ink to avoid transferring any oils to the surface.
Load your mat and press the flashing button to begin cutting, paying careful attention to what color mat you're on so you know which color of Infusible Ink to put in your machine.
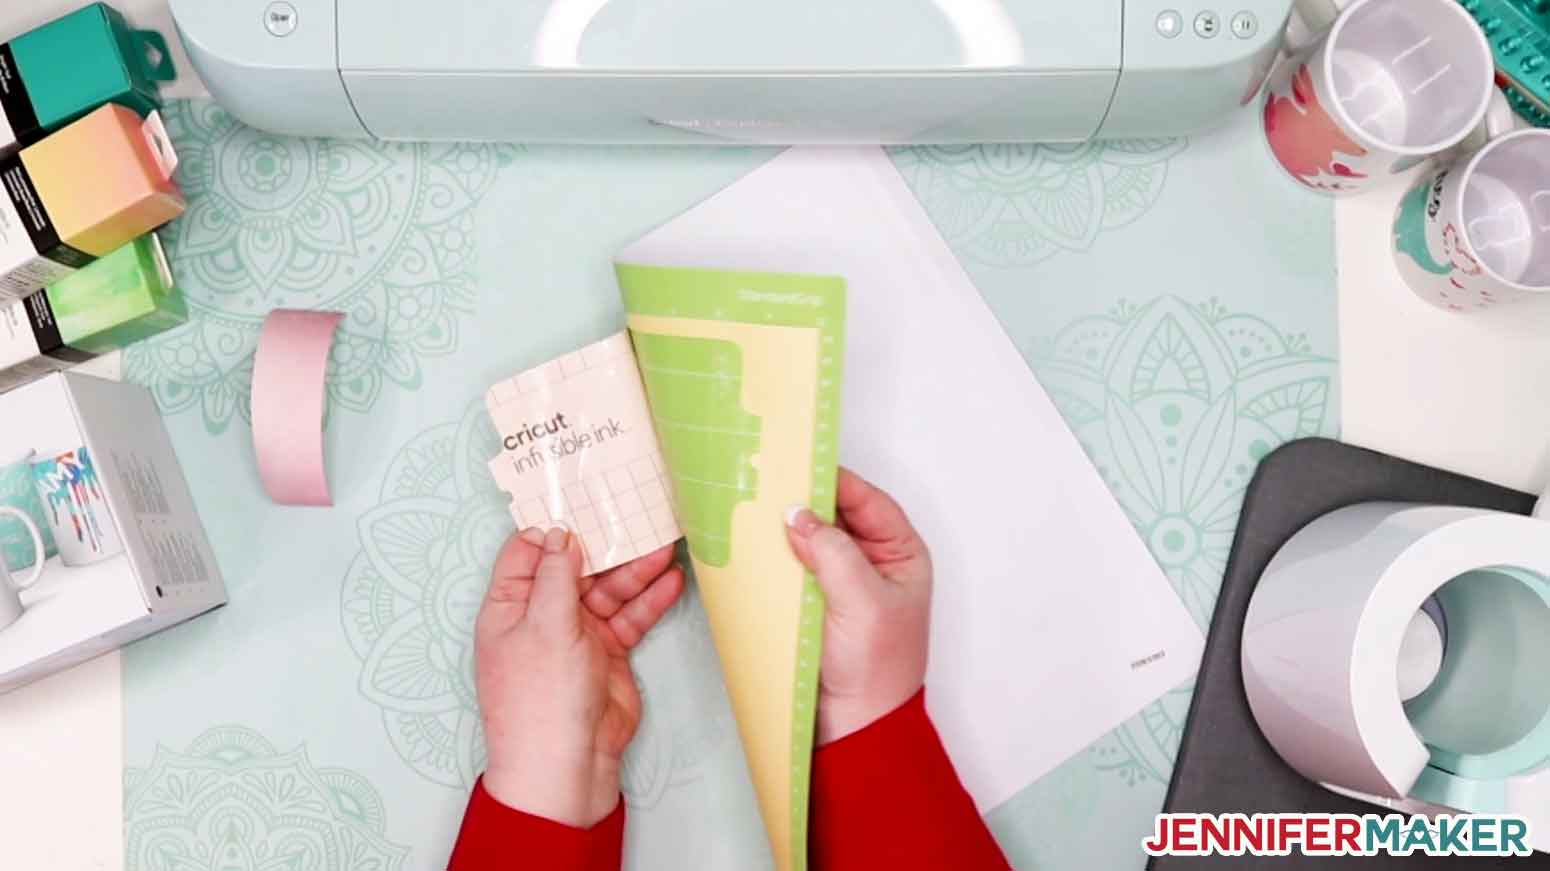
When you are done cutting, unload the mat, flip the mat over onto your work surface, and peel the mat away from the Infusible Ink carefully. I've designed my mug wraps so that the outside template will cut out of the larger Infusible Ink transfer sheet — this makes it super easy to apply to your mug later on.
Note: If for any reason your machine doesn't cut all the way through the outside as mine does, you can either trim it later with scissors or next time you cut increase your pressure in your Custom Material Settings. (I have my Infusible Ink Transfer Sheet material settings on 268 pressure and it works like a champ.)
Repeat as necessary for all layers in your design.
STEP 3: WEED AND LAYER YOUR INFUSIBLE INK DESIGN
Once you cut out your Infusible Ink, you want to weed it, which means to remove all the extra bits that you don’t want to transfer to your mug. To get started, roll and gently bend the transfer sheet up and down until the edges of the design begin to lift from the carrier sheet.
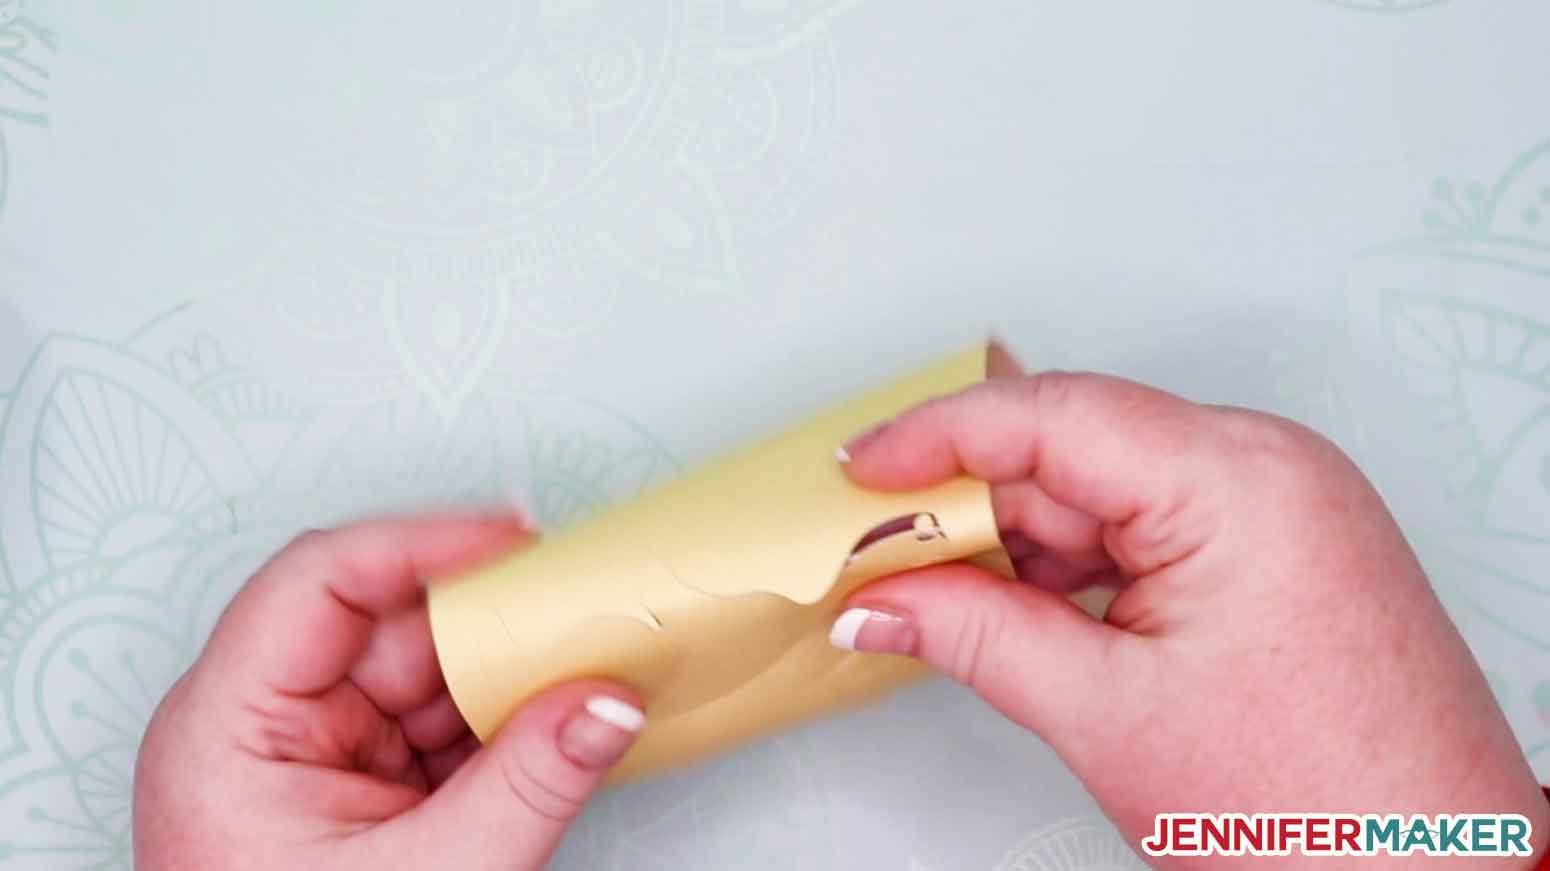
Now you can just weed the extra bits away with your fingers. You are welcome to also use a weeding tool, but I find it works best if I just bend the sheet away from me slightly and pull it right up with my fingers.
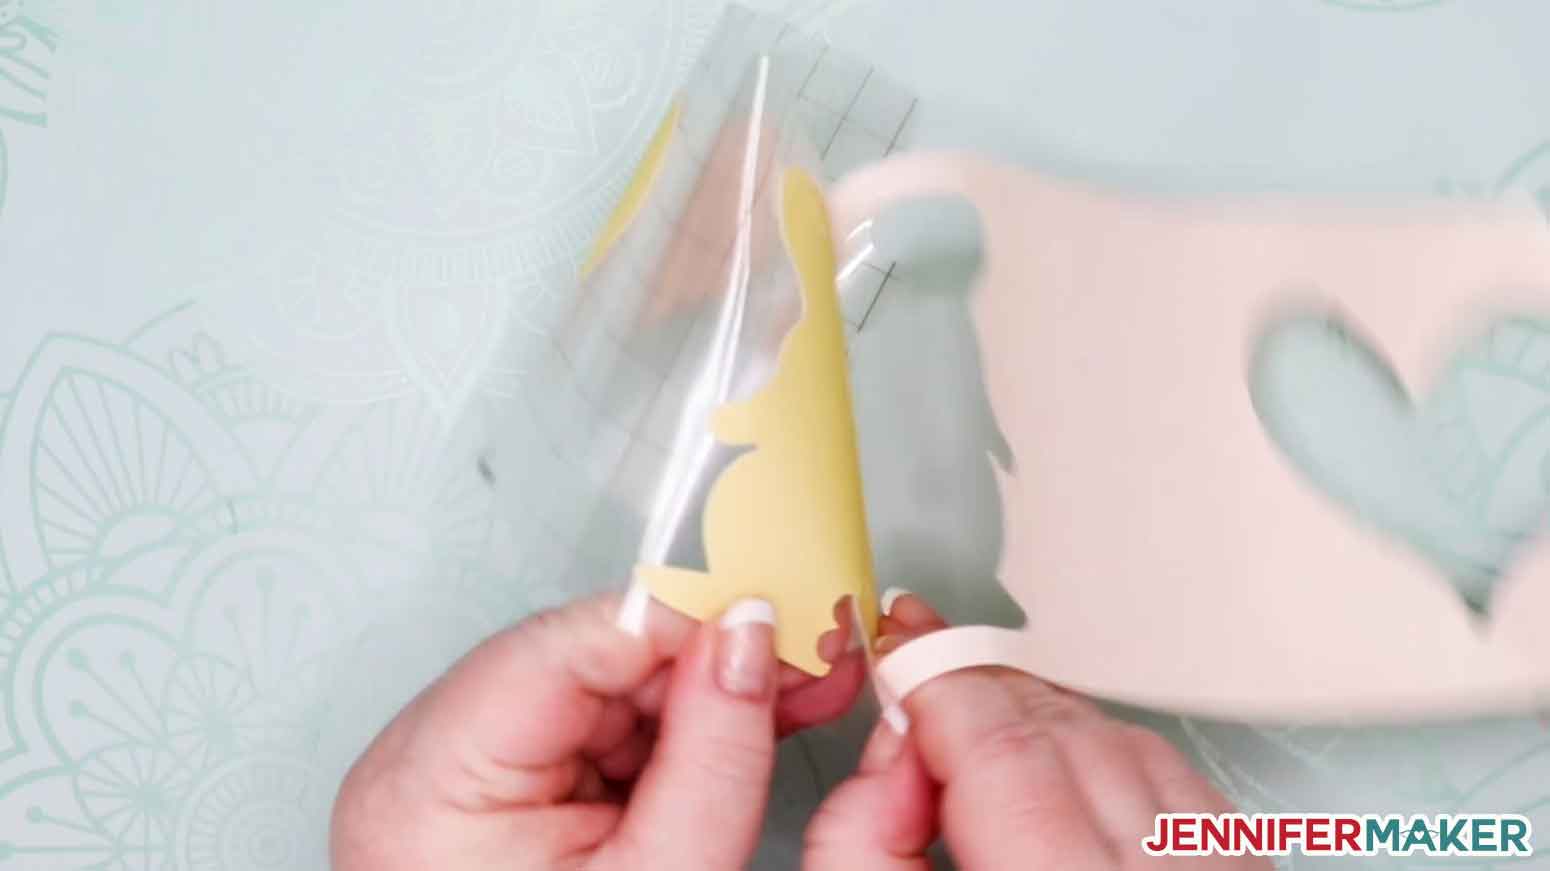
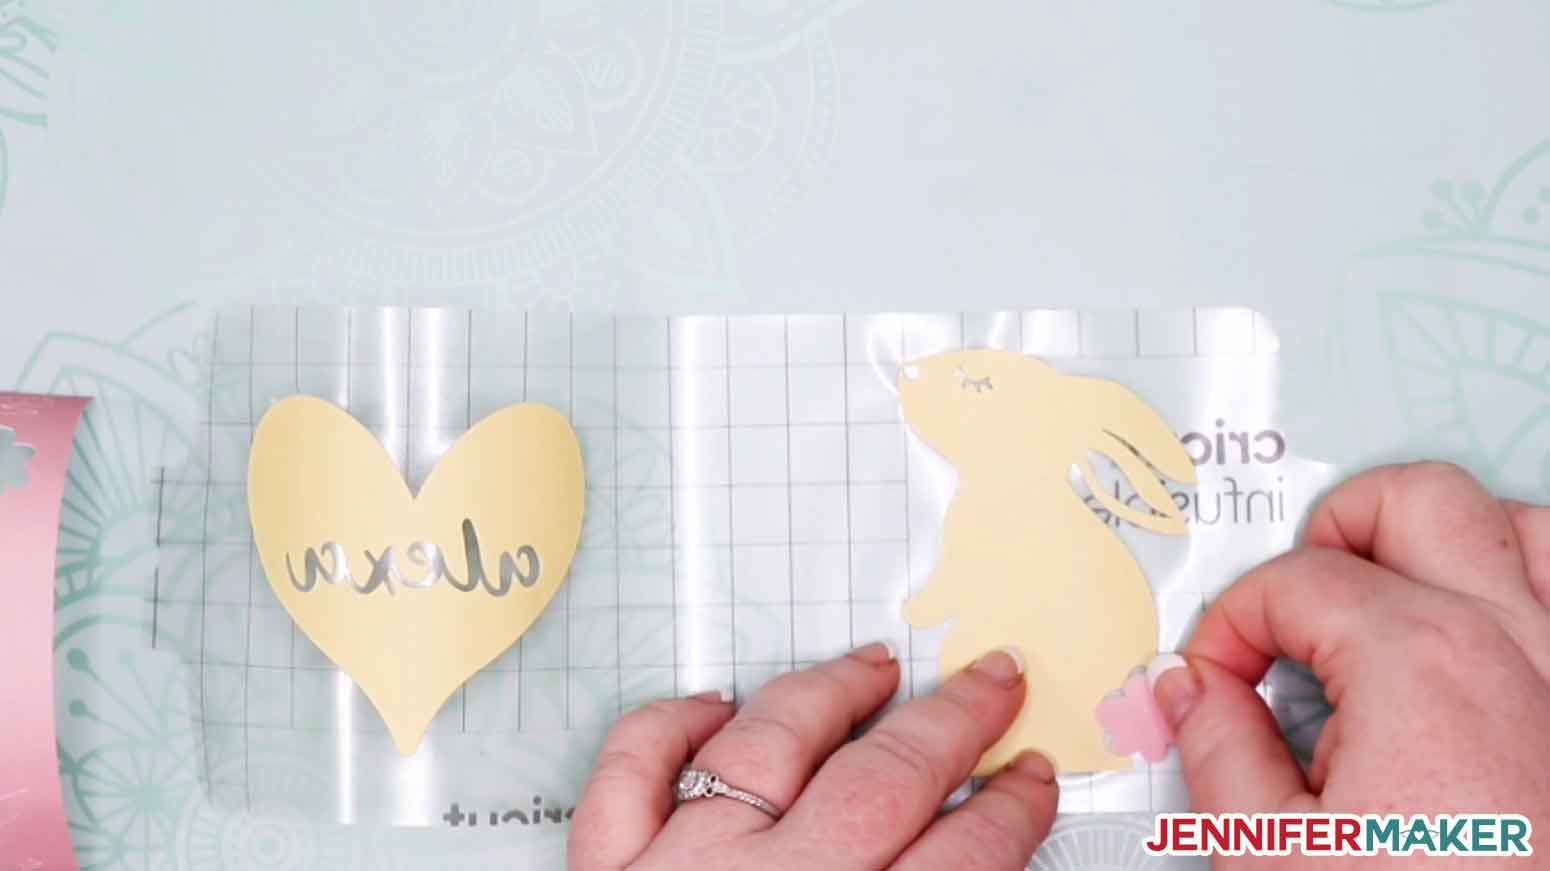
Once everything is weeded, it's time to layer your colors. To do this, you want to keep the large rectangular shape intact and move other colors to it. Just peel off shapes and words from other sheets and set them onto the main rectangular design. The sticky liner will keep the color shapes in place.
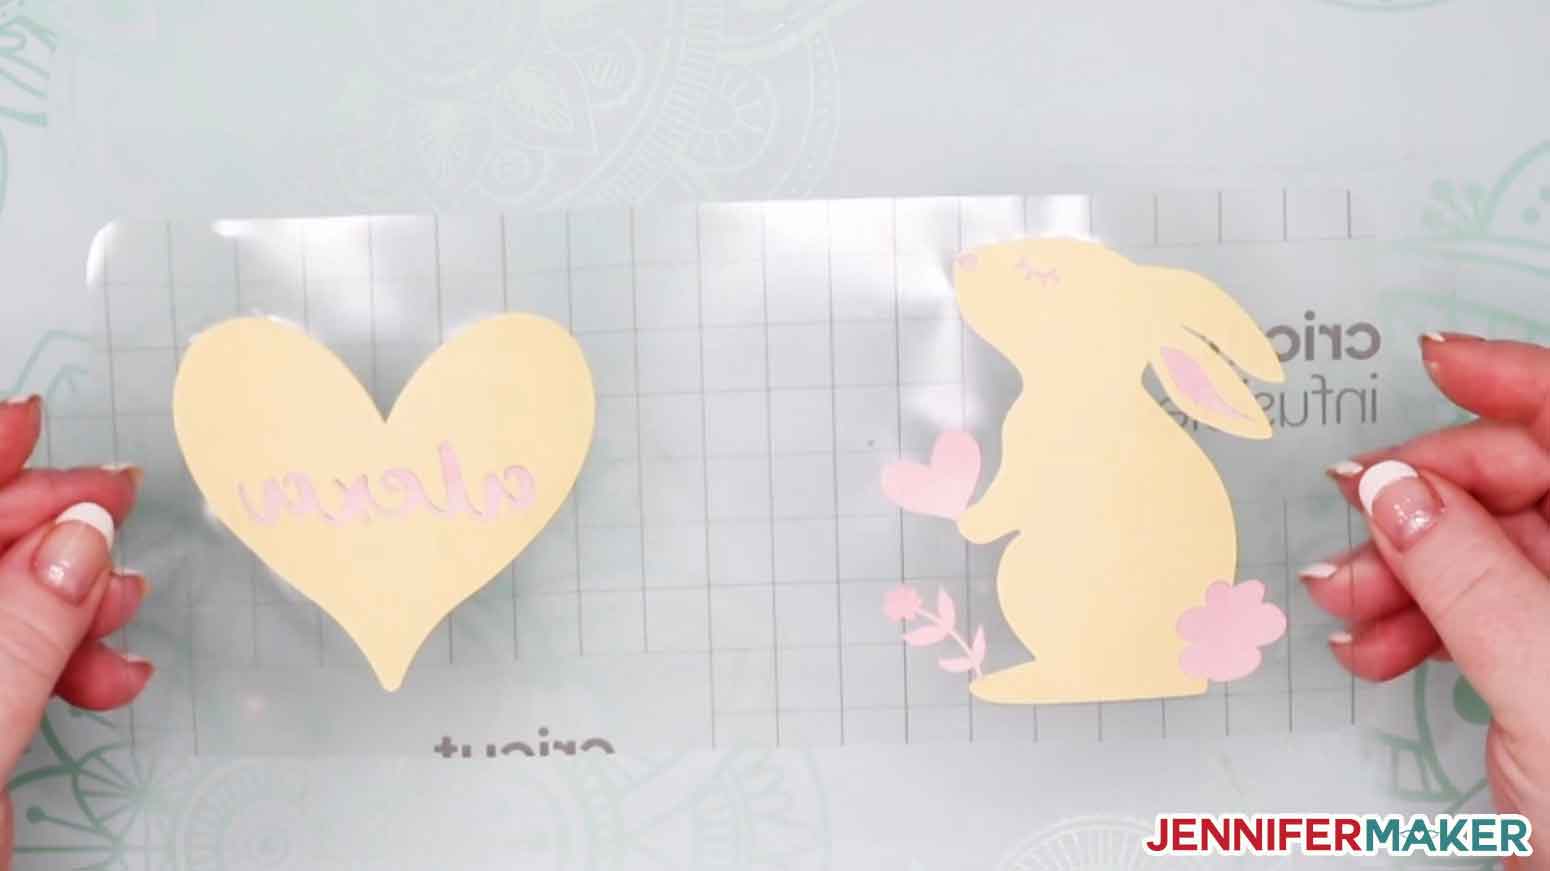
Once you've finished setting your colors, flip your design over so you can see how it will appear once it is on your mug and look for any missing bits you forgot to weed or set. Here is the layered Infusible Ink sheet:
STEP 4: APPLY YOUR DESIGN TO YOUR MUG
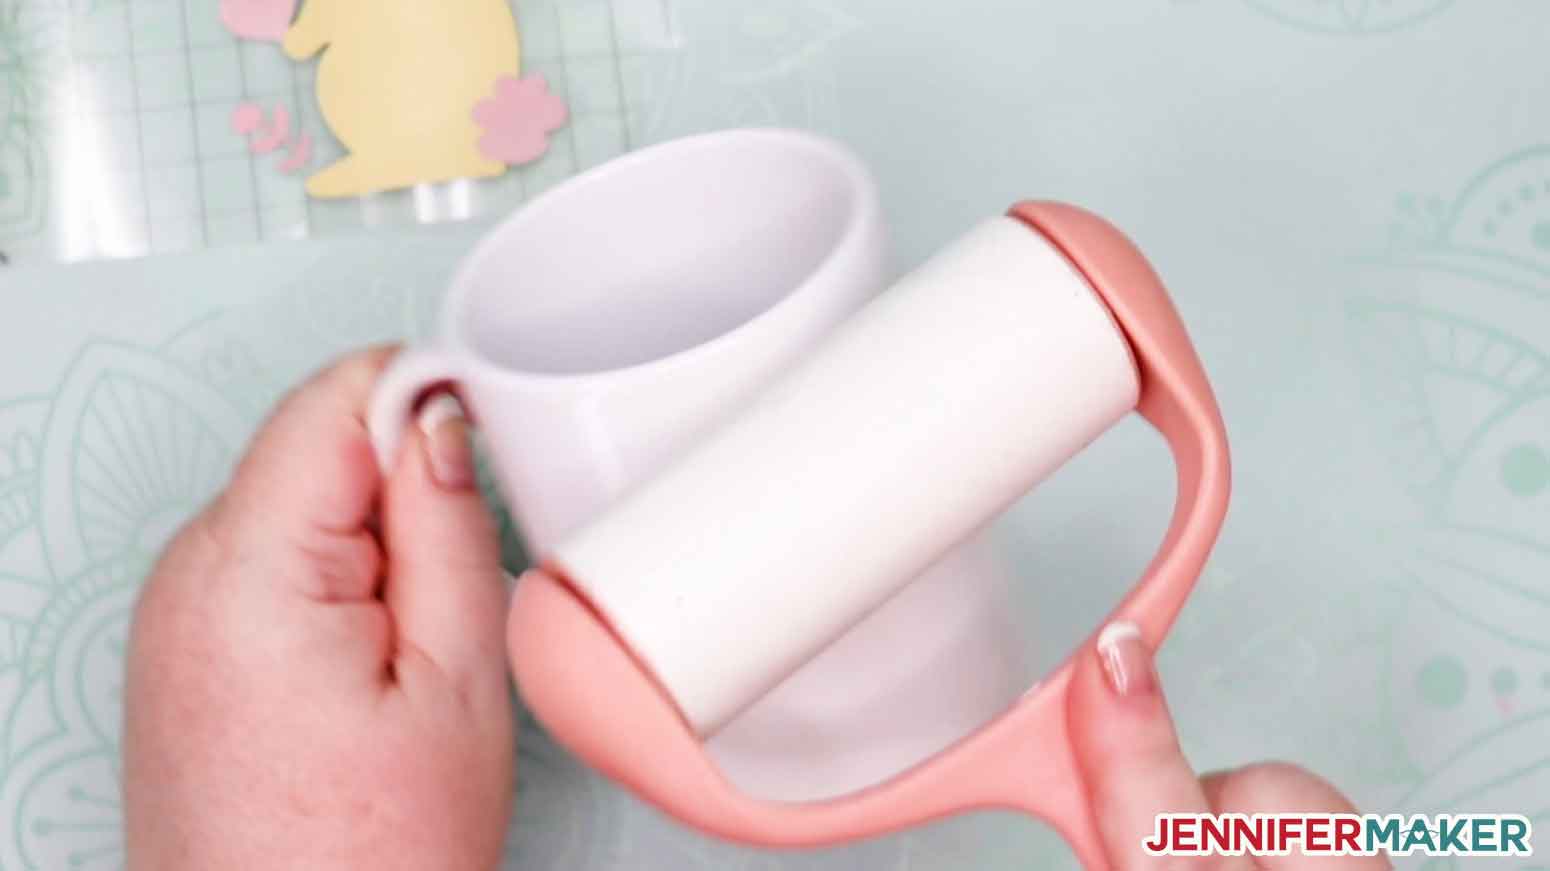
Begin by cleaning the surface of your mug with a lint roller. This removes any dirt or dust and get the surface as clean as possible, and makes sure the Infusible Ink transfers cleanly and vividly.
If you have a full coverage design with lots of parts in special places, just wrap the whole design around the mug. I explain the best way to do this in my Fancy Wraps Mug tutorial.
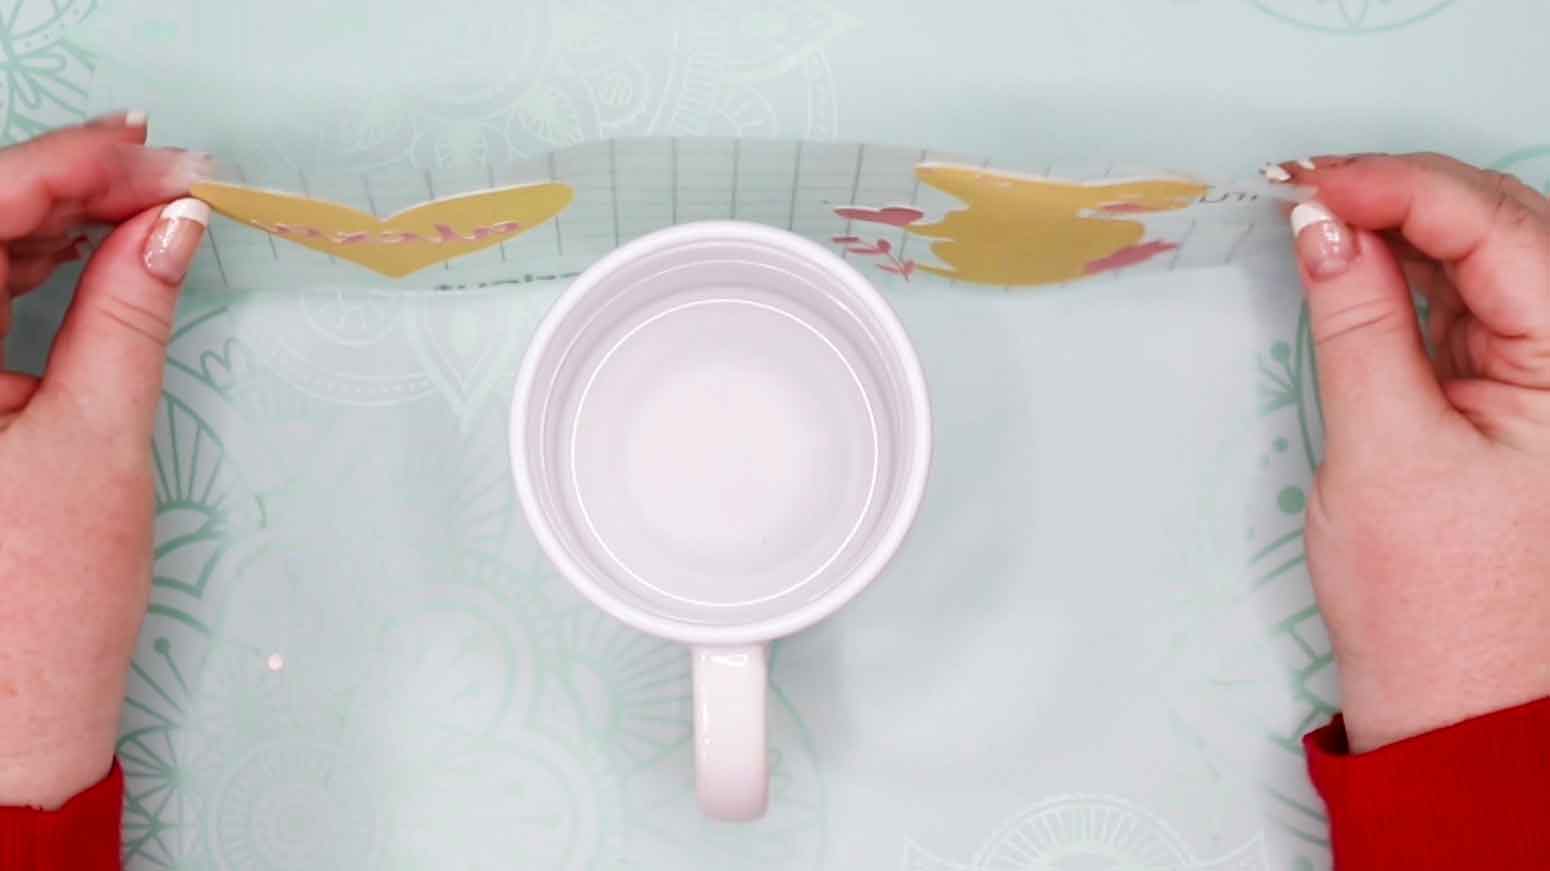
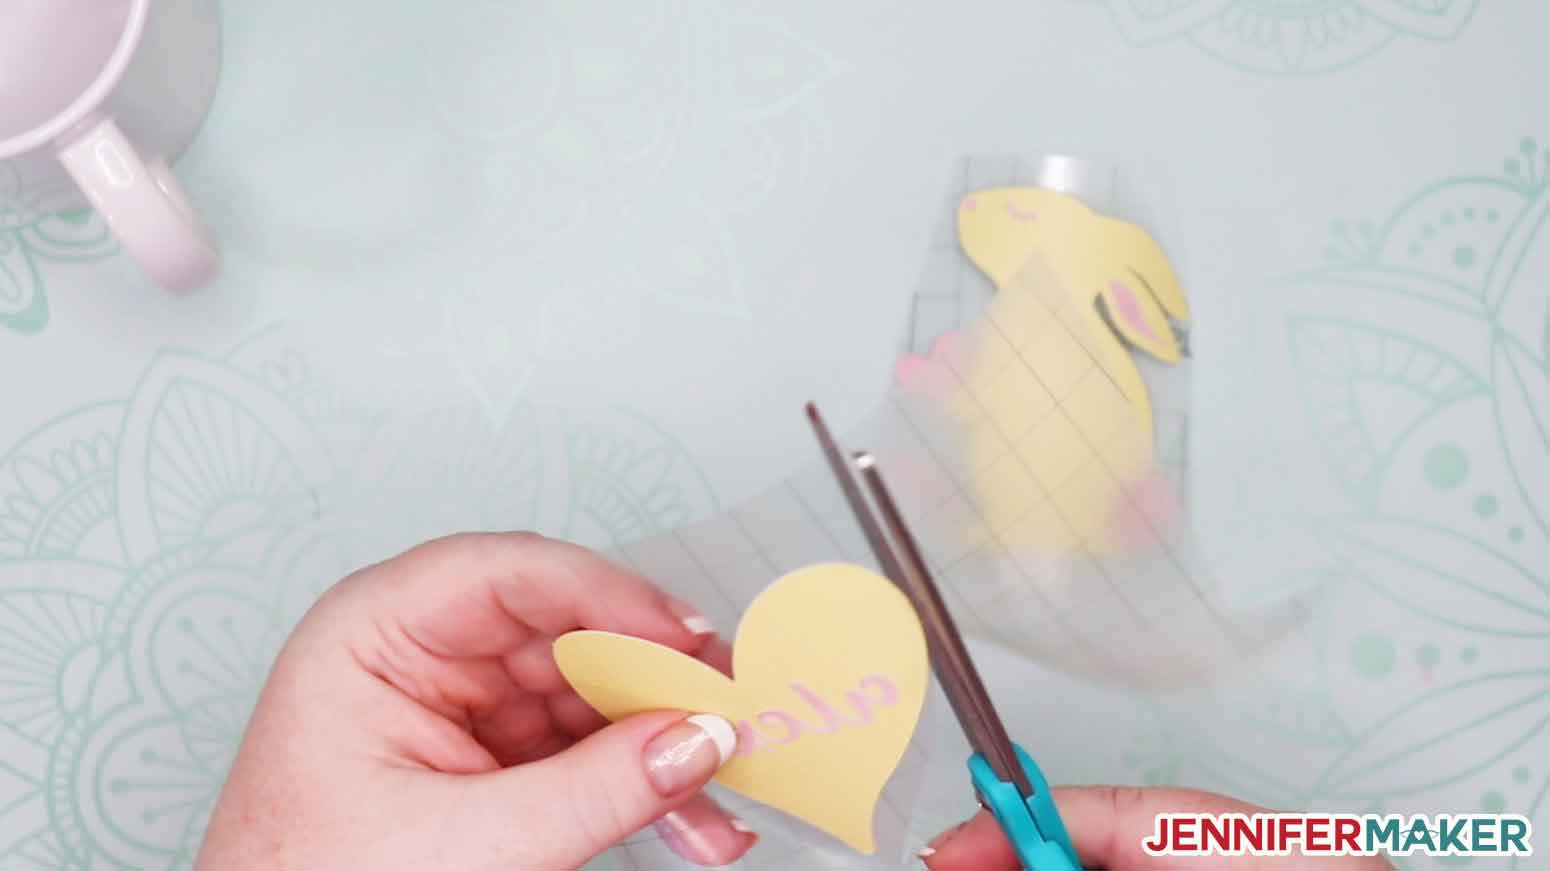
If you have a less-than-full coverage design to apply to your mug, the best thing to do is to trim your liner as close to your design as you can, then just position and stick on your mug wherever you want it to go. Doing it this way will avoid transferring any little extra bits or dirt to your mug, and make for a cleaner transfer. If you need to tape it down, feel free to tape it with heat-resistant tape, but avoid covering any part of your design if you can manage it.
And that's it! Your design is on your mug and it's time to press it! You do NOT need to cover your design with butcher paper if you're just using Infusible Ink transfer sheets!
STEP 5: PRESS THE MUG WITH THE CRICUT MUG PRESS
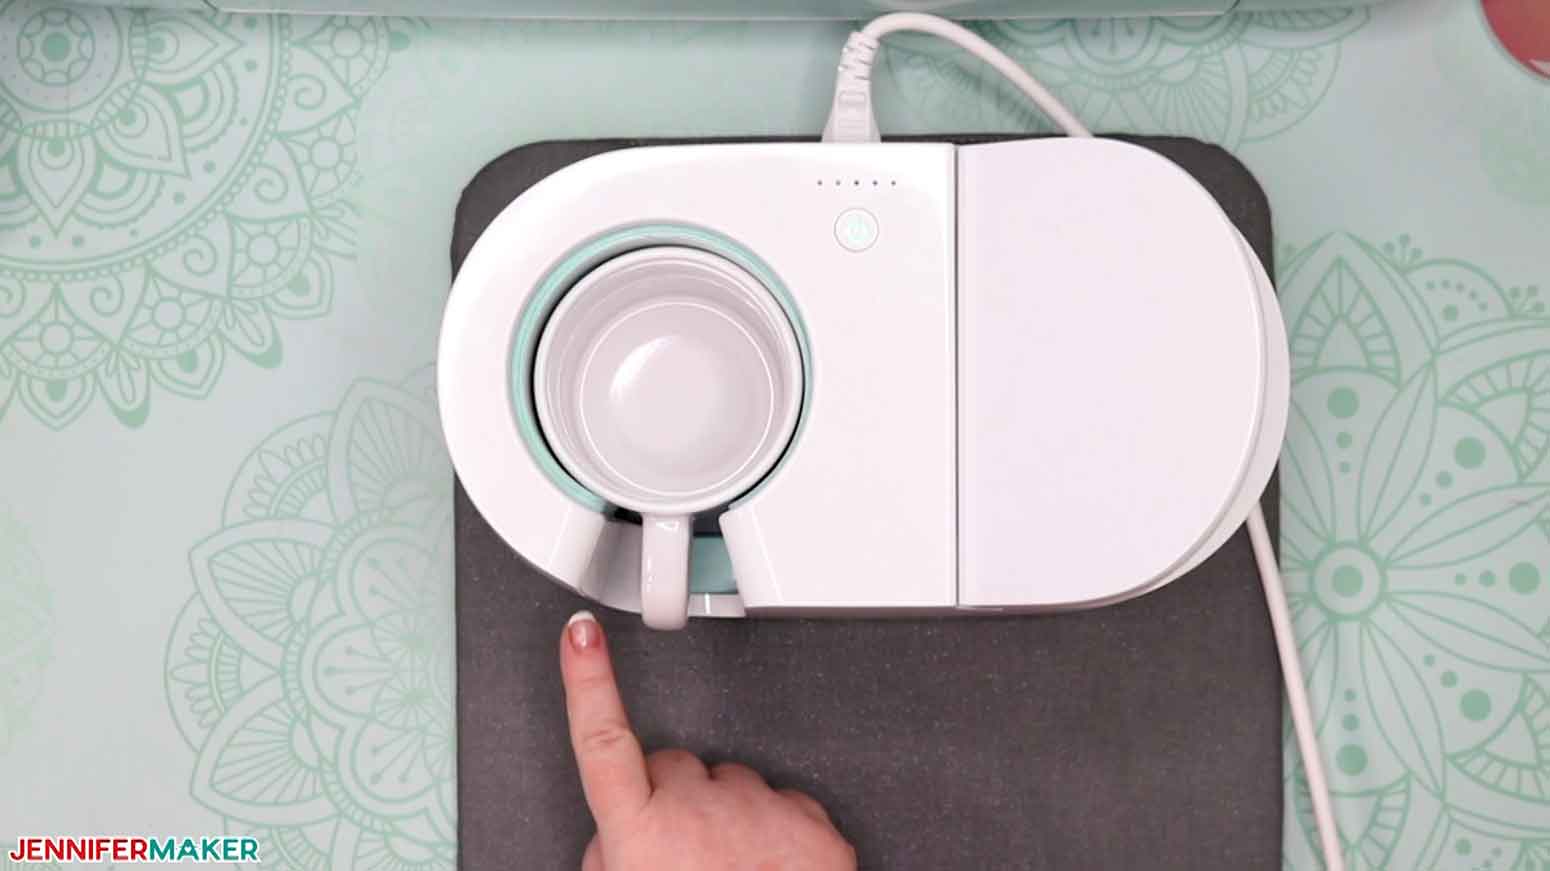
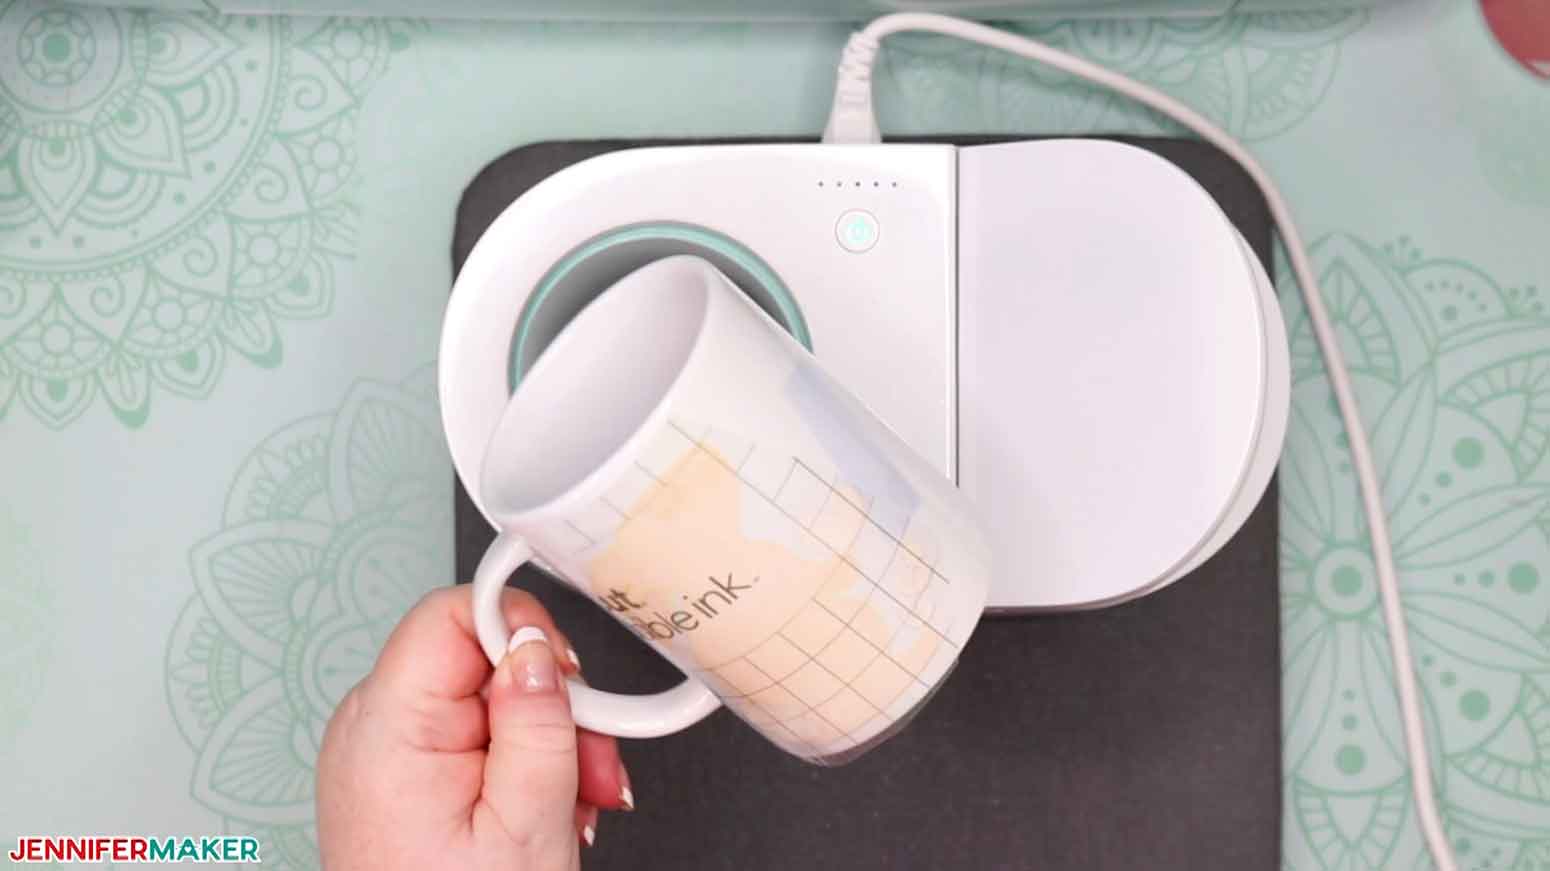
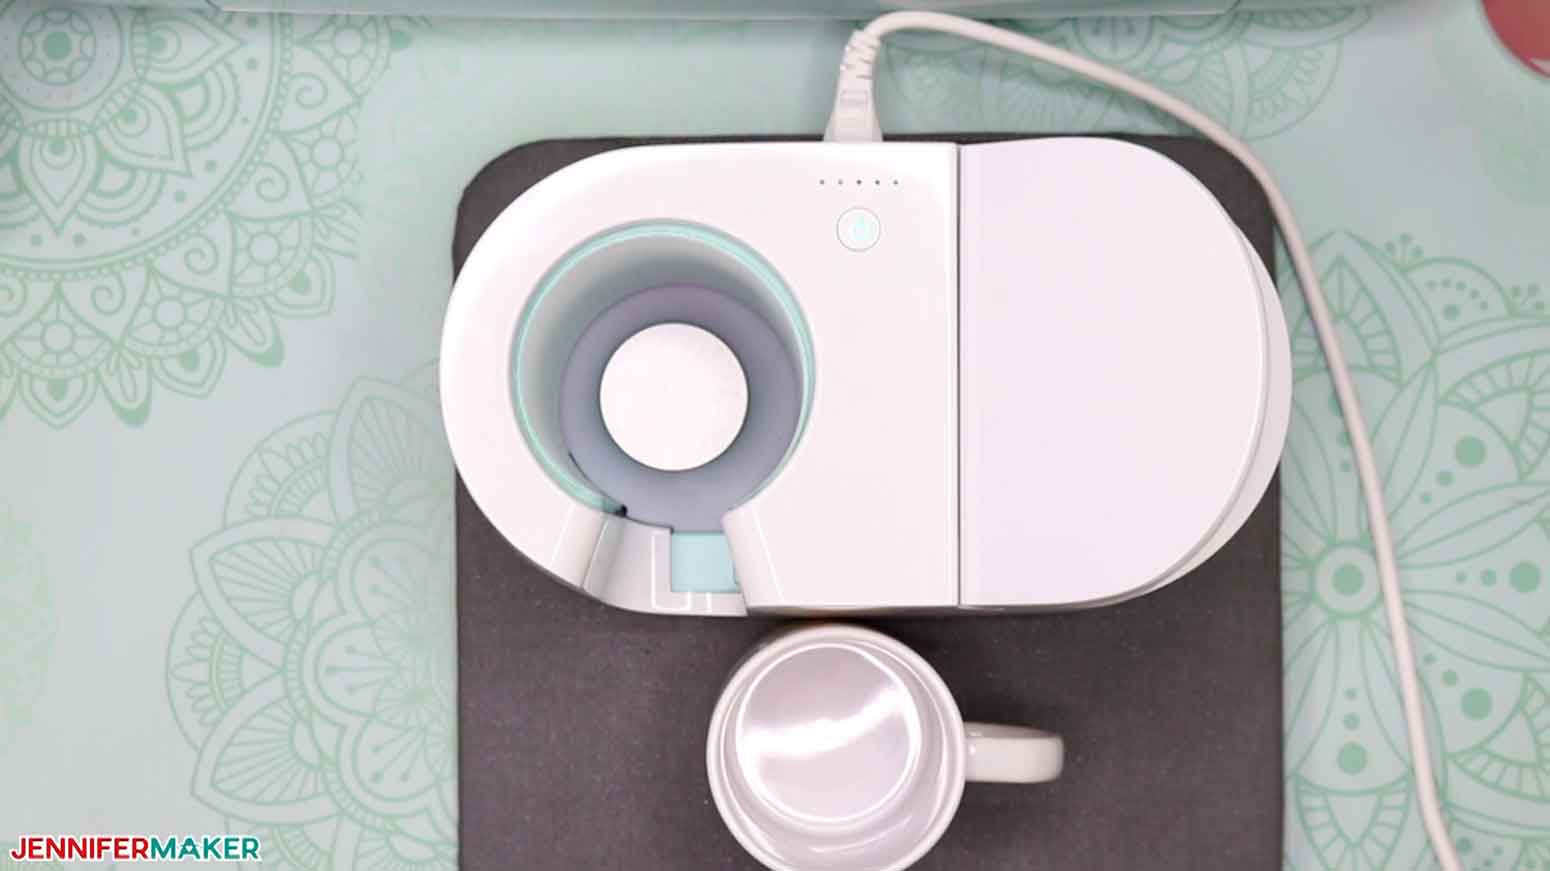
With the Cricut Mug Press powered on and the power button green (which indicates it is ready), hold your wrapped mug by the handle and place it in the heating chamber.
Pay attention to where the mug handle is and make sure the heat plate appears to be covering all of your design. I usually move my handle a bit to the left rather than center it.
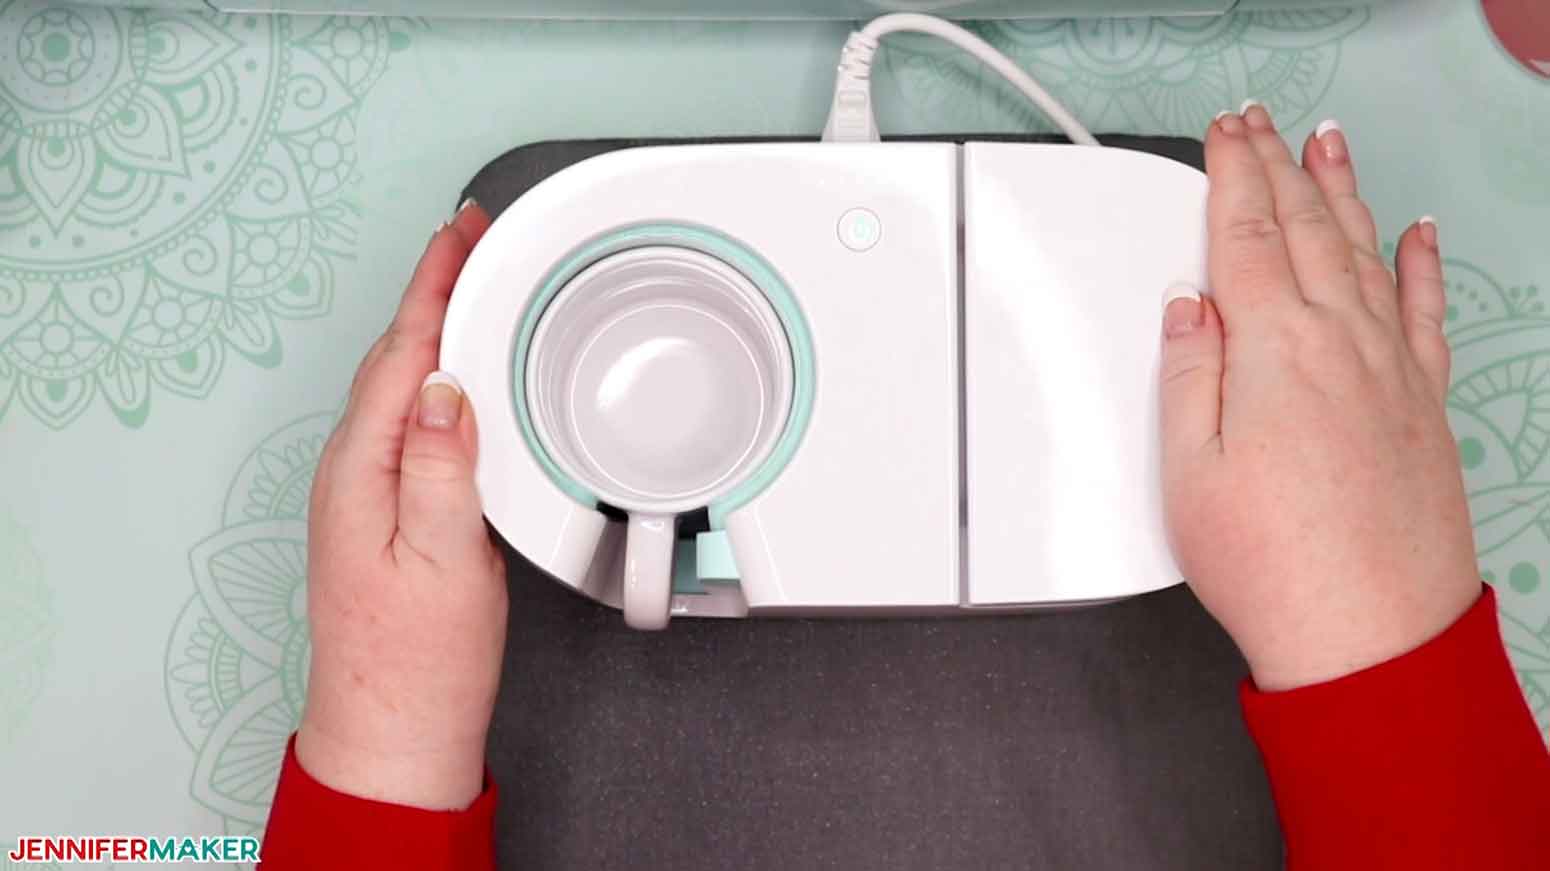
Now push down the lever on the top of the Cricut Mug Press and check that the heat plates are completely covering your design. If not, immediately open the clamp, reposition the mug (you'll probably want to rotate the handle a bit to the left), and close the clamp again. And do not leave your mug in for more than 20 seconds before pushing the lever down.
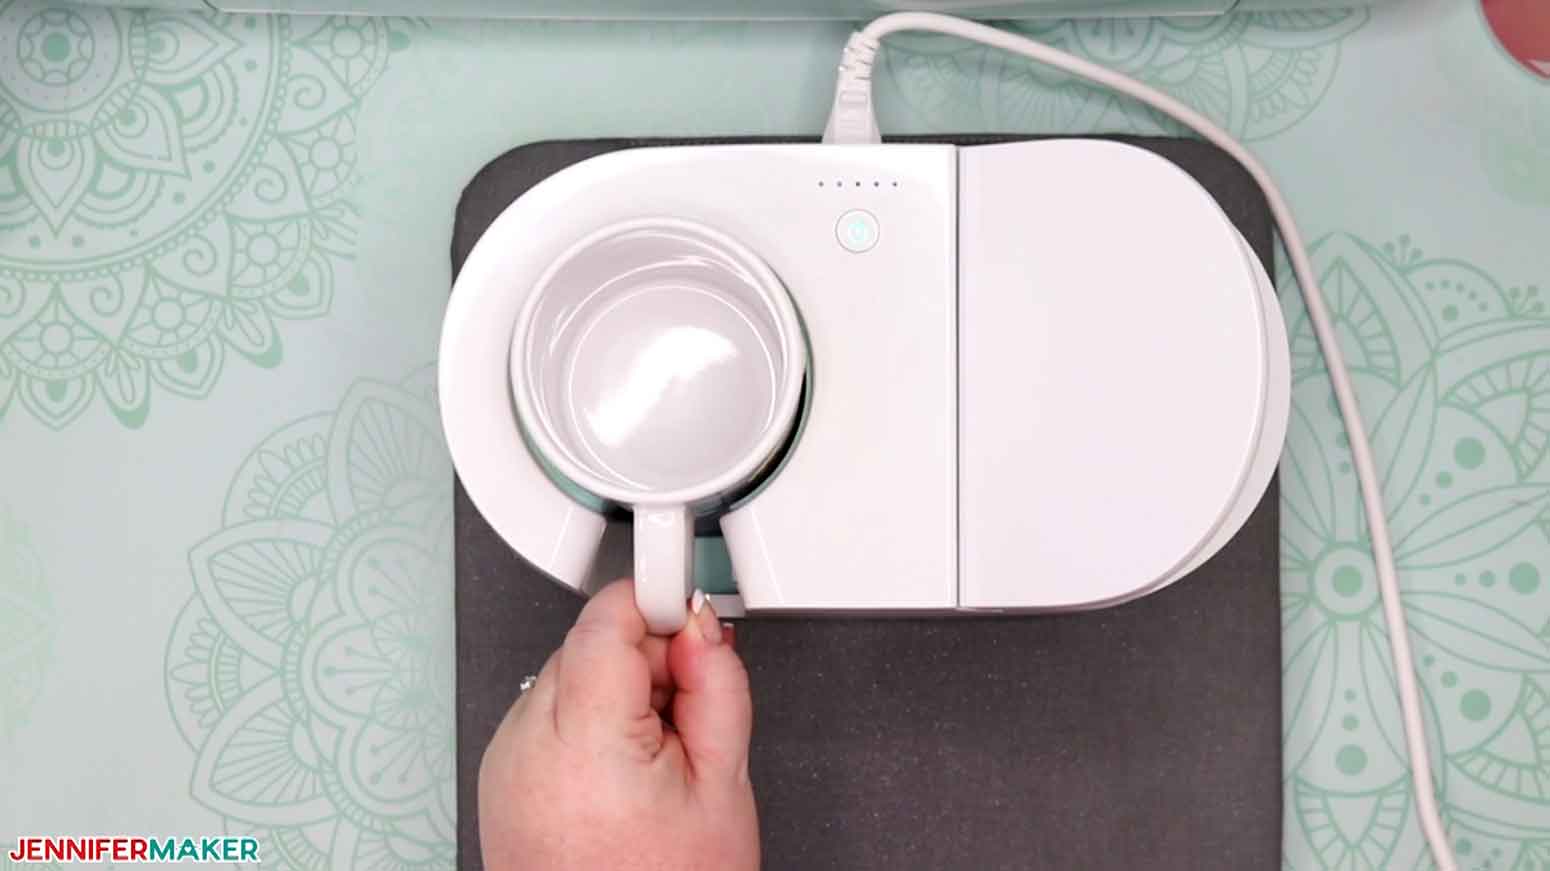
Pushing down on the lever starts the pressing process. There is no other button to push or settings to worry about. The Cricut Mug Press takes the temperature of your mug and the ambient temperature of your room, and determines the correct settings for you. The little lights on the top of the Cricut Mug Press indicate the progress of your press — an average mug takes about six minutes to press.
When the Cricut Mug Press is finished, it will beep at you. Lift up on the clamp to release it and pull the mug out by the handle, which will NOT be hot. Be careful not to touch the heat plate with the back of your fingers or touch any other part of the mug, as it will be quite hot.
Immediately place your mug on a heat-resistant surface to cool. I place my mug on the same mat I am using for my mug press itself as it's right there and super convenient.
Allow the mug to cool down before you remove the transfer sheet. This takes anywhere from 15 to 30 minutes.
STEP 6: SHOW IT OFF
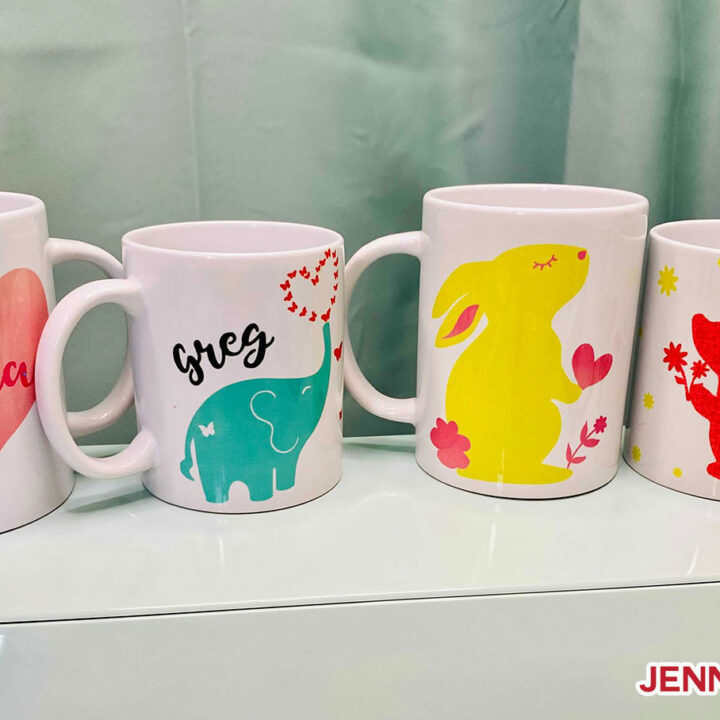
When the mug is cool enough to handle, pull off an end of the transfer sheet under the handle and unwrap your beautiful mug!
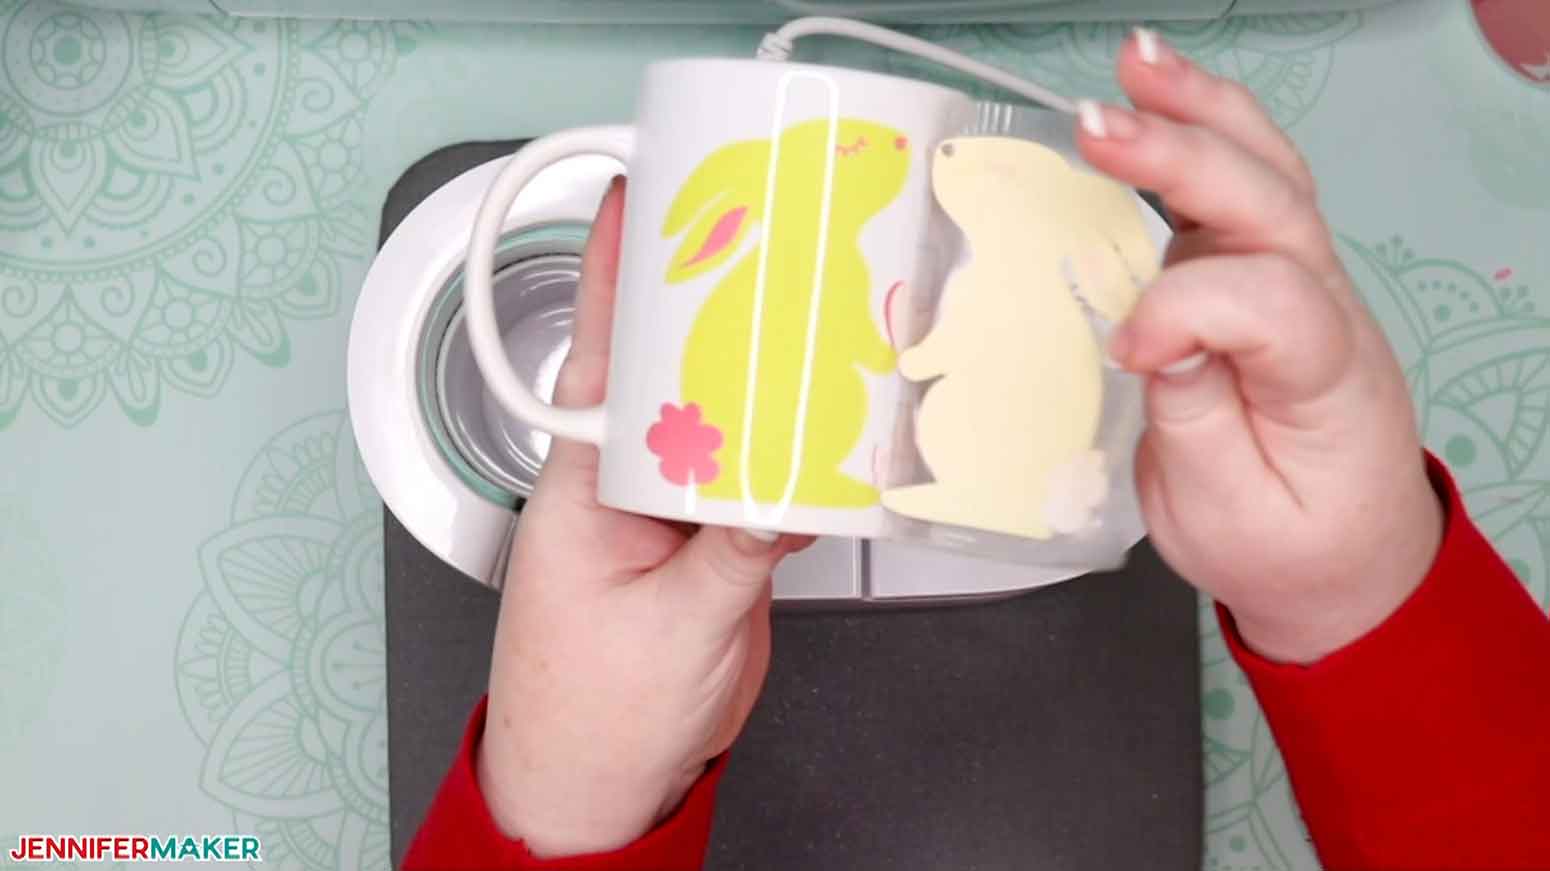
All the color is SO pretty!
Now I know you'll ask if you can press it again with another color layer, so here's the deal. Yes, you could, it's really better to press it just once. If you do want to press it again, either wrap the entire thing with a liner that covers the whole mug for a consistently colored press, or — if you must use tape — make sure the tape is not covering any other part of your design. And if you want to layer both Infusible Ink transfer sheets and pens or makers, first do your sheets, then do your pens and markers in that order.
Notes
The font I used for Alexa's name in this tutorial is Tingler.
Recommended Products
As an Amazon Associate and member of other affiliate programs, I earn from qualifying purchases.

Answers to Your Questions about Layered Infusible Ink Mugs
Q: When can I buy a Cricut Mug Press?
Thursday, March 11, 2021 at 12:01 am ET. You can buy the Cricut Mug Press in the Cricut shop, Amazon, Michaels, Joann, Target, HSN, Hobby Lobby, and Walmart on that date.
Q: What kind of mug can I use for my layered Infusible Ink mugs?
Your mug must have a poly coating and straight walls. It is important to look for sublimation (poly-coated) mugs. Other mugs will not work. The Cricut Mug Press accommodates mugs in sizes from 11 oz. – 16 oz without any manual adjustment.
Q: Do I have to only use Cricut mugs?
You will need to use straight-walled, sublimation compatible drinkware. Cricut has tested their mugs and verified that they work the best, but you can use other brands. I’ve had great success with these sublimation blank mugs.
Q: Do I need to use a white mug?
For the best, most vibrant, results we suggest that you use a white mug for your Infusible Ink project, as the ink is transparent.
Q: Are layered Infusible Ink mugs made in the Cricut Mug Press safe for use in the microwave and dishwasher?
Yes, they are totally safe in the dishwasher and microwave immediately after they’re cooled enough for you to handle — there is no cure time!
Q: Where can I use the Cricut Mug Press?
You can use it anywhere you have good ventilation, so near an open window or with a fan going. Put your Cricut Mug Press on a heat resistant surface, such as an EasyPress pad, to avoid damaging anything underneath.
Q: How do I center my layered Infusible Ink design on my mug?
The trick I use is to keep the handle facing me and then wrap the design starting from the opposite side of the handle, keeping the wrap straight. If it doesn’t start to stick evenly, you can take it off and try again. Or just trim your design close to the edge and manually position it exactly where you want it to go on your mug!
Q: How long do I need to let my layered Infusible Ink mugs cool?
You need to wait the same amount of time as for non-layered designs — allow 15-30 minutes to let the mug cool down after coming out of the Cricut Mug Press before touching and removing the liner. The handle will stay cool to the touch, but the cup itself will be hot, so don’t touch.
Q: How close to the handle can my layered Infusible Ink mug design be?
Your design can wrap to ½ inch from the handle. If your design is closer than ½ inch to the handle, the design cannot be heated thoroughly enough to transfer properly and you’ll see fading or discoloration. All of my free mug designs are set up so that they are not within that safety zone of the handle.
Q: Do I have to use small Cricut Mug Press Infusible Ink transfer sheets, or can I use the large Infusible Ink transfer sheets I already have?
No, you can cut the Infusible Ink transfer sheets you already have down to size and they will work just fine! Just remember to mirror your layered Infusible Ink mugs in Cricut Design Space!!
Q: When I cut my Infusible Ink for my mugs, the template doesn’t cut through the liner like yours does in your tutorials. How do I fix this?
Go the menu with three lines in the upper left corner, select Manage Custom Materials, find the Infusible Ink Transfer Sheet settings, and change your pressure to 268.
Q: Can I use any kind of tape to hold down my layered Infusible Ink design?
No, you have to use only heat-resistant tape. If you use regular tape, it will melt adhesive onto your design and mug press, so don’t do that.
Q: How long does this pressing process take with the Cricut Mug Press?
It depends on the temperature of your room and your mug, but it should take somewhere around 5-6 minutes or so. Your Cricut Mug Press will automatically determine the press time for you, so you don’t have to worry about timing anything.
Q: Why do I have blue dots or specks of color on my mug?
The blue dots are dust! It is very important to get the mug absolutely free of dust, which you do by using a lint roller on the mug right before you press it. You’ll also want to make sure that when you weed the Infusible Ink sheet that no little stray little dots of ink accidentally fall onto the sections that should be clear. So always check both your liner and your mug before you press the design.
Get my free SVG files to make these cute animal layered Infusible Ink mugs
I’d love to see your layered infusible ink mugs and all the ways you’ll find to use the Cricut Mug Press. Please share photos of your finished mugs in our Facebook group or tag me on social media with #jennifermaker.
Love,

Want to remember this? Save this Layered Infusible Ink Mug Tutorial to your favorite Pinterest Board!


What a nice post. I am eager to do some for children’s gifts!
Wonderful, Susan! So glad you have a plan for it already!
I own a Joy. How can I use your mug wraps with a Joy?
Hi Kimzer! Absolutely! The wraps are sized to work on the Joy.
Thank You, Thank you!! was hoping that there was a way to layer colors with this amazing product.
As always Jennifer you knocked it out of the ball park here!!
You are so welcome, Donna! Happy to hear that it was useful! 🙂
Hi Jennifer I was wondering if you have had any issues with using the lager infusible ink sheets, I have read people post saying the they have had the lines on the sticky side transfer through onto the cups, I would love to use the bigger sheets but to Afraid to try it, have you ran into this issues using the lager sheet ?
No one on our team has run into this problem, Georgina, but we know that other crafters have experienced it! According to Cricut, what you need to do to avoid this is to:
“Use a Cricut mug blank* or sublimation compatible blank
Before wrapping around the mug, trim transfer sheet liner close to the design
Use heat-resistant tape as needed to secure the design to the mug
*Poly-coating on Cricut mug blanks is specially formulated to minimize gridline transfer.”
Many of us are using the larger sheets because we have a stash of them, and aren’t having trouble at all, so go for it! 🙂