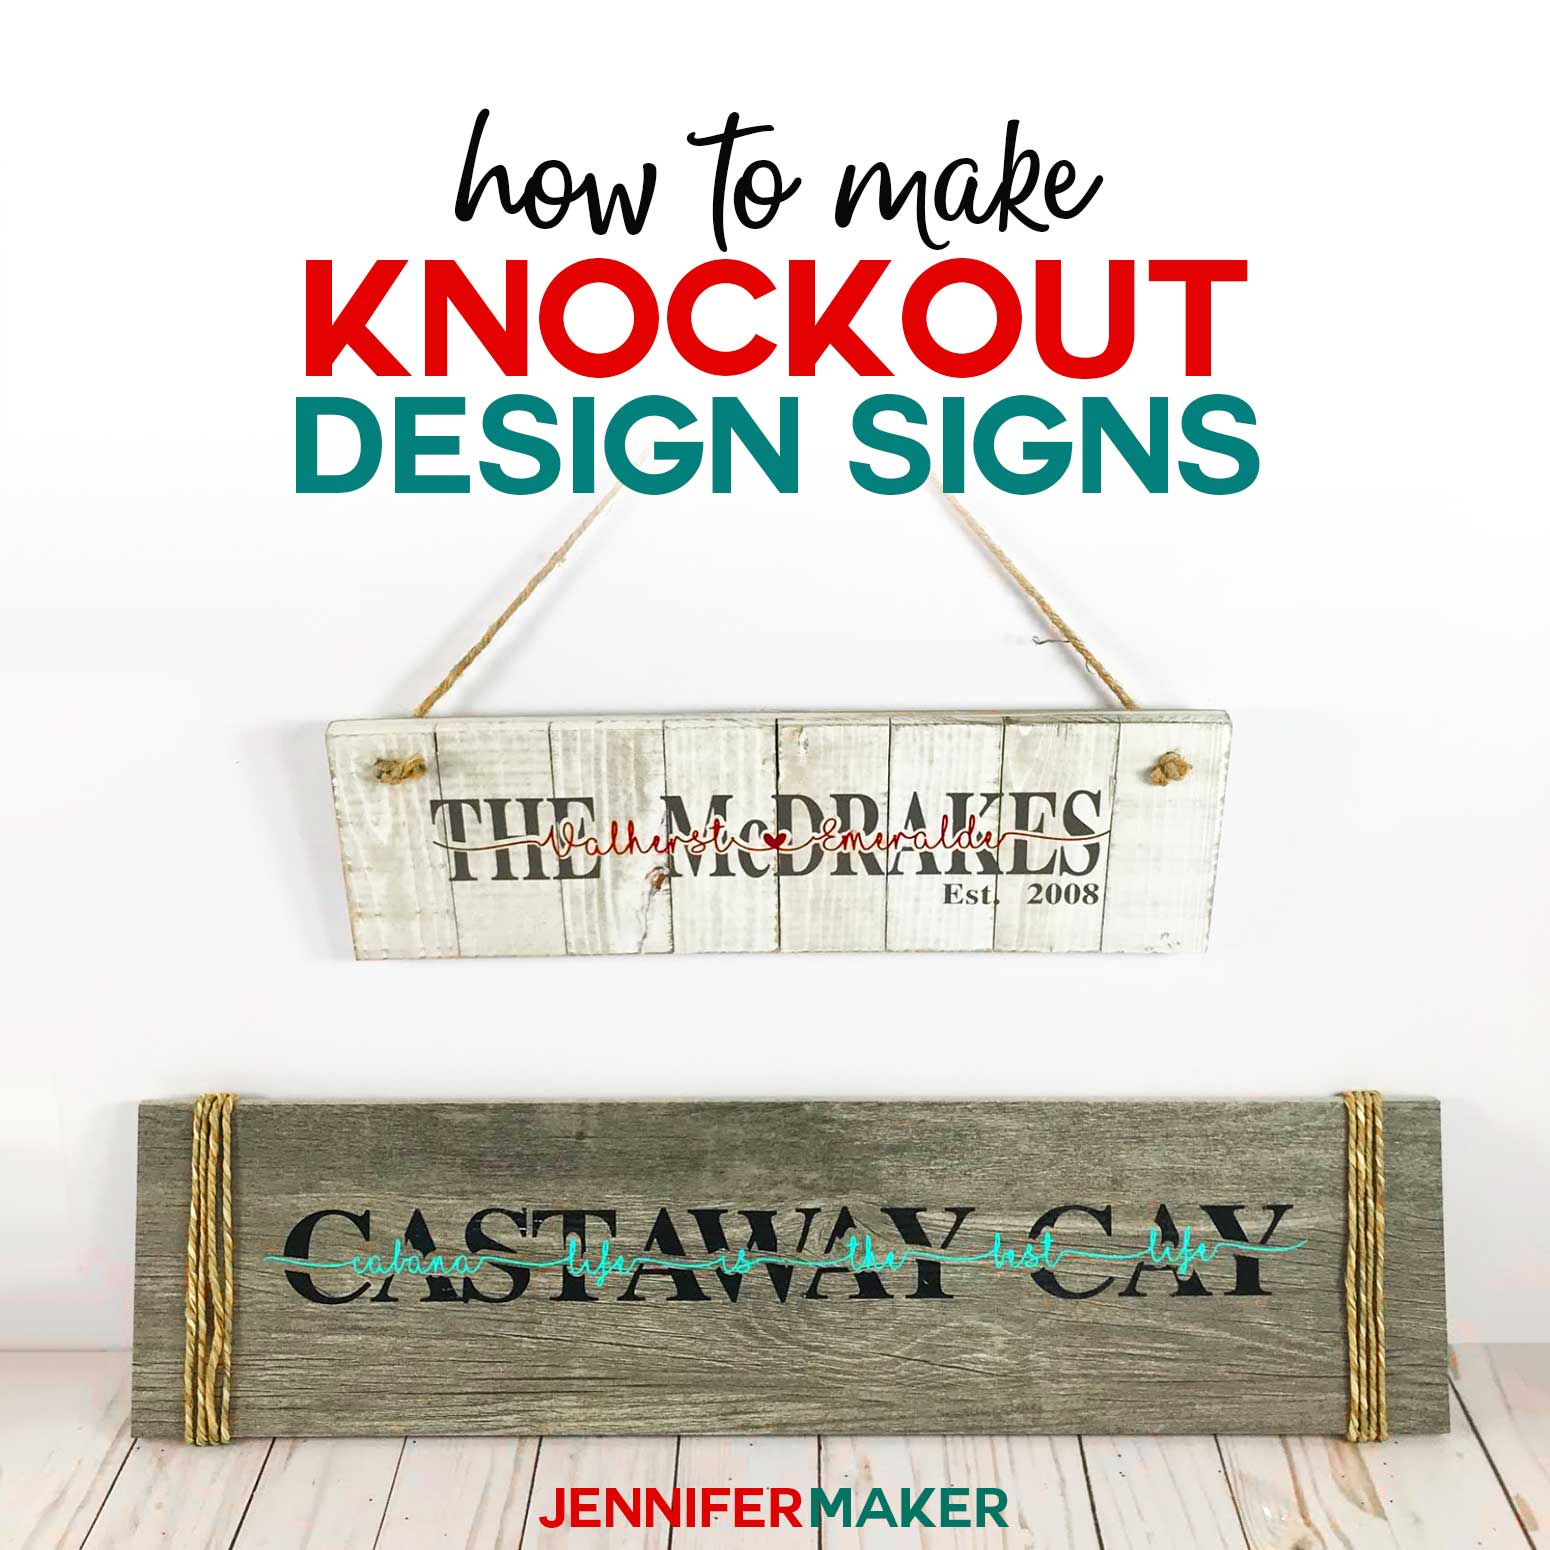
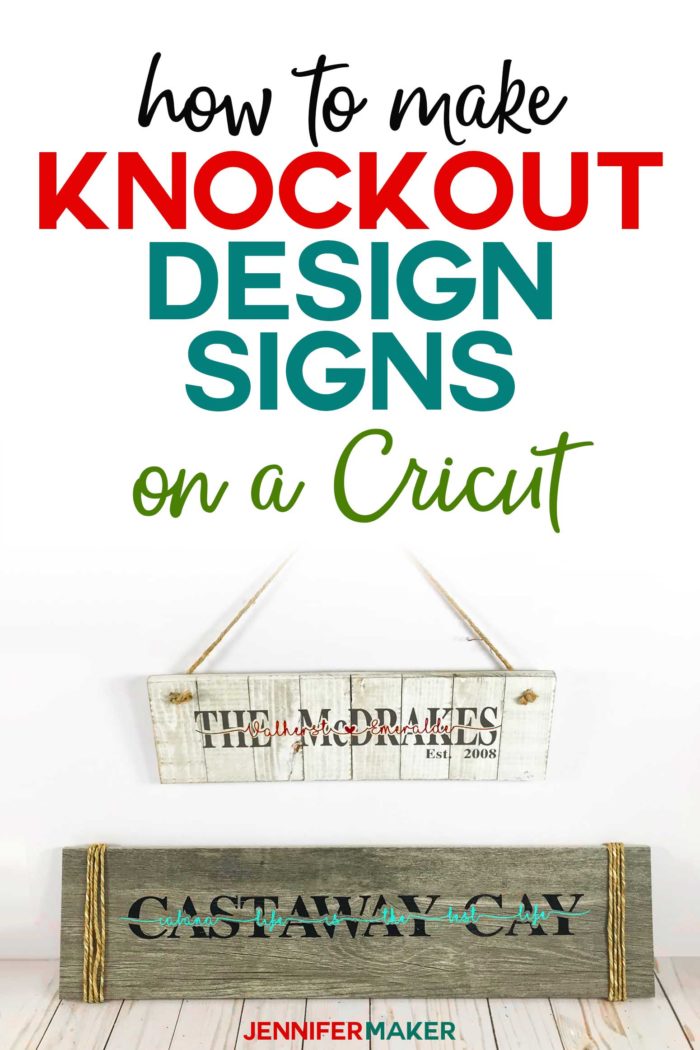
Learn how to create beautiful “knockout” designs in names and words to create amazing personalized signs, shirts, totes, and mugs. I show you how to do the knockout technique in Cricut Design Space and then show you how to layer the knockout design in vinyl and apply it to a sign and a mug.
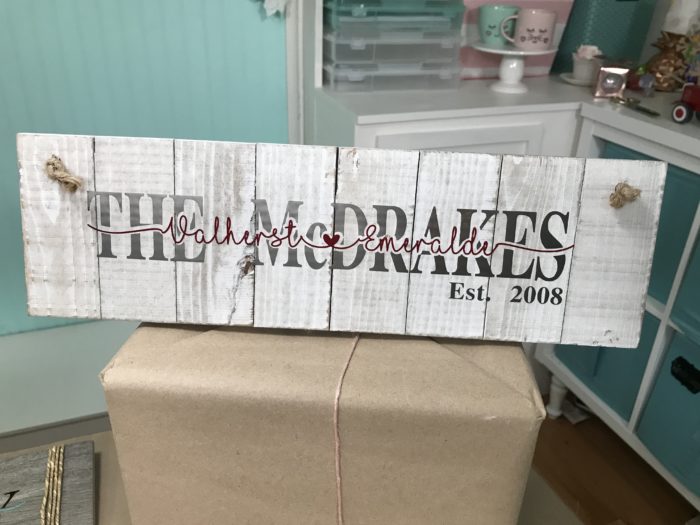
One of the best things you can use for Cricut cutting machine for is SIGN MAKING. It’s really so easy and satisfying to make big impact signs with vinyl from a Cricut. And one of the most popular sign styles these days is the knockout design sign. A knockout design is where you superimpose letters or an image on another word. It’s stylish, fun, and very on trend right now.
Today I am showing you how I made my knockout design sign in Cricut Design Space. In fact, I’m going to show you three different methods — the print preview method, the Inkscape method, and the Illustrator method. You pick the one you like best!
And then I’ll walk you through the process of creating one of these awesome knockout design signs. All you’ll need to make this sign is some vinyl, transfer tape, twine, super glue, and a ceramic tile which I got at my local home improvement store for just $1.50. So this is a very inexpensive project with big appeal.
Many thanks to the readers and viewers who requested I explain the knockout design technique:
Key concepts taught in the video tutorial include how to find special characters in fonts, how to create a font outline, how to slice, how to weld, how to use letter space, and how to apply vinyl to ceramic.
See exactly how to create knockout designs in Cricut Design Space in this step-by-step video below:
Enough talk — let’s make some knockout design names and words! This post contains some affiliate links for your convenience (which means if you make a purchase after clicking a link I will earn a small commission but it won’t cost you a penny more)! Read my full disclosure policy.
Materials for Knockout Design Word Signs and Mugs
- Ceramic tile (get them from the flooring section of your local home improvement store)
- Self adhesive vinyl (I recommend Oracal 651 for the best adhesion to the ceramic tile)
- Transfer tape
- Scraper tool
- Rubbing alcohol
- Twine or thin rope
- Super glue
- A way to cut your vinyl (I used the amazing Cricut)
How to Make Knockout Design Word Signs
Tip: Watch a full step-by-step video of this tutorial in my detailed video here.
To begin, go to Cricut Design Space and add your main word! To do this, click New Project, and Text on the left side and type your main/big word(s) or name(s) in all capital letters. Keep your name(s) under 9″ for now (you can resize later).
Choose a font that is big and bold and chunky for the best effect. For this tutorial, I am using Times New Roman Bold and Impact. Other good fonts that work well for knockout designs include the following:
- Cricut Sans Bold (available by default in Cricut Design Space)
- The Bold Font
- Lesjam
- Calvier
- Tech Headlines
- Chuck Noon
Tip: If you’re not sure how to install fonts, please check out my Font Installation tutorial and video!
Adjust Letter Space until your word looks good, keeping the letters quite close together. You want to create a big, bold word here.
Note: If your letters aren’t kerning properly, go ahead and click Advanced > Ungroup to Letters and manually adjust them. Just be sure to select all of your letters and Weld when you’re done.
Now, add the accent word(s), names(s) or image you want to use for your knockout design. I created my accent words in the free I Love Glitter font, but here are other good script fonts that pair well with the above fonts:
Resize your accent words so they are about the same length, or even a touch longer, than your big, bold words. You may need to make your accent word line a little longer by adding special characters, like squiggly lines — this is why the I Love Glitter font I’m using works so well.
Tip: If your accent words or image seems to be about the same height as your big bold words, you may need to make your big bold words taller so they extend above and below the accent words. To do this, click the Unlock icon in the lower left corner of the big bold word and now resize to make the word taller. The idea is to create a design where all the words and/or images are recognizable.
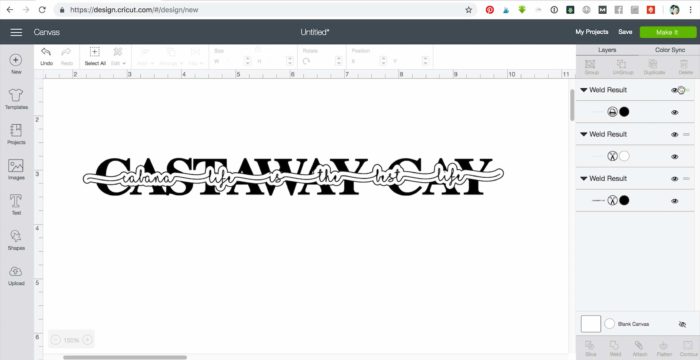
Once you have your elements the way you want them, it’s time to knock things out! Select two layers — the big bold word and the accent word(s)/image — and click Slice. Select and delete the extra bits you do not need, leaving you with the big bold word (minus a space where the accent words were).
At this point, you have a decision. You can keep your knockout design as is, with the two layers just barely touching, or you can add some white space around the accent letters/image for better contrast. I think having the layers just barely touching looks better when you’re using an image.
If you want to create white space (an outline layer) around your accent letters, you’ll need to do a few extra steps. There are three methods that I know of to do this:
Cricut Design Space (Desktop/Laptop) Outline Knockout Method:
Note: I have a more recent knockout tutorial that is current as of December 2019. You can view that knockout tutorial here.
- Locate your duplicate accent letters and change it from Cut to Print then Cut.
- Then click Make It and click Send to Printer.
- Click Bleed on the Printer window.
- Now rather than actually printing it, you want to save the preview image you see here. I do this by right-clicking and selecting “Save Image As” on my Mac, but you can also do it by clicking and dragging it to a folder.
- Once that preview image is saved, click Upload in Cricut Design Space, locate the PNG file you just saved, and import it as a Cut image. When prompted to Select & Erase, click the box around the outline to remove it, then click Continue.
Note: You’ll notice that this method gives you a less than ideal outline. If this is okay with you, skip the next two sections. If you want something better, try one of these two methods.
Inkscape Outline Knockout Method (Better):
- Hide the grid in Cricut Design Space by clicking twice in the box between the rulers (upper left corner) and take a screen shot of your accent text.
- Open Inkscape and paste your screen shot in, resizing it so it fits on your canvas.
- Select the pasted image and go to Path > Trace Bitmap (in the box that pops up, choose Brightness Cutoff, set the Threshold to .90, check Remove Background, and click on OK.
- Now click Path > Outset. You probably only need to do this once, just enough so your text looks chubby.
- Click Path > Break Apart.
- Delete everything but the outline you made.
- Save the file as a SVG.
- Click Upload in Cricut Design Space, locate the SVG file you just saved, and import it as a Cut Image.
Illustrator Outline Knockout Method (Best):
- Hide the grid in Cricut Design Space by clicking twice in the box between the rulers (upper left corner) and take a screen shot of your accent text.
- Open Illustrator and paste your screen shot in, resizing it so it fits on your canvas.
- Select the pasted image and go to Object > Image Trace > Make & Expand.
- Click Object > Path > Offset Path. Set your Offset to .1 and your Joins to Round, then click OK.
- Select the Direct Selection Tool and remove the borders.
- Select All and go to Pathfinder Tools and click Unite.
- Save the file as an SVG.
- Click Upload in Cricut Design Space, locate the SVG file you just saved, and import it as a Cut Image.
iPad/iPhone/Android Phonto Knockout Method:
- Download a free app called “Phonto – Text on Images” from the App Store (on iPad/iPhone) and from the Play store (on Android).
- Open Phonto and click the camera icon at the bottom, then choose Plain Image (select the all white image).
- Once you have a plain white image, click the square-and-arrow icon in the upper right corner and select Use.
- Tap on the image to add text and type the big bold name in all capital letters. Tap on Font to change the font to something like Times New Roman. (If it doesn’t show up at first on your image, click Style to change the color from white to black.)
- Tap on the image again to add text and this time type the accent name(s) in lowercase letters. Tap on Font to change the font to something like “i love glitter.” Position the accent text on top of your big bold text (resize as necessary)
- To add the white space around the accent letters, tap on it, tap on Style, tap on Stroke, and move the Alpha sliding bar all the way over to the right. Also slide the Width sliding bar to the right until you have a sufficient amount of white space around your accent text.
- Once you are satisfied with your knockout text, tap Export in the bottom right, tap Save Image, and it will save to your photos.
- Now just add that image to your Cricut Design Space! You can upload the photo directly from your Photos if you’re on an iOS device, or email it to yourself if you’re on an Android device. Note that you will need to use your wand during the upload process to remove the white inside the letters.
Tip: There’s a great video on how to use Phonto to make knockout text here!
Regardless of which method you create your outline with, you’ll then need to insert the uploaded cut image to your canvas, rotate and resize as necessary, and place it over your big bold text.
Now select your big bold text layer and the outline layer and click Slice. Remove the extra layers you do not need.
Resize your bold text and accent text to fit your board, sign, canvas, or other material you plan to put your knockout design on. To do this, click on Templates, choose “Basic Canvas” and, from the Size menu at the top of the Cricut Design Space window, choose “Custom.” Now type in the dimensions of your board you’ll be putting your knockout design on at the top of Cricut Design Space. Tip: Click the unlock button at the top of the screen before entering your measurements.
Once you have the template created, drag both your big bold text and your accent text into the template outline and resize BOTH to fit within it. I recommend you leave about 10% white space on all sides, or even a little more if you’ll be putting ropes around the ends like I have.
Now just cut and apply to your sign, canvas, board, whatever! Be patient — vinyl isn’t as apt to stick to a textured ceramic as easily as something else like a smooth wood.
Get my free SVG cut files for all of my projects
If you create a knockout design sign, please share a photo in our Facebook group,!
See all of the projects, tutorials and free designs in The Great Maker Show and Tell Challenge! There is one for each day of the 25 Days of Christmas! This is my gift to you for the tremendous support, enthusiasm, and love you’ve shown to me and my little blog over the past two years. To “open” a gift, hover over the day’s image and click the download icon.
[ess_grid alias=”25days2″]
Love,


Awesome