
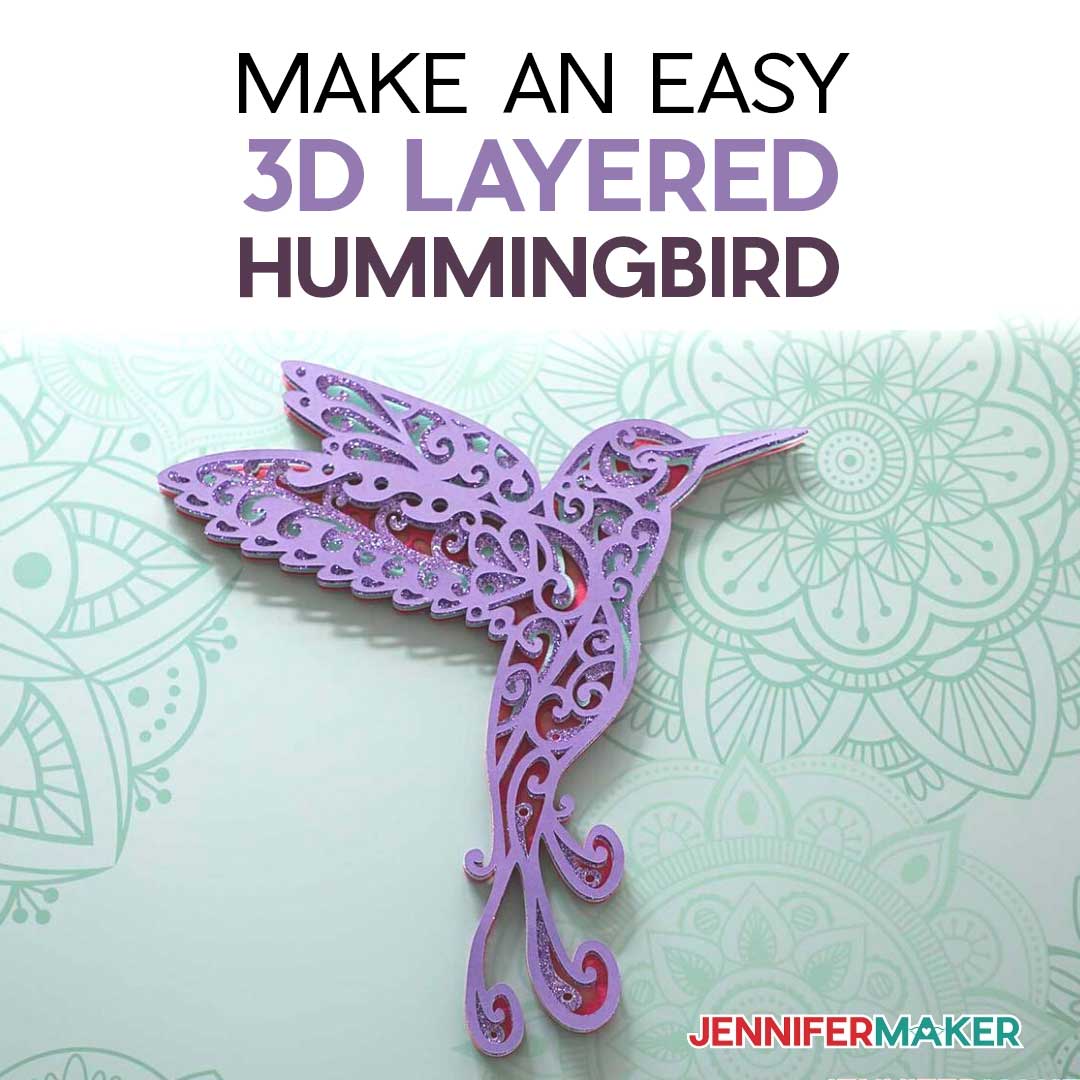
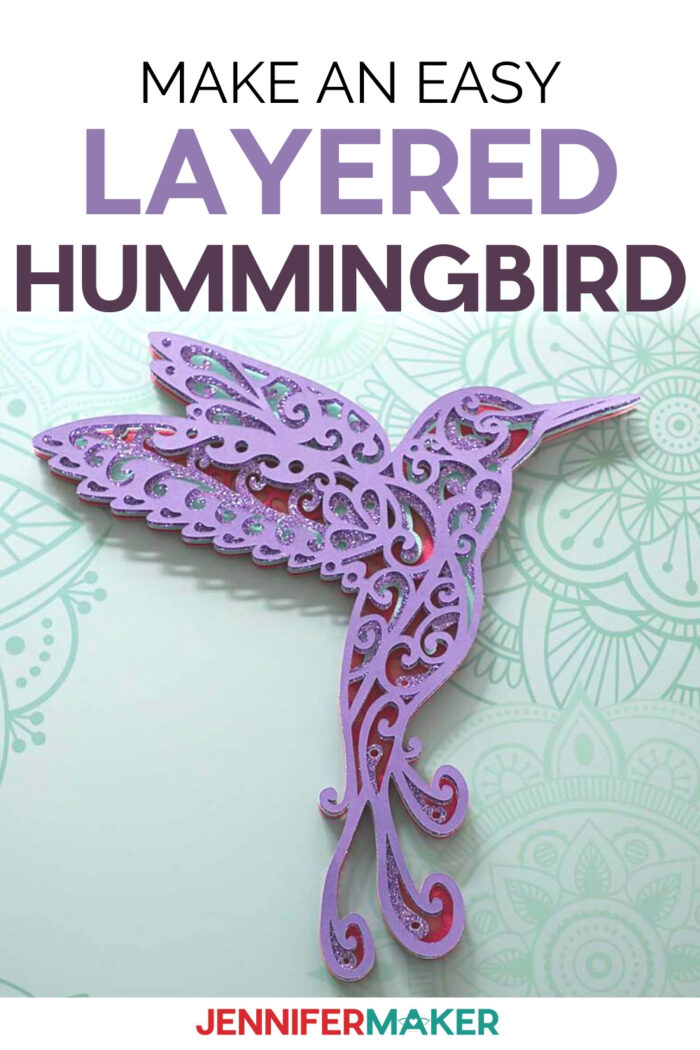
Use this free Hummingbird SVG to Make a 3D Layered Design that is easy and fun to put together!
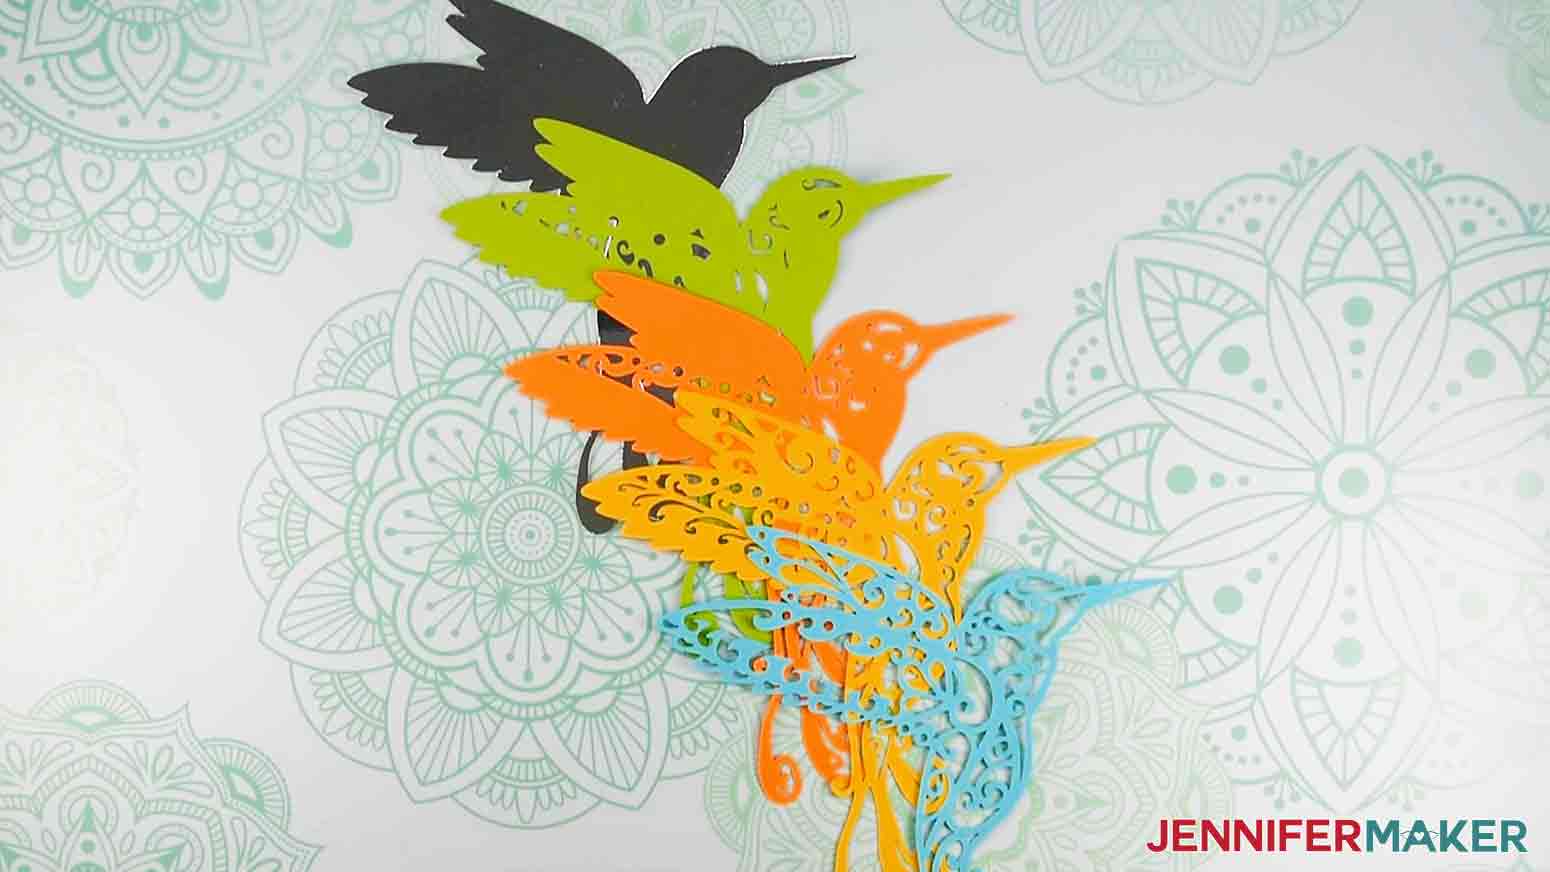
3D layered designs are SO much fun to make! My layered 3D mandala sunflower is one of our more popular designs, and the recent 3D Layered Paper Cut Series I released has been a big hit! These layered designs are so cool to design that I kept thinking about what my next 3D project would be. I was sitting out on my deck the other day when I noticed a hummingbird flying around my garden. That was the inspiration I needed! Hummingbirds are brightly-colored birds known for their ability to flap their wings at an incredible speed making it almost a blur to see. This five-layered hummingbird SVG design is easily made using different colors of cardstock that could mimic the bright colors of the birds!


When I first shared this pretty hummingbird, many of you asked if I had other 3D layered designs like this — I saw requests for turtles and anchors. I do not currently have these, but you could make them yourself in Design Space. I show you how to do it in my Custom Cut workshop if you’re interested in learning!
So while you can make a 3D layered design from pretty much any shape, I wanted to create a hummingbird because they represent perseverance (traveling 2000 miles at times!) and the infinite (figure 8 wing flap), two concepts near and dear to my heart. In some cultures, hummingbirds are even thought to be signs of love and messengers from heaven. Hummingbirds are little reminders to pursue your dreams and overcome your obstacles!
If you’re interested in making the hummingbird SVG layered design, you’ll find it is quite easy as it has just the five layers of cardstock. This is a great project if you’re a beginner to the 3D layered designs, as the fewer the layers, the easier it is to figure out. Your cutting machine does most of the hard work for you!
Let me show you how easy it is to use my hummingbird SVG to make a 3D layered project. This post contains some affiliate links for your convenience (which means if you make a purchase after clicking a link I will earn a small commission but it won’t cost you a penny more)! Read my full disclosure policy.
Materials to Create a Layered Project Using My Hummingbird SVG Design
- 65 – 80 lb. 8.5″ x 11″ Cardstock (I used this exact paper)
- Foam Spacers
- Cricut XL Scraper Tool
- Craft knife or scissors
- A cutting mat for your Cricut (green or blue works, just make sure it’s sticky!)
- A way to cut your paper (I used the Cricut Maker cutting machine but they can also be cut on a Cricut Explore or Cricut Joy)
- Design #234 – My free SVG design files (available in my free resource library—get the password by filling out the form at the bottom of this page)
How to Use my Free Hummingbird SVG to Make a 3D Layered Design
Intricate Layered Hummingbird Design
This five-layered Hummingbird is surprisingly easy to make as long as you use the right settings for intricate cuts on a Cricut!
Materials
- One (1) sheet 12" x 12" Silver Mirror cardstock
- Four (4) sheets 12" x 12" 65 lb Cardstock in different colors (more if you want to add cardstock decorations to your display)
- Zots clear mounting circles -OR-
- Double-sided Adhesive 3D Foam Squares
- 12 x 12 Shadow Box Frame — optional as a display
- Hot Glue Gun — optional, for adhering designs to shadow box, dowel, or magnets
- Hot Glue Sticks — optional, if you use the glue gun
- 3/4" Ceramic Adhesive Magnets — optional, for display
- One (1) 1/8” Wooden Dowel — optional, for making the bouquet decoration
- Cardstock Butterfly shapes from my Popup Butterfly Card — optional, for shadow box accents
- Rainbow Window Film — optional to cut just the base layer for a window cling
- Rolled paper flowers from my Letter with Paper Flowers
- Design #234 — My free SVG/DXF/PDF design files (available in my free resource library—get the password by filling out the form at the bottom of this page)
Tools
- A way to cut your cardstock — I used the Cricut Maker 3 cutting machine with the standard Fine-Point Blade, but you can use any Maker or Explore machine. You can also use my special Joy-sized file!
- Cricut Machine Mat, 12" x 12" or Joy-sized (LightGrip or StandardGrip works)
- Cricut XL Scraper Tool to remove cutouts from machine mats
- Craft Knife or scissors (to cut your adhesive material)
- Aluminum foil (optional, for cleaning the Cricut Fine-Point Blade)
- Weeding Tool (optional, to help pop out tiny cutouts)
Instructions
STEP 1: GET MY FREE HUMMINGBIRD SVG FILE
Get the free Hummingbird SVG (Design #234) from my free resource library (get the password to the library in the form at the bottom of this post).
Upload the Hummingbird SVG into Cricut Design Space and add it to your Canvas.
Tip: If you’re not sure how to upload an SVG cut file to Cricut Design Space, watch this helpful video training series I made. If you’re on an iPhone or iPad, here’s how to download and upload SVG files to the Cricut Design Space app.
This is what the hummingbird SVG file looks like when added to your Design Space Canvas.
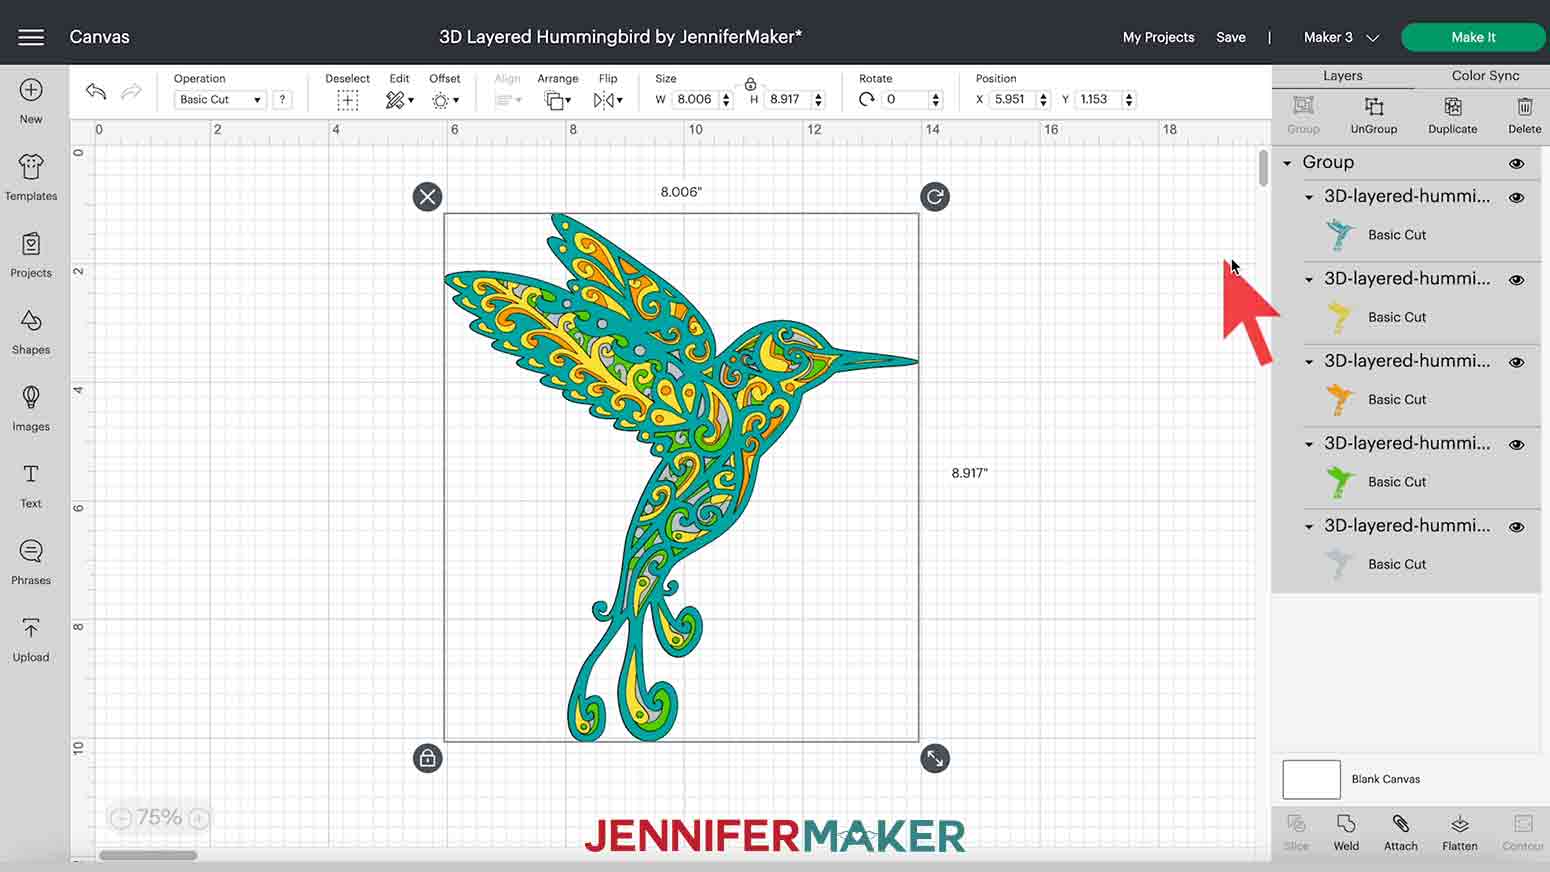
Click “UnGroup” to see all five layers. You can either use the colors I have, or select a layer and click on the similarly colored box in the upper menu to change its color. When you're done adjusting the design, click "Select All" in the top menu
You can also resize this design, but we need to adjust all of the layers together to make sure the pretty cutouts and designs match. Click “Select All” in the top menu, then click “Align” and scroll down to select “Center.” The design will return to its original position, layers in a stack. Now click “Group” so that when you resize, all the layers maintain the same proportions. To resize simply drag the resize handle in the lower right corner of the bounding box until you get the size you want.
If you need help resizing this SVG, please see my design resizing guide.
STEP 2: CUT OUT YOUR HUMMINGBIRD SVG
Once you have the 3D layered hummingbird adjusted to your measurements, make sure you have the correct machine selected in the top menu and then click "Make It."
If a window asking how you will load materials pops up, select “On Mat” and hit “Continue.” On the Prepare screen, make sure you have the right number of mats and click “Continue” again.
TIP: On the Make Screen, normally I would select “Medium Cardstock'' and “Heavy Cardstock” since that’s what I’m using for my design.
However, since this design is very detailed and requires a lot of intricate and precise cuts I’m going to use “Cardstock (for intricate cuts).” To find this special setting, click “Browse All Materials” and type “Intricate” into the search window. Select “Cardstock (for intricate cuts)” in the results and click "Done" to reload the Make screen with the new material setting.
I got the best results by still changing my Pressure setting to "More." Also, check the box next to “Remember Material Settings” so the machine will use the same setting for each mat. Always save time when you can!
TIP: Check that your Cricut Fine-Point Blade is clean and loaded in the indicated clamp. Use my tin foil ball tip to clean it if you want! Review my guide for cleaner cuts for directions and even more tips.
TIP: A clean, sticky mat will keep your paper in place, which is especially important for intricate designs such as this. Check out my guide for cleaning Cricut mats for help.
TIP: If you're getting tearing or other issues after following all my tips, the paper may be the issue. Really inexpensive paper often has short, weak fibers, which can lead to choppy cuts. I recommend Cricut and Recollections brand cardstocks.
Load your first layer's paper on the mat and follow the prompts to cut. When it's done, check that the cut is all the way through the paper before unloading the mat. Just gently bend the mat under a cut section so see if the paper is cut. Mine wasn't! If this happens to you, press the Go button again to run the same cut in the same exact spot. The second time should go all the way through.
When each layer is finished cutting, unload your mat, flip it over, and gently bend your mat away from the cardstock to remove it. This helps prevent any ripping or curling of the paper.
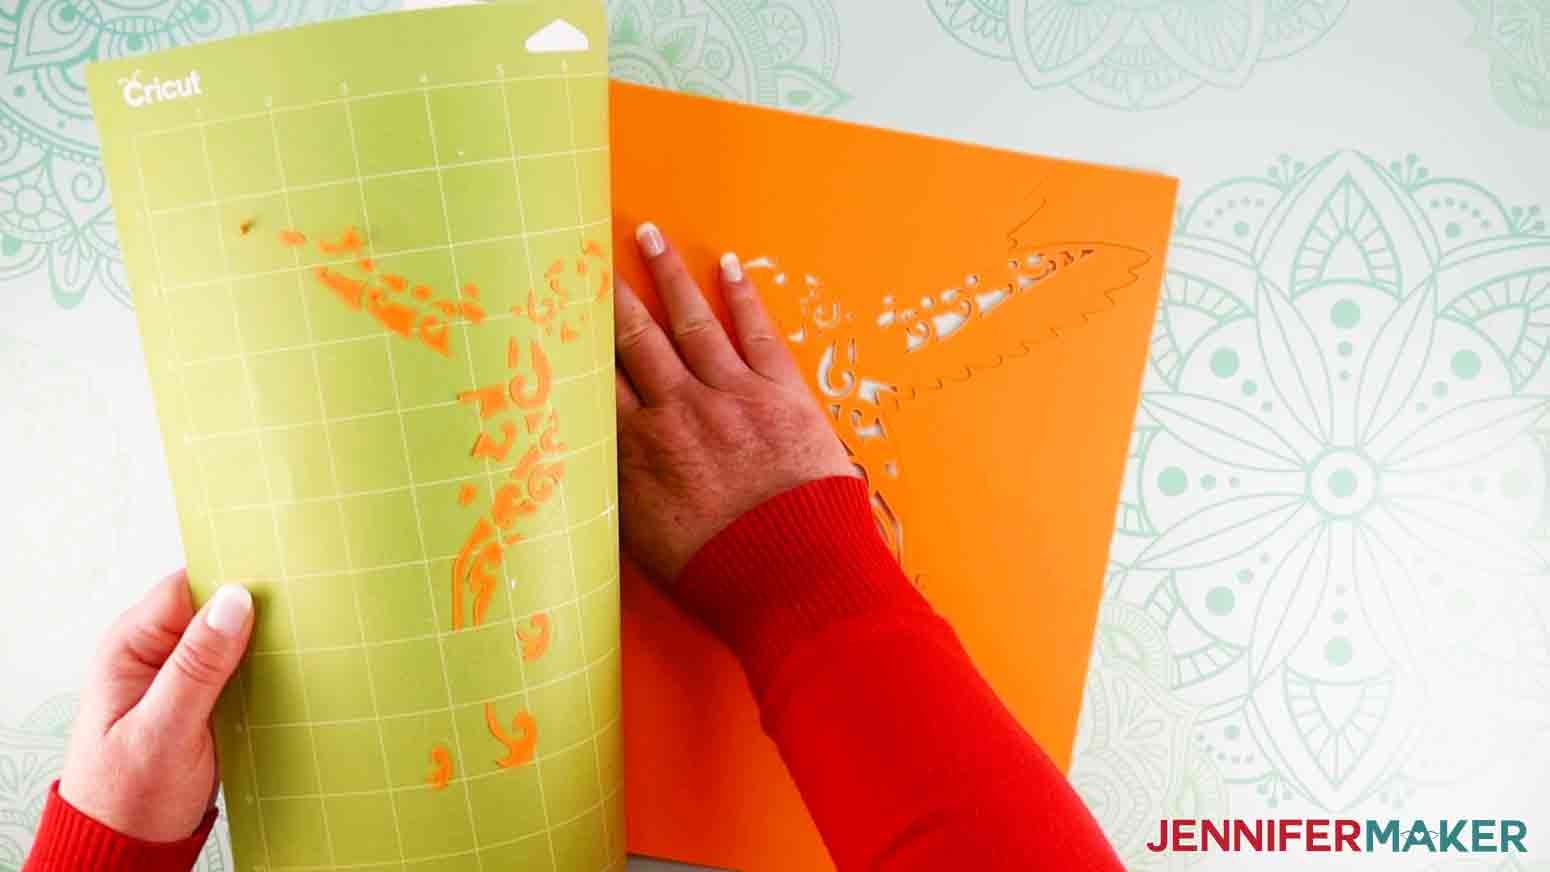
As you cut each layer, you may notice small bits and pieces of cardstock left behind on the mat. I used my extra large Cricut scraper tool to easily remove those pieces.
If small cutouts are still stuck in your design, you can use your fingers or a weeding tool to pop them out.
These are the layers you’ll have when you’re done cutting:
STEP 3: ASSEMBLE THE INTRICATE HUMMINGBIRD DESIGN
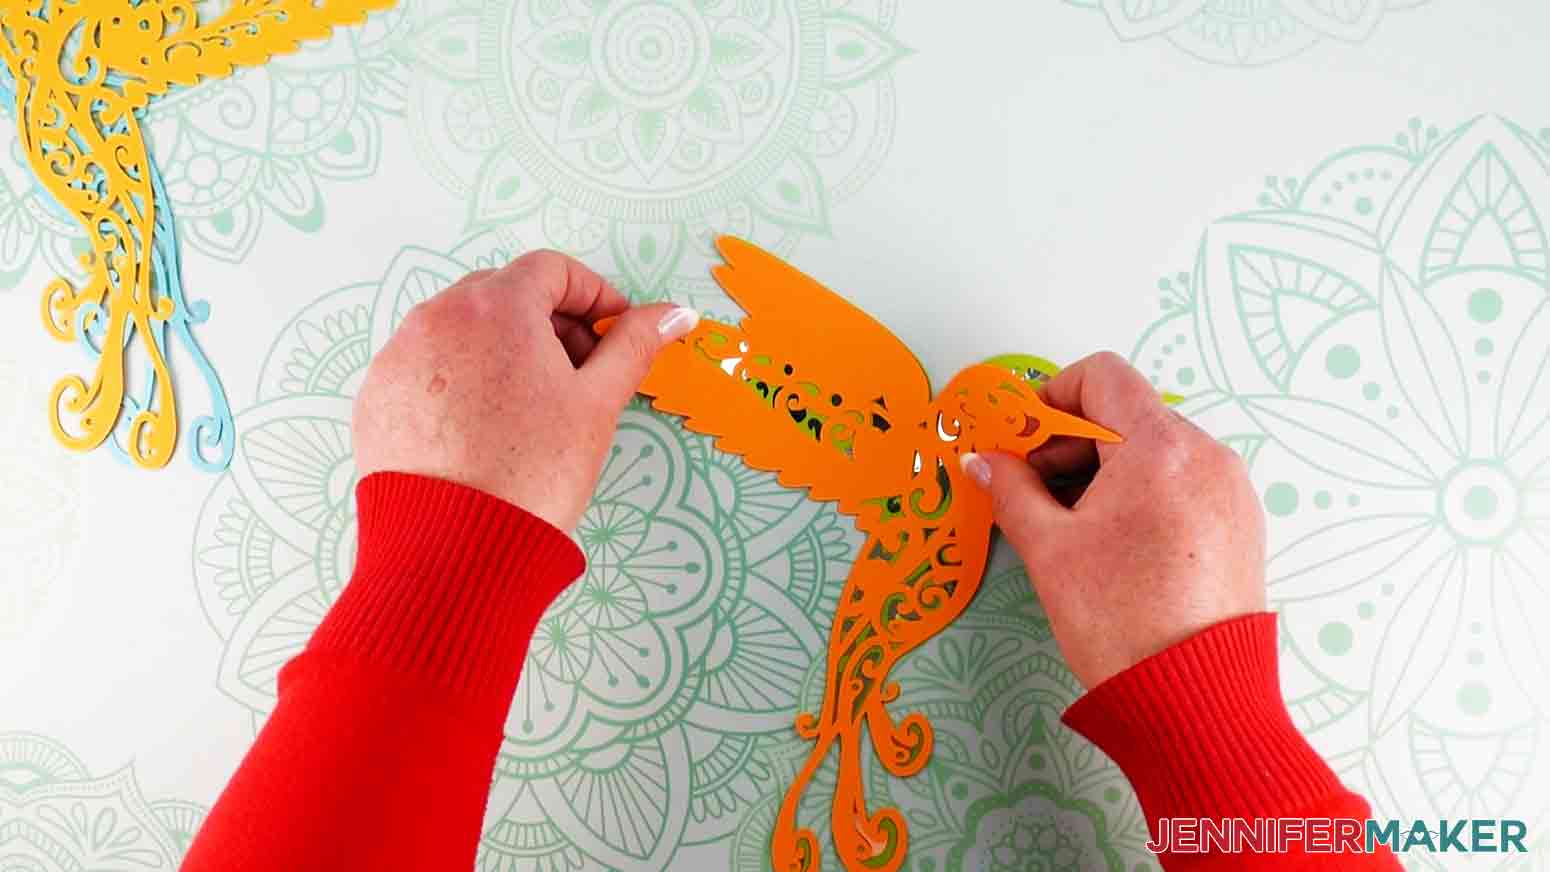
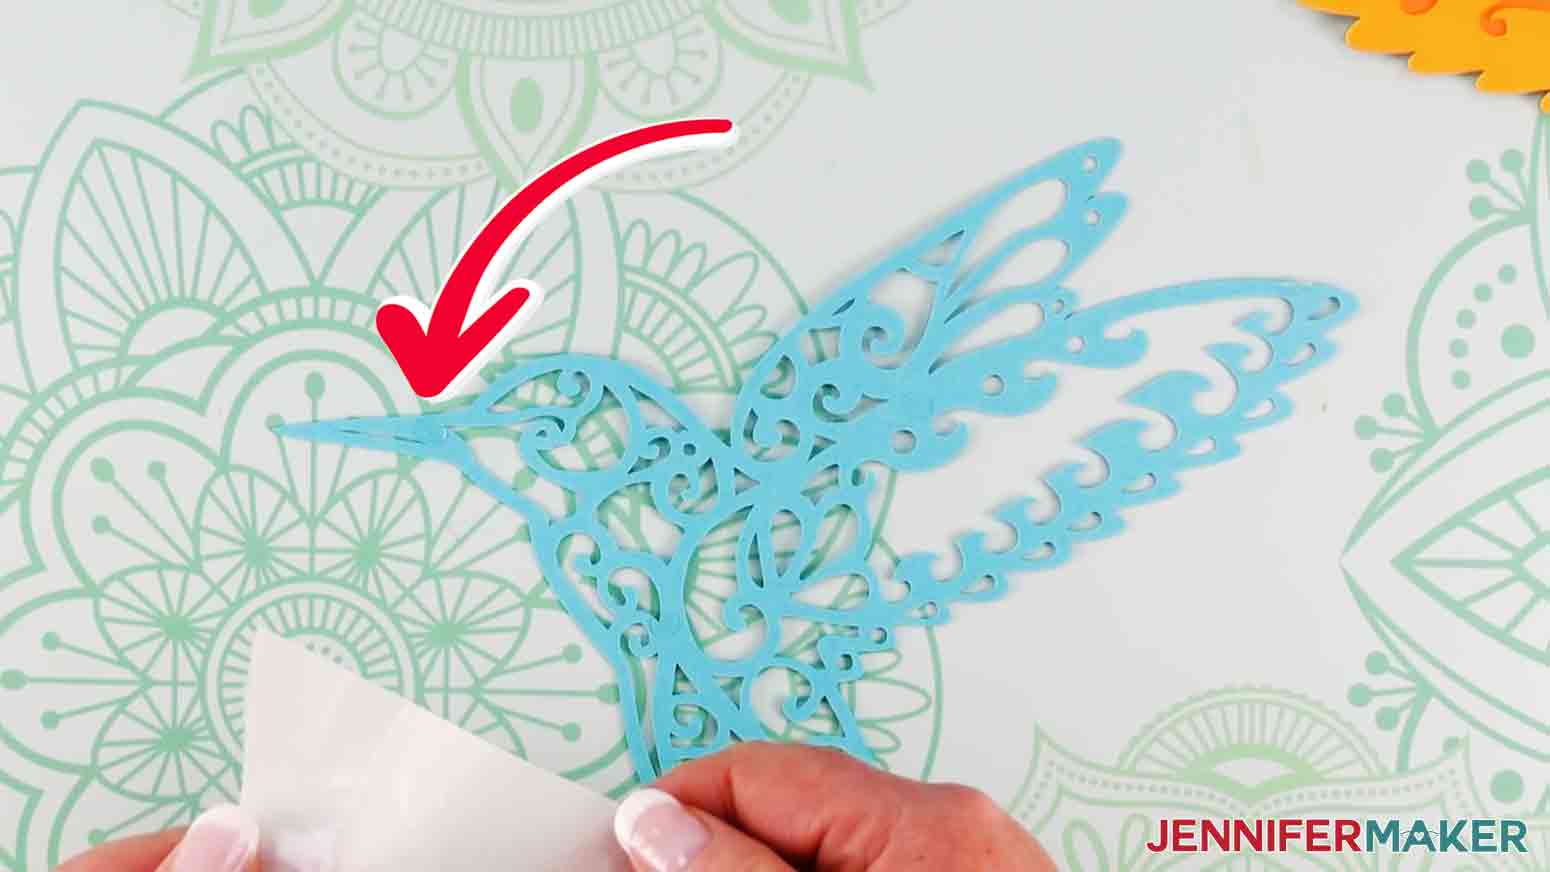
Now that you have your five pieces cut, you can assemble them. I used clear Zots since my white adhesive foam might be visible in the intricate cuts, but use whatever you're comfortable with.
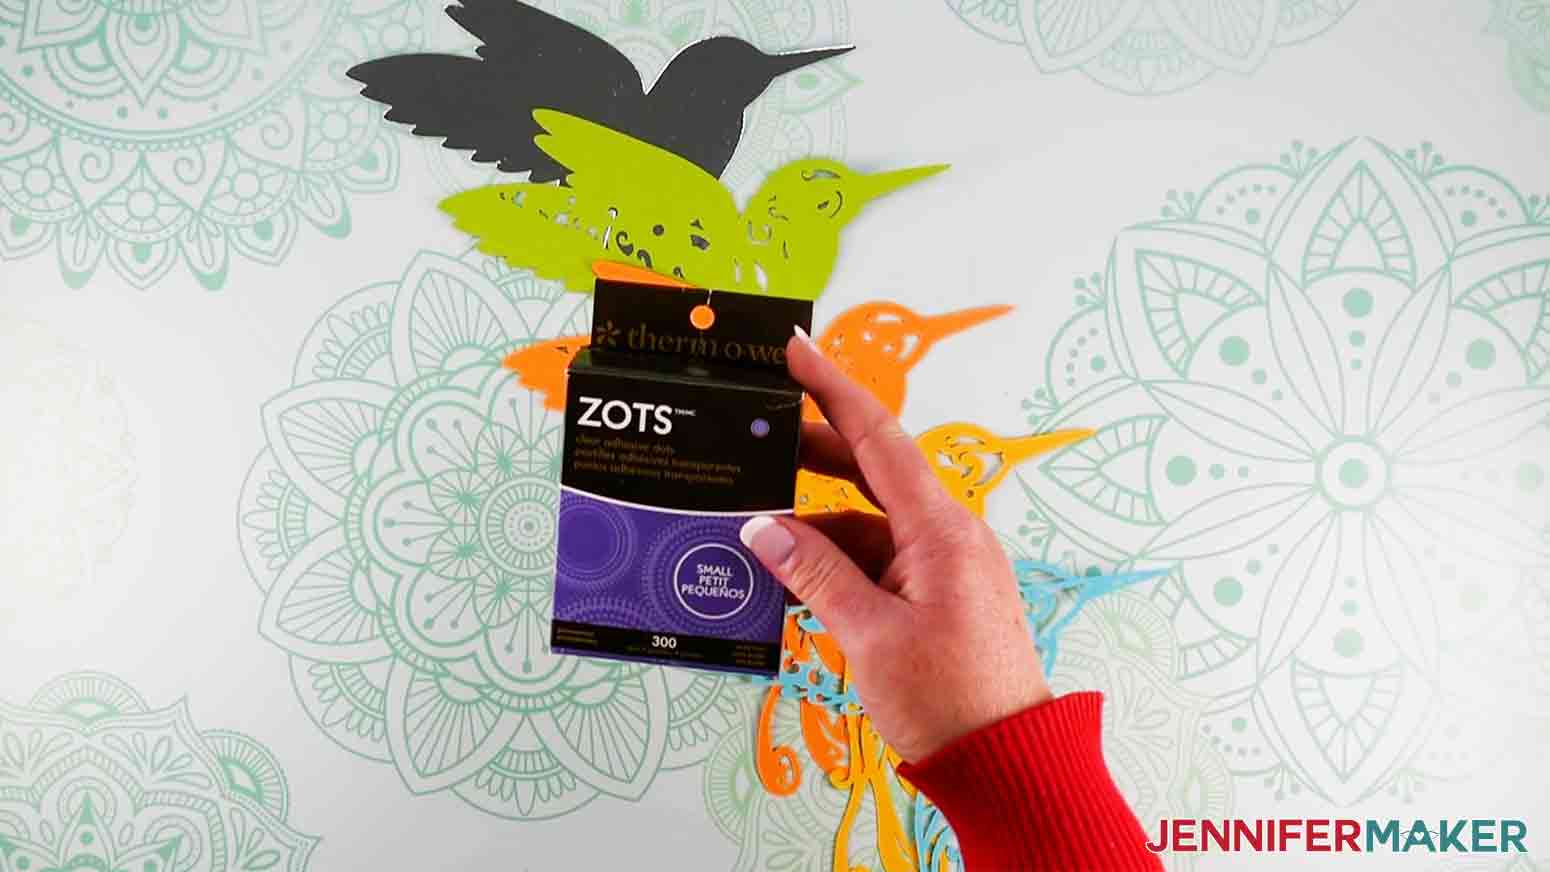
Zots are extra sticky! I recommend working with one at a time and only removing one side of the protective film. Use the remaining paper to position the Zot, press it in place, and then peel it off.
Position several adhesive spots on the back of Layer four. The clear Zots are hard to see, so I've pointed to one with a red arrow.
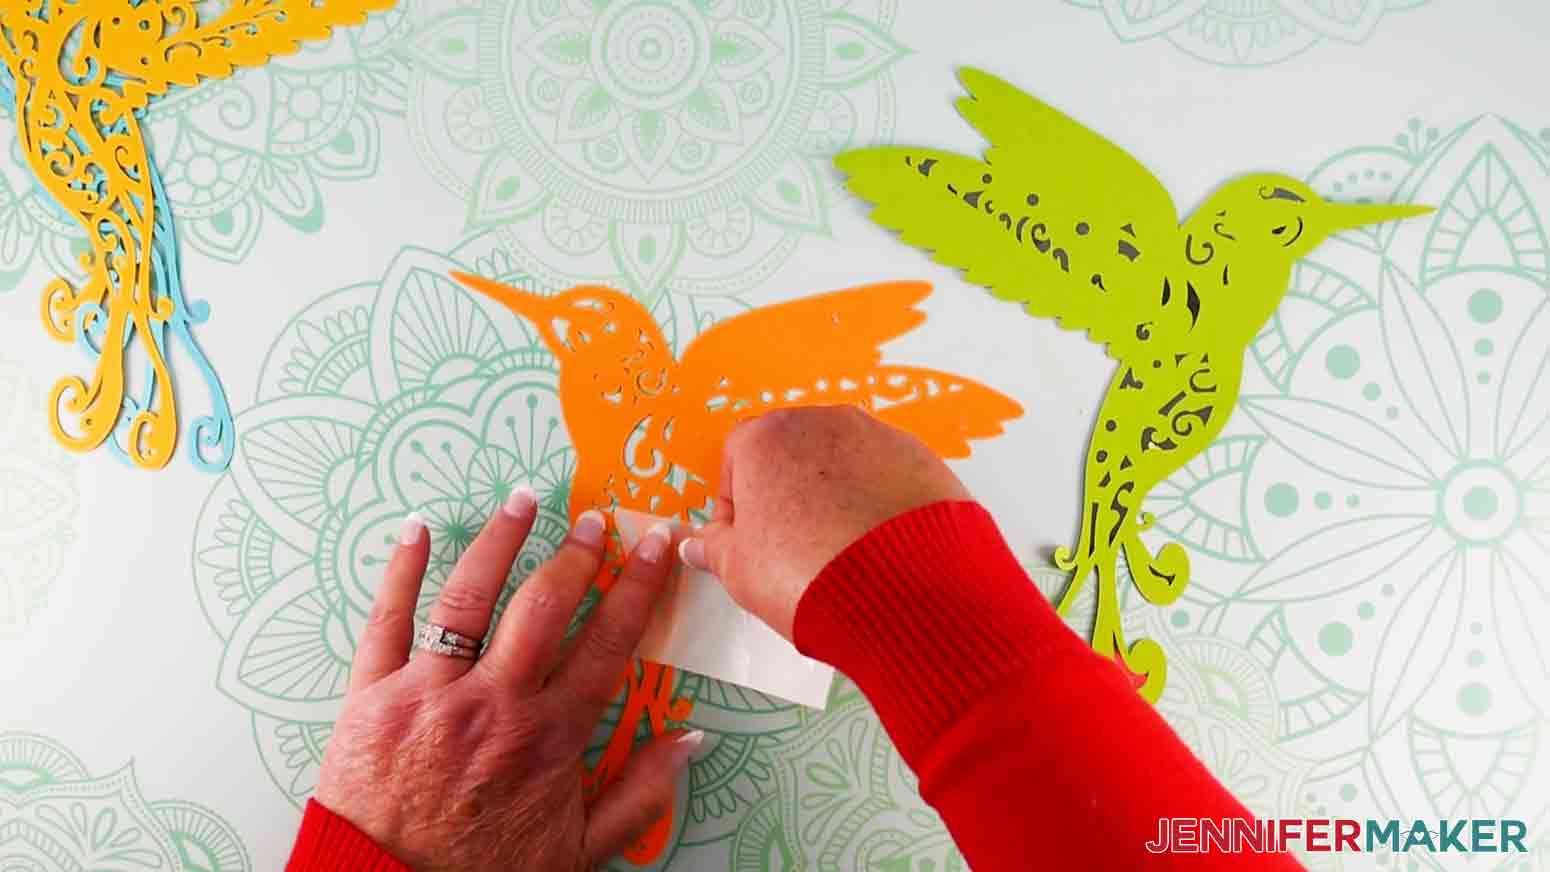
Line it up very lightly over Layer five until all the edges line up. Press down to adhere.
Repeat the process with the remaining layers, making sure your beak and feather swirls line up correctly!
Here is an example of lining up Layer three on Layer four.
Then place Layer two on Layer three.
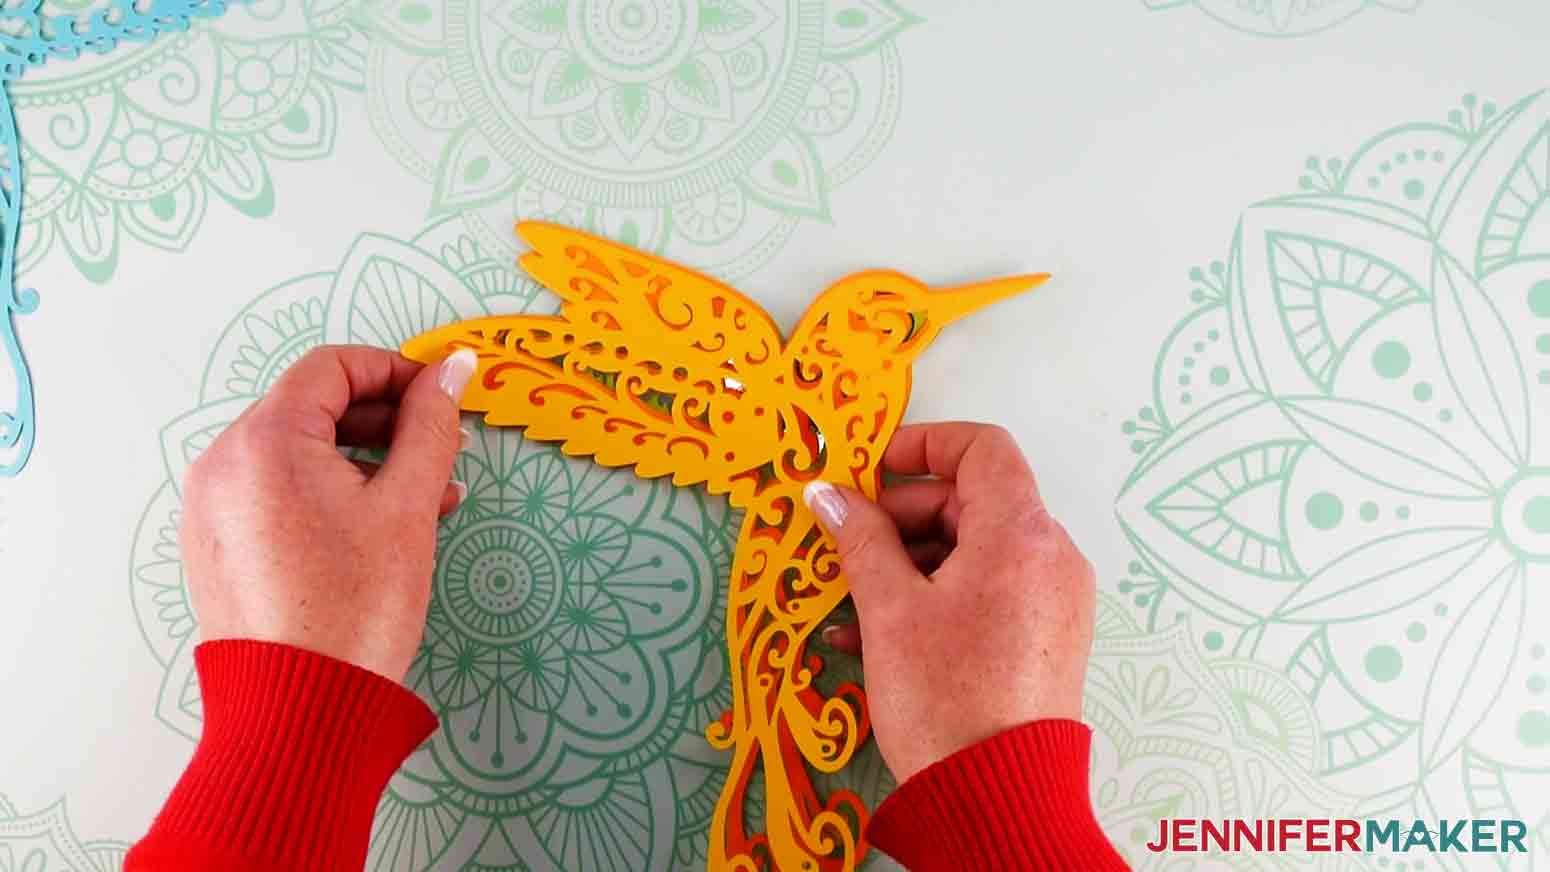
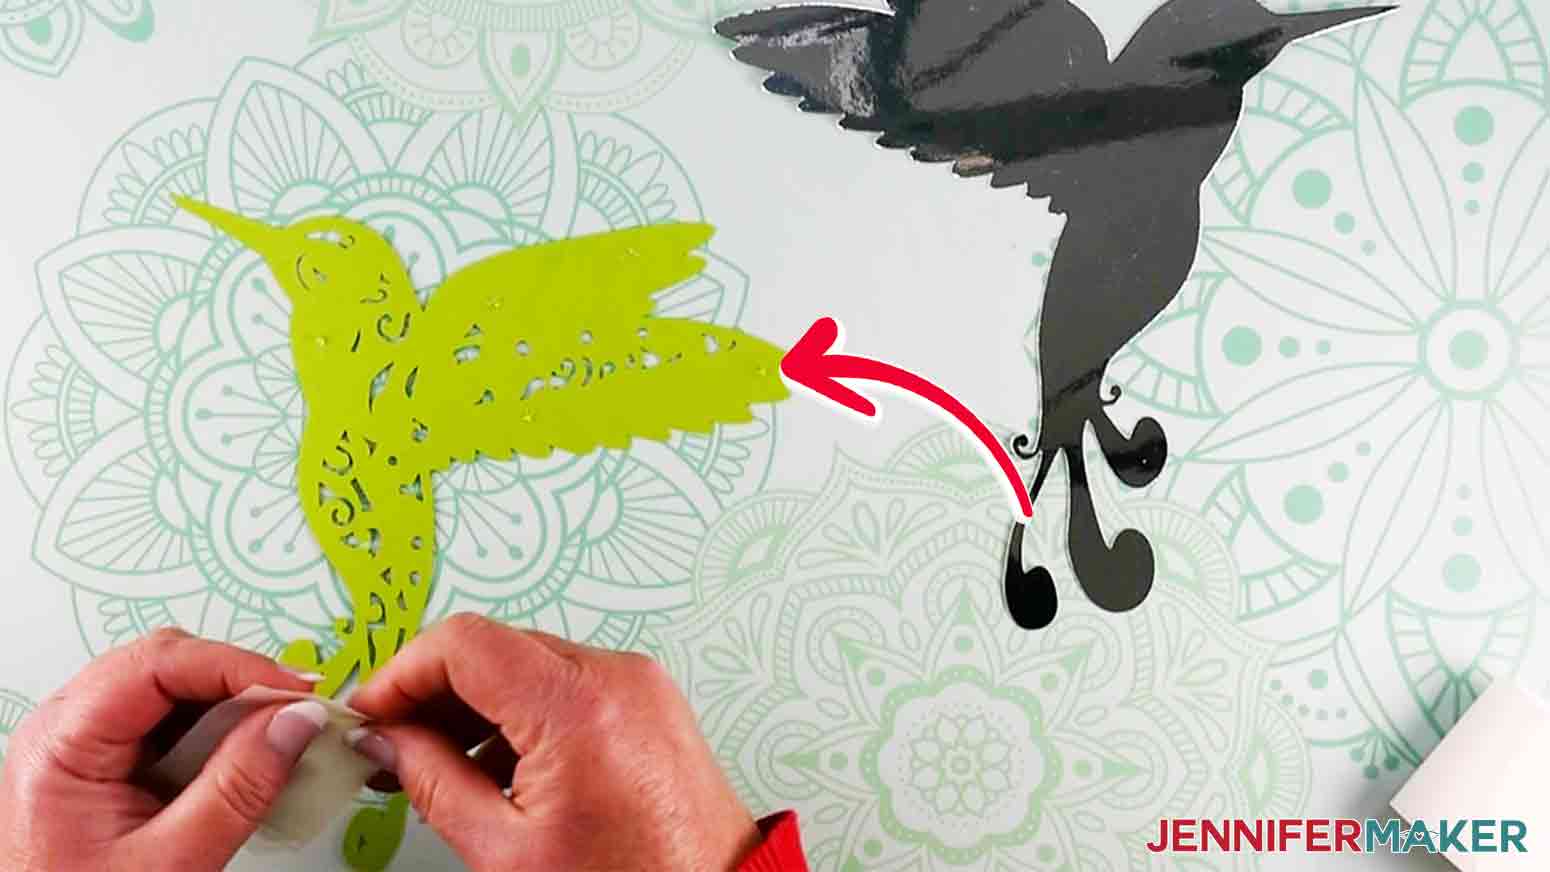
Finding discrete spots for your Zots or foam adhesive will get more difficult as the cardstock layers get more intricate. The red arrow indicates where I placed a Zot on Layer one, right at the base of the beak. You can cut your adhesives smaller, too, with a craft knife or scissors.
Place Layer one on Layer two and your stack is done! When Layer one is placed on Layer two, the Zot blends in since it's clear!
STEP 4: Show it Off
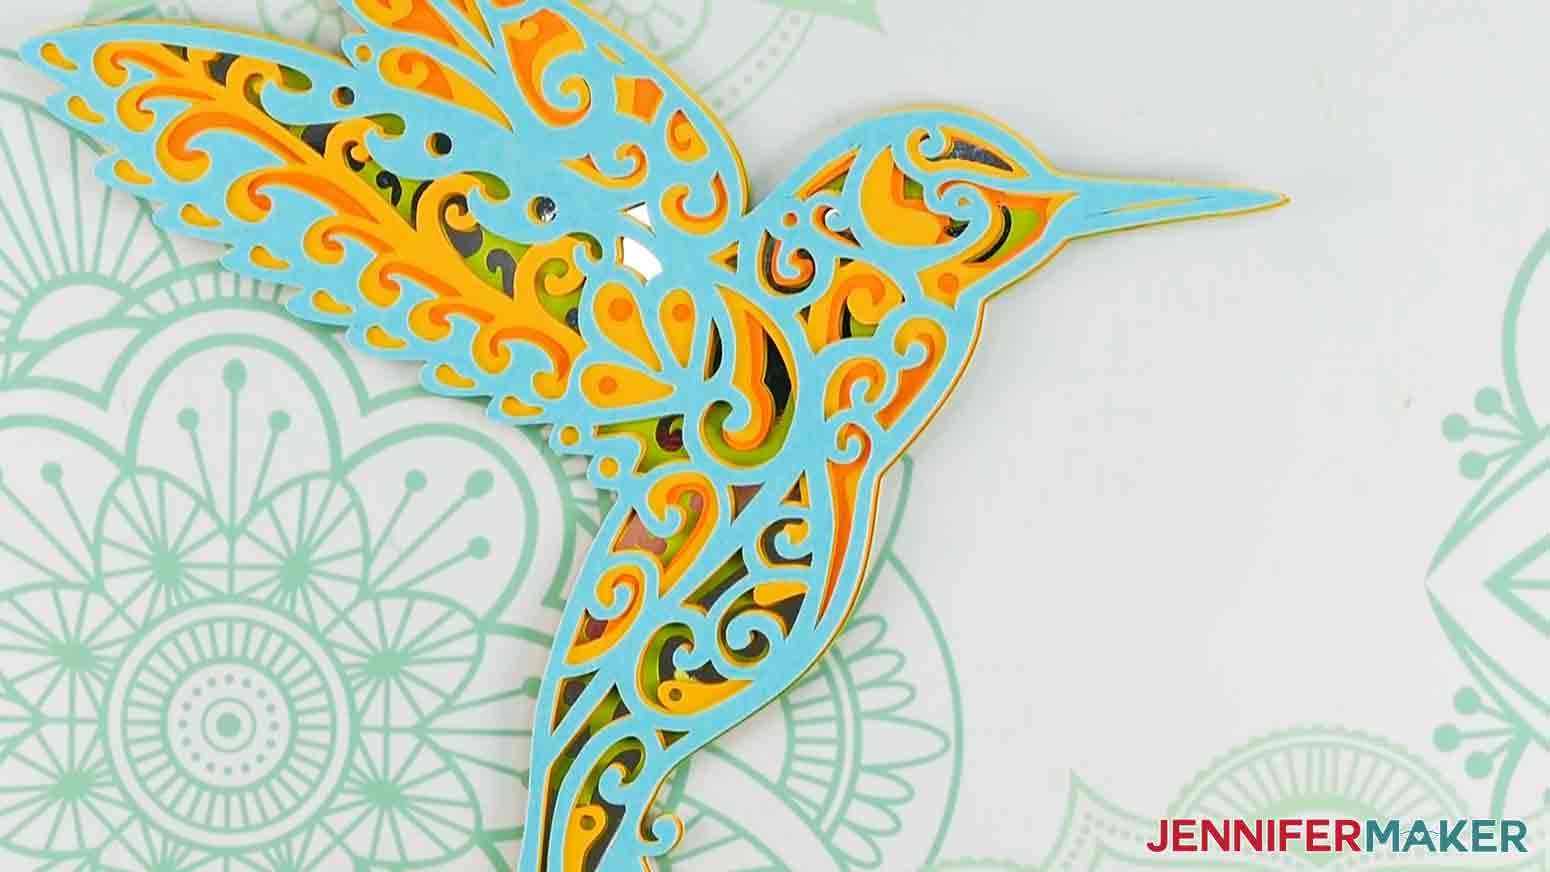
Here’s what my finished 3D Hummingbird looks like. I just love the look of all the layers and how the pretty colors compliment one another.
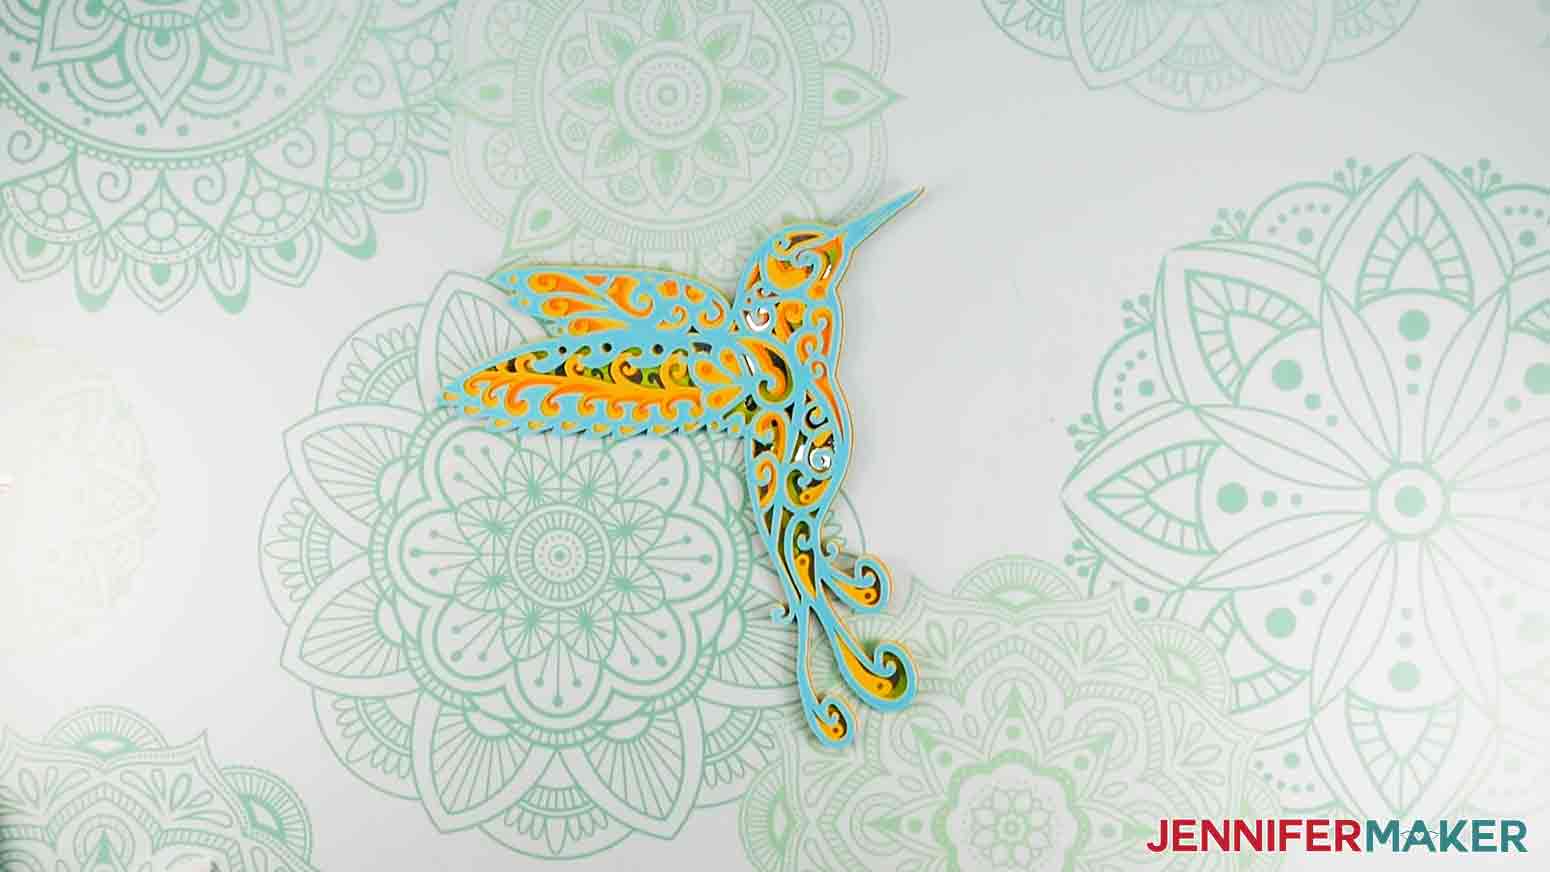
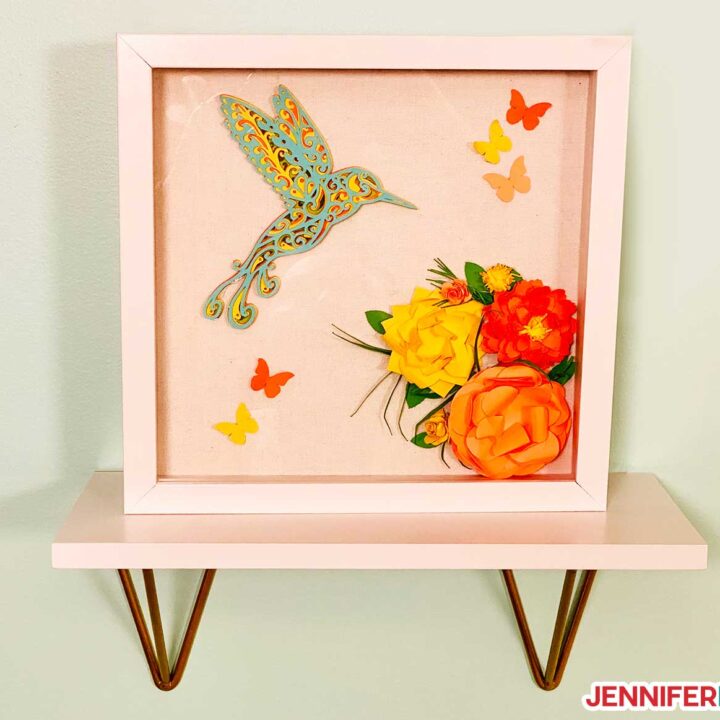
You could give your hummingbird a home by adding it to a shadow box!. Just use tape or hot glue to mount it to the shadow box backing. I added cardstock butterfly shapes from my Popup Butterfly Card and rolled paper flowers from the Letter with Paper Flowers tutorial.
I also made a smaller version that you can cut on the Cricut Joy. I’ve included the special cut setting in the description underneath the video description on YouTube. Since the hummingbird will be even smaller, you could add a magnet to the back with hot glue to decorate your refrigerator! I also hot glued one to a wooden dowel to dress up a bouquet of silk flowers.
Notes
The larger design will create a hummingbird that is about 8" x 9".
The smaller design will create a hummingbird that is about 4.25" x 4.75".
Recommended Products
As an Amazon Associate and member of other affiliate programs, I earn from qualifying purchases.

Get my free Hummingbird SVG file to make a 3D Layered Design.
Are you looking for a different 3D layered design? You could learn how to make your own in any shape you want in my comprehensive Custom Cut workshop. Learn more about the workshop at https://makeracademy.com/custom-cut. I’d love to see your project using my free Hummingbird SVG. Please share a photo in our Cricut group or tag me on social media with #jennifermaker.
Love,

Want to remember this? Save my free Hummingbird SVG design tutorial to your favorite Pinterest Board!

Can you do this with vinyl instead of card stock? I’m trying to get ready to decorate the house with some vinyl decor on my walls.
You can definitely make this with vinyl, Shaunda!
This is so beautiful! And. perfect… I have promised to show a friend how to use her cutting machine next month and this will be one of the projects that we will make. Thank you.
I’m so happy to hear that you like the design, Sue!
Dear Jennifer,
I am new to this product line and want to purchase my first Cricut. My problem is that there are several machines and I want to purchase one that does the most in one machine. I went on the website but didn’t see a good description as to what each machine does. With having to limit my time in store, I wanted to seek your expertise on which machine I could purchase to do the most for me. I am a very experienced crafter, seamstress and love to make my own greeting cards and hangable art. I have enjoyed receiving your emails and would like to be able to make some of the projects. I got started with your no-sew face masks at the onset of the pandemic. My two co-workers and I made over 300 masks for homebound seniors in our area. I thank you for helping us achieve this goal in a time when doing something good for others made all the difference for us!
Hi Kathy, I am so happy to hear that you enjoyed the no-sew design. If you want help choosing the best Cricut for you, I have an article that will help you at https://jennifermaker.com/best-cricut-machine-buy/. If you are on Facebook, you can also ask for advice in my free private Facebook group https://www.facebook.com/groups/cricutcraftersandmakers/. I hope that helps!
I got password, signed in and still can’t get the hummingbird cut file.
Hi Linda, my SVGs Made Simple video and workbook 1 will give you step-by-step directions to download my files. If you need additional help, please reach out to my communications heroes at [email protected]. I want to do my best to help you so you can download the design!
I downloaded the files and extracted from the zip, but do not see any SVG files?
Hi Wanda, you should see a file that ends with -SVG.svg. My SVGs Made Simple Video 1 will give you directions to help you download my files. If you need more assistance, you can reach my Communications Heroes at [email protected]. I will do my best to help you get started with the project!
How do I save to my computer
Hi Barbara, Video 1 in my SVGs Made Simple training series will walk you through the process to download and save any of my free designs to your computer or device! https://jennifermaker.lpages.co/the-joy-of-svgs-all-access-pass/. If you still have any questions, you can email me at [email protected]!
I downloaded the hummingbird, and cut all 5, but it didn’t cut the pieces out of the bird, but rather cutted a bunch of shapes along the sides and bottom of the paper. The birds are all cut out as a solid piece. What did I do wrong?
Barbara! Please reach out to my team at [email protected] with photos of what you experienced so they can help you better!