
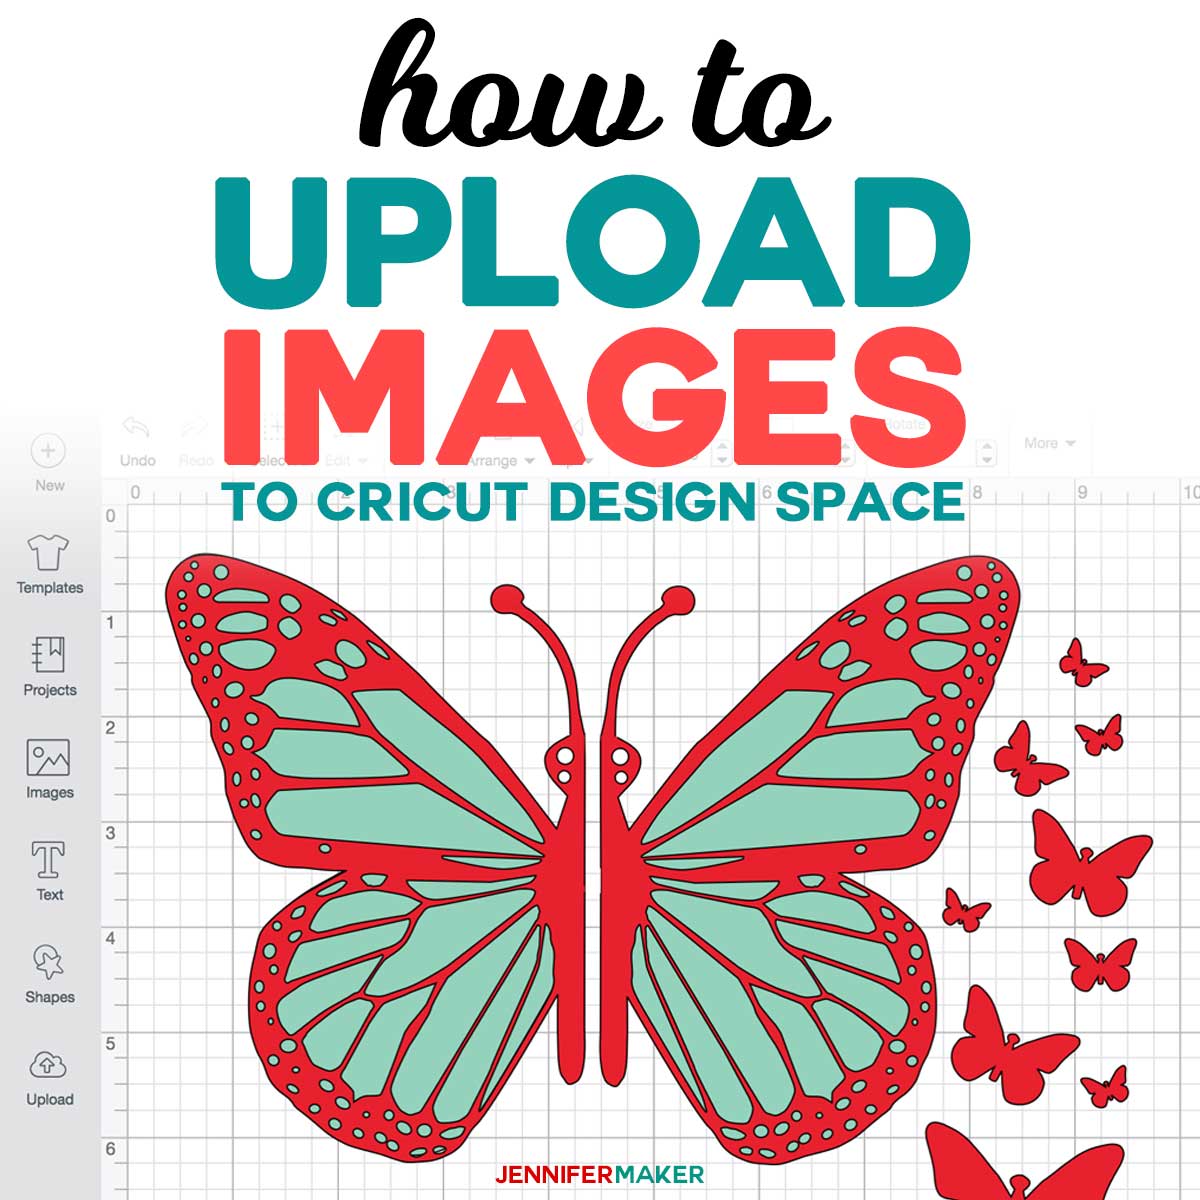
How to upload images to Cricut Design Space on Mac, Windows, or even an iPad — it’s easier than you think!
One of the great things about the Cricut Explore and Cricut Maker cutting machines is how you can upload your own images to Cricut Design Space. I offer more than 100 free images here on my blog that you can upload! But I get a LOT of emails about HOW to upload images to Cricut Design Space. So let’s talk about how to get these super cool images into Cricut Design Space!
I think the best type of files to upload to Cricut Design Space are SVG files. An SVG is a file with a pre-made design that you can download to your computer or device then upload to Cricut Design Space. The file contains all (or most) of the imagery and directions needed to cut a project exactly as designed. And it’s this exactness that makes SVG cut files so appealing — it allows designers to make something precisely and share it with others so they can do the same thing.
But the truth is that trying to getting SVG images uploaded can be pretty frustrating sometimes. Sometimes they download into weird places, or even don’t look right after you’ve downloaded them. Other times, they don’t seem to upload the way we expect. Or we can’t get them uploaded at all!
And, for those of you on Windows, you may download a file and not be able to find the SVG file at all because of weirdness on your computer. I can help with this, too!
This post contains some affiliate links for your convenience (which means if you make a purchase after clicking a link I will earn a small commission but it won’t cost you a penny more)! Read my full disclosure policy.
Are You Brand New to Cricut? Start Here!
If you are brand new to using your Cricut, here are some helpful links to get you started using your machine:
How Do You Get SVG Images?
Now you may be wondering, where do you find SVG images?
As it turns out, SVG images all over the place. I myself have a big collection of free SVG files here on my blog. I keep them all in my free resource library. And many other bloggers do something similar and are happy to share their designs with you via SVG cut files. If a design is being shared, the blogger will mention it in their blog post.
Beyond blogs, you’ll also find cut files in SVG design shops. Most all shops have a free section along with their files for sale. If you don’t mind paying a small price, SVG shops usually have what you need in their large collections
Another place to look for SVG cut files is in Facebook groups devoted to Cricut, Silhouette, and other cutting machines. Most of these groups encourage their members to share files they’ve made themselves and members are allowed to download them.
Here is a list of where I think you can get the best free SVG cut files!
How to Upload Images to Cricut Design Space
Now let’s get all of those awesome SVG files you’ve found into your design software. I’m going to show you how to upload in different ways on a variety of devices.
How to Upload Images in Windows
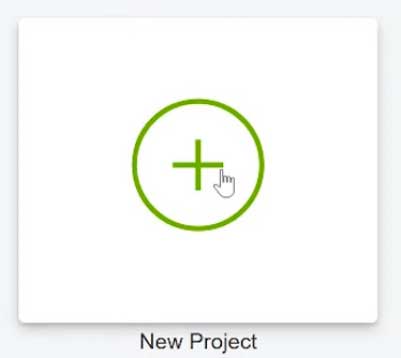
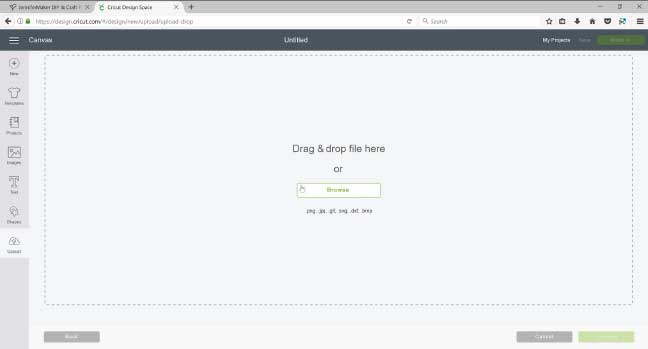
First, let me show you how uploading works in Cricut Design Space on Windows running Firefox. Go to Cricut Design Space at https://design.cricut.com. Click the New Project button.
This is the first step to upload images to Cricut Design Space!
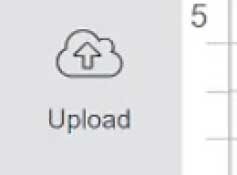
Then click the Upload button over on the left.
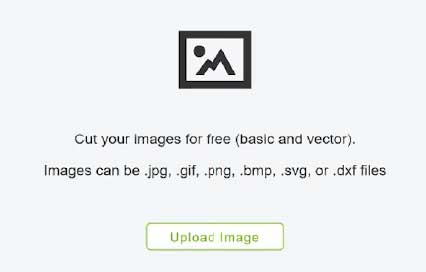
Then click the Upload Image button.
Then you click the Browse button. You can drag and drop with Windows, if you prefer, but I think it’s best to Browse for your file.
Locate the SVG file. Do not upload the ZIP file by accident. If you do, you will get this message:

It’s really important that you don’t just upload this ZIP file. You want to find the decompressed version, and then find the SVG file inside that folder, and then upload that. Otherwise it just won’t work and it will tell you so.
Important: If you do NOT see the SVG file, but instead see something that says “Chrome HMTL Document,” this IS your SVG file. Windows is simply not showing it as an SVG because you do not have an application installed that understands and identifies it.
So there we go, our image is uploaded to Cricut Design Space! Add in some tags and click the Save button. And it will save to Cricut Design Space for us.
And the uploaded files appears over on the left side of your screen. You click it and click Insert Image.
How to Upload Images to Cricut Design Space on a Mac
Let’s start with a Mac running Chrome. Go to Cricut Design Space at https://design.cricut.com and click on New Project.
Now click the Upload button.
On the next screen, click Upload Image.
On the screen that appears next, you can do one of two things. You can either drag your SVG file from the Finder right into the Upload area — it will turn green when the window recognizes a valid file, OR click the Browse button and use the File Open window to locate and select your SVG file. Either way works.
Tip: If you’re using the Browse button — type in SVG in the Find box in the upper right corner of your File Open window, select “Scalable Vector Graphics” from the drop-down list, and watch all the SVG files on your computer show up! Pretty nifty, eh? I appear to have a LOT.
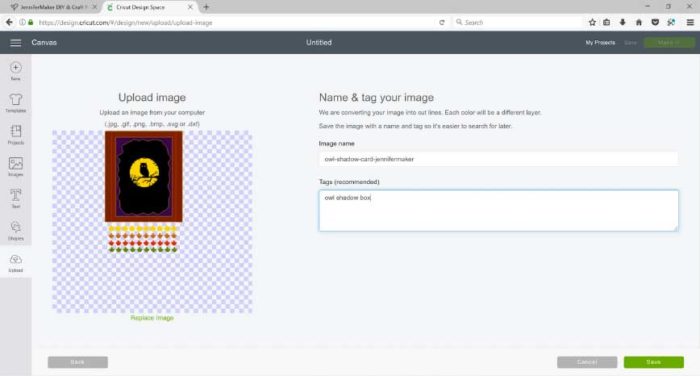
Once you’ve selected your SVG file, be sure to give Cricut Design Space some time to load your file — some complicated files may take longer than you expect. A sliding green bar across the top of your screen indicates that it is uploading. When it is finished uploading, don’t stop yet — you have one more step to save it. You need to name and tag your image, and then click Save.
A note about the Image Name and Tags. I recommend you at least put in tags, as it will help tremendously later when you are looking for a file. Just put in some tags that make sense to you. When you’re ready, click the green Save button.
Once the file is saved, you’ll be back at the first Upload screen and you should see your most recently uploaded file on the top left.
By the way, if you’ve ever been stumped by why you don’t see ALL of your uploaded files here (I hear this one a lot), just click this little “View all” link above the images — it will show ALL images you’ve ever uploaded. Nifty, eh?
Ok, now that you’ve uploaded your file, you may be wondering how to use it. Just click once on the image of your upload. You will see a green box appear around the image to indicate you’ve selected it, and you’ll also see a thumbnail of the image appear next to the Insert Images button. (This is so you know if you’ve selected more than one.) Now just click Insert Images. The design appears on your Canvas, ready to go.
There are often things you need to do to designs, especially more complex and amazing designs, after you upload. We’ll talk all about that in the next session/video.
So that’s how you upload in Chrome?
How NOT to Upload SVG Files on Windows or Mac
Now let me tell you what you SHOULD NOT do if you’re attempting to upload a file.
1. Do not double-click the SVG file. This will cause your computer to look for a file that can open it, such as Inkscape or Illustrator. This is NOT what you want.
2. Do not drag it to your browser window. This will usually result in your browser displaying the image, but not in your design software. This will not get you where you want to go.
3. Similarly, do not drag it into Cricut Design Space unless you are in the Upload Image window with the gray dashed line. It won’t work, and your browser will simply display a static image of the file.
4. You also want to be careful to upload the SVG file, not the PDF or JPG or any other file that might be in the folder. I should also note that while DXF files are allowed, do not open those if you have an SVG — more data is in the SVG file and you’ll have better results with it. Most designers, including myself, include the DXF file for those who have design software that does not allow SVG files.
How to Upload Images to Cricut Design Space on an iPhone/Pad
So now let’s go over uploading a file using the iPad that is running Chrome Remote Desktop. If you’re not familiar with Chrome Remote Access, go back to the first session in this training series where I talk about how you can install it and how you can use it to do a whole lot of things you can’t normally do with an iPad or iPhone with Cricut Design Space. This is really a helpful tip.
So here I am on my iPad. I’m going to click Chrome Remote Desktop Access. My app is already setup so I’m going to connect to my iMac so that I can go ahead and do things. So I need to authenticate first which is set up in advance when you install this initially.
So here we are on my iPad looking at Cricut Design Space that’s on my Mac. You could also do this to look at Windows. It works in either way. You just need to have to set up. So I am going to walk you through how I can upload a file using my iPad without having to go to my Mac at all.
So I’m going to click on New Project right over here on the left.
And then I’m going to click the Upload button also on the left side.
So let’s click on Upload Image and here we see exactly what we see in Cricut Design Space.
So I am going to use Browse as it’s a lot easier to do using this interface. Alright so and this screen is small on my Ipad — you can enlarge it by using two fingers and spreading them apart just like you would normally do in an iOS app.
So there’s the SVG file.
Tap it to select it. Then I’m going to tap Open and I’ll make this smaller again so we can watch it.
All right, there we go. So there’s my owl file and I can again name and tag my image. So I can click here in the tag line and then up here in the upper right hand corner there’s an icon of a keyboard. If you click that your keyboard on your iPad comes up and you can put in your tags or whatever you might like. Tags, by the way, are just a sort of keyword that you can use when you’re searching for things. And then we click the Save button right there in the lower right and it has saved for us just like it’s supposed to.
In order to see this image on our iPad, we have to save this owl as a Project. I’m going to show you very quickly how to do this so that you’re ready to go in the next step. The next video, which is going to talk about how to prepare the files you’ve uploaded for actually cutting and how to customize them as well. Okay, so we’ve selected our owl card. Let’s make this a little bigger. Alright so let’s click Insert Images. So there is the owl on my Canvas.
Now to save this as a project which is separate from saving as an image or just, you know, uploading, we’re going to go the Save button in the upper right corner. Click it and it will come up with a box that’s a Saved Project. We bring up our keyboard again and we’re going to type in “owl shadow box card – Jennifer Maker.”
There we go. Hide the keyboard window and click Save. It will tell you it is saving. So it’s now saved as a Project. This is not normally something you need to do until you’re actually read to save it, but in this case on the iPad we want to do that.
So now let’s go back and go into the Cricut Design Space app. Again, that’s different than using the Remote Chrome Access app to get to our desktop or laptop computers. Okay, so we’re going to click on the drop-down menu in the upper left corner and choose My Projects in the Cloud. This is important because these projects are’t saved on the iPad; they’re saved in the Cloud that we just did through remote access.
And, sure enough, it shows up and it’s available for us to use. All we have to do is click othe project and it’ll give us the option to use it.
And we click OK and it will appear on our Canvas. And that is how you get an SVG file uploaded into Cricut Design Space using an iPad running Chrome Remote Access.
How to Get Free Image Files to Upload to Cricut
The best way to get the free images to upload to Cricut is to go to my free resource library and download the projects you’d like. I keep all of my projects in my free library for you to use. To get the password to the library, just fill out the form below and you’ll get immediate access:
If you try one or more of these projects, I’d love to see what you made! Email me at [email protected] or share your project on our Facebook group!
Love,

Want to remember this? Save the Upload Images to Cricut Tutorial to Your Favorite DIY Pinterest Board!


Thank you for such a thorough post on SVG files. I always find them frustrating when they do not show up the way I think they should. You tips have given me some great ideas on how to solve the uploading issue. Thank you!
I am still having difficulty uploading an SVG. I followed all the steps but when I get to SAVE the SAVE icon is not highlighted and will not let me save.
Sometimes with more complex files, some members of my team have found this same issue. A solution they have found is to just move the file on your canvas in Design Space slightly, and then try to save! Don’t worry, you can do this!!