
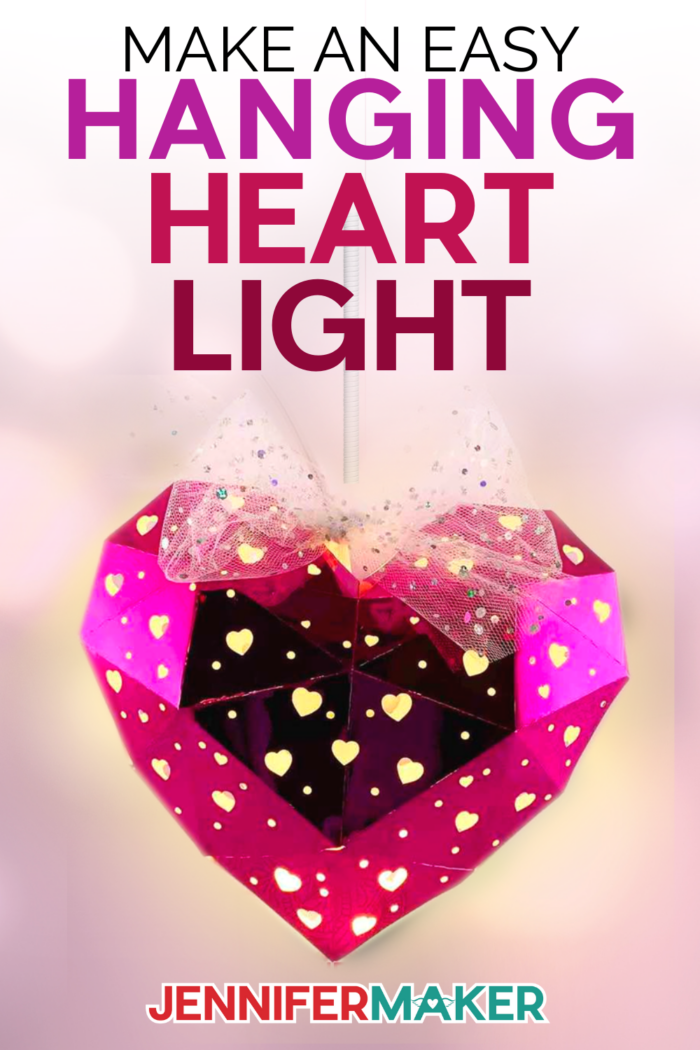
Show some love with this super easy heart-shaped hanging paper lantern! Learn how to make it with my free pattern and full tutorial!
Hanging paper lanterns are incredibly fun and popular projects! These lanterns are a fun way to showcase your personality and style and in case you need more inspiration, you can check out my first star paper lantern project or read about my adventure in making a luminary for every month of the year! One of the reasons these hanging paper lanterns are so popular is that they are so versatile and can accent any room with just the right color of paper. These Heart-Shaped Hanging Paper Lanterns are so easy to make!
Want to save this project? Enter your email below and we’ll send the project straight to your inbox.
Watch my step-by-step video to see how to cut and assemble this heart-shaped hanging paper lantern, perfect for Valentines Day!
Please note: The pattern has been updated since this video was made, and you’ll now need to set and attach your score lines before you make it OR used the “dashed-line” version. See the step-by-step tutorial below for more details.

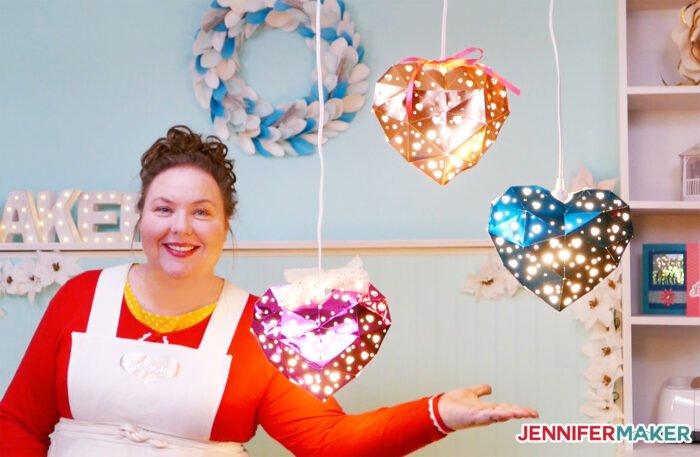
These trendy hanging paper lanterns are so fun to make, and I love the whimsical heart shaped design. One of things I love about this design is that it looks intricate and complicated, but they’re easy to make and give off an amazing wow factor!
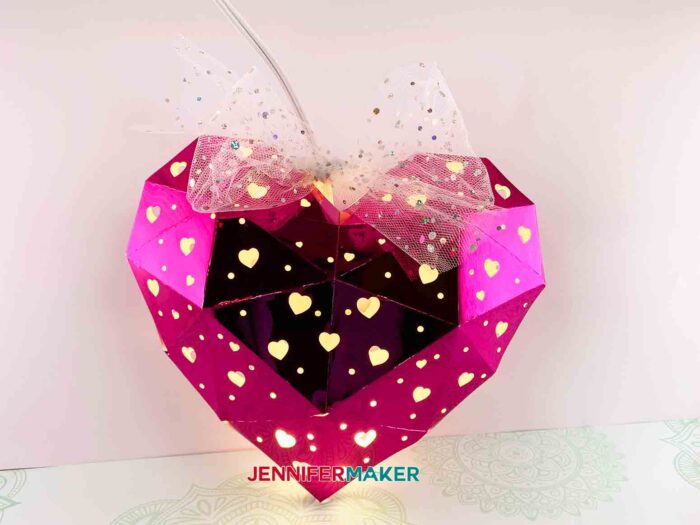
To make the hanging lantern, you only need two sheets of 65 lb. or 80lb. cardstock — the 12″ x 12″ size. You can also 110 lb. instead if that’s what you have! For this tutorial, I used two sheets of 80 lb. mirror metallic pink cardstock.
You’ll also want an adhesive. You can use glue or double-sided adhesive tape, such as Scor-Tape — really anything that will keep the cardstock together. If you use a cardstock with a texture, like glitter, you may need to experiment with glues or even double-sided tape to find the best adhesive for your paper.
The only other supply you’ll need is a a hanging lantern cord for pendant lighting and a light bulb. I used a 40 watt LED lightbulb. It’s VERY important you use only an LED light in your lamp, as it will not generate any infrared heat. Do not put any light source that will generate heat into this paper lamp.
I used a Cricut cutting machine to cut my cardstock, along with the fine point blade and a blue LightGrip machine mat.
A scoring stylus or scoring wheel is optional — you can make this project with or without one!
And that’s all you need. Other than the pattern, of course! Now I’ve designed my heart lantern to have little cut-outs, but if you’d prefer not cut-outs, or want entirely different cut-outs, I show you how to do this at the end of the tutorial video!
So let me show you where to find the designs, and then I’ll show you how to cut and assemble your Heart-Shaped Hanging Paper Lantern! This post contains some affiliate links for your convenience (which means if you make a purchase after clicking a link I will earn a small commission but it won’t cost you a penny more)! Read my full disclosure policy.
Materials to Make a Heart-Shaped Hanging Paper Lantern
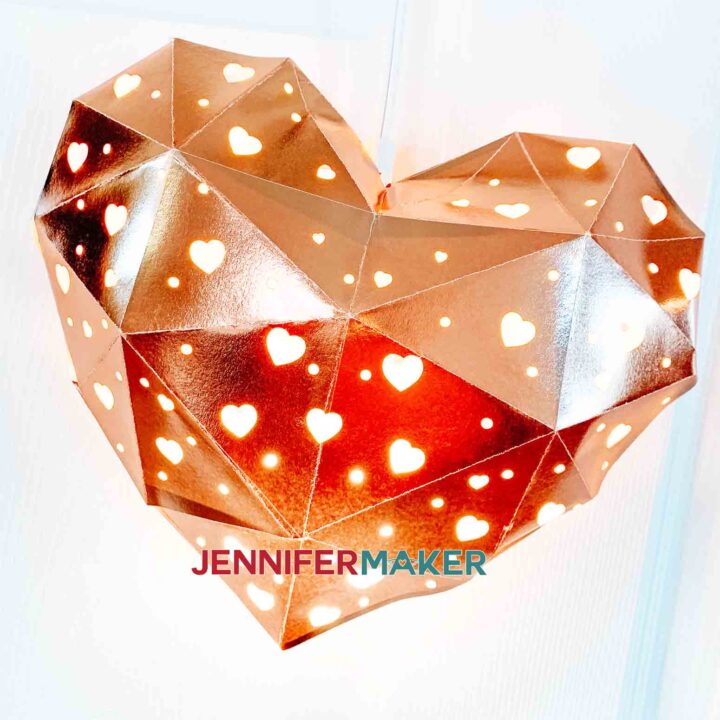
- Two sheets of 12″ x 12″ Mirror Metallic Pink Cardstock (Tutorial Photos) or 12″ x 12″ Rose Gold Foil Cardstock (Main Photo) or whatever you want to use, such as this Mirror Gold Cardstock
- Hanging Lantern Cord for Pendant Lighting
- Light Bulbs
- Double-sided tape like Scor-Tape (1/8″) or tacky glue
- Cricut Scoring Stylus or Scoring Wheel (optional — used the “dashed-lines” version if you do not have a scoring stylus or scoring wheel)
- Cricut XL Scraper
- Weeding Tool
- Rotary Cutter
- Cricut Blue LightGrip Machine Mat
- A way to cut your paper (I used the Cricut Maker cutting machine but they can also be cut on a Cricut Explore or Cricut Joy)
- Design #283 (My free SVG/PDF/DXF design files are available in my free resource library – get the password by filling out the form at the bottom of this page)
How to Make A Heart-Shaped Hanging Paper Lantern
Heart Shaped Hanging Paper Lantern
I just love paper crafts, especially ones that light up! This Heart Shaped Hanging Paper Lantern is just perfect for Valentine's Day and is sure to brighten your sweetheart's day!
Materials
- 12" x 12" Mirror Metallic Pink Cardstock (Tutorial Photos)
- Note: The Metallic Pink Cardstock is no longer available, but this Metallic Red is just as stunning!
- 12" x 12" Rose Gold Foil Cardstock (Main Photo)
- Hanging Lantern Cord for Pendant Lighting
- LED Light Bulbs
- Thin double-sided adhesive tape such as Scor-Tape (1/8")
- Design #283 –My free Heart Lantern SVG design file (available in my free resource library–get the password by filling out the form at the bottom of this page)
Tools
Instructions
STEP 1: GET THE HEART LANTERN DESIGN:
You can get my Heart Shaped Hanging Paper Lantern design file from my free resource library (get the password to the library in the form at the bottom of this page.
Tip: If you are not sure how to upload an SVG cut file to the Cricut Design Space, watch this helpful video training series I made. If you are on an iPad or iPhone, here is how to download and upload SVG files to the Cricut Design Space app.
This project requires folding and it has two different versions for you to choose from -- a "dashed-line" version and a "scored-line" version. The filenames identify the version.
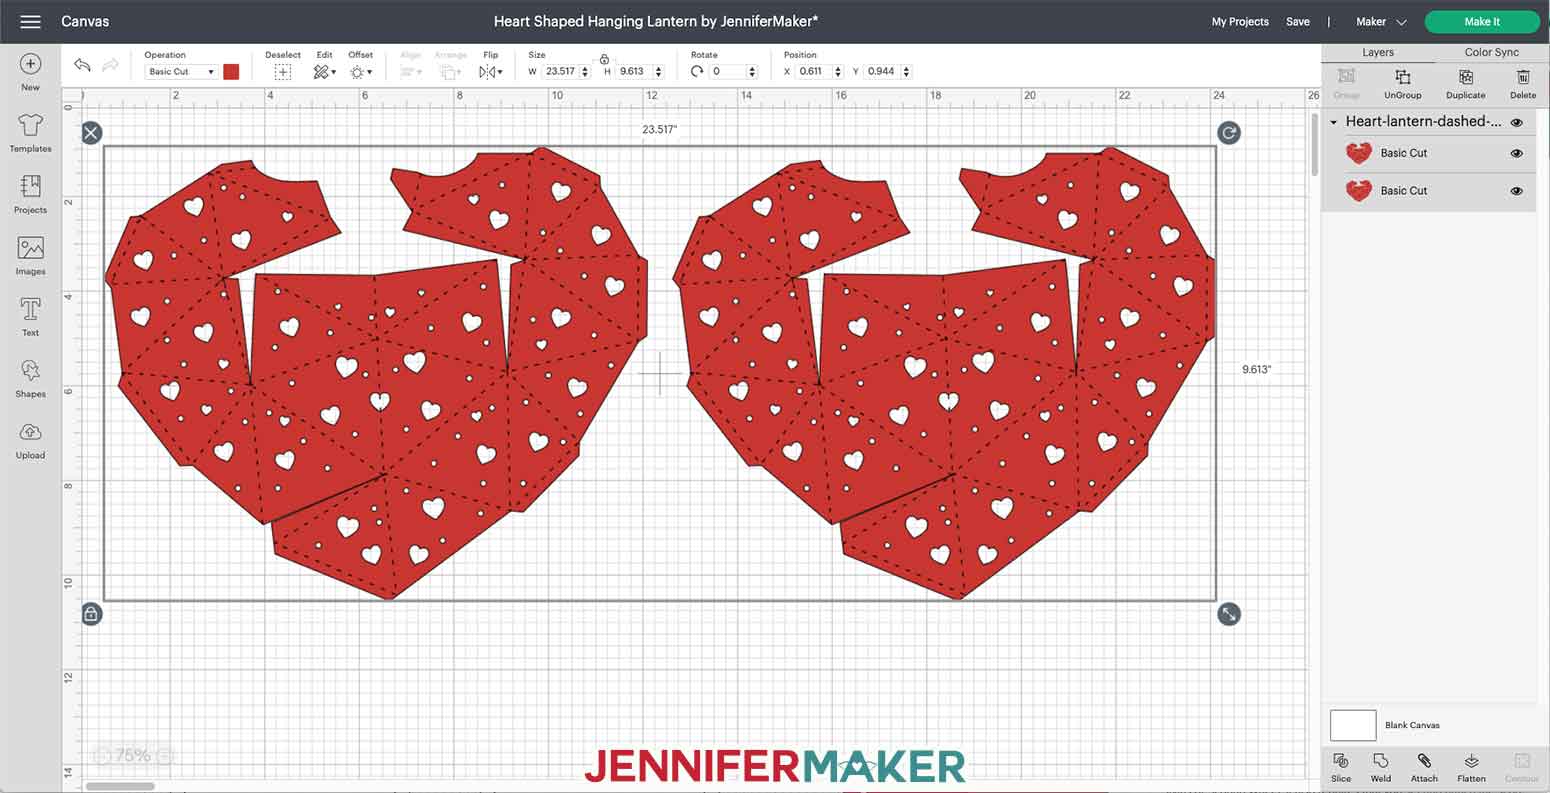
The dashed line version does not require a scoring tool or any score line setting. Instead, we've added small cuts to the file that will assist you in folding your project. If you are new, we recommend you use this version of the project.
Here is what my dashed line Heart Lantern design file will look like when you upload it to the Cricut Design Space:
The scored line version requires a scoring tool, such as the Scoring Stylus or Scoring Wheel. It also requires that you set and attach the score lines in this tutorial. If you don't set and attach your score lines, your score lines will cut rather than score.
Here is what my scored line Heart Lantern design file will look like when you upload it to the Cricut Design Space: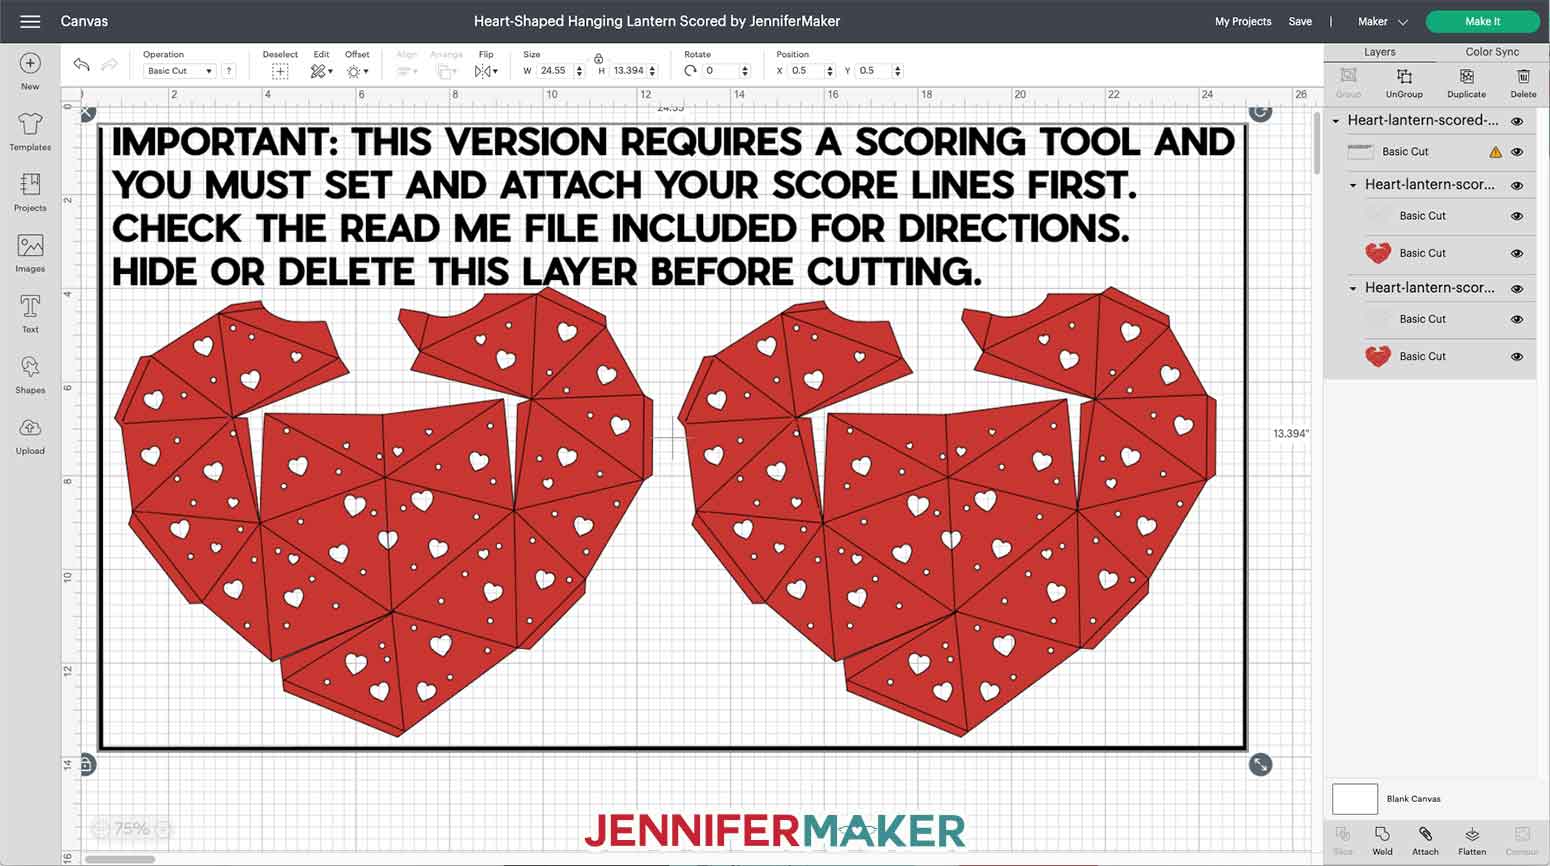
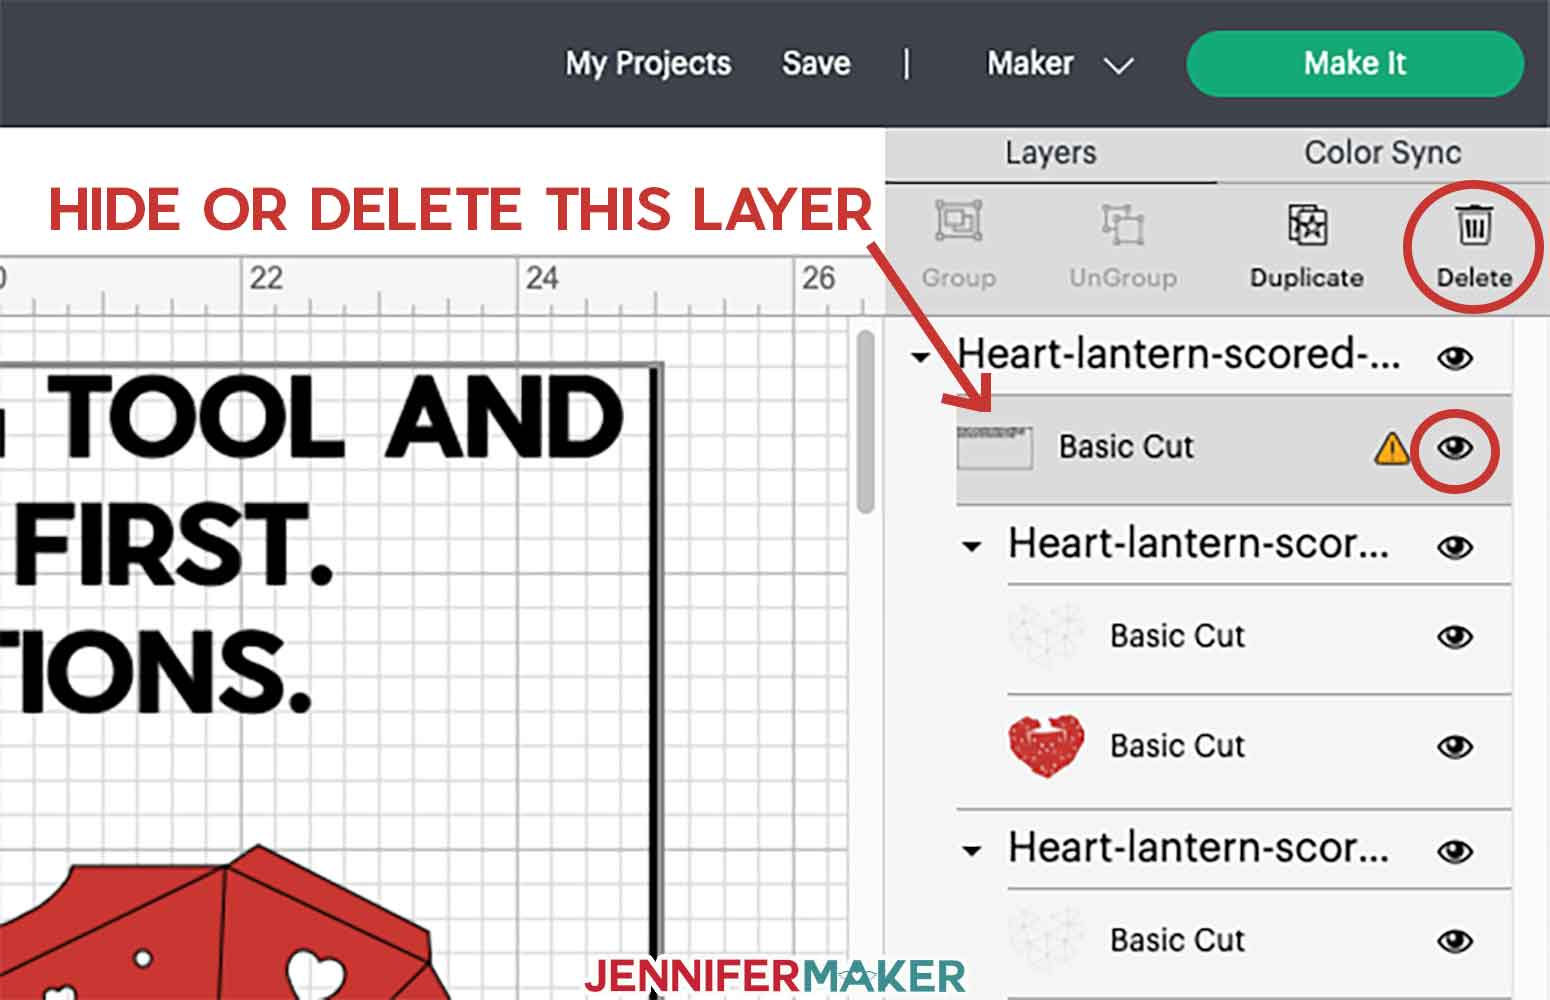
First thing you want to do is zoom out so you can see the whole design and hide or delete the black layer with the directions. You can do this by selecting the black layer in the Layers panel on the right and clicking the Eye icon or the Delete icon.
I originally pre-set and attached this project's score lines for for you, but Cricut Design Space no longer recognizes this. That means you need to set and attach your score lines.
HOW TO SET & ATTACH SCORE LINES
To set and attach score lines in this project, select the design on the Canvas and click Ungroup. Now begin checking the Layers panel for layers that look like nothing more than empty, uncolored lines -- those are the score lines. Another way you can identify the score lines in this project is to look for two layers that are in a small group with themselves -- in these small groupings, the top in the score line and the bottom is the base layer.
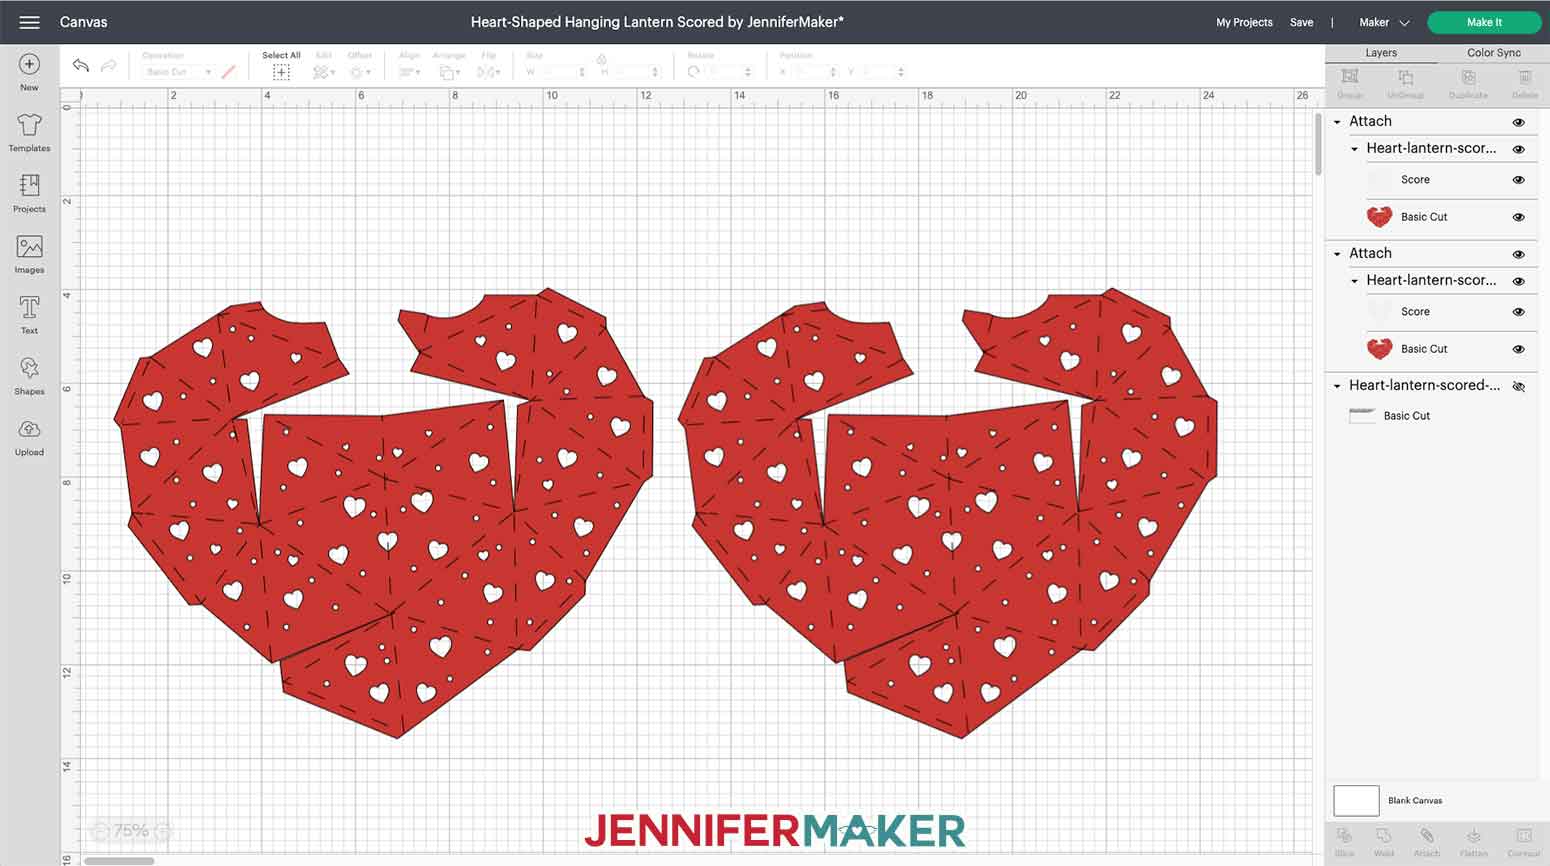
So once you've found a Score line, select it in the Layers panel, then go to the Operation menu, and choose Score. You should see that layer change from Basic Cut to Score in the Layers panel. Now hold down the Shift key and select the layer below that, then click Attach. Your Score line is now set and attached to its base layer. It's very important you tell Cricut Design Space which layer you want scores by attaching it, or you'll just have scoring happening on empty mats. Continue going down the Layers panel until all layers that just seem like empty lines are set to Score, and make sure you Attach them to the layer immediately below it each time. When you feel you've got them all, click Make It and carefully check each mat. If you see any mats that appear to just be odd black lines, that means you forgot to attach some score lines to their base layers. Go back and find them, and then select the score line and the layer immediately below that, and click Attach.
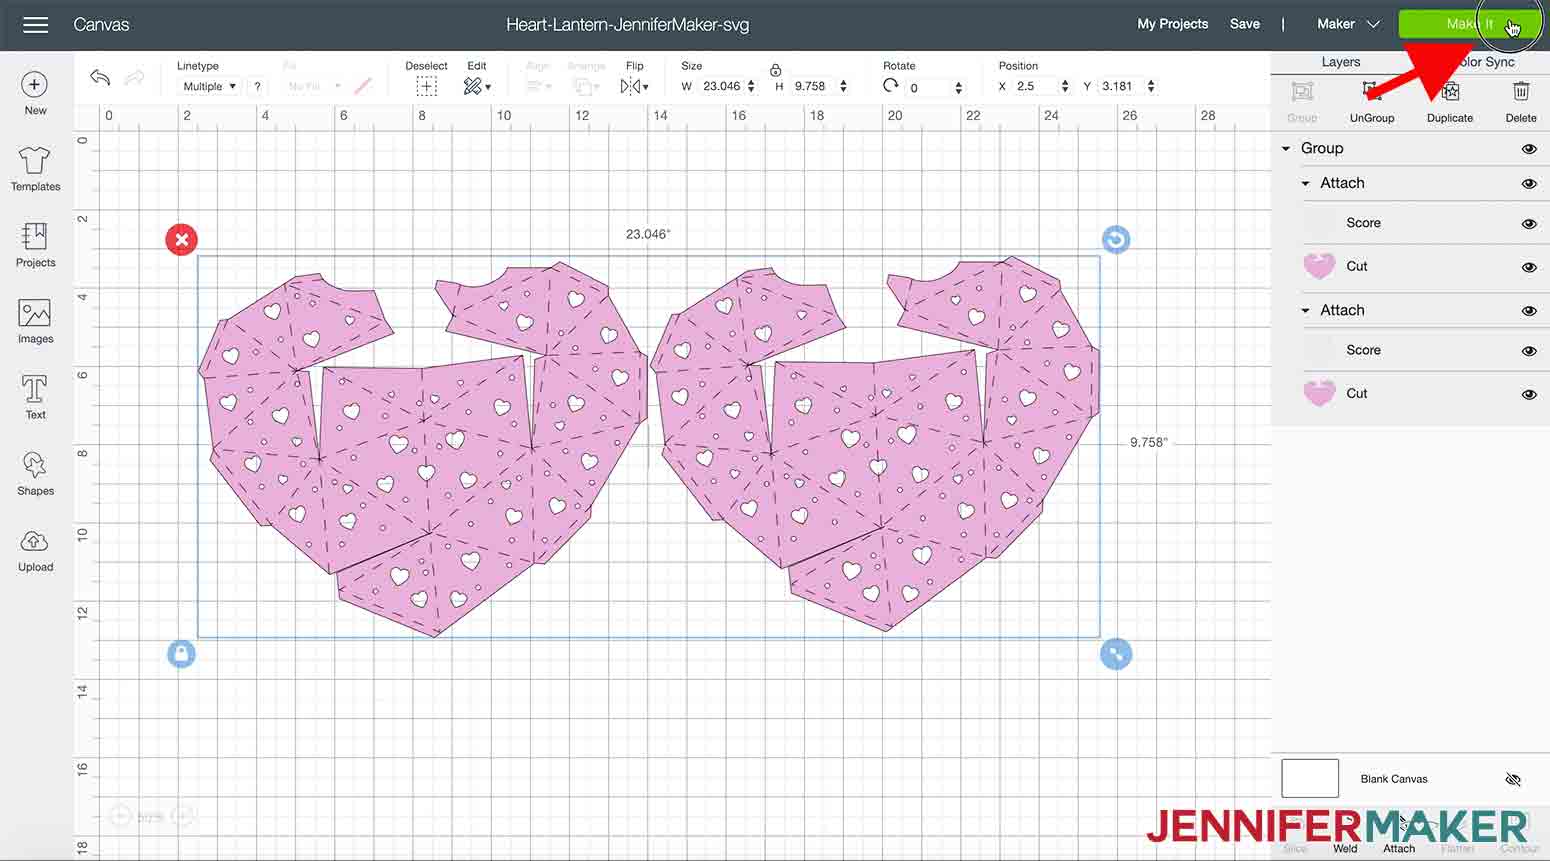
This is how your project should look when all score lines are set and attached:
This video shows you how to identify and set score lines in one of my projects.
If you'd like to change the color of your material, you can select each colored layer from the Layer panel, then click on the Color Picker at the top of the screen to choose a new color.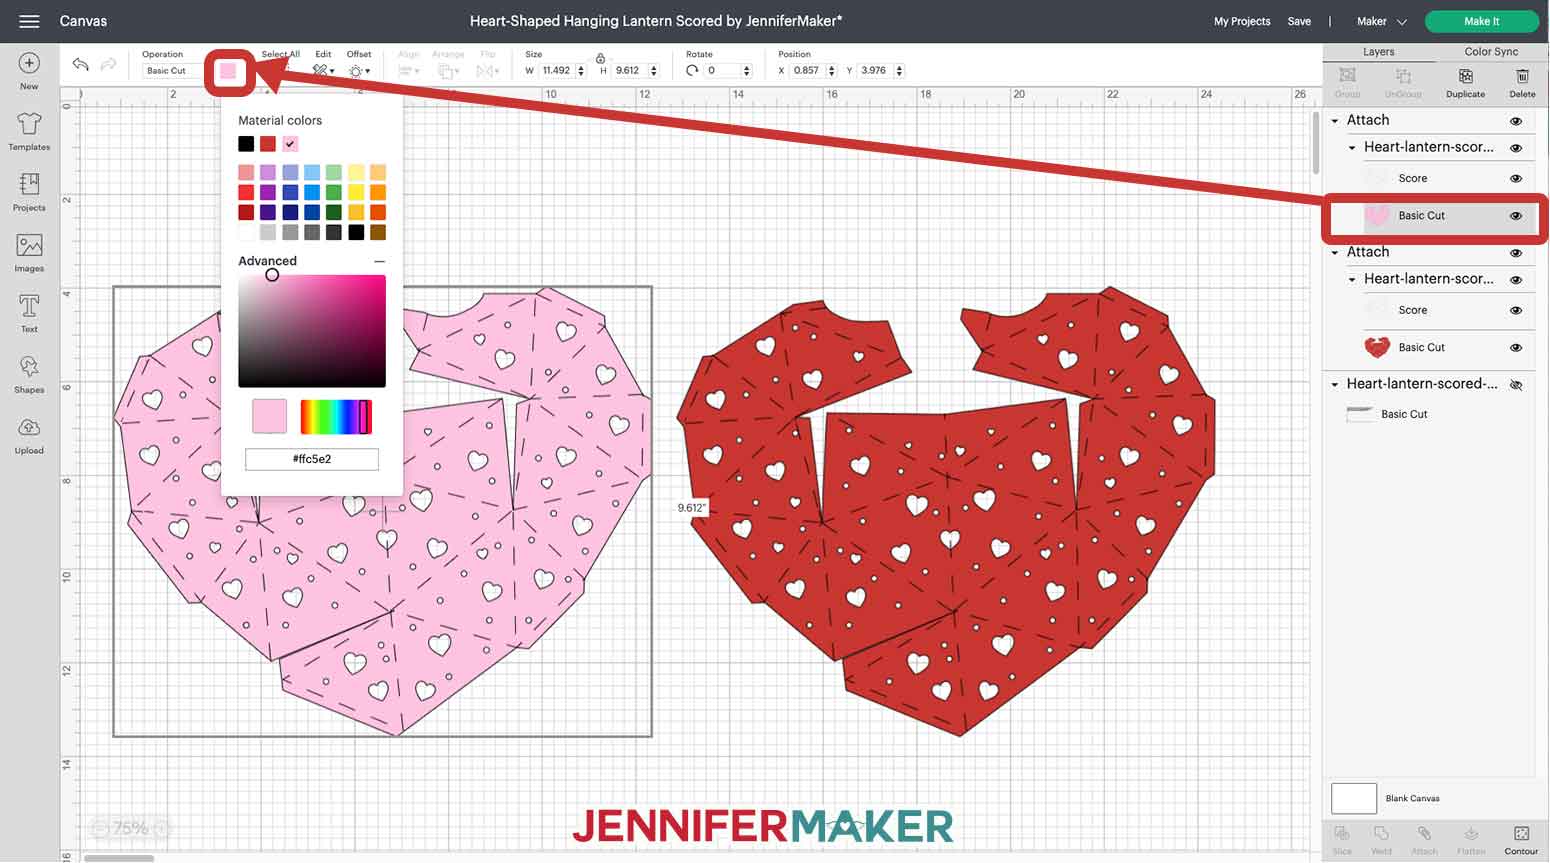
STEP 2: SELECT MATERIALS AND TOOLS IN CRICUT DESIGN SPACE
When your project is ready, click "Make It".
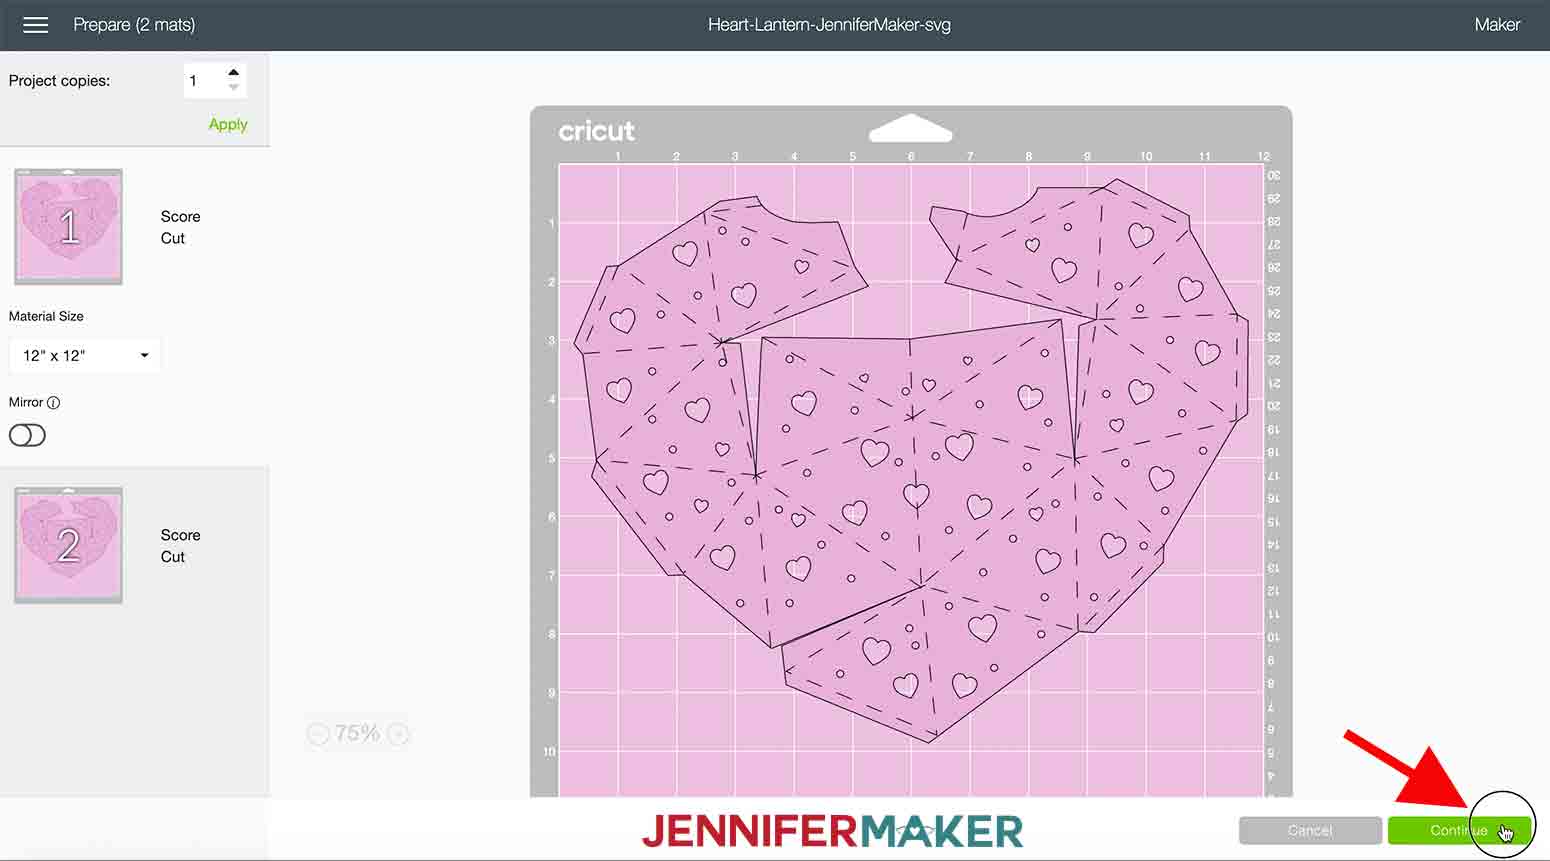
That will take you to this screen where you will now click "Continue" in the bottom right. (If you are asked if you want to cut this on or off a mat, choose "On Mat.")
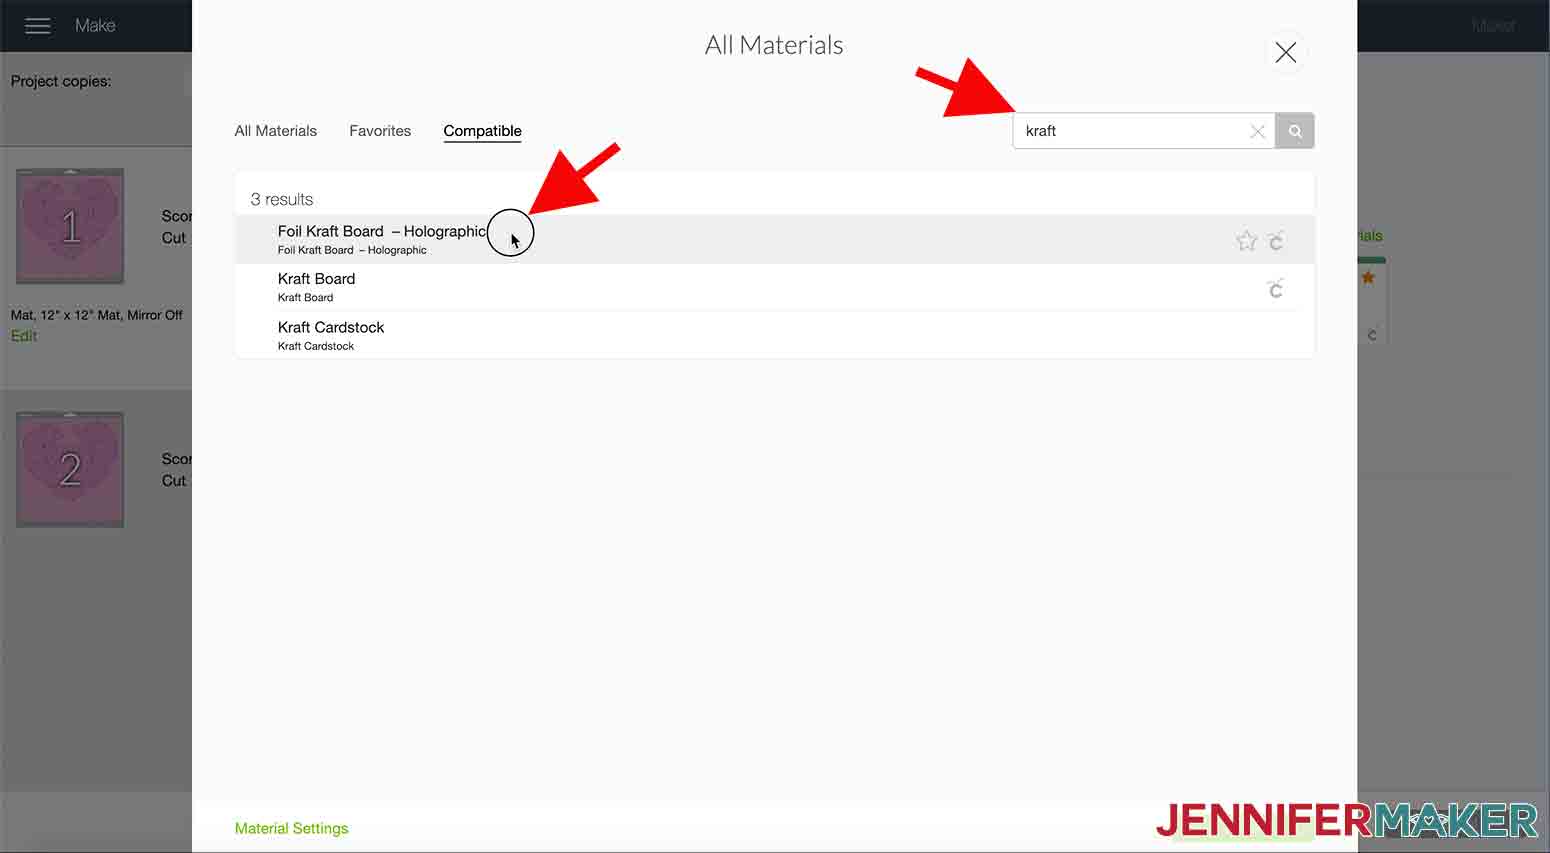
Now it's time to choose your materials and tools. Click "Browse Materials".
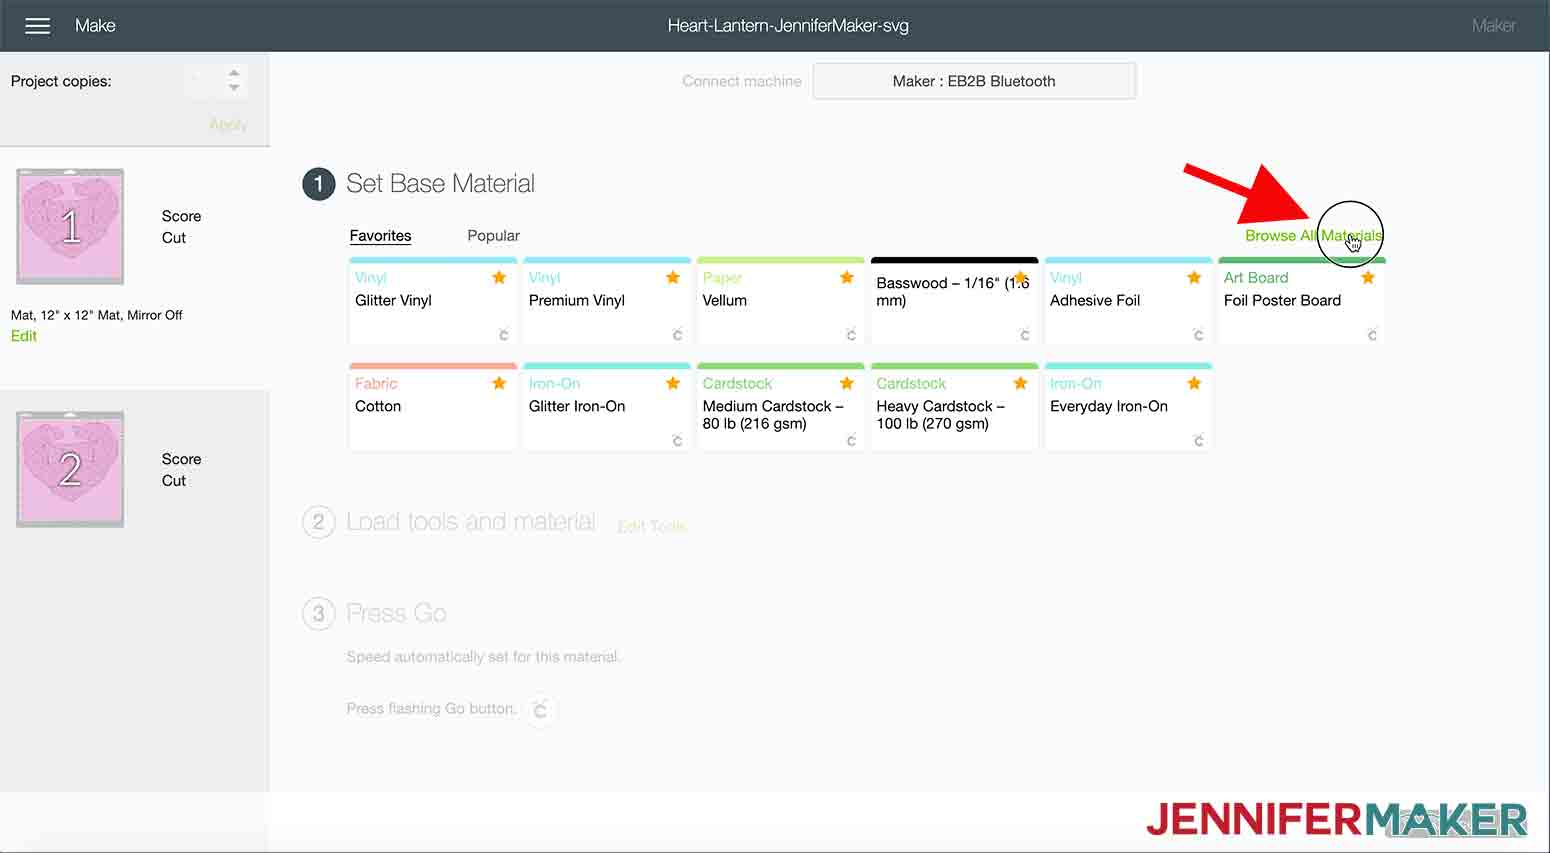
I used Mirror Metallic Pink Cardstock and after some trial and error I found the perfect setting for the cut...Foil Kraft Board. So I typed "Kraft" in the search window and selected "Foil Kraft Board, Holographic".
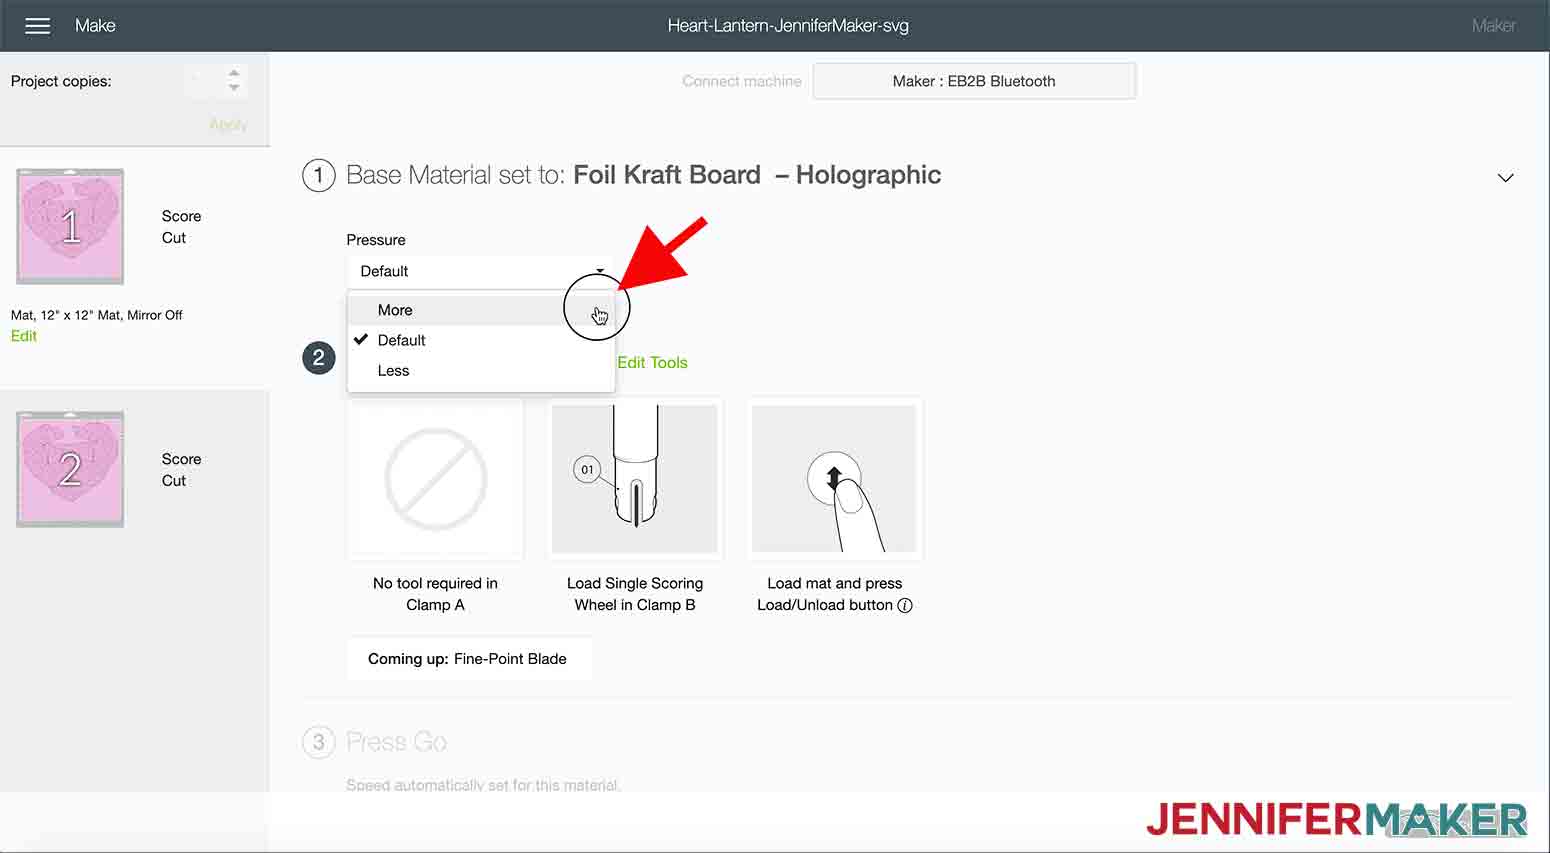
I always like to change my pressure to "More" to ensure a nice clean cut.
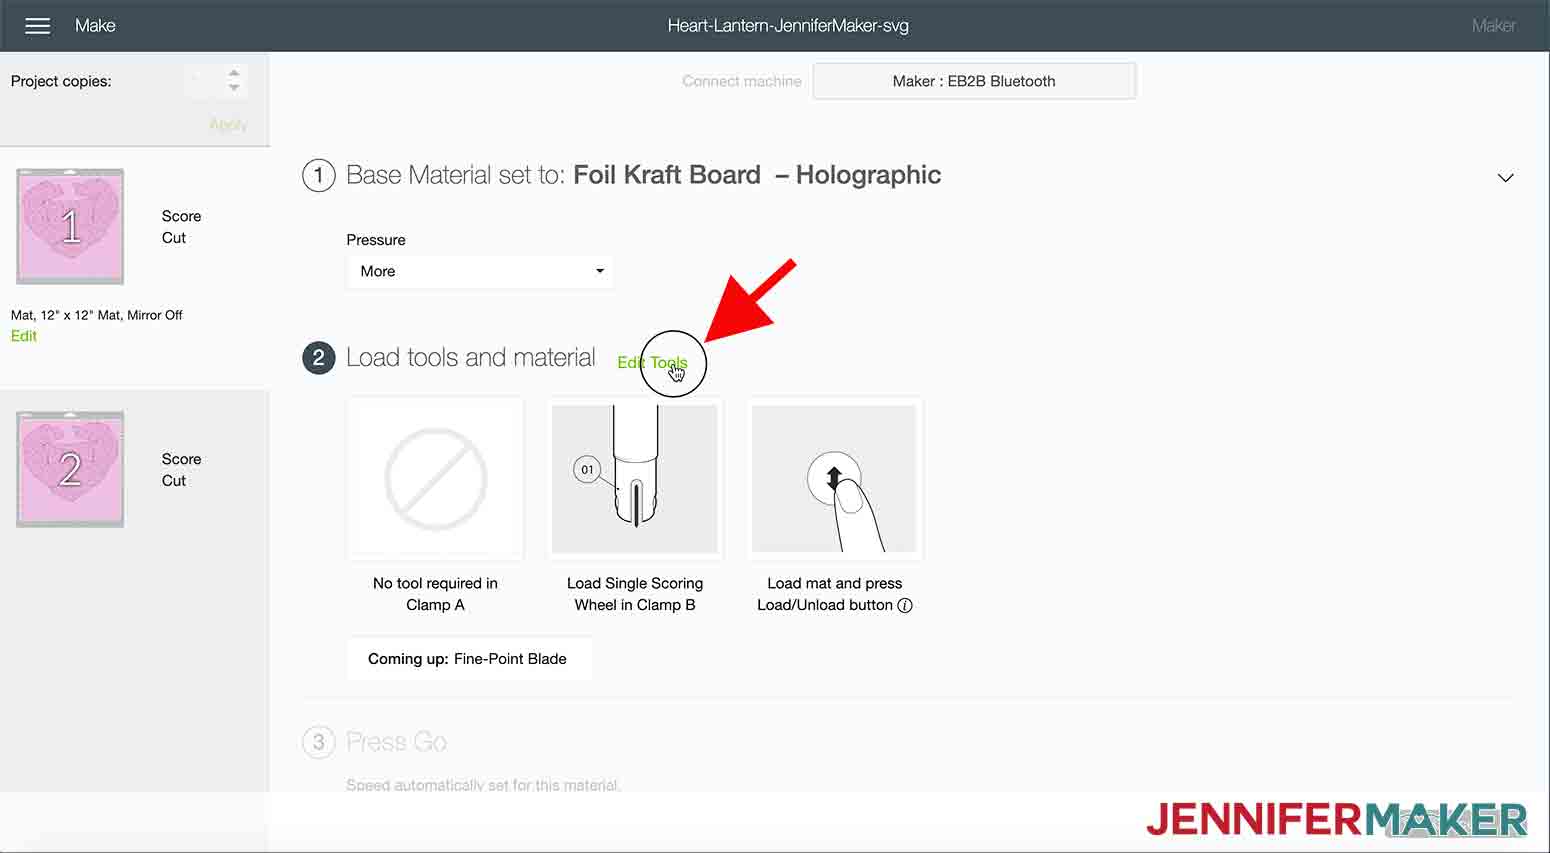
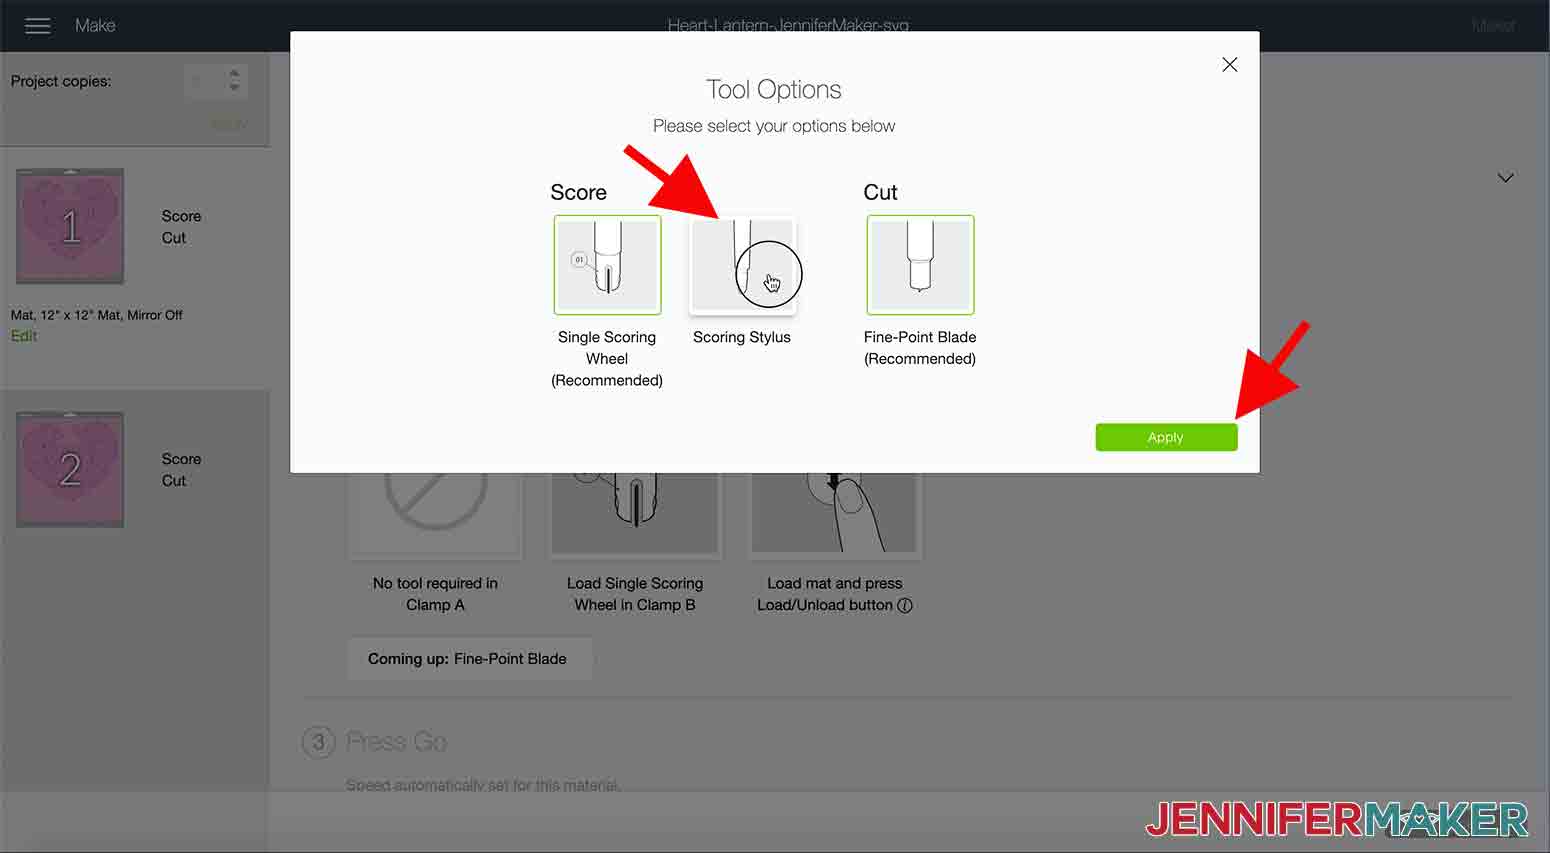
Next, I'm going to click "Edit Tools" because I'm going to use my "Scoring Stylus". This tool works great for this project and it's easier because you won't need to switch out tools.
Now you are all ready to cut.
STEP 3: CUT YOUR HEART SHAPED HANGING PAPER LANTERN
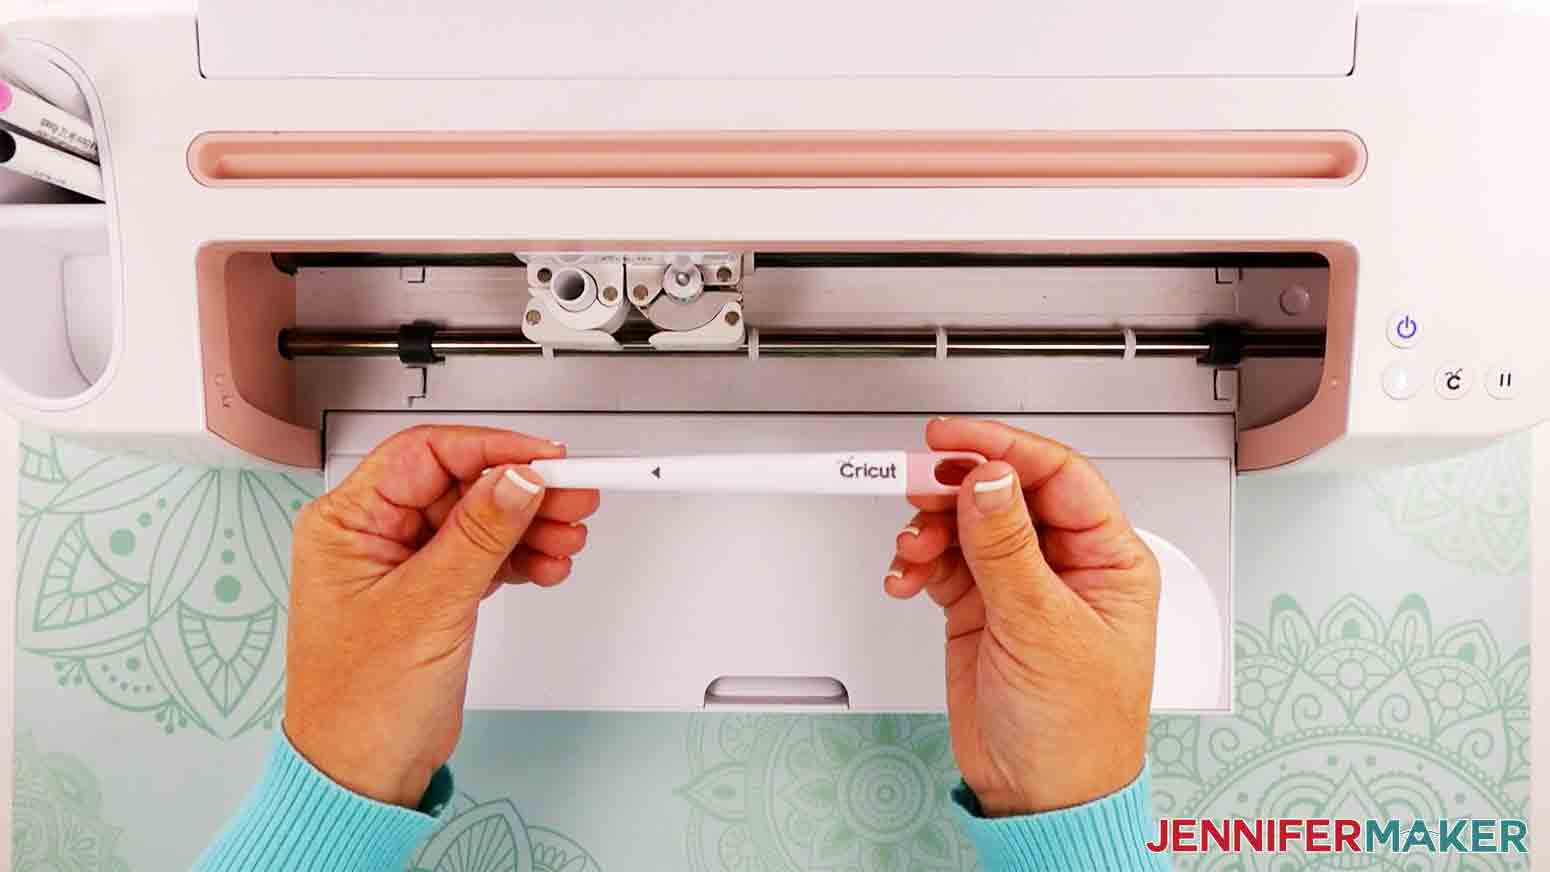
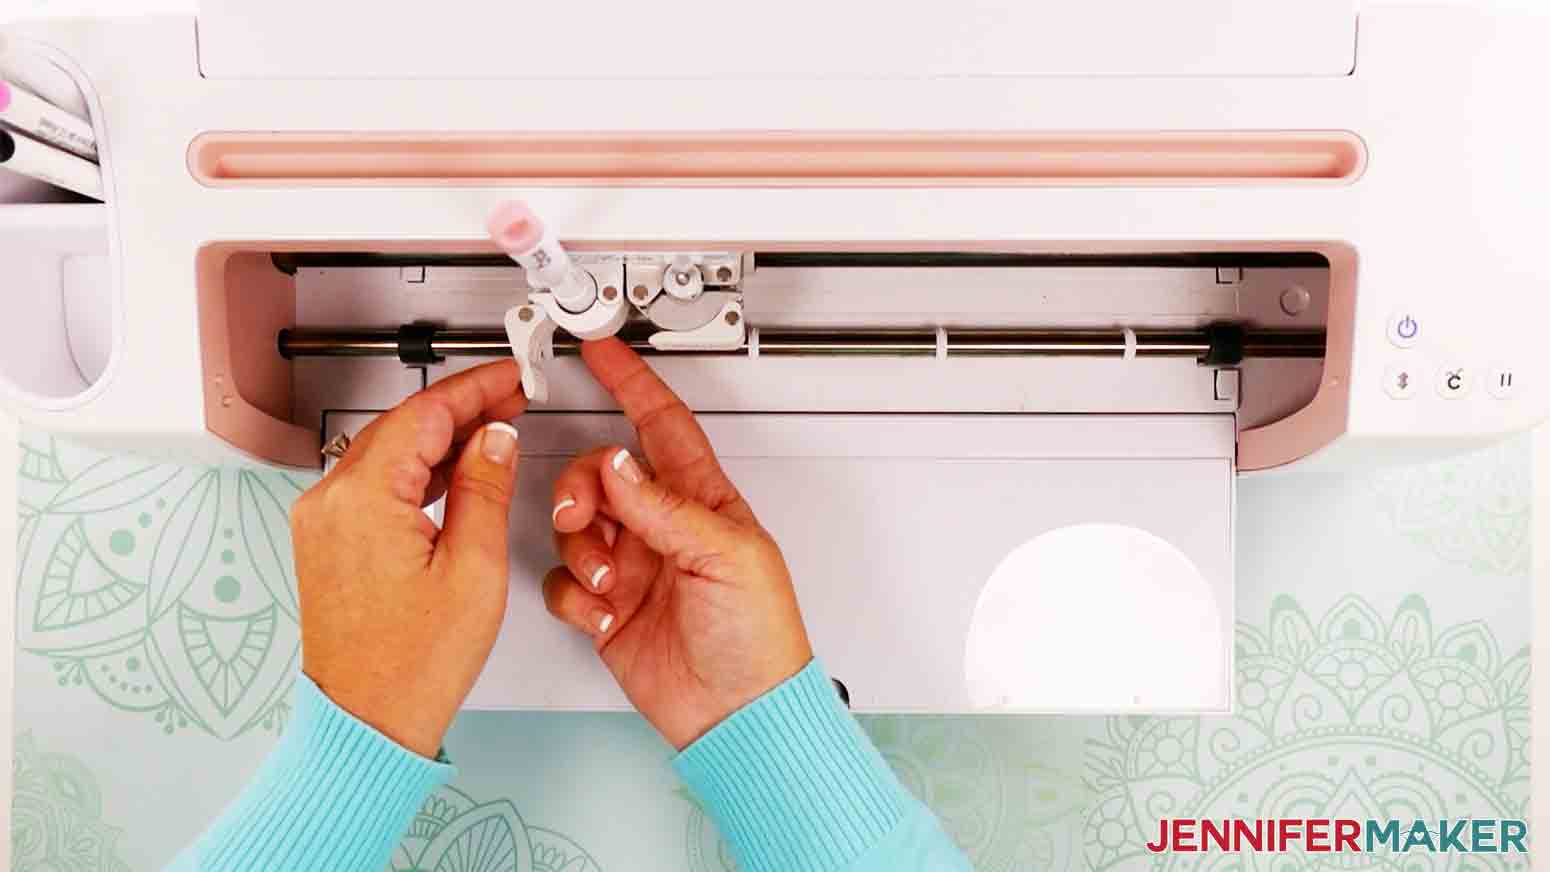
First, make sure to add the scoring stylus in "Clamp A".
Next, place your cardstock on your Blue LightGrip mat and load the mat into your machine, I'm using the Maker, but you can also cut this on the Explore Air 2...then press the flashing Cricut icon. Repeat this step for the other side of your heart design. 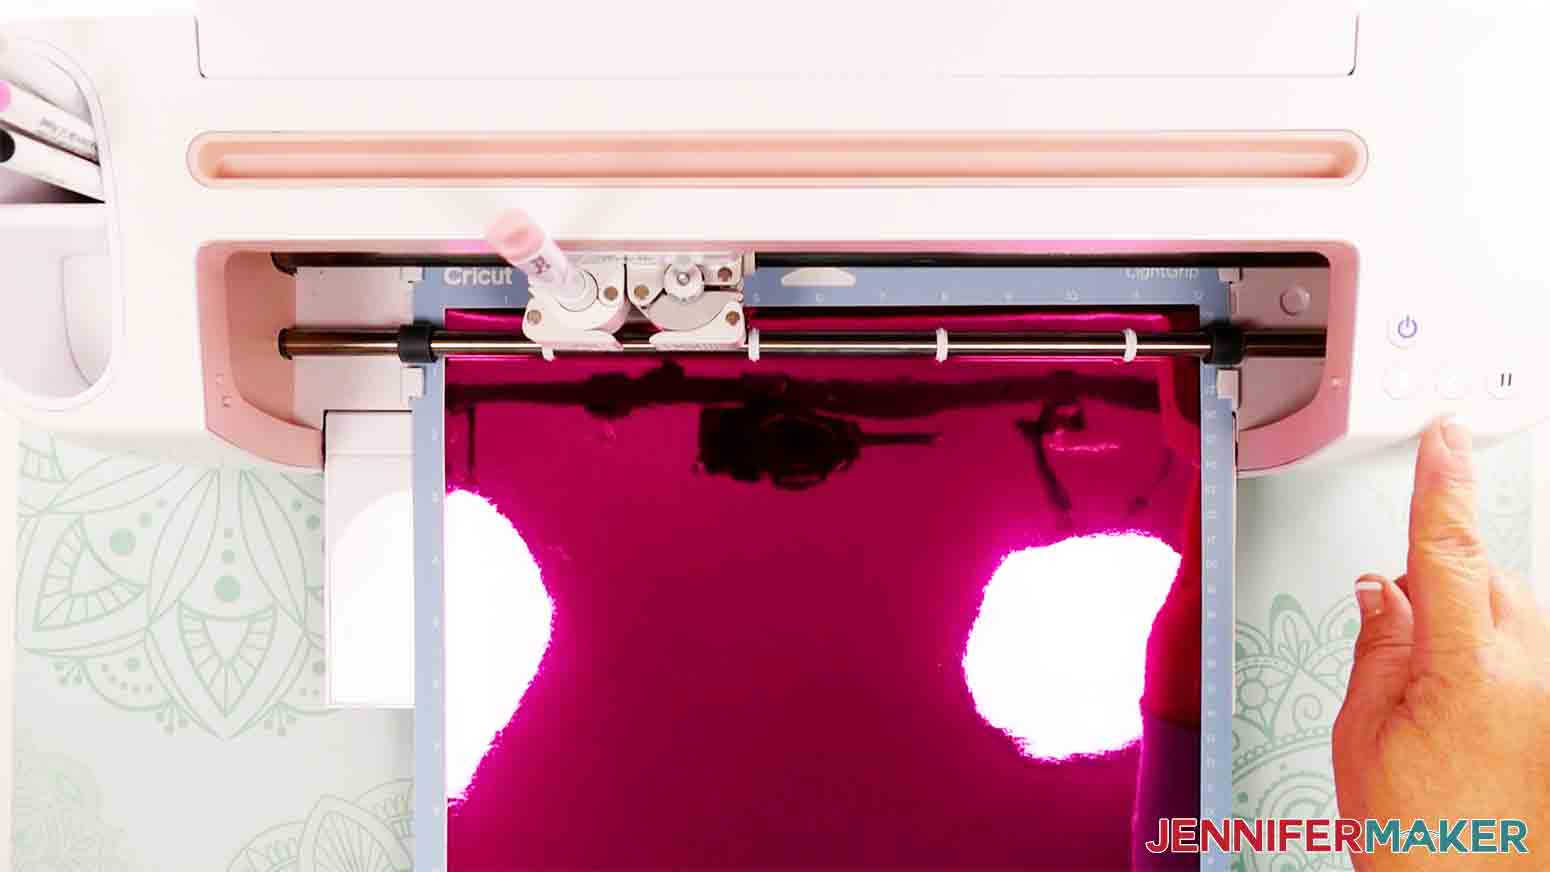
STEP 4: ASSEMBLE YOUR HANGING PAPER LANTERN
Once the cut is complete you will peel the cardstock off your mat.
TIP: Flip your mat over and slowly roll it back. This releases the paper and keeps it from rolling.
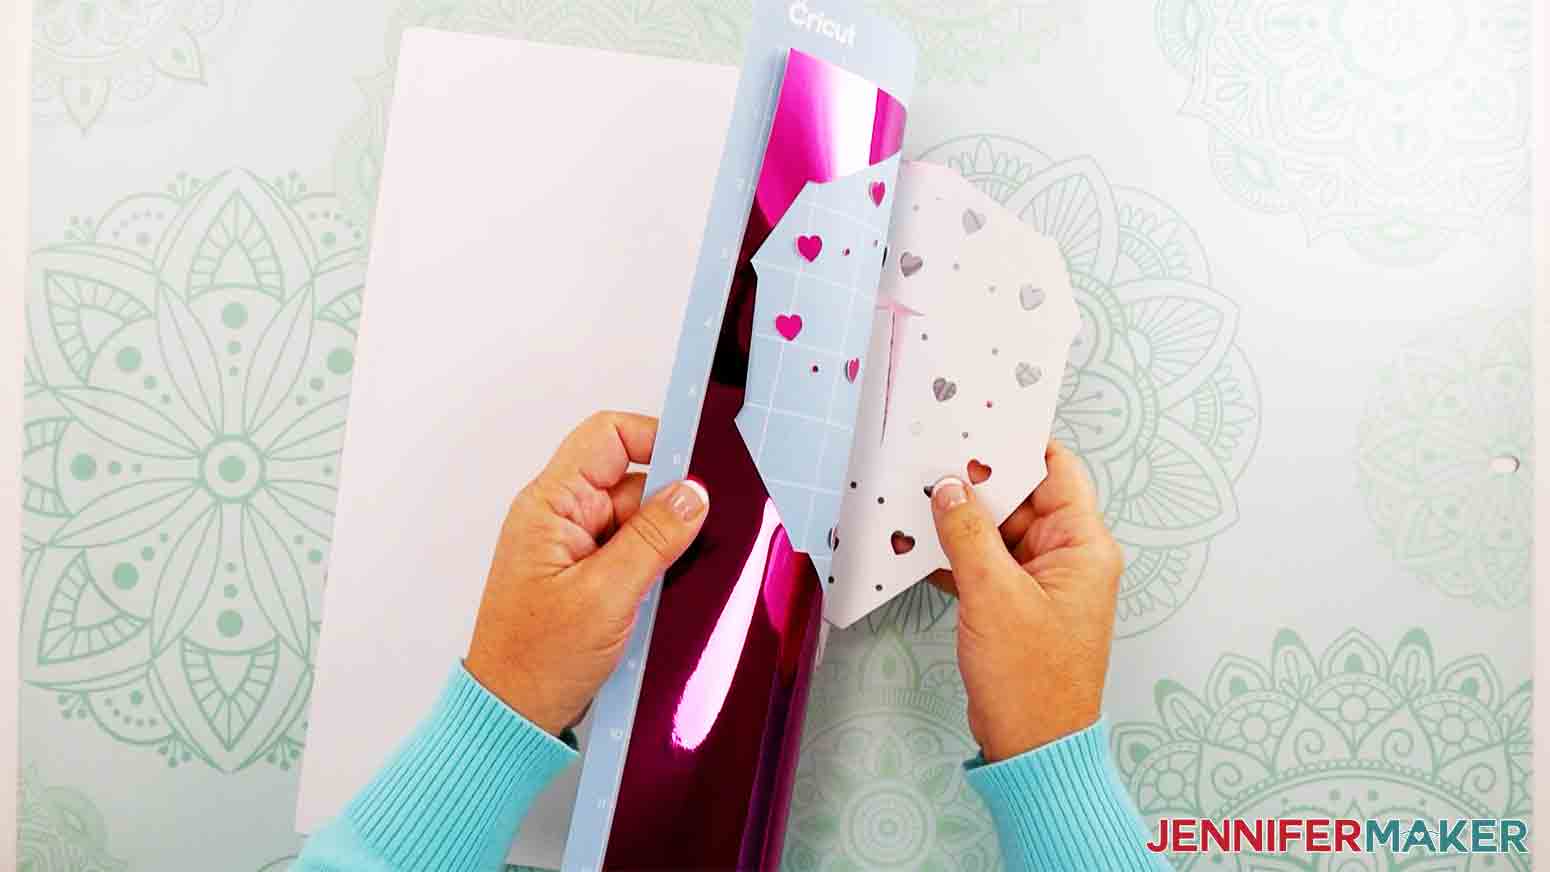
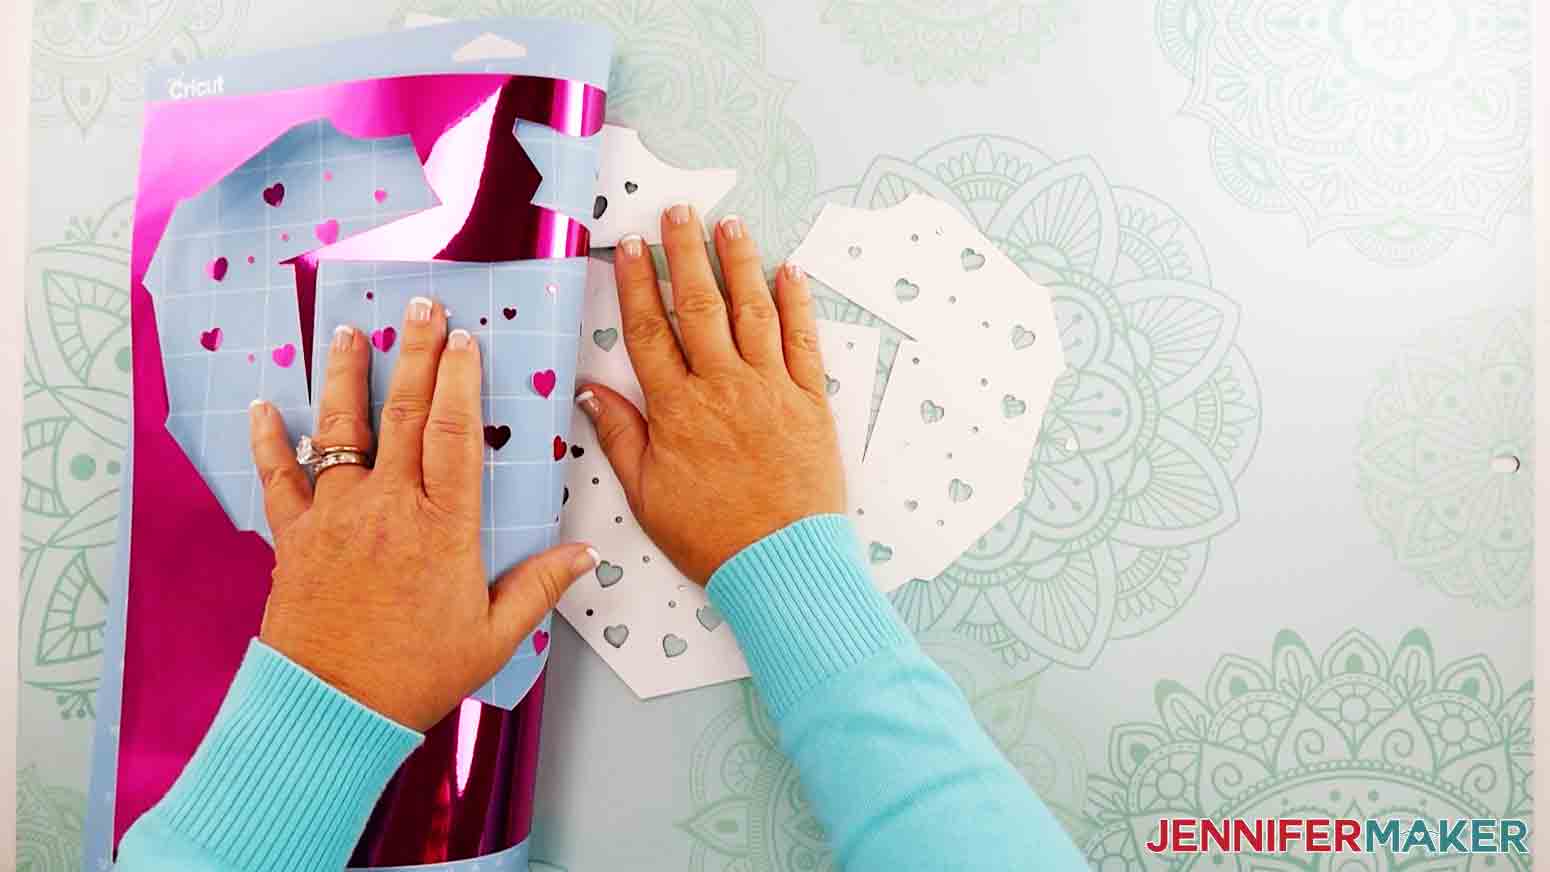
Then use a weeding tool or pen to pop out the bits and pieces that didn't come out on their own during the cut.
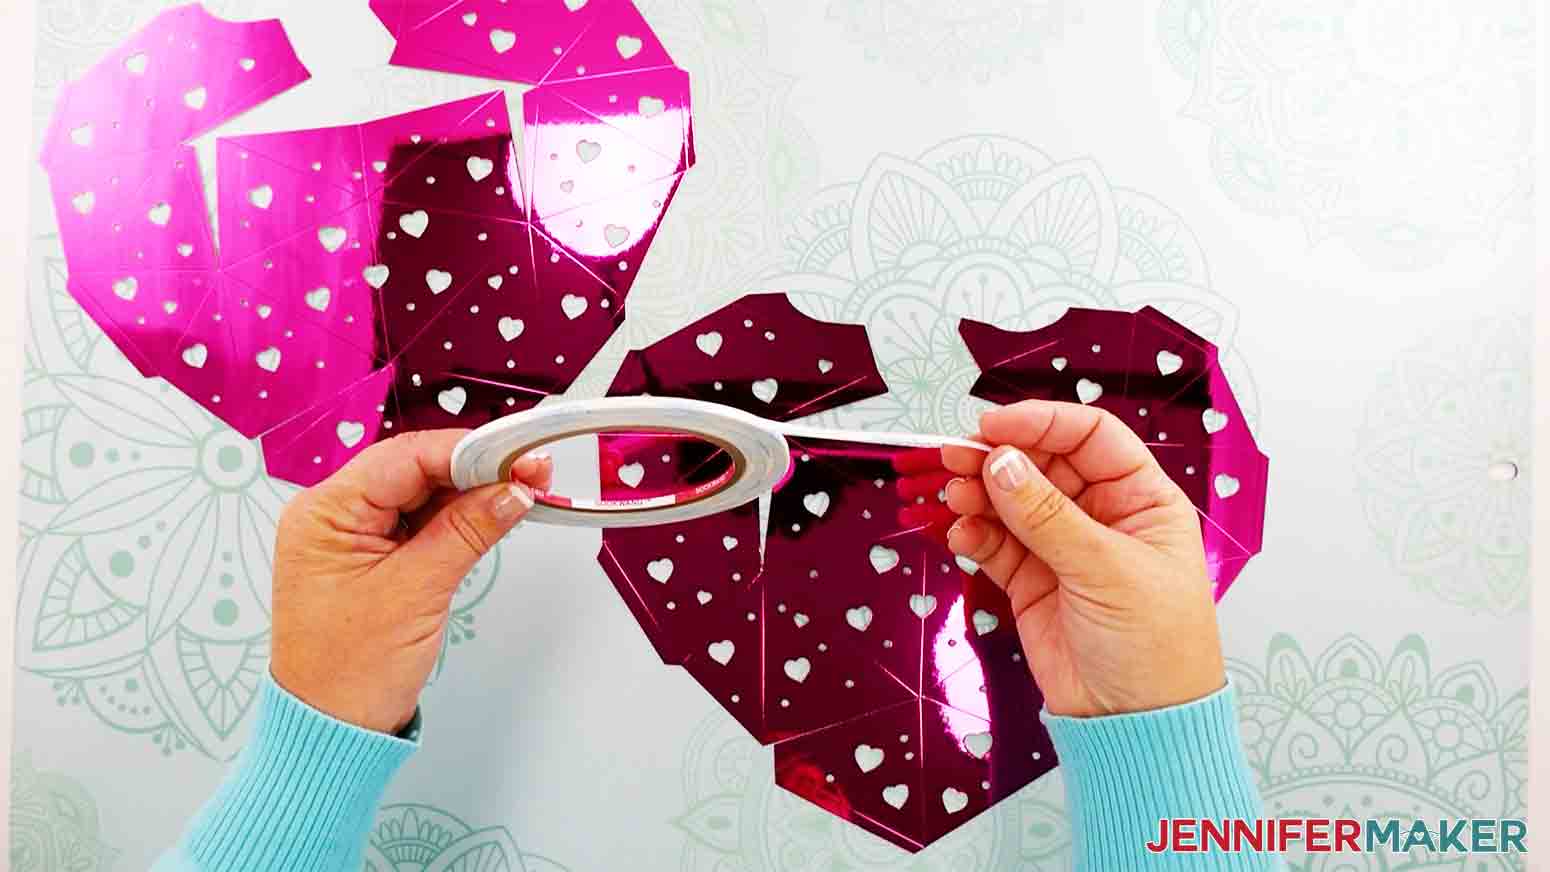
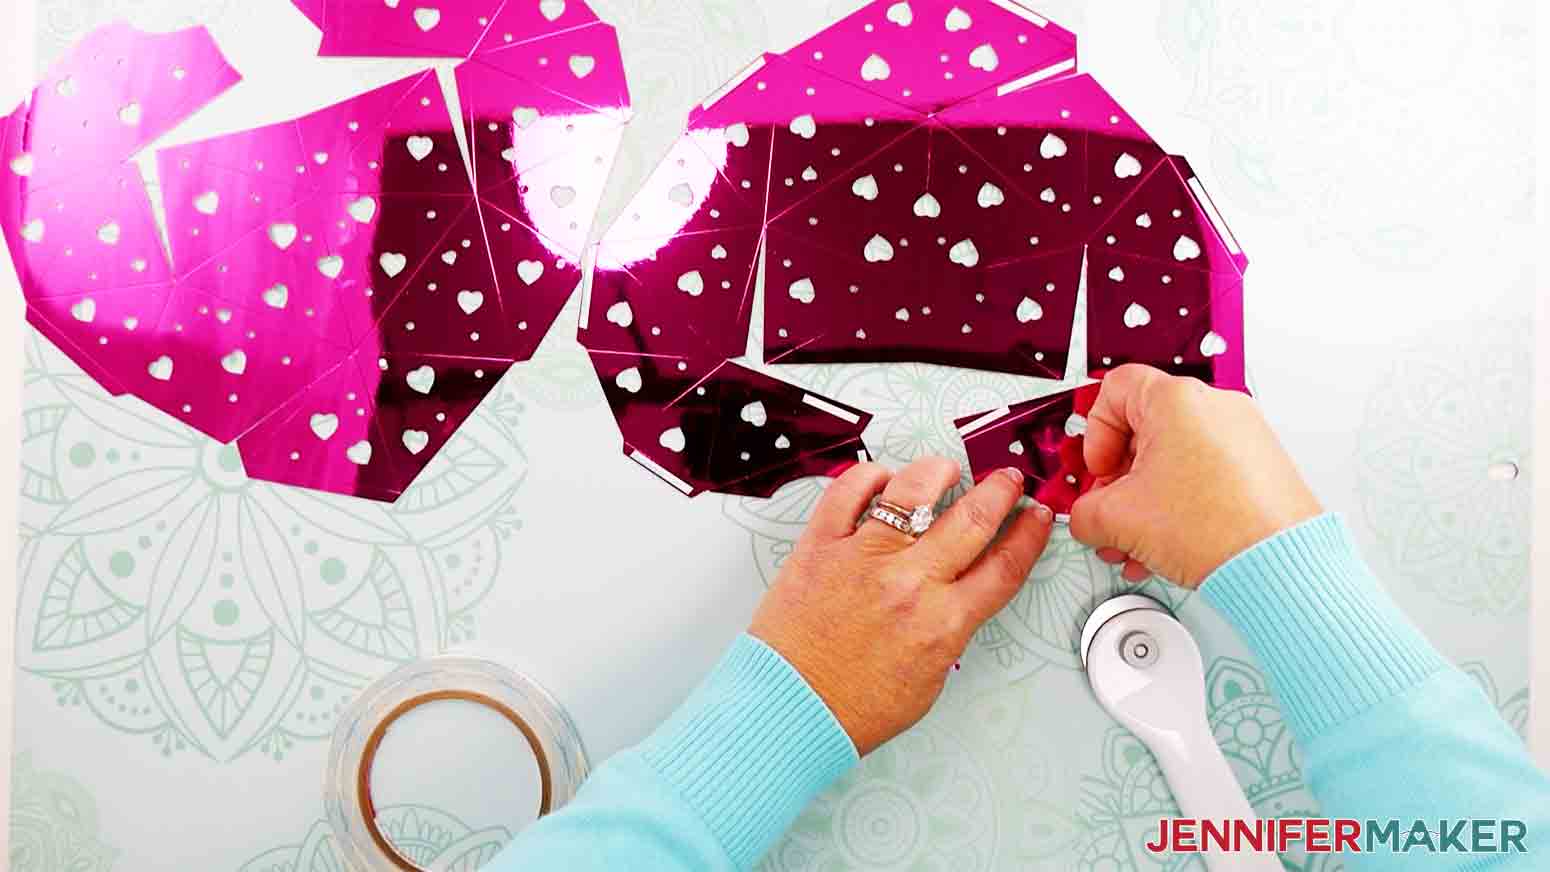
Now that you have both sides of the lantern, the first thing you want to do is apply small pieces of Scor-Tape to each of the tabs, don't peel it back to expose the adhesive part just yet.
TIP: If you can, use a rotary blade to cut the scor-tape. You can use scissors, but they might get ruined by the sticky part of the tape.
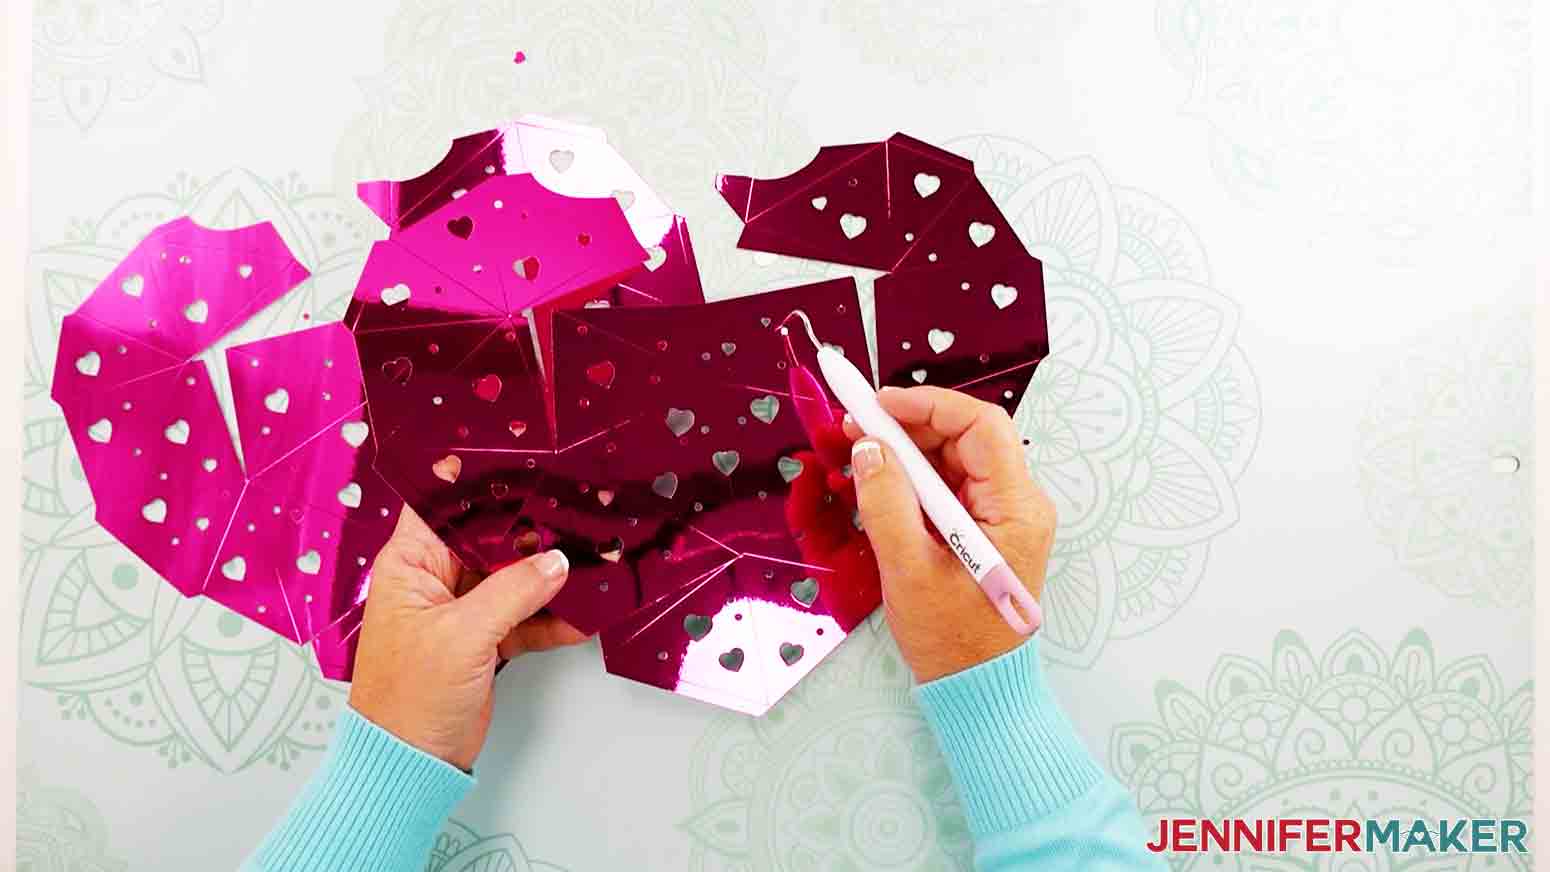
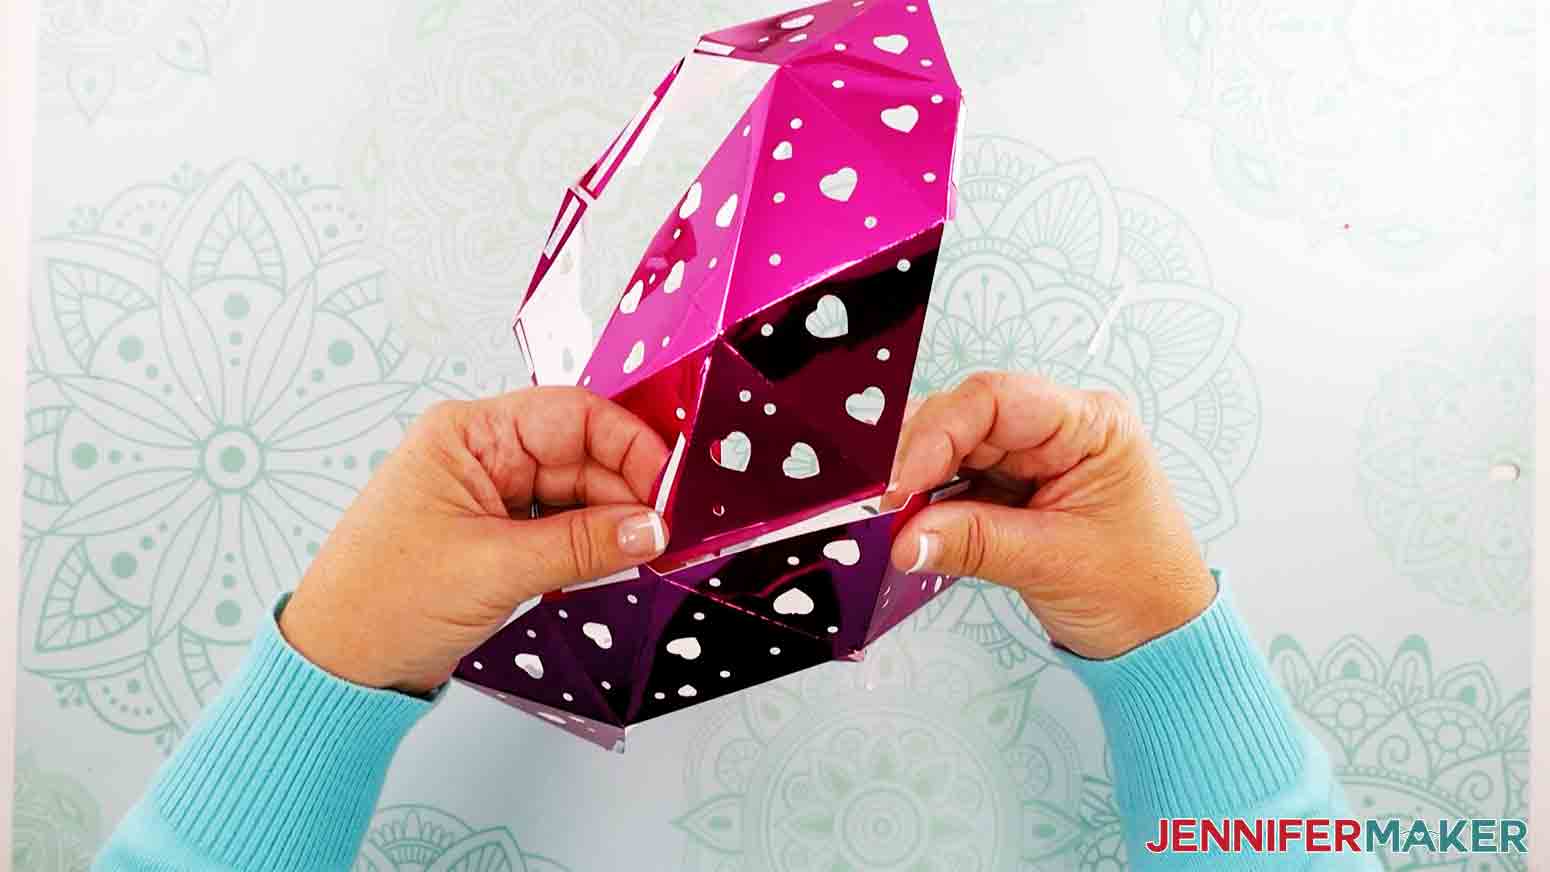
Now, it's time to fold. It really helps if you use a hard edge to fold the tabs. I used the side of my portable trimmer, but you can use whatever works for you.
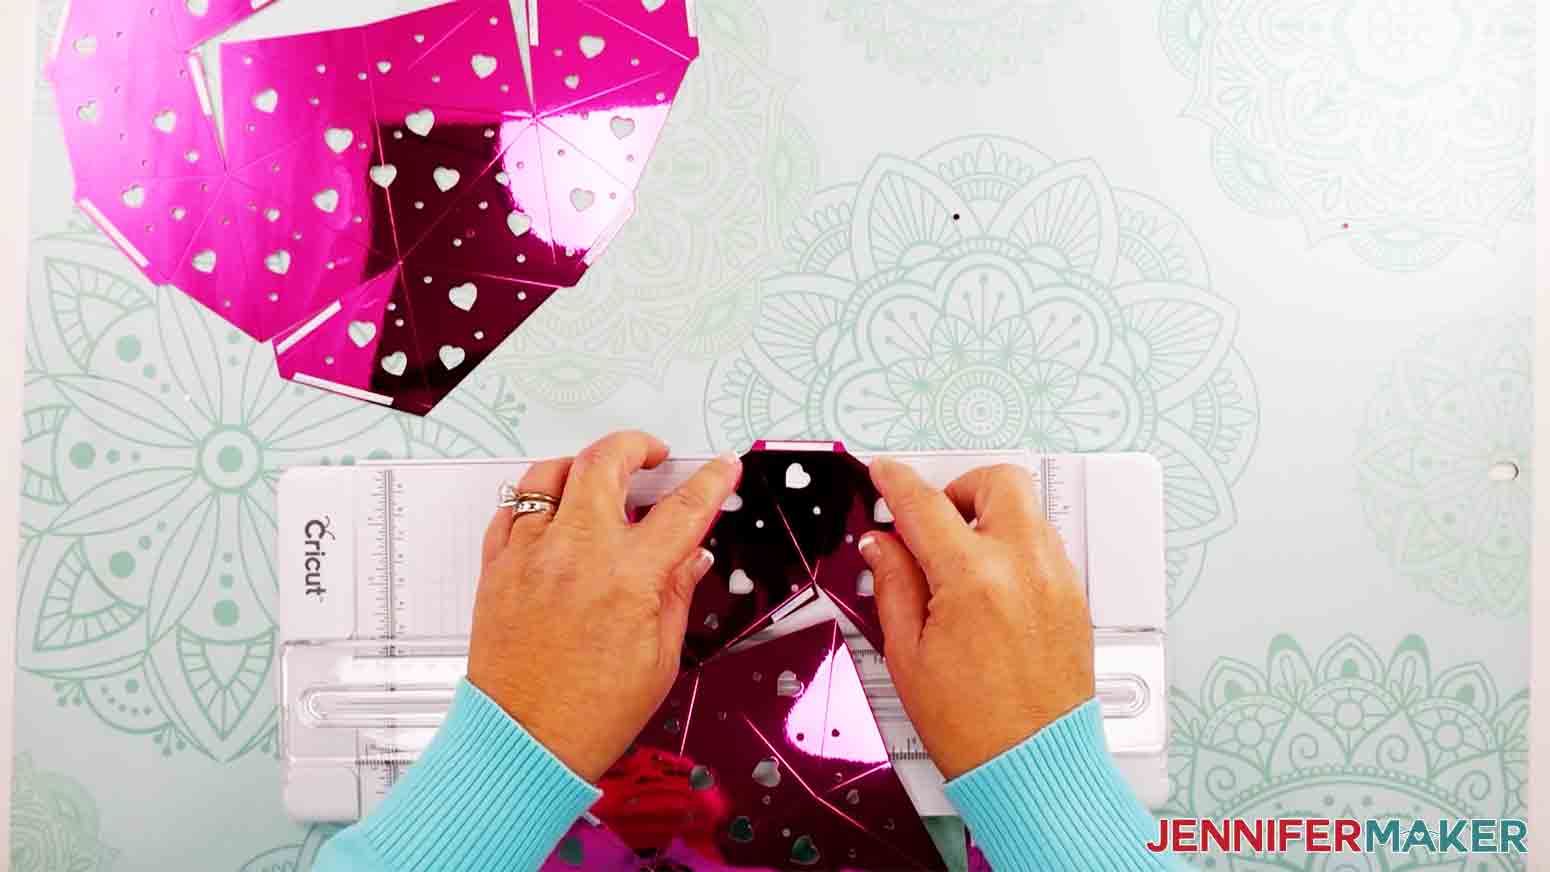
You can just use your hands to bend and fold the other parts of the design.
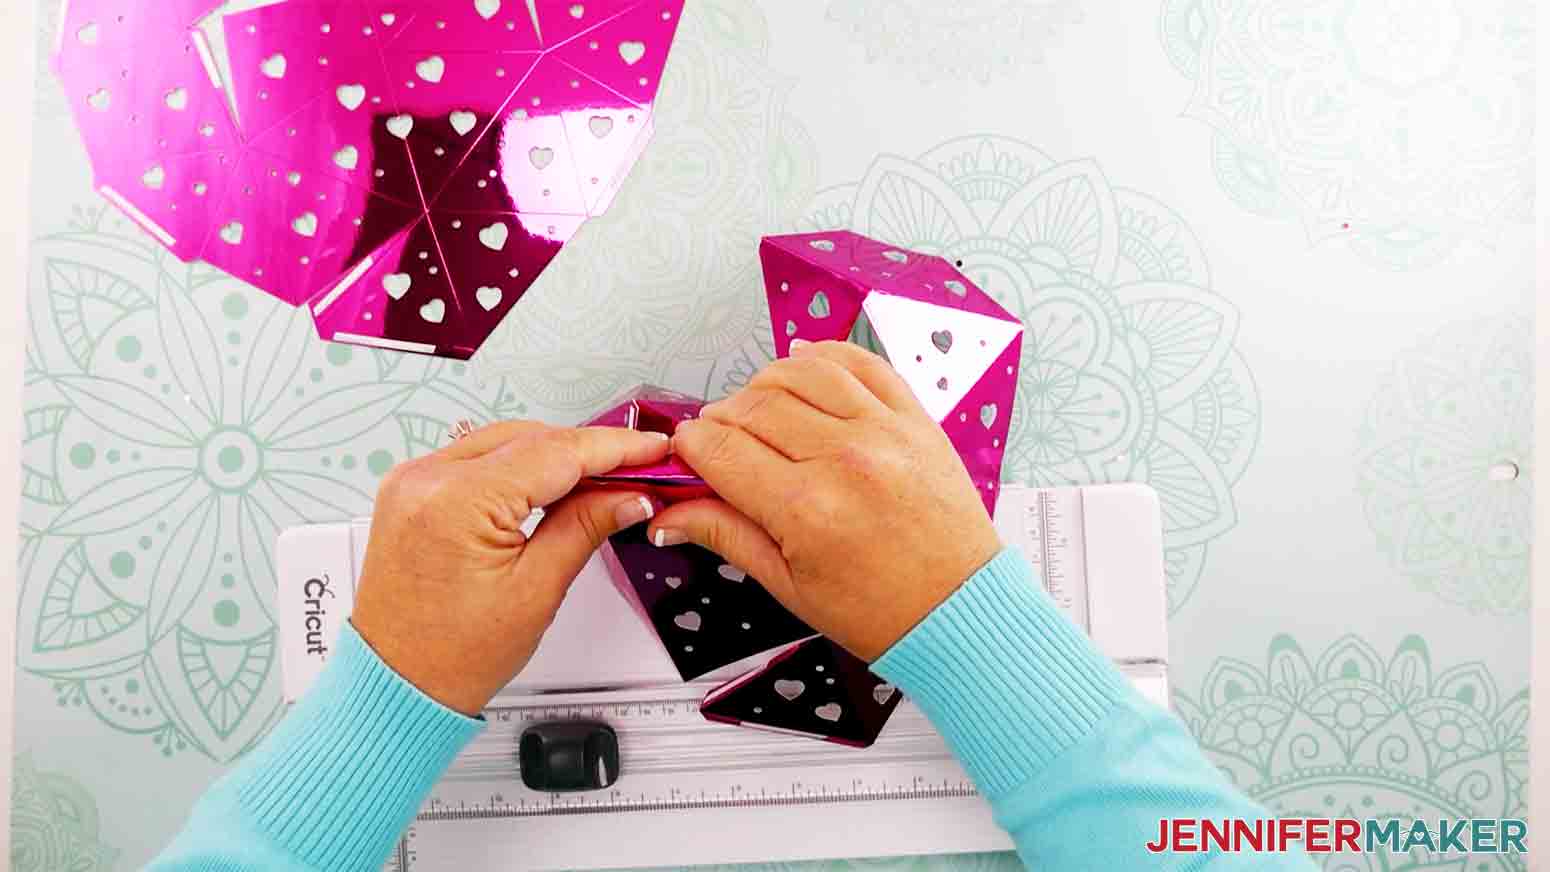
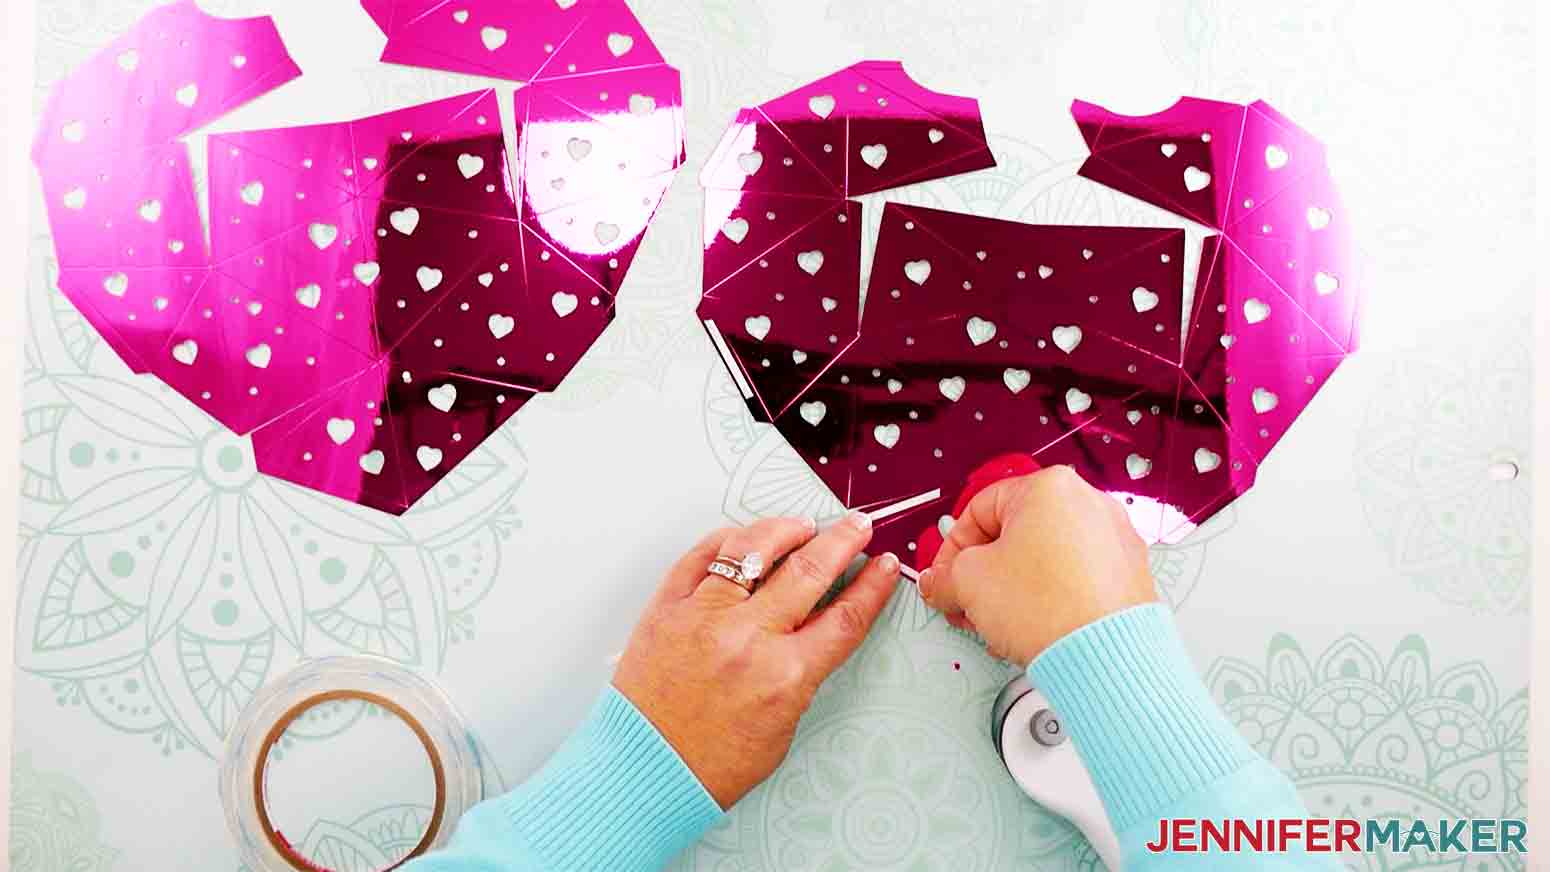
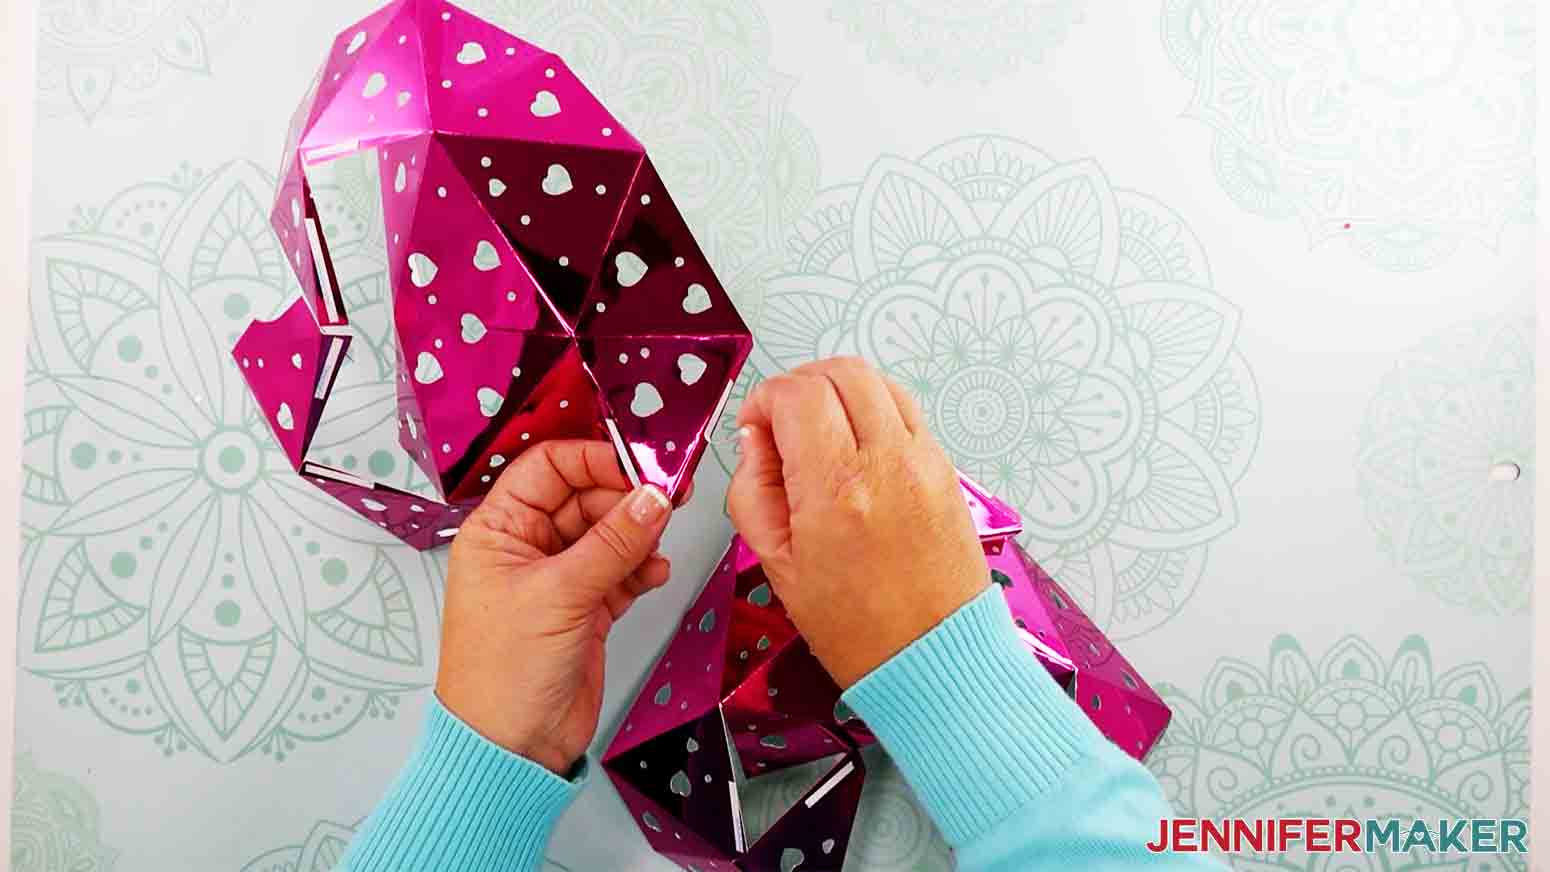
Next, starting at the bottom, peel back the Scor-Tape and attach it to it's corresponding side.
Each tab should be attached to the inside of the heart and use your fingers to make sure it's firmly attached. This can be a bit tricky, because it's a tight space, but take your time.
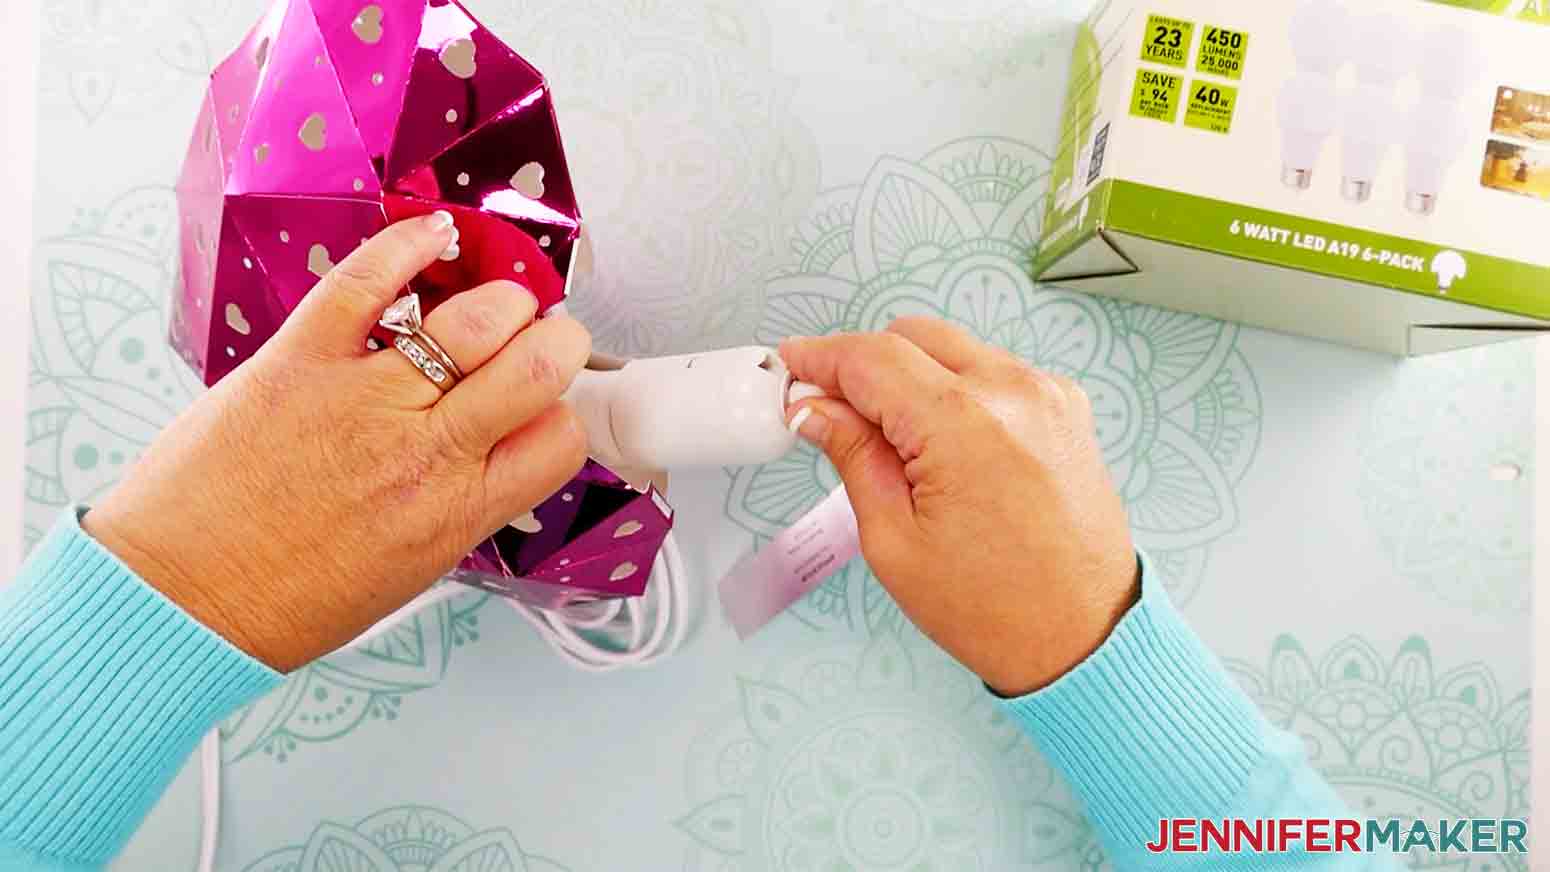
Now, make sure your LED light bulb is screwed into the hanging cord and make sure everything is working.
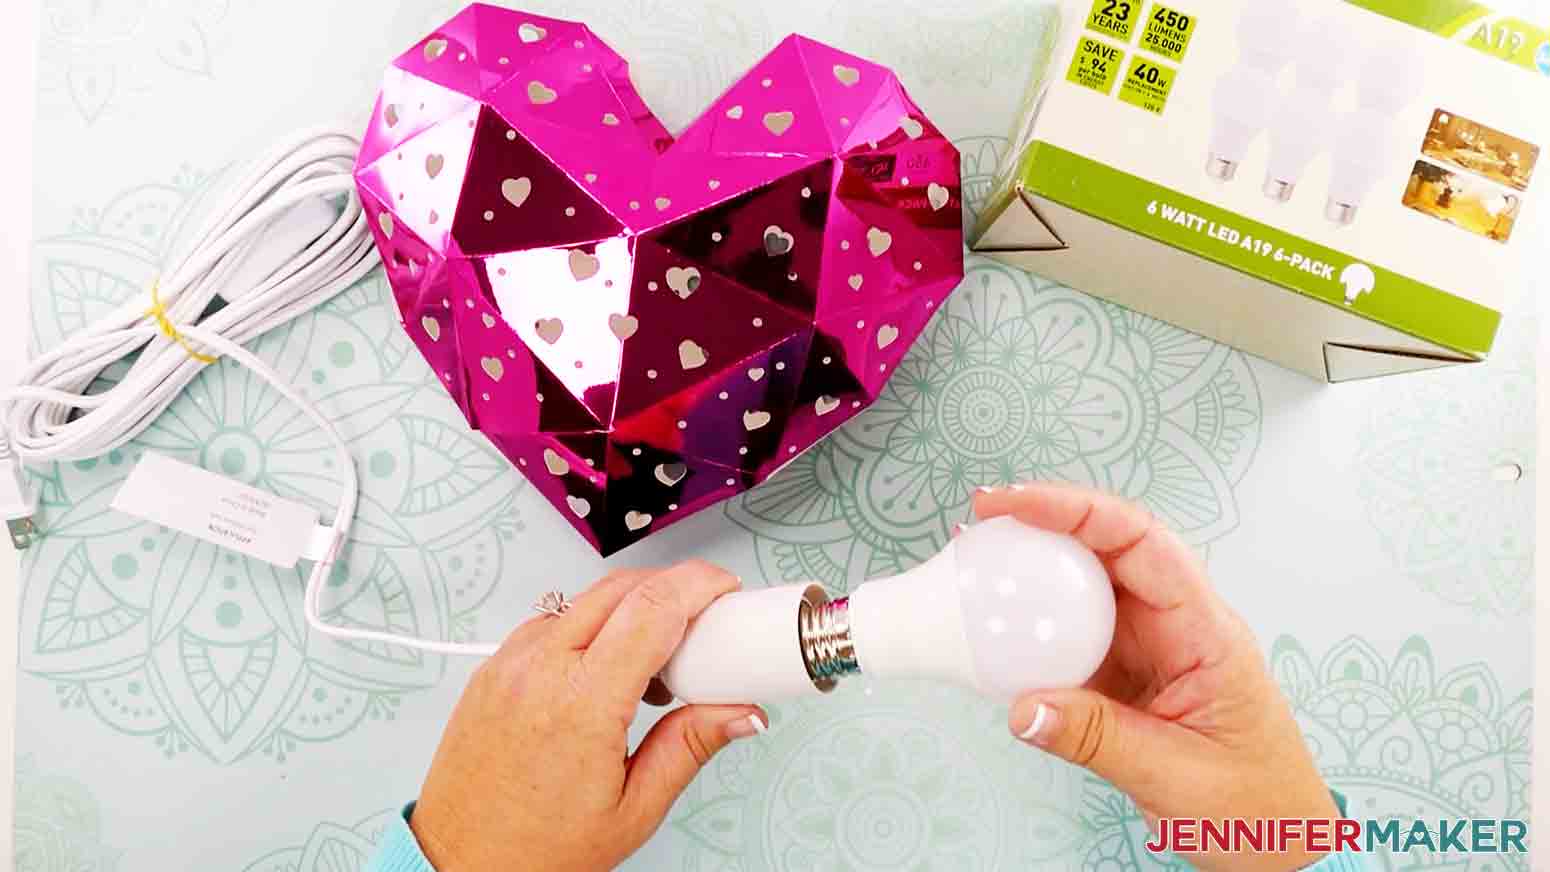
I plugged my LED light in and switched it on to test it out.
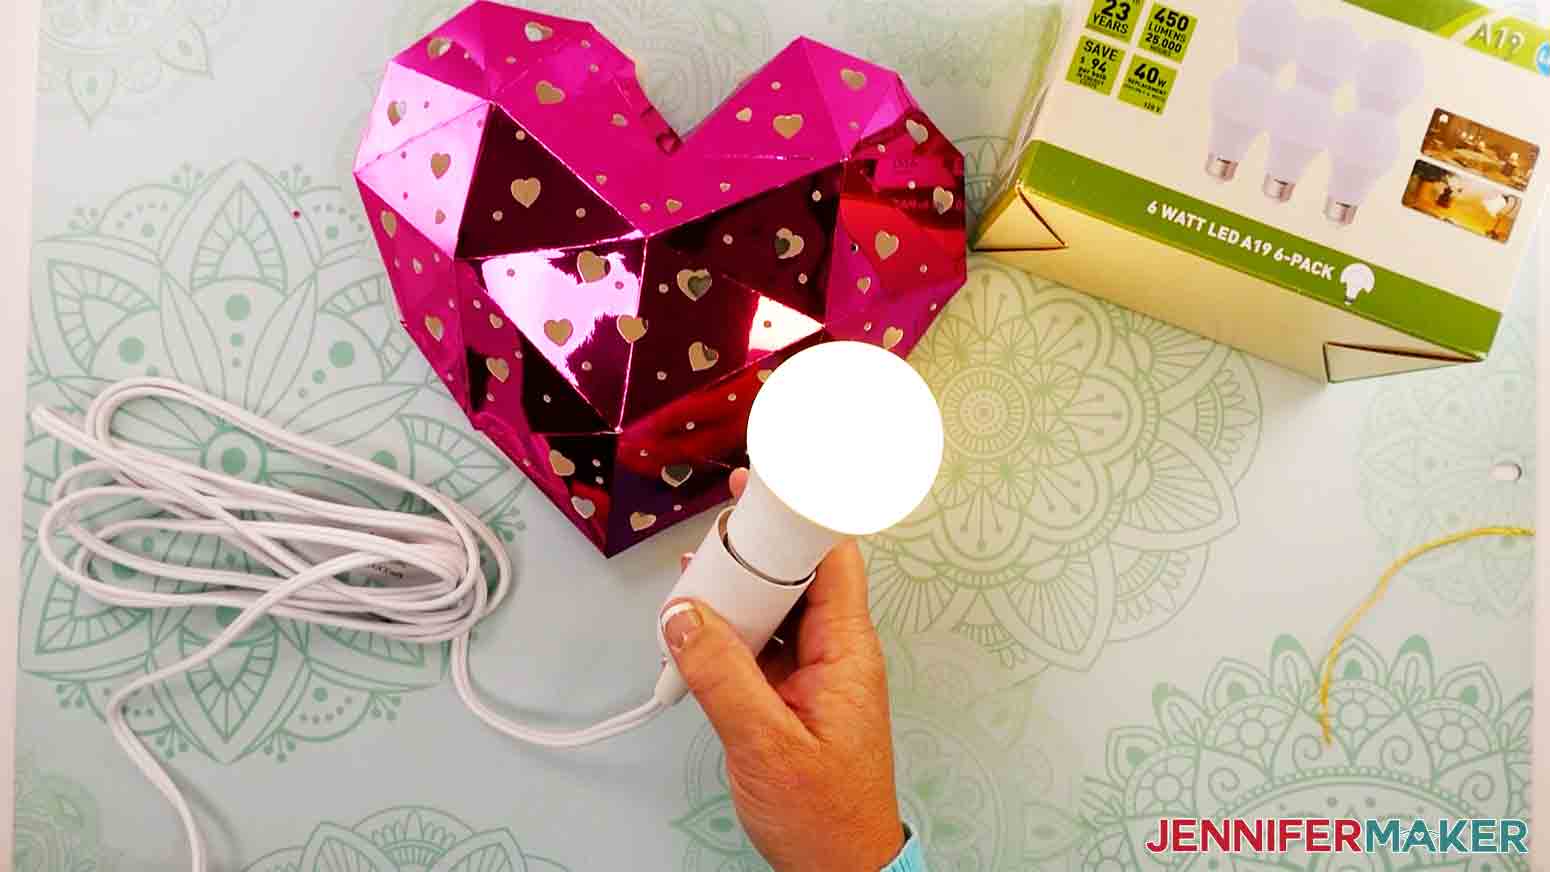
With the Heart Lantern on its side and still open at the top, place the light bulb into the lantern. You will notice there's a hole at the top big enough for the bulb to fit through.
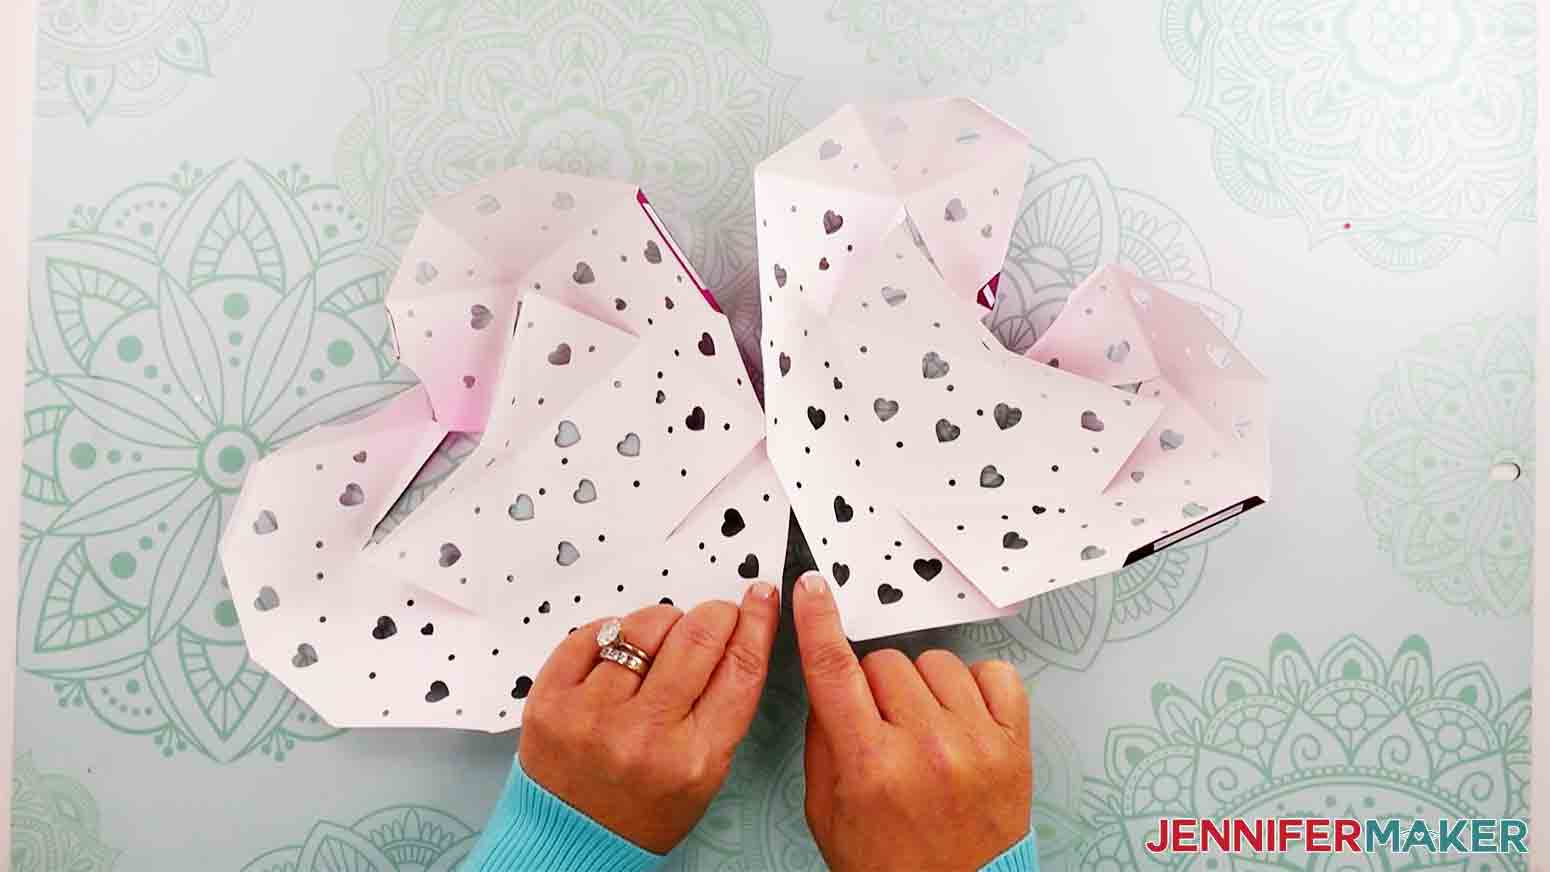
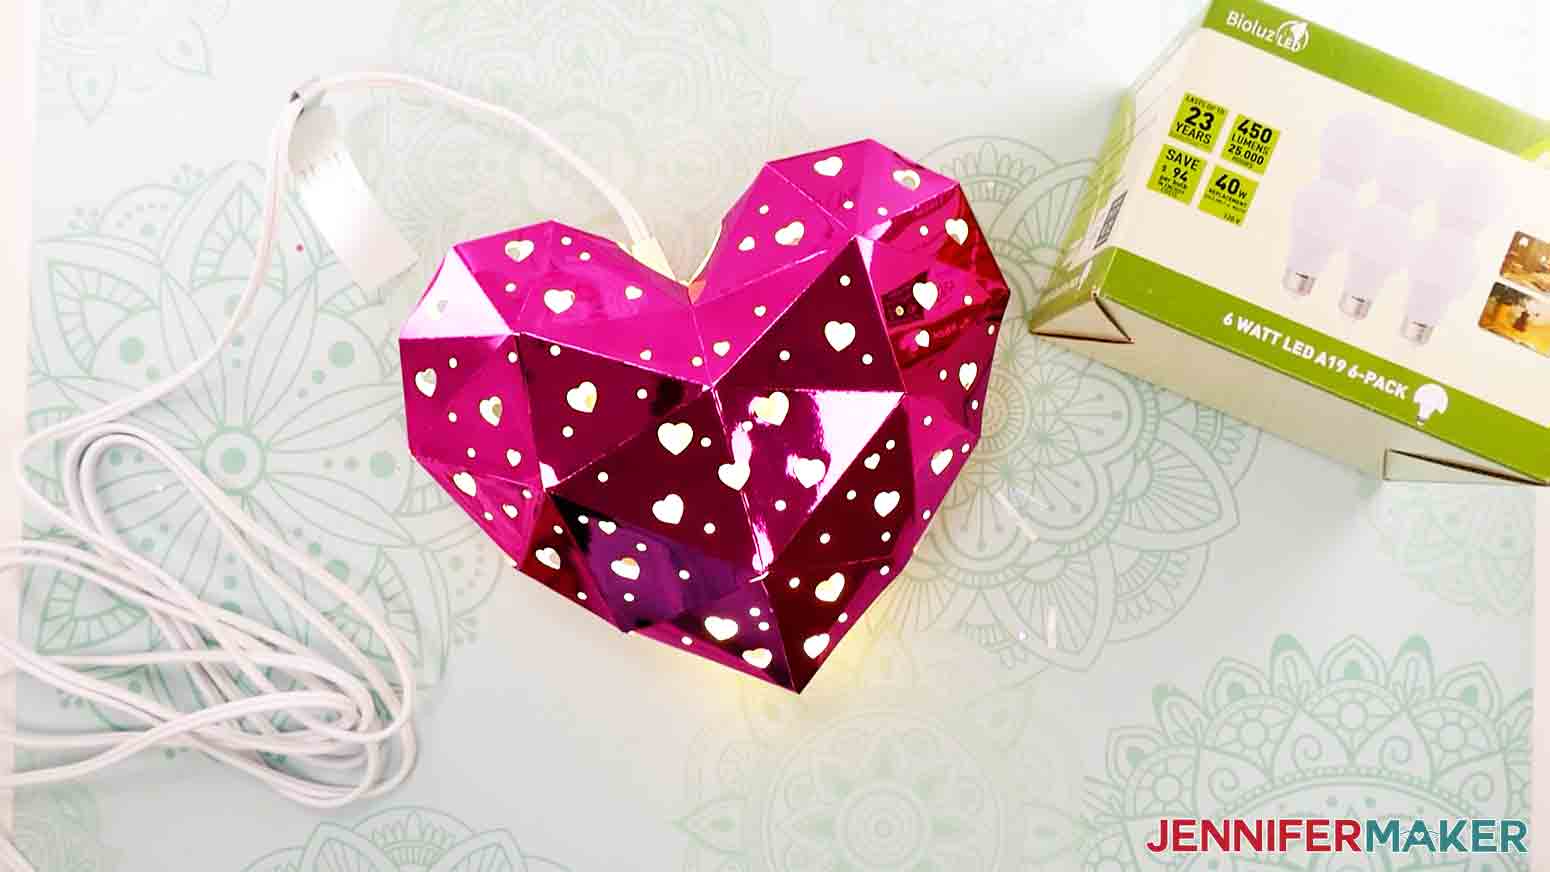
Now finish attaching all the tabs, making sure each tab is firmly stuck to the other side. And that's it...you're all done!
STEP 5: SHOW IT OFF!
Your final and most fun step is to hang your heart lantern up wherever you like, plug it in, and enjoy the glow!
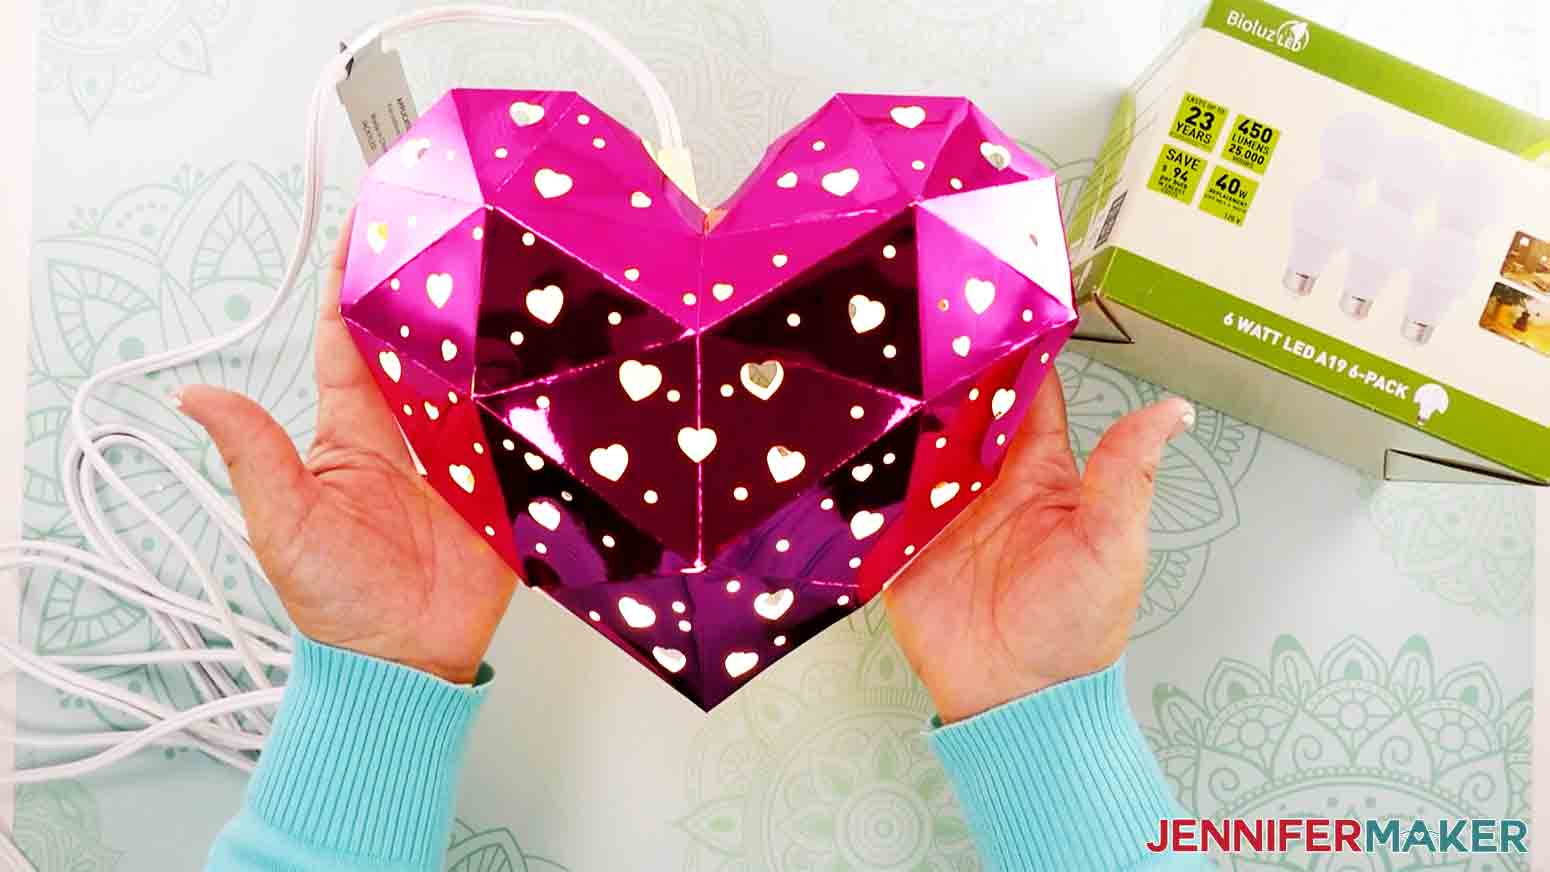
Isn't it so pretty? Just perfect for Valentine's Day or any celebration of love throughout the year, weddings, baby showers, anniversaries...it's the perfect finishing touch! And it's sure to impress!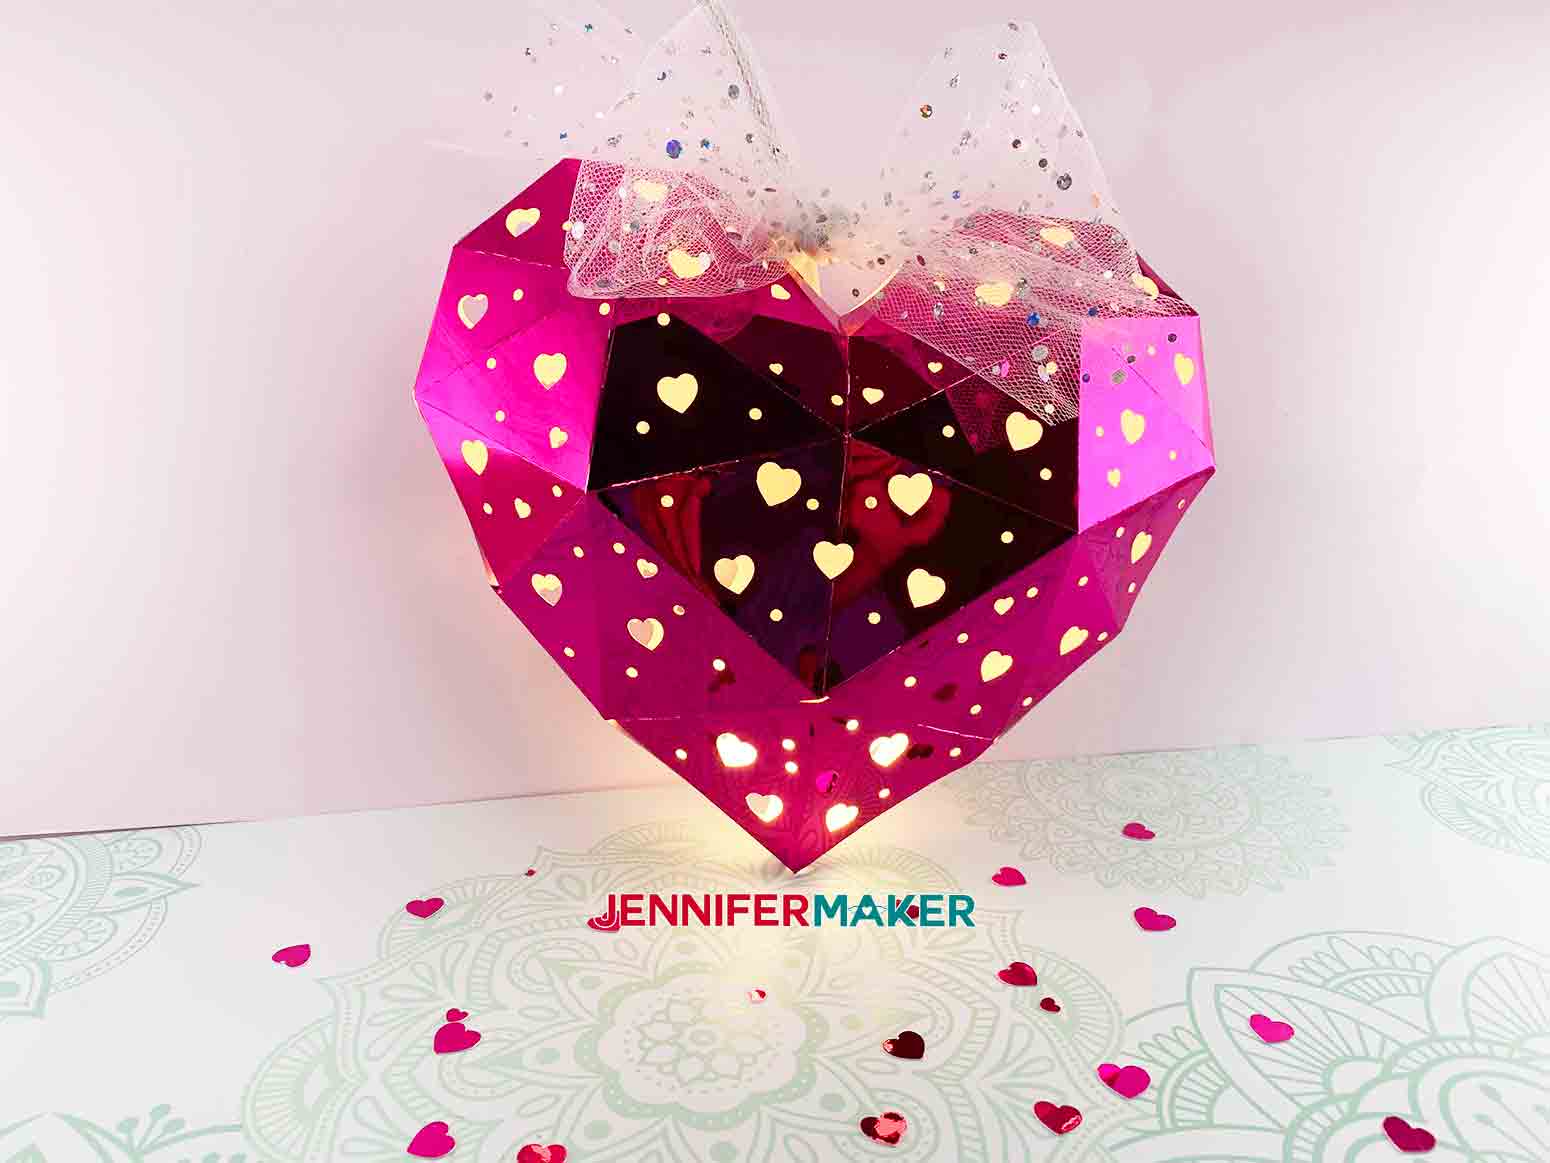
You can also adjust the size if you are looking for something smaller, maybe for a centerpiece or a garland, and add fairy lights instead of a light bulb.
Notes
Special thanks to the JenniferMaker Design Team, specifically Debbie, Stephanie, and Sarah, for helping me design, make, and teach you how to make this lovely Heart Lantern.
Answers to Your Questions About Making A Heart-Shaped Hanging Paper Lantern
Q: How do you change the lightbulb in the lantern?
If you use the LED bulb we recommend for this project, it is rated for an average of 13 years using it 3 hours a day! By this point, many people would be ready to just change out their lamp, but if you would still like to keep yours, just slice one of the tabs open at the top with a craft knife, reach in to replace the bulb, and tape it back up.
Q: Won’t the lightbulb get too hot?
No, so long as you use LED bulbs as they will not generate infrared heat.
Q: What kind of cardstock can I use?
You can use any quality cardstock. I personally like the holographic foil Kraft board the best for these.
Q: When I cut my heart-shaped lamp, the heart was cut up into little pieces and nothing scored. What do I do?
Be sure to use the proper version for your tools and, if you choose the “scored-line” version of the pattern, be sure to set and attach your score lines before you click “Make It.” If you don’t have a scoring tool or feel comfortable setting your score lines, choose the “dashed-line” version of the pattern instead. Both versions are in the ZIP file provided in my library.
Get my free SVG files to Make A Heart-Shaped Hanging Paper Lantern
Isn’t this heart lantern just beautiful and whimsical? It can be a fun decoration for Valentines Day or used to decorate a room any time of year! Please do share a photo of your heart-shaped hanging paper lanterns in our Facebook group or tag me on social media with #jennifermaker.
Love,

Want to remember this? Save this heart-shaped hanging paper lantern tutorial to your favorite Pinterest Board!

wonderful jennifer thanks so much x
You are most welcome, Valerie!
can this be put on an led bulb on the ceiling lights
I don’t see why not, Jennifer! As long as they are LED they won’t produce heat to cause any damage.
Wondering if it would work on a smaller scale with led candles… I may just have to give it a go. Love your tutorials xx
Gillian, smaller should work, would love to see what you come up with! Email my team at [email protected] with your photos if you like!