
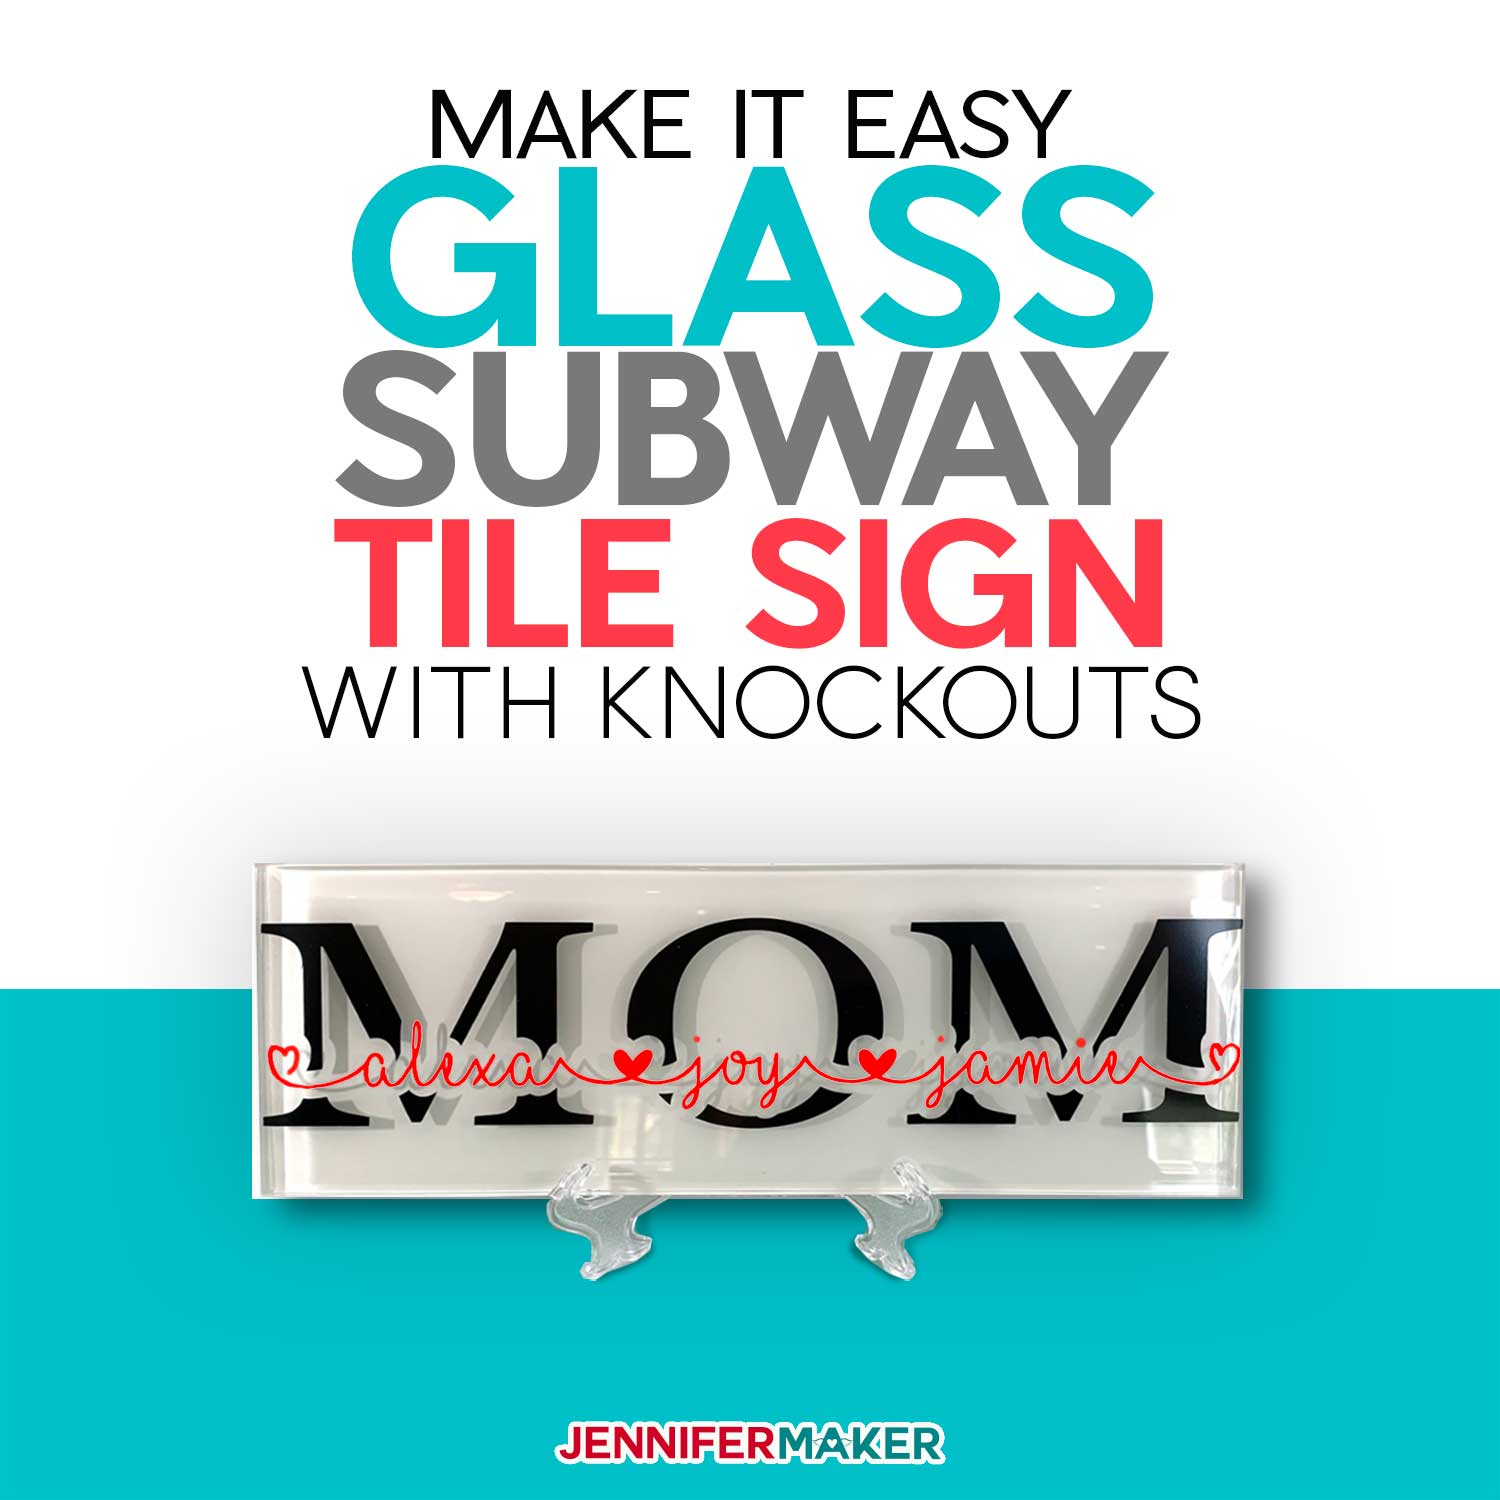
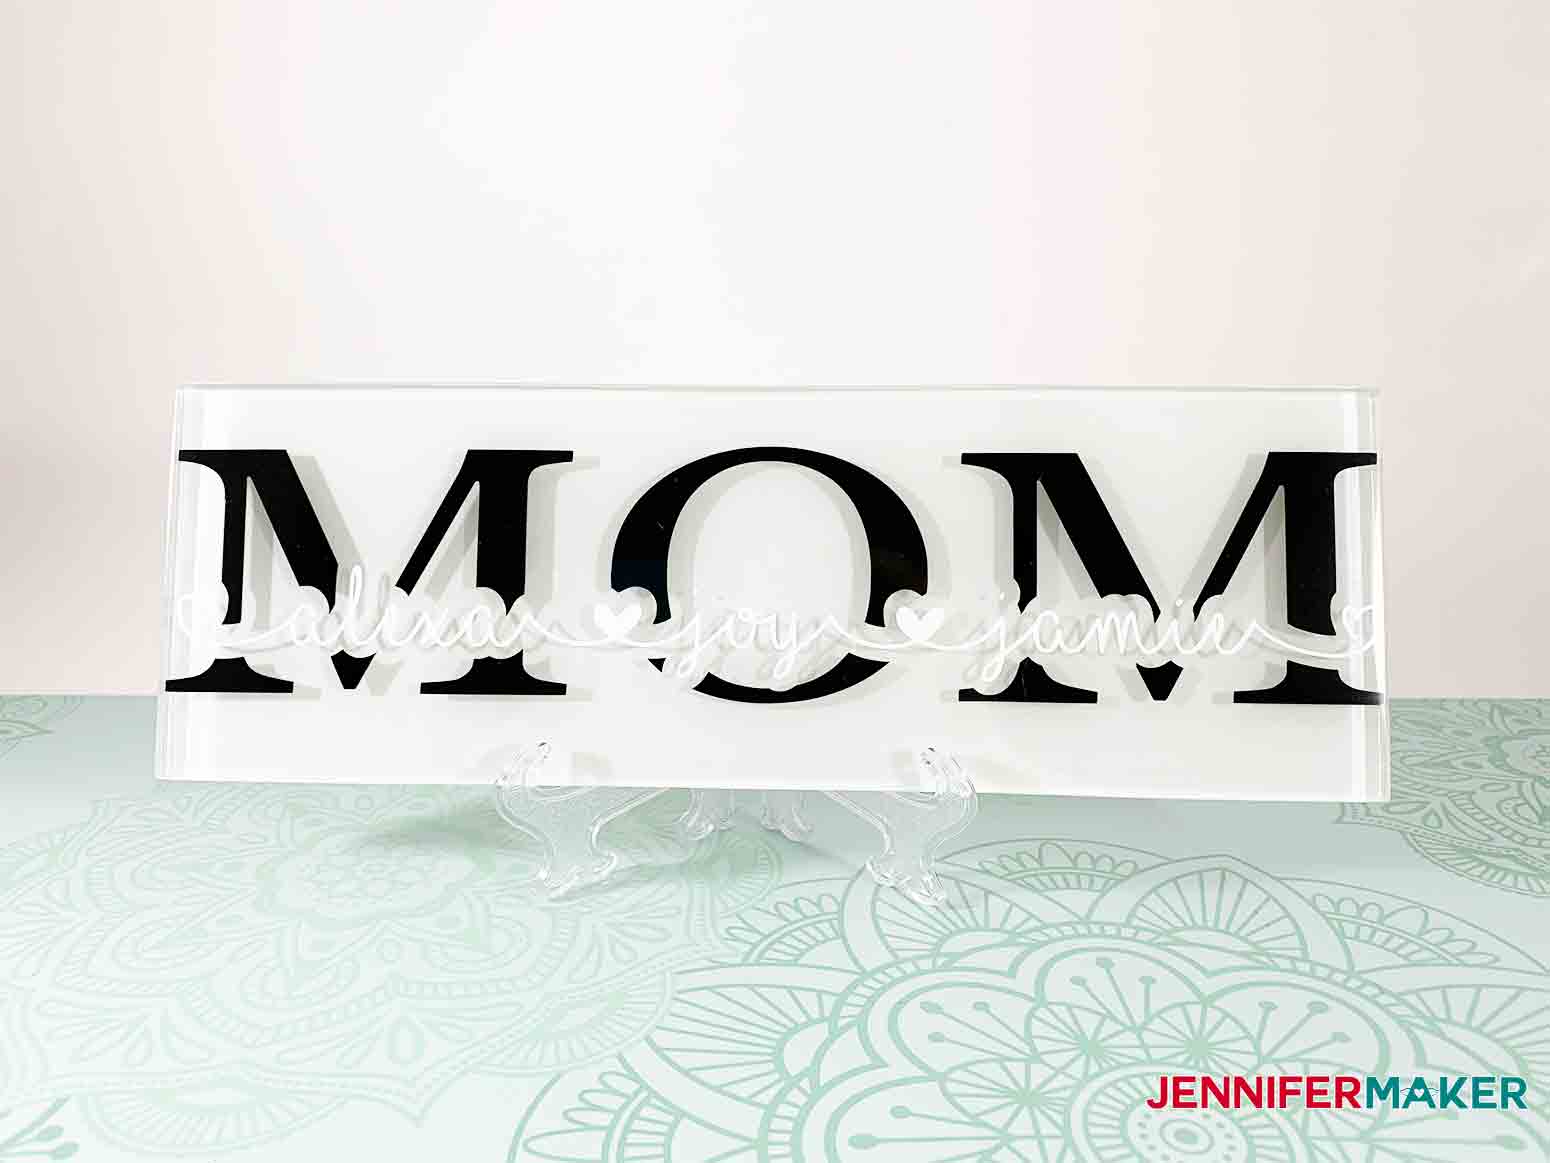
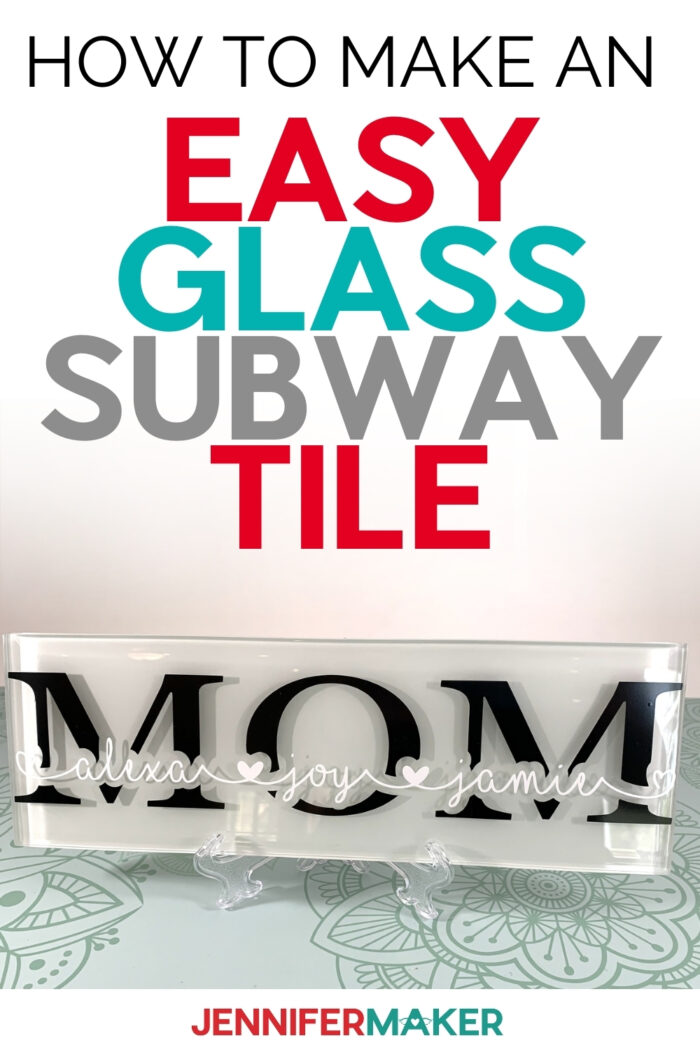
Learn how to make your own personalized glass subway tile sign with a fun “knockout” design that will be a unique home decor and wonderful gift idea!
I love making signs! One of my first signs was the Easy Vertical Welcome Sign that still sits on my porch! I also love the Painted Wood Sign (using the Cricut to cut a vinyl stencil) and my Welcome Home Sign with Interchangeable Seasonal Shapes. Signs make such wonderful gifts because you can personalize them to become one-of-a-kind projects. But there are still so many signs to make … I must make all the signs! Today’s sign project is a highly requested glass subway tile sign with the ever-popular knockout design.

The design you see here, with the small script words going through the larger letters, is what’s known as a “knockout” design. Last year I made a detailed tutorial showing you how to Make Knockout Designs in Cricut Design Space. So this Glass Subway Tile Sign uses the same knockout technique and it can all be done in Cricut Design Space — no need for a third-party program. I will show you exactly how to create this awesome subway tile in this photo tutorial! You may also find it helpful to watch this video tutorial with the same technique here:
Let me show you how easy it is to make this personalized glass subway tile sign! This post contains some affiliate links for your convenience (which means if you make a purchase after clicking a link I will earn a small commission but it won’t cost you a penny more)! Read my full disclosure policy.
Materials to Make a Personalized Glass Subway Tile Sign
- Glass Subway Tile (4″x12″) (*Note, the white glass subway tile I used for this tutorial is currently unavailable. So I’ve linked to a similar tile of the same size. Here are others if that one becomes unavailable: white subway glass tile, blue subway glass tile, seafoam green glass tile)
- Clear Plastic Easel (5″)
- Cricut Permanent Vinyl (2 colors)
- Cricut Transfer Tape (Standard Grip)
- Painter’s Tape
- Rubbing Alcohol
- Cricut Brayer
- Cricut Scraper
- Cricut Weeding Tool
- Glass Pen Marker
- StandardGrip cutting mat for your Cricut
- A way to cut your vinyl (I used the Cricut Maker cutting machine but they can also be cut on a Cricut Explore or Cricut Joy)
- Font Adorn Smooth Serif and I Love Glitter (Optional)
How to Make a Glass Subway Tile Sign with a Knockout
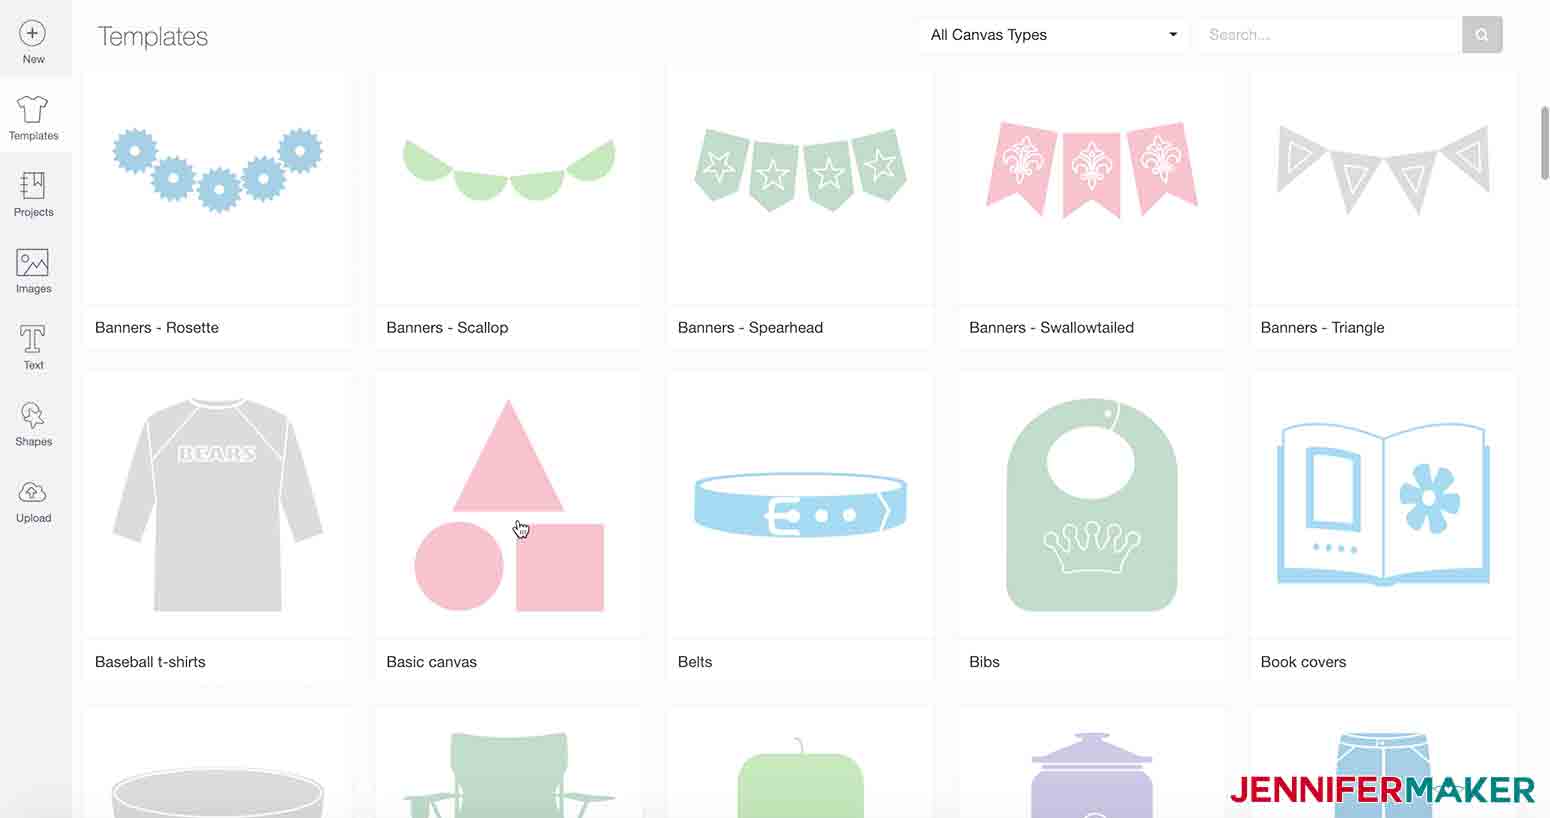
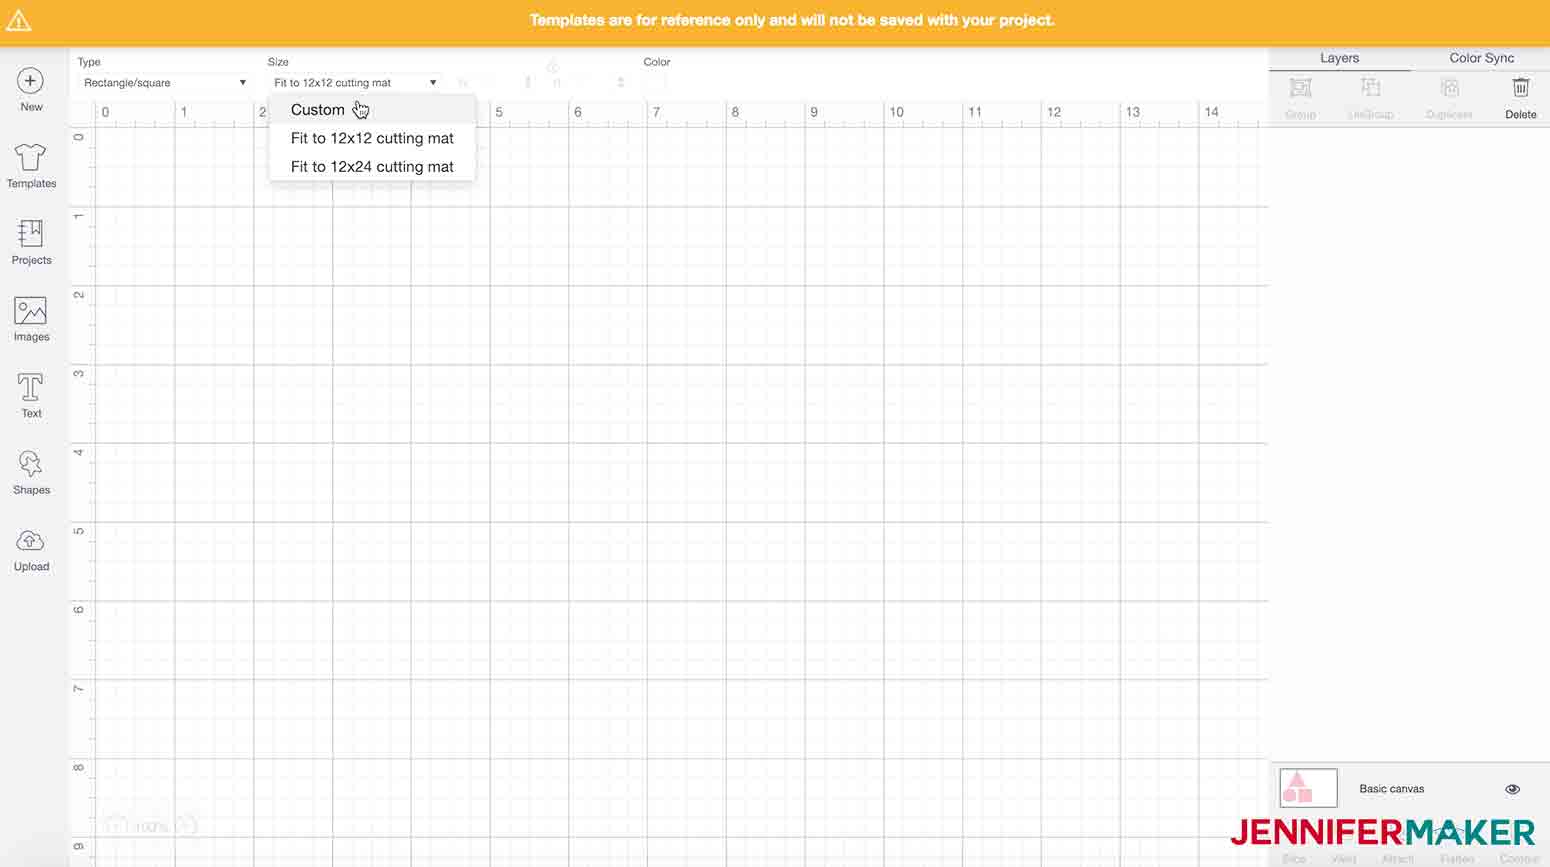
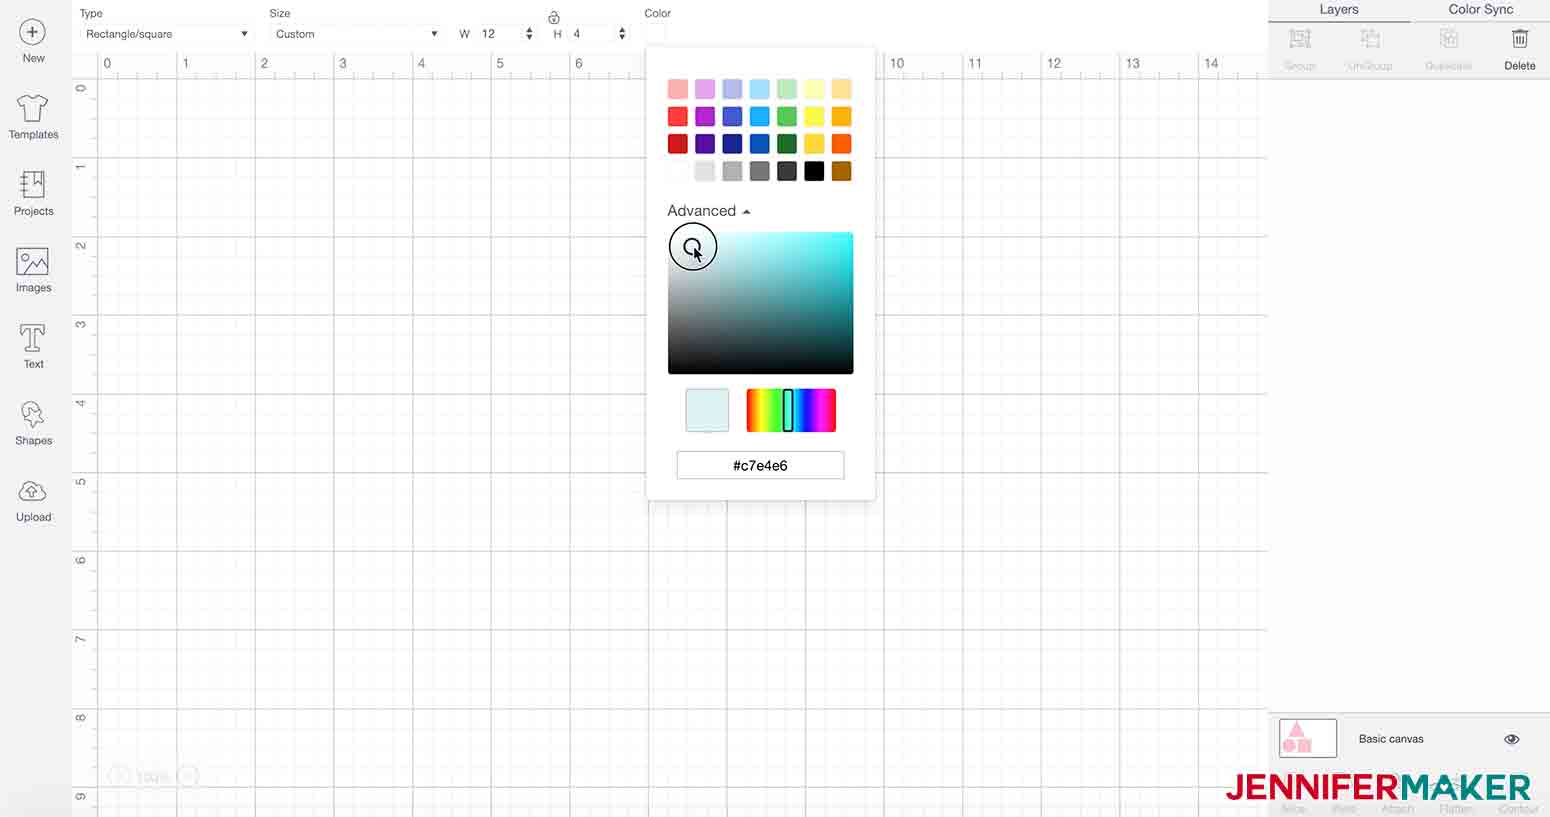
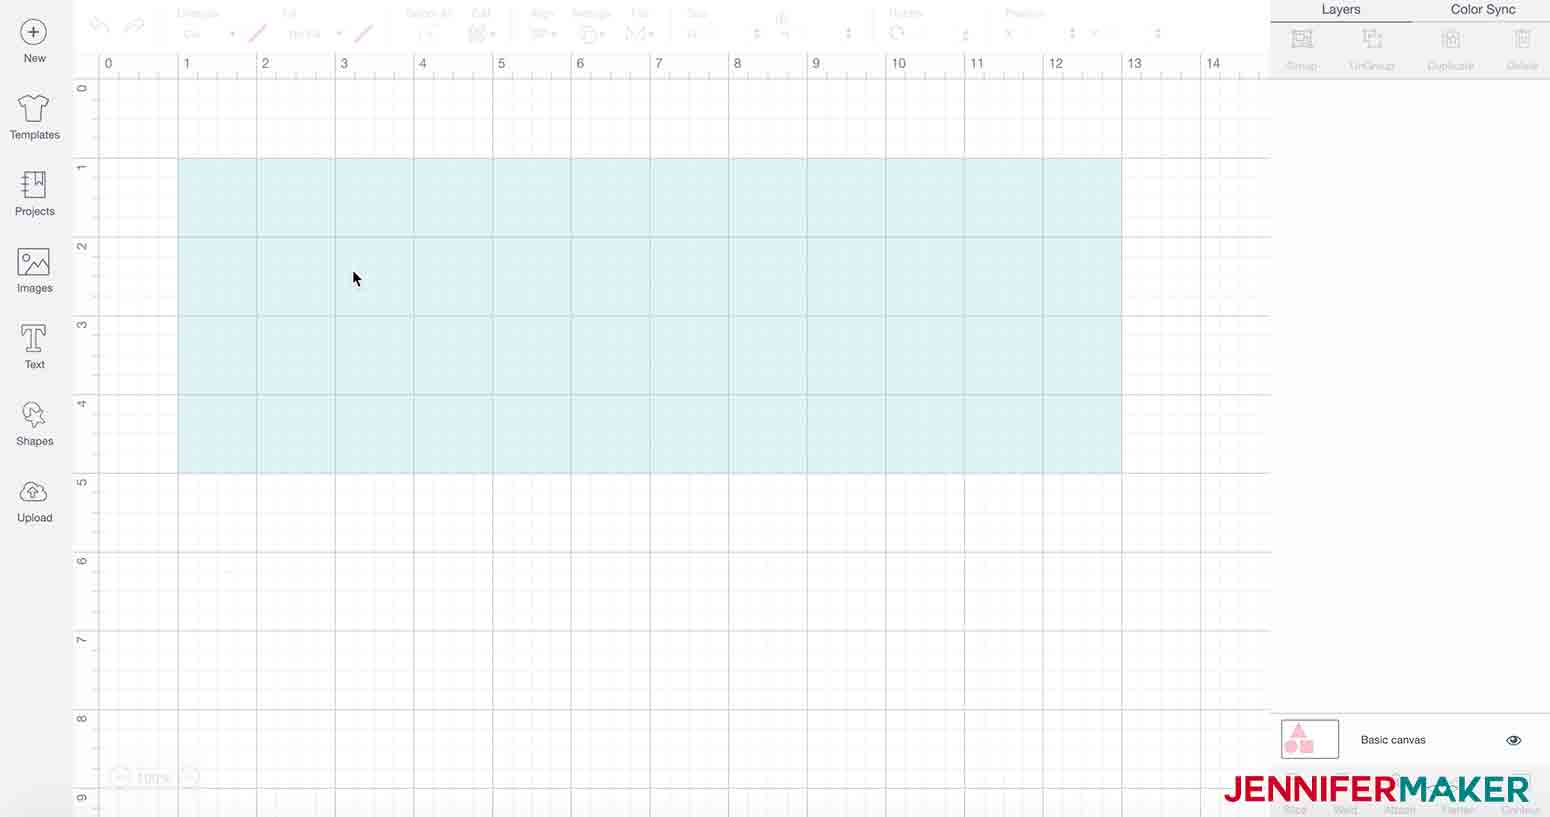
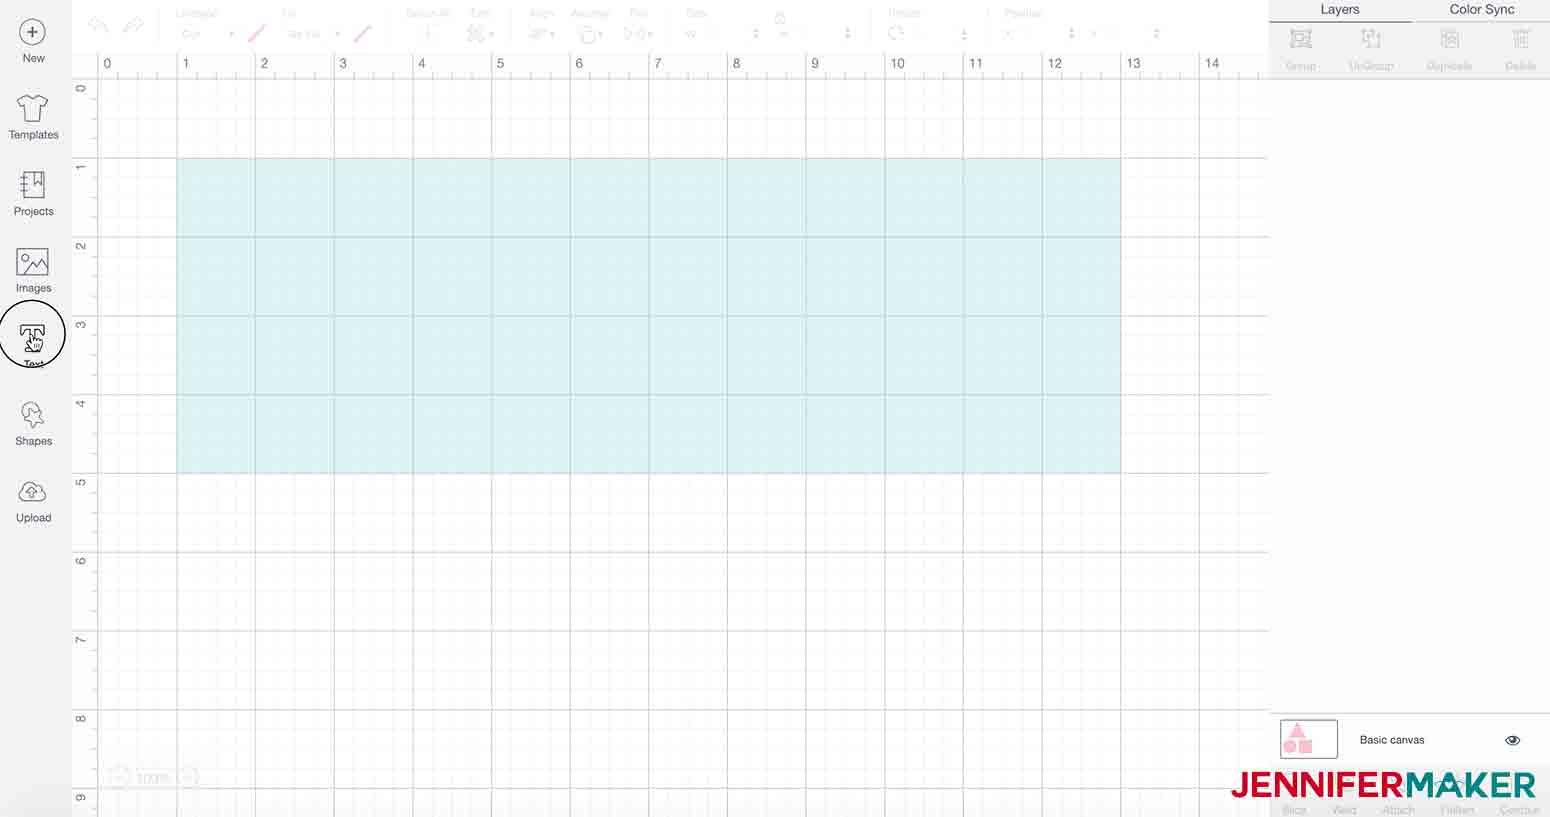
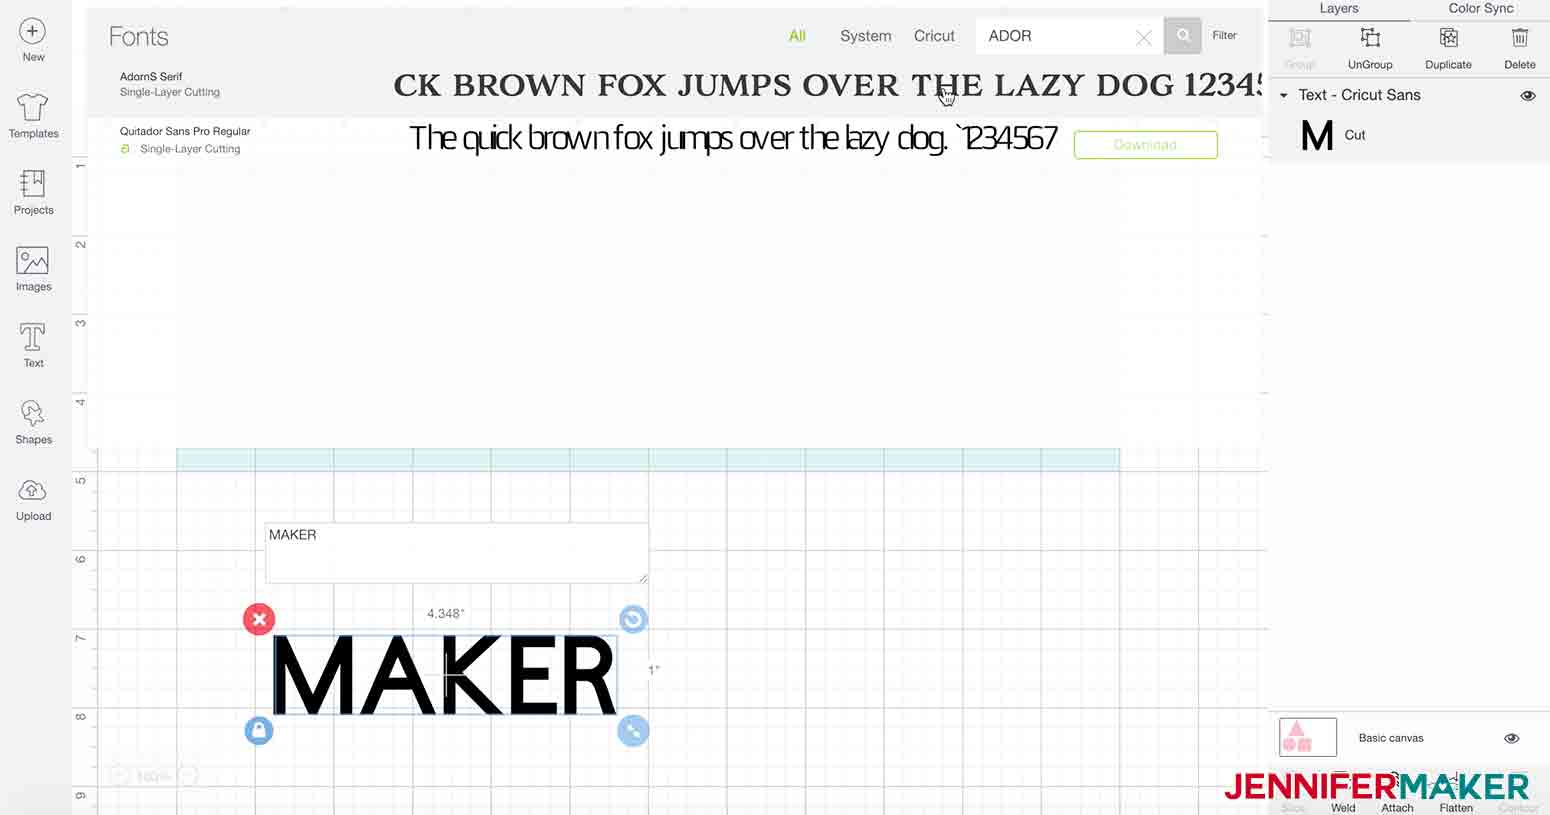
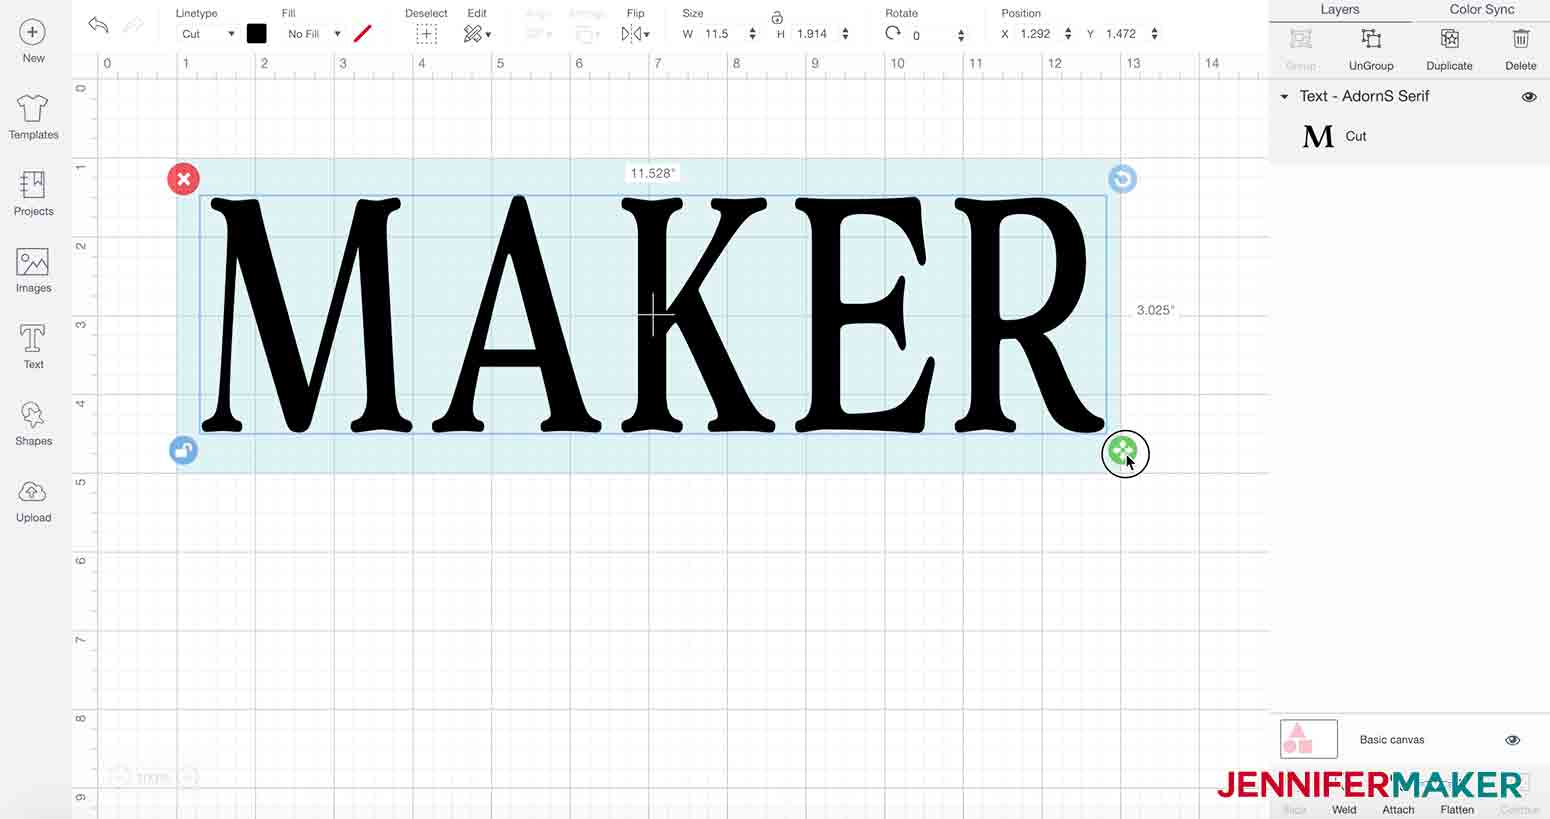
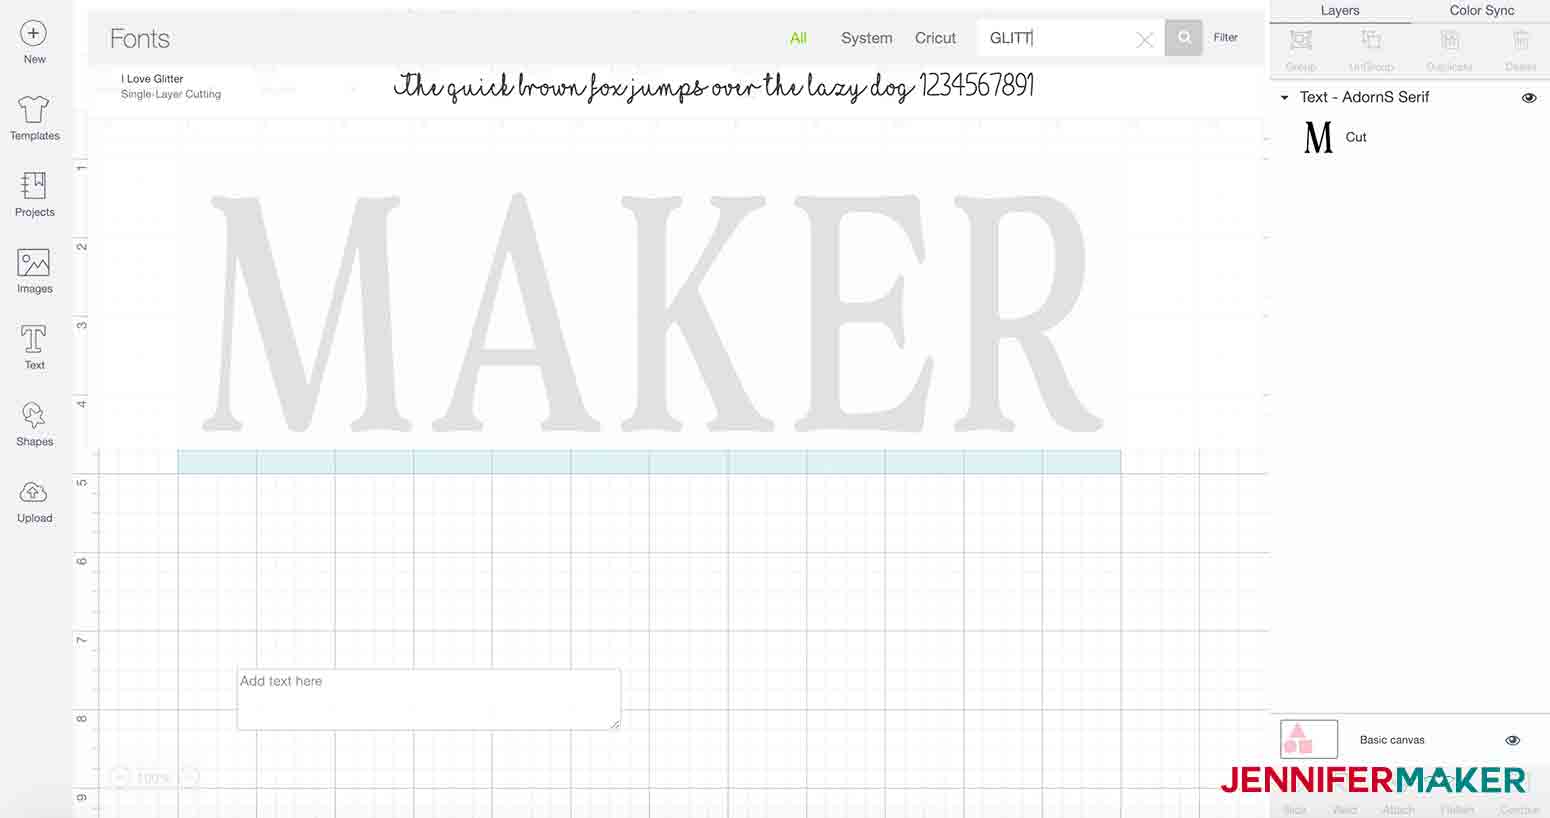
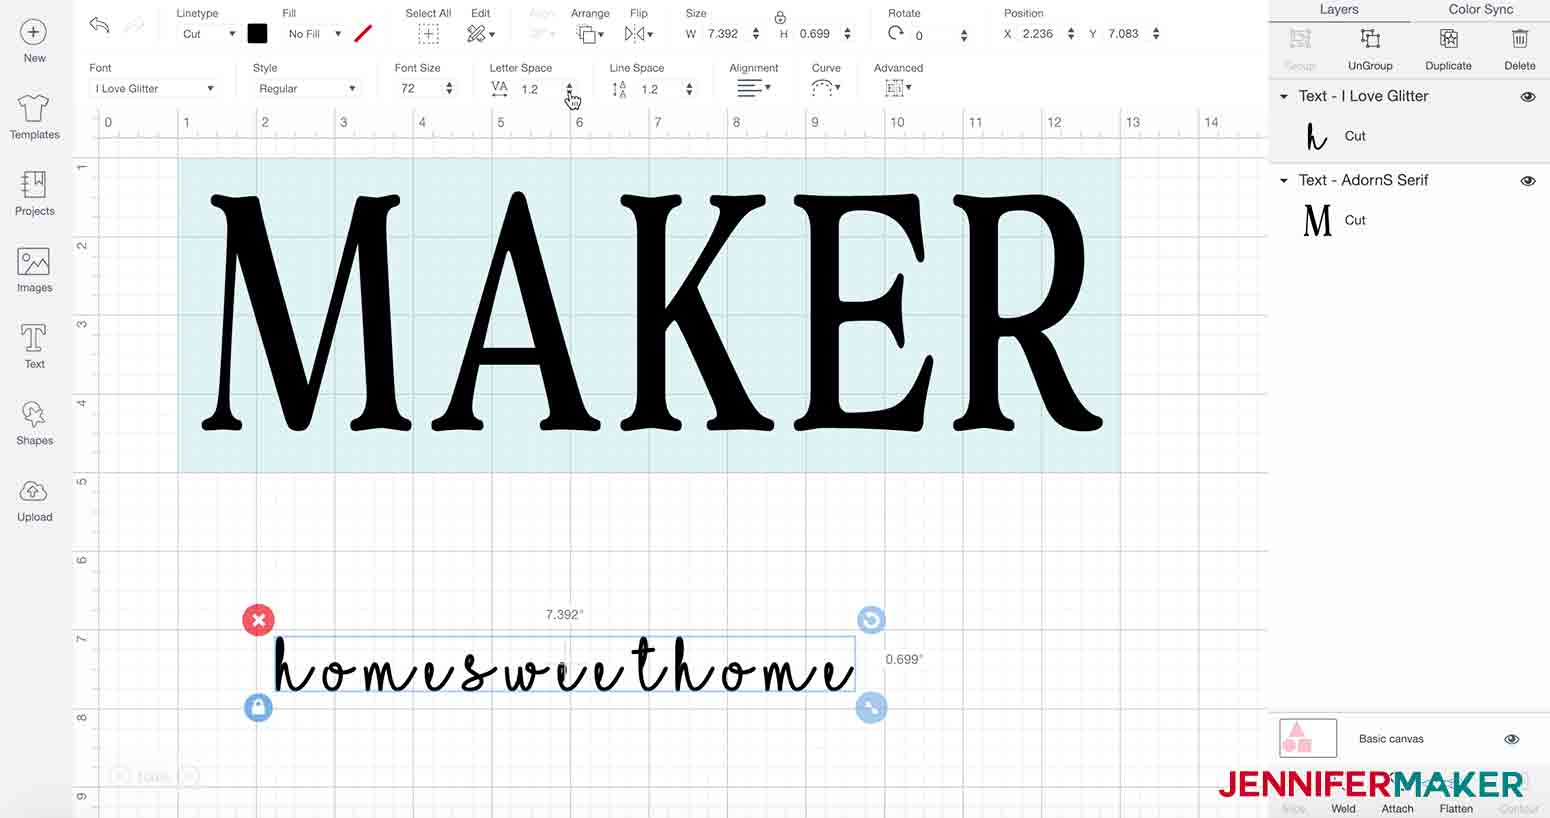
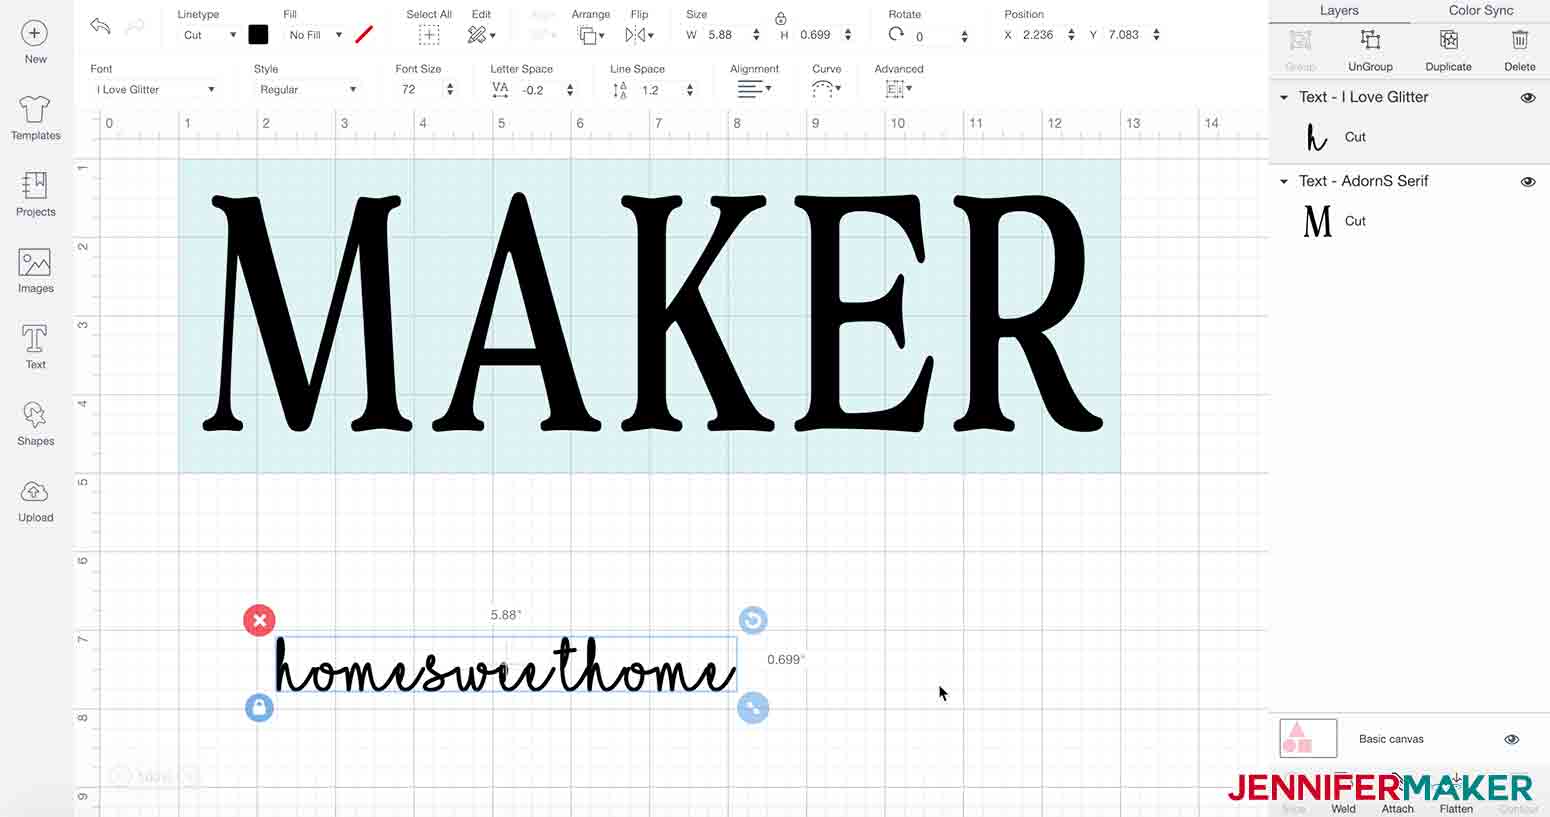
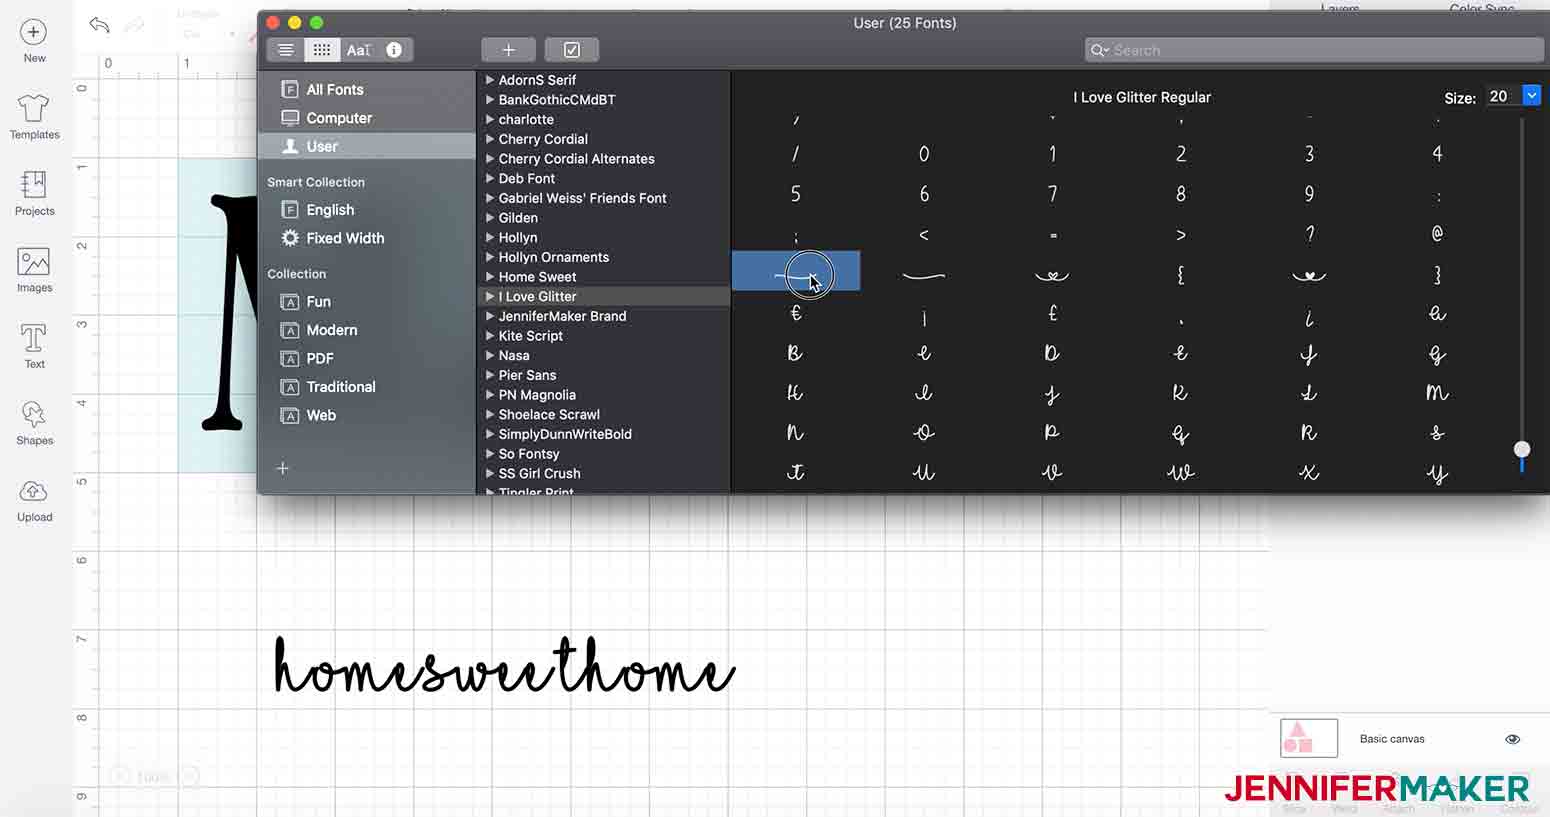
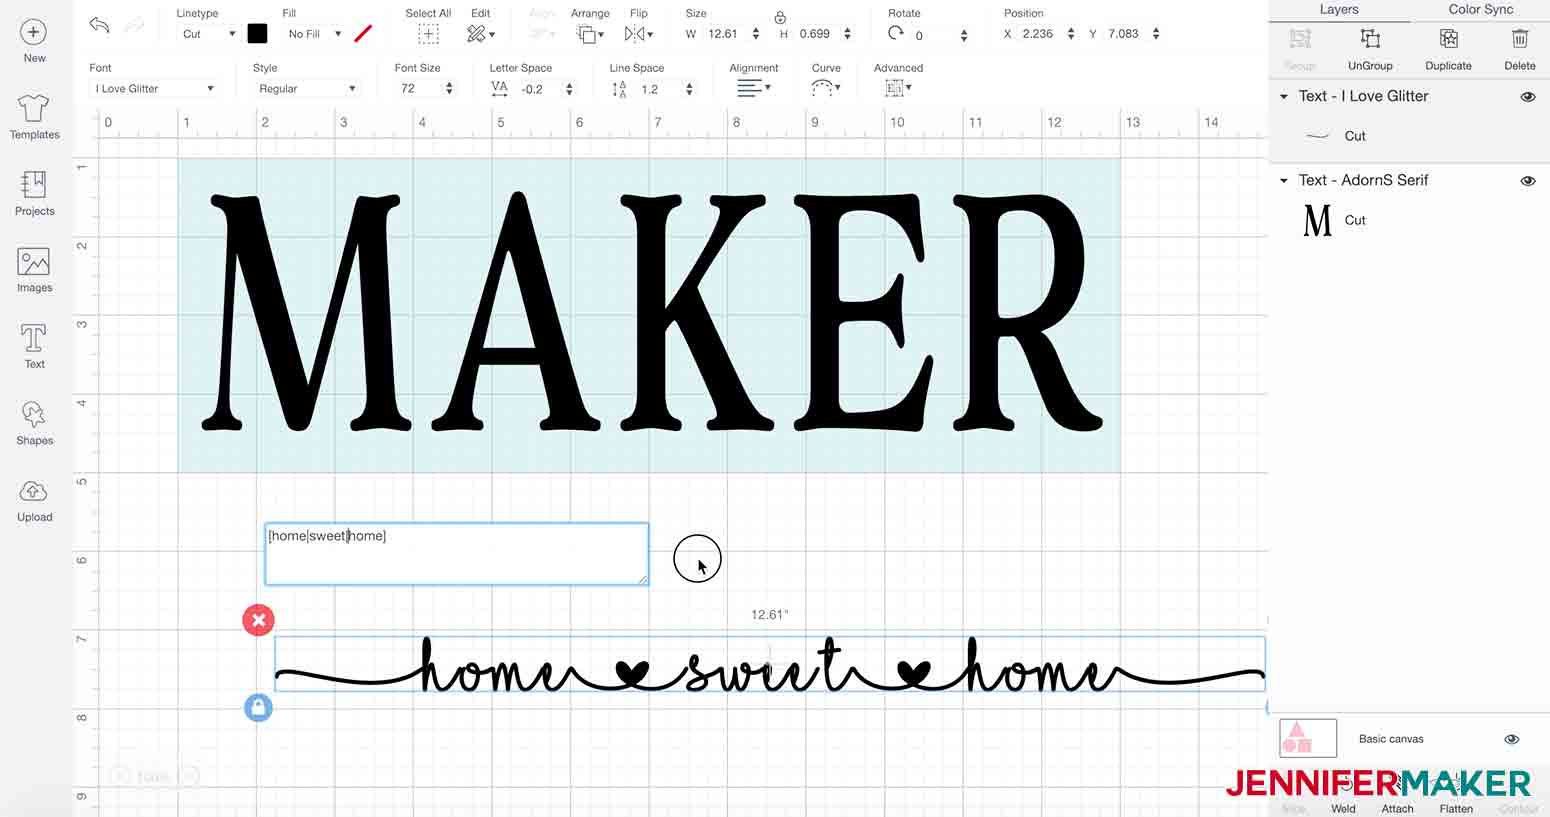
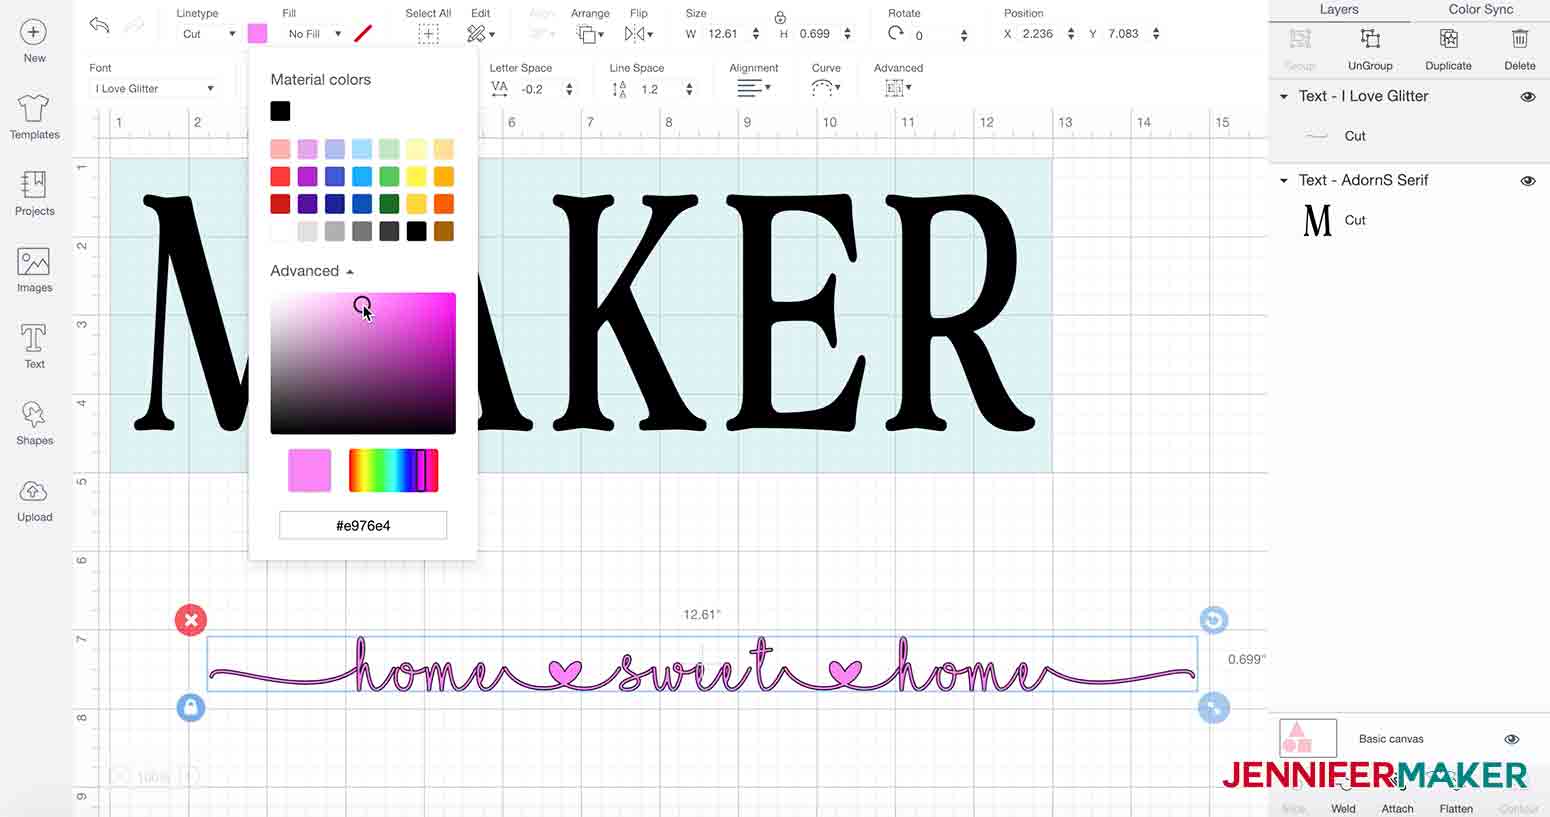
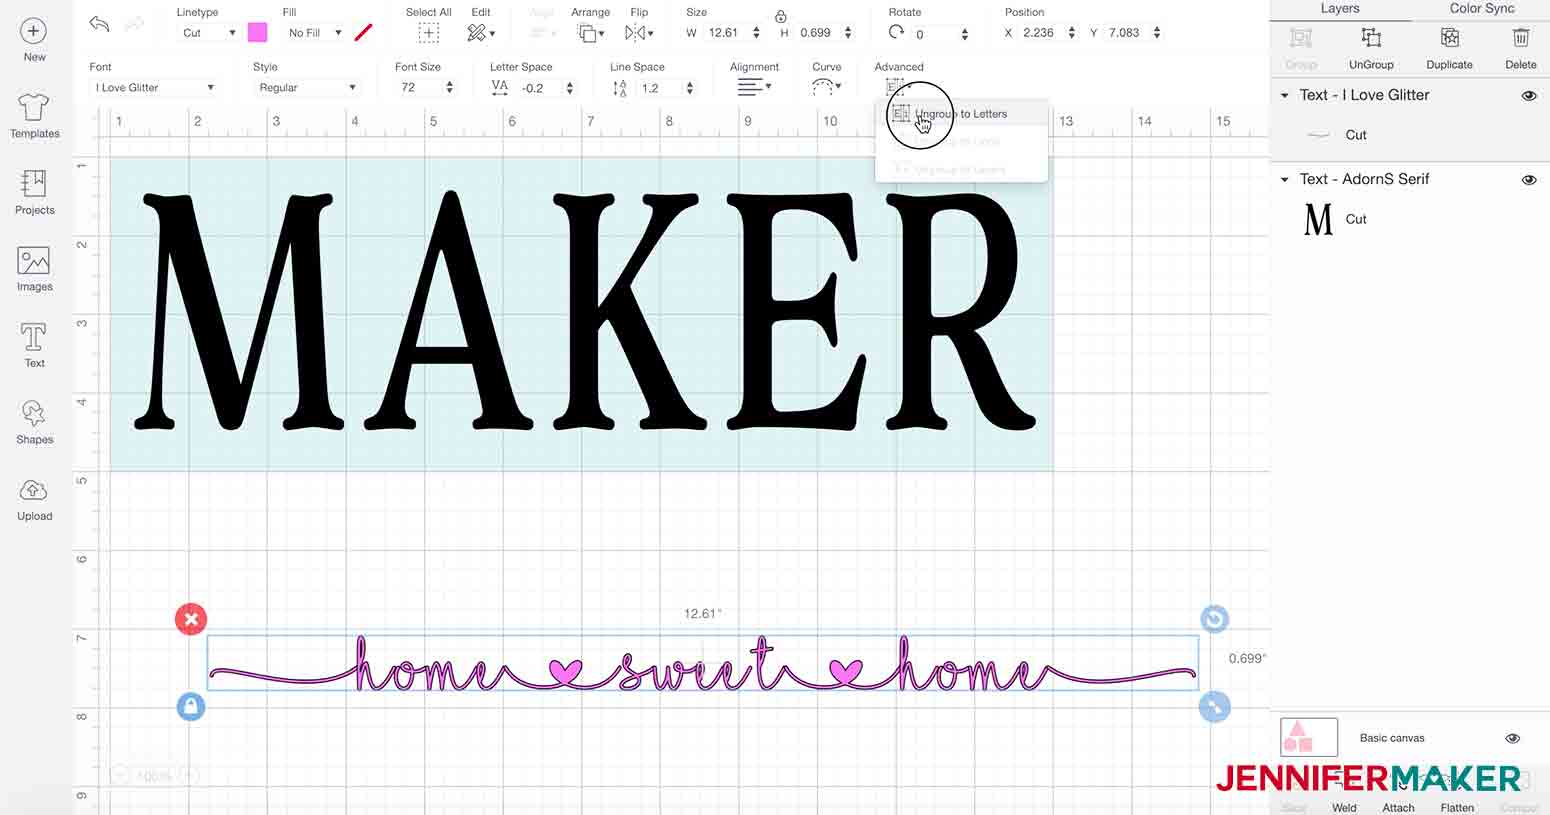
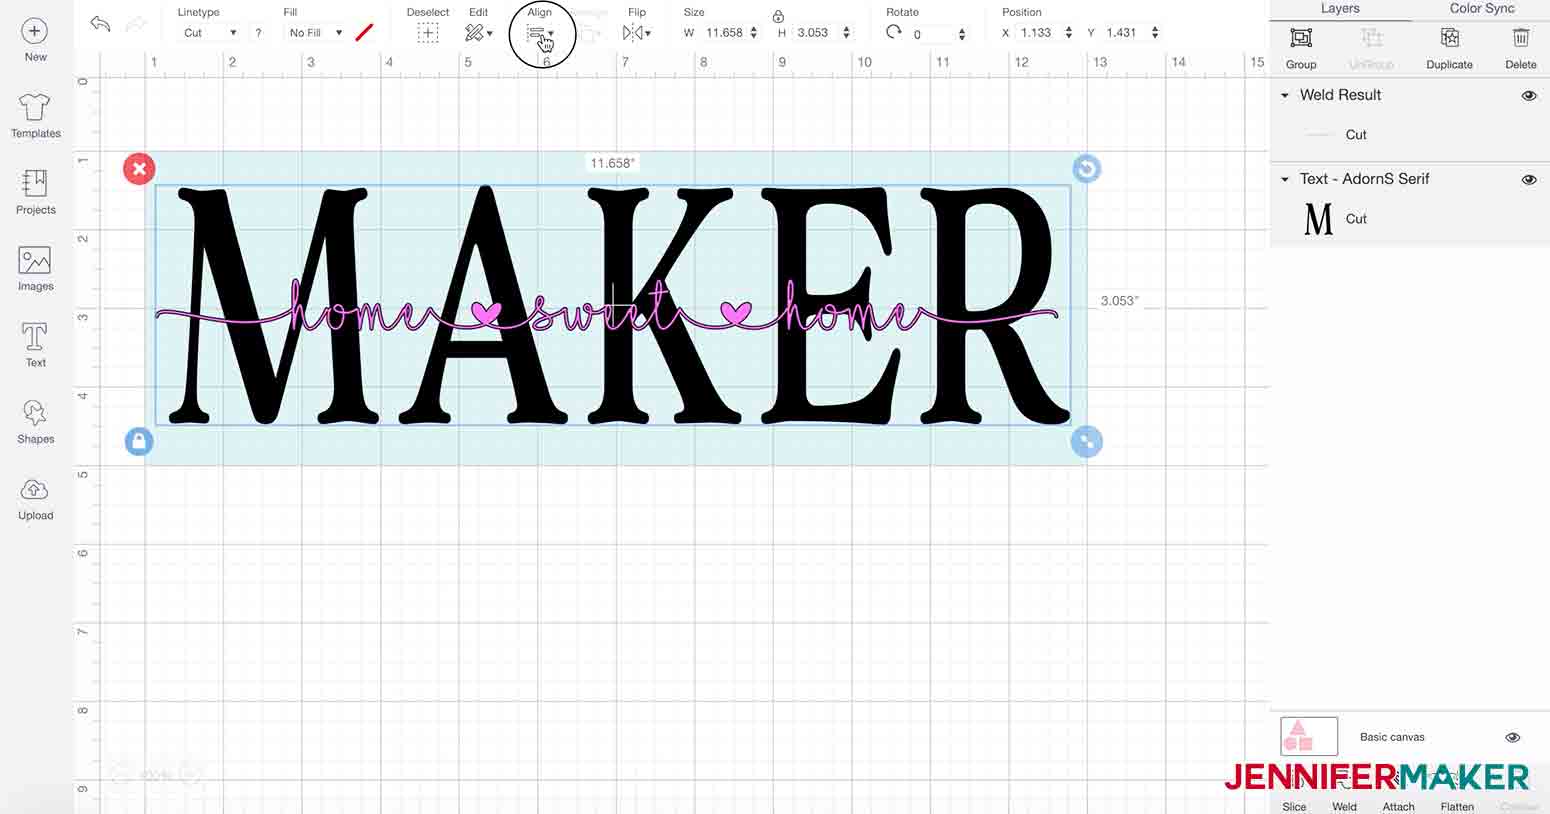
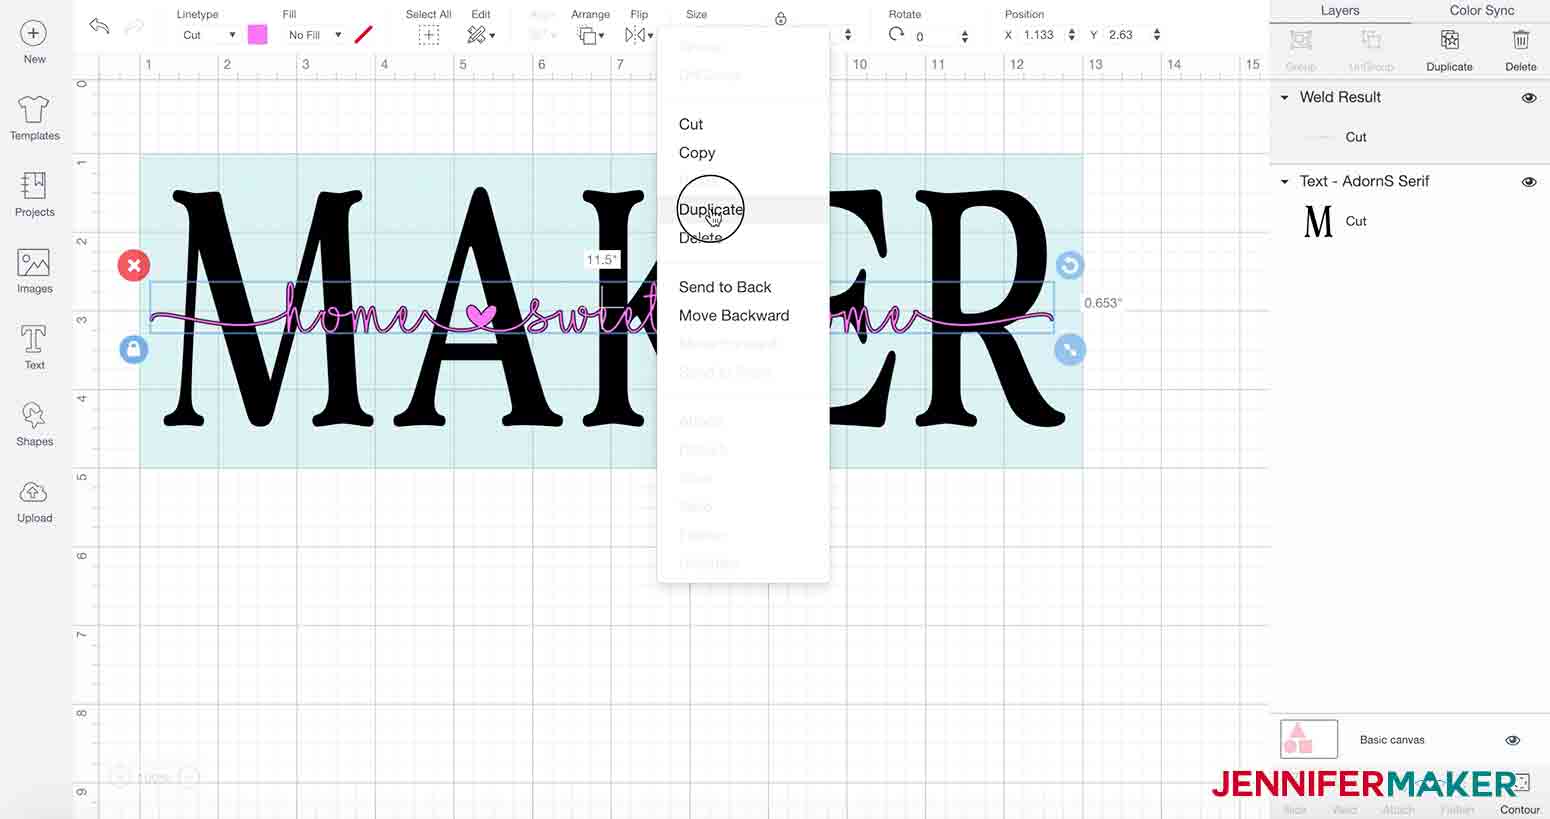
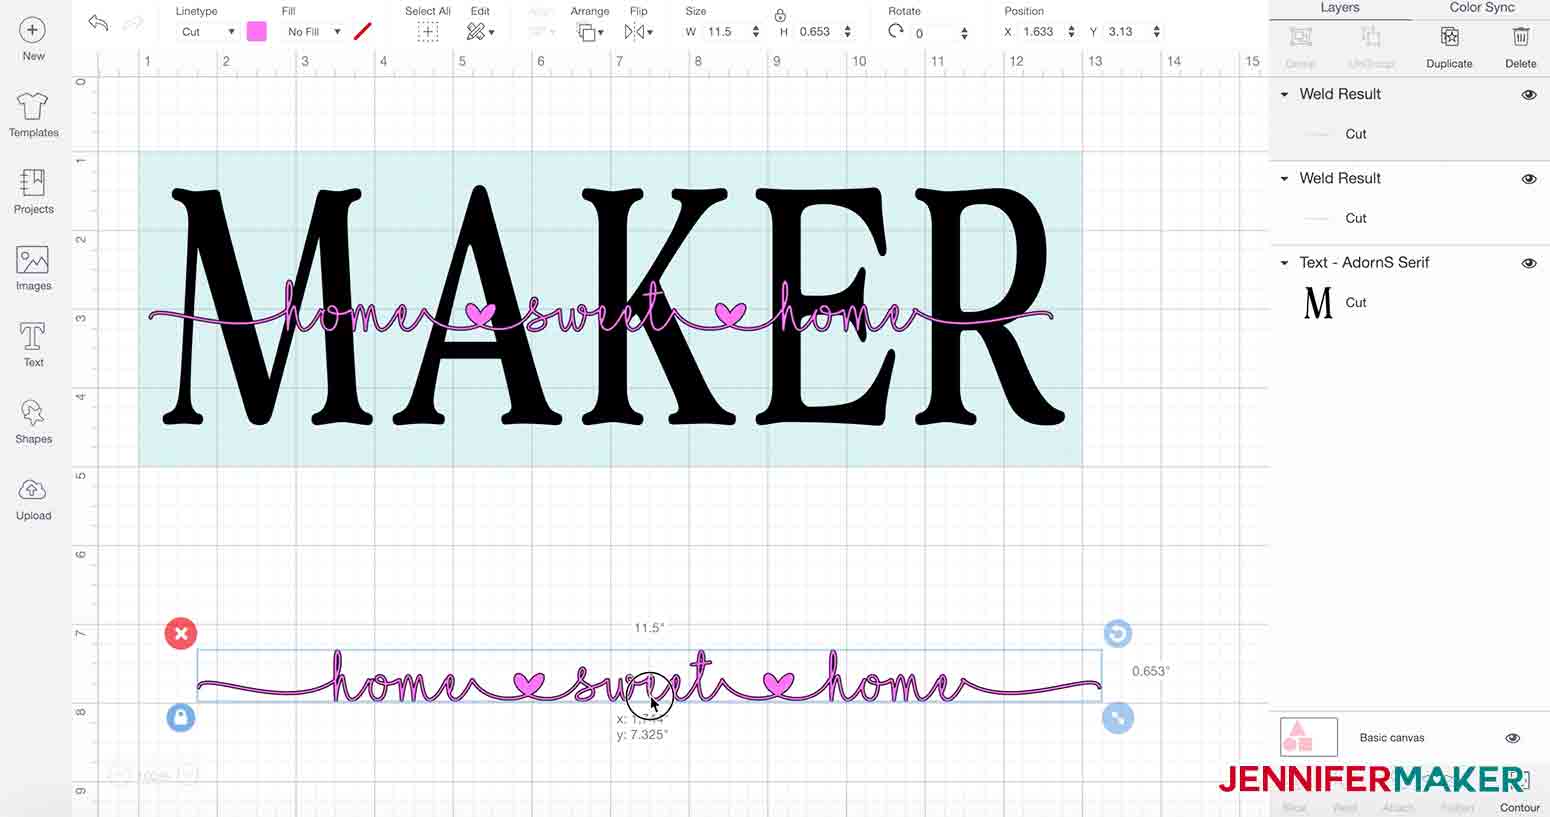
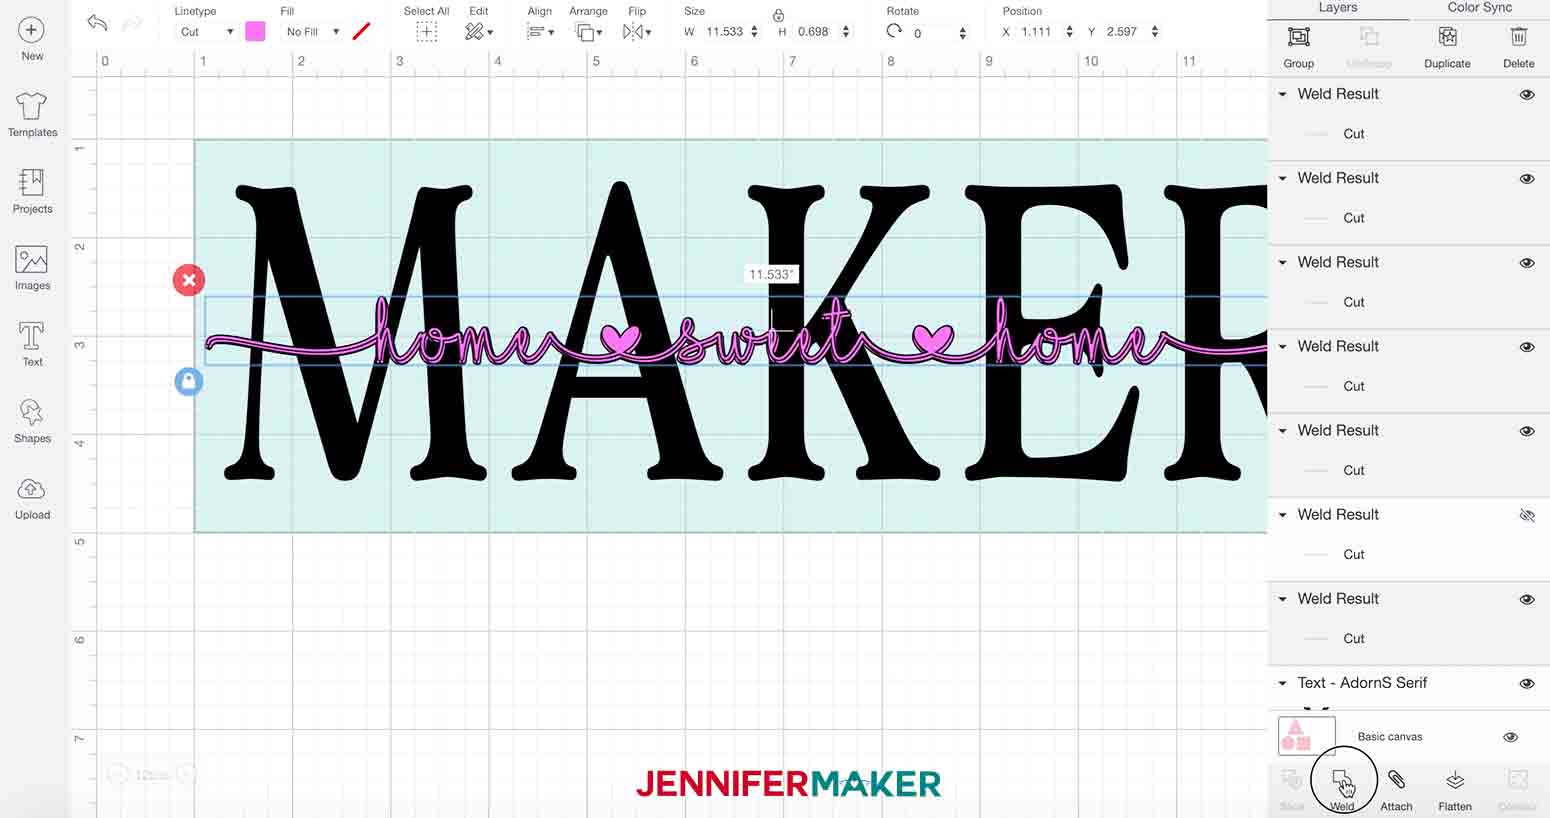
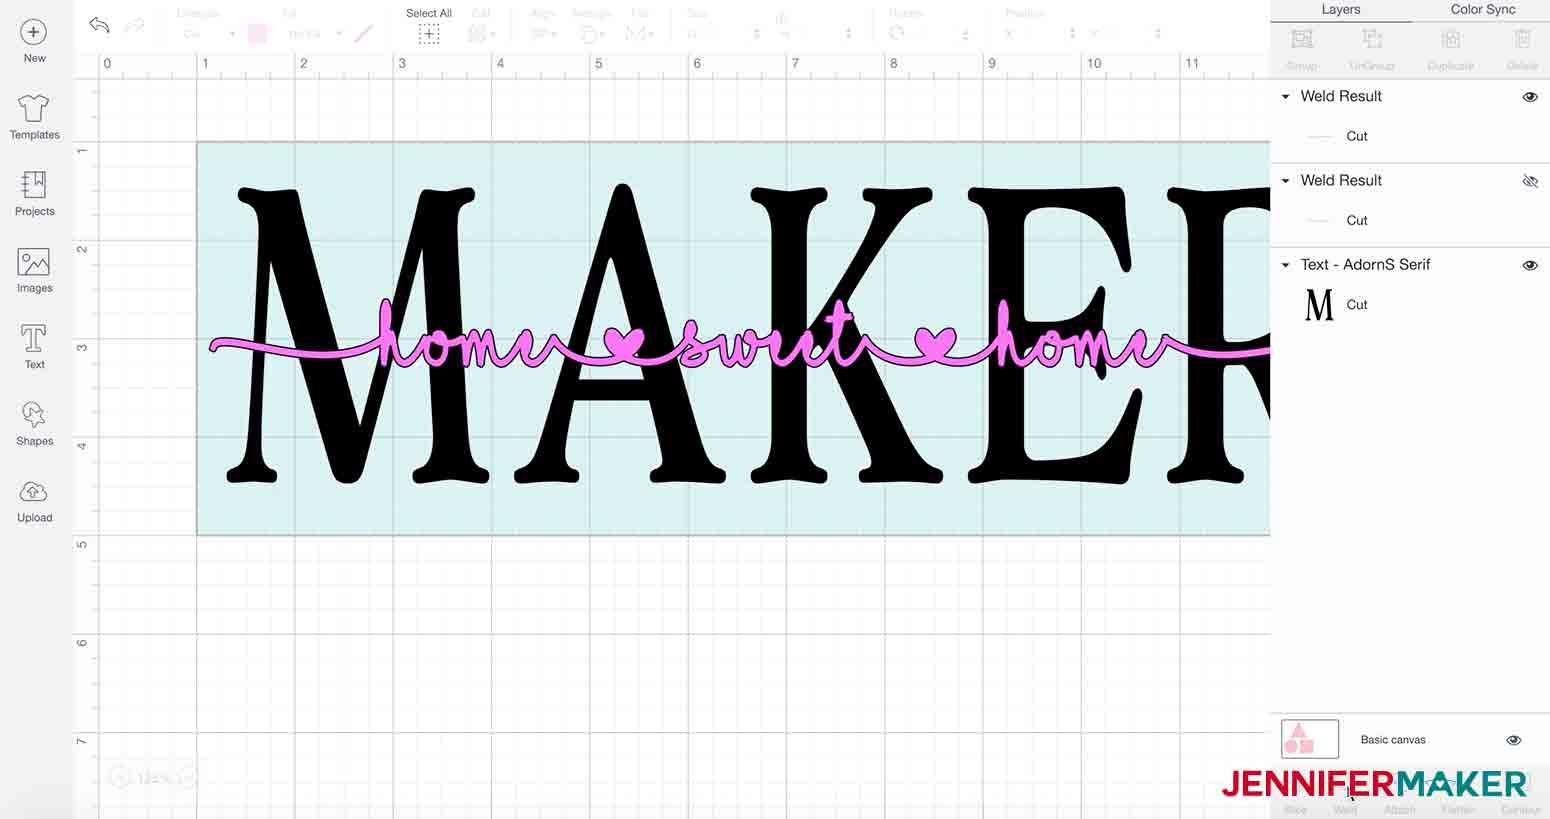
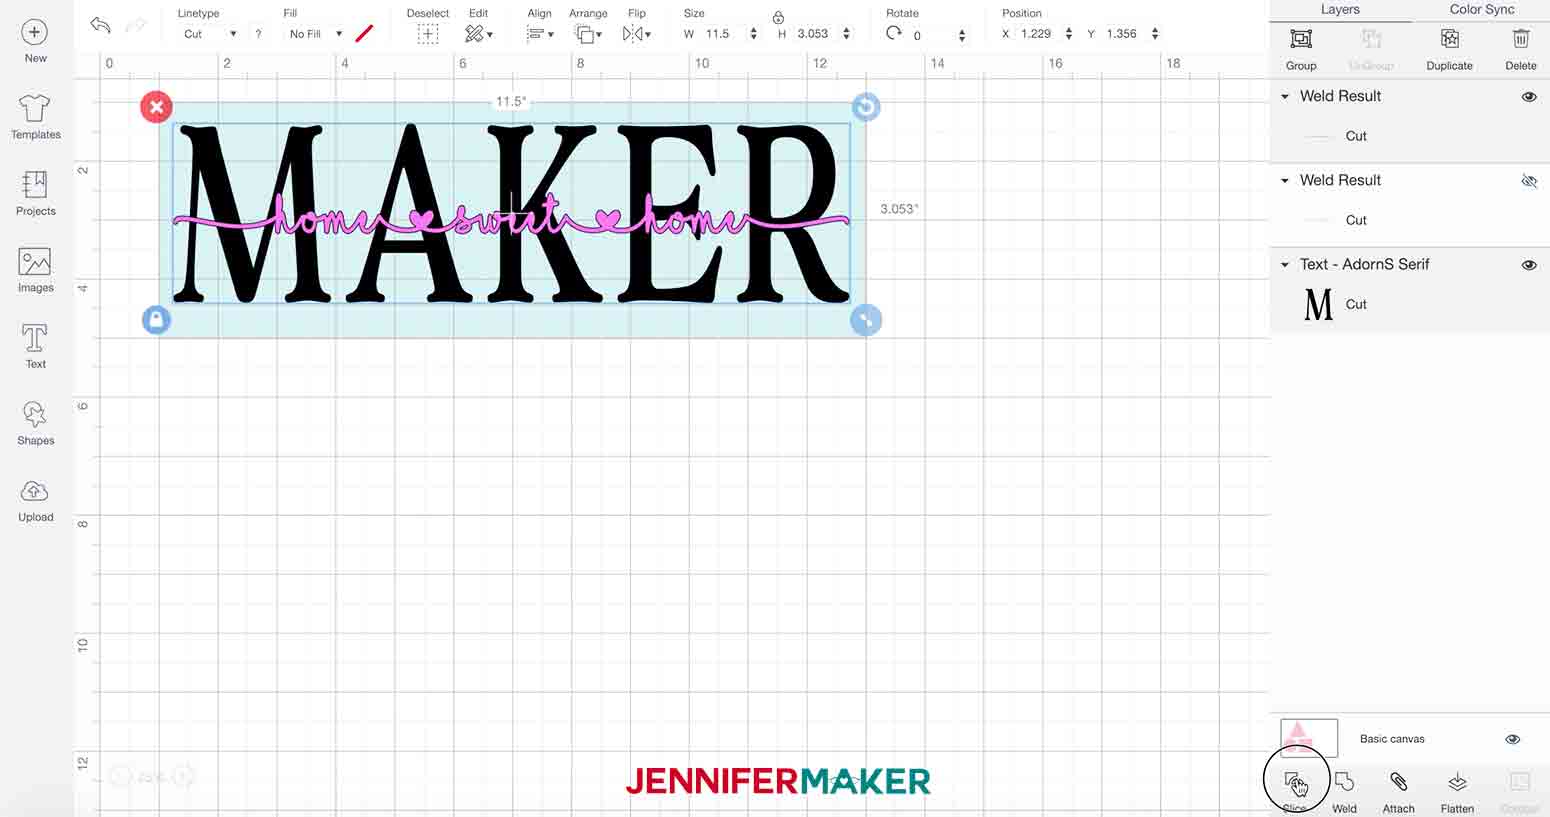
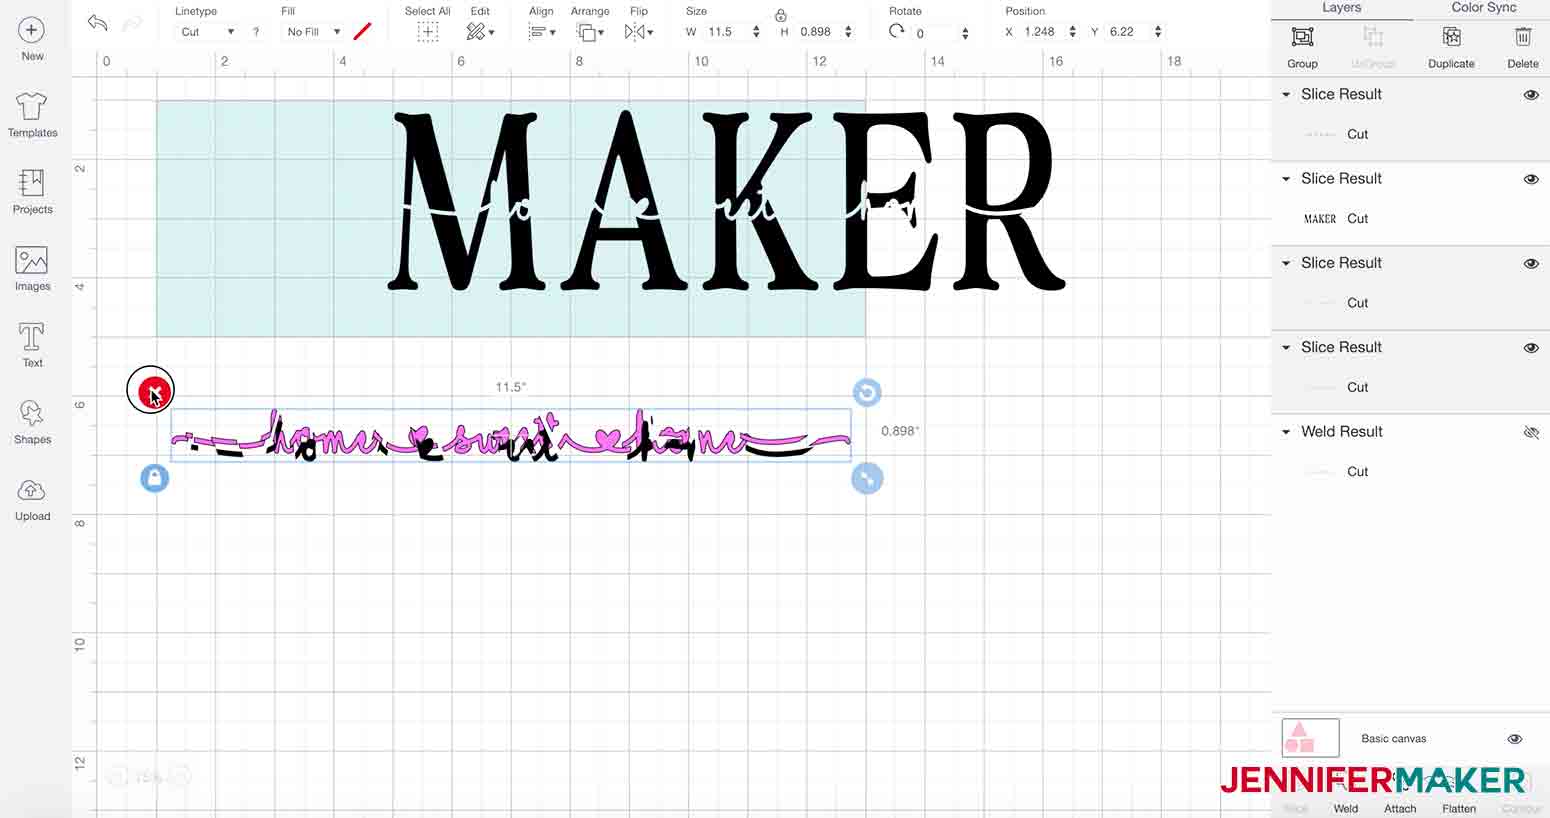
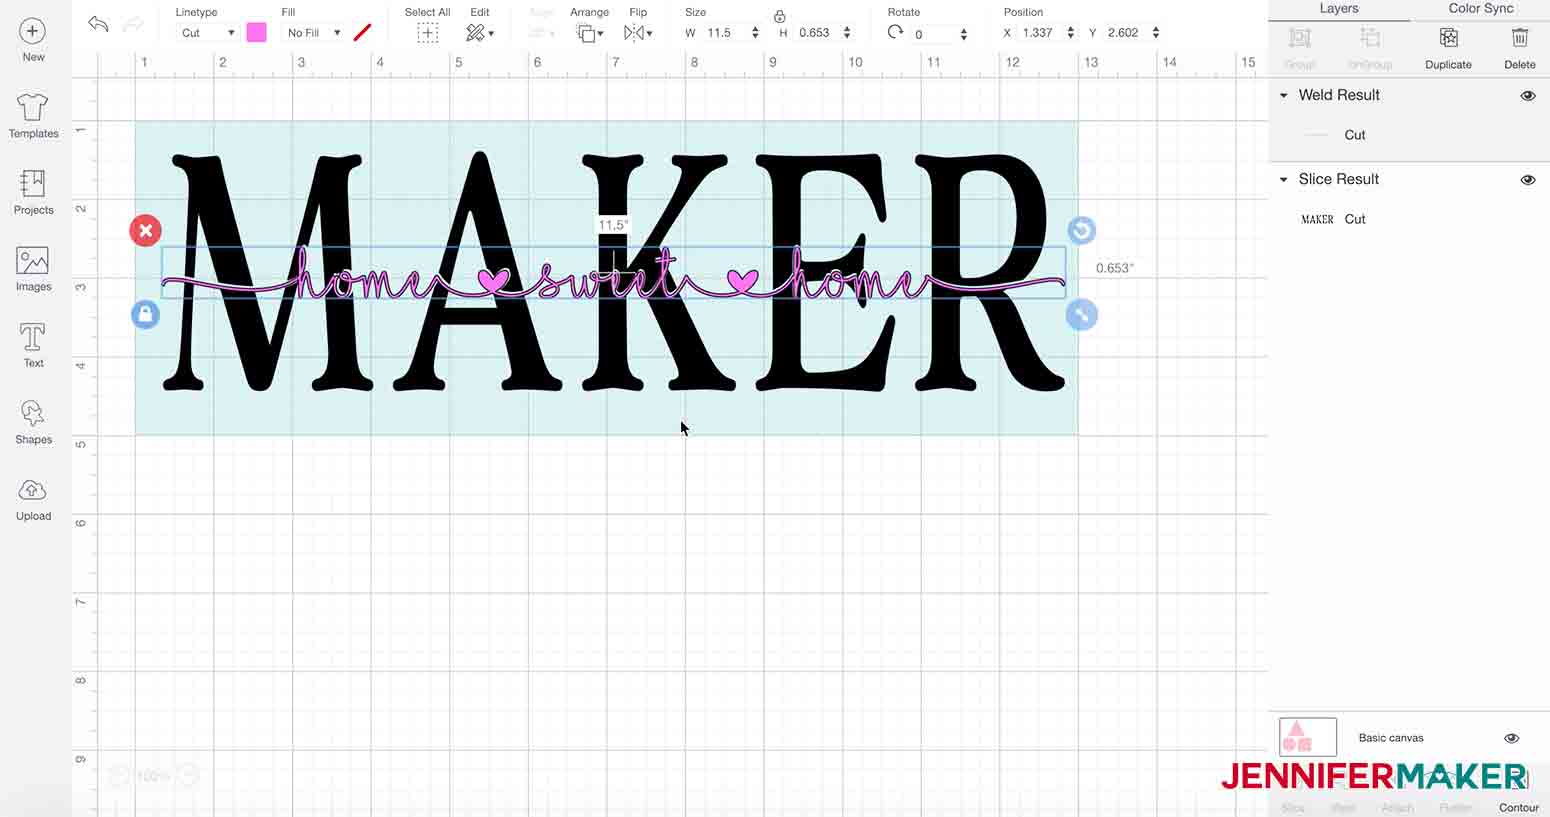
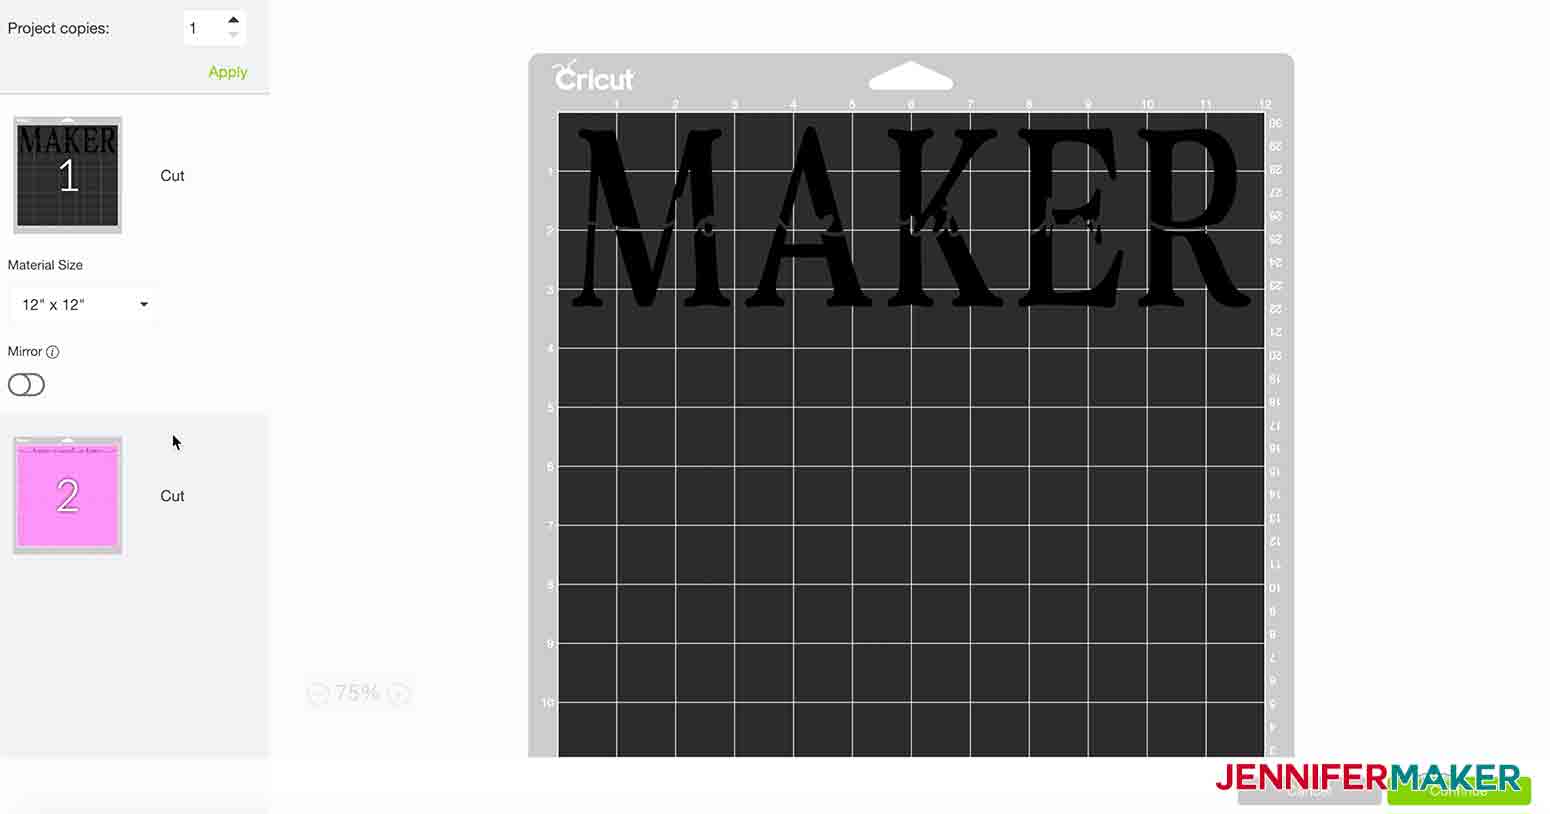
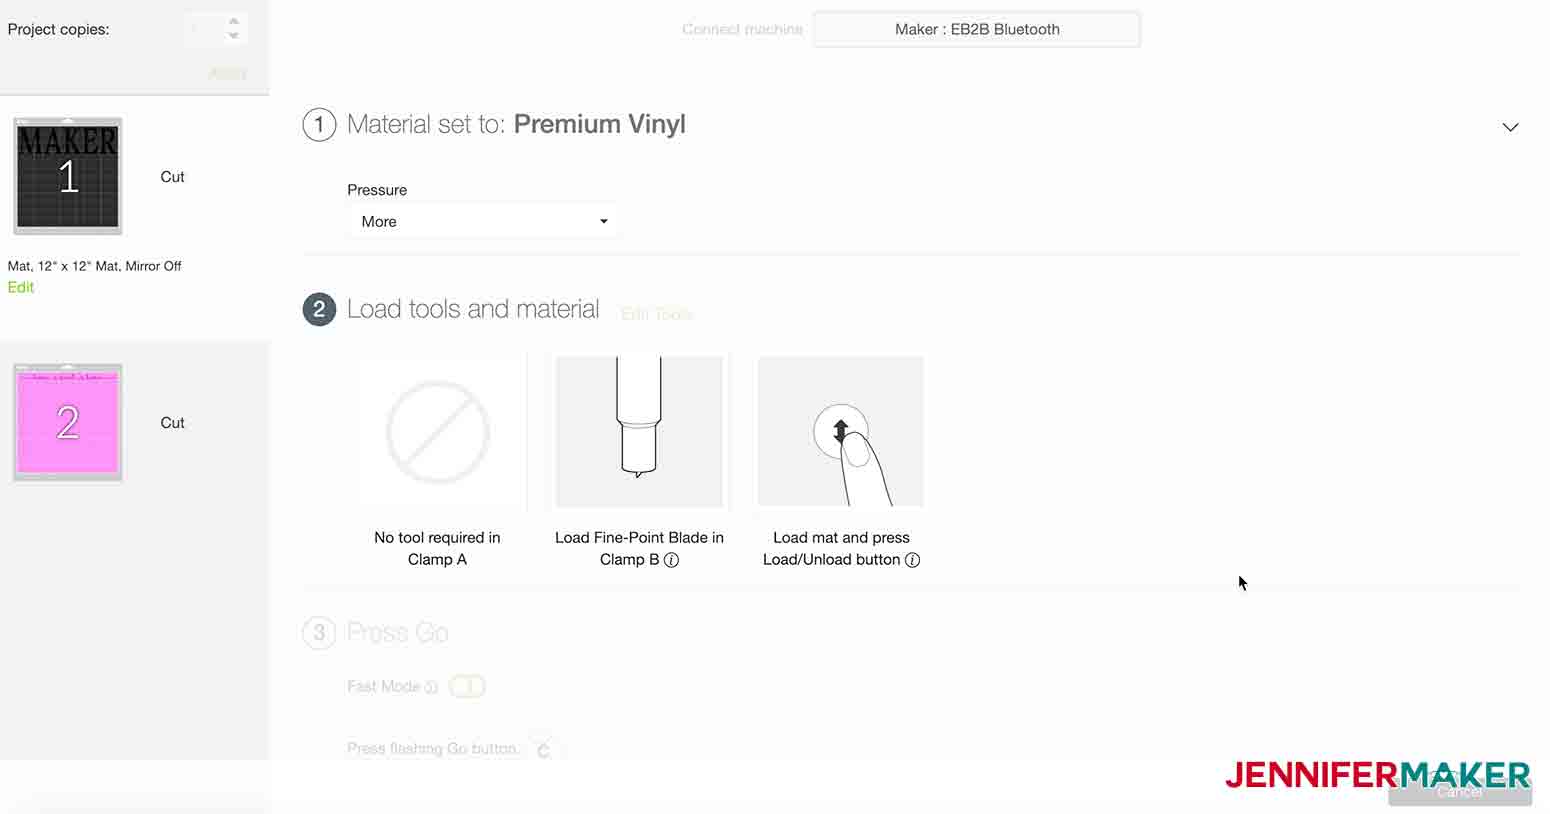
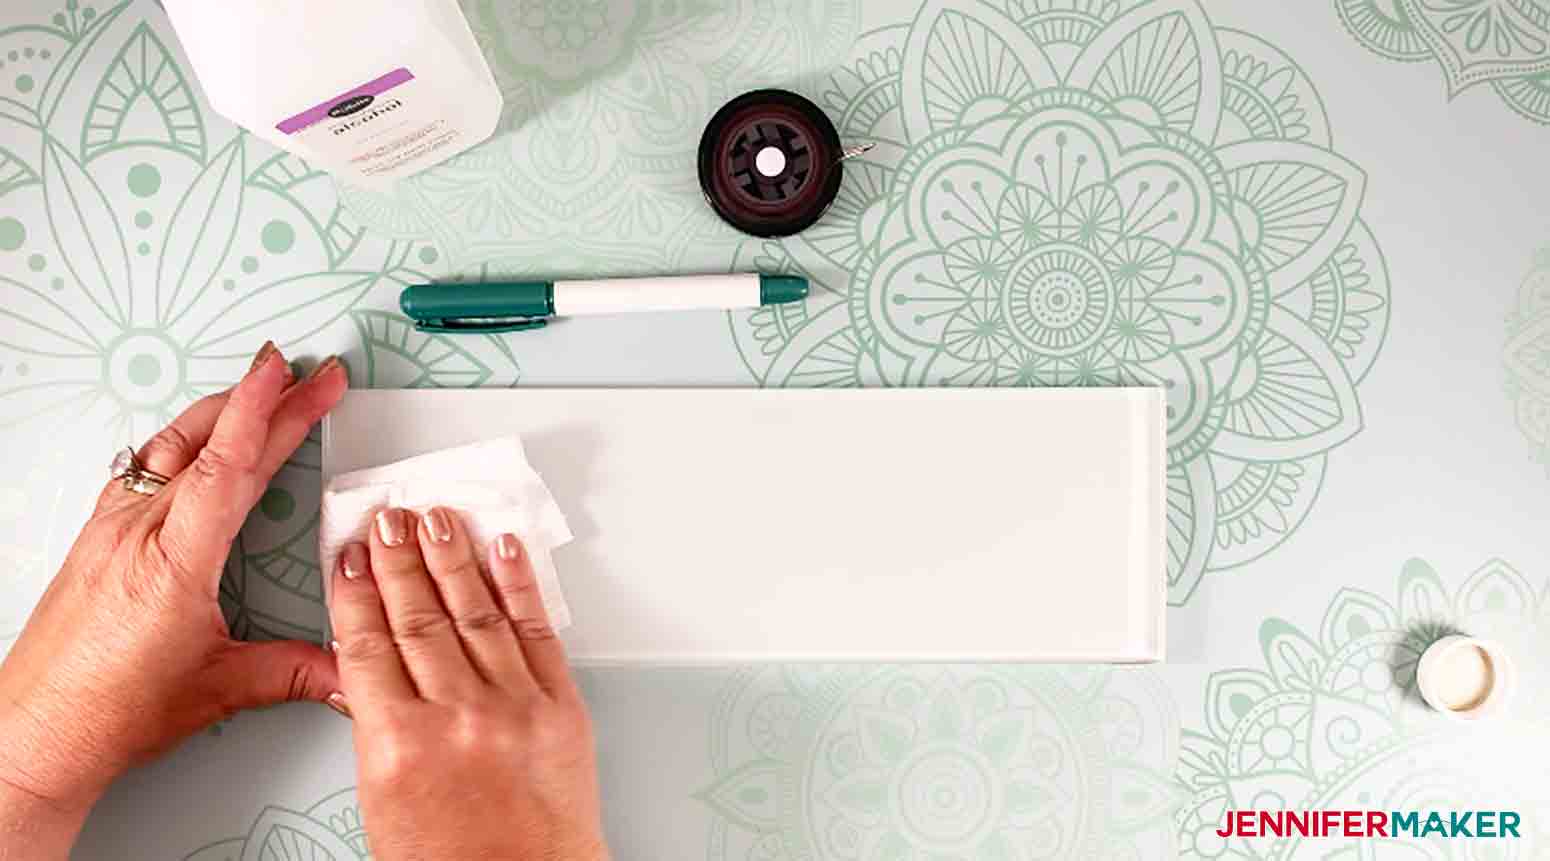
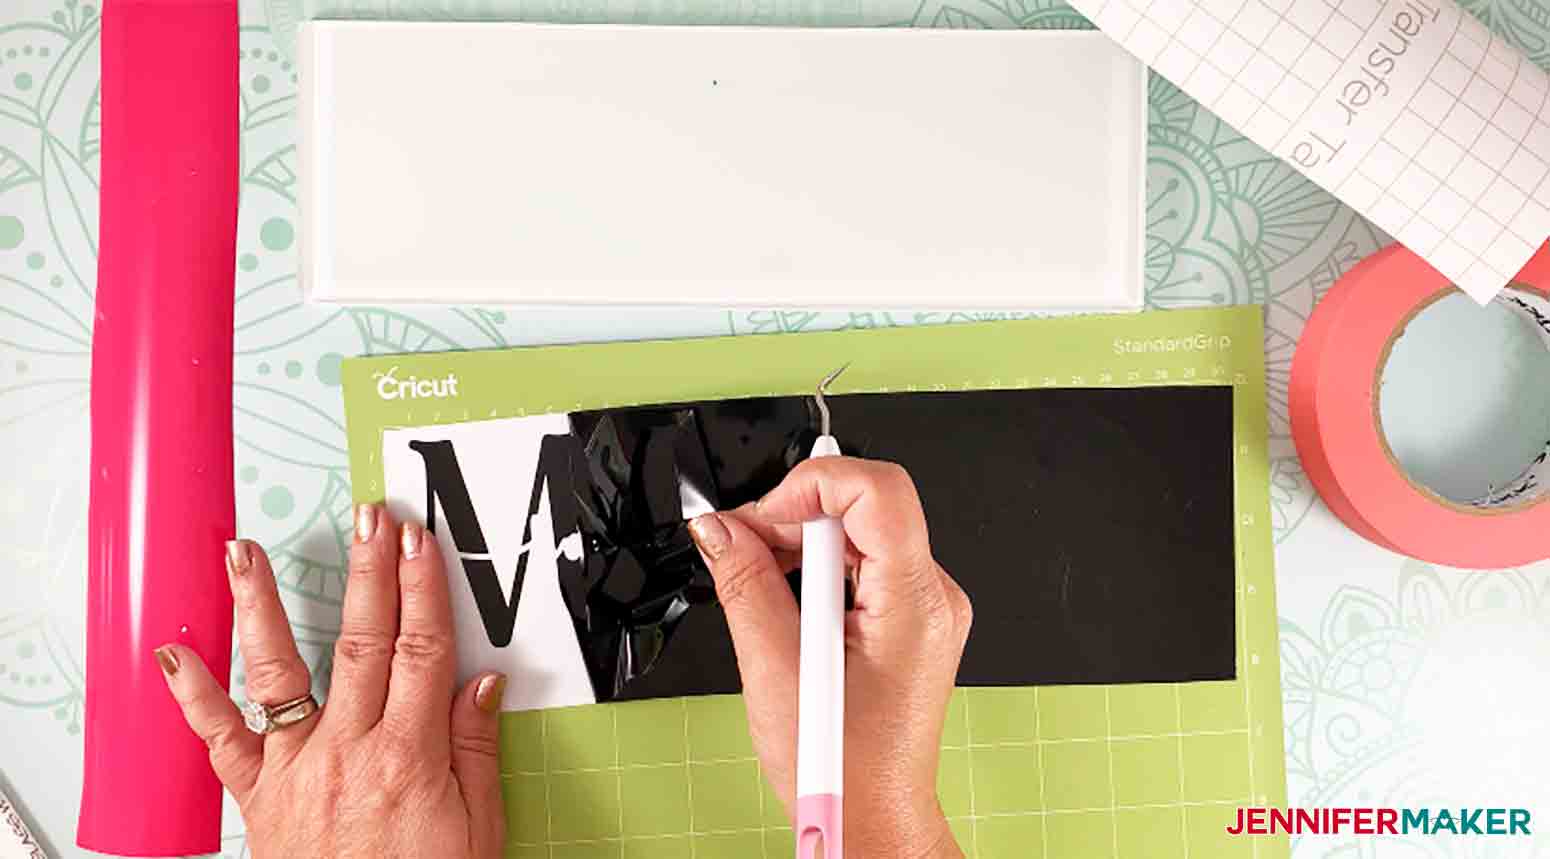
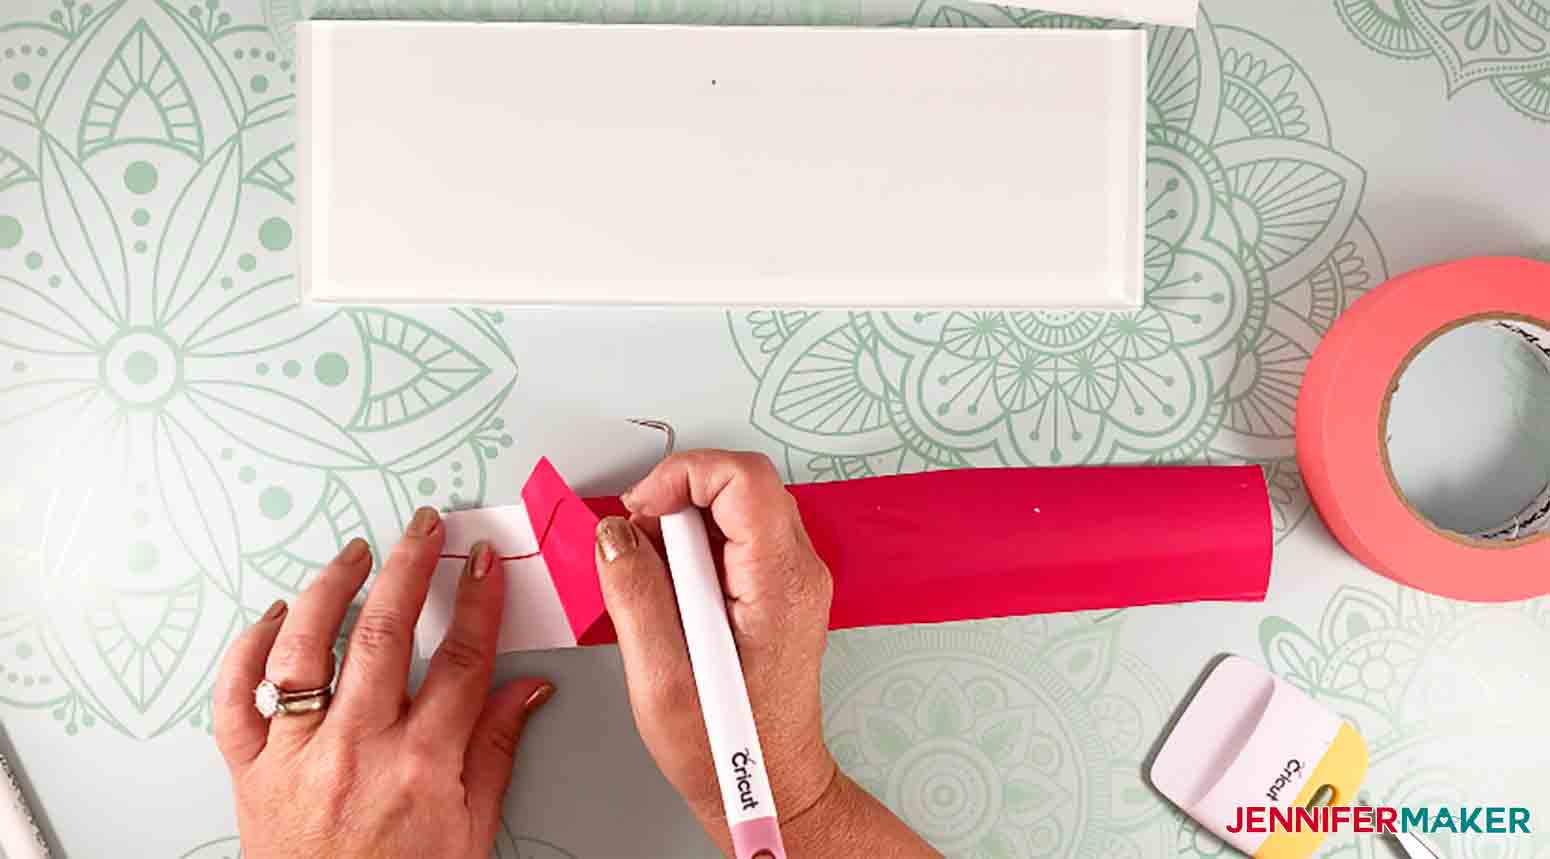
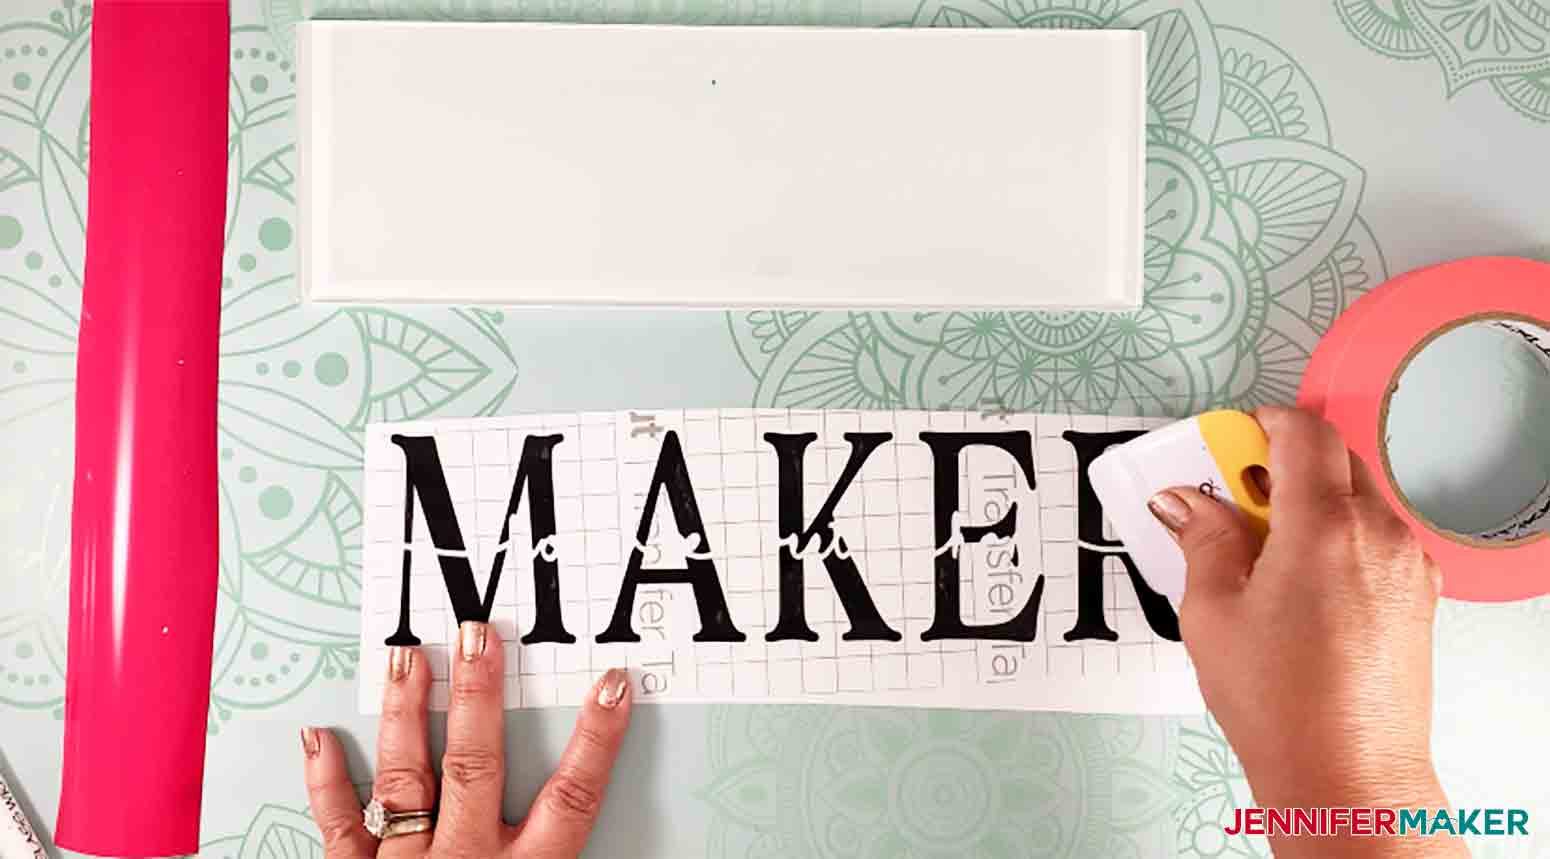
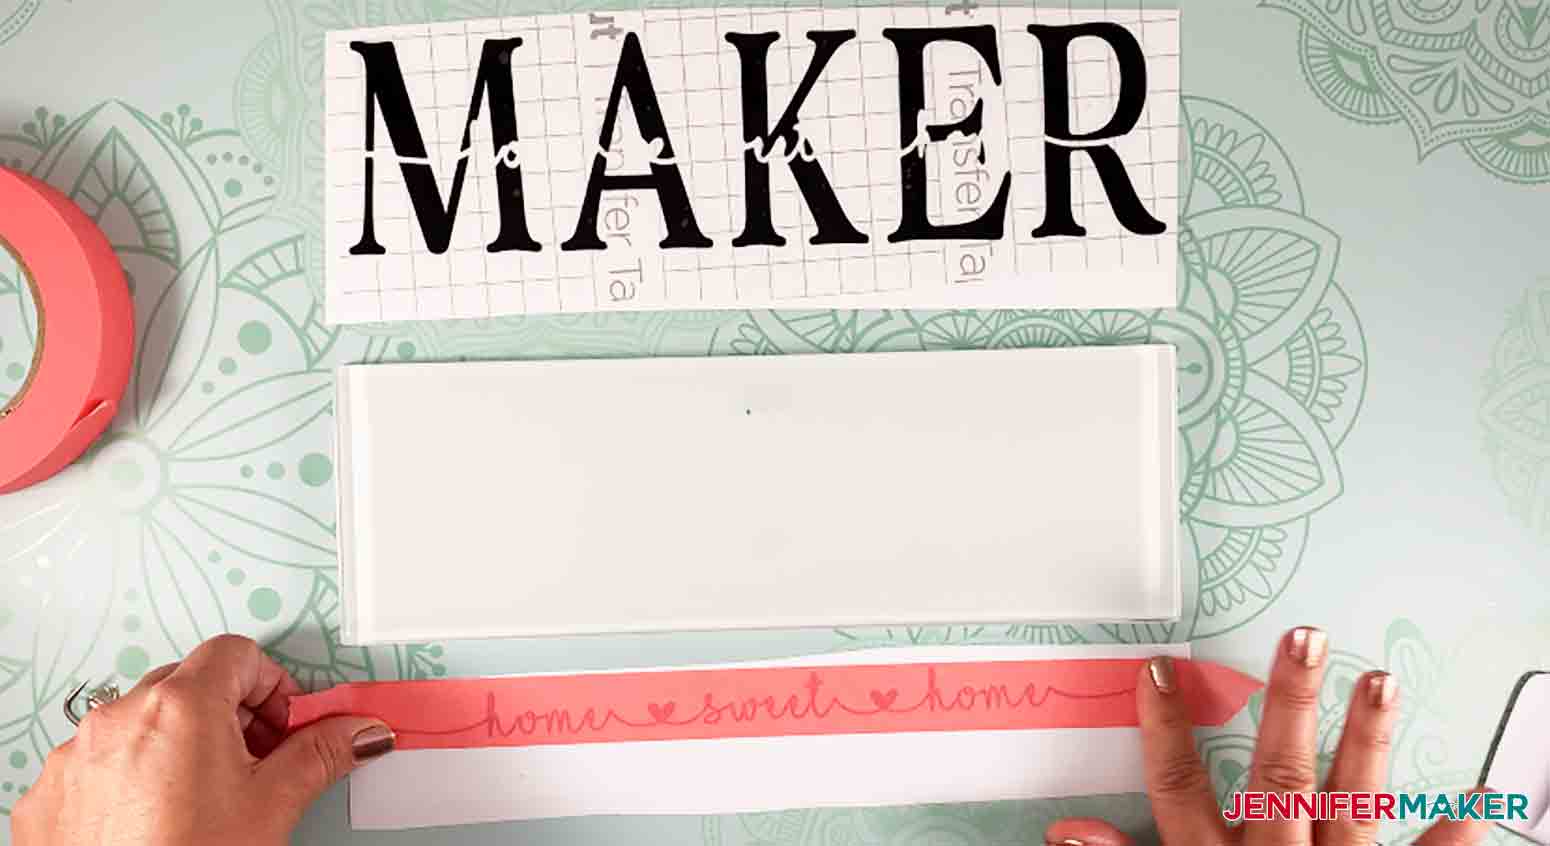
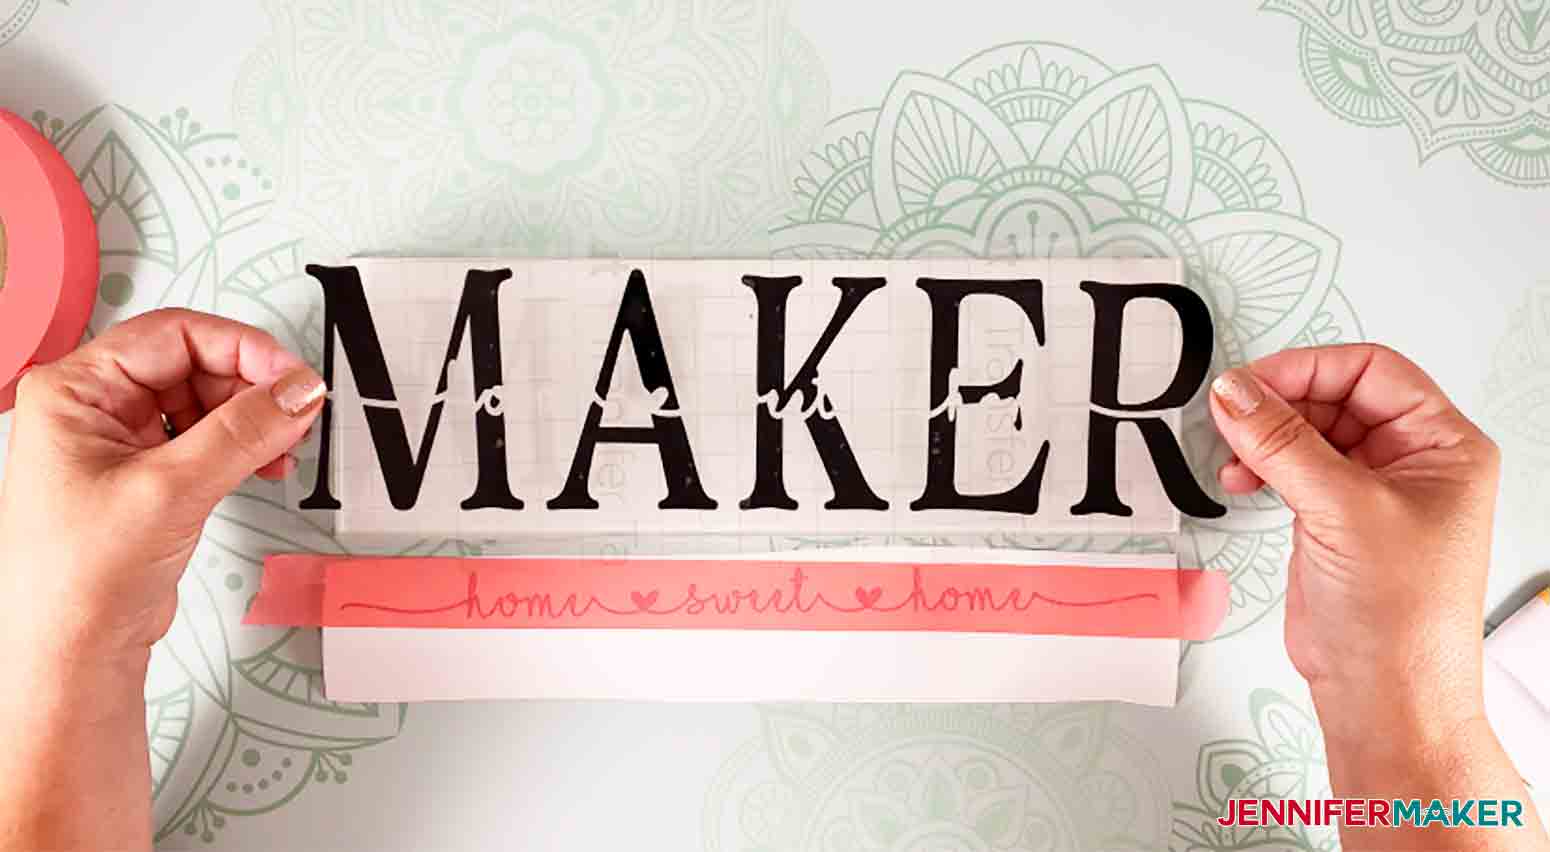
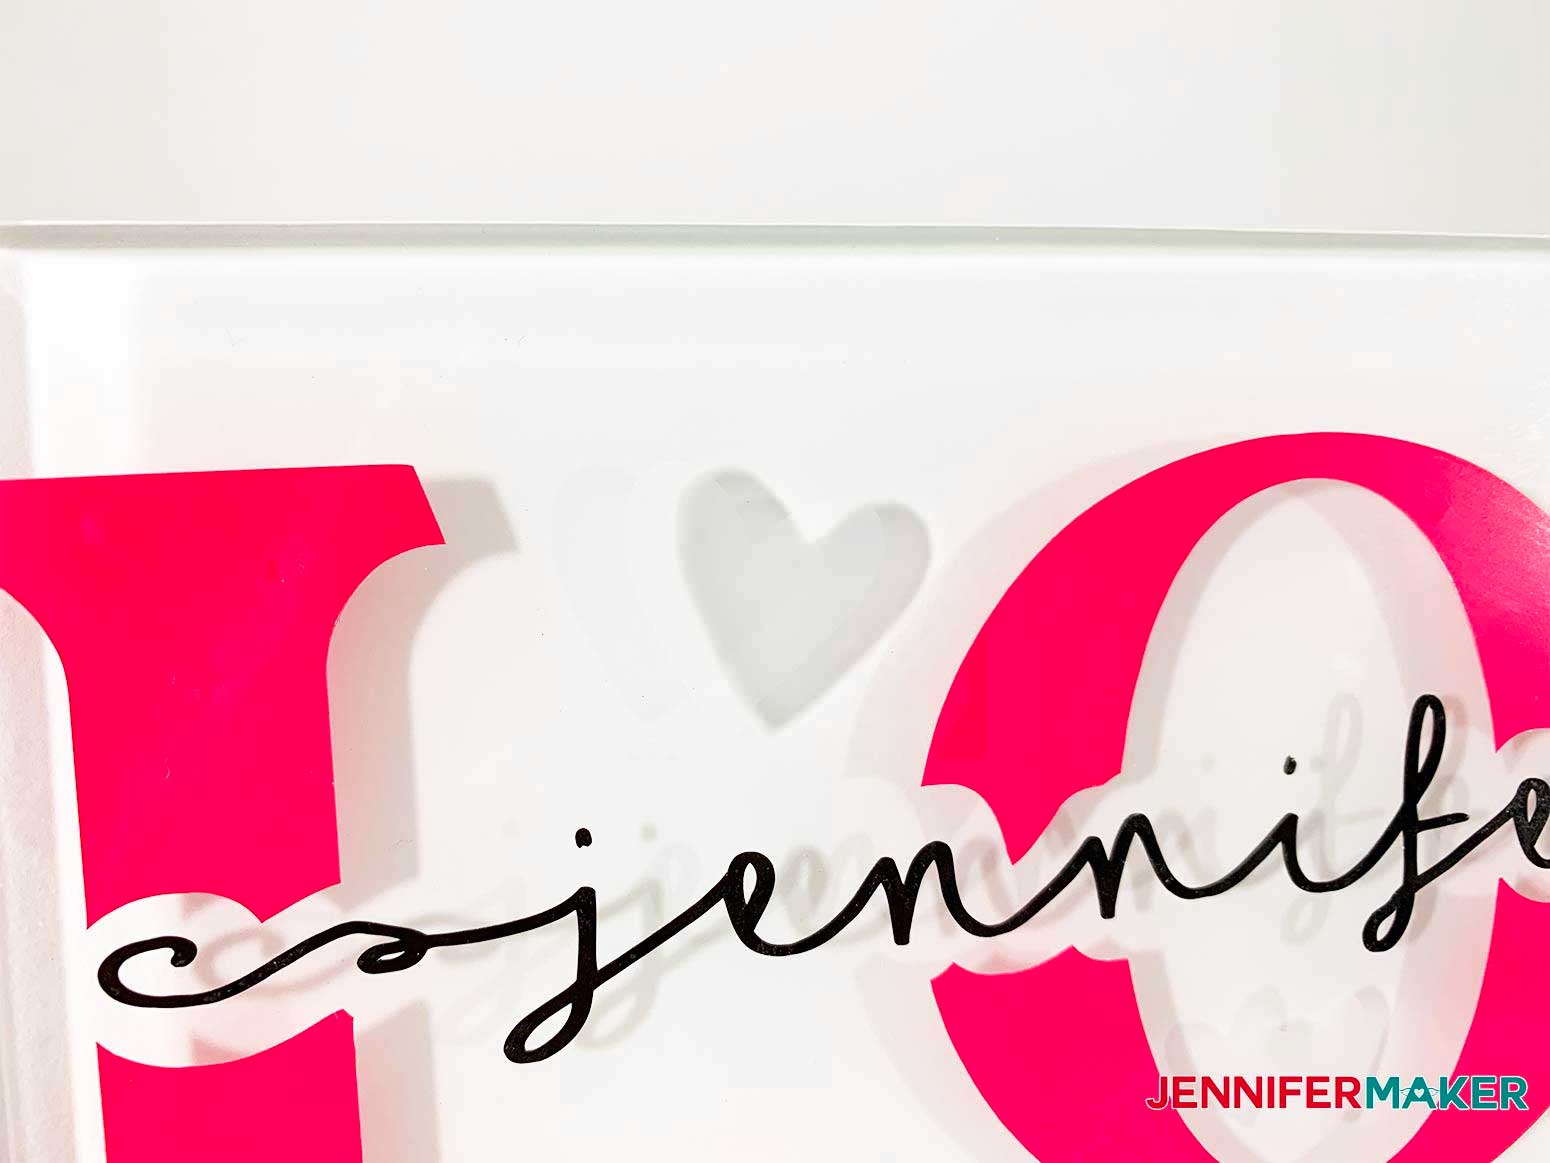
This pretty Glass Subway Tile Sign is a beautiful addition to any home. It also makes a great gift! STEP 1: CREATE YOUR KNOCKOUT DESIGN IN CRICUT DESIGN SPACE To begin, open Cricut Design Space and select "New" on the left to begin a new project. Next, select "Template" Scroll down to select "Basic Canvas". (The icon for it shows a triangle, circle and square.) On the Cricut Design Space Canvas screen, go to the "Size" drop-down option and choose "Custom". Click the unlock button to change the size of the template. Change this and make the template the same dimensions as the tile, sign, or other surfaces you plan to put your knockout design on so you can properly design it! If you are using the same glass tile sign I used, you will make it 12" x 4". If you use a different surface, match the tile size or whatever size you are using. Select "Color" and pick a color close to the color of your tile. This will allow you to see the text overlays better. Keep in mind this is simply a template and will not show up as part of your project when you are ready to cut. Select the Text tool. Type your MAIN WORD, I used my last name "Maker", but you can use whatever word you like: MOM, DAD, GRANDMA and select your font, I used AdornS Serif. TIP: If you’re not sure how to install fonts, please check out my Font Installation tutorial and video! Resize your large word to fit the tile. Keep the width at 11.5"(or even 11"—you need space on the sides of your sign) if you're using a 12" x 12" cutting mat. Hit the unlock button if you'd like to make your word bigger to fill up the entire space. Add a new text layer for your ACCENT WORDS. I used the font "I Love Glitter." I chose "home sweet home" for my accent words. Adjust Letter Space until your words look good while keeping the letters quite close together so they touch. I added special characters to my accent words, a squiggly line at the beginning and end, and some hearts between the words. You can do this by opening up the Character Map on a Windows computer or Font Book on a Mac. Copy and paste the special characters. Choose a color for your accent words. Resize your accent words so they are about the same length, or even a touch longer, than your big, bold word. Note: If your letters aren’t kerning properly, go ahead and click Advanced > Ungroup to Letters. Click weld when you’re happy with the placement of your letters. Once you have your elements the way you want them, it’s time to knock things out! I have a VIDEO that shows you how to do what I am about to explain in this tutorial, if you would prefer to watch it! Make sure both of the text layers are aligned vertically and horizontally. Duplicate your accent word and move it below your main design. (You'll see why we do this in a moment.) Duplicate this again. We will use this duplicate or "base accent layer" to create space around the accent words for the "knockout". Duplicate the accent text layer a few times. (I believe I did it about 6 times). Offset each duplicate text layer from the base accent layer in all directions ever-so-slightly. Select all of the accent words (base accent layer and duplicates) that are now layered over the top of the main word and hit "Weld" (be careful not to select the first duplicate we made and moved below the design, you will need this next.) Move this welded layer back on top of your main bold text. Here's how it should look. Now select your main word and the welded accent words and hit "Slice." Remove all the bits that were cut out and delete them. Now take the accent words we moved in the beginning and place them in the blank space on your main word. (You will probably have to hit "Arrange" and "Send to Front" so your accent word is on top.) TIP: If you would like more empty space around your accent word you can repeat the steps above until it's just the way you like. STEP 2: CUT OUT YOUR DESIGN Once you are happy with how things look it's time to hit "Make It". On the next screen, you should see two mats with your design. If everything looks right, select "Continue". Here you will be prompted to choose your material, select "Premium Vinyl". Make sure you have the right tools in your machine and you should be ready to load your mat into the Cricut and cut out your design. STEP 3: WEED YOUR DESIGN AND APPLY TRANSFER TAPE First, clean the Glass Subway Tile with rubbing alcohol to get rid of any dust and so you have a clean surface to place your vinyl. Weed your vinyl with the weeding tool and apply transfer tape. I used StandardGrip transfer tape for my main word and used the scraper to burnish the front and the back Then I used painter's tape for the accent words. STEP 4: APPLY YOUR DESIGN TO YOUR GLASS SUBWAY TILE Before applying your words to the tile, use a measuring tape or a ruler to locate the center of the glass. This helps to make sure your design is lined up properly. I used a glass pen marker to mark the center point (you can wipe this off after applying the vinyl). Now, very carefully apply your MAIN WORD to the tile. Repeat with your accent word, making sure to get it right where you want it. The beauty of the painter's tape is it's not too sticky, so you can adjust it as needed to get it just where you want it. Now pull off the painter's tape and you're DONE! STEP 5: SHOW IT OFF! So pretty, right? I made a few different versions because I just love these so much! I even etched some hearts on this one. Here's a closer look. Read this tutorial to learn how to etch glass using vinyl decals. These would definitely make wonderful gifts. Now you have a beautiful accent piece for your home or a thoughtful gift for anyone you choose. They will love it! Prefer to make smoother knockouts? You can! Check out my tutorial to make Knockout Designs in Inkscape and Adobe Illustrator. There are step-by-step tutorials and a video. Special thanks to the JenniferMaker Design Fairy Team, specifically Design Fairy Debbie, for helping me design this Glass Subway Tile Knockout Sign. FONTS USED IN THIS PROJECT: As an Amazon Associate and member of other affiliate programs, I earn from qualifying purchases.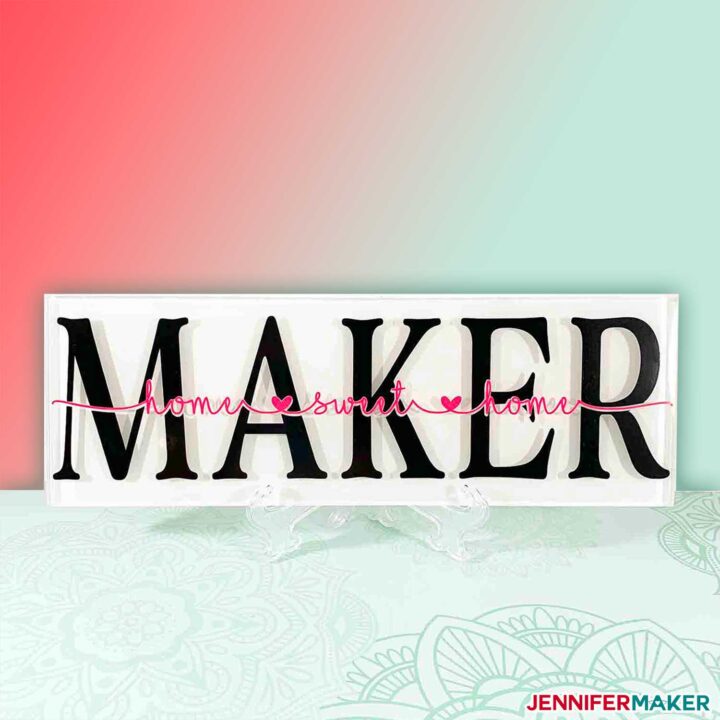
Glass Subway Tile Knockout Sign
Materials
Tools
Instructions


 Now you can manually adjust the spacing between the letters.
 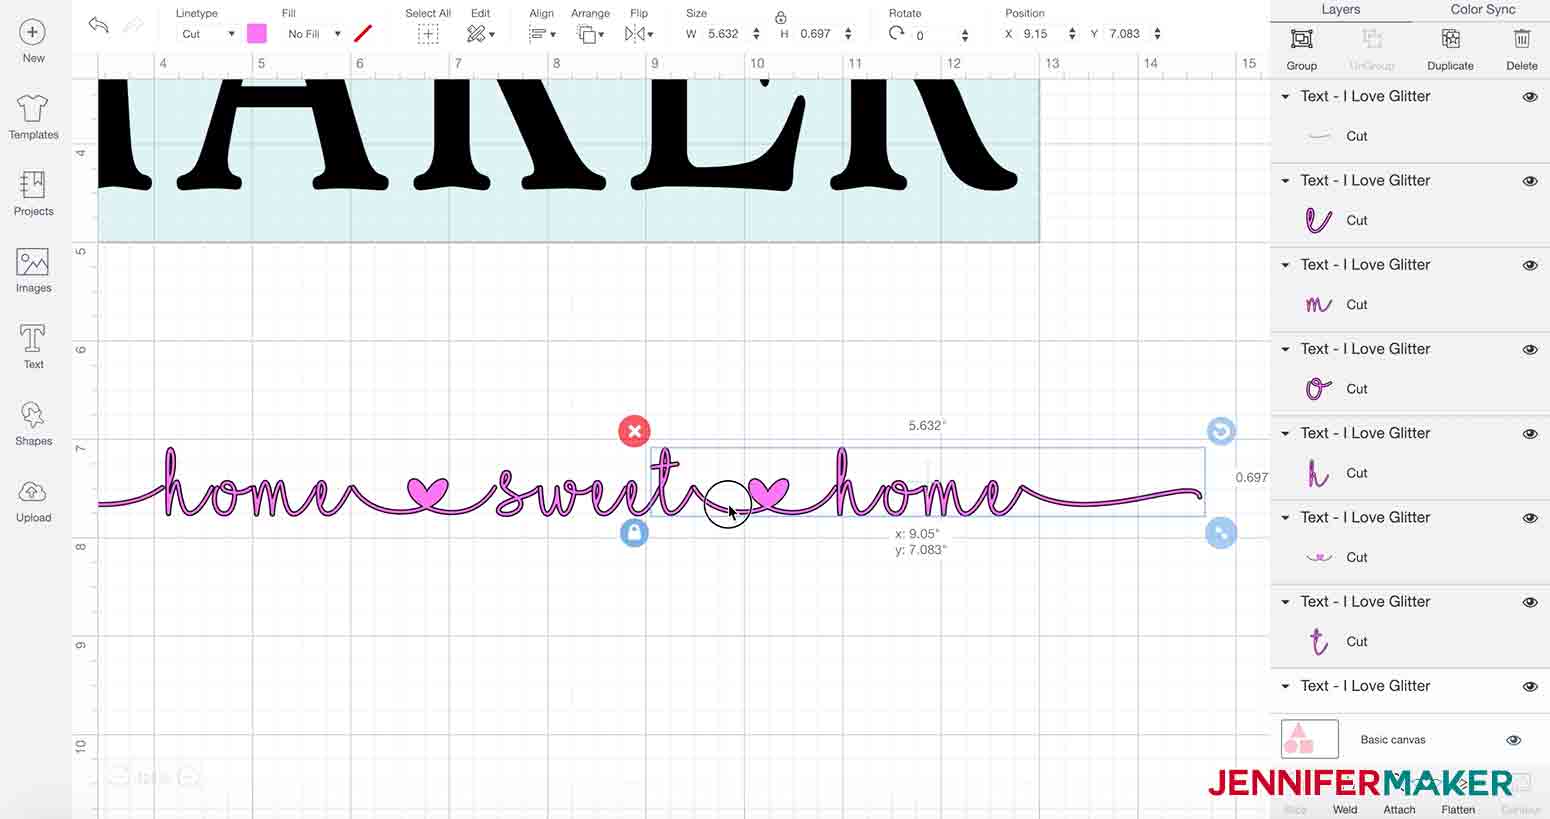 Here's what my design looks like with the letters placed correctly.
 I found it worked much better for the "I Love Glitter" font because the painter's tape is not as sticky as the regular transfer tape and it was so much easier to peel it off the smaller letters.
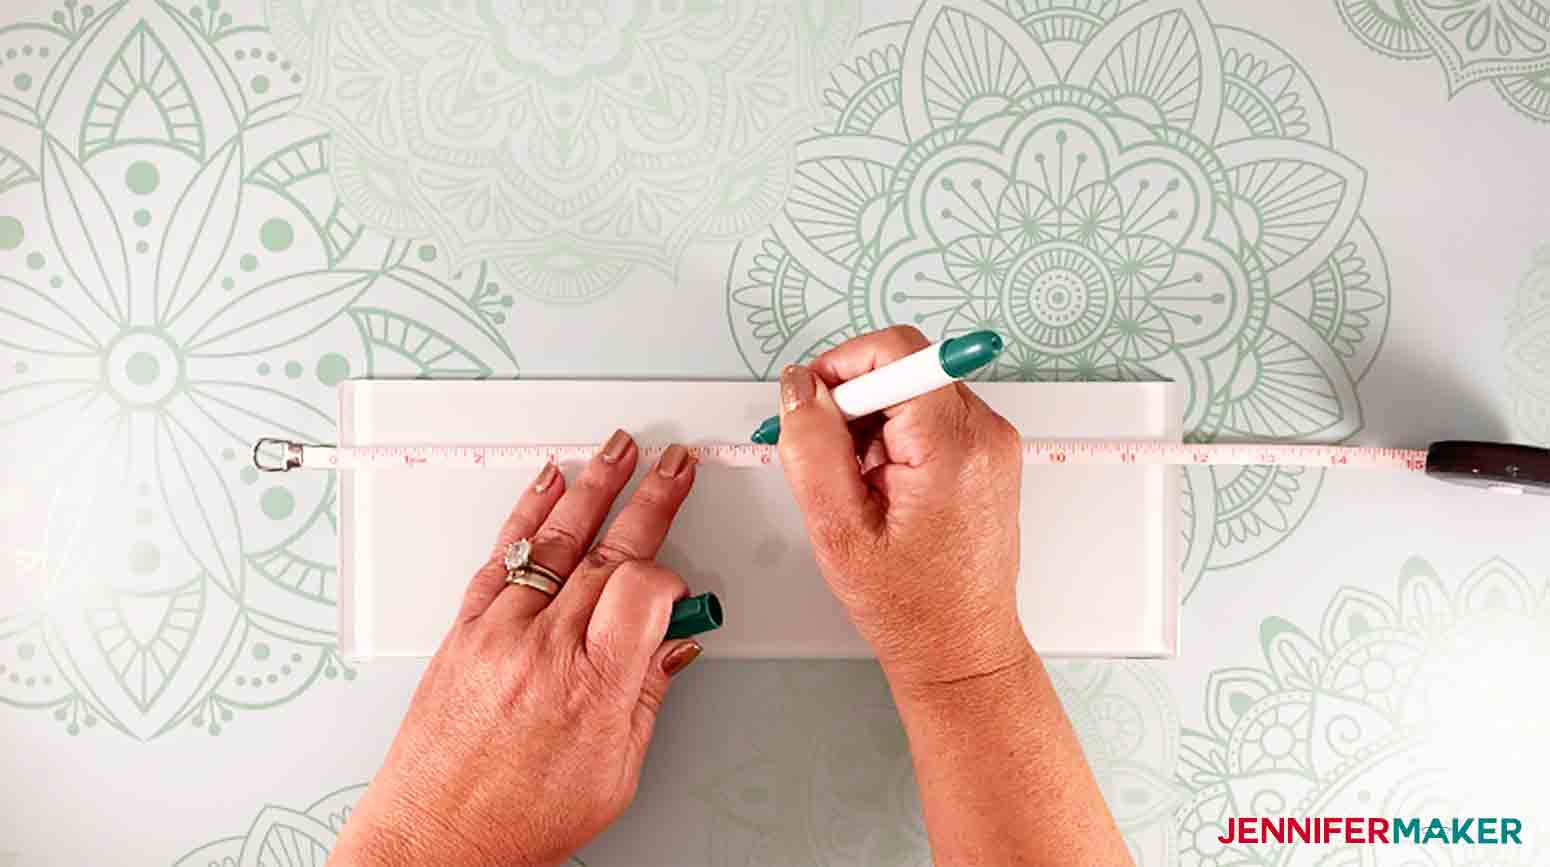
 Take your time and make sure it's right where you want it because. Start from the center and go SLOW, making sure to smooth out all the edges to prevent bubbles in the vinyl. Then carefully pull off the transfer tape.
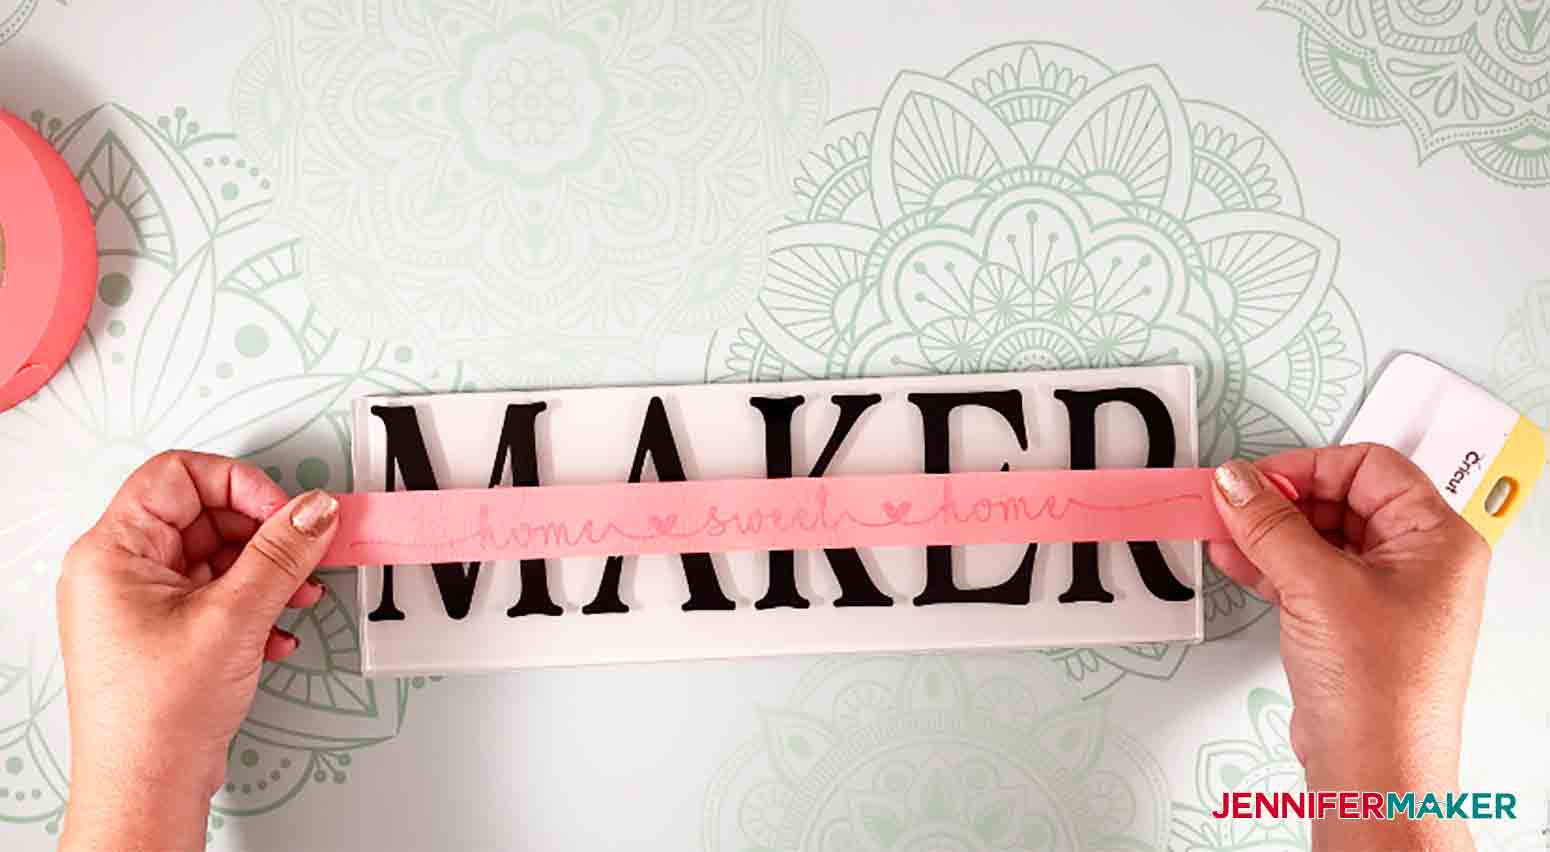

Notes
ACKNOWLEDGMENTS
Recommended Products

Get my free SVG files for all of my designs
This Glass Subway Tile Sign does not have a design file; however, you can get free access to all of my other design files by signing up using the form below.
I’d love to see your pretty glass signs, with or without knockouts. Please share a photo in our Facebook group or tag me on social media with #jennifermaker.
Love,

Want to remember this? Save this Easy Glass Subway Sign tutorial to your favorite Pinterest Board!


Thank you so much for this detailed tutorial!! Your site is a wealth of knowledge and I enjoy learning your easy techniques. This project is beautiful and so easy to follow. I create custom t-shirts and more items because of you! Thank you!!
Thank you for sharing these wonderful projects. Always inspiring! I am trying to figure out the font for the Mom Subway Glass sign. It is different than the one used on the Maker sign. Please share the name of the font? Thank you!
The font is “I Love Glitter” and you can find it here on DaFont.
Wonderful tutorial!! Thank goodness for the new offset feature in Design Space. Love this beautiful design and it’ll be perfect for a Mother’s Day gift. Thank you very much for the fabulous idea.