
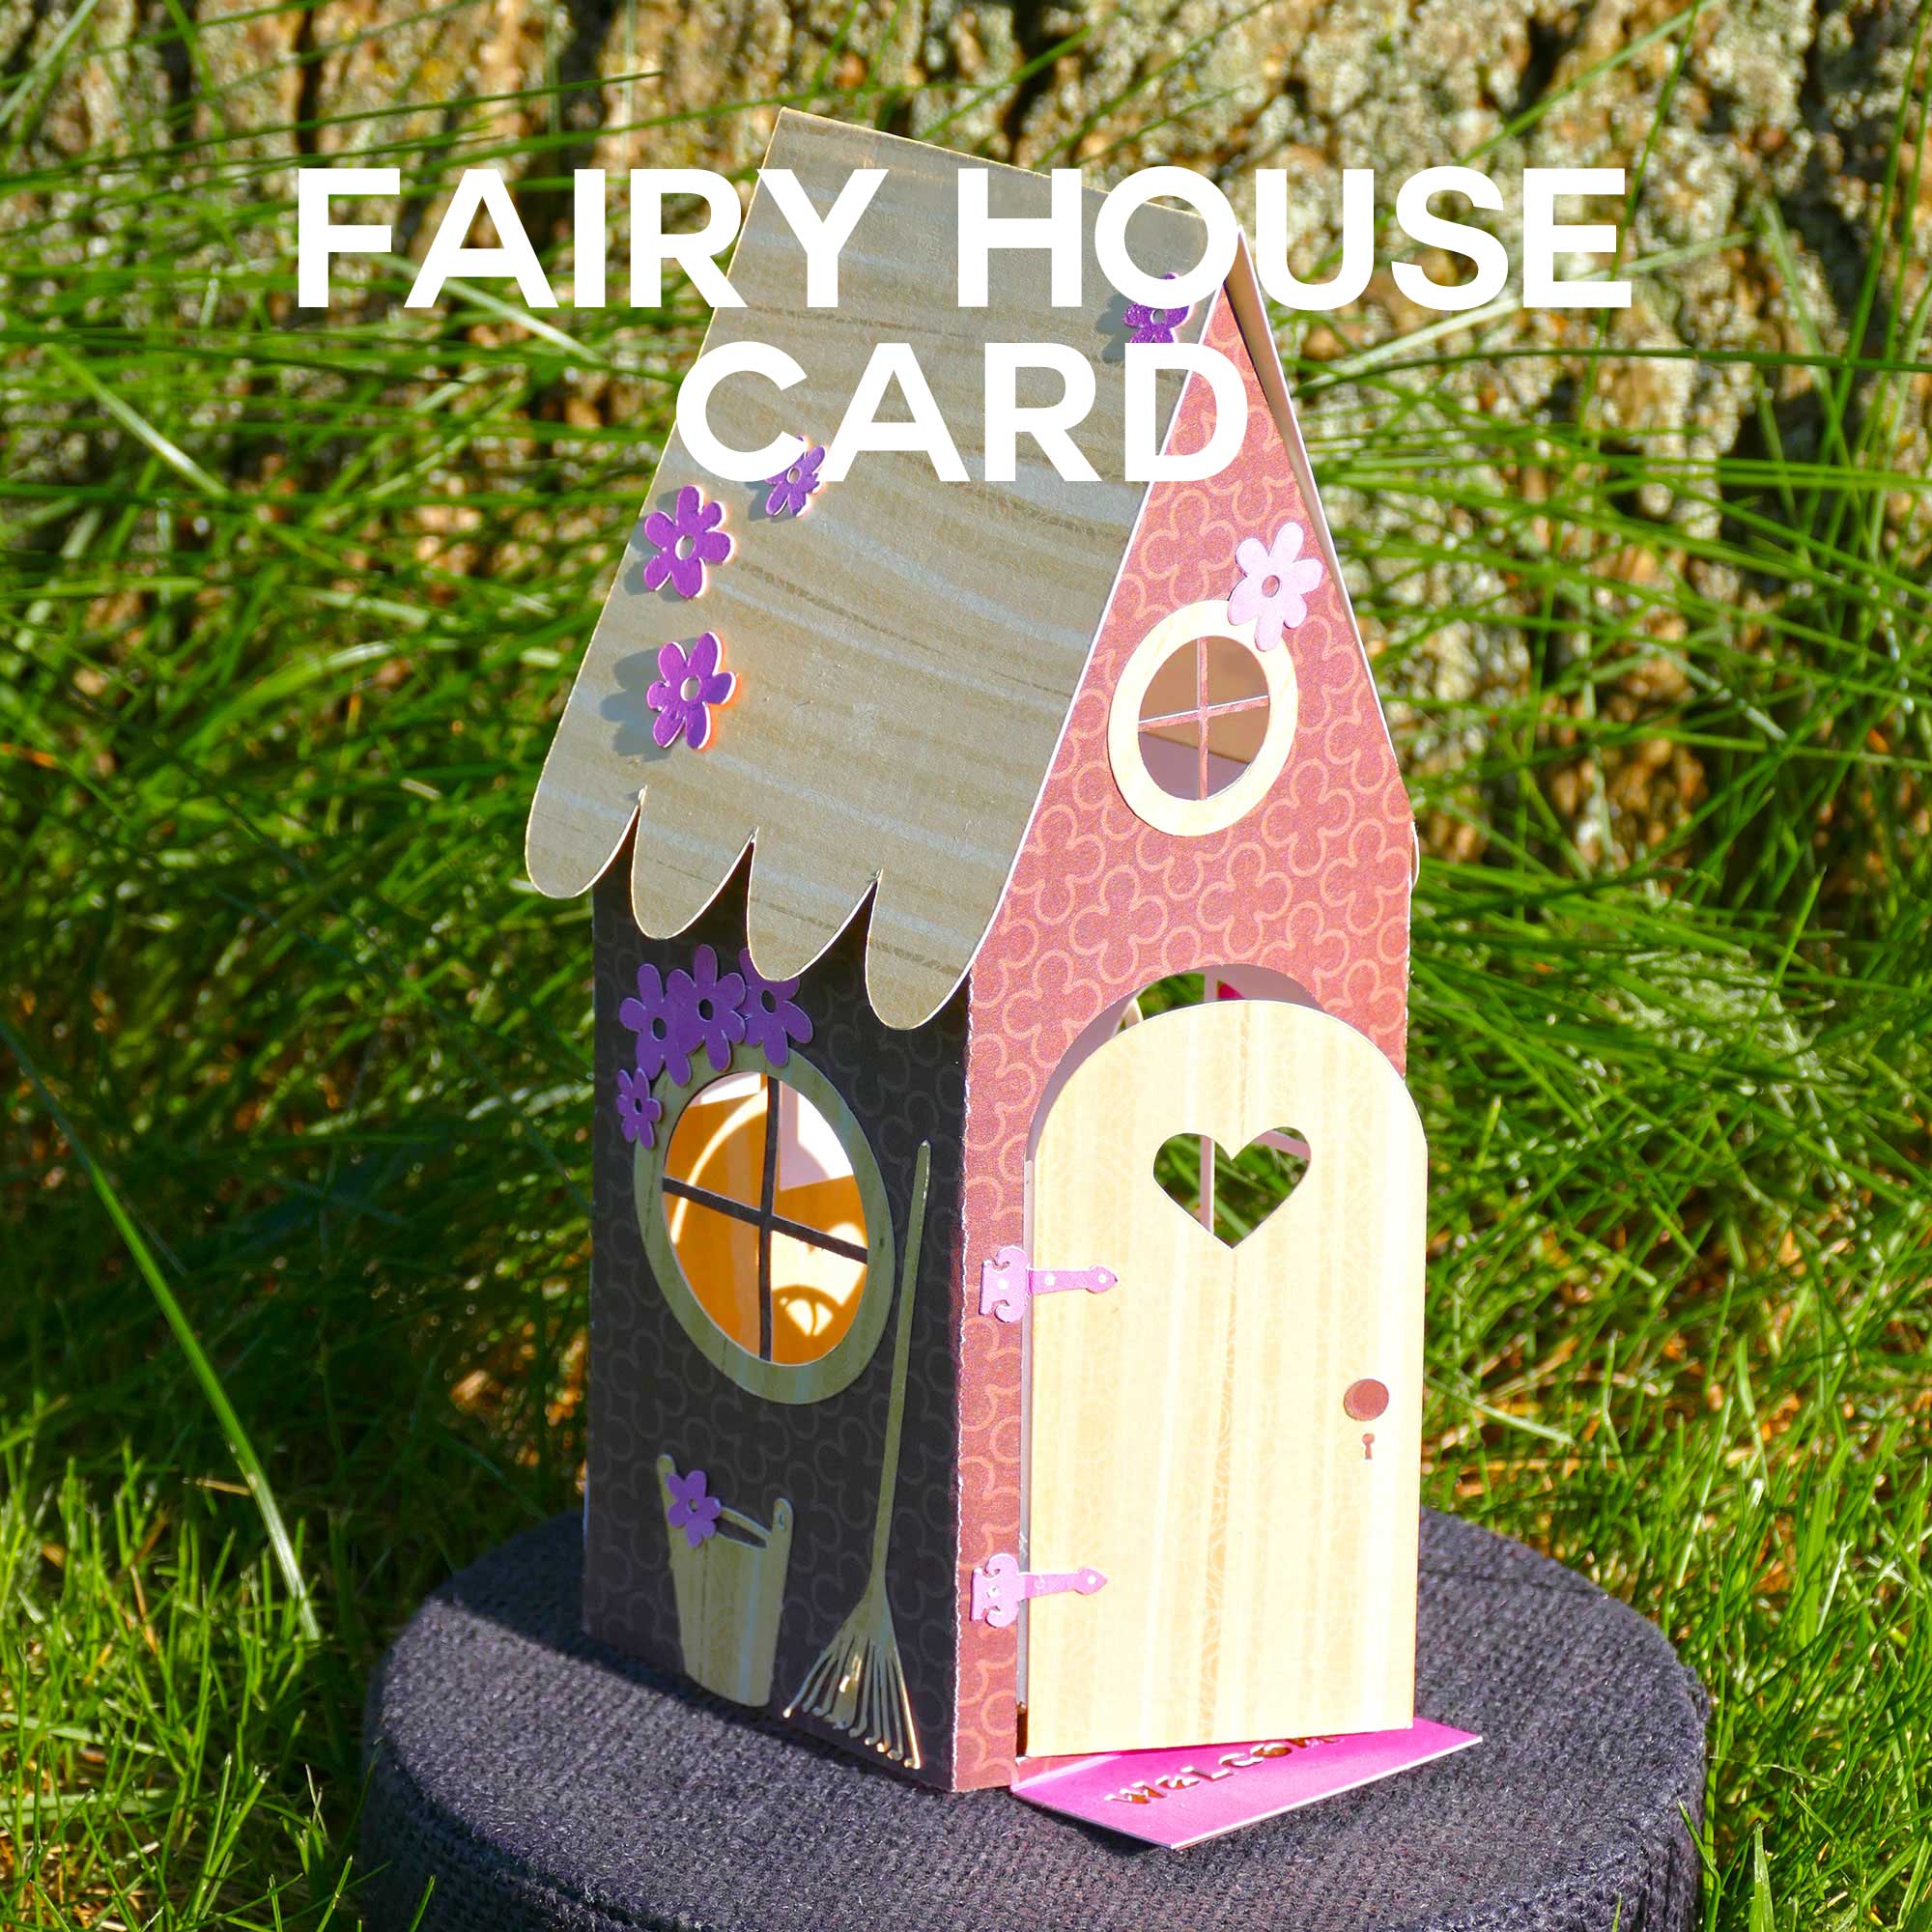
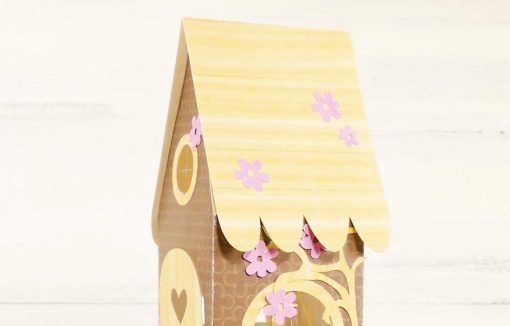
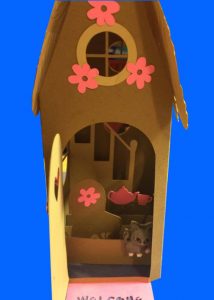
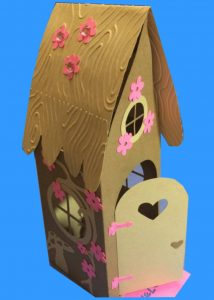
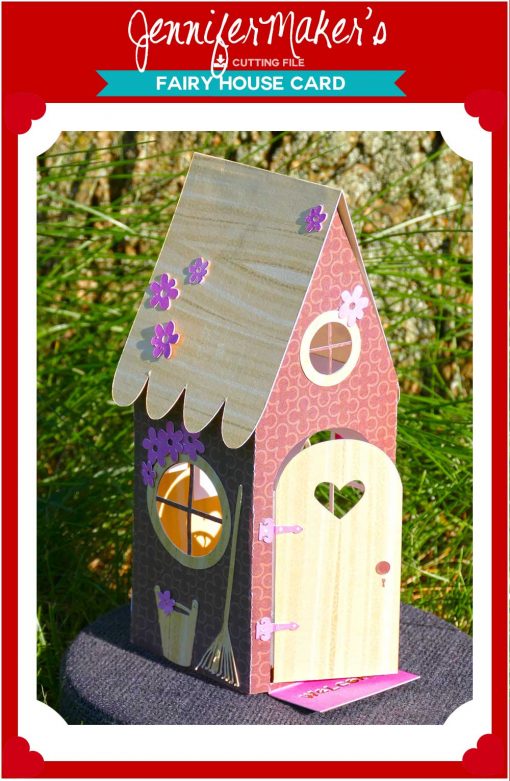
Spring is in full swing here in Ann Arbor and summer is just around the corner. To celebrate, I’ve designed a Fairy House Card. We Ann Arborites love our fairy doors and houses! Send this card to a loved one or keep it for yourself! The card folds flat so you can slip it right into a 5″ x 7″ envelope, then pops open to reveal the sweetest little fairy house! Open the little door to see inside. There’re so many details on the card—there’s even a mouse hiding somewhere. The cut files to make this card are free here on my blog, so let me show you how to assemble it.
Here’s a peek into the paper Fairy House!
Some of the links below are Amazon affiliate links for your convenience. Read my full disclosure policy.
Fairy House Card Materials
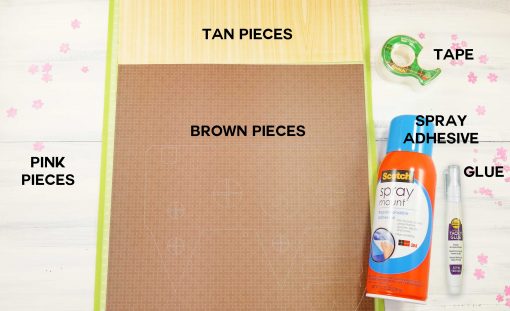
- 12″ x 12″ Brown cardstock (I used a patterned brown card stock from the White Ginger Stack)
- 12″ x 12″Tan cardstock (I used a woodgrain card stock from the White Ginger Stack)
- 12″ x 12″Pink cardstock (I used a pink card stock from the DIY Project Stack Flowers)
(NOTE: These cardstocks are no longer available, but you can find excellent substitutes for all in this Country Floral Stack!) - Spray adhesive (I used 3M Spray Mount)
- Tape (I used Scotch Magic Tape)
- Glue (I used Aleene’s Tacky Glue in a pen)
- Design #30 – Cut files (available free in my Resource Library — get the password to this free library by filling out the form at the bottom of this post)
- A way to cut out your pieces (I used a Cricut Explore Air 2, but you could also use a Silhouette Cameo or other machine that uses SVG files)
How to Assemble Your Fairy House Card
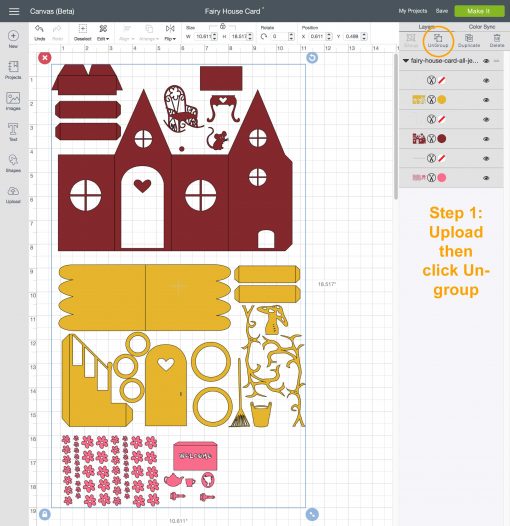
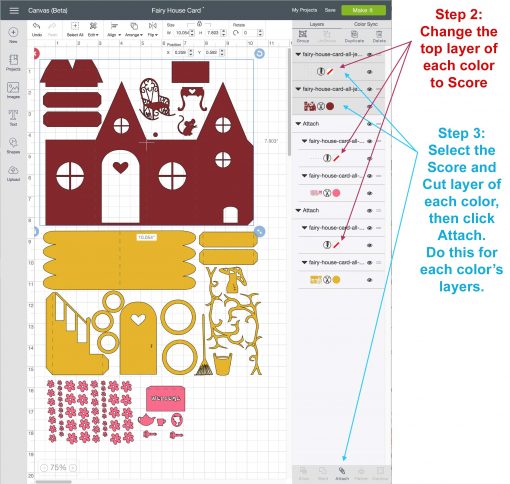
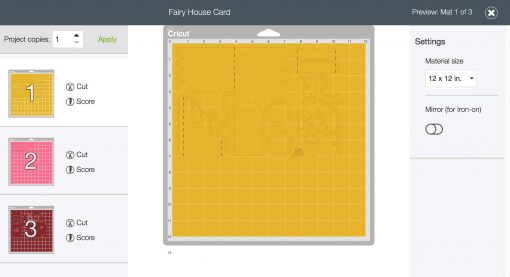
First, cut out all your pieces on the appropriate card stock. To do this, upload to your software (I am using Cricut Design Space), ungroup all layers, change the top layer of each color to Score, then select all that color’s layers (both Score and Cut), and click Attach. Here’s what that looks like:
Step 1: Upload and Ungroup (orange circle).
Step 2: Change the top layer of each color to Score.
Step 3: Select the Score and Cut layers of each color, then click Attach.
This is what you should see after you click the Make It button.
Next, watch the assembly video from start to finish to see how I put the card together. I am also providing text steps below for those who cannot (or do not want to) watch the video.
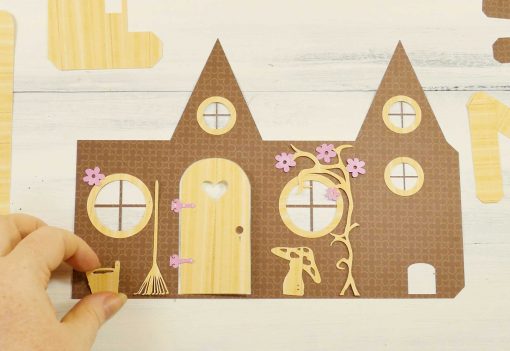
Once your pieces are cut, decorate the front of the house as you see fit. The circles go around the windows. The little accessories can go wherever they fit. Just be careful not to cover any of the score lines. I used Spray Mount to get the small pieces to adhere cleanly to the front of the house. If you plan to put anything on the walls inside the house, do that now, too.
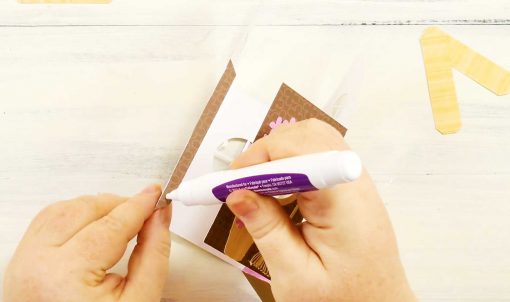
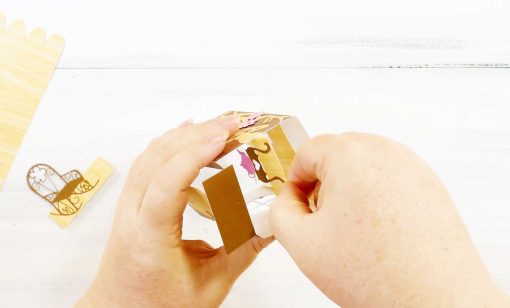
Carefully fold the house along the score lines.

Put glue on the narrow tab that sticks off the back of the house and attach the left side of the house over it. Fold it flat and allow it to dry flattened. This ensures the card will fold flat and not buckle later.
Fold the tabs on the staircase piece, put glue on the tabs, and place in the house from the bottom. In my Fairy House, I put the staircase as far back in the house as it could go, but you can choose to put it anywhere. The important thing is to make sure the staircase is parallel to the front door and the tabs are glued on straight across from one another—this ensures the card can fold flat without a problem.
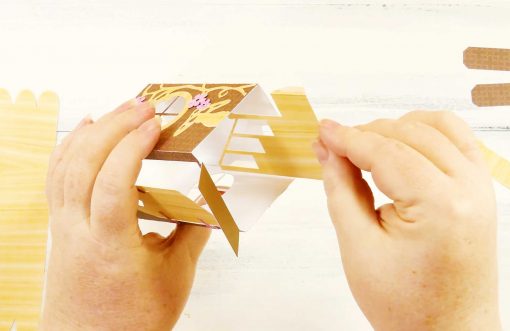
Tip: If you’re going to hide the mouse in his little hole on the back of the card, glue him to the backside of the staircase so he’s visible when looking through the mouse hole.
Glue any furniture, accessories, or notes you like to the rectangular pieces. Fold back the tabs on the rectangular pieces, then slide them into the house from the bottom as you did the staircase. I recommend you allow some space between each piece for a more three-dimensional look.
Fold the roof hinge so each tab goes in the opposite direction from the others.
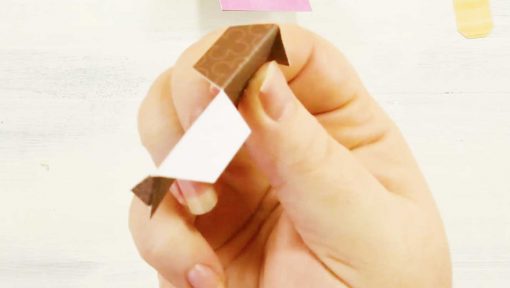
Put glue on the small triangle pieces of the hinge and secure to the peaks of the house roof. The triangle pieces go on the backside of the roof peaks.
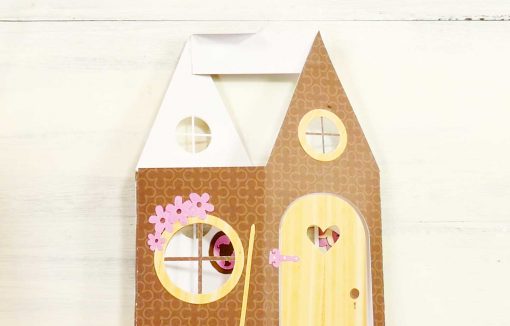
Put any flowers or decorations you like on the roof, then fold in half along the score line. Make sure the roof is very well folded—I run my fingernail along the edge to really set that crease.
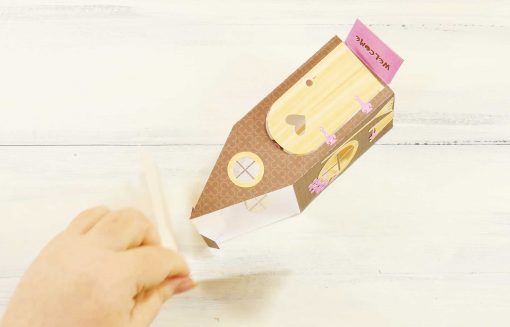
Glue the two tabs on the roof hinge, then set the roof on the tabs. Fold the house flat and press the roof down onto the tabs to set it in place.

And that’s it! You now have a super-cute Fairy House Card!
Ready for the free cut files? They are in my free resource library — get the password to the library by filling out this form:
Get my free SVG cut files for the pop-up Fairy House Card

Subscribe (free!) to my newsletter with updates and tips PLUS get instant access to my resource library with this file and all of my other free files, printables, and patterns! Once subscribed, I will send you a newsletter with details about my new free files each week.
I hope you enjoy making this card! I think it’s fun and not overly difficult, despite all the details. Remember, I love to see your creations — send photos to me at [email protected] and let me know if I can share them on the blog.
Here is the first Fairy House Card made by a reader and supporter, Sue Reeve — I love how she gave the mouse a little door! He needs his privacy, too!
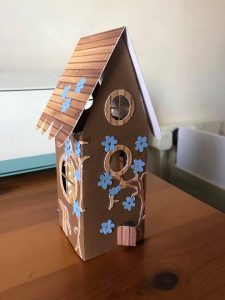
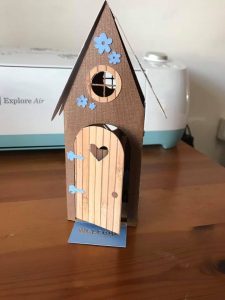
Another lovely Fairy House by reader and supporter Laura Robison — she added a cute cat!
Now, I wouldn’t keep this little paper house outside for much longer than it takes to snap a few photos. But if you’d love to make a fairy garden outside, check out this awesome post on How to Make a Fairy Garden with tips on layouts, plants, supplies, and materials!
Love,

Like this tutorial? Please share it with your friends and pin this post on Pinterest!


Thank you for your generosity and sharing of your creative spirit. I appreciate too not only the free files, but that you are also providing step by step instruction. Thanks too for using Design Space 3, so that others can begin to get used to using it. Love the Fairy House card.
My pleasure, Mary! I enjoy sharing and watching others make my designs. I provide the step-by-step directions because I prefer to read those myself — I’m not really a video person. And yes, I decided I should be using DS3 from now on since that is the platform that we’ll have in the future. Thank you for the comment and the kind words. 🙂
I just love your files. This is going to be made for my Grand girls. So stinkin cute!!! thank you.
Thank you, Kim!
Thank you for this Jennifer, I am going to change it to a tool shed for father’s day card..
Great idea, Paul! I’d love to see a photo of it after you finish. 🙂
this is so adorable! thank you so much for sharing!
Thank you, Patricia!
I love this card ! I’m using design space and I tried to ungroup so I could change colors of different cuts but it didn’t work. Is there a reason I couldn’t ungroup or did I do something wrong?
Thanks
Helen
Hi, Helen! The elements of the Fairy House are in compound paths to make it easier for people to cut out the card, so ungrouping is not possible. In the future, I will see if there is a way to allow ungrouping while still keeping it easy for folks to use. This may not help you, but I did upload each element into it’s own file (and I made an exclusive fairy) for my Patreon supporters. More information on Patreon is at https://www.patreon.com/jennifermaker. No pressure, of course! Just throwing that out there. Here’s what that looks like:
Fantastic Card! You are extremely talented. It is very generous of you to share the design! Making it now.
Thank you so much, Sandy!
Thank you
I love this cute Fairy House, thank you for sharing this wonderful craft! I do not have a Circuit, but would love to make this for my granddaughter, is it possible to cut-out the pieces by hand?
Yes, you can make this by hand with scissors. 🙂
Thank you Jennifer for designing this, just love it, have made it for my friends birthday.
You’re welcome! Happy to hear you like it!
hi Jennifer
You have created such a beautiful art, I love it, I have not a good hand in crafting and designing, but i will try this one.
This fairy house is so cool. My first paper project. Couple of questions if you don’t mind. The tab where you glue the house together I didn’t see a score mark. Did I miss something? Also there is 4 (2 of different colors) that you attach furniture to. (Is that for an option or do they go somewhere?) Also the square above the table. The picture of the lady looks like 2 different colors. Sorry so many questions but I am new to the papercrafts so I may not be reading patterns correct or missing something somewhere. Your site is really neat. Never thought I would get into something like this. Usually it was vinyl and HTV. But these are so neat. Love that you have a video. I started and stopped a lot. lol Can’t wait to try another project. It’s so neat when your done and it actually make you smile that the project was completed.
I’m a little late in this game but i love it. Jennifer, your projects and crafts are so much fun to do. Your instructions are clear, i love this fairy house card. My first attempt was not great (my roof just wasn’t the right size) any way I know i’ll get it right. Thank You!
Happy to hear this, Jacquelyn!
Hi Jennifer, I love this little fairy house card, but I went to cut it and it cut where the score lines should be. So I went to the site and has instructions for Cricut but I don’t have one. I am using another cutter. How do I get score lines instead of cut lines???
Absolutely LOVE your teachings Jennifer thank you so much. So looking forward to your SVG course. Please save a spot for me ??❤
do you spray the entire brown piece to put on the small pieces or do you spray the small pieces?
This is really a personal preference. I prefer to use the spray adhesive on the smaller pieces to attach to the larger pieces.
Hi Jennifer! I just bought a cricut joy. I don’t have it yet, but, would I be able to use this file with it?
Hi Isabel! Absolutely, you will just need to resize it down to fit in the machine.
Hi Jennifer I love this card an plan to make it for a little friend who I know will love it’s magic and all the surprises within. I’m wondering what the finished size of the card is so that I can organise an envelope. I actually think this would be a useful bit of info to add to the info about the card in your library. Thanks for all your designs
Hi Kate! The card will take a A7 (5″x7″) envelope.