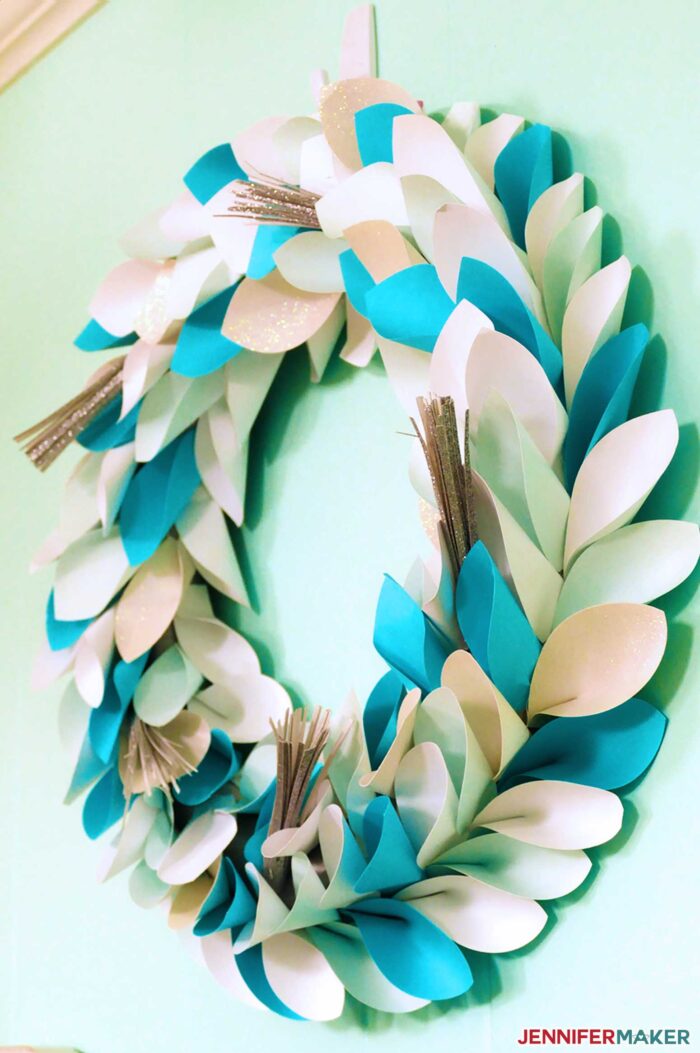
Paper wreaths are beautiful and require very few materials. Learn how to make a simple yet lovely winter wreath that will be the talk of the neighborhood!
A few days ago I took a photo of my DIY Christmas Town Countdown on my mantle, above which hung a pretty paper wreath. This wreath is drawing so many comments from social media, and it’s really so easy to make. It’s nothing more than paper, glue, and a foam wreath form with a little ribbon wrapped around it. So for Day 4 of The Great Maker 25-Day Gift-Away Challenge, I am showing you how to make a DIY winter wreath to enhance your holiday decor!

Wreath making is a popular hobby, and I can see why. There’s just something about wreaths and the way they can dress up a door or warm up a wall. When I first got my Cricut cutting machine and went looking for awesome crafts to make with it, one of the very first things that caught my eye was a paper wreath. I had no idea you could make a wreath from paper! But you totally can… and they’re really pretty amazing.
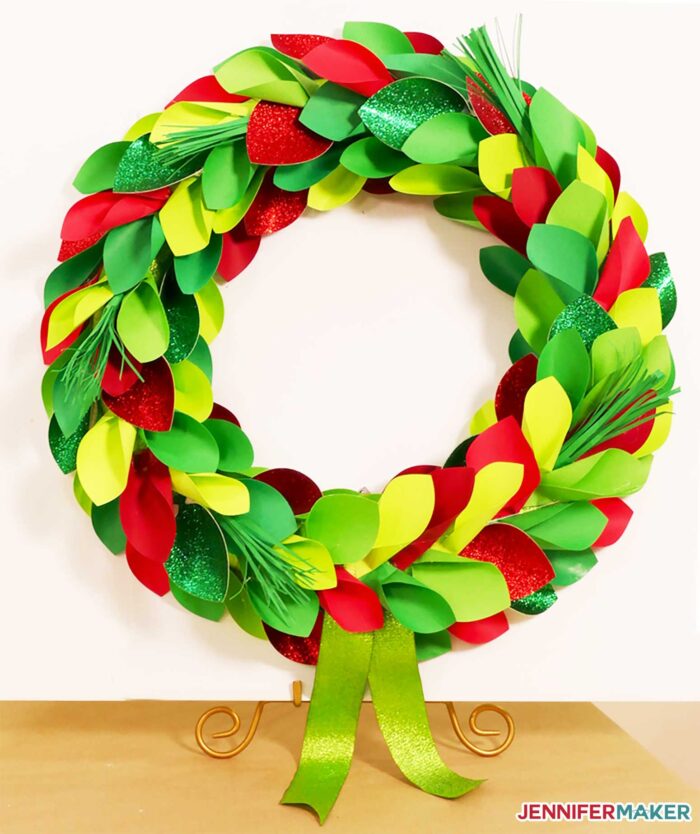
So today I want to show you exactly how to make this paper winter wreath. To make it, you’ll need some 65 lb. cardstock in a variety of complementary colors — you can see I used whites and blues on this wreath, and the traditional reds and greens on this one. The color makes a big difference — feel free to use other colors for other seasons, like black and orange for Halloween!

You’ll also need a wreath form — the kind made out of foam, some ribbon to wrap around your wreath form, and a hot glue gun with plenty of hot glue sticks.
I also recommend you wear silicone finger protectors to avoid burns. I did not, and as I was putting the last sprig into the wreath, I burned two fingers on my hand. Ouch! So don’t be like me — protect your precious fingers!
I have a free pattern for you to use, so let me show you where to find it and then I’ll show you how to put this lovely winter wreath together!
See exactly how to make this stunning winter wreath from paper in this tutorial video below (or keep scrolling if you prefer a step-by-step photo tutorial):
Let me show you how to make DIY winter wreaths from paper! This post contains some affiliate links for your convenience (which means if you make a purchase after clicking a link I will earn a small commission but it won’t cost you a penny more)! Read my full disclosure policy.
Materials to Make a DIY Winter Wreaths
View my Amazon shopping list with the exact items we used to make this project!
- 10 sheets of 65 lb. cardstock in various but similar shades (I used this pack of blue ombre cardstock and this pack of green cardstock)
- 5 sheets of glitter cardstock (I used Cricut Glitter Cardstock)
- 16″ foam wreath form
- At least six yards of 1/ 1/2″ wide ribbon (I used silver and green)
- Hot glue
- Ruler
- Silicone finger protectors (trust me!)
- UV Sealer
- A way to cut your cardstock (I used the amazing Cricut)
- Design #169 – My free SVG/DXF/PDF cut file/pattern for the shadow box template (available in my free resource library—get the password at the bottom of this post)

How to Make a Winter Wreath from Paper
Step 1: Get my free paper wreath file and pattern.
Download the free winter wreath pattern (Design #169) from my free resource library (get the password to the library in the form at the bottom of this post).
Step 2: Cut your paper winter wreath leaves and spruce springs
You can cut this winter wreath with scissors of a good craft knife, and I’ve included a PDF if you’d like to do that. I cut these on my Cricut cutting machine because it is so much faster, so let me show you how to do that!
First, upload the winter wreath SVG file to Cricut Design Space and place it on your canvas.
If you’re not sure how to upload an SVG cut file to Cricut Design Space, watch this helpful video training series I made. If you’re on an iPhone or iPad, here’s how to download and upload SVG files to the Cricut Design Space app.
Here’s what my paper wreath SVG cut file looks like uploaded to Cricut Design Space:
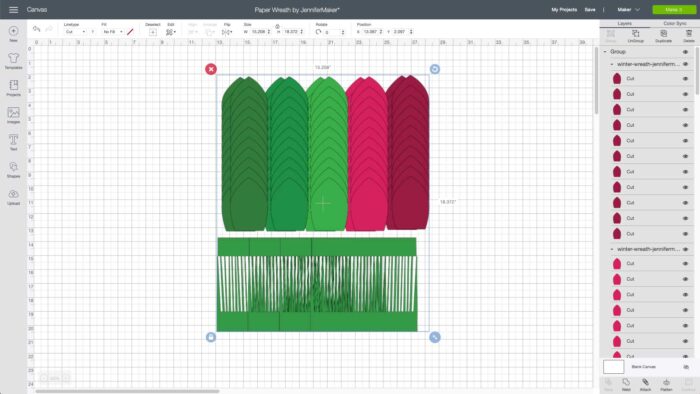
When you’re ready, click Make It — there is no scoring, grouping, or attaching required for this project.
Step 3: Wrap your wreath form in ribbon
Wrap your wreath form in ribbon, securing the ribbon at the start and end with a bit of hot glue. When you wrap, pull the ribbon tight and just barely overlap the wrap that came before it. Your goal is to cover the entire wreath form in decorative ribbon so it looks good from the side and back.
Step 4: Fold and glue the leaves to the outer edge and inner edges
- Fold about half of your leaves at the flat base of the leaf.
- Starting with the outside rim with your wreath form on a flat surface, hot glue leaf to the form, keeping the back of the leaf fold flat with the table. Make sure to only glue the bottom of leaf to form. Alternating leaf colors as you go around the edge, making sure to keep your leaves in a straight line and cover the the leaf you just glued with the next leaf, leaving about an 1.5” gap. Uniform spacing is key to making this project aesthetically pleasing.
- Repeat this process on the inside edge of the wreath, but this time angle every other leaf upwards. Space according to how it looks – about 1” between leaves.
Step 5: Glue the leaves to the top of your wreath.
- To create the leaves for the top of the wreath, you will make a tri-fold leaf. Fold each point to the middle and secure with glue. Try to crease your leaf just at the base to keep a nice rounded shape.
- Glue the leaves on the top of the wreath form in a “V” shape, overlapping each other, and pointing slightly outward.Try and create consistent “V”shapes that repeat at consistent angles. (For a larger wreath, you will glue three across in a “W” shape, overlapping each other.)
- Go around the wreath form, alternating colors until you’ve finished!
Step 6: Add spruce springs and any other decorations.
- Curl your needle sprigs lightly at the ends
- Roll sprigs, keeping the edge even.
- Secure end with glue
- Tuck and glue intermittently in wreath to give added dimension
Get my free DIY winter wreath SVG cut files and patterns
If you make a DIY winter wreath, show us! Please share your photo in our Facebook group or tag me on social media with #jennifermaker .
See all of the projects, tutorials and free designs in The Great Maker 25-Day Gift-Away Challenge!
Love,

Want to remember this? Save the DIY Winter Wreath from Paper Tutorial to Your Favorite DIY Pinterest Board!