Learn how to make temporary customized decals for weddings, dinner parties, BBQs or other events with these vinyl letter decals
Making removable customized decals for weddings, dinner parties, BBQs or other events is easy! By using removable vinyl, we can personalize just about anything. Like our grandmother’s antique cut crystal champagne flutes just for one special night. Or, how about some personalized beer pints for game night. There are lots of options for these vinyl letter decals.

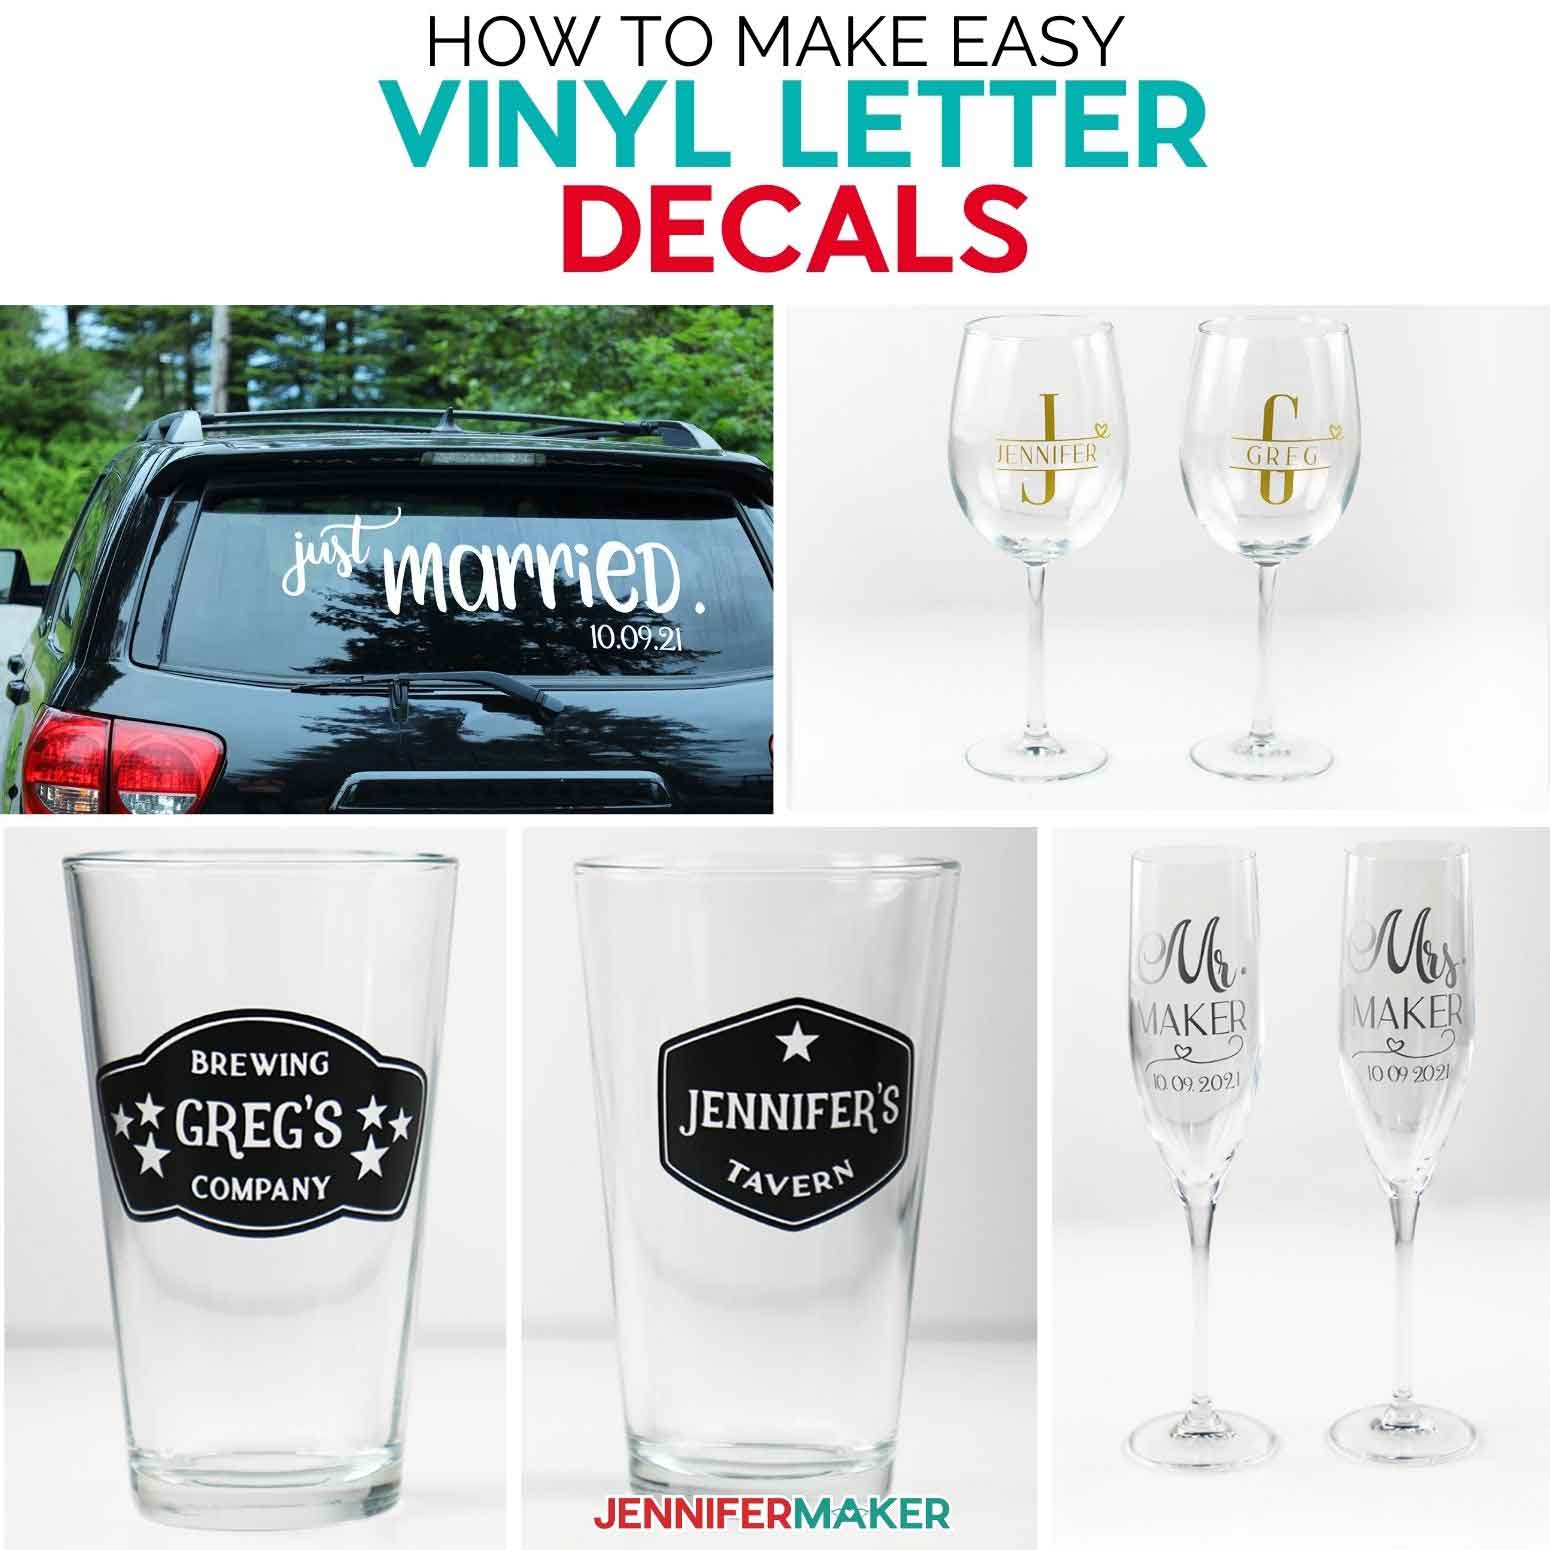
Add a special touch to any event with the help of personalized vinyl letters. I show you how to make your very own vinyl decals personalized to any event you may be hosting, or attending. Just place them on a smooth surface and they’re good to go!
To start off, we will need a few different types of vinyl material: Cricut Premium Removable Vinyl, this bundle includes black, white, gold and silver. We will also use Cricut Smart Removable Vinyl in white and Chalkboard Vinyl.
Other materials we will use include: black Kraft board, transfer tape, chalk and chalk markers and of course we’ll need something to put our vinyl on. I’m using champagne flutes, wine glasses, beer pints and my car! Well actually my car window!
And finally, we will use our Cricut Machine. I’m going to use the Maker 3, but you can also make most of these designs with an Explore 3 or an original Maker or Explore cutting machine. I’ll even show you one you can make with the Cricut Joy.
And we will use our Cricut StandardGrip cutting mat, weeding tool, scraper (or credit card to get any air bubbles out), hot glue gun and sticks, some clothespins and for the larger decal it helps to have a 12 inch by 24 inch StandardGrip mat, but that’s optional.
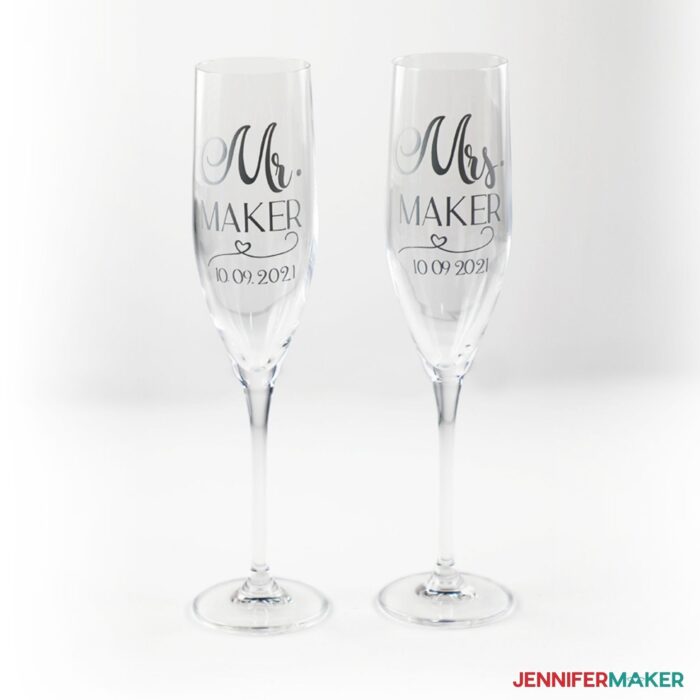
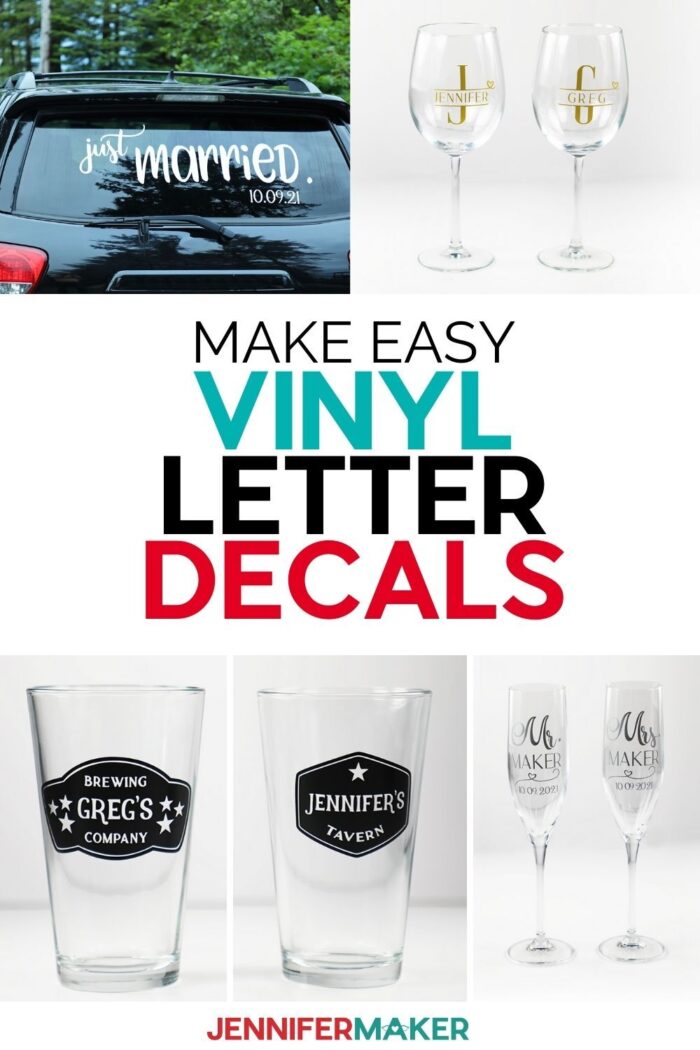
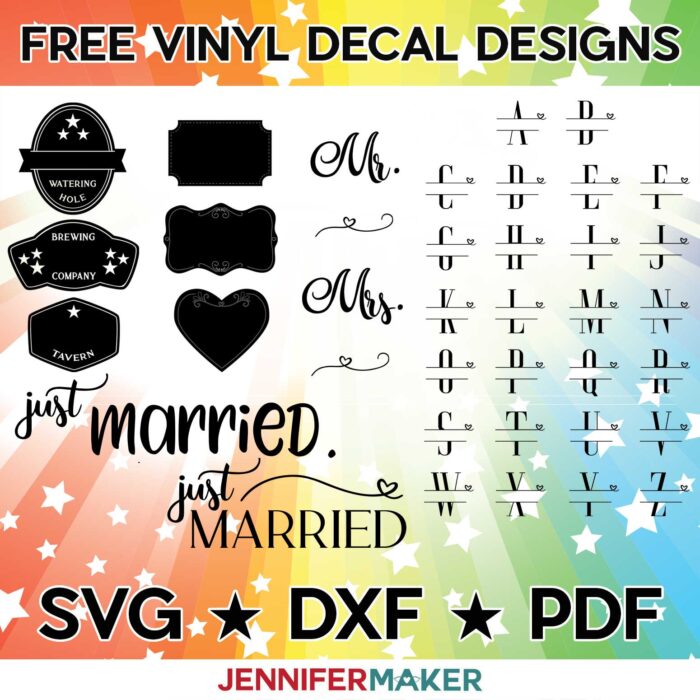
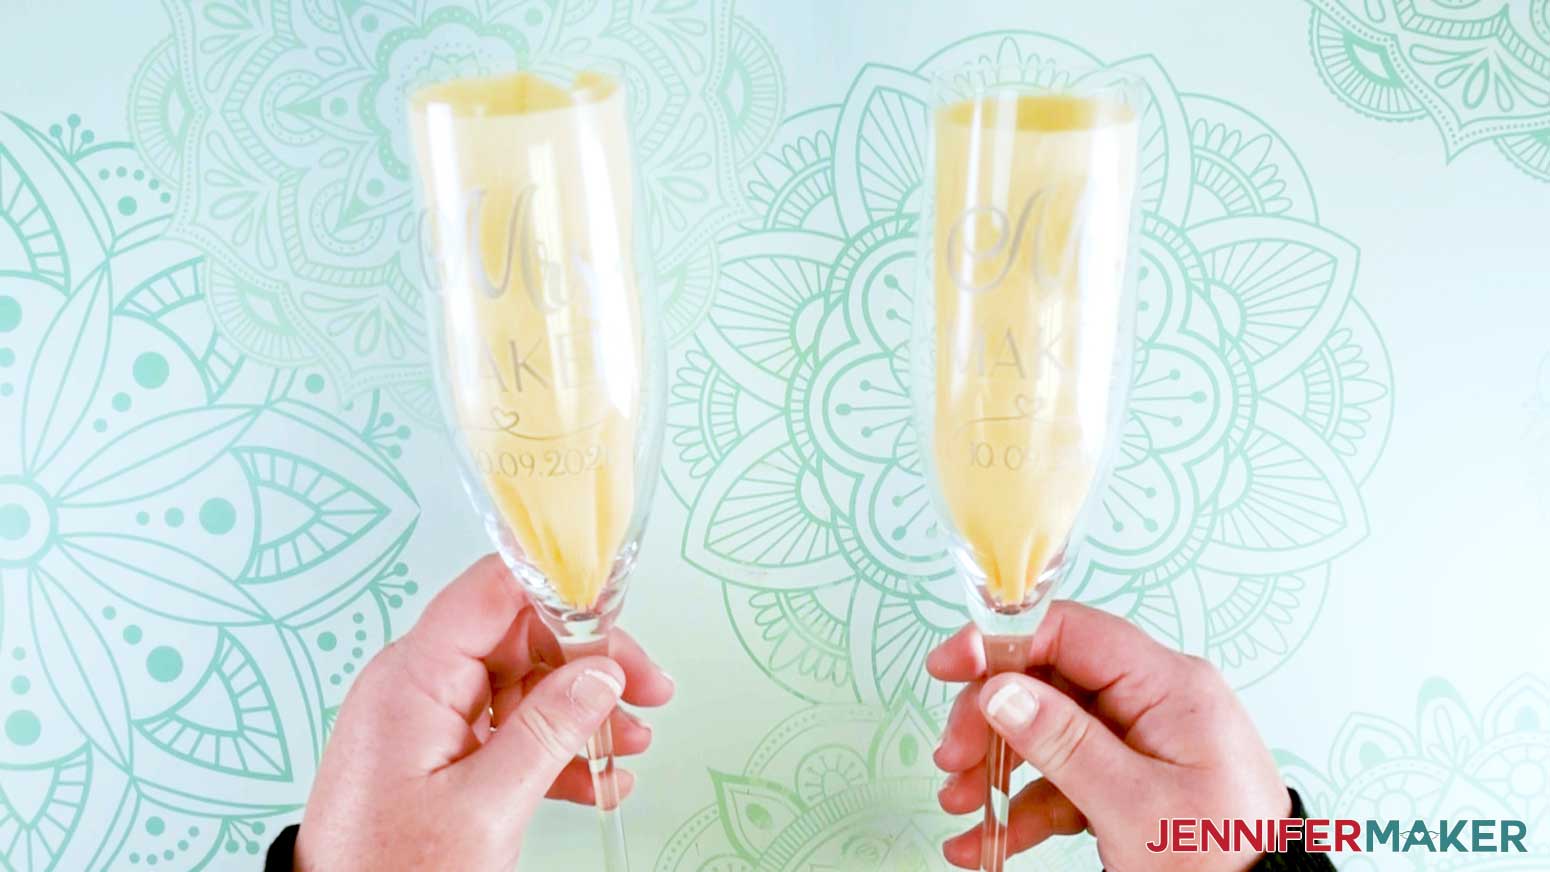
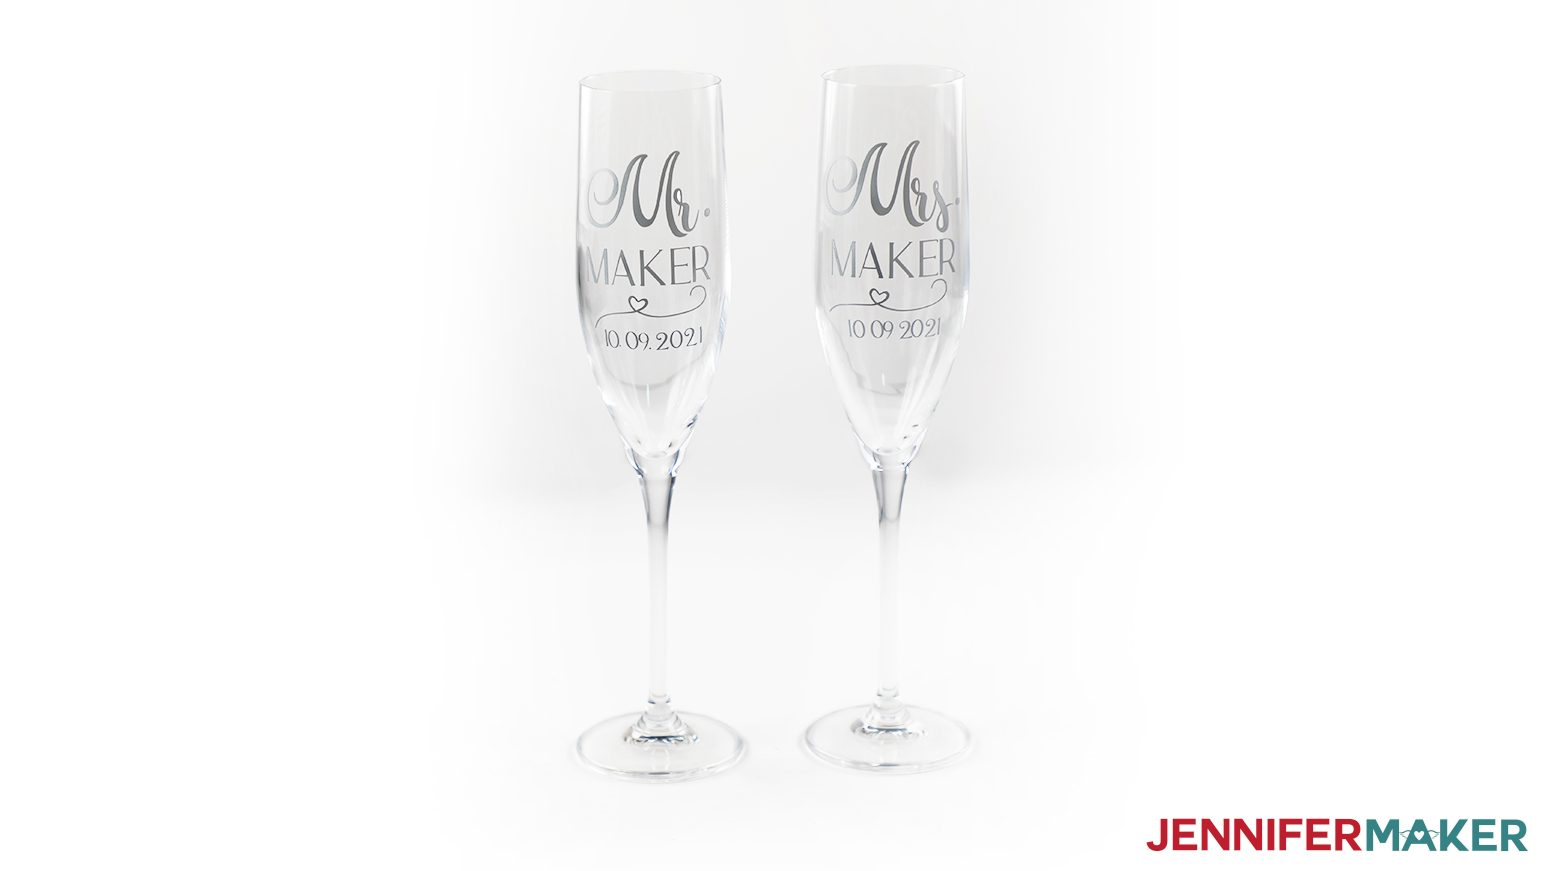
For weddings, I’ve included designs for adding a temporary Just Married decal to the back window of a vehicle. I also included Mr. & Mrs. decals for personalizing champagne flutes or other wedding reception items. I suggest adding a last name and wedding date to either decal for a personal touch.
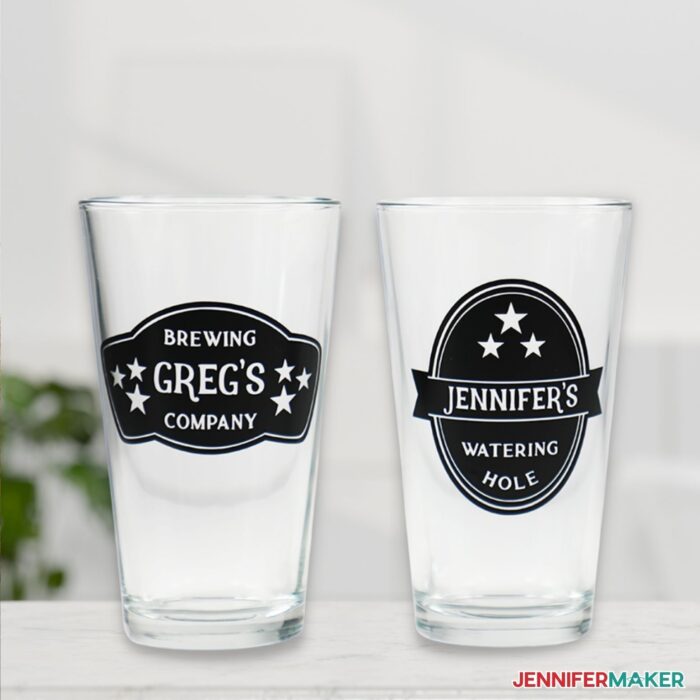
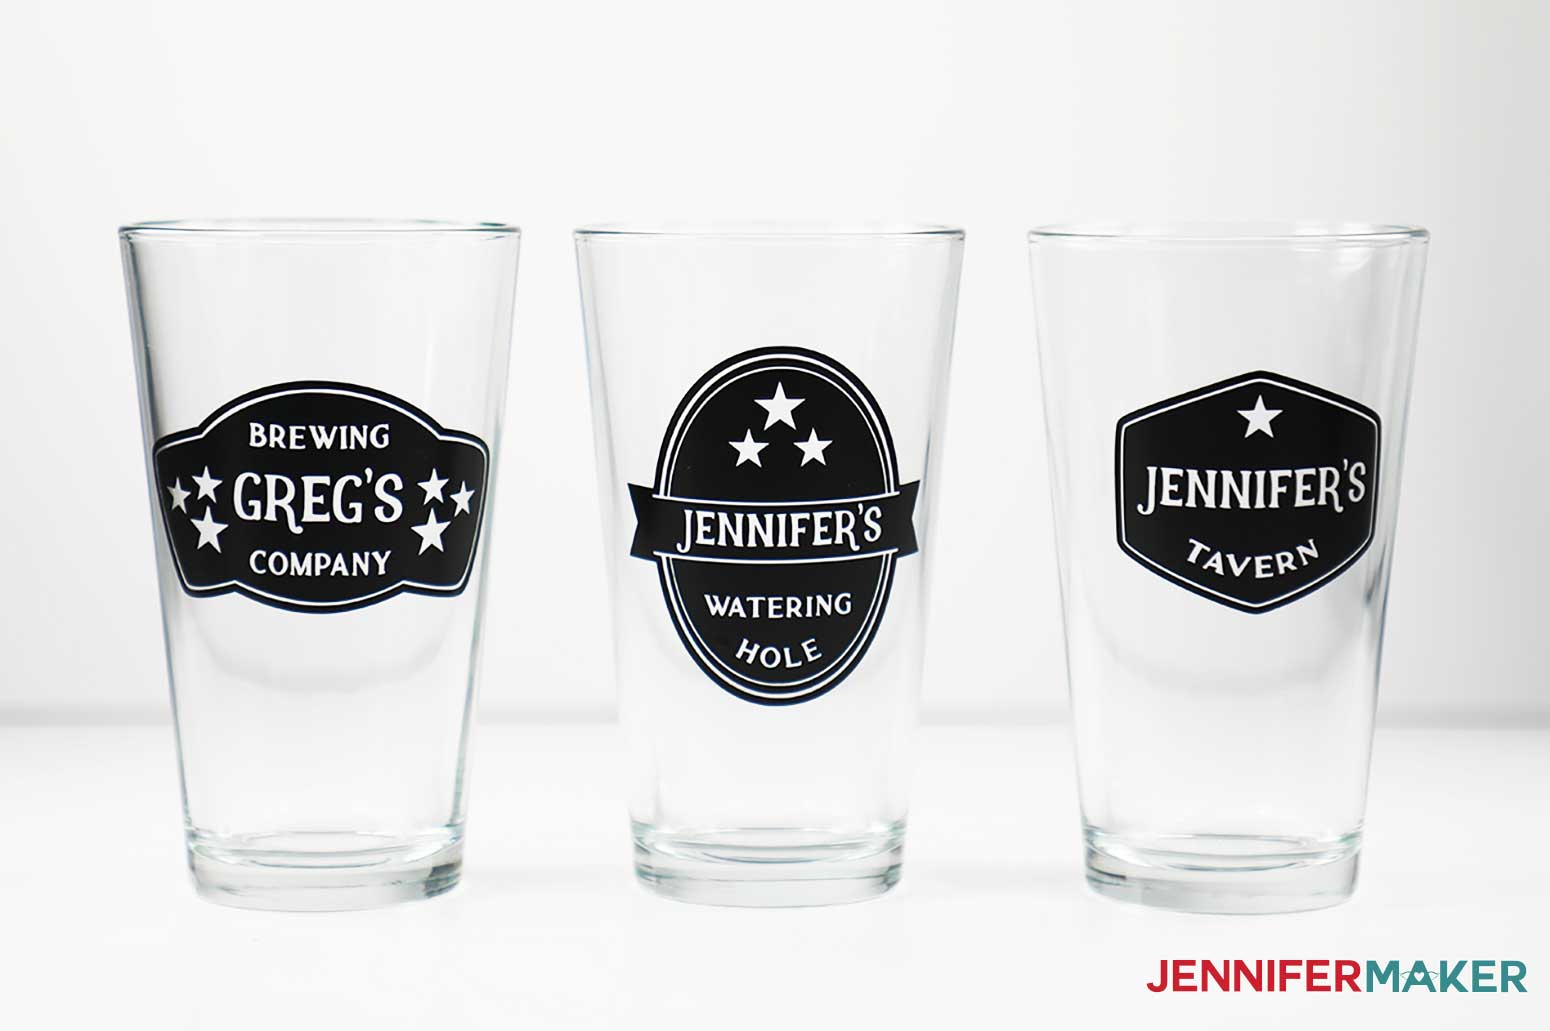
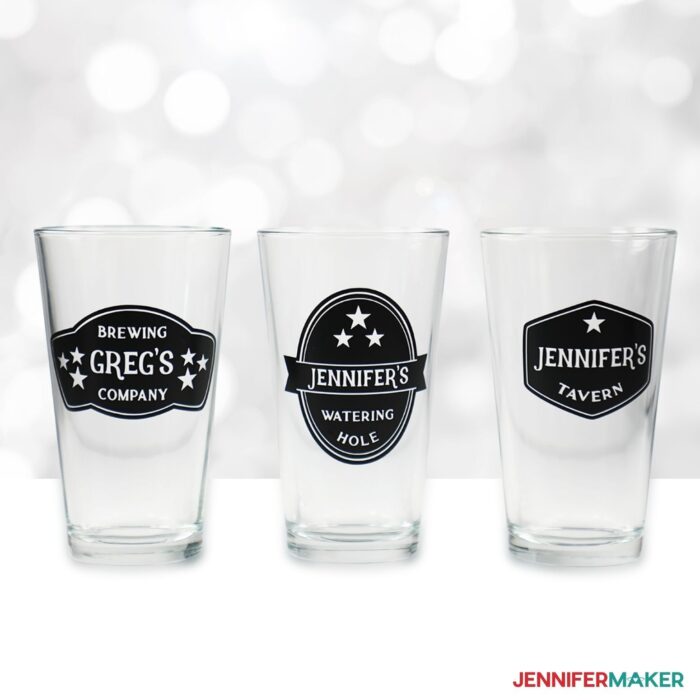
For dinner parties or gatherings, I included labels for beer pints and wine glasses. Add your guests’ names and they have a personal glass to use all evening. The removable vinyl comes off easily at the end of the night! These personalized glasses will be a great touch to add to any event!
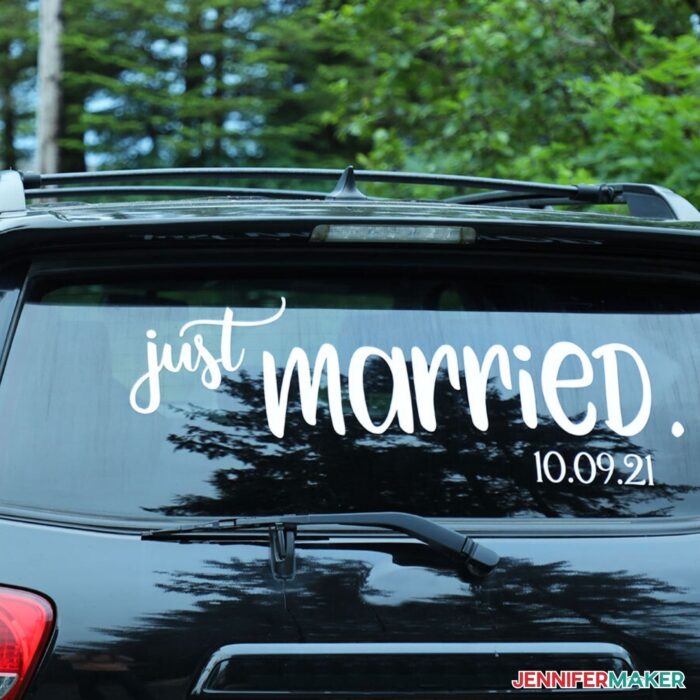
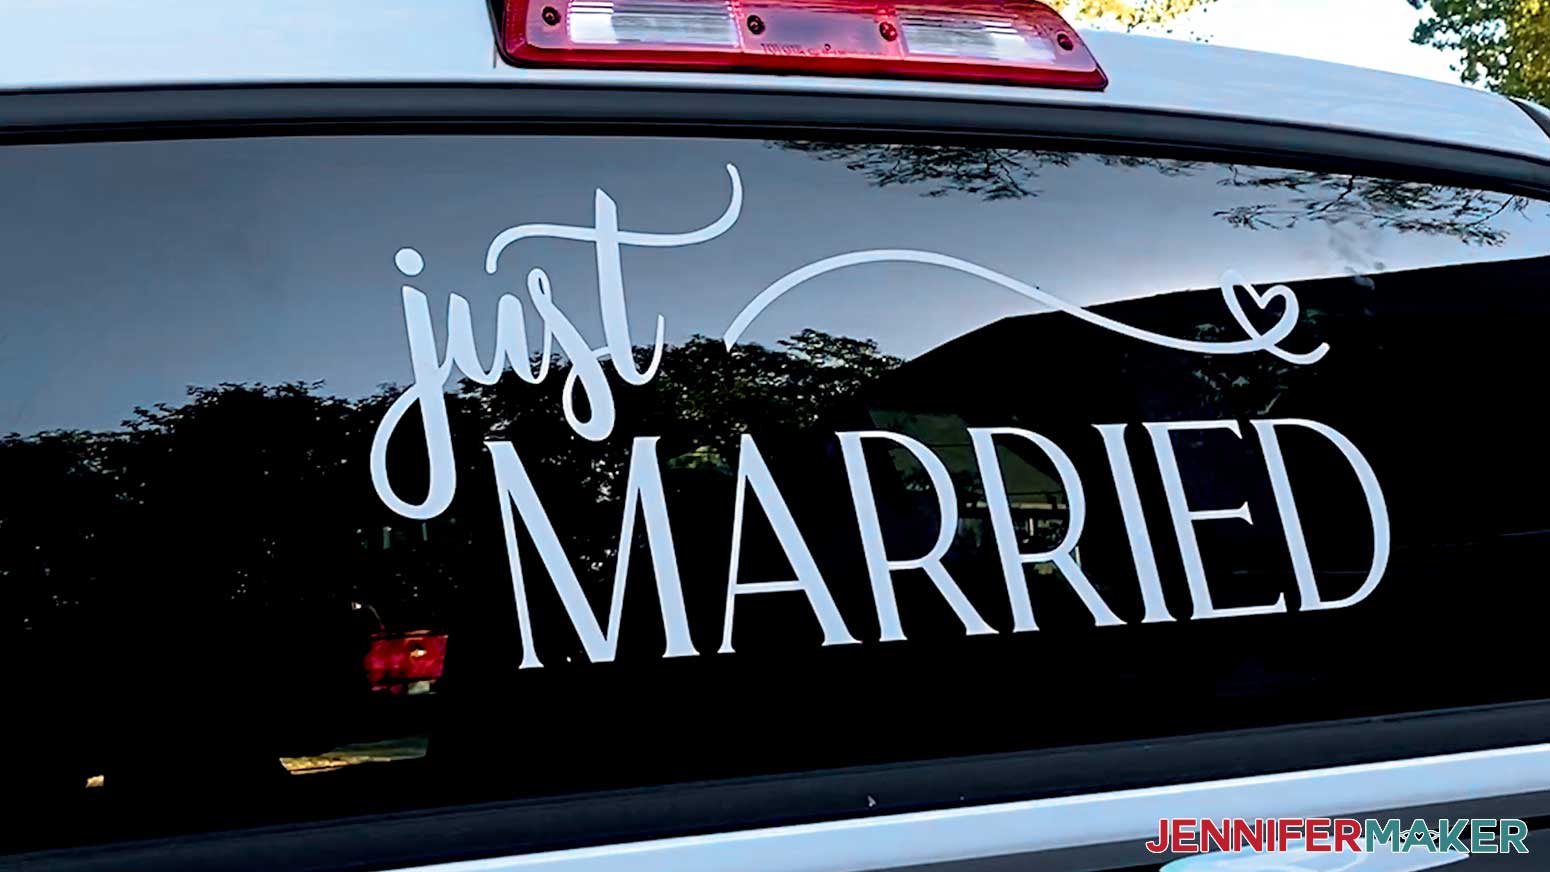
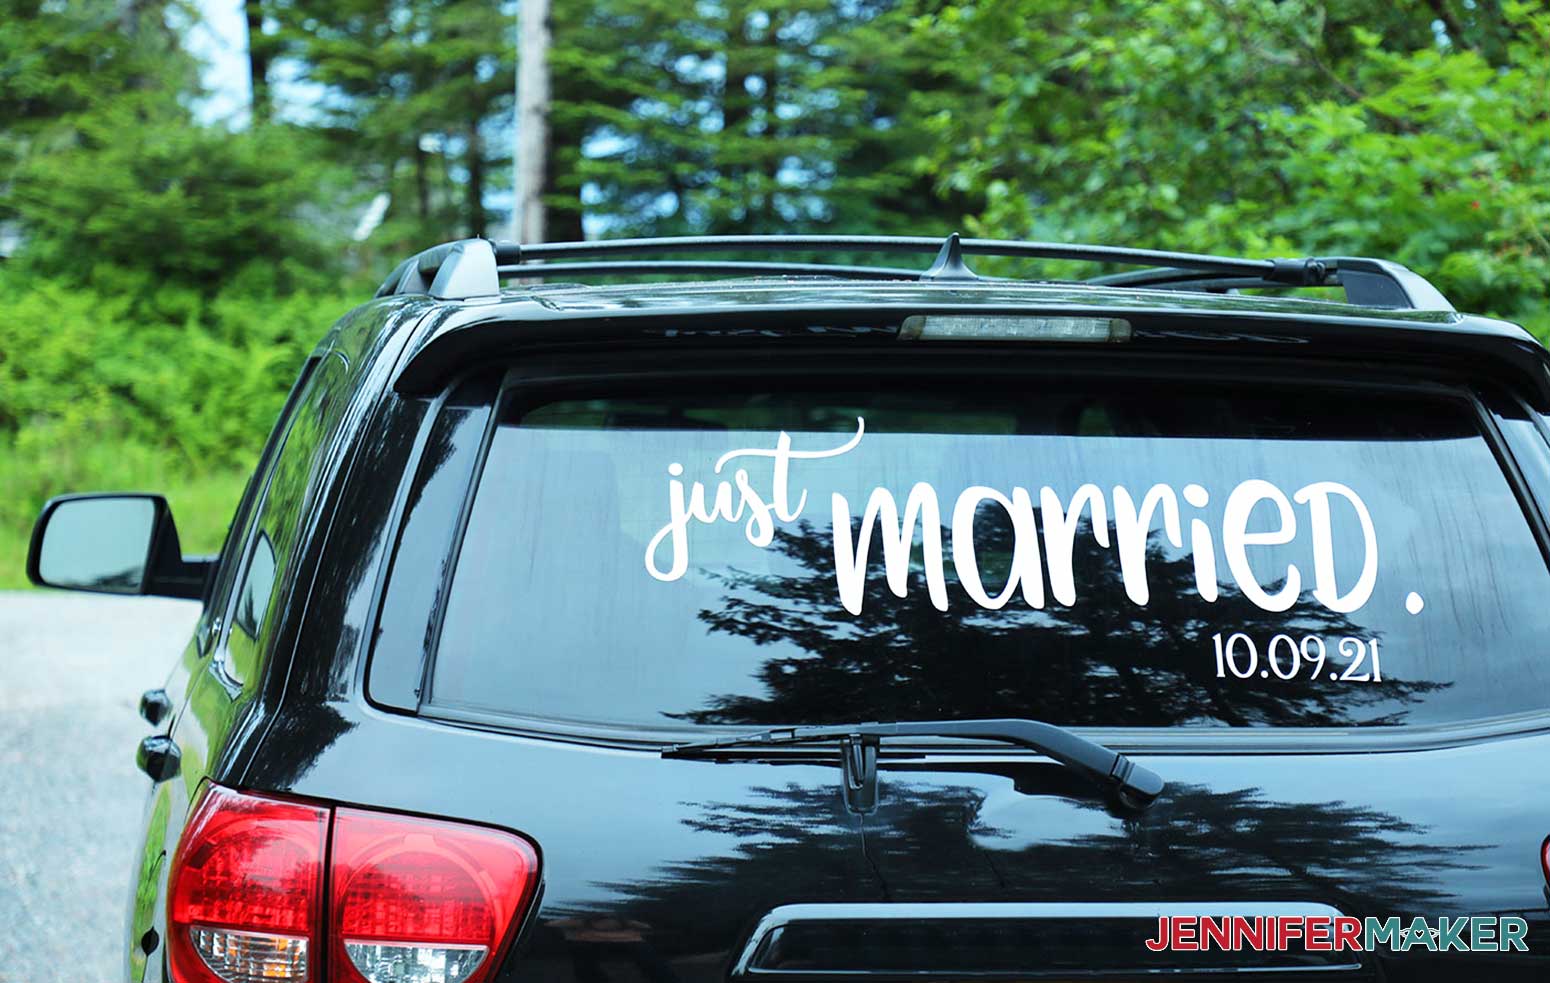
Here’s a fun way to make a big splash at a wedding! Just Married car window decals! One of the great things about using removable vinyl is that it’s so easy to remove after the honeymoon, but it holds up nicely for several days in rain, snow or sunshine! This is what my Just Married decals look like when they are customized and applied to a car window.
Here’s a supply list of what you need to make vinyl letter decals! This post contains some affiliate links for your convenience (which means if you make a purchase after clicking a link I will earn a small commission but it won’t cost you a penny more)! Read my full disclosure policy.
Materials to Make Vinyl Letter Decals
View my Amazon shopping list with the exact items we used to make this project
- Premium Removable Vinyl Bundle
- Chalkboard Vinyl
- Kraft Board in Black
- Wooden Clothespins
- American Crafts White Chalk Marker
- Optional (Cricut Smart Vinyl – Removable in White, Cricut Transfer Tape, Chalk, Chalk Markers, Wine Glasses, Beer Pint Glasses, Champagne Flutes)
- (Optional) Font (I used Braga Font)
- A method to cut your vinyl decals, I used the amazing Cricut Maker 3 but you can also use the Cricut Maker, the Cricut Explore 3, the Cricut Explore, or the Cricut Joy
- Green StandardGrip Cutting Mat
- Green StandardGrip Cutting Mat 12″ x 24″ (Optional)
- Weeding Tools
- XL Scraper
- Painter’s Tape
- Hot Glue Gun
- Hot Glue Sticks
- Isopropyl Alcohol
- Lint-free towel or coffee filters
- Design #321 – My free SVG/PDF/DXF design files are available in my free resource library (get the password by filling out the form at the bottom of this page)
How to Make Your Own DIY Vinyl Letter Decals
The detailed step-by-step assembly video on how to create these personalized vinyl letter decals was broadcast during Maker Academy Weekend 2021. Get a pass to watch all 20+ workshops, each with a printable handbook, transcript, audio files, design files, and support with a VIP pass below:

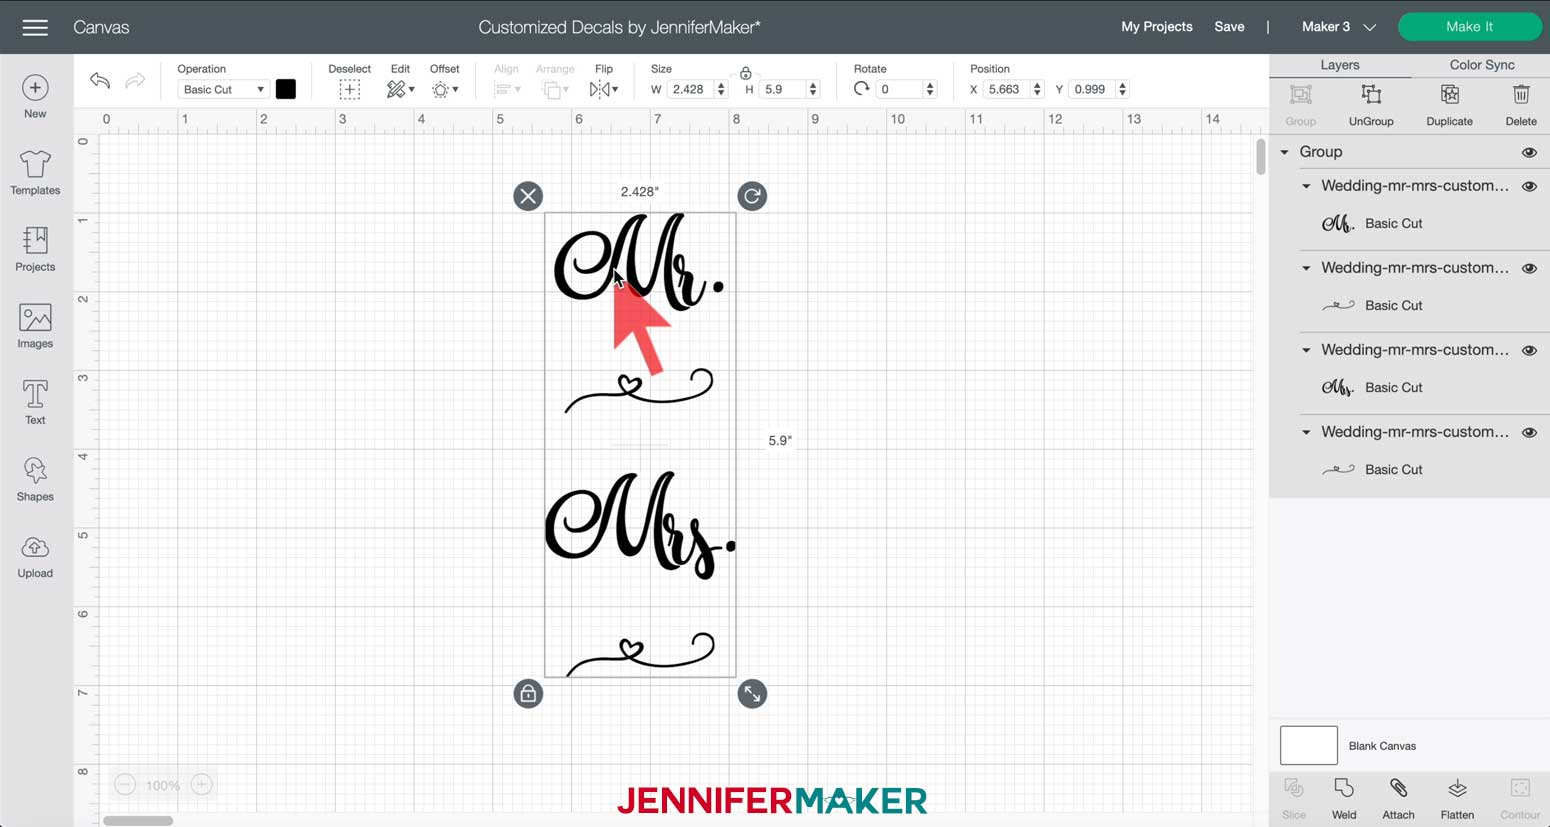
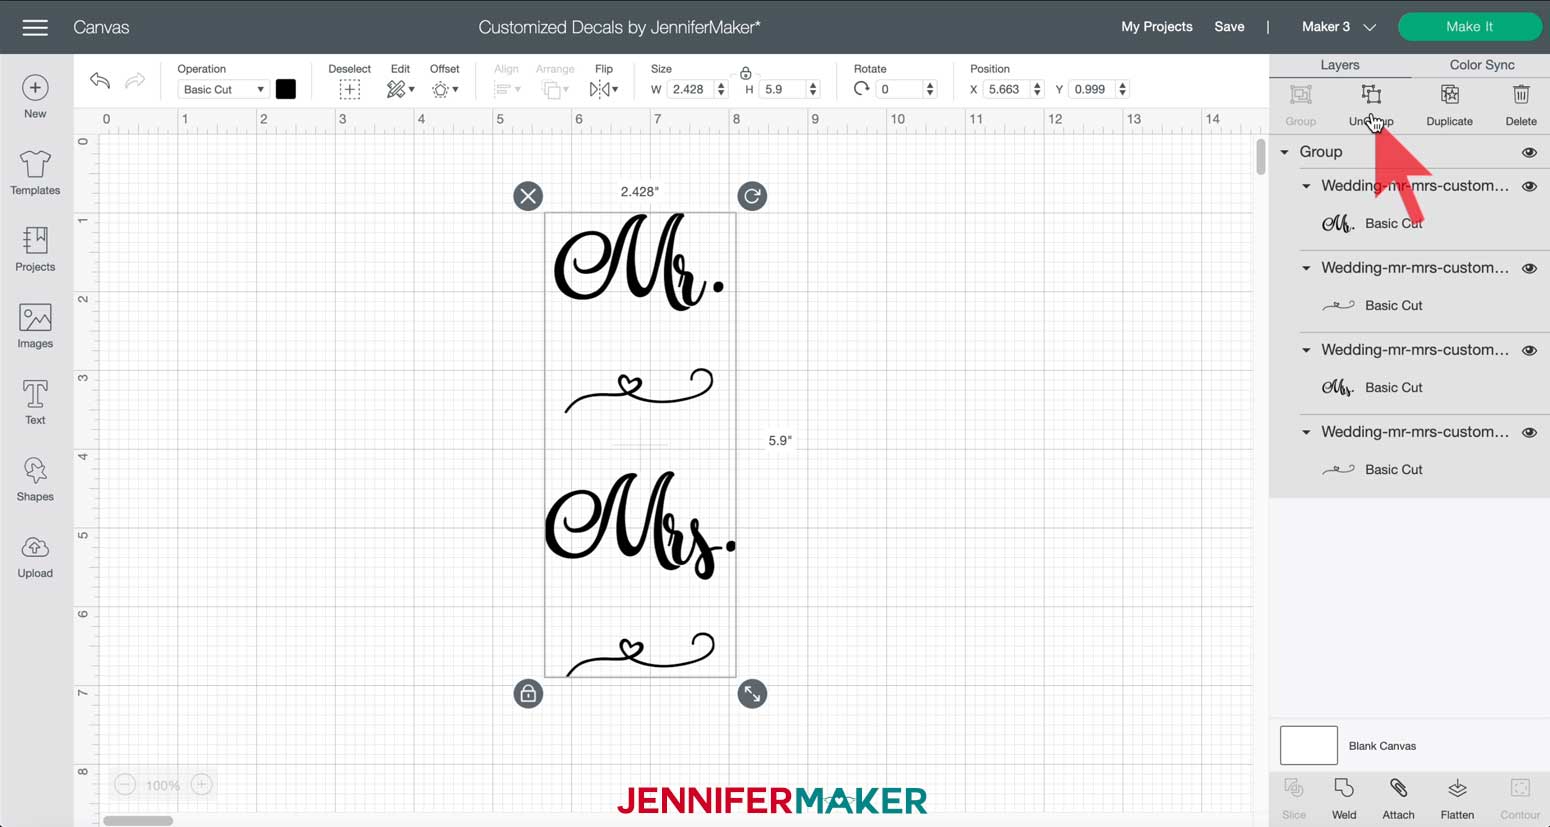
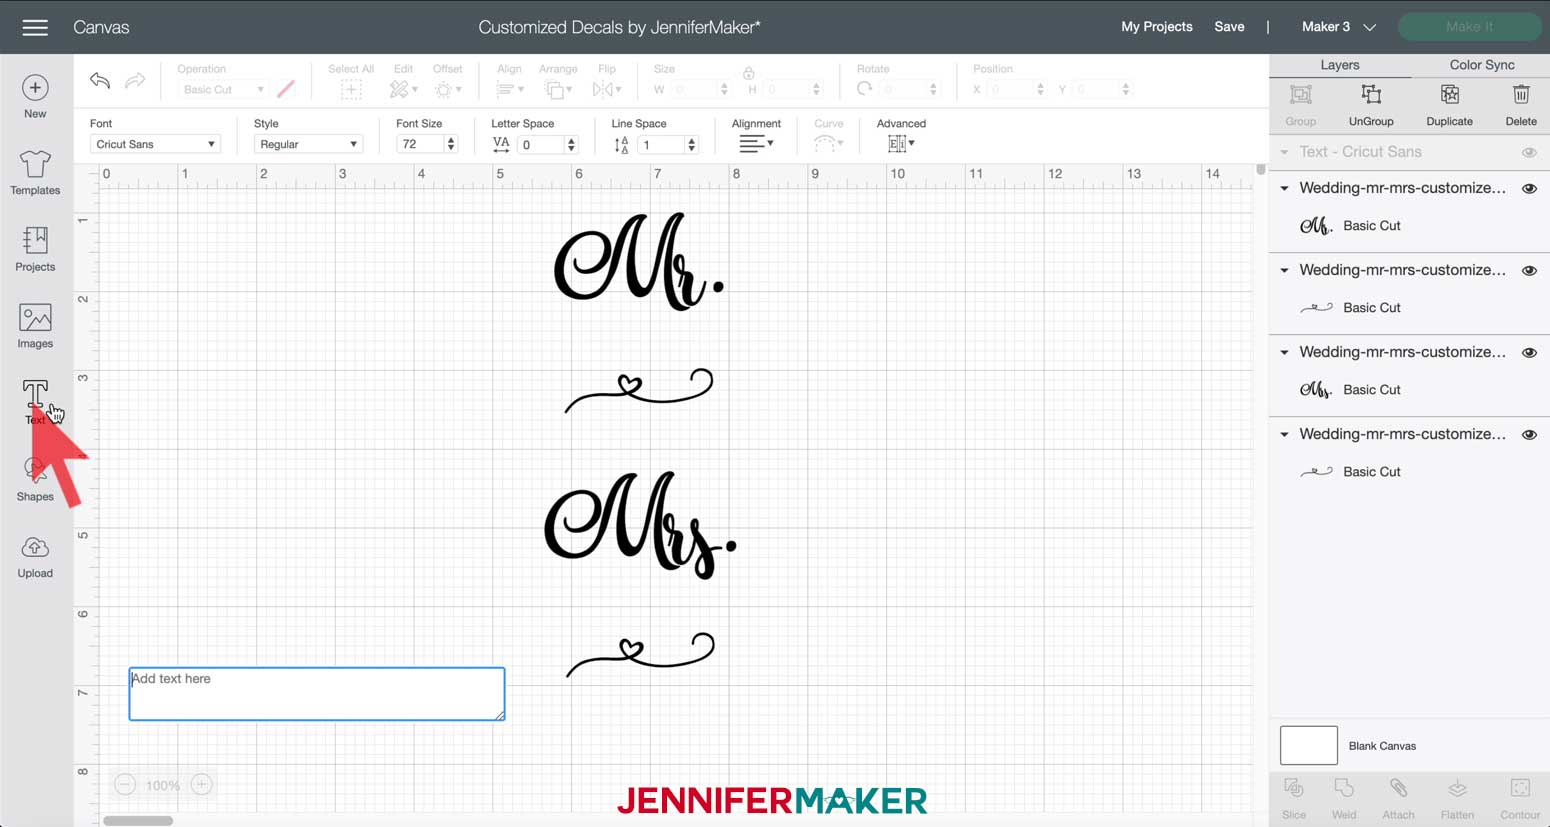
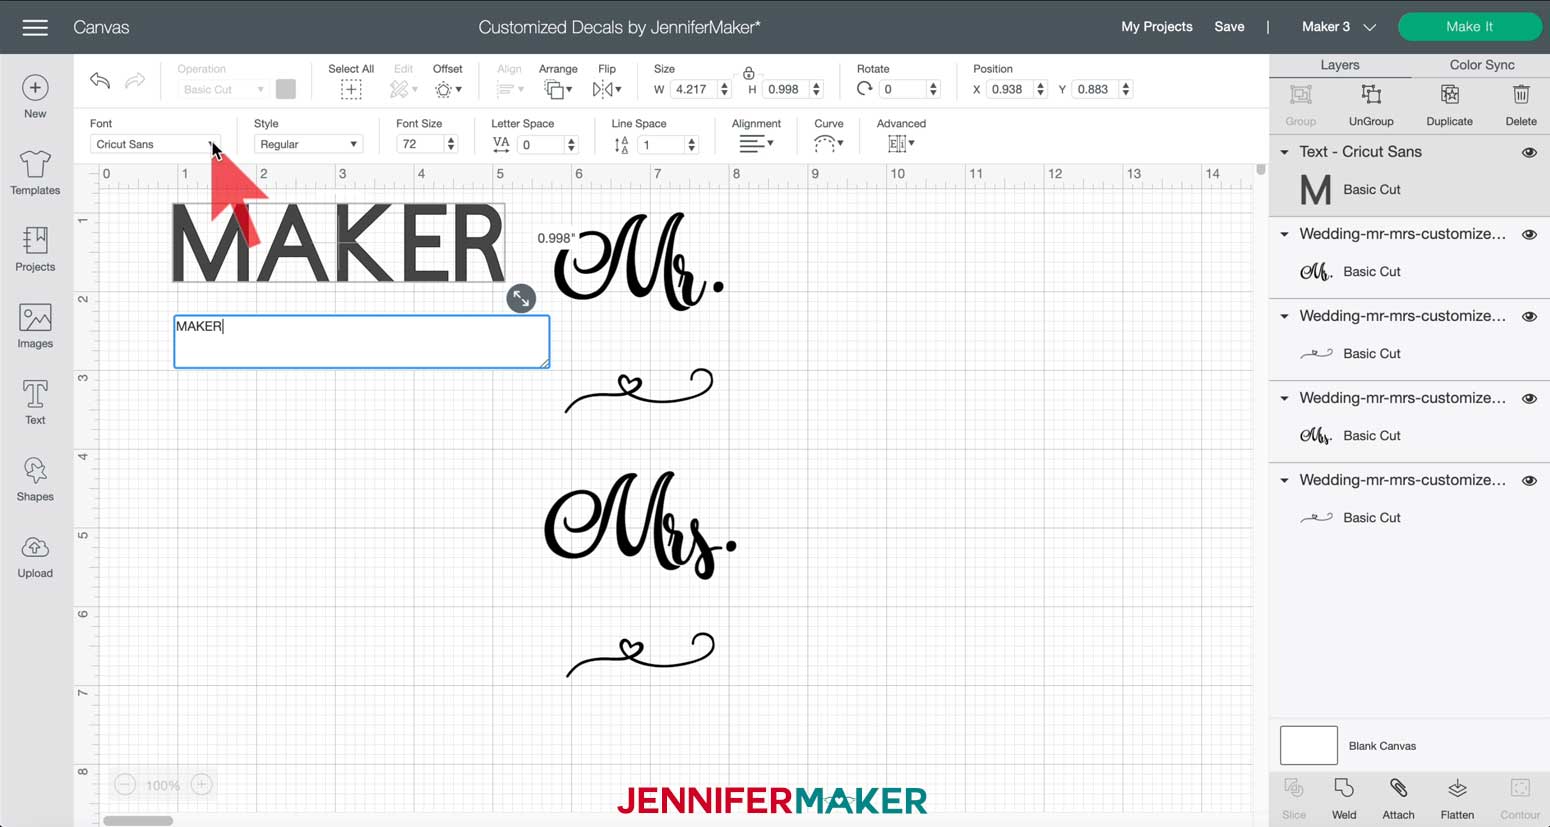
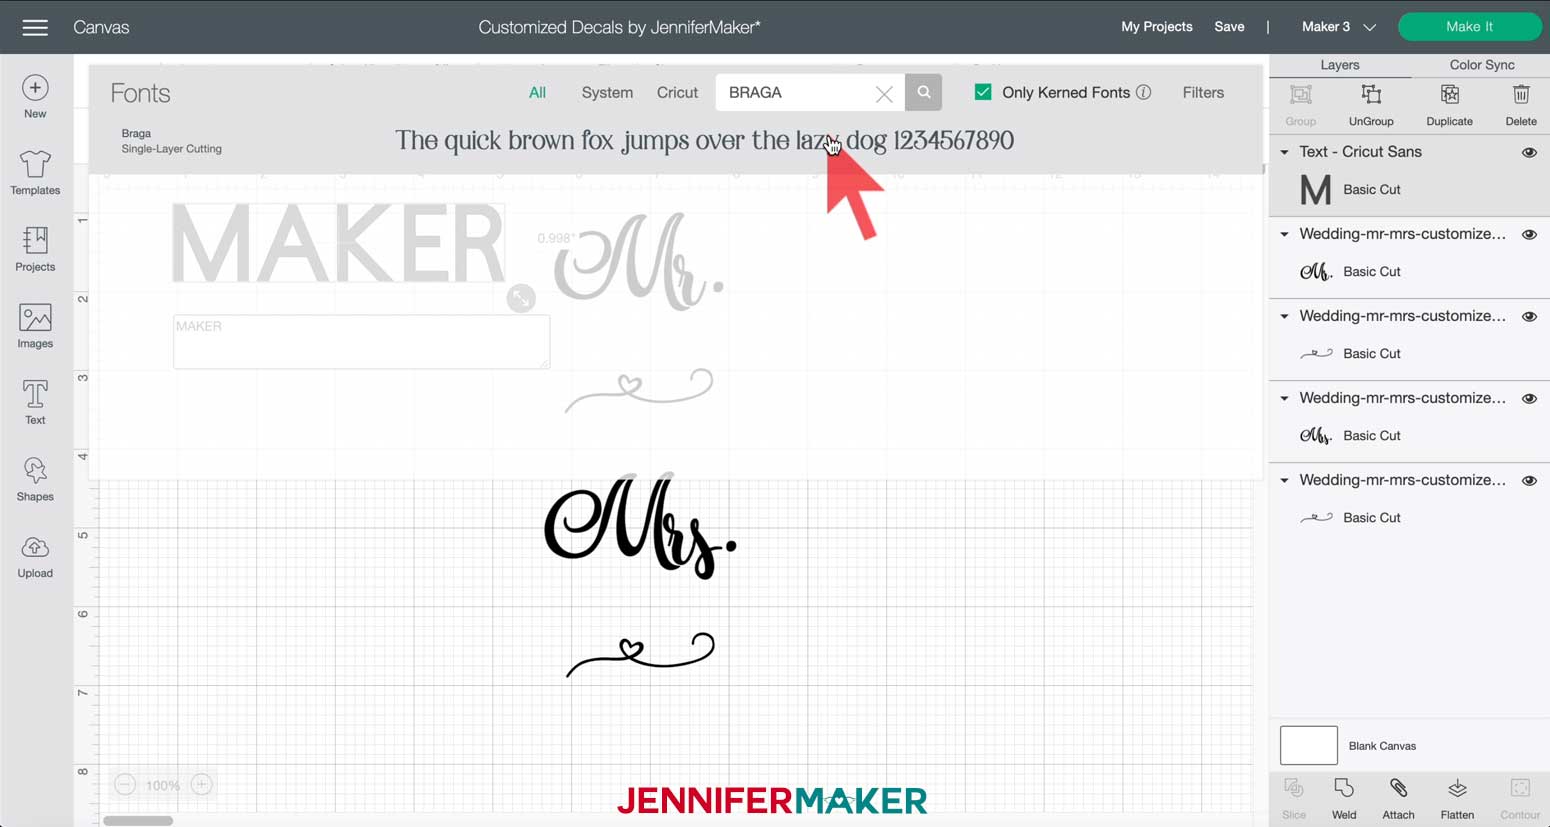
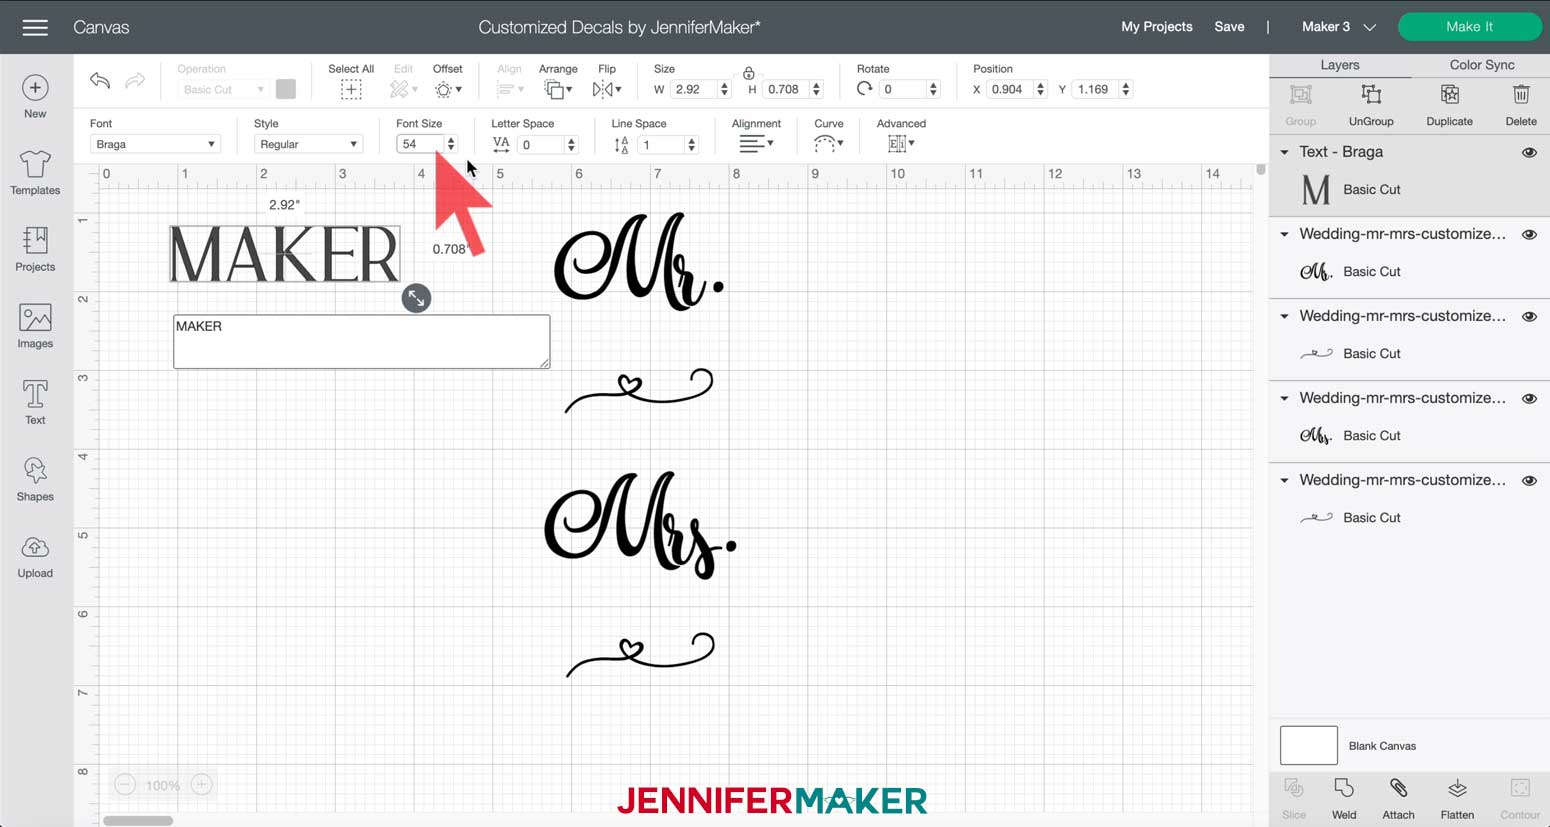
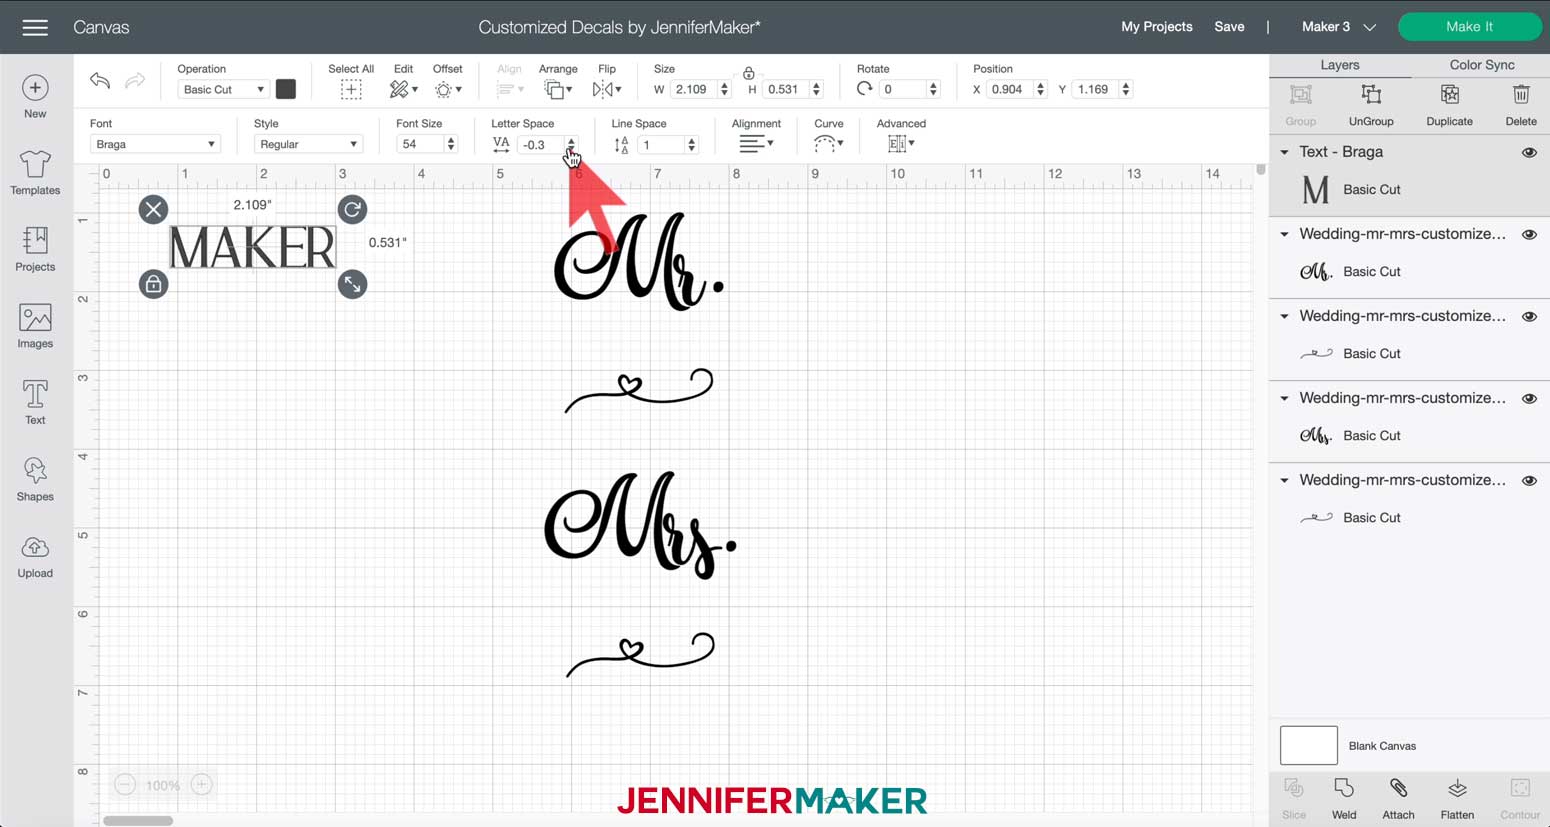
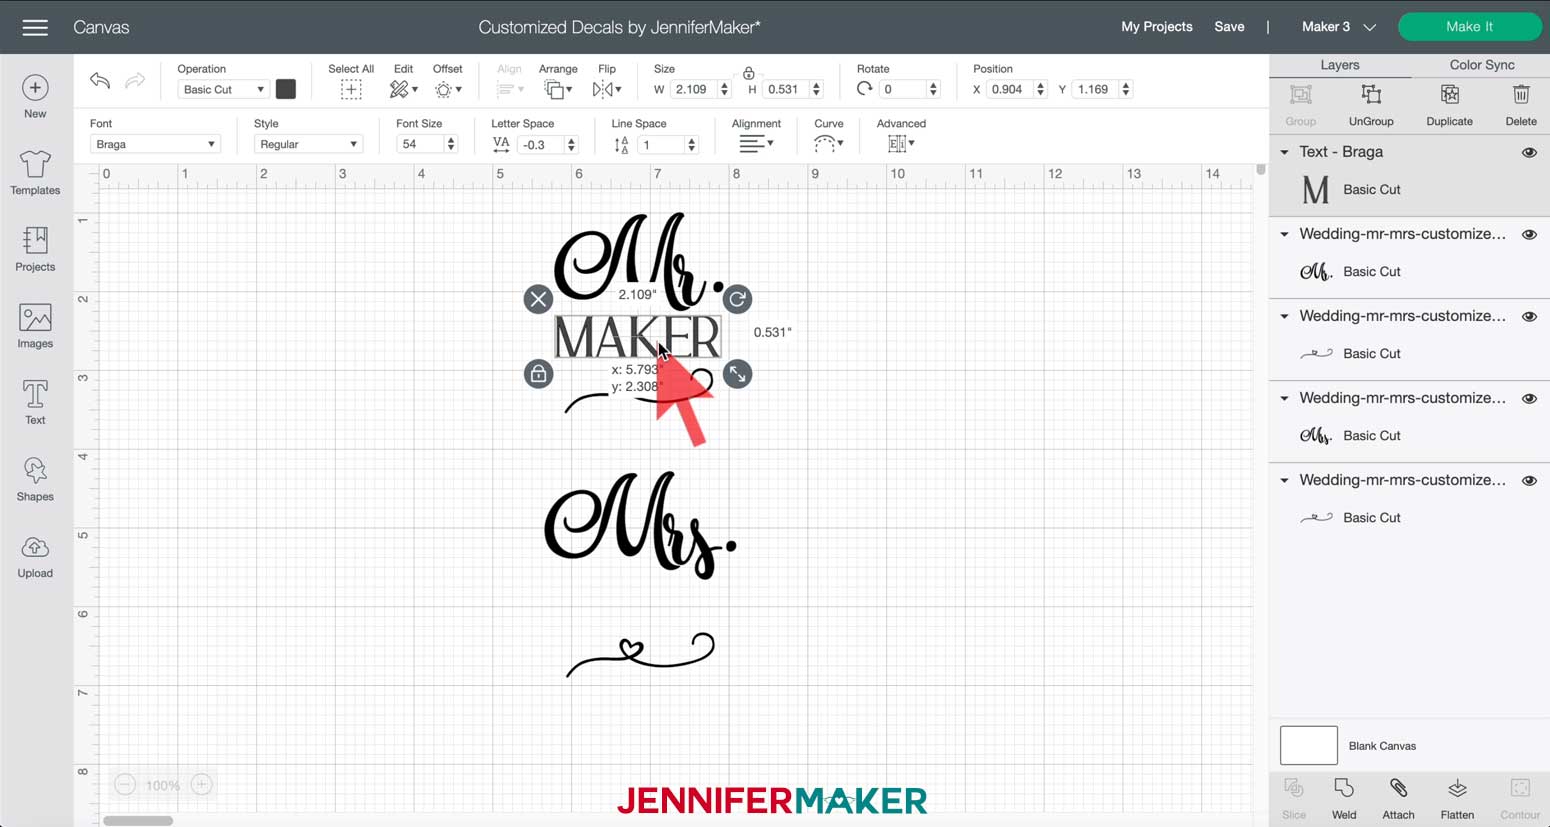
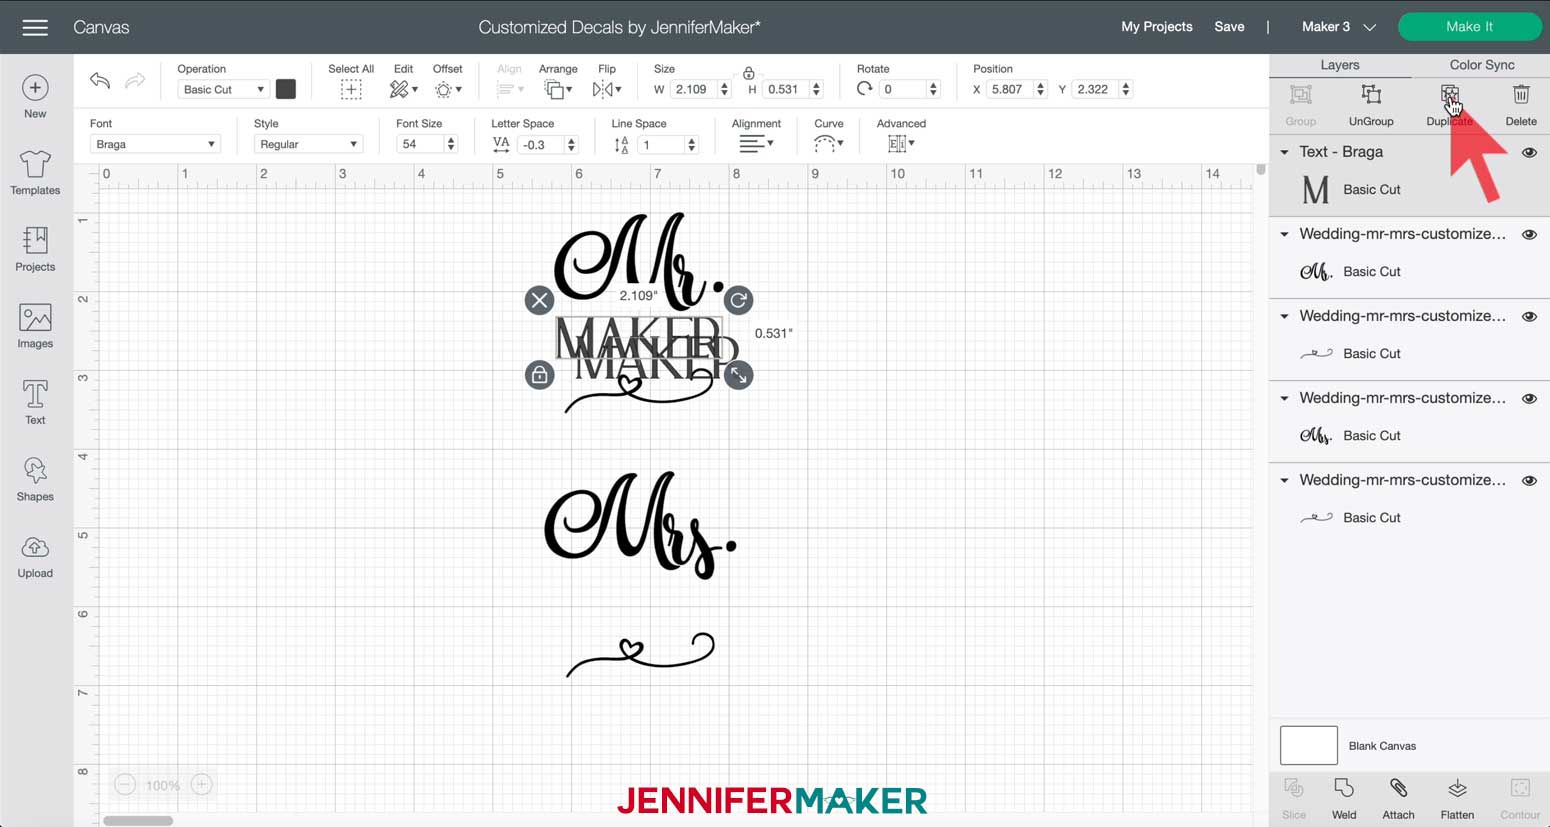
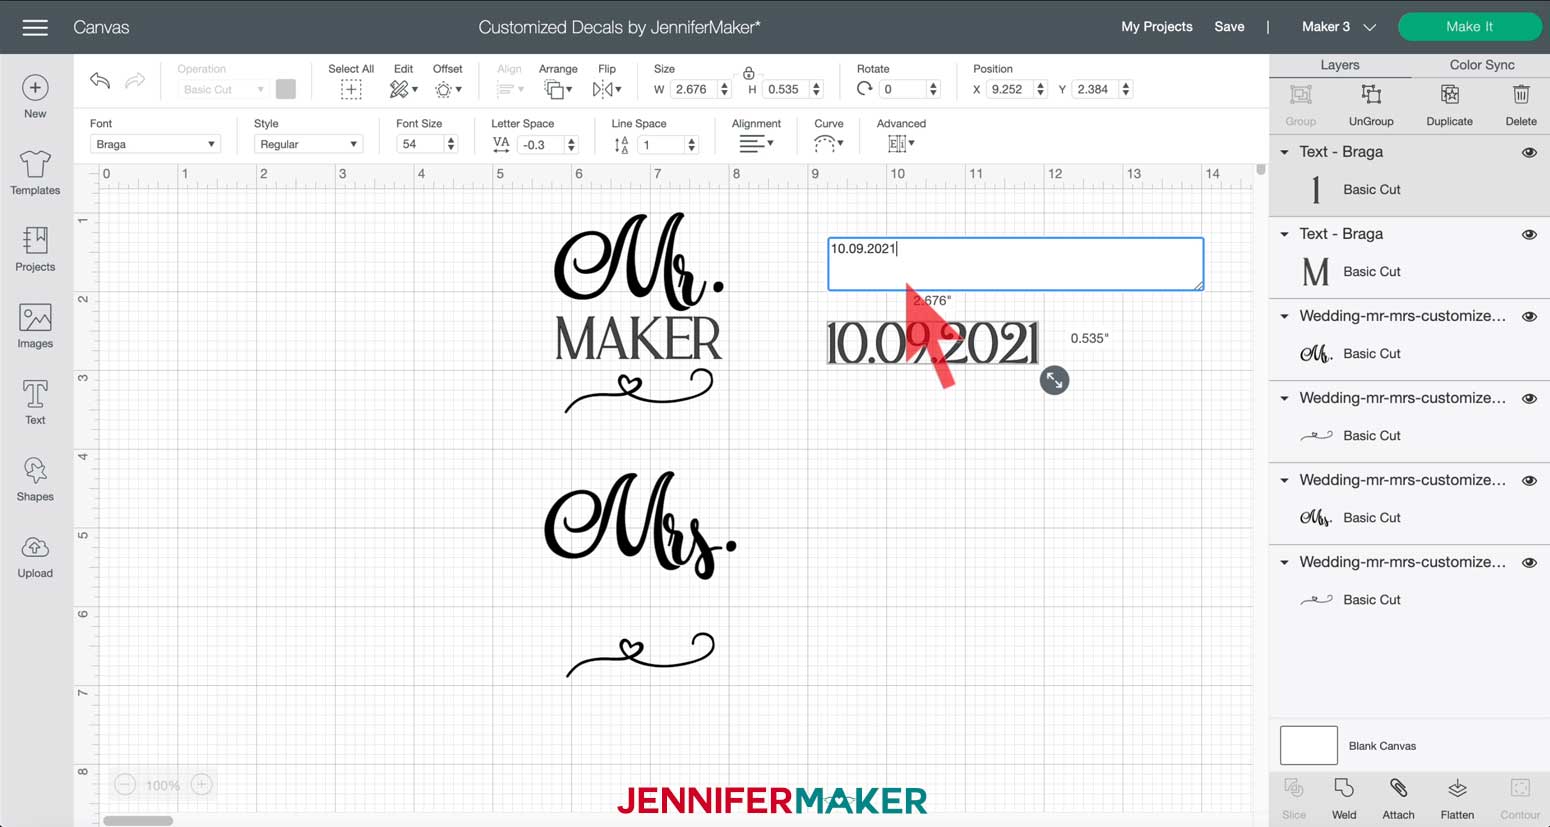
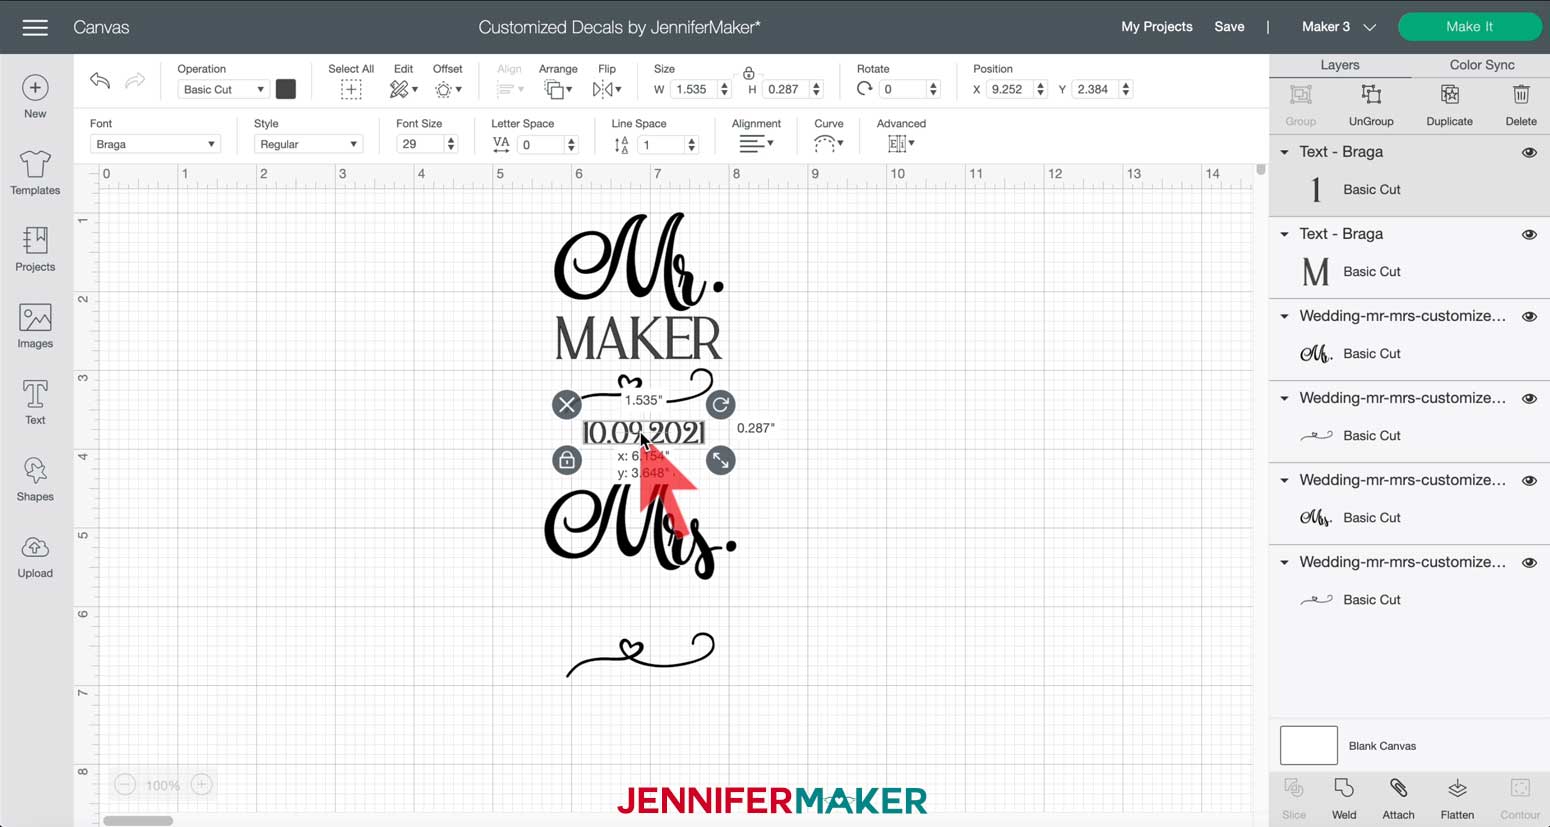
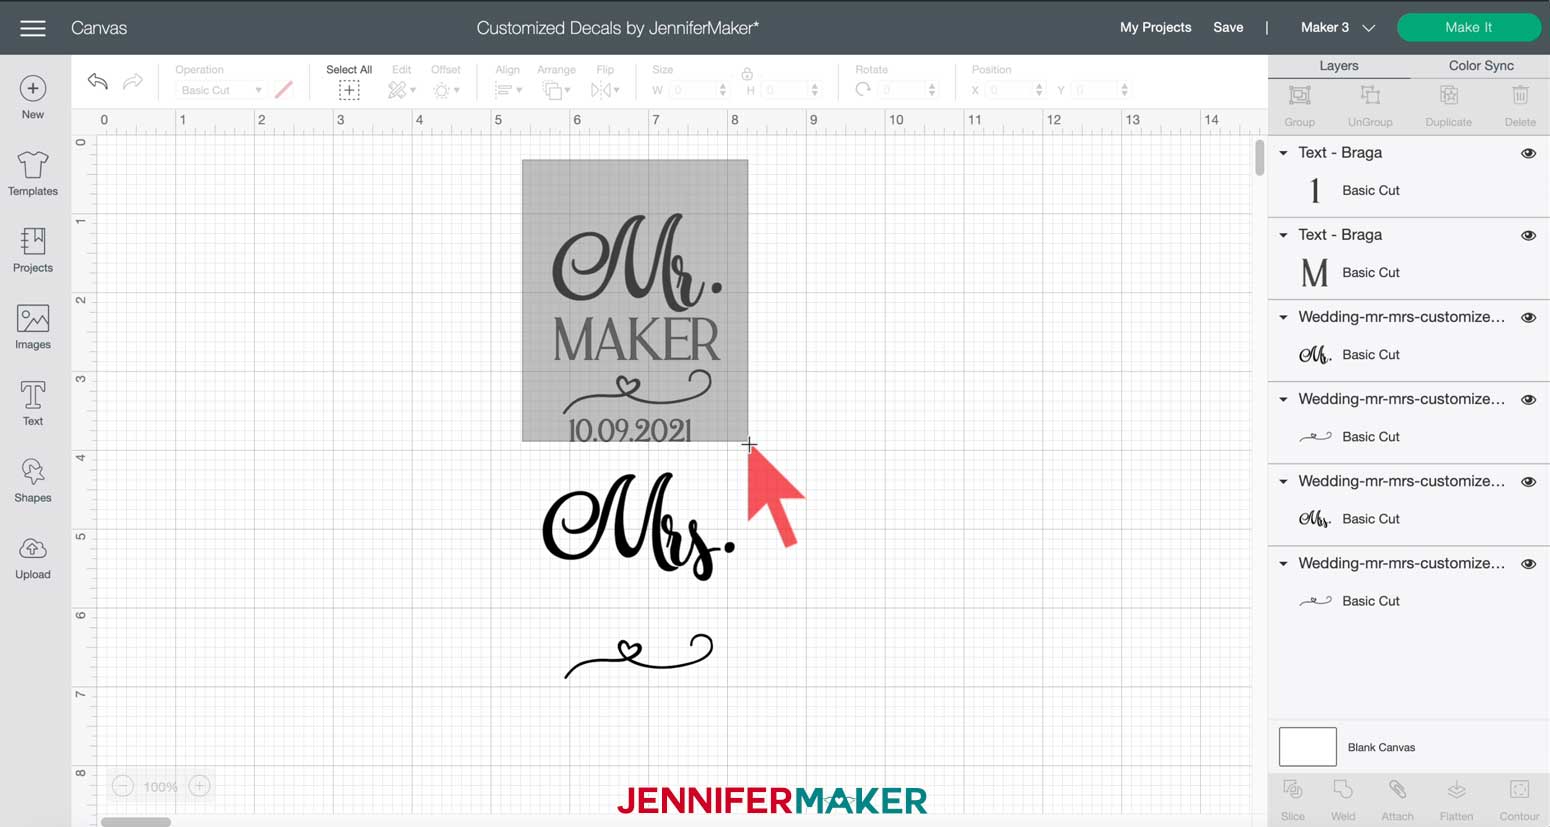
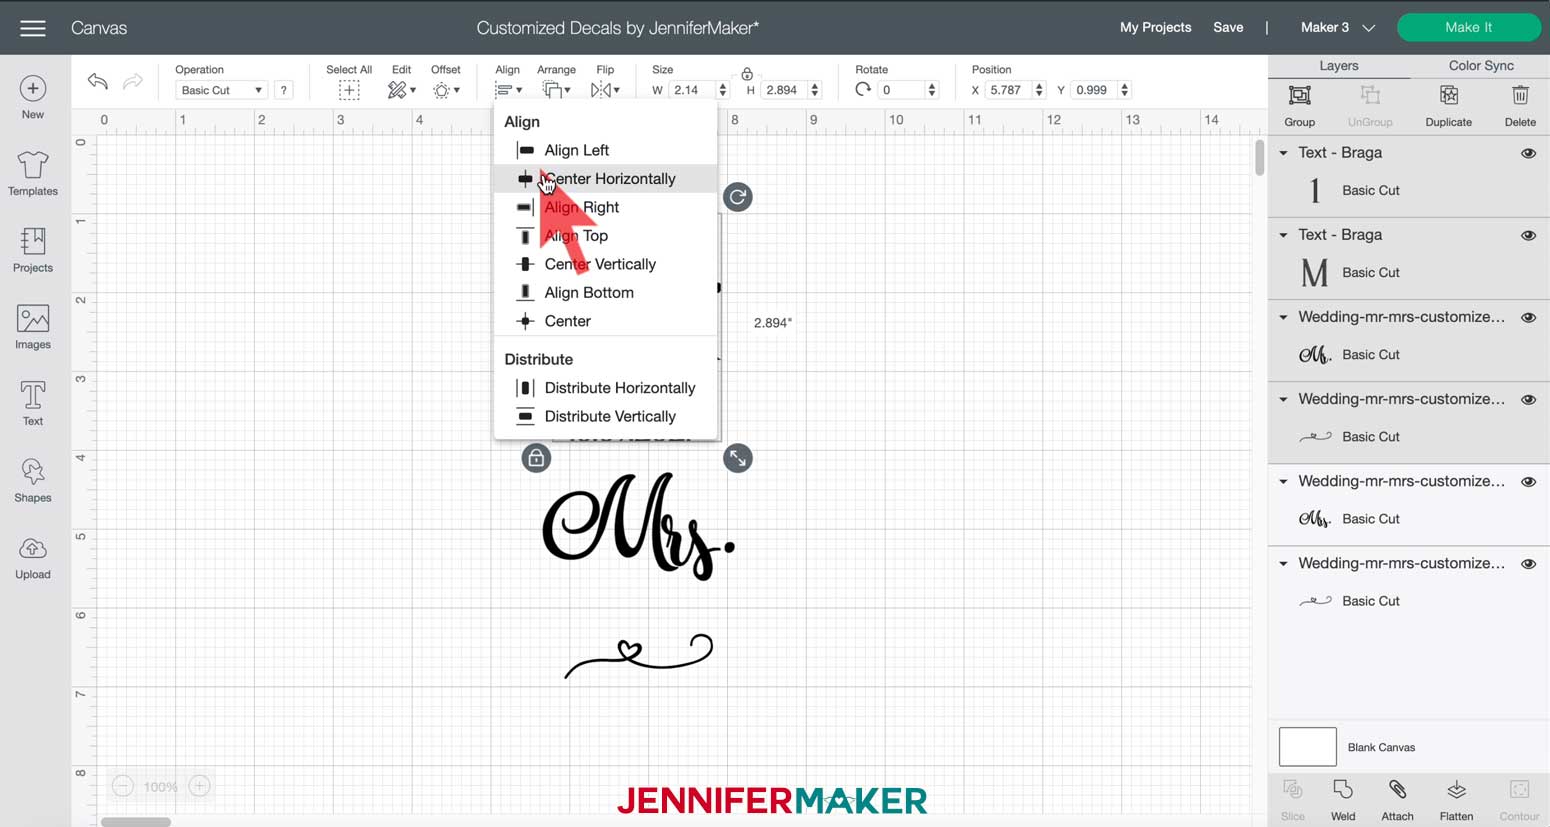
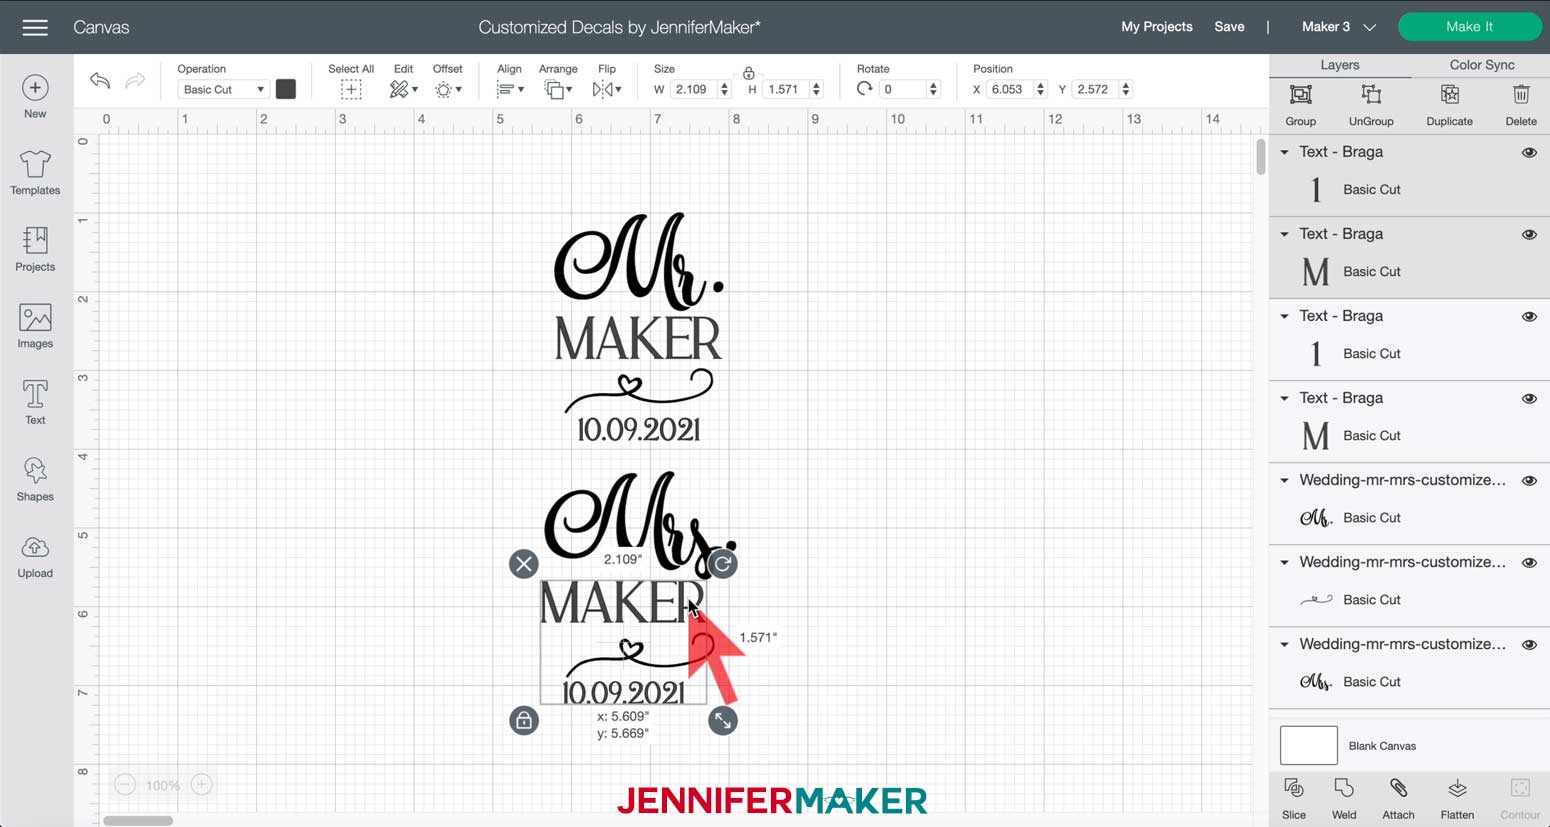
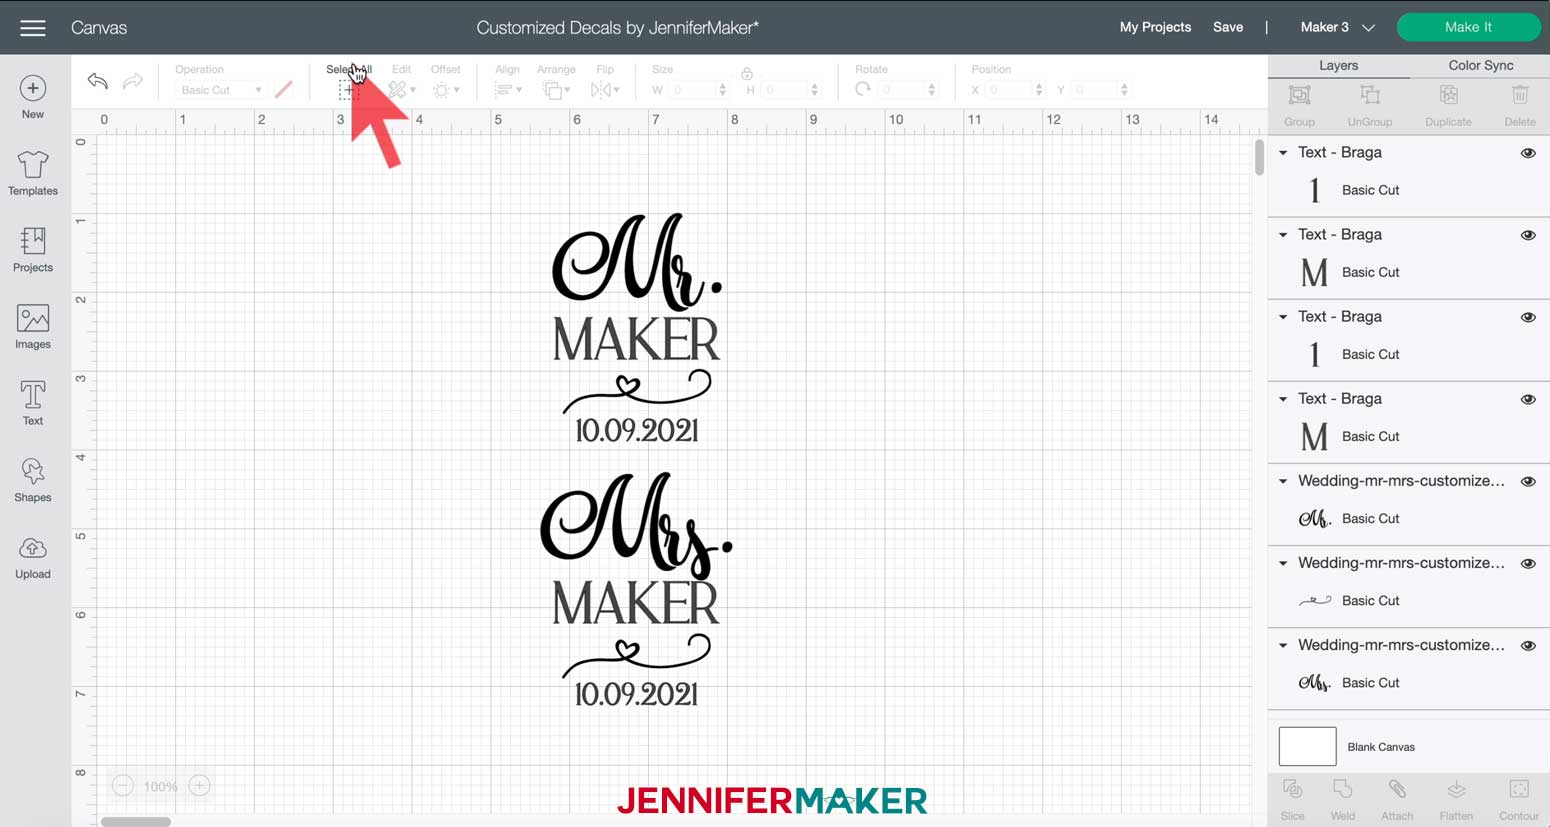
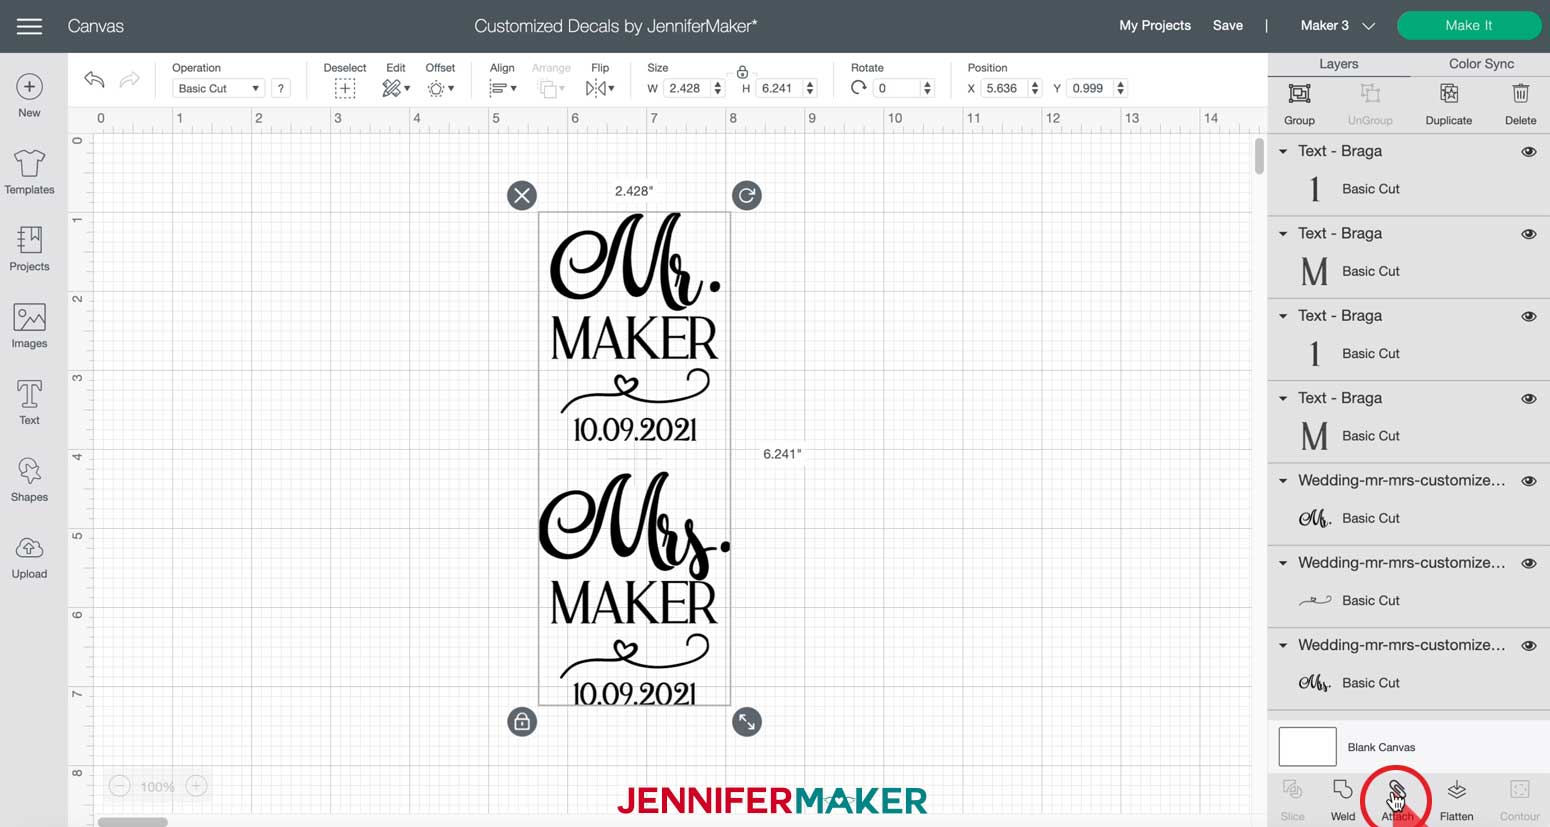
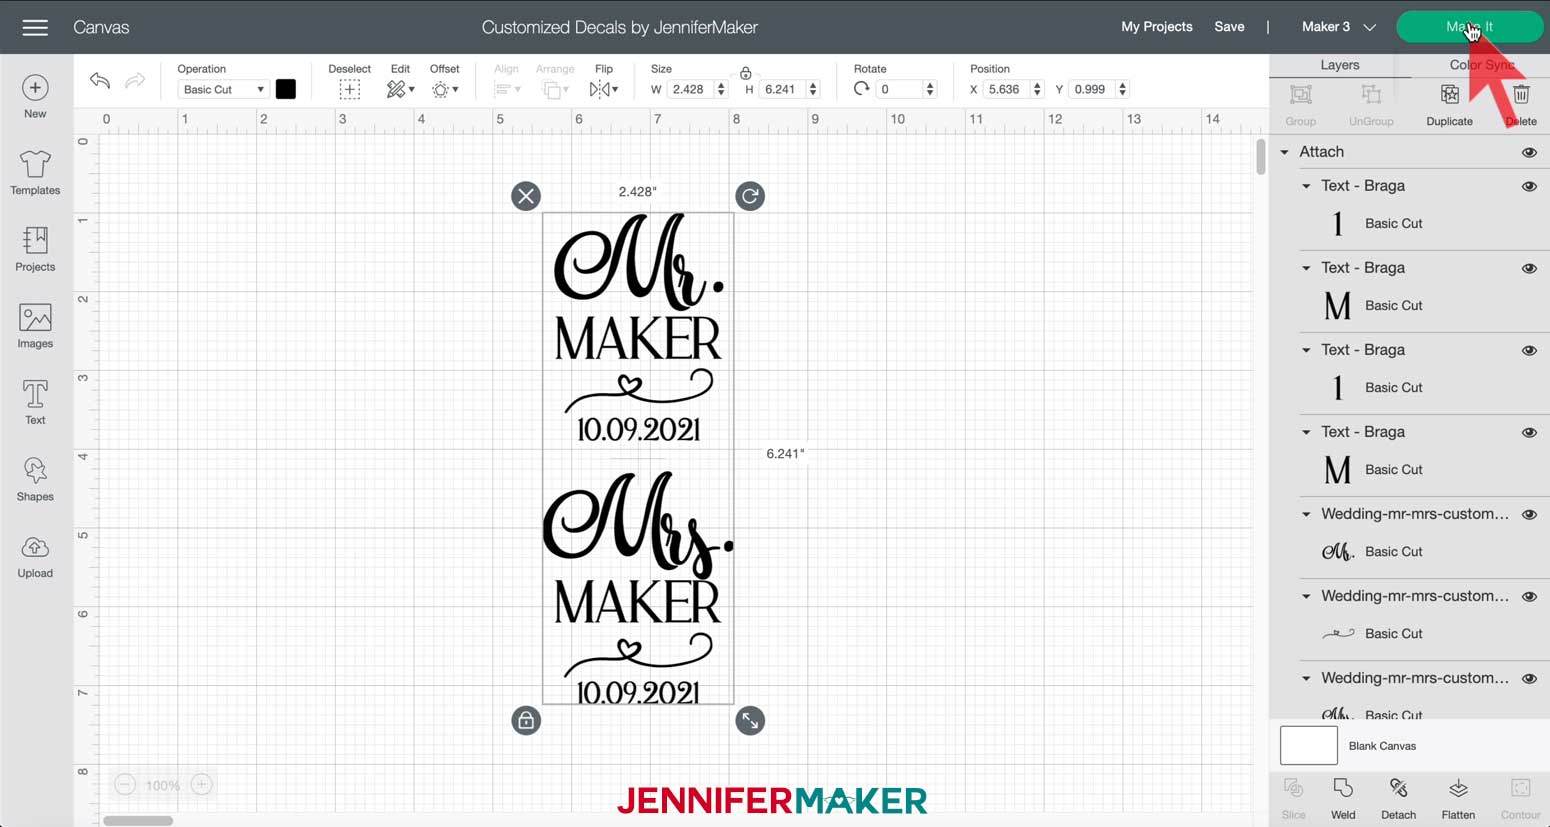
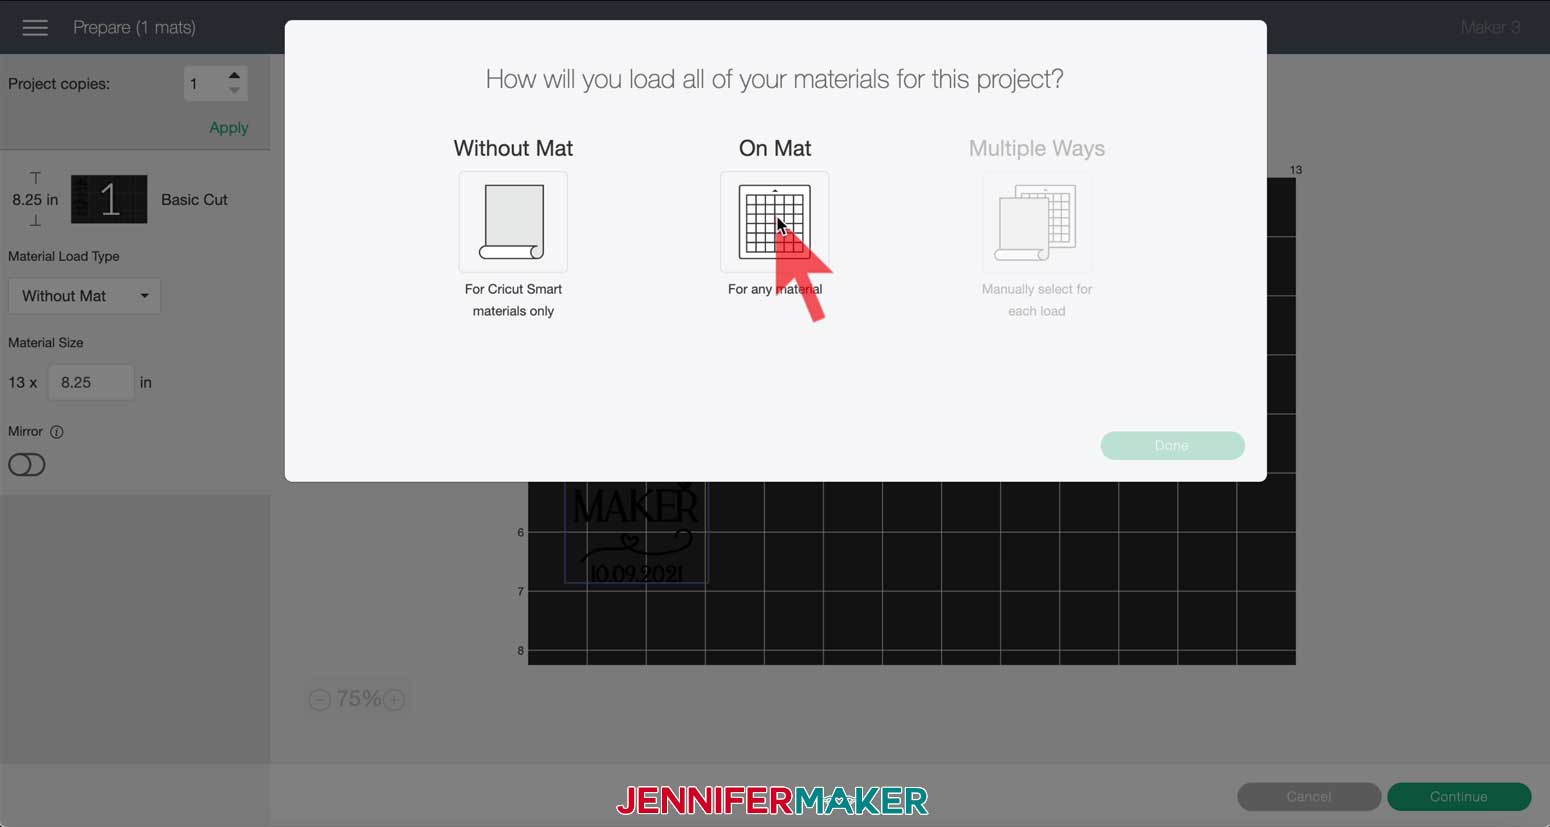
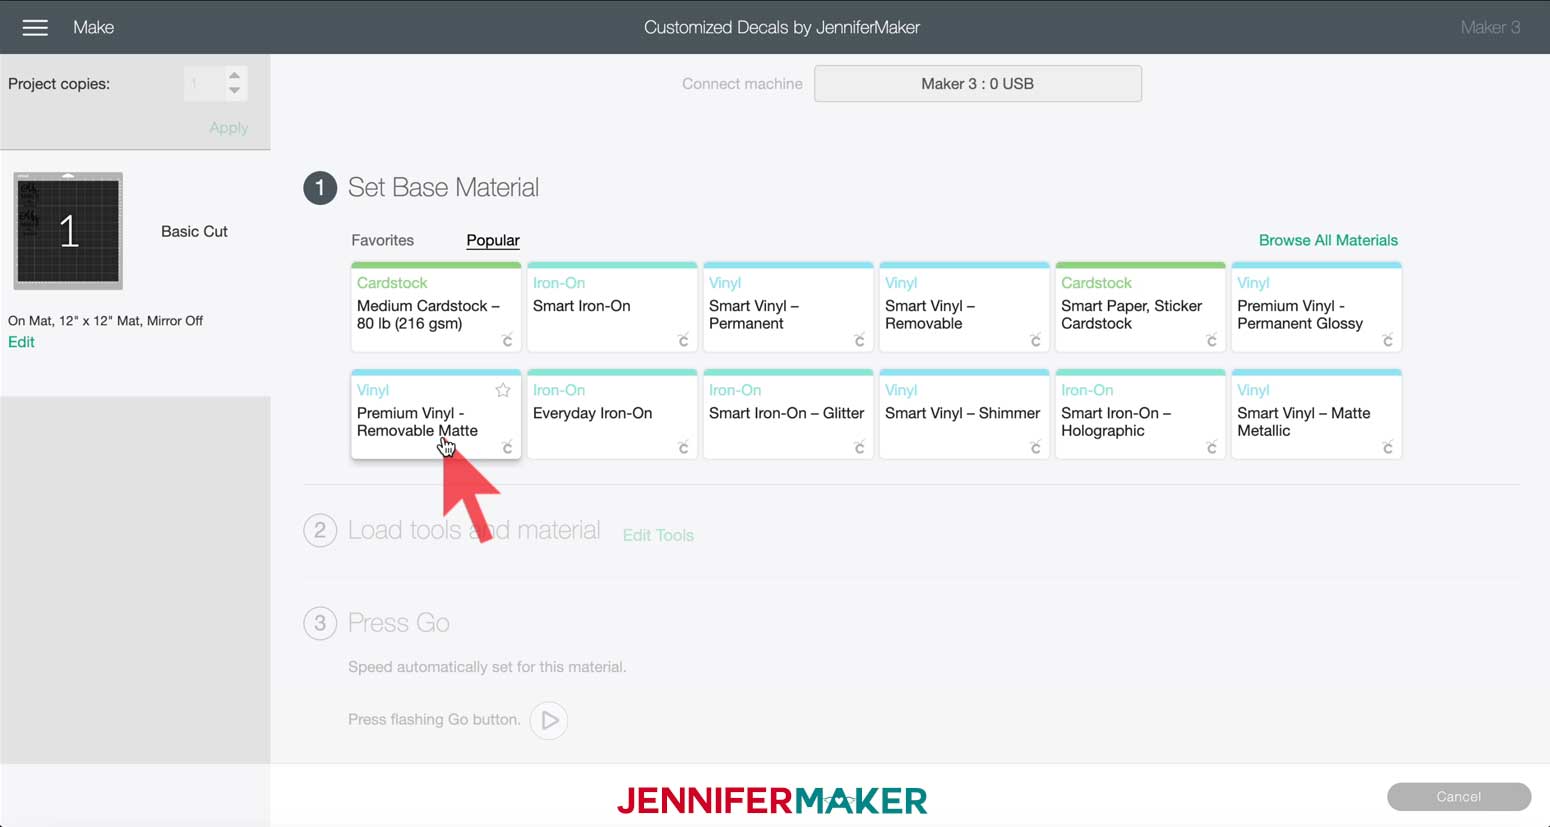
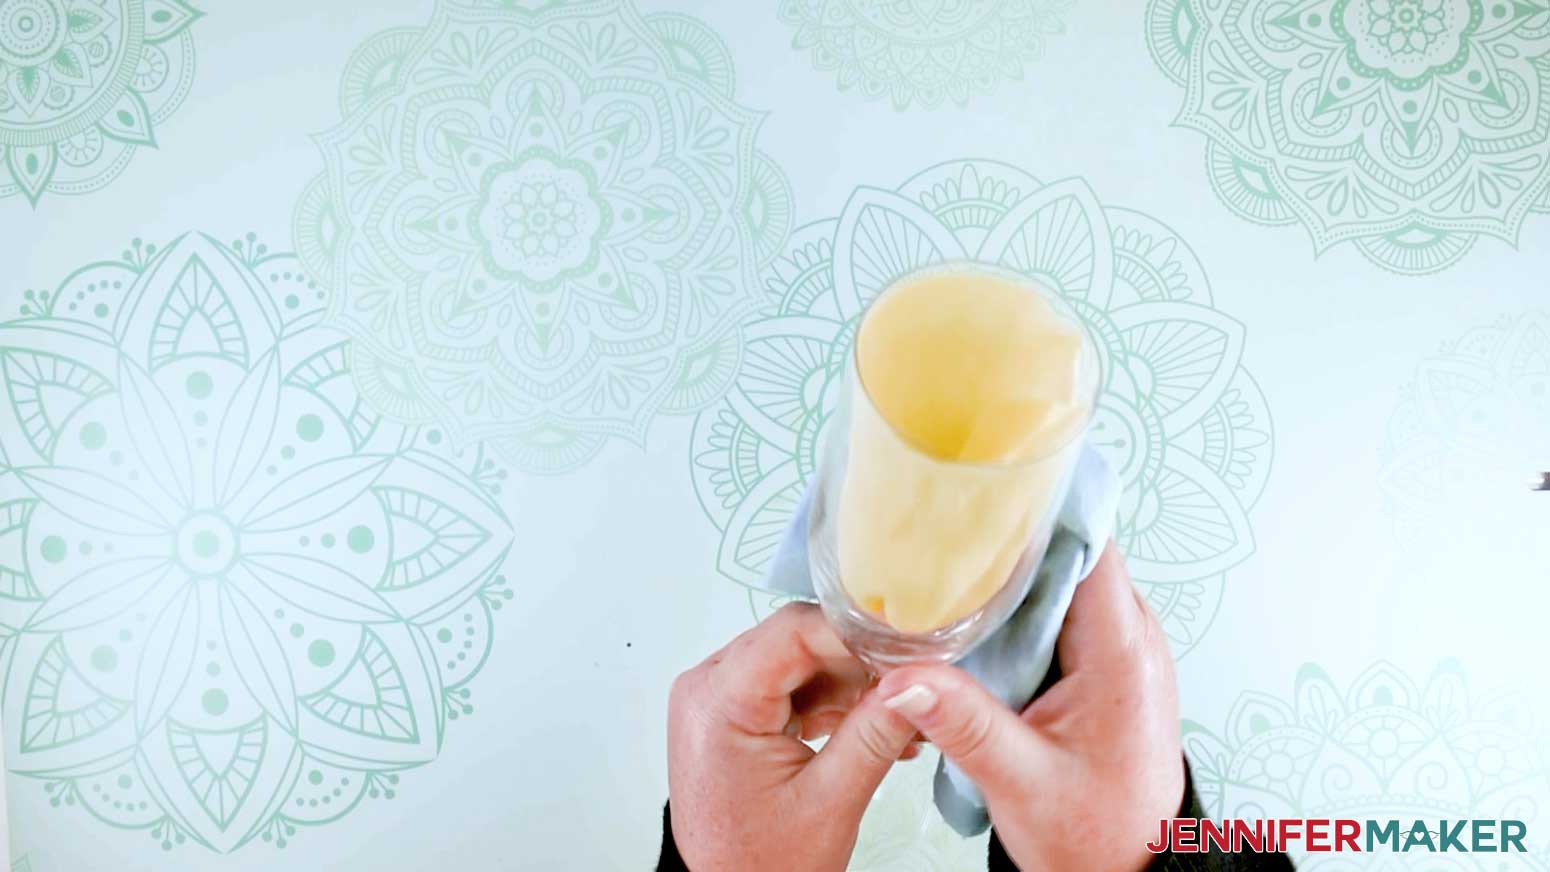
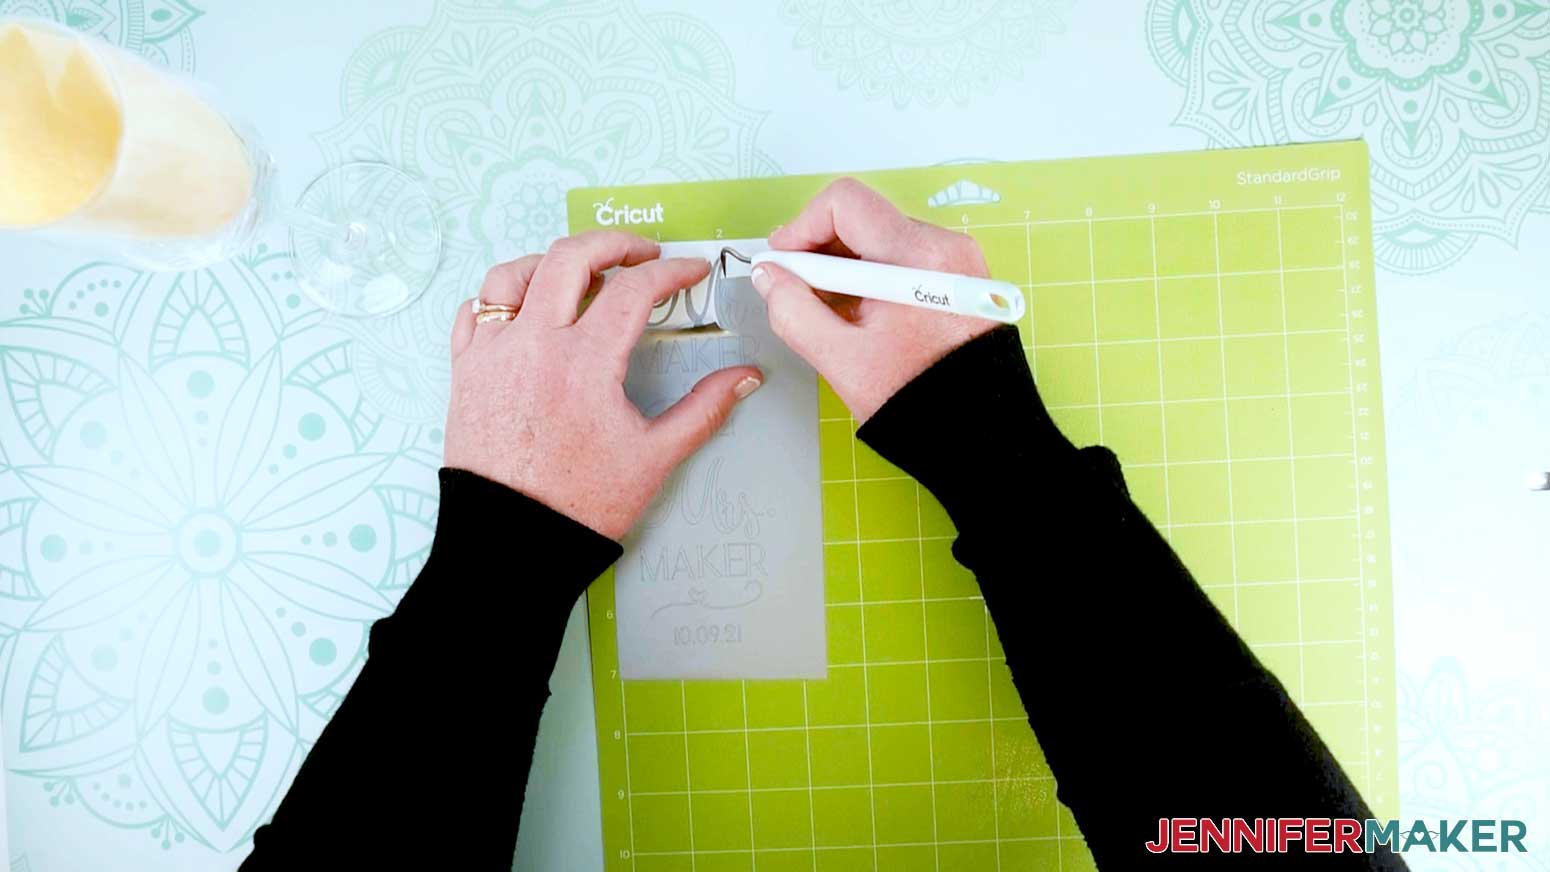
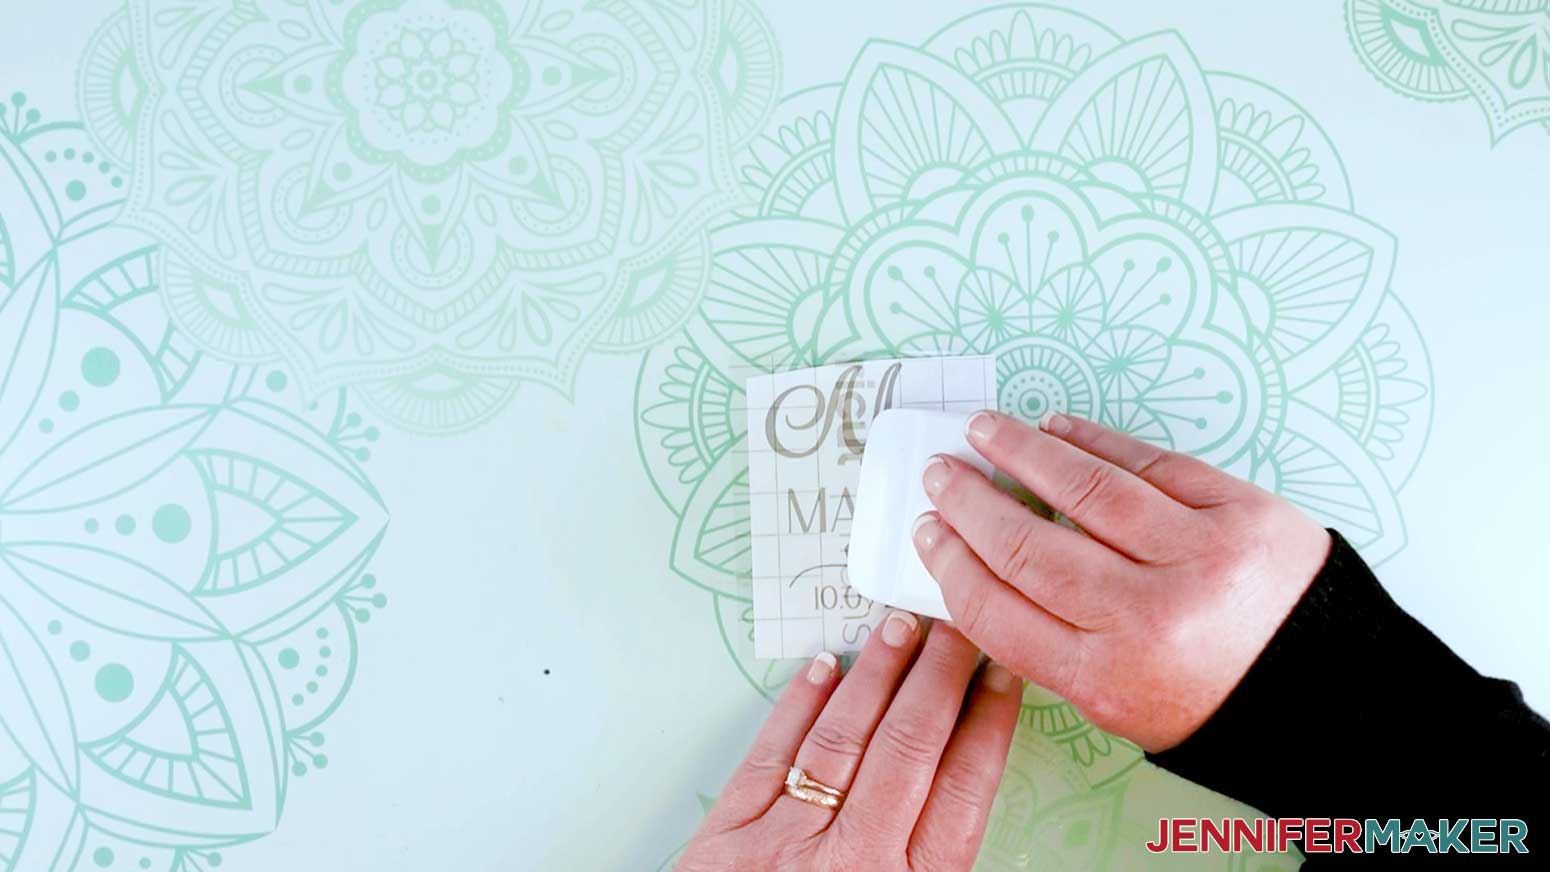
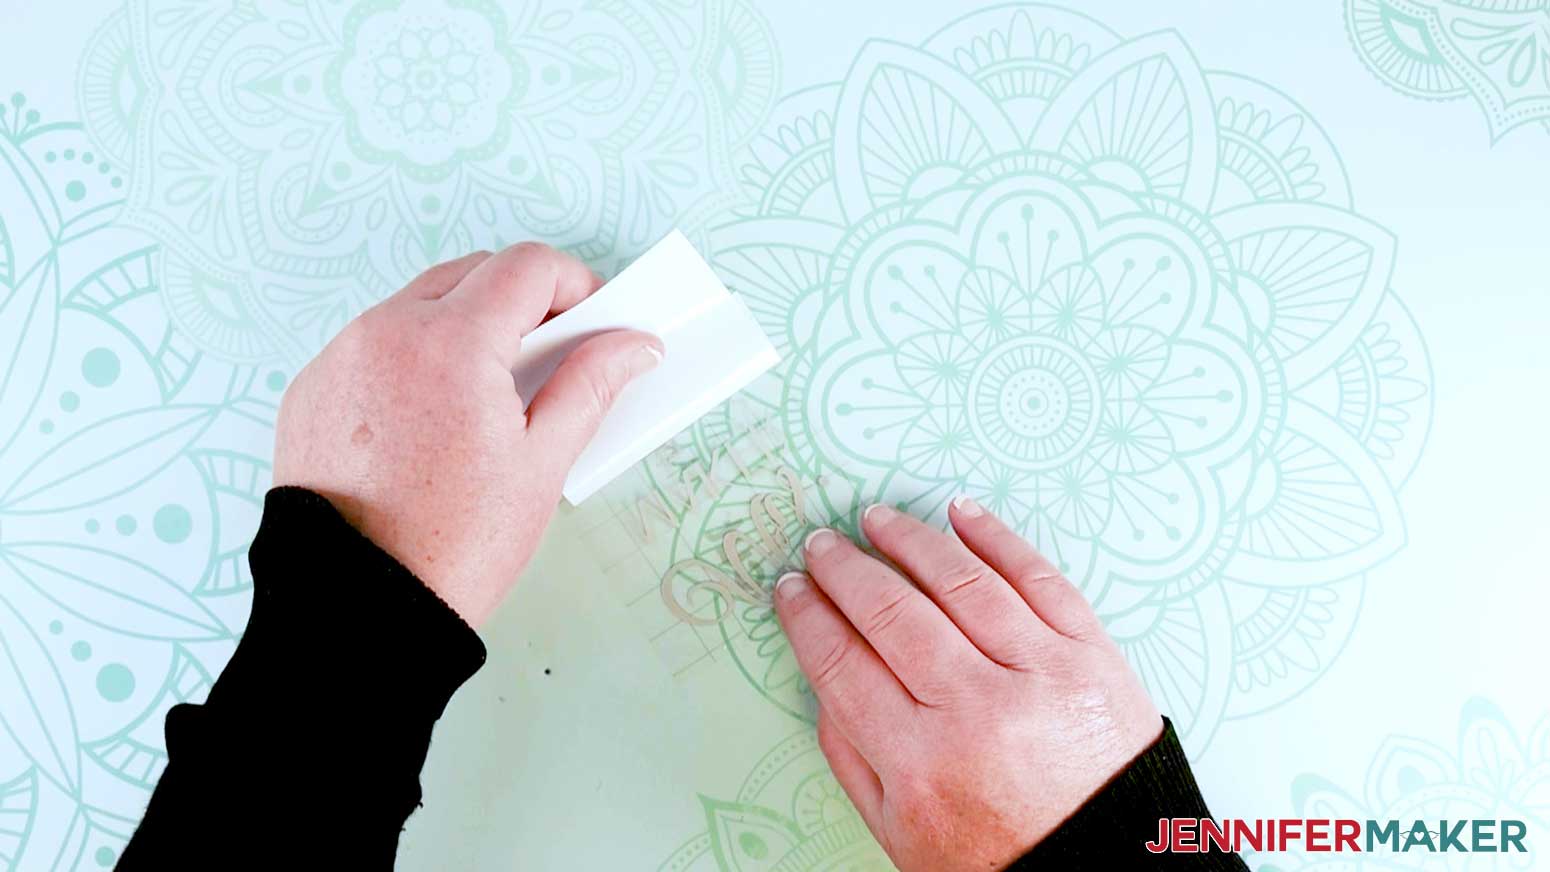
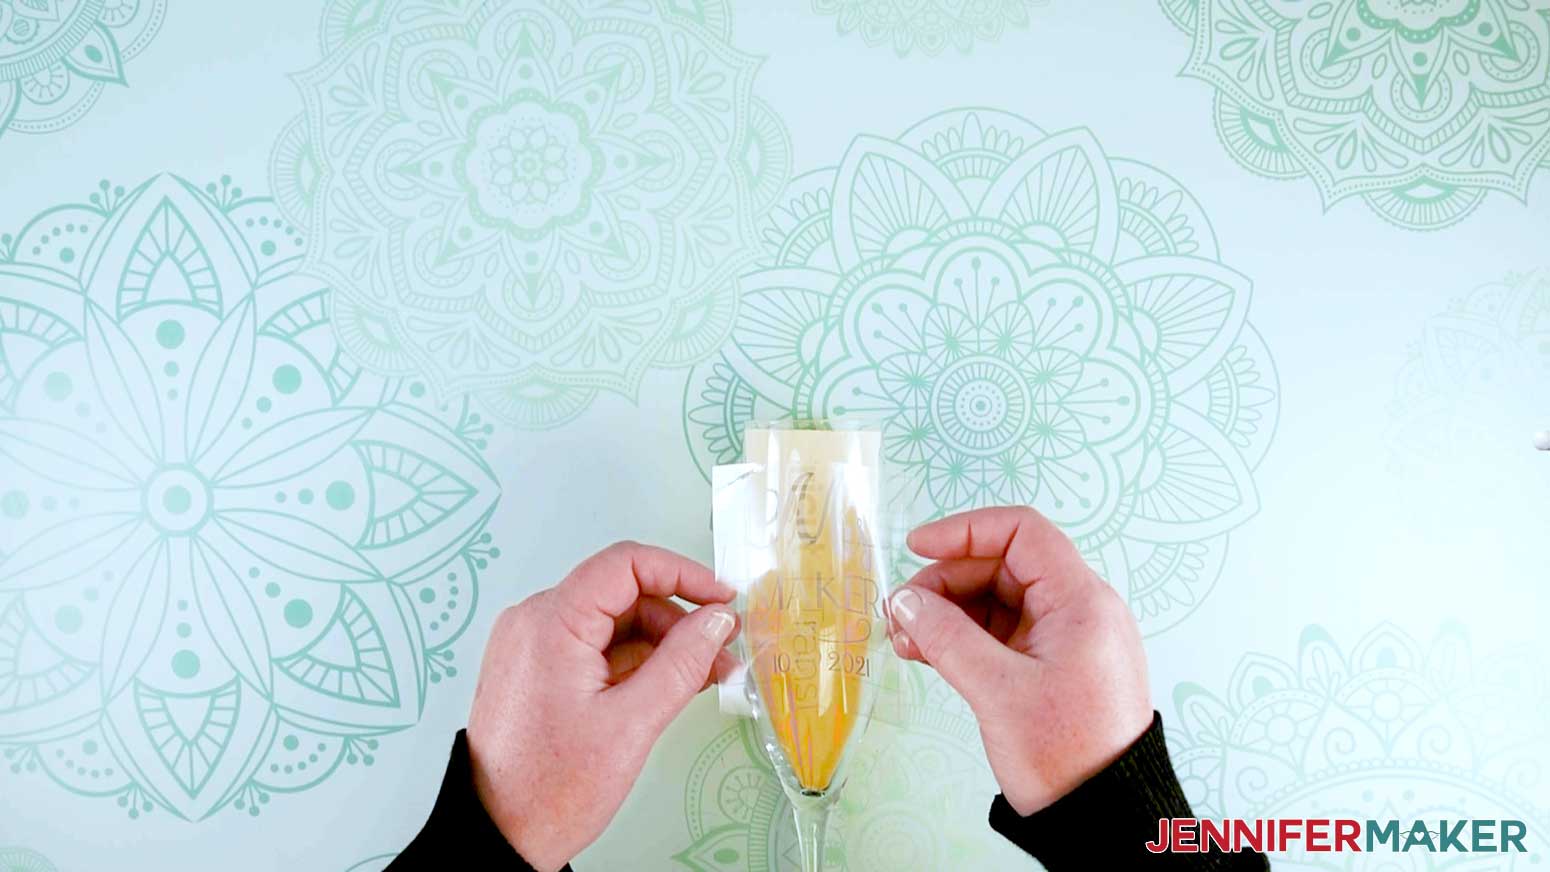
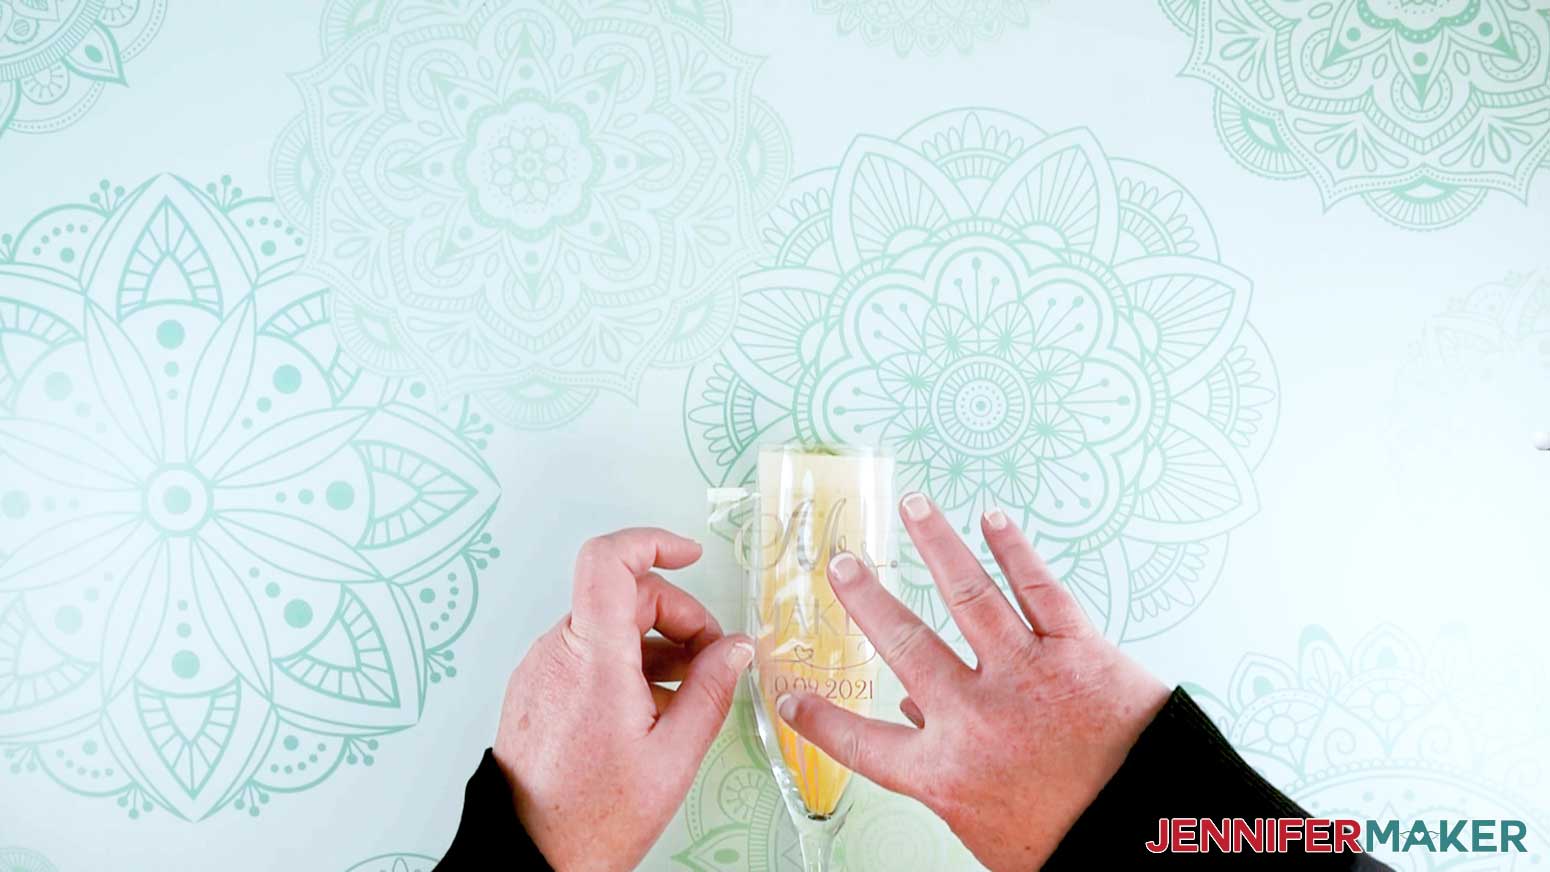
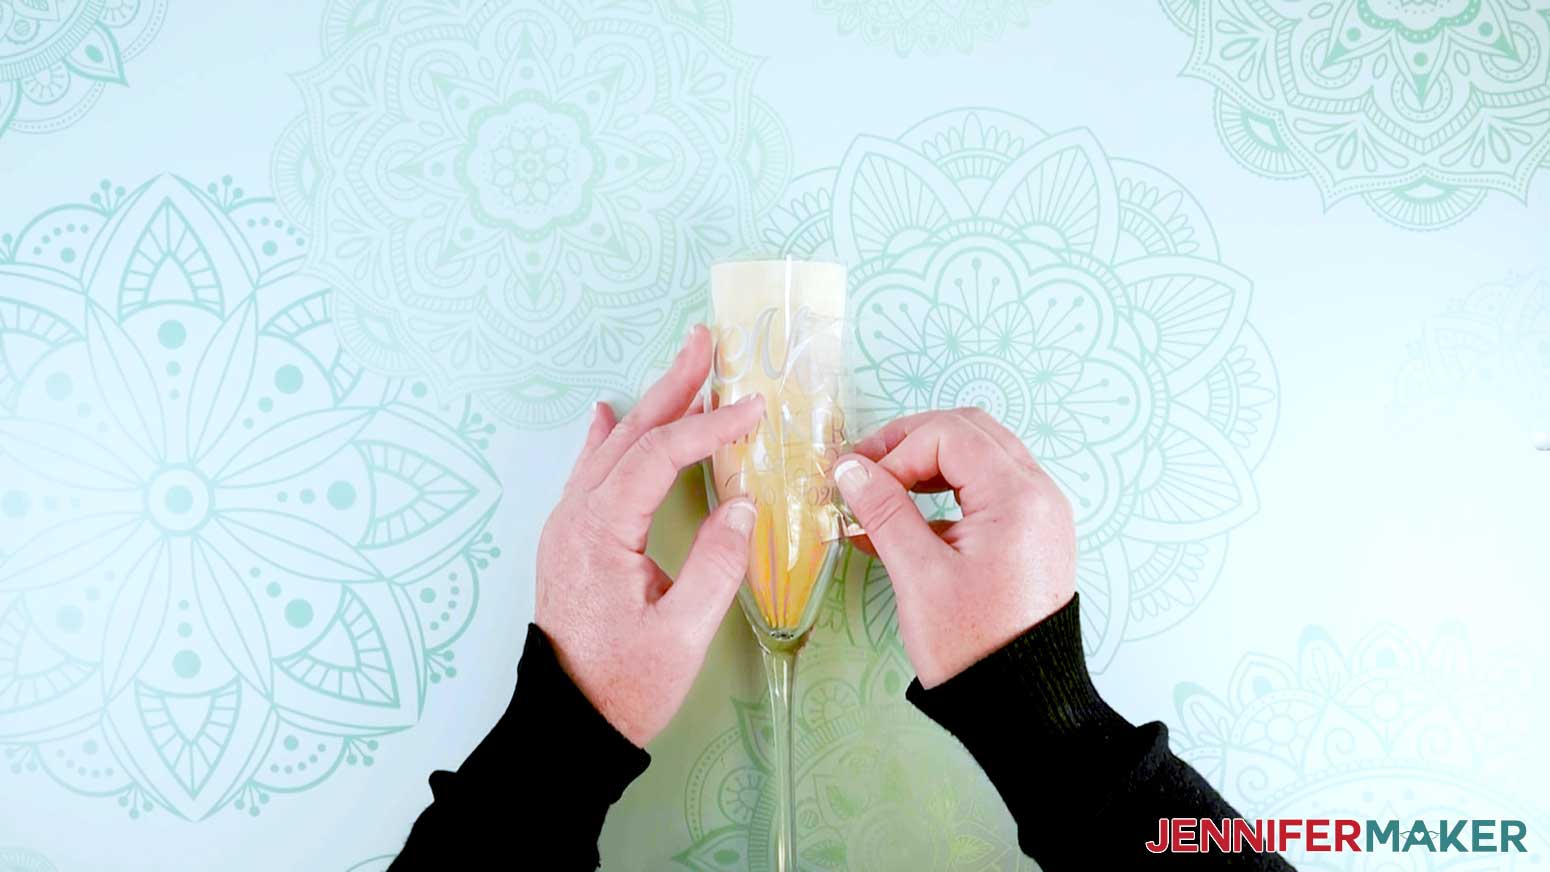
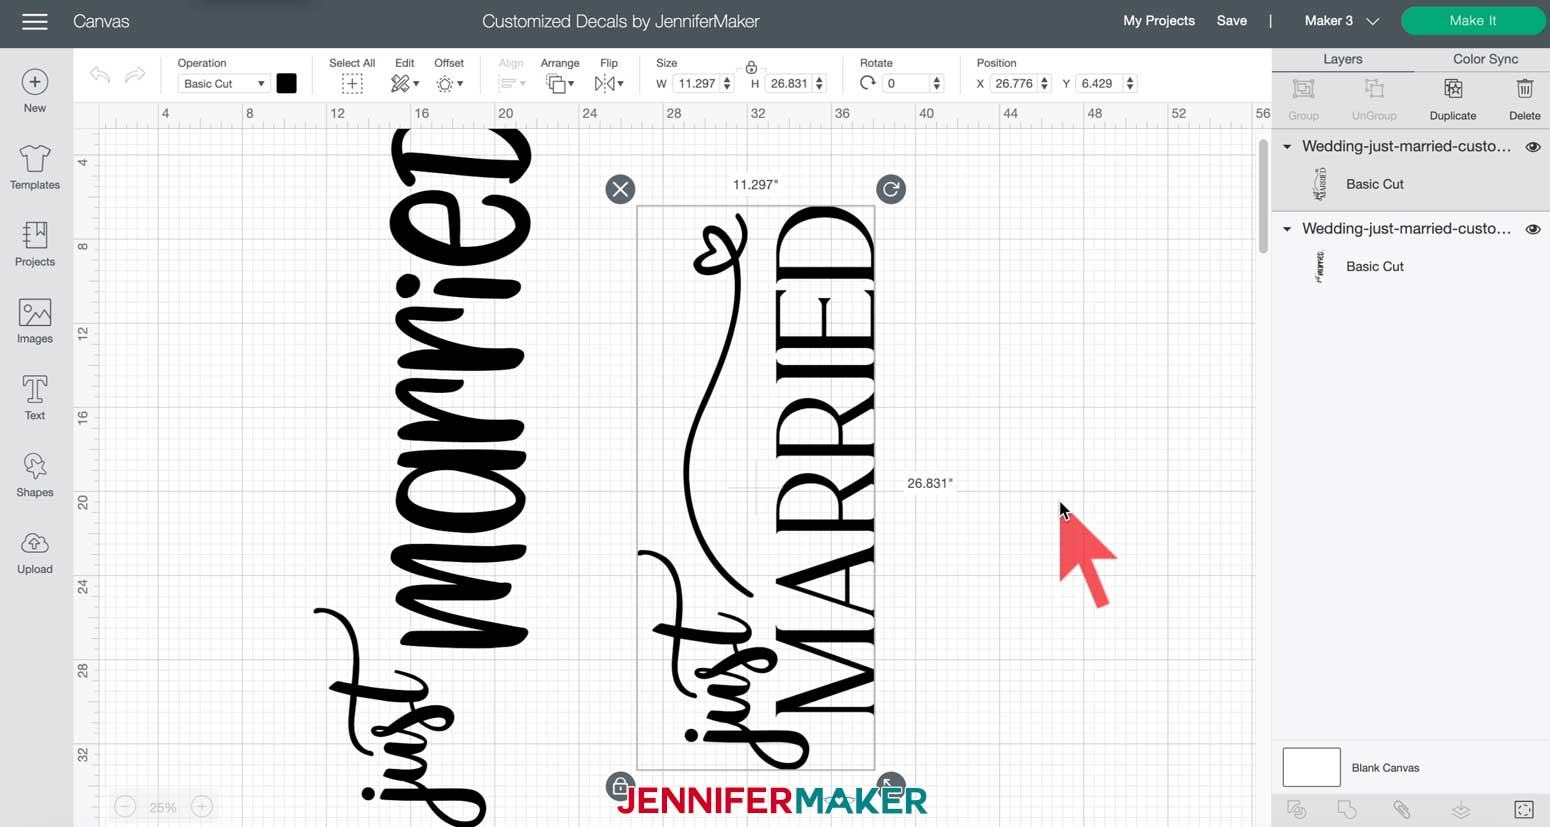
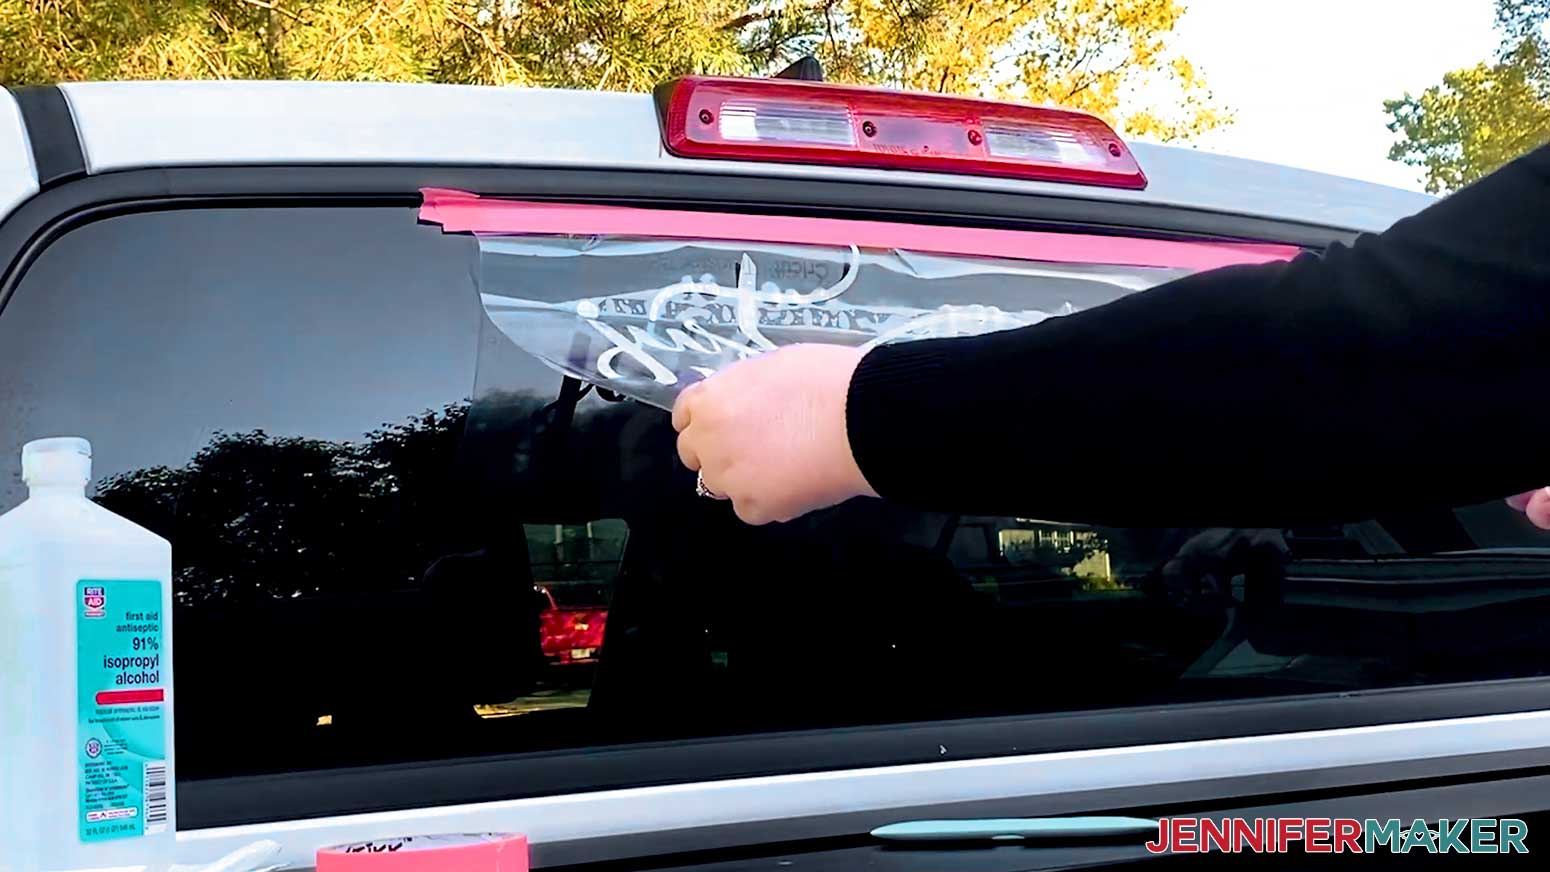
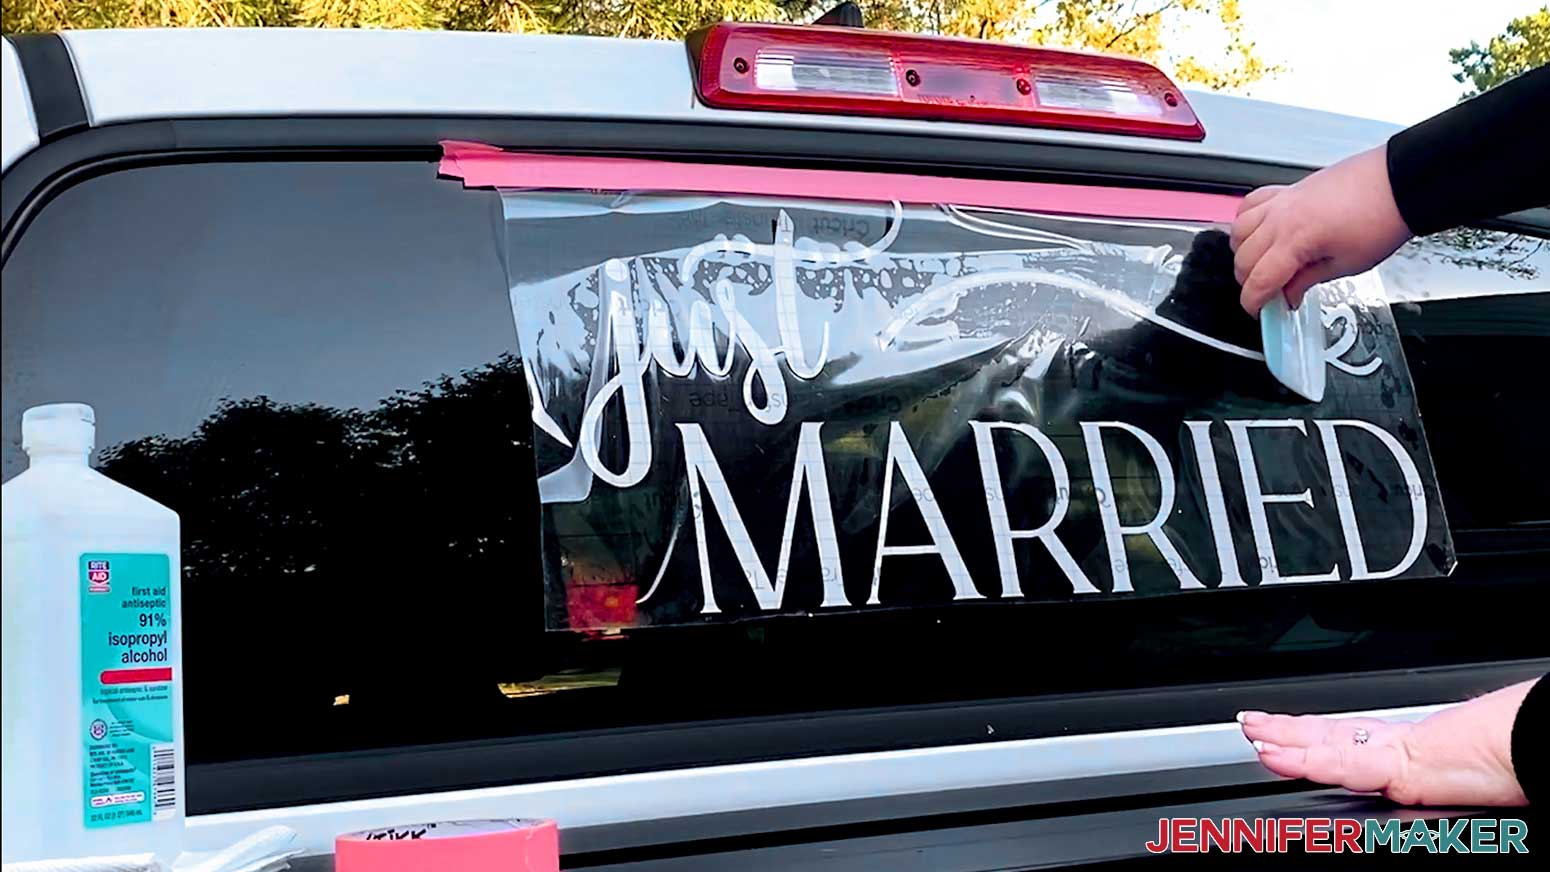
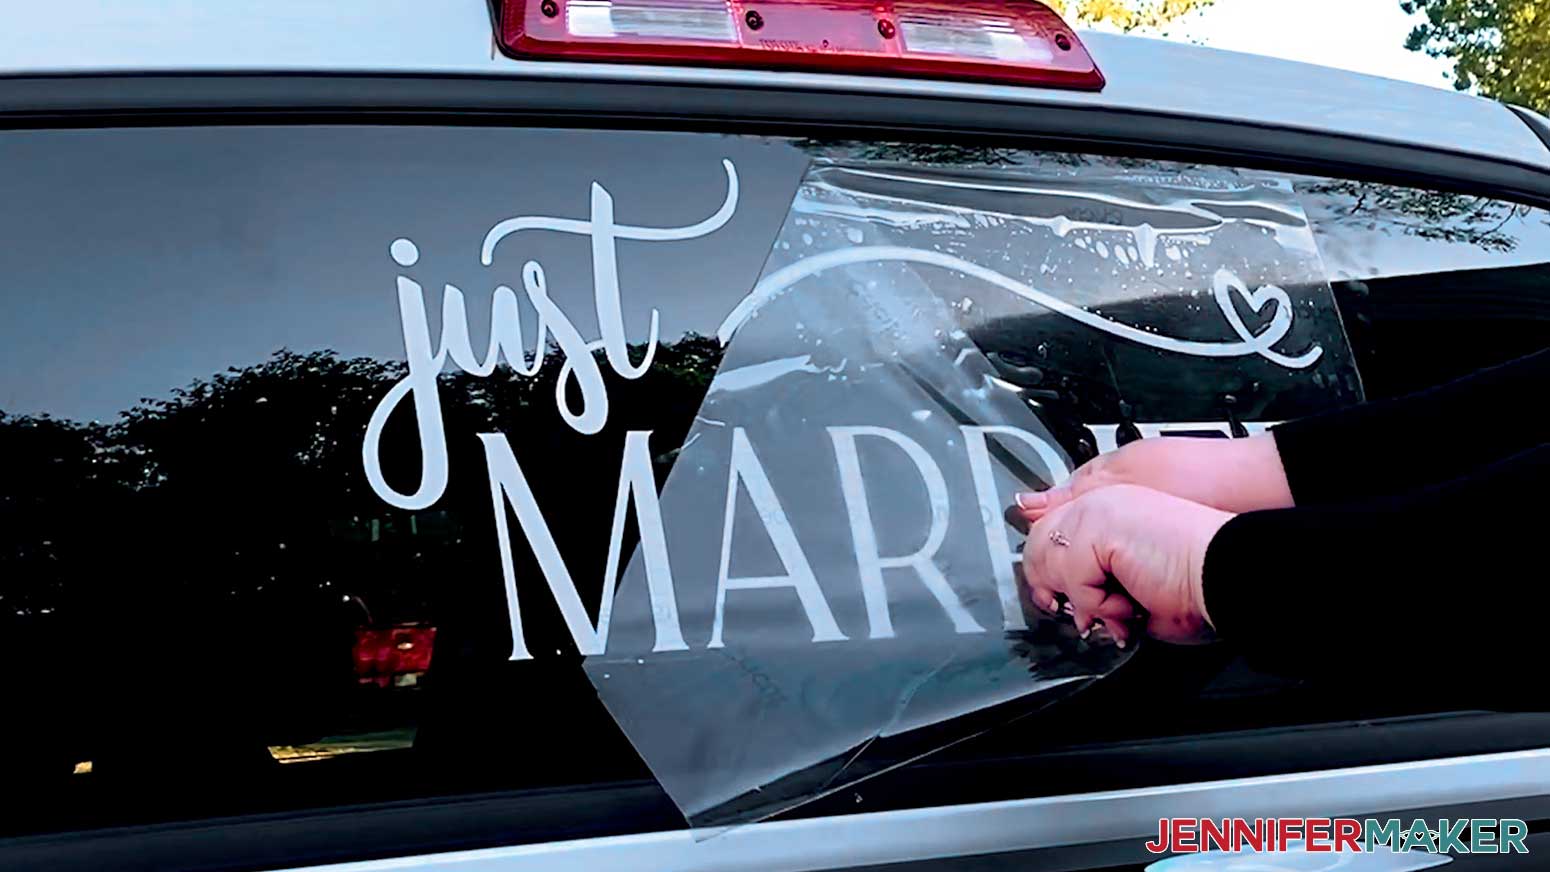
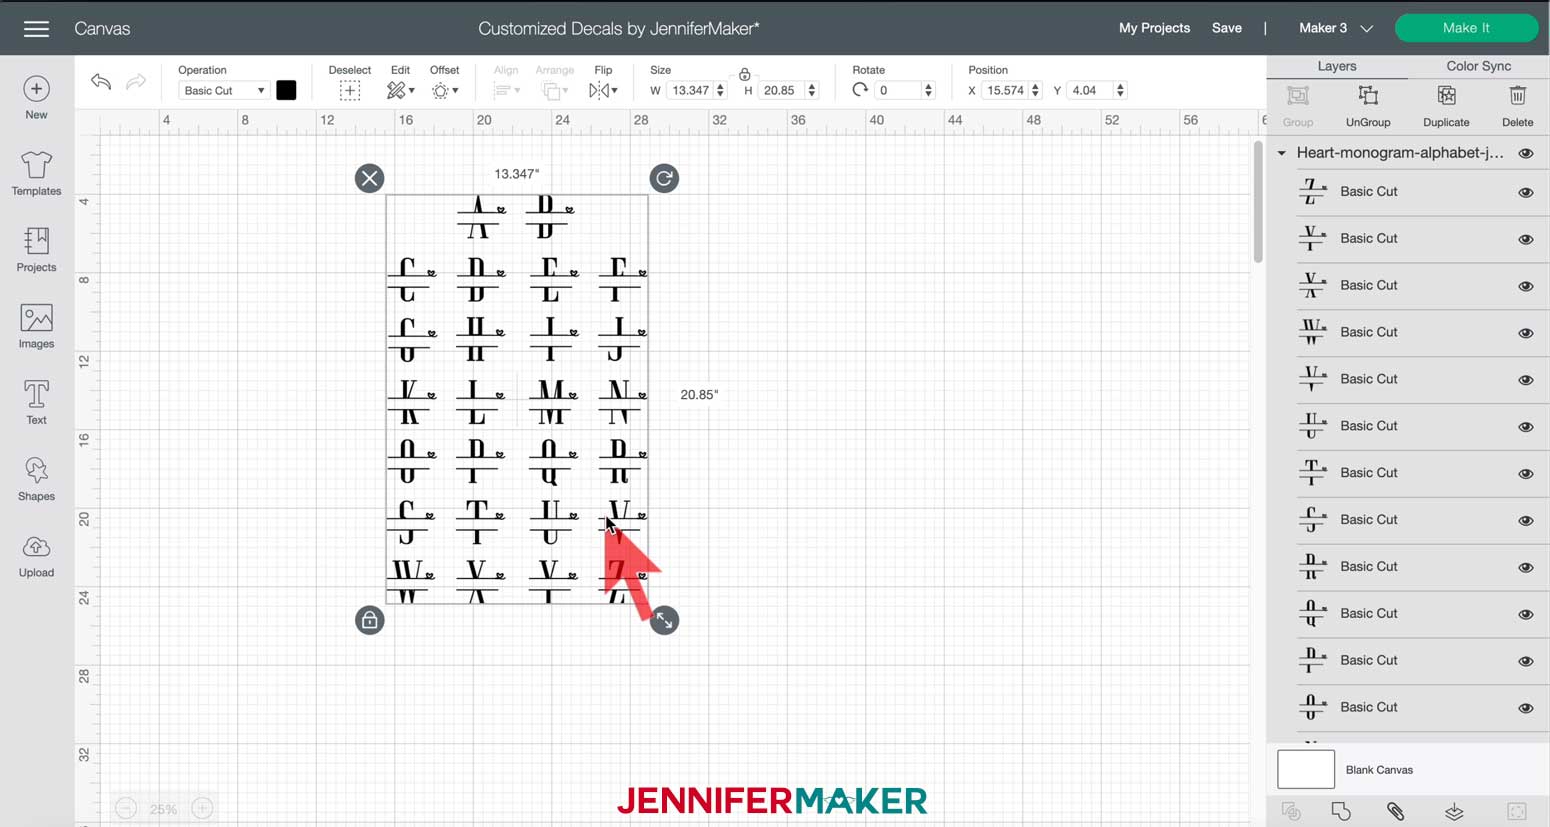
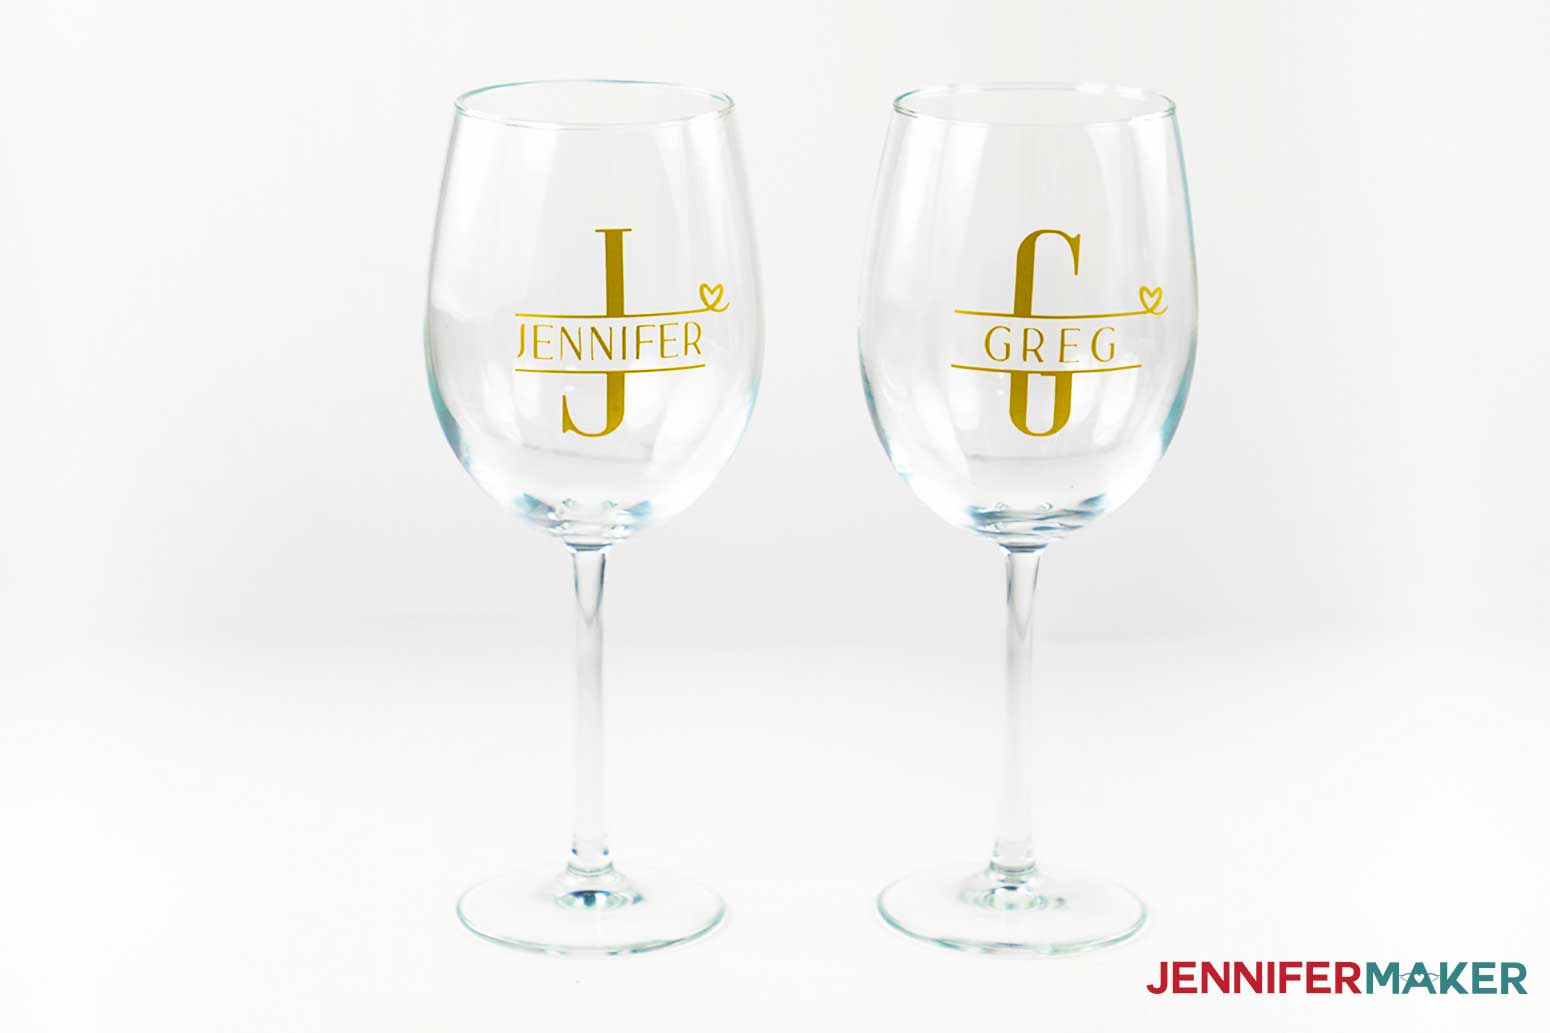
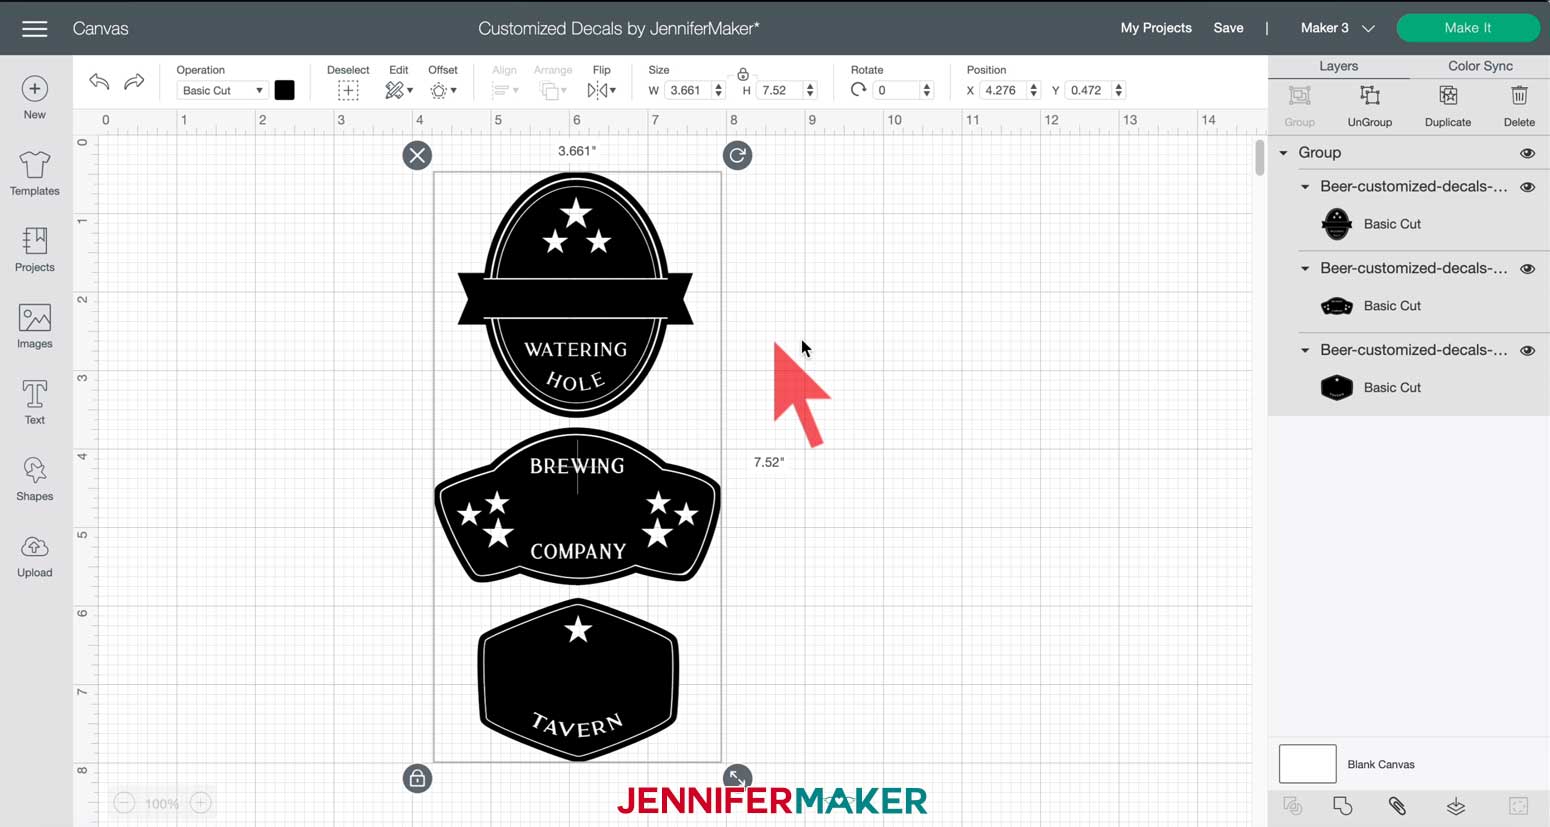
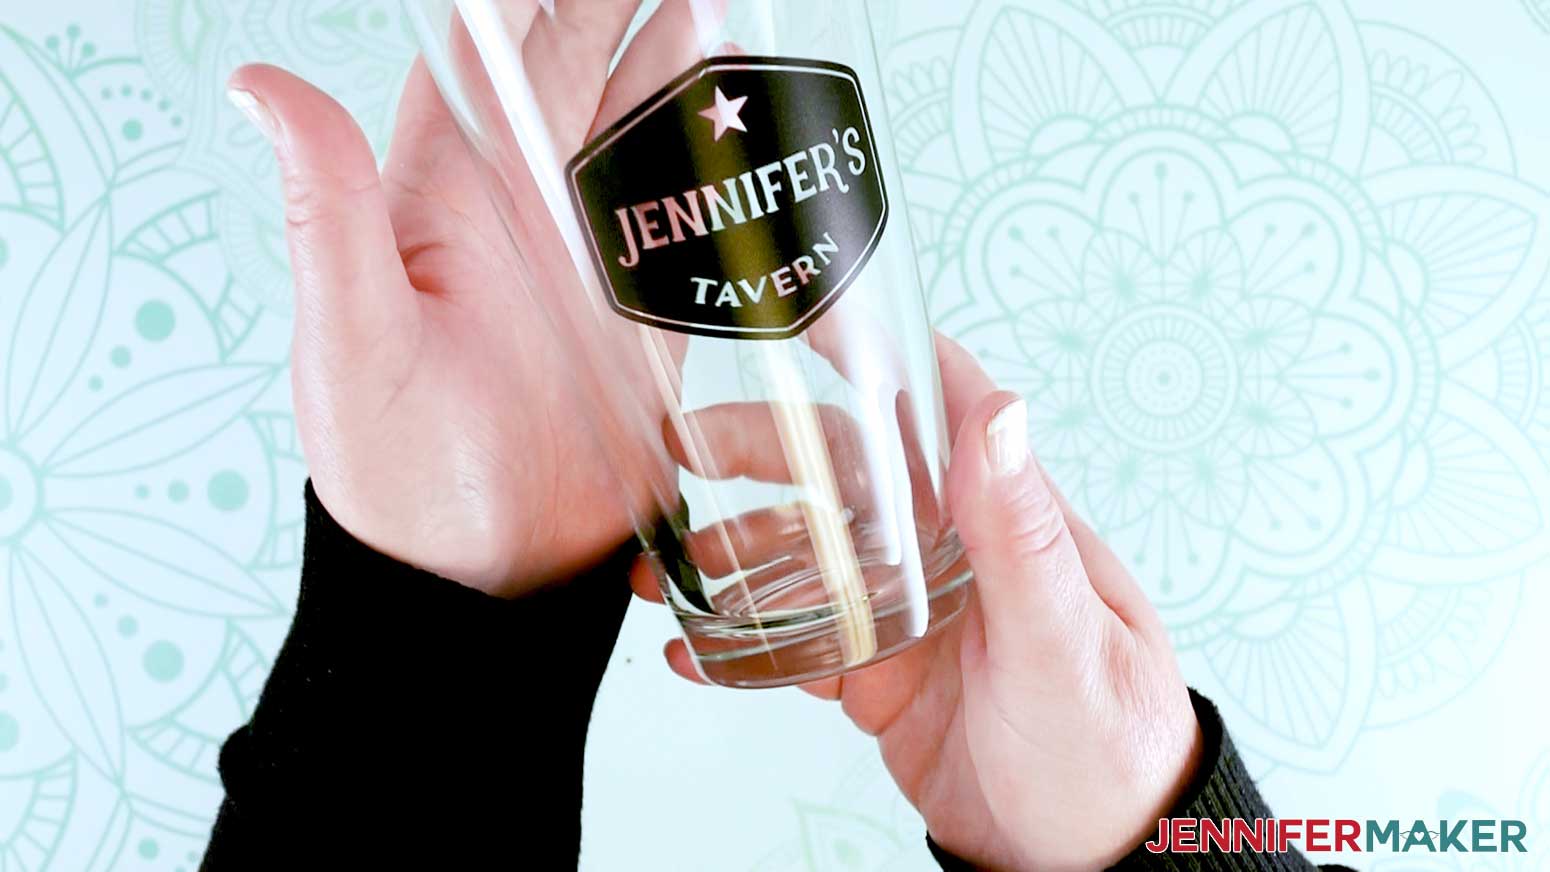
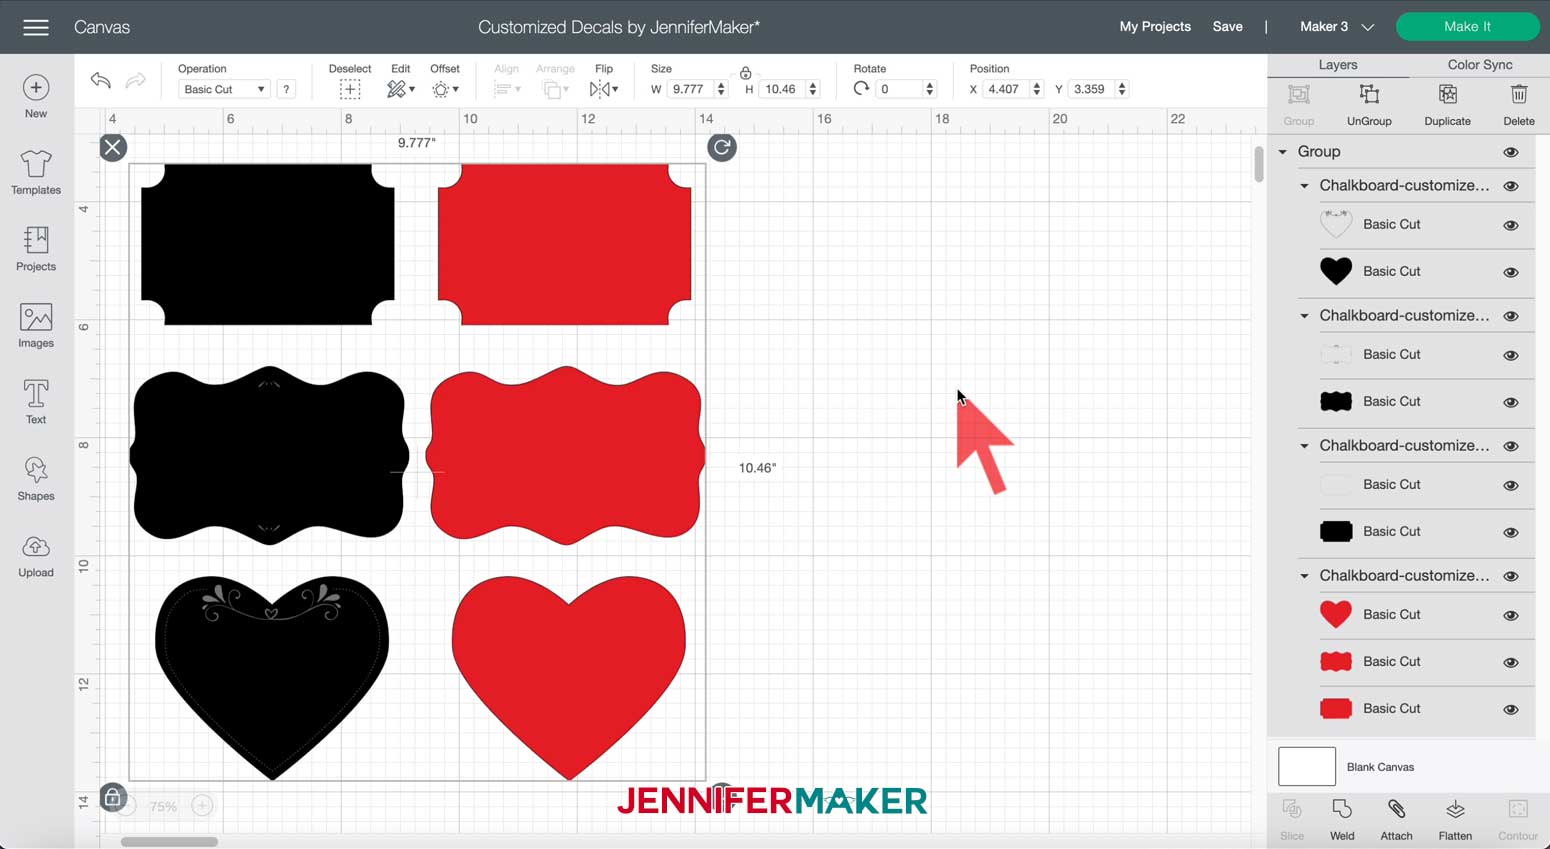
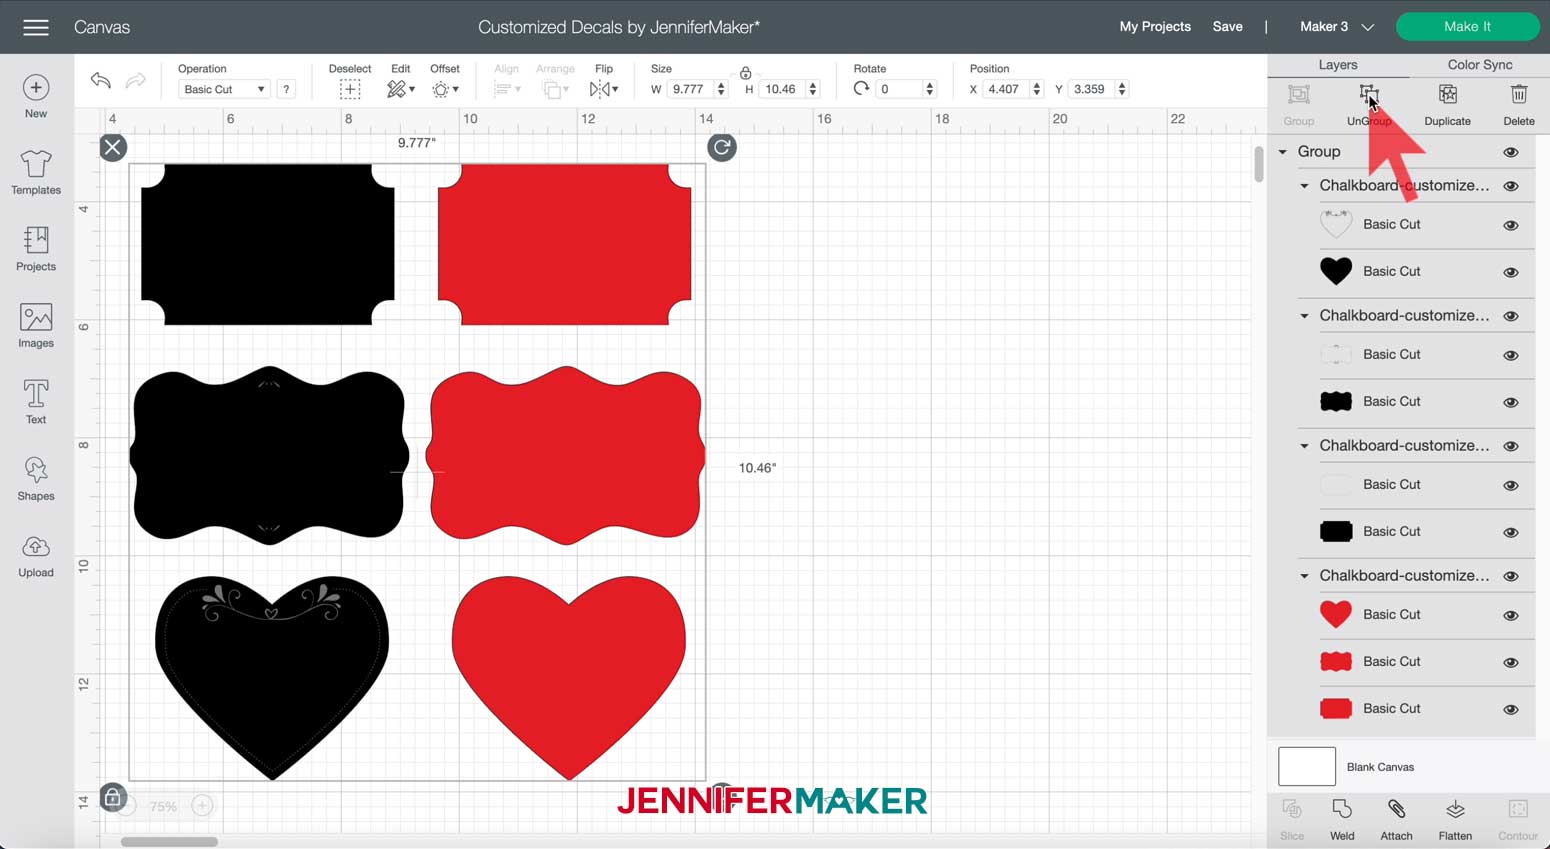
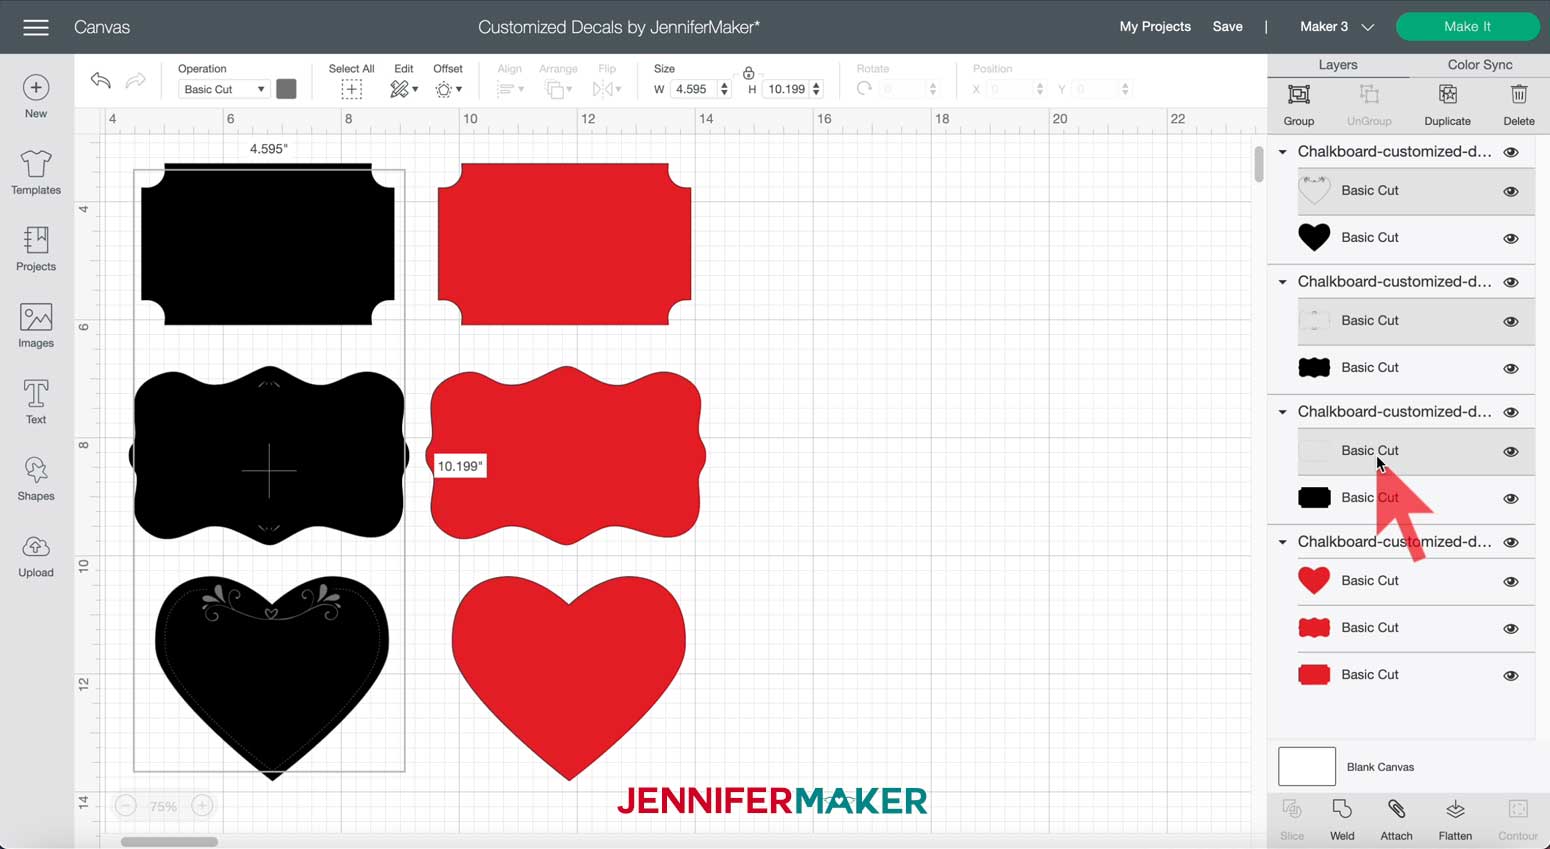
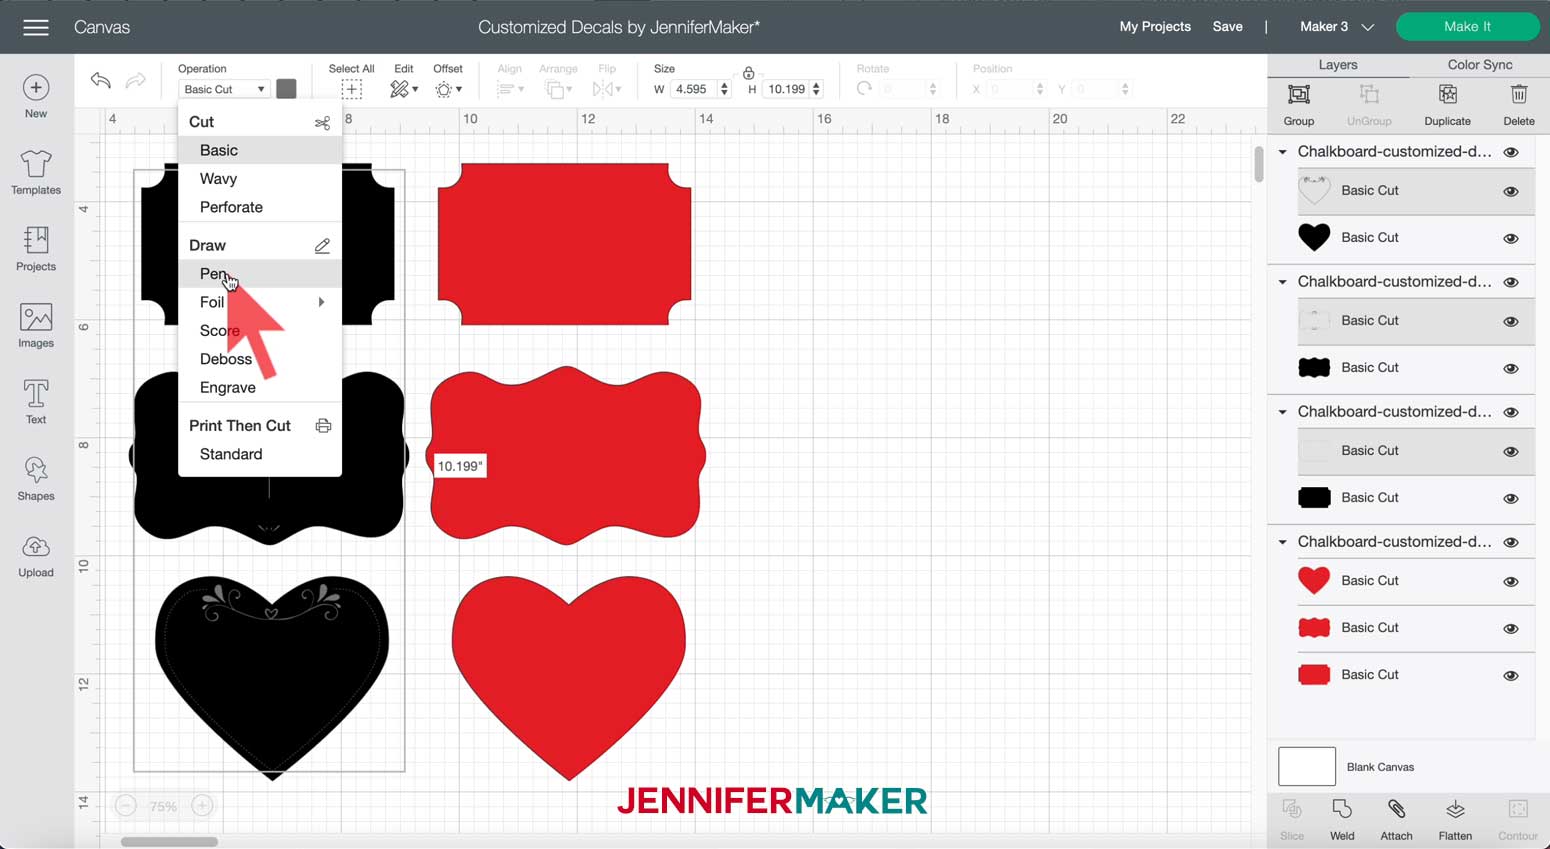
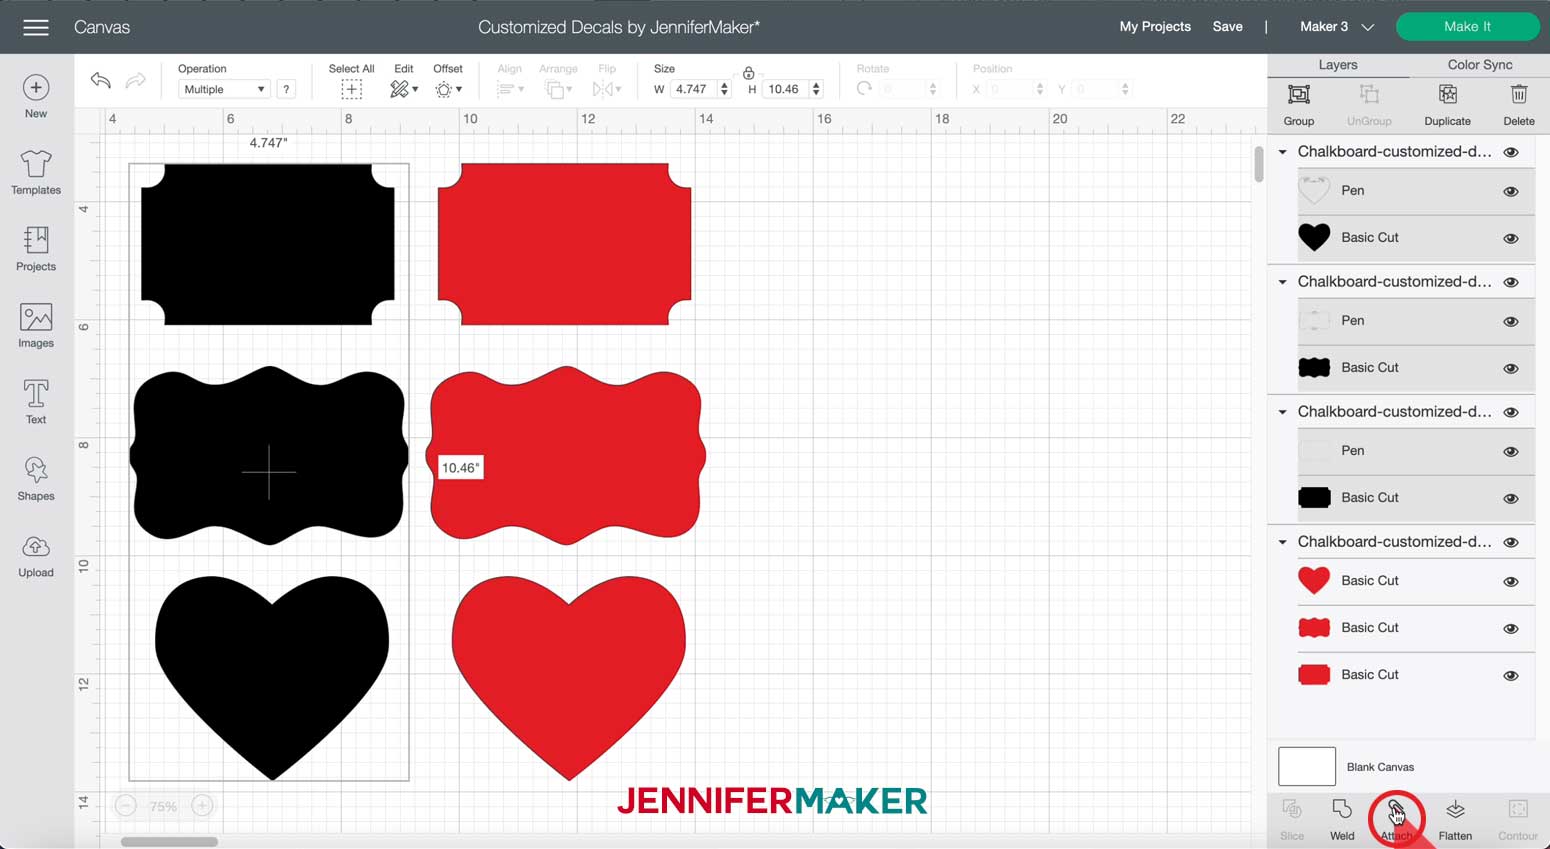
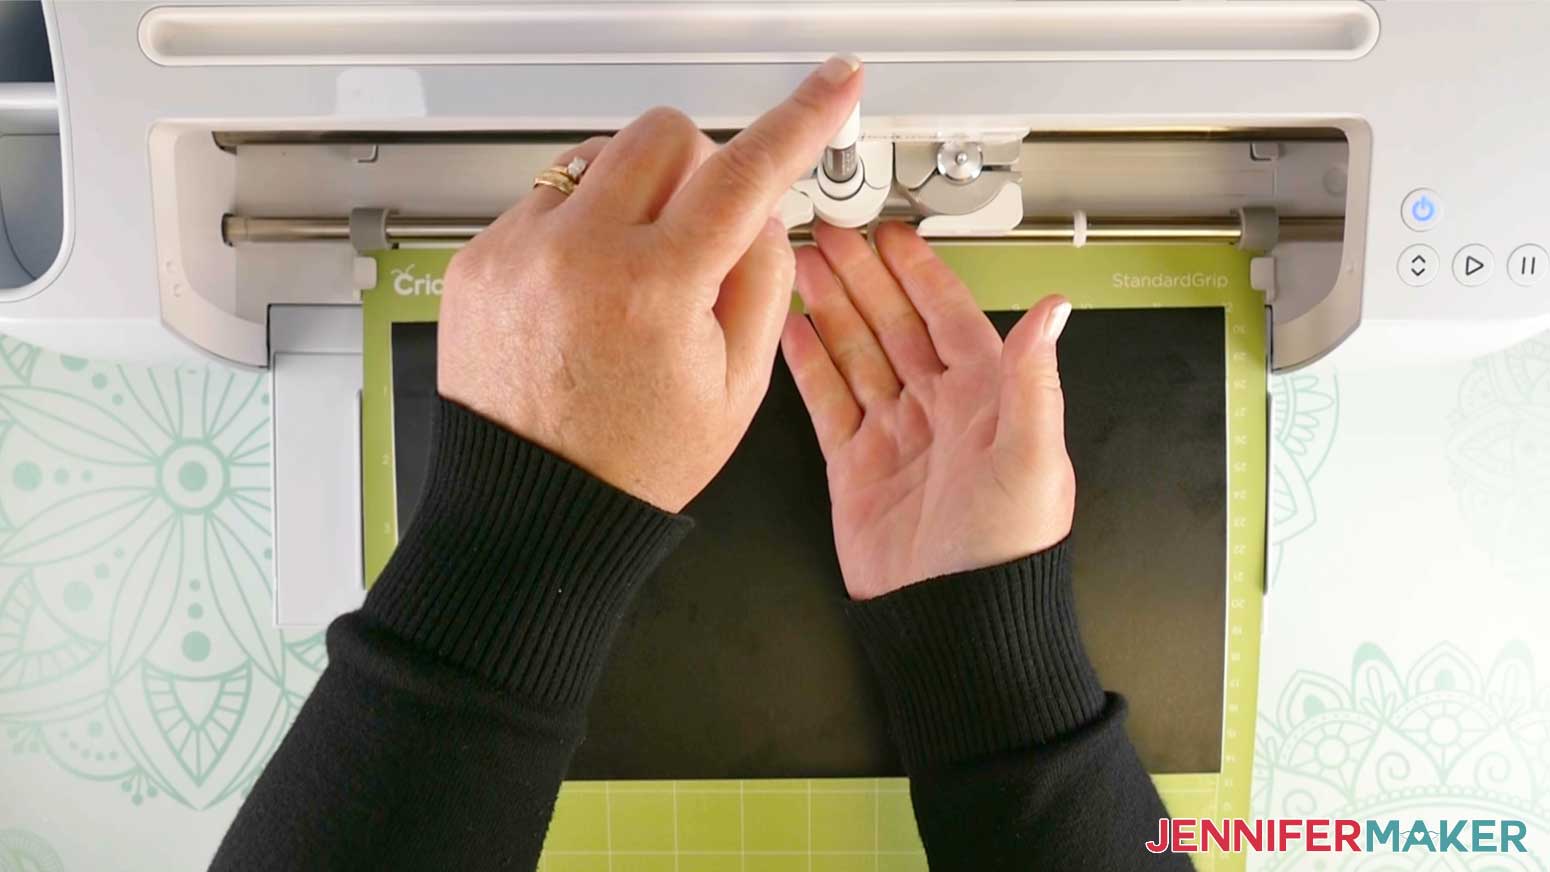
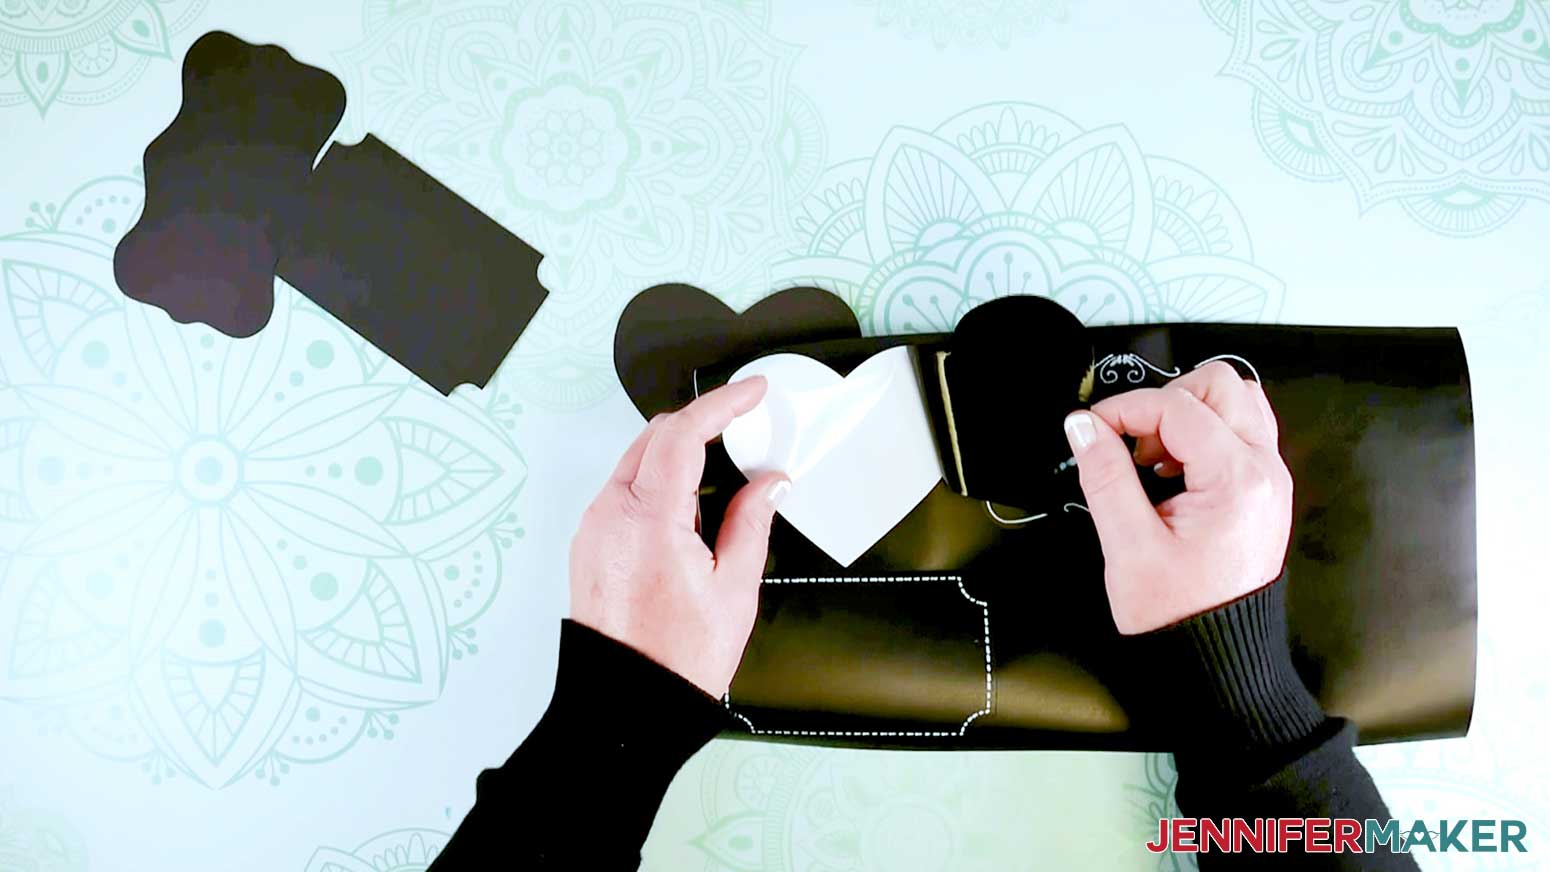
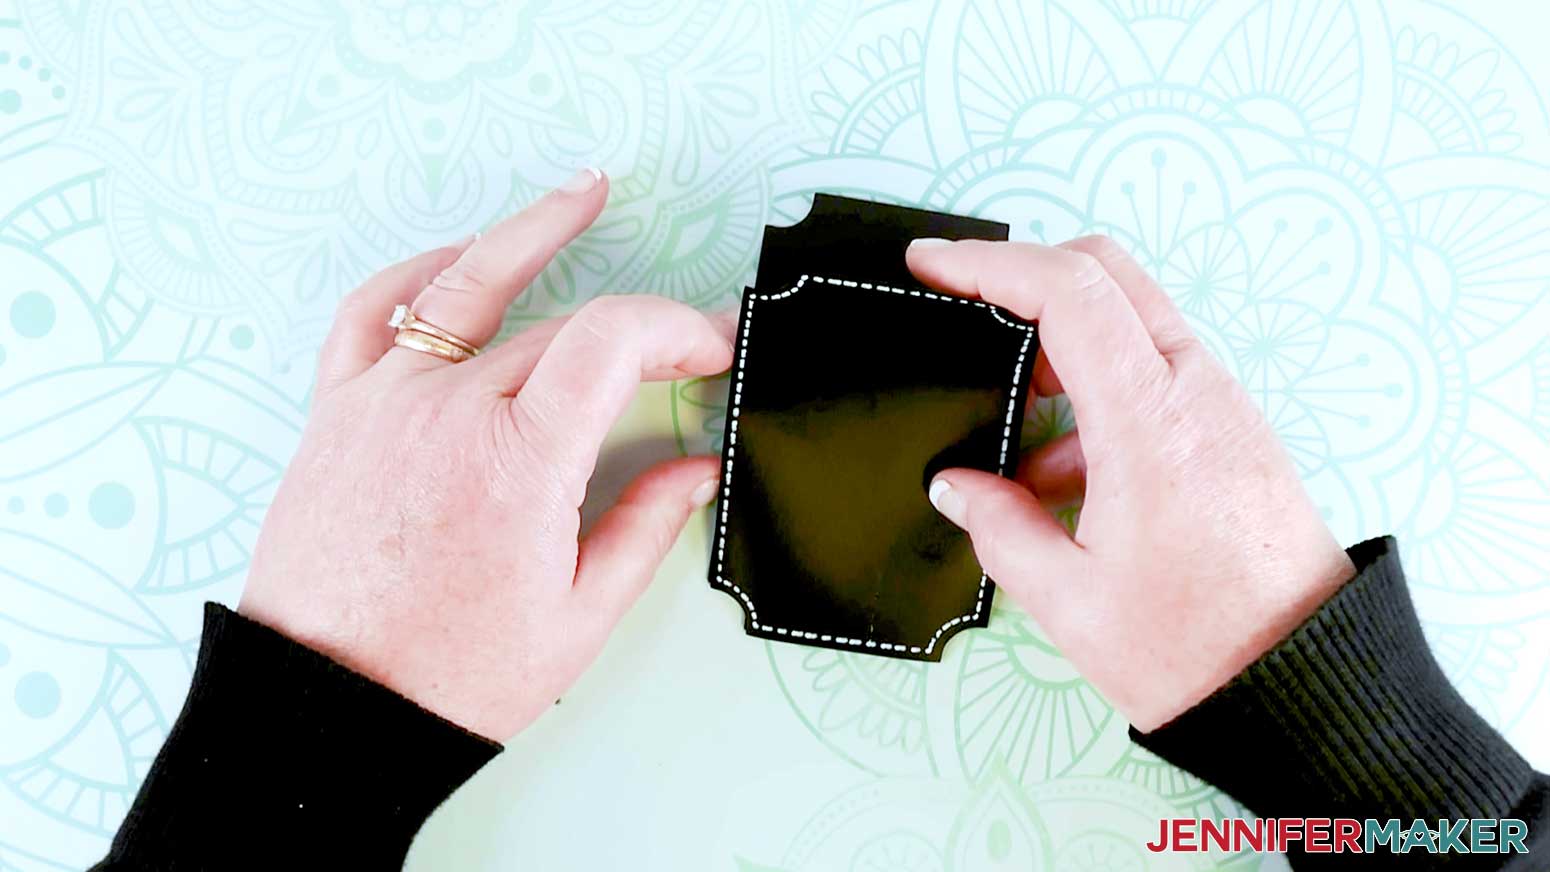
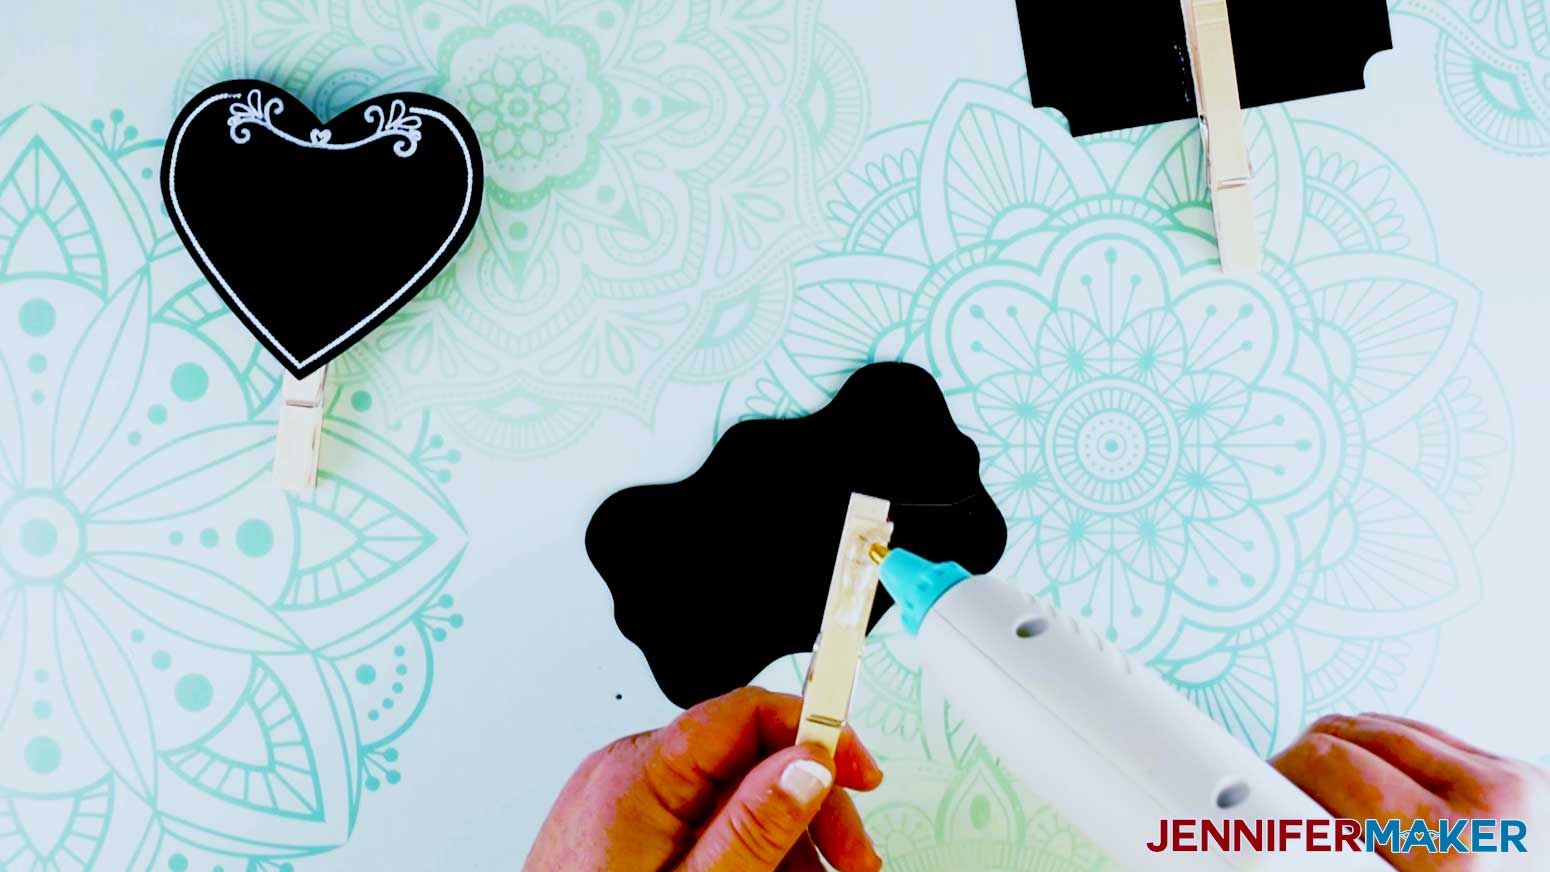
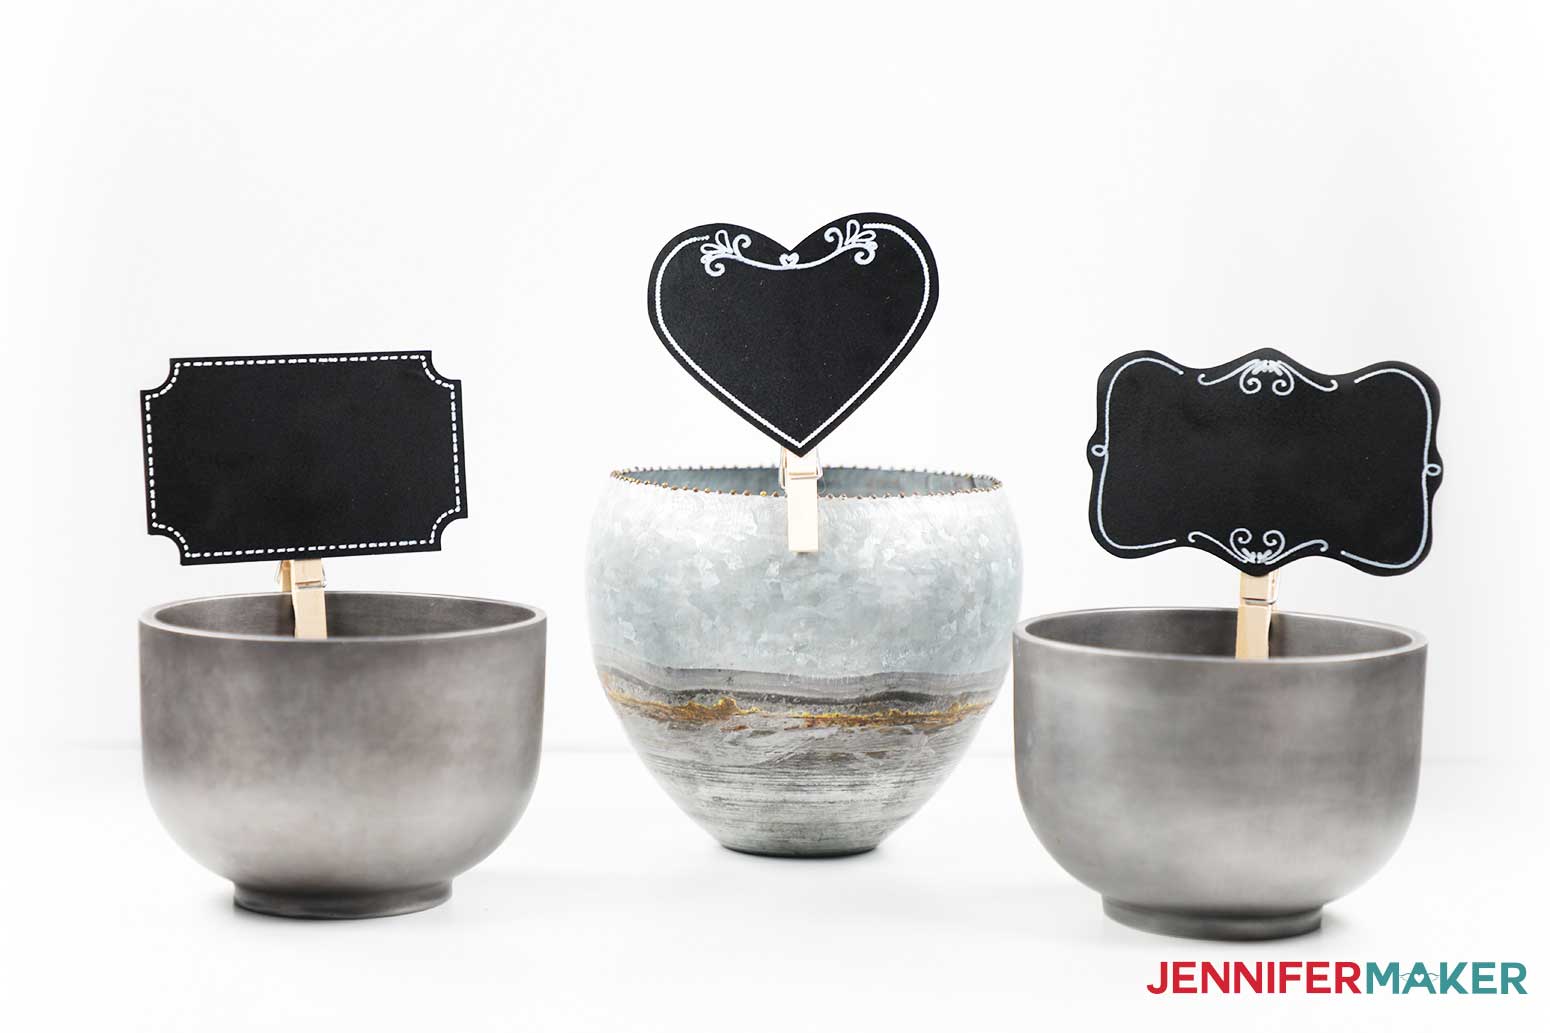
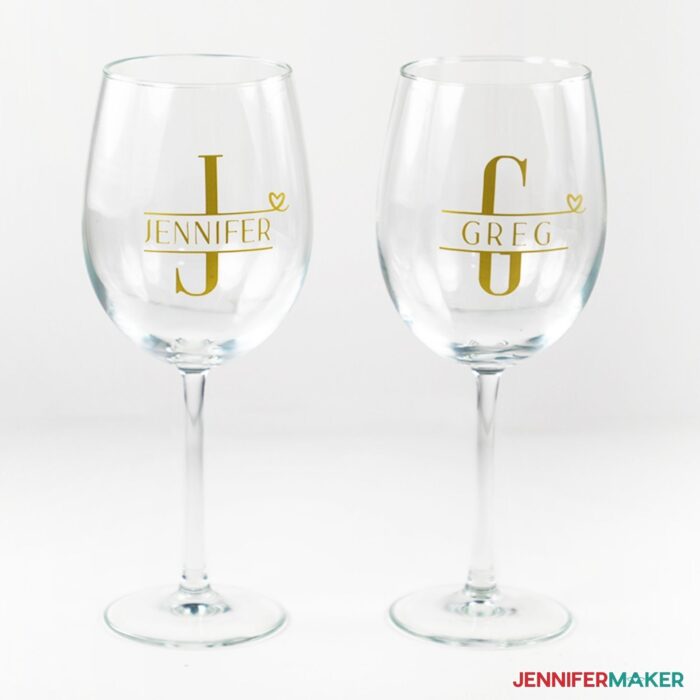
Making temporary customized decals for weddings, dinner parties, BBQs or other events is easy! By using removable vinyl, we can personalize items like our grandmother’s antique cut crystal champagne flutes just for one special night and remove the decals later without damaging the glass. The first step is to download my customized decal designs from my free resource library -- it's design #321 TIP: If you are not sure how to upload an SVG cut file to Cricut Design Space, watch this helpful video training series I made. If you are on an iPad or iPhone, here is how to download and upload SVG files to the Cricut Design Space app. I made a selection of temporary decals that can be customized and applied using removable vinyl. For weddings, I included SVGs for temporarily adding a Just Married decal to the back window of a vehicle. I also included Mr. & Mrs. decals for personalizing champagne flutes or other wedding reception items. I suggest adding a last name and wedding date to either decal for a personal touch. For dinner parties or gatherings, I included labels for beer pints and wine glasses. Add your guests’ names and they have a personal glass to use all evening. The removable vinyl comes off easily at the end of the night! For BBQs and potlucks, label food and drink items using chalkboard decals! Just provide chalk or chalk pens and have your guests write a description of their dish. Then attach the decals using the clothespins and now your guests can peruse the buffet line with confidence! STEP 2: PERSONALIZE YOUR DECALS The process of adding names or dates to the decals is the same for all the designs. Let’s go through setting up the Mr. & Mrs. champagne flute decals with a personalized name and date. This is what my Customized Decals SVG files look like when they are uploaded to Cricut Design Space. Click on Ungroup to ungroup everything. Click on Text in the column on the left and type your personalized name in the box that appears and says “Add text here.” Change your Font, Style, Font Size and Letter Space. You may use any font you like. For this example, I used Braga, Regular, Font size: 54 points and a Letter Space: -0.3. If you want to visually resize your text, you can also use the arrow on the bottom right corner to change it. TIP: Watch this video to learn how to add fonts to Design Space. Click and drag your name to position it so it fits between “Mr.” and the heart swirl. Now, duplicate your text layer by making sure it’s selected in the Layers column on the right side and then clicking on Duplicate. Change the text to the wedding date. I used the same font but decreased the size to Font size: 29 points and used a Letter Space: 0. Move the date to just below the swirl. Select all of the Mr. decal layers by clicking and dragging over them. Click on Align at the top and select Center Horizontally. When you’re happy with the layout of everything, hold down the Shift key while selecting both the name and date text layers. Click on Duplicate. Drag your copied text layers down to the “Mrs.” decal and Center align all the Mrs. decal layers just like you did above for the Mr. decal. Now, select all the layers by clicking on the Select All button on the top menu. Click Attach at the bottom of the layers panel. NOTE: If you need to resize the decals to fit your glass, now is a good time to do that. Select your Attached layers and resize using the arrow or by entering a size in the Width box in the top menu bar. We’re ready to cut our decals! Select your machine on the top menu bar and then click Make It. Unless you’re using Smart Vinyl on a Cricut Maker 3, Explore 3 or Joy, select On Mat and click Done. Click Continue. Select your Base Material. I selected and placed Premium Vinyl—Removable Matte in Silver on a Green StandardGrip Mat to make the Mr. & Mrs. Champagne flute decals. You will be prompted to load your Fine-Point Blade and load the mat. When you’re all set up, click the flashing Start button. Now, let’s apply the decal to a champagne flute. First, thoroughly clean the outside of the glass with Isopropyl Alcohol using a paper towel. While the alcohol is drying, prepare your decal. Weed your design carefully, removing all of the excess vinyl you do not need. Be sure that all the small dots and pieces you want to keep stay adhered to the carrier sheet, while making sure you remove all the small centers to your letters and numbers. TIP: I have lots of weeding tips on my Cricut Best Tips and Tricks post. Next, cut a piece of Cricut Transfer Tape a size just larger than your vinyl decal. Remove the backing from the transfer tape. Apply the transfer tape to your vinyl decal by holding the transfer tape in the shape of a taco or “U” shape then putting the bottom of your “taco” onto the middle of your design. Smooth the tape over the decal from the center outward making sure to press out and remove any bubbles. When the transfer tape is in place, use a scraper tool or other hard and flat-edged item (like a store loyalty card) to transfer the vinyl decal design to the transfer tape. It’s important to scrape it well to transfer the vinyl decal. It helps to scrape it from both the transfer tape side and the carrier sheet side. Carefully peel the carrier sheet off the decal. TIP: If little bits don’t want to transfer to your tape, scrape it again and pay careful attention to those problem areas. Now place your design on your surface, being mindful that it is straight and centered. Make sure both the vinyl and transfer tape are adhered to the glass. Use your fingers to push out any bubbles or creases in the vinyl. Pick up a corner of the transfer tape and slowly remove it from your decal. Use your fingers again to smooth out the vinyl and make sure the decal is securely adhered to the glass without any noticeable bubbles. Now your champagne flutes are ready to use! At the end of the evening, simply remove the vinyl before washing the glass. All the other decals can be customized in Design Space following these same basic steps. Here are all the materials I used and special tips for each of the individual decals: One of the great things about using removable vinyl to make the Just Married car decal is that it’s so easy to remove after the honeymoon, but it holds up nicely for several days in rain, snow or sunshine! The two decals I designed are large format so need to be cut on a Cricut Maker or Explore using removable vinyl on the larger 12” x 24” mats. Or, for a mat-free option, use the new removable Smart Vinyl on the Maker 3 or Explore 3 (I used Smart Vinyl - Removable in White cut on a Maker 3). This is what the Just Married decals look like when the SVG is imported into Design Space. NOTE: There are two decals in the Just Married Customized Decals SVG. Just hide or delete the extra design you don’t need before cutting. Select which machine you will use to cut the decal and then click Make It. Select the type of removable vinyl you will be using and follow the prompts like you did in Step 2 above for the Mr. and Mrs. champagne flute decals. Then, weed and apply transfer tape like you did in Step 3. To put the large decal on the back windshield of a vehicle, make sure the window is very clean. Use a paper towel to wipe it down with Isopropyl Alcohol. Once it’s dry, take your design and position it on the window. You can use a ruler or tape measure to make sure it’s centered and a level to make sure it is level. Tape along the top edge of the transfer tape using painter’s tape. This ensures that your design stays in position. Flip your design up, carefully remove the carrier sheet ensuring the design stays adhered to the transfer tape, and then flip the design back over smoothing from the top as you go. Once your design and transfer tape are stuck in place, use a scraper to get bubbles out of your design and adhere it well to the window. Work from the center outwards. Remove the painter’s tape at the top holding your design to the window. Also remove your transfer tape going slow and gentle. Once your decal is on the window, use a scraper or your finger to make sure the vinyl is smooth and adhered well. If there are bubbles that are hard to smooth out, using a weeding tool with a sharp point, poke a hole in the middle of the bubble so the air escapes and then you can flatten the vinyl. This is what my Just Married decals look like when they are customized and applied to a car window: The Heart Monogram Alphabet SVG for the wine glass monogram contains all the letters of the alphabet. After importing the SVG into Design Space, first upgroup the design. Next, select the letter you'd like to use by clicking on it and dragging it off to the side. Then select the all the rest, group them and either delete or hide them. I'm using a "J" for Jennifer. To add a name, click "Text" in the left column and type your name. I'm using the Braga font and ALL CAPS. Now resize and position your name and click attach. Then cut and apply it to a wine glass. I used Cricut Premium Vinyl - Removable in Gold. This is what my personalized wine glasses look like when they are finished. I provided three different beer glass decals in the Beer Customized Decals SVG. You can follow the instructions in Step 2 above to add a name and attach it to the beer decal to cut it out of the removable vinyl. That is what I did to make these labels, which turned out so cute! TIP: Alternatively, you can cut the beer decals out of chalkboard vinyl WITHOUT customizing them in Design Space. Then, use a chalk marker to write a name on the label by hand. If you’re not sure ahead of time who will be showing up to a dinner party, this is a great way to make sure no one is left out! The SVG file for the chalkboard decals contains a couple extra items. This is what the imported file looks like in Design Space. The black Basic Cut shapes are the decals we will cut from Chalkboard Vinyl. They include decorative line drawings, which we will use to draw cute details onto the labels using a white Permanent Chalk Marker. The extra decal shapes in red are for cutting out the labels using black Kraft Board, which will serve as the backing to our chalkboard vinyl. After importing, we need to change the three decorative line drawings from Basic Cut to Pen lines. First, ungroup everything. Next, select the three decorative lines in the layers panel by holding down the Shift key and clicking on each one. In the Operation menu at the top, change the linetype from Cut>Basic to Draw>Pen. We don't need to worry about selecting a specific pen color because we are going to use the same marker to draw all the lines. When you do this, it looks like the decorative lines have disappeared because the default pen color is black, but as you can see on the right, they are still there. Now hold down the Shift key while also selecting each of the black Basic Cut shapes (so all the Pen layers and their corresponding black decals are selected). Click Attach at the bottom and everything is ready to go! NOTE: These can be cut on any Cricut cutting machine, but to use the Permanent Chalk Marker you will need to use any of the Maker or Explore machines. The pen will not fit in the Cricut Joy. When you are prompted to load your material, make sure you prepare your mats with black Kraft Board corresponding to the red labels, and Chalkboard Vinyl corresponding to the black labels on Green StandardGrip Cutting Mats. If you choose to draw the decorative designs, load a Permanent Chalk Marker (Medium size) into the A clamp while cutting the black Chalkboard Vinyl -- be sure you push it firmly into the holder until it pops into place. To assemble, remove each chalkboard label from the carrier sheet like a sticker, and carefully align it to the corresponding Kraft Board backer. Push out any bubbles by scraping outward from the center with a Cricut XL Scraper. Dab the top half of a wooden clothespin with hot glue gun and adhere it to the back of a label (attach it to the Kraft Board side). How adorable are these chalkboard labels? Use a non-permanent chalk marker or piece of chalk to write custom words or descriptions on the labels. Simply use a damp cloth later to remove your chalk writing and reuse the label! NOTE: The lines you draw using the Permanent Chalk Marker will not wipe off. I can’t wait to see all of the beautiful decals you personalize and make! Fonts used for the Mr. & Mrs. champagne flute decals: Braga (for customization) Featherly in Heart Swash Font Bundle Fonts used for the Just Married #1 vehicle decals: Fonts used for the Just Married #2 vehicle decals: Fonts used for the monogram wine glass decals: Braga (for customization) Featherly in Heart Swash Font Bundle Fonts used for the beer glass decals: Realist Typeface (for customization) Fonts used for the BBQ chalkboard labels: Featherly in Heart Swash Font Bundle The approximate final sizes of the decals are: Mr. & Mrs. champagne flute decals: 2" x 3" Just Married vehicle decals: 36" x 12" Monogram Wine glass decals: 2.25" x 2.5" Beer glass decals: 3" x 3" Chalkboard labels: 3.5" x 5"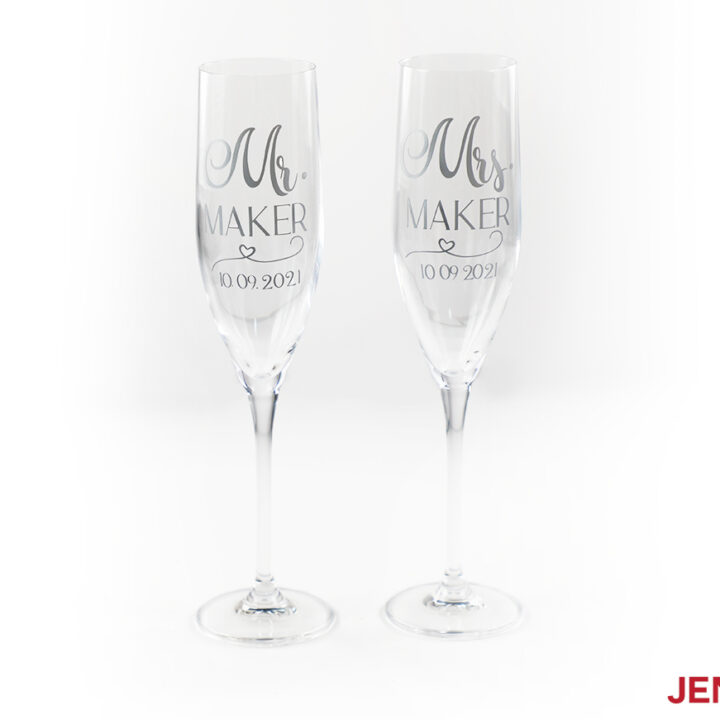
Customized Vinyl Decals
Materials
Tools
Instructions
STEP 1: GET MY FREE CUSTOMIZED DECAL FILES

STEP 3: APPLY THE DECALS
MR. & MRS. CHAMPAGNE FLUTE DECALS

JUST MARRIED CAR DECAL

WINE GLASS MONOGRAM DECAL
BEER GLASS DECAL
CHALKBOARD BBQ LABELS
Notes
These wine glasses turned out beautiful. This is a great and easy way to add personalization to an intimate dinner party!
Answers to Your Questions About How to Make DIY Vinyl Letter Decals
Q: Where is your tutorial for this project?
This is a special project we made for our free Maker Academy Weekend event! A complete and detailed step-by-step video premiered during the event November 4-7, 2021. Get access to the workshop video and printable workbook with a VIP Pass to Maker Academy Weekend 2021, which comes with other perks and bonuses, too!
Q: Will these decals really come off glass easily?
Yes! We put the “Just Married” vinyl on Greg’s back window to test it out, but since we’re NOT married yet (just engaged), we removed it so as not to confuse anyone and it came off easily!
Get the free designs for my Vinyl Letter Decals!
I love seeing what you make with my designs and how you use them! Please share a photo of your vinyl letter decals in our Facebook group or tag me on social media with #jennifermaker.
Love,

Want to remember this? Save this DIY Vinyl Letter Decals Tutorial to your favorite Pinterest Board!