
Make an easy DIY pet gate or baby gate that is both pretty and functional! This extra-wide, extra-tall freestanding security gate can be custom made to fit your space.
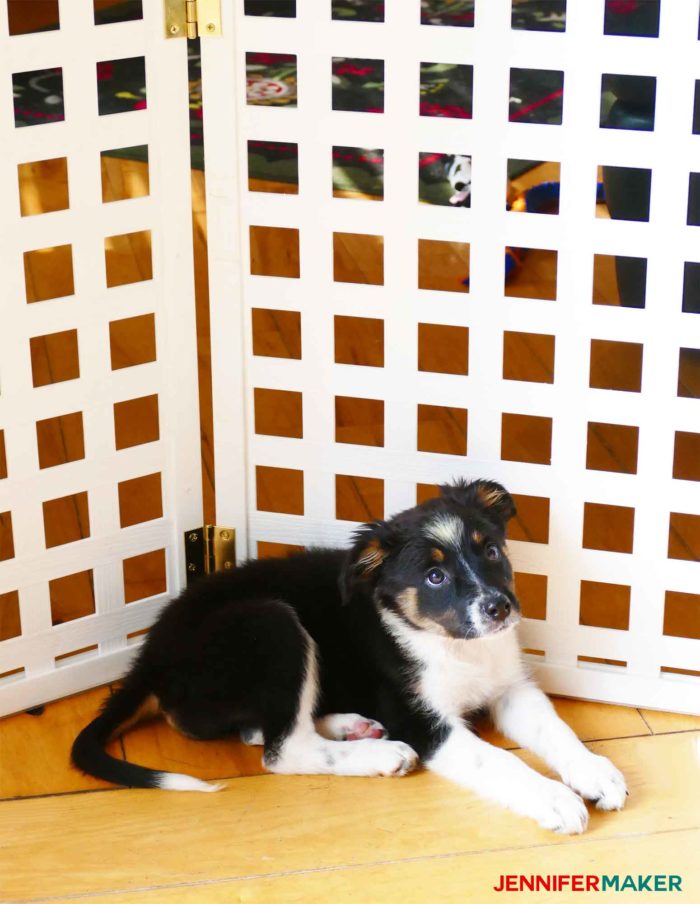
We just adopted a new puppy! And the night before she came home, we realized we needed to puppy-proof our living room. Unfortunately, our living room has two very wide openings, so off-the-shelf pet gates were going to be pricey. So instead we came up with an easy and inexpensive DIY pet gate to make our living room safe for our new dog. And — speaking as a mom — this solution would make a great DIY baby gate, too!
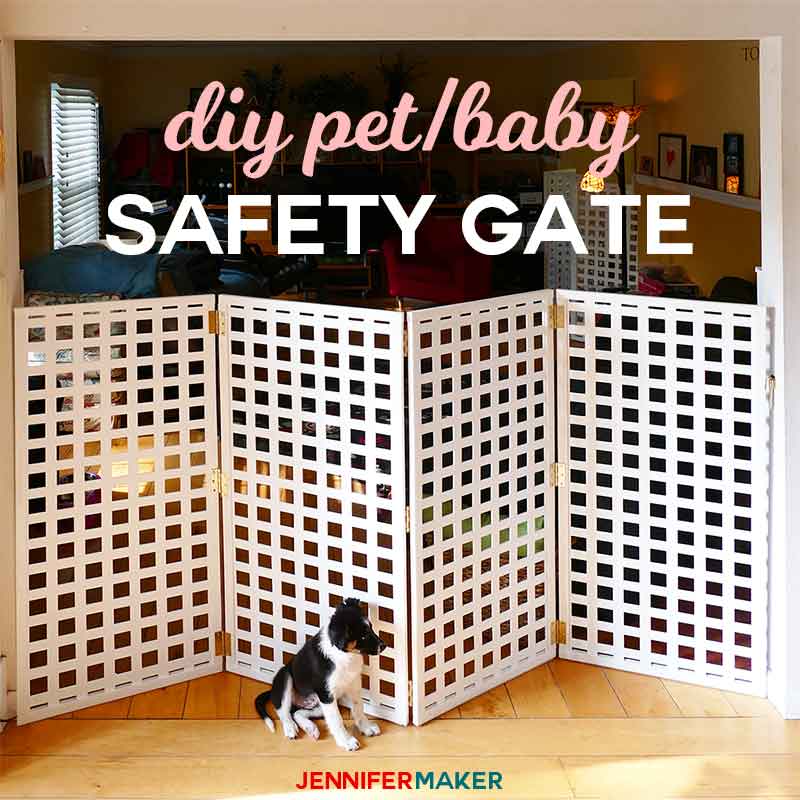
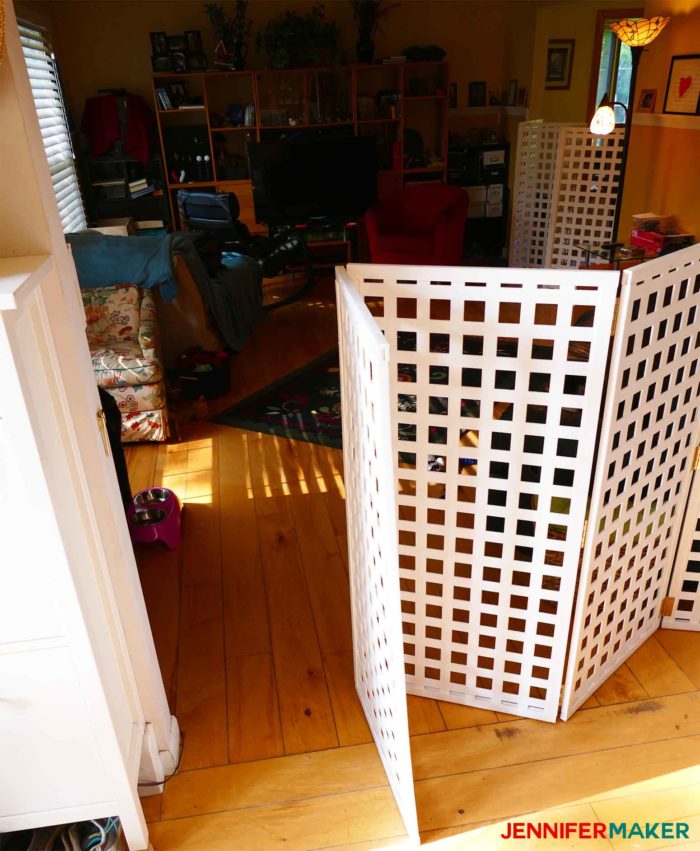
The thing I love about our DIY safety gate is how versatile it is! It is freestanding, so it can go nearly anywhere. But to make it more stable for little ones or jumpy pets, you can still attach it to the walls on either side. And it’s pretty easy to just swing one side open to walk through, too!
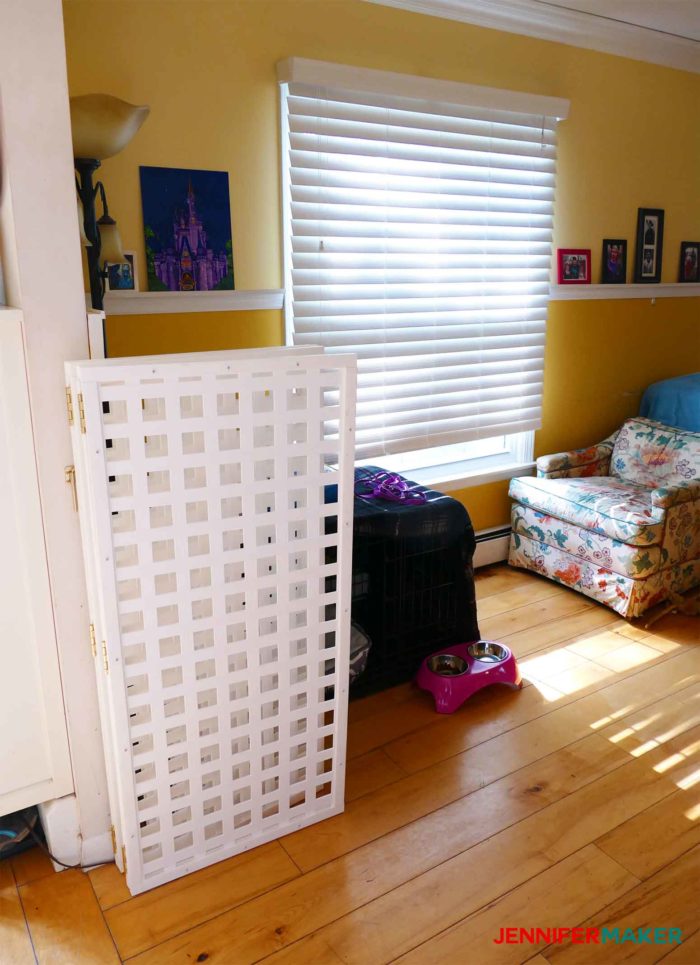
Best of all, this gate can be folded up neatly to one side, or completely out of the way, when you’re not using it. This is precisely what we needed as this gate will be used periodically, not all the time. We wanted to be able to completely remove it when it wasn’t needed.
Also, if you need to keep cats in a room, this DIY pet gate works for that, too! Our safety gate is 48″ tall, which is probably tall enough to keep most cats from jumping over. But you could make this gate up to 8 feet tall which will definitely keep cats out!
I also love the white trellis pattern, as it goes well with our living room’s white moulding. It’s a classy, clean look! And we’re using plastic trellises rather than wood so you don’t have to worry about splinters.

Best of all, we were able to make this in one evening so we were ready for our new puppy the next morning!
I’m going to show you how to build this diy baby/pet gate in this tutorial! This post contains some affiliate links for your convenience (which means if you make a purchase after clicking a link I will earn a small commission but it won’t cost you a penny more)! Read my full disclosure policy.
Materials and Tools for the DIY Baby Gate / Pet Gate
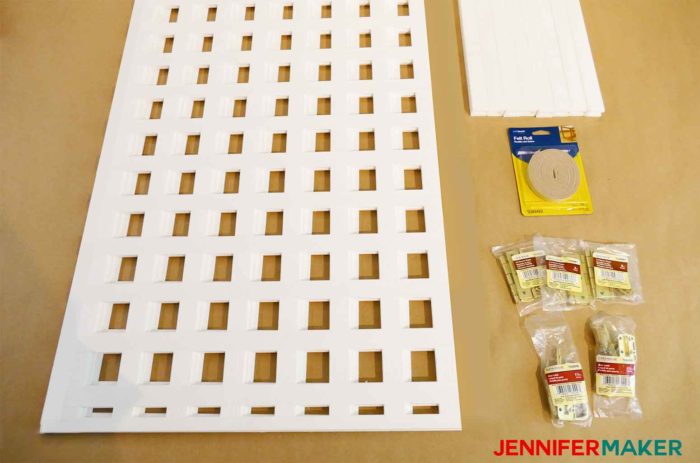
- 1 Plastic Lattice Panel 4′ x 8′ (these comes in a variety of colors and patterns)
- 6 Lattice caps in 8′ long sections
- 60 lattice screws (these were available for free near the lattice caps at our home improvement store — if you can’t find them, they’re just 3/8″ screws)
- 9 brass hinges (3 inch long, full mortise)
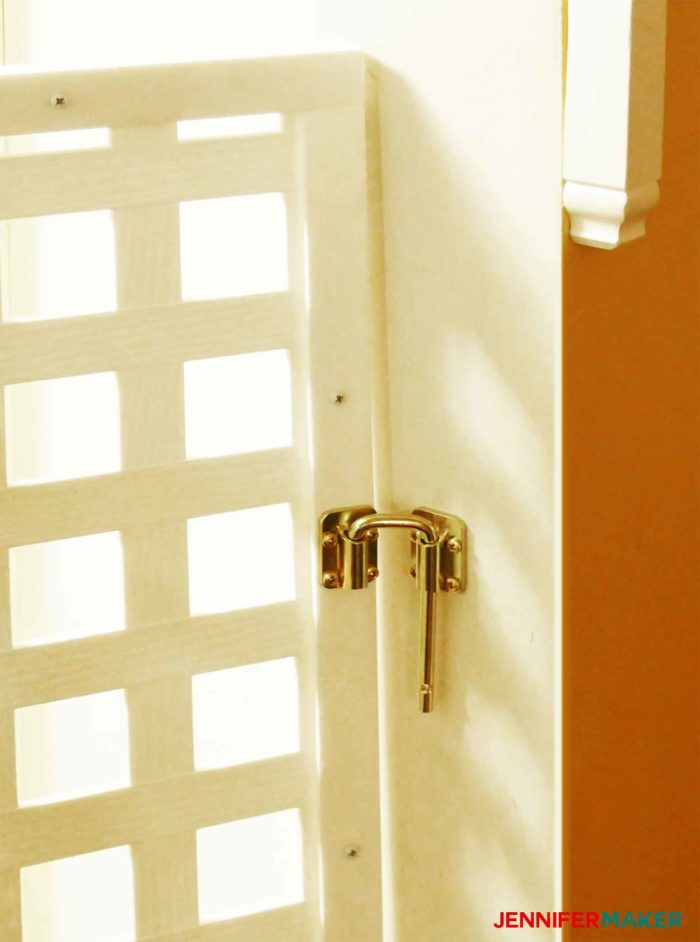
- 2 sliding door latches
- Sticky felt roll (optional, to protect your floor)
- Sliding door latch (optional, to secure to wall)
- A way to cut your lattice and lattice caps (we used a table saw, but handsaw would work too)
- A screwdriver
How to Build a DIY Baby Gate/Pet Gate
First, measure the opening you need to secure. Our space was 82″ wide (so about 7 feet wide). It’s important that your DIY safety gate be longer than your space so it can be freestanding (as it needs to be slightly folded to be stable). Our DIY safety gate is over 8 feet wide, so it works perfectly in a 7 foot wide opening.
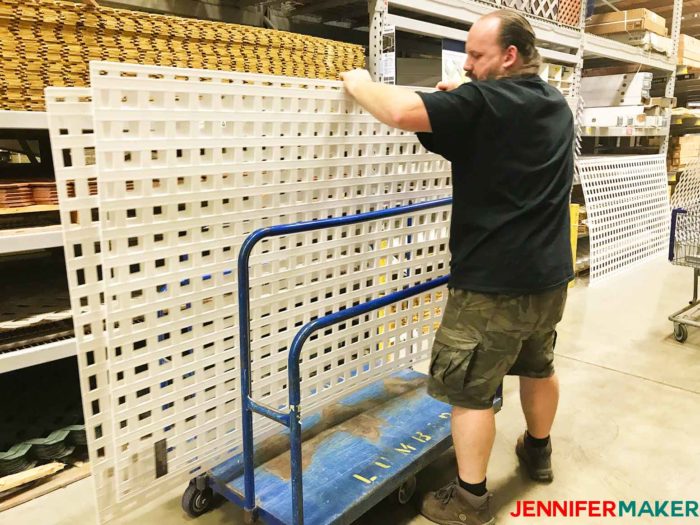
Buy your supplies—we got everything from our local home improvement store (Lowe’s). The materials are all linked above to help you locate them! Note that the lattice panel might be tough to fit in a small car, but it will bend and roll if necessary.
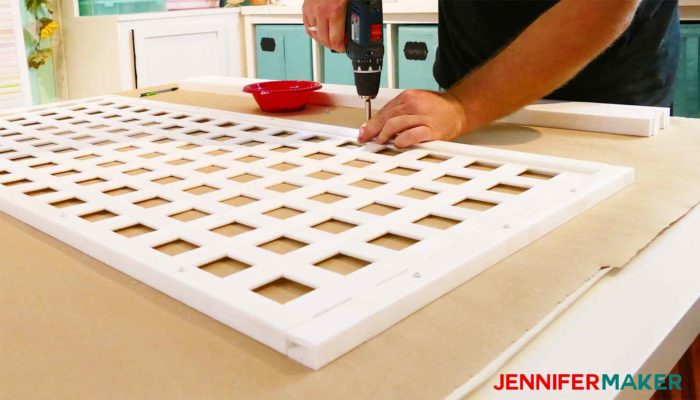
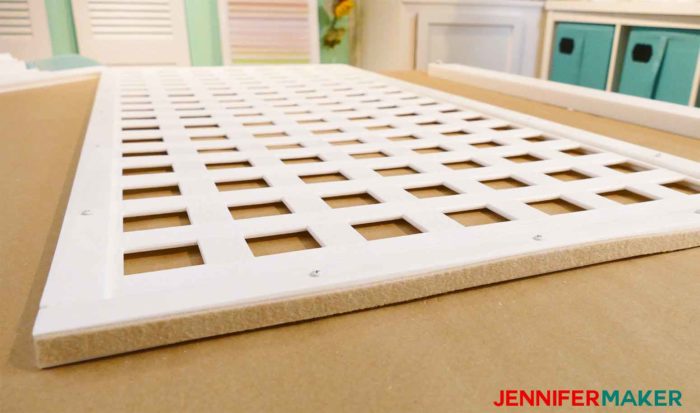
Next, cut your lattice panel into four sections, each 4′ high by 2′ wide. Then trim the long edges so that they are all flush (no little sections sticking out)—this will make it easier to put the lattice caps on and make them sturdier.
Also, cut your lattice caps into eight 46.5″ sections and eight 22.5″ sections.
Now. put your caps on your lattice sections and screw them in multiple places to keep them secured on your DIY safety gate.
If you have wood floors like me, you’ll want to protect them by putting a line of sticky felt padding along each bottom edge.
Once all panels are edged, it’s time to connect them together with hinges. We used three hinges between two panels to make sure it was super sturdy and steady. Leave enough space in between the panels when you’re screwing the hinges on to allow it to fold completely. We also recommend you put the hinges more towards the center rather at the very top and very bottom—spacing the hinges evenly along the edge will make your DIY safety gate sturdier.
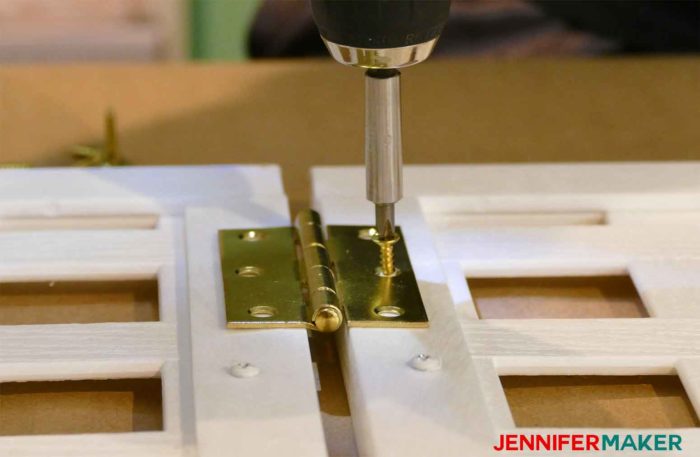
Tip #1: Keep the sides of the panels that show the screws all on one side for consistency.
Tip #2: If you are using four panels as we did, make sure your center set of hinges are on the opposite side of the safety gate than the other two. This will allow it to fold up neatly!
Finally, if you want to attach your DIY baby gate or pet gate to the wall so it is more secure (a must with babies/toddlers), screw in a sliding door latch panel to either side of the gate. Then attach the bolt side of the sliding door latch to the wall. The higher up you put the latch, the more secure it will be (and easier for you to reach/harder for little hands and paws to reach).
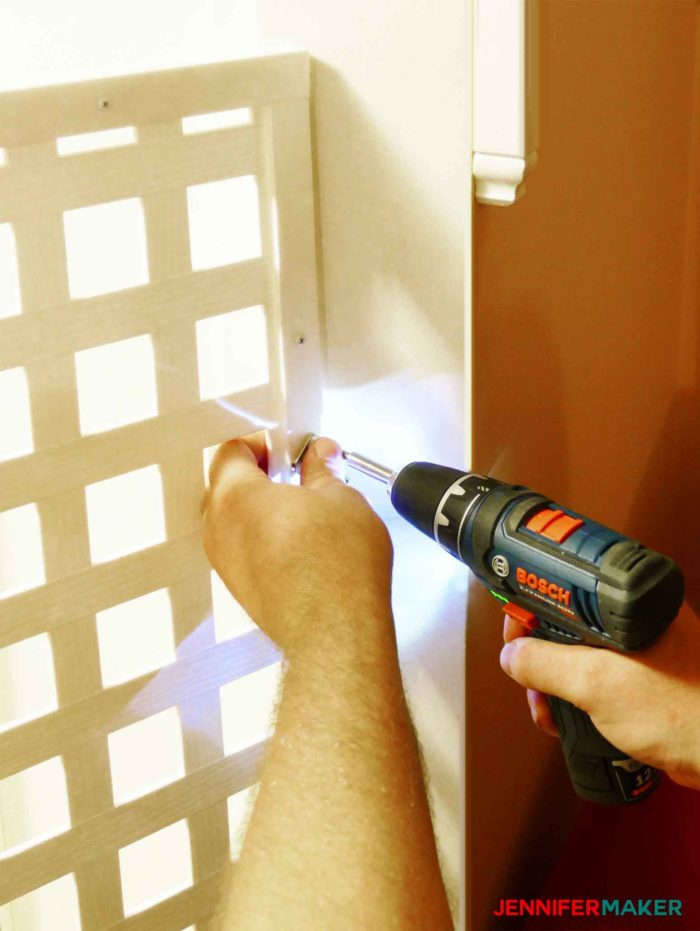
Now just unfold your DIY safety gate in your space and secure it to the wall with your latches.
When you want to walk through your gate, just unlatch it and swing one side open. Because it is freestanding, this is super easy! You can’t do this with those annoying pressure-mounted baby gates!
And when you don’t need this safety gate at all, just fold it up and set it aside for free and easy access to your space.
This extra-wide and extra-tall DIY safety gate cost us just $130 to make an over 8-foot-long 4-panel freestanding gate. You could also make two 2-panel 48″ gates for this same price. Here’s what each item cost:
- Plastic Lattice 4′ x 8′ panel = $31.97
- Lattice caps x 6 = $44.28
- 3″ Hinges x 9 = $30.42
- Latches x 2 = $14
- Felt Roll = $10
Note: We made two of these DIY pet gates, as we have two entrances into our living room.
I’d love to see your pet gates! If you make one, please share a photo in our Facebook group or tag me on social media with #jennifermaker.
Love,

Want to remember this? Save this DIY Baby Gate / Pet Gate Tutorial to your favorite Pinterest board!
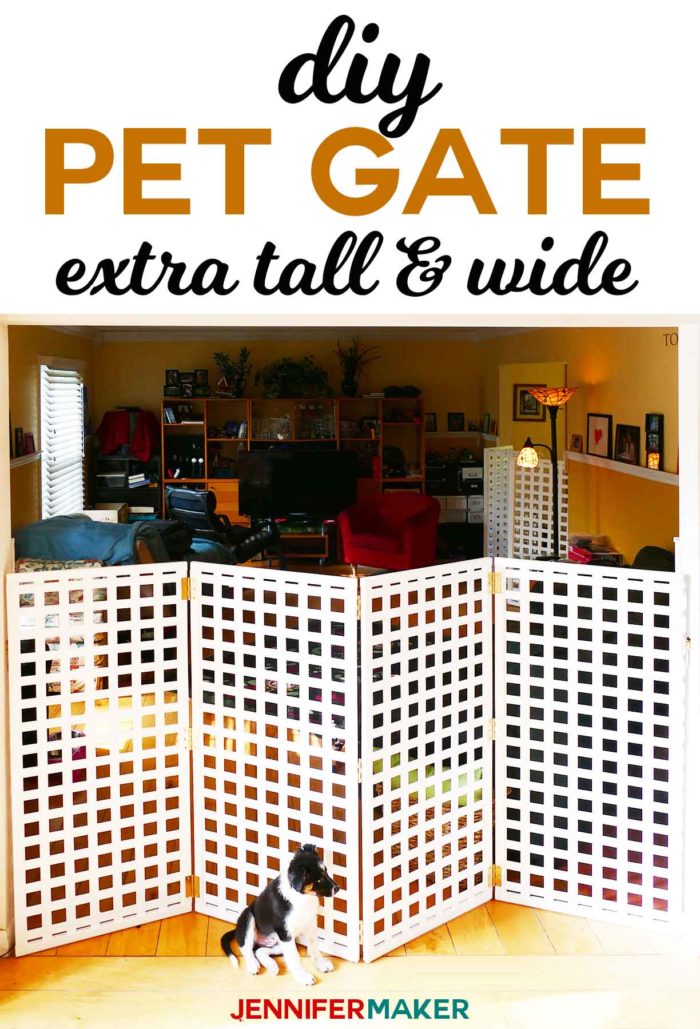
Make this freestanding DIY pet gate / baby gate for a custom space that is extra tall and extra wide!


What a great idea Jennifer and congrats on the new puppy!
Thank you, Connie!
Jennifer, I think this idea for making tall security gates from plastic and attaching them to the wall with sliding glass door brackets is brilliant. The lattice caps are ridiculously expensive though, aren’t they?They are plastic! But…it is custom and it allows the puppy to be free. I don’t like the way people are putting puppies in cages for 8-10 hours a day. That is like being a POW! I hope your great idea encourages people to make these sturdy, safe enclosure instead. And, your new baby is adorable!
Yes, the lattice caps are pricey! But it does allow for something custom, and that made it worth it for me. And it’s working great for both my little puppy and my 3-year-old 65 lb. Golden.
I love this puppy gate idea! We recently got another German Shepherd Skylee and this is the perfect solution for her. Love it! Thanks!
Yay! Happy to hear this tutorial was helpful!
Great job. The gates look better than the ones sold in pet stores. I’ll be making one as soon as the temp. drops.
Thank you, Sharon! If you make one, please email me a photo!
Wow, It looks amazing also comfortable for the crawling baby. You did it like an expert. And thank you so much for coming to me at the right time. I also need a baby gate for my crawling baby. Can’t wait to make this at my home. Keep up with good work.
Thanks! We use these gate often still. Our dogs love to try to bite the mail as our delivery person puts them into our door slot, so we block the door from the dogs. Works like a charm! LOL!
Thank you so much for this idea. We have recently moved into a smaller house with 4 cats and litter boxes. Nowhere in the house to put them, tried the laundry room and one (don’t know who) decided that as the laundry baskets were in the room with their litter, the baskets were fair game! Only other place is the garage and we don’t want them loose in there. Then I came across your idea for flexible baby/pet gates and (!) knew it was just what we could use with cat flap in the door. Haven’t made it yet as I’m in the final stages of convincing other half that it would work and be easy to make – wish me luck.
I hope it works. Cats can jump high so you’ll just want to make sure your gate is tall enough so they don’t manage to get out!