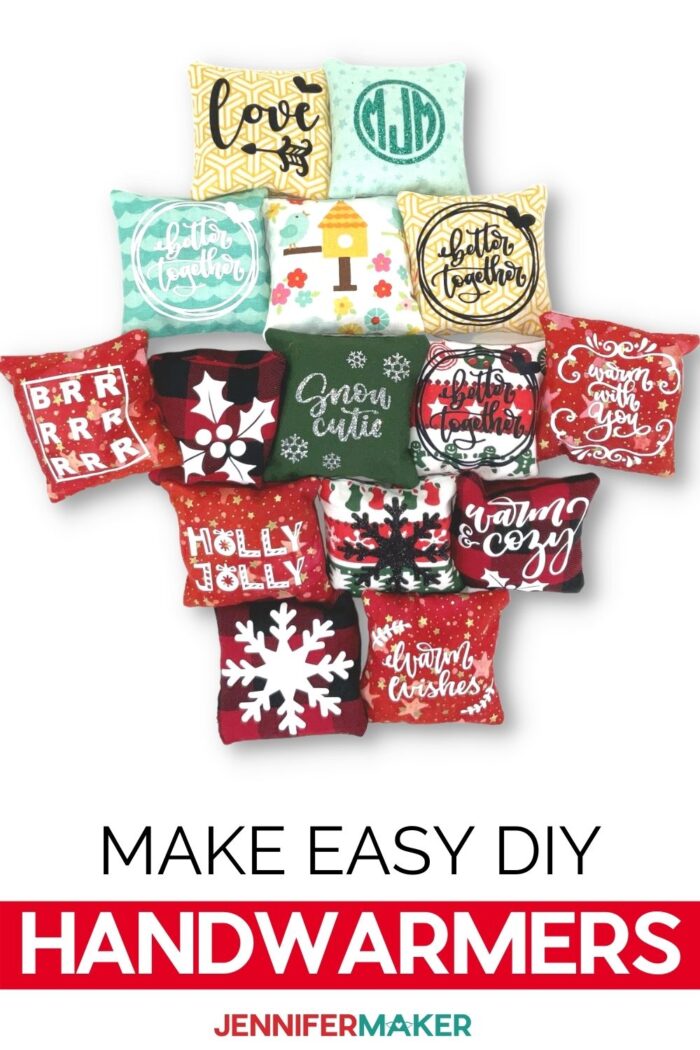
Warm up your little paws and join me to make some easy sew and no-sew pocket hand warmers. Customize them by using some of my ready-made designs or come up with your own.
Here’s a fun fact: I love winter…not so much because of the weather, more-so because of all the fun holidays. But alas, winter means cooler temperatures, so I’m always looking for ways to keep warm. One of my earliest blog projects were heart-shaped hand warmers. But I know of an easier and faster way to make pocket hand warmers and I’d love to share it with you. My new hand warmers are SO cute! I’m going to show you how to make two DIY hard warmer versions: one that you sew and also a no-sew version. Plus we’ll add some fun vinyl to make them extra festive.

These little hand warmers are great for the entire family. They are also super easy to make so you won’t mind making a batch of them if you’d like to give some away to friends or family members.
We will start with some pretty fabric. Finding your favorite pattern will probably be one of the most fun parts of this project! There are just so many choices to choose from. I will be using 100% cotton fabric for this project. Pretty pattern fabrics are beautiful, however, if you are going to add my custom designs to your Pocket Hand Warmers, patterned fabrics can interfere with the design. If you are going to sew these, you will need a sewing machine, sewing machine needle, and thread.
We’ll use Heat n’ Bond for the no-sew version and a heat source like the Cricut EasyPress mini. We’ll also use that for our iron-on vinyl. Of course, we’ll need our Cricut cutting machine, rotary blade for the Maker, or Bonded Fabric blade if you are going to use the Explore series. We will also need a pink fabric cutting mat and a green standard grip mat for the iron-on vinyl.
If you don’t have a sewing machine, or don’t know how to use a sewing machine, I’ve included a no-sew version so that you too can create some homemade hand warmers! These little pocket warmers are a great way to to keep your hands toasty. They are also the perfect size for little hands to hold while waiting on the school bus on a cold day.
The best part is that all you really need to make this simple project are some squares of fabric and some uncooked rice and you’ve got yourself a pair of hand warmers!
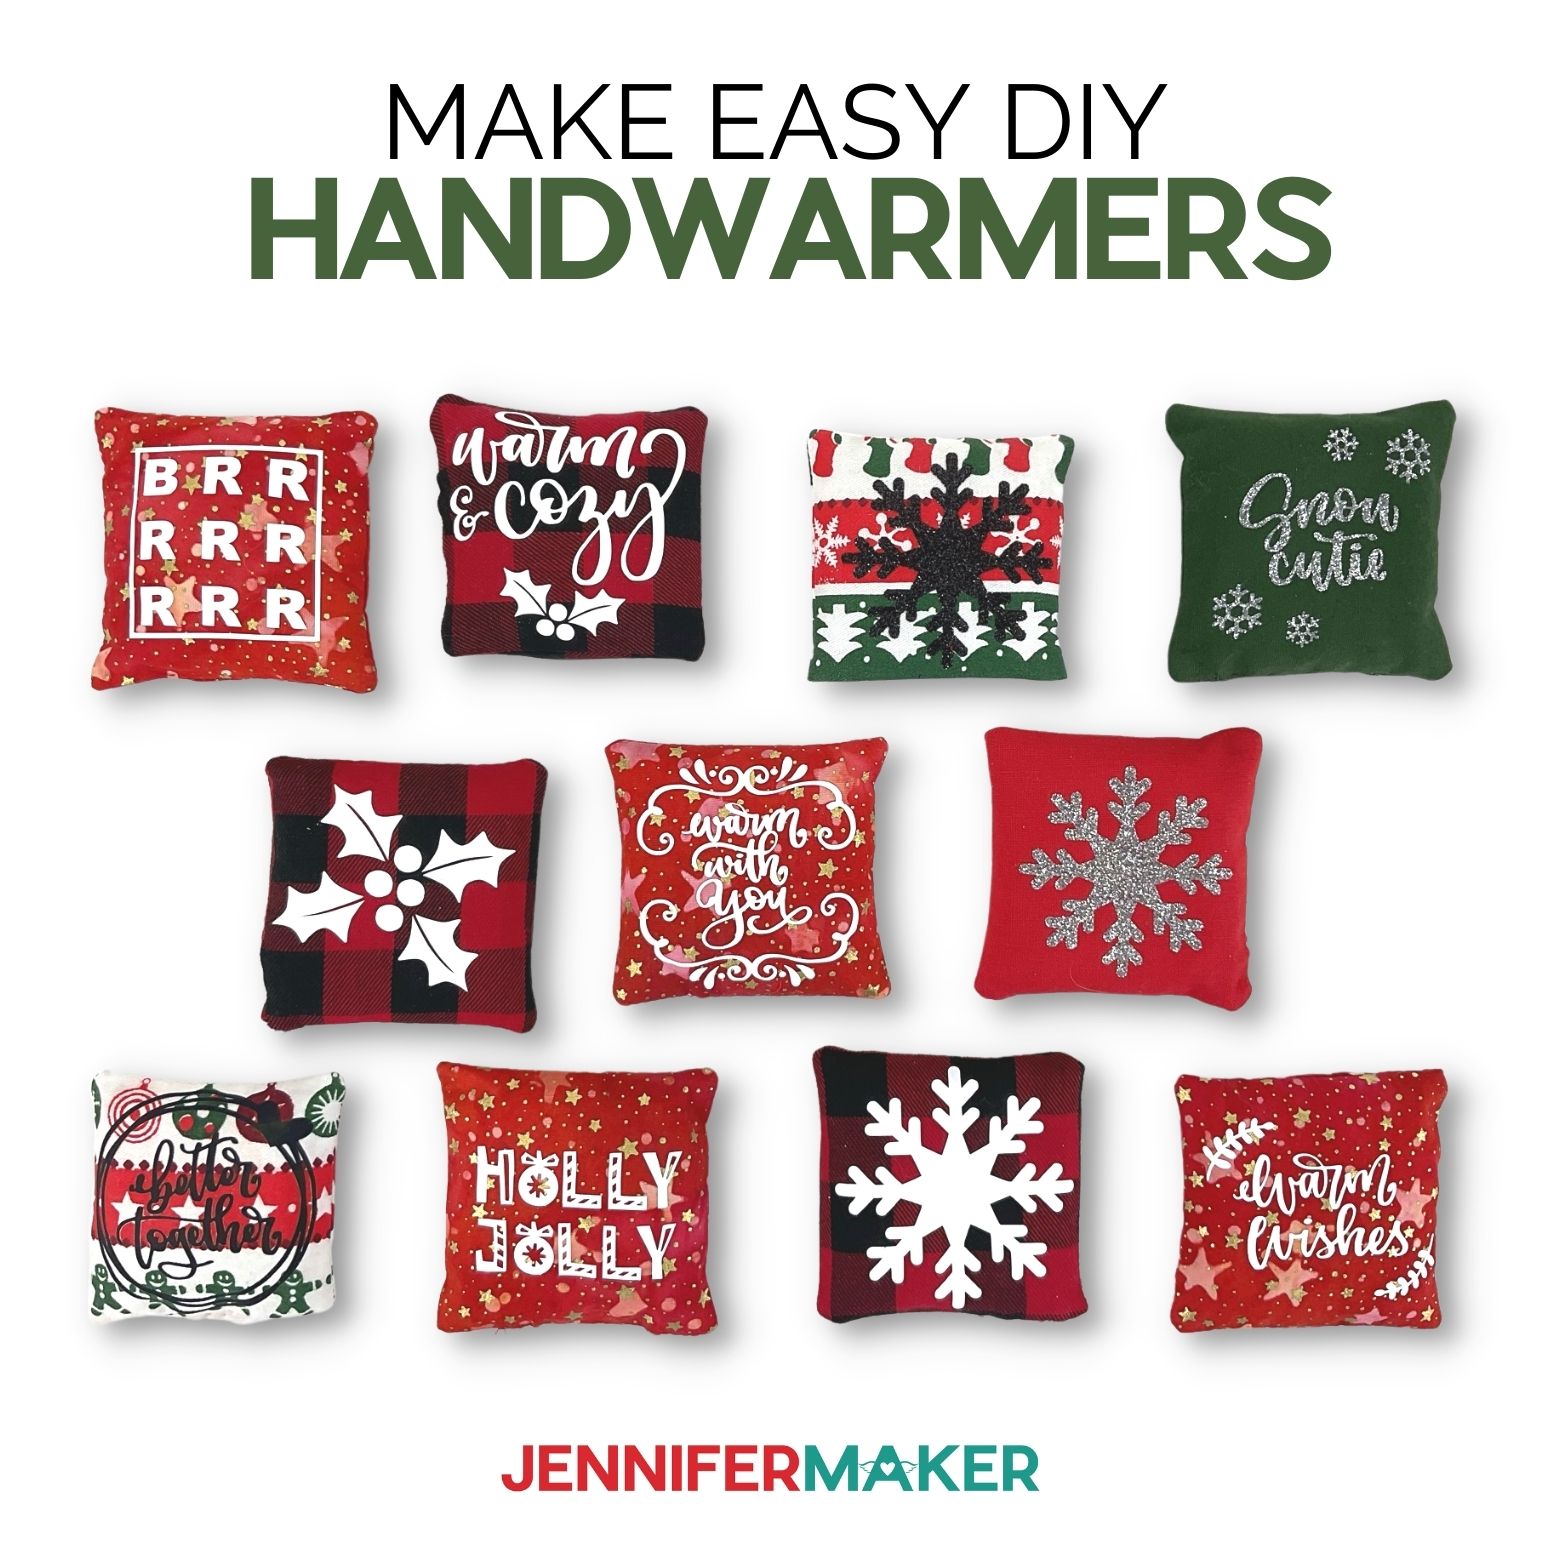
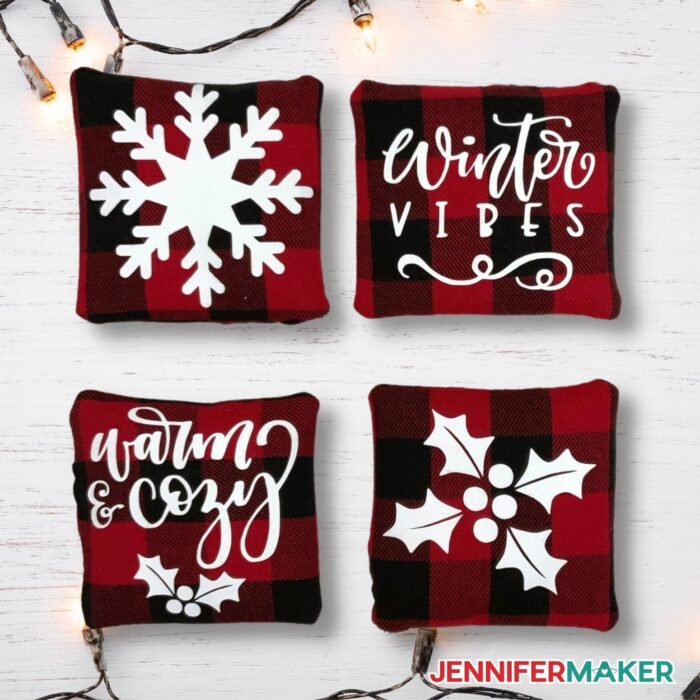
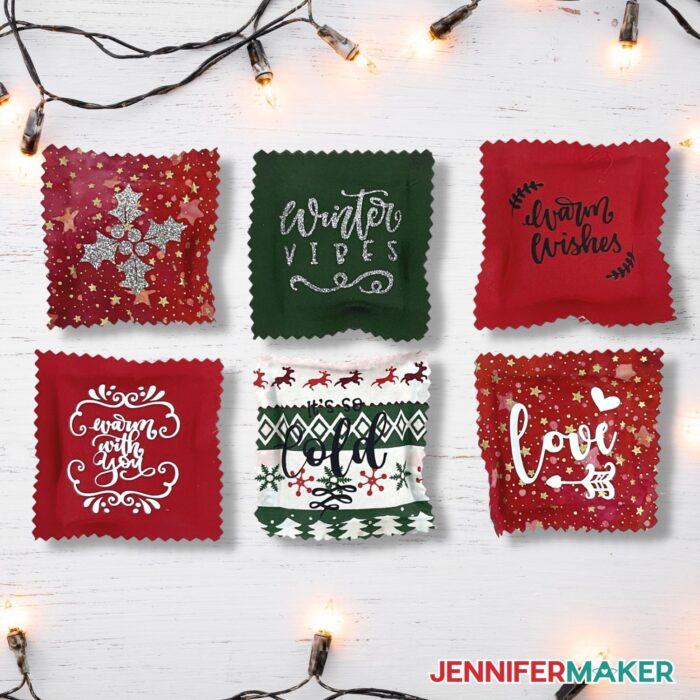
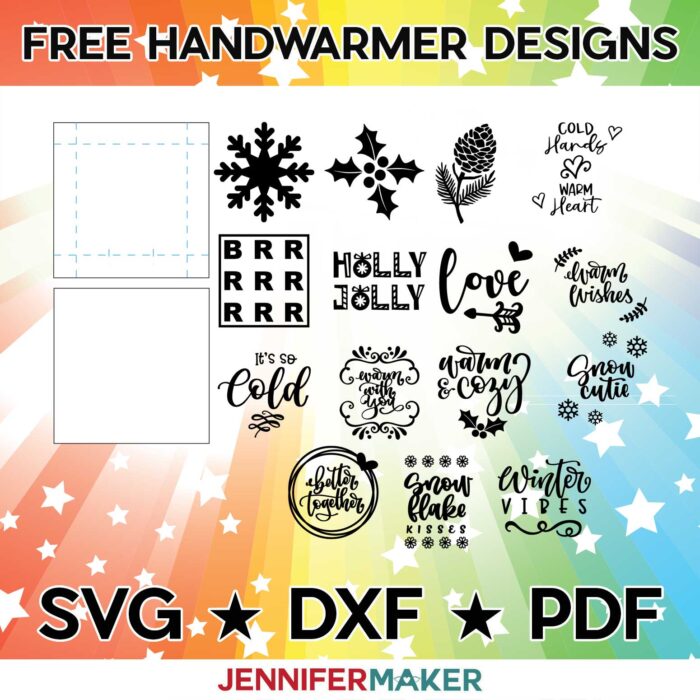
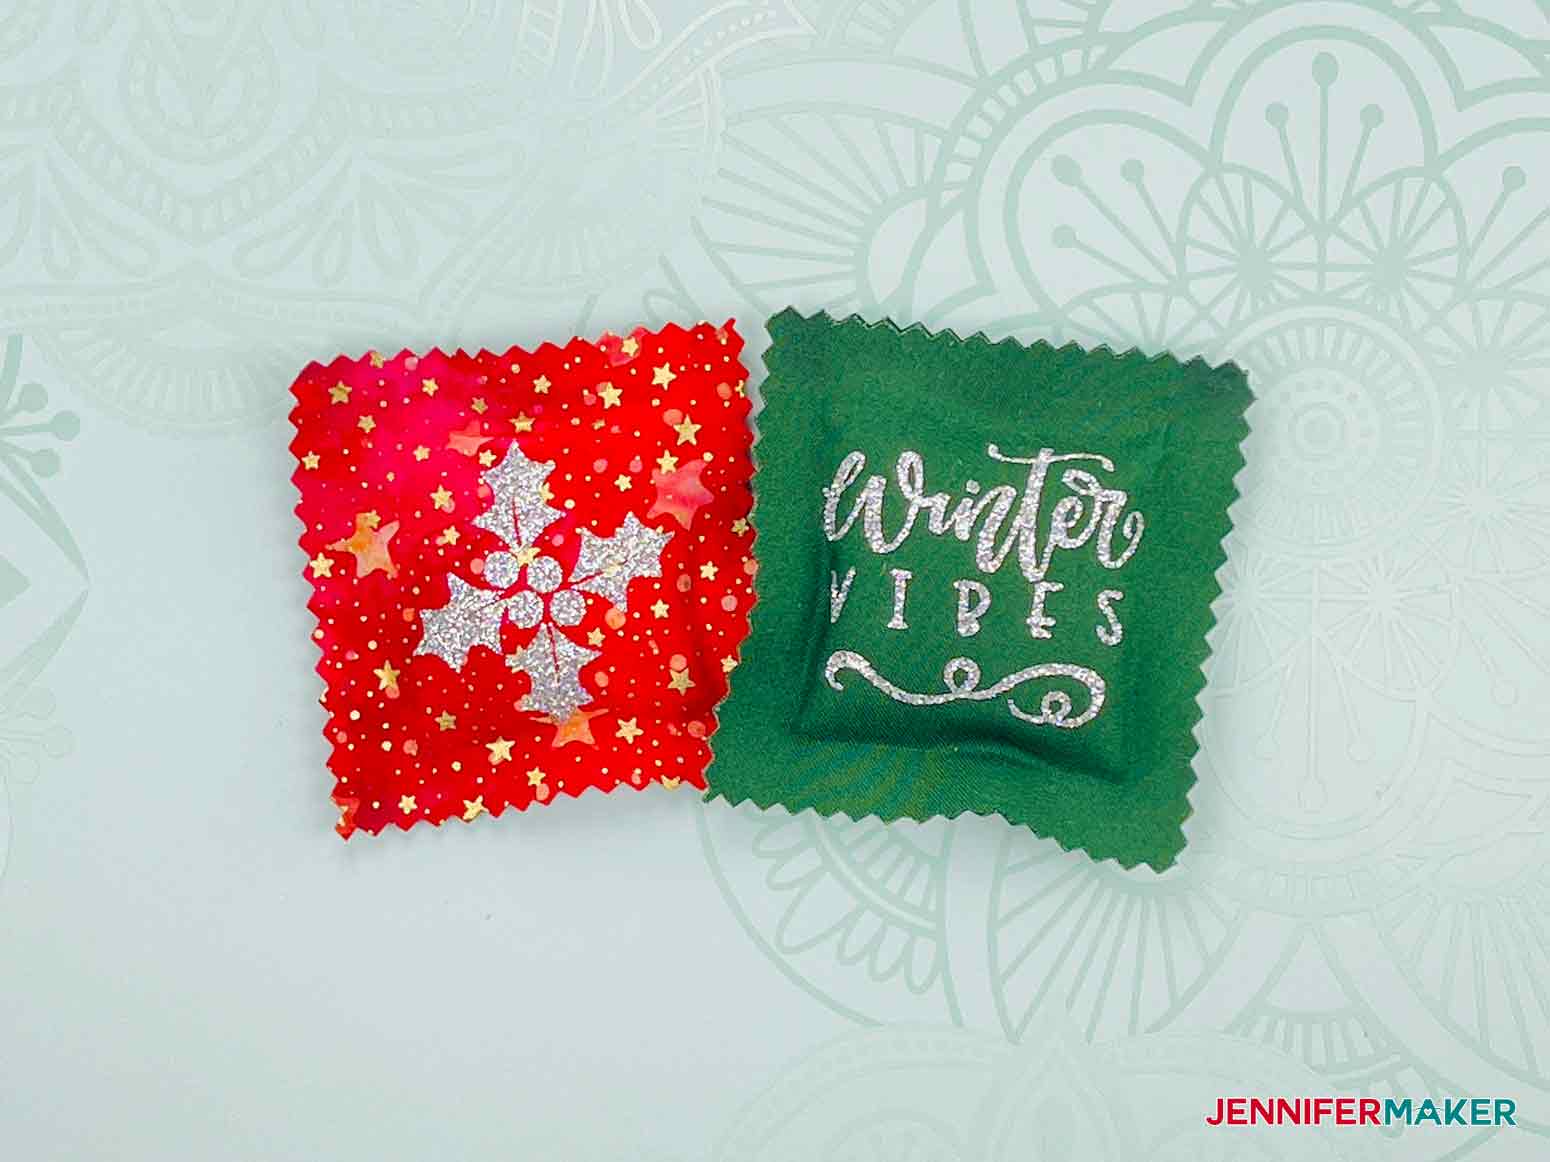
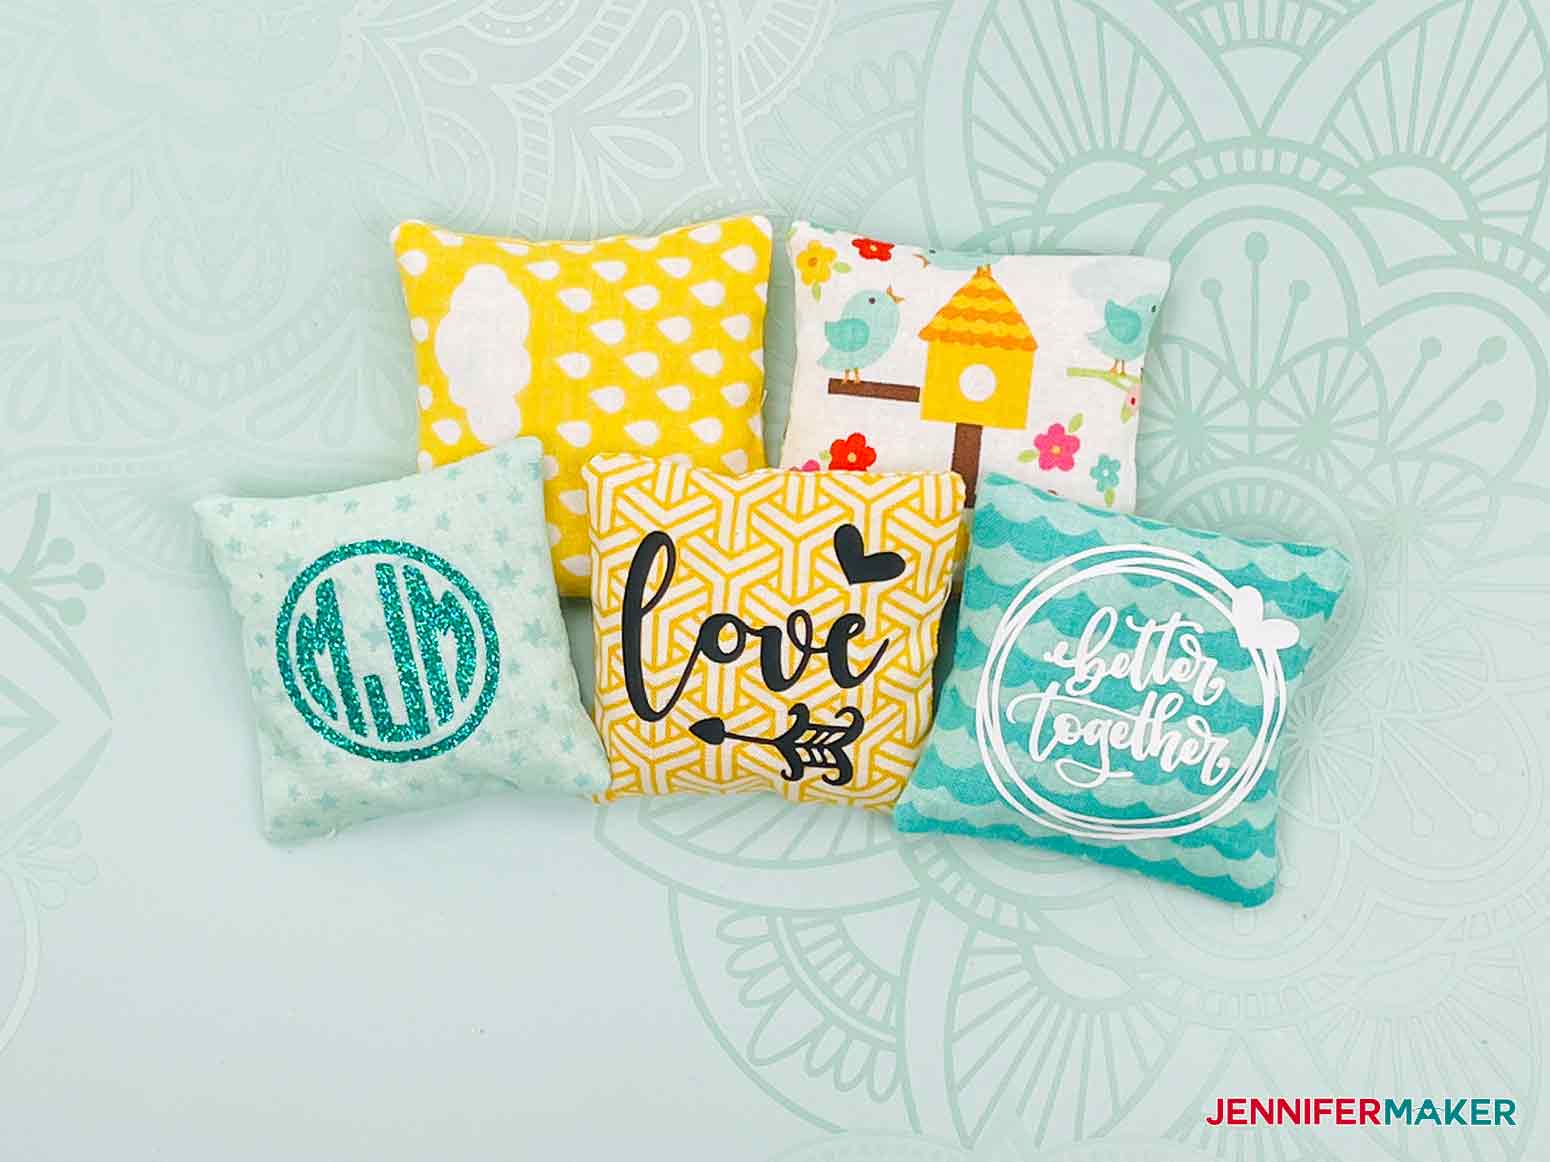
I’ve made fifteen different designs for you to use, including these super cute and fun versions for the holidays:
Here’s a supply list of what you need to make hand warmers! This post contains some affiliate links for your convenience (which means if you make a purchase after clicking a link I will earn a small commission but it won’t cost you a penny more)! Read my full disclosure policy.
Materials to Make Hand Warmers
View my Amazon shopping list with the exact items we used to make this project
- Fabric (8″ x 4″ for each hand warmer) (I used Red, Green, Holiday Stars, Print Design)
- Sewing Thread
- Long-Grain Rice
- Heat n’ Bond (No Sew Option)
- Iron-On Vinyl (I used White and Black and Silver Glitter)
- Rotary Blade (Maker Series)
- Bonded Fabric Blade (Explore Series)
- FabricGrip Cutting Mat (12″ x 12″)
- Standard Grip Mat
- Sewing Machine and Needle
- Hand Sewing Needle
- Straight Pins
- Ruler
- EasyPress Mini
- EasyPress Mat
- Pinking Shears (No Sew Option)
- Optional Point Turner and Seam Creaser Tool, Cricut Basic Tool Kit, Rotary Cutter, Cricut Washable Fabric Pen, Cricut Trimmer, Cricut Self-Healing Cutting Mat, Cricut Ruler
- A method to cut your vinyl – I used the amazing Cricut Maker but you can also use the Cricut Explore
- Design #332 – My free SVG/PDF/DXF design files are available in my free resource library (get the password by filling out the form at the bottom of this page)
How to Make Your Own DIY Hand Warmers
Pocket Hand Warmers
Warm up your little paws and join me to make some easy sew and no-sew pocket hand warmers. Customize them by using some of my ready-made designs or come up with your own.
Materials
- Red Fabric (8" x 4" for each hand warmer)
- Green Fabric (8" x 4" for each hand warmer)
- Holiday Stars Fabric (8" x 4" for each hand warmer)
- Print Design Fabric (8" x 4" for each hand warmer)
- Sewing Thread
- Long-Grain Rice
- Heat n' Bond (No Sew Option)
- White Smart Iron-On Vinyl
- Black Smart Iron-On Vinyl
- Silver Glitter Iron-On Vinyl
- Design #332 - My free hand warmer patterns (get a password to my free library by filling out the form at the bottom of this post)
Tools
- A method to print and cut your fabric and vinyl - I used the Cricut Maker 3 but you can also use the Cricut Maker or Explore Series machines
- Cricut Rotary Blade (Maker Series)
- Cricut Bonded Fabric Blade (Explore Series)
- FabricGrip Cutting Mat (12" x 12")
- Cricut Standard Grip Mat
- Sewing Machine and Needle
- Hand Sewing Needle
- Straight Pins
- Ruler
- Cricut EasyPress Mini
- Cricut EasyPress Mat (12"x12")
- Pinking Shears (No Sew Option)
- Point Turner and Seam Creaser Tool (optional)
- Cricut Basic Tool Kit (optional)
- Rotary Cutter (optional)
- Cricut Washable Fabric Pen (optional)
- Cricut Trimmer (optional)
- Cricut Self-Healing Cutting Mat (optional)
- Cricut Ruler (optional)
Instructions
STEP 1: GET MY FREE POCKET HAND WARMERS DESIGN FILES
First, download my free Pocket Hand Warmers SVG files, design #332, from my free resource library..
TIP: If you're not sure how to upload a file to Cricut Design Space, watch this helpful video training series I made. If you're on an iPhone or iPad, here's how to download and upload files to the Cricut Design Space app.
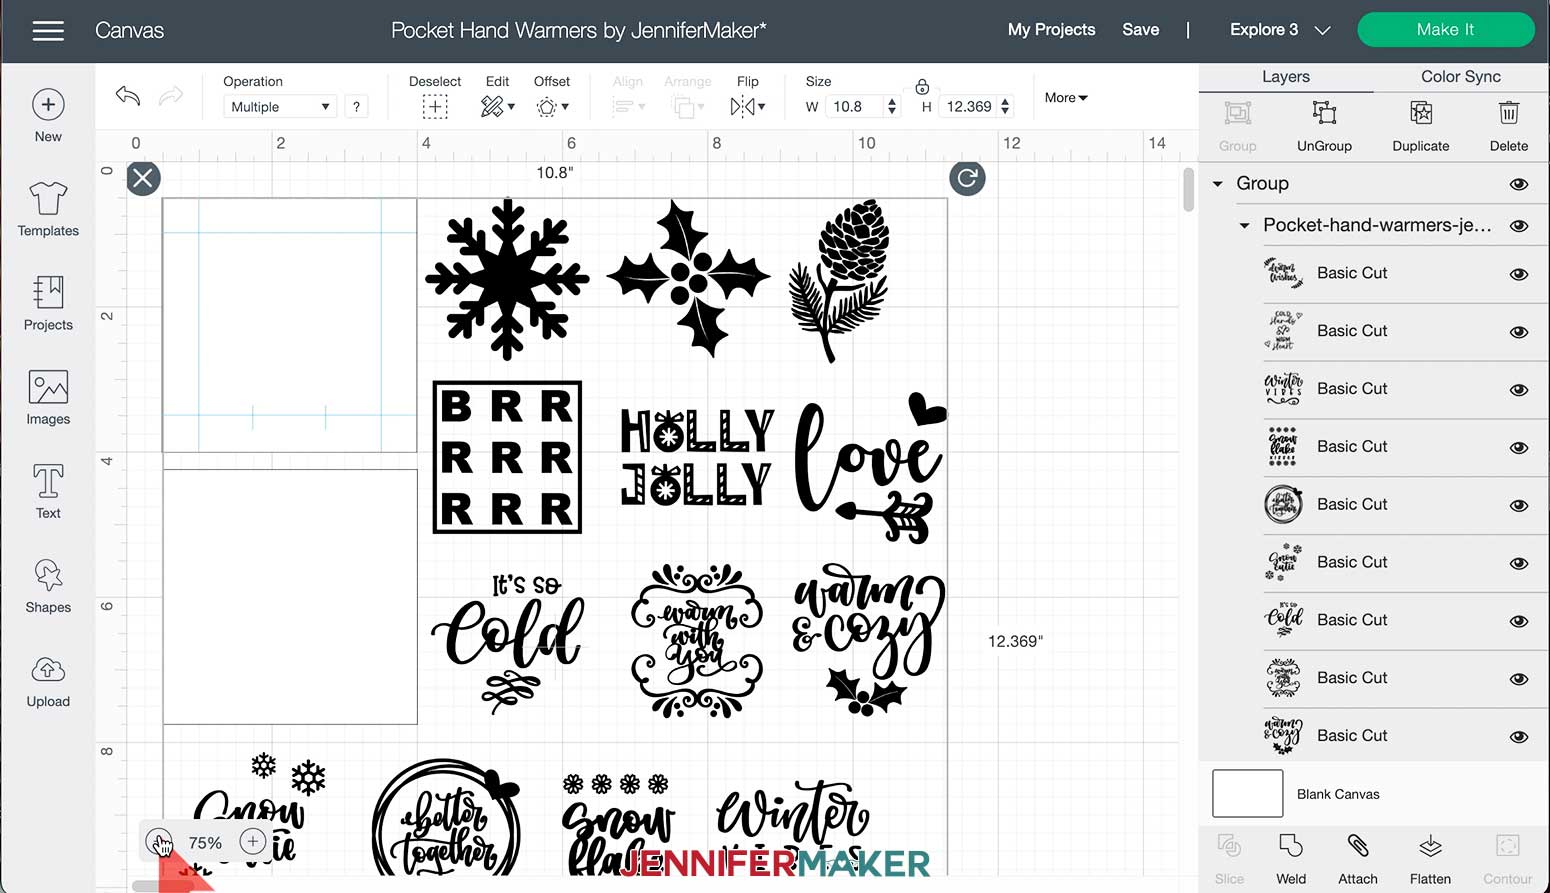
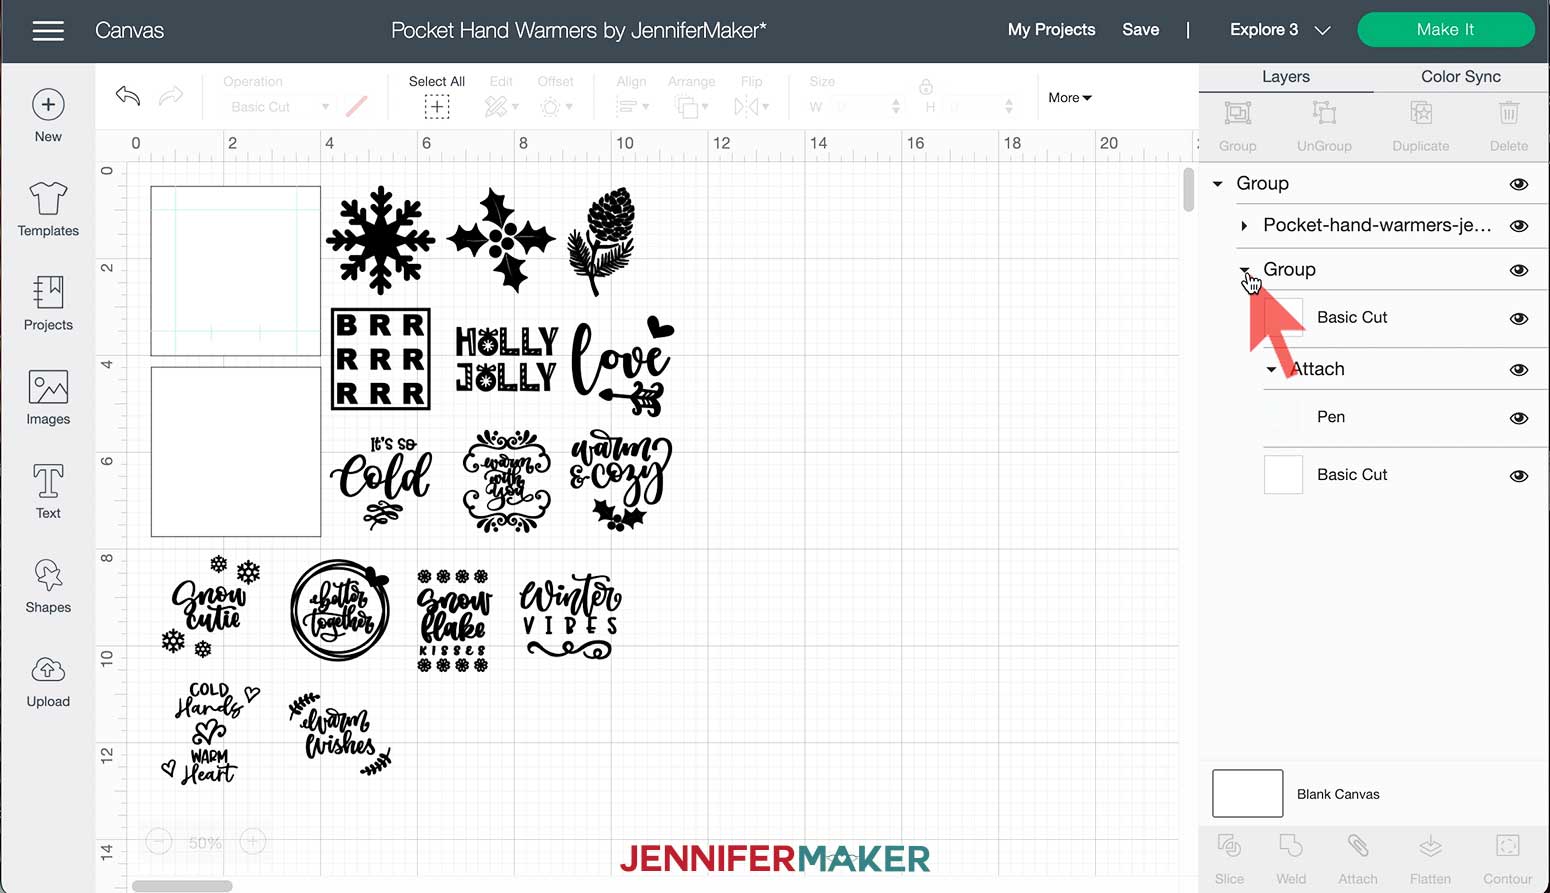
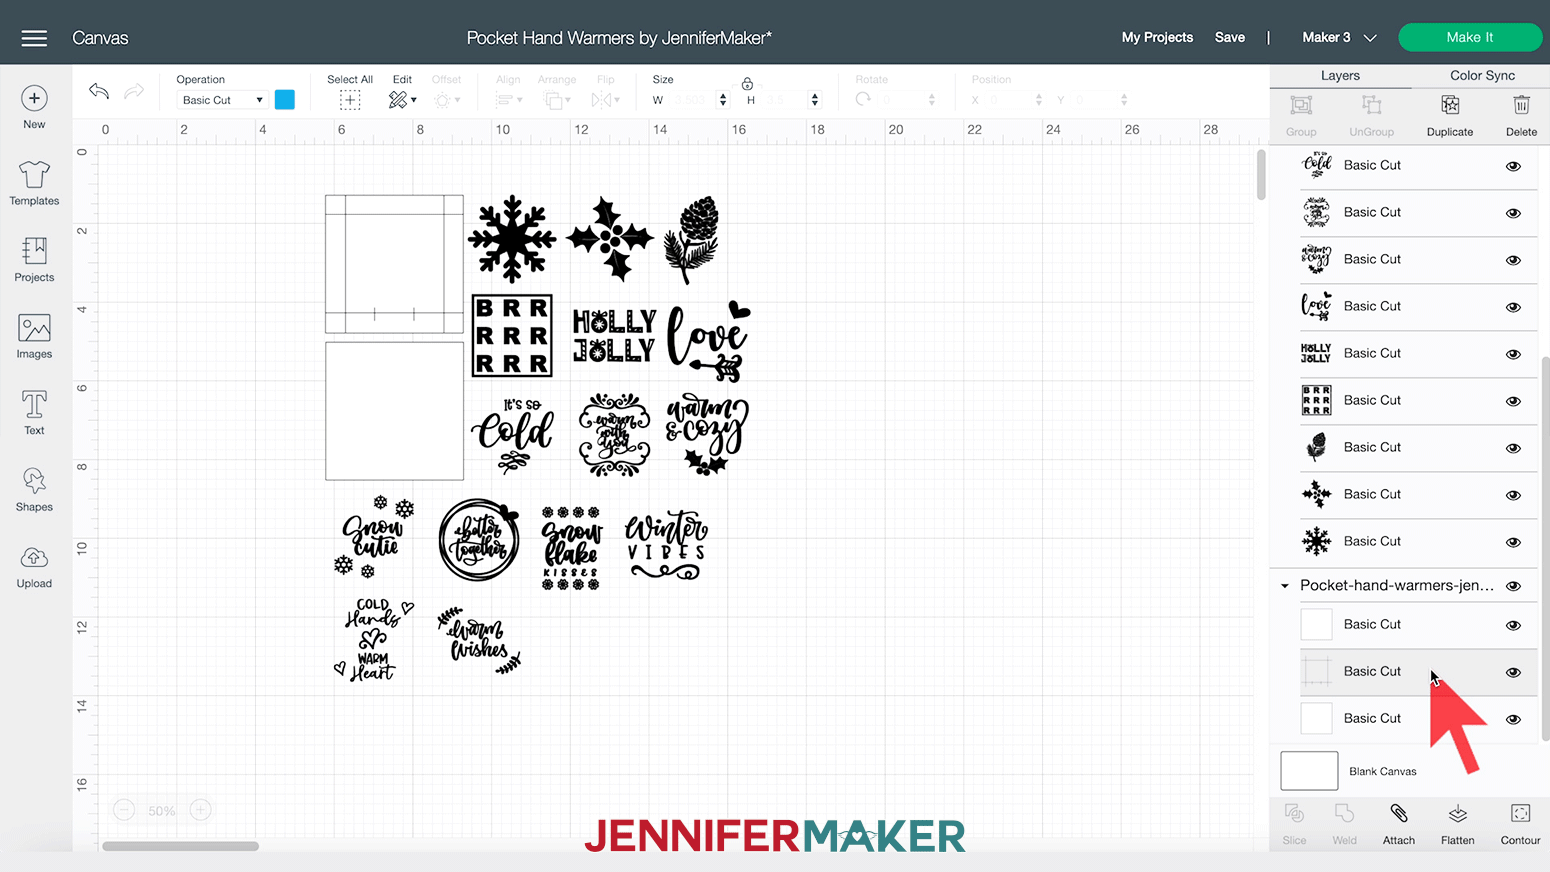
Here’s what my Pocket Hand Warmers SVG designs look like in Design Space. If necessary, you can reduce the magnification in the lower left corner of the canvas to see more of the design.
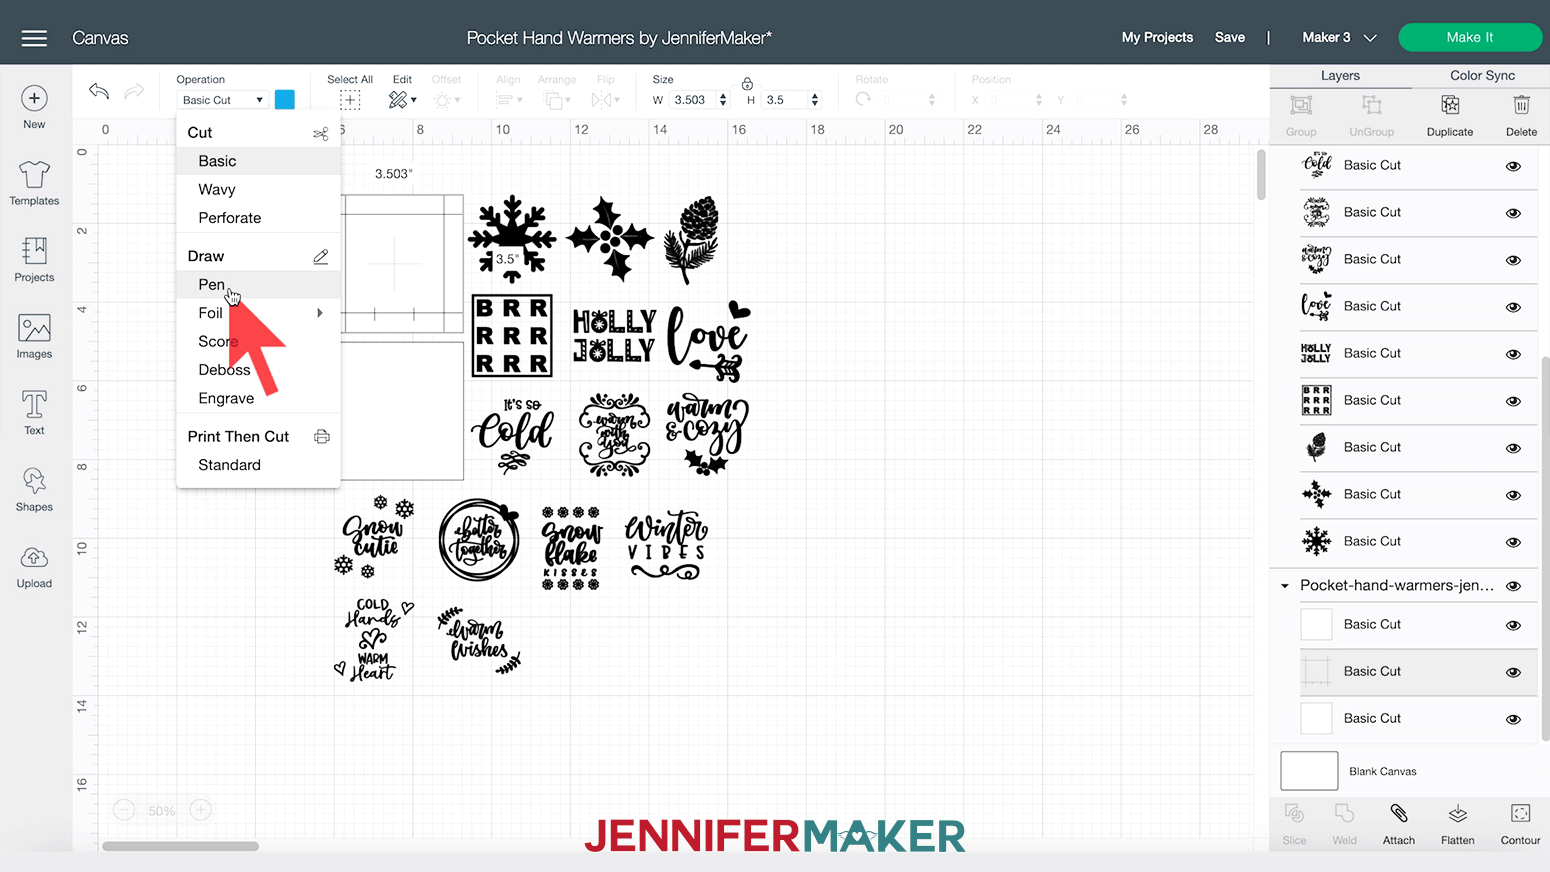
STEP 2: CUT YOUR DESIGNS
There are 15 iron-on designs to choose from along with two squares for cutting fabric.
CUT THE IRON-ON VINYL
I'm going to cut the iron-on vinyl designs first. Click the eye icon next to the last group in the layers panel that contains the fabric squares and pen layers to hide it. Click the eye icon to hide any designs that you do not want to cut. I am going to cut all of the designs.
I am ready to click "Make It."
I am using Cricut's Smart Iron-On Vinyl for this project so I am selecting "Without Mat" and then clicking "Done." If you are using different iron-on vinyl, select "On Mat." You will only see this screen if you are cutting on a Cricut Maker 3 or Explore 3 machine.
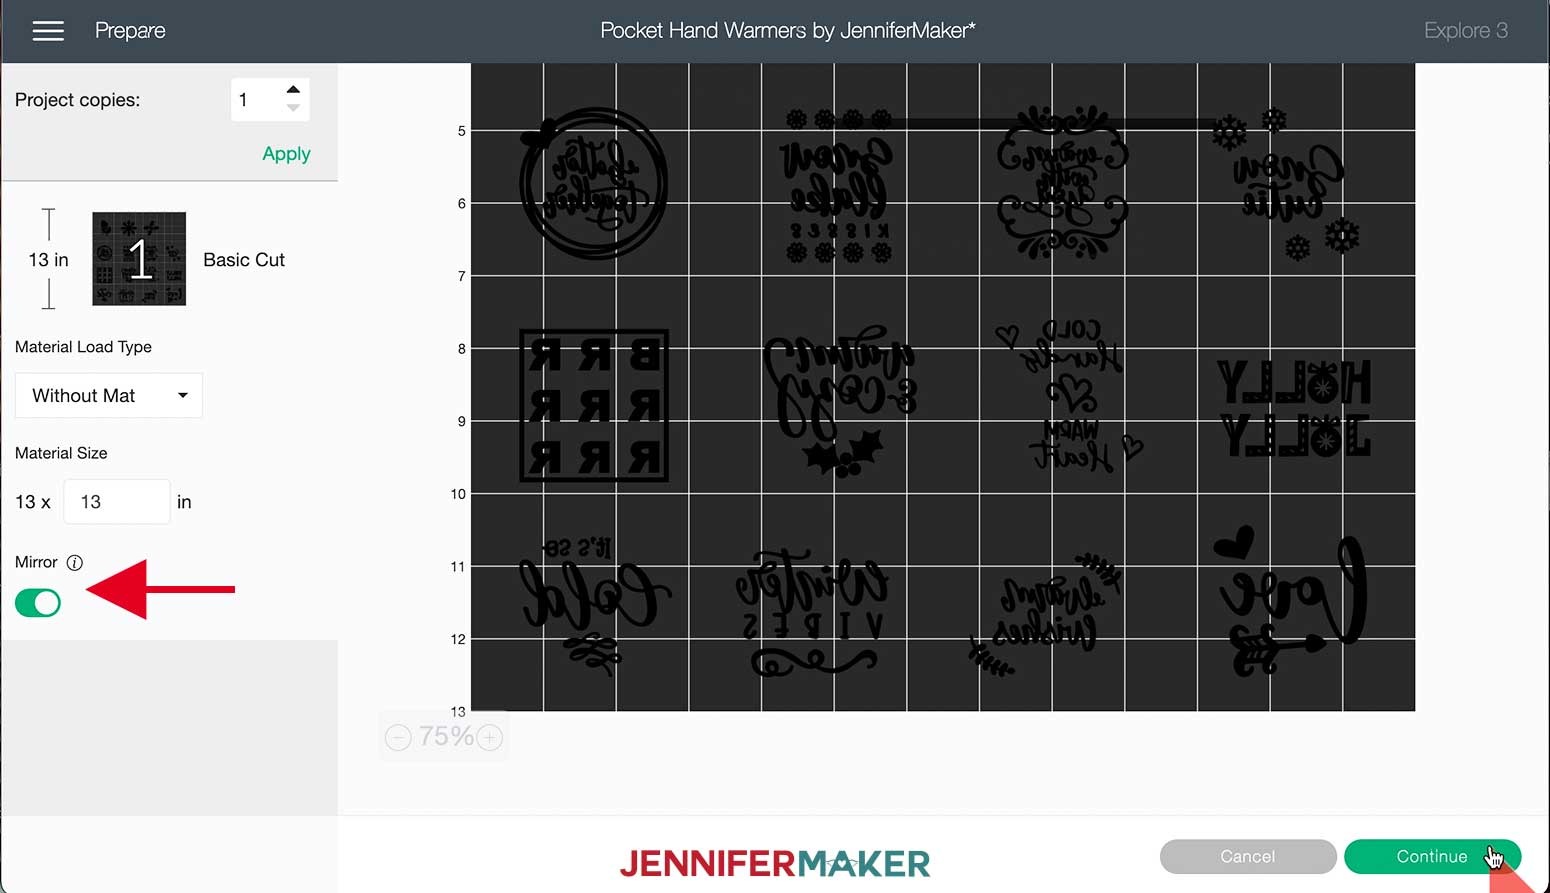
I do not like my designs this close to each other, so I am going to adjust the material size so I can spread them out. This makes it easier for me to cut each design from the vinyl after they are cut.
Make sure you have selected "Mirror" and then click "Continue."
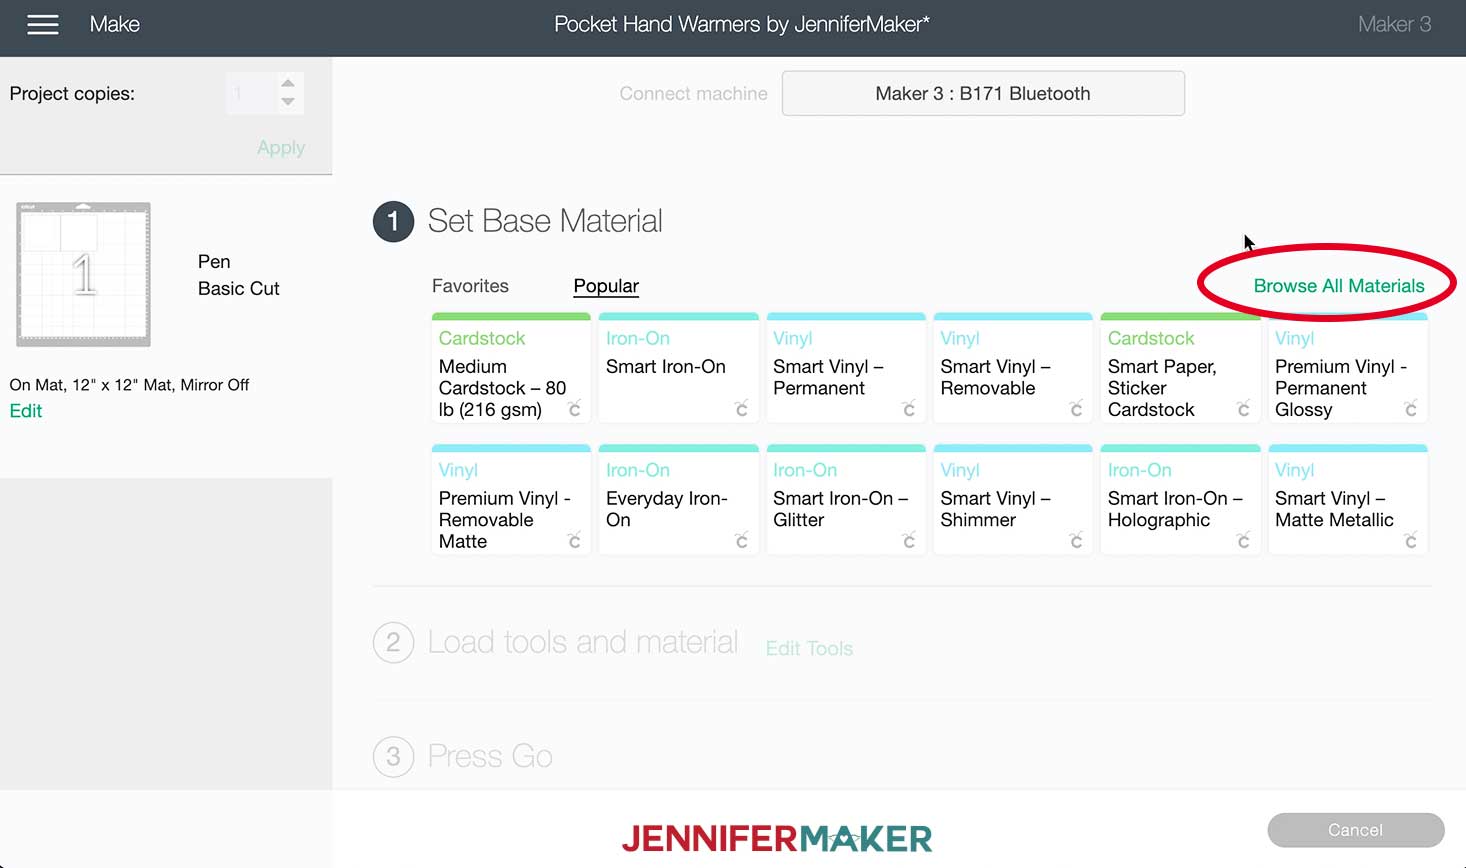
For my base material, I am selecting Smart Iron-On. If you are using another iron-on vinyl, choose "Browse All Materials" to search and select your base material.

Double check that you have mirrored your design. For the pressure, I always select "More" for a nice, clean cut.
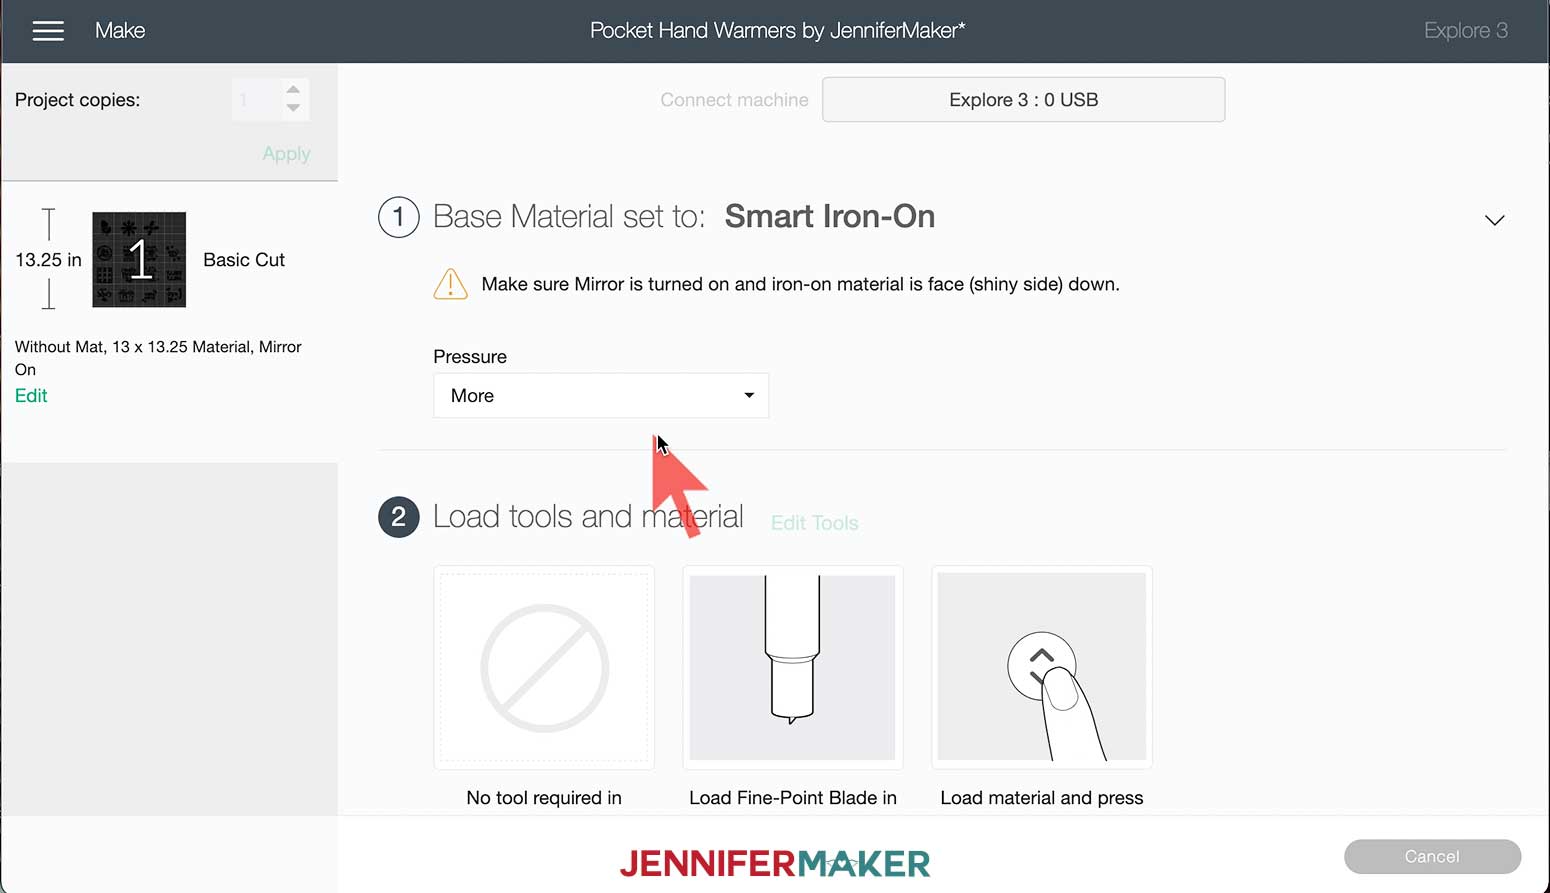
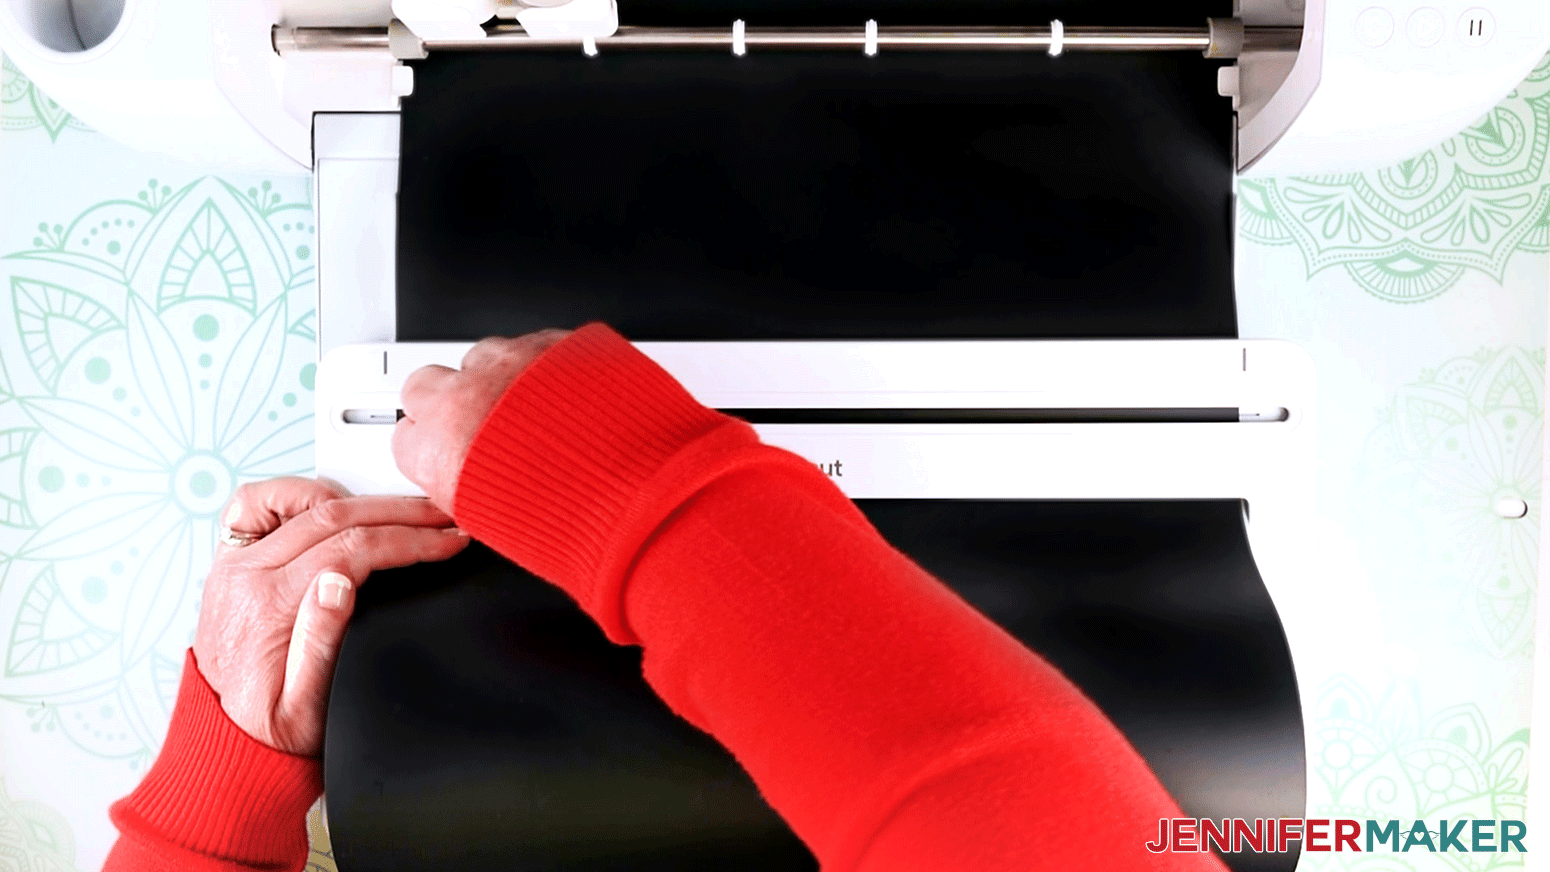
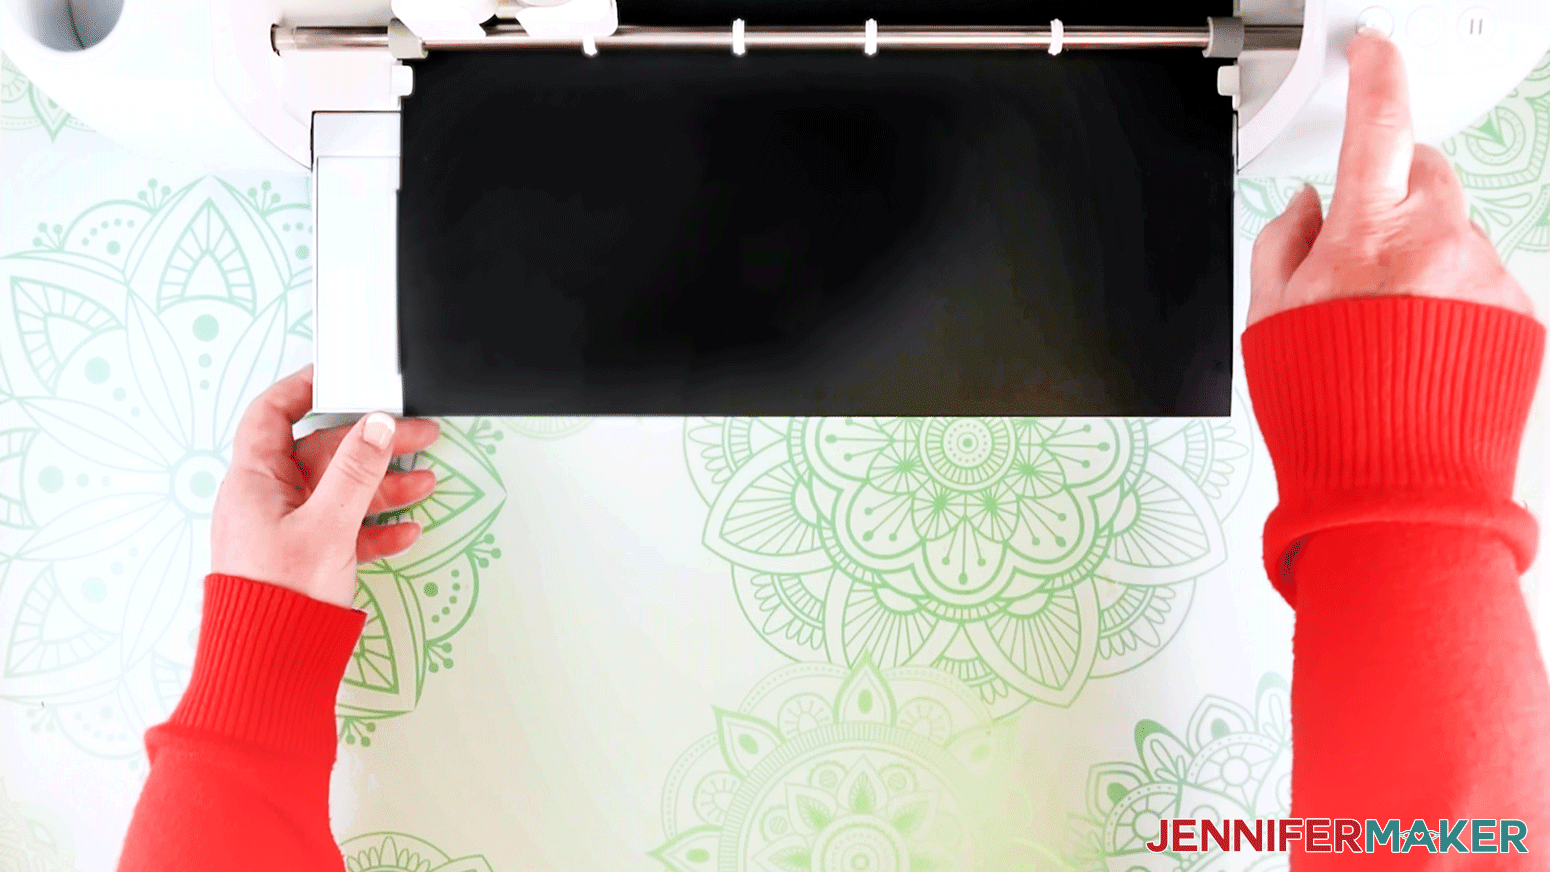
Insert your Smart Vinyl or mat into the machine then push the go button to begin cutting.
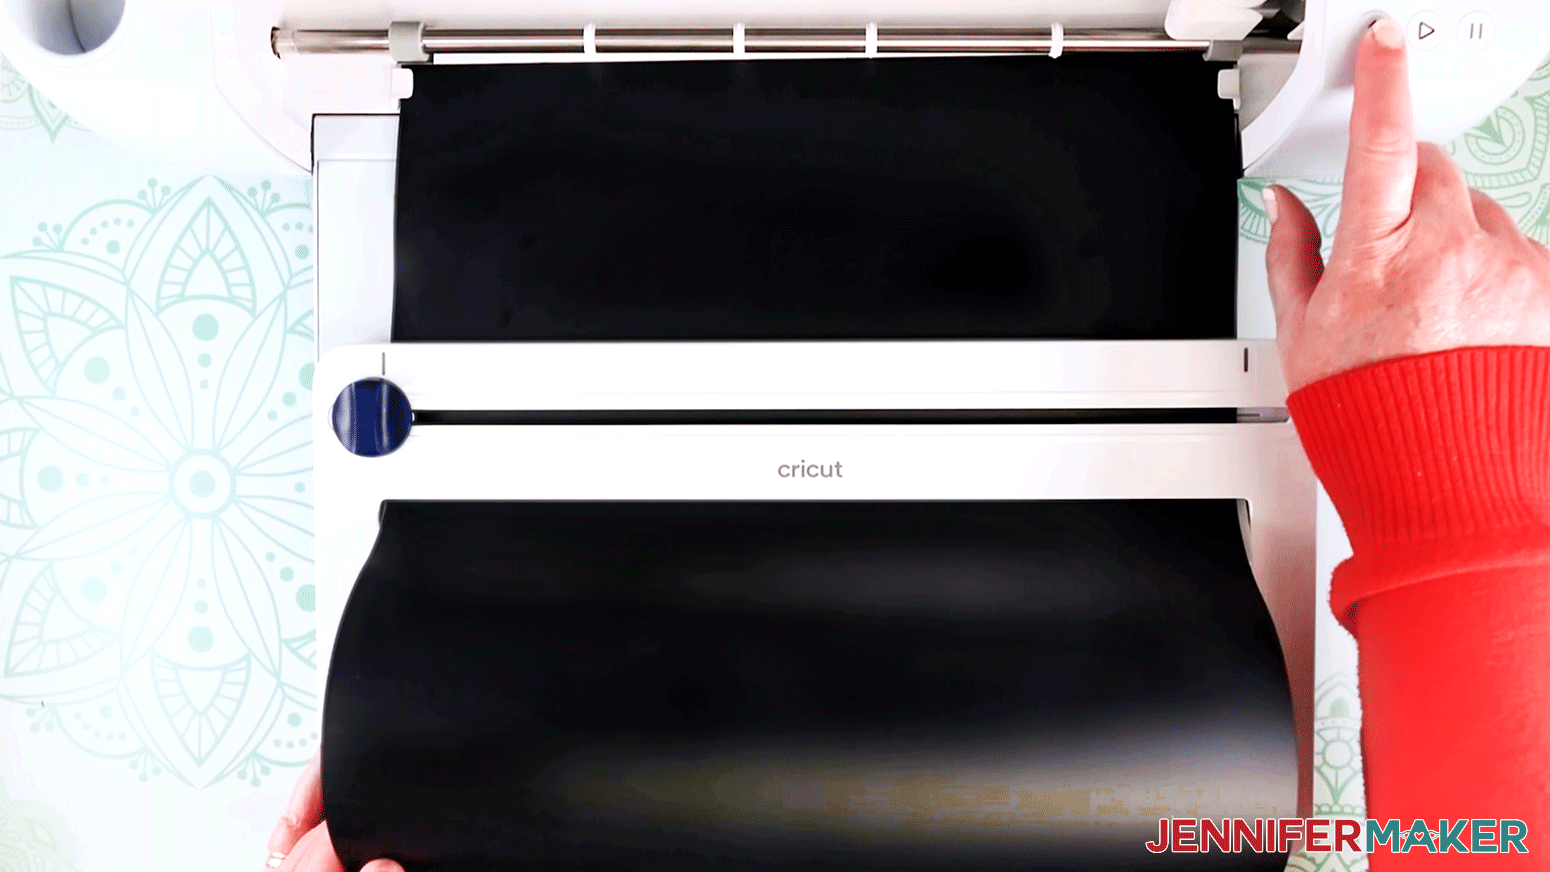
When your design has finished cutting, cut the Smart Iron-On Vinyl, remove the tray, then unload it from the machine.
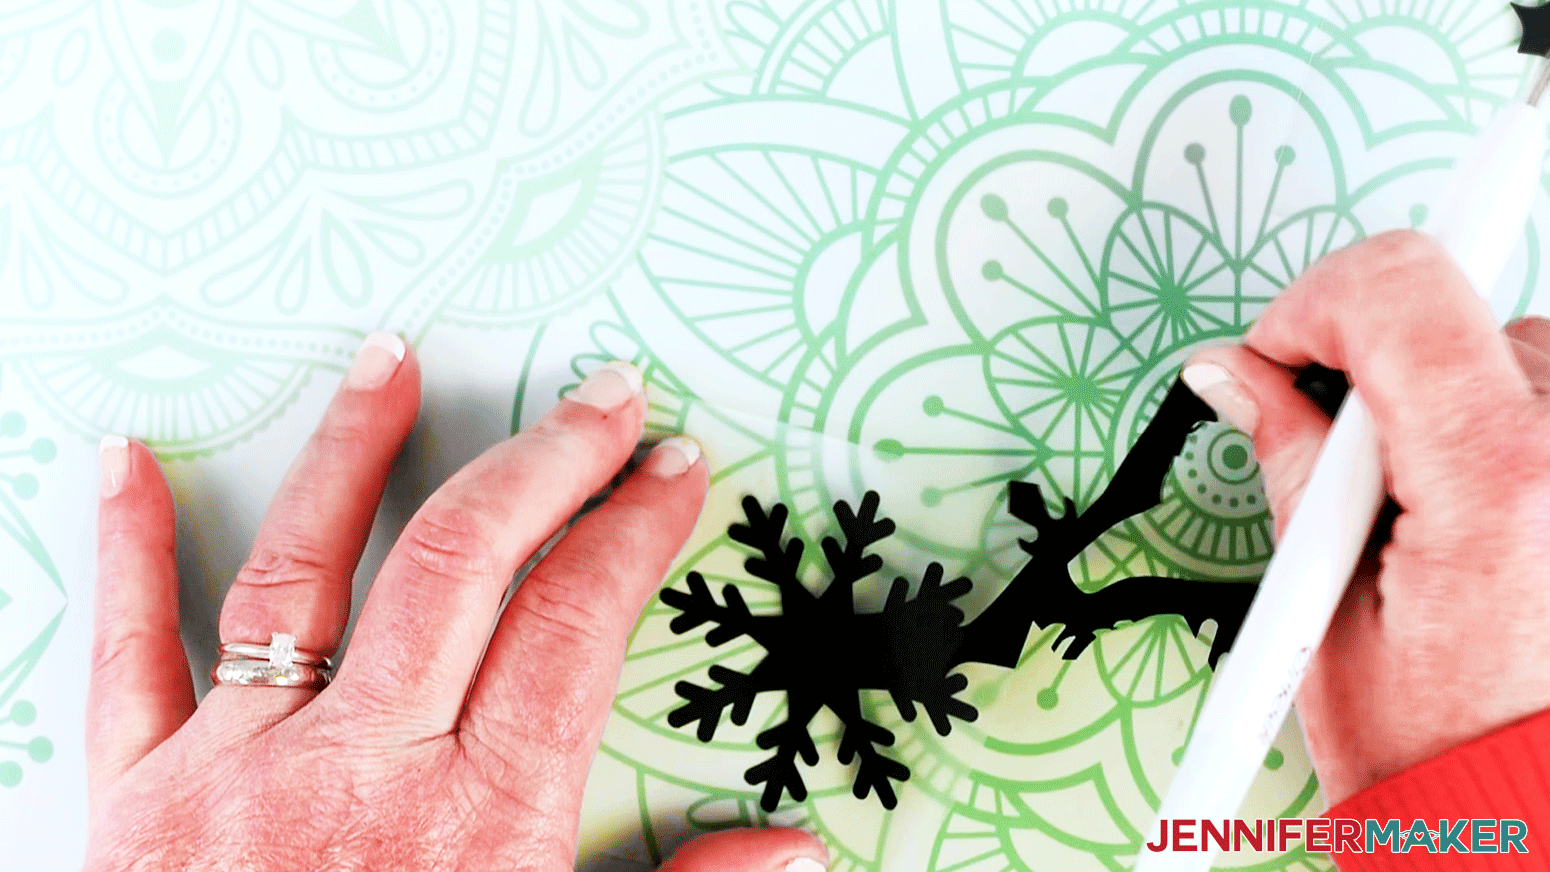
Use scissors or the Cricut Trimmer to cut each design from the Smart Iron-On Vinyl.
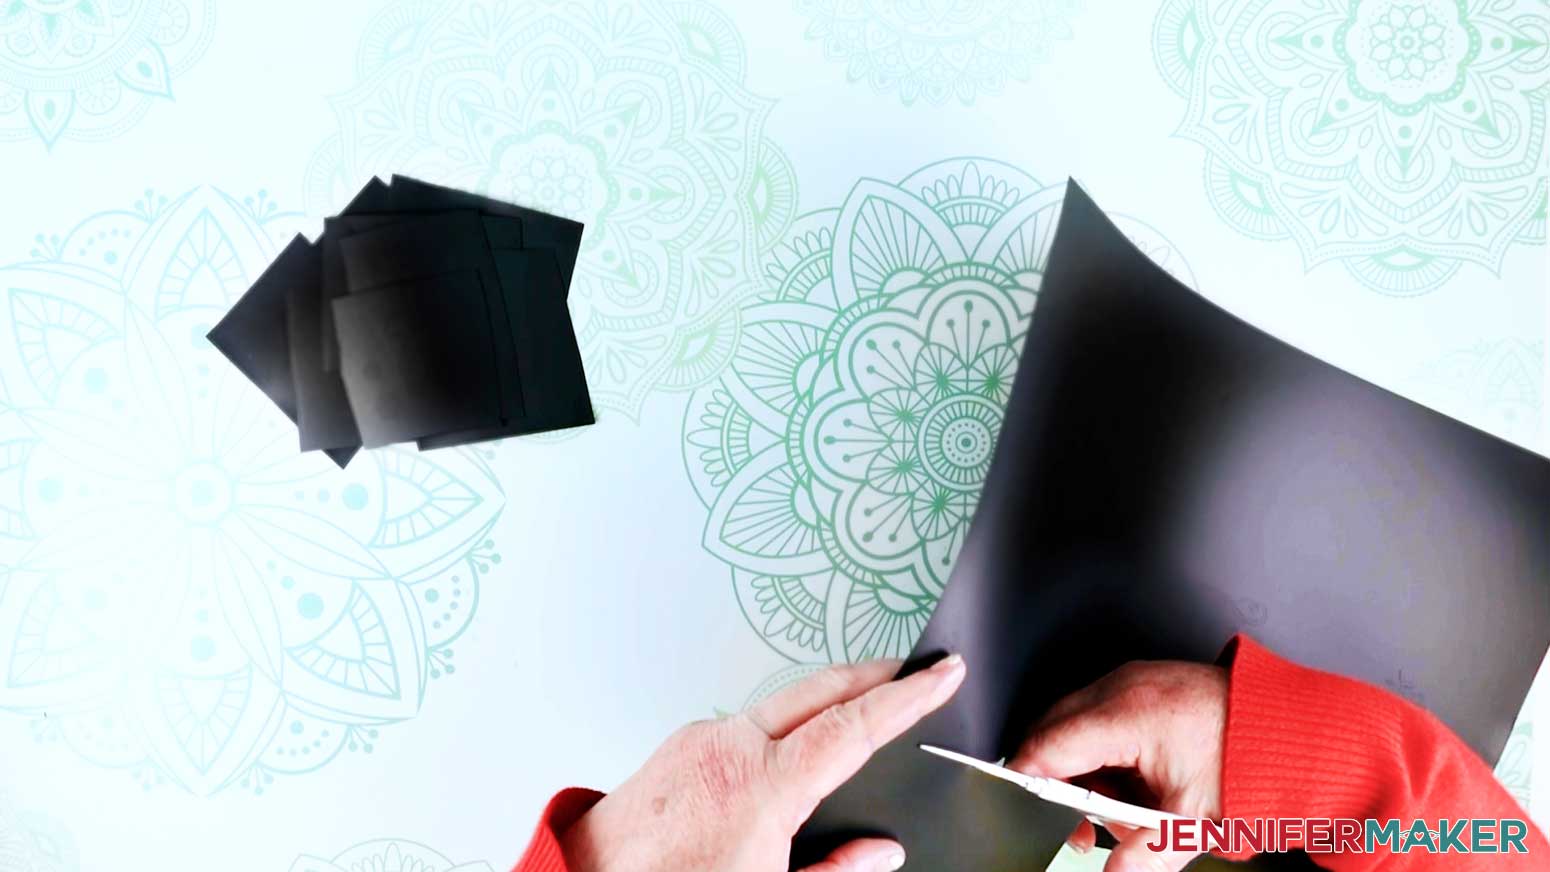
Use a weeding tool to weed each design.
It took approximately nine minutes to cut and another 20 minutes to weed all of the designs.
CUT THE FABRIC
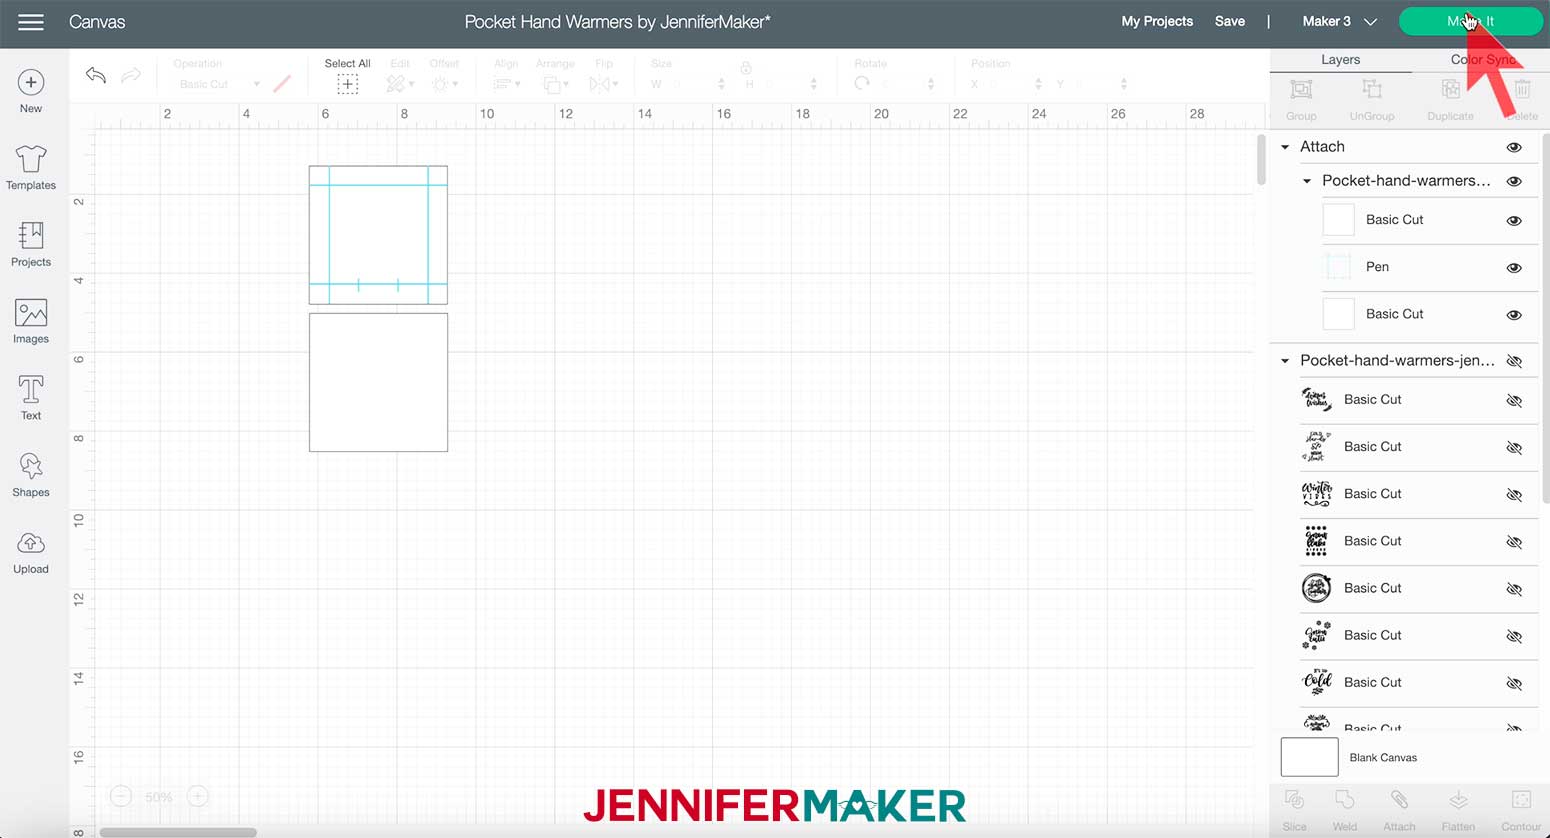
Unhide the fabric layer that we hid to cut the vinyl by clicking the eye icon in the layers panel on the right side of the screen.
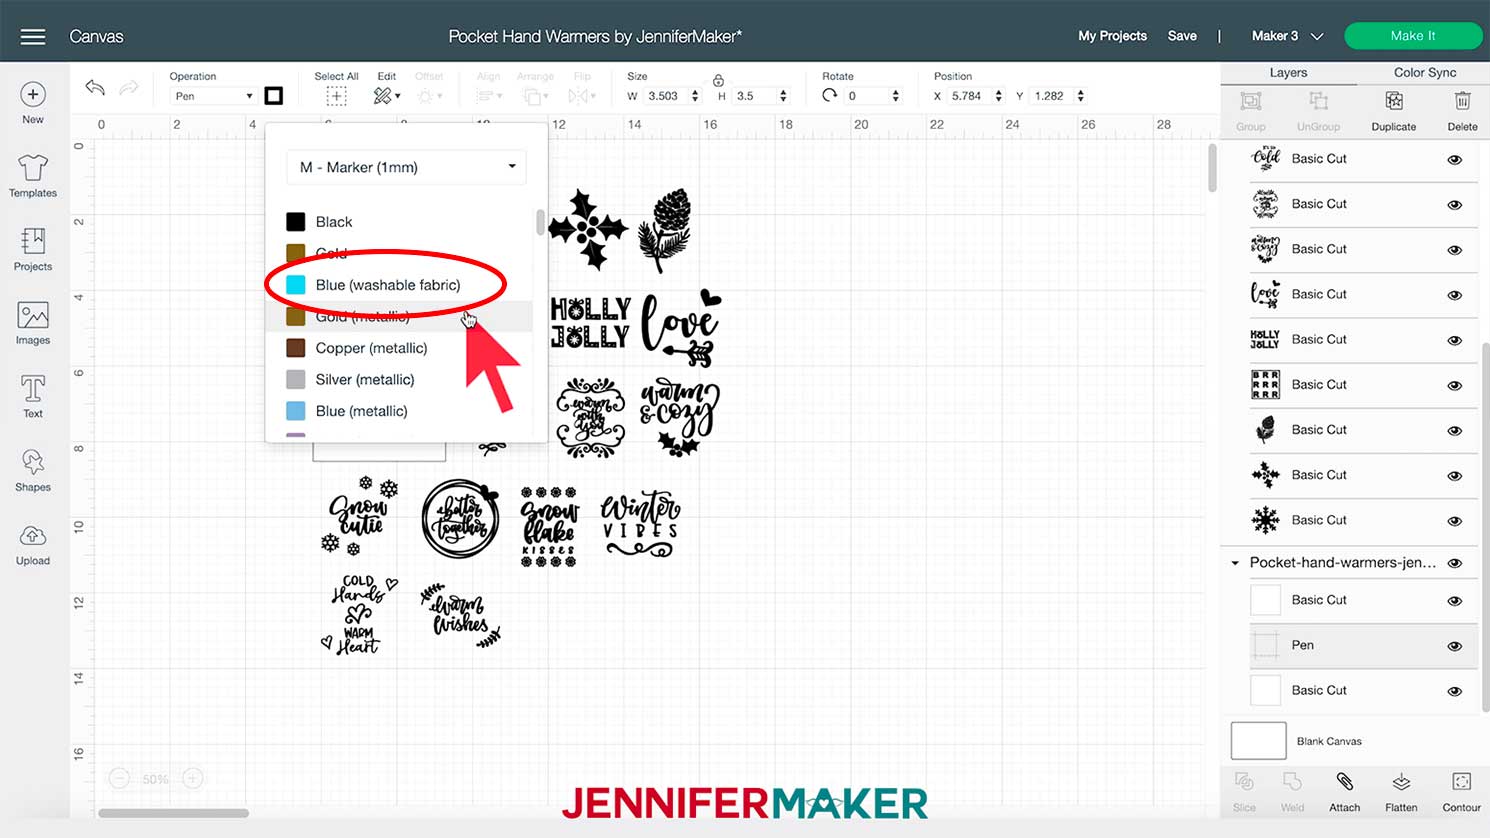
If you want to use a fabric pen (optional) to mark the seam allowance on your fabric (1/2" seam allowance), scroll down to the bottom group and click on the middle layer that currently says basic cut.
Under the Operation drop down menu, select Pen from the Draw section.
Click on the color box to the right of the operation menu. Click the drop down and select Marker. Then choose "Blue (washable fabric)" for the color.
Select the first two layers and then click "Attach" in the lower right of the canvas below the layers.
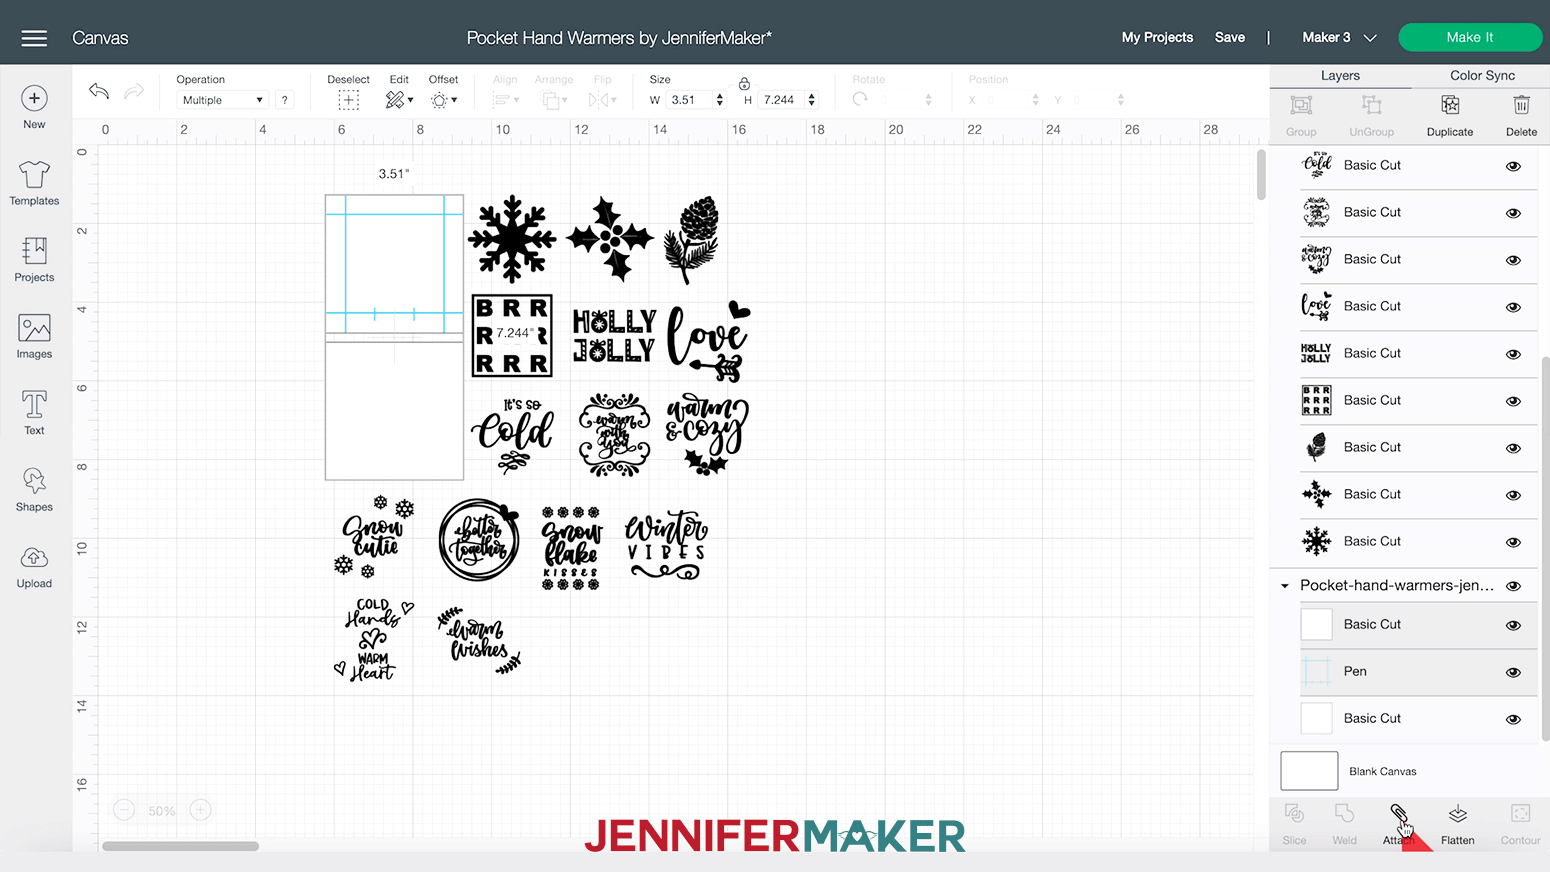
This tells the machine that you want the fabric pen to write on that fabric layer. Without attaching the fabric lines, they will show up separately when you go to make it.
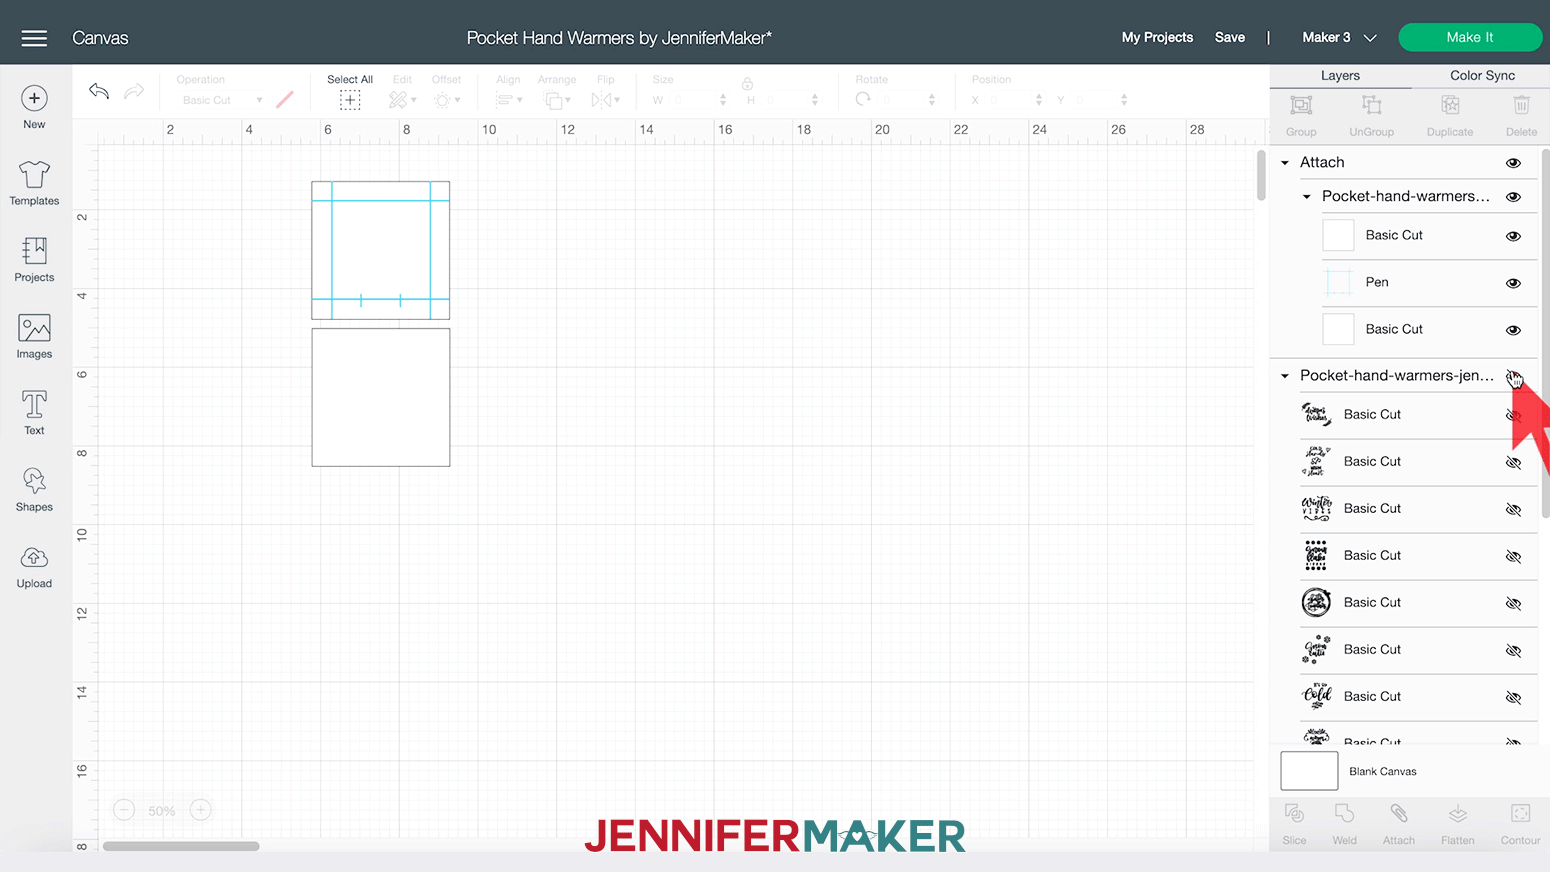
If you do not want to use the fabric pen, or you are making no-sew pocket hand-warmers, click the eye icon to hide this layer. Remember to use a 1/2" seam allowance when sewing.
Read my post on How to Cut Fabric on a Cricut Explore or Maker for additional tips on using the Explore Series machines to cut fabric.
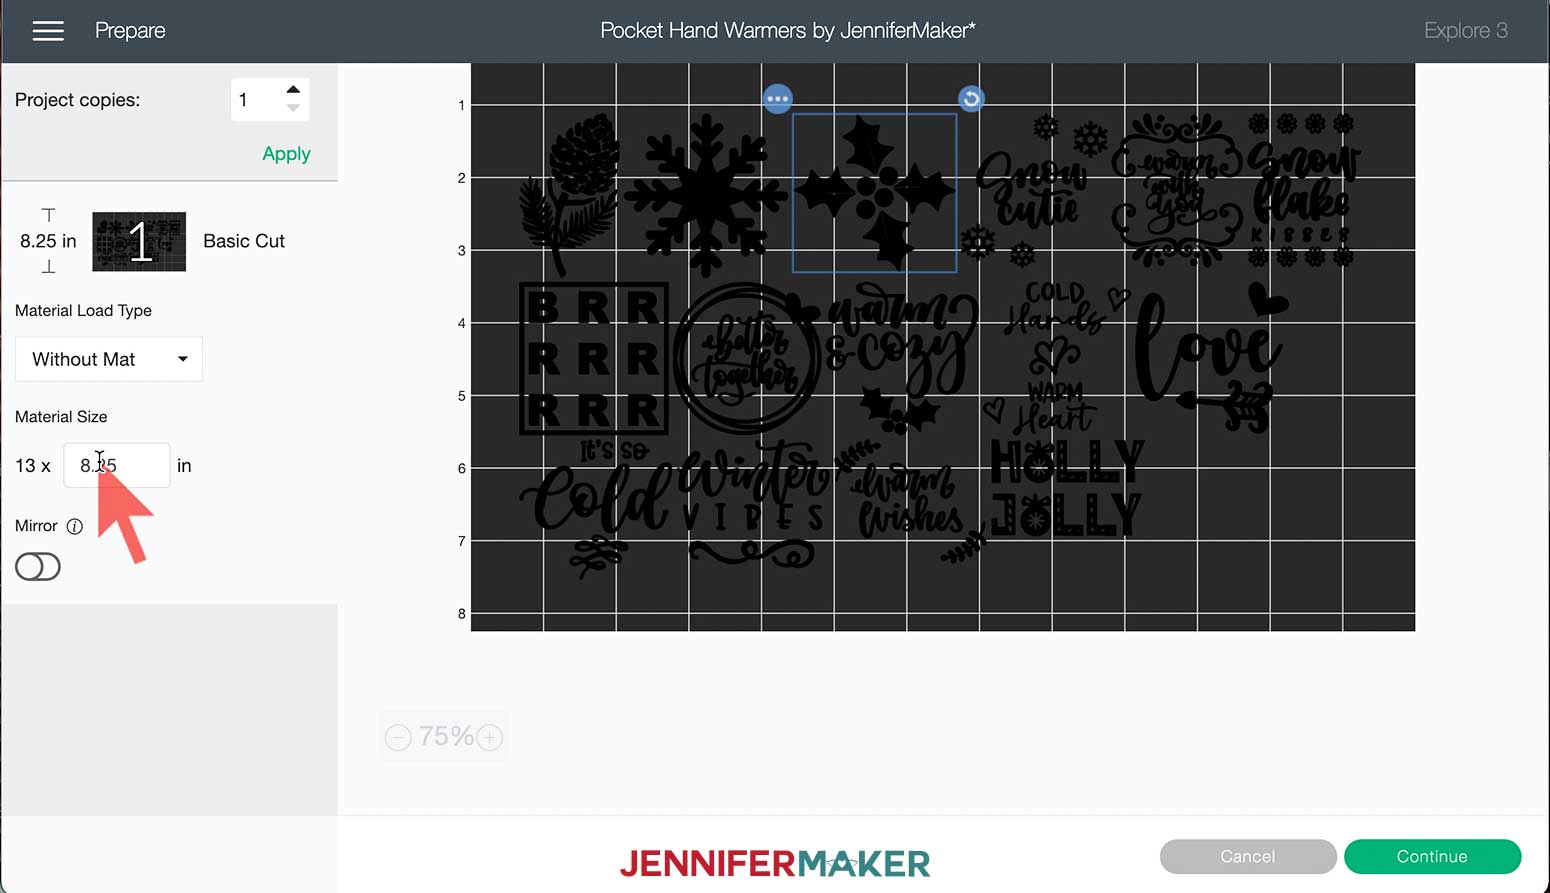
TIP: If you are cutting multiple sets, simply select the fabric group and click duplicate to create additional copies. If you are planning to make a lot of Pocket Hand Warmers, I recommend placing your fabric on a cutting mat and cutting 3.5" x 3.5" squares using a ruler and rotary cutter for faster results.
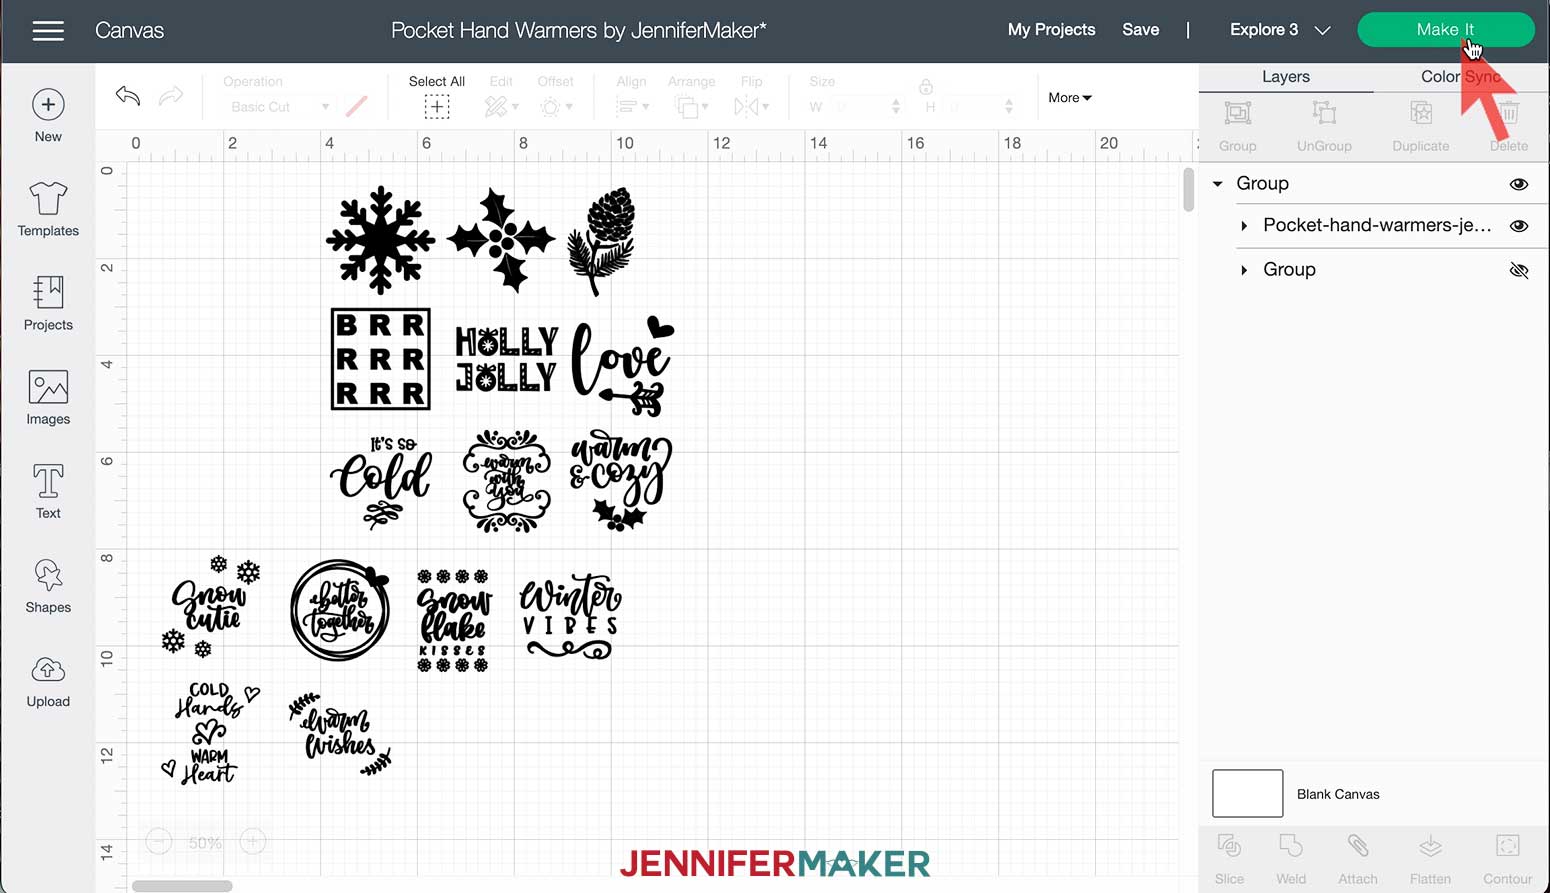
Hide the iron-on vinyl layers group in the layers panel on the right side of the screen by clicking the eye icon.
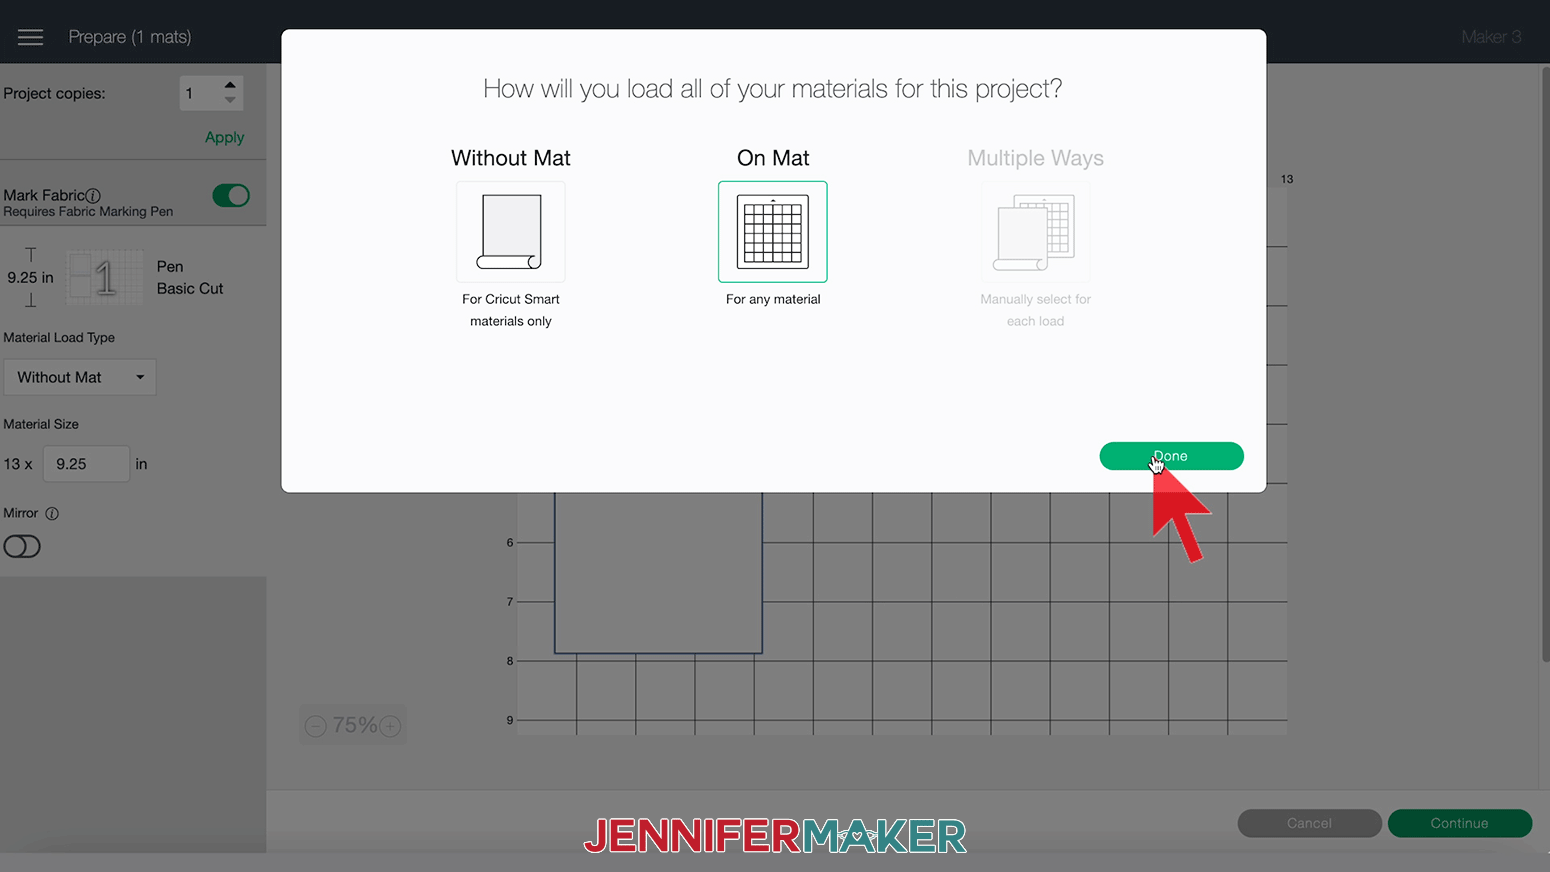
Click "Make It" in the upper right corner of the canvas.
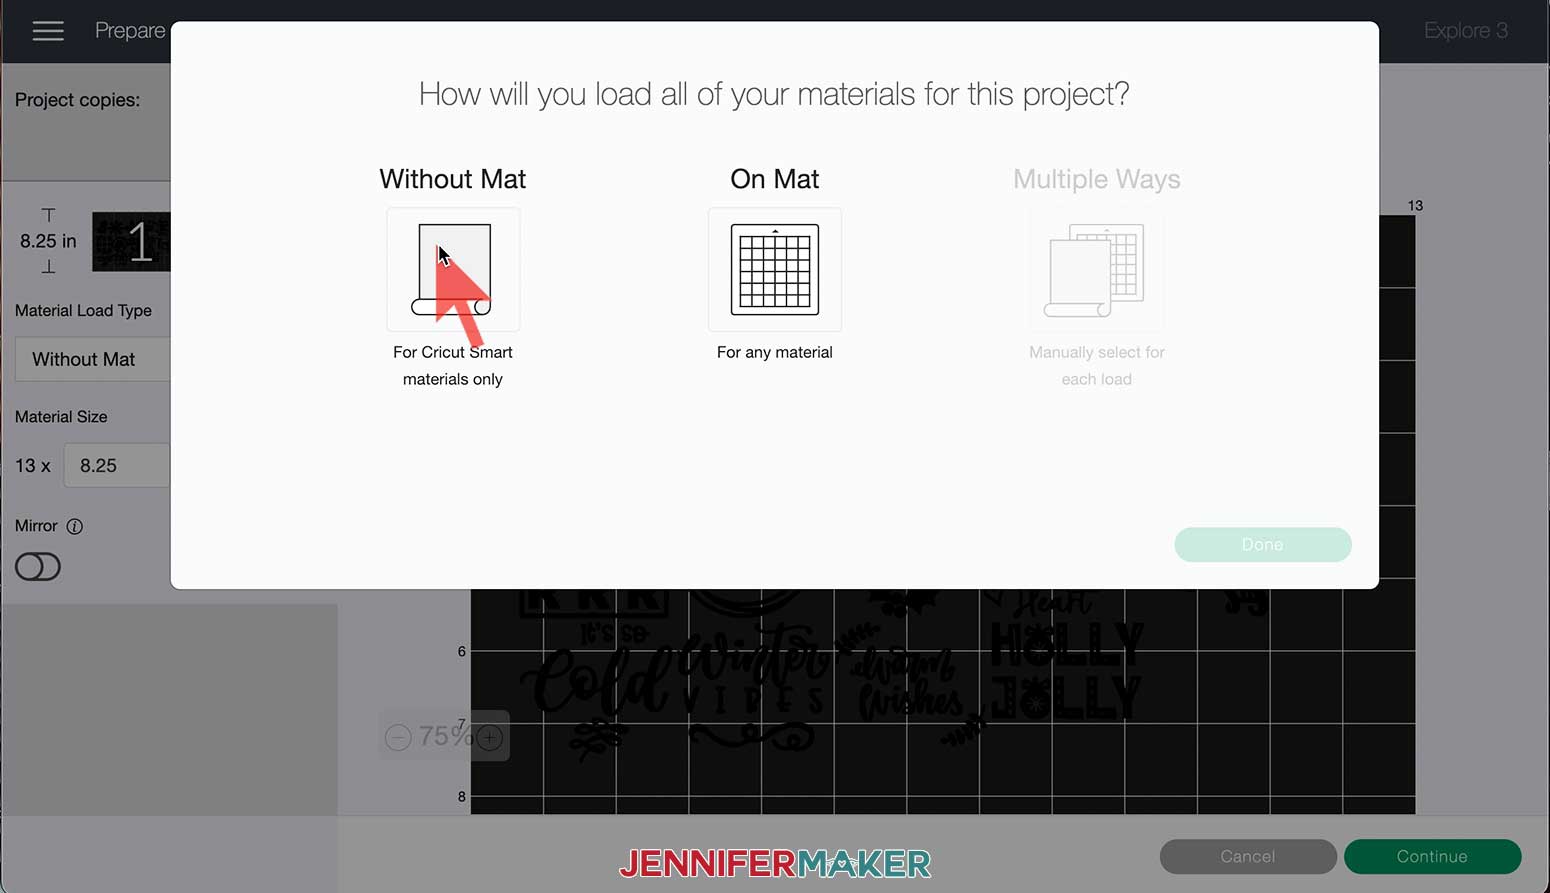
Select "On Mat" and then click "Done." You will only see this screen if you are using the Cricut Maker 3 or Explore 3 machines.
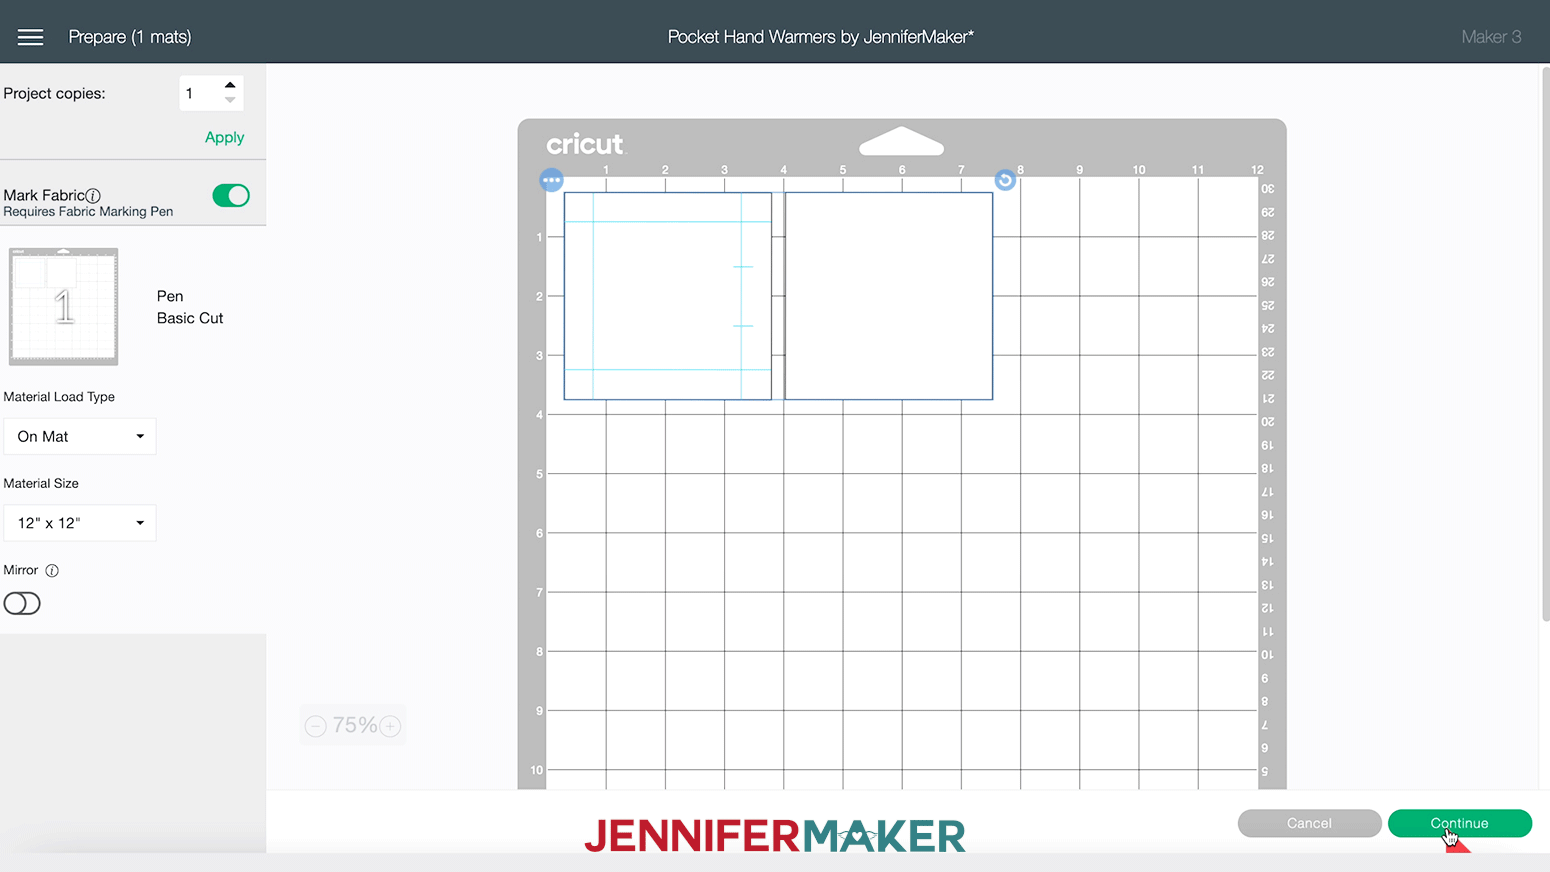
On the Prepare screen, select the rotation icon in the upper right corner of the squares
![]()
Rotate the object 90 degrees.
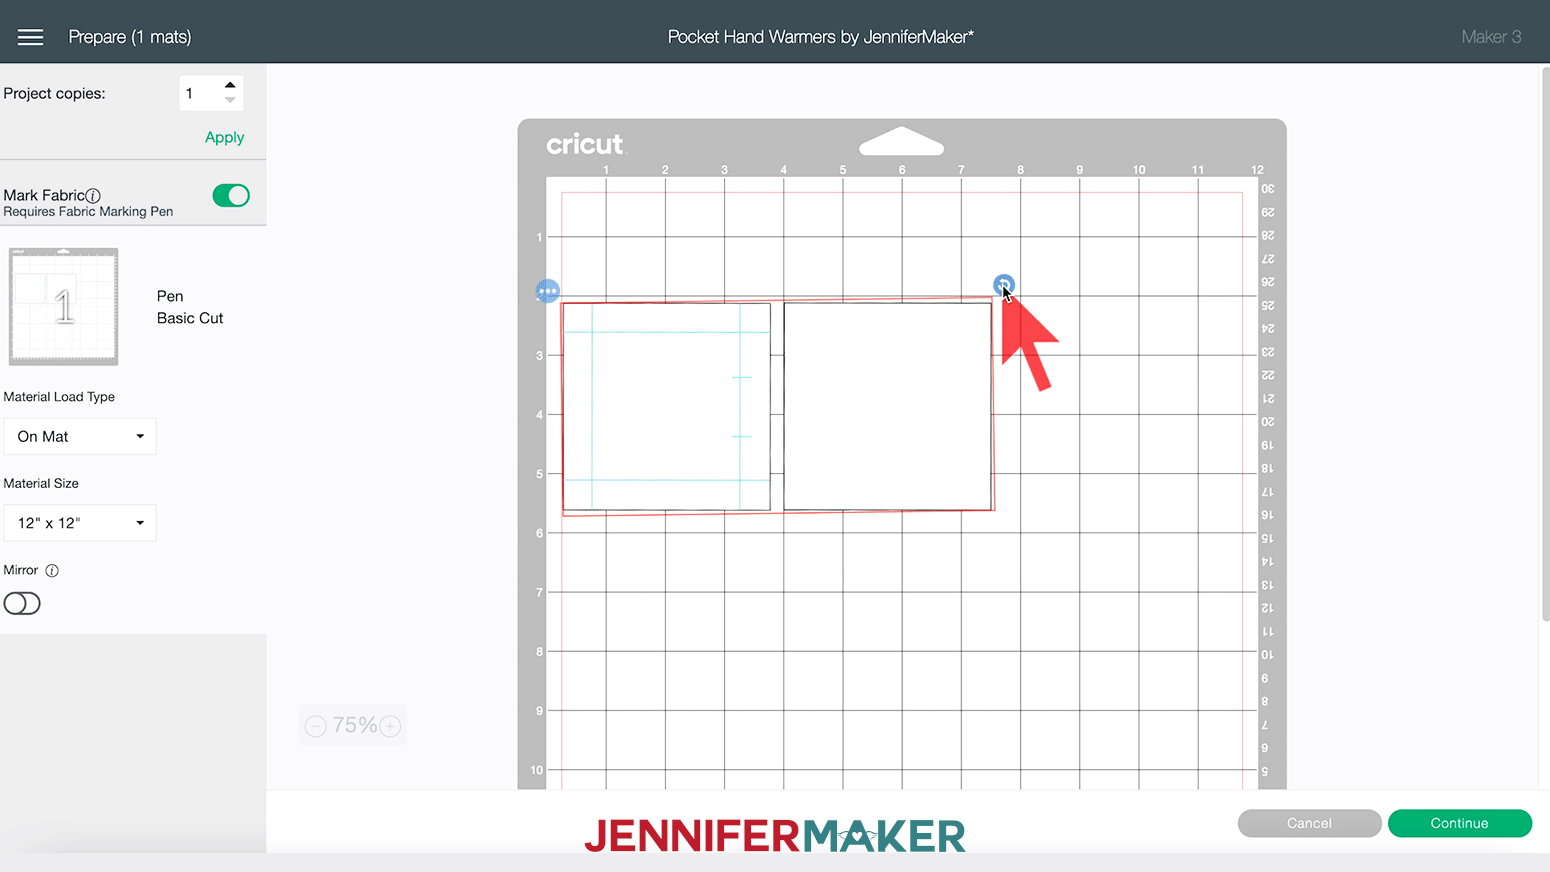
Click "Continue" in the lower right corner.
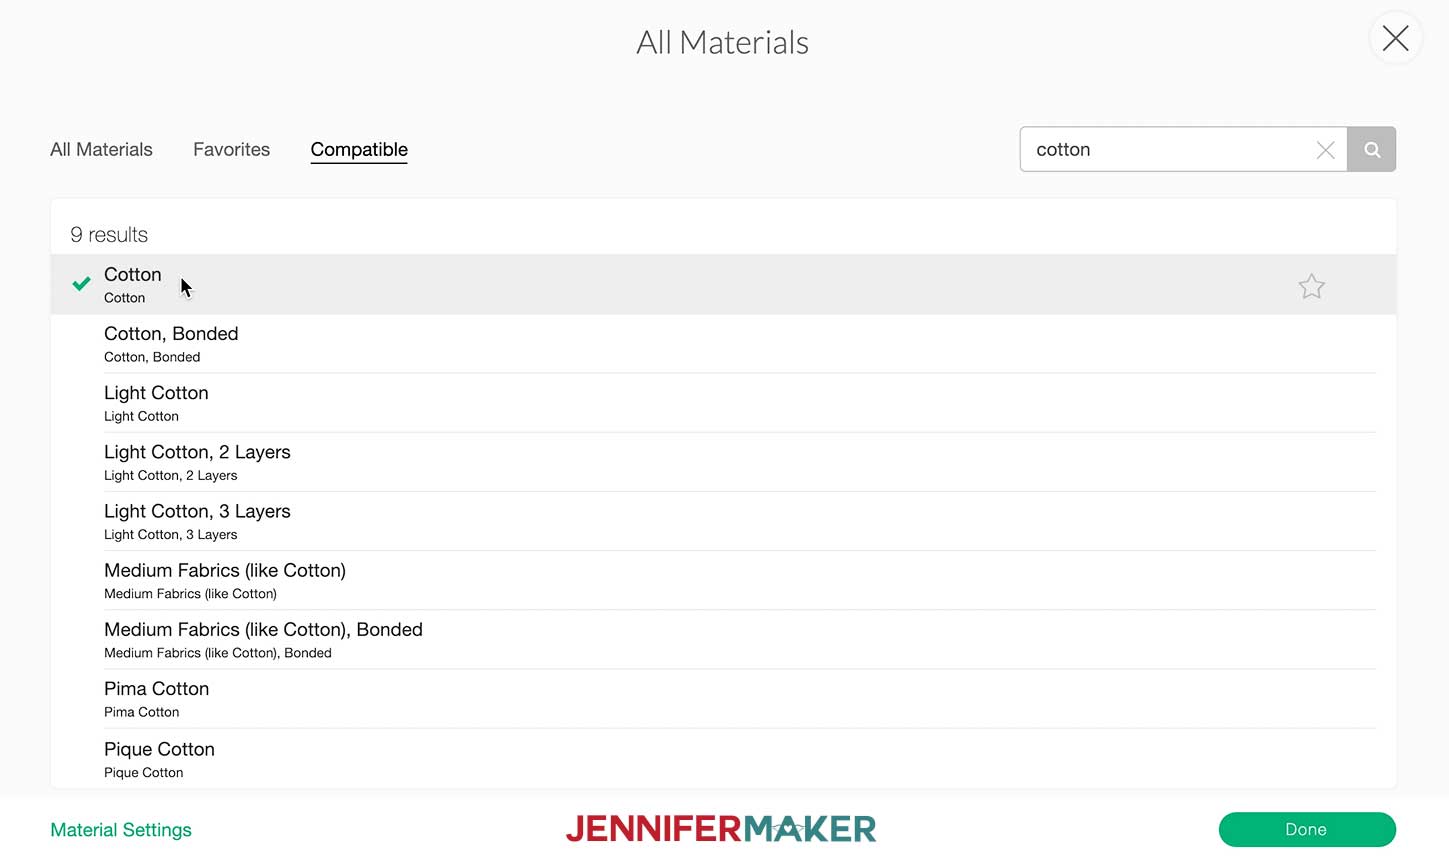
Select "Browse All Materials"
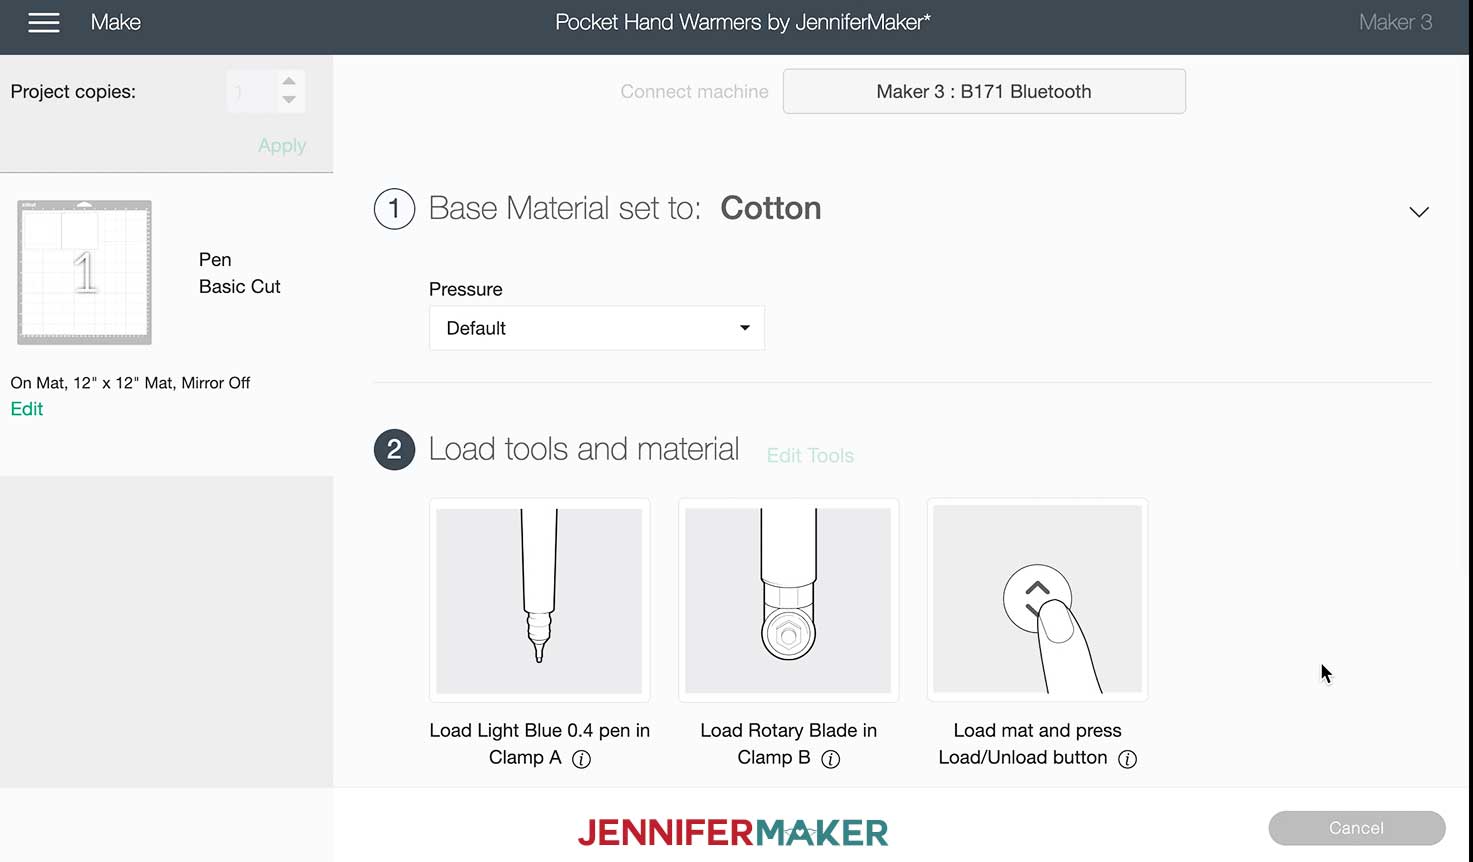
Type cotton in the search field, select "Cotton" and then click "Done."
Insert the fabric pen into clamp A (left side, optional) and load the rotary blade into clamp b (right side).
Take a piece of fabric large enough to cut the pattern (at least 8" x 4" for one Pocket Hand Warmer) and place it on your FabricGrip Machine Mat. If the fabric has a pattern/print design, and you are using the fabric pen, put the print side of the fabric face down on the mat.
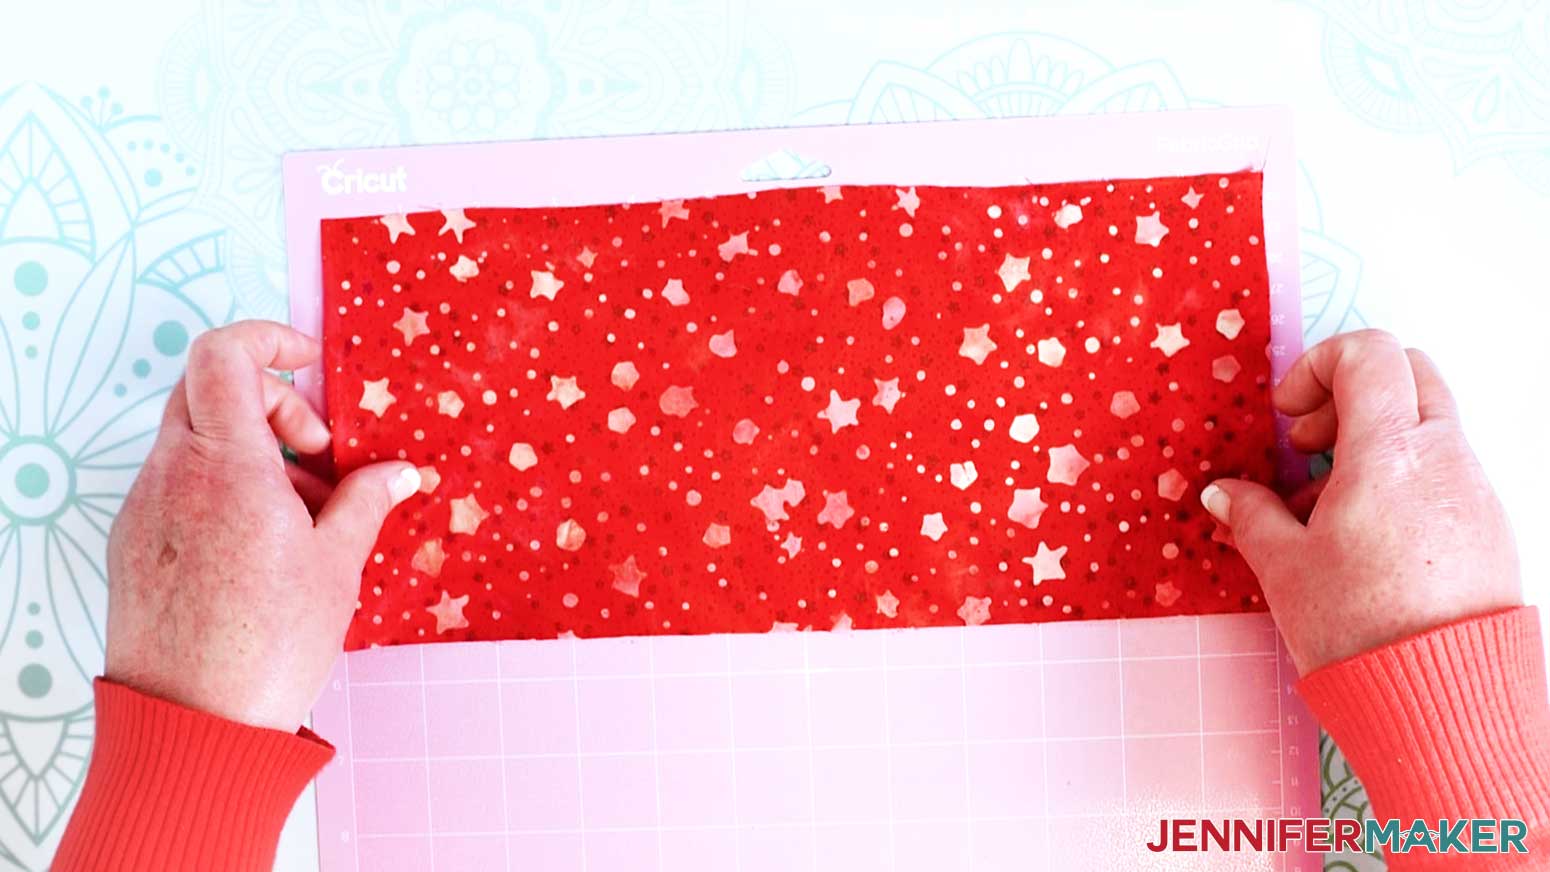
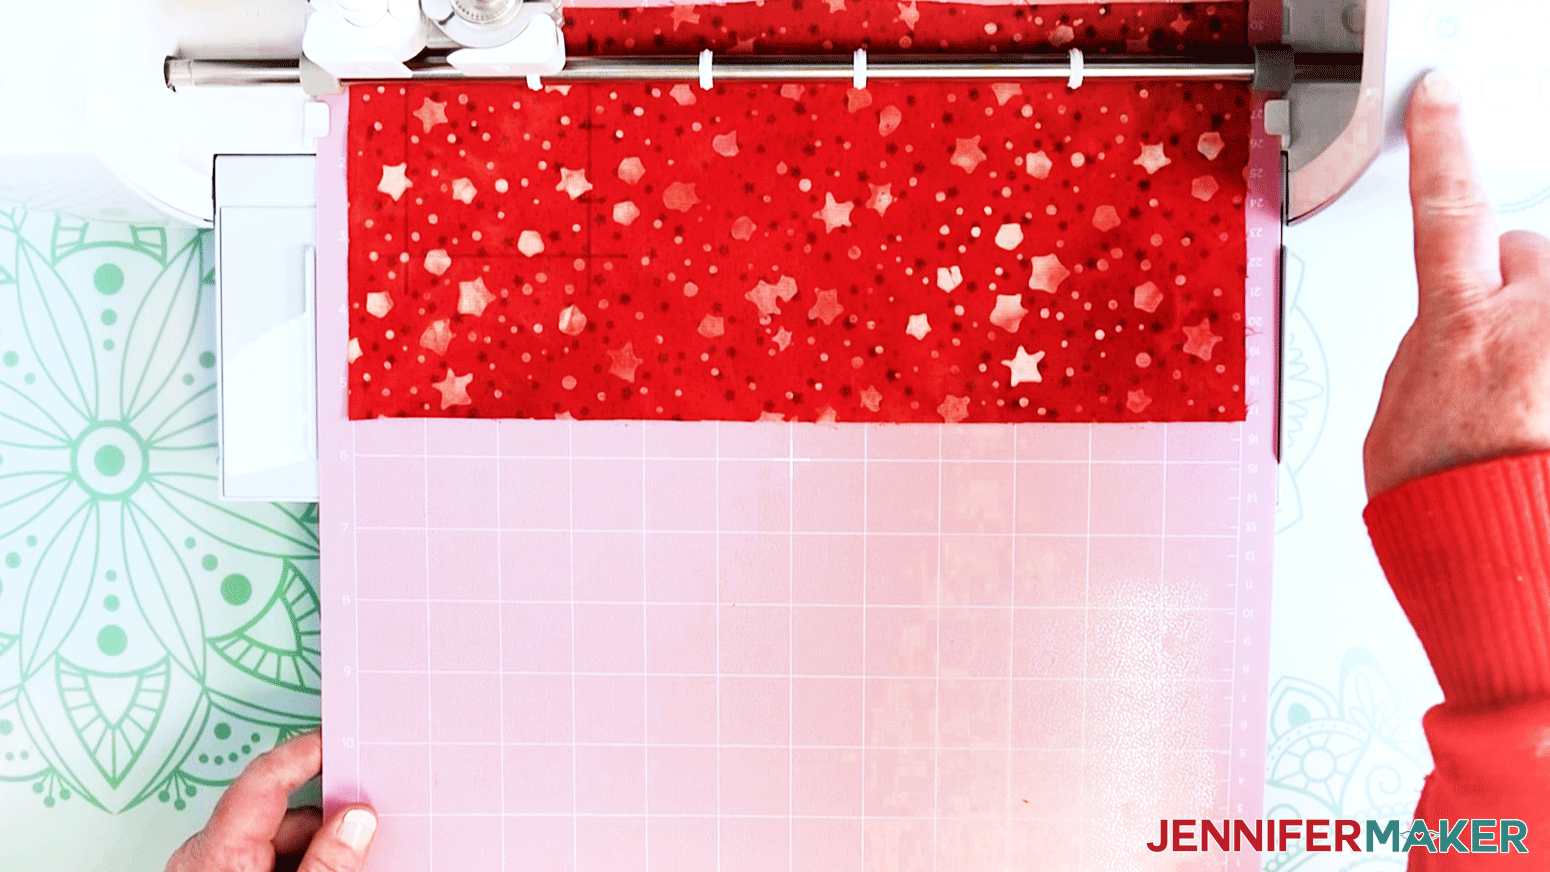
Insert the mat into the machine.
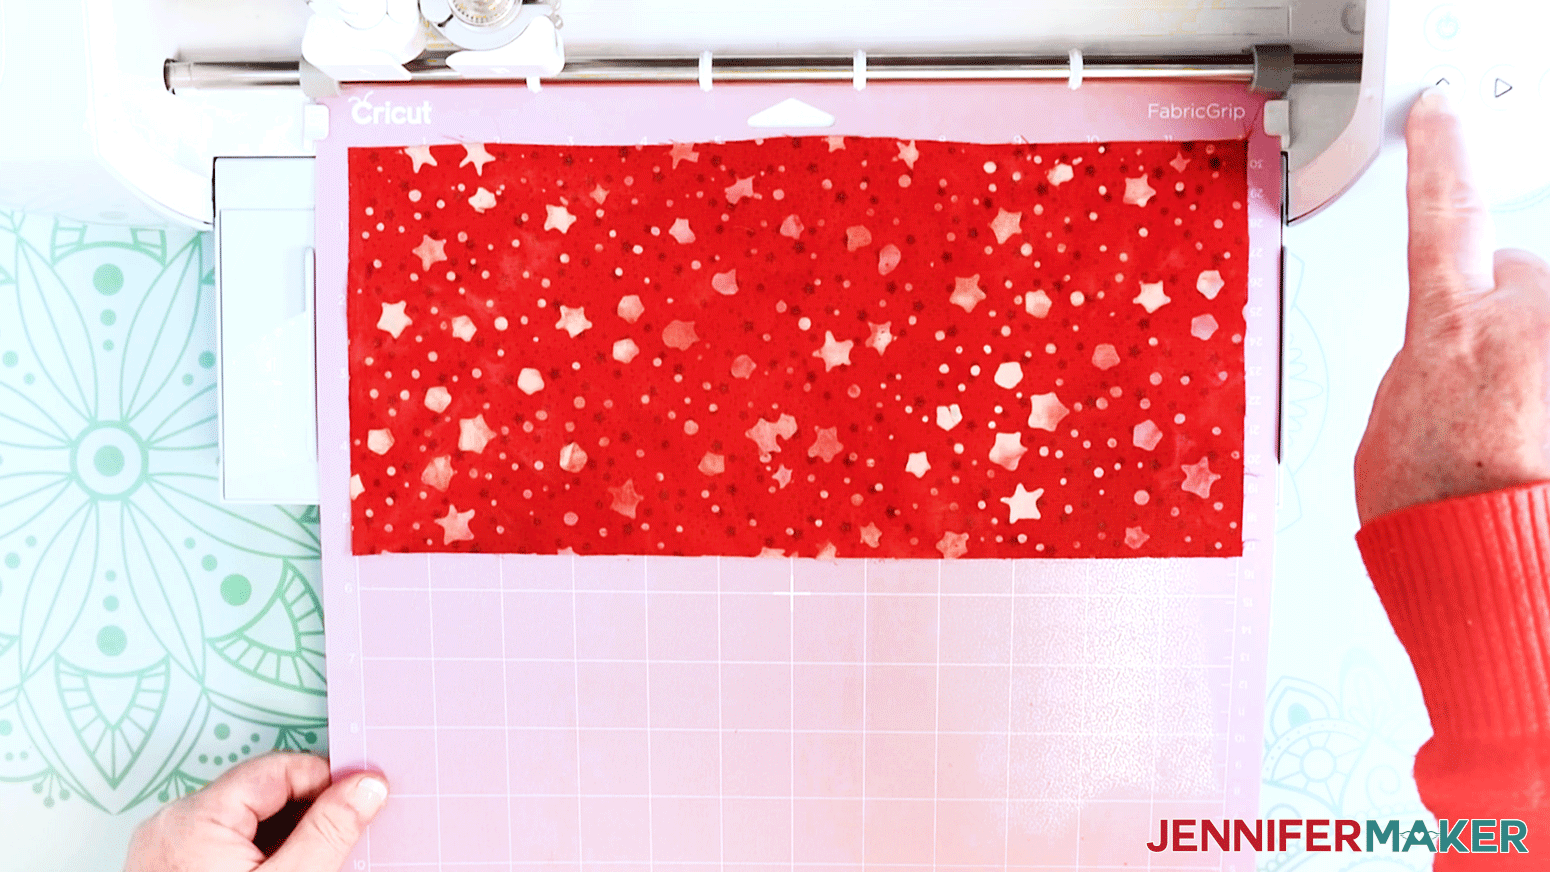
Push the go button to begin cutting.

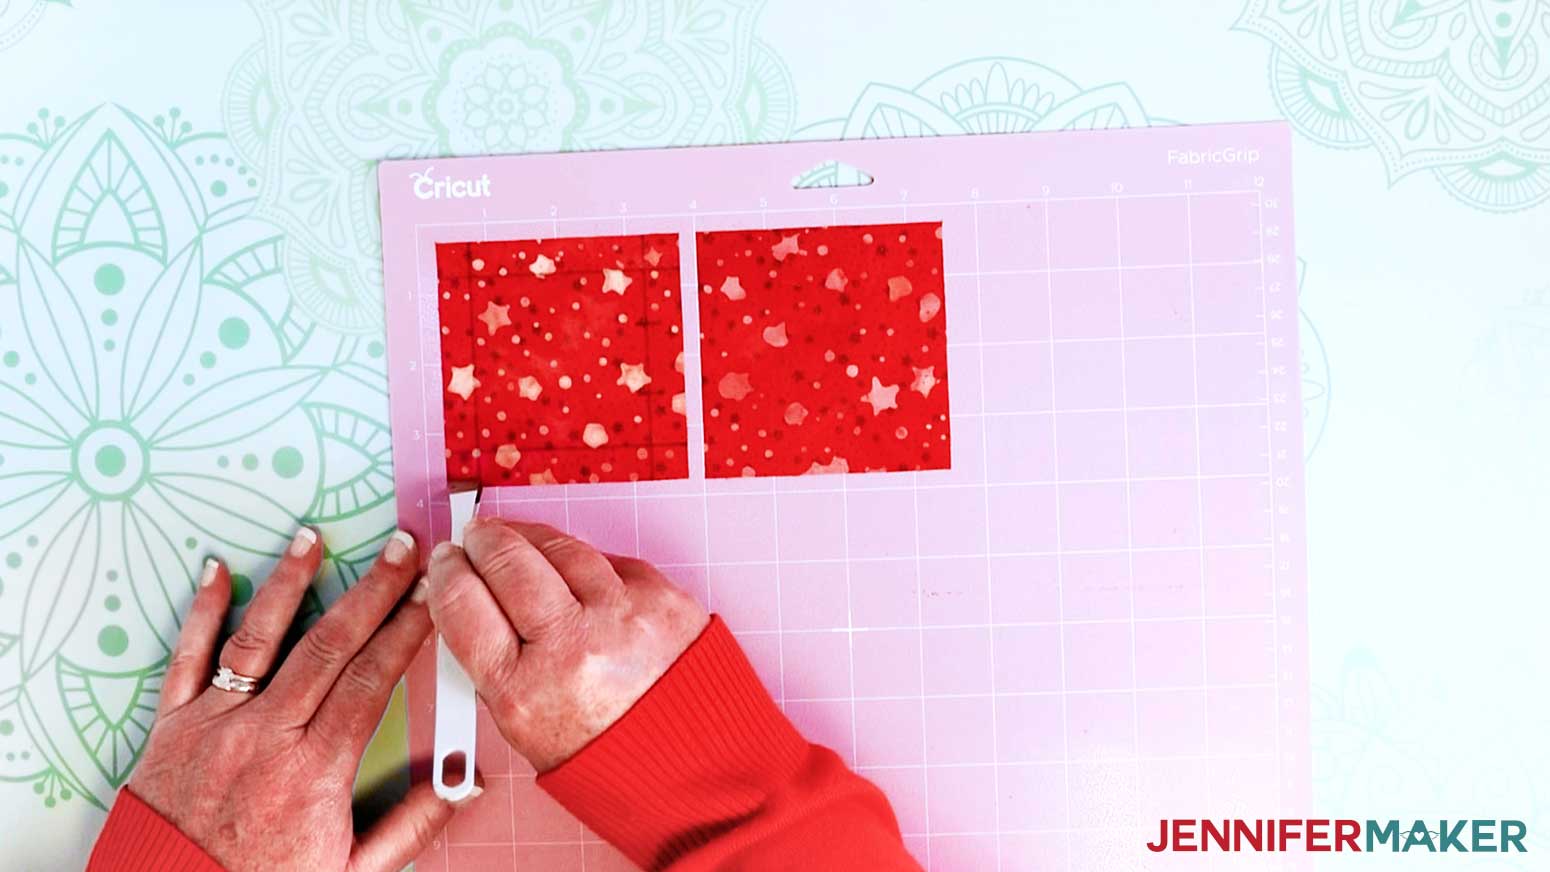
When your fabric has finished cutting, unload the mat from the machine.
Remove the fabric from the mat. I find a pair of tweezers helpful in removing fabric from the mat.
STEP 3: ASSEMBLE YOUR POCKET HAND WARMERS
Now it's time to put our Pocket Hand Warmers together. I am going to show you how to assemble one using a sewing machine and how to make a no-sew option.
SEWING VERSION
Take the two pieces of fabric and place the right sides together if your fabric has a printed design.
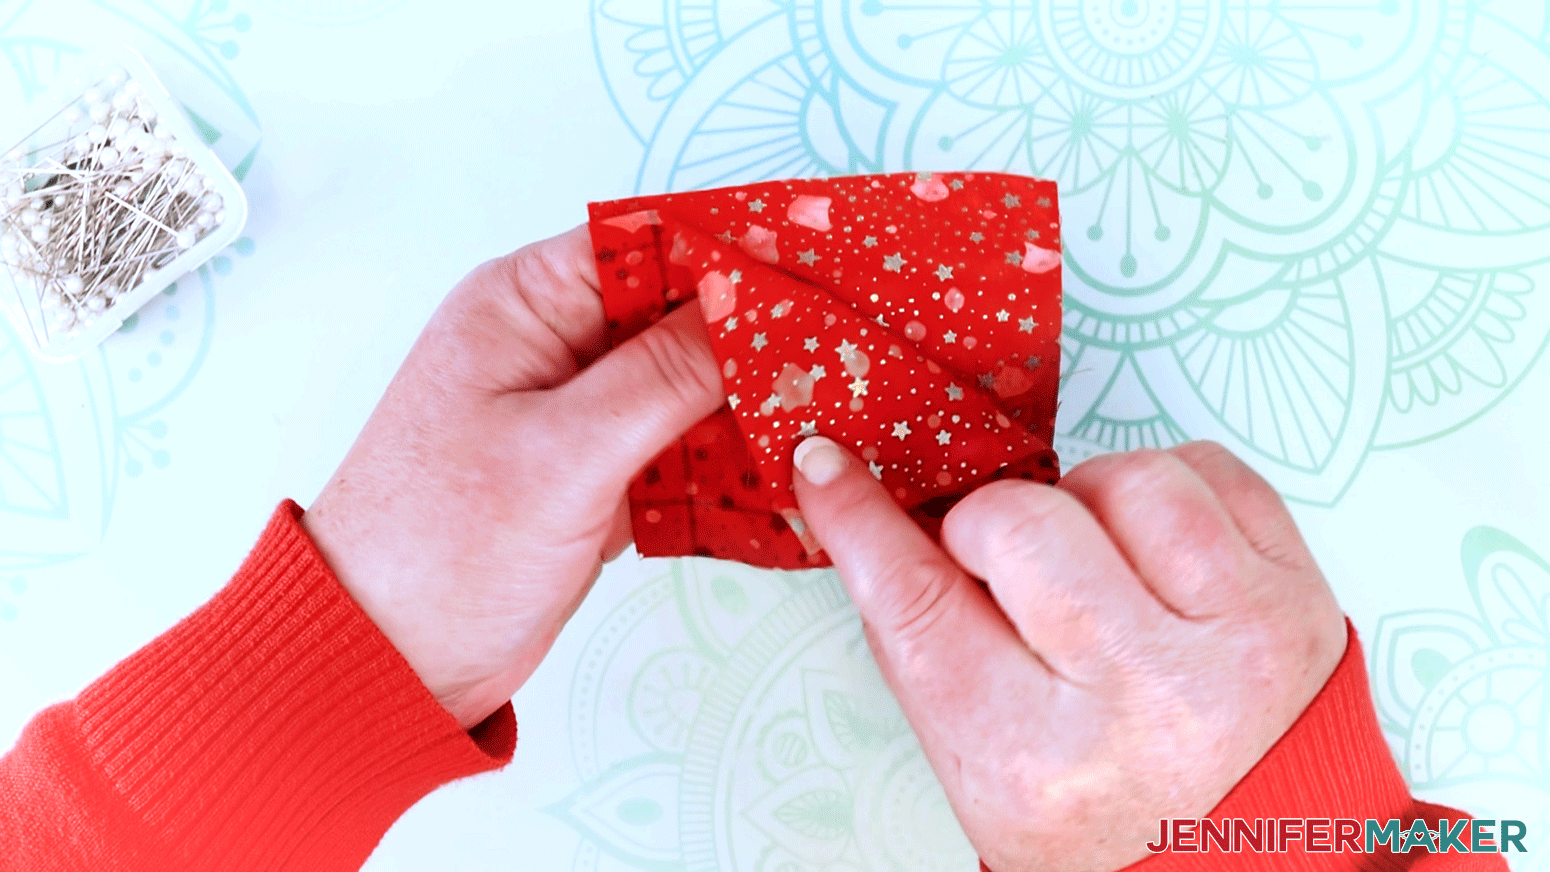
Place the fabric piece marked to indicate the sewing lines on the top, then begin adding two straight pins along each side to keep the fabric pieces together. If necessary, use your EasyPress mini on medium to iron the fabric flat before pinning.
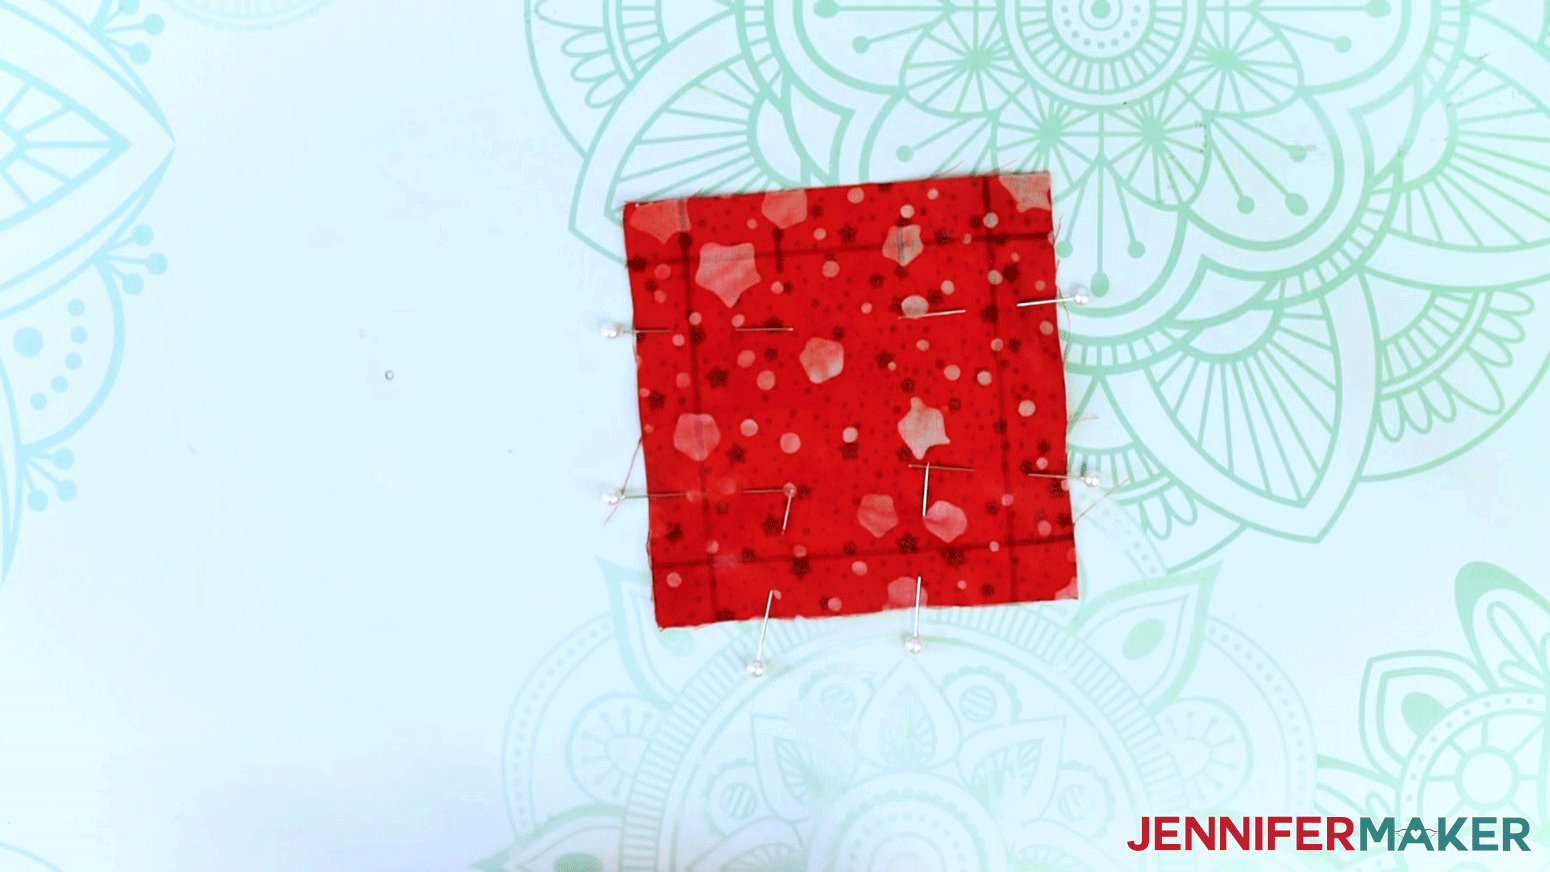
The two vertical marked lines at the top of the piece indicate the opening. We will use this to turn our fabric right side out and fill the hand warmer with rice. Therefore, we do not want to sew between these two lines.
Let's take this over to our sewing machine. Take the fabric and place the side with the fabric pen marks for the opening so it is on the right. Place the fabric under your sewing machine foot so that you begin sewing below the opening on the lower line.
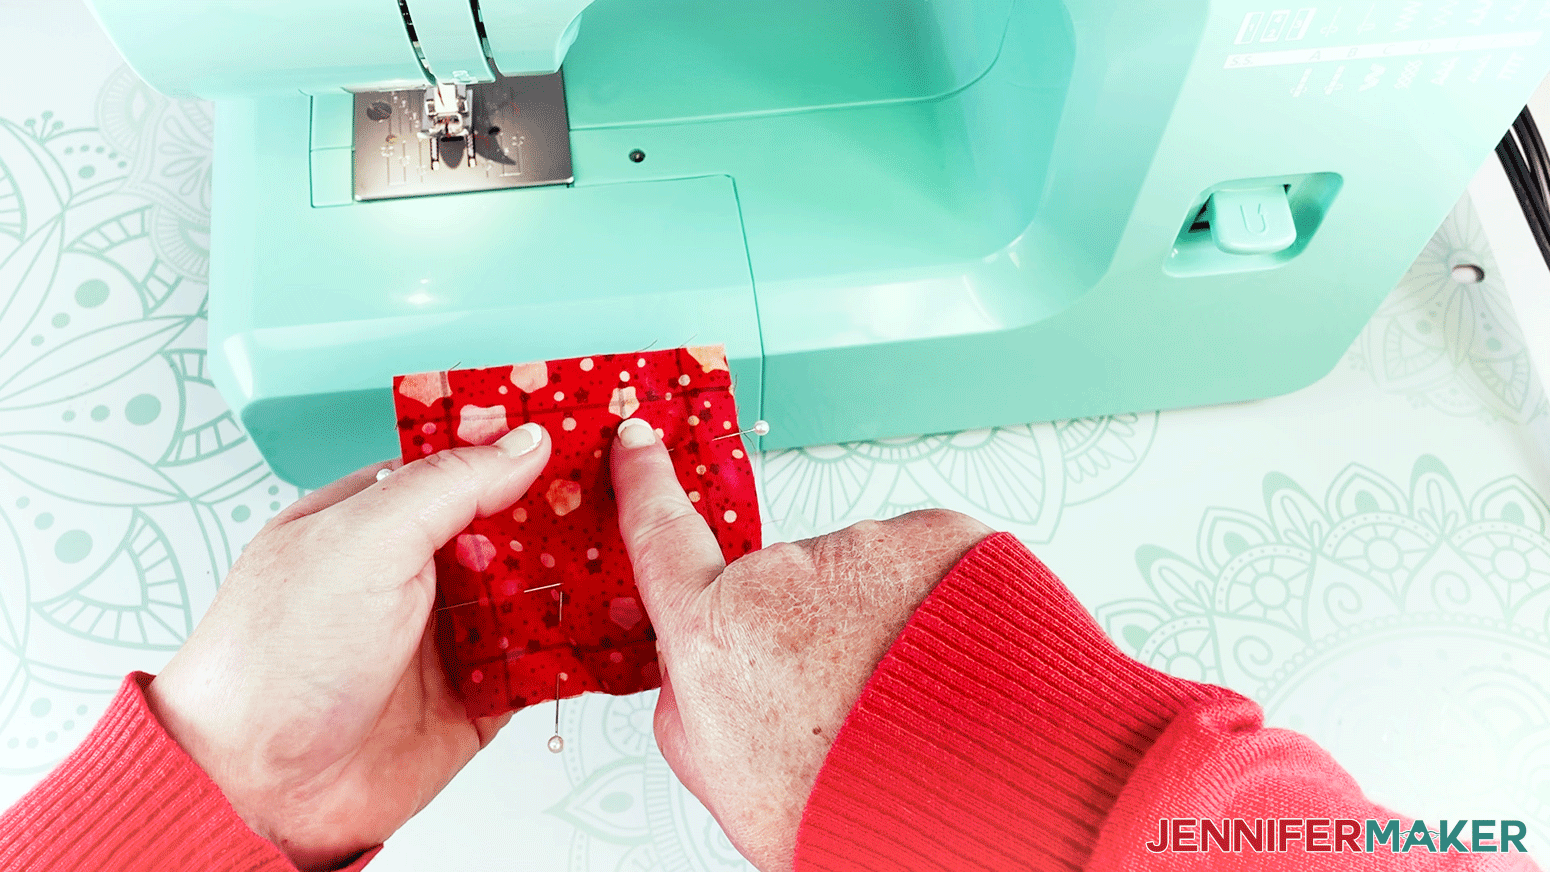
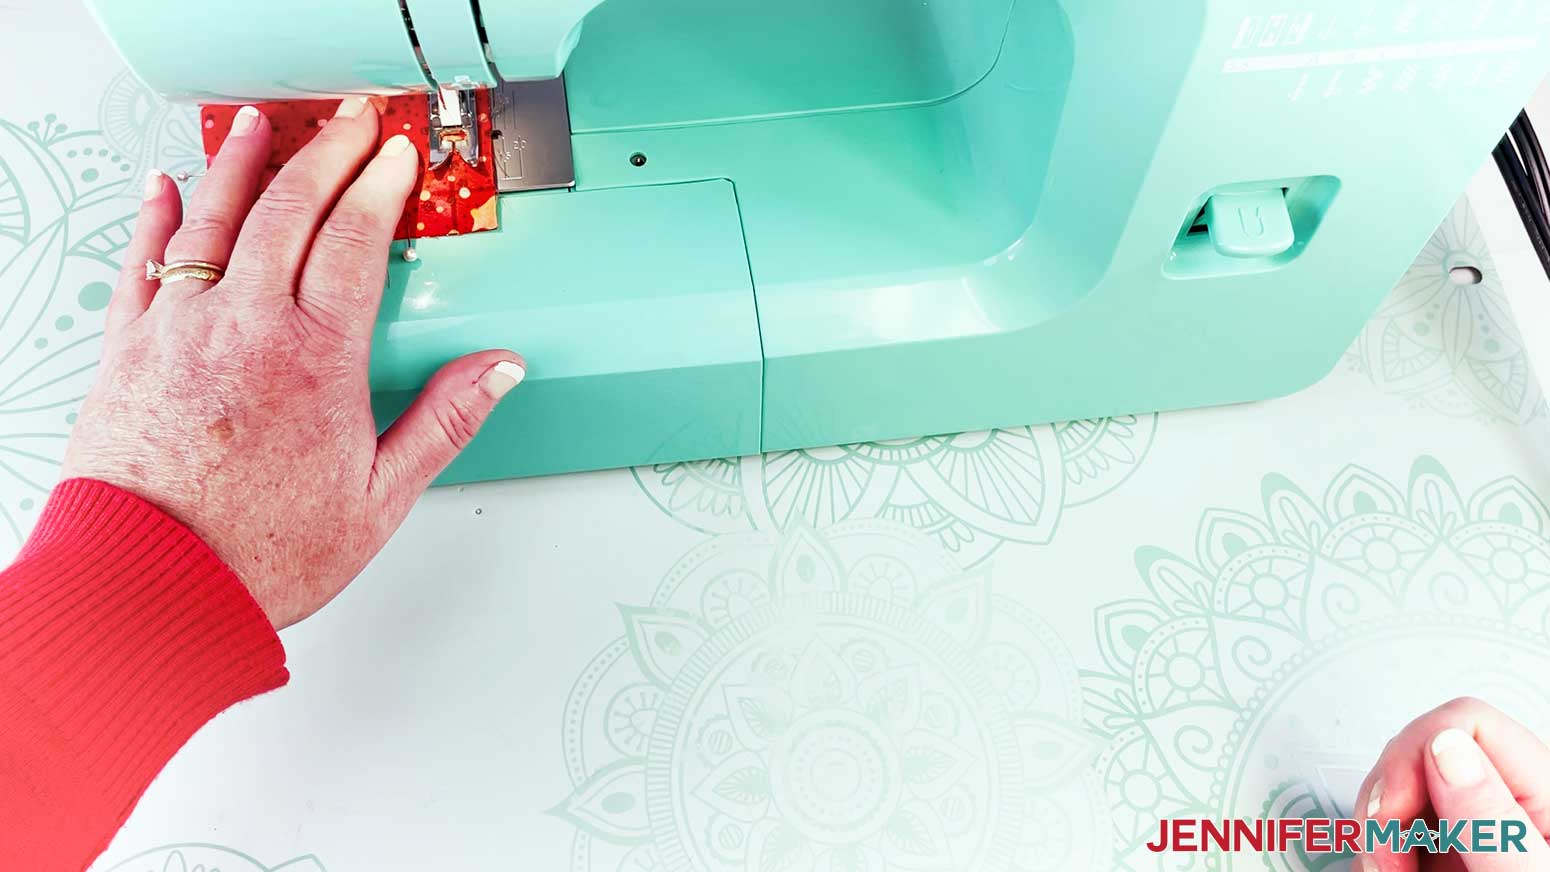
Begin sewing, making sure to back stitch a few stitches to lock the stitch so it does not come open when we fill the hand warmer with rice. Continue sewing around the fabric on the blue stitch lines.
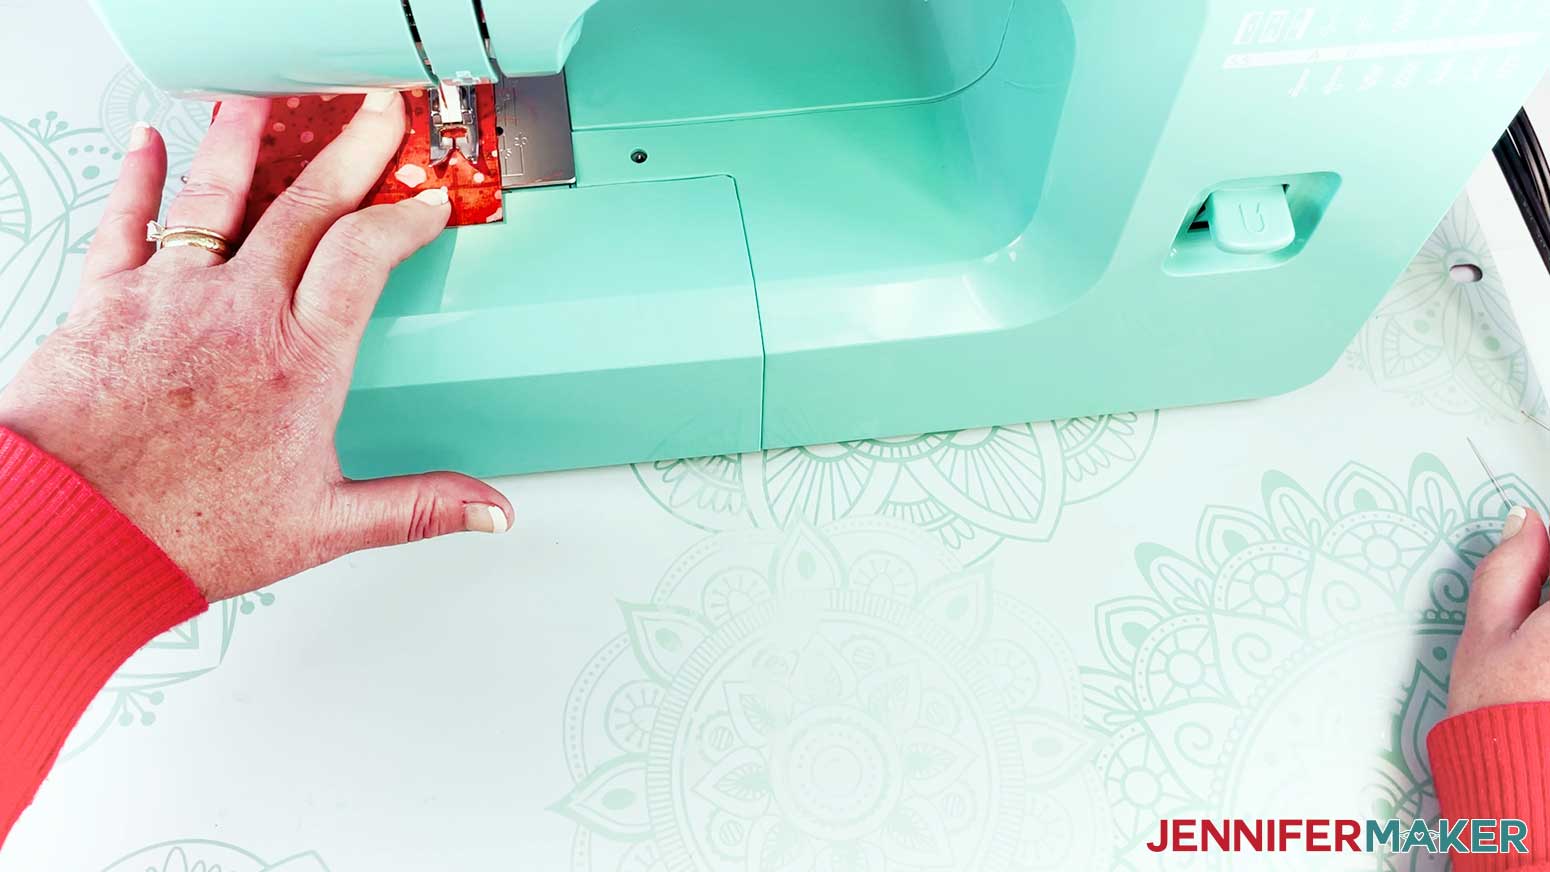
When you get to the end, stop at the line before the opening. Do not sew through the space marked for the opening. Remember to back stitch a few stitches to lock the stitch so it does not come open.
Take a pair of shears and trim the seams closer to the stitch. This eliminates bulk when we turn the fabric right side out.
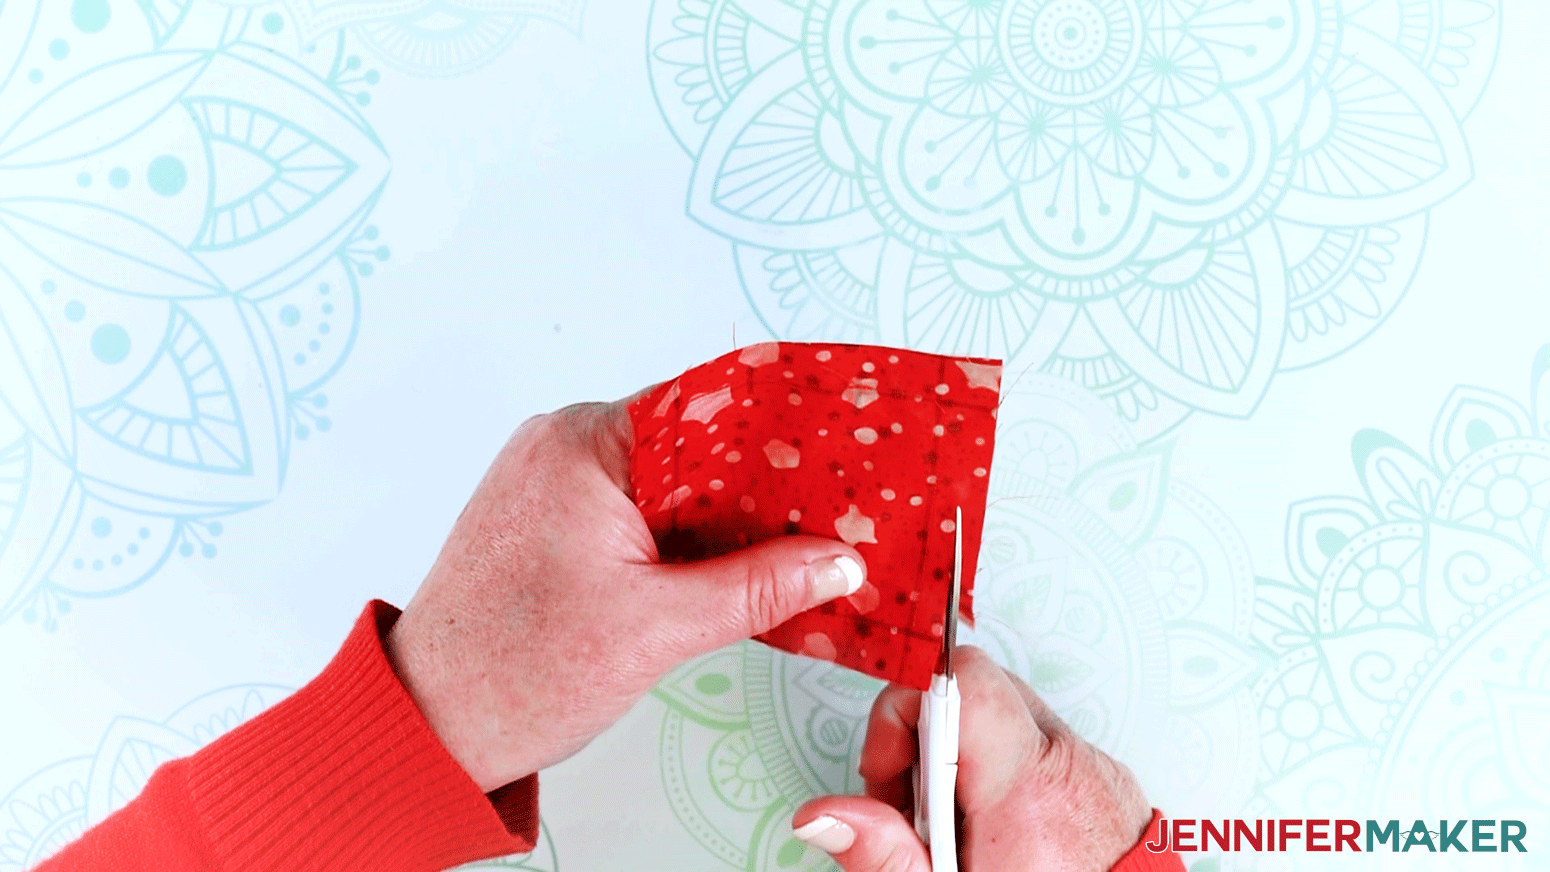
Make sure to cut the corners at a diagonal.
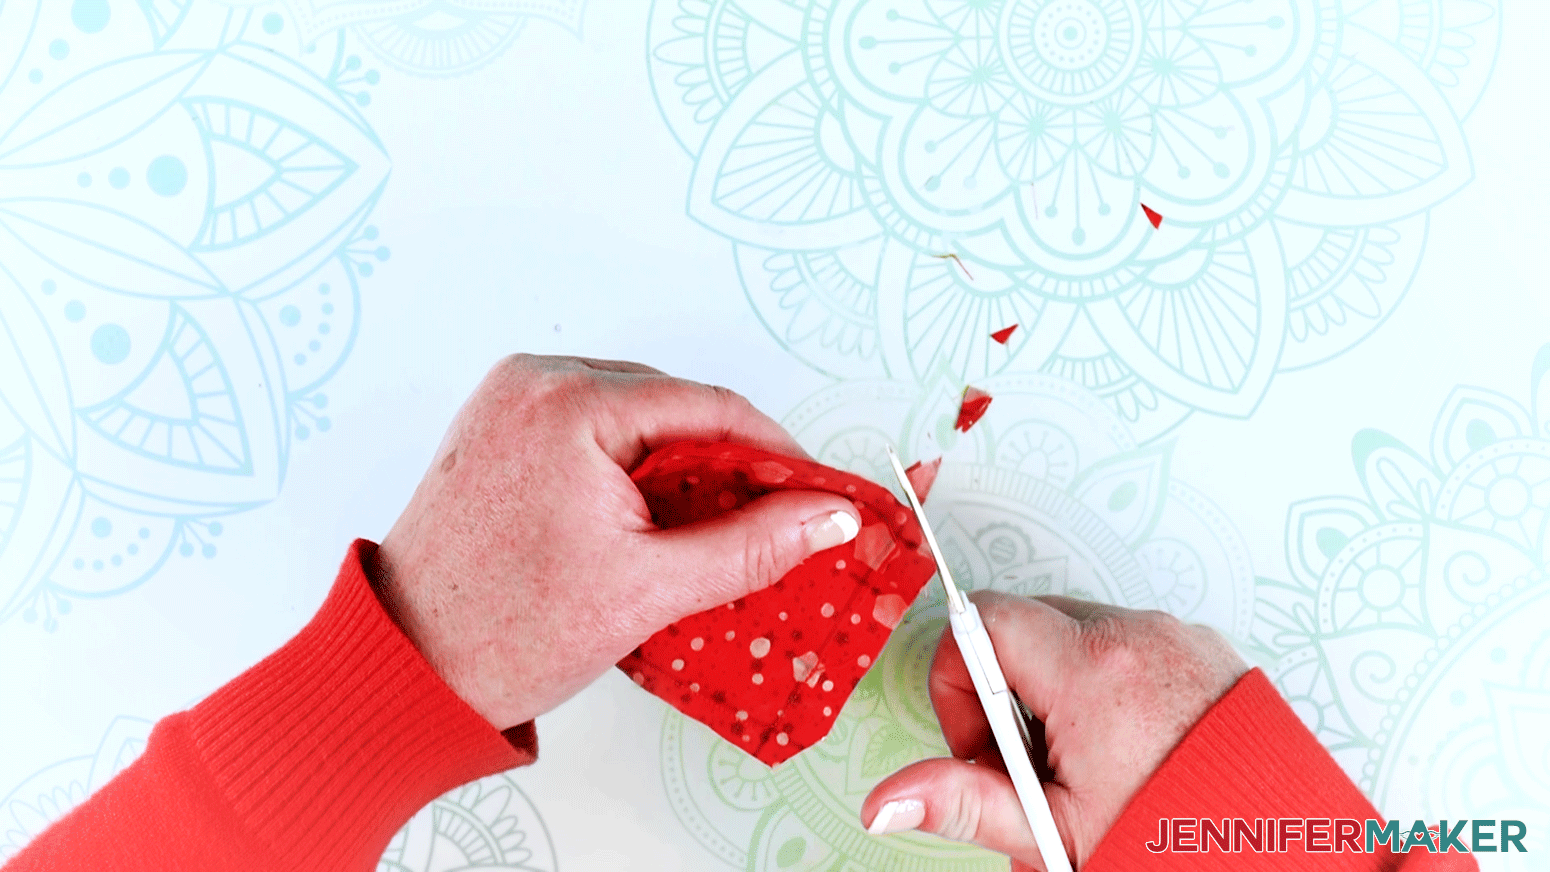
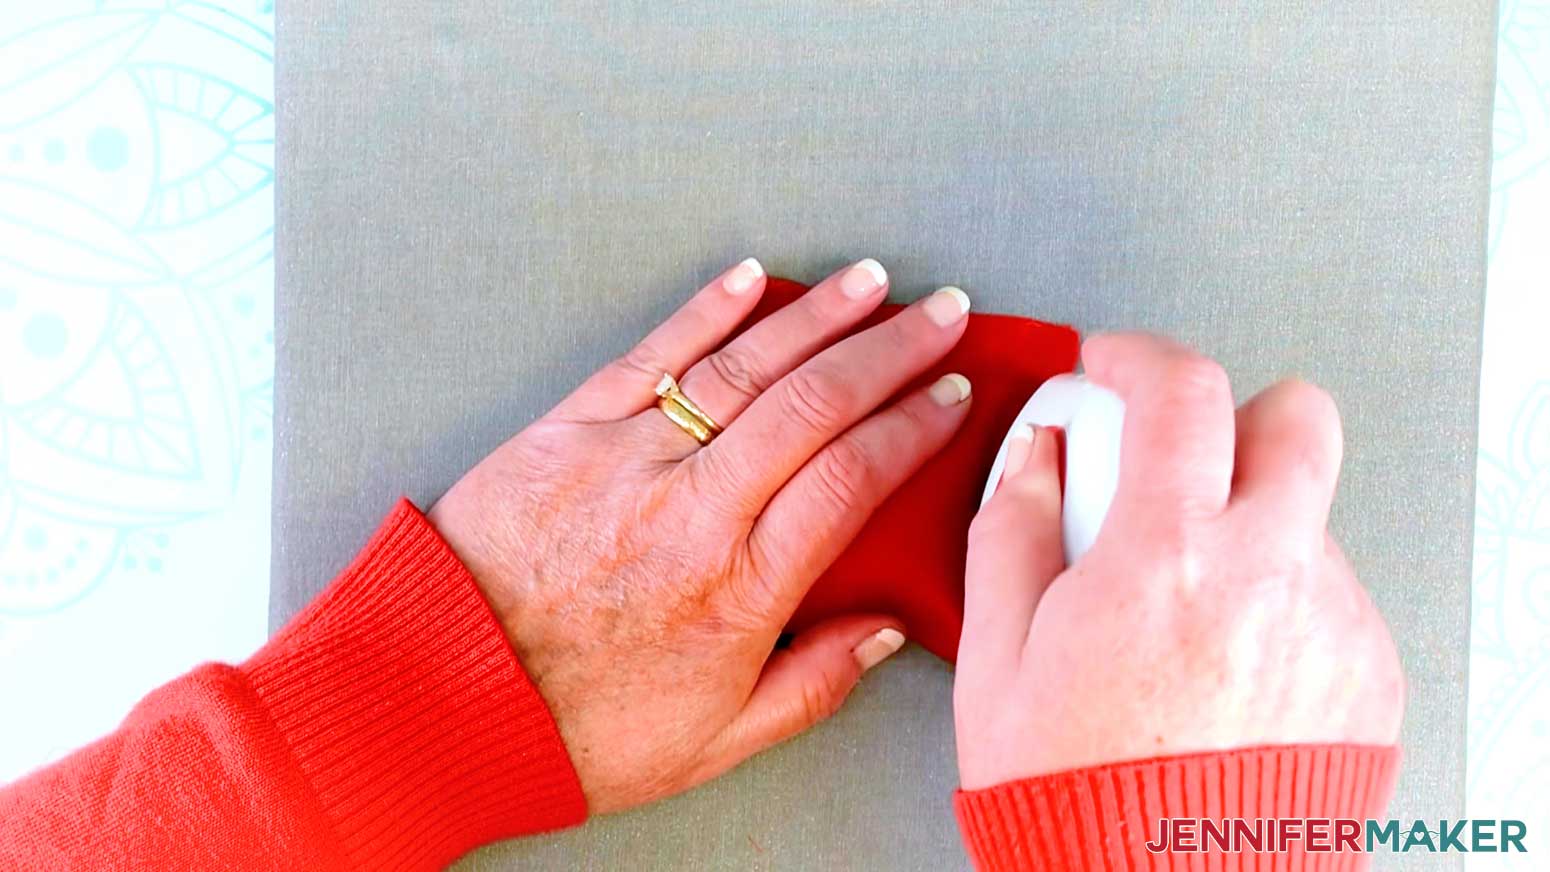
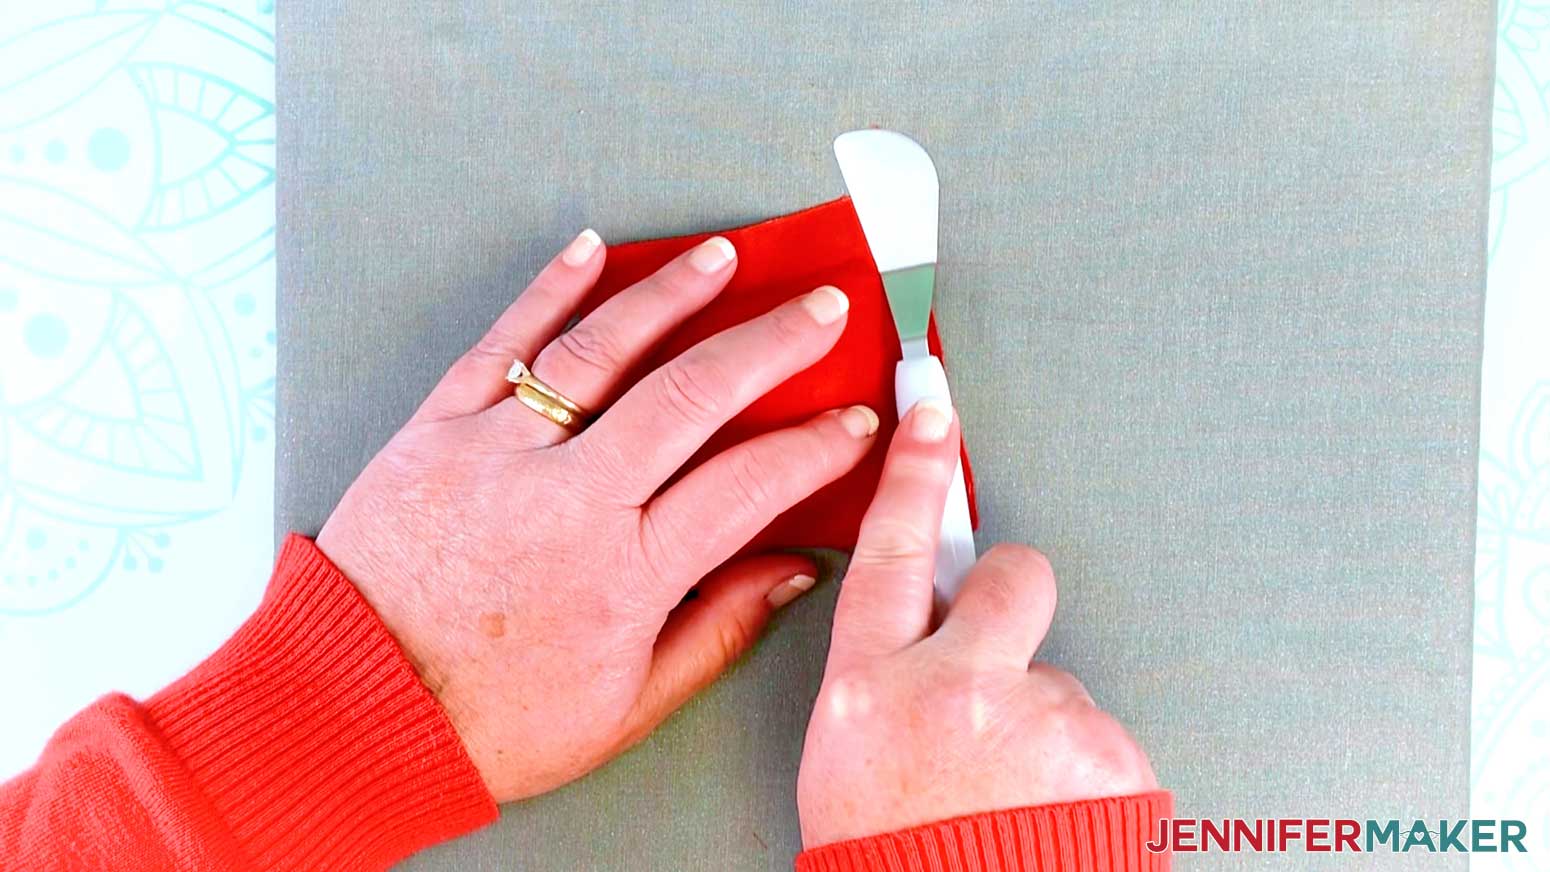
Use your fingers to pull the fabric through the opening so the right side of the fabric is now facing out. Use a seam turner tool or a Cricut spatula to help form the seams and sharpen the corners.
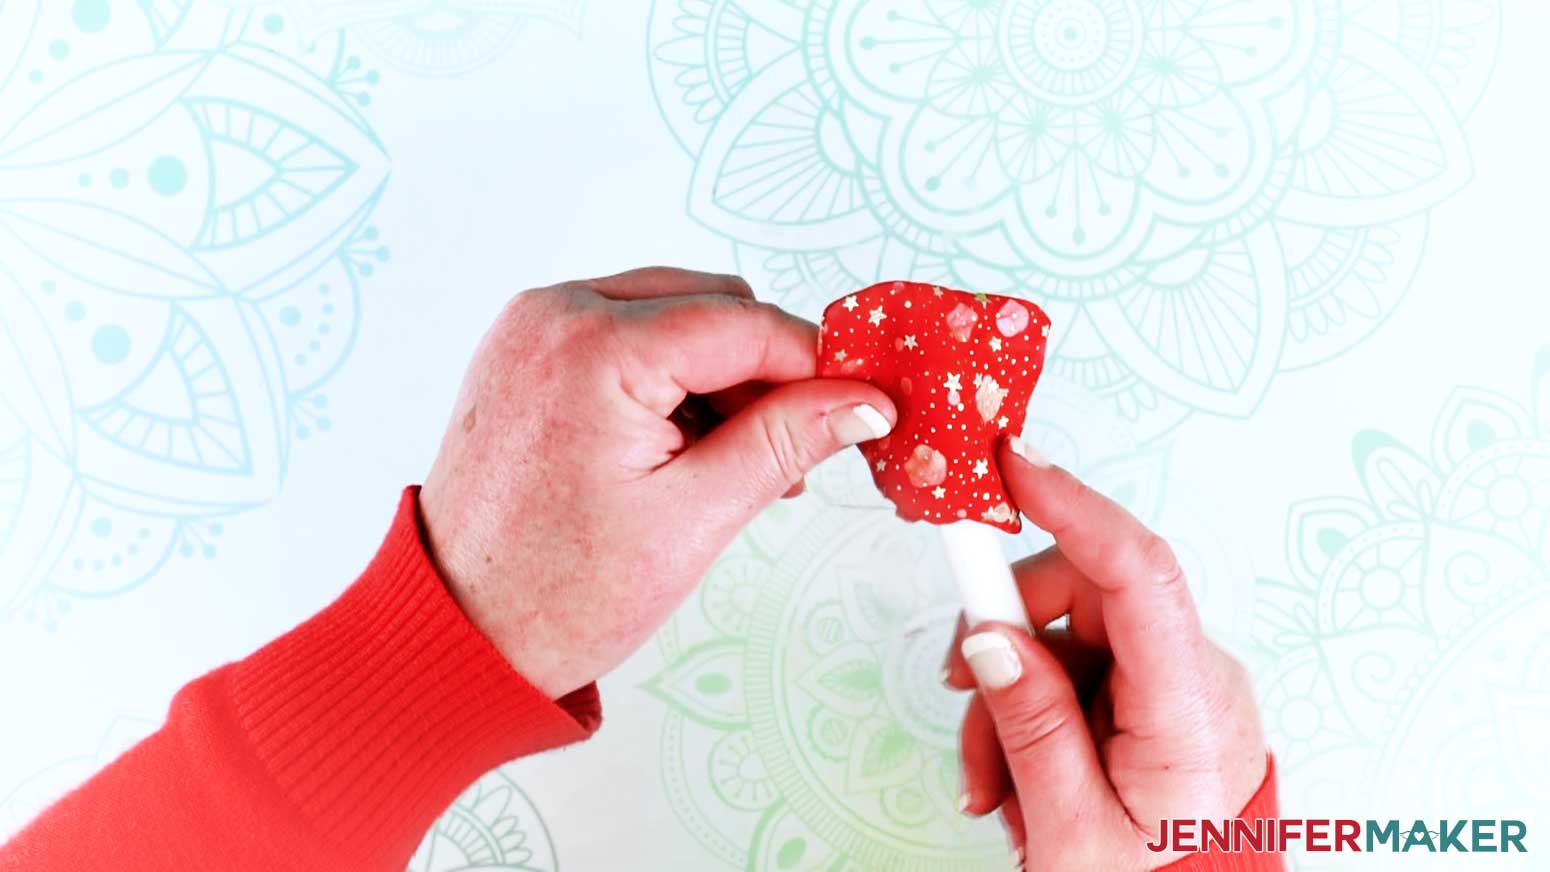
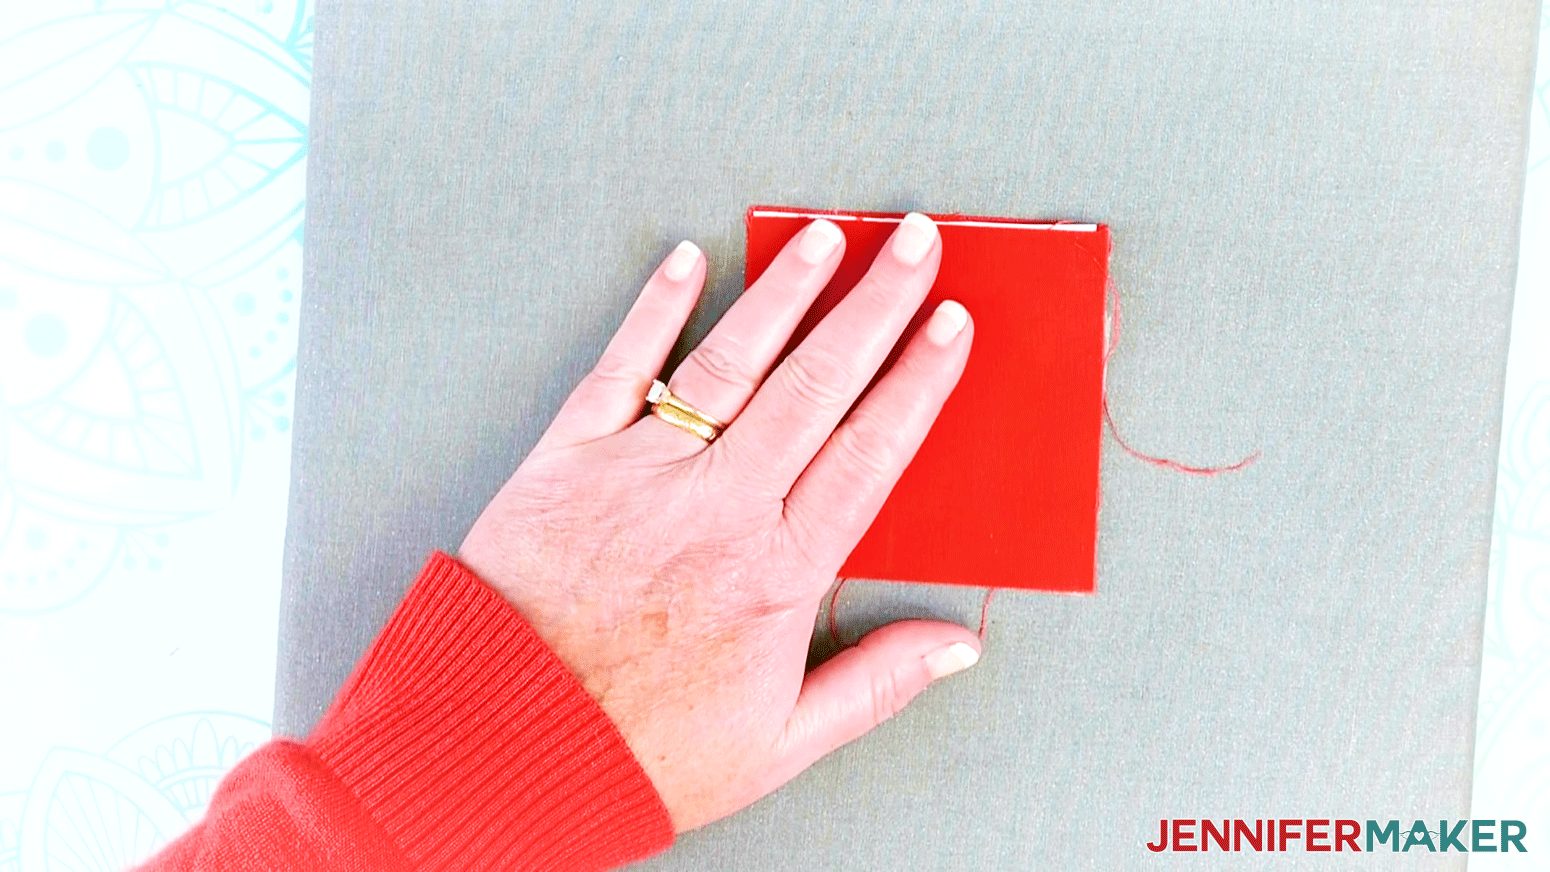
I am using my EasyPress Mini at the medium setting with my EasyPress mat to press my fabric flat along the seams.
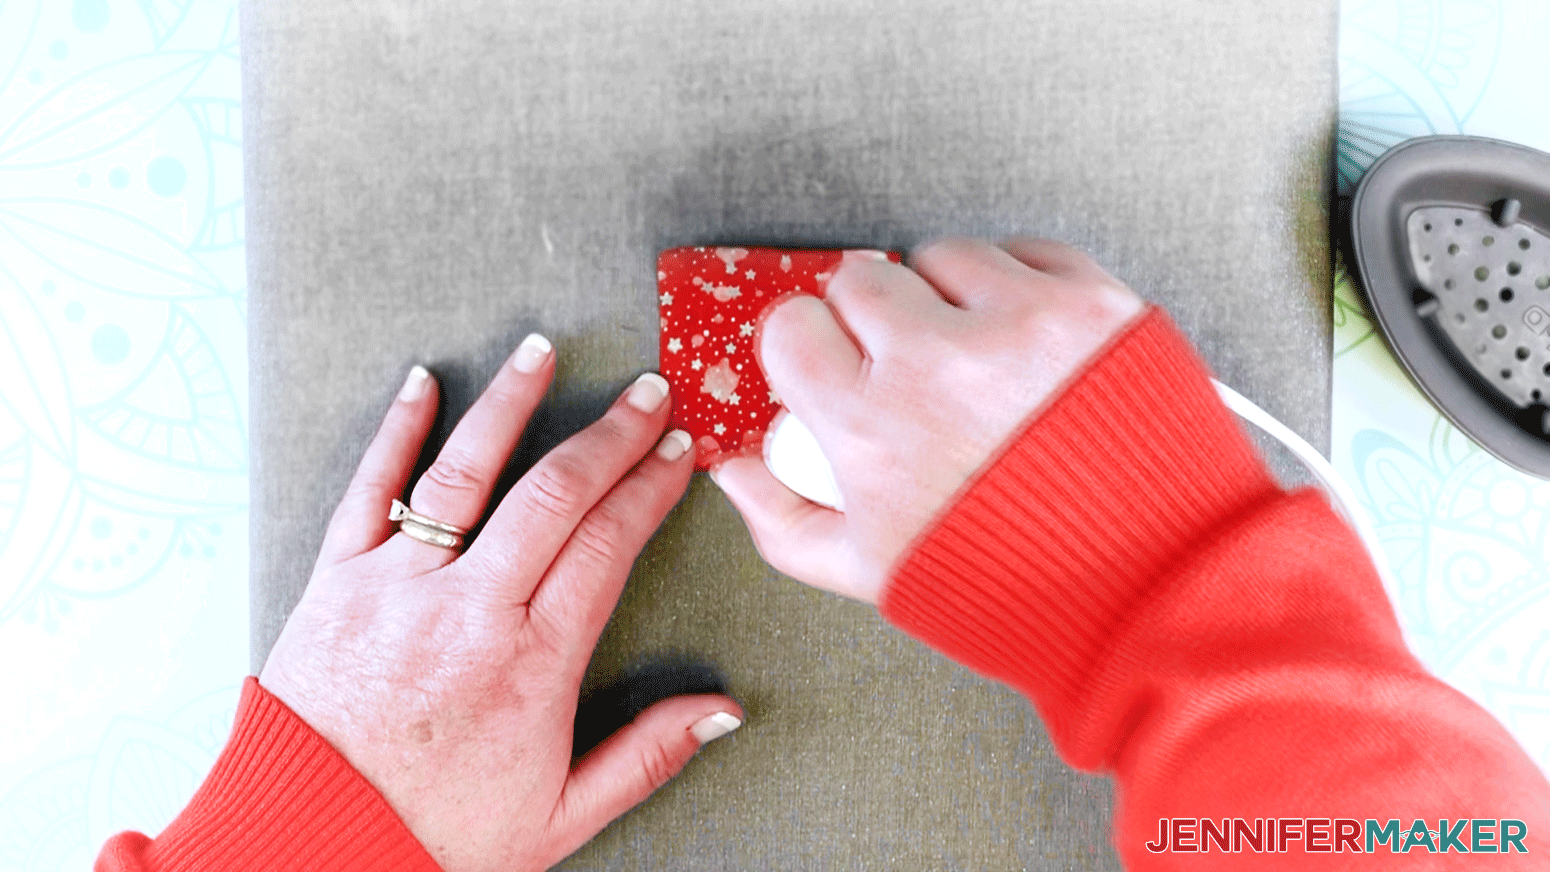
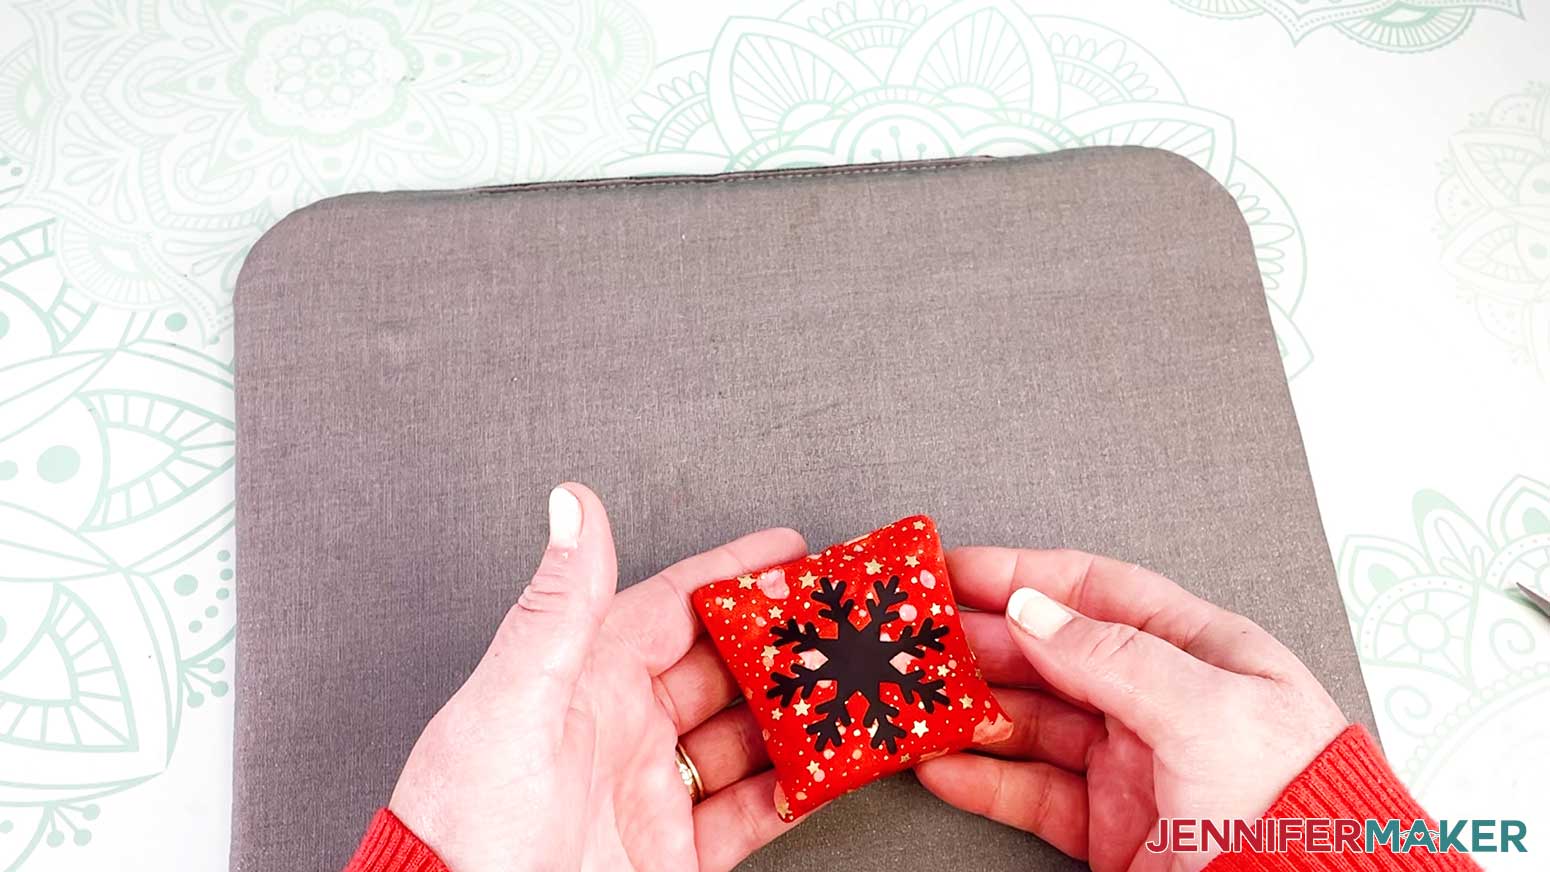
Pick one of my designs for your Pocket Hand Warmer and place it on top of the fabric.
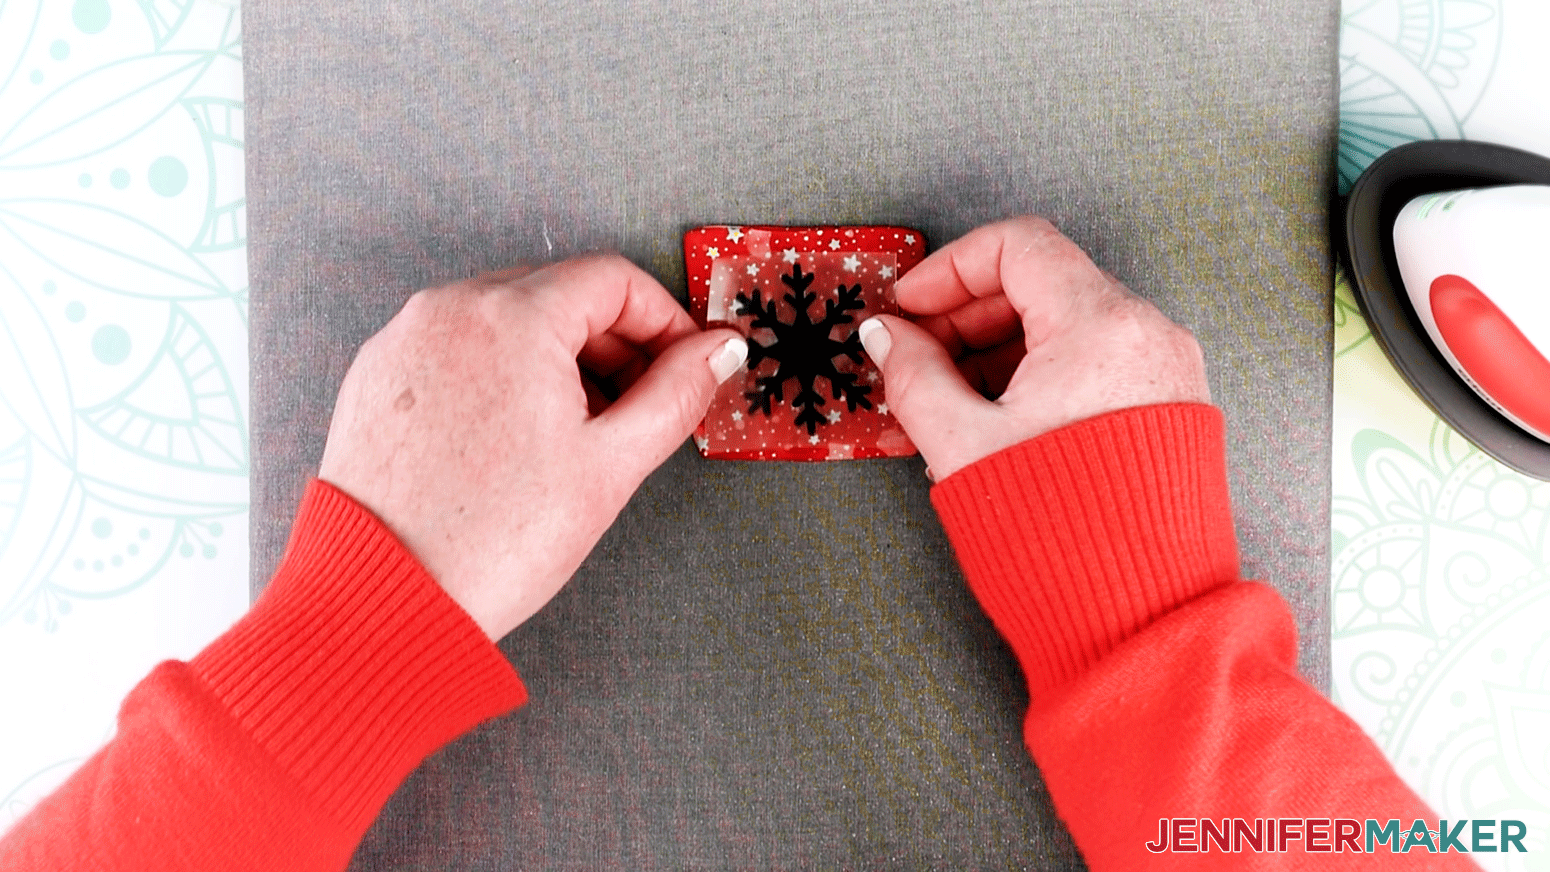
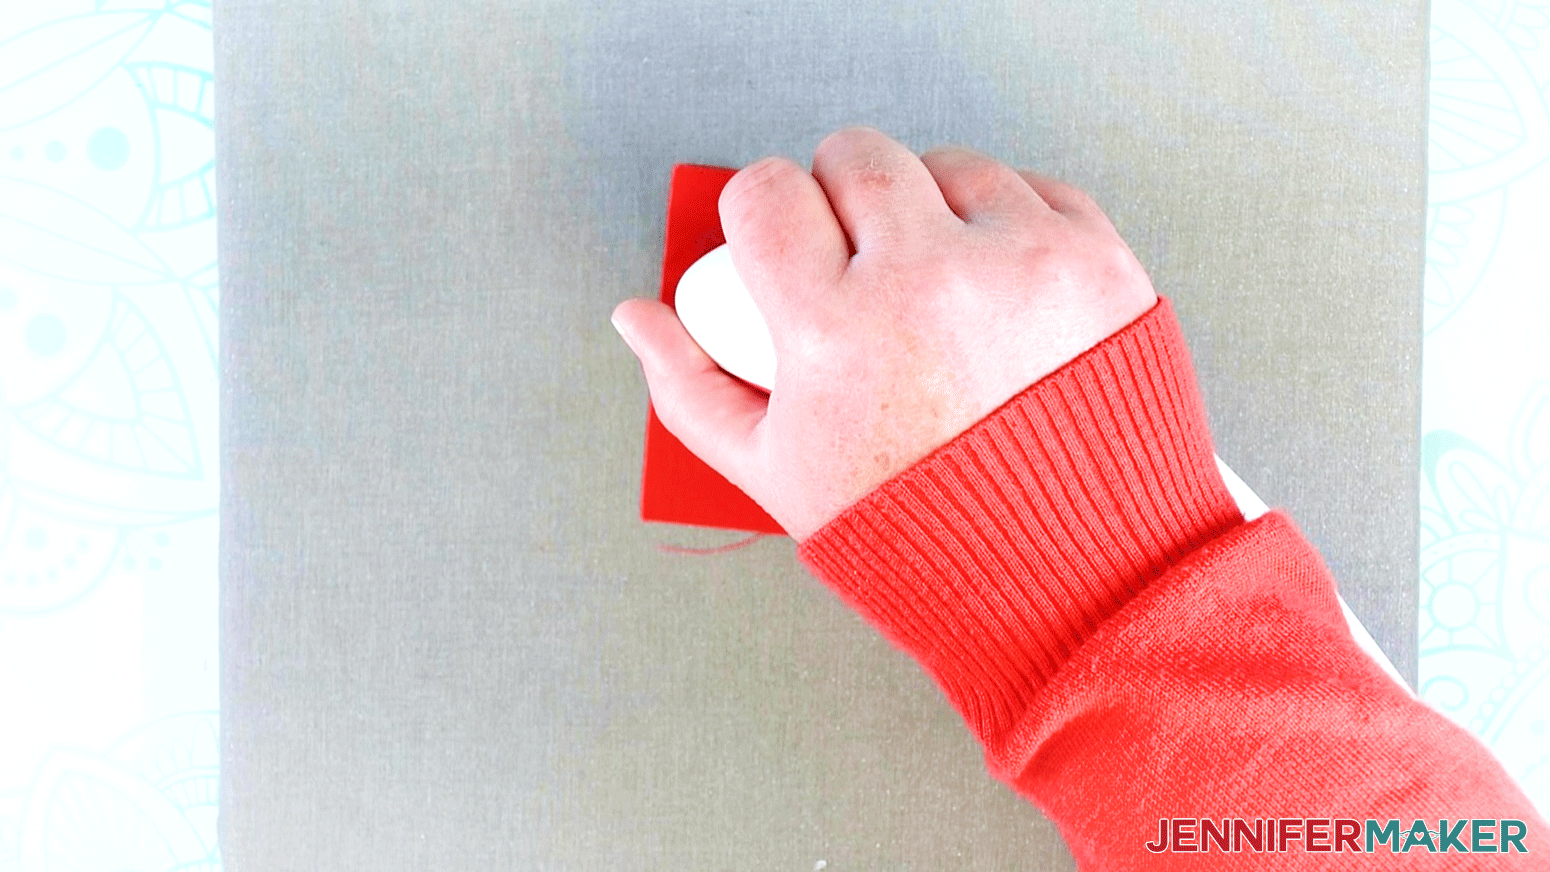
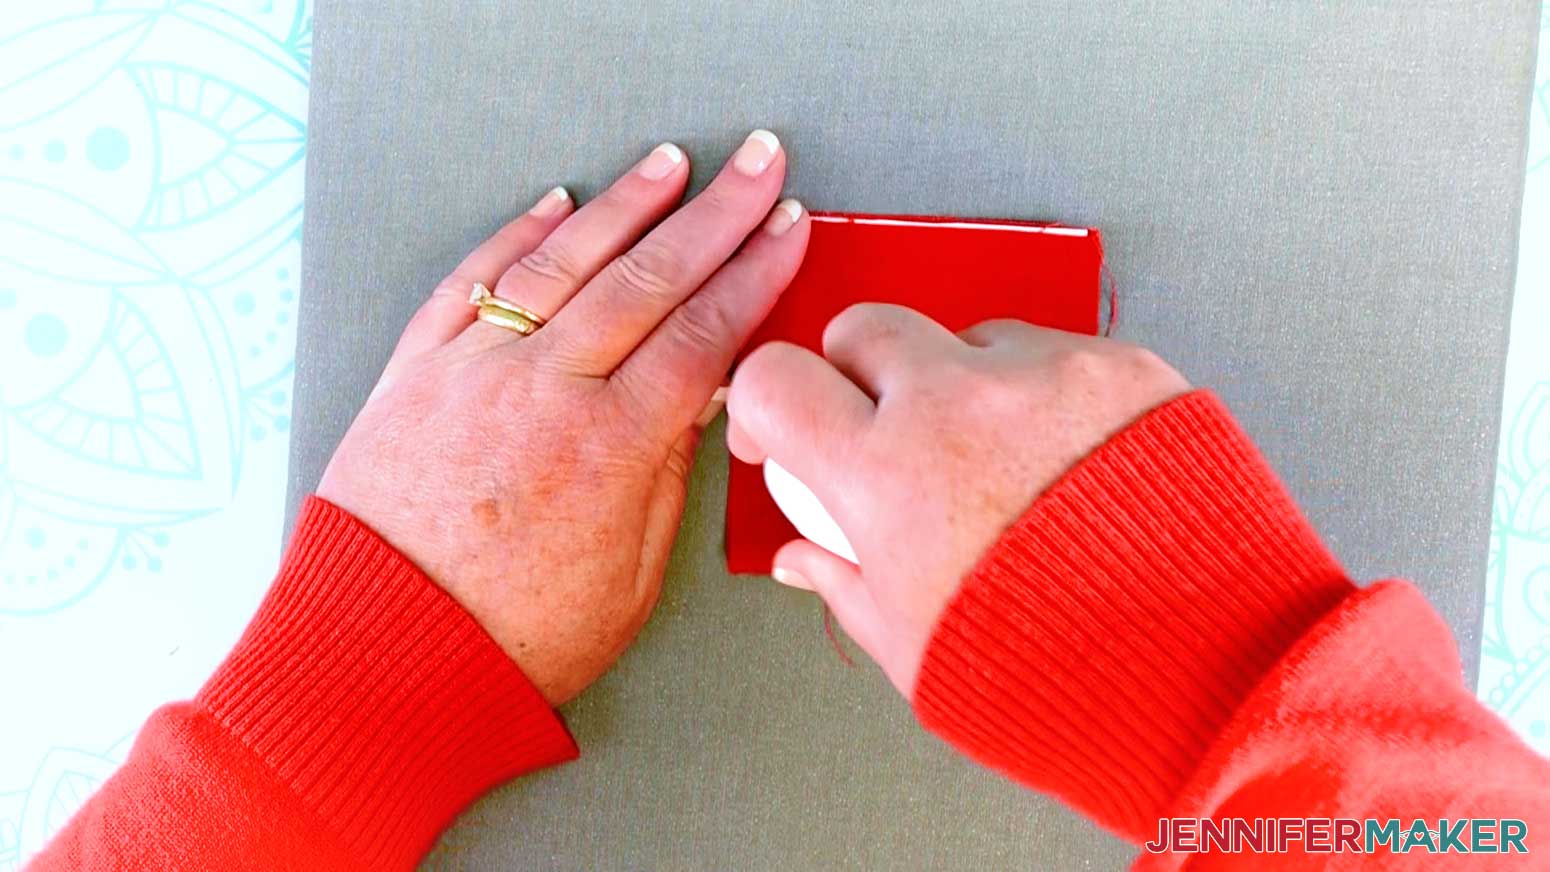
I am using Smart Iron-On Vinyl with my EasyPress Mini. According to Cricut's Heat Guide, this calls for a five second pre-heat and 25 second heat application.
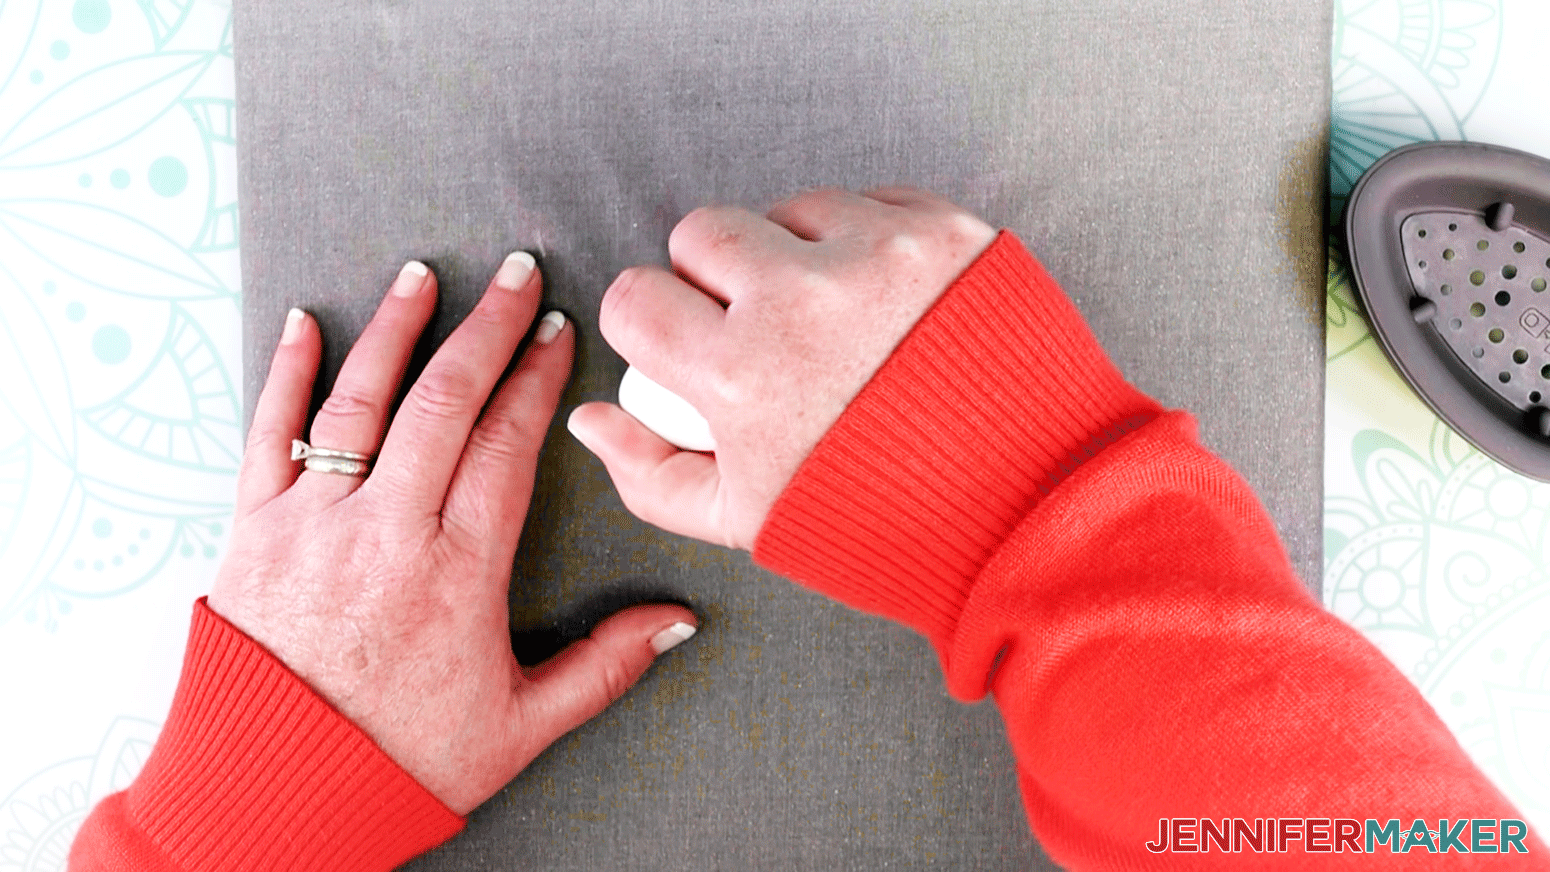
Flip the fabric over and heat for another 15 seconds. When the vinyl has completely cooled, remove the clear transfer film from the vinyl.
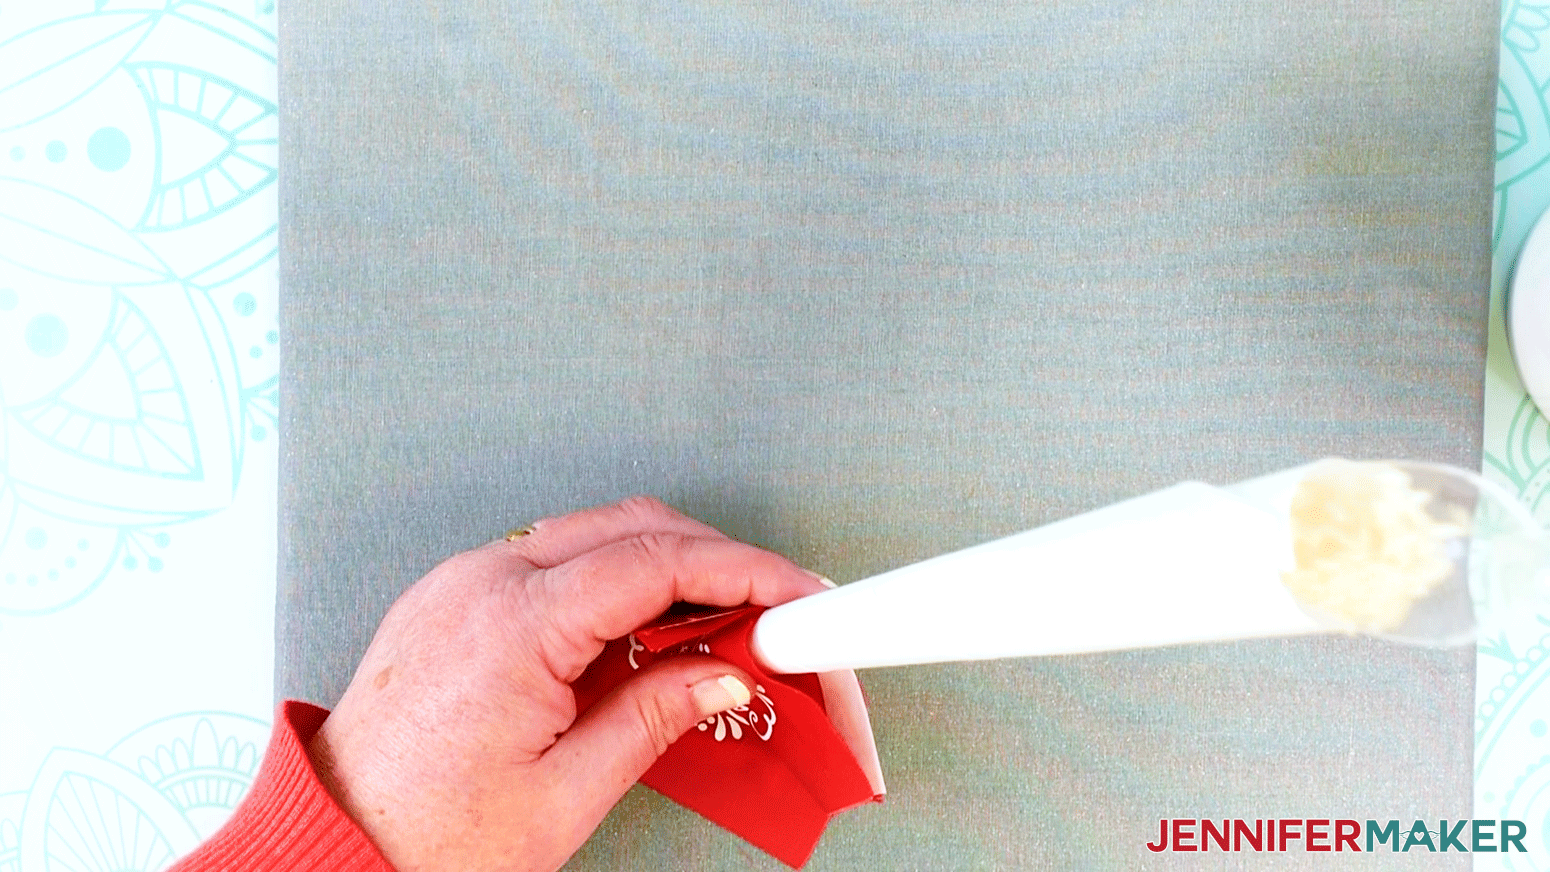
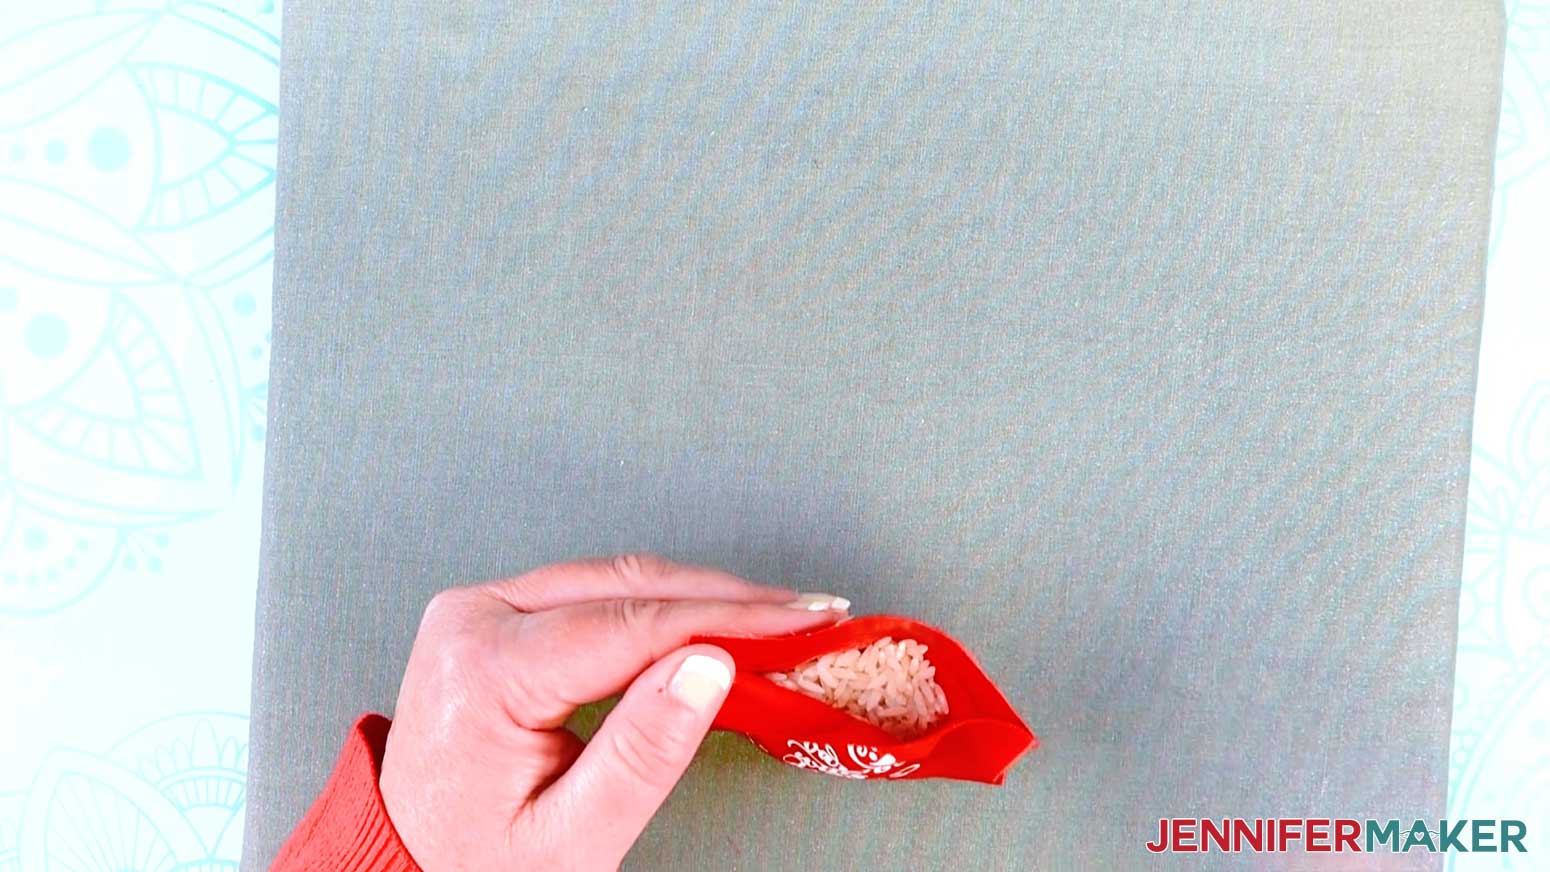
We are now ready to fill our hand warmer with rice. You could also add one to two drops of an essential oil to the rice for a nice scent. If you add essential oil, I recommend mixing the oil with the rice before you add the rice to the hand warmer so the oil does not stain your fabric. Use a spoon, scoop, funnel, or even a folded piece of paper to fill rice into the hand warmer.
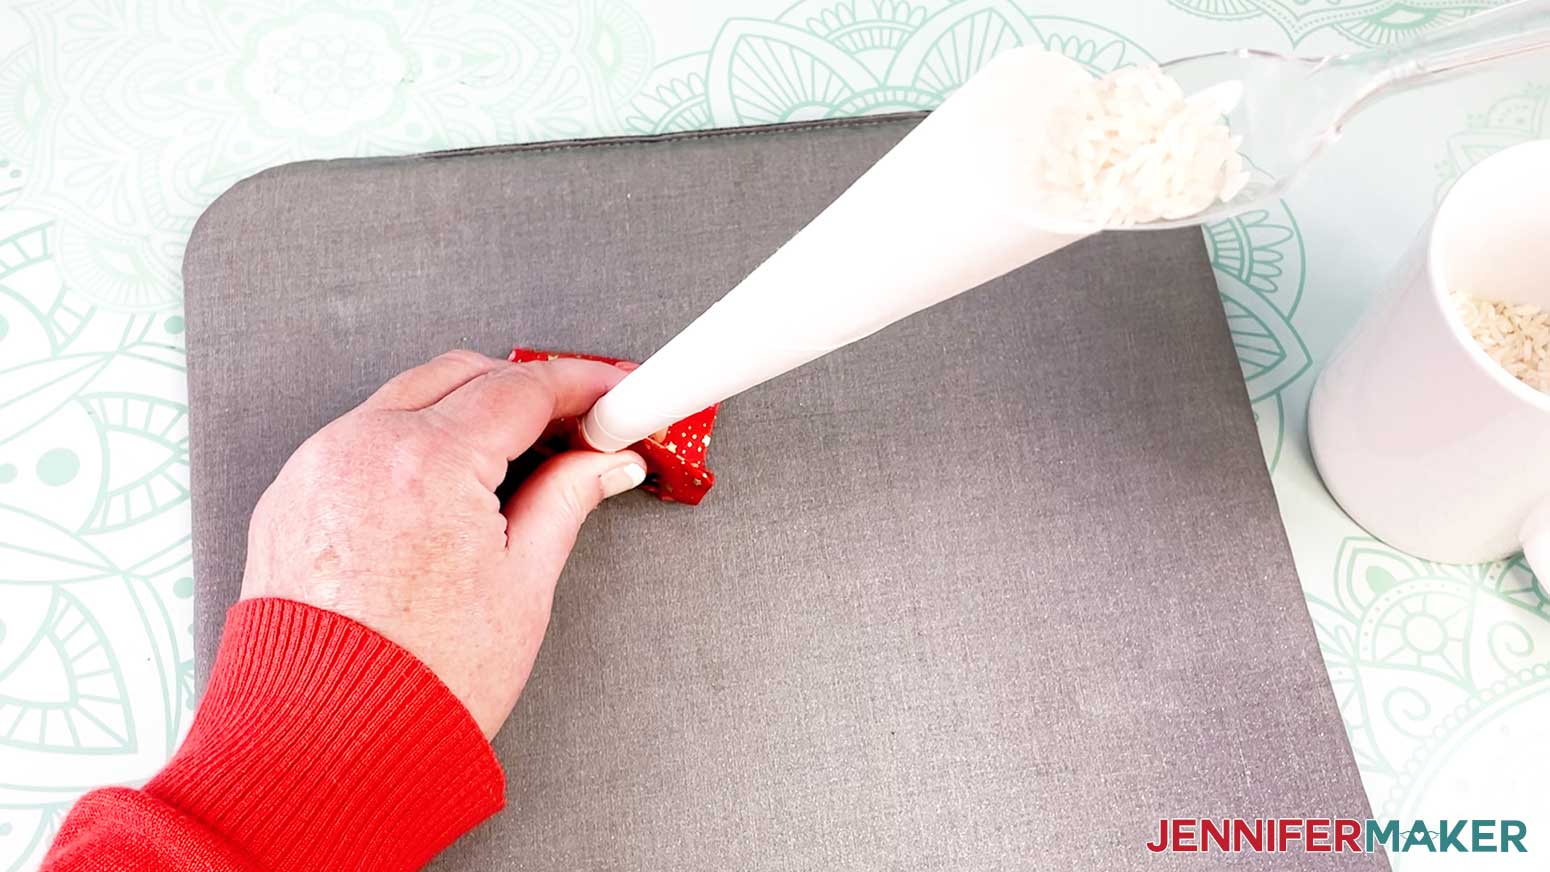
Do not over fill with rice. Fill to approximately 1/4" from the seam opening. Use a straight pin to hold the opening closed.
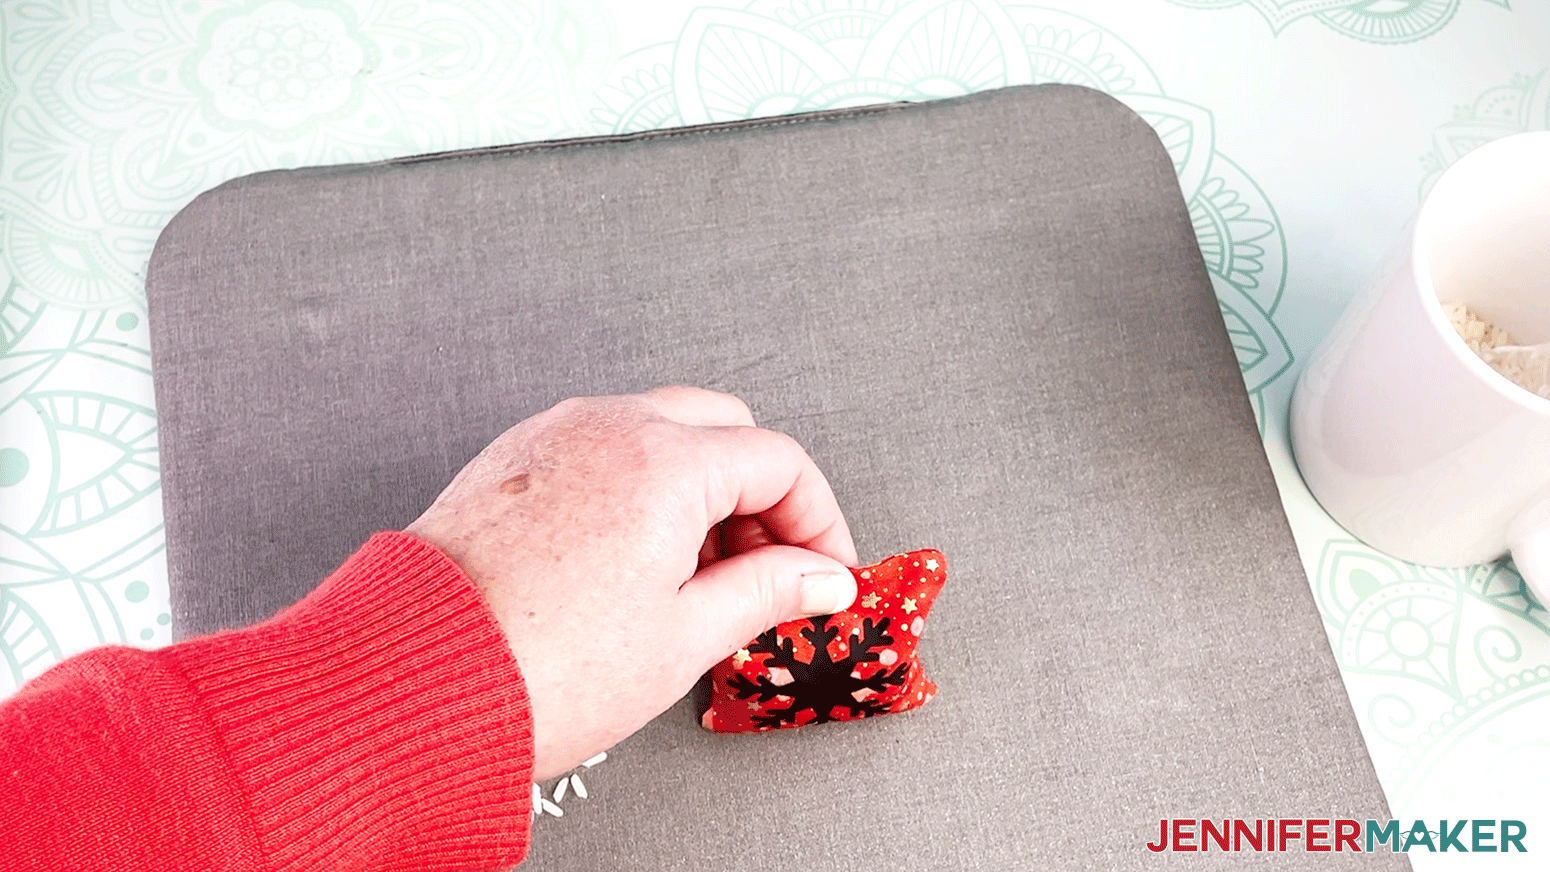
We can now begin hand stitching the opening closed. If you want to close these quickly, you can use your sewing machine by stitching close to the seam. My preference is to hand-stitch the closure because it gives the Pocket Hand Warmers a more polished look.
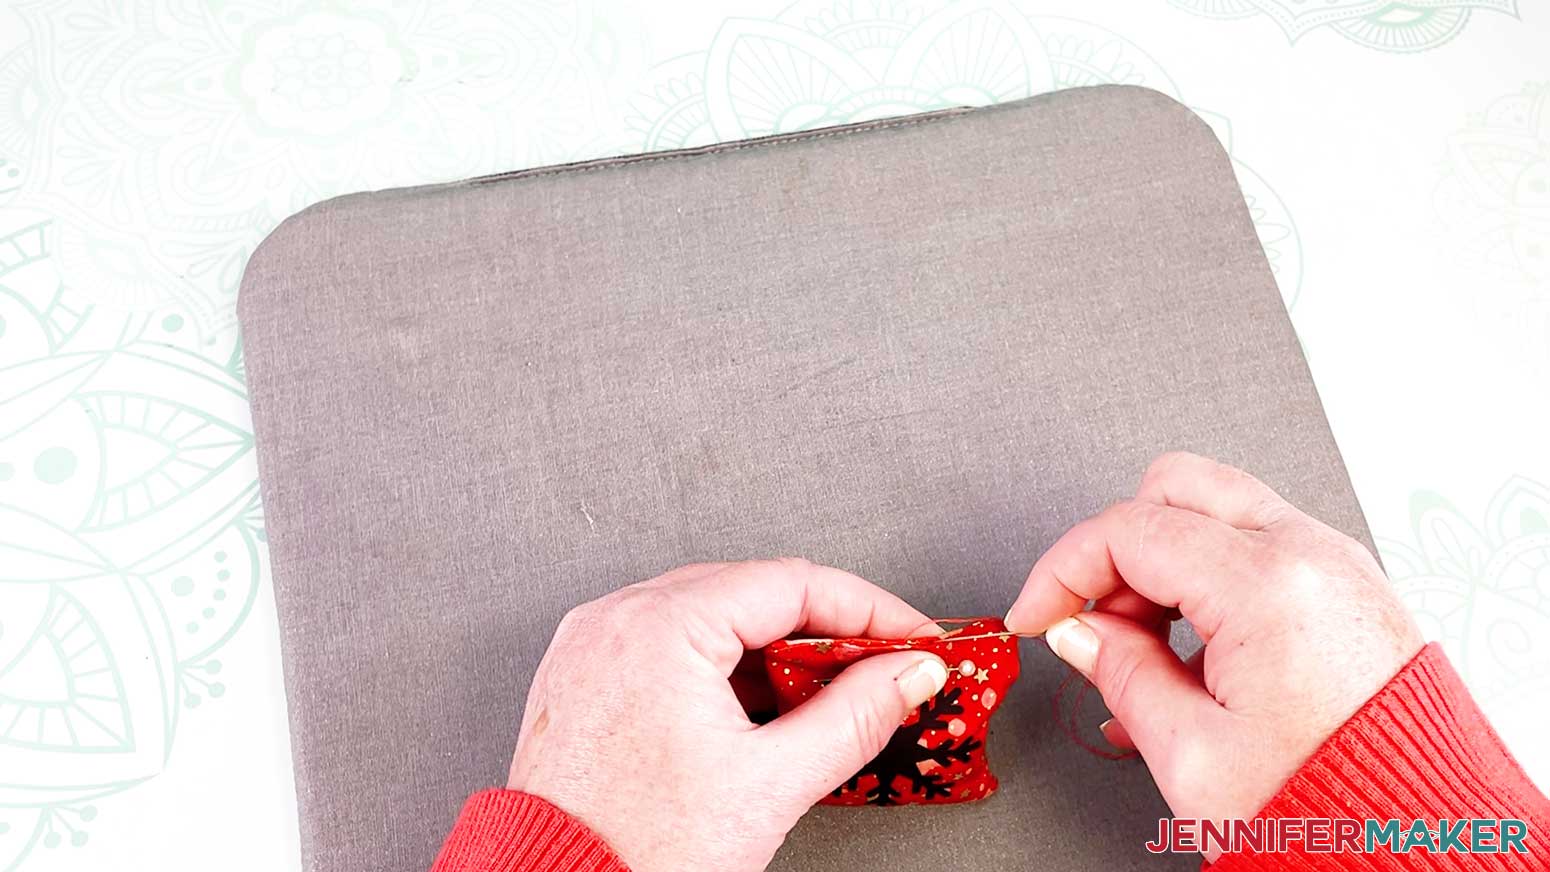
The stitch I am going to show you is called a ladder stitch, also referred to as an invisible stitch. Begin by threading your needle and tying a knot into the end of the thread.
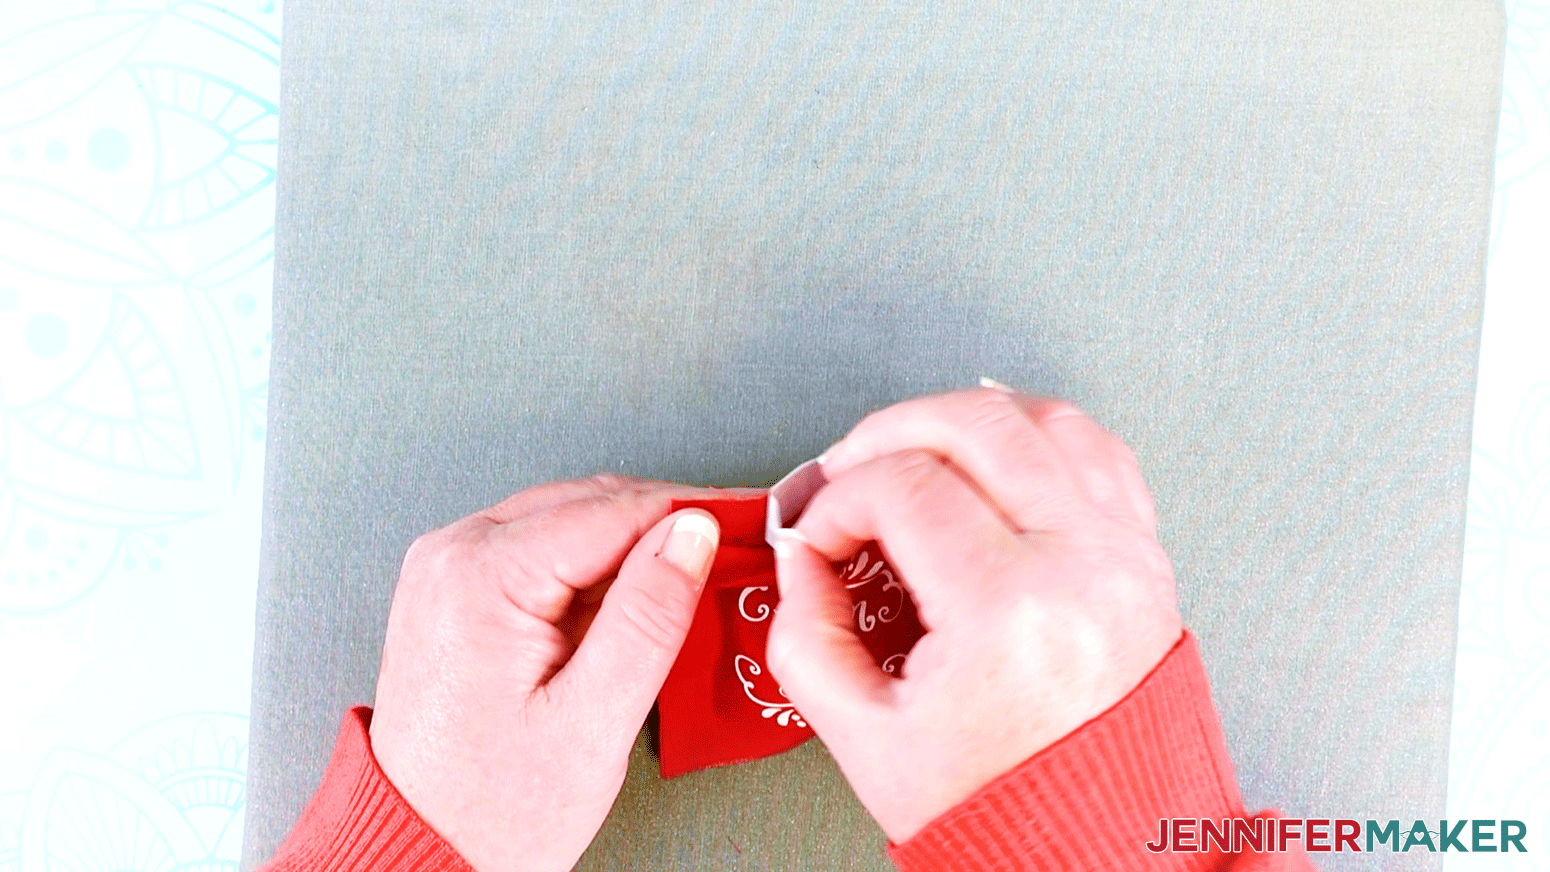
Take your needle and push it through a small piece of the seam at one end of the opening.

Now go directly across from where your needle is and grab a small section of the fabric from the inside seam.
This is a diagram of what the ladder stitch looks like.
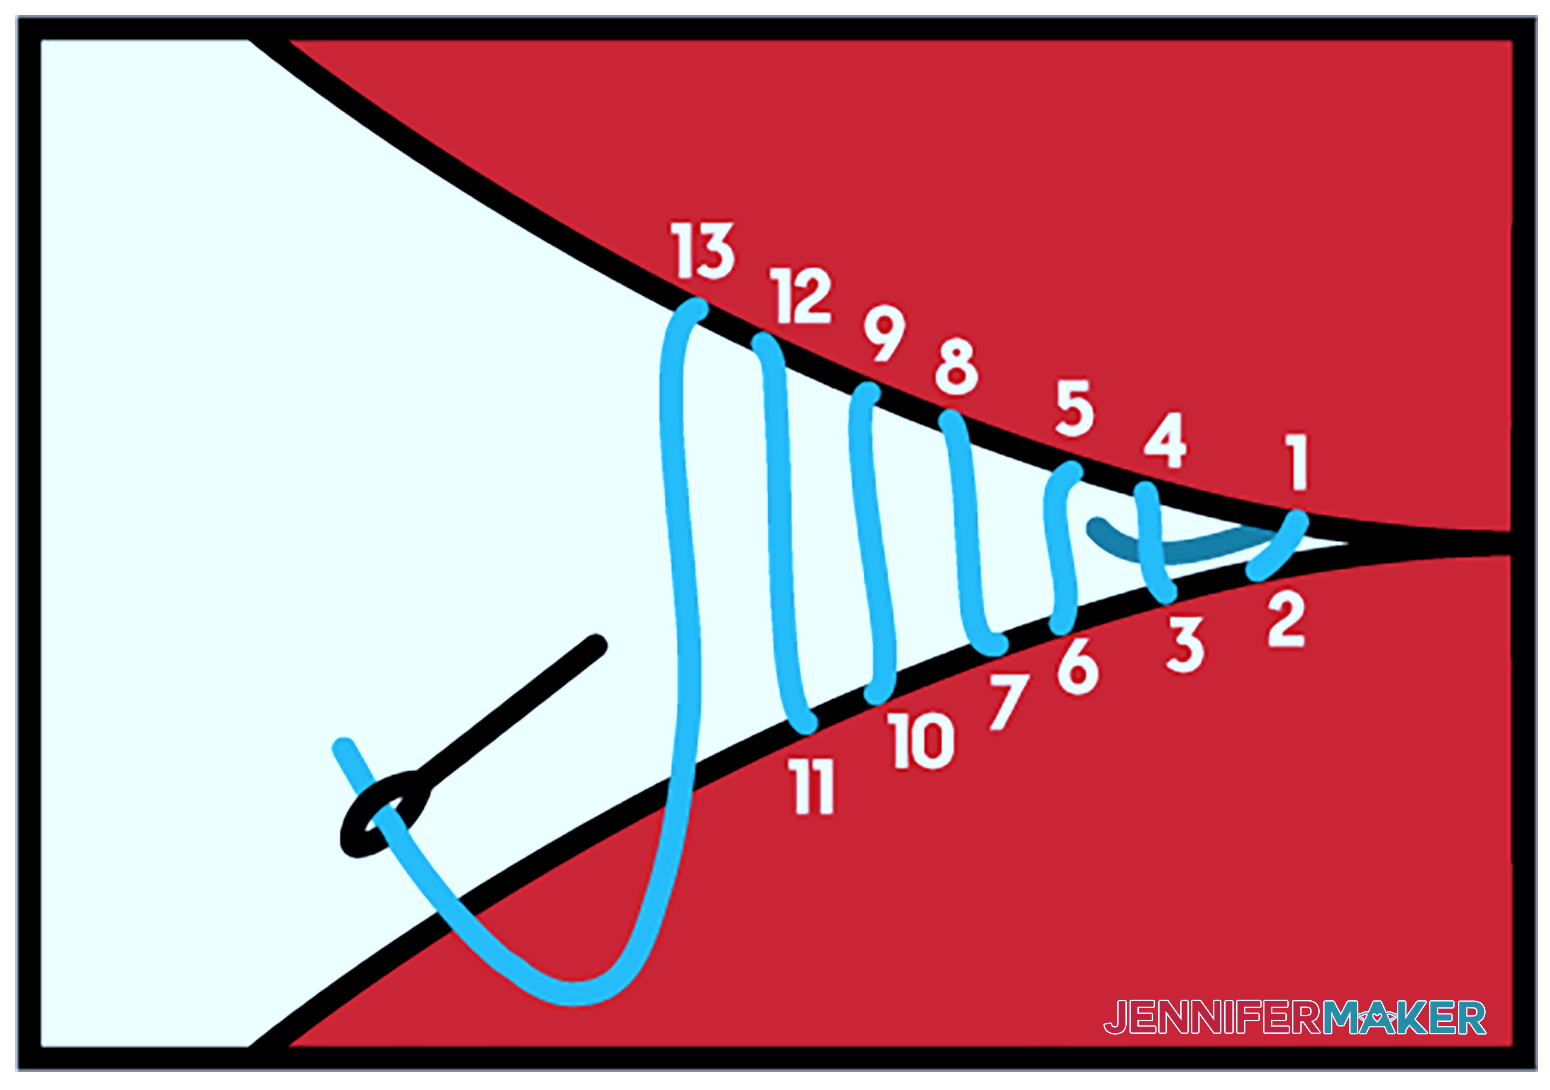
Repeat this process going back and forth between the sides until you get to the end of the opening. Do not pull your thread too tight as you stitch. This will result in a bunched up seam.
To tie off your stitch, run the needle through a small section of fabric. Pull the thread until you have a small loop. Run the needle through the loop and pull tight. Repeat once more.
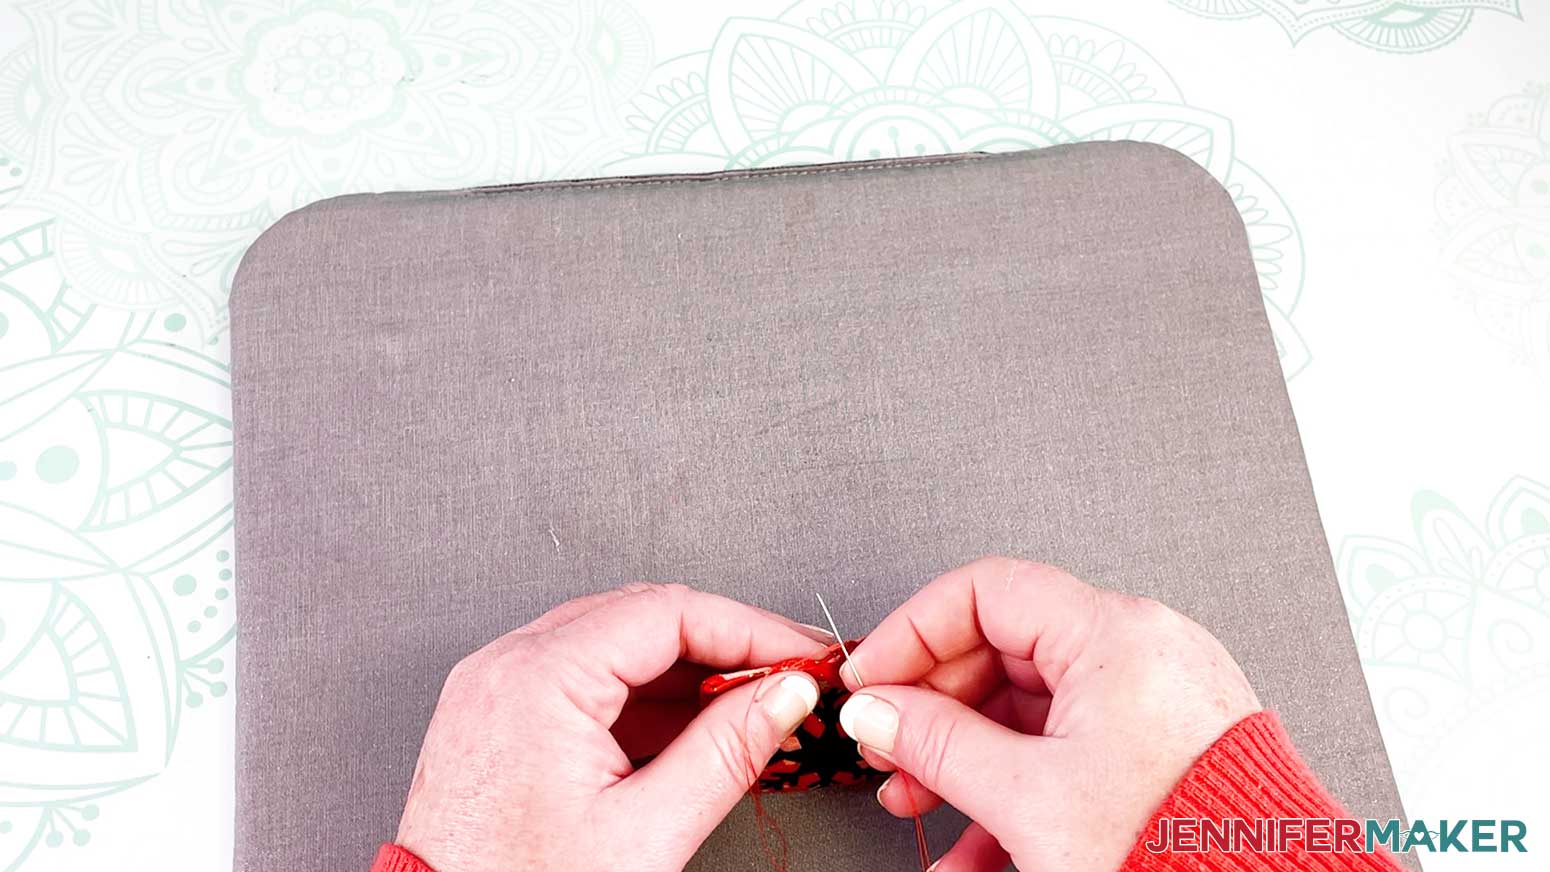
After knotting your thread, take the needle and go back through the fabric then trim your thread. This hides the tail end of the thread inside the hand warmer. Remember to remove the straight pin when you have finished sewing the seam.

We are done with our first Pocket Hand Warmer! Did you find it easy to make?
NO SEW VERSION
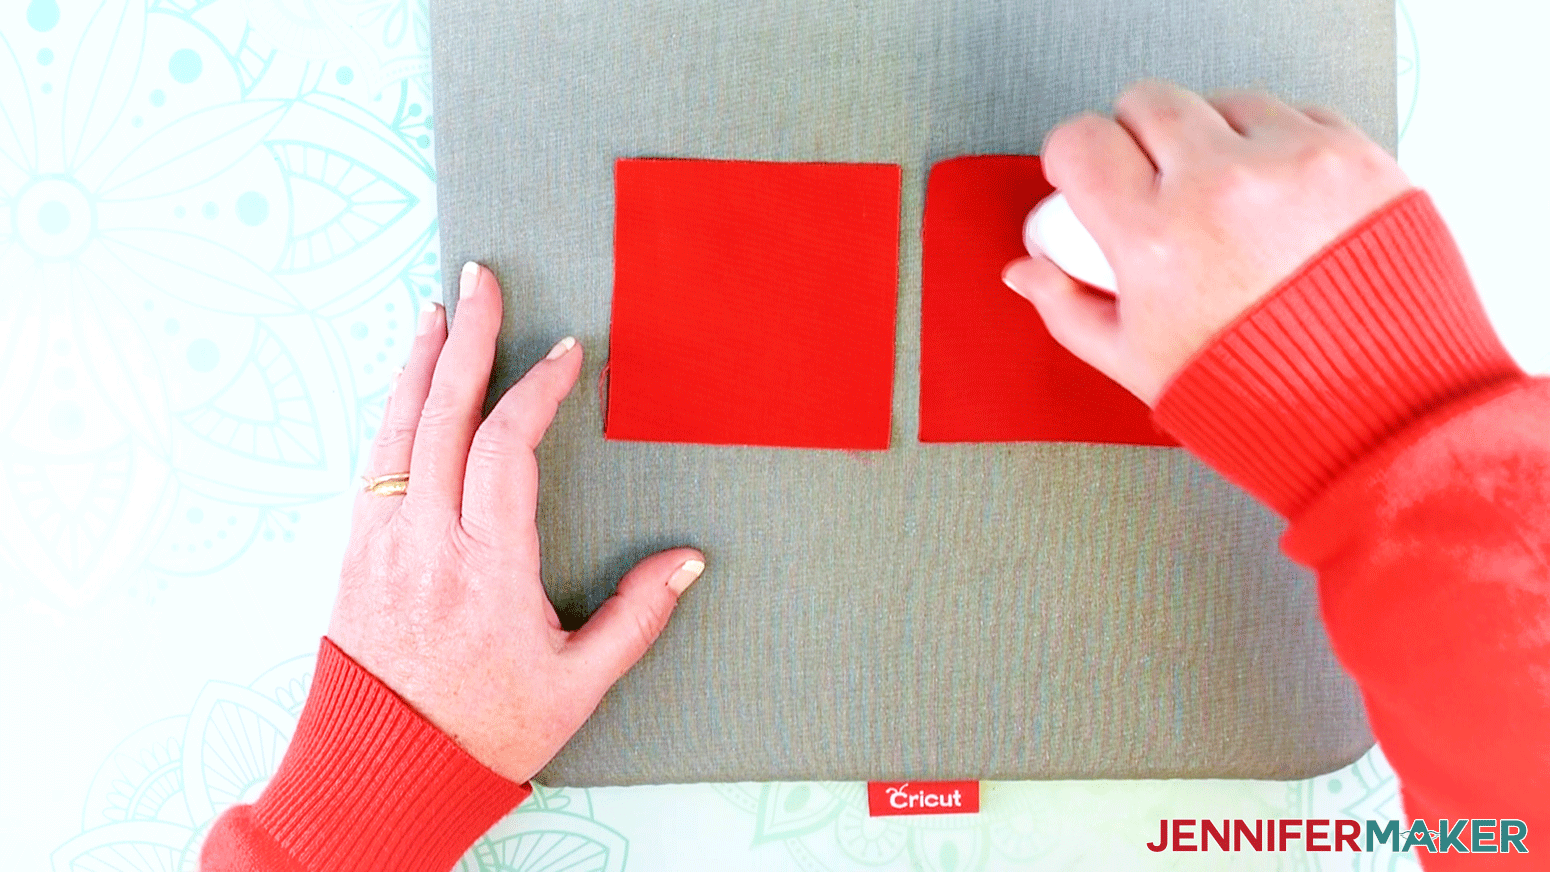
For the no sew option, cut your fabric using your Cricut or hand cut two 3.5" x 3.5" squares. Reminder, if you use your Cricut to cut your fabric, hide the pen layer. You do not want to mark up your fabric for this version.
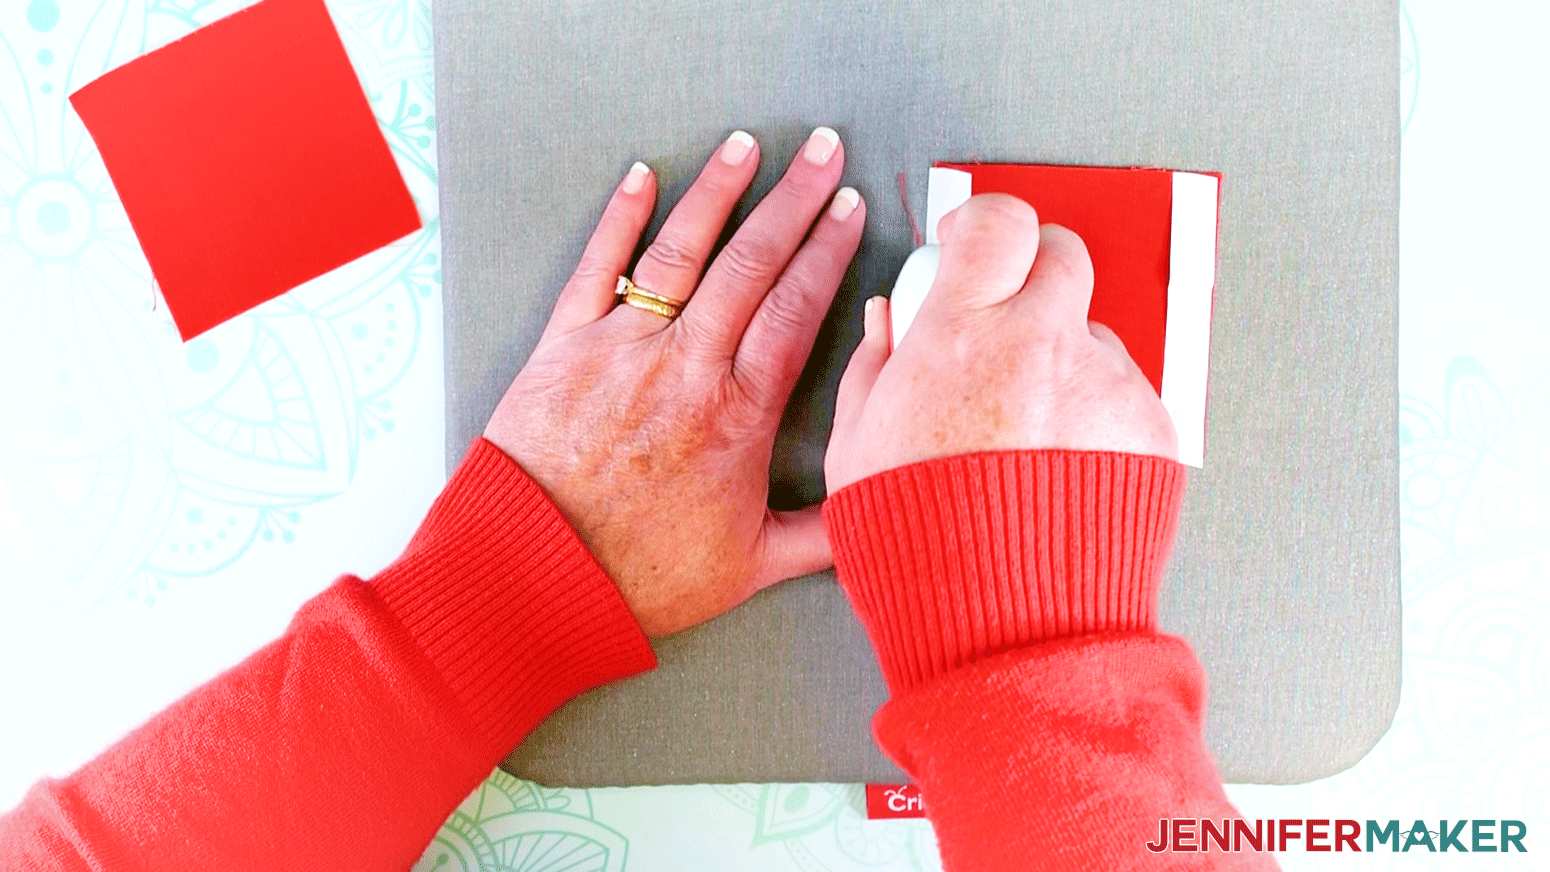
Cut four 1/2" x 3 3/8" strips of Heat n' Bond.

I am using my EasyPress Mini, however, you can also use a standard iron. My EasyPress Mini is set on medium which is the setting for the Smart Iron-On vinyl design I will be using. Make sure to check the heat settings if you are using a different type of vinyl. Place a piece of fabric on the EasyPress heat mat so the right side of the fabric is facing down. Iron the fabric flat.
Take two of the Heat n' Bond strips and lay them on each side of the fabric then iron. You only have to iron the Heat n' Bond for a couple seconds. Do not remove the paper backing.
Roll back the paper backing approximately 1/2" on the top of the two strips we just ironed.
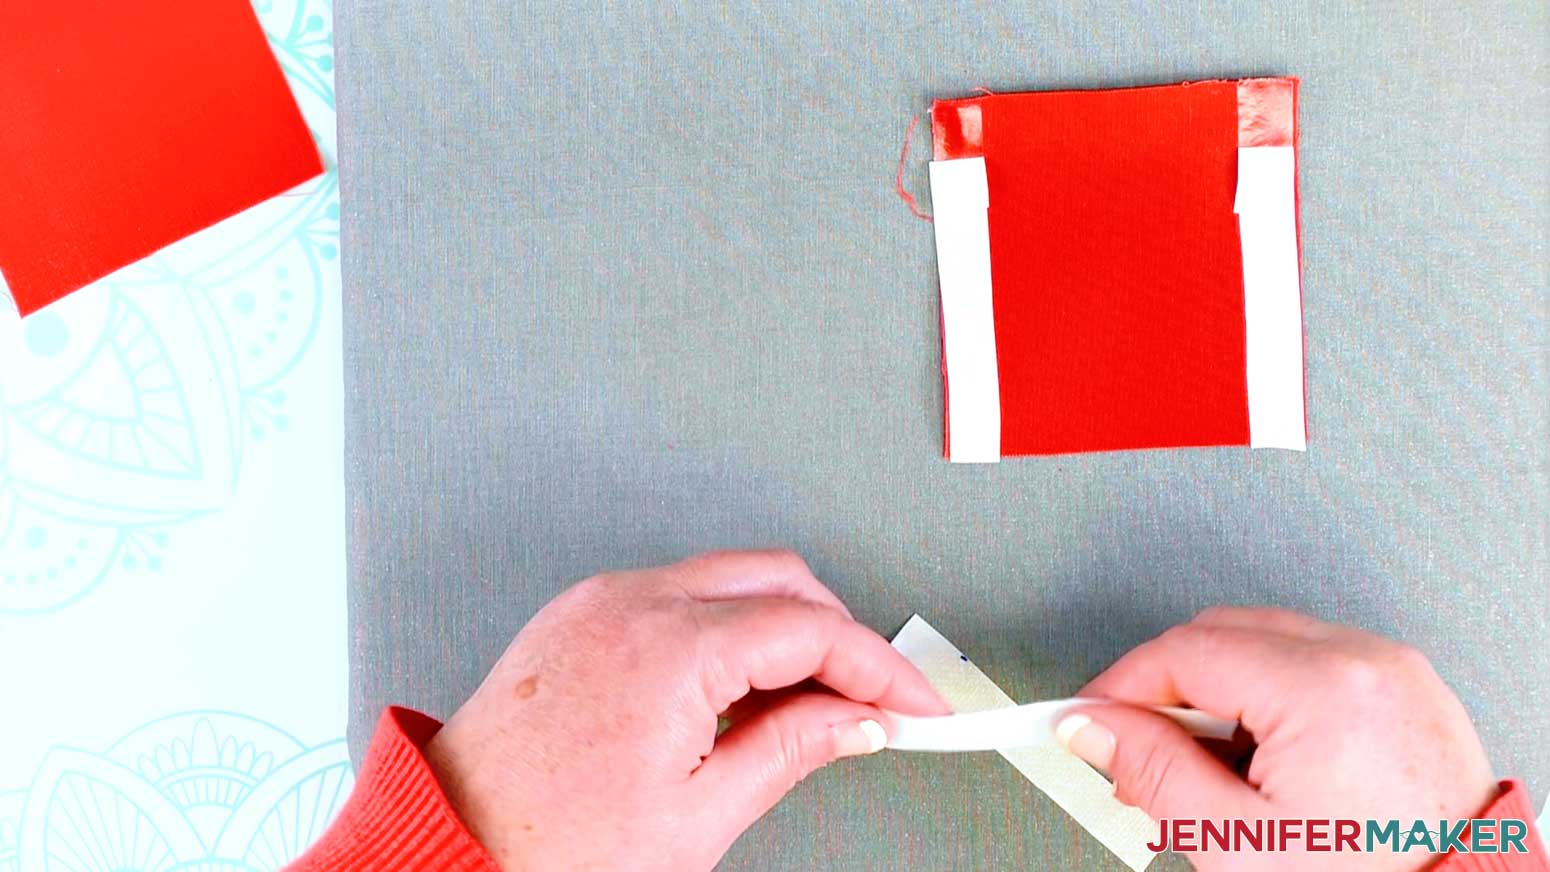
Place a Heat n' Bond strip on the fabric then roll back the paper strips.
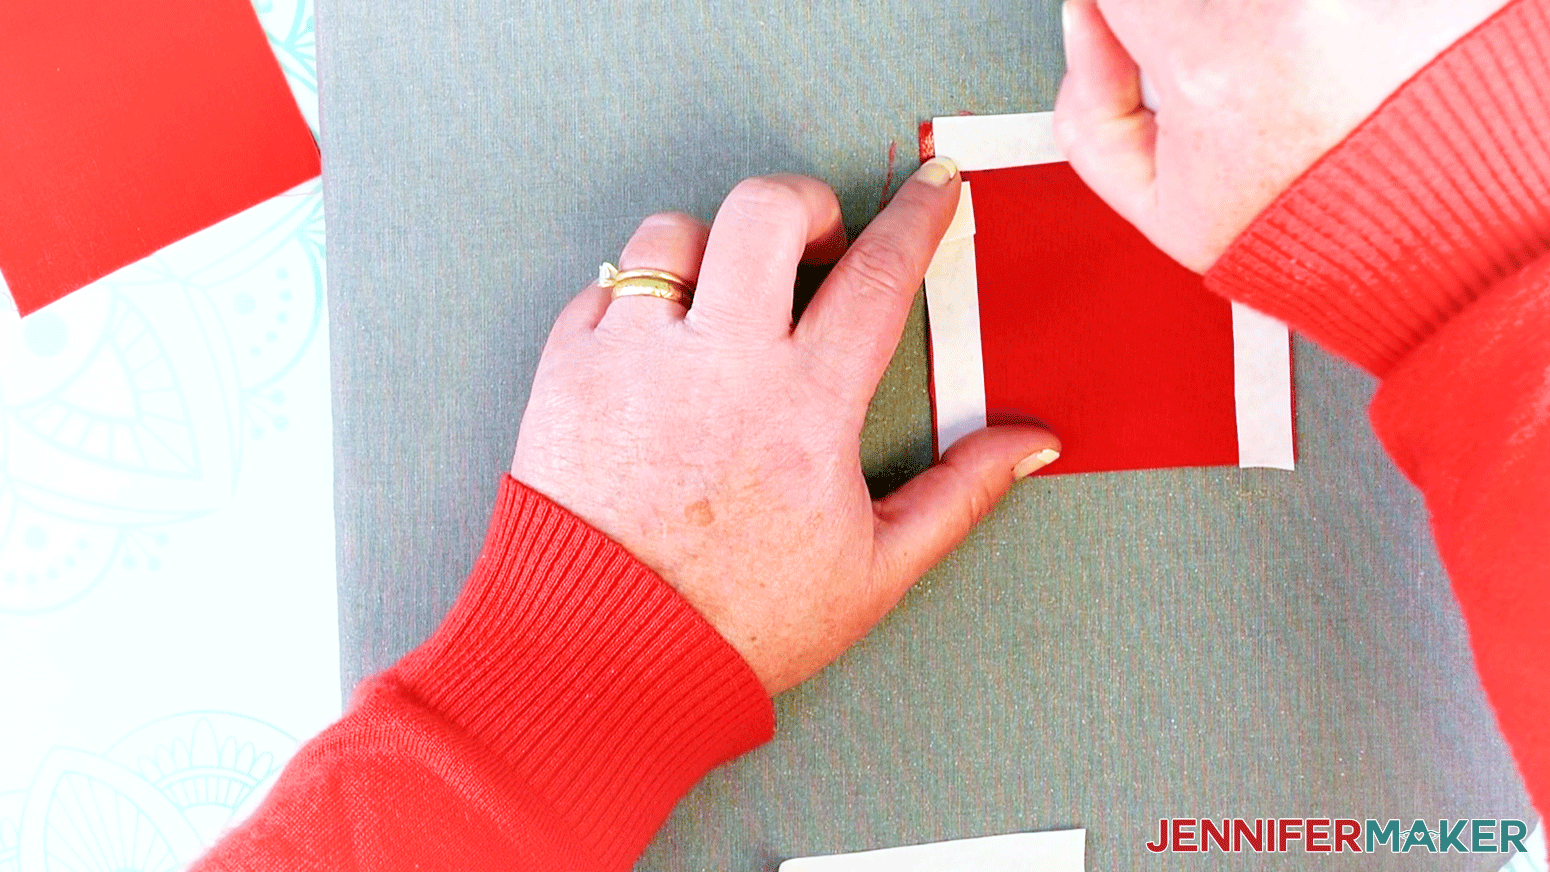
Iron the Heat n' Bond for two to three seconds and then repeat this same process to add the strip of Heat n' Bond to the bottom of the fabric.
IMPORTANT: Allow the fabric and Heat n' Bond to completely cool.
Take your iron-on vinyl design and apply it to the front (printed side) of the fabric. With a piece this small, I find it easiest to eyeball center placement of my design. You can, however, fold the piece in half horizontally and vertically and iron a seam to find the center point.

The Smart Iron-On Vinyl that I am using says to set my EasyPress Mini on medium heat and then preheat the fabric for five seconds. After the pre-heat, iron the design on the fabric for 25 seconds.
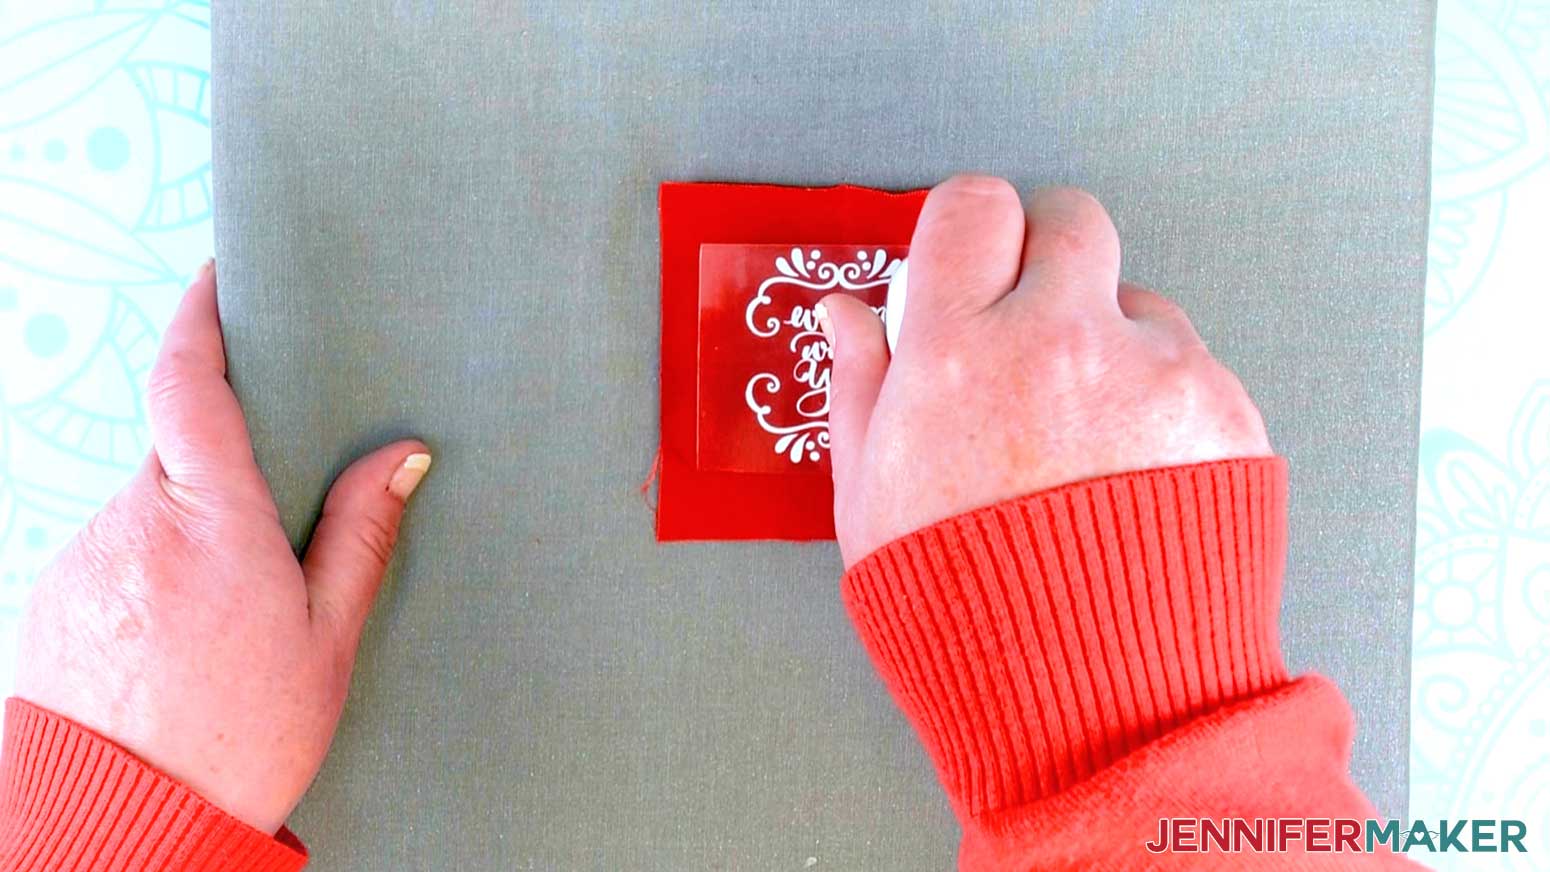
After 25 seconds, turn the fabric over and iron the back side for 15 seconds.
Allow the design to cool and then remove the transfer film from the vinyl. Next, remove the paper tape off the Heat n' Bond from the top (or bottom) and two sides from the other fabric piece.
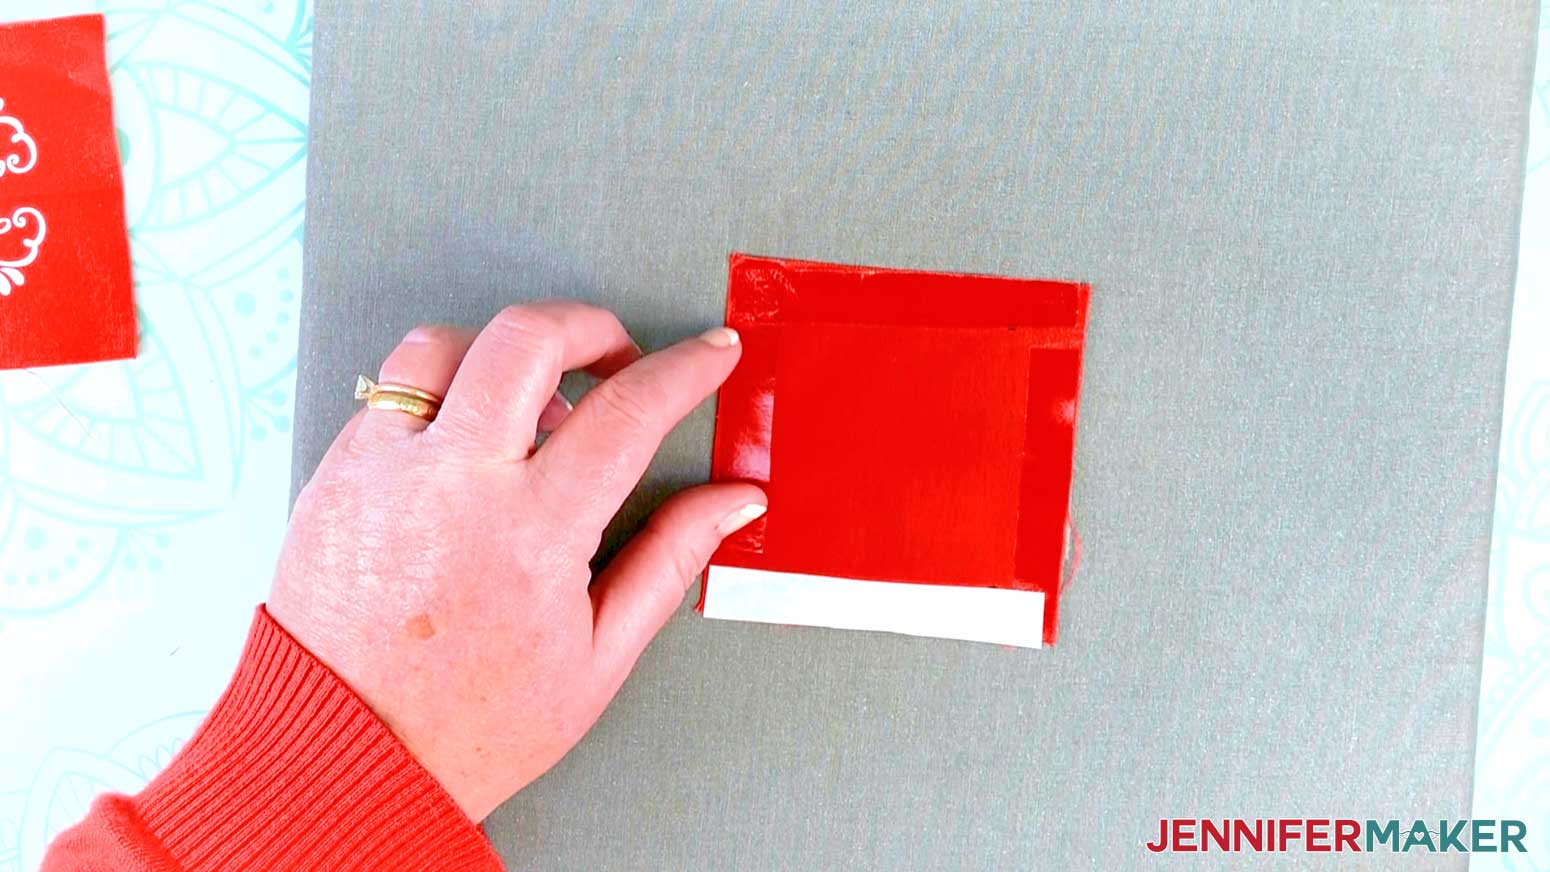
Place the two pieces of fabric together with the right sides facing out.
Flip the pieces over so your iron-on design is facing the mat.
Now I am going to use my EasyPress Mini to iron the top and two sides of the fabric so they adhere together with the Heat n' Bond. Again, you do not need to heat the fabric for very long, about two to three seconds.
Set the fabric aside until it is completely cool. Not slightly warm, but completely cool. If you do not wait for the fabric to cool, you risk the seam coming open. If it does, simply iron again and wait until cool.
Once the fabric is cool, begin adding rice in the opening of the hand warmer.
Do not over fill the pocket with rice as this too can risk the seam splitting open. The rice should come about 1/8" to 1/4" below the Heat n' Bond tape.
Remove the paper tape from the last strip of Heat n' Bond.
Place the two sides of the fabric together and then press using your EasyPress Mini. Heat for approximately three to four seconds.
I used my Cricut Spatula (you could also use the back side of a metal spoon) and rubbed it back and forth along the seam. This helps to take the heat away from the seam while pressing the fabric together. Keep pressing the seam closed with the spatula until the fabric is cool.
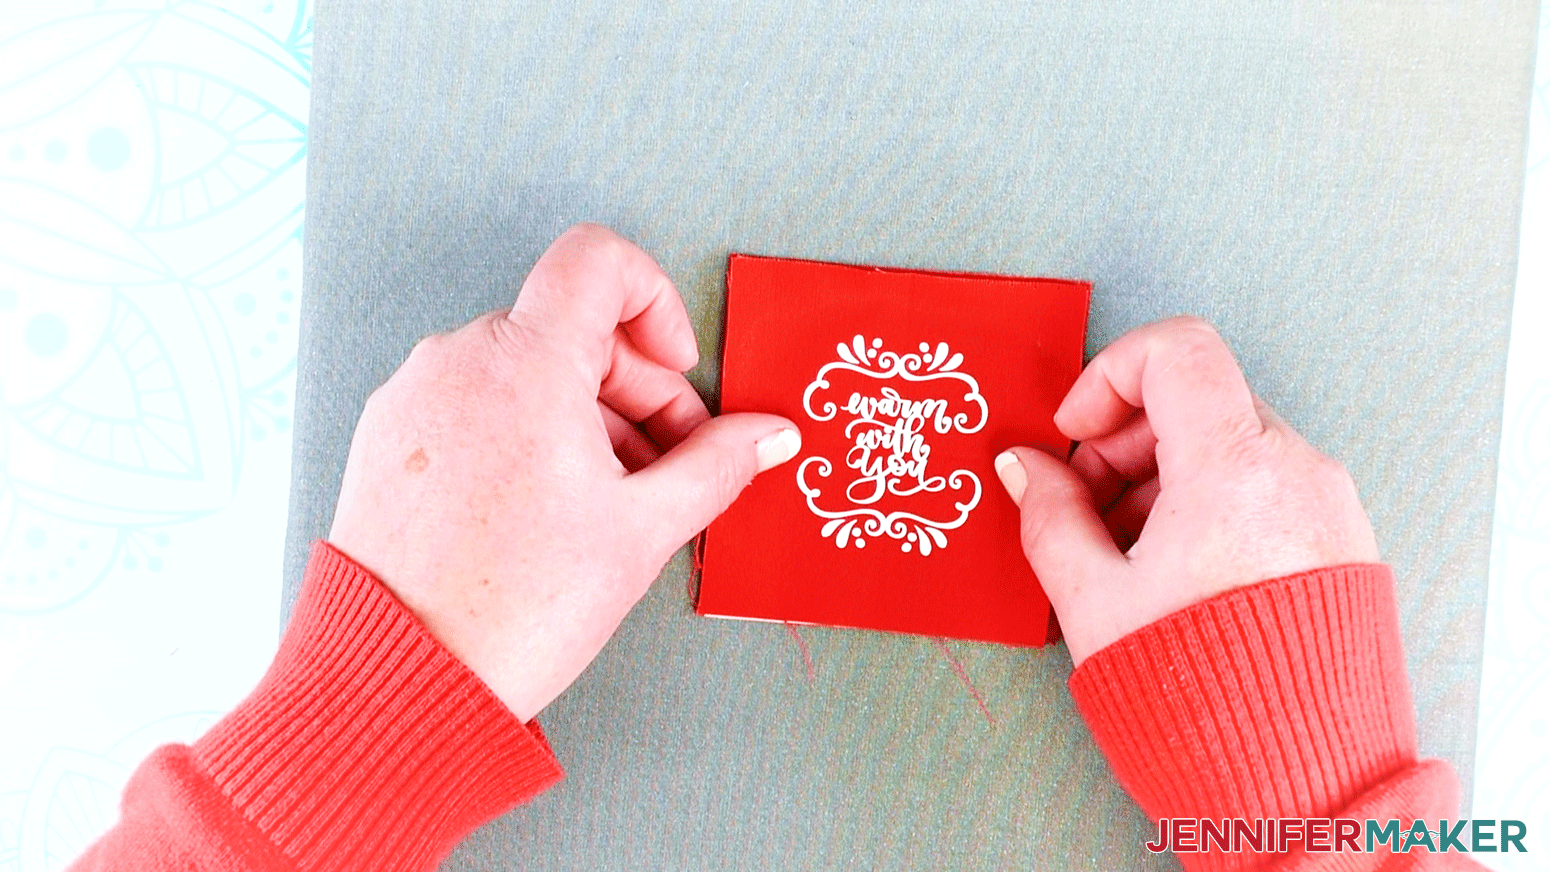
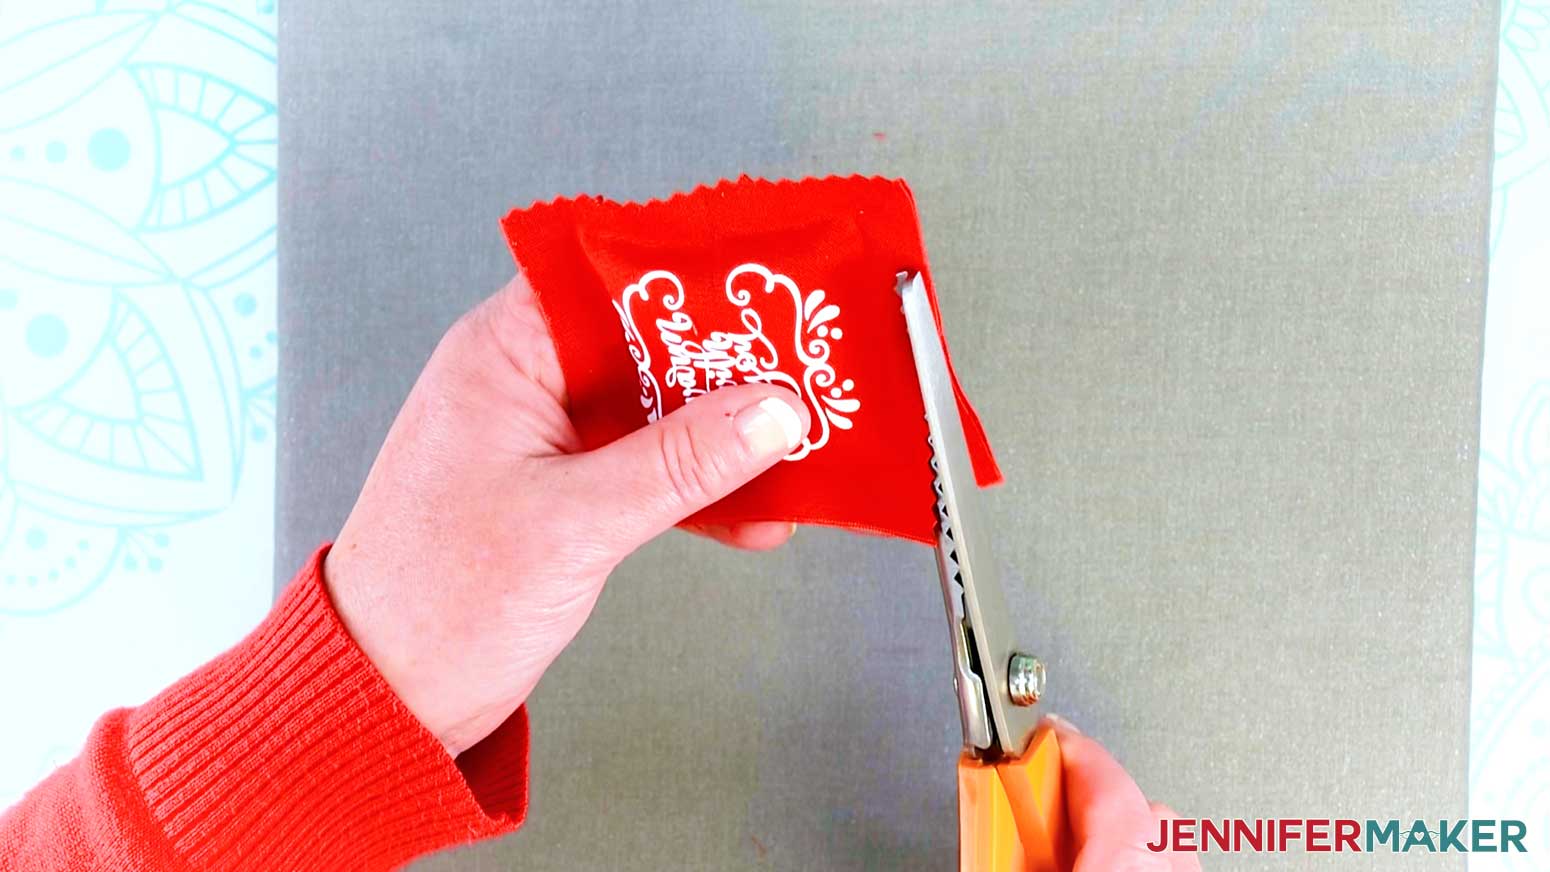
After your fabric has completely cooled, take your pinking shears and cut along the edge of all four sides of the Pocket Hand Warmer. This gives your hand warmer a finishing touch and, by using the pinking shears, it will help eliminate fraying of the fabric.
Here are a couple finished no-sew Pocket Hand Warmers
To use your Pocket Hand Warmers, stick them in the microwave for 20-30 seconds but no more than a minute. Heat up time can vary depending on your microwave. Shake the hand warmer after removing from the microwave to help distribute the heat. They should stay warm for 15-20 minutes.
Notes
My Pocket Hand Warmers are approximately 2.75" x 2.75" when finished. These designs are hand lettered with the exception of Brrrrrrr (Arial Black) and Holly Jolly (Holiday Seasons).
Recommended Products
As an Amazon Associate and member of other affiliate programs, I earn from qualifying purchases.

The detailed step-by-step assembly video on how to create DIY hand warmers is part of Maker Academy Weekend. Get a pass to watch all 20+ workshops, each with a printable handbook, transcript, audio files, design files, and support with a VIP pass below:

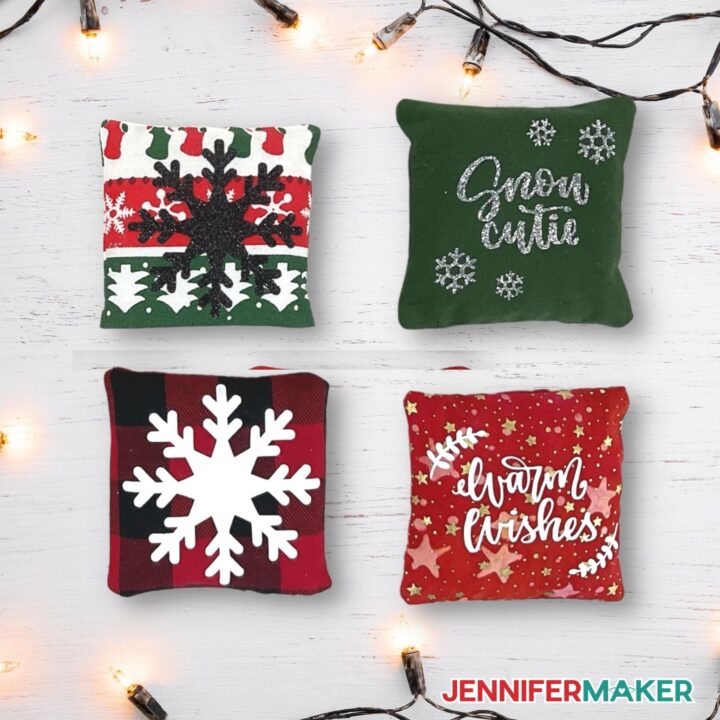
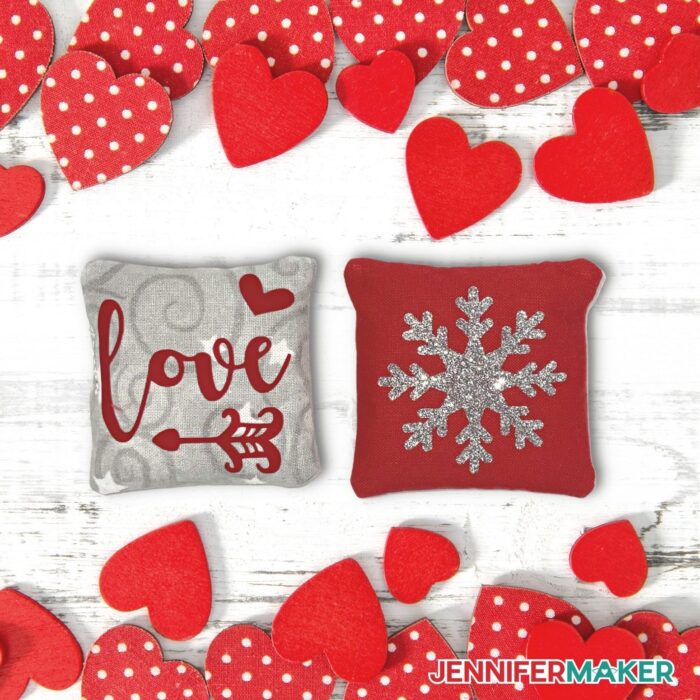
These were so fun to make and a pretty easy project if I do say so myself. I’m really loving how these hand warmers turned out with this flannel fabric. Another great idea is to use an old flannel shirt that you no longer use to make your handmade hand warmers during the chilly weather.

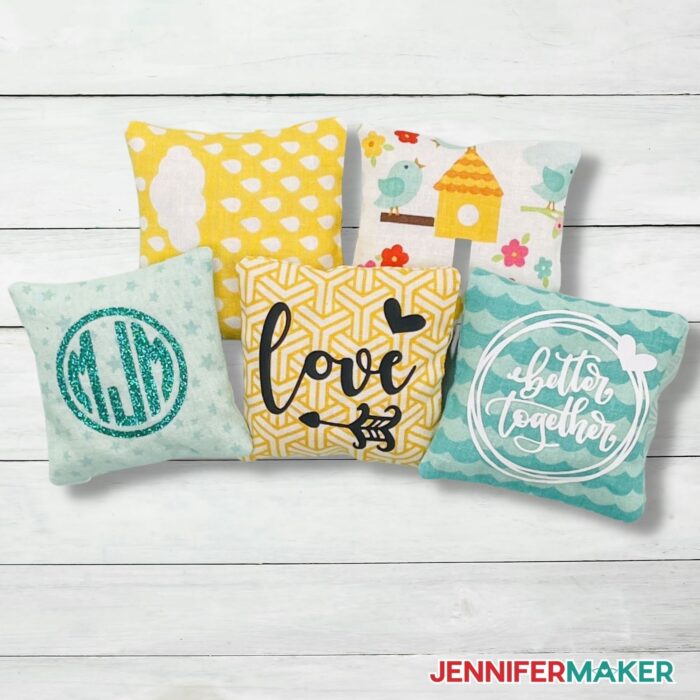
These make for a great gift and perfect stocking stuffers. They will be much appreciated during the winter weather! Here is a cute love theme I made as well. You can get creative and even make heart shapes for them like I did a few years back!
Answers to Your Questions About How to Make DIY Hand Warmers
Q: Where is your tutorial for this DIY Hand Warmers project?
This is a special project we made for our free Maker Academy Weekend event! A complete and detailed step-by-step video premiered during the event November 4-7, 2021 — specifically, this tutorial video was available to watch for free for 24 hours beginning November 6 at 12:00 pm ET! Get access to the workshop video with a VIP Pass to Maker Academy Weekend 2021, which comes with other perks and bonuses, too!
Q: How long do I microwave these handwarmers for to get them warm?
20 seconds is all you need.
Q: Can I really put iron-on vinyl in the microwave?
Normally I would not suggest it, as the heat will weaken the adhesive on the vinyl. But 20 seconds isn’t very long. Do not, however, use any FOIL iron-on vinyl as it has enough metal in it that it will spark when you microwave. (Yes, we tested!) Glitter iron-on vinyl is fine, however. That said, if you think you’ll use these a LOT, just forgo the iron on vinyl entirely or make a stencil and paint them instead.
Get the free designs for my DIY hand warmers!
I love seeing what you make with my designs and how you use them! Please share a photo of your hand warmers in our Facebook group or tag me on social media with #jennifermaker.
Love,

Want to remember this? Save this DIY Hand Warmers Tutorial to your favorite Pinterest Board!