
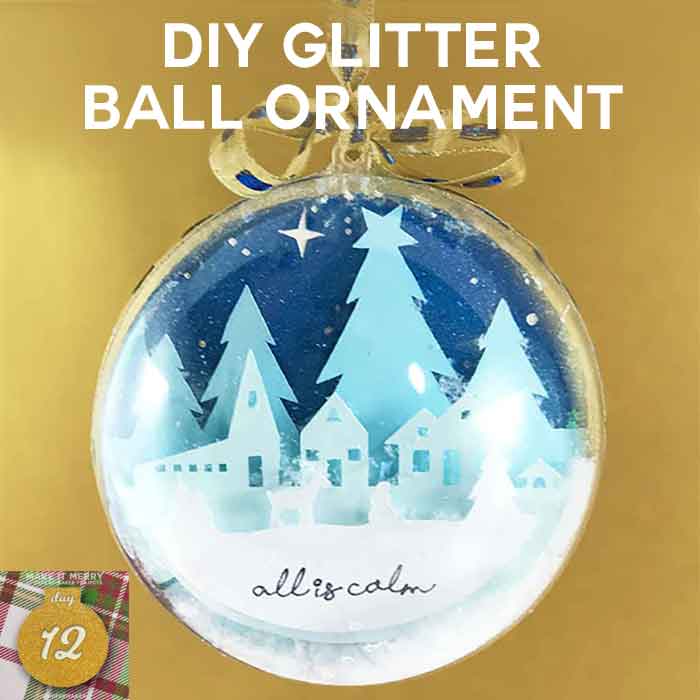
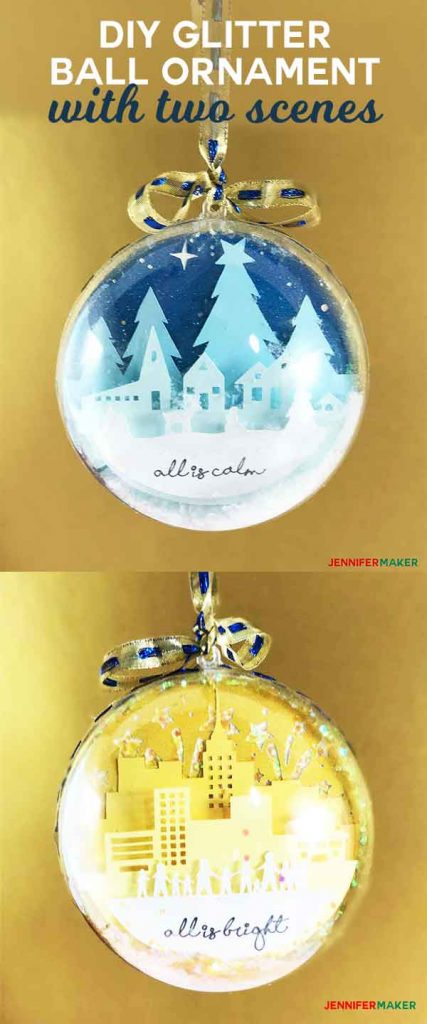
 My craft room sees a lot of “craftermath.” After I made my Snow Globe and Glitter Globe Top Mason Jars, I had a whole mess of glitter and clear plastic ornaments leftover. I put them in a box, thinking I was done for the year. But today, inspiration struck! I had another use for them. So for Day 12 of my MAKE IT MERRY: 25 Days of Maker Projects Christmas, I’m making Glitter Ball Ornaments with two sides and two scenes, each with different (and separate) glitter!
You can see my Glitter Ball Ornament in action in this little video:
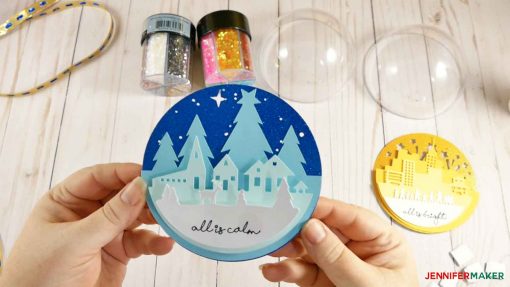
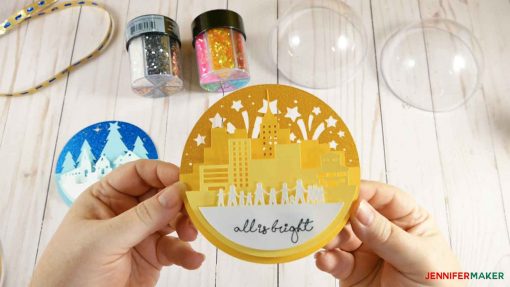
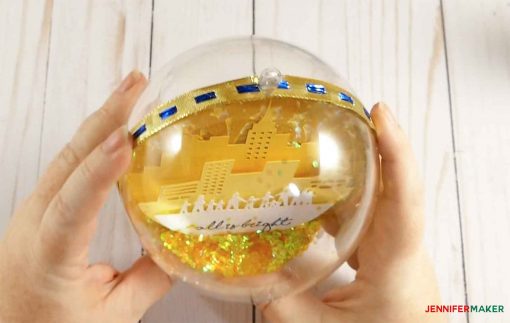
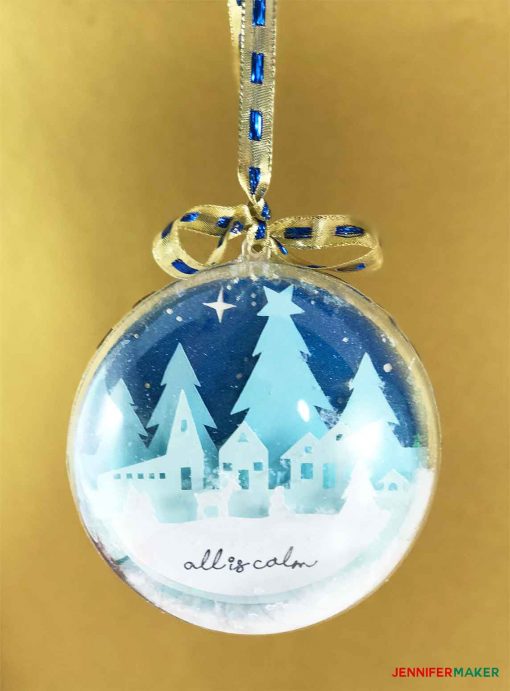
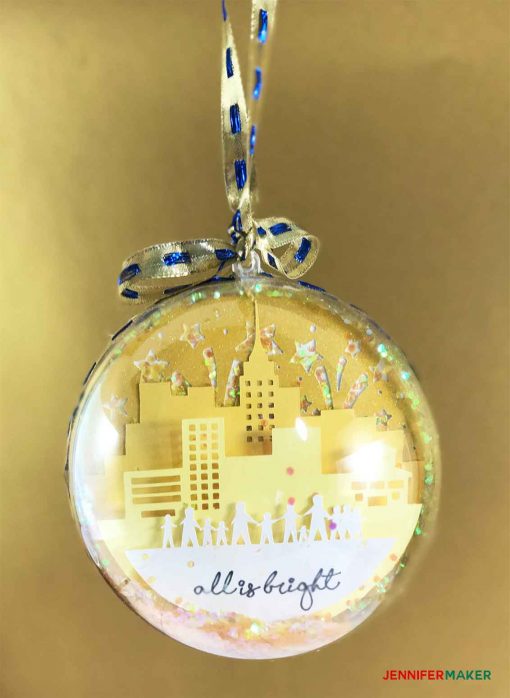
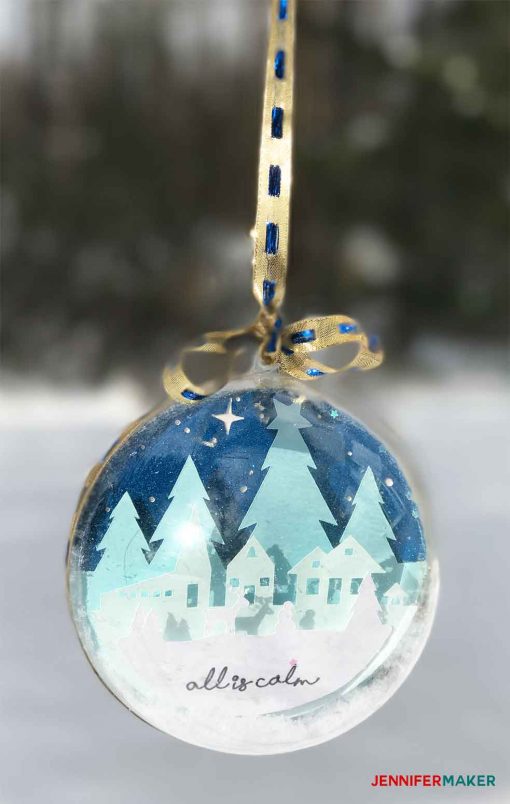
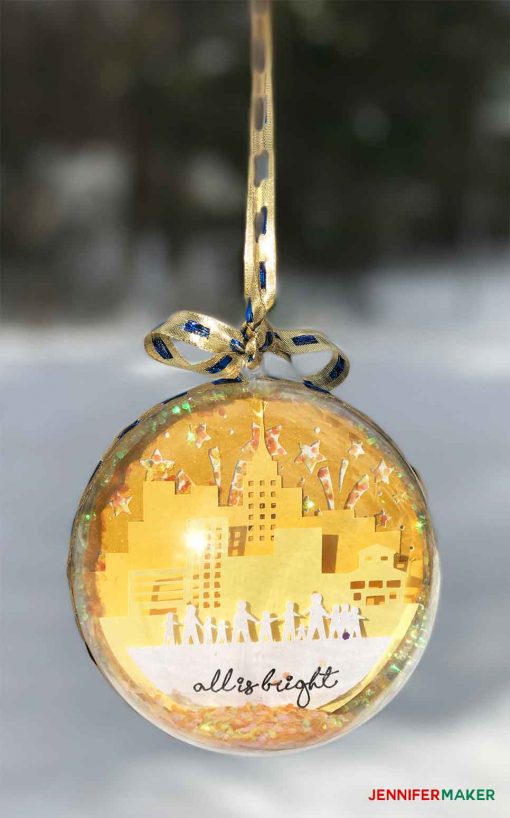
This is not your traditional glitter ball—instead of just coating the inside, I’m instead using the inside as a sort of glitter globe and including pretty holiday scenes. The trick to this ornament is to seal each side so the glitter can’t travel between the two halves. But it’s not hard once you know the trick, and I’ll show you how.
Want to make a Glitter Ball Ornament, too? I can show you how! This post contains some affiliate links for your convenience (which means if you make a purchase after clicking a link I will earn a small commission but it won’t cost you a penny more)! Read my full disclosure policy.
Materials for the Glitter Ball Ornament
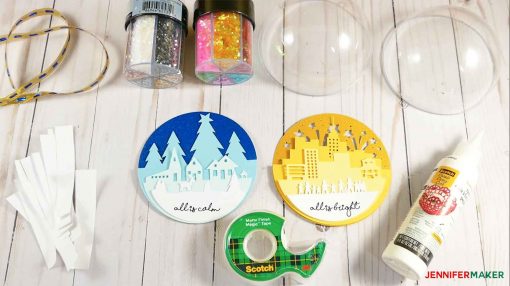
- Large (4.72″/120mm) clear fillable ornaments that open in half
- Cardstock, both regular and glitter
- Chunky glitter and/or faaux snow
- Glue gun and hot glue, tacky glue, tape, and spray adhesive (yes, I used all of these!)
- Matching ribbon (this ribbon was gifted to me, so I can’t link to it—I think it’s vintage)
- Black pen to put in your Cricut accessory holder (optional)
- A way to cut the cardstock (I used a Cricut )
- Design #75 – My free SVG cut file (available in my free resource library—get the password at the bottom of this post)
How to Make Your Glitter Ball Ornament
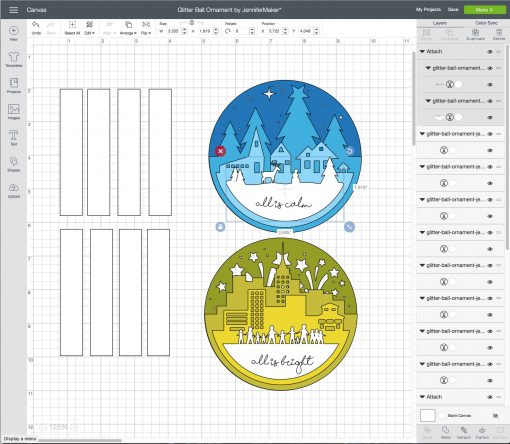
First, download Design #75 which are my free SVG cut files from my free resource library and upload the file to your design software. If you’re not sure how to upload an SVG cut file to Cricut Design Space, watch this helpful video training series I made.
Note: You must prepare your file in Cricut Design Space before cutting. Change the two writing layers to “Write,” attach them to the appropriate white scene layer, and put your pen in the accessory holder of your Cricut before you cut them out.
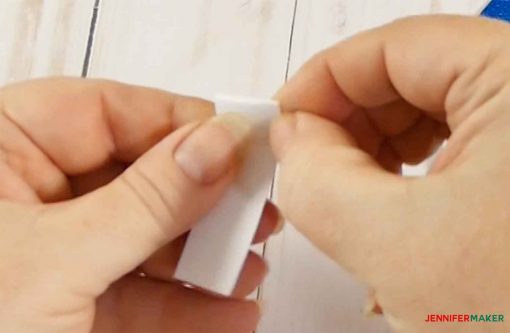
Cut out your card stock. Note that included in my SVG cut file are some long rectangles. These are to create your own spacers in between the layers. If you already have spacers (3D foam squares or dots), feel free to use those instead. If you don’t have them, just fold your rectangles up about 5-6 times and tape them closed. Voila, instead spacers!
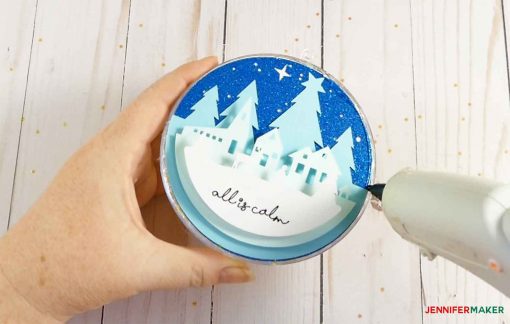
Glue two spacers on the back of the white “all is calm” layer of your ornament scene.
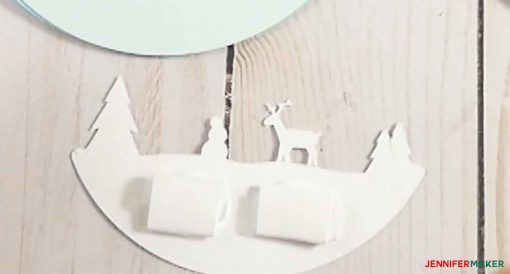
Now glue the white layer to the next layer in the “all is calm” scene (buildings). Note that the bottoms are not flush—the white layer is positioned higher than the bottom of the next layer.
Glue two spacers to the next layer (“trees” layer).
Then glue that “trees” layer to the layers you’ve already done. You should now have three layers with spacers in between each layer.
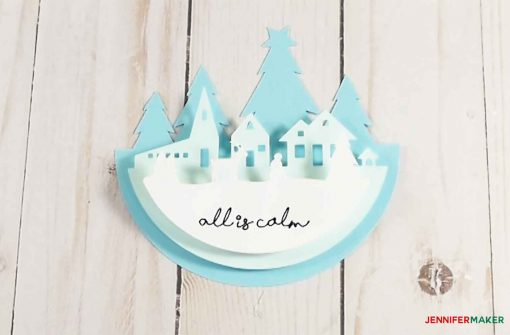
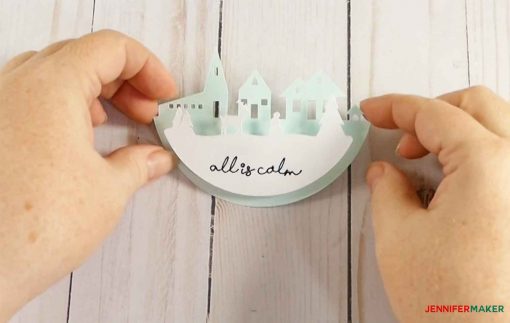
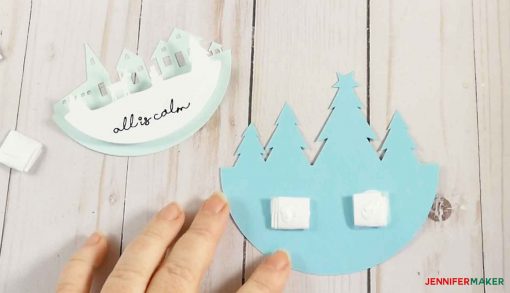
Spray the back of the set of glued layers with spray adhesive, then attach to the full circle layer (the “star” layer). Align the bottoms.
Repeat for the layers of the “all is bright” scene of the ornament.
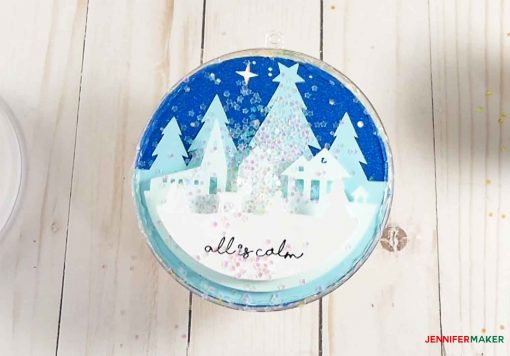
Spray the back of the “all is calm” paper scene with adhesive and attach it to the other half, back to back. Make sure the tops and bottoms of the scene are in alignment on both halves.
Pour gold glitter into one half of the clear ornament ball. Orient the hole at the top of the ornament toward the top of your work area so you know where it is.
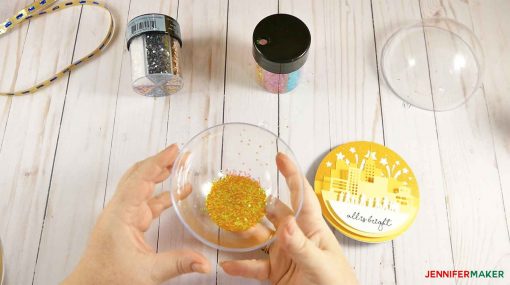
Using your hot glue gun, place a ring of hot glue just inside one half of your clear plastic ornament. Allow to cool.
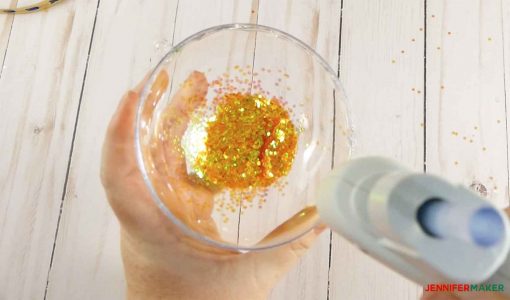
Put another ring of hot glue on top of the first one, this time work quickly so it doesn’t cool. Be sure to remove any hot glue strings that may fall inside your ornament.
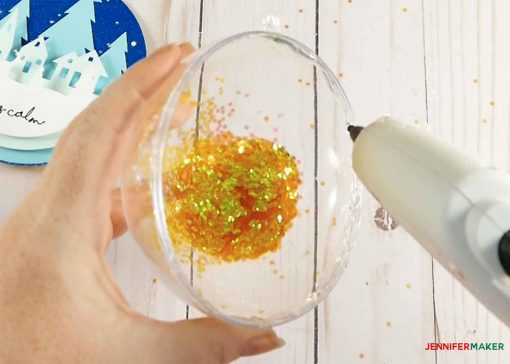
Carefully press the edges of your paper scene, “bright” side down, into the that ring of still-warm hot glue. Make sure all edges touch the glue.
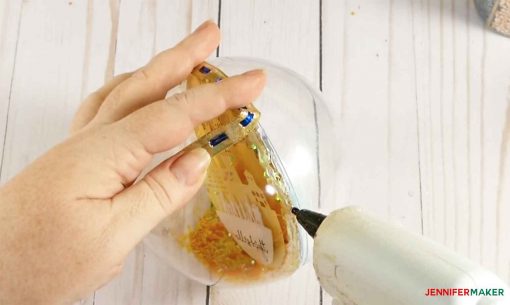
Put another ring of hot glue around the edges of the “calm” paper scene, sealing in all the glitter and making sure the paper stays in place.
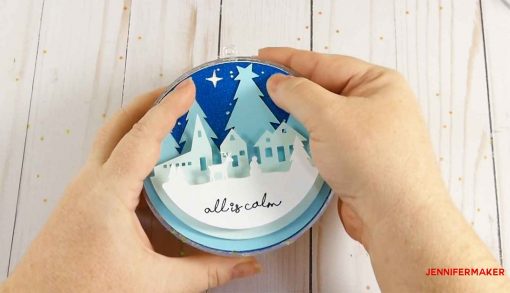
Pour white glitter and/or faux snow on top of the “calm” scene, doing your best to keep it in the middle.
Put the other half of the clear plastic ornament shell on. Don’t worry if it doesn’t click into place — just get it on as tightly as you can. Make sure the hole at the top of this half matches the hole at the top of the other half. 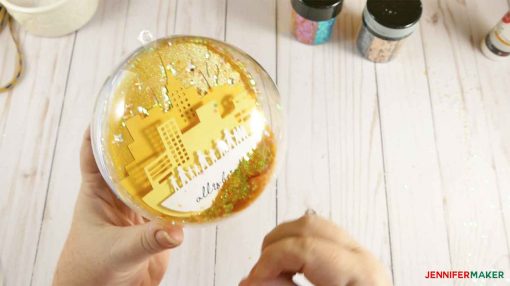
Glue the edge of the clear ornament ball with hot glue to seal it closed, covering it with ribbon as you go.
Put some ribbon through the whole, tie a bow (and knot it in place), then tie a knot in the other end.
And that’s all there is to it! The glitter/faux snow will stick to any hot glue inside the ornament, so you won’t even notice it. And the glitter also likes to stick to the cut out bits in the sky in the “all is bright” scene thanks to the spray adhesive.
This ornament is surprisingly sturdy. I dropped it in the snow — no problem. Later I dropped it on my living room floor when I was playing with my dog. Again, no issues. Everything is contained inside the hot glue keeps everything closed. And I have not detected any glitter contamination from one scene to the other!
Get my free cut files for the Glitter Ball Ornament
I hope you’ll make a glitter ball ornament, too! If you do, please share a photo with me at [email protected] or tag me on social media with #jennifermaker.
VisitCome back tomorrow to open the Day 13 gift of my MAKE IT MERRY: 25 Days of Maker Projects Christmas! You can be notified of when there is a new gift ready to open on my blog, just fill out this form!
Love,

Want to remember this? Save the DIY Glitter Ball Ornament to your favorite Pinterest board!


Will your 25 days of Christmas crafts stay on your website or will they be removed after Christmas?
BTW I love your site! So many great projects!
Yes, all of these projects will stay on my blog after Christmas. 🙂
Thank you for the inspiration and great tutorial!
MERCI beaucoup pour vos partages.
Que Noël soit l’annonce d’un bonheur grandissant dans la joie et la paix!
Can this file be used with sure cuts alot?
I believe so. If Sure Cuts a Lot accepts SVG files, then yes.
These are simply stunning. I would love to craft like this.