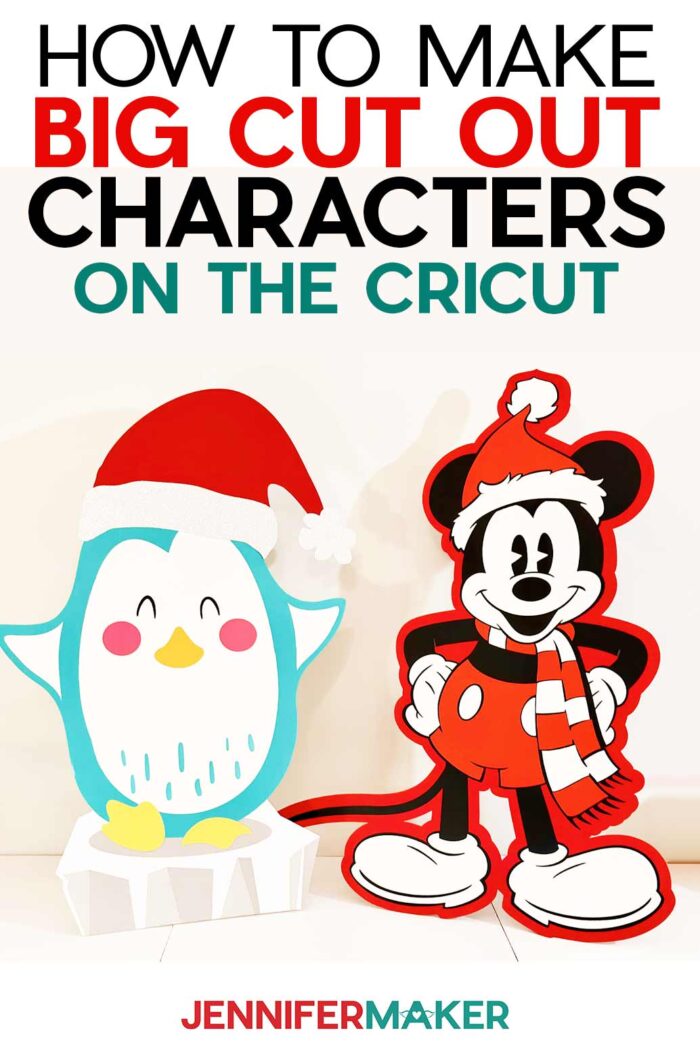
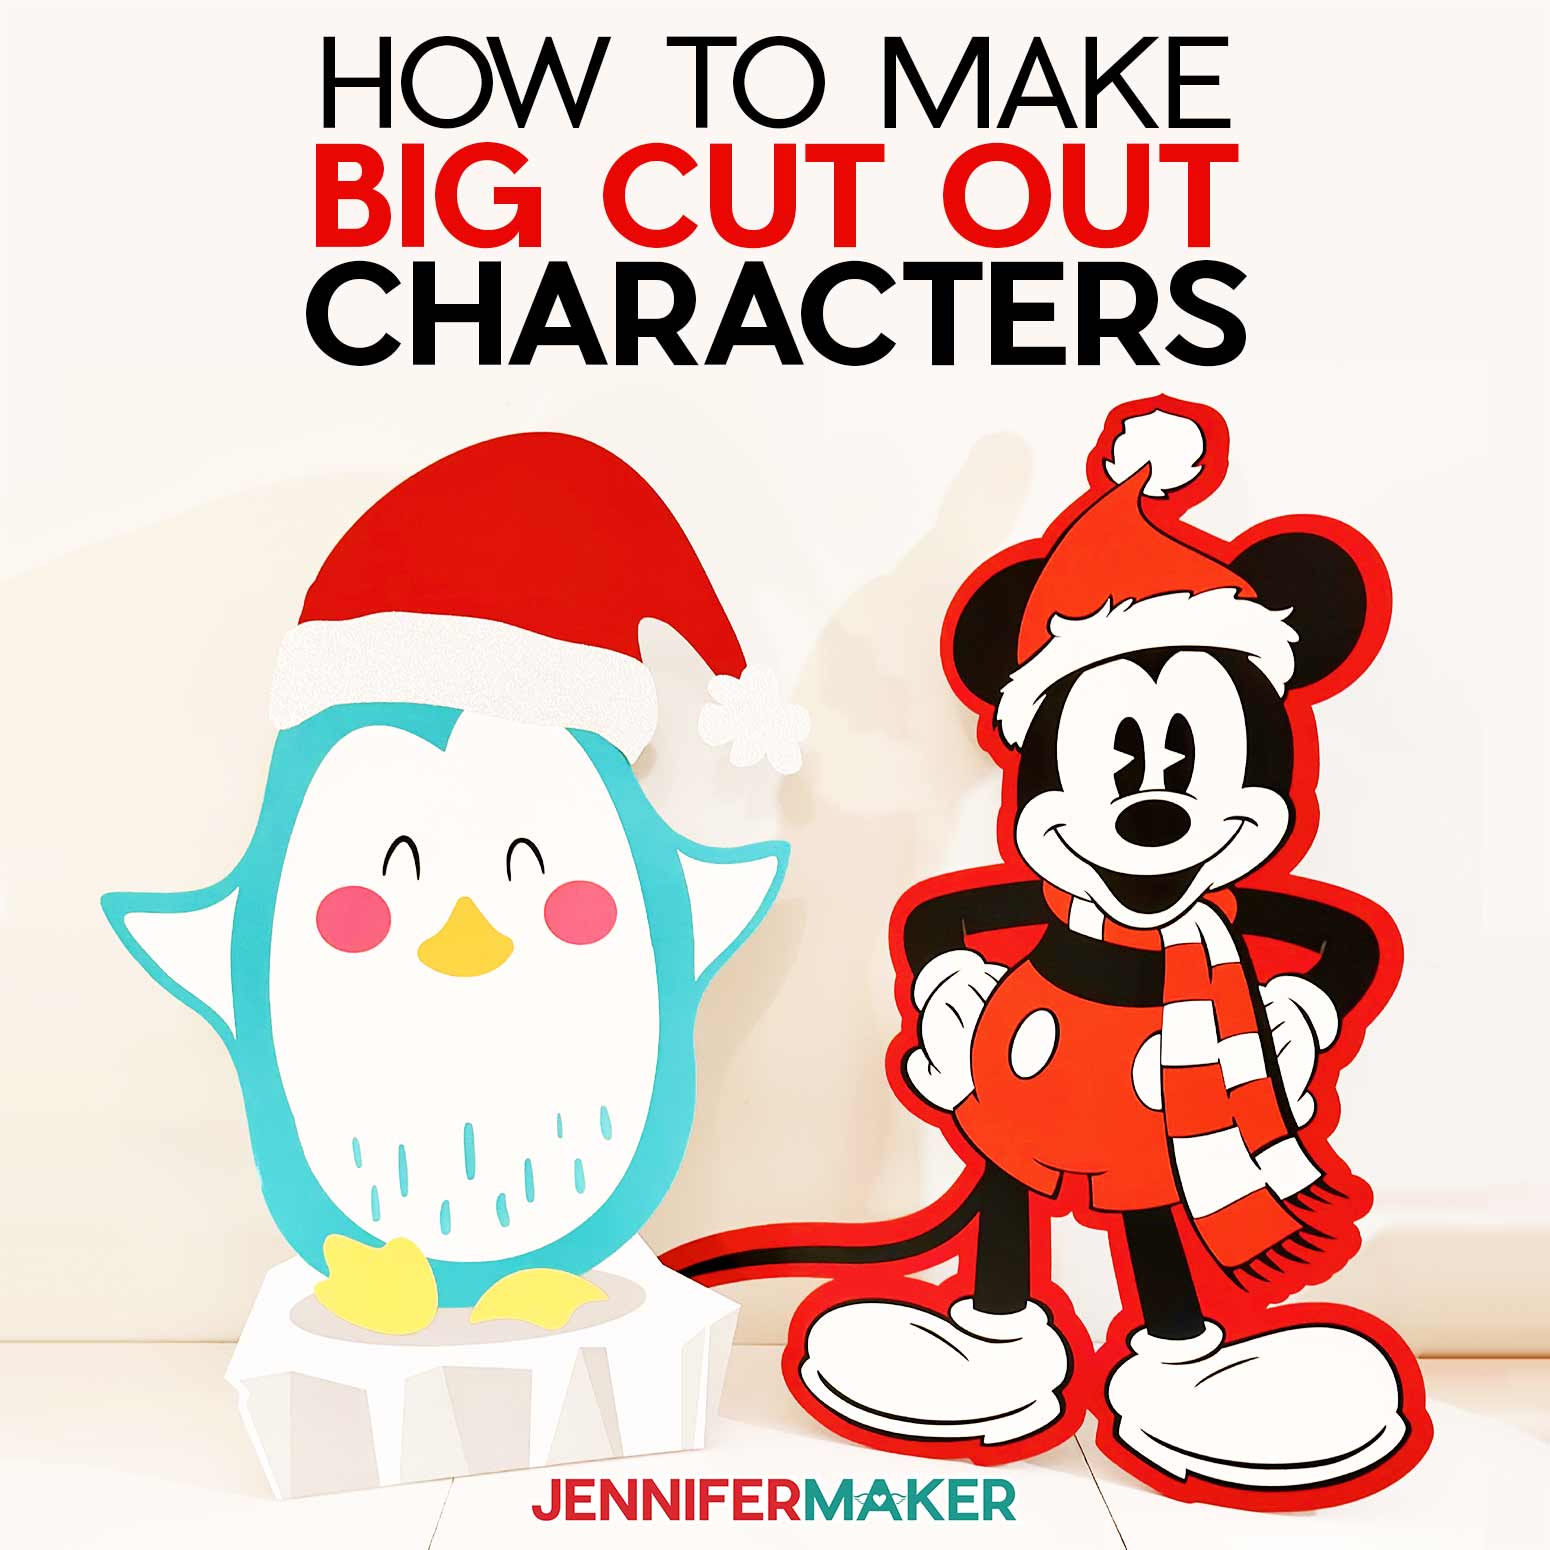
Learn how to make DIY cut out characters bigger than your mat!
Sometimes, you just need to go BIG! And with some creative cutting and gluing, a Cricut can totally help make projects larger than your mat. I showed you a version to make a cardstock Baby Yoda. And of course the giant unicorn decal. But what if you want to make DIY cut out characters that stand up and much as they stand out? I’ve got a new project just for you for Day 2 of the Merry Maker Mingle!
Watch the full step-by-step DIY cut out characters tutorial:

 What is the Merry Maker Mingle? This is an annual tradition here at JenniferMaker! Every day for the first 25 days of December, we gift you with a brand new project, design, tutorial, and video for something YOU asked us to make. On top of that, we host a giveaway with 25 days of prizes. Some of the amazing prizes are Cricut cutting machines, sewing machines, gift cards, and beautiful print editions of our popular Cricut Coach Playbook. You can even earn bonus entries for sharing photos of the daily projects! Click here to learn more about the Merry Maker Mingle!
Character cutouts are a hit at birthday parties, showers, and business openings, but they have to be pretty big to make a splash. Much bigger than a cutting mat!
Luckily, when a design is too big to fit on a standard mat, Cricut Design Space has helpful tools to make your DIY cut out characters come to life! With shapes, alignment, and the Slice tool, you can make big designs into pieces small enough to cut. I’ll show you how to make it work on a multi-layer design, but the process is even easier on simple projects with one large layer.
Want to practice the assembly before trying out the slicing techniques? Good news! I’ve included pre-sliced versions of the penguin and stand in the download file. You can also find a link to the pre-sliced Mickey I’ve made for you below. If you want to make the Mickey, please note that you will need to purchase the file from Cricut Design Space.
I have some secret tips to put the pieces back together with Scotch tape and a ball-tip burnishing tool (or even a spoon!) that will make the reassembled cardstock look seamless. You’ll be so impressed with your own work!
Depending on your project, you’ll need a lot of high-quality cardstock, craft glue, a brayer, and a 12″ x 12″ Green StandardGrip Mat to cut multi-color designs. I used a Maker 3, but you can use any Maker or Explore machine, even a Cricut Explore Air. If you have a Cricut Joy, try this technique the next time a project is just a bit too large for your Cricut machine!
I used foam core for stability in my last larger than mat project blog post, but tried corrugated yard sale signs this time–they’re both great options! I’ll show you how to cut them safely with a craft knife and self-healing mat. Adhesive spray works well to attach the plastic layers to the DIY cut out characters. I’ll also show you how to make a new stand design to keep your DIY cut out characters upright!
There are so many cute characters available in Design Space, even Disney images like the Mickey I used! I’ll show you how to pick character images for custom cutouts in the video.

Let me show you how easy it is to make DIY cut out characters! This post contains some affiliate links for your convenience (which means if you make a purchase after clicking a link I will earn a small commission but it won’t cost you a penny more)! Read my full disclosure policy.
Materials to Make DIY Cut Out Characters
View my Amazon shopping list with the exact items we used to make this project!
For the Penguin, I used:
- 100 lb 12″ x 12″ Cardstock in Blu Raspberry/Teal
- 100 lb 12″ x 12″ Cardstock in Sweet Tooth/white
- 80 lb 12″ x 12″ Cardstock in Black
- 100 lb 12″ x 12″ Cardstock in Dove Gray
- 100 lb 12″ x 12″ Cardstock in Silver Glitter
- 80 lb 12″ x 12″ Cardstock Neutrals – I used White and Stone
- 80 lb 12″ x 12″ Cardstock Brights – I used Sunflower, Tangerine, Begonia, and Rouge
- 100 lb 12″ x 18″ Cardstock in white – for the stand template
- Two sheets of 24″ x 36″ 4mm thick Corrugated Plastic Yard Signs
For Mickey, I used:
- 100 lb 12″ x 12″ Cardstock in Sweet Tooth/white
- 80 lb 12″ x 12″ Cardstock in Black
- 100 lb 12″ x 12″ Cardstock in Candy Apple Red
- 100 lb 12″ x 12″ Cardstock in Red Rose
- 80 lb 12″ x 12″ Cardstock Neutrals – I used Graphite
- 100 lb 12″ x 18″ Cardstock in white – for the stand template
- Two sheets of 24″ x 36″ 4mm thick Corrugated Plastic Yard Signs
For both, you’ll need:
- A way to cut your cardstock. I used the amazing Cricut Maker 3 but you can also use the original Maker or an Explore series machine with the Fine Point Blade
- Cricut Green StandardGrip Machine Mat, 12″ x 12″
- Bearly Art Precision Craft Glue
- Spray Adhesive
- Scotch Tape
- Cricut TrueControl Knife – to cut the Corrugated Plastic on a Cricut Self Healing Cutting Mat
- Ball-tip stylus
- Brayer
- Westcott Stainless Steel Cork Backed Ruler – 36″
- Cricut Spatula
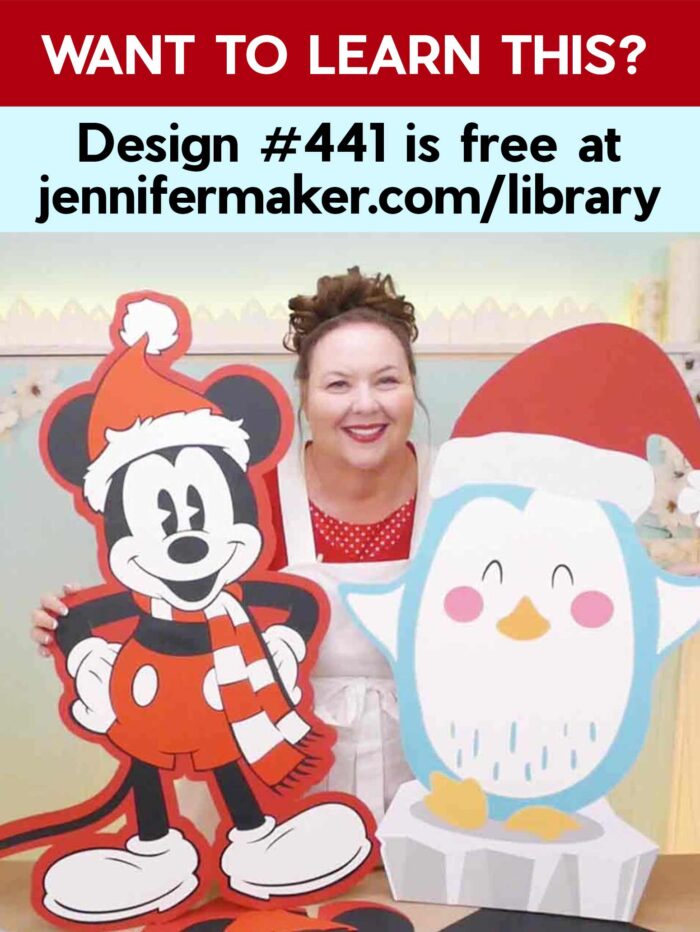
- Design #441 (My free SVG/PDF/DXF design files available in my free resource library – get the password by filling out the form at the bottom of this page)
Entirely Optional:
- Cute holiday shoes — I wore these Christmas Snowglobe “Make a Wish” shoes in my tutorial video, if you also need a pair in your life.
How to Make DIY Cut Out Characters

DIY Cut Out Characters
Learn how to make very large DIY cut out characters larger than your mat that stand up!
Materials
- Several 24" x 36" 4mm thick Corrugated Plastic Yard Signs - I used two for the Penguin and two for the Mickey
- 5 Sheets 100 lb 12" x 12" Cardstock in Blu Raspberry/Teal for the Penguin
- 9 Sheets 100 lb 12" x 12" Cardstock in Sweet Tooth (white) for the Penguin's body details and Mickey's white areas
- 8 Sheets 80 lb 12" x 12" Cardstock in Black for the Penguin's eyes and # Sheets for Mickey
- 6 Sheets 100 lb 12" x 12" Cardstock in Red Rose for Mickey's base
- 3 Sheets 100 lb 12" x 12" Cardstock in Candy Apple Red for Mickey's red clothes
- 2 Sheets 100 lb 12" x 12" Cardstock in Dove Gray for the Penguin's shadow and iceberg
- 2 Sheets 100 lb 12" x 12" Cardstock in Silver Glitter for the Penguin's hat trim
- 6 Sheets 80 lb 12" x 12" Cardstock Neutrals - I used White and Stone for the Penguin's iceberg and Graphite for Mickey's gray accent
- 5 Sheets 80 lb 12" x 12" Cardstock Brights - I used Sunflower, Tangerine, Begonia, and Rouge for the Penguin
- 5 Sheets 100 lb 12" x 18" Cardstock in white for the stand template
- Design #441 (My free SVG/PDF/DXF design files available in my free resource library - get the password by filling out the form at the bottom of this page)
Tools
- A way to cut your cardstock. I used the amazing Cricut Maker 3 but you can also use the original Maker or an Explore series machine with the Fine-Point Blade
- Cricut Green StandardGrip Machine Mat (12"x12")
- Bearly Art Precision Craft Glue
- Scotch Magic Tape
- Cricut TrueControl Knife - to cut the Corrugated Plastic
- Ball-tip stylus - to burnish the taped seams
- Brayer
- Spray Adhesive
- Westcott Stainless Steel Cork Backed Ruler - 36"
- Cricut Spatula
- Cricut Self Healing Cutting Mat
- Scoring Wheel or
- Scoring Stylus - to create alignment marks on the stand template
Instructions
STEP 1: GET MY FREE CUT OUT CHARACTER FILES
First, download my Giant Penguin SVG/DXF/PDF and Santa Mickey Project Link (see DIY Cut Out Characters) files from my free resource library. It's Design #441. Just go to the red bar at the top and look for Libraries, then either click Get a Password (if you don't yet have one) or click Enter the Library. You can find the pattern by searching the page for design 441 and then click it to download.
The download folder includes PDFs to cut by hand, and DXF or SVG files for use with a cutting machine. I'll show you how to prepare the penguin for cutting using the SVG with a Cricut. Then you can use the same steps on other big projects. If you'd prefer to use a pre-sliced image, follow the Cricut Design Space project links to access my prepared Penguin or Santa Mickey. Note that the Mickey file is a licensed image and you will have to purchase it through Design Space before cutting it.
First look for a character you want to make big! Your goal is to find a layered SVG that works. You will want to start with a high-quality SVG, rather than a PNG or other low-resolution image. You will also want to look for a design with a pretty solid base, and extra layers on top. You can upload your own SVG or find so many great options ideal for large cardstock cutouts in Cricut Design Space!
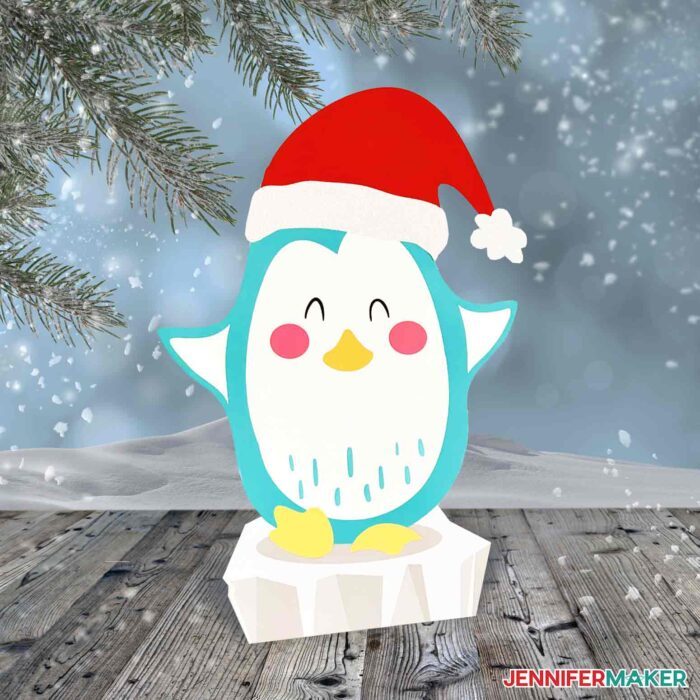
To demonstrate this, we’ve created a giant penguin you can make or simply practice with. Upload the SVG penguin file to Cricut Design Space and add it to your Canvas.
TIP: If you're not sure how to upload an SVG cut file to Cricut design space, watch this helpful video training series I made. If you are on an iPad or iPhone, here is how to download and upload SVG files to the Cricut design space app.
STEP 2: PREPARE YOUR GIANT PENGUIN IMAGE FOR CUTTING
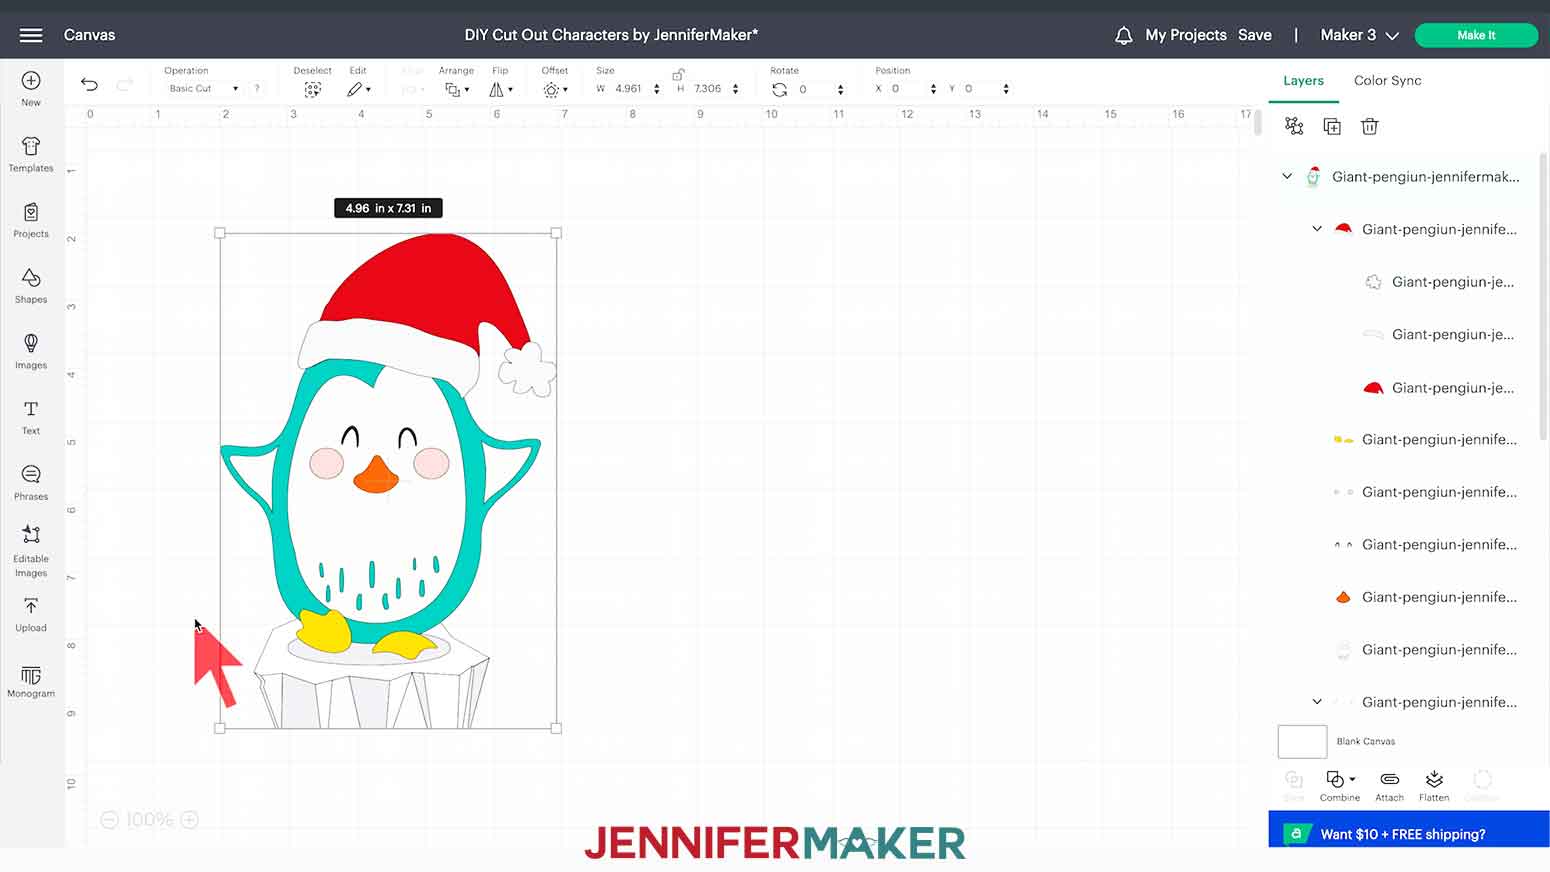
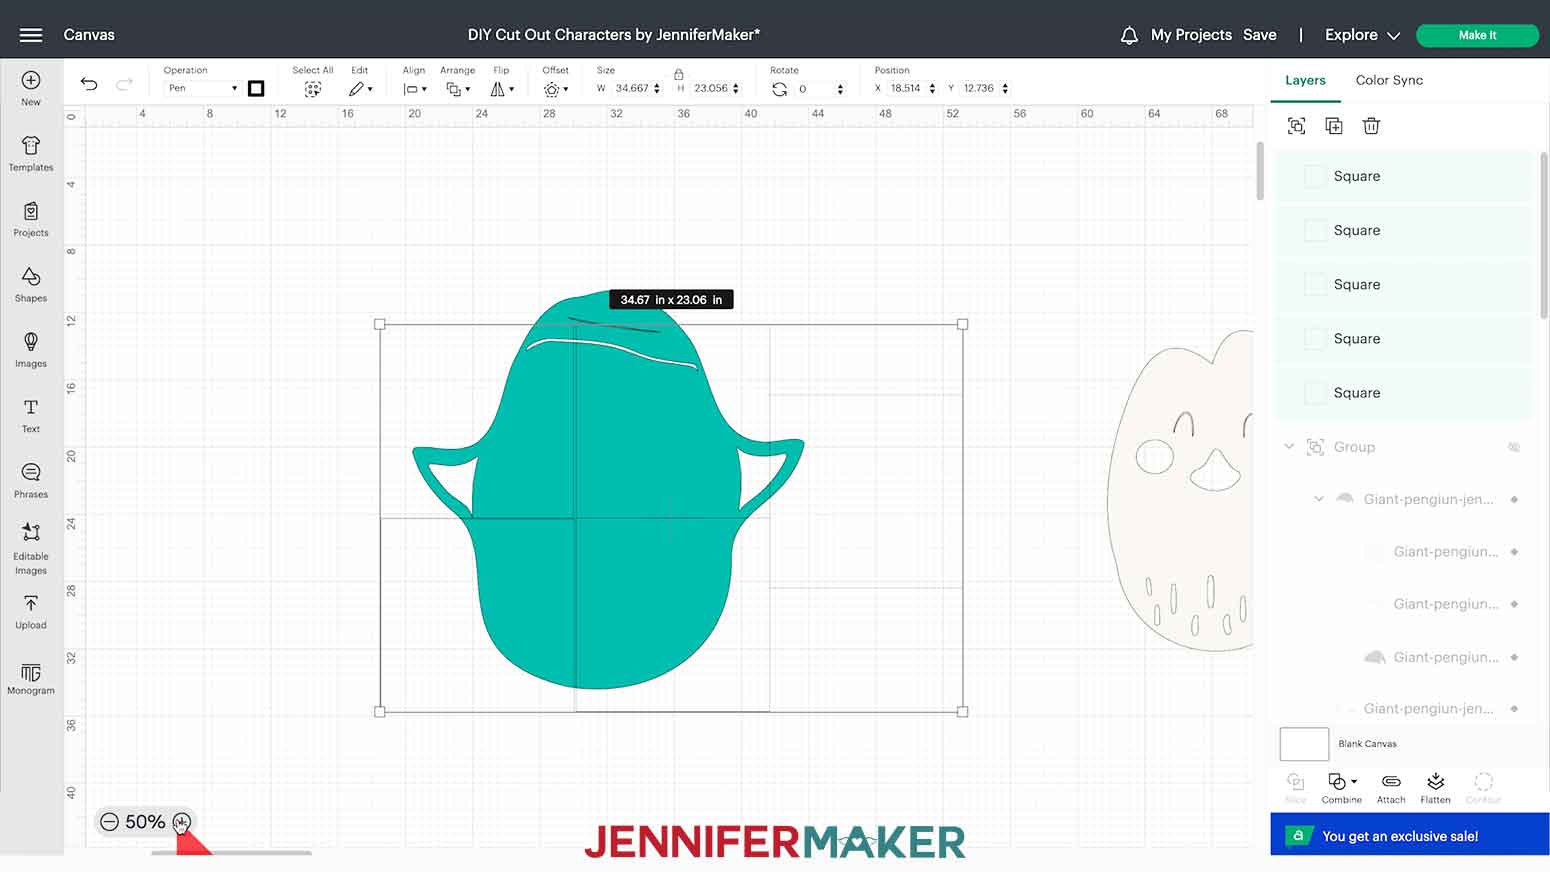
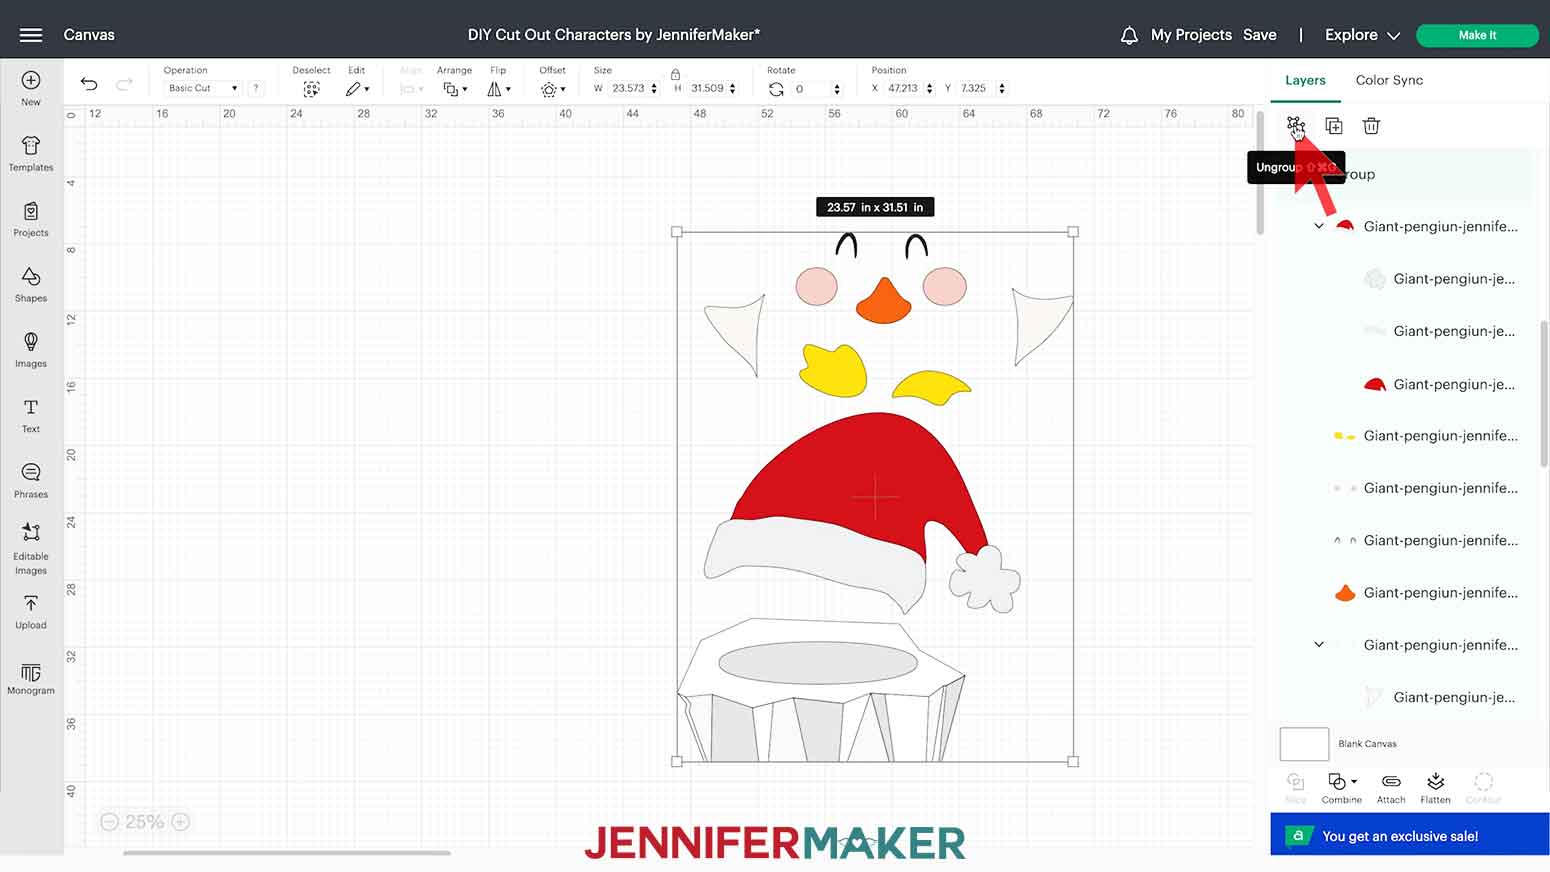
First, resize your image to the desired size. With the lock icon at the top closed to maintain proportions, I enlarged my giant penguin to be 36″ tall. I’m going to zoom out so I can see everything within the window. Use the plus or minus sign on the bottom left of the canvas to zoom in or out.

Next, Ungroup all the layers by selecting the character and clicking Ungroup, then click anywhere on the canvas outside of the bounding box.
This next step is the key to cutting a larger than mat image! You want to break apart the images that are too large into mat-sized pieces. Here’s how!
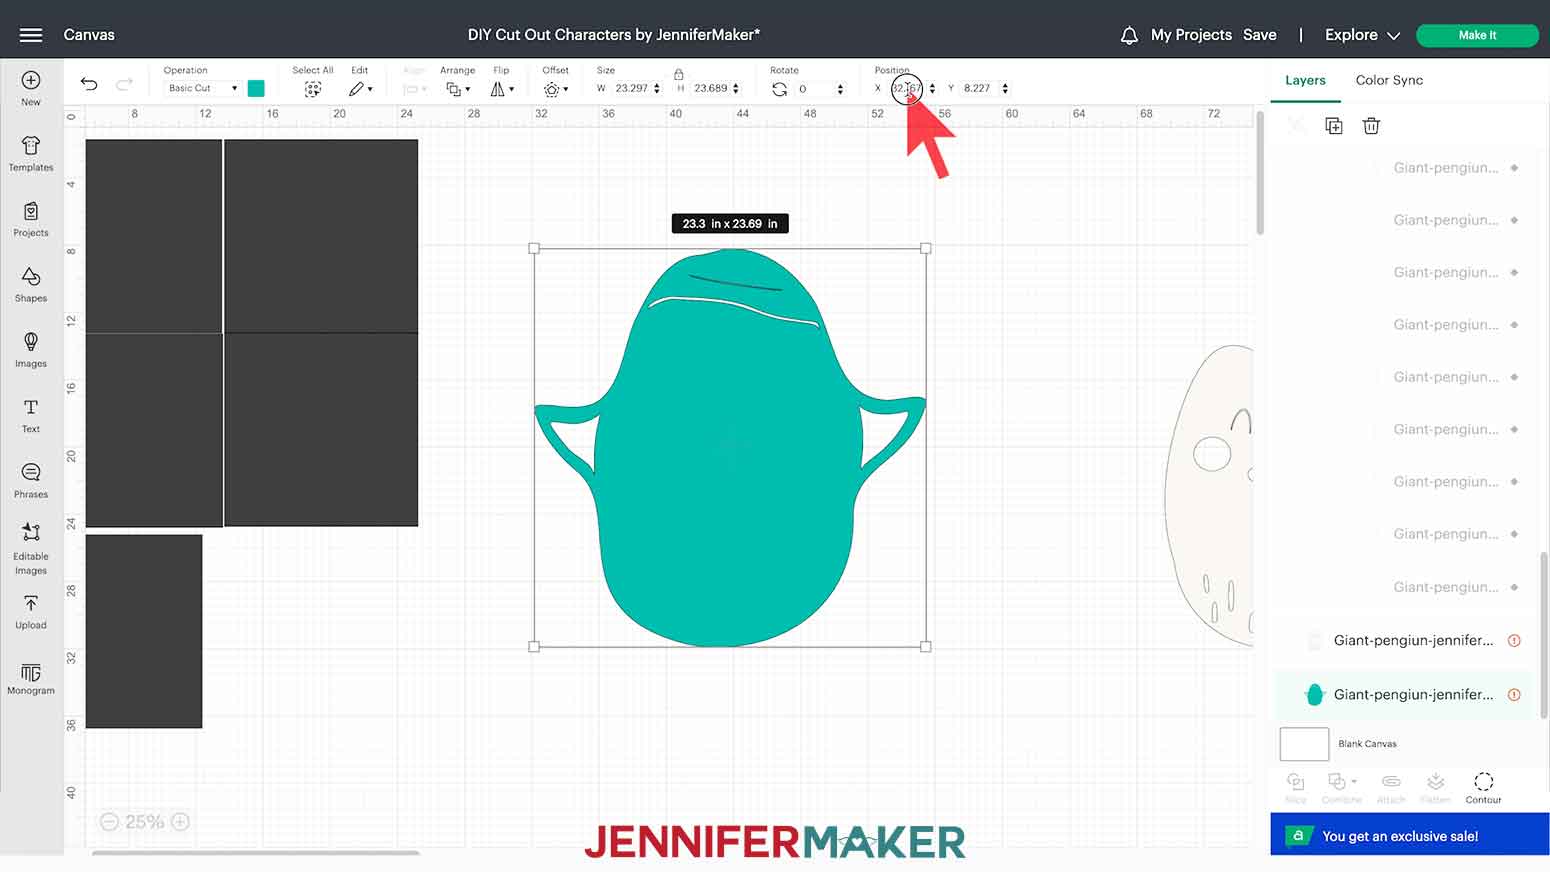
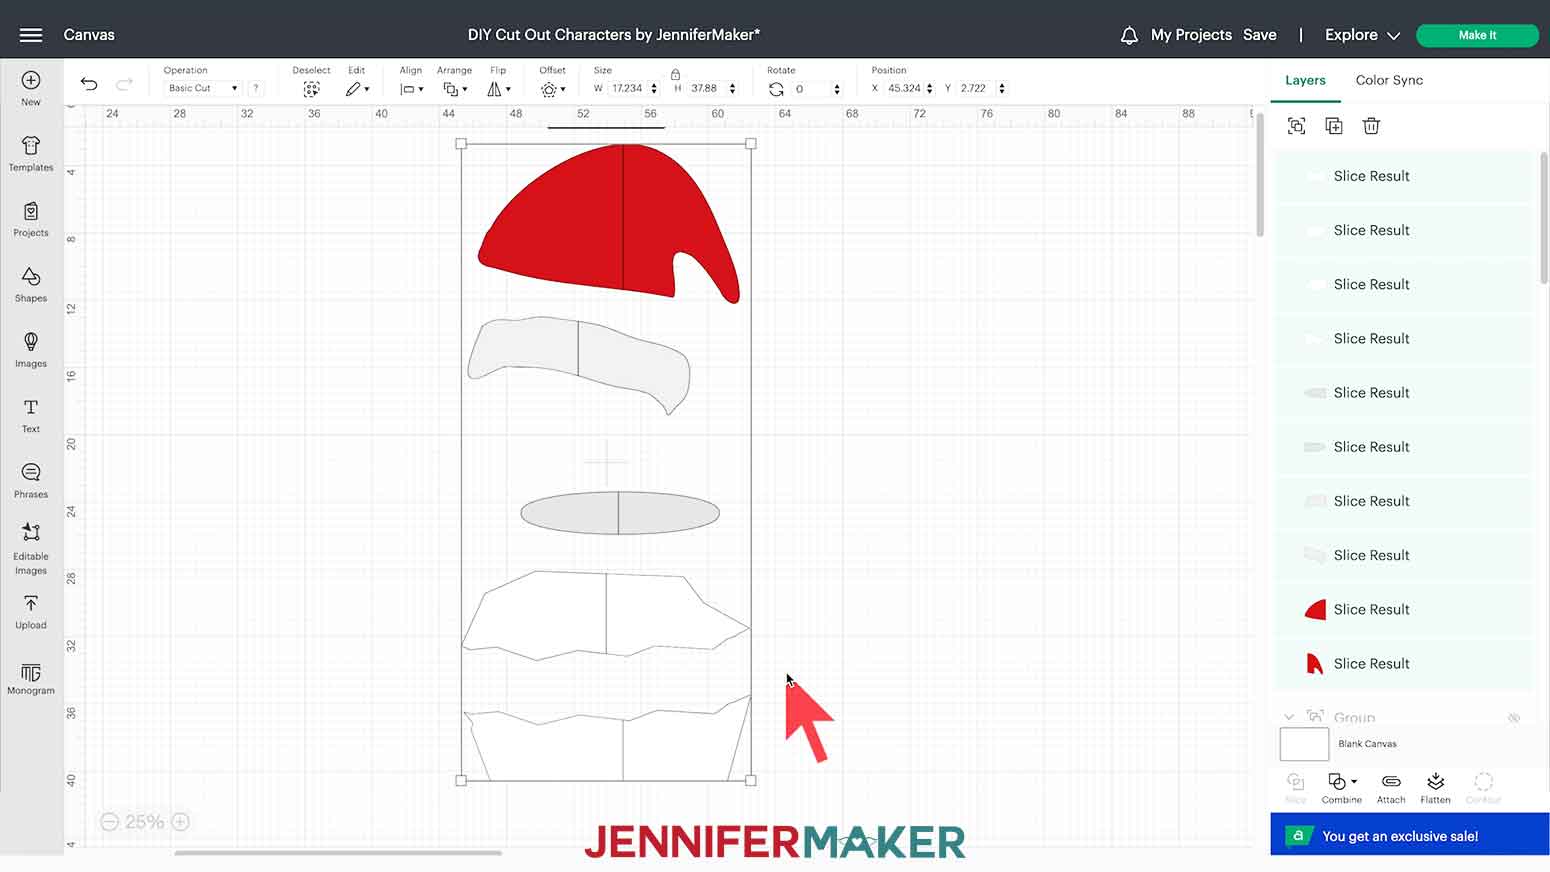
I’ll move some of the smaller layers out of the way to see all the layers I am working with in order to determine what will need to be sliced. You can see that some of his layers, such as his eyes, feet, and nose, are already small enough to fit on 12" x 12" my mat, so we don't have to slice them. I’m also going to move the iceberg out of the way because I’m going to slice that separately.
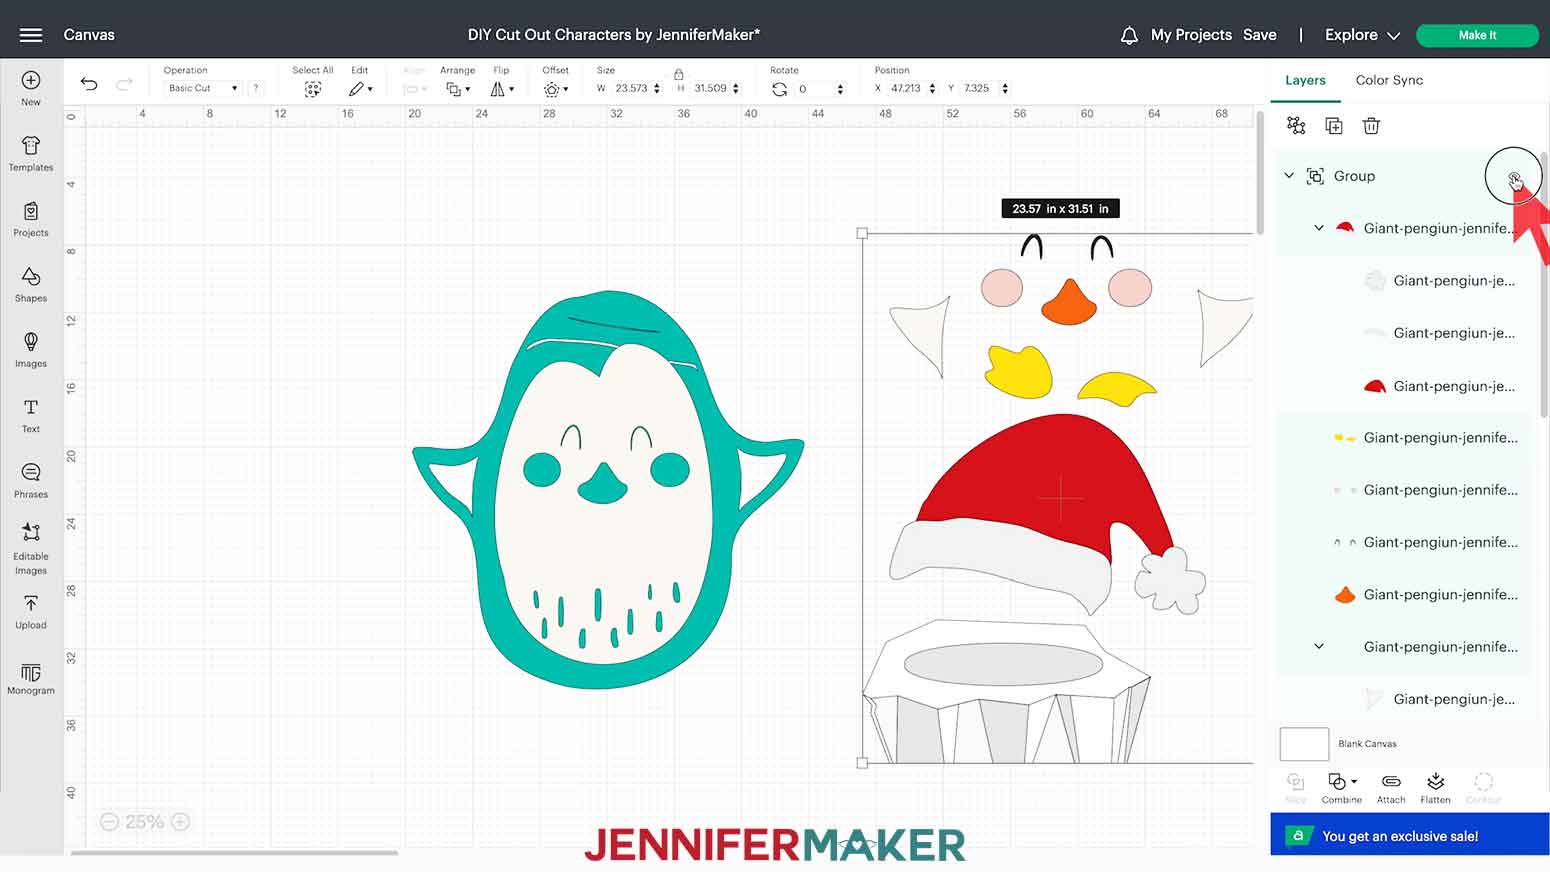
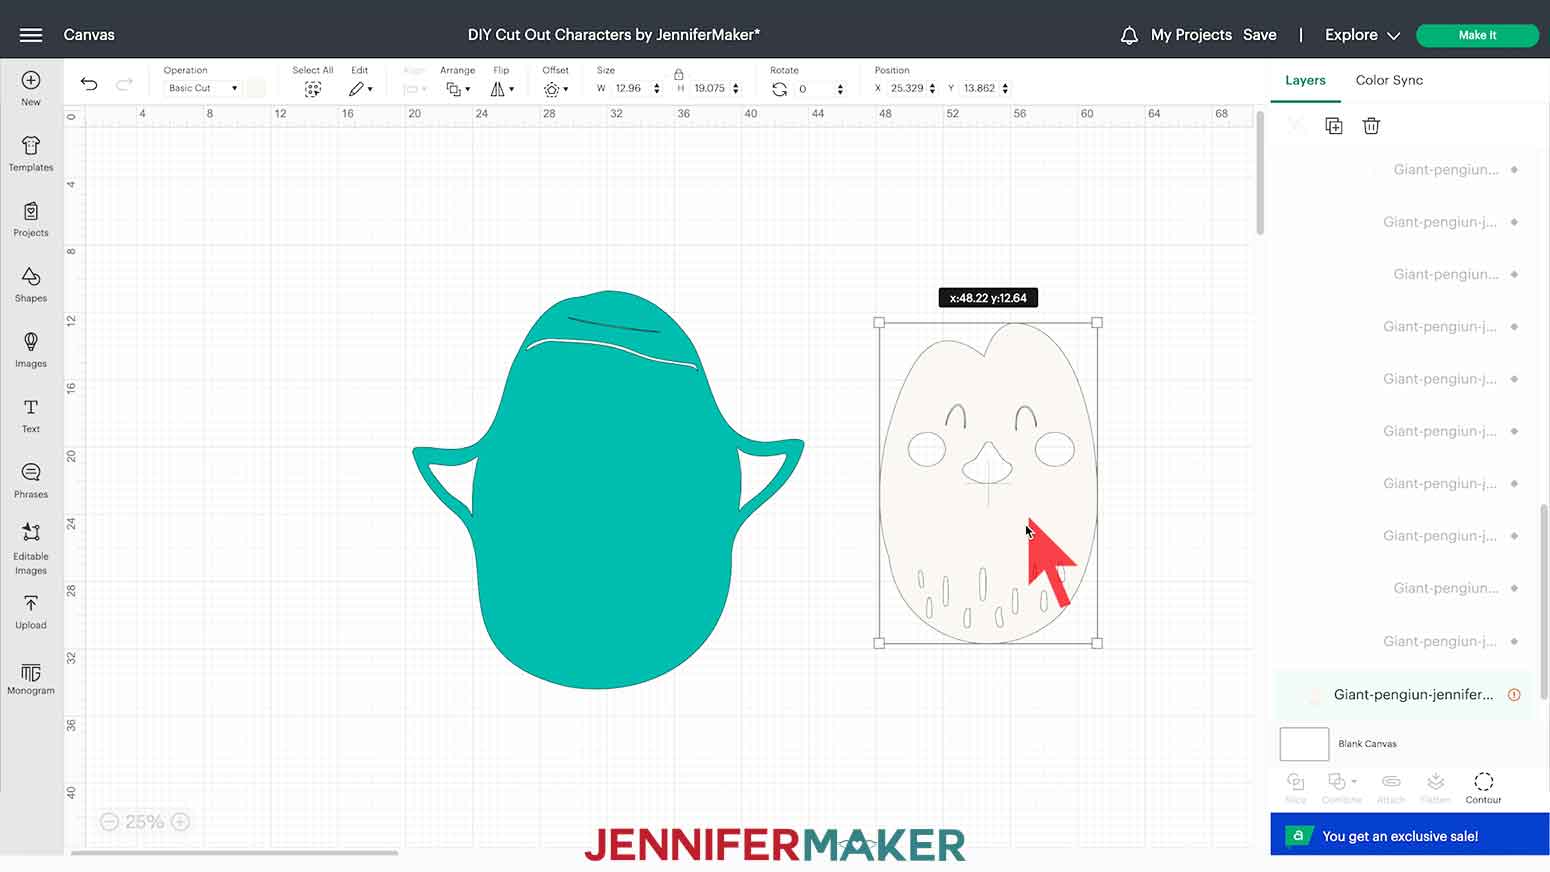
His white and teal body layers are the ones we need to slice, so drag those apart, too.
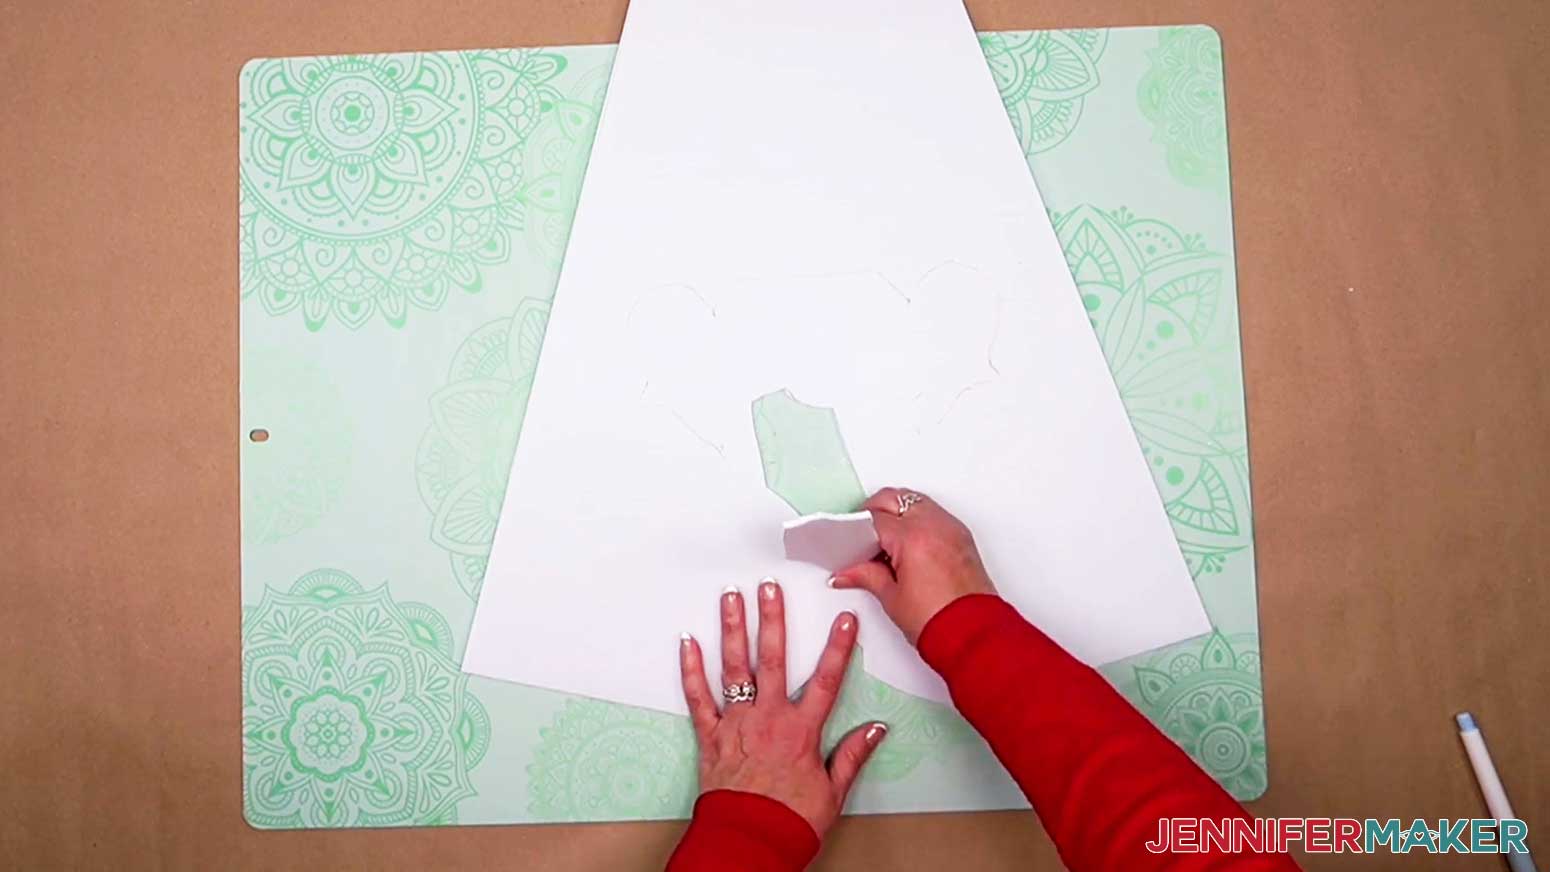
Once you have all layers separated, you’ll notice some strange cutouts on his body layers. Don’t panic! These cutouts are placement guides and are going to help us remember where all the little bits go and align the layers when it’s time to piece them all back together.
Now I need to cut the layers that are too big down into mat-sized pieces. I'll start with the base layer.
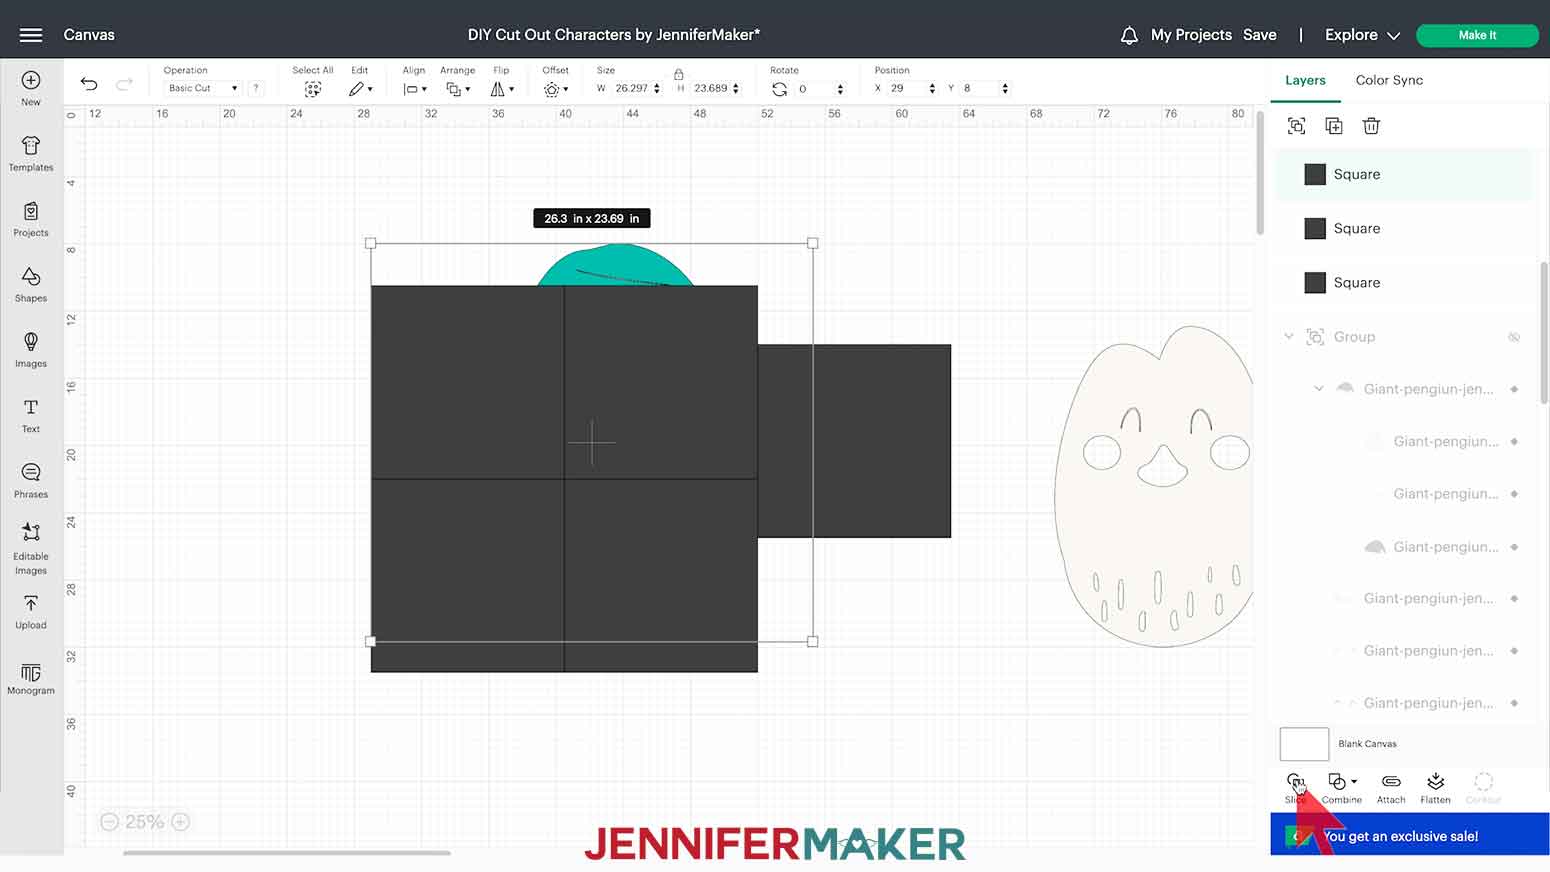
To do this, click on the Shapes icon and select a Square from the free section to add it to your Canvas. With the lock icon closed, adjust the square to the size of your mat’s maximum cutting area. For example, I’m using a 12″ x 12″ mat, so the maximum cutting area is 11.5″ x 11.5", so that is what I will size my square to be.
Next, duplicate the shape until you have enough of these correctly-sized squares to roughly cover your image.
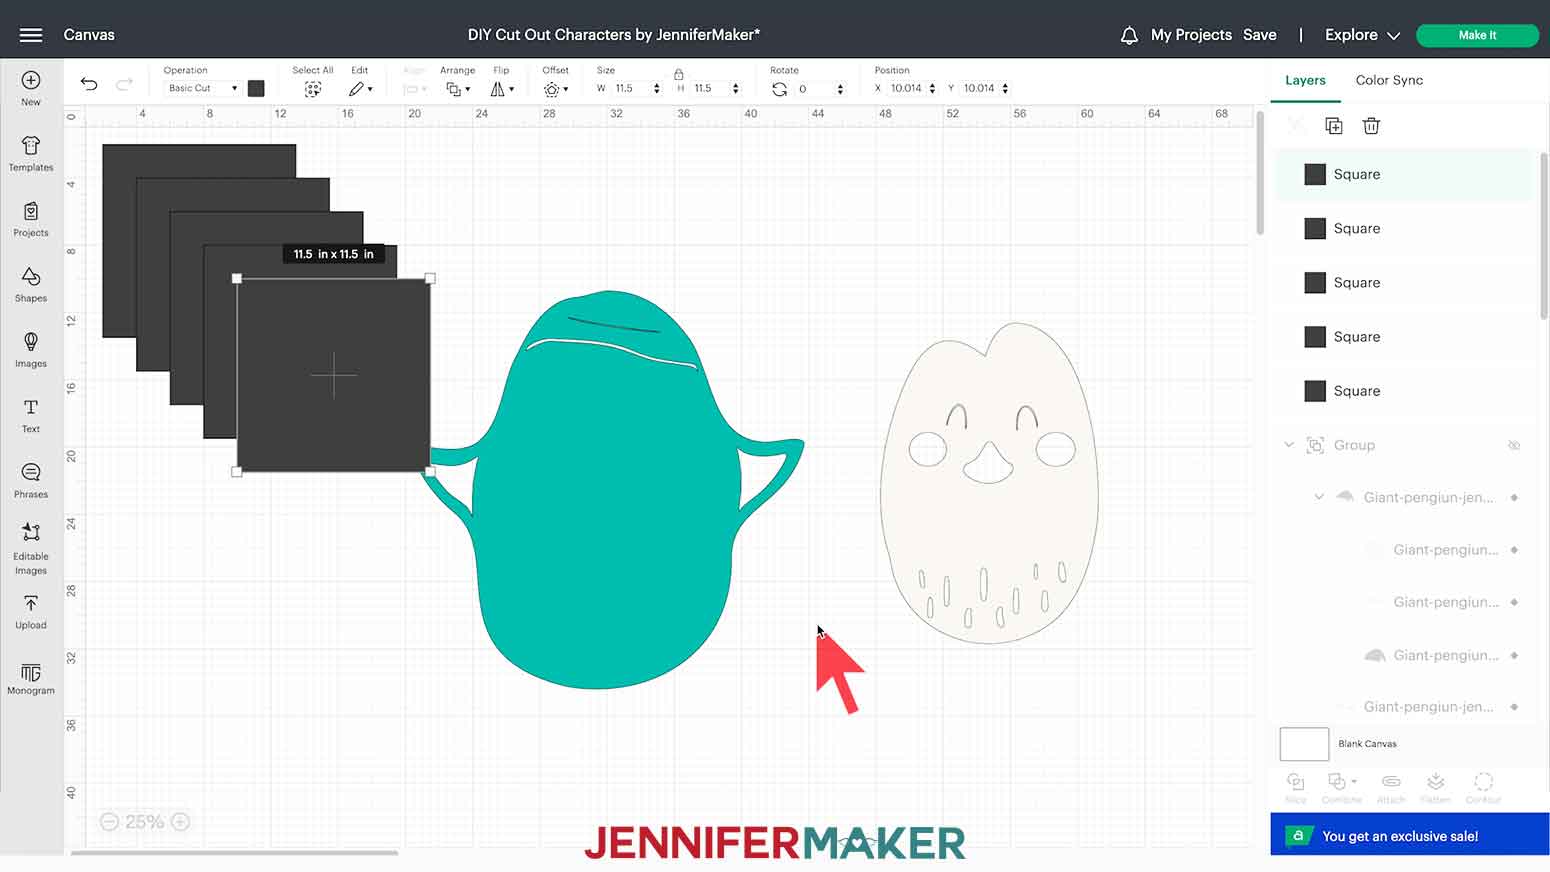
I needed five squares sized 11.5″ x 11.5″ to cover his teal body completely.
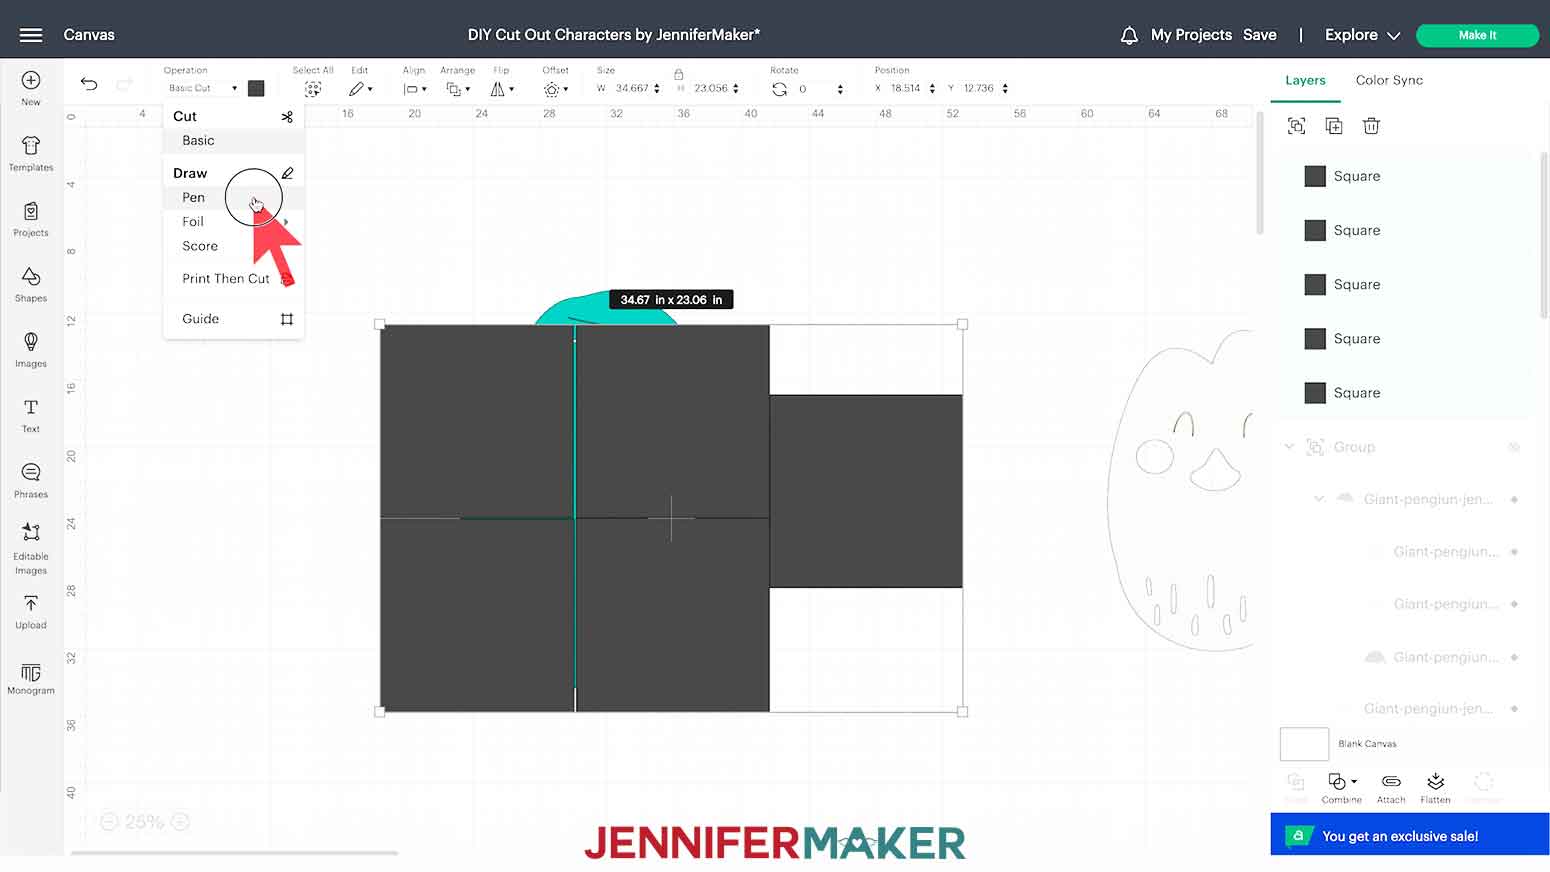
TIP: If you're having trouble seeing if you're covering everything under the squares, change their Operation to "Pen" while laying things out. Just don’t forget to switch back to "Basic Cut" before slicing!
I’m also going to be mindful of where I place the squares so that my slice lines are least visible AND don’t create any oddly-sized bits. Positioning them under shapes from the other layers helps.
To avoid overlaps or gaps during assembly, we need to exactly align the squares. One way to do this is with the X and Y Position fields and your Canvas grid. X indicates the spot on the Canvas horizontally while Y is the vertical spot.
Make sure your grid lines are visible on the Canvas. If they aren't, click on the top left corner of the Design Space canvas until you see them.
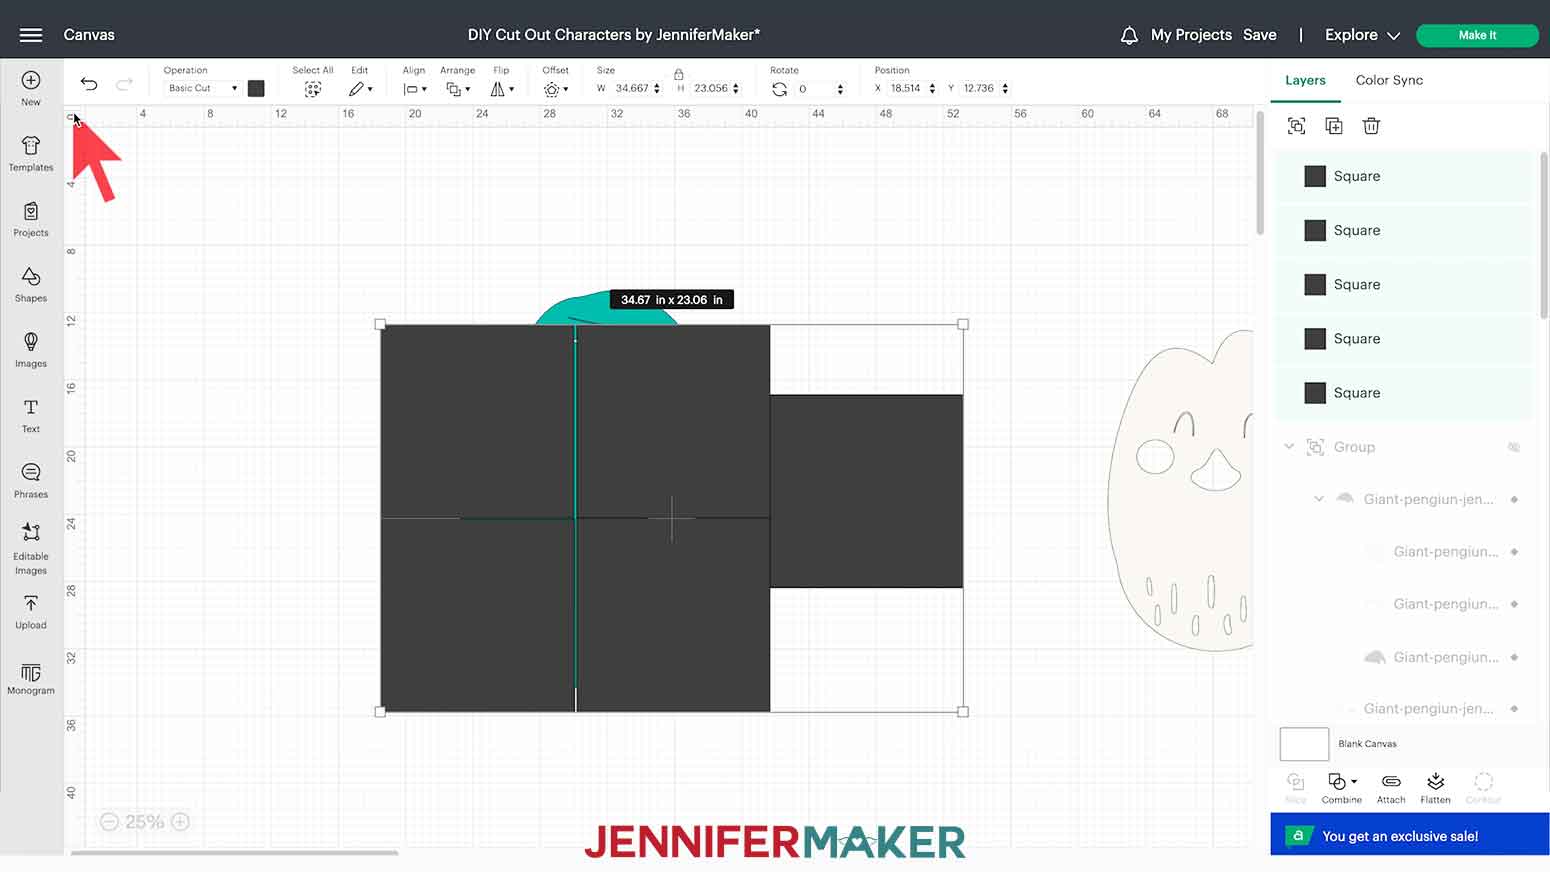
Right now, the teal body layer of my penguin is sitting at about X: 5.5 and Y: 9. Your X and Y numbers might not match exactly to mine, because your teal layer might be in a different position on the canvas. That’s ok. You just want to make sure you line up the left bottom corner of the bounding box of that layer at the inch or half-inch mark. That’s how we can make sure the alignment of the squares is just right! Use the fields at the top to put yours in the same spot if you'd like.
Since the grid squares are in 1/2" increments, I can easily start at the bottom left, and round up to the nearest inch or half-inch in both the X and Y fields at the top.
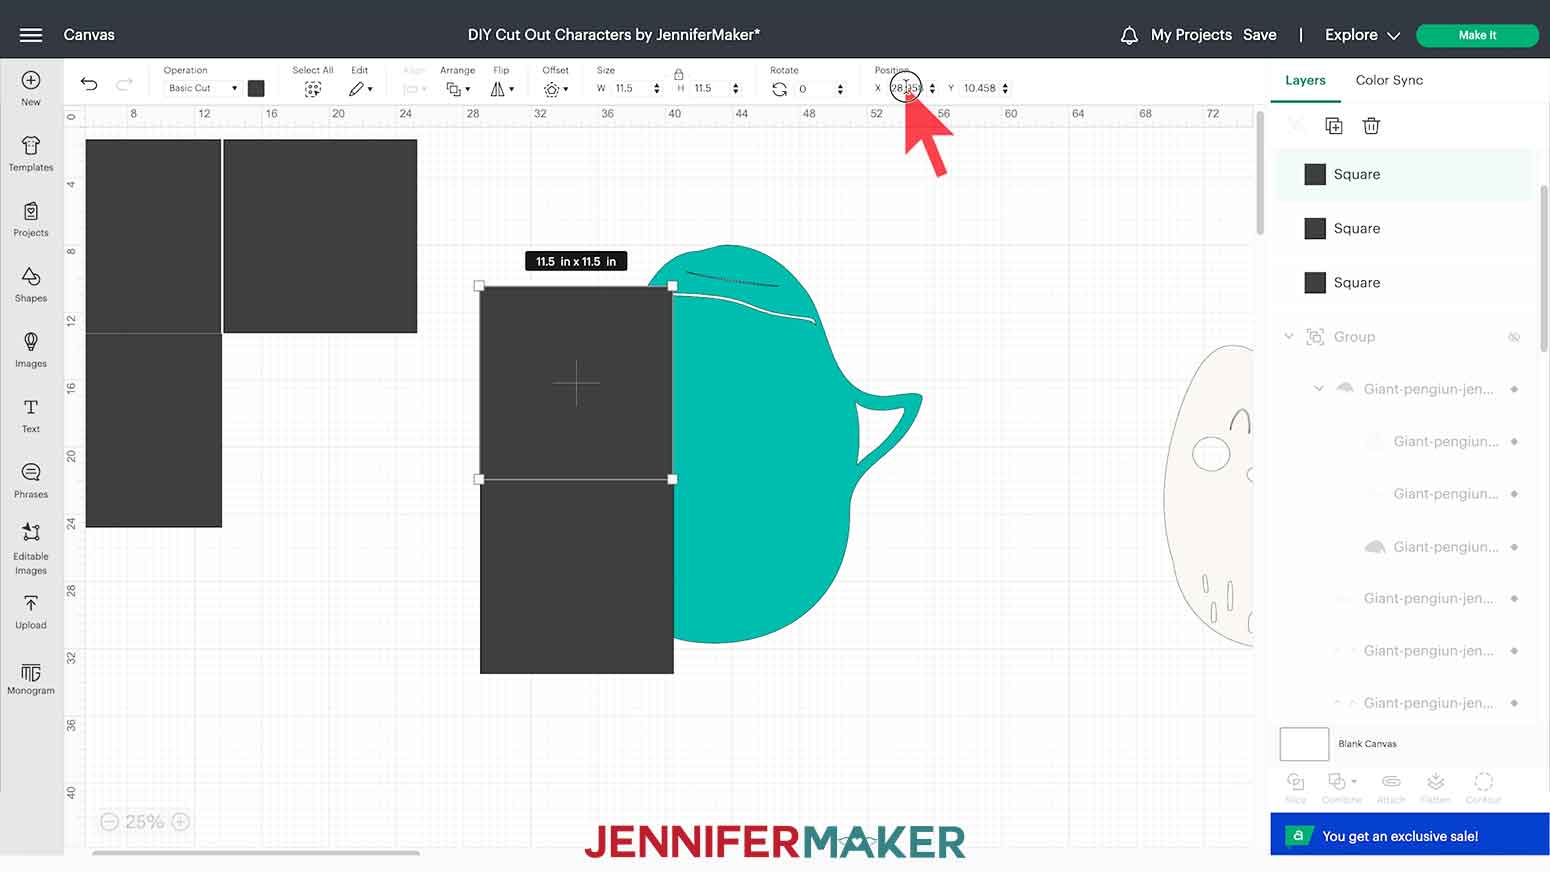
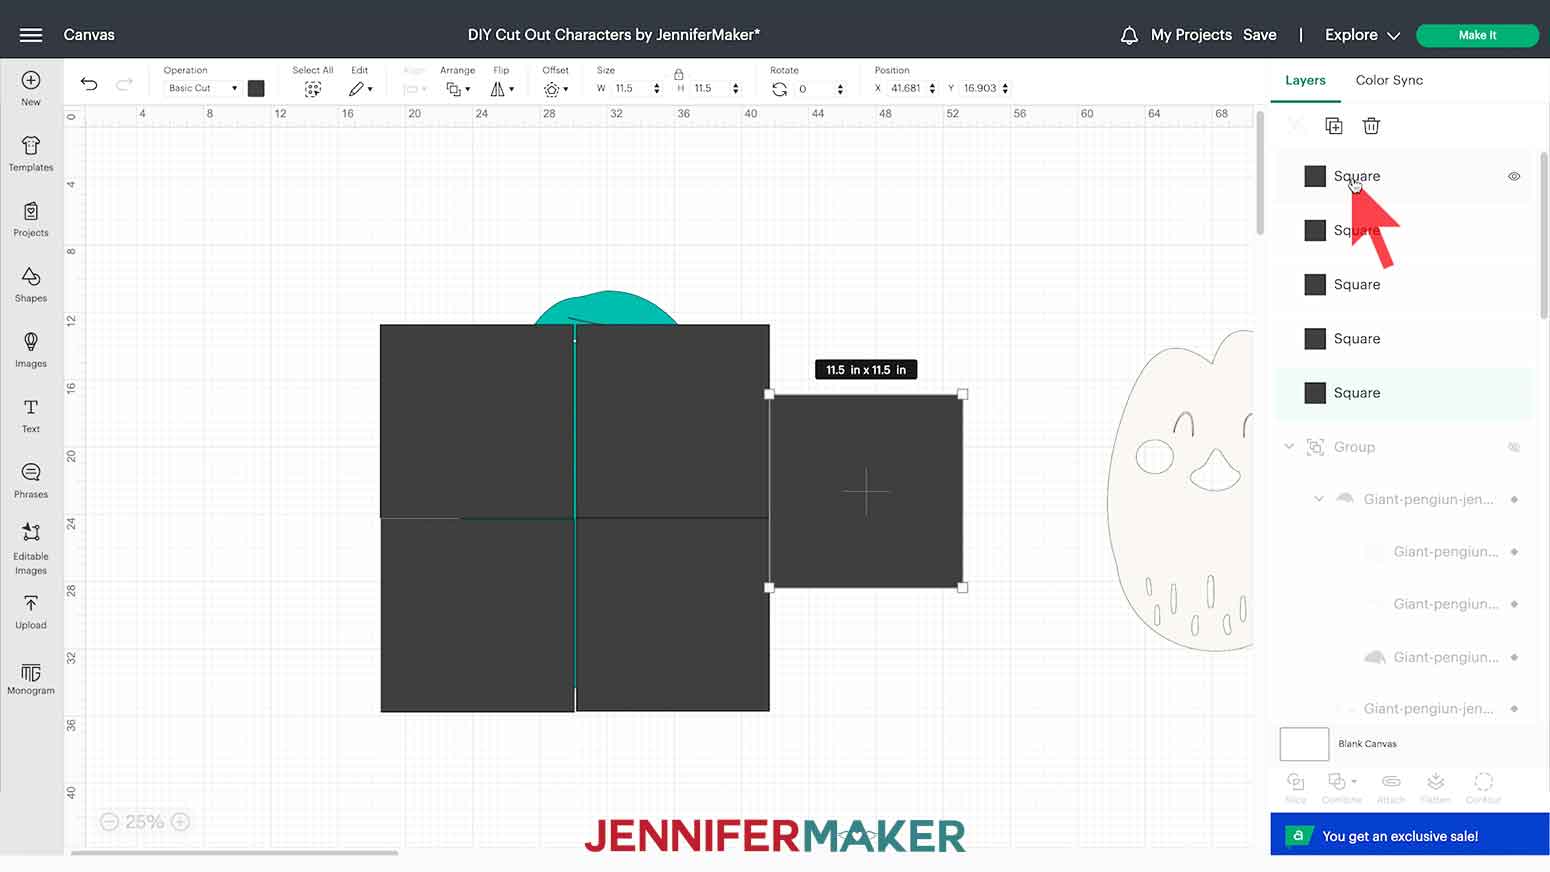
Now I’ll place the rest of my squares based on the placement of the first. The next square will go above the last. I’ll eyeball it on the canvas and then adjust the numbers in the X and Y fields at the top…rounding to the closest inch or half-inch. and so on and so forth, until all of my squares are covering the penguin. A bit of his head at the top left is uncovered, but that's ok. It is smaller than my square so I'll just leave that as the last piece after slicing everything else.
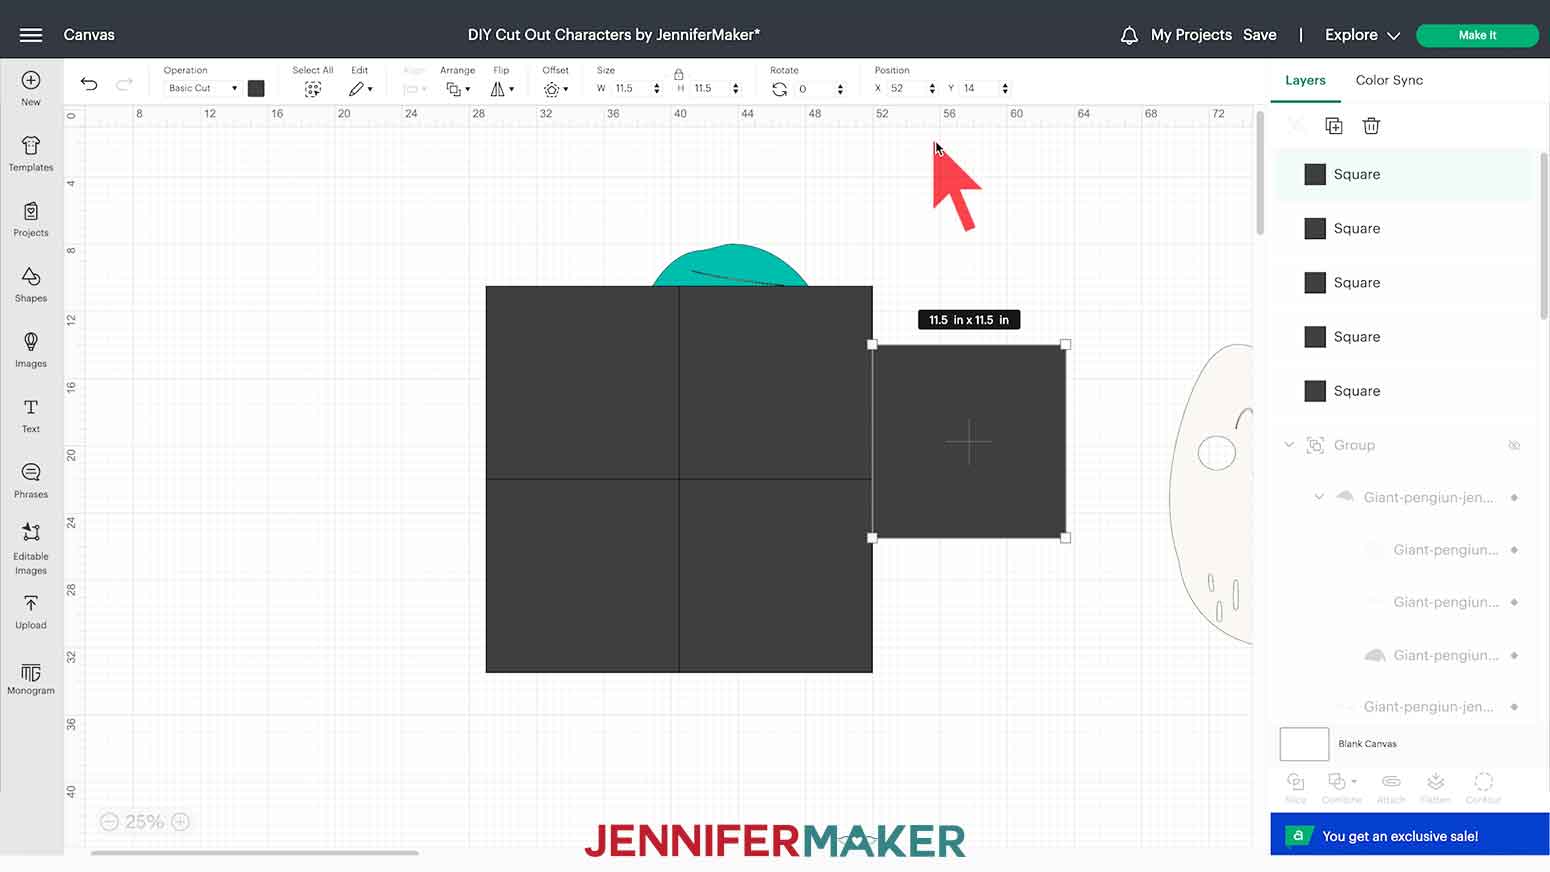
Once all my squares are in place, I’ll double-check where my slice lines have fallen. I don’t want the right wing to become an awkward slice so I’ll shift the teal base layer to the right a bit until I’m happy with the placement. You can always zoom in closer to check the alignment and change to “pen” under operation to see what’s underneath. Just always make sure to change back to “basic cut.”
Since I know these squares don't have gaps or overlaps, I'll make a copy to use on the other pieces by holding my Shift key to select them all in the Layers Panel and then clicking Duplicate. I’m also going to group them for now so I can hide them so I can keep working on the teal layer.
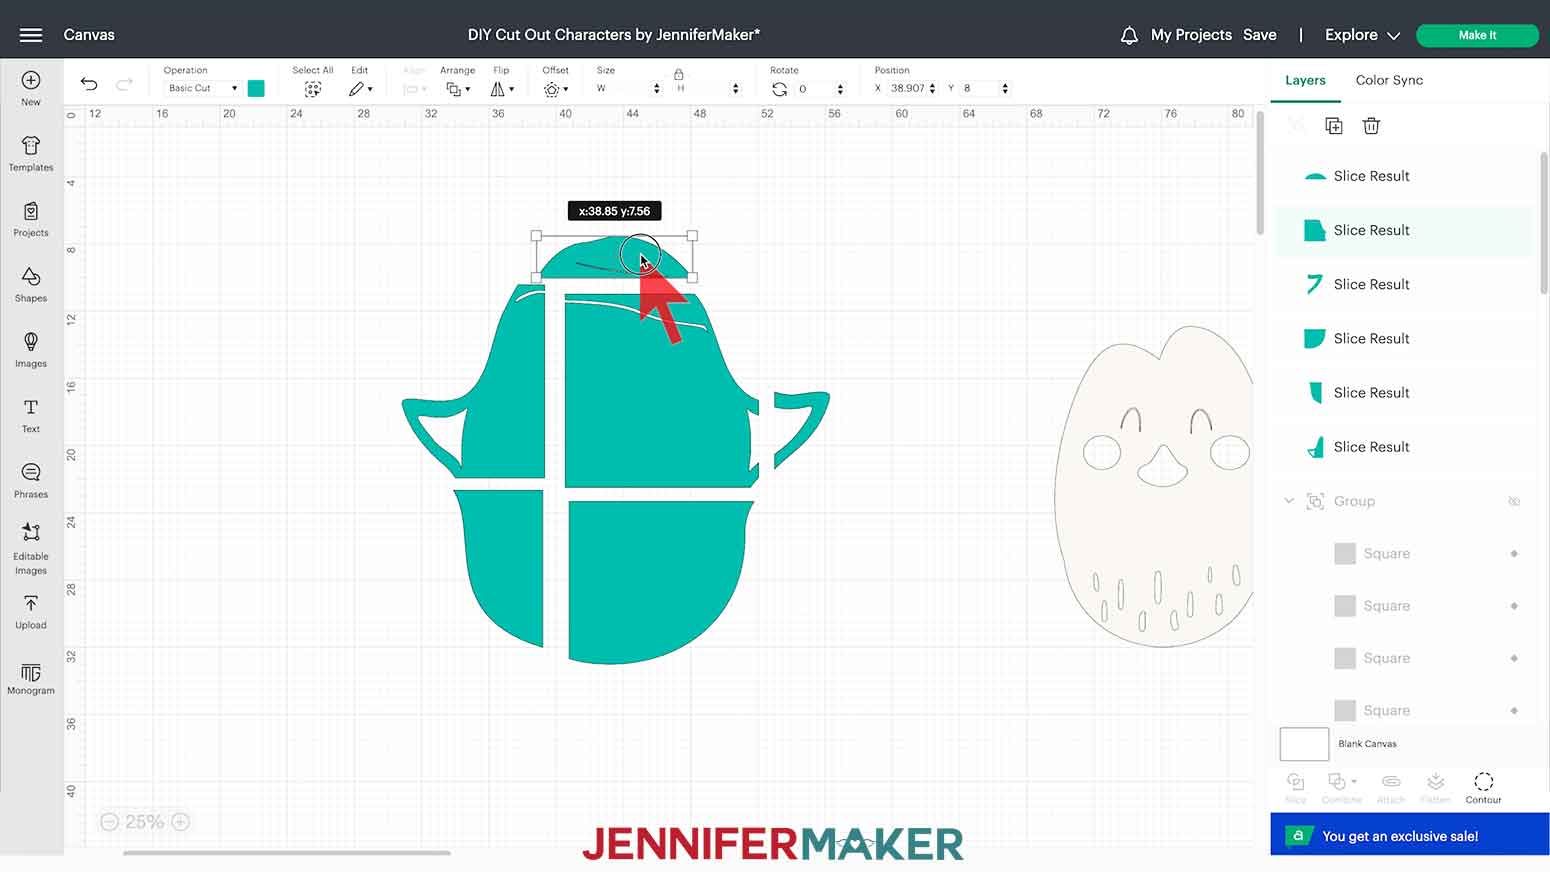
Make sure your original squares are changed back to Cut. Then one at a time, hold Shift to select a square and the layer within it (remember, we’re on teal) and click Slice below the Layers Panel. Repeat until all layers are sliced with the squares. Now, delete the extra sliced bits you do not want until you just have the teal penguin base layer sliced into his mat-sized pieces. You should be left with the teal penguin base layer sliced into his mat-sized pieces. Mine is sliced into 6 pieces, including that little piece of its head.
Remember if you ever make a mistake you can always click the “undo” button at the top to go back to the previous step.
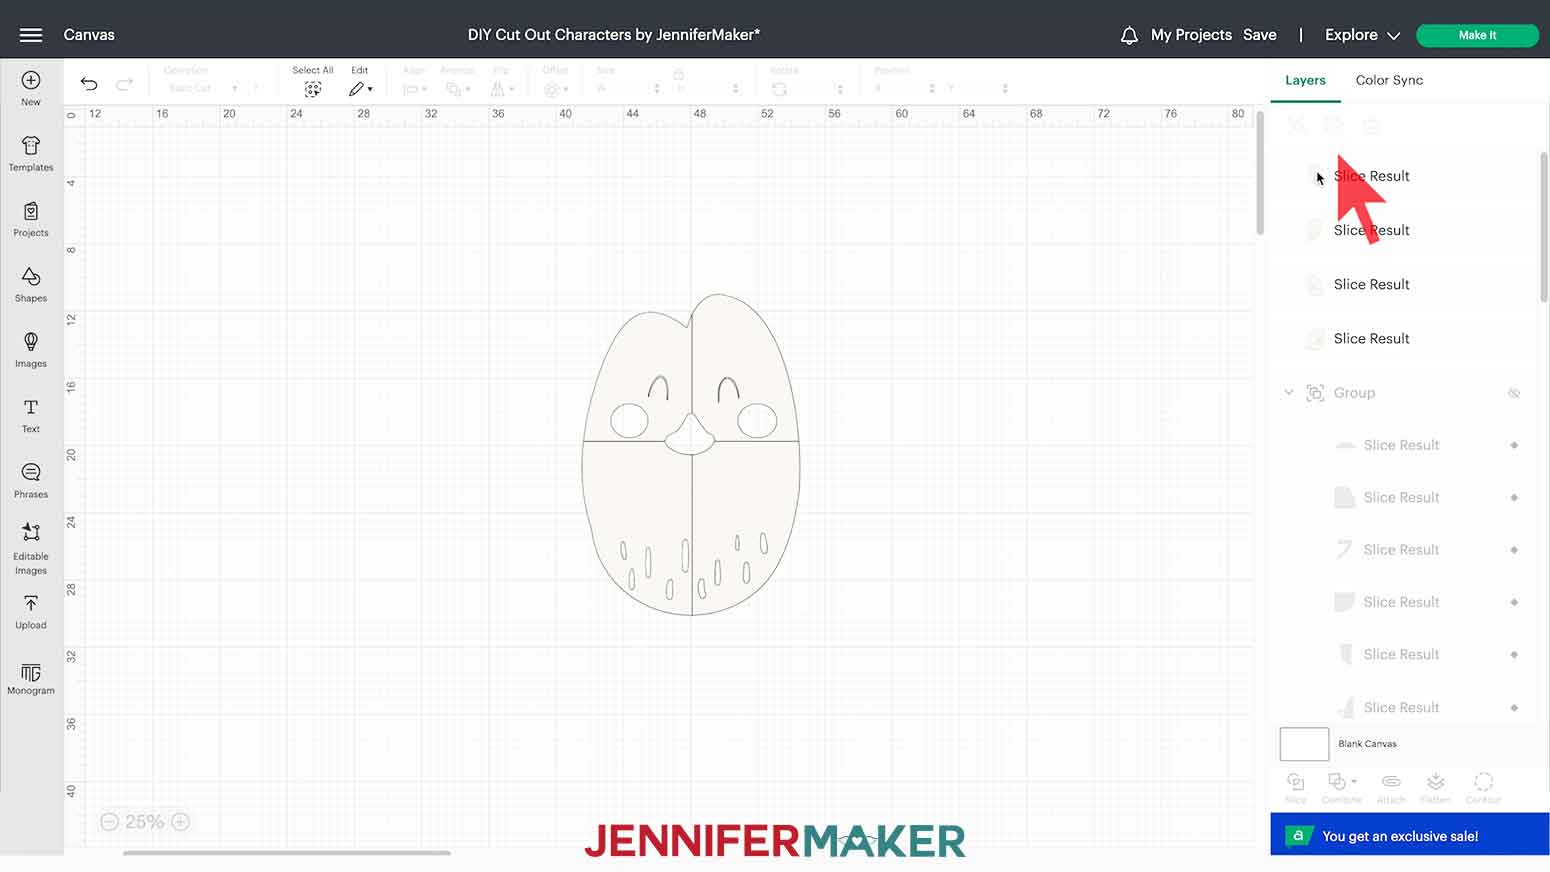
Now we’ll move to the white layer so I will group my teal layers and hide it for now.
I will also find my duplicate squares and click on the eye icon to bring them back on the canvas.
I can see I will only need four squares for this layer so I will delete one after I “ungroup” them.
I will repeat the same process to slice this layer into four mat-sized pieces.
Select a square, the white layer, and then slice each piece one at a time and make sure to delete the leftover bits in the layers panel.

Once that’s finished, I will group and hide that layer. Then I’m going to unhide the layer with all the other pieces, we hid earlier and “ungroup” that. Then I will repeat the same steps to slice the larger pieces of my santa hat and the iceberg. There are five pieces in all.
Click on Shapes, add a square, resize it to 11.5” with the lock icon closed to maintain the proportions and duplicate until I have enough to cover each part.
Looks like I will need two squares for each piece.
I’ll start with the red layer, add and align the squares over top. Before I slice I will duplicate the squares so I can use them for the next piece and so on.
Once you start getting the hang of it you can slice first, then delete the extra bits all at once. It’s completely up to you.
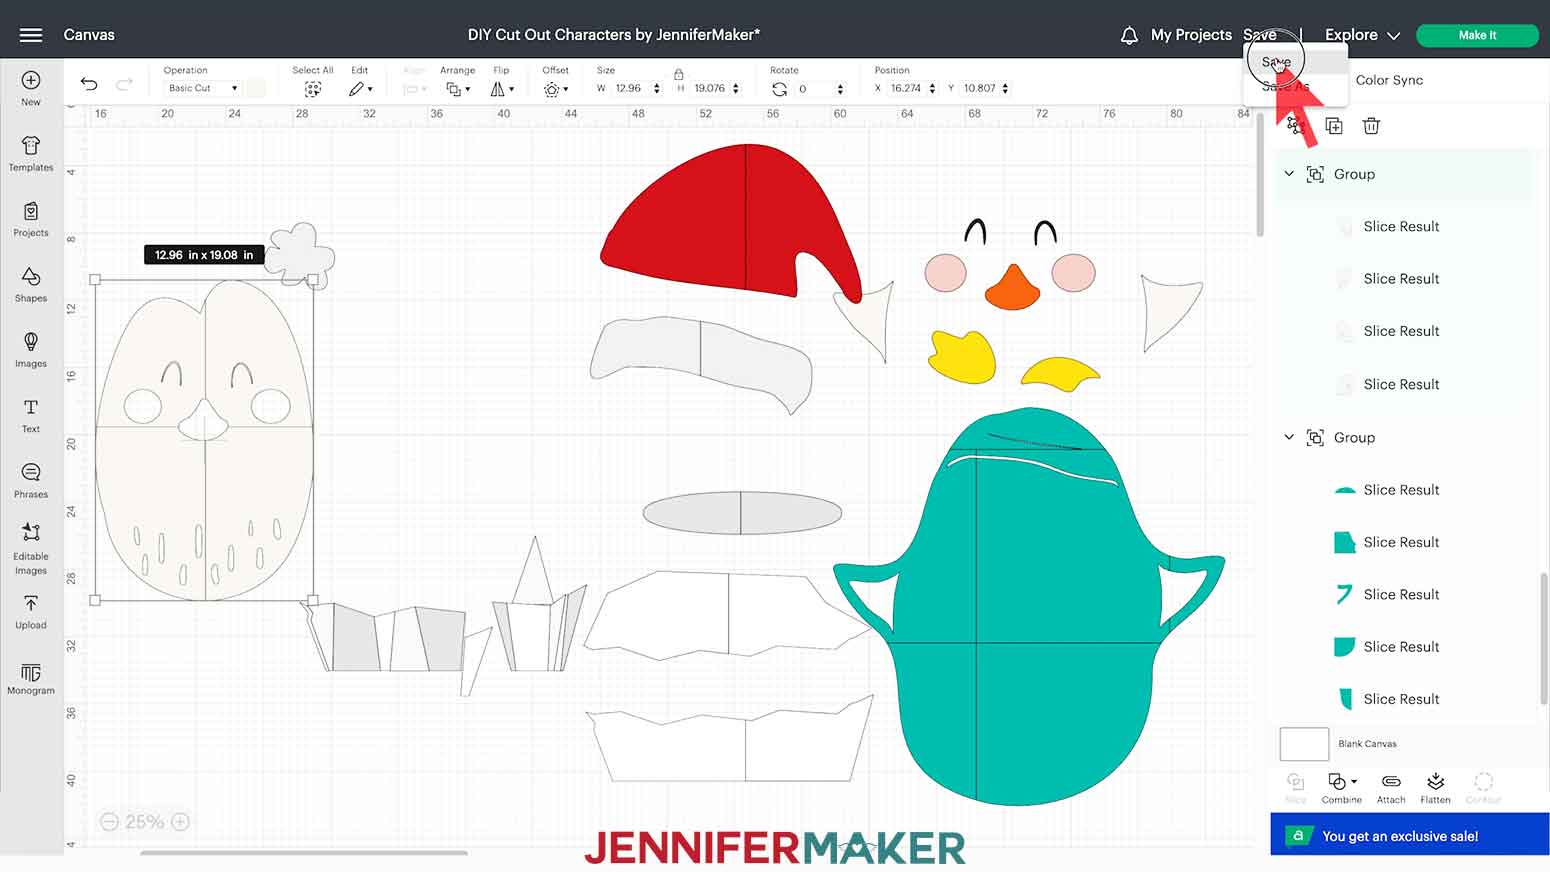
Once everything is sliced I will add it all back to the canvas to make sure everything is all set.

You’re ready to cut the design! Be sure to save your work now.
STEP 3: CUT OUT YOUR DESIGN
Make sure you select the right machine and click "Make It."
If prompted, click "On Mat," "12 in x 12 in," and "Confirm."
On the Prepare screen, make sure your Material Sizes look correct (I'm using 12" x 12" for everything) and there aren't any really tiny pieces or ones that don't fit on the 12" x 12" mat. If there are, go back to the Canvas and follow the slicing steps again.
Click back on the first mat and then click "Continue."
On the Make screen, set your Material Settings according to your choices.
Here is a list of the cardstock colors and weights, along with the corresponding Cricut material settings I tested for my giant penguin. Of course, you can use any color, size, or weight cardstock you’d like or have on hand. I prefer 80 lb and 100 lb cardstock for a project like this, but a lighter weight such as 65 lb would be totally fine since he’s going to be mounted on a stiff backing. You can use my settings as guidelines, but remember that all machines and papers cut differently, so you may need to adjust yours.
Cardstock Warehouse, 12" x 12", 100 lb - Heavy Cardstock - Less Pressure
- Blu Raspberry (teal body)
- Sweet Tooth (white body)
- Dove Gray (shadow and iceberg)
Cardstock Warehouse, 12" x 12", 100 lb - Glitter Cardstock - More Pressure
- Silver Glitter (hat trim and pom pom)
AC Cardstock, 12" x 12", 80 lb - Medium Cardstock - Default Pressure
- Black (eyes)
Brights Variety Pack:
- Sunflower (feet)
- Tangerine (nose)
- Begonia (cheeks)
- Rouge (Santa hat)
Neutrals Variety Pack
- White (iceberg whites)
- Stone (iceberg mid-gray)
To find the appropriate cardstock setting for each mat, click "Browse All Materials" and type "cardstock" in the search bar. Then select the desired result, click "Apply," and adjust the Pressure as necessary.
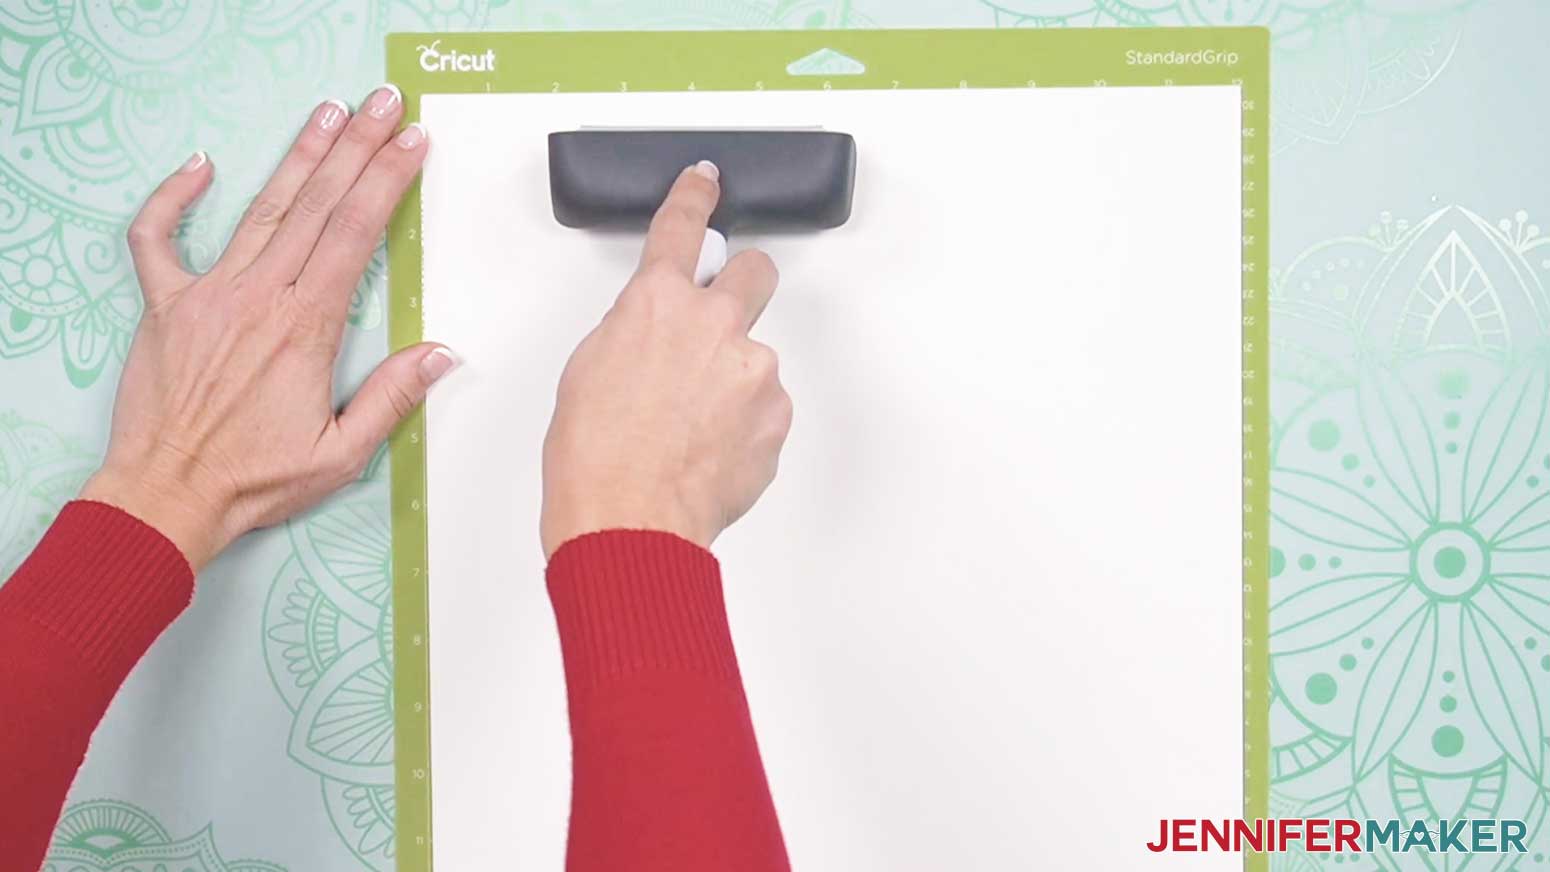
Place your first mat's cardstock face up on a Green StandardGrip 12" x 12" Machine Mat and use a brayer to make sure it's fully adhered. Check that your Fine-Point Blade is clean and in Clamp B. Then, load the mat into the machine and press the "Go" button.
TIP: If you run into any issues cutting your cardstock, check out my Cricut Tips & Tricks for Cleaner Cuts.
When the cut is finished, unload the mat, flip it over, and roll it back to release the cardstock. This helps prevent the material from curling and ripping.
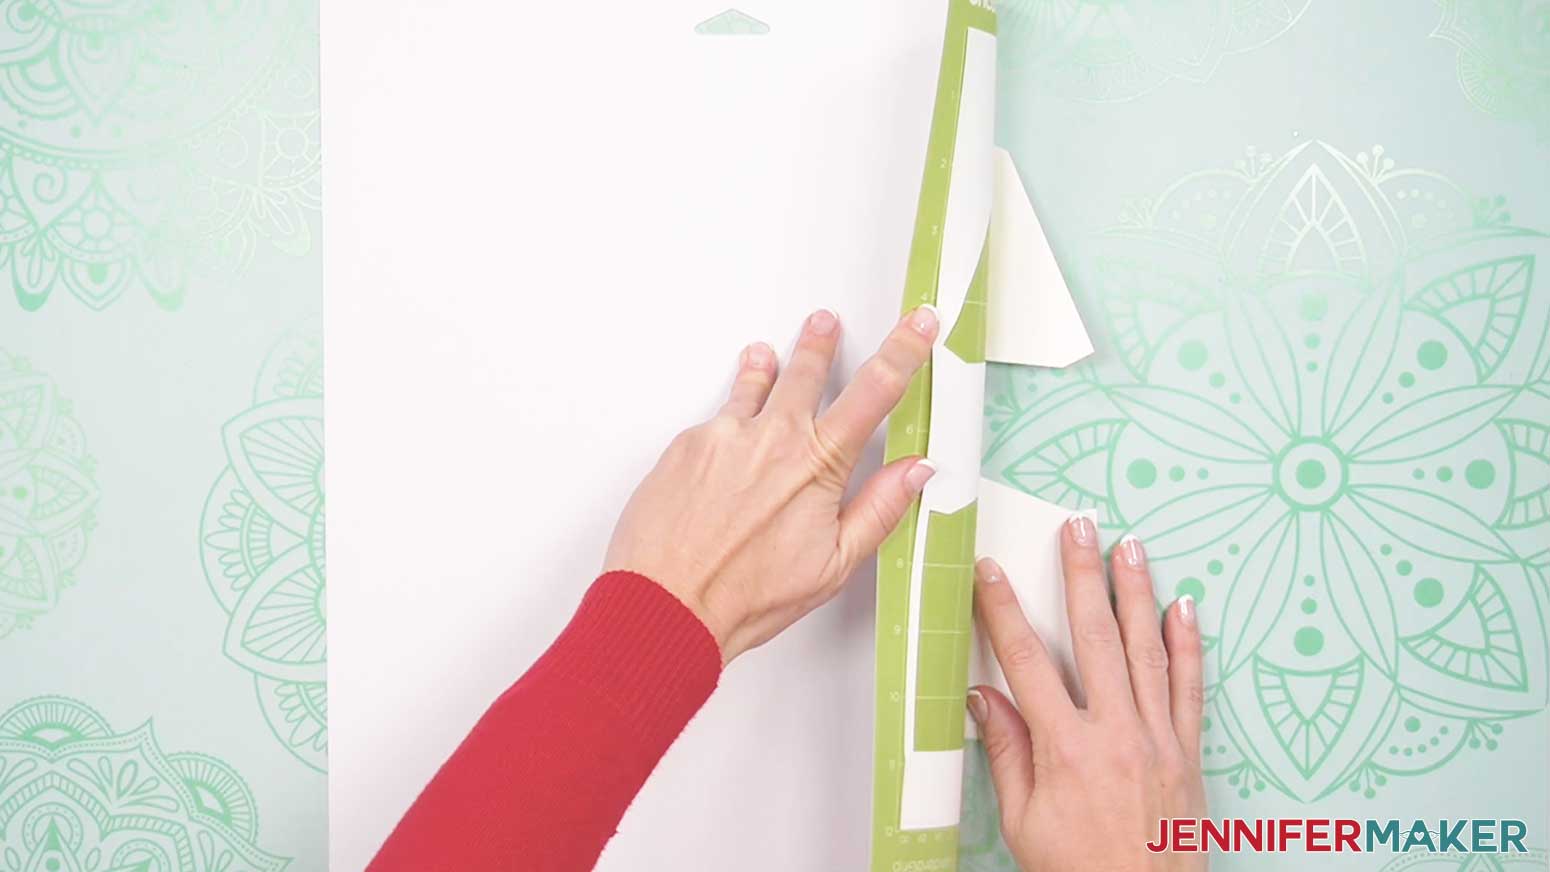
If the smaller bits do not release from the mat, use a spatula to carefully lift them off the mat.
Repeat the process with the rest of the mats. Stack your similar pieces together as they come off the mat so everything stays in the correct orientation.
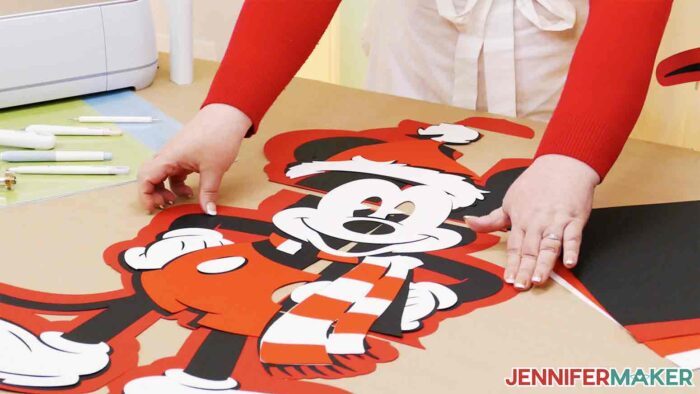
STEP 4: PIECE YOUR DESIGN CUTOUTS BACK TOGETHER
Once all your pieces of cardstock are cut, make sure you know how to put it all back together. I recommend you refer to the images on the Cricut Design Space screen you cut from to make sure you know which pieces go where and in which orientation. So for the penguin, you’ll need to tape together the teal layer, the white body layer, and the iceberg layer (if you cut it on two pieces of paper as I did).
Clean your work area Make sure your work area is well lit. If you are working with white paper, make sure your hands are clean.
Two at a time, turn the pieces over to work on the back.
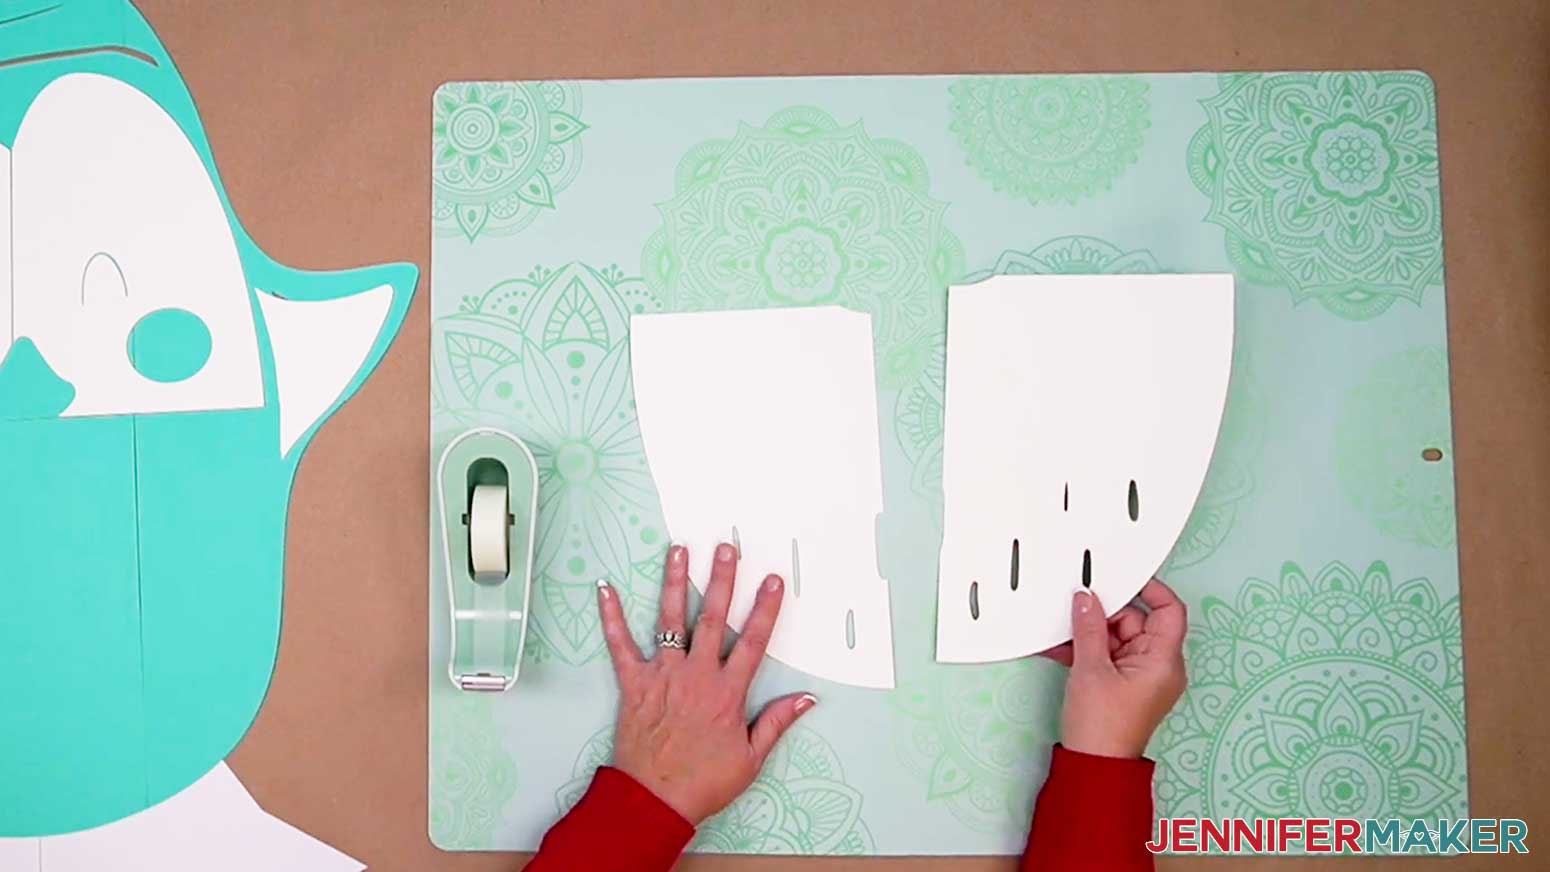
Alight the two pieces and join them using a strip of Scotch Magic Tape™. Make sure there is approximately an inch of additional tape extending beyond the seam on both sides.
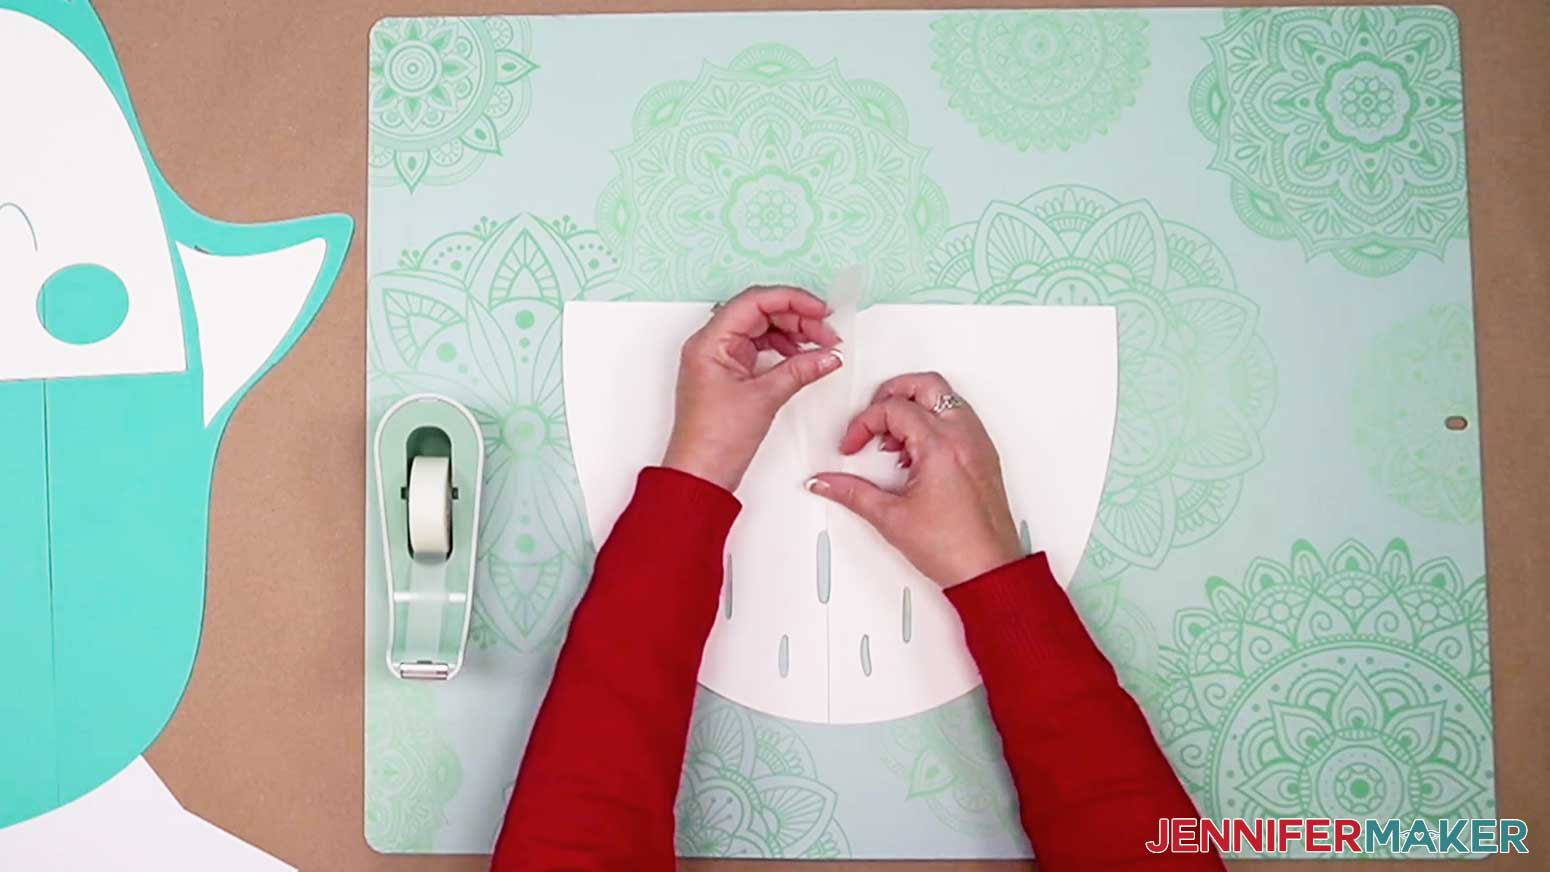
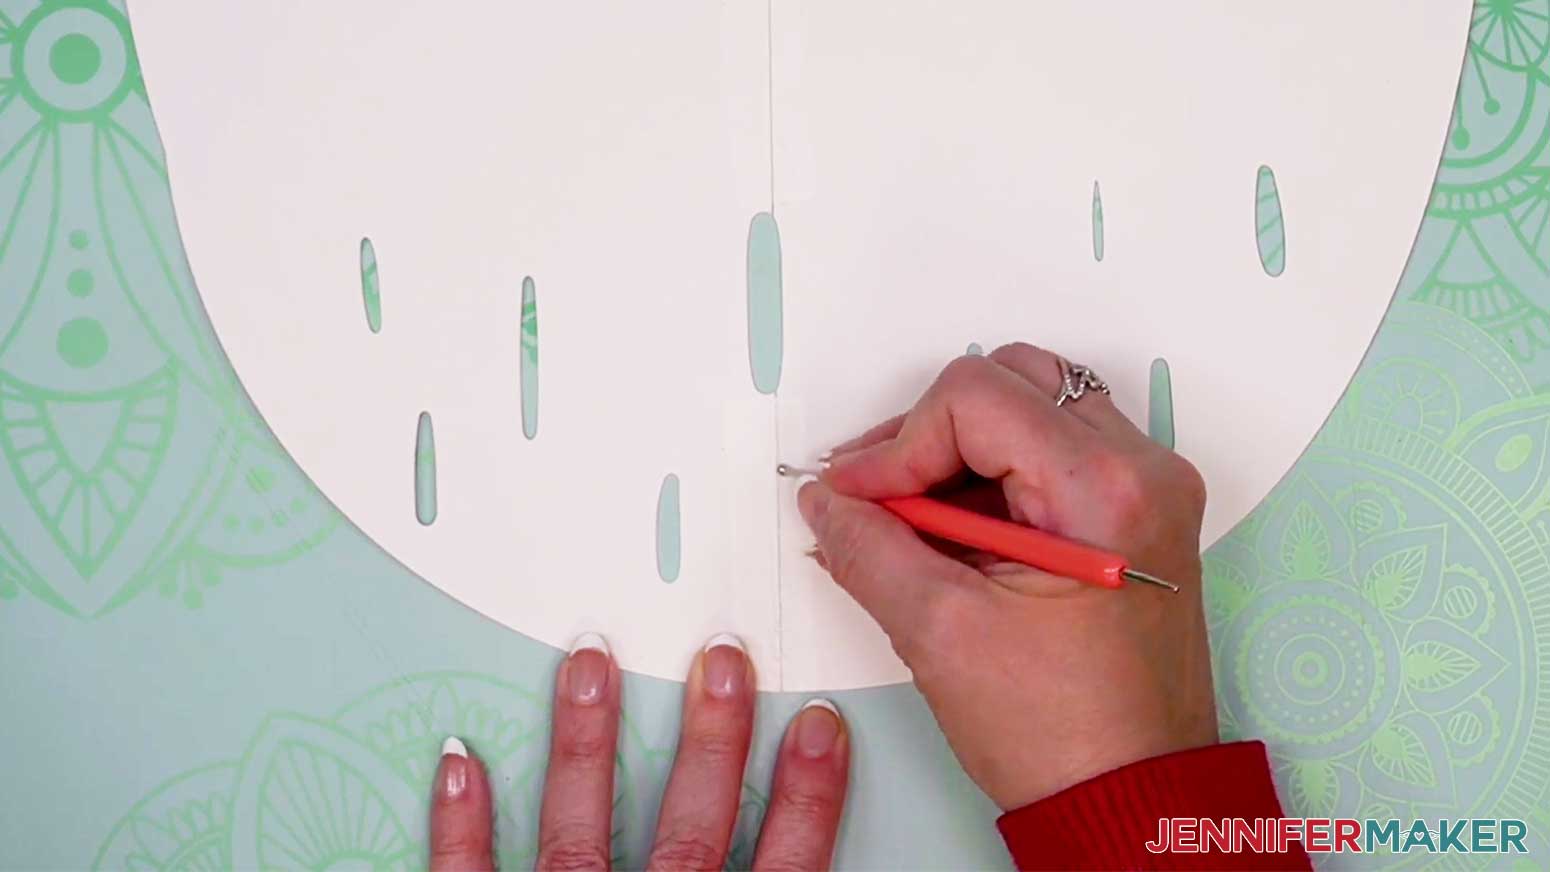
We'll blend the seam using a smooth metal tool, like the ball-tip stylus in the tool list. A spoon also works! Press and blend the thin cut edges together until they seamlessly merge. This is called burnishing, even though we also use that term when transferring vinyl to other surfaces. If you're working on a soft wood surface, place a self-healing mat under the seam to protect it from the pressure.
If you’re not familiar with burnishing paper edges, practice on taped scraps of similar cardstock before you try this on something you cannot replace.
With moderate pressure, run the tool back and forth perpendicular to the seam. Don't press so hard that the paper tears. The tape will bond more completely to the paper, and you'll see the cardstock fibers expand at the cut to fill in any space. Work parallel right over the seam as well to really smush the to pieces together.
Finally, flip the pieces over so they are face up. Carefully, with a clean, sharp, craft knife, trim the excess tape so it’s flush with the edge of the cardstock. Remember the self-healing mat!
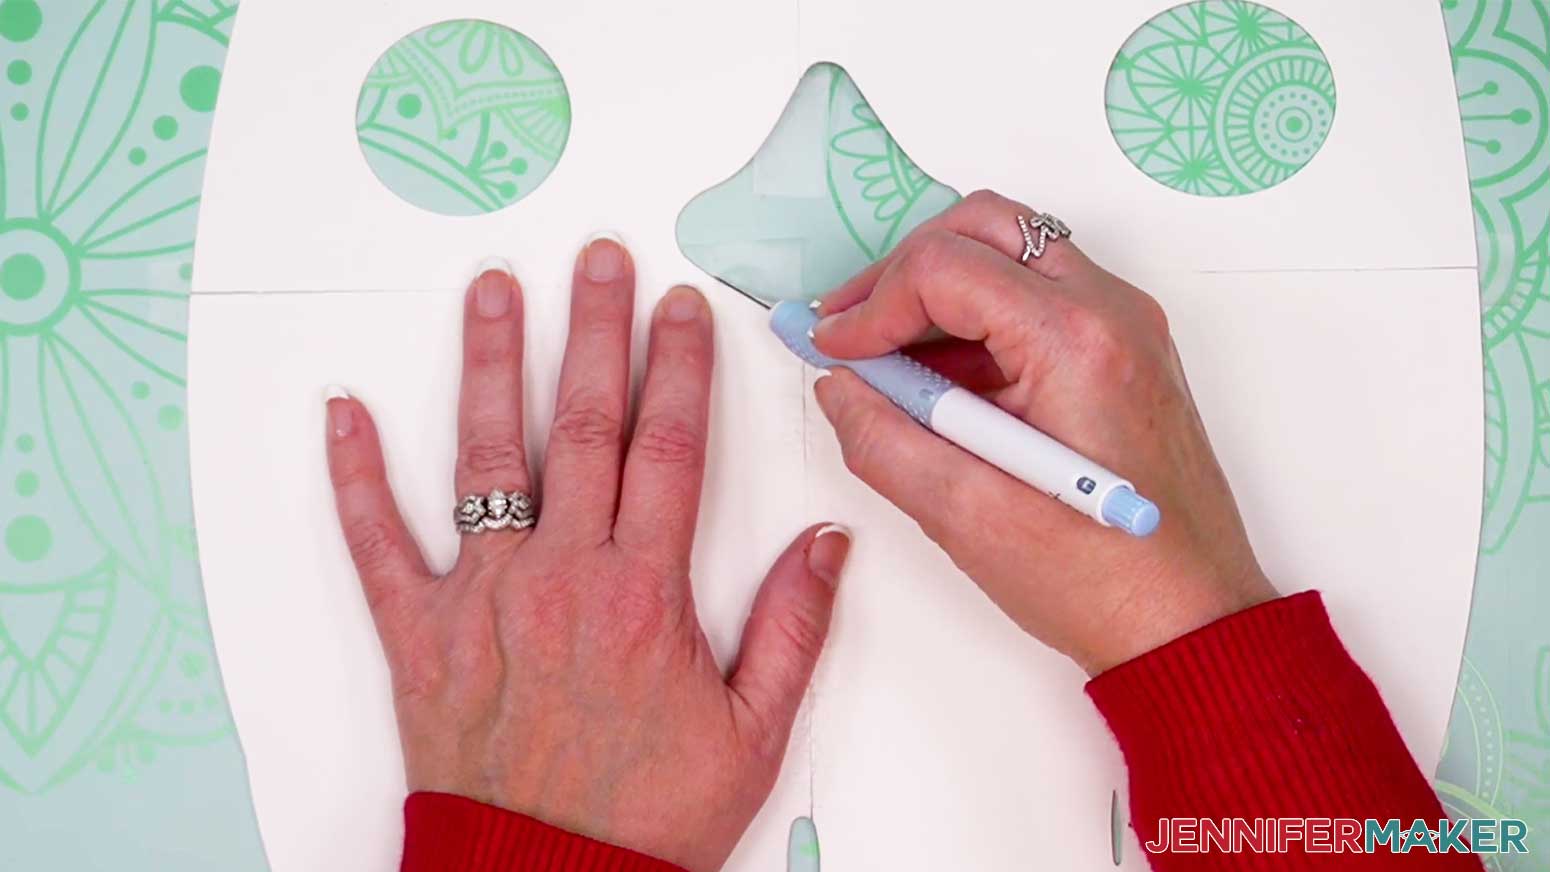
Continue the steps above for all pieces and layers.
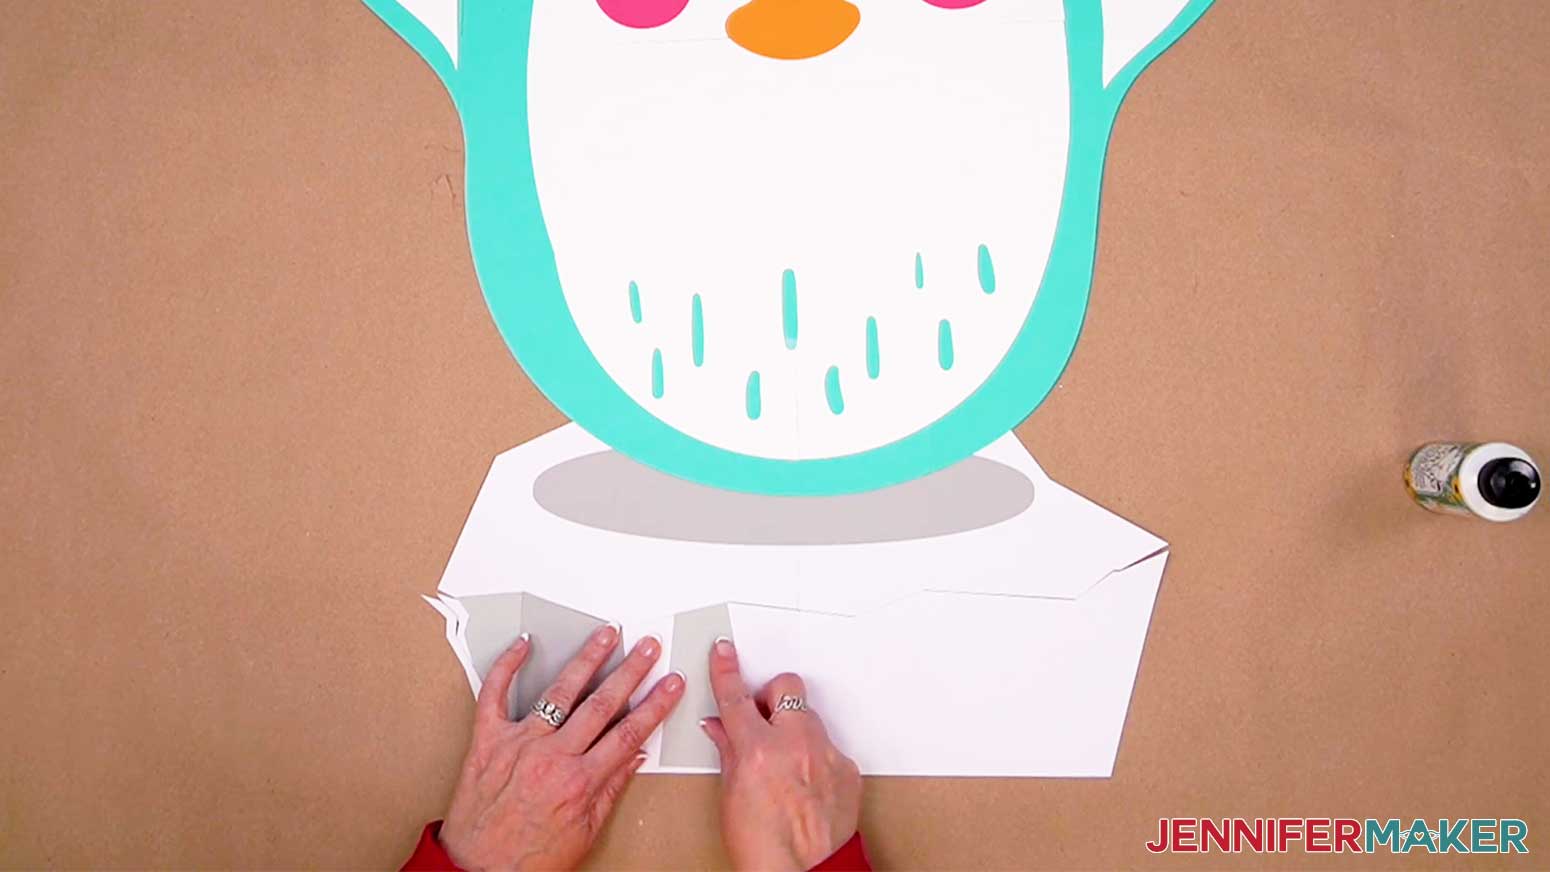
STEP 5: ATTACH YOUR PENGUIN LAYERS
With your layers put back together, you can now start attaching them to each other. Start with the bottom layer and work your way up.
Place the teal body layer face up with the white body to the side, face down. Use the ultra-fine precision tip of your Bearly Art Glue to apply a thin layer of glue on the back of the white cardstock, without getting to close to any edges.
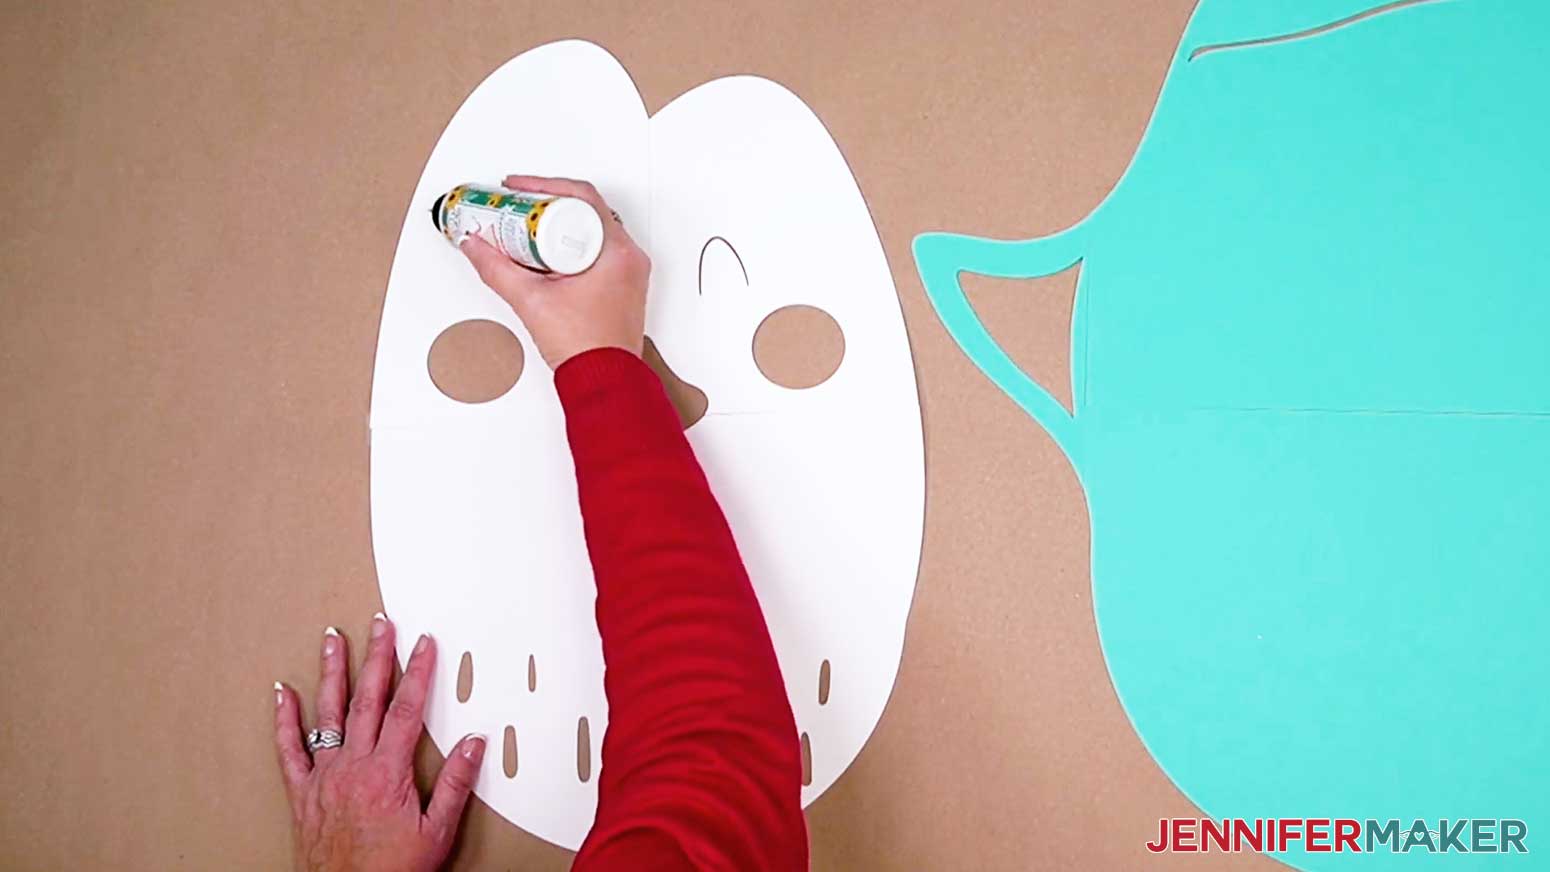
Using the screen image for reference, place the white section on top of the body. Use your brayer to help smooth out any bumps and secure them together together. Then add the white flipper pieces.
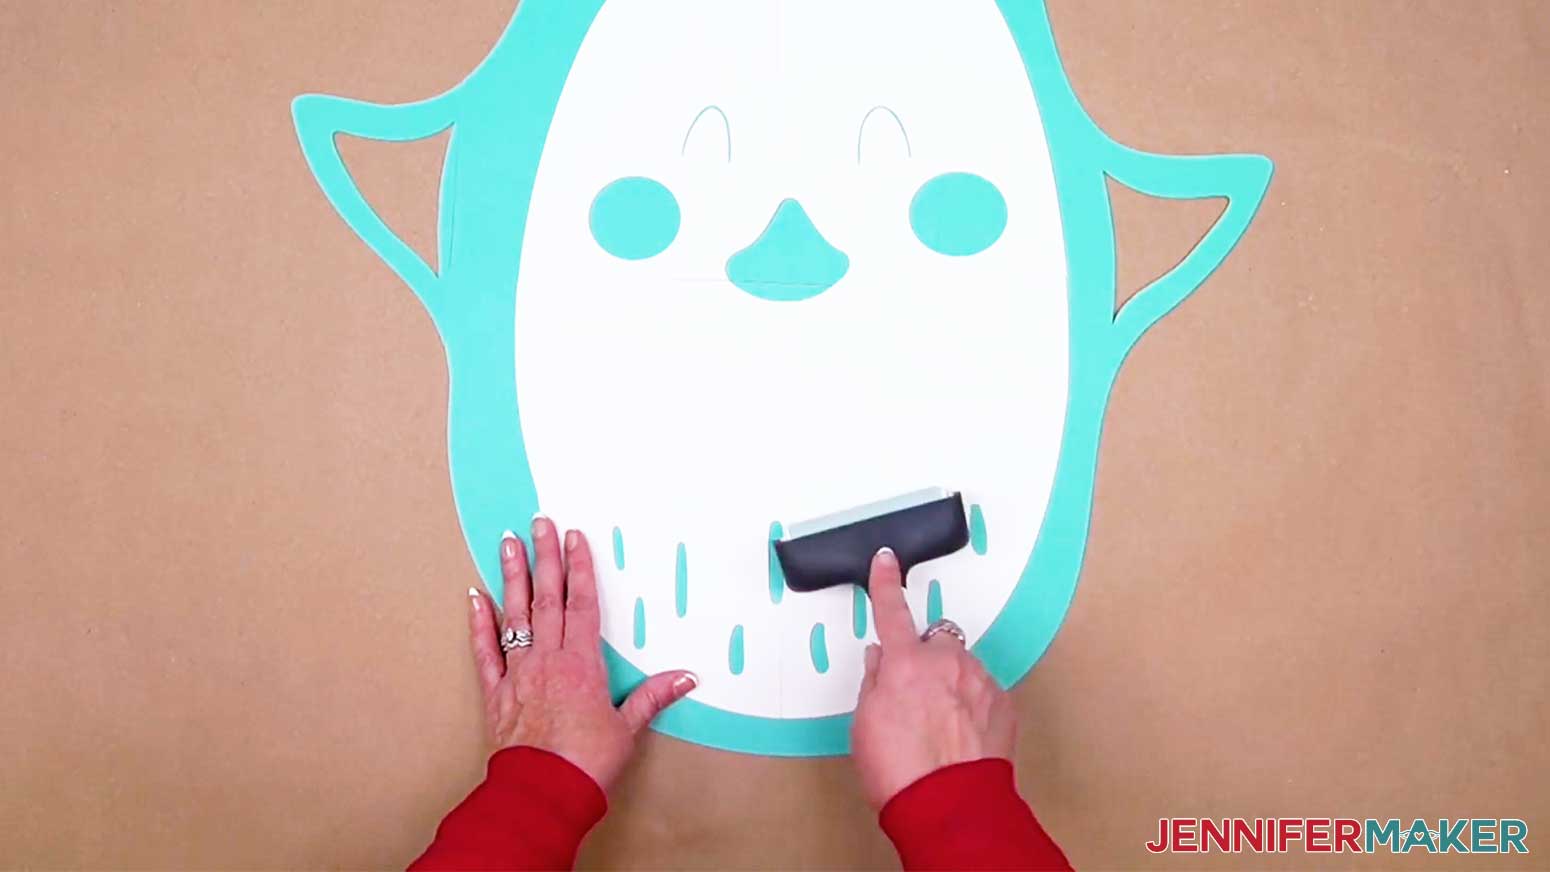
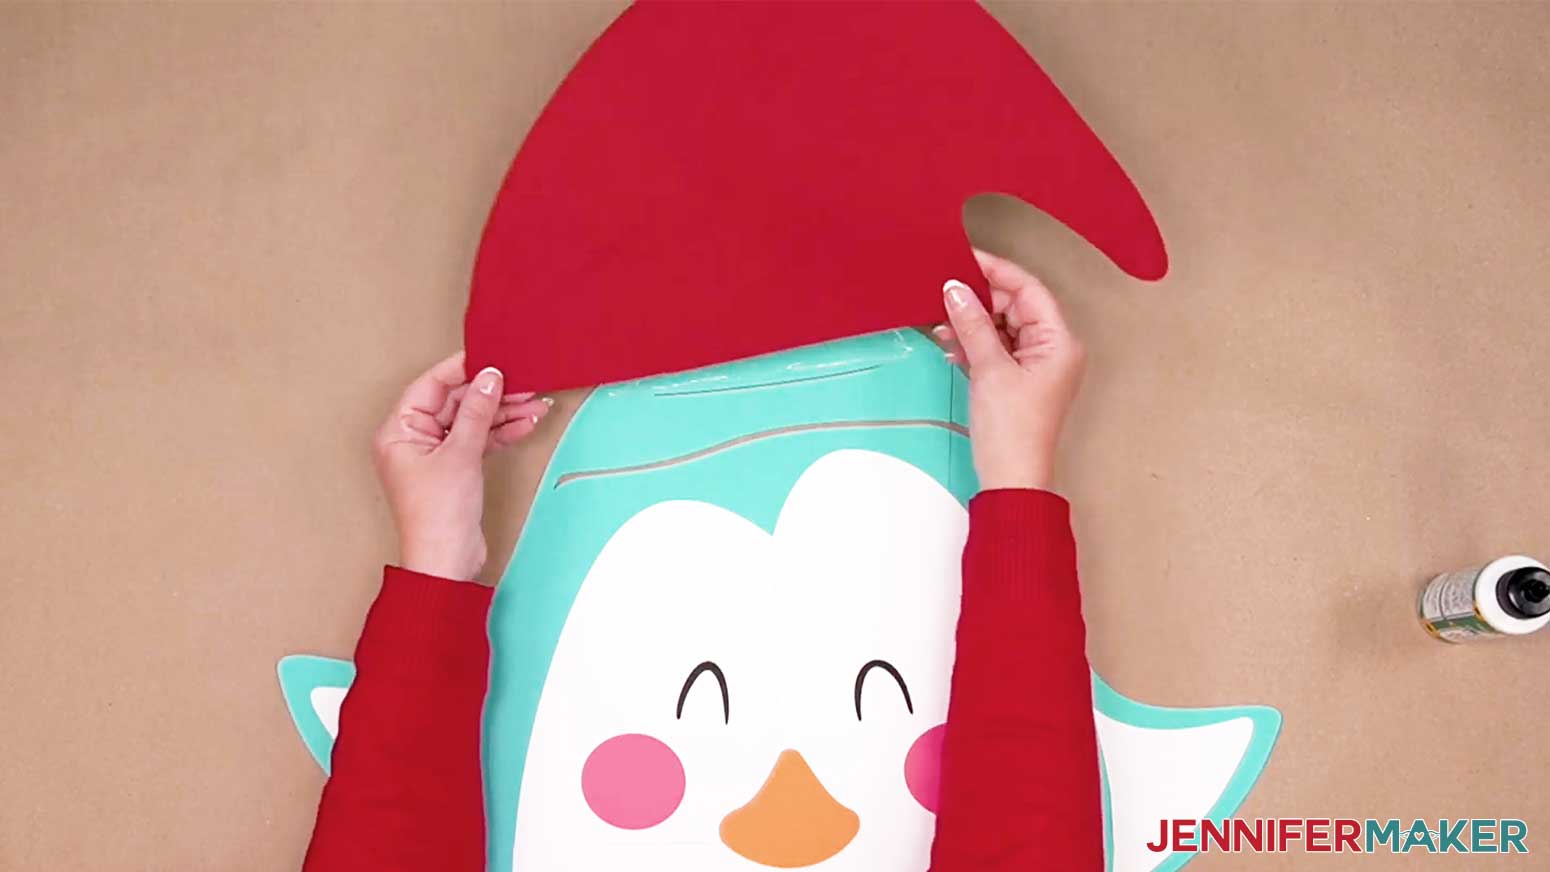
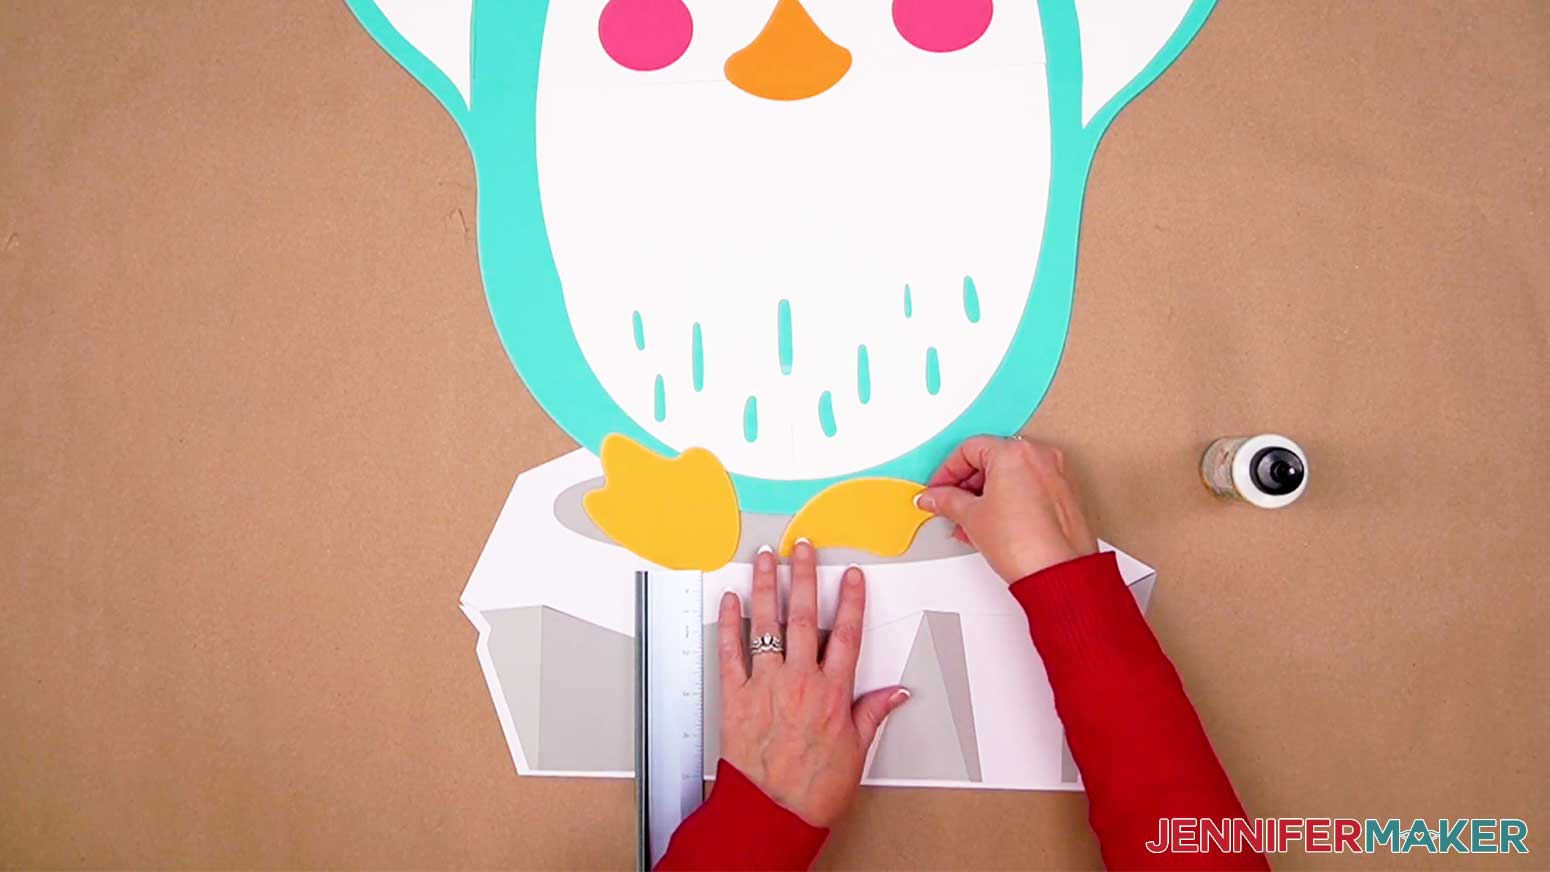
Continue with the rest of the layers and pieces in the following order. Use the cutout guide marks to align the smaller bits and to help place the Santa Hat in just the right spot! This order worked for me.
Assemble the iceberg in the same way in this order:
- Bottom white base
- Top white base
- Shadow pieces
To determine where the penguin should be positioned on the iceberg, use your ruler to measure about 5" up from the bottom of the ice. This is where the bottom of his feet will land. I just eyeball his horizontal positioning so he looks about centered within the shadow oval. I also recommend referring to the image on your Design Space screen when positioning the pieces.
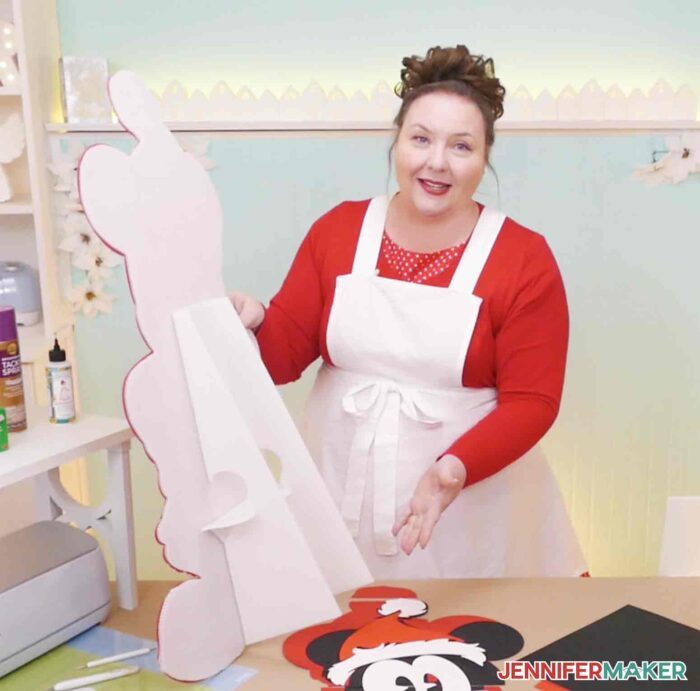
STEP 6: ADD BACKING AND A STAND
Now we want our cutout to stand on his own! So we’ll need to add a stiffer backing to him because cardstock alone is not enough.
To reinforce our big cut out characters we’ll use these big plastic sheets. You could use foam core sheets instead, but it won’t cut as neatly or look as polished when you’re done. More on that a little later..
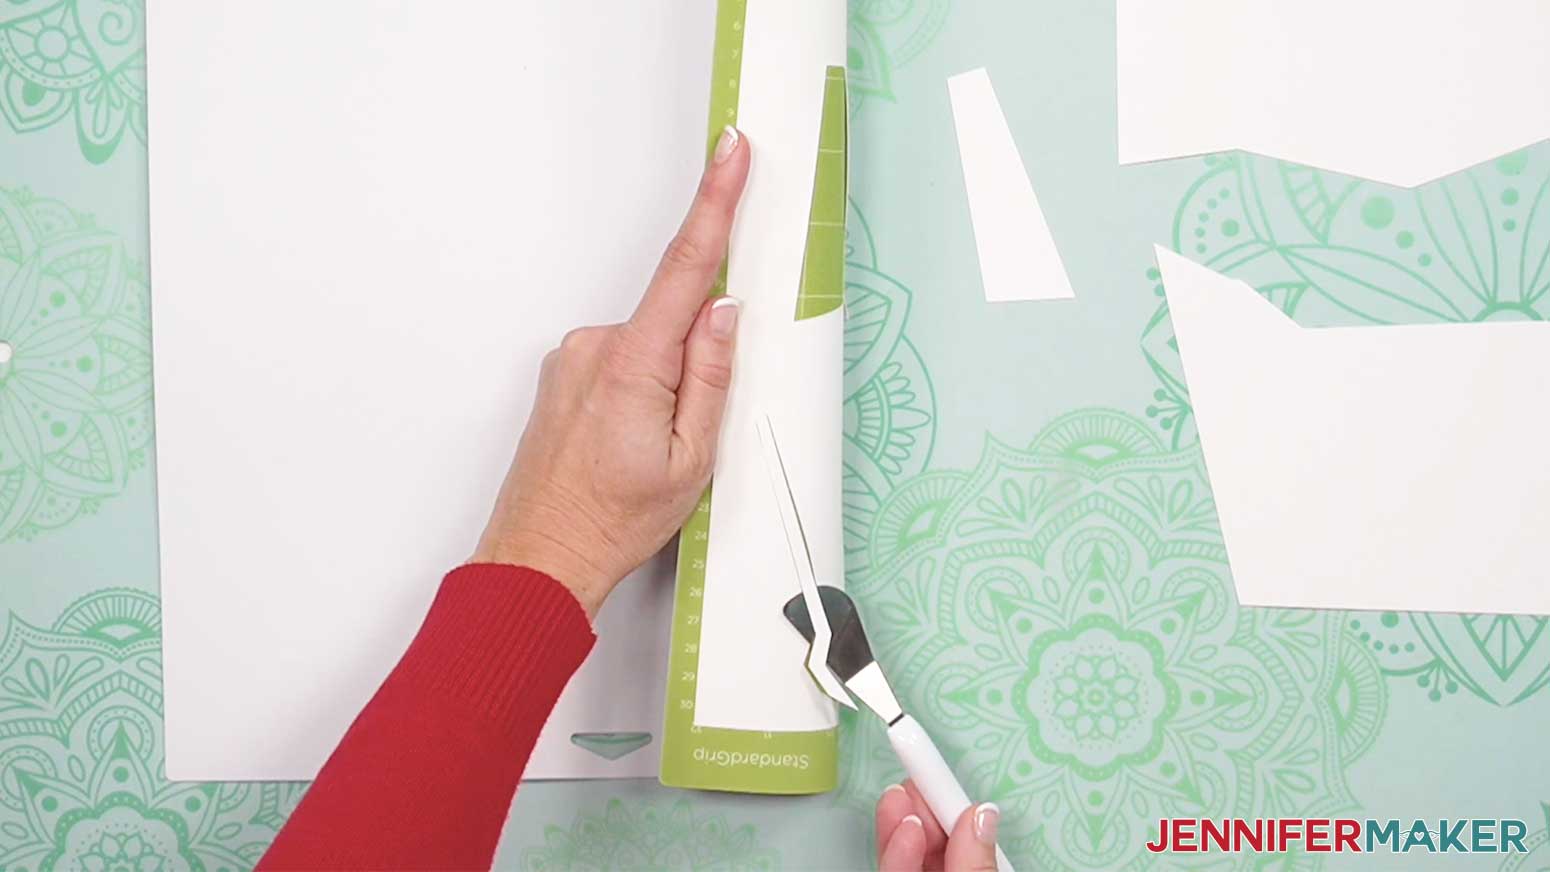
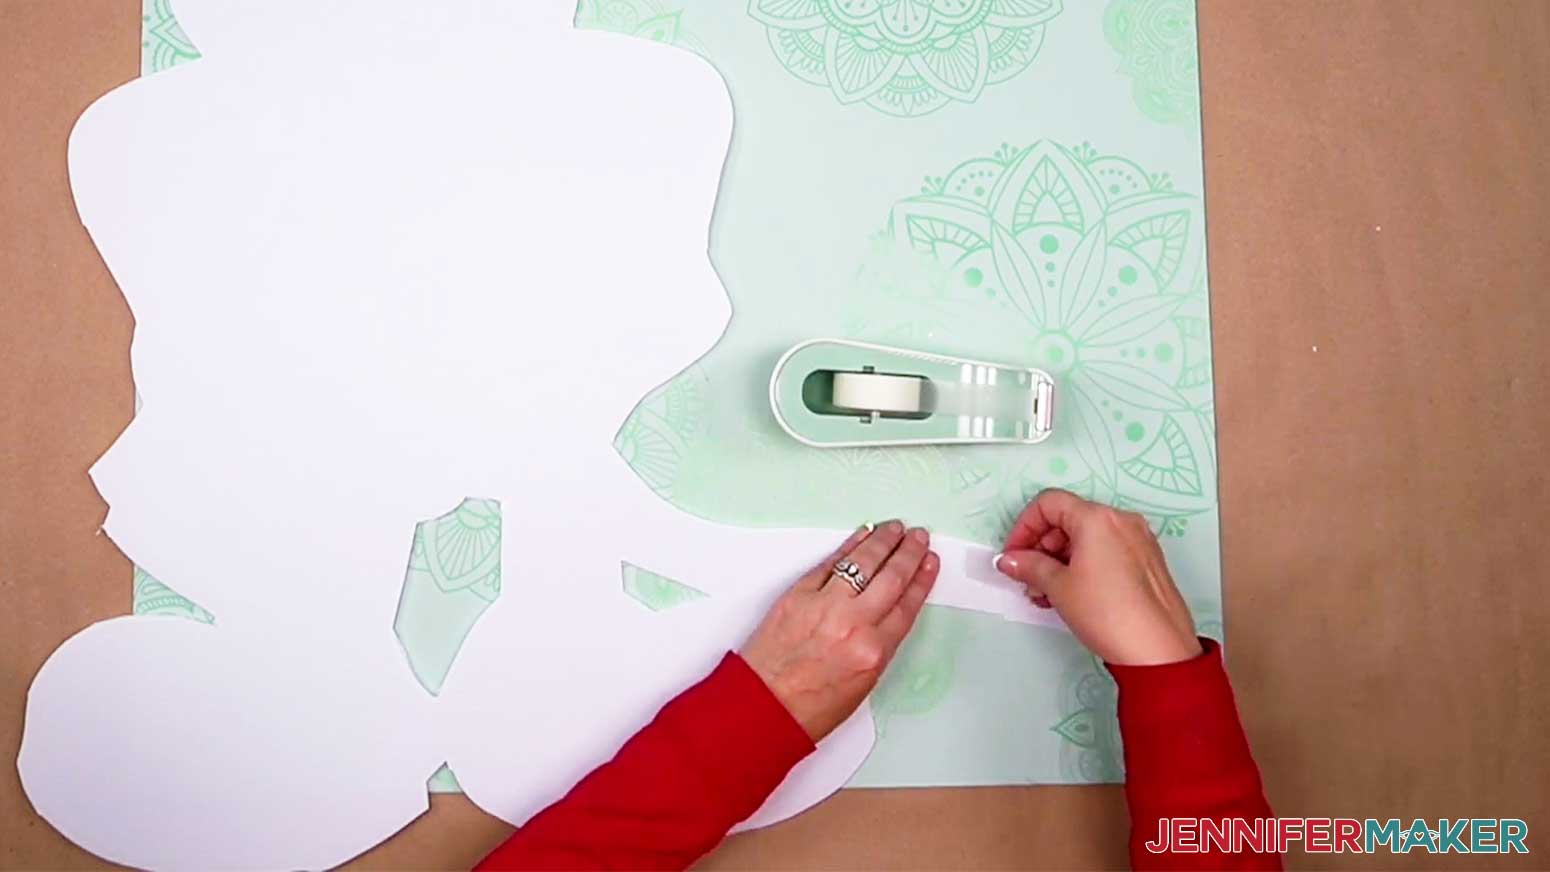
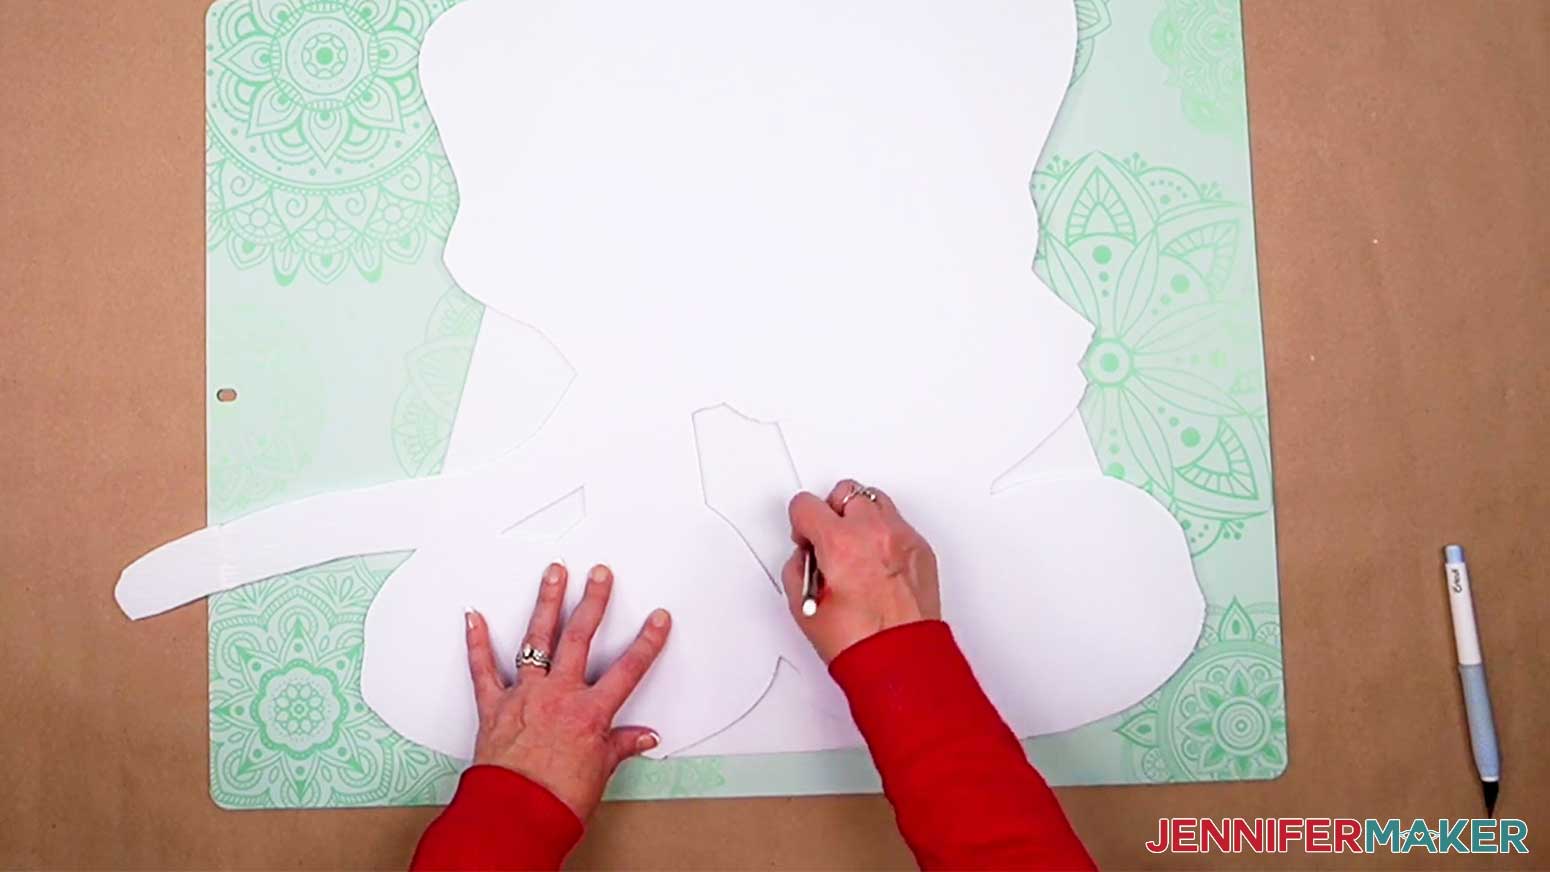
Place a corrugated plastic sheet down on your work surface then put your cardstock cut out face up on top of it. Align the cutout so the bottom edge is against the bottom edge of your backing. Now trace your character cut out on the plastic sheet with a pencil.
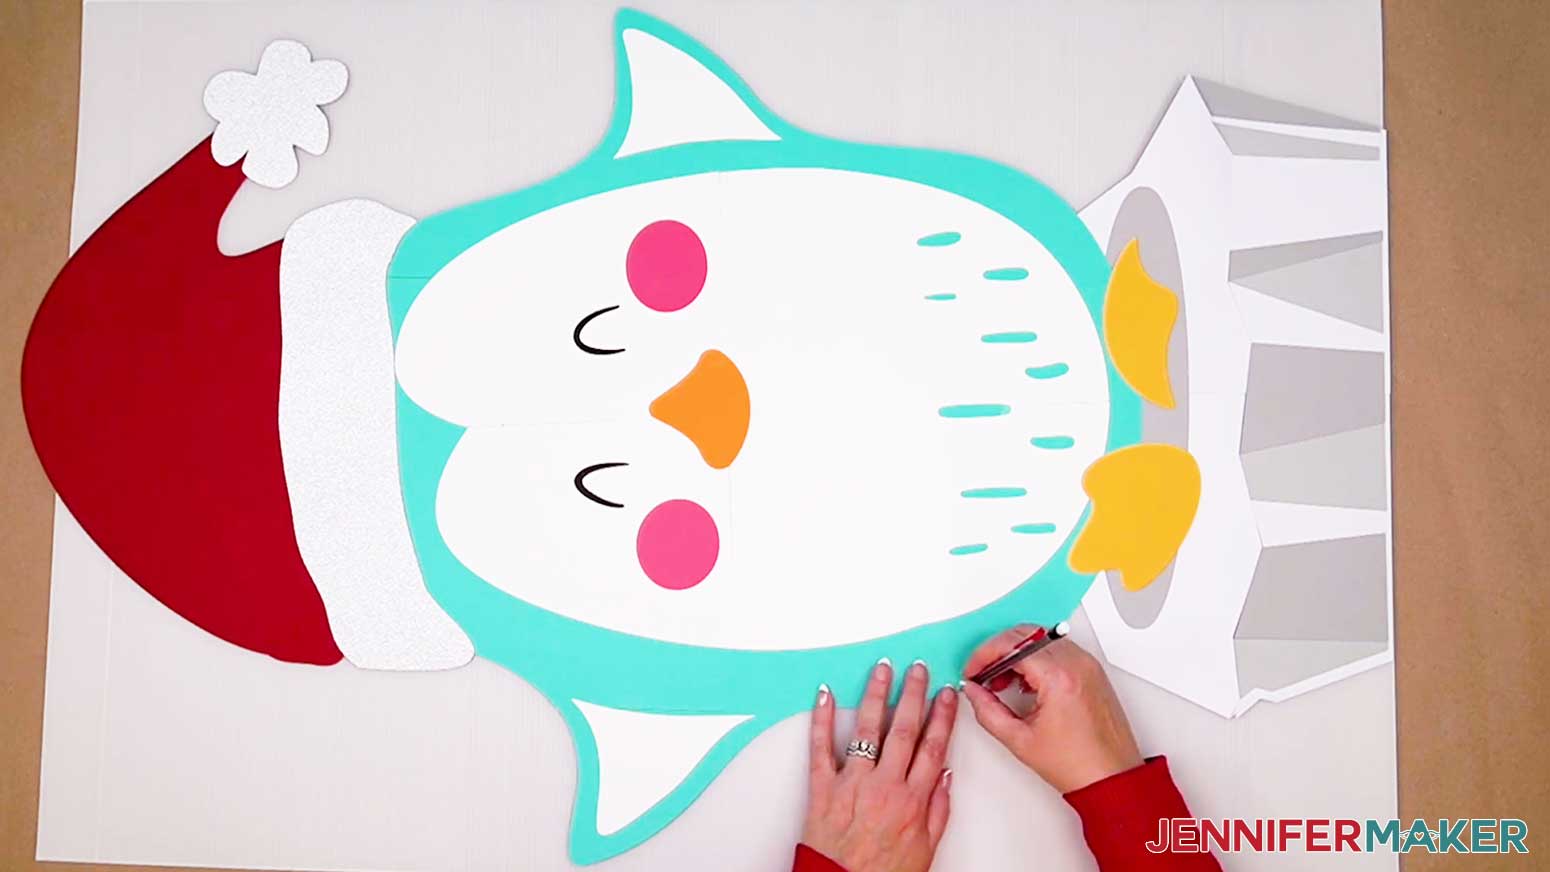
Once the outline is clear, set the character aside. With a self-healing mat underneath, cut along the INSIDE of the pencil line with a sharp craft knife. Be careful.
If you’ve sized your penguin just like I have, he will fit on one sheet of corrugated plastic. Otherwise, repeat with additional pieces of plastic sheets as necessary, then use Scotch Tape to tape the plastic sheet pieces together.
In a well-ventilated and protected area (or a big cardboard box to catch overspray, add a light coat of spray adhesive to the character's back. Then place it face up on the plastic backing. The cardstock will extend beyond the plastic just a bit to keep it from being visible. I recommend the spray adhesive because you can reposition the character a bit before it dries completely.
Make the Stand
Now let's make the stand. This step is optional of course.
You can find the FREE PRE-SLICED stand template SVG in the folder you downloaded in Step 1. We'll cut it out of cardstock, then transfer the design to the plastic backing just like we did for the character before assembling the 3D stand. There’s also an full-size version of the stand included in the file.
Upload the SVG you’d like to use and add it to your Canvas.
Here’s what the pre-sliced stand template looks like on the Design Space canvas. I zoomed out a bit to see the whole design.
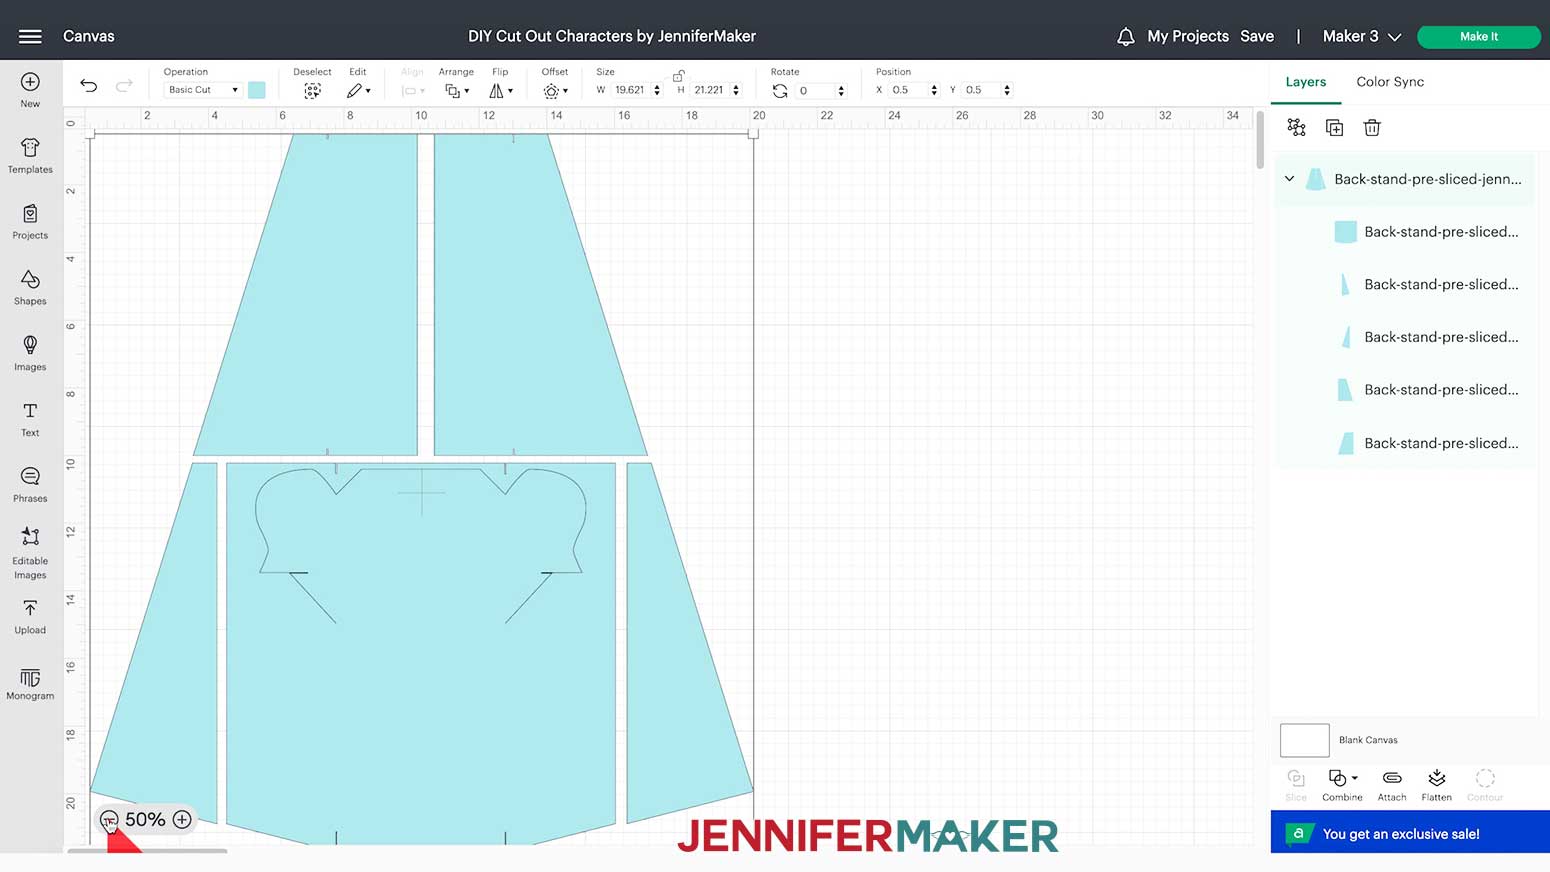
The stand measures around 21" tall which is perfect for the 36" cutout.
If you are making a cutout that requires a different size stand you can resize it to your desired measurements. Just make sure you keep the lock icon closed above the size field in the top menu to maintain the proportions.
You will notice small notches on the top, bottom, and center of the stand. We’ll use these later to mark our fold lines to score by hand when we set up the stand.
Now we’re ready to cut. Click Make It and continue.
In addition to the fine-point blade, you'll need a single scoring wheel or scoring stylus to add the included crease alignment lines to the template. I'm using the stylus.
I used white 12" x 12" 100 lb cardstock with the "Heavy Cardstock" material setting and "Default" pressure.
Then click “Edit Tools” to select the “Scoring Stylus” and click “Apply.”
Make sure to add the Stylus to Clamp A on the machine.
Once the cut is finished, remove the pieces from the mats as normal and make sure they're all oriented correctly before taping them together..You do not need to burnish the seams. It should look like mine.
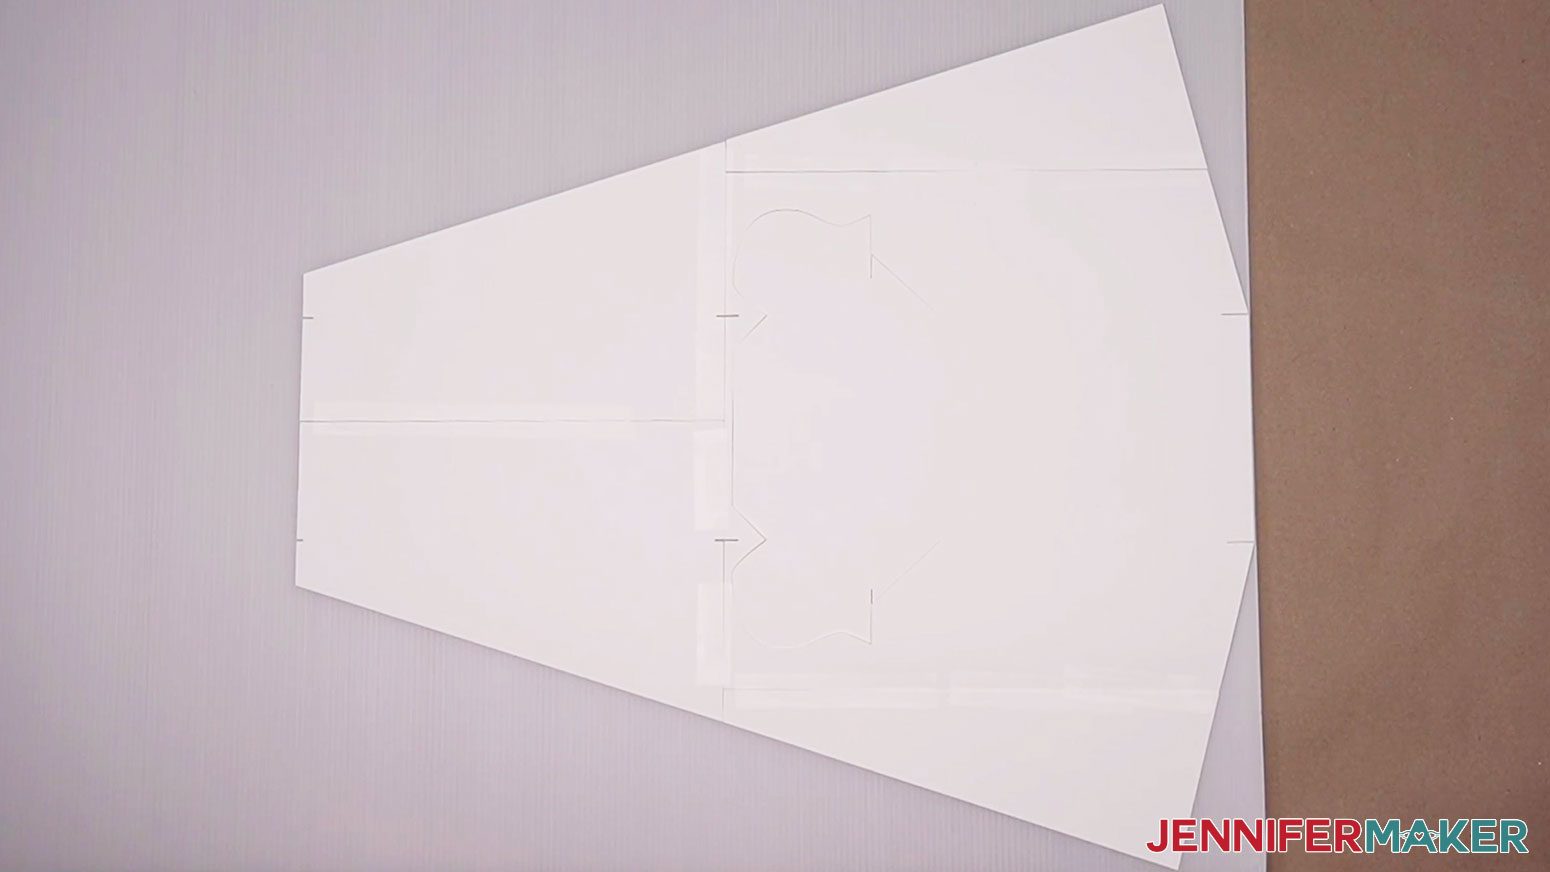
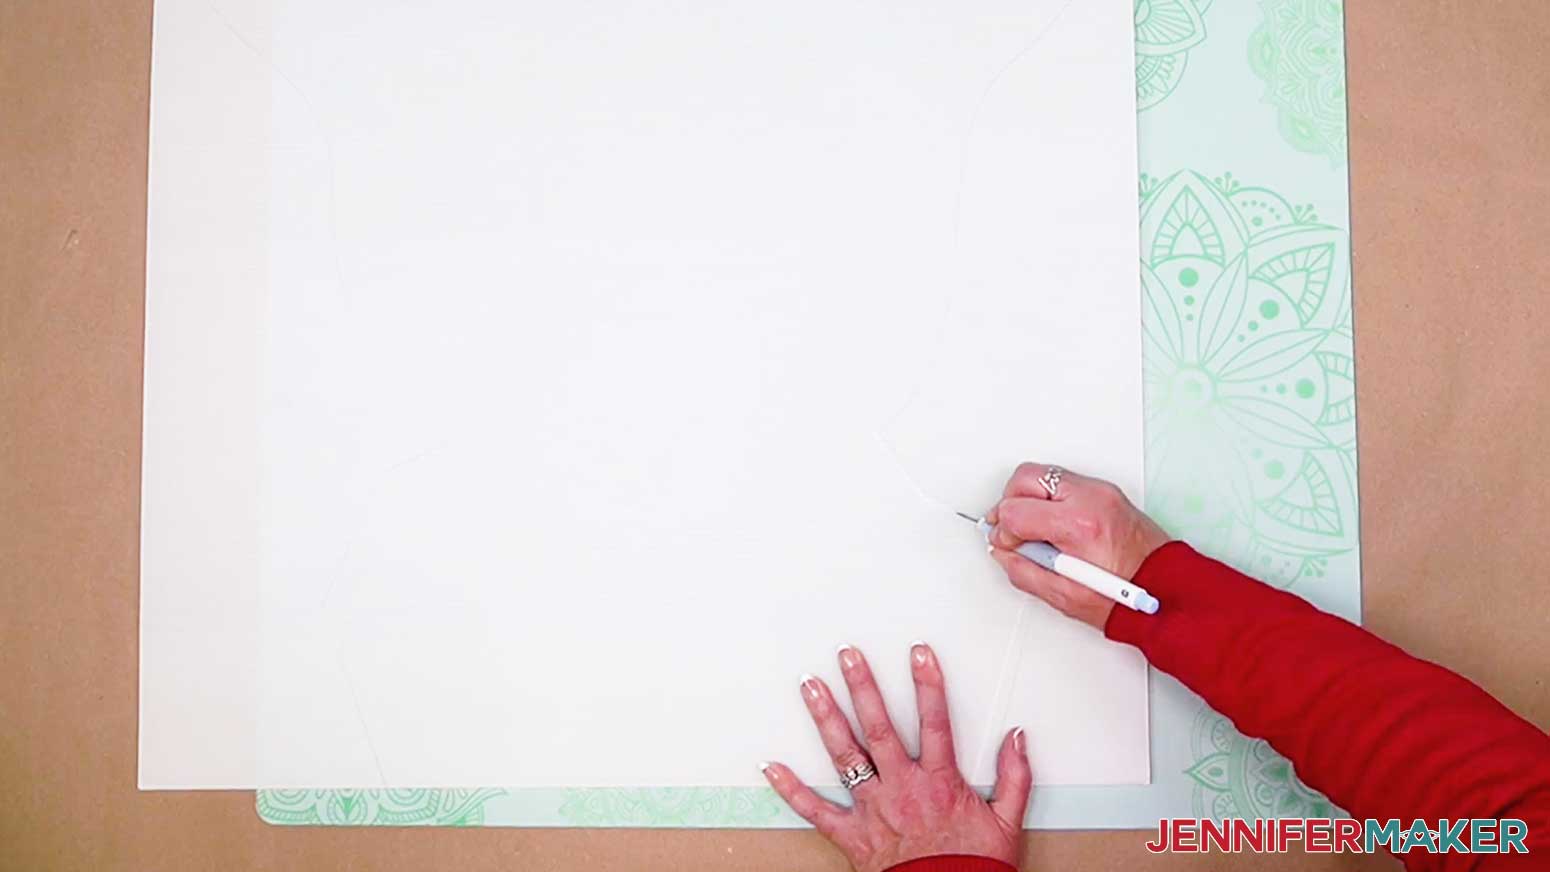
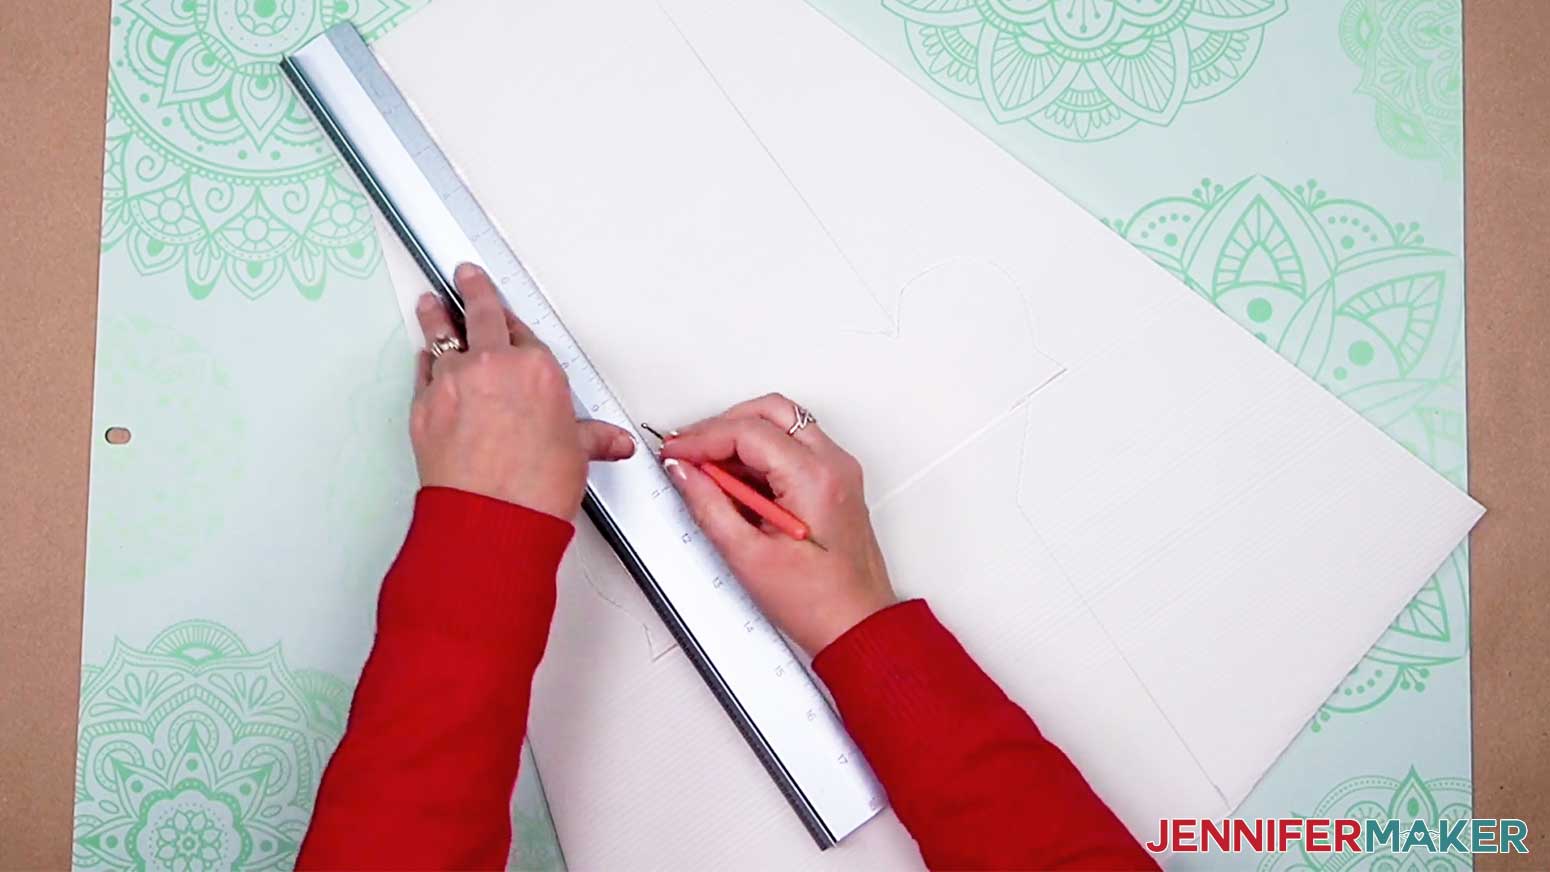
Trace your cardstock stand template's border onto a sheet of the corrugated plastic yard signs.
Make note of the notches for the score lines and the center section that is cut out. We need to use those to mark our score lines!
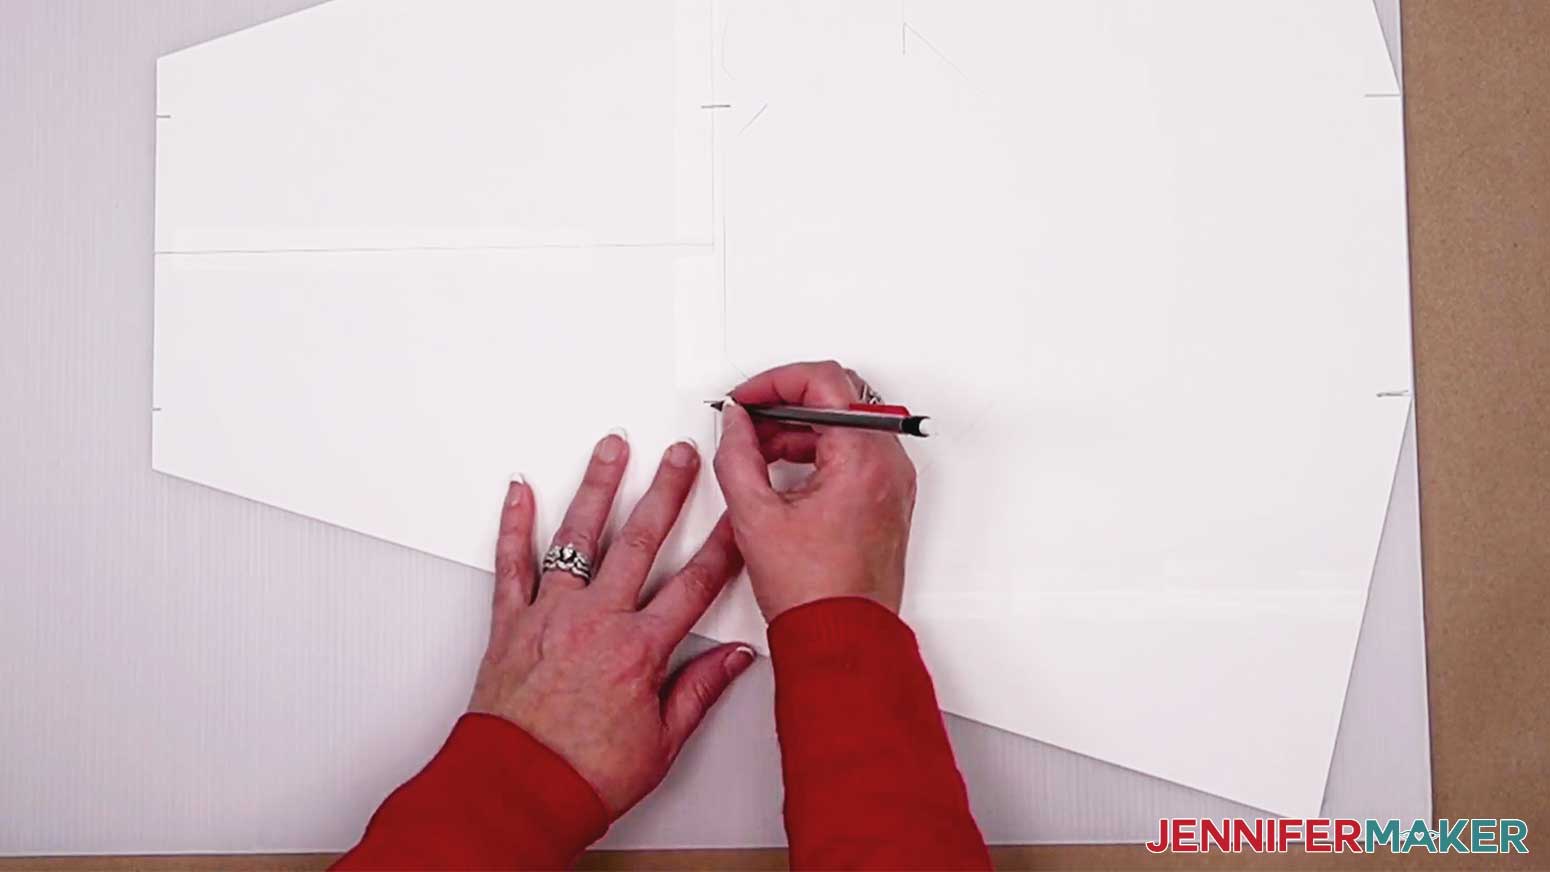
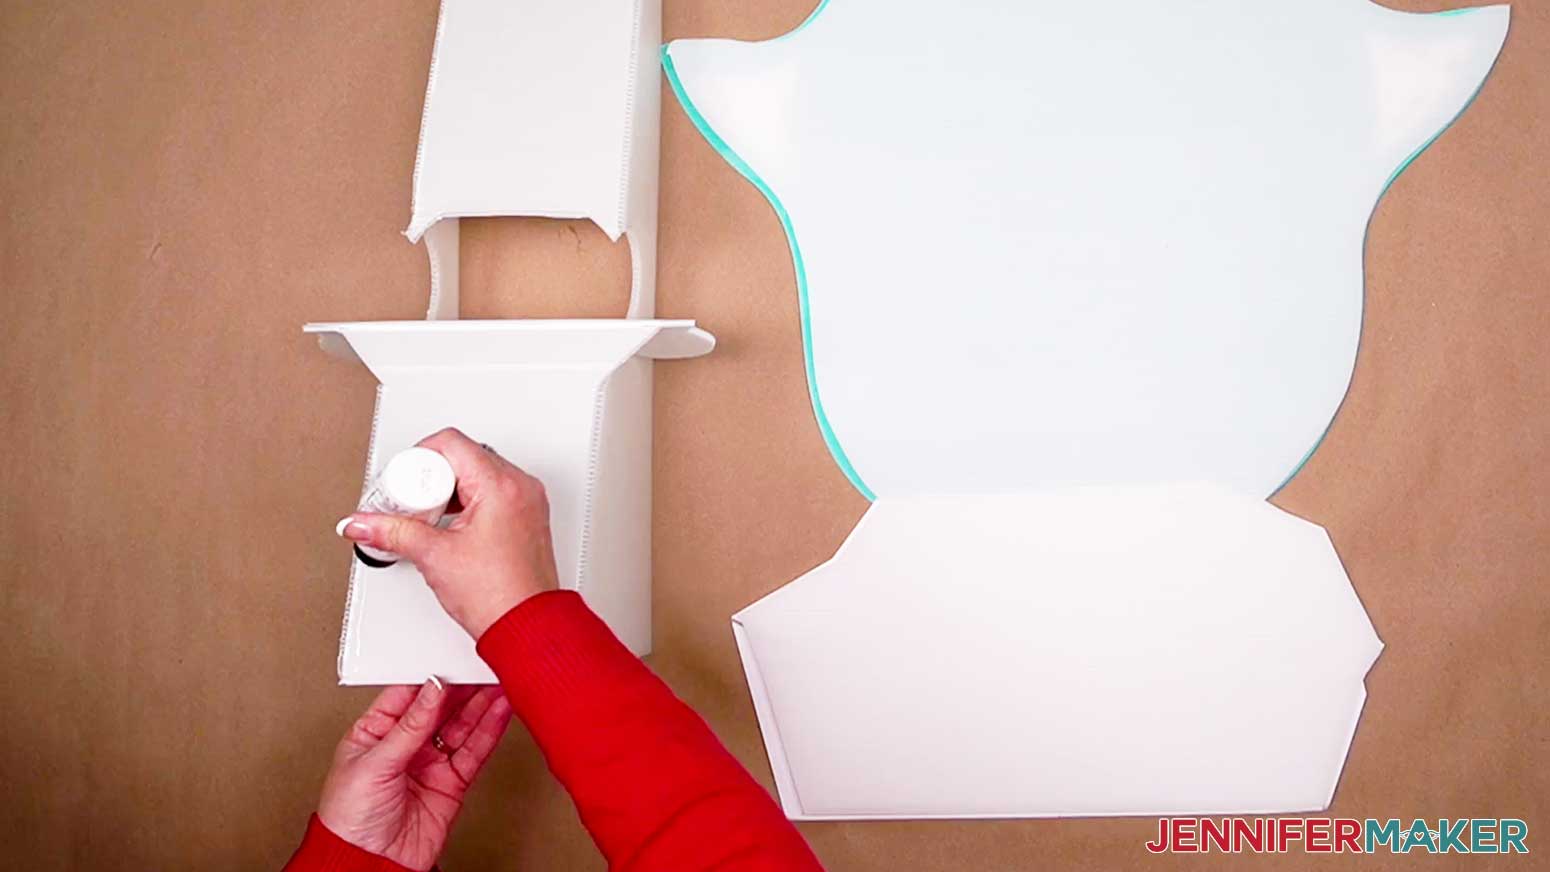
With the template still in position, fold the inner flap down on the horizontal score line and trace the inside of the shape on the plastic.
Now, mark the tops and bottoms of the vertical and horizontal notches and remove the template.
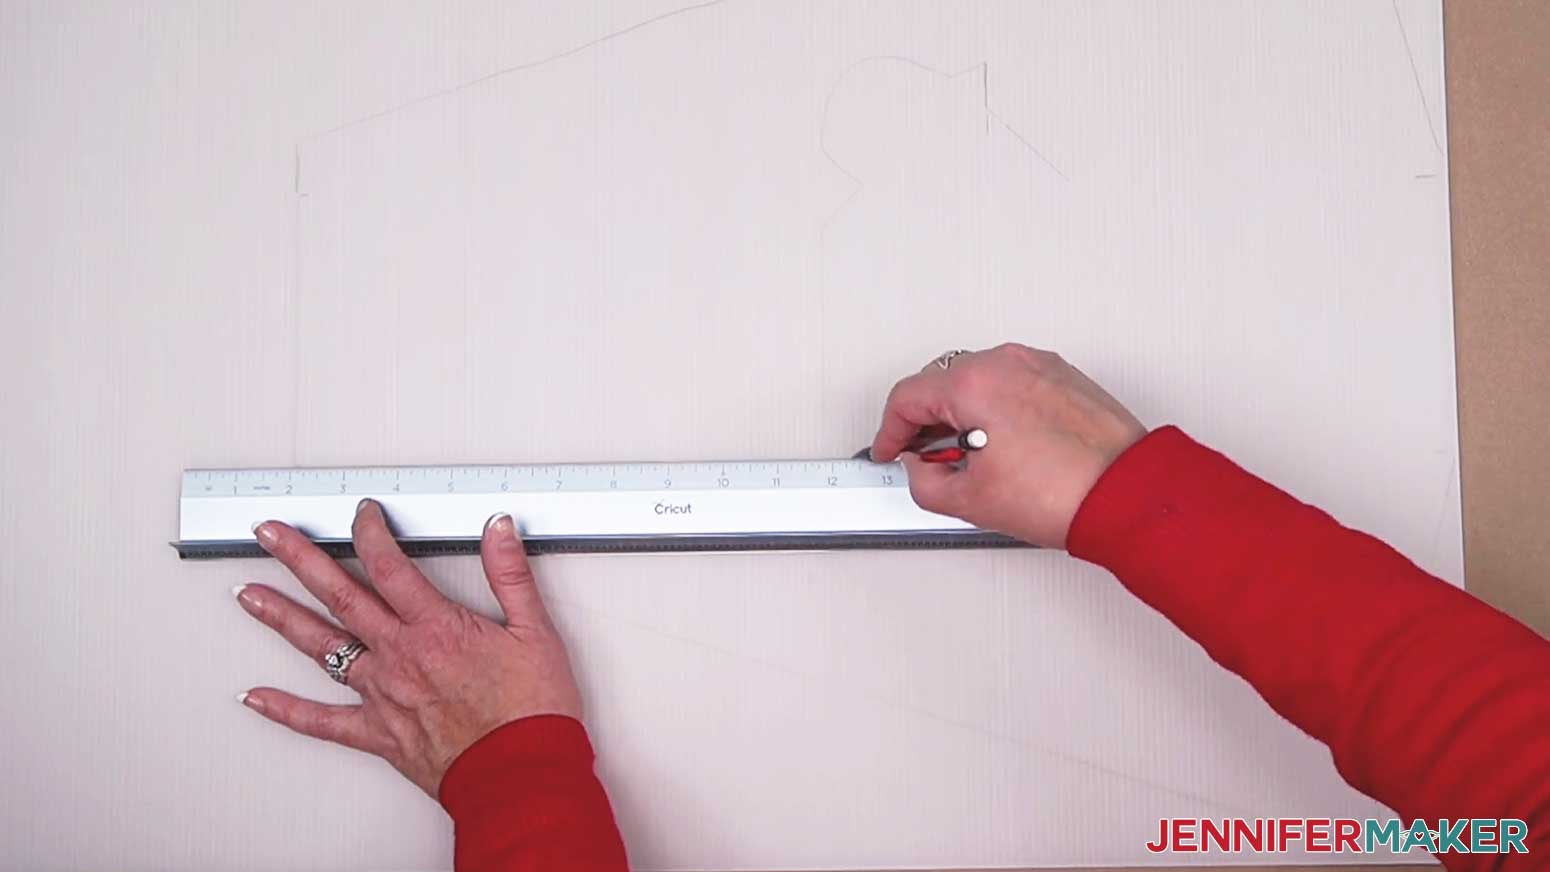
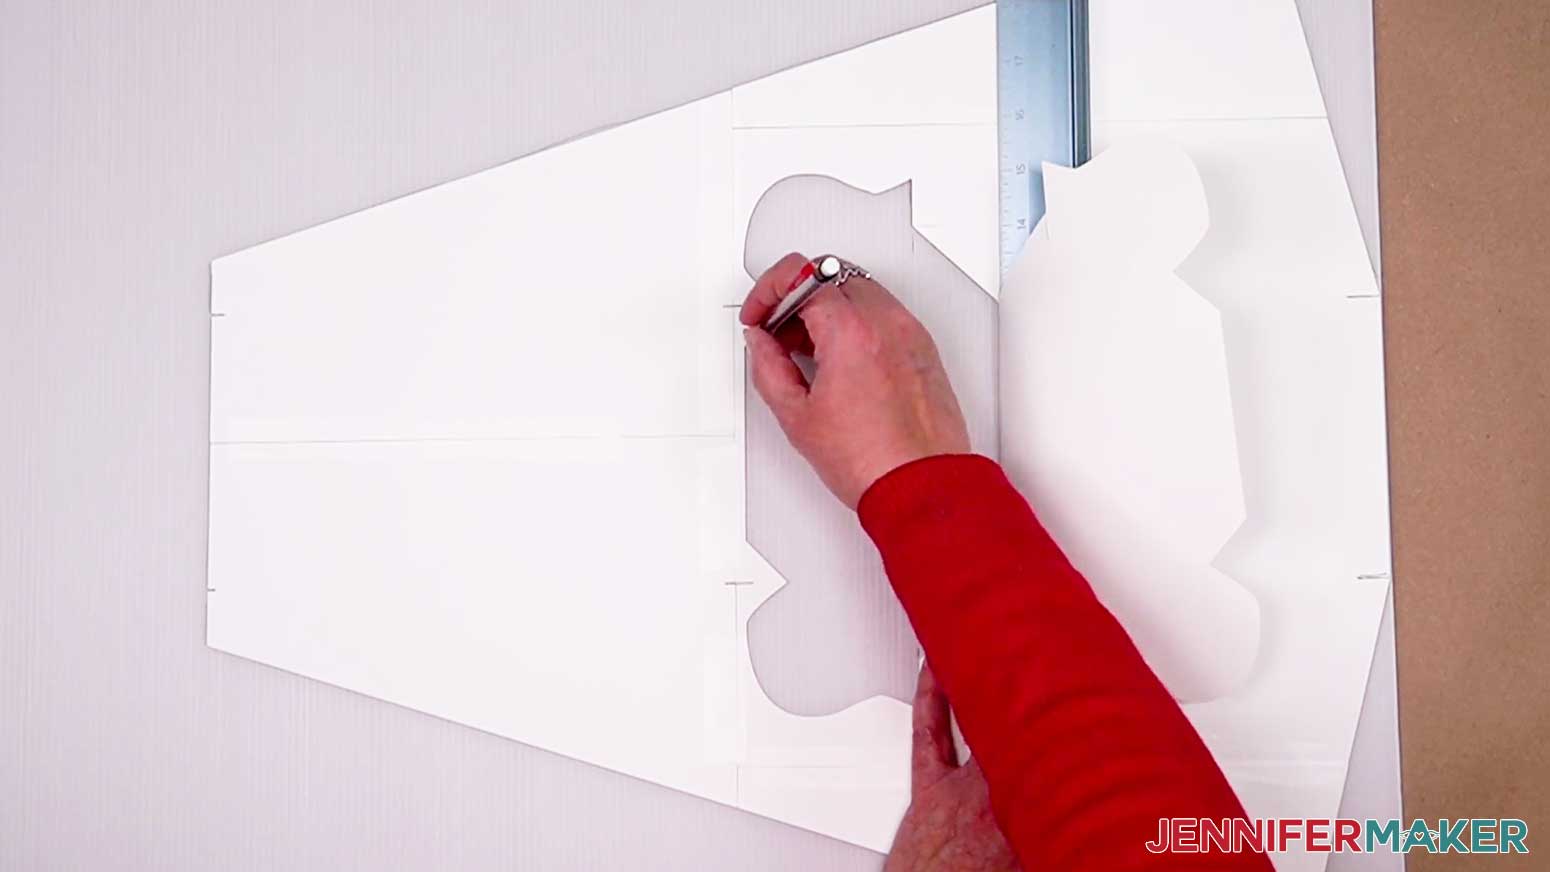
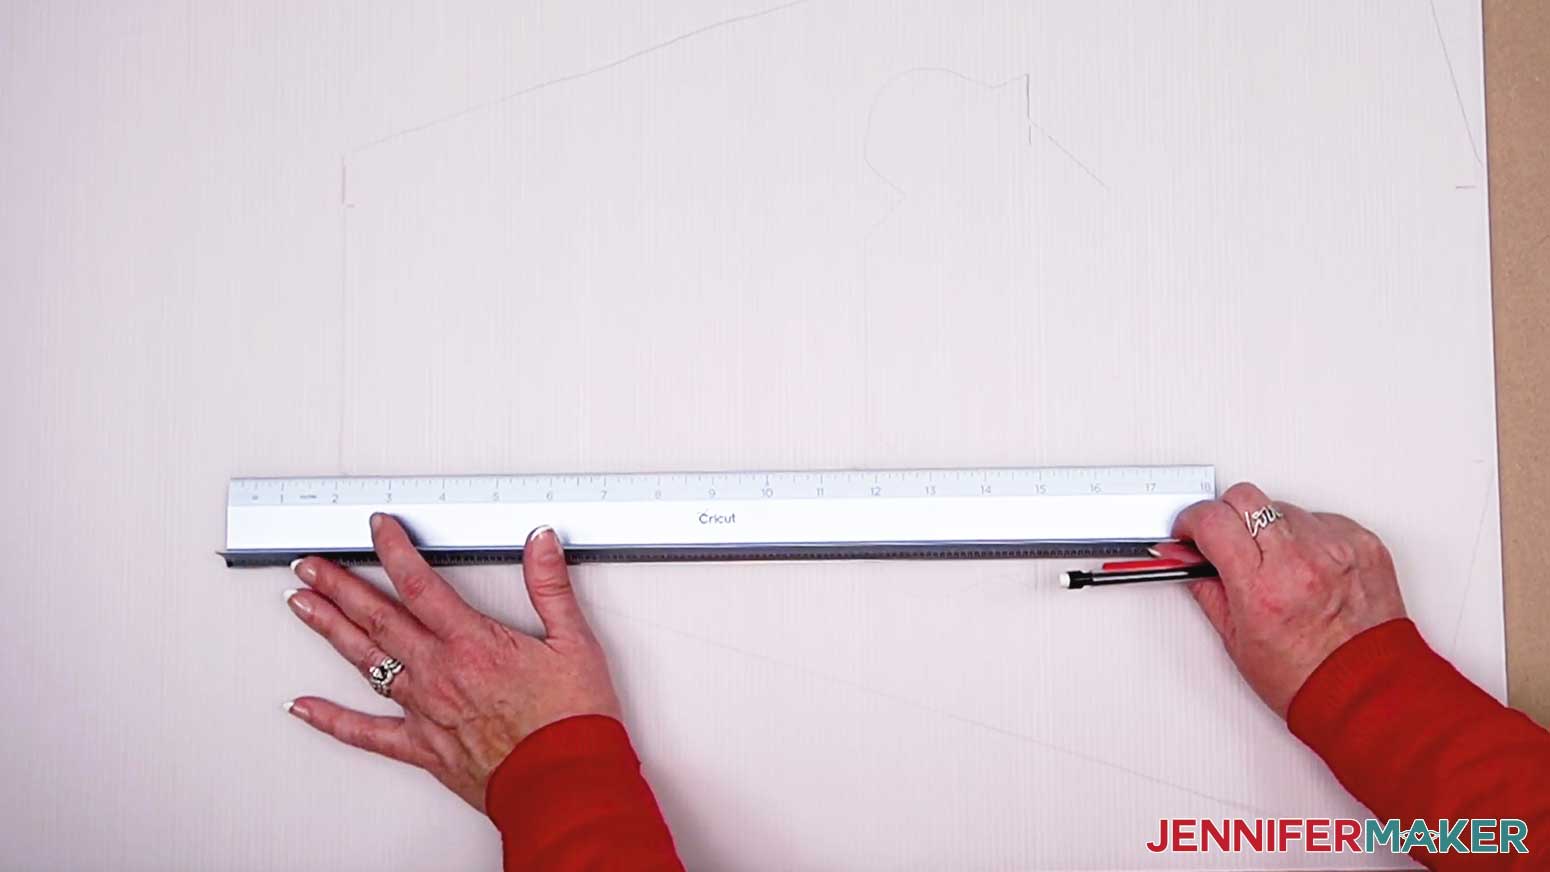
Using a ruler aligned with the top and bottom score line marks on the left side, draw a vertical line, stopping at the point of the V shape, then continuing down to the bottom. Repeat on the other side.
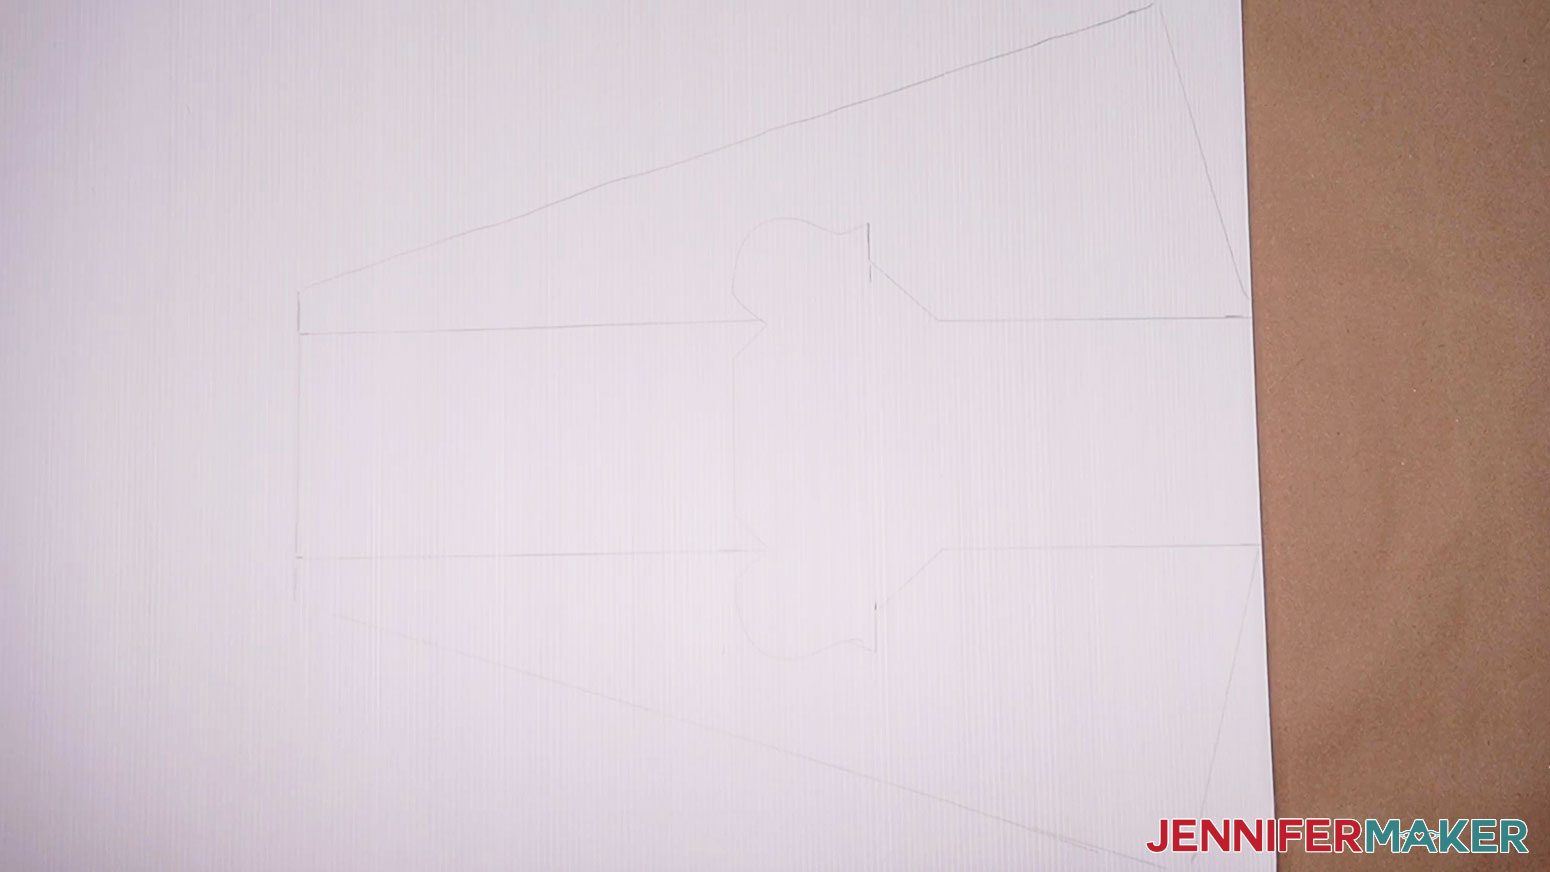
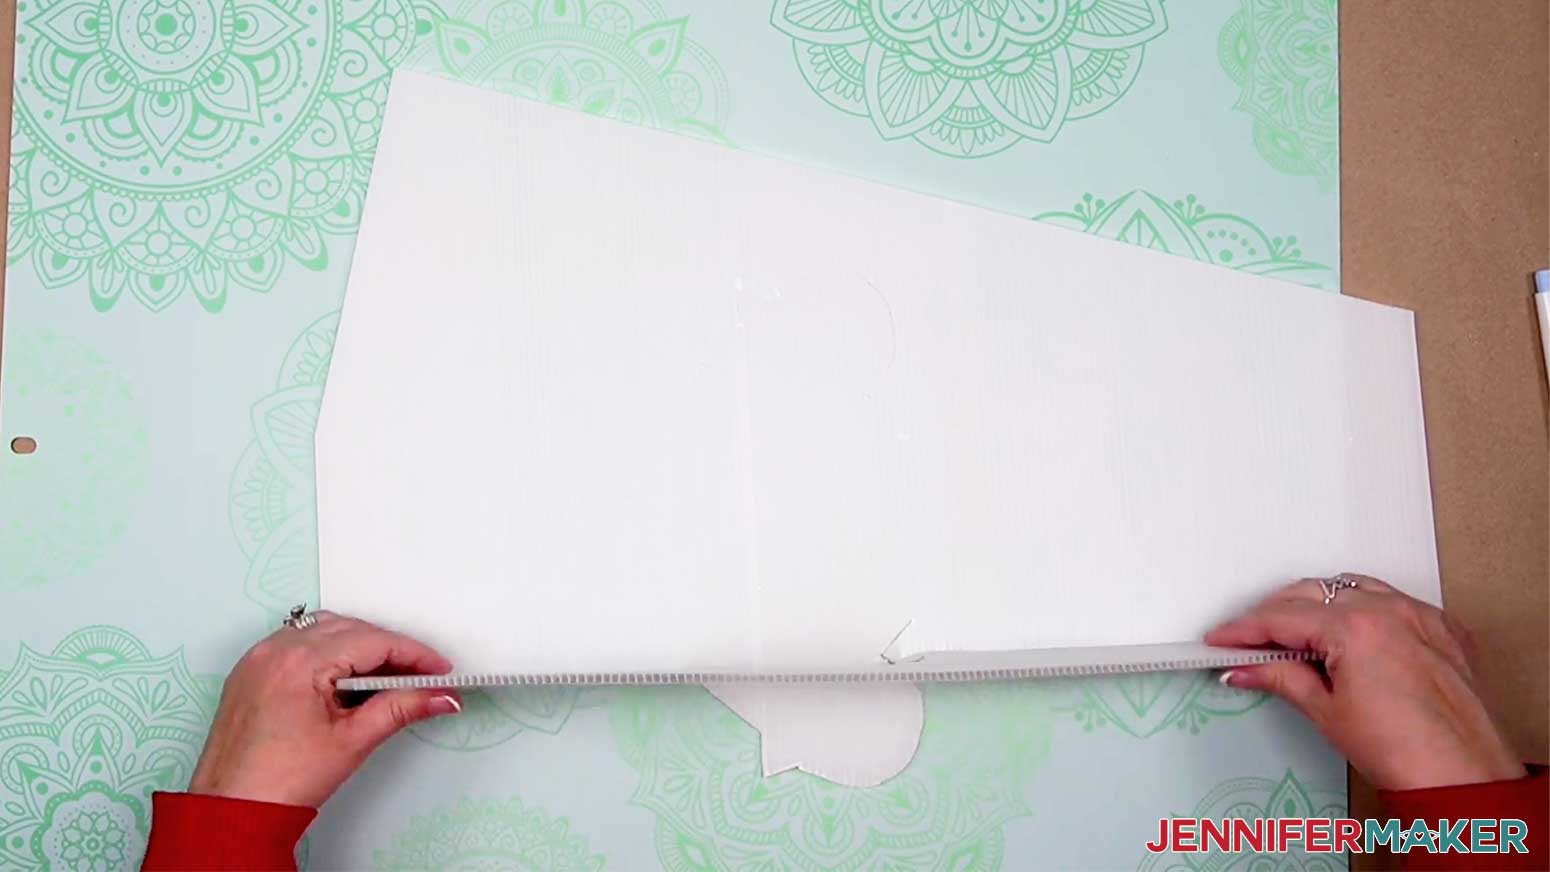
Using a craft knife, cut out the outer shape of the stand, and the inner flap shape, making sure NOT to cut where your score lines will be.
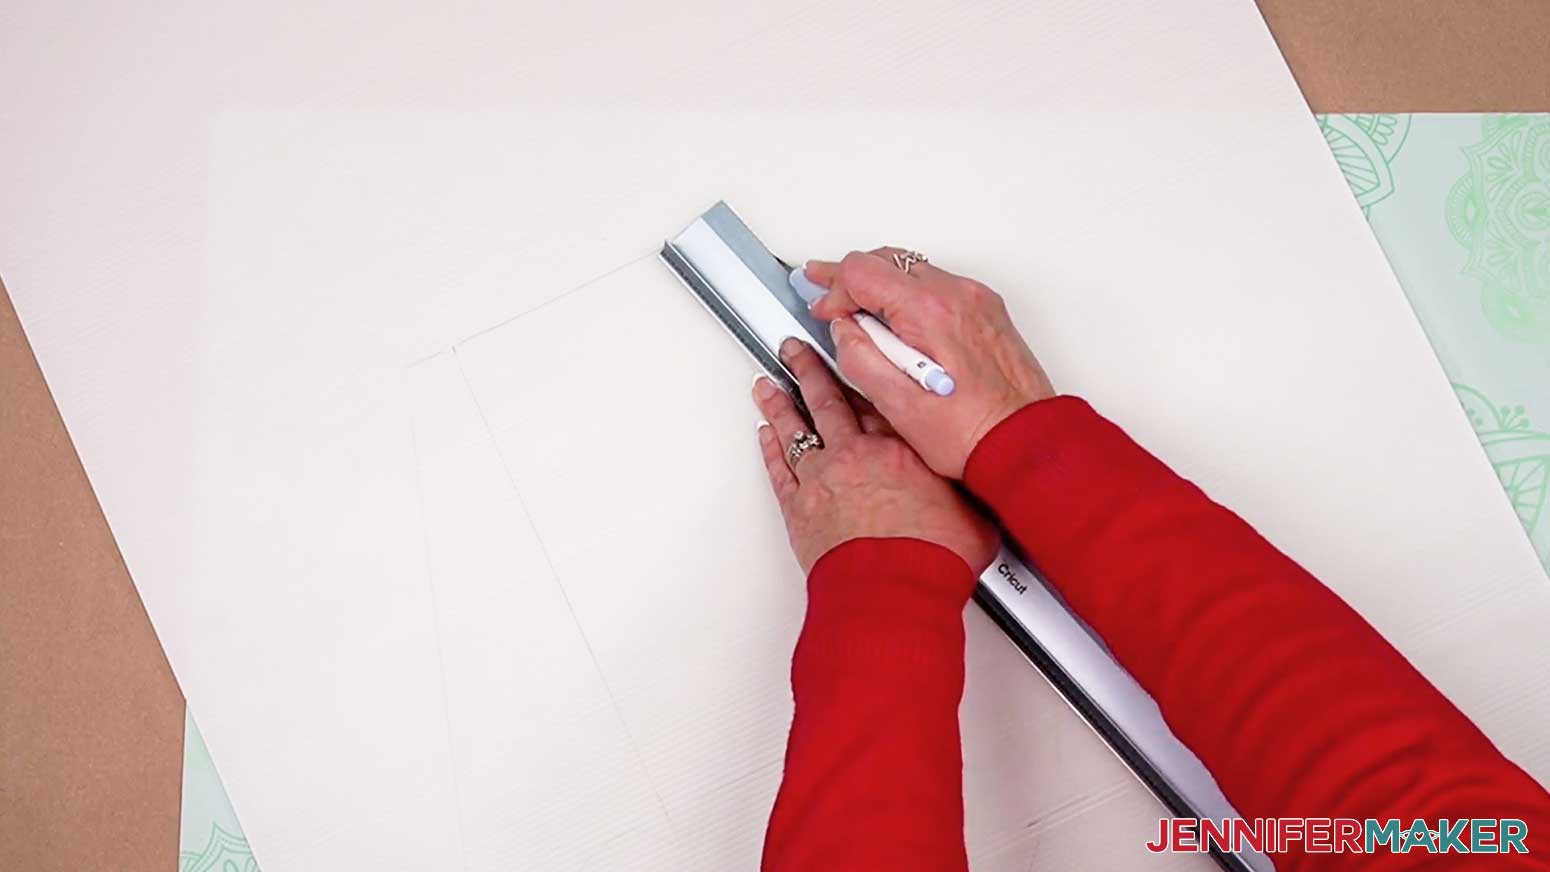
With your ruler and your burnishing tool or Cricut Scoring Stylus, make your score lines. Dent the plastic but try not to cut through it.
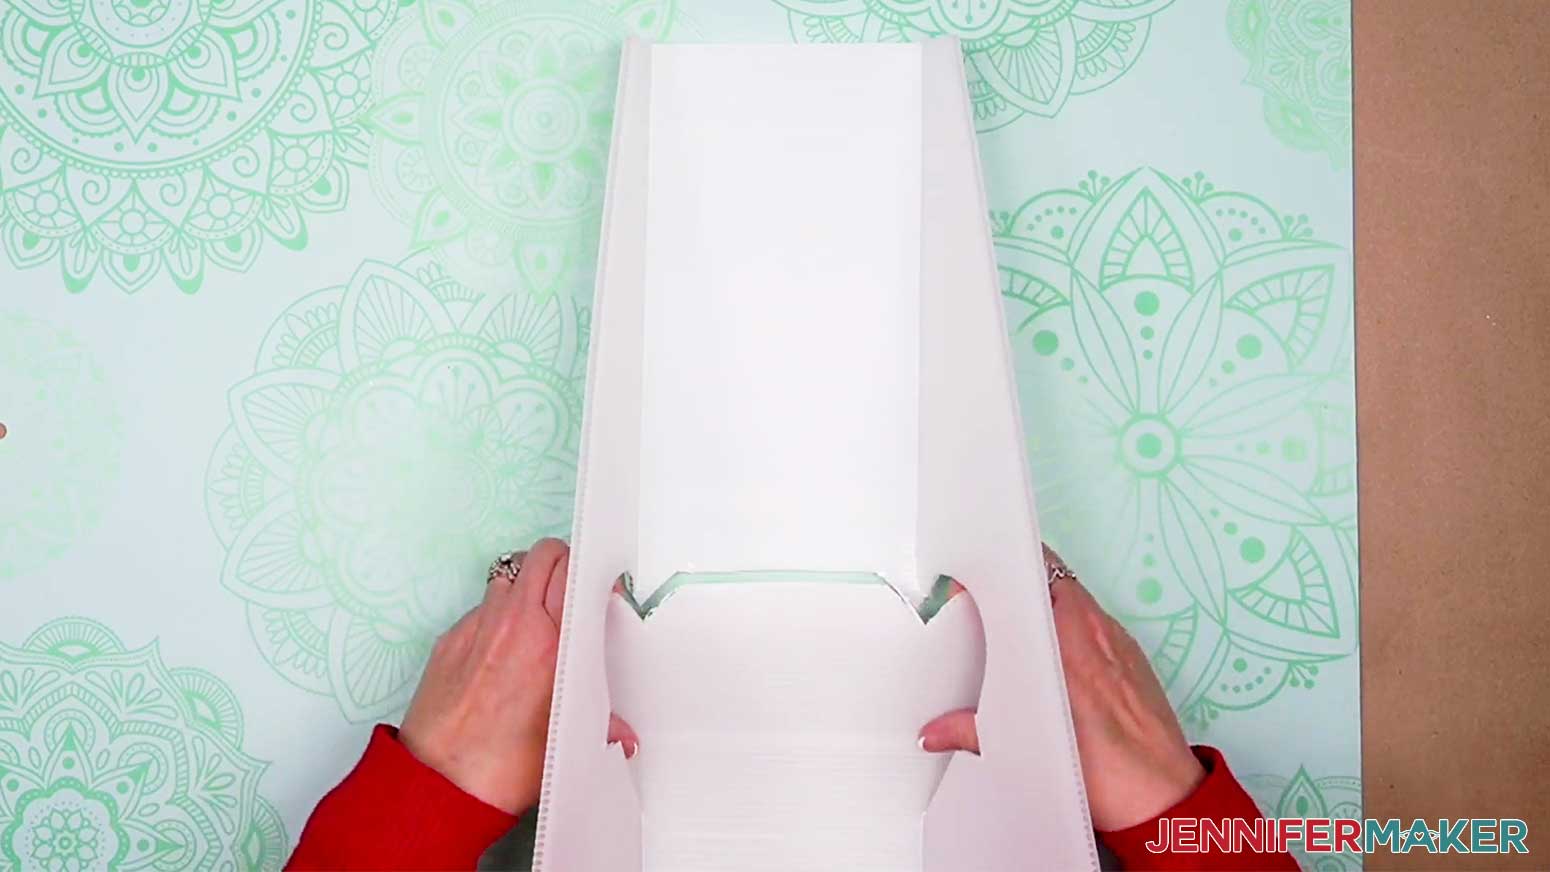
Carefully pop out the inner cut shape. Then fold up along your horizontal and vertical score lines. Fold the arms of the stand back toward you, making sure the inner flap stays flat, then flatten them back out. Next, fold the inner flap on the horizontal score line toward you, while also folding the arms back toward you.
Fold the inner flap down into the notches and into place.
Align the bottom of the stand with the bottom of the back of your cutout.
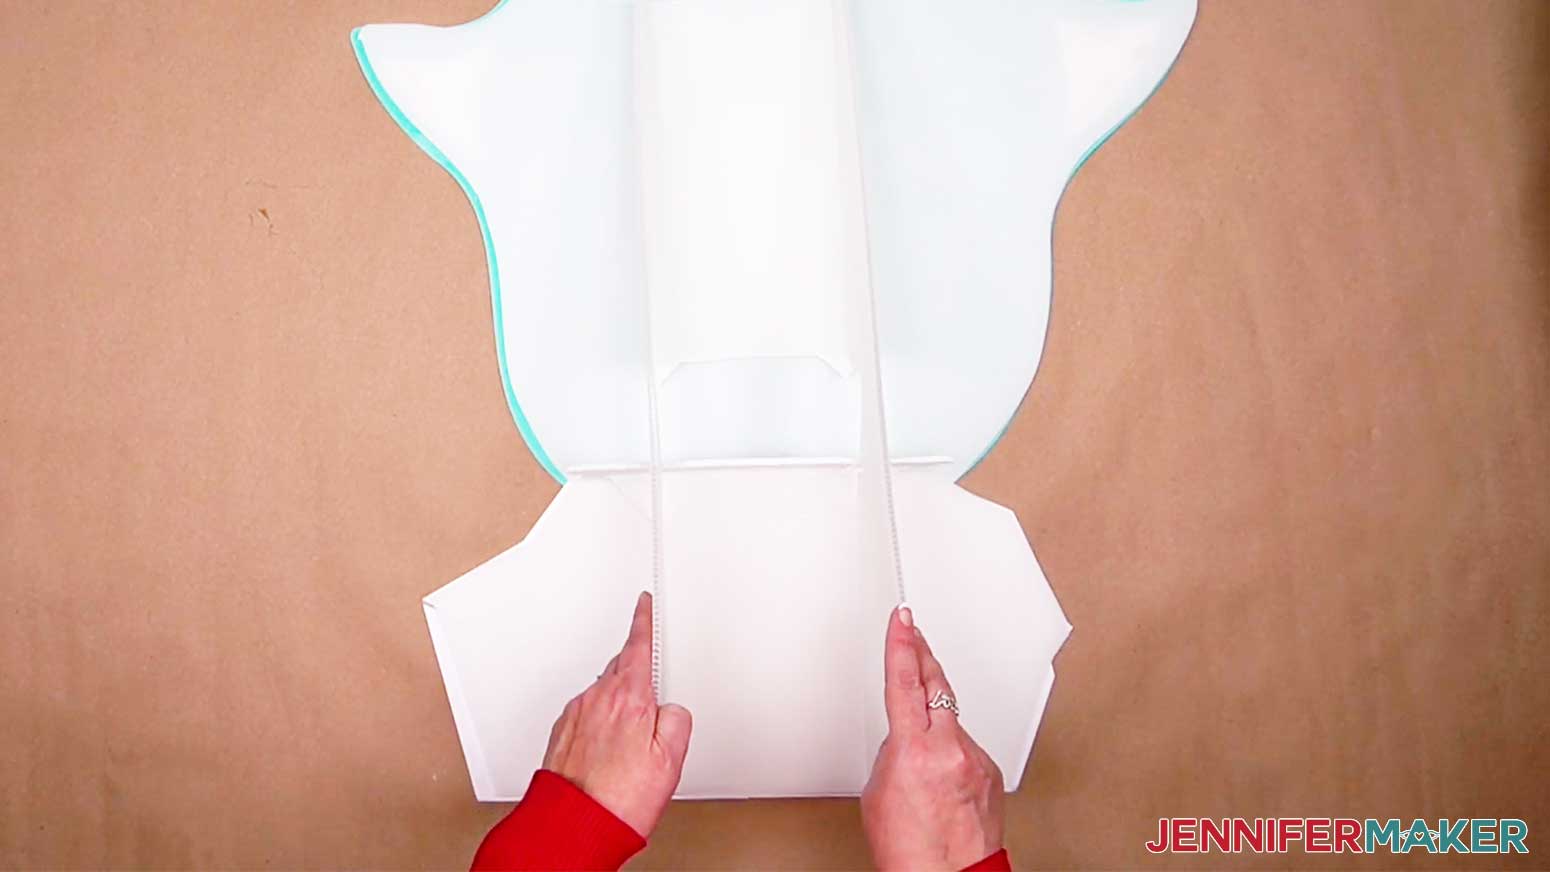
Use spray adhesive or your Bearly Art Glue to glue the flat side of your stand to the back of the mounted cutout.
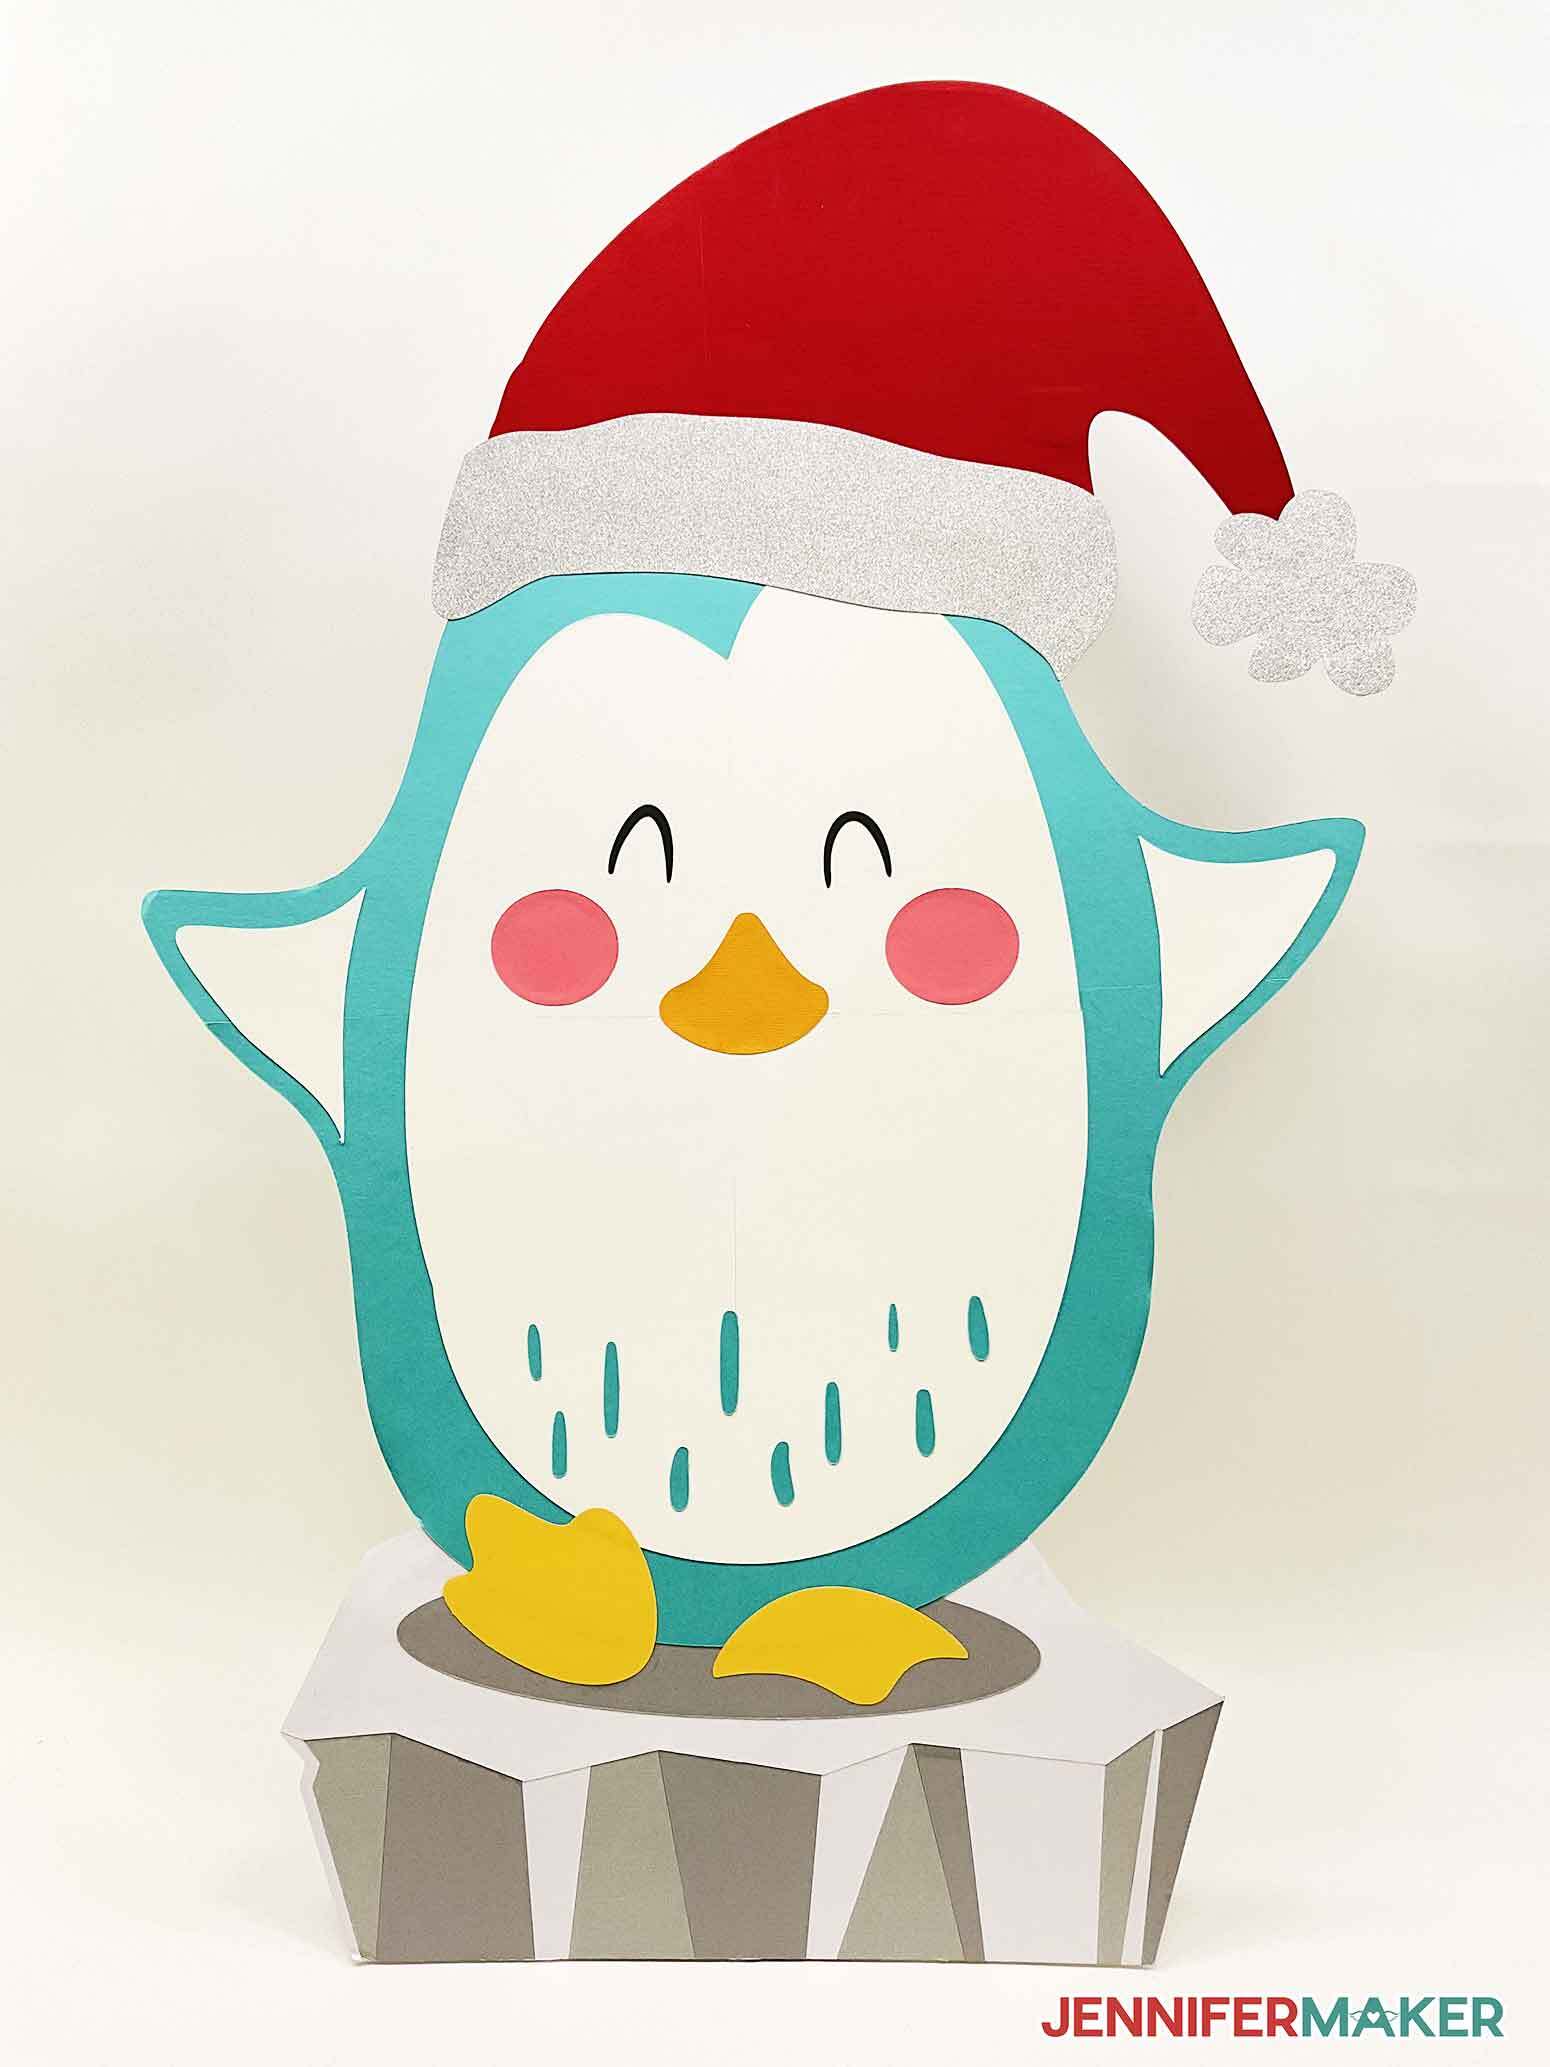
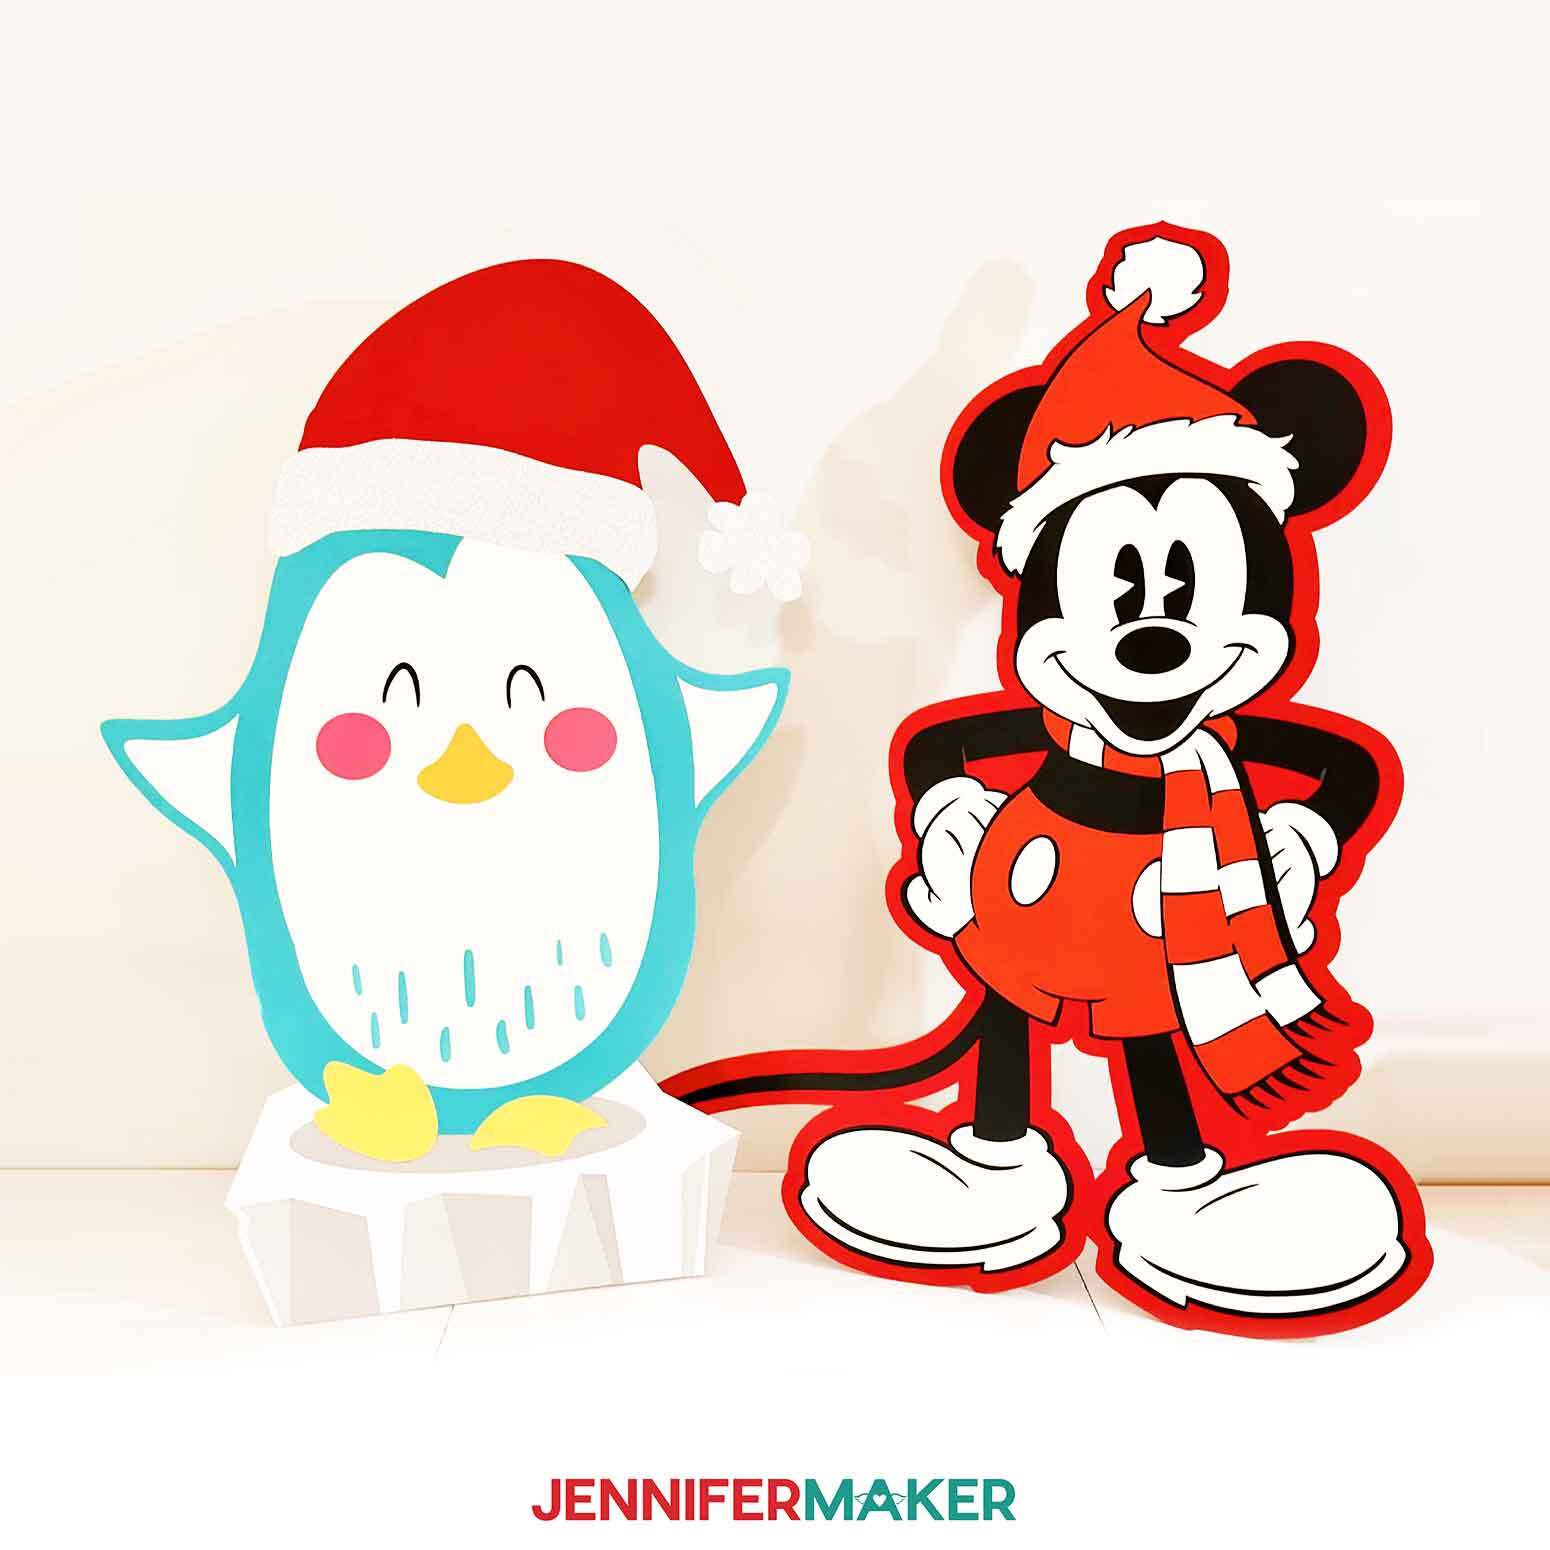
Wait about 5-10 minutes for the glue to dry, then stand up your cutout and see him come to life!
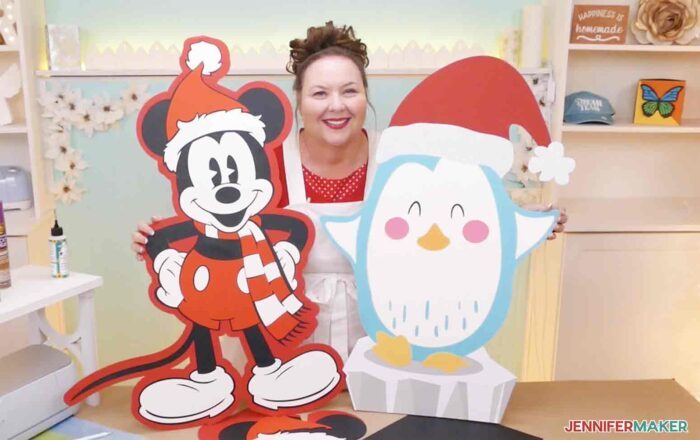
VARIATIONS:
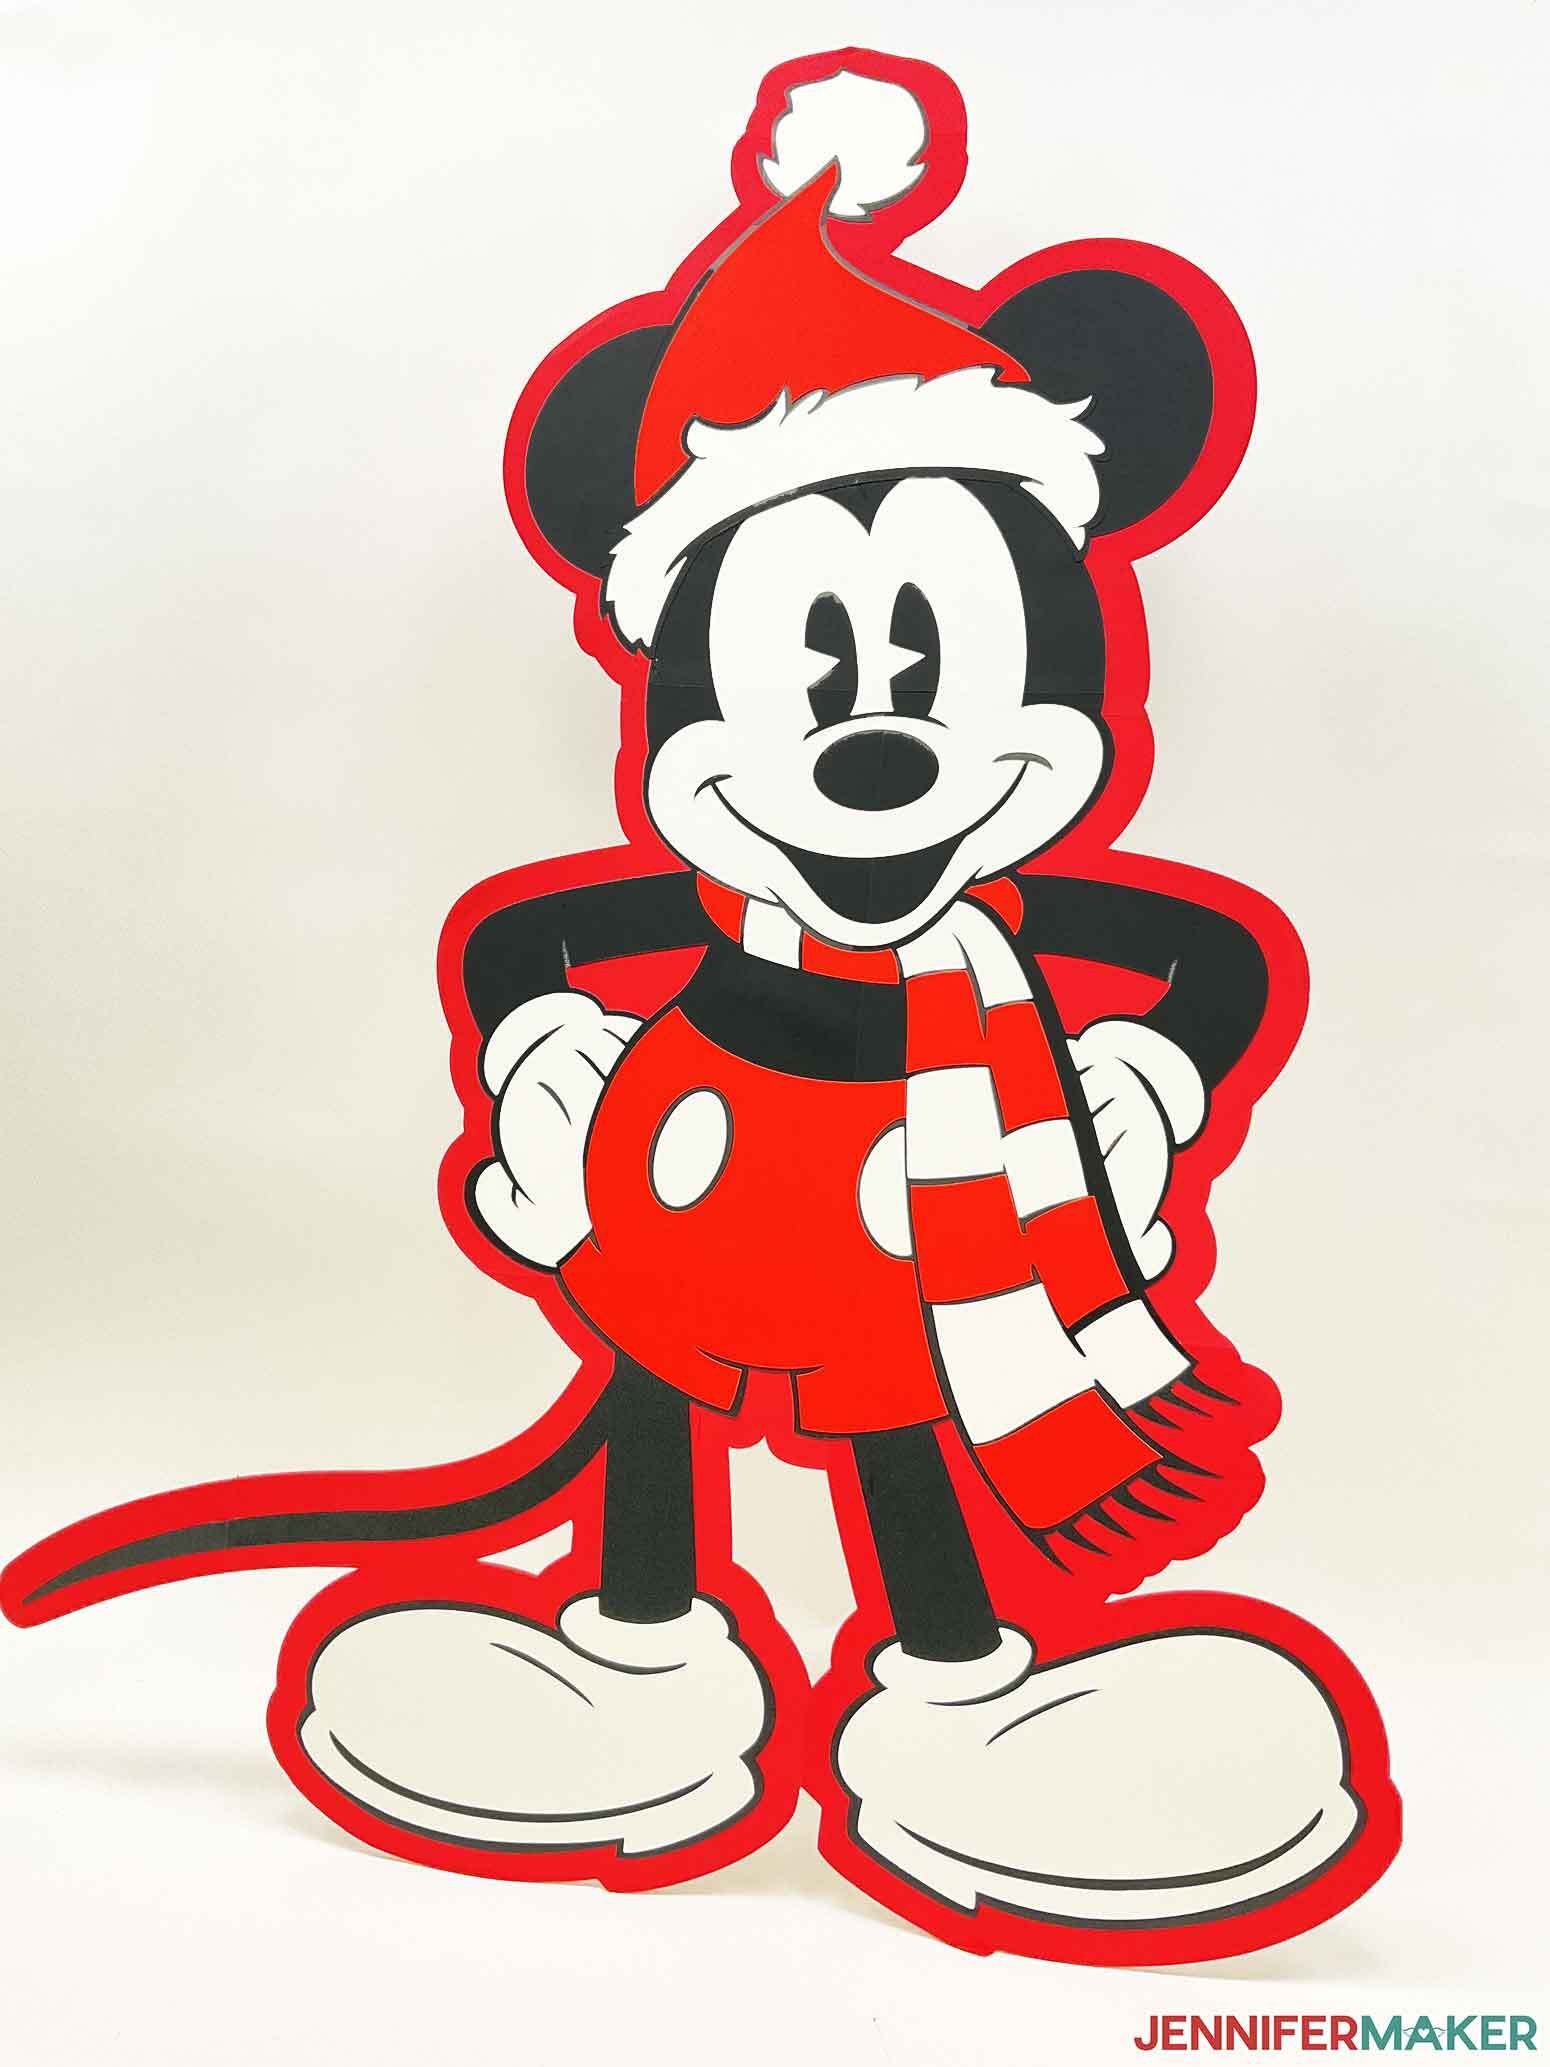
Now that you have all the steps and tips to create a DIY cutout and stand, you can apply the same technique to essentially anything. For example, you make a giant cutout of Mickey Mouse. I already pre-sliced this Santa Mickey in Design Space. So all you need to do is click “Make It.”

You can find my pre-sliced Mickey using my Design Space project link.
Please note Santa Mickey in mat-sized pieces is NOT a FREE FILE. At the time of this tutorial, there is a Cricut fee of $1.99 to use the licensed image.
Note, the original Mickey design (#M150F3BD) is not identical to this Mickey. I have omitted some of the background layers that were not necessary for this application of the design. Also, due to licensing restrictions, Mickey Mouse is unfortunately not available outside of the United States.
Follow the same steps above to cut, assemble, and mount a 36" Santa Mickey. Here is a list of the cardstock colors, weights, and material settings I used for my Santa Mickey.
Cardstock Warehouse, 12" x 12", 100 lb - Heavy Cardstock - Less Pressure
- Red Rose (base layer)
- Candy Apple Red (red clothes)
- Sweet Tooth (white layers)
AC Cardstock, 12" x 12", 80 lb - Medium Cardstock - Default Pressure
- Black (all black layers)
Neutrals Variety Pack
- Graphite (gray accent layer)
Once you have all your layers and pieces cut and taped together, this is the order in which I attached the layers:
- Deep Red Body Layer
- Gray Shadow and Hat Placement Layer
- Back Body Layer
- White Face Layer
- Black Hat Layer
- Red Hat and Shorts
- White Hat Trim, Gloves, and Shoes
- Red and White Scarf
Once your Santa Mickey’s layers are all attached, trace him onto a sheet of the corrugated plastic. Note that his width is slightly larger than the plastic sheet so his tail will hang off a bit. Trace the necessary piece onto extra plastic, then use Scotch Tape to tape the plastic sheet pieces together.
Use your cardstock stand template to trace, cut and score a stand out of a plastic sheet. BUT before attaching the stand, I want to make a couple of extra modifications.
Mickey has a gap between his legs and a small gap between his feet. but I don’t want to see the stand there. So I’m going to align the stand with Mickey exactly where I want him to be, then trace the gaps onto the back stand and cut them out. This is completely personal preference and an optional step, but I think it’s a nice finishing touch.
Now I’ll use spray adhesive to attach the stand to the back of my Mickey cutout and he's DONE!
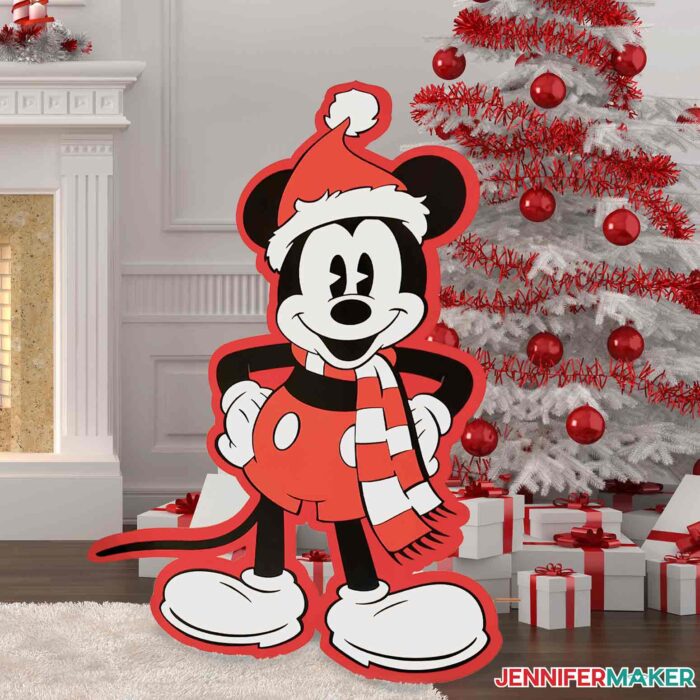
STEP 7: SHOW IT OFF
Display your giant cutout characters however you like! Since they use cardstock, they're safest indoors except on the driest of days.
Notes
*For our international readers: please note that if you are not able to find Mickey Mouse in Design Space, it is because the Disney-licensed image is likely not available outside of the U.S. due to licensing.
Recommended Products
As an Amazon Associate and member of other affiliate programs, I earn from qualifying purchases.

Answers to Your Questions About DIY Cut Out Characters
Q: How do you make a character out of cardboard cutouts?
A: You can use the steps from my tutorial to trace your DIY cut out characters on to cardboard, too!
Q: How do you make your own cut out on Cricut?
You can use the slicing and assembly techniques from my DIY cut out characters tutorial on any design you like!
Q: How do you make cardstock cutouts?
A: You can cut cardstock in any shape to create your character with a Cricut, or print the design as a PDF to trace on your material. Then just cut it by hand!
Q: What is the best thing to cut foam with?
A: I prefer to cut foam core with a sharp craft knife held at an angle. Holding it straight up and down makes a mess! Remember to cut on a self-healing mat to avoid damaging your work surface.
Q: What is Merry Maker Mingle?
A: Each day in December leading to Christmas, I present you with a brand new “gift” — a project to craft, make, or do. You can make these projects on a Cricut cutting machine or by hand if you don’t have one. Most of our Merry Maker Mingle projects will come with a fun video with yours truly, a step-by-step printable photo tutorial, and a free pattern/SVG cut file. Sign up to get daily updates and prizes!
Get my free SVG files to create DIY Cut Out Characters
I love seeing what you make with my designs and how you use them! Please share a photo of your DIY cut out characters in our Facebook group or tag me on social media with #jennifermaker.
Love,

Want to remember this? Save this DIY Cut Out Characters Tutorial to your favorite Pinterest Board!