
Learn how to make a simple and stylish split monogram in Cricut Design Space the fast and easy way!
It’s fall, my all-time favorite season! Let’s make something fun together. A reader asked me how to make a fancy monogrammed pumpkin, so I thought it would be fun to just show everyone how to do it! Split monograms are a fun and classy way to show off your family spirit, and they are surprisingly easy to make in Cricut Design Space.
So now let me show you how to make an easy split monogram project! This post contains some affiliate links for your convenience (which means if you make a purchase after clicking a link I will earn a small commission but it won’t cost you a penny more)! Read my full disclosure policy.
What You Need to Make a Pumpkin with a Split Monogram in Cricut Design Space
- Craft or real pumpkin (I’m using a 13″ white craft pumpkin)
- Permanent outdoor vinyl
- Transfer tape
- A Cricut Explore or Cricut Maker
- (Optional) The free SVG files Design #108 (they are in my resource library — to get the password to it, fill out the form at the bottom of this post)
How to Make a Split Monogram Pumpkin
This Split Monogram Pumpkin tutorial is broken into three parts:
- How to use a template in Cricut Design Space
- How to split a monogram in Cricut Design Space
- How to Cut and Apply the Vinyl to your Pumpkin
How to Use a Template in Cricut Design Space
Tip: Watch the video at the top of this post to see how to make this design quickly. If you prefer written directions and screen shots, read on!
To begin, measure your pumpkin. You need to know it’s height (minus the stem) and the width (diameter, not circumference). If you’re struggling with this, lay your pumpkin on a big piece of paper (position it so the place you want your monogram to appear facing UP) and draw an outline with pencil — now remove the pencil and measure the height and width of the outline.
My craft pumpkin is 13″ tall by 10″ wide.
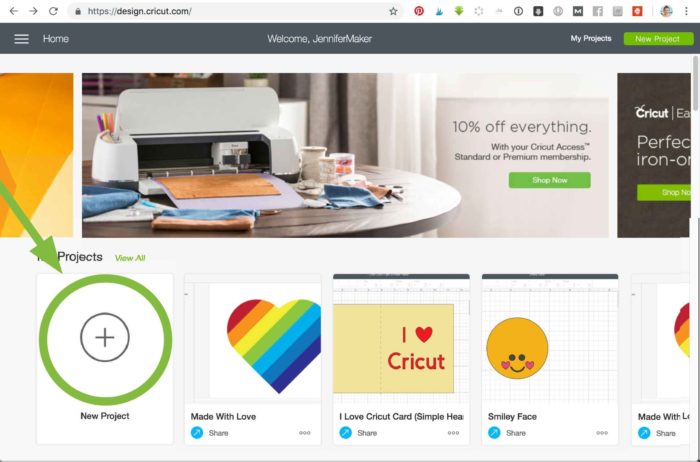
Open up Cricut Design Space by going to design.cricut.com or by tapping the Cricut Design Space app on your mobile device and click New Project.
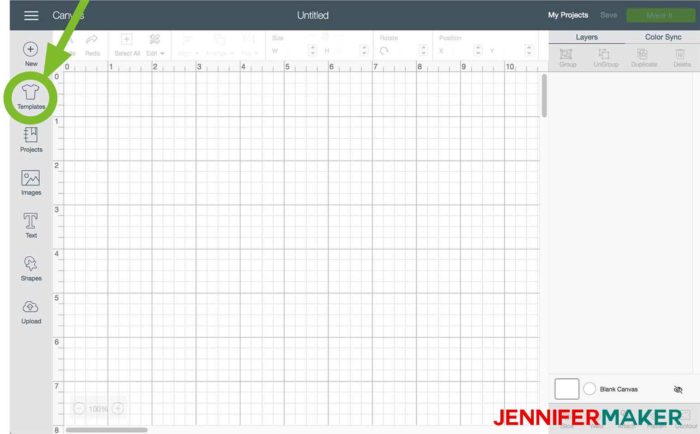
Click the Templates button on the left side (this step will work only in the desktop version of Cricut Design Space, not in the iPhone/iPad/Android app version).
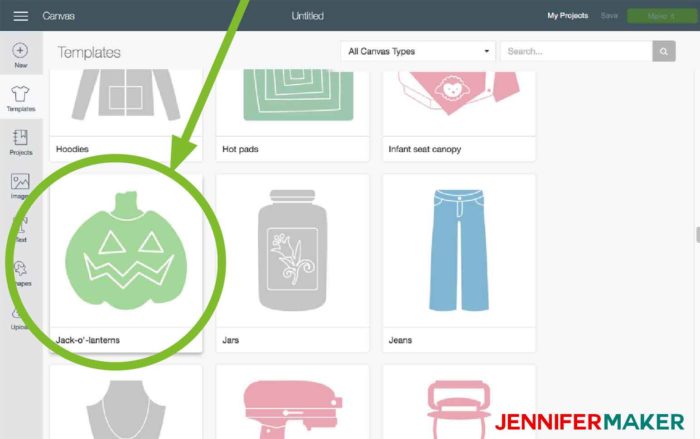
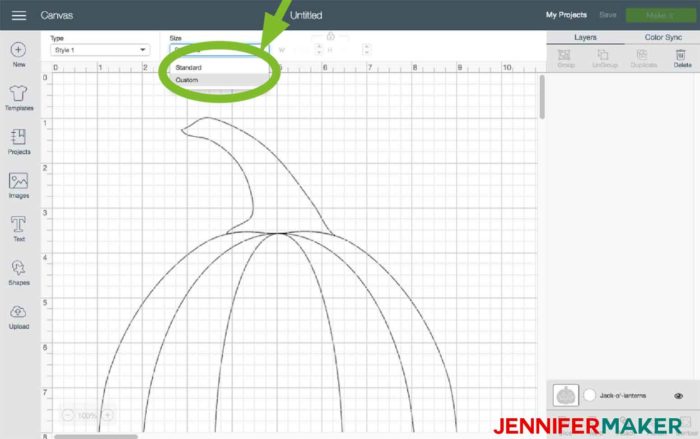
Scroll down through the template options and click Jack-O’-Lanterns.
When the template appears on your canvas, immediately click the Size drop-down menu and choose Custom.
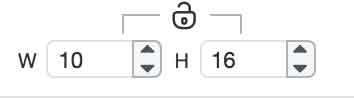
Now click the little lock button to the right of the menu (to unlock the relational sizes). Put your pumpkin’s width and height into the box.

Now if you look at this pumpkin template, you’ll notice the stem is quite high and it’s height is included in the measurement. But you measured your pumpkin without the stem. So add a few inches to your height in the box here in Cricut Design Space to make sure the pumpkin template is the same size as your actual pumpkin.
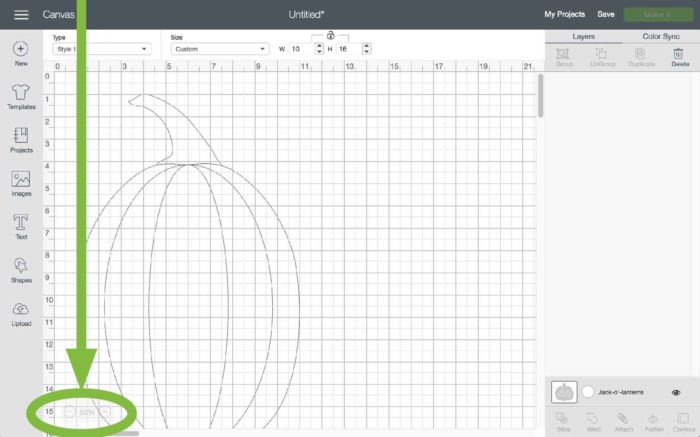
Now resize your Canvas so you can see the entire pumpkin by clicking the minus sign in the lower left corner.

Tip: If you ever need to change the size of this template again, just click on the template name in the Layers panel on the right side of your screen.
Now you’re ready to begin designing your split monogram pumpkin!
How to Make a Split Monogram in Cricut Design Space
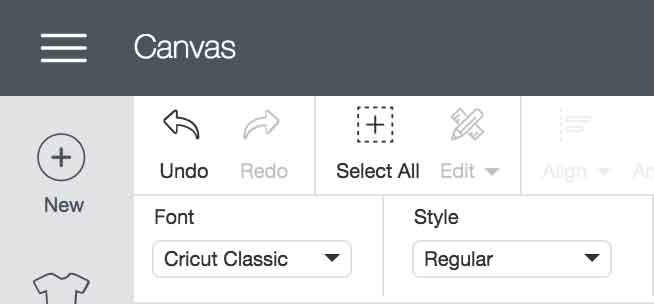
To begin, we need to put in your big initial letter. So click the Text button on the left side.

Pick a font (the ones with prices below their names will cost you extra) and type your initial. I’m using Cricut Classic (a free font in Cricut Design Space) for this split monogram tutorial.
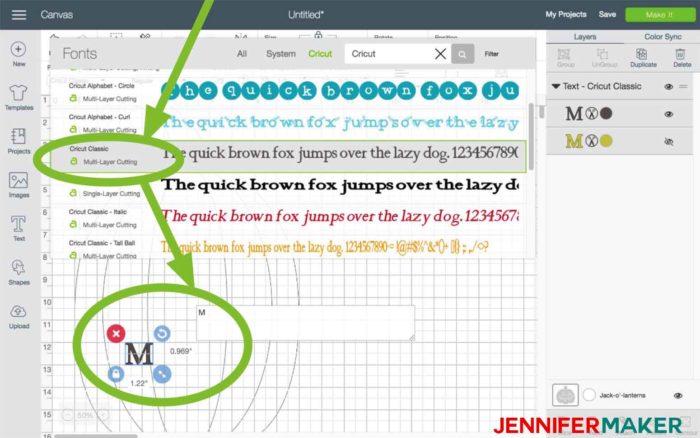
Click on your initial and center it on your template (click and drag it into position).
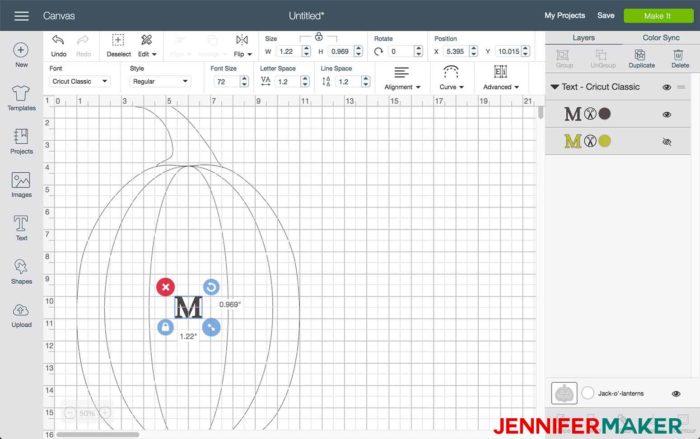
Now click and drag the resize (double-arrow) icon in the lower right corner of your initial to make it larger, allowing it to fill at least 50% of the pumpkin.
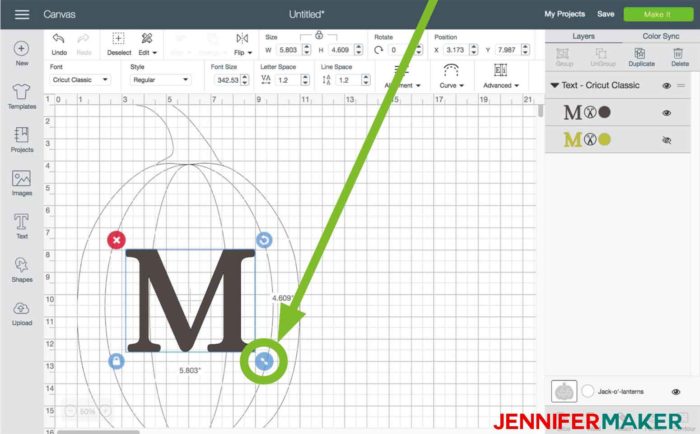
Tip: If your initial seems too tall or too wide, you can change that by clicking the lock button in the lower left corner of the initial, then clicking and dragging the resize button again to change its dimensions.
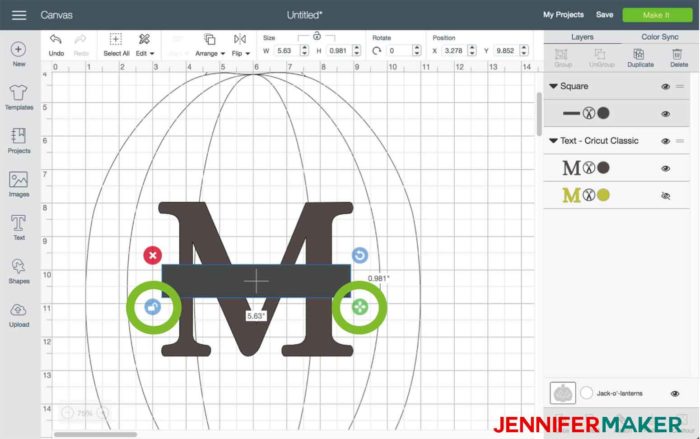
Now click the Shapes button on the left side and choose Square.
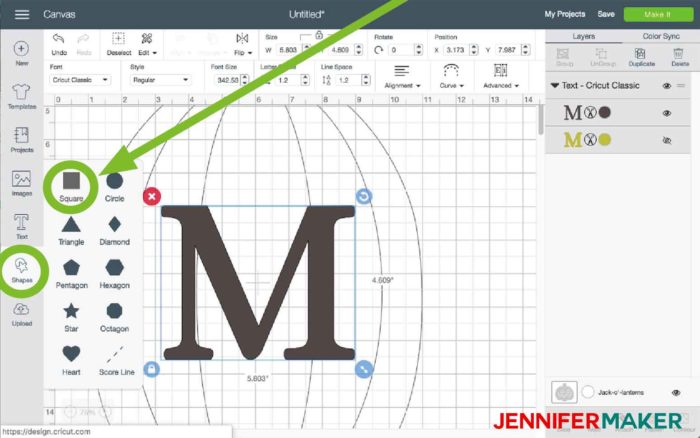
Click the lock button in the lower left corner of the square (to unlock it), then click and drag the resize button to make the square into a wide rectangle about 1/5 to 1/4 the size of your initial. Do what looks good to you!
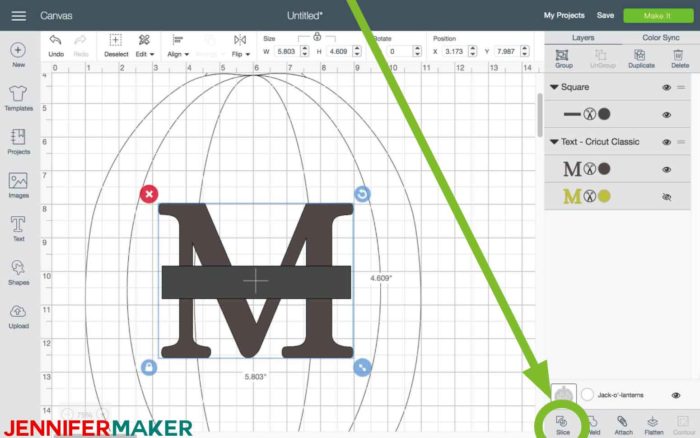
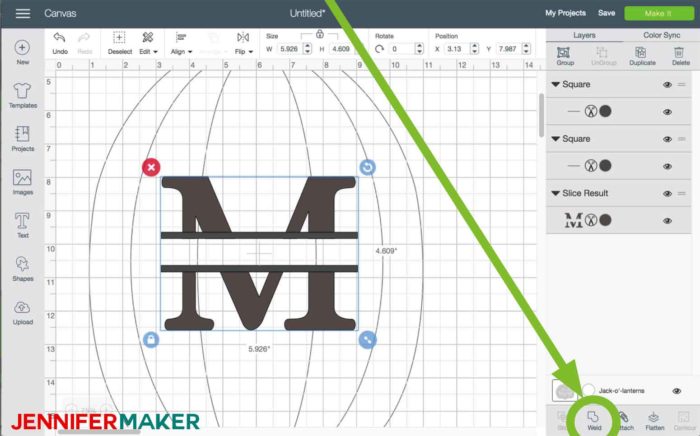
Now select everything and click Slice in the lower right corner of Cricut Design Space.
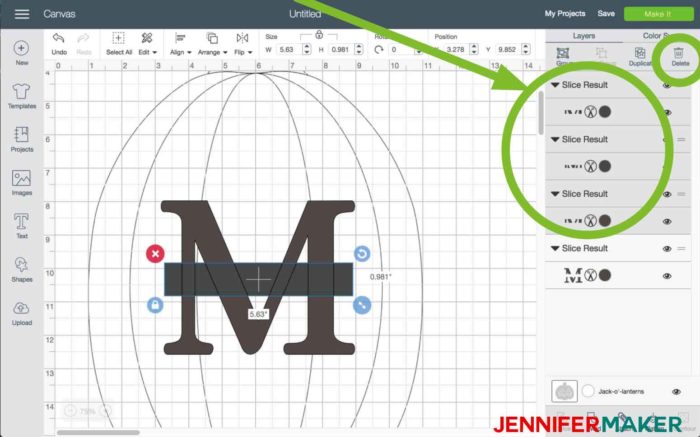
You’ll be left with some extra bits (centers of the initial you sliced out). Select these Slice Results all in the Layers panel and delete them (I had three to delete, you may have only two).
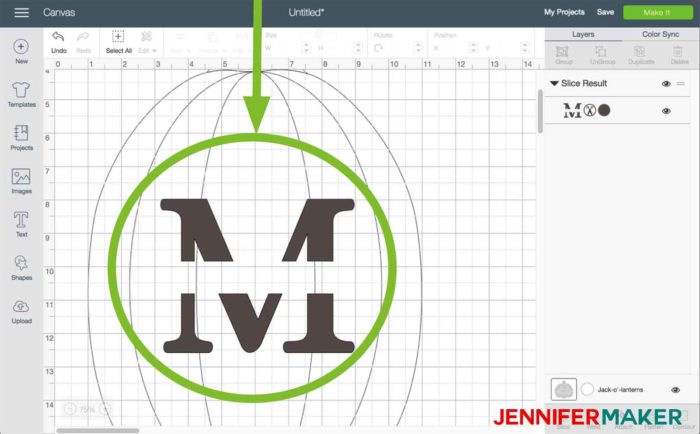
You can see your split monogram starting to take shape!
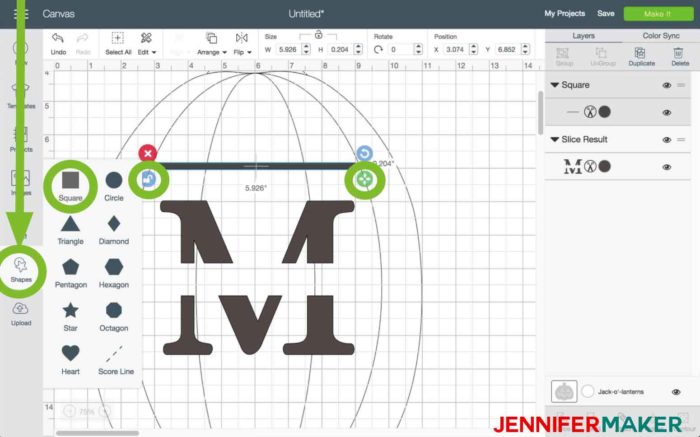
Now we again click on Shapes and select Square. This time we need to unlock and resize that square into a skinny rectangle a little wider than our initial, like this:
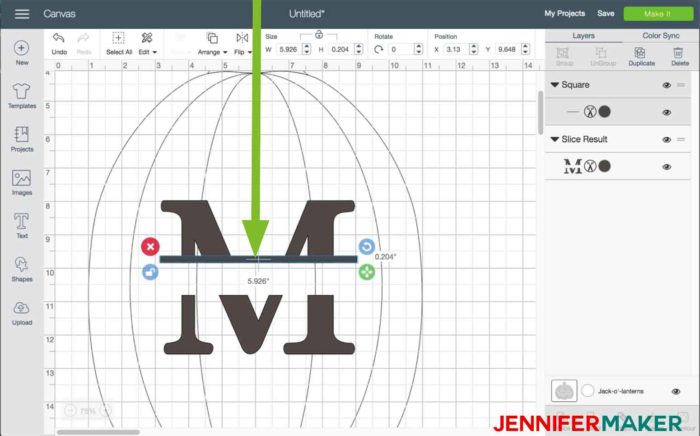
Click and drag the rectangle into place just above where the top half of your initial ends.
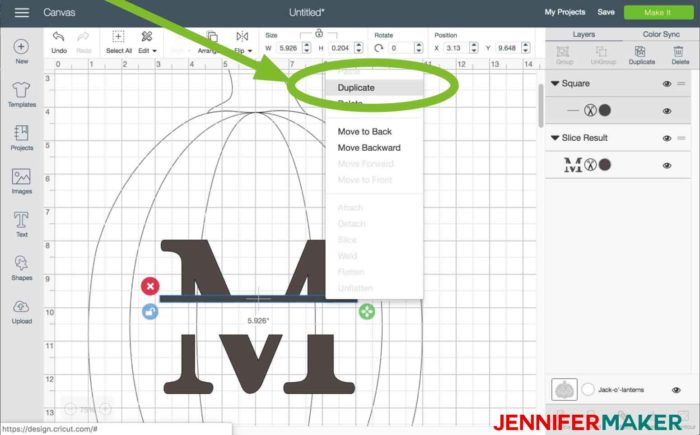
Right-click on the line you just made and choose Duplicate from the drop-down menu that appears. (If for some reason you cannot find this menu, just copy and paste the line.)
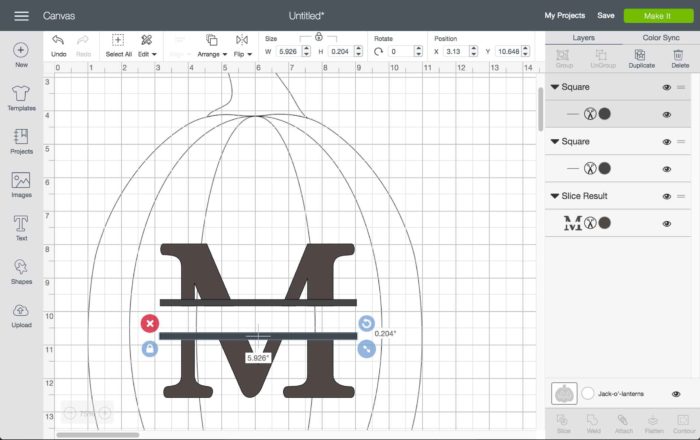
Move the line into position at the top of the bottom half of your split monogram:
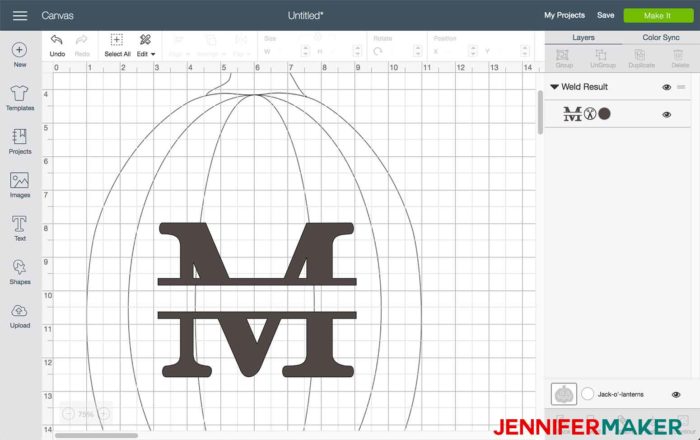
Now select everything and click Weld to stick it all together.
This is what it will look like after you click Weld — it is now just one layer.
It’s time to put your name in! Click on Text, type your name, resize it, and move it into position in your split monogram.
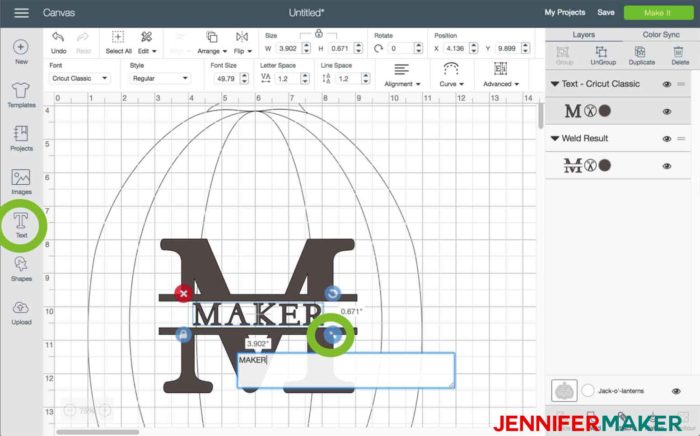
If the letters don’t seem to fit, you can select the text and click Letter Space in the top toolbar to increase (or decrease) the space between the letters.

If you have it the way you like it, you can select everything and click Weld again to mush it all down into a single layer. But if you think might edit it again, just click Group instead.
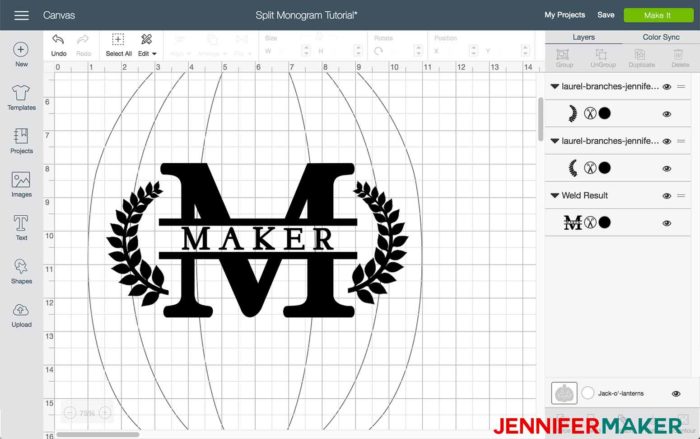
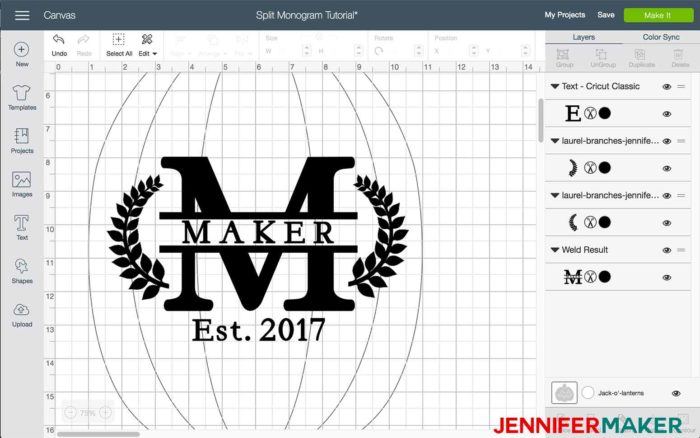
And there you have it — an awesome split monogram made in Cricut Design Space.
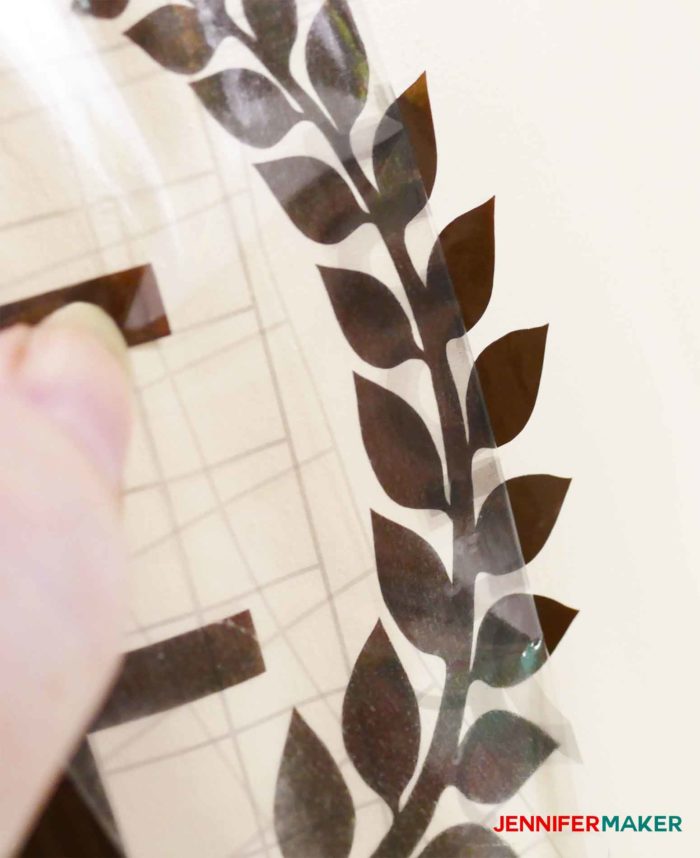
If you want to add some laurel branches on either side of it, I’ve created some pretty ones for you to use for free! You can download the SVG file (Design #108) and use this tutorial to upload them to Cricut Design Space. Or you can buy some from Cricut Design Space if you prefer (search on “laurel” or “branches”).
And if you want to put any other text with your initial, like “Established” and the year, do it now with the Text button.
Now you may note that my split monogram doesn’t fill all the vertical space. If that is okay, with you, just move on to the next step. But if it bugs you, select everything, click the lock icon, and click and drag the resize icon until it looks the way you’d like. I made my split monogram a little taller.
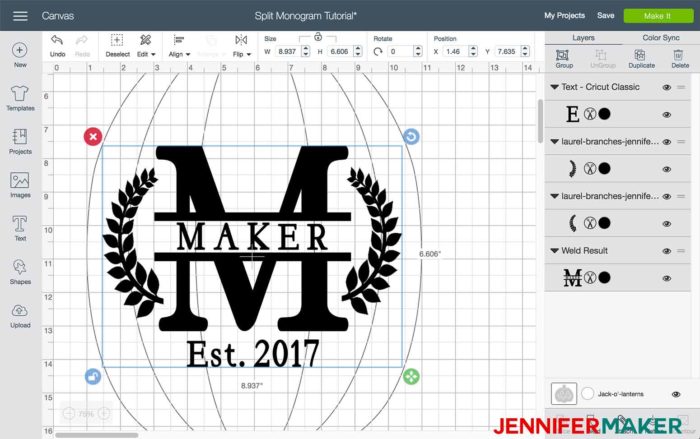
To finish up, select everything and click Group to keep it all together. Click Make It.
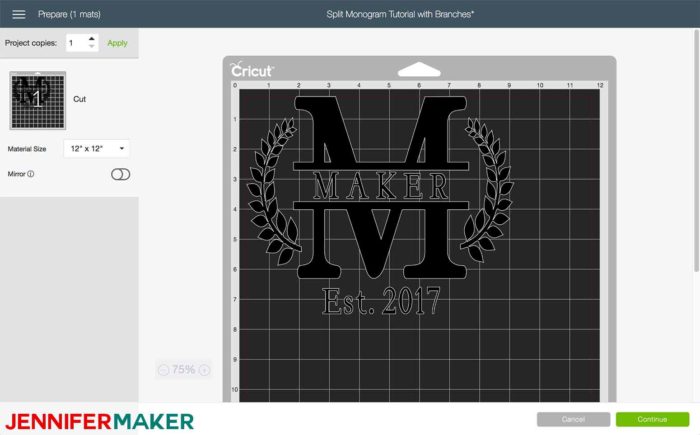
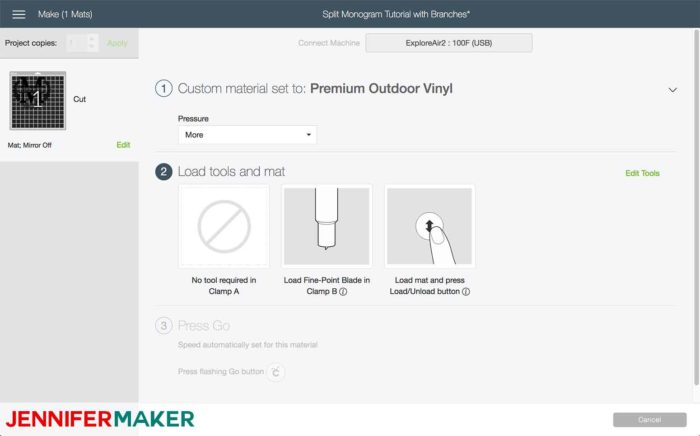
Now select the appropriate material (I’m using Cricut Premium Outdoor Vinyl), load your mat, and clicking the flashing Go button on your machine.
Congratulations, you’ve made a gorgeous split monogram perfectly scaled to your project!
How to Cut and Apply the Split Monogram Vinyl to your Pumpkin
Put your vinyl on your mat, paper side against the mat (so vinyl side up). Put it in your Cricut and cut it!
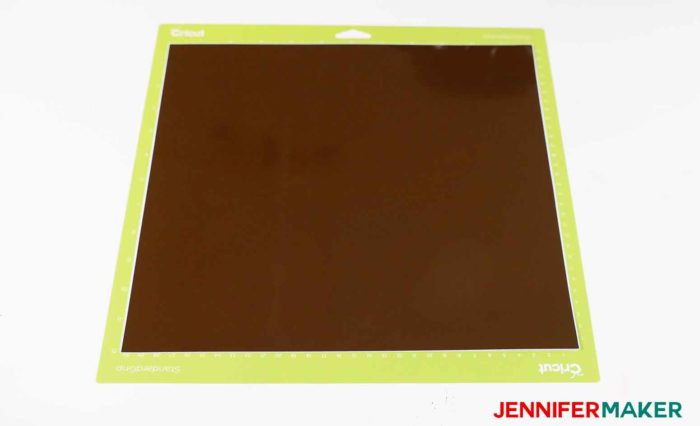
Once the vinyl is cut, remove the extra vinyl from the design.
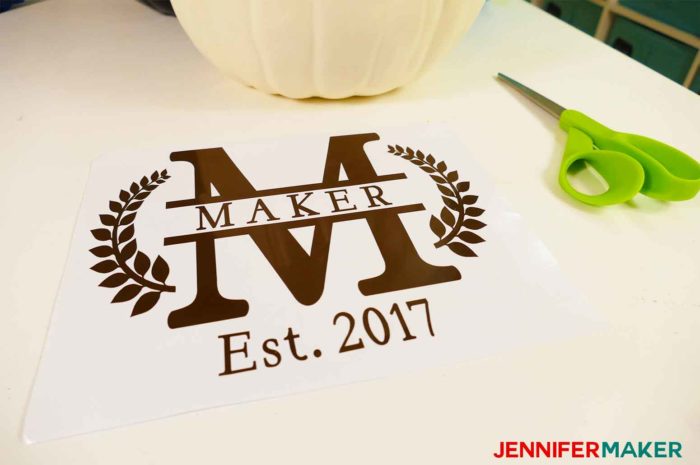
Hold the design up to your pumpkin to make sure it’s still the size you intended. If it is not, this is a better time to fix it than later on!
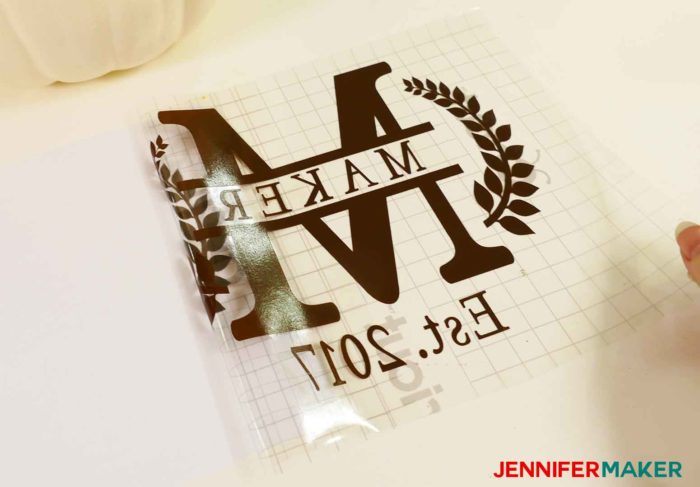
Apply transfer tape to the top of your split monogram vinyl decal.
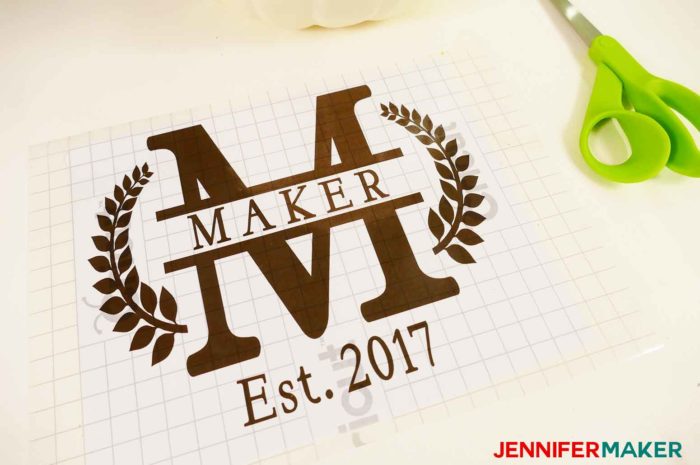
Remove the backing off the transfer tape.
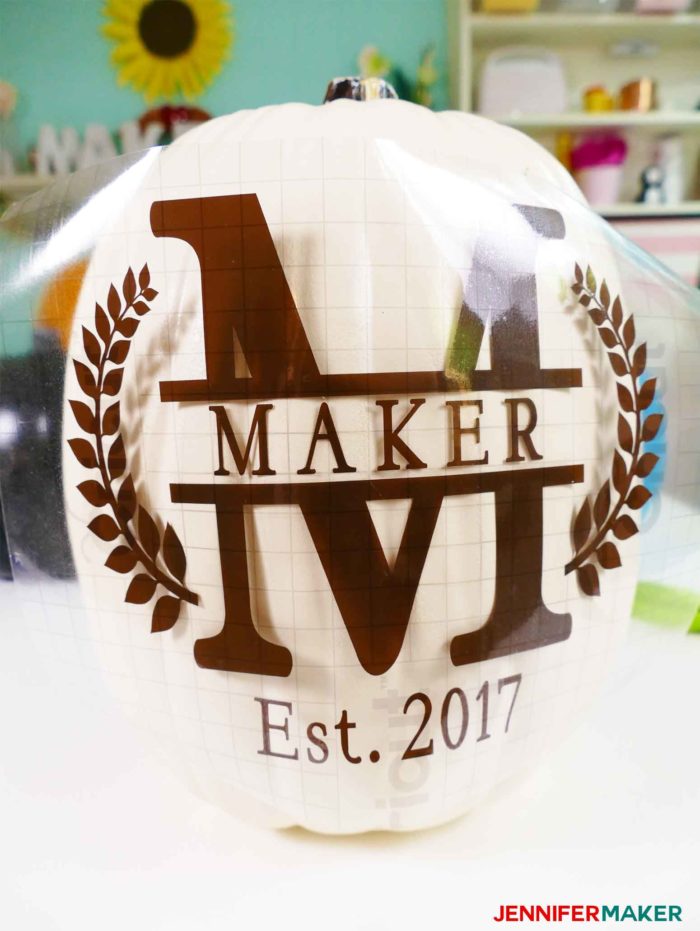
Carefully place the transfer tape with the split monogram vinyl decal on your clean pumpkin. Be sure to start pressing it down from the center outward.
I found it worked best to burnish the name down first, again working from the center outward.

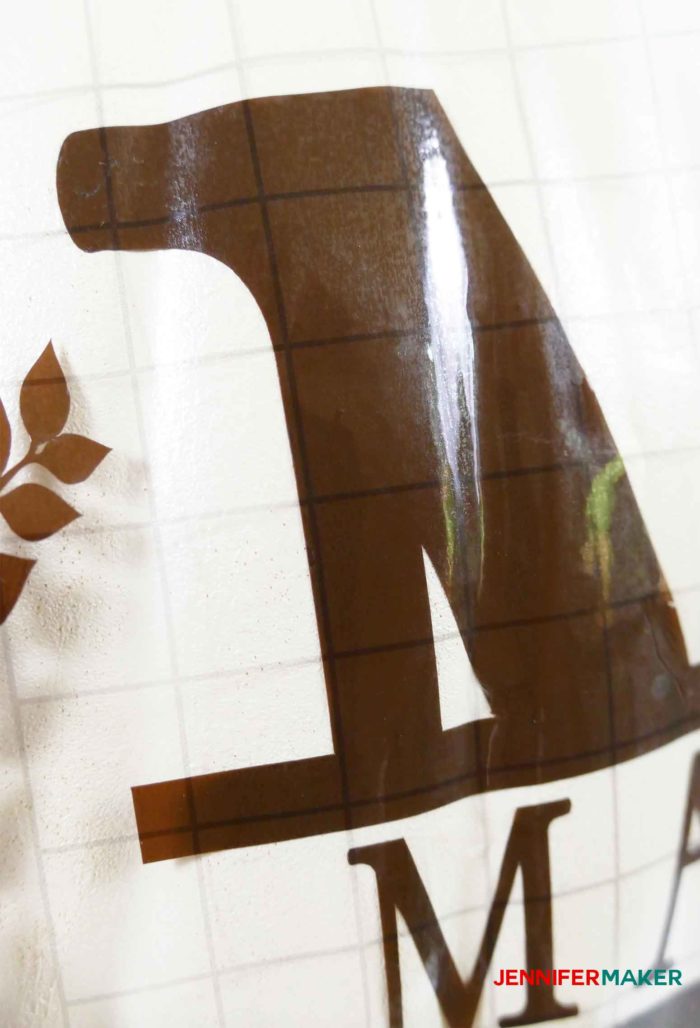
Carefully press the vinyl into the peaks and valley of the pumpkin as you go.
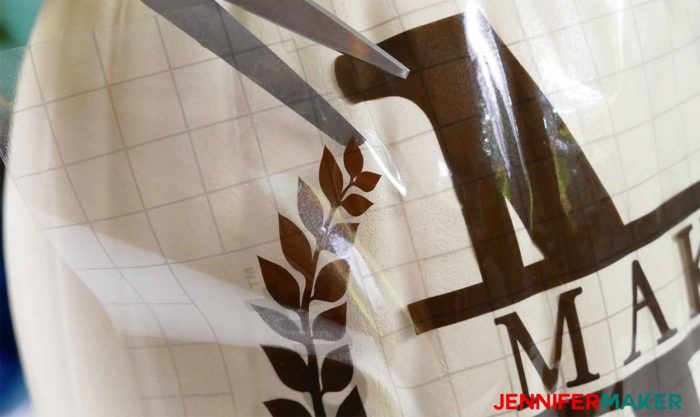
When you get to vinyl at the outer edges of your design, you may find the transfer tape wants to crease. To avoid this, cut the tape so the vinyl can go on smoothly.
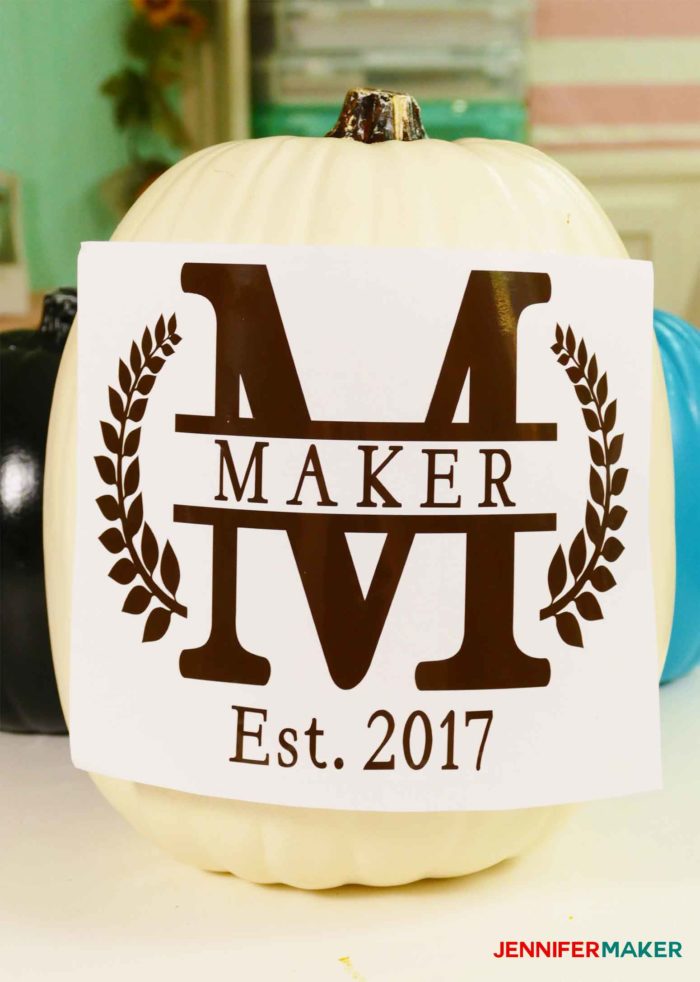
Once your vinyl is all applied, carefully remove the transfer tape from your split monogram.
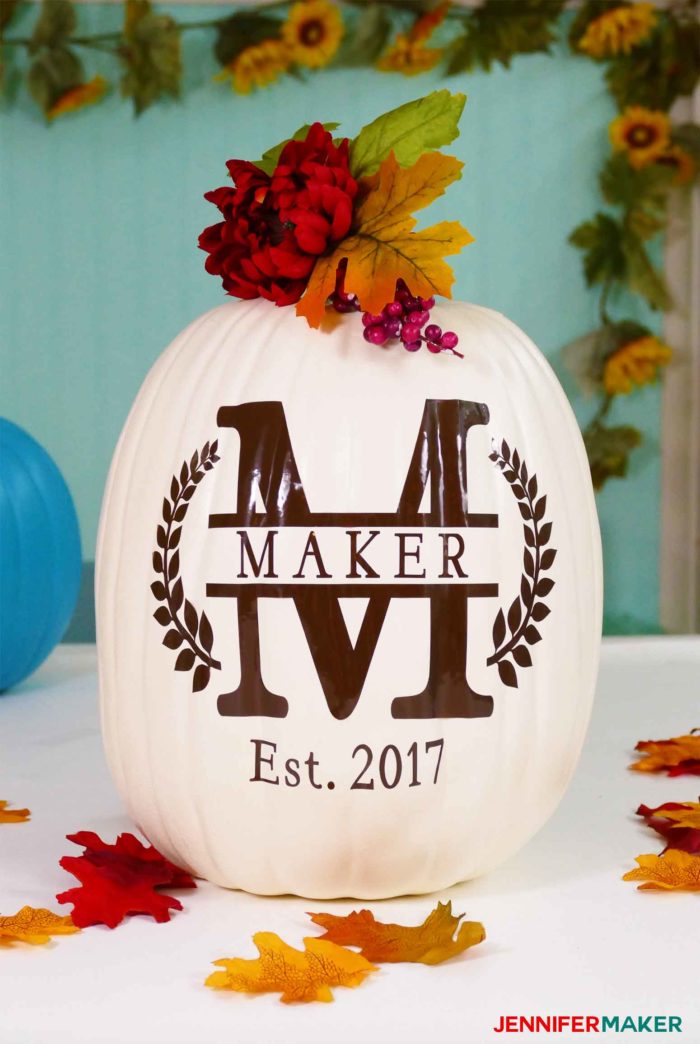
Step back and enjoy your new split monogram pumpkin!
Free SVG Cut Files to Make Split Monograms
You can get the password to my resource library that has ALL of my free cut files in it by filling out this form:
If you make a split monogram, please show me. You can email your photos to [email protected] or post them in our Facebook group and I will include them on this page for the world to see!
Want to learn more and make the most of your Cricut? check out my Cricut Coach Playbook, filled with over 65 printable one-page diagrams that show you how to do all the popular tasks in Cricut Design Space!
Love,

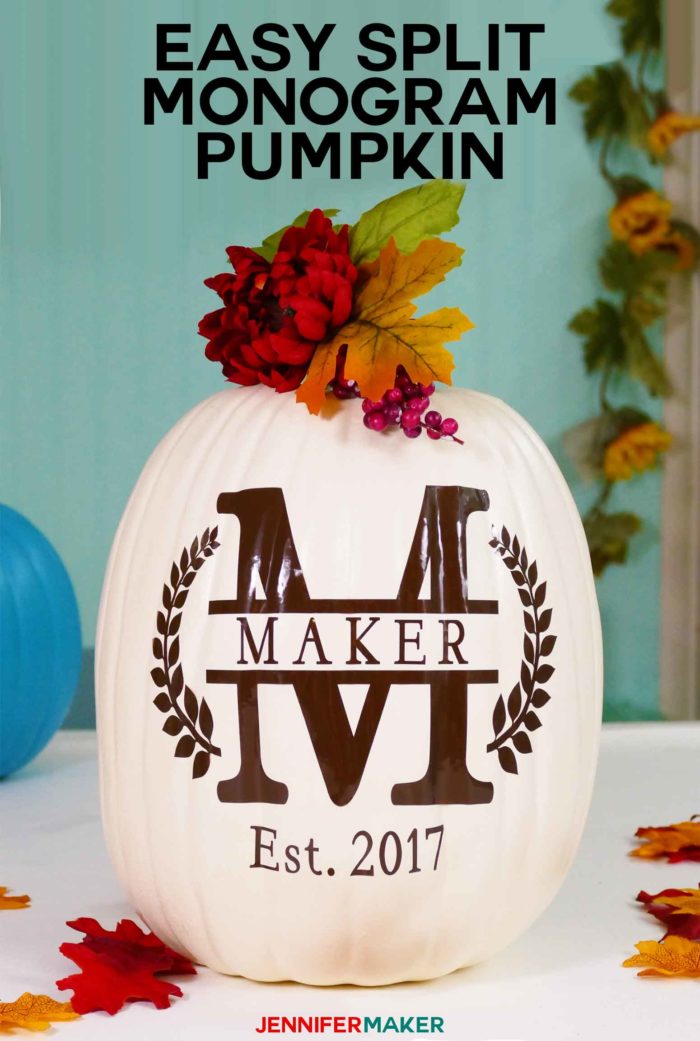
Want to remember this? Save the Cricut Split Monogram Tutorial to Your Favorite DIY Pinterest Board!


You’re out of this world Amazing! Thank you so much for this tutorial. I just purchased my copy of your book, can’t wait to browse through and finally create something “fabulous”.
Thank you, Ana! I’m happy to hear you like the tutorial!
Awesome tutorial, thanks Jennifer.
Pinned and Followed!!
Kindest Regards
Kelly
Thank you, Kelly!
Very detailed tutorial. Thank you Jennifer.
Pinned and Followed!!
Have a good day
John Sathama
Thank you for this awesome tutorial … it was easy to follow and helped me complete my project in know time !!
Awesome !! Thank you Jennifer
Your instructions are beyond wonderful and easy to follow.
Why thank you, LaVerne! I am happy to help and love to teach!
Thank you for this tutorial. I’ve been wanting to make a split monogram and couldn’t figure it out. You’ve walked me through it perfectly!
Thank you for the tutorial.
You’re welcome!!