Learn how to make cards fast and easy with the new Cricut Card Mat – 2 x 2!
Cricut cardmakers have been asking for more tools and the company has listened! With the new Cricut Card Mat – 2 x 2, you can cut up to four cards at once using full-size Cricut machines. Better yet, the mat is specially-designed to cut just the top layer, so you can use pre-folded Cricut Insert Cards and other materials without damaging the back! Previously, Insert Cards were a bit difficult to use on machines other than the Cricut Joy, so this opens up tons of possibilities! I’ve had a lot of fun testing the new mat and am excited to share my best tips — and four new designs— with you today!
See the full step-by-step video tutorial on how to use Cricut Insert Cards with the new 2 x 2 card mat!

The Cricut Card Mat – 2 x 2 is not an ordinary machine mat. Its innovative design has four cutting areas, alignment guides, and protective dividers that let you cut the front of the card while protecting the next layer! This way, you can cut up to four Cricut insert cards or Cutaway cards at once. While the Cricut Joy card mat has these innovative features, you can only cut one card at a time due to its size. When it’s card season, this is the tool I’ll be reaching for!
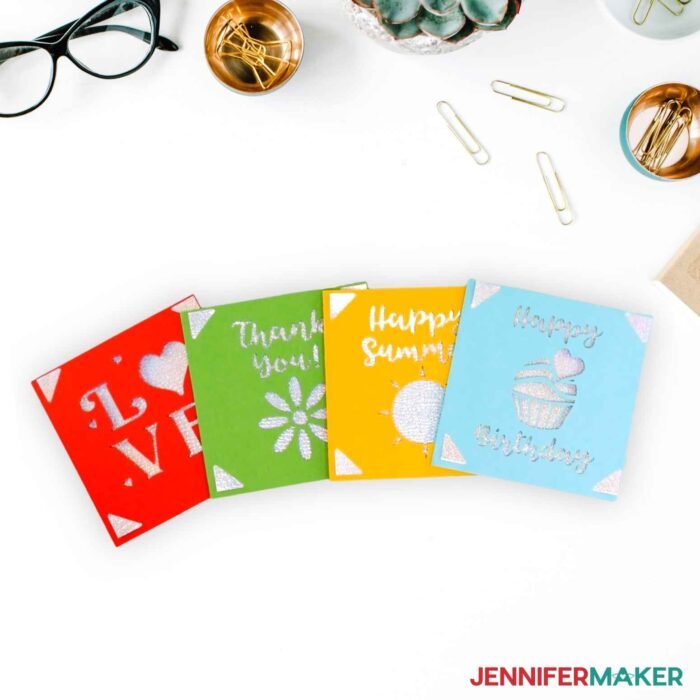
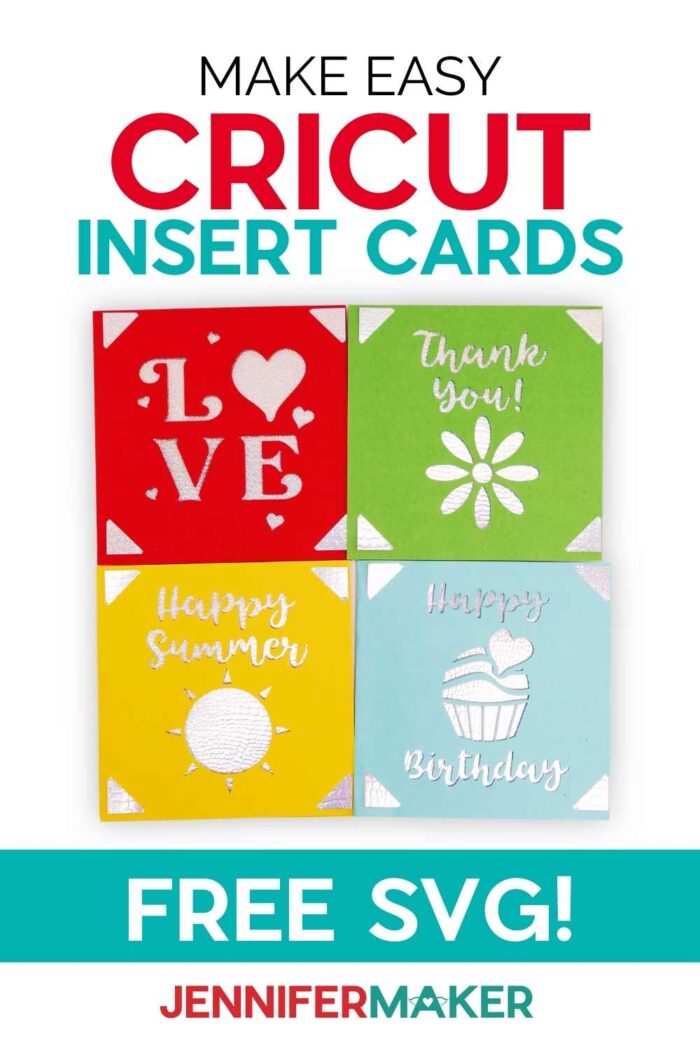
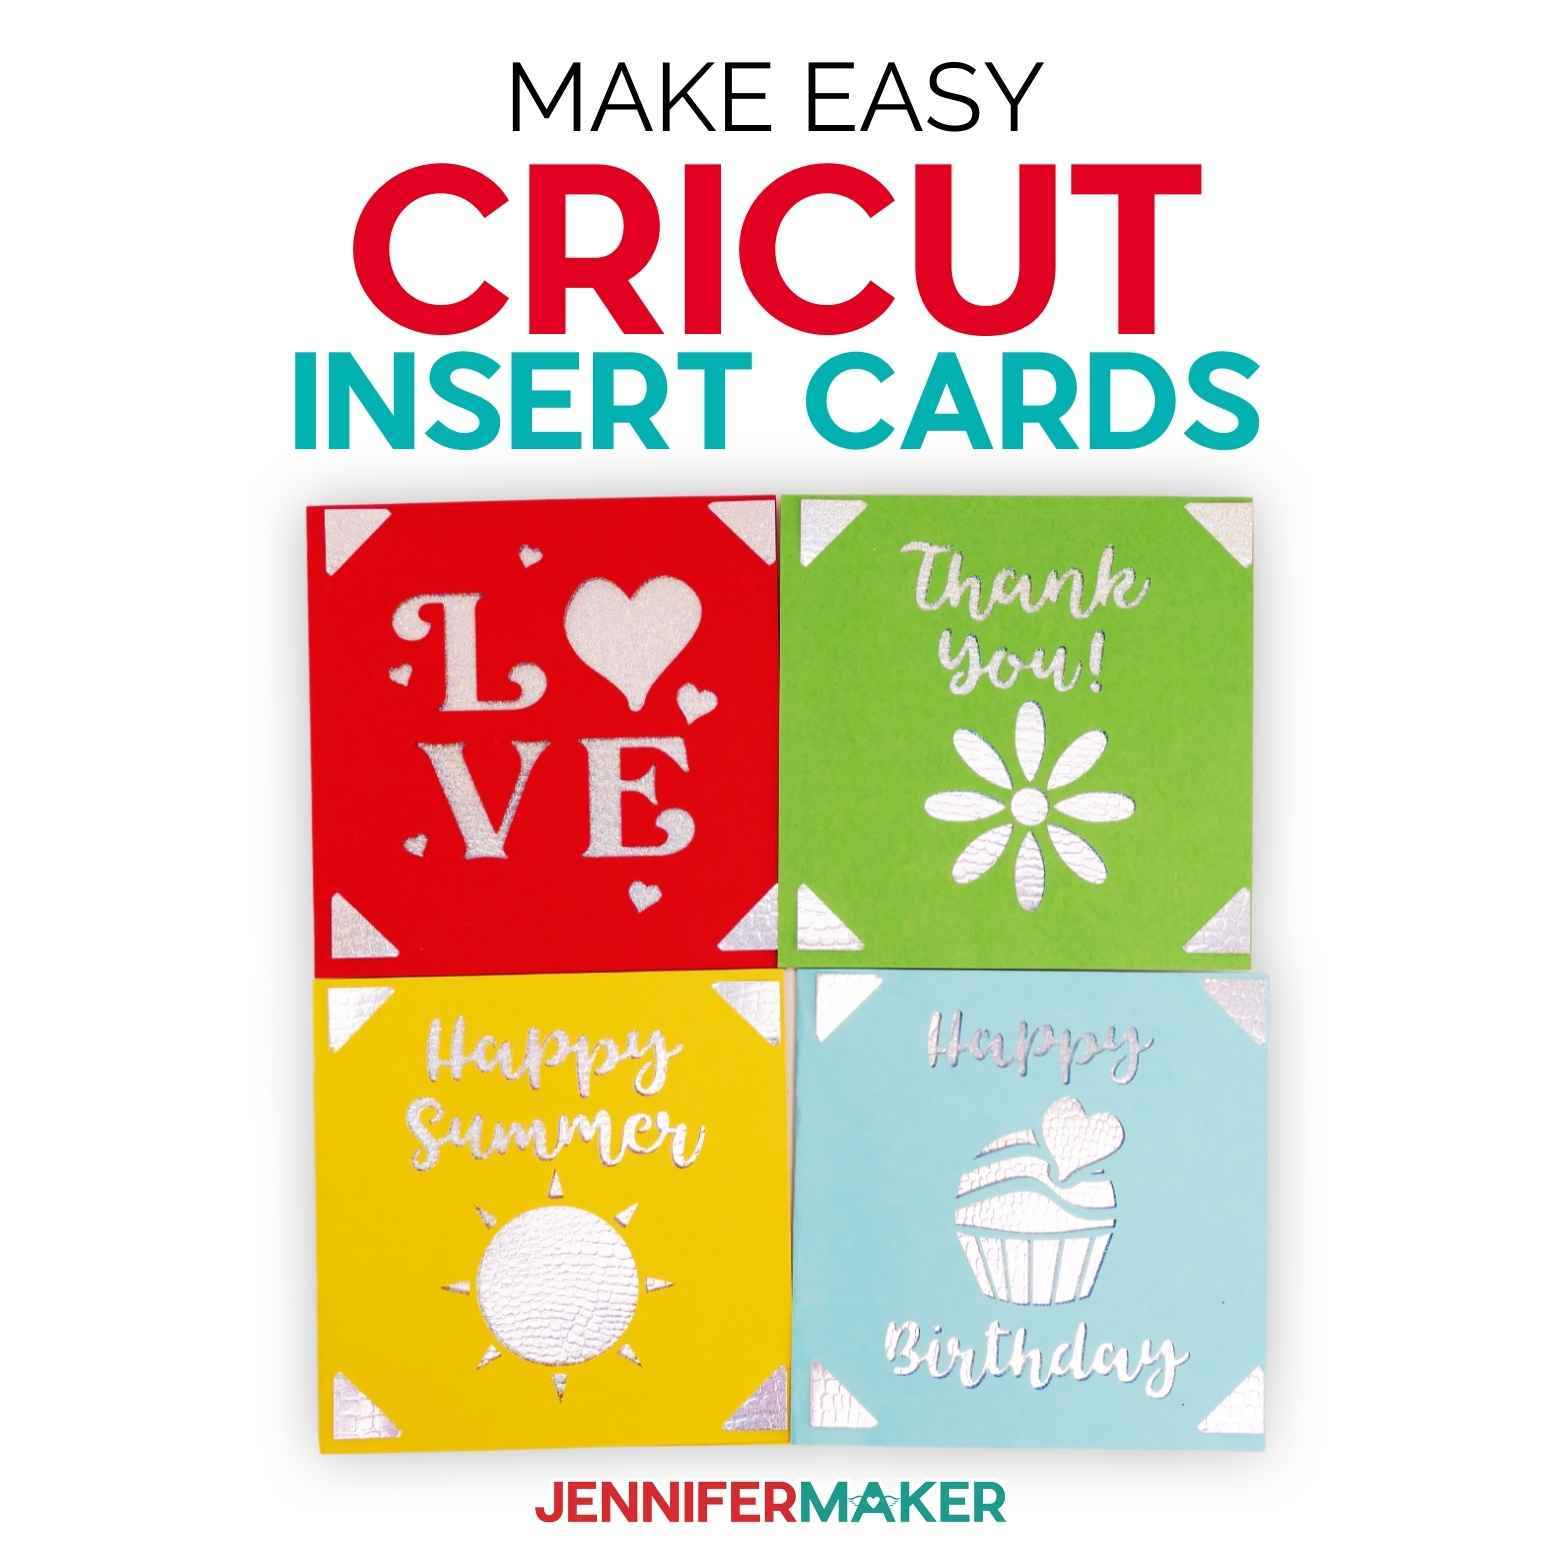
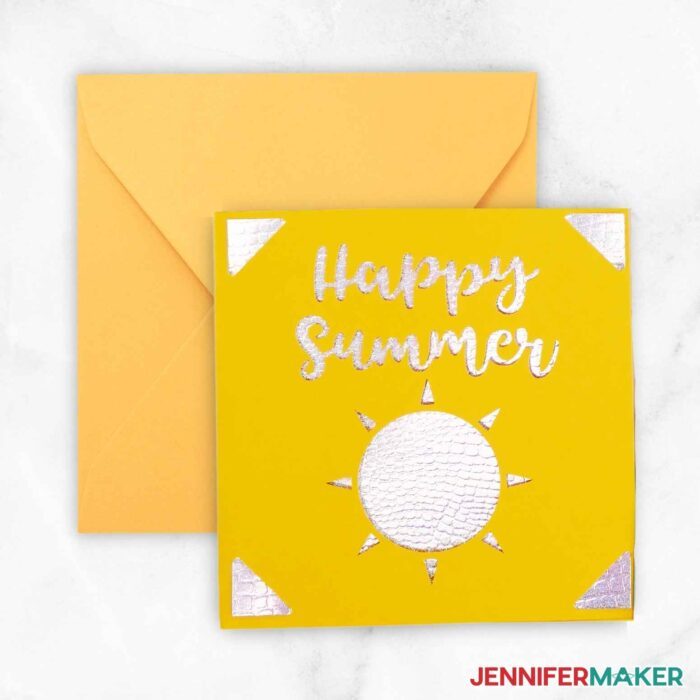
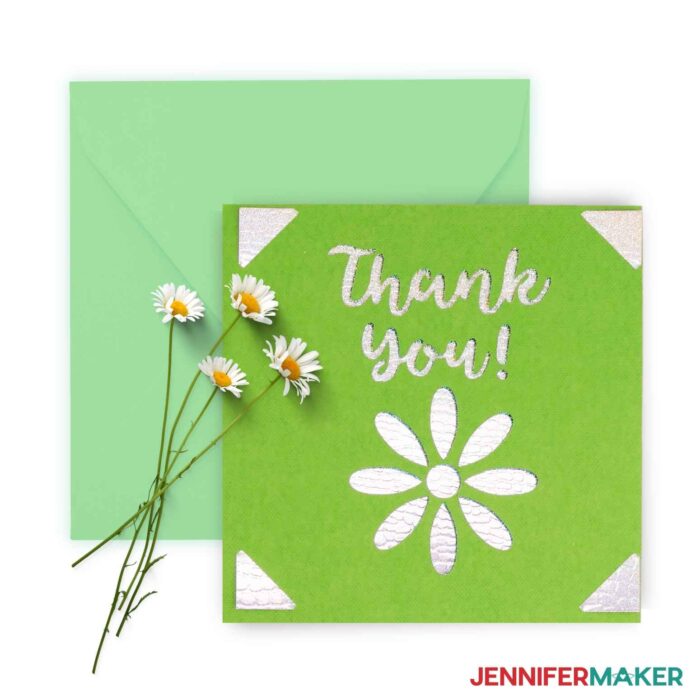
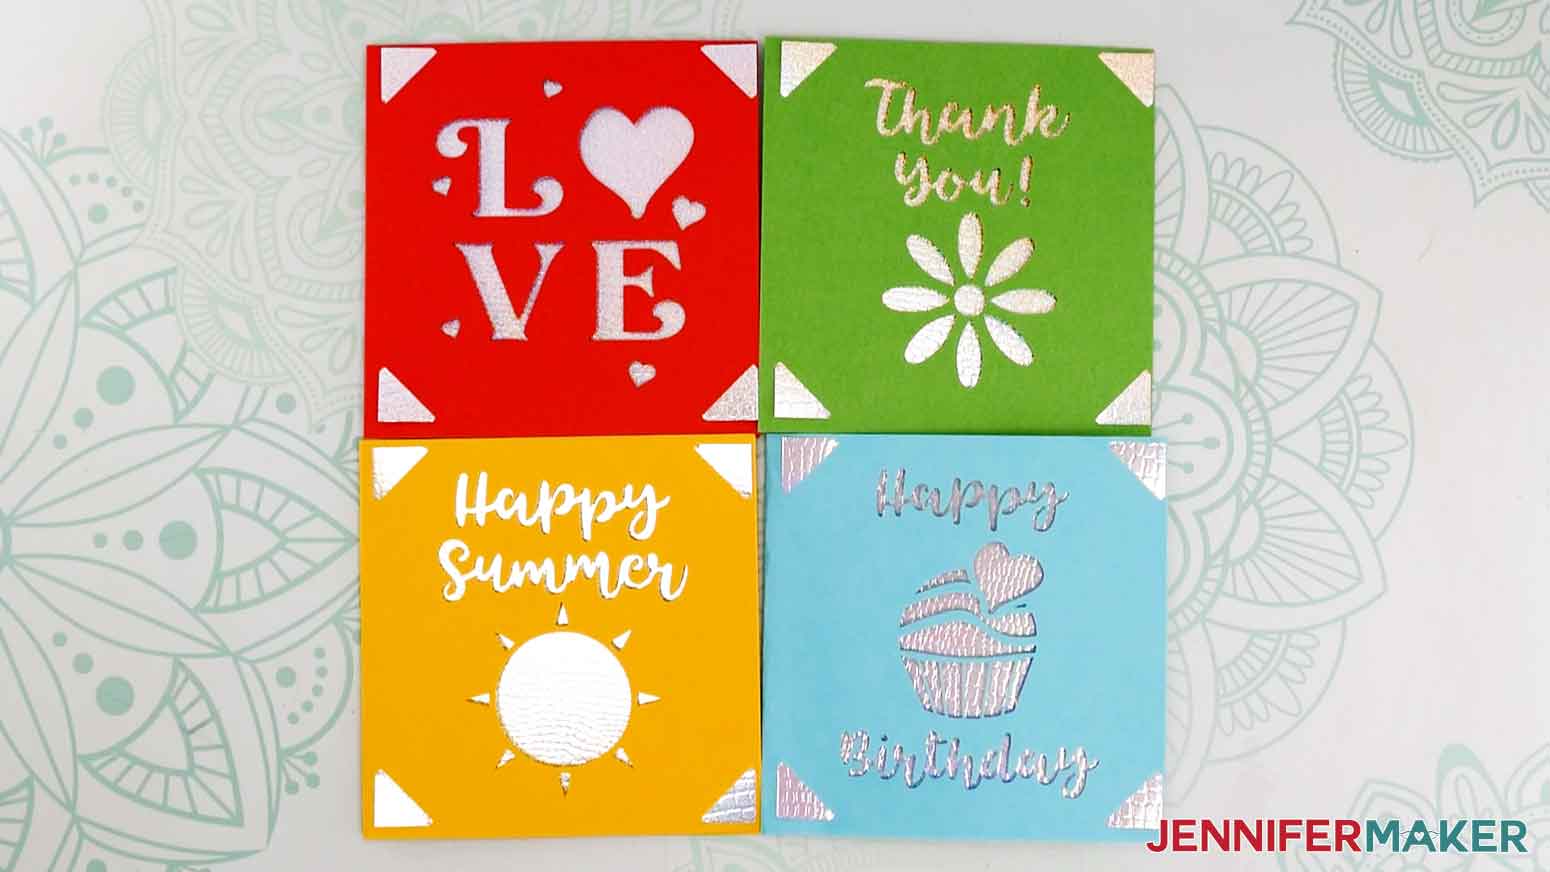
My custom card designs include blank cards to celebrate Summer and Love, or to send a Thank You or Happy Birthday to a loved one. They use simple cuts on the face of the card to make vibrant two-tone greeting cards. And they already have the corner cuts to keep the card insert in place. Once you get the hang of the mat, you’ll be able to make different cards for every season and celebration.
Today, I’ll show you how to use the Rainbow Scales Cricut Insert Cards with the new mat, but there are lots of card materials to explore. You can also use Cricut’s Cutaway cards, Foil Transfer cards, or fold your own good-quality cardstock to their sizes.
If you want to explore many more card options, there are lots available in Cricut Design Space. Just search for “card” or use their filters to find the designs you need! Make sure they fit the card material and size you want to use.
Speaking of sizes, the Cricut Card Mat – 2×2 can cut several sizes, including two new ones!
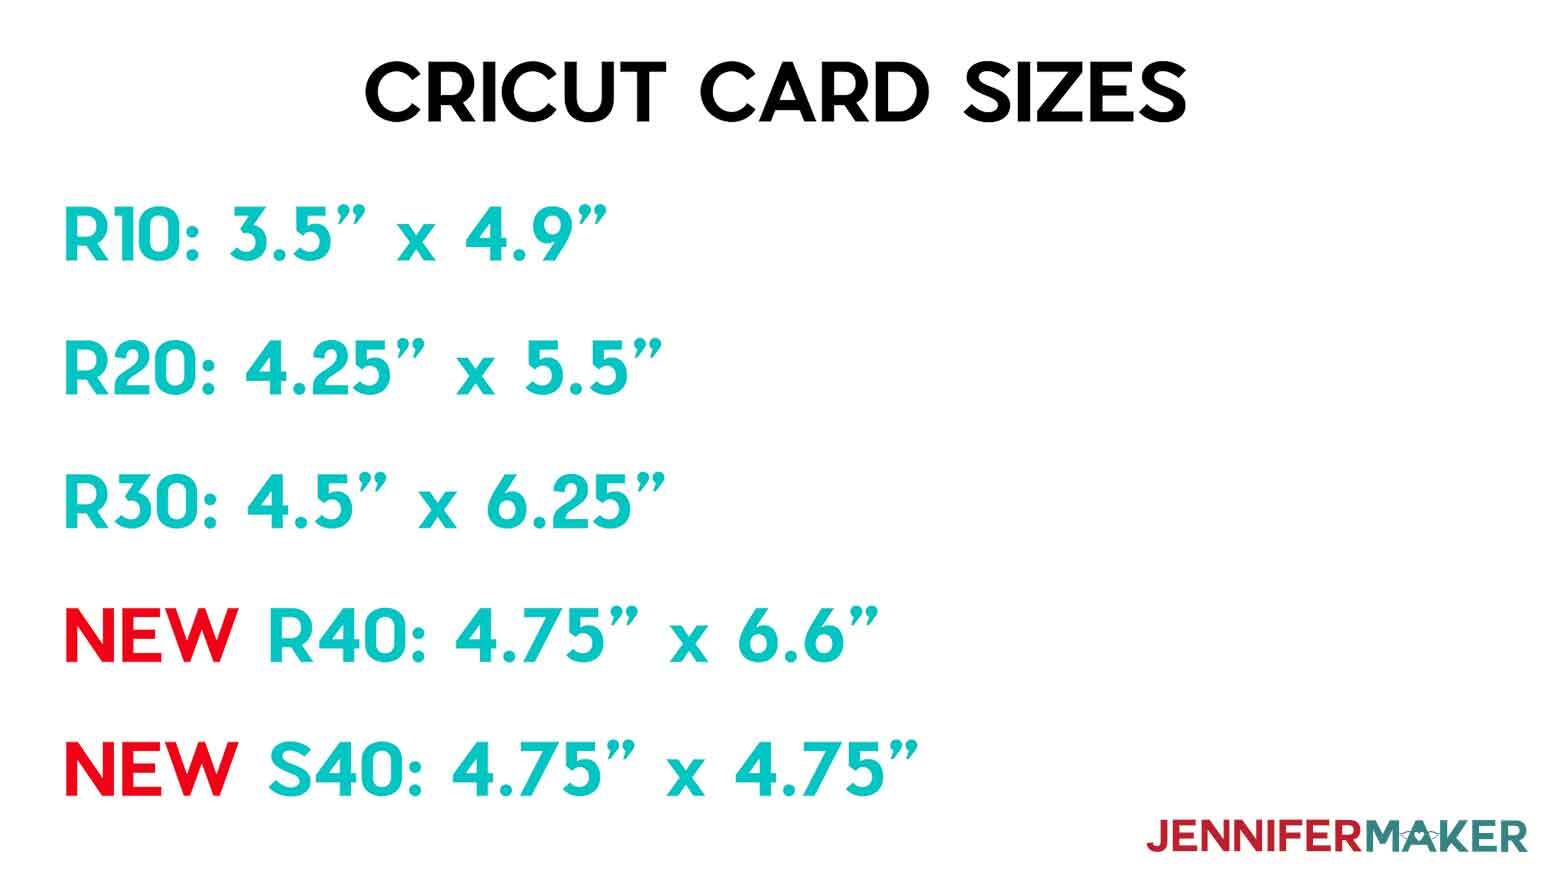
- R10: 3.5″ x 4.9″ (8.9 cm x 12.4 cm)
- R20: 4.25″ x 5.5″ (10.8 cm x 14 cm)
- R30: 4.5″ x 6.25″ (11.4 cm x 15.9 cm)
- NEW R40: 4.75″ x 6.6″ (12.1 cm x 16.8 cm)
- NEW S40: 4.75″ x 4.75″ (12.1 cm x 12.1 cm)
Tip for Cricut Joy machine users: the new R40 and S40 sizes require the new mat since they are larger than the smaller machine can cut on a specialized card mat.
And while I do consider machine mats consumable materials, I have a few tips to help get more life out of your 2×2 mats:
Protective covers are your friends! They keep your Cricut mat clean and sticky, so keep the covers in place as much as possible. Do remove both before you load the mat, even if you’re just cutting one card. You don’t want it to get caught in the machine! Removing both lets you stick them shiny sides together to protect the surfaces that touch the mat. This way, they’ll pick up less dust to transfer to the mat. Bonus tip to keep the sides straight: put a sticker on the matte side and make sure you can always see it.
Just like a regular mat, the new mat will lose its stickiness fastest wherever you adhere your materials most often. If you cut fewer than four cards at a time, your mat will wear unevenly. I’ll show you how to even out its use by dragging your designs to less-used mats in the Prepare screen.

I’ll also share my favorite cutting and material settings for the best results with your Cricut Card Mat – 2 x 2. The designs cut perfectly on my Cricut Maker 3, but also work well on original Maker or Cricut Explore machines. I used a Cricut Fine Point Blade since my designs just use cut lines, but you can also use scoring tools, pens, markers, and foil transfer tools with the new mat.
Thanks to the ingenious glue-free design of the Cricut Insert card corners, we don’t need adhesives. A few tools are helpful, but we’ll use them a bit differently than we usually do. I’ll show you the secret in the video!
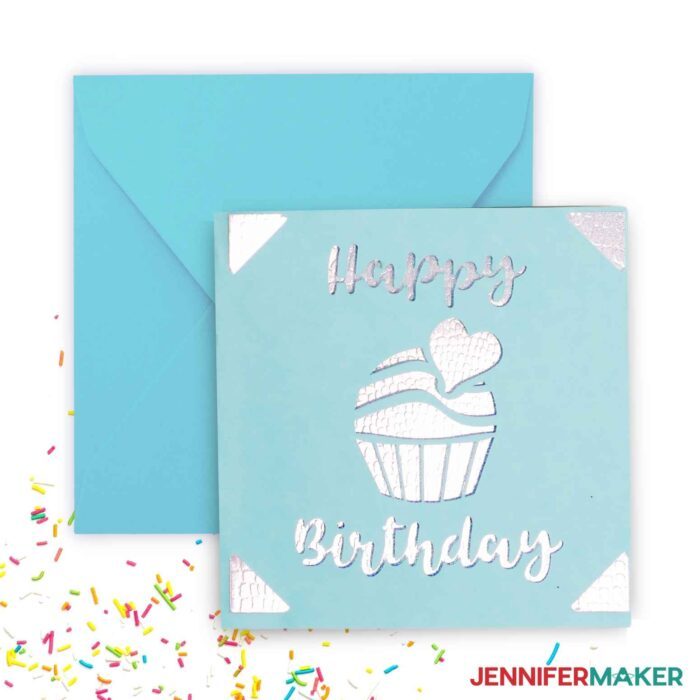
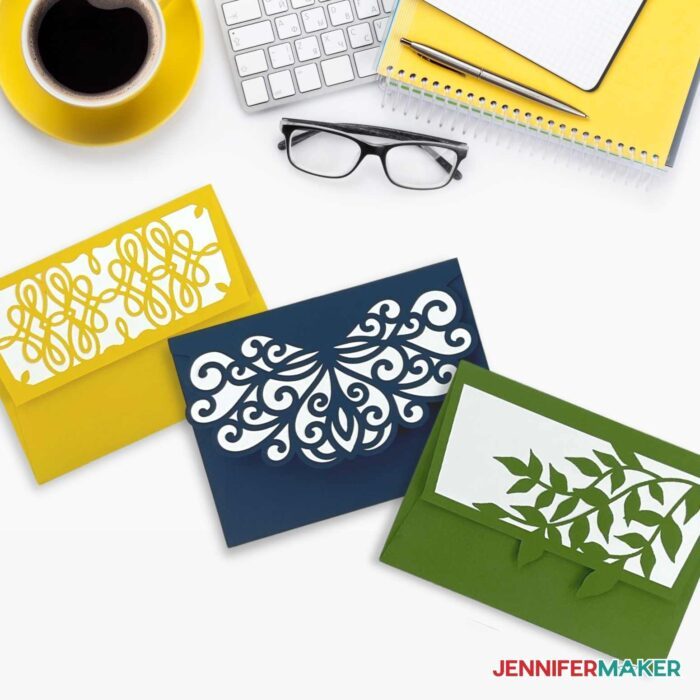
And yes, you can mail these gorgeous cards! Since I’m using one of the Cricut Insert Cards kits, I’ll just use the white envelope that matches my S40 design. But if you want to make some custom envelopes, check out my tutorial on How to Make an Envelope.
If you want to make your own corner cut card designs, you can use mine as a starting point. Just use the Contour Tool to hide the inner design elements, leaving the corner cuts. Then, add a new cut file to your Design Space Canvas and resize it to fit between the corner cuts. Select both layers and use the Slice Tool to create your homemade card to fit your card recipient. I recommend using simple shapes and designs until you get the hang of it!
These Cricut Insert Cards are so easy to create with the new 2×2 mat that you can make them in just a few minutes. Let me show you how!
Ready to make your own Cricut Insert cards with a 2×2 Mat? This post contains some affiliate links for your convenience (which means if you make a purchase after clicking a link I will earn a small commission but it won’t cost you a penny more)! Read my full disclosure policy.
Materials & Tools to Make Cricut Insert Cards with a 2×2 Mat
View my Amazon shopping list with the exact items we used to make this project!
- Four (4) Cricut Insert Cards, Rainbow Scales Sampler – S40
- Design #391 – My free template (available in my free resource library—get the password at the bottom of this post)
- A method to cut your Cricut Insert Cards — I used the amazing Cricut Maker 3 but you can also use the Cricut Maker or Cricut Explore Series
- Cricut Card Mat – 2×2
- Weeding Tool
- Scraper
- Brayer (optional)
How to Make Cricut Insert Cards with a 2×2 Mat
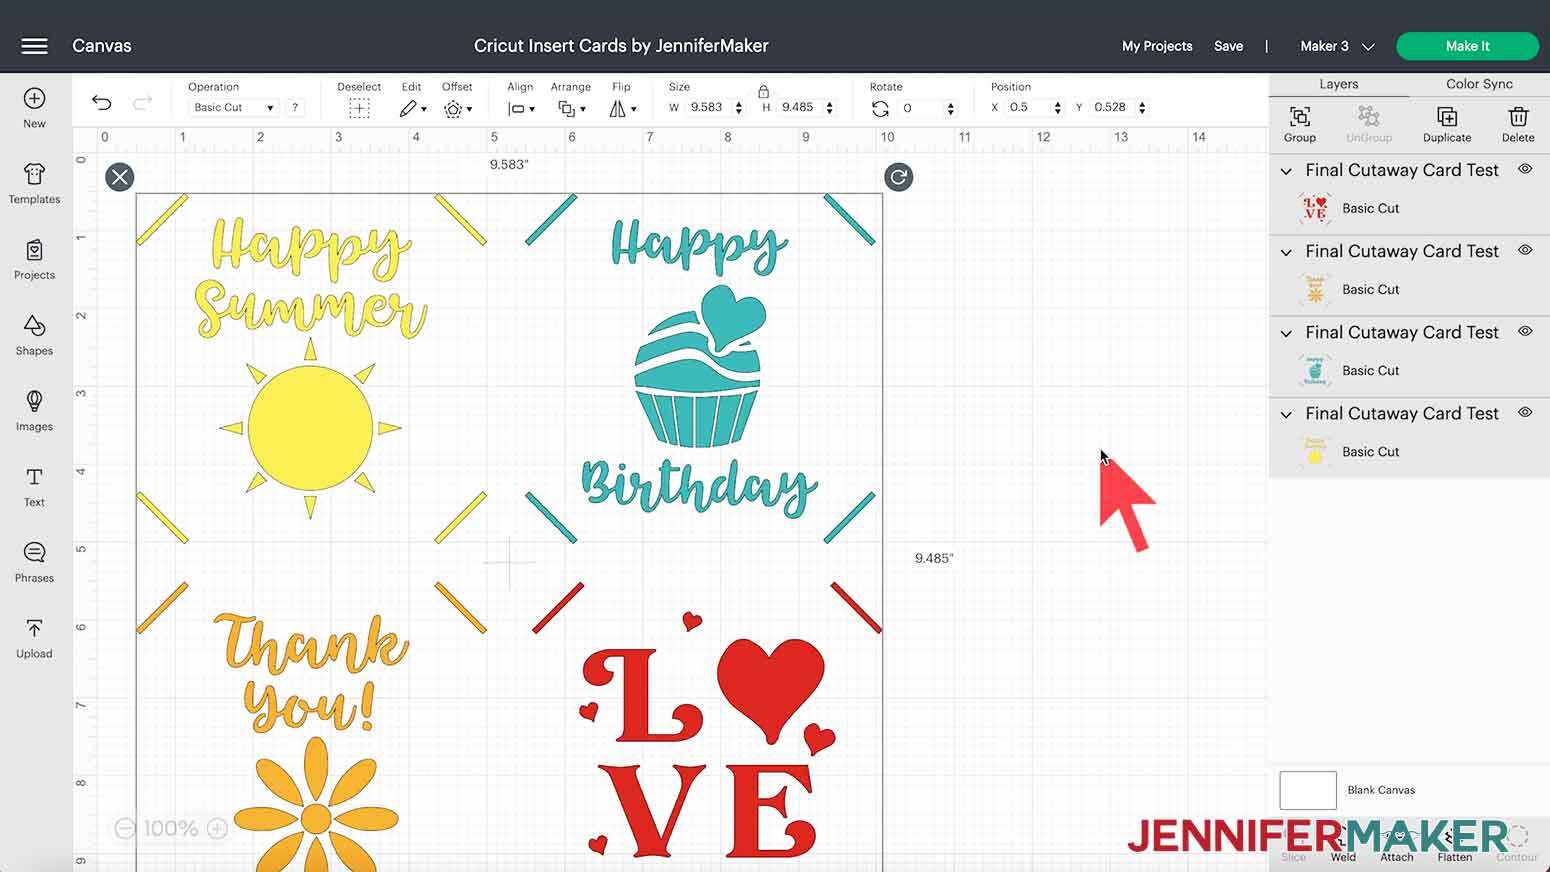
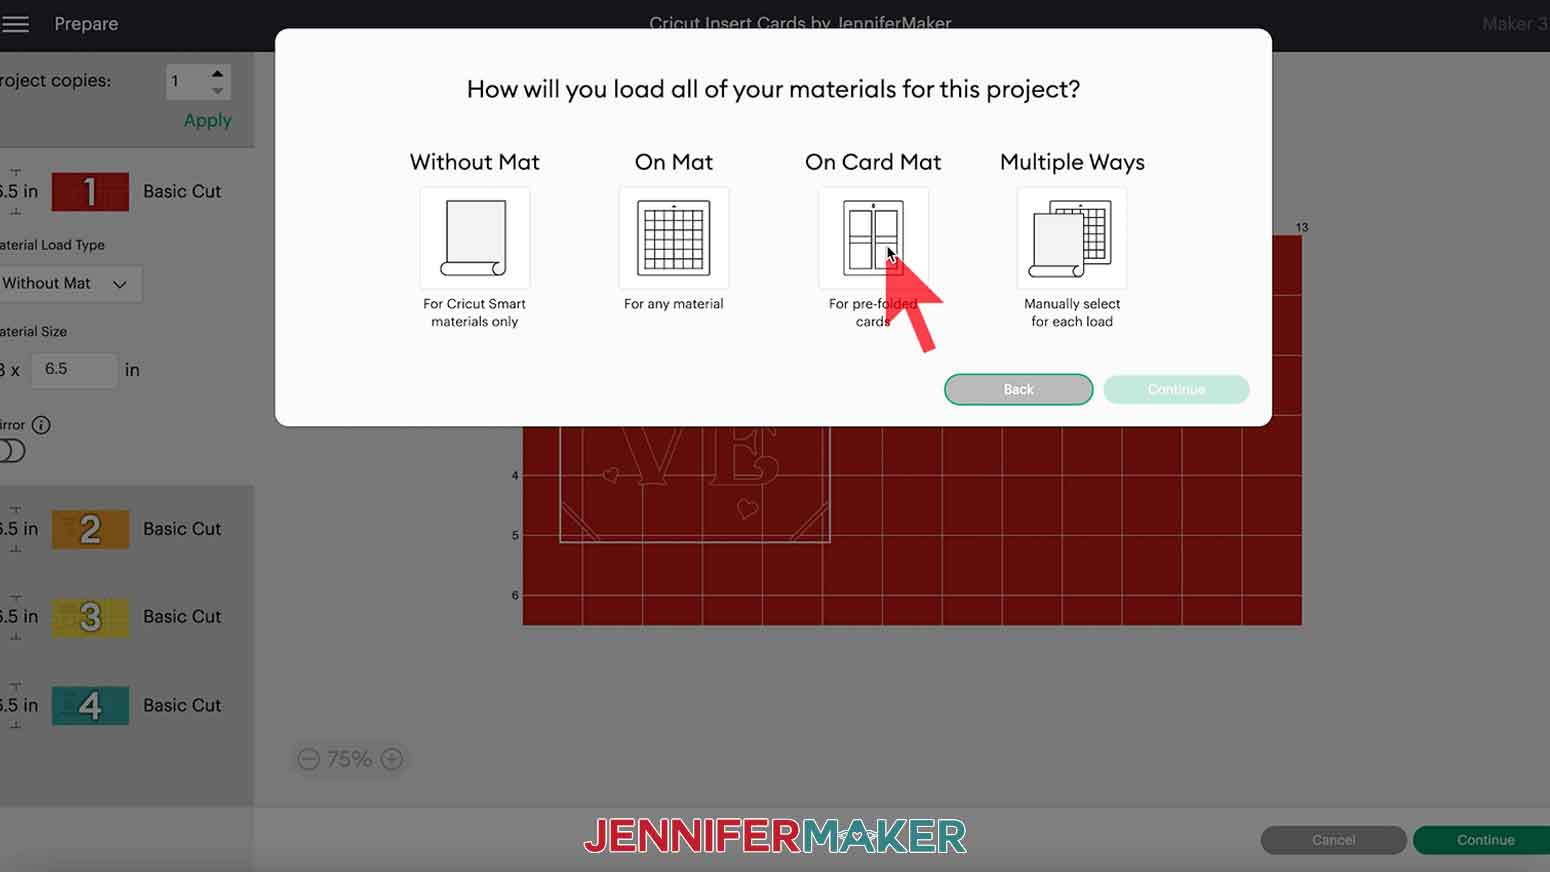
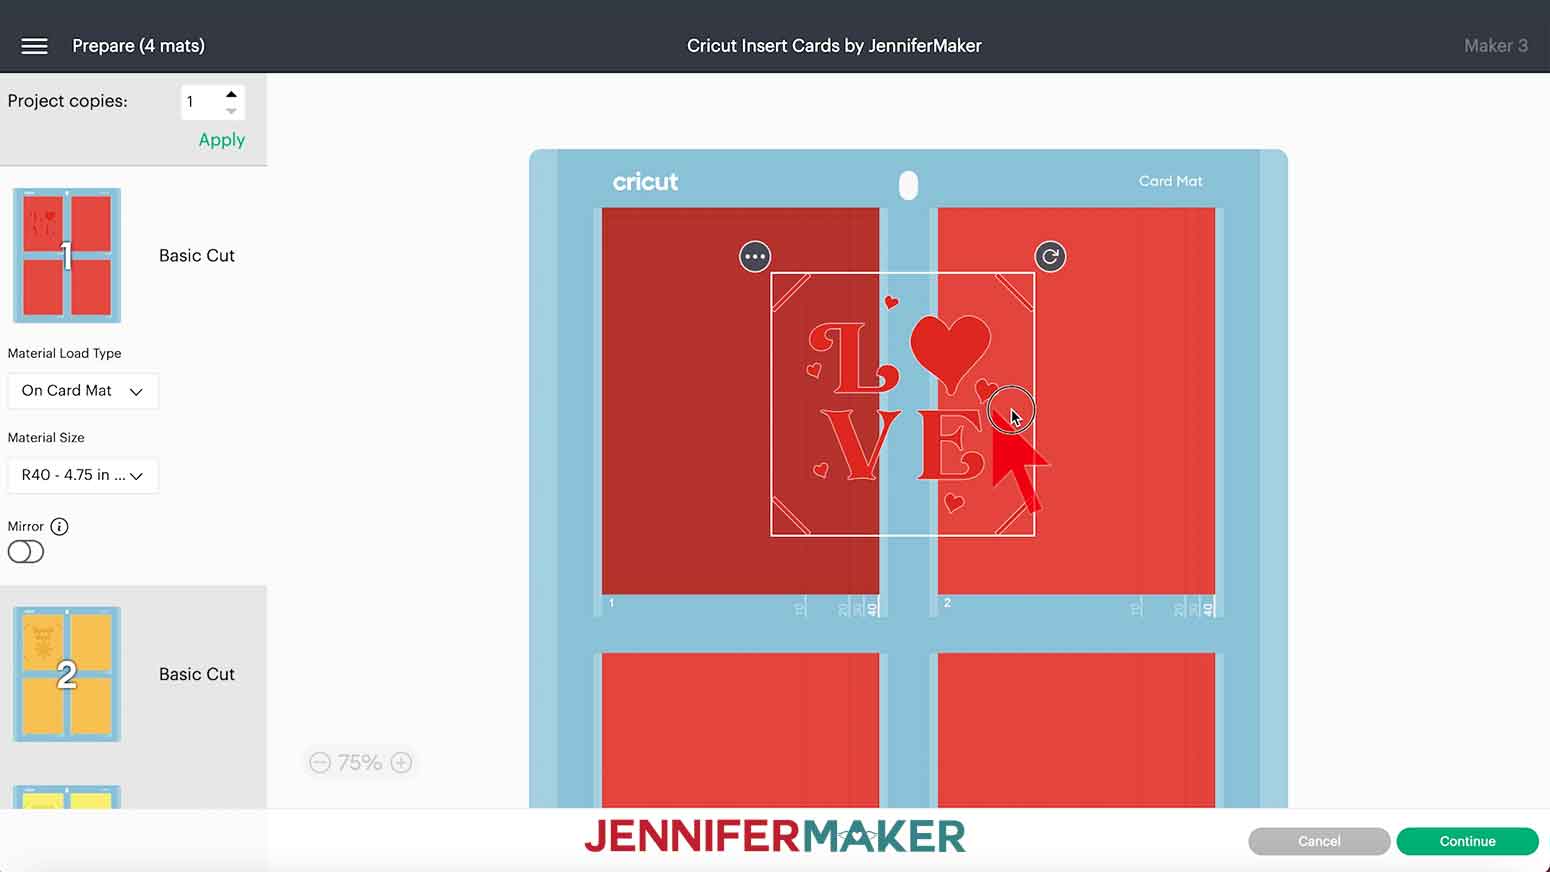
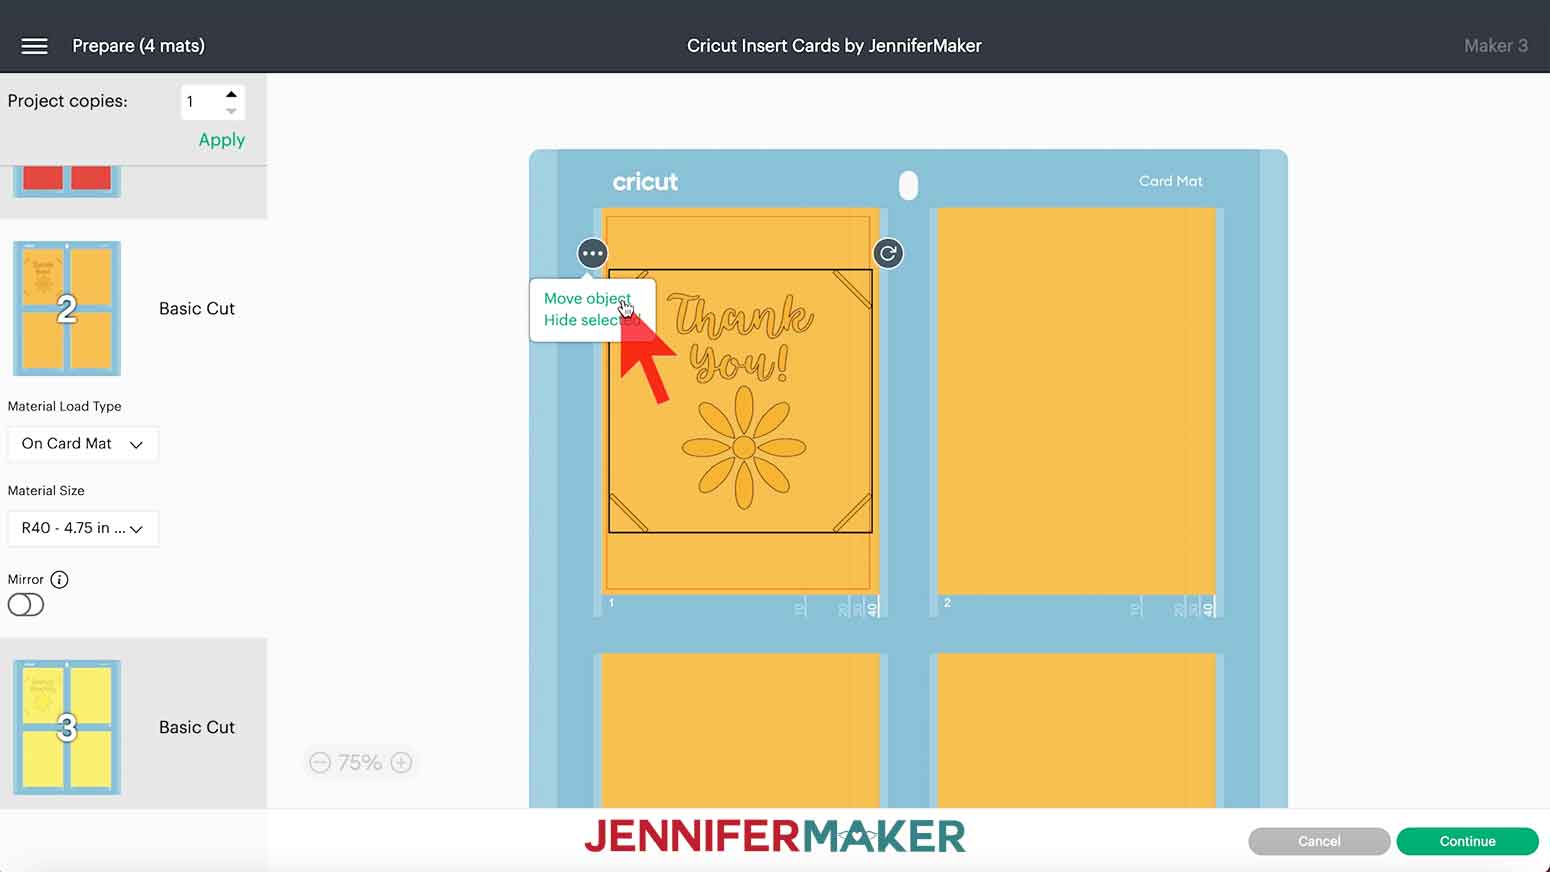
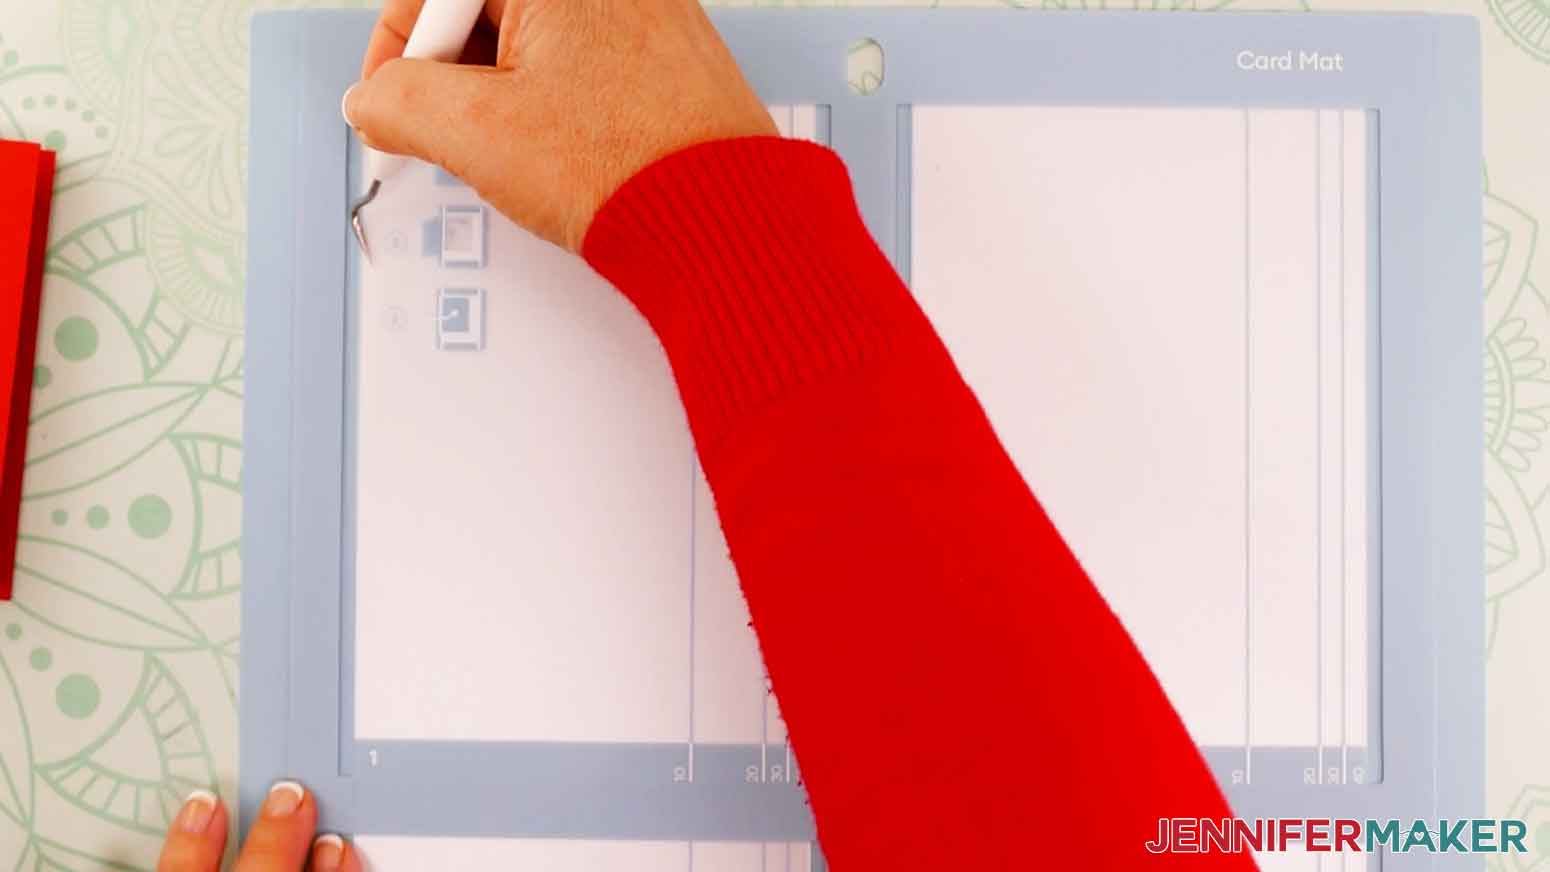
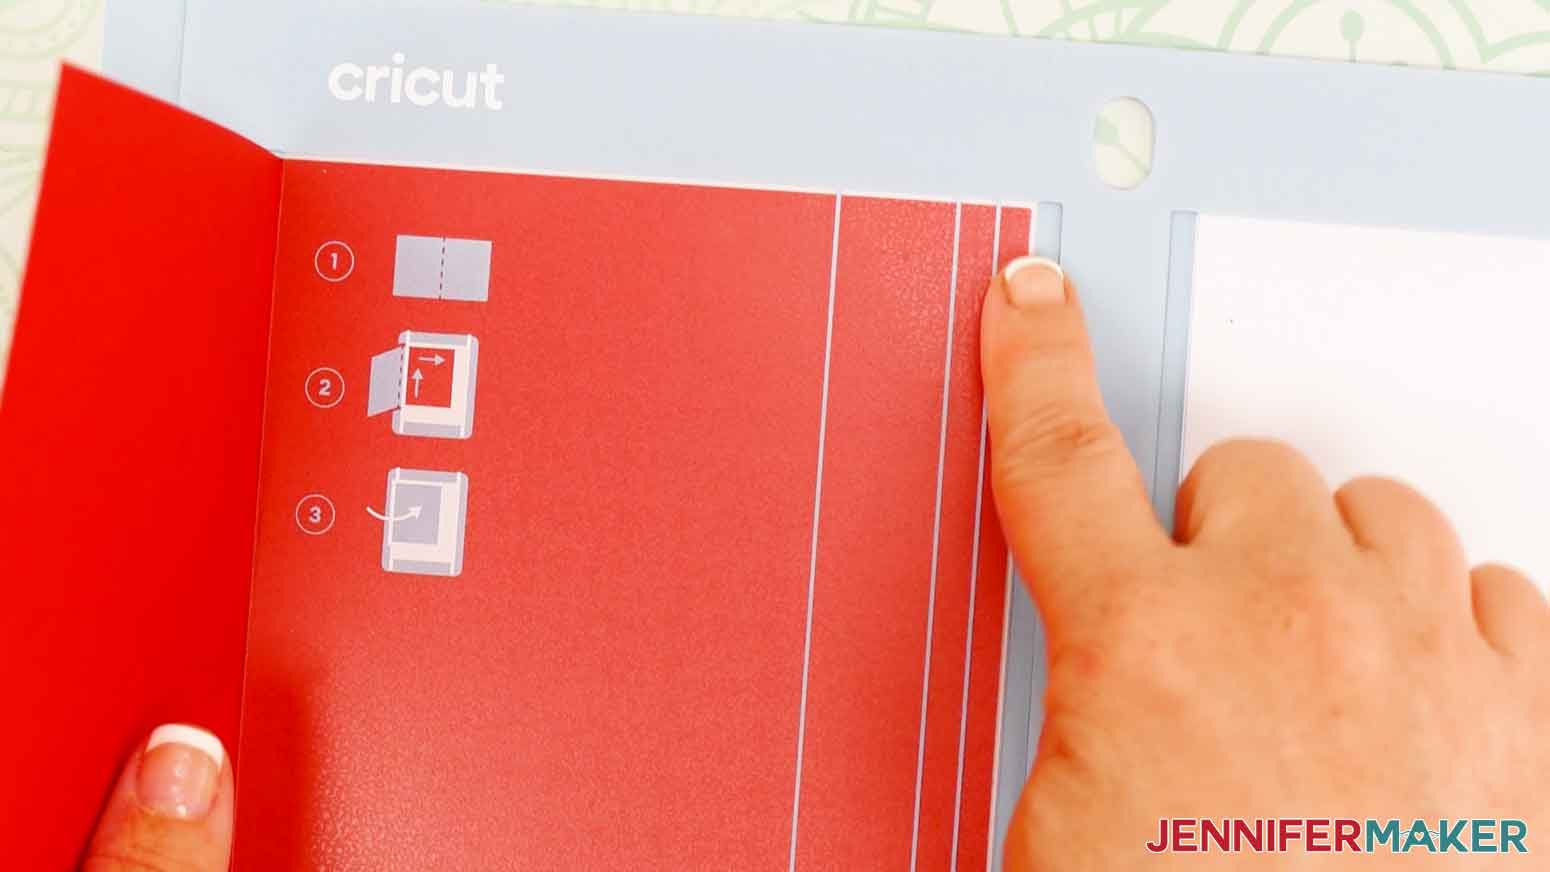
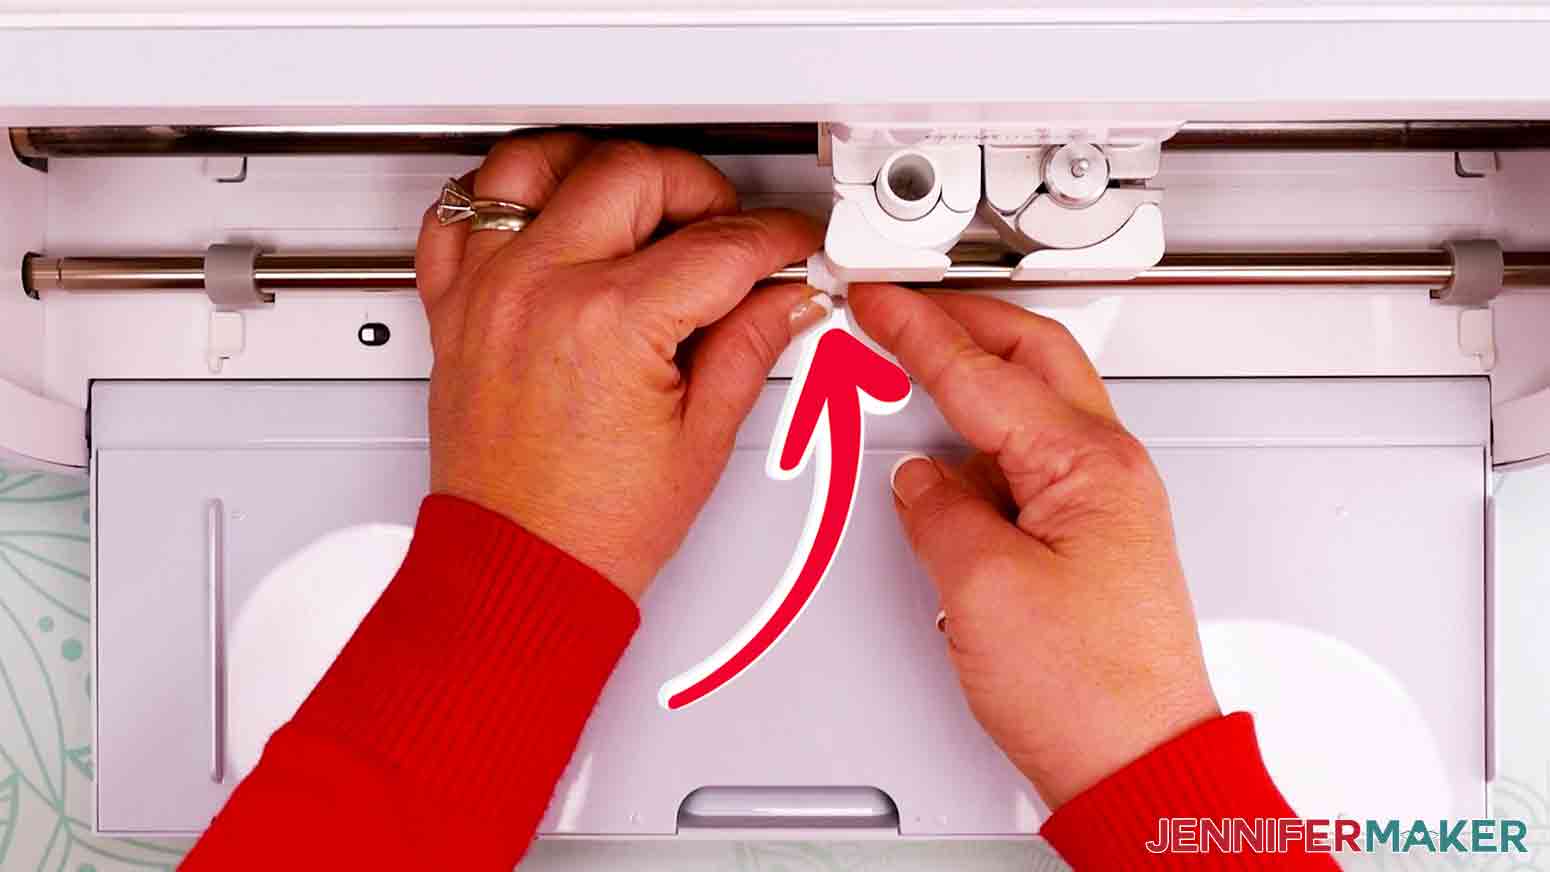
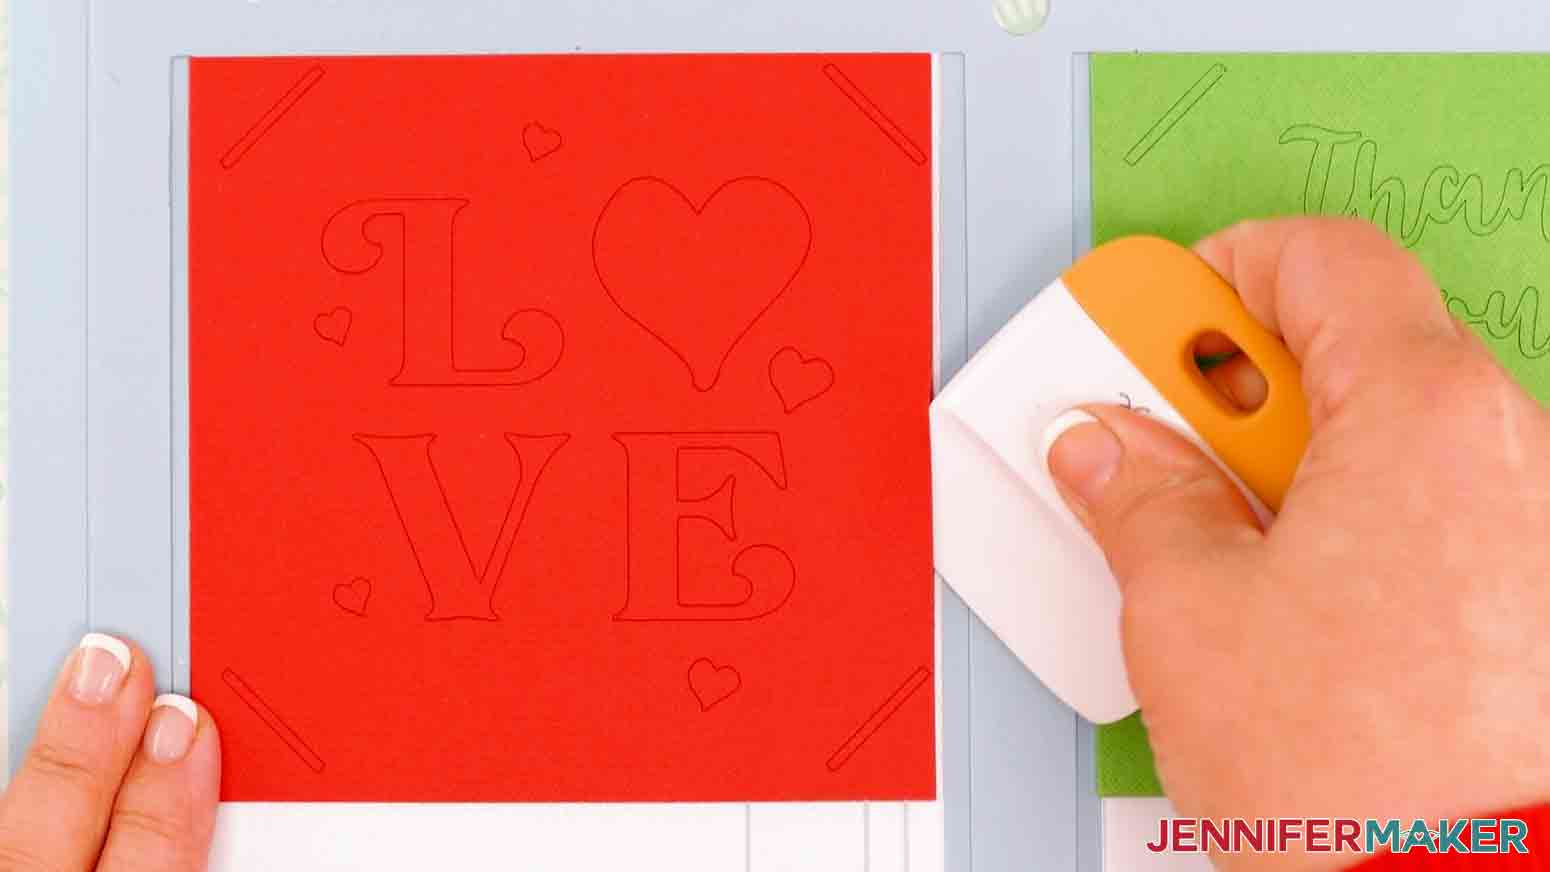
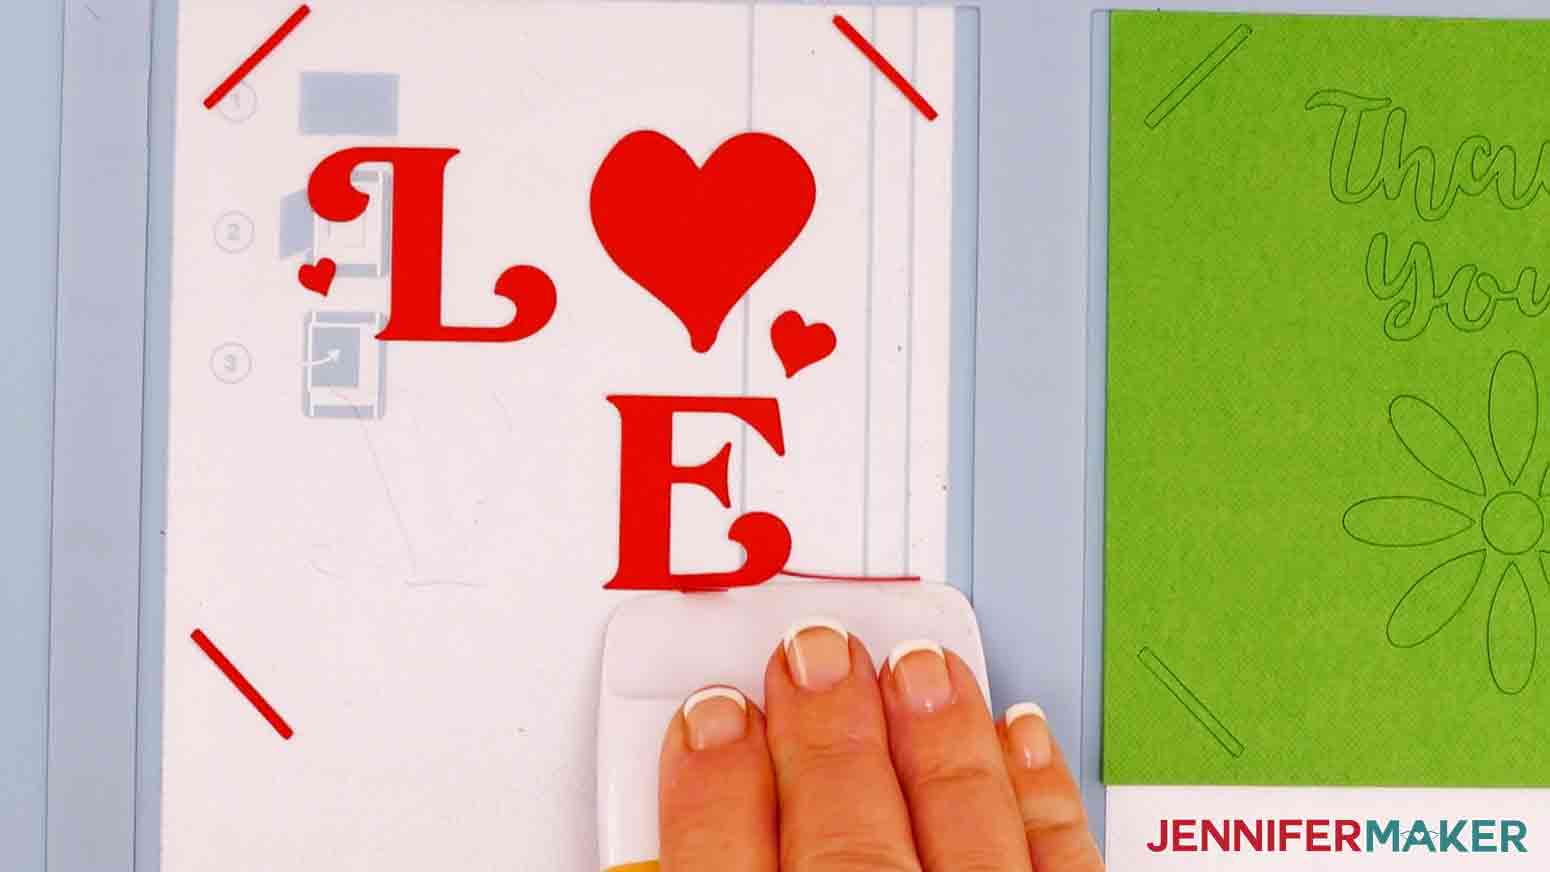
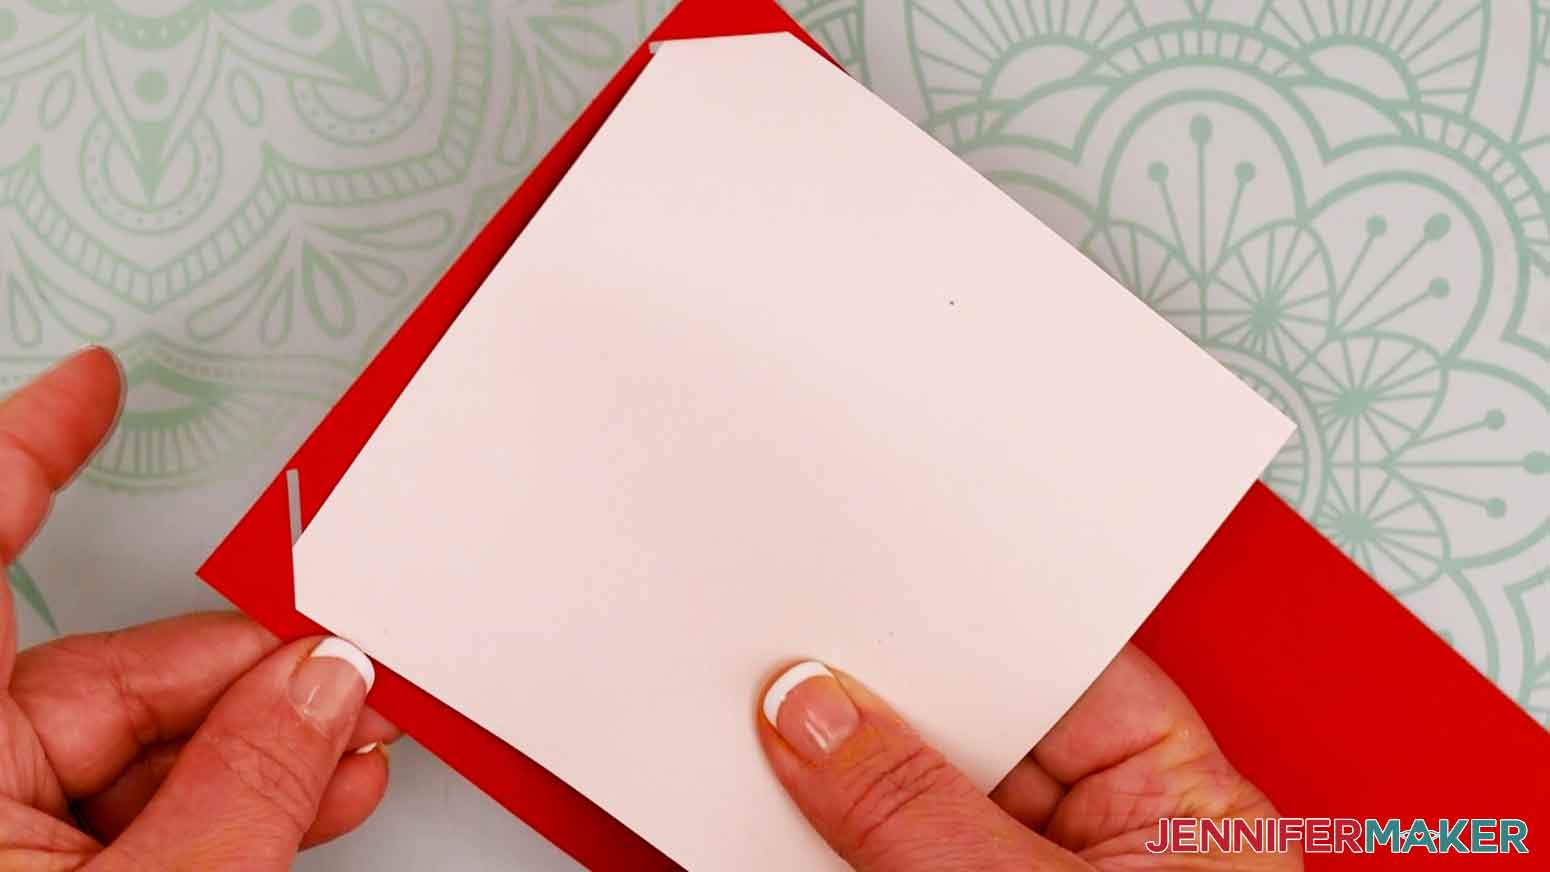
Learn how to use the Cricut Card Mat - 2x2 to cut up to four cards at once! First, download my Cricut Insert Cards SVG/DXF/PDF files from my free resource library, it's Design #391. Upload the SVG file to Cricut Design Space and add it to your Canvas. TIP: If you are not sure how to upload an SVG cut file to Cricut Design Space, watch this helpful video training series I made. If you are on an iPad or iPhone, here is how to download and upload SVG files to the Cricut Design Space app. You can also find more cards for pretty much any celebration, event, or holiday you can imagine in Cricut Design Space. You can zoom out to see everything by clicking on the minus sign on the lower left of the Canvas. This is what my four Cricut Insert Card designs look like on my Canvas. NOTE: Cricut has created new size descriptions to avoid existing paper size names that vary by country. The S stands for Square and R stands for Rectangle. The numbers start at 10 and increase as the cards get larger. The new sizes are R40 (4.75" x 6.6") and S40 (4.75" x 4.75"). Here is a reference chart for all of the sizes. I designed these files to fit the S40 and cut all four designs at once. You can certainly make just one card at a time, multiples of one, or really mix and match however you like! The cards are ready to cut, so all you need to do is make sure you have the right machine selected and click "Make It." On the next screen you’ll see a pop-up window with different cutting options. Choose “On Card Mat” and click "Continue." Now on the Prepare screen, the four designs are on different mats because they were different colors on the Canvas. We can move them all to one mat and put different color cards in the panels. TIP: If you cut only one or two cards at a time, remember to move them to different parts of the mat to avoid wearing out the top panels. Just click and drag the design to any of the other three panels like you see here. To combine the mats, select Mat 2's design, click on the three dots, and then "Move Object." On the pop-up screen, click on Mat 1 and hit "Confirm." Now that design shows up in the second panel of Mat 1. You can move it to another panel if you like or leave it there. Move the other cards to the third and fourth panels. Next, click the "Material Size or Card Size" field and select "S40" to match our cards. You’ll see all four cards on the mat change size. At the time of this tutorial, you cannot cut multiple size cards on one mat. Click Continue. I’ve done A LOT of experimenting with the different material and pressure settings and I have settled on my favorite: "Cardstock for intricate cuts" with normal pressure. Feel free to experiment because every machine cuts a little differently. The 2x2 mat takes a bit more preparation than a normal machine mat. First, remove the protective mat covers from both sides, even if you're just cutting one card. Place them shiny sides together to avoid picking up dust and set them to the side. Also, make sure the mat is top-edge up, so you can read the word “Cricut.” Unlike other machine mats, the 2x2 mat must be loaded top-first. Otherwise, your designs will not be properly aligned on the cards. Now it’s time to add the cards to the mat. The surface you want to cut goes on top of the divider, so the other side goes under it, fed from the left. TIP: Gently poke a weeding tool under the divider's left edge and pull up just enough to slide the card's back underneath. Make sure the card is aligned at the top left corner and tucked all the way to the right. The plastic divider's left edge should be nearly flush with the card's crease. You can confirm you're using the correct card size using the helpful guides on the divider. Press down on the card and to make sure it sticks well to the top of the divider. This shouldn’t be a problem with a new mat because it’s super sticky, but as the mat gets more use, a brayer might help. Before cutting, make sure to move the white star wheels to the center to avoid marking up the cards. Just use your fingers to move them all into the center so they align with the middle column of the card mat. Finally, make sure there’s plenty of space behind the machine for the mat to feed through. I jammed my machine finding that out! Once the mat is loaded and you’ve made sure you have plenty of room behind your machine, press the flashing button to start cutting. When the cut is done, unload the mat. Instead of my usual tips to remove cardstock from a mat, leave it flat. Use a scraper tool to lift up the top, right, and bottom edges of each card first so it won’t rip, especially when the mat is super sticky. Once it’s lifted a bit, you can gently pull the rest of the card up from the divider. The rest of the pieces should stay stuck to the divider. To remove the left behind bits and pieces, use the scraper again. It’s important to scrape from top to bottom, rather than side to side, so the little bits don’t get stuck in the mat's crevices. Now all that’s left to do is add the insert. Lay the card open and hold your insert face down. Gently bend the insert so you can get the corners into the matching slits cut in the card's front. When you close the card, you'll see the decorative insert peeking through the design! Here are my four finished cards. I think they turned out really nice and cutting four cards at once saves so much time. 
Cricut Card Mat 2x2 Designs
Materials
Tools
Instructions
STEP 1: GET MY FREE CARD DESIGN FILES
STEP 2: CUT YOUR CARDS
STEP 3: REMOVE CARDS FROM MAT & ASSEMBLE
STEP 4: SHOW IT OFF!
Notes
Answers to Your Questions on How to Make Cricut Insert Cards with a 2×2 Mat
Q. Can I use the Cricut Joy Insert Cards with the new mat?
Yes! The 2×2 mat works with all Cricut card sizes.
Q: Can I use the Cricut Card Mat 2 x 2 with a Cricut Joy?
No, the 2 x 2 mat is made for a standard size machine, meaning ones from the Maker and Explore series. It will not fit in the Joy.
Q: Will these cards cost more postage to mail?
Depending on your card’s dimensions, thickness, and weight, it may cost more than an average card. I recommend measuring and weighing it and checking with your mail service just in case.
Q. How can I write in the Cricut Insert Card?
The Cricut Card Mat 2×2 makes writing on the inside of cards easy! Instead of adding your card to the mat with the front on top, open it and fold the crease the opposite way so the inner right side is on top. Then, just slide it in as normal and use a writing design with a Pen tool to add your meaningful words to the inside of the card!
Q. Do I have to use Cricut cards?
While the Cricut Card kits make the 2×2 mat super easy, you can make your own insert cards out of cardstock. Just cut your cardstock to the size you need, add a crease, and use it like a normal card. I recommend good-quality 65-80 lb cardstock.
Get my free SVG files to make Cricut Insert Cards with a 2×2 Mat
I’d love to see YOUR Cricut Insert Cards and all the designs you make with the Cricut Card Mat – 2×2! Please share a photo in our Facebook group or tag me on social media with #jennifermaker.
Love,

Want to remember this? Save this tutorial on Cricut Insert Cards with the 2×2 Mat to your favorite Pinterest Board!