
Never again be confused about what Cricut blades to use for your projects! This handy guide shows you how to install, change, maintain and store your Cricut blades to get the cleanest and best cuts from your Cricut!
When I got my first Cricut, the whole idea of removable blades mystified me a bit. In fact, I didn’t touch that fine point blade for the first couple of weeks. Then I noticed my cuts weren’t as clean as before, and I thought, “Oh, I must need a new blade.” This set me off on a quest to learn about Cricut blades — how to find them, install them, change them, and — of course — use them properly.
For the first six months of my Cricut’s life, I changed my blade regularly. Whenever the blade seemed dull, off I went to the store to get a new one. But at some point I got tired of buying new blades and instead starting looking into how to extend my Cricut blades’ lives. Since then, with what I learned, I haven’t bought a new Cricut fine point blade in over a year!
Now I am a pro at making the most of my Cricut blades, knowing which blades works best for which projects, and getting the best results from each blade. I want you to be a pro, too, so I’ve put ALL my tips and tricks here for you! I recommend you print this out and keep it next to your Cricut so you can check it every time you have a Cricut question!
This post contains some affiliate links for your convenience (which means if you make a purchase after clicking a link I will earn a small commission but it won’t cost you a penny more)! Read my full disclosure policy.
The Cricut Blades: What’s the Big Difference?
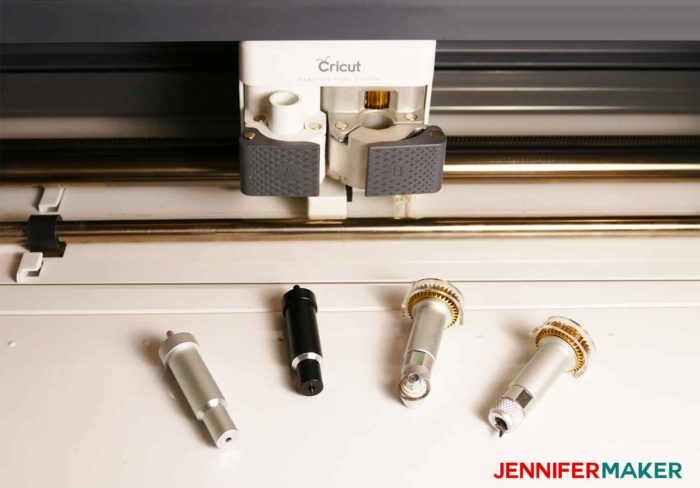
There are currently three different blades that fit in the Cricut Explore series, and six different blades that fit in the Cricut Maker series. They are:
Silver or Gold Fine Point Blade (fits in Explore and Maker):
The Fine Point Blade is your standard, basic blade. This blade has a 30 degree angle and is 1.1 mm long to fit in a Cricut Explore or Maker. The Fine Point Blade is what most of us start with, and many folks only ever use this blade. It’s used for cardstock and vinyl mostly. I use this blade for 90% of my Cricut cutting projects.
This blade comes in a “Fine Point Blade” version and a “Premium Fine Point Blade” version—the blade quality differs (the premium is German carbide and it should stay sharp longer). The Fine Point Blades can be identified out of their packaging by the color of the caps— usually gray for the regular fine point blade, and RED or WHITE for the premium fine point blades.
Note: Some people report that the Fine Point Blades (non-Premium blades) cut a little differently and require LESS pressure. So if you get this type and have issues with cutting, reduce your pressure.
Important: Do not use the blades that have packaging with a big green box (see below image on the right) — these blades are made for older Cricut Expression machines and are too long for the Cricut Explores and Makers.
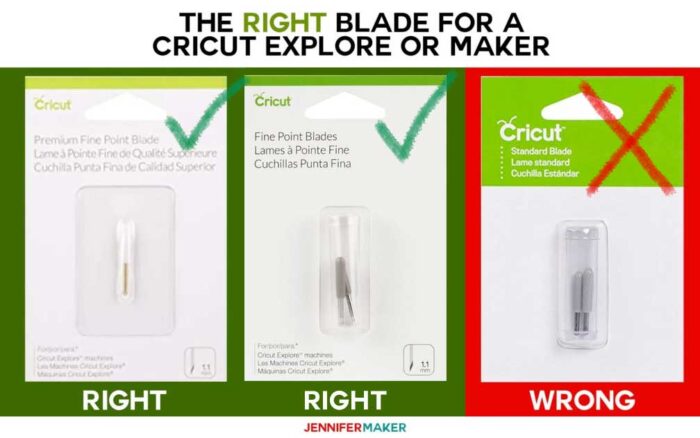
If you do not use the right blade for your Cricut, it may cutt TOO DEEP. So check your packaging and be careful when buying replacement Cricut blades.
Black Deep Point Blade (fits in Explore and Maker):
The Deep-Point Blade is a special blade that cuts deeper than the standard fine point blade. This blade has a steeper blade angle (60 degrees vs 45 degrees for the other fine point blades) and harder, more durable steel. I’ve used it for THICKER projects on my Cricut Explore and Maker. If you find your fine point blade just doesn’t want to cut through a material thicker than standard cardstock, this is the blade to use. You can identify a deep-point blade outside of its packaging by the color of its cap, which is BLUE or BLACK/BROWN. Here is the Deep-Point Blade cutting leather:

Pink Bonded Fabric Blade (fits in Explore and Maker):
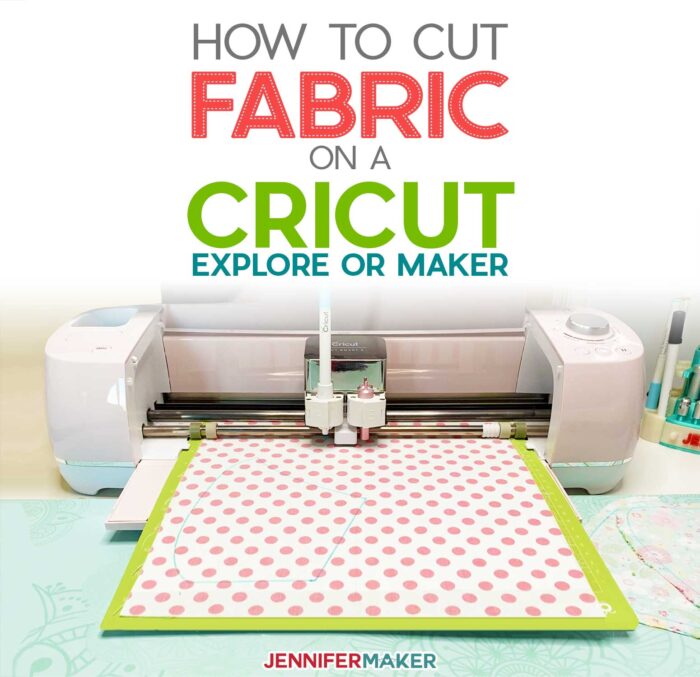
If you like to cut fabric on your Explore, the Bonded Fabric Blade is the blade for you. This blade will stay sharper longer when cutting fabric. While it fits both the Explore and Maker, it’s really intended for the Explore as the Maker has other blade options for fabric, like the rotary blade.
Rotary Blade (fits in Maker only):
Fabric cutters will want to use the Rotary Blade in their Maker. This blade has a tiny rotary wheel that can cut amazingly intricate designs. You can also use this blade for crepe paper with great success! Basically, the rotary blade is great for any material that would snag on a regular blade.
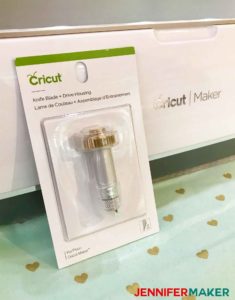
Knife Blade (fits in Maker only):
Got something really thick to cut? The Knife Blade is your solution! This is like a miniature and very sharp Xacto knife and it can really get in there to cut the tough stuff. I’ve used my knife blade to cut wood and leather.
Scoring Wheel & Double Scoring Wheel (fits in Maker only):
The scoring wheels don’t actually cut — instead, they score. The Cricut Scoring Wheel looks like the rotary blade, but it won’t actually cut through your material. It comes with two tips: the single scoring tip and the double scoring tip. Use the single scoring tip for light materials like cardstock. Use the double scoring tip for harder to fold materials like cardboard.
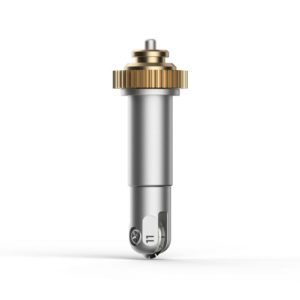
Engraving Tip (fits in Maker only)
 The engraving tool lets you engrave on flat, soft metals (such as aluminum and copper), leather, acrylic, and paper. With the engraving tip, you can engrave unique and permanent designs on a variety of materials for many different projects, such as intricately engraved dog tags, name plates, inscribed art, home decor, jewelry, gorgeous monograms, and heirloom-quality keepsakes. The engraving tool is $44.99 for both the tip and housing, or $24.99 for just the tip. View the Engraving Tip + Housing on Cricut.com. And here’s a video that shows the engraving tip up close!
Fine Debossing Tip (fits in Maker only)
 The debossing tool pushes the material IN to create pretty effects — it’s the opposite of an embossing tool. Deboss any design you’d like, including decorative flourishes, patterns, monograms, logos, seals, and more. This rolling debossing ball, with a wider range of motion, gives you free reign to customize, personalize, and design with incredible intricacy. Make a dimensional wedding card, thank you card with your monogram, or add flourish to gift boxes, tags, and more. Creates a stunning effect on foil cardstock, coated paper, shimmer and glitter paper, foil cardstock, basswood, and much more. The debossing tool is $44.99 for both the tip and housing, or $24.99 for just the tip.View the Fine Debossing Tip on Cricut.com. And here’s a video that shows the Debossing Tip close up.
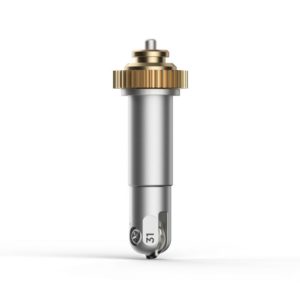
Perforation Blade (fits in Maker only)
 The perforation tool creates easy perforations for tear-offs and easy peel-aways using paper, cardstock, acetate, poster board, and more! Get the perfect tear quickly and effortlessly with precise perforation cuts for a wide variety of projects. To create uniform, finely perforated lines for any design, just snap this tip onto the QuickSwap Housing and tell your Cricut Maker to “Go!” Evenly spaced perforation lines allow for clean, even tearing without the need to fold beforehand – especially great for shapes with curves. Perfect for tear-out booklet pages, raffle tickets, homemade journals, or for any project that demands a clean tear. For use with Cricut Maker machines. This is a basic Perforation Blade with 2.5 mm teeth / 0.5 mm gaps. The perforation tool is $44.99 for both the blade tip and housing, or $24.99 for just the tip. View the Perforation Blade on Cricut.com. Here’s a video that shows the perforation tool close up!
Wavy Blade (fits in Maker only)
 This tool will create a wavy edge rather than a straight edge to give you a decorative edge faster. This is a special sculpted stainless steel blade that lets you make original vinyl decals, iron-on designs, envelopes, cards, gift tags, and collage projects, or any time you need fabulously finished edges and stylish design accents. Perfect for iron-on, vinyl, paper, cardstock, fabric, and more. For use with Cricut Maker machines.The wavy blade is 2.0 mm L / 0.8 mm H. The wavy edging blade is $44.99 for both the blade tip and housing, or $24.99 for just the tip. View the Wavy Edging Blade on Cricut.com. And here’s a video that shows the Wavy Blade in action.
Which Blade Do I Use For This Project?
Now that you know each of the blades, let’s look at which blade you should use for which project. Below is a chart that shows you blades and materials. Whenever I have a project here on the blog that used a particular blade, I’ve linked it so you can see REAL results!
| Material Type | Best Blades | Sample Projects |
|---|---|---|
| Regular Cardstock (65 lb. to 110 lb.) and papers | Fine Point Blade (the standard blade) | Paper Flowers |
| Vinyl (any type) | Fine Point Blade (the standard blade) | Apple Mandala Vinyl Decal |
| Very thick cardstock and things like Kraft board | Deep Point Blade (Explore) or Knife Blade (Maker) | Rose Gold Leather Journal |
| Fabric | Rotary blade (Maker) or Fine Point/Bonded Fabric Blade if you're willing to back it with a bonding paper (Explore) | Maker Mat Dust Cover & Tool Organizer |
| Leather | Knife blade or Rotary Blade (Maker) or Deep Point Blade (Explore) | Easy Leather Wallets |
| Wood | Knife blade (Maker only) | 3D Family Tree from Basswood |
| Crepe paper | Rotary Blade (Maker only) | Crepe Paper Peonies |
| Craft foam | Deep Point Blade (Explore/Maker) | |
| Foil | Deep Point Blade (Explore/Maker) |
Installing a New Cricut Blade
First, it’s important to understand that Cricut blades really come in two parts — the blade itself and the blade housing. You need BOTH to install and cut with them on your Cricut. All new Cricuts come with a Fine Point Blade and Blade Housing, but if you go to the store to get a replacement blade, you only need the replacement blade, not a whole new blade housing (unless you lost yours or something like that).
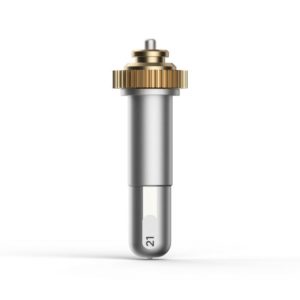
Here’s what a new Deep-Point replacement blade looks like by itself:

When you feel it’s time to get a new fine point or deep point blade and install it in your housing, here’s what you do:
- Buy a Premium Fine-Point Blade (for a fine point blade housing) or a Deep-Point Blade (for a deep-point blade housing). Note that these two blades have different housings — they are not interchangeable.
- Open the clamp and remove the blade housing.
- Push the plunger on the top of the blade housing and gently pull out the blade from the bottom. Be careful—it’s sharp! Set it aside.
- Remove the little plastic cover from the new blade.
- Put the shaft of the new blade into the blade housing. There’s a magnet in the blade housing that will hold the new blade in place.
- Replace the blade housing in the machine. (See Changing Your Cricut Blade Housings below).
- Put the little plastic cover you removed from the new blade onto the tip of your old blade to keep it from hurting you or anyone else.
What about installing a new rotary blade for the Cricut Maker? Here’s what you do when you’re ready to change it:
- Buy a Rotary Blade Kit.
- Remove the rotary blade housing from your Maker.
- Open your Rotary Blade Kit, remove the protective plastic cover, and slip it over your existing rotary blade with the large opening over the housing screw. Make sure you feel the protective cover click into place.
- Use the screw driver provided in your kit to remove the screw from the housing. Keep the blade within the protective cover as you do this.
- Remove the new rotary blade, conveniently placed in a new protective cover, from the Rotary Blade Kit package.
- Place the new rotary blade over your housing.
- Replace the screw with the screwdriver — be careful not to over tighten it.
- Remove protective plastic covering carefully (remember, that rotary blade is still sharp) and replace the rotary blade in your Cricut (see Changing Your Cricut Blade Housings below).
- Put the old blade (with the protective cover still on it) back into the packaging before you store or discard it.
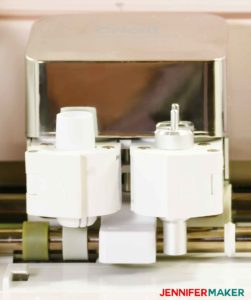
Changing Your Cricut Blade Housings
One of the things I love about the Cricut is how easy it is to use. That installing and changing blades is no exception to this!
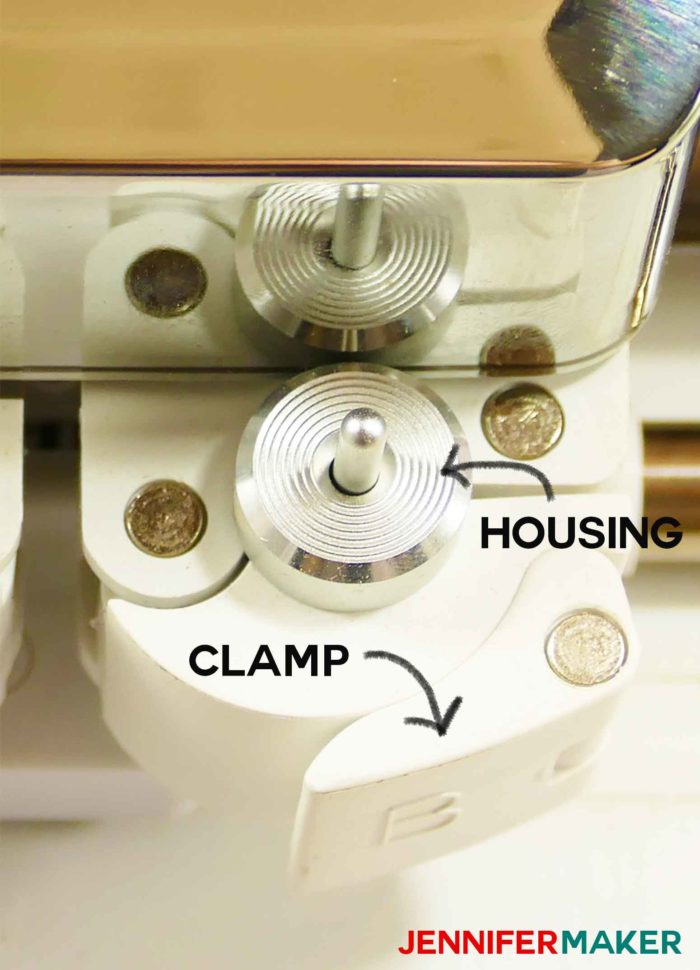
To change the Fine Point and Deep Point Blades, you simply open the clamp (clamp B if you have two clamps), pull up and remove the blade housing currently in your machine, drop in a new blade housing, and close the clamp. Voila!
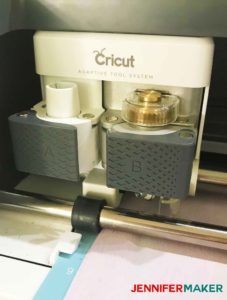
To change the Knife Blade, Rotary Blade, or Scoring Wheel on the Cricut Maker, you just need to make sure the gear on the blade housing is facing toward (and fitting into) the gear on the Cricut. Open clamp B, remove whatever blade housing is there, position the new blade housing so it fits in the gear, and close the clamp.
Keeping Your Cricut Blades Sharp
Remember how I said I’ve been using the same Premium Fine-Point Blade for over a year now? It’s true, and there’s a trick to it! Rather than replacing my blade every time it seems to be getting dull and not cutting like it should, I am able to fix it. There’s two ways I do this:
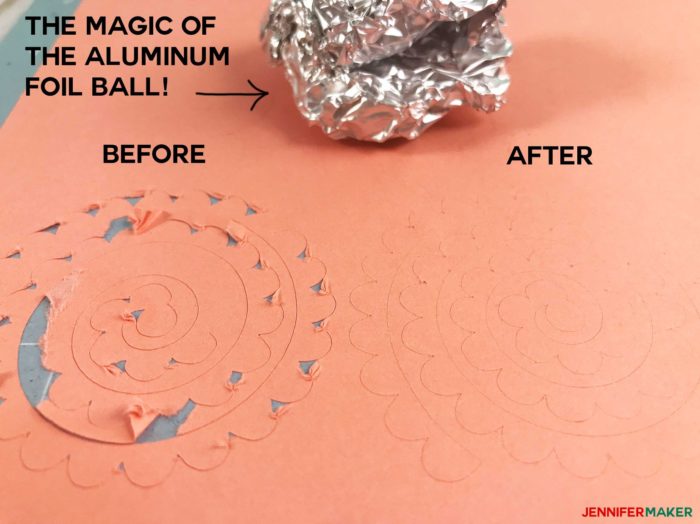
- Ball up a sheet of aluminum foil, remove the blade housing from the Cricut, depress the plunger, and stick the blade into the aluminum foil ball over and over. I poke the point in about 50 times. This helps to remove any bits of paper or vinyl that might be stuck to the blade, working to clean it (not sharpen it). This technique works for the Fine Point and Deep Point Blades.

- Spread a piece of aluminum foil on your cutting mat and cut a simple design in it. It will help clean your blade a bit and doesn’t require that you remove your housing. This technique works for all blades. Again, note that this cleans it, not sharpens it, but it does the trick!
Another way to keep your blades cutting better is to use a different blade to cut paper than the blade you use to cut vinyl—it will extend the life of the blade and make for better cuts. Color code your blades by painting the tip of the plastic blade cover with some acrylic paint—white for paper, black for vinyl, etc.
Click here for more tips on fixing Cricut cutting problems!
Storing Your Cricut Blades
I like to store my blades right in my Cricut compartments, inside the drop-down door in the front. The compartment on the left is designed for blade storage and works great. Put blade housings in the back on the raised plastic points. Loose blades go in the front — there’s a handy magnet there to keep them in place.
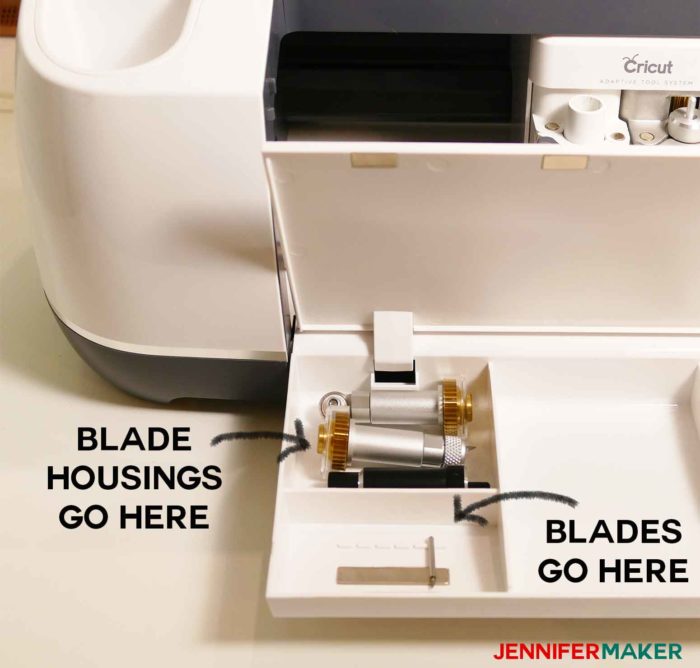
The nice thing about keeping your blades here is they are always with your Cricut, even if you transport it somewhere else.
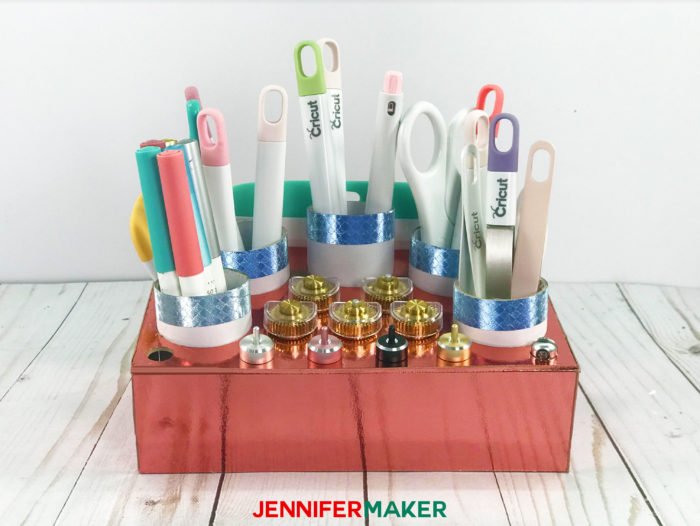
That said, if you have a lot of blades, you’ll need a bigger place to store them. Here’s an awesome Blade Organizer you can make on your Cricut Maker using heavy Cricut chipboard or on your Cricut Explore using three layers of Kraft board!
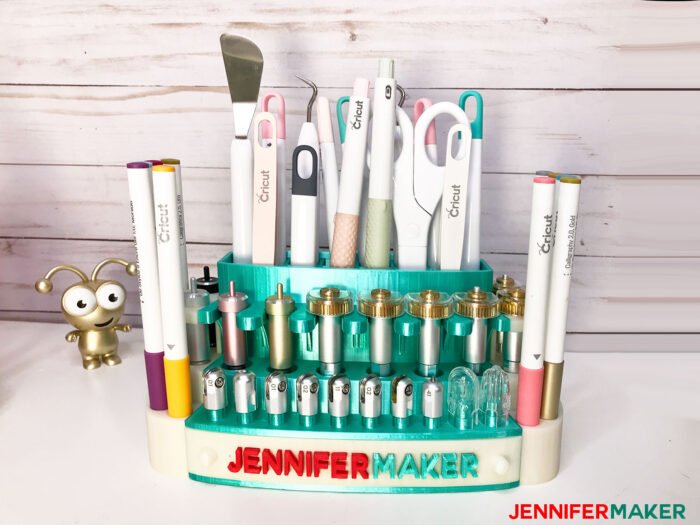
And I have since upgraded to this 3D printed tool holder that Greg designed for me — if you have a 3D printer and want to make this, here’s the STL file:
Do you have favorite Cricut blade tip or trick you’d like to share with everyone? Post it here! I always love to hear from you! I will keep adding to this list, too. And if you want to get more Cricut tips and tricks, check out this list of 45+ Cricut tips and tricks!
Love,

Want to remember this list of Cricut Blades tips and tricks? Pin it to your favorite Pinterest board!


Thank You ! Thank You ! Thank You
You’re welcome, Sue!
When you say to ‘mark’ your different blades, just be sure you don’t mark the actual blade. Jennifer is saying mark the COVER for the blades. Even a tiny bit of paint on the blade makes it NOT fit in the housing. Just thought I’d share my experience trying to identify mine. LOL Love all youro hints and projects. Thanks!!
Thanks for sharing this information.
Thank you so much! I only had my maker for a month and I did not know what was going on with my fine point blade… I did the tinfoil and I am much happier now! Thank you!
This post was so helpful! I just got a Cricut for Christmas and love knowing I’ll be able to prolong my blade life! Thank you!
Thank you for sharing this. I am fairly new to using the Cricut (since end of Oct) and every little tidbit helps.
I cant get the link to work is it no longer available?
I fixed the links in this article — sometimes Cricut moves things around in their store.
i retried the link even signed out of ds and signed back in and retried and will not work is there another way to get file and save to my computer and bring into ds?
sorry still doesn’t work
You are a wealth of knowledge…thank you for sharing and helping all us newbies out. I’m pretty sure I wouldn’t be using my maker to its potential without all your blogs, videos etc. You’re cute as a button too! Thanks again!
I just found your blog (and subscribed), it’s wonderful! I want to be you when I grow up. 🙂
Thank you from the bottom of my heart for your instructions. I’m a bit intimidated by my new Cricut Maker machine, so reading information on blades has increased my confidence. I’ll be certain to subscribe to your newsletter for projects and tips; it’s exciting to have such detailed advice from you!
Happy to help, Anne Marie!
Should you always be able to see the outline of what you were cutting? I am doing your rolled paper flowers on 65lb cardstock and I can see a faint image of it on my mat afterward. Does that mean it is going too deep?? I kind of feel like if I go any lighter it doesn’t cut everywhere good.
I would try to got one step lighter and see what happens! Sometimes the best results come from trial and error!
This helped me so mush. Thanks you so much Jennifer.
Awesome to hear, Joseph!