
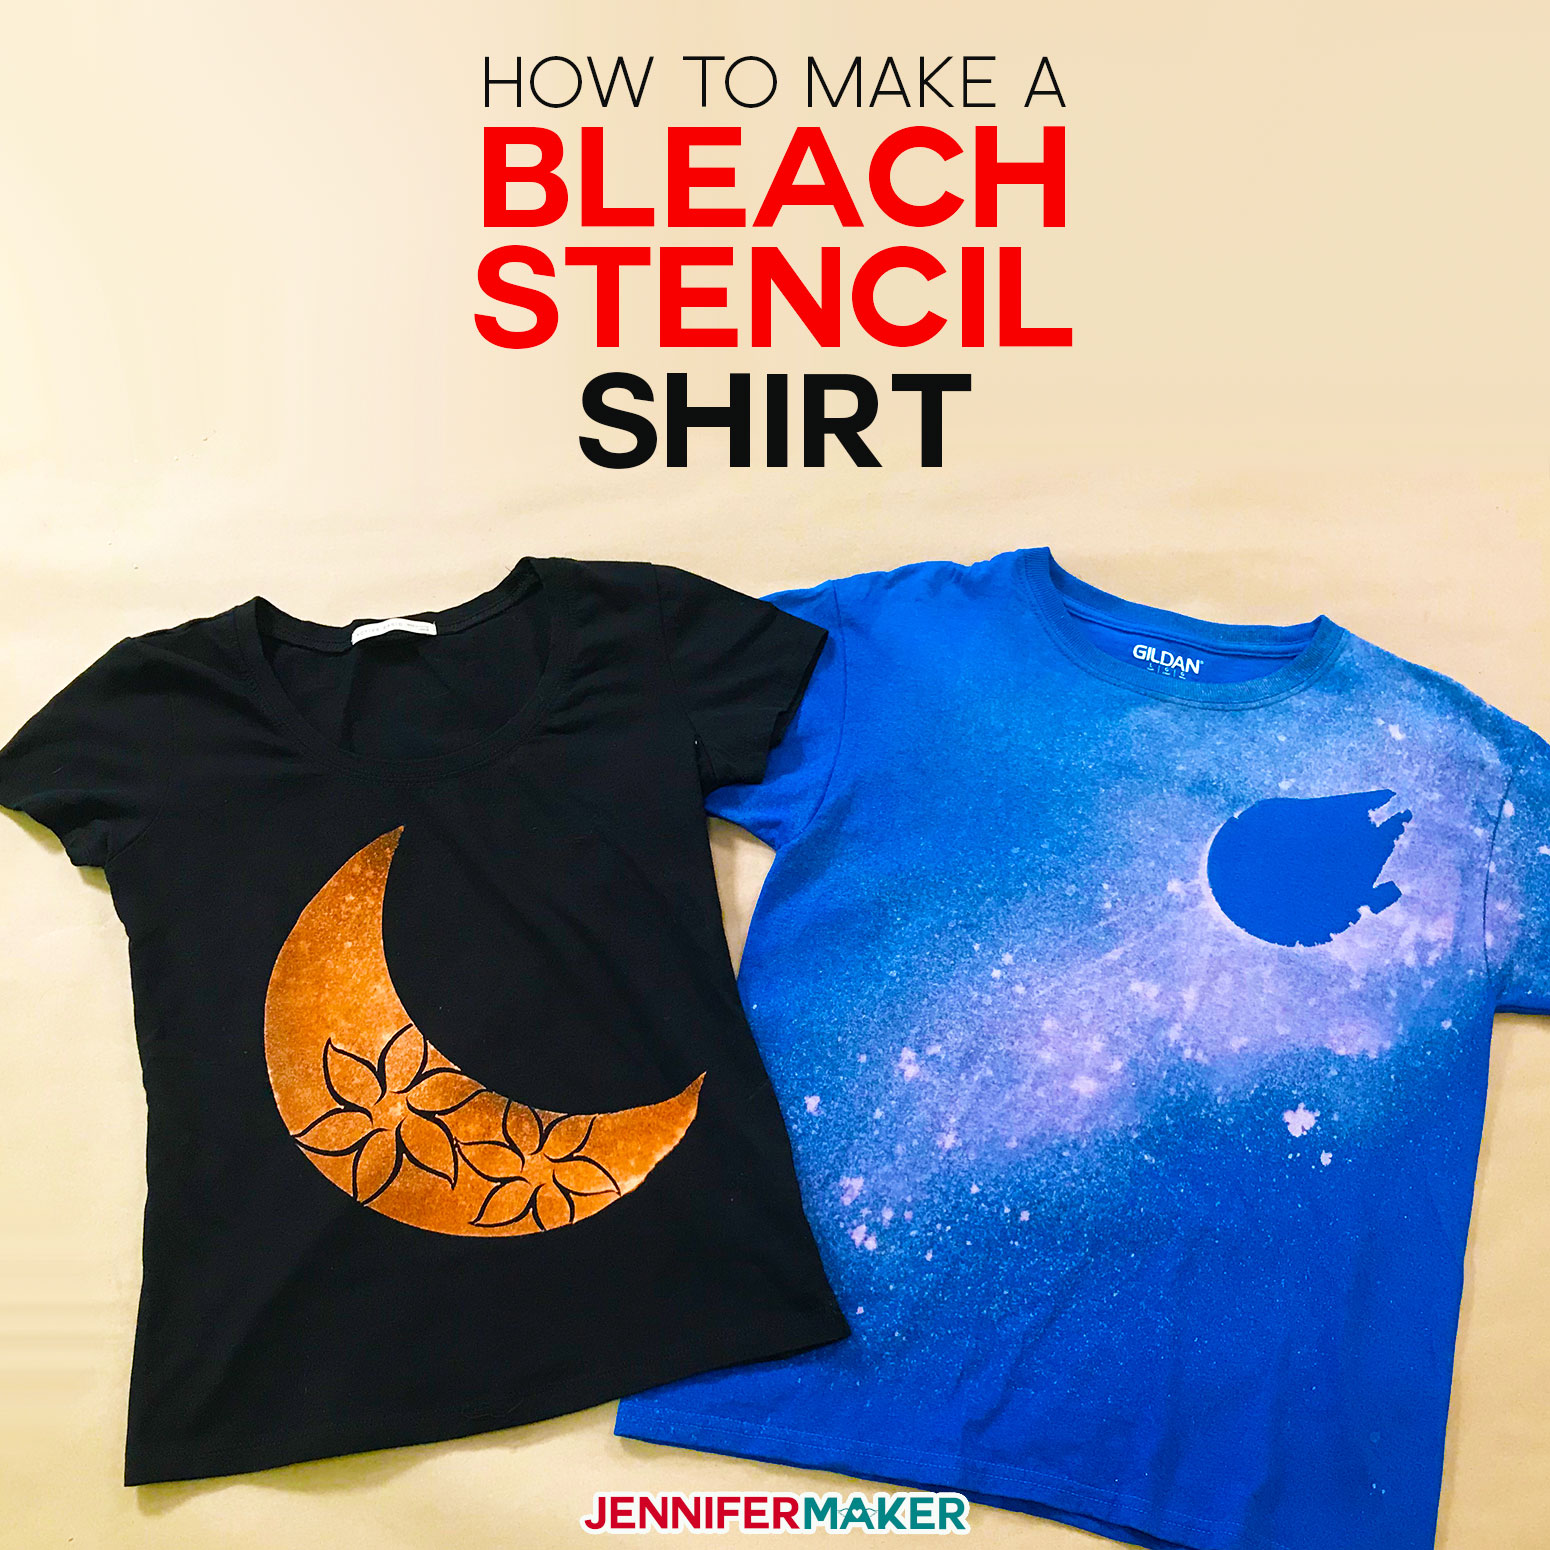
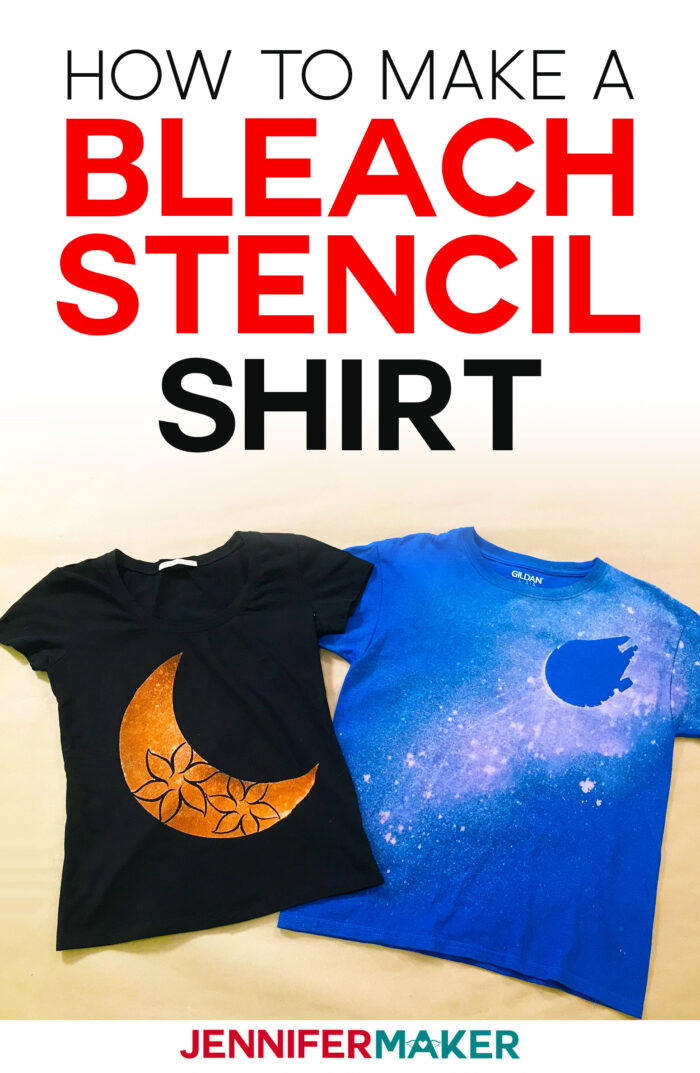
Learn how to create amazing T-shirt designs with bleach spray and DIY stencils. In this tutorial, I show you how to make these fun bleach stencil shirts at home.
A few months ago I had the opportunity to visit Cricut headquarters and get a tour. While I was there, I did a new-to-me project — I made a spray bleach stencil shirt! I didn’t even know bleaching T-shirts was a thing! But, it turns out it totally is and you can make beautiful stencils out of freezer paper or vinyl using your Cricut machine — then you can use those stencils to make a DIY bleach stencil shirt! I never would have thought to put bleach on dark-colored clothing on purpose, but now that I see what it can do, it’s so COOL. So for Day 18 & 19 of The Great Maker 25-Day Gift-Away Challenge, I am showing you how to create a beautiful bleach stencil shirt.

See exactly how to make beautiful stencils for T-shirts with your Cricut using either freezer paper or vinyl in my tutorial video here:
To make a bleach stencil shirt, you first need a stencil. You can make a stencil with both freezer paper and vinyl. I tried both and I really think you can use either. The freezer paper is a little easier to get onto your shirt, but the vinyl produced a little clearer image. But it’s not a huge deal either way — so pick the stencil material you have on hand!
The T-shirt design itself is created by putting the stencil on the shirt and then spraying it with bleach. The droplets of bleach create a beautiful and unique effect on the shirt, and the effect differs depending on the color of shirt you start with and how long you leave the bleach on your shirt. It’s FUN and really pretty easy!
So for this project, you’ll want a T-shirt, and I recommend one with a high cotton count for the best bleached effects. You also need a spray bottle, one capable of producing a fine mist. In the spray bottle you’ll put a one-to-one ratio of bleach to water — use the liquid bleach, and skip the bleach crystals for this project as the crystals can clog up your spray bottle. You can also use a bleach pen if you want to draw freehand on your shirt. As for a stencil material, you also need either freezer paper (NOT wax paper and NOT parchment paper) or permanent vinyl and some transfer tape, plus a way to cut your stencil material like a Cricut.
Other supplies that are useful to have on hand are a plastic drop cloth and protective gear like gloves, an apron, goggles, and a mask, some paper towels, a tub or bucket, and some hydrogen peroxide.
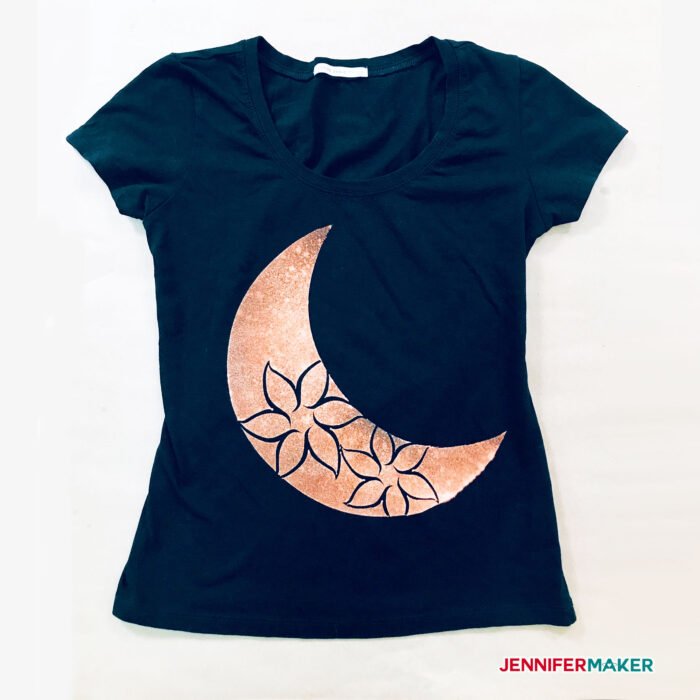
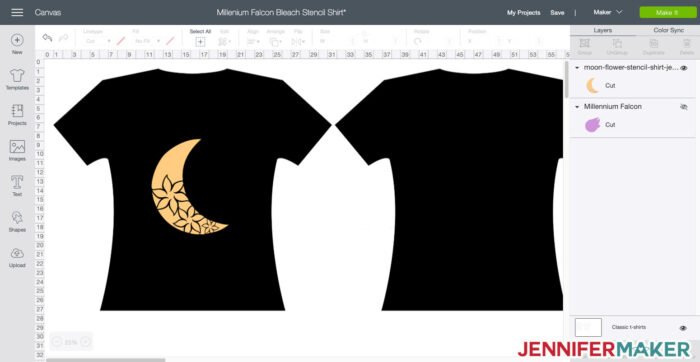
Now, let’s talk about the design. Your stencil can be a negative or a positive. A negative stencil allows you to bleach the design right onto your shirt, like with this moonflower stencil here.
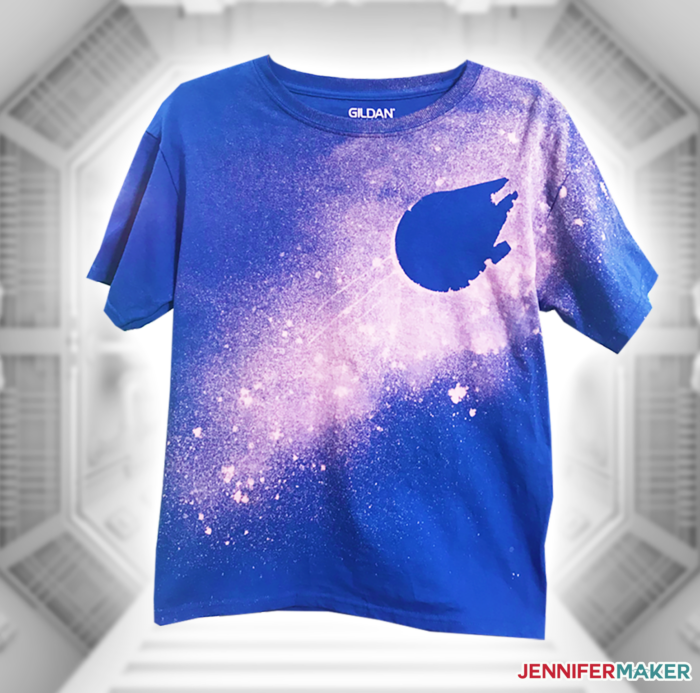
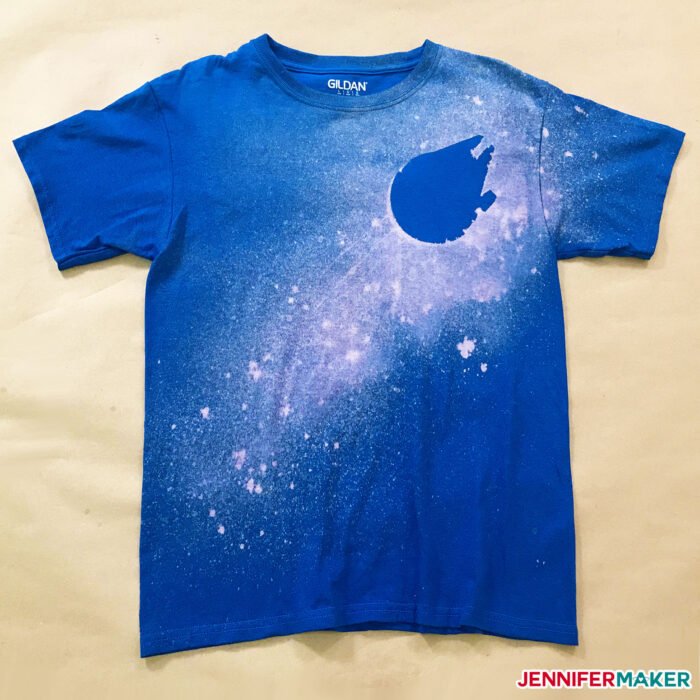
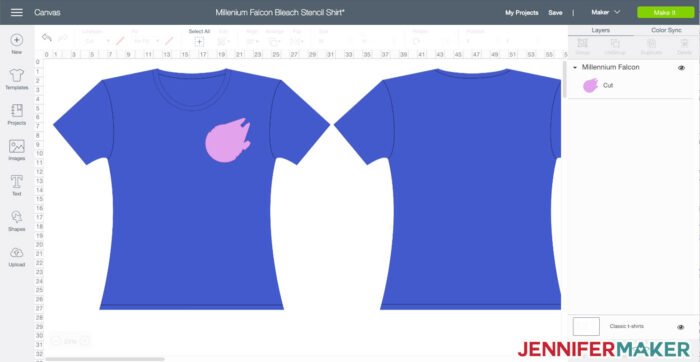
A positive stencil masks out the color of the shirt, like the Millennium Falcon stencil here.
Both create really cool effects. I’m a little partial to the positive stencil because of the way the bleach spray makes it look like a star field, but you get to choose what works for you! It’s all about personal preference. These two designs here are a great way to learn how to make a bleach stencil shirt, so let me show you where to find them then we’ll have our first attempt at bleaching a shirt together!
Bleached T-shirts with cool designs are the perfect gift, and they’re so much fun to make! With some practice bleach stenciling, you’ll get great results and turn boring, blank T-shirts into something fabulous!
Ready to make your own DIY stencils for a bleach shirt? I’m excited to show you how! This post contains some affiliate links for your convenience (which means if you make a purchase after clicking a link I will earn a small commission but it won’t cost you a penny more)! Read my full disclosure policy.
Materials to Make DIY Bleach Stencil Shirts with a Cricut
View my Amazon shopping list with the exact items we used to make this project!
- T-Shirts – I used one of these T-shirts on Amazon for the moonflower shirt and a Gildan cotton shirt in royal blue for the Millennium Falcon shirt, but you can use any mostly cotton shirt you like – the possibilities are endless!
- Liquid Bleach (do NOT use Clorox Bleach Crystals)
- (Optional) Bleach Pens
- Stencil material (either Freezer Paper, or Permanent Adhesive Vinyl + Transfer Tape)
- Spray bottles capable of a fine mist, not just squirting or streaming
- Dropcloth
- Cardboard or a shirt form
- Paper towels
- Hydrogen peroxide
- Safety equipment (gloves, apron, goggles, mask)
- Standard Grip Cutting mat (the 12″ x 12″ size)
- A way to cut your stencil (I used the amazing Cricut cutting machine!)
- Designs #184 and #183 – My free SVG design files and template (available in my free resource library—get the password by filling out the form at the bottom of this page)
- (Optional) The Millennium Falcon image in Cricut Design Space (not free, currently $1.99 for the image)
How to Make DIY Stencils from Freezer Paper, Vinyl, and Bleach
Step 1: Prepare Your Shirt
Before you bleach shirts, first wash and dry your T-shirt. This step is important to remove any coating the manufacturer may have added to the shirt.
Step 2: Make a DIY Stencil or Use My Free SVG Files
You can make your own DIY vinyl stencil in Cricut Design Space. For example, I made the Star Wars Millennium Falcon stencil from a design I found in Cricut Design Space – Design #184 (click here to see the public design project). Here’s what that design looks like:
Or you can use my free DIY stencil pattern and SVG cut files of the pretty moon with flowers (Design #183). Here’s what that looks like uploaded to Cricut Design Space:
Get my free DIY stencil designs from my free resource library (get the password to the library in the form at the bottom of this post).
Tip: If you’re not sure how to upload an SVG cut file to Cricut Design Space, watch this helpful video training series I made. If you’re on an iPhone or iPad, here’s how to download and upload SVG files to the Cricut Design Space app.
Step 3: Prepare Your DIY Stencil Design for Cutting
Measure your shirt and decide how big you want your stencil to be. Then cut your design out using your Cricut cutting machine. You do NOT have to mirror your design. You can cut your stencil from either freezer paper or permanent vinyl — freezer paper will be a little easier to apply, but the permanent vinyl will result in a sharper image.
Note: If using freezer paper, be sure to cut the freezer paper shiny side down. If you have a Maker and a rotary blade, you can use that. Or just use the ‘Washi’ or the “Freezer Paper” setting with the fine-point blade — I used this to cut the Millennium Falcon from Freezer Paper.
Step 4: Use Cardboard to Prevent Bleeding
For best results, slide a piece of cardboard inside the shirt. This will help make sure no bleach seeps through the front of your shirt to the back of your shirt. It also helps keep your bleach from running past your stencil lines and gives an easier surface to work with.
If you need to protect other parts of your shirt from bleedthrough, just use freezer paper inside the shirt. I recommend you put it shiny side down.
Step 5: Iron the Shirt and Apply the Stencil
Iron the shirt where you will be making your bleach design. You want to make sure you’re working on a flat surface so that your design isn’t warped by wrinkles. This also helps the stencil adhere to the shirt better.
Place the stencil on the shirt.
If you’re using vinyl, transfer it to your shirt with transfer tape. press down well with your fingers, and carefully remove the transfer tape — you’ll need to go slow, as the vinyl is not going to want to stick well to the T-shirt. Slow and steady wins the race here. After you remove the transfer tape, press down again along the edges of your vinyl to make sure it is stuck to the shirt as good as can be.
If you’re using a freezer paper stencil, place it shiny side down on the shirt and iron it. You’ll want your EasyPress at 310°F or your household iron at medium-high temperature—press for about 10 seconds. What you’re doing is causing the plastic on the freezer paper to adhere to the t-shirt. The freezer paper will not damage the shirt.
Cover the rest of your shirt that you do not want to be bleached with more freezer paper. Be sure to press the freezer paper so it stays in place.
Step 6: Mix the Bleach and Test
Mix your liquid bleach with water in your spray bottle using a 1:1 ratio. You could do this step beforehand, but it leaves you open to accidentally getting some on your hands and ruining your shirt when handling it. It’s recommended you dispose of extra bleach when you’re done or it may warp the bottles and give off some potentially bad fumes.
Test the spray bottle a few times in a sink or far away from your shirt so you can make sure it’s working properly and the mist setting is correct. You want a fine mist rather than a strong stream.
Have a stack of paper towels nearby to use for blotting.
Fill your bucket/sink/tub with cold water. Make sure it’s enough to submerge your entire shirt.
Step 7: Bleach Your Shirt
- Spray your entire design with bleach once then IMMEDIATELY blot dry with paper towels or rags. You’ll want to spray about six to eight inches above your shirt as you don’t want to soak your shirt in bleach. You simply want the bleach mixture to make contact with the exposed parts of your shirt. Blotting with the towels will soak up a lot of the bleach – you want this so that the fibers of your shirt don’t wick the bleach underneath your stencil. Remember to blot the freezer paper surrounding the design as well – blot anywhere you see the bleach has hit. If the freezer paper gets too wet, the bleach will soak through and make little flecks of bleach where you don’t want it.
- Repeat the last step. Spray again and then immediately blot again. Spraying twice helps make sure you got enough coverage. You can repeat this for a third time, but you run the risk of the bleach bleeding outside of your stencil. I would not recommend spraying more than 3 times.
- Wait and watch the design lighten and/or change from its original color. This can vary in time depending on the brand and color of the shirt. Some of mine took just 5-8 minutes to get to the color I want them at, while others took 20-30 minutes. Different shirts from different brands may bleach in different ways and a different color – it really depends on the kind of dyes used. When bleaching some shirts, it is difficult to tell how much lighter the design is getting, because the shirt is wet from the bleach. I had this issue with both of my blue Millennium Falcon shirts.
- If you’re wanting an easy way to speed up the lightening process somewhat, you can set the shirt out in the sun for a few minutes. The heat and UV rays help the chemical process and your results will be lighter.
- After about 7 – 10 minutes, dunk the shirt in cold water to stop the bleaching process. Once your design has reached the color you want it to be, immediately dunk it in the cold water you have waiting. No need to peel off the freezer paper, just dunk it in. You also don’t want to wait until the bleach is dry, as that will degrade and eat the fibers and cause holes.
- Wash the shirt in your washing machine on a cold cycle by itself with 1 cup of Hydrogen Peroxide to fully stop the chemical reaction of the bleach. Don’t wash with your normal clothing as there is still bleach in the shirt.
- Dry as normal, and revel at your amazing new creation!
Things to keep in mind:
- NEVER heat your bleached area directly. The fumes created are highly toxic.
- Make sure to have the appropriate safety gear when handling bleach – gloves, drop cloth, goggles, etc.
- It’s safer to mix the bleach and water just before you’re ready to start and dispose of the bleach directly after you’ve achieved the desired results to minimize bleach exposure to other surfaces.

Get my free DIY Stencil SVG cut file for T-shirts
I’d love to see your bleach stencil shirts, bleach shirt designs and ideas, and all the other fun ideas you come up with to use spray bleach! If you make one, please share a photo in our Facebook group, or tag me on social media with #jennifermaker.
Love,

Want to remember this? Save the Bleach Stencil Shirt Tutorial to your favorite Pinterest Board


Get you some much needed rest, everyone will come back for the video
Less scared now to try a bleach project, Thanks for reducing my fear level!!!
So glad to hear you are taking care of yourself! Thanks for the info, I love the moon one!
What a great project. Looks like tons of fun.
Wow, the bleach mist really does look exactly like a starry night sky. I’m thinking that would even make a pretty canvas for the wall haha! It looks almost like a photo or a painting!