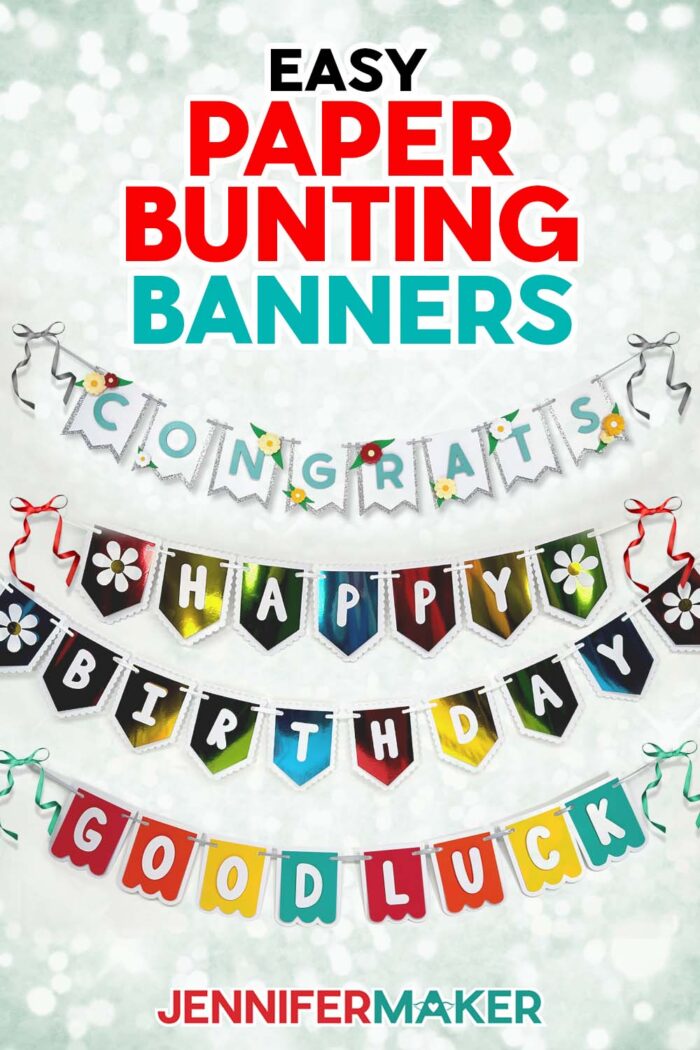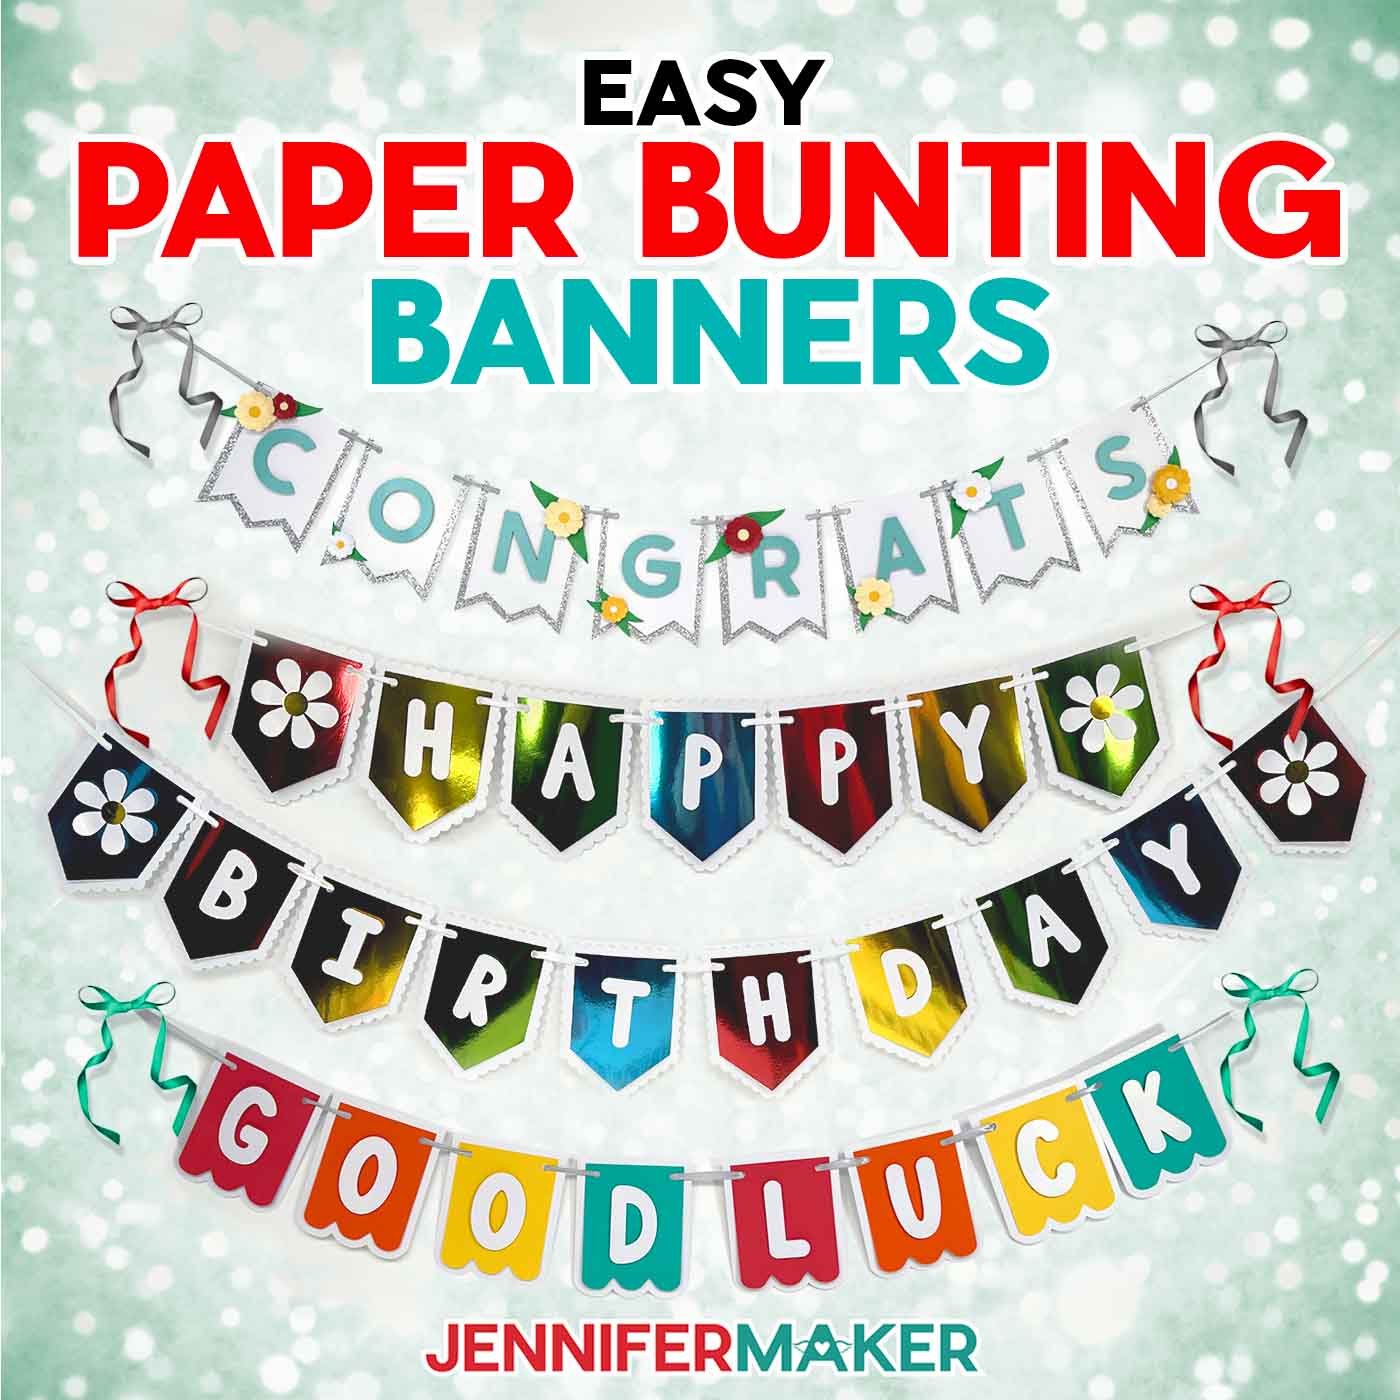
Learn how to make a paper bunting banner for your next celebration!
There’s always something to celebrate, whether it’s a birthday, a milestone, or even just the season! With the right files and some simple planning, the most basic materials can make a big statement. Homemade party decorations are fun to make, and can be personalized with different paper for the special occasion! Today, I’ll show you how to make a beautiful paper bunting banner for a special day!
Watch the full step-by-step video tutorial on making a paper bunting banner:

I love the look of paper banners, but the store-bought ones are never quite right. The colors and sentiments can feel impersonal and mass-produced, and they often lack personality and flair! But with some quality cardstock, my design files, and a few other tools and materials, you can make just what you need for the occasion.
A crafted paper bunting banner is a fantastic way to customize your party space, and using a cutting machine like a Cricut makes the process even easier by cutting precise, consistent pieces that look amazing. They don’t take much time to cut and assemble, making them a quick project for a last minute celebration!
I’ll demonstrate with my Cricut Maker 3, but you can cut paper bunting banners on any Cricut or another cutting machine – even the Cricut Joy!
Start by selecting the colors, types, or patterns of cardstock for the panels of your banner. The weight of your cardstock can vary, and you can experiment with different types like foil, shimmer, and glitter. Patterned scrapbook paper is a fun option because it comes in countless designs, and you can mix and match different prints. Whether you’re going for bold, bright colors for a birthday bash or soft, pastel tones for a wedding, you have endless possibilities and combinations to make it unique!
I’ll walk you through how to customize the look of your bunting banner pieces in Cricut Design Space to match your materials, then how to cut your paper into perfectly precise banner pieces. Be sure to set your material sizes and base material cut settings correctly for the cleanest cuts, and clean your blade often — especially if using glitter cardstock.
Once your pieces are cut and removed from the mat, you can start attaching the letters to each panel. I used a combination of glue and tiny adhesive foam squares for a three-dimensional pop! Then I’ll show you the easiest way to string your bunting flags onto a piece of ribbon, but you can also use jute string, yarn, or any other material that would work. Leave a little space between each banner panel so your banner can hang freely.
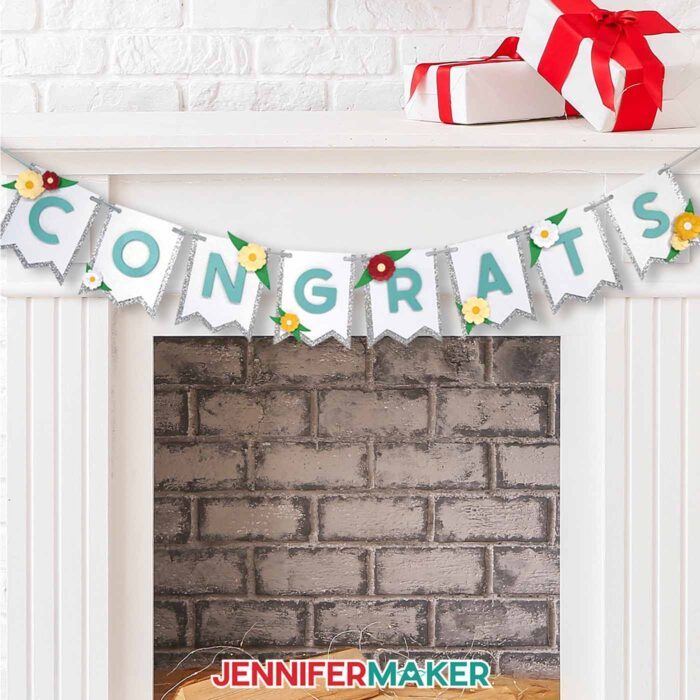
You can hang your banner with a push pin on each end of the ribbon, tie the ends in a loop and hang from hooks or nails, or use tape to hold the banner – so long as it’s not too heavy. String it across a doorway, on a wall, or attach it to stakes for an outdoor party decoration! I hung mine from my mantel and it looked amazing.
With just a few materials and tools, you can create a beautiful paper bunting banner for any occasion. Make one for your next special event, a birthday, graduation, holiday party, or even as a charming piece of home decor! It’s an easy peasy DIY project to add some festive cheer to any space!
Let me show you how to make a paper bunting banner! This post contains some affiliate links for your convenience (which means if you make a purchase after clicking a link I will earn a small commission but it won’t cost you a penny more, there is no additional cost)! Read my full disclosure policy.
Materials to Make A Paper Bunting Banner
View my Amazon shopping list for the exact items I used!
- Three to Ten (3-10) Sheets of 8.5″ x 11″ 65 lb. White Shimmer Cardstock
- Six (6) Sheets of 8.5″ x 11” Foil Cardstock -OR-
- Two (2) Sheets of 12″ x 12″ Silver Glitter Cardstock
- Four (4) Sheets of 8.5″ x 11″ 90 lb. Shimmer Cardstock
- One (1) Sheet of 8.5″ x 11″ 105 lb. Teal Pearlescent Cardstock
- 0.4” Wide Ribbon
- A way to cut your materials – I’m using the Cricut Maker 3, but you can also use the Cricut Maker, a Cricut Explore Series machine, the Cricut Venture, Cricut Joy, or Cricut Joy Xtra
- Cricut Green StandardGrip Machine Mat 12″ x 12”
- Brayer
- Scraper
- Scissors
- Spatula
- ¼” x ¼” Adhesive Foam Squares
- Craft Glue (I used Bearly Art Precision Craft Glue)
How to Make a Paper Bunting Banner!

Paper Bunting Banner
Learn how to make a paper bunting banner!
Materials
- Three to Ten (3-10) Sheets of 8.5" x 11" 65 lb. White Shimmer Cardstock
- Six (6) Sheets of 8.5" x 11” Foil Cardstock -OR-
- Two (2) Sheets of 12" x 12" Silver Glitter Cardstock
- Four (4) Sheets of 8.5" x 11" 90 lb. Shimmer Cardstock
- One (1) Sheet of 8.5" x 11" 105 lb. Teal Pearlescent Cardstock
- 0.4” Wide Ribbon
- Design #697 (My free SVG/DXF/PDF design files are available in my free resource library - get the password by filling out the form at the bottom of this page)
Tools
- A way to cut your materials - I’m using the Cricut Maker 3, but you can also use the Cricut Maker, a Cricut Explore Series machine, the Cricut Venture, Cricut Joy, or Cricut Joy Xtra
- Cricut Green StandardGrip Machine Mat 12" x 12”
- Brayer
- Scraper
- Scissors
- Spatula
- ¼” x ¼” Adhesive Foam Squares
- Craft Glue (I used Bearly Art Precision Craft Glue)
Instructions
STEP 1: GET MY FREE PAPER BUNTING BANNER DESIGNS
First, download my Paper Bunting Banner designs from my free library – look for Design #697. Alternatively, you can use the Save This Project form near the top of this post and the design link will be emailed to you.
The designs are sized to be cut on any Cricut cutting machine.
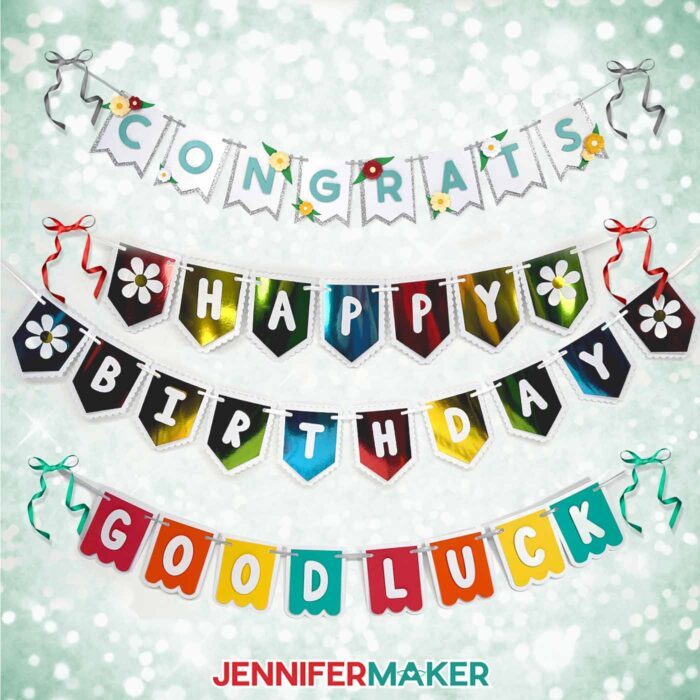
The SVG and DXF folders contain two designs. There’s a “Happy Birthday” banner and a “Congrats” banner. I will show you how to prepare, cut, and assemble both designs.
TIP: If you’re not sure how to download zip files and upload designs, go to jennifermaker.com/svgs.
OPTION 1: “HAPPY BIRTHDAY” PAPER BUNTING BANNER
STEP 2: PREPARE AND CUT YOUR BANNER DESIGN
CRICUT DESIGN SPACE
- In Cricut Design Space on a blank Canvas, click “Upload.”
- Click “Upload Image.”
- Click “Browse.”
- Find and select the “birthday” SVG.
- Click “Open” and then “Continue.”
- Click “Upload” to add the design to your Canvas.
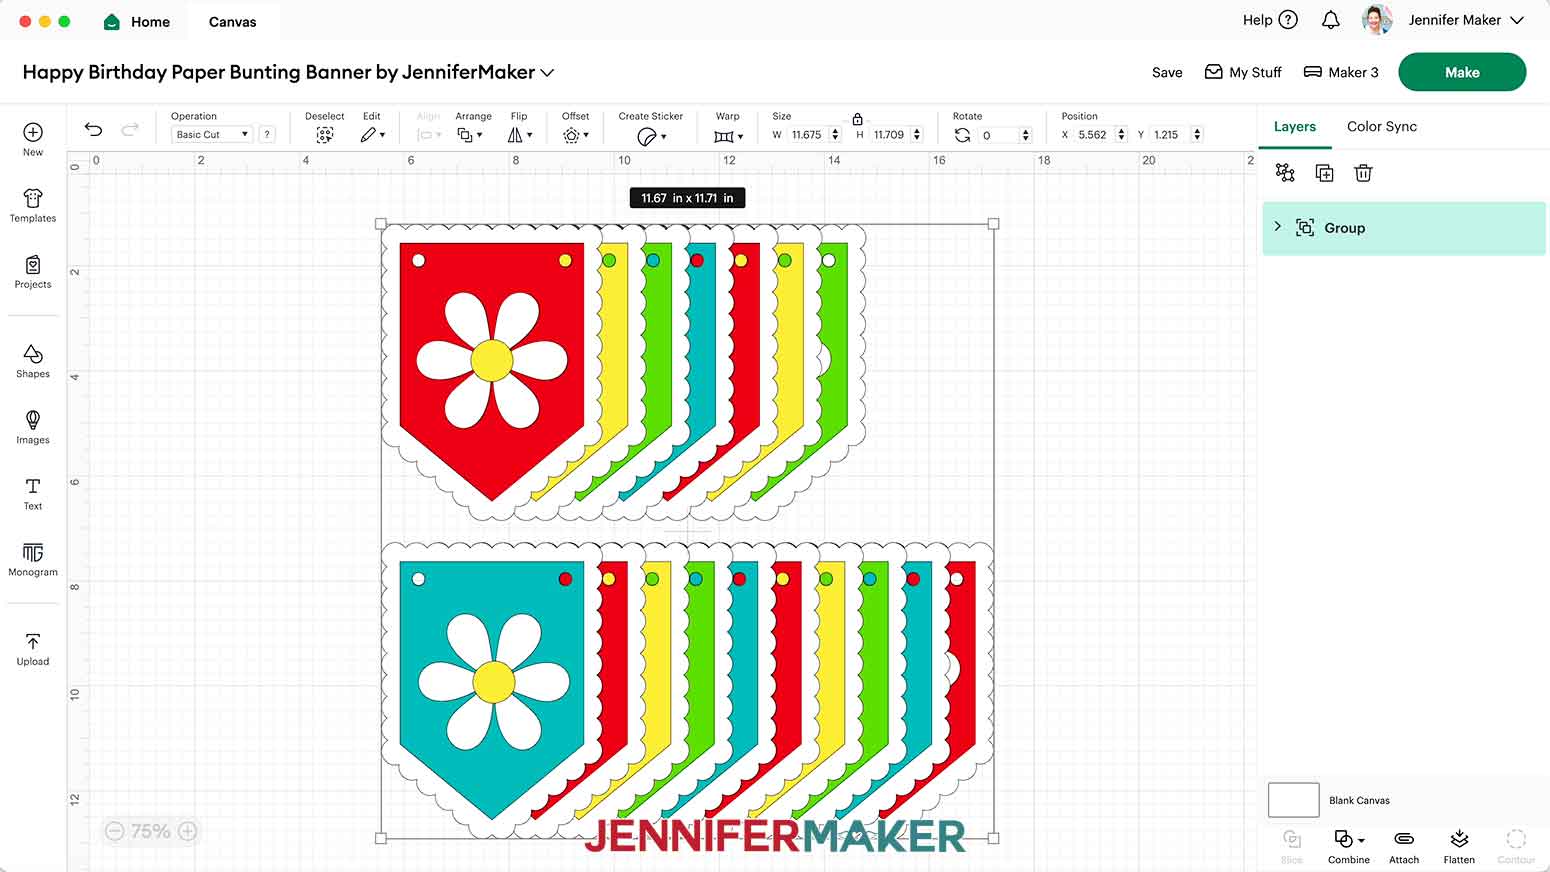
- Here is how the design looks on my Canvas.

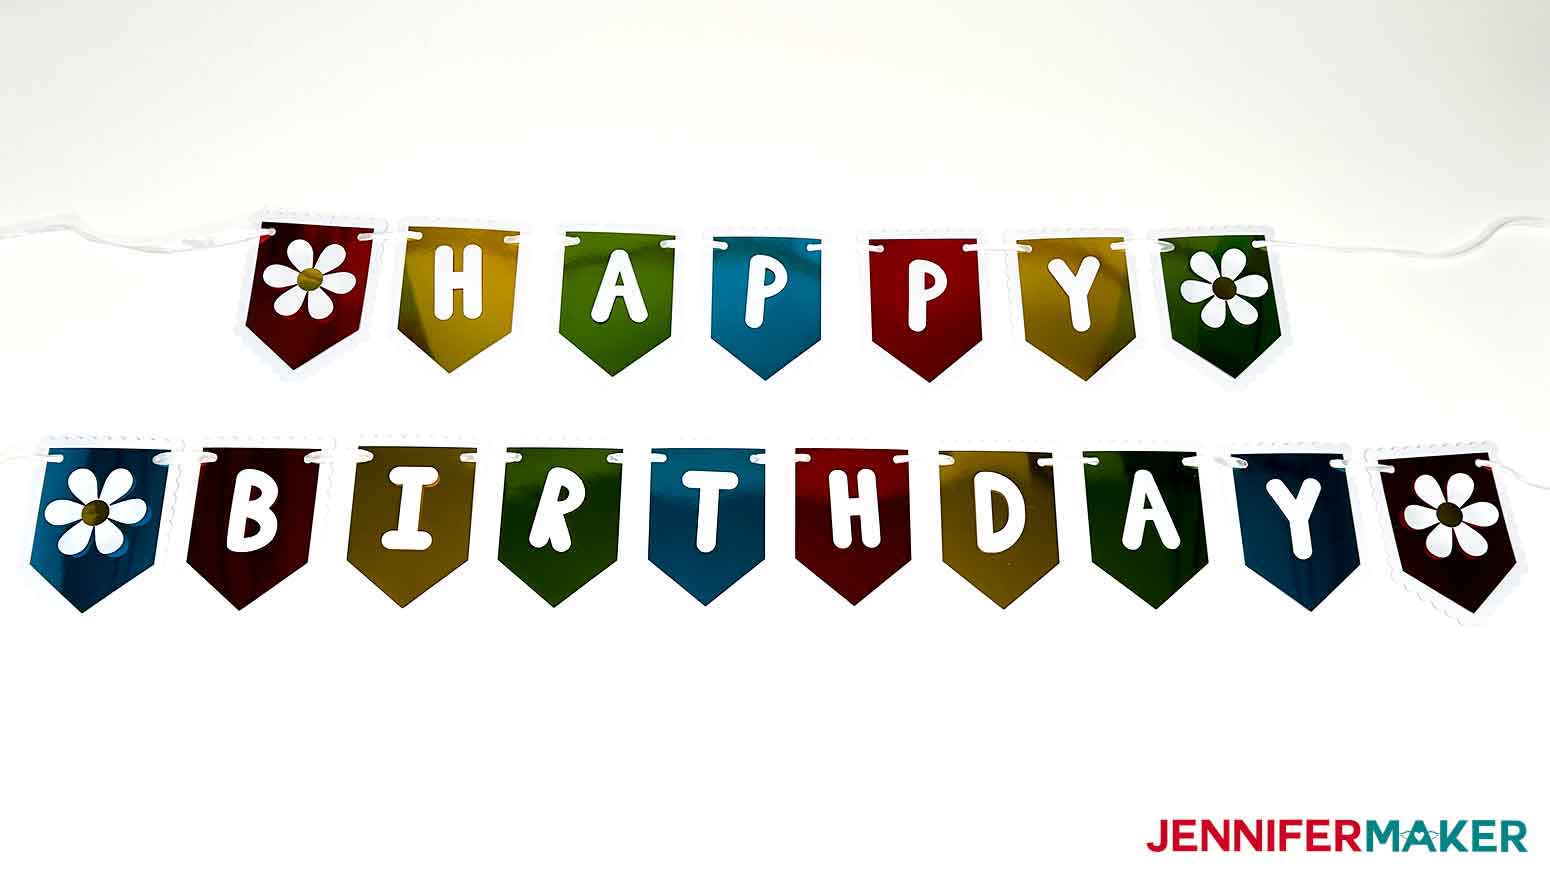
- The seventeen colored flag-shaped pieces will be the panels, the seventeen larger white flag-shaped pieces will be the panel backers, the four white and yellow flowers are embellishments, and the H-A-P-P-Y B-I-R-T-H-D-A-Y letters will spell out the sentiment across the panels.
- Click “Save” and give your project a name.
- Ungroup the design and spread the pieces out.
- If you'd like to change the color of any of your pieces to match your materials, first click the arrow next to a panel in the Layers Panel to reveal all of its layers in the group.
- Select the individual layer you'd like to adjust and click the Color Box at the top to pick a new color for the layer.
- Your design is ready to cut!

CUTTING
- Make sure the correct machine is selected.
- Click “Make” in the upper right corner of the screen.
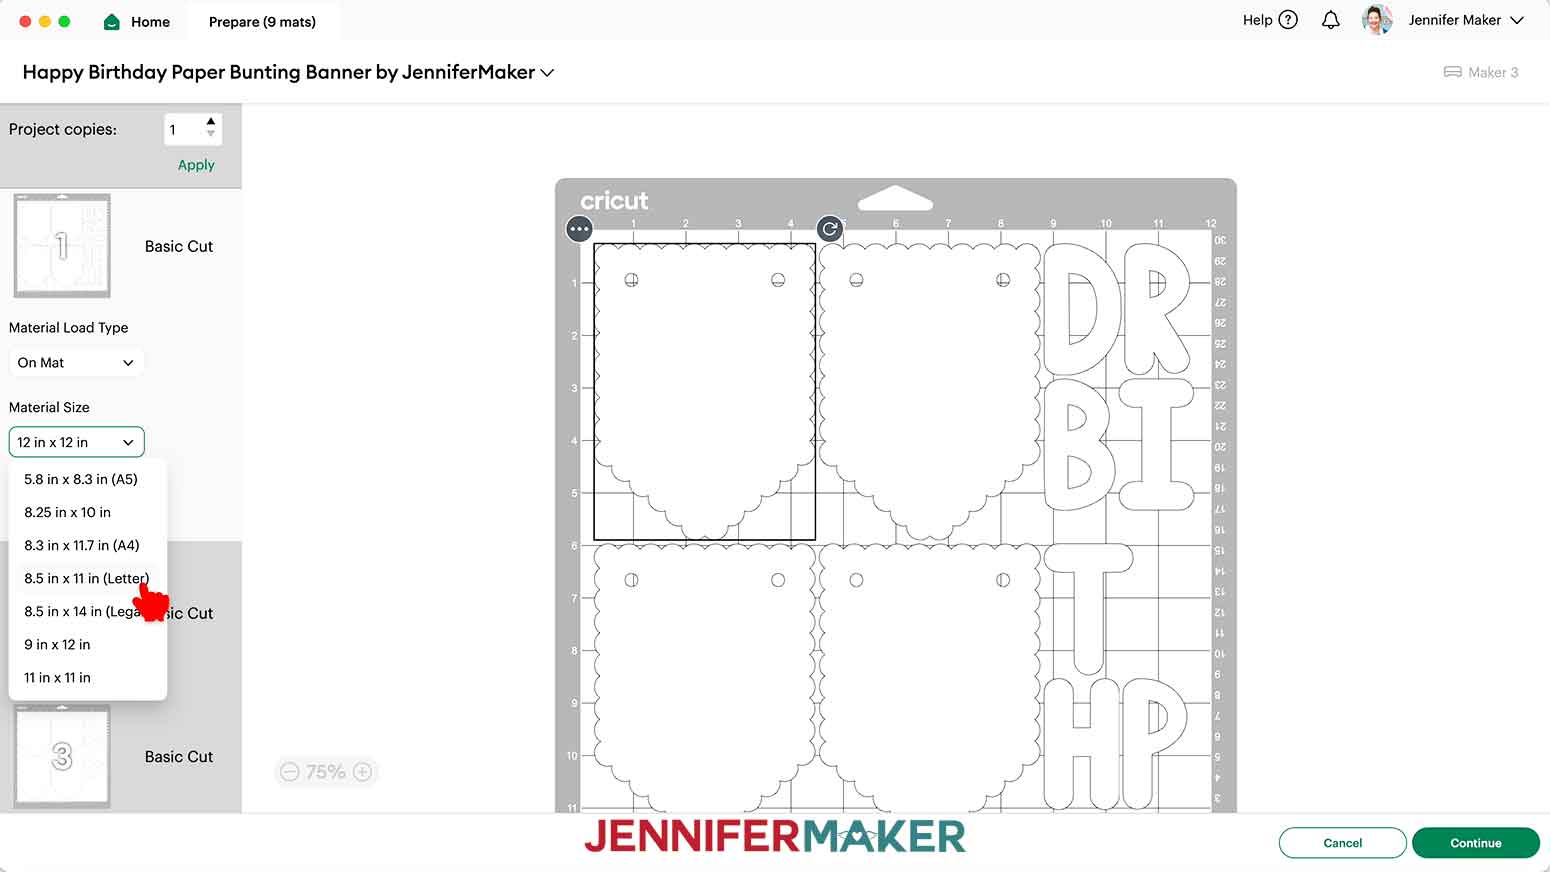
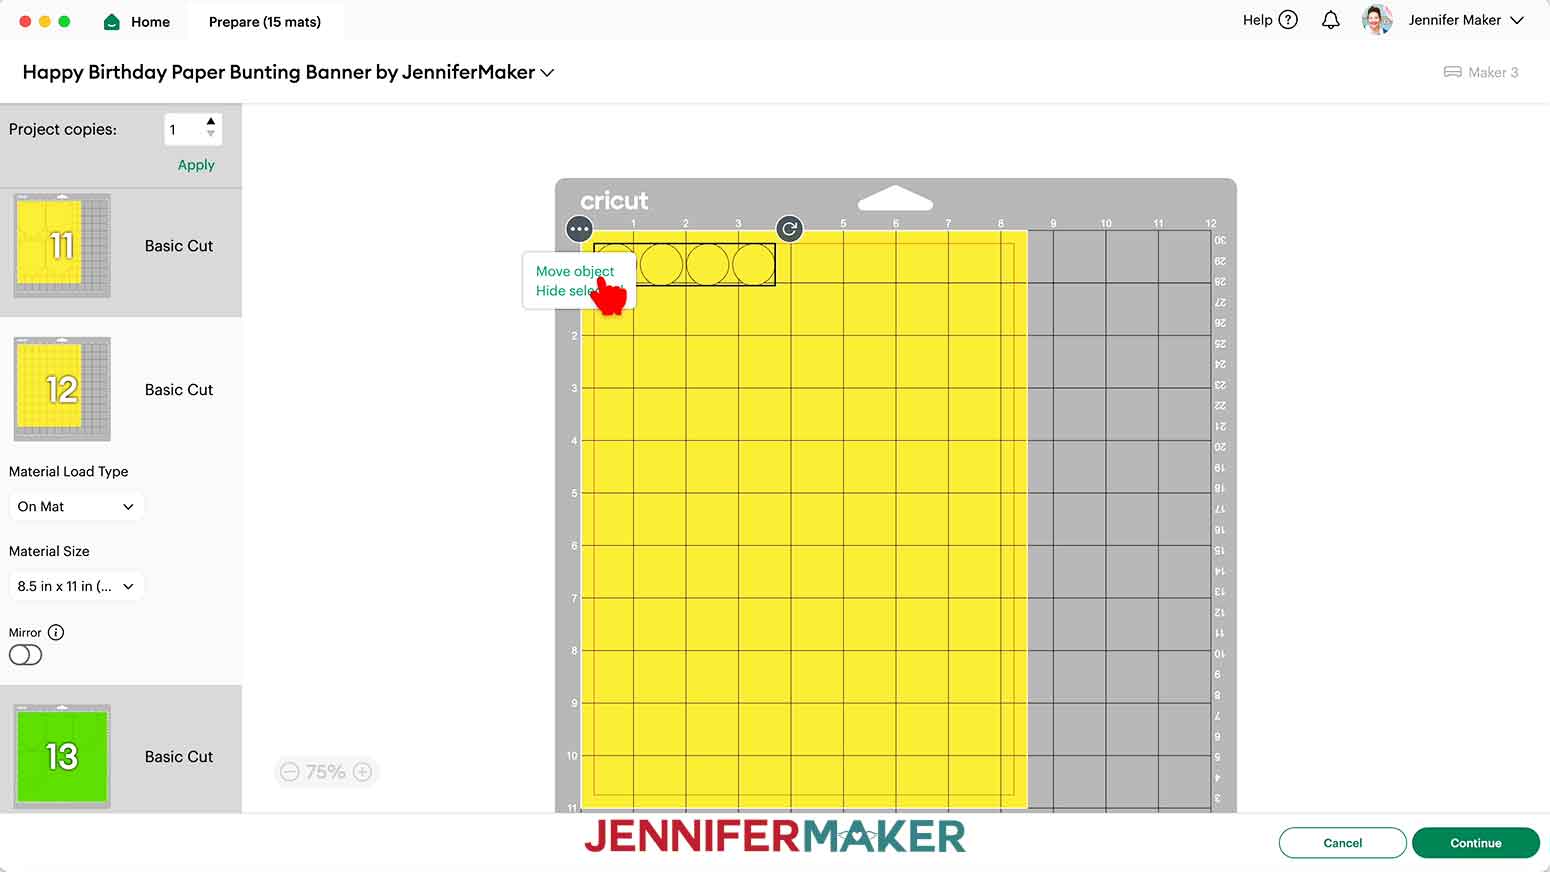
- On the Prepare screen, make sure that “On Mat” is selected.
- Set your material sizes. My white mats were cut from 8.5” x 11” shimmer cardstock and my colored mats were cut from 8.5” x 11” foil cardstock, so I changed the material size on each mat to “8.5 in x 11 in (Letter)” to match my materials.
NOTE: If possible, you can combine your mats of the same color to save time and materials. Visit my DIY Lollipop Holders tutorial to learn how. - Once all your mats are ready, select the first mat and click “Continue.”
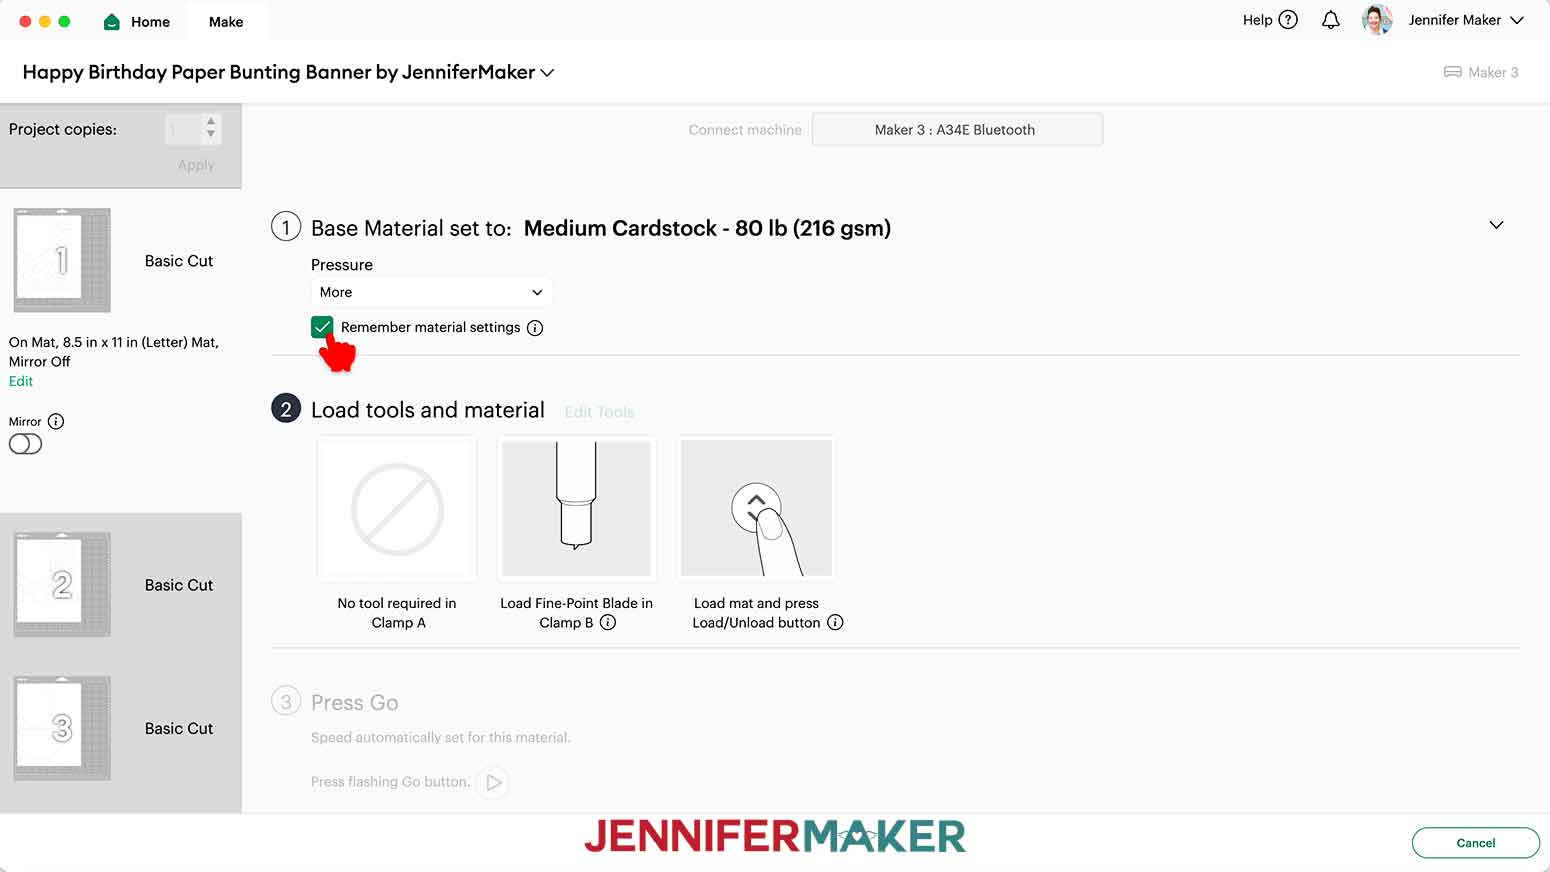
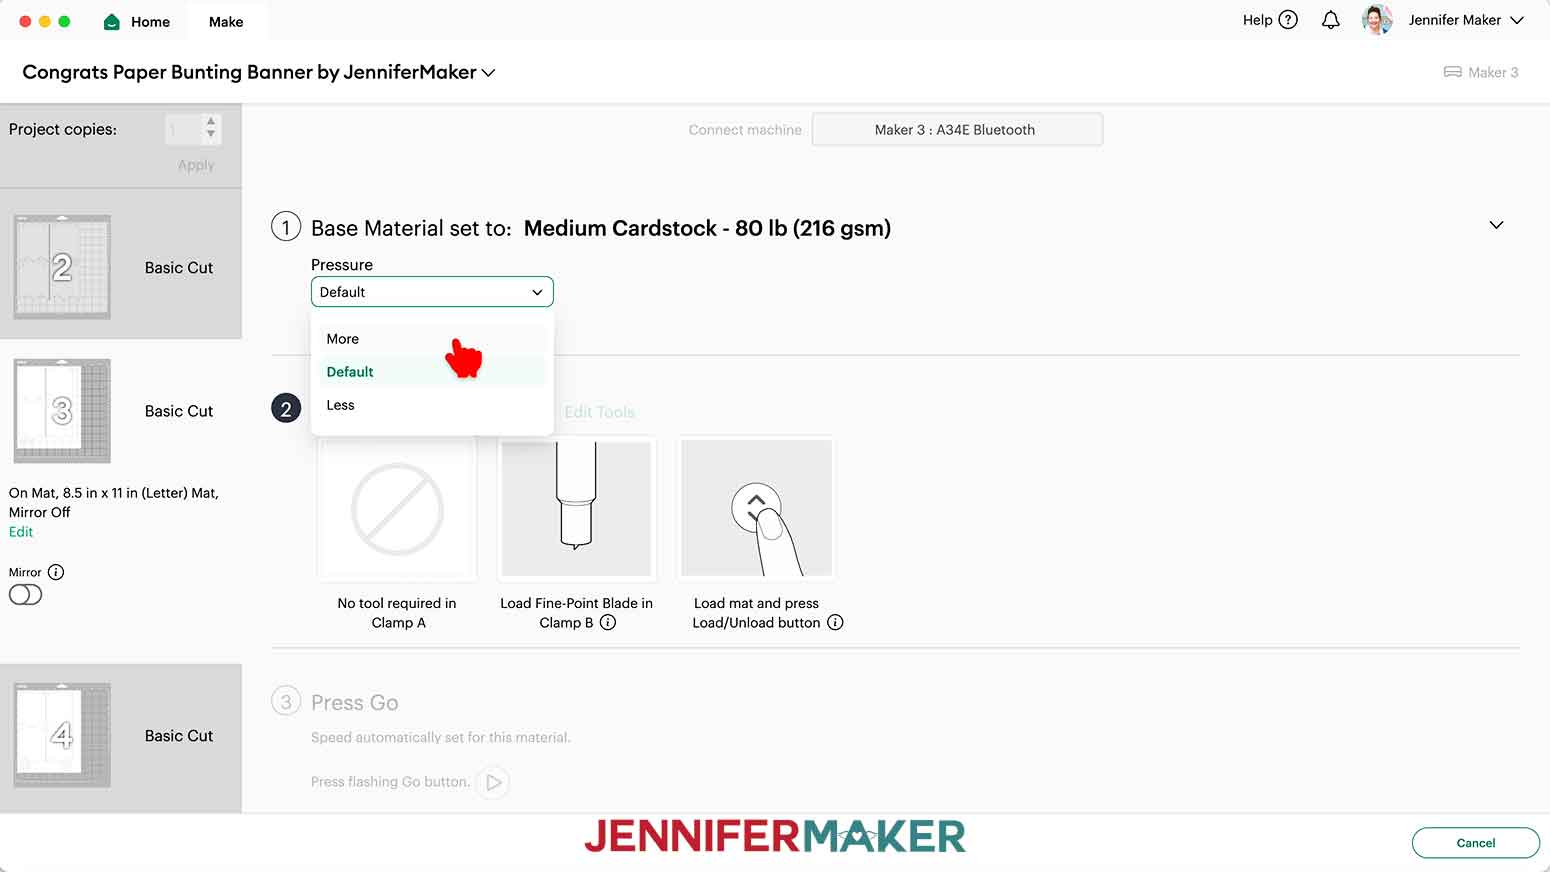
- On the Make screen, I used the “Medium Cardstock - 80 lb (216 gsm)” setting for my shimmer and foil cardstock, and chose “More” Pressure for a cleaner cut.
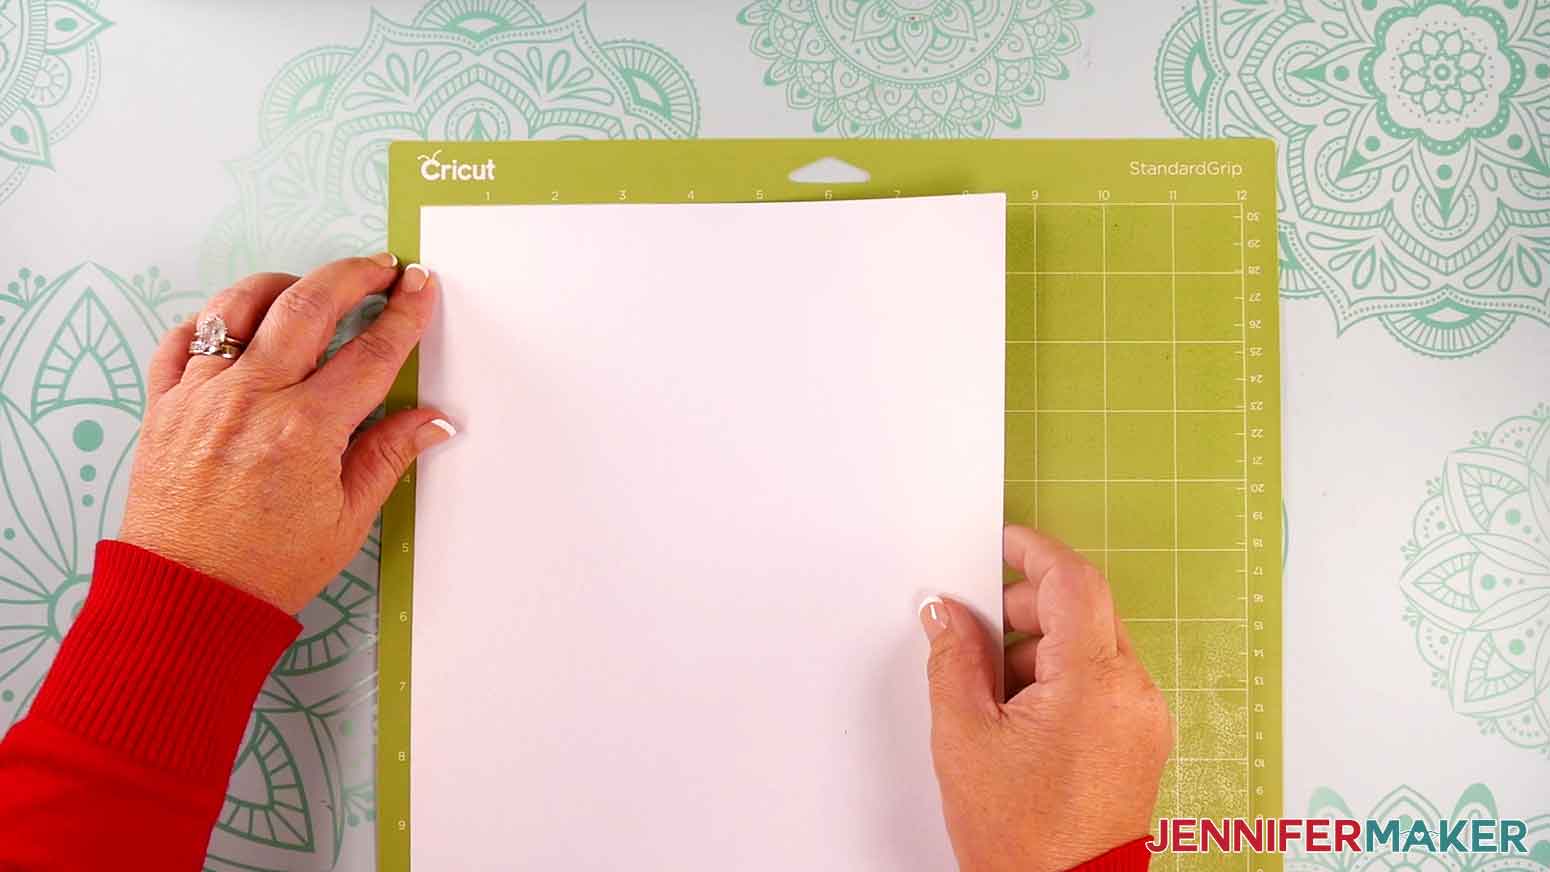
TIP: If all of your materials use the same cut setting, check the box next to “Remember material settings” on your first mat to apply the settings to all of the mats. - Place your first mat’s cardstock face up on a green StandardGrip machine mat so it covers the design area on the screen.
- Use your brayer to smooth the sheet down and make sure it’s adhered well.
- Make sure your Premium Fine Point Blade is clean and in the correct clamp.
- Insert your prepared mat into your cutting machine so it matches the screen’s orientation, and press the flashing button to load it.
- Press the flashing middle button to begin the cuts.
- When it has finished cutting, don’t unload the mat just yet. Instead, gently lift a corner of the design to see if the cut went all the way through the sheet in the correct spots.
- If it’s not cut through, smooth the material back down and press the “Go” button again so your Cricut can go back over the cuts one more time.
- When the cut is finished, press the flashing button to unload the mat.
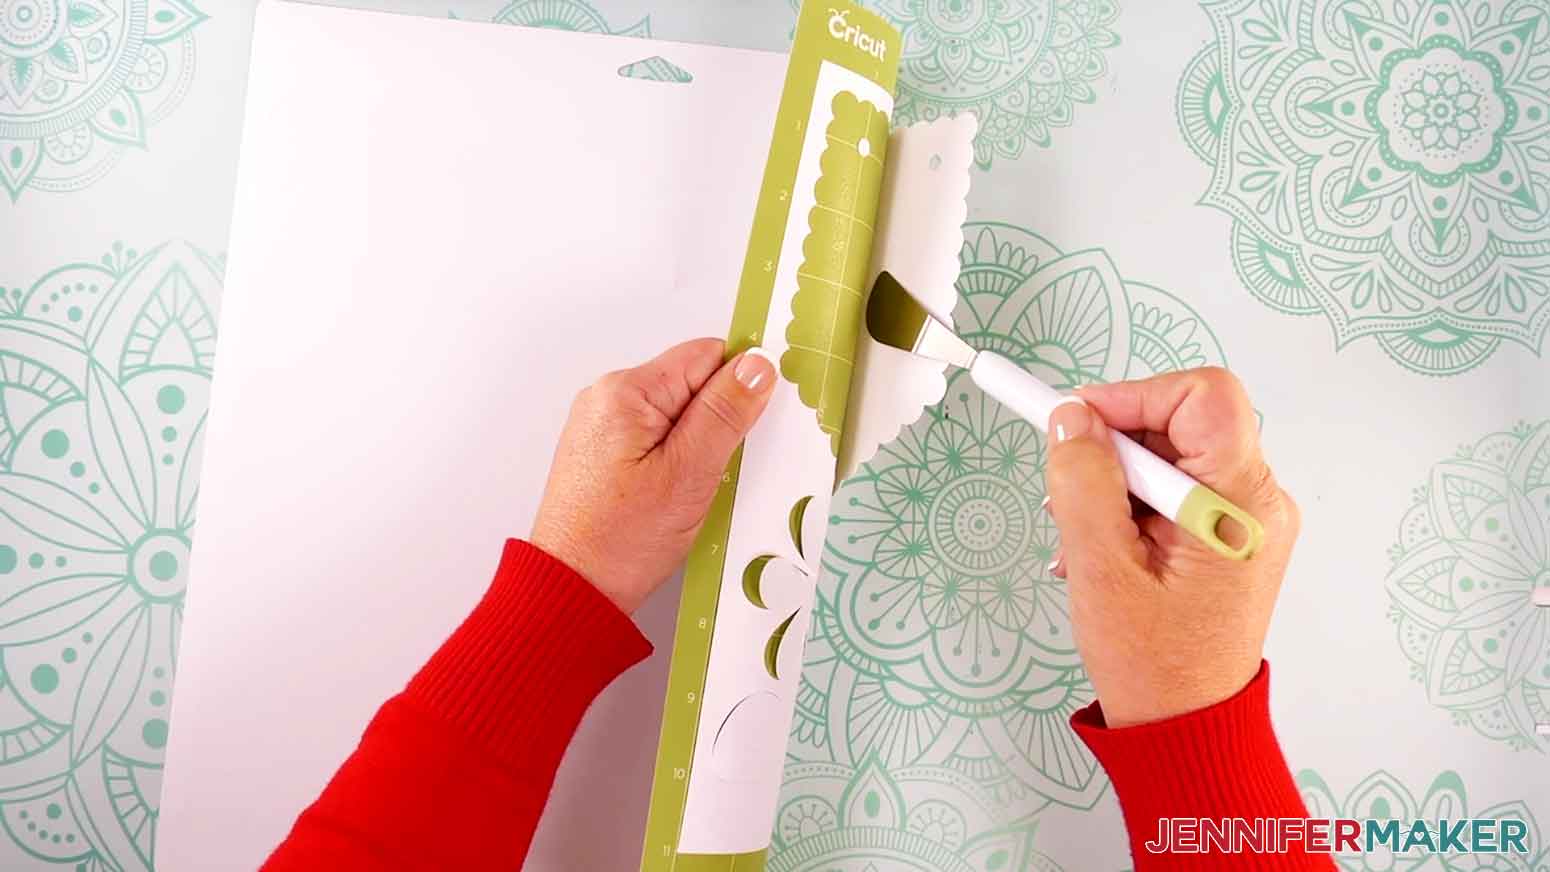
- Flip your mat over and peel it away from the cardstock.
TIP: If there is a lot of extra cardstock uncut next to your design, use scissors or a paper trimmer to cut it off and save it for smaller projects. - Repeat steps 7-15 for the other mats.

STEP 3: ASSEMBLE YOUR “HAPPY BIRTHDAY” PAPER BUNTING BANNER
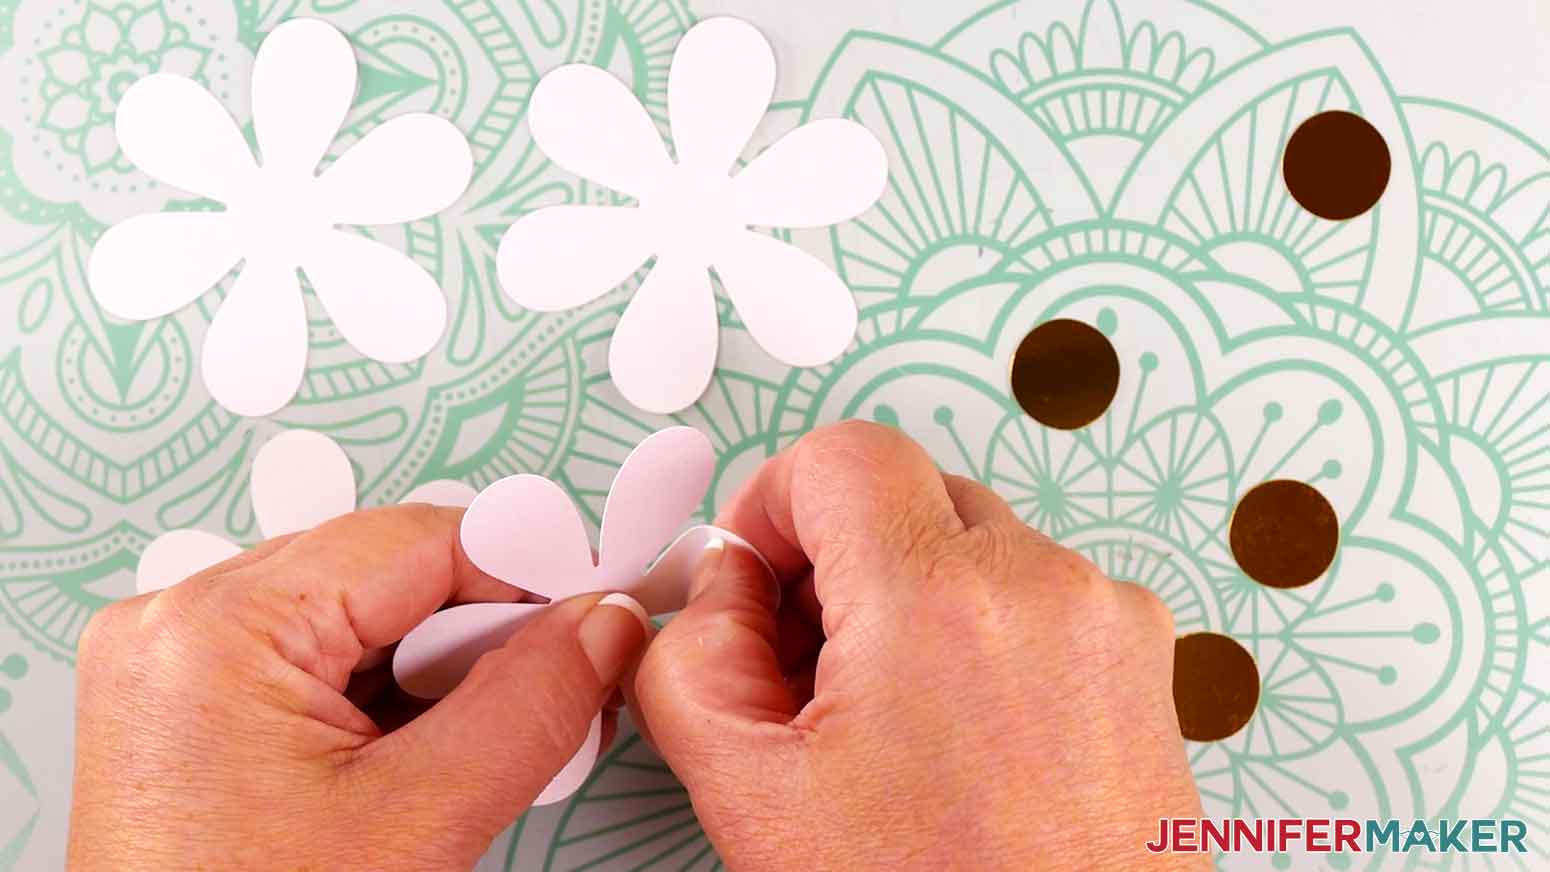
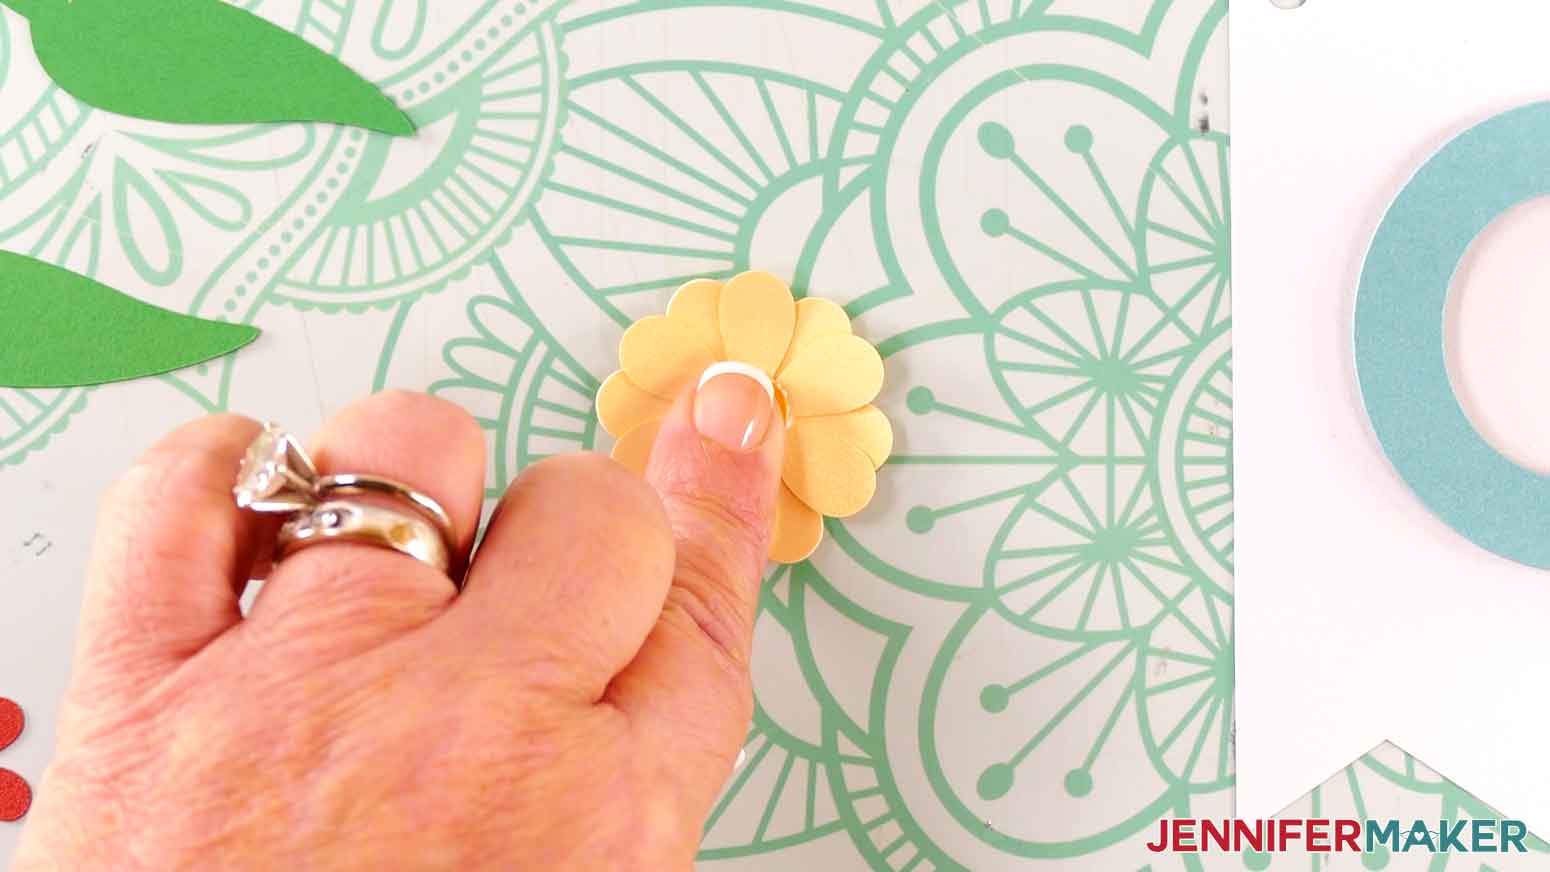
- First I’ll assemble the flowers. Grab the flower shapes with the petals and the small circle pieces.
- Hold one flower shape with petals face up and use your fingers to curl the edges of the petals upwards to add dimension.
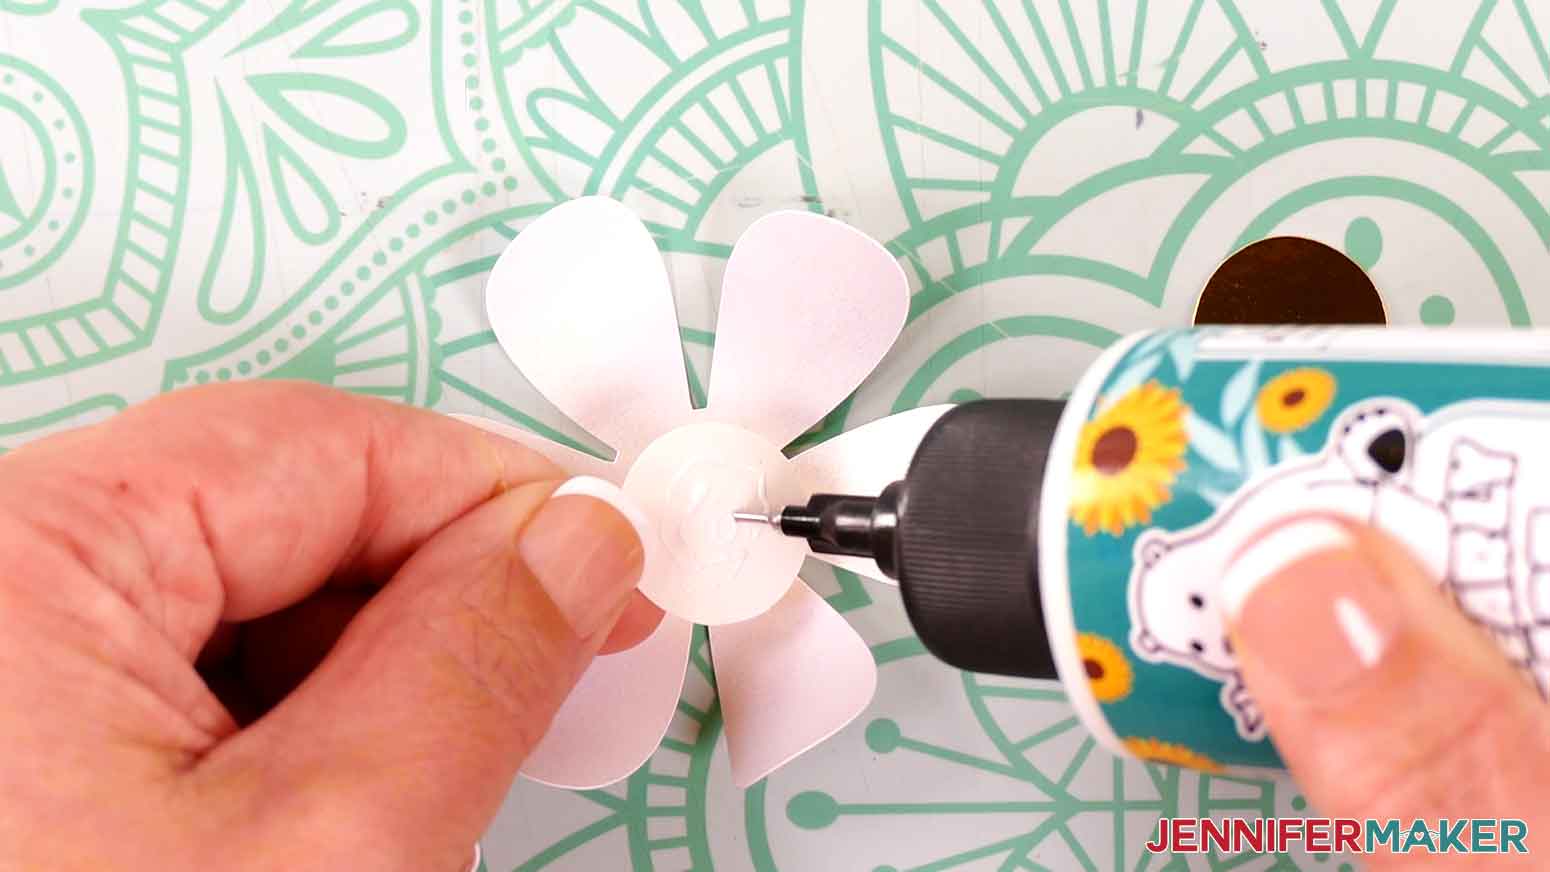
- Add a small amount of glue to the back of one of the small circle pieces.
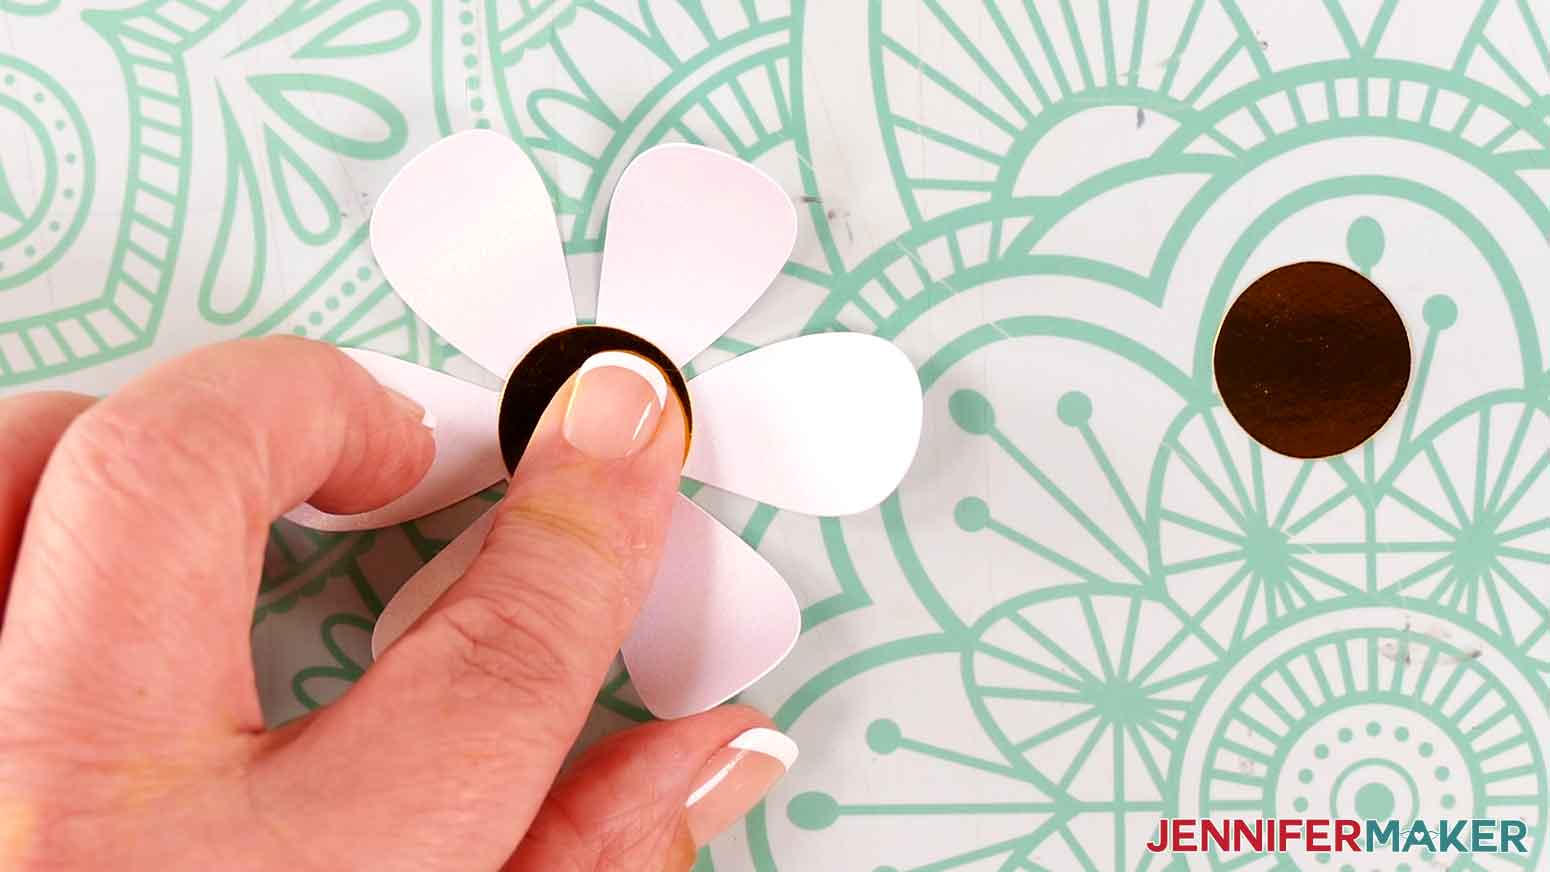
- Press the small circle piece onto the center of the flower shape with petals to adhere it.
- Repeat steps 2-4 with the remaining three flower shapes and circles.
- Find the first panel for your banner. Mine is red.
- Grab the assembled flower that goes on that panel, and using your Canvas in Cricut Design Space as reference, place it in the center of the panel.
- Using your machine mat with the cover on, or a self-healing cutting mat with measurements, place the first colored panel so its top edge is aligned with a horizontal line on the mat. I moved mine an inch down (to the 1-inch horizontal line) for some wiggle room.
- Take a ruler and place it horizontally across the flag, with the top of the ruler aligned with the bottommost edge of the flower. Take note where the ruler is positioned on the mat. Mine was at approximately 4.5 inches down. This will serve as a guide to place the letters and the other flowers.
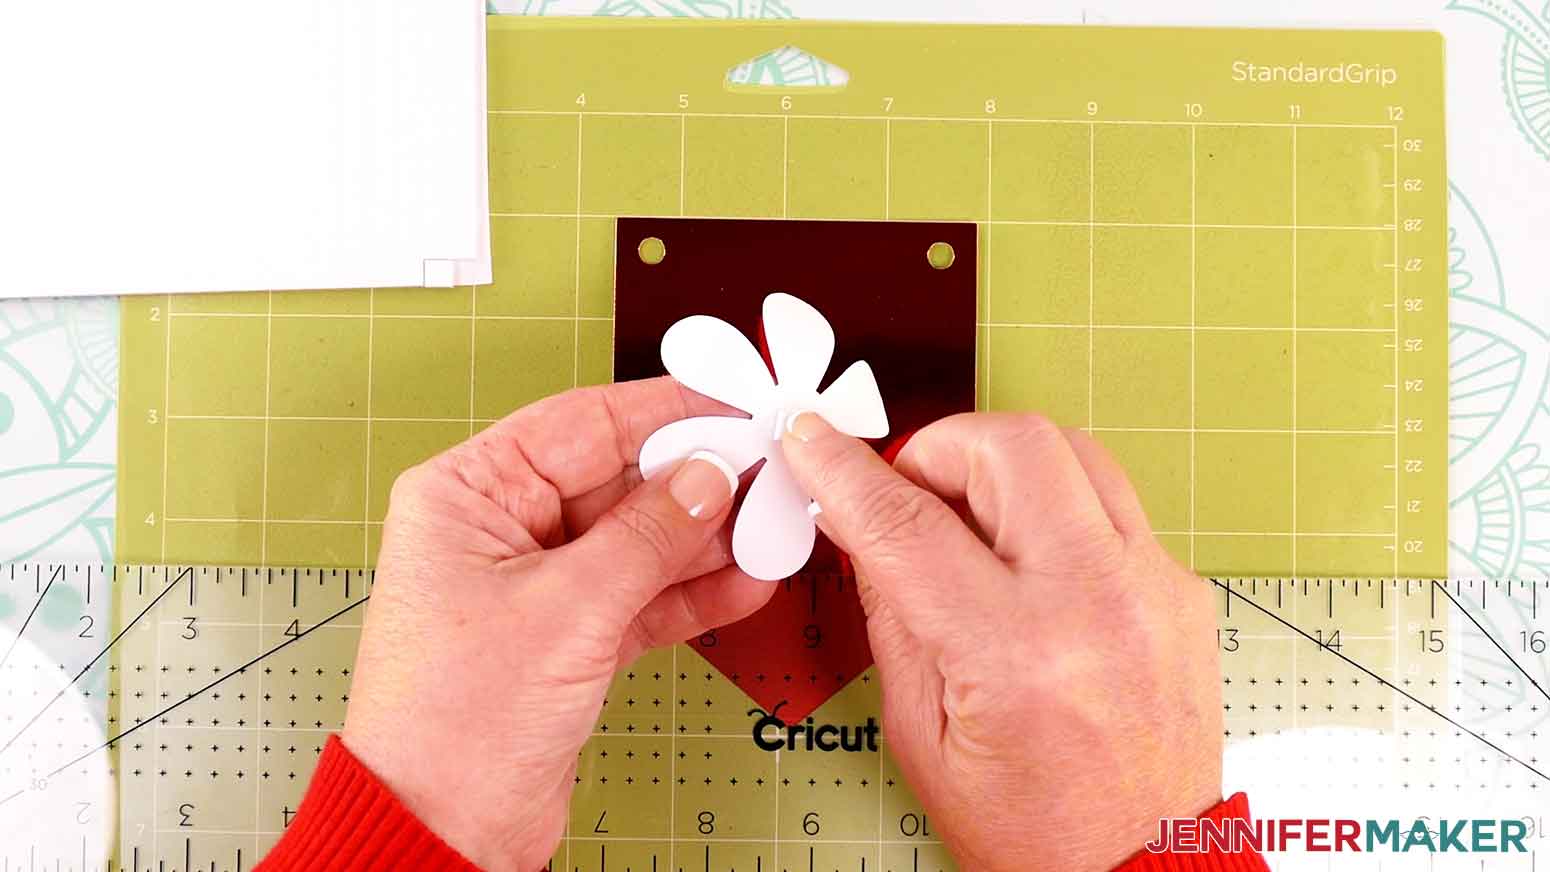
- Peel the back off one ⅛” thick adhesive foam square.
- Press to attach the foam square to the back center of the flower.
- Peel the backing off the other side of the foam square.
- Make sure the ruler is positioned where you noted it should be in step 9.
- Center the flower so there’s equal space on either side on the colored panel and the bottom edge lines up with the ruler.
- Press to adhere the flower to the panel.
- Repeat steps 7-15 to adhere the letters H-A-P-P-Y and the other flower to the banner panels.
NOTE: I used one to two adhesive foam squares on each letter, depending on the letter’s shape and how much support it needed. - Repeat steps 7-15 to attach a flower to the first and last banner panels, and the letters B-I-R-T-H-D-A-Y to the eight banner panels between them.
- We’ll string the “Happy” banner first. Grab your spool of ribbon, and find the loose end.
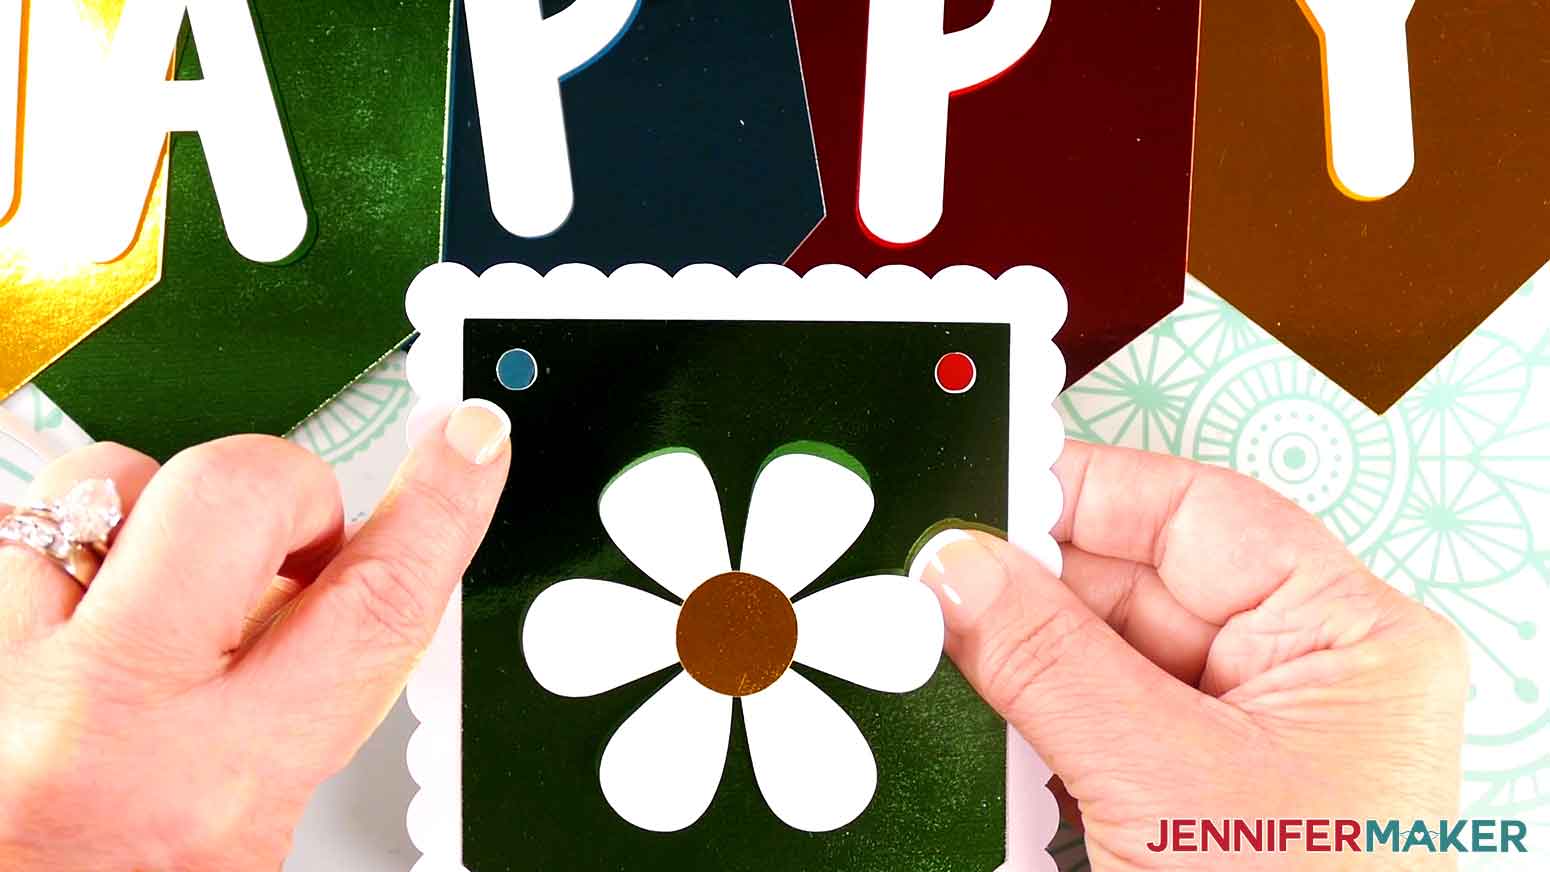
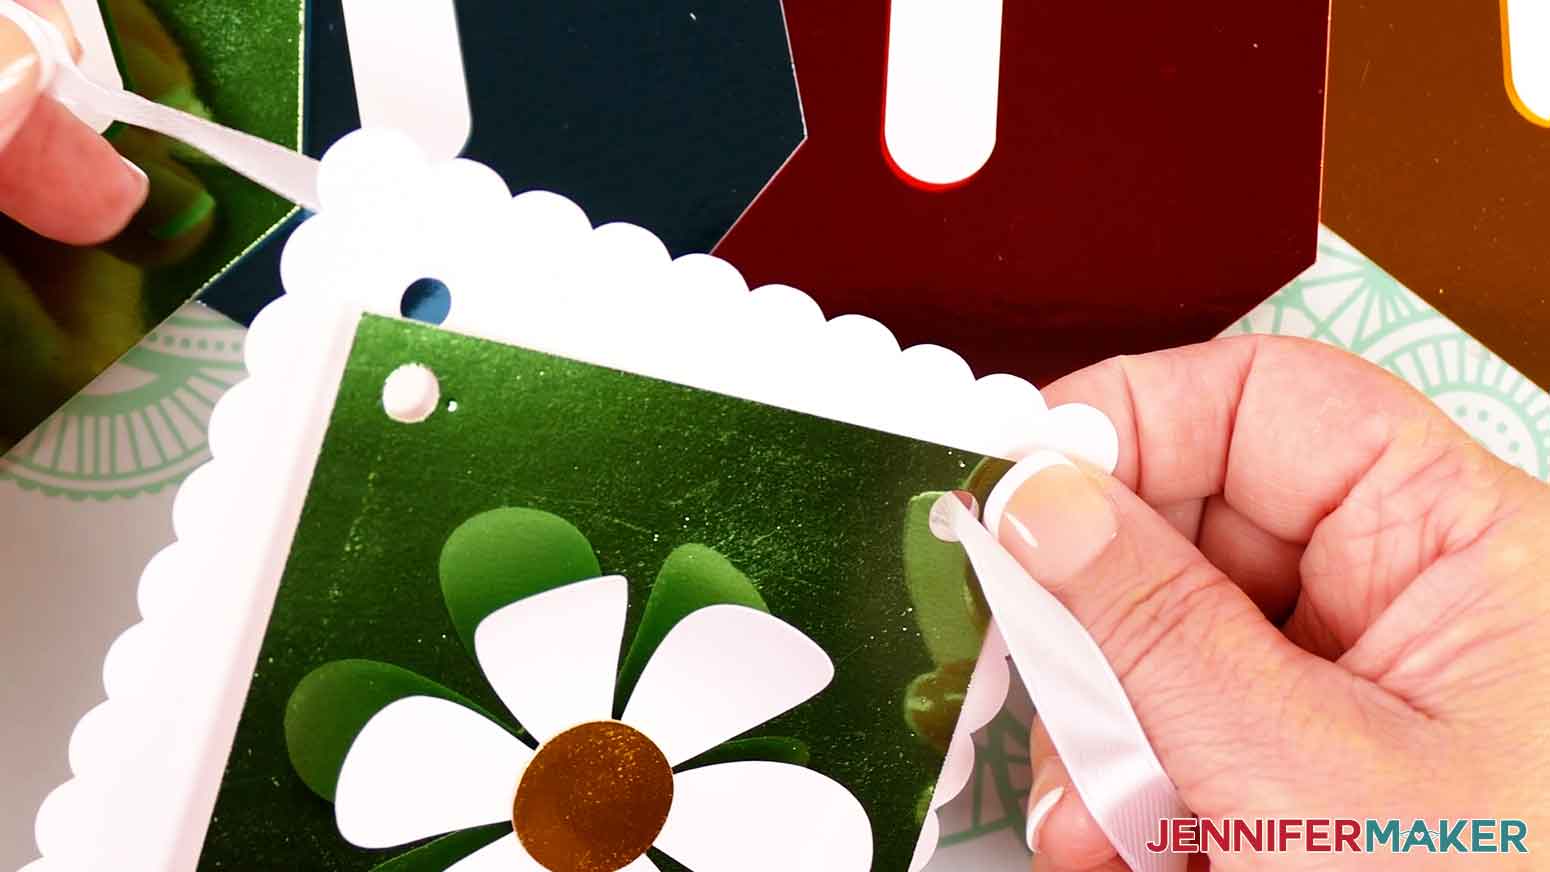
- Starting with the rightmost colored banner panel with the flower on it, grab a banner backing piece with scalloped edges and place it pretty-side up behind the colored banner panel. Line up the holes.
NOTE: You can glue your two panel pieces together if you'd like, but it's not necessary for the final look of your banner. - Insert the loose end of the ribbon down through the right set of holes.
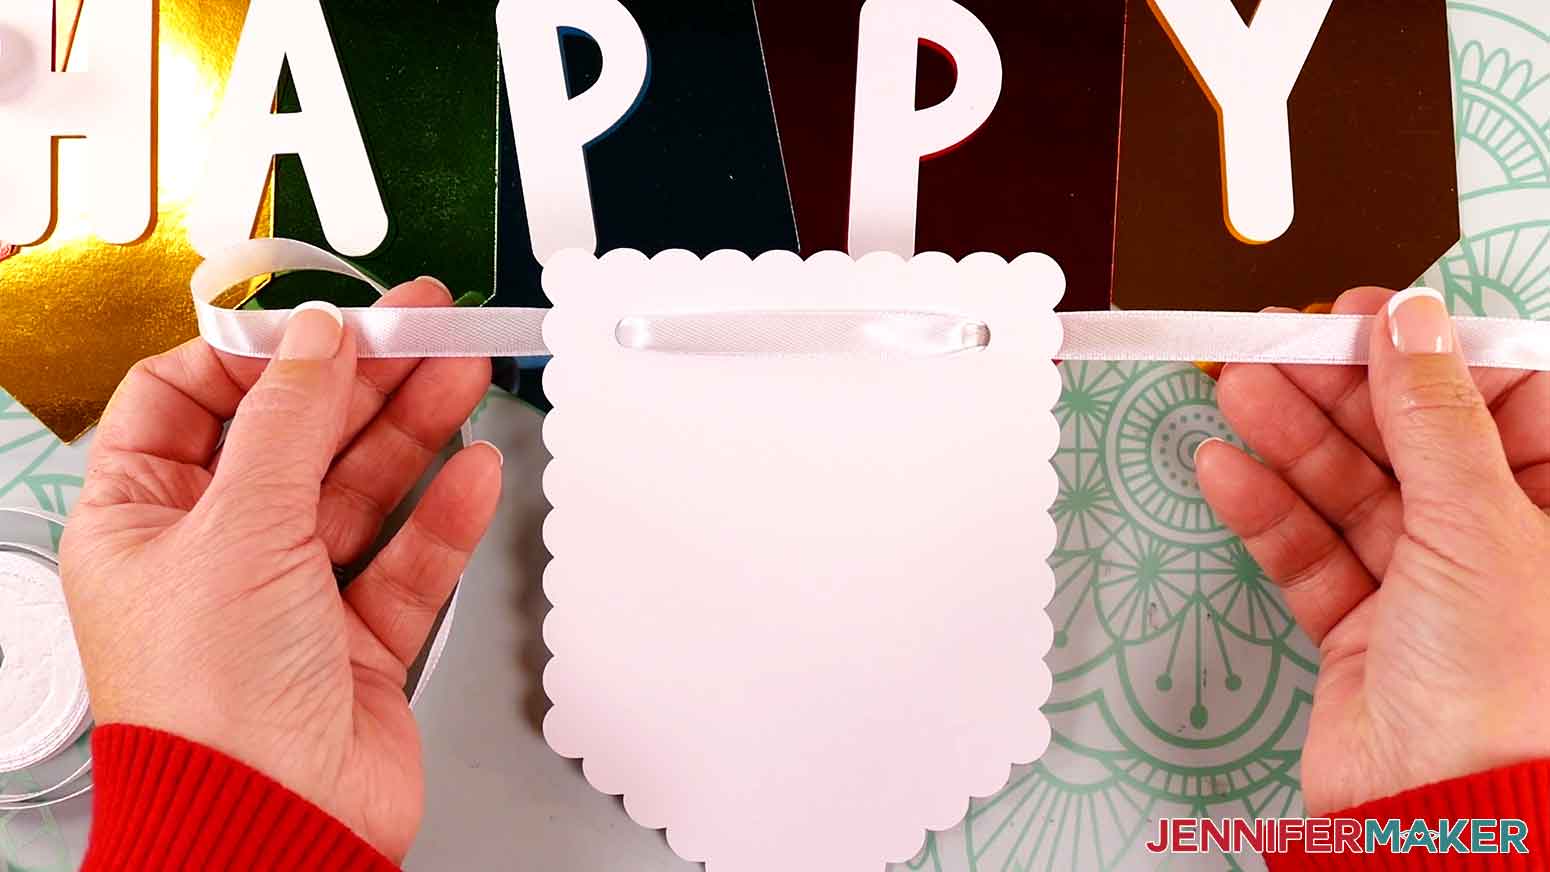
- Pull the ribbon back up through the left set of holes. Try to keep the ribbon flat and untwisted through each panel for a more finished look. Make sure it’s flat against the back of the banner panel.
- Pull the ribbon through the banner backers and panels so there’s approximately 12” of ribbon hanging out the right side of the banner pieces.
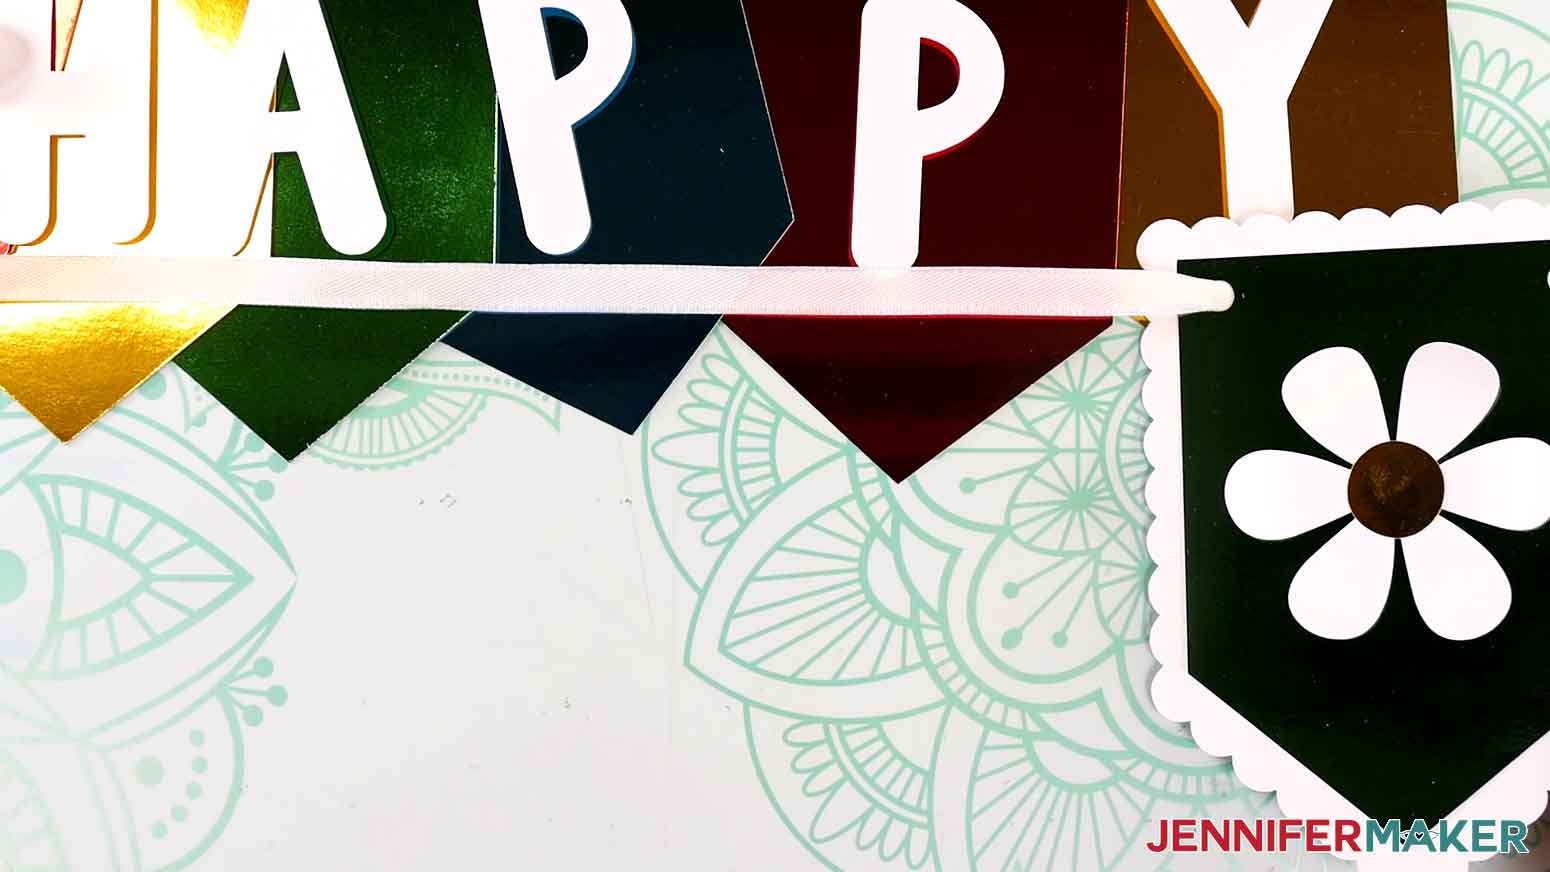
NOTE: You can also leave a lot more loose ribbon if you’re not sure how much you’ll need to hang the banner, and trim it later. - Repeat steps 19-21 for the Y, P, P, A, H, and the other flower piece, in that order. As you string each additional banner panel and backer, space them about 0.5” to 1” from the previous set.
TIP: If the end of your ribbon becomes frayed from inserting it through the holes on your banner pieces, trim the frayed part off so it is easier to string. - Once all of the backers and panels are strung onto the ribbon, slide them if needed so they are evenly spaced along the ribbon.
- Leaving about 12” of ribbon on the other end of the banner, cut the ribbon from the spool.
NOTE: You can also leave a lot more loose ribbon if you’re not sure how much you’ll need to hang the banner, and trim it later. - Repeat steps 18-25 to create the second B-I-R-T-H-D-A-Y banner.


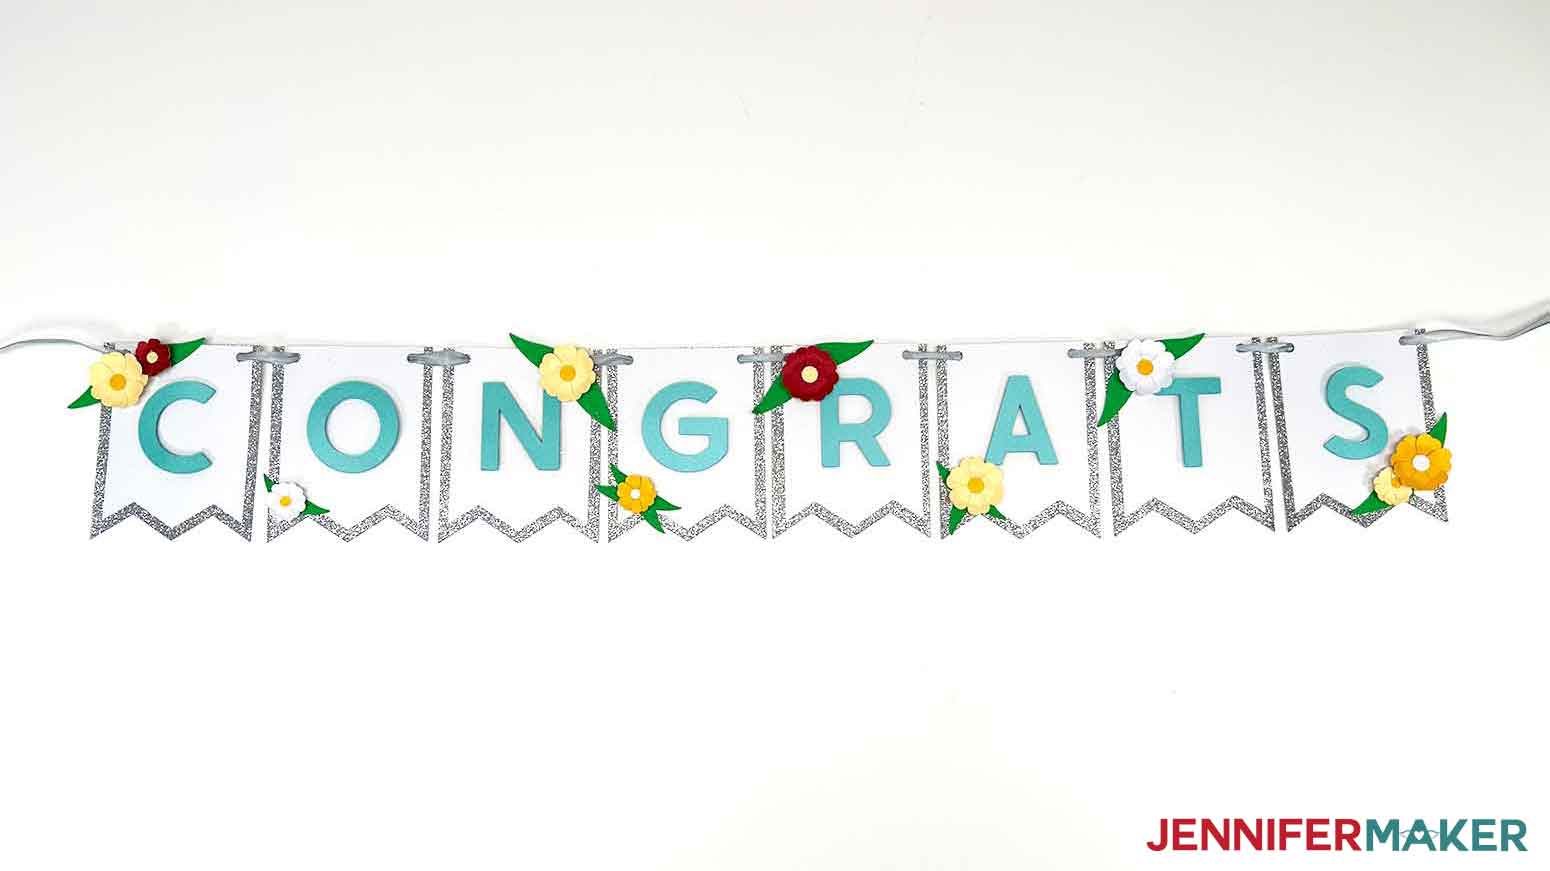
OPTION 2: “CONGRATS” PAPER BUNTING BANNER
STEP 2: PREPARE AND CUT YOUR BANNER DESIGN
CRICUT DESIGN SPACE
- Follow steps 1-12 in the "Cricut Design Space" section above to add the “Congrats” SVG to your Canvas and prepare it for cutting.
- The eight white flag-shaped pieces will be the panels, the eight larger gray flag-shaped pieces will be the panel backers, the flowers and leaves are embellishments, and the C-O-N-G-R-A-T-S letters will spell out the sentiment across the panels.

CUTTING
- Follow steps 1-16 in the "Cutting" section above to cut your banner pieces.
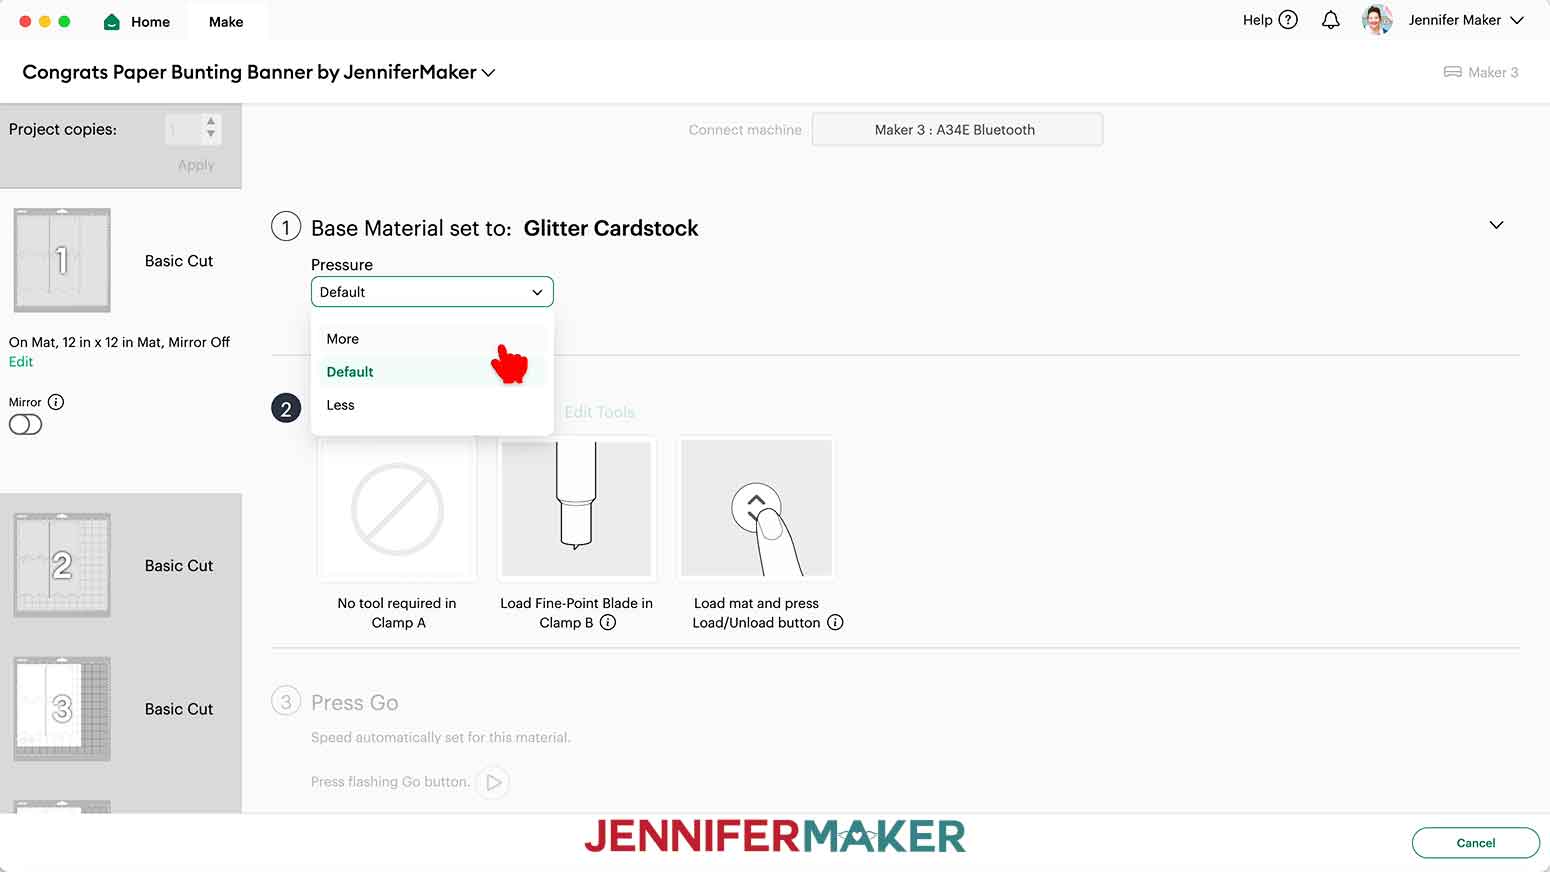
- On the Make screen, I used the following settings:
Glitter cardstock: “Glitter Cardstock” setting with “More” Pressure
Shimmer cardstock: “Medium Cardstock - 80 lb (216 gsm)” setting with “More” Pressure
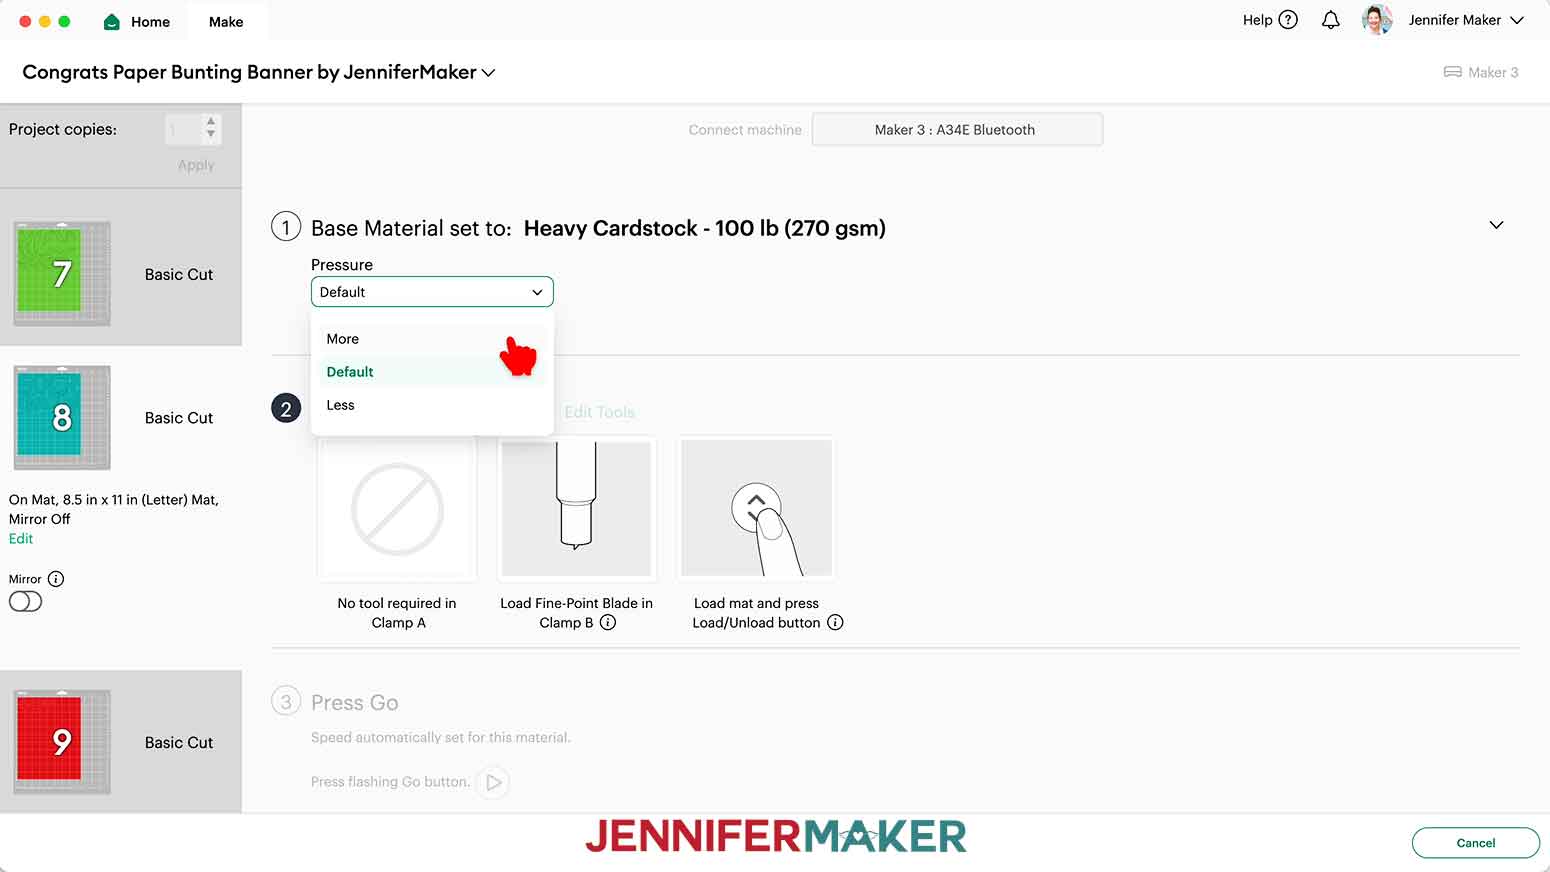
Heavy shimmer cardstock: “Heavy Cardstock - 100 lb (270 gsm)” setting with “More” Pressure
STEP 3: ASSEMBLE YOUR “CONGRATS” PAPER BUNTING BANNER
- Grab the ⅛” thick adhesive foam squares. Remove the backing from the back of two of them, and attach them to the back of the letter “C.”
TIP: Depending on the shape of your letters, you can use one to three adhesive foam squares on the back of each. I used two to three foam squares on each of the letters on the “Congrats” banner because of their wider shape. - Place the banner panels in the order you’d like them to be on your banner. Since mine were all white, it didn’t matter which order I placed them in. Make sure the holes for the ribbon are at the top of each panel.
- Use your Canvas in Cricut Design Space as reference, and place each of the letters in order on top of an empty banner panel to spell out your sentiment.
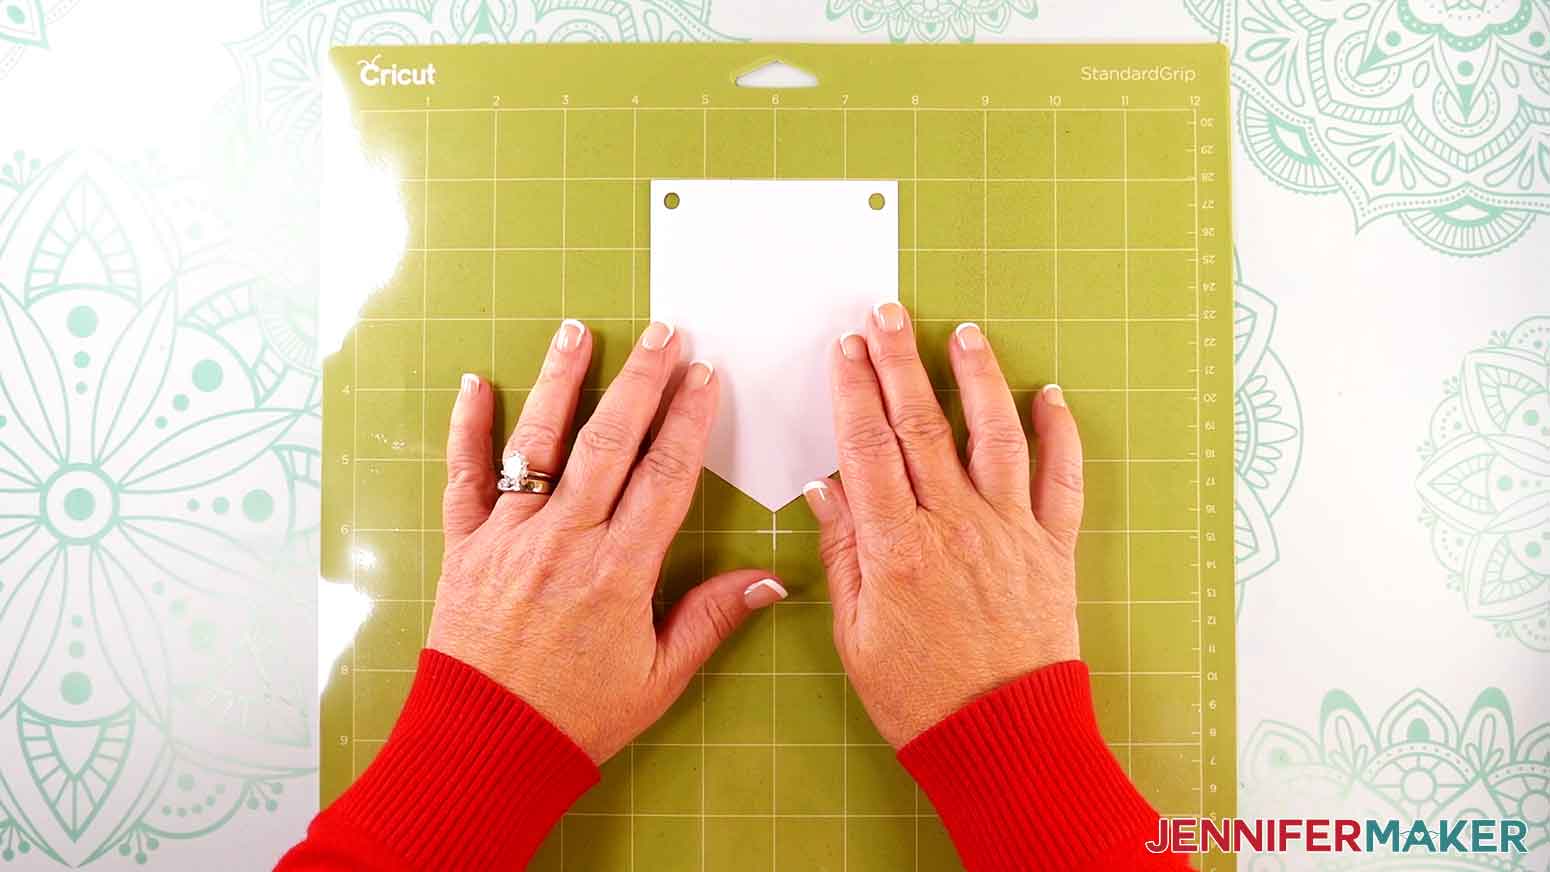
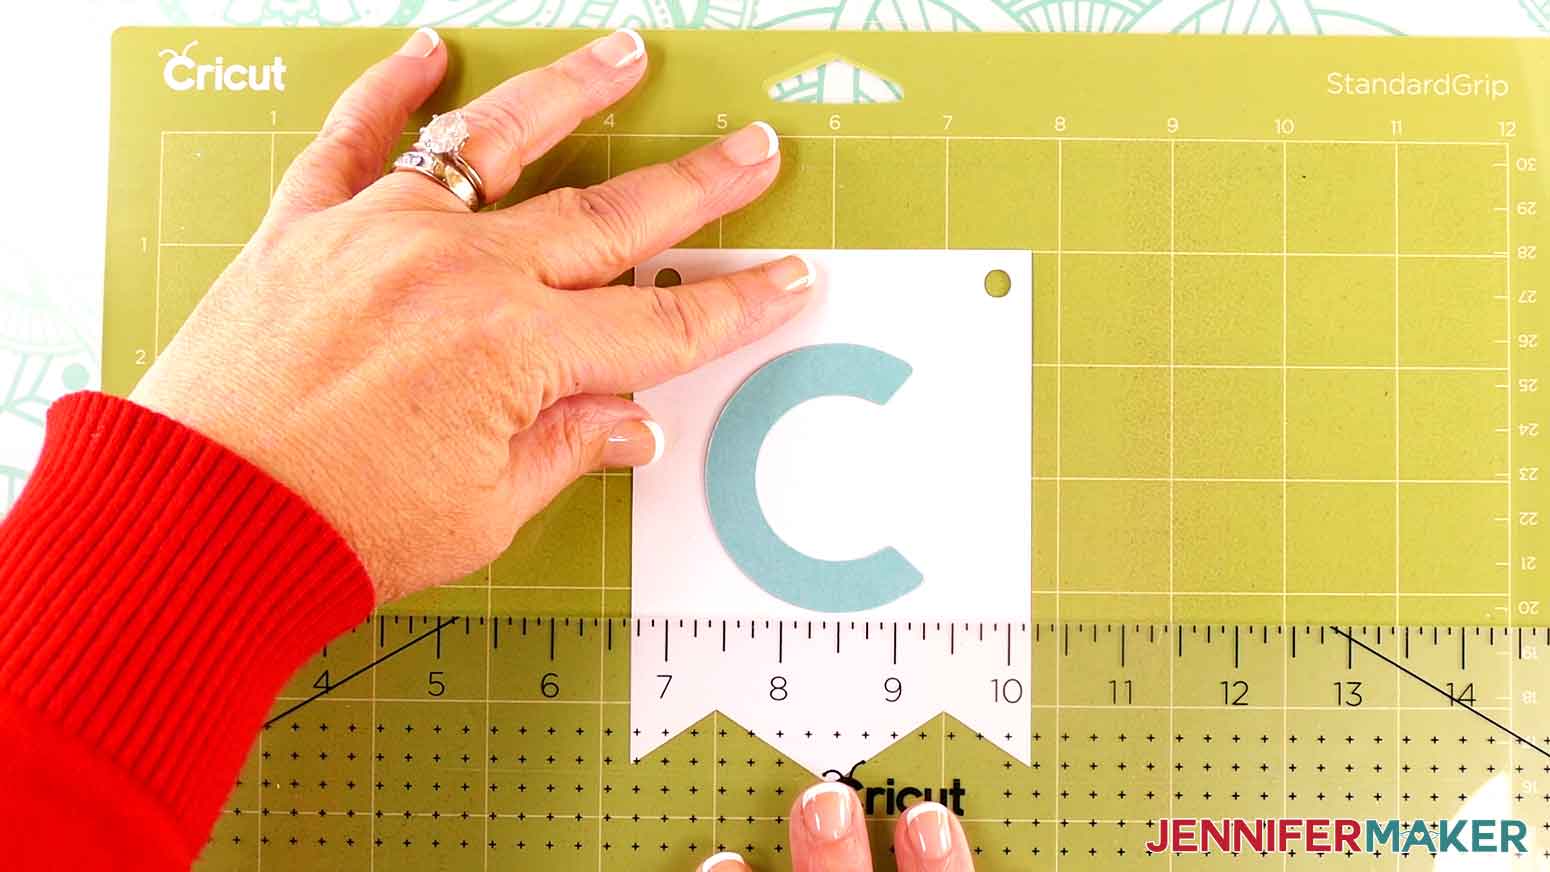
- Using your machine mat or a self-healing cutting mat with measurements, place the first panel so its top edge is aligned with the top line on the mat.
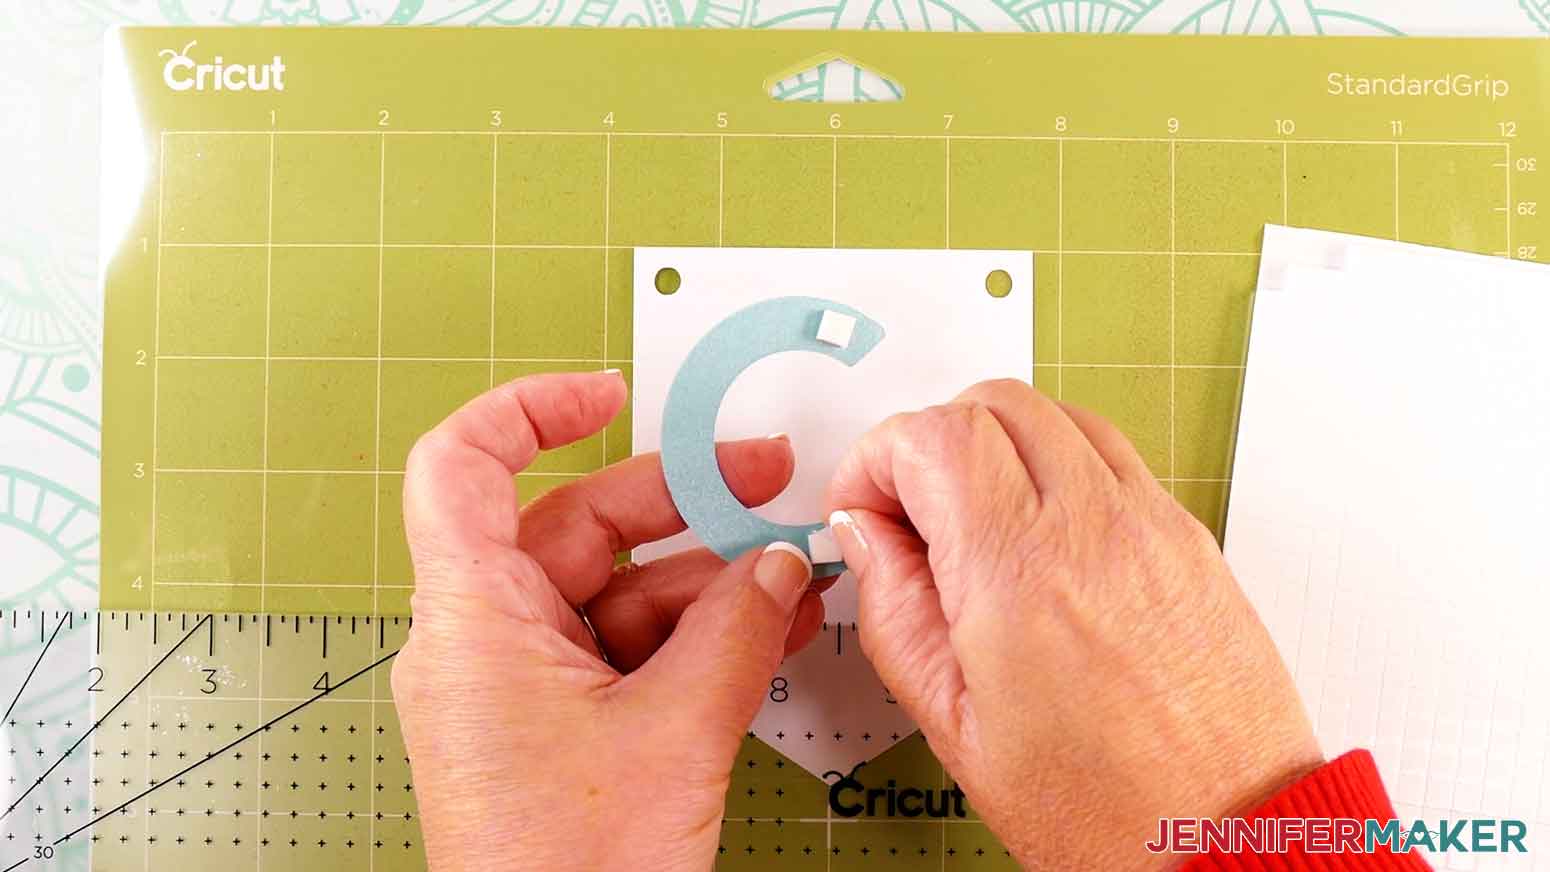
- Grab the letter that goes on that panel and using your Canvas in Cricut Design Space as reference, place it in the center of the panel.
- Take a ruler and place it horizontally across the flag, with the top of the ruler aligned with the bottommost edge of the letter. Take note where the ruler is positioned on the mat. This will serve as a guide to place the other letters.
- Peel the backing off the other side of the letter's foam squares.
- Make sure the ruler is positioned where you noted it should be in step 6.
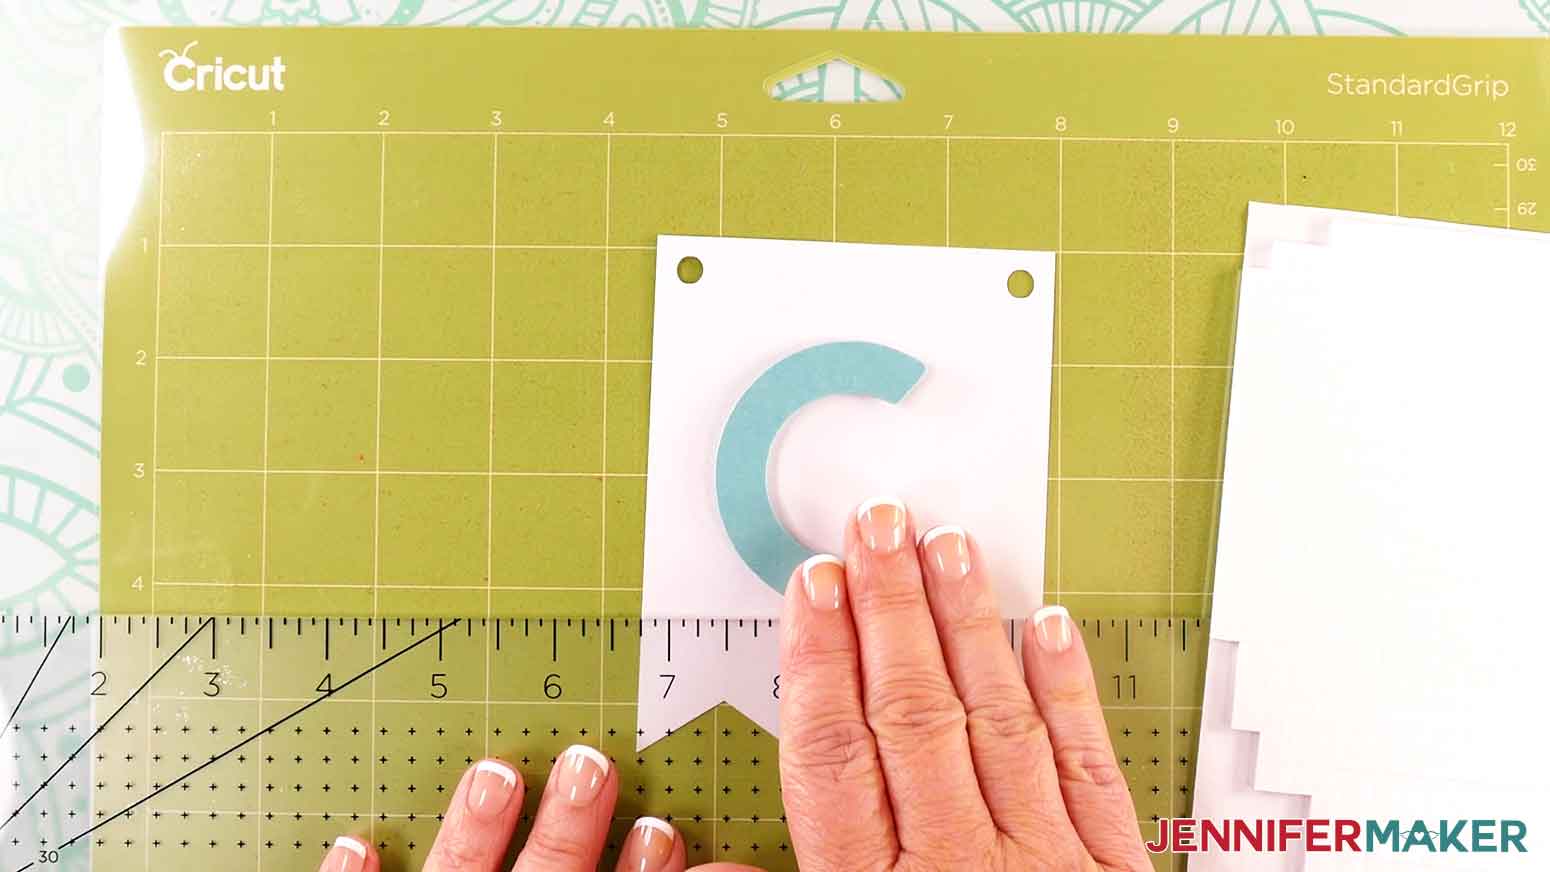
- Using your Cricut Design Space Canvas as reference, center the letter so there’s equal space on either side on the panel and the bottom edge lines up with the ruler.
- Press to adhere the letter to the banner panel.
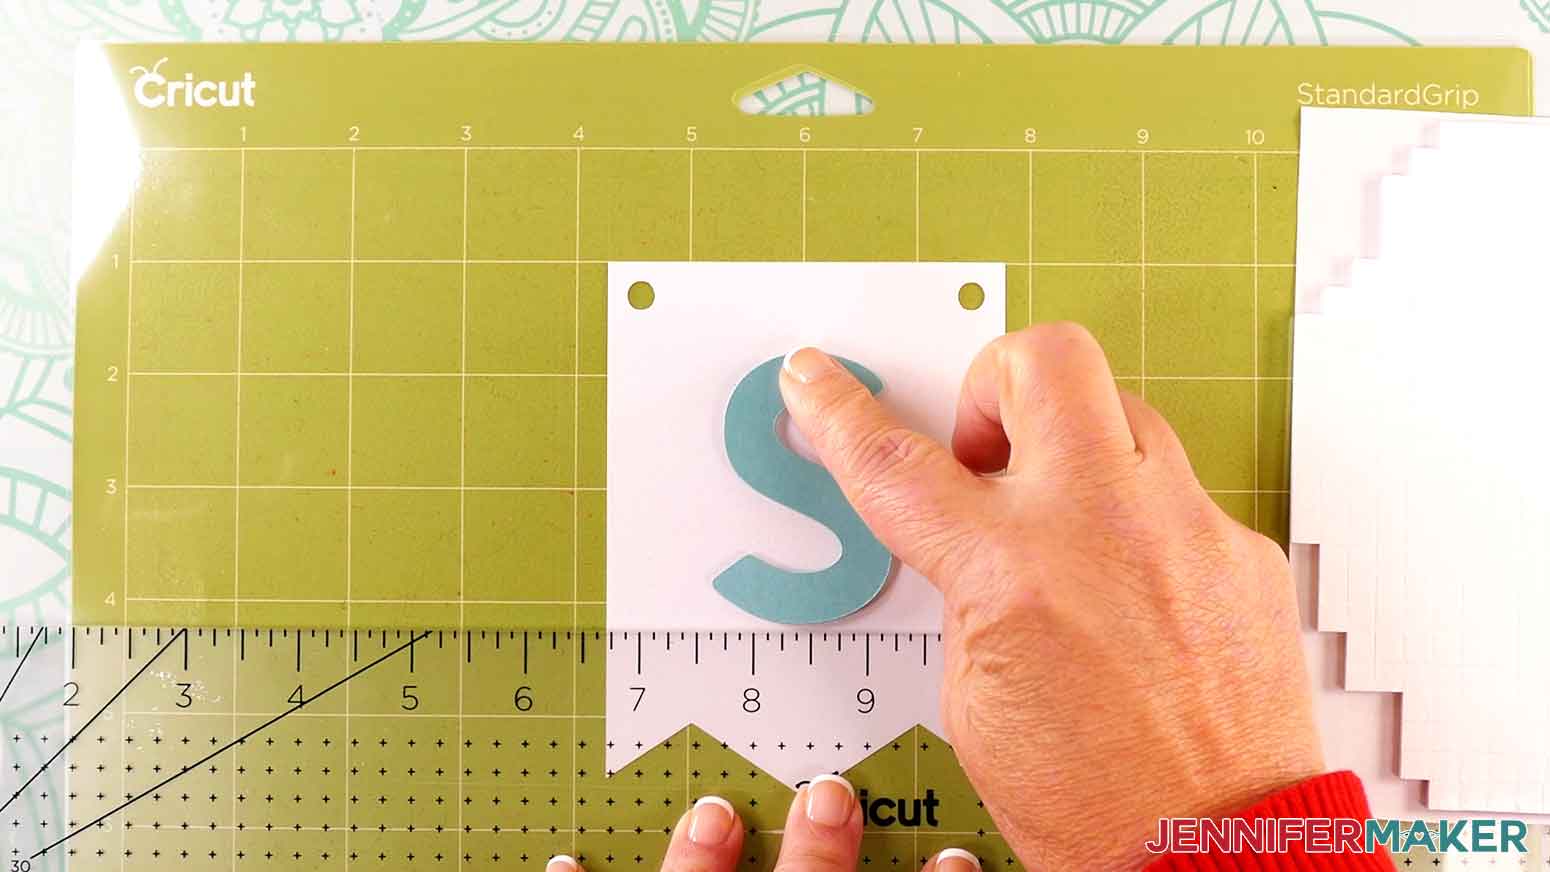
- Repeat steps 4-10 to attach the rest of the letters of your sentiment to the banner panels, in order. Place the adhesive foam squares evenly on the back of each letter.
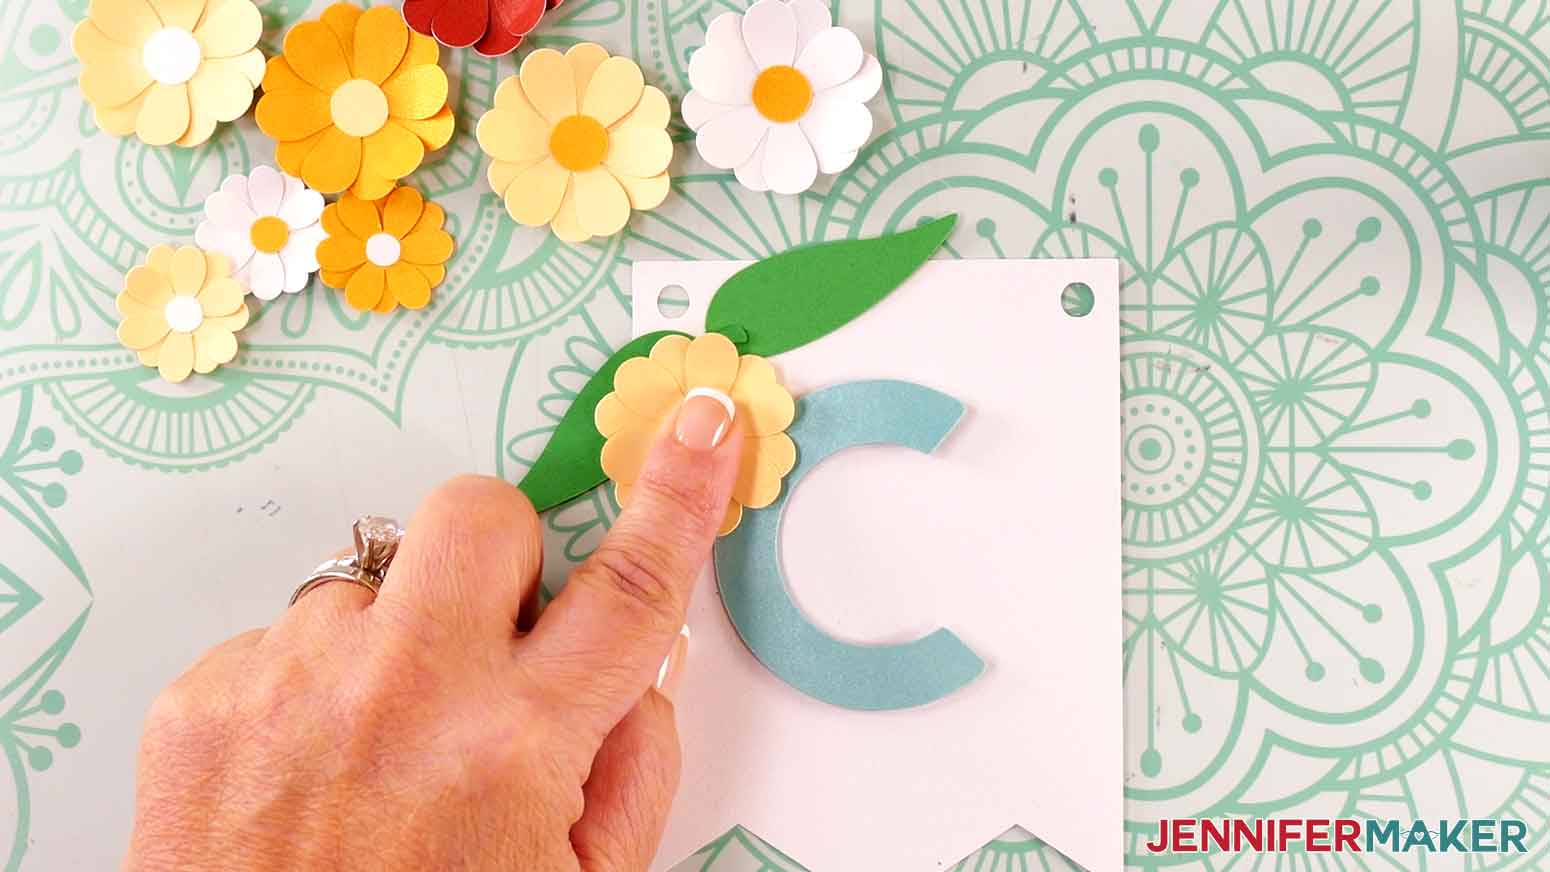
NOTE: The “O” is not a perfect circle, so be sure to turn it so it is oriented the correct way, with it running longways from top to bottom. Use your Canvas in Cricut Design Space as reference. - Grab two matching large leaf pieces, two matching flower petal pieces, a larger circle piece, and your first banner letter panel.
- Use your fingers or a long, thin, cylindrical object like a pen or a Cricut Scoring Stylus to curl the petals upward on both flower petal pieces.
- Apply a small amount of glue to the back center of one of the flower petal pieces.
- Turn it glue-side down and layer it over the other matching flower petal piece. Stagger the petals so all are visible.
- Use a finger to press the top flower piece down into place.
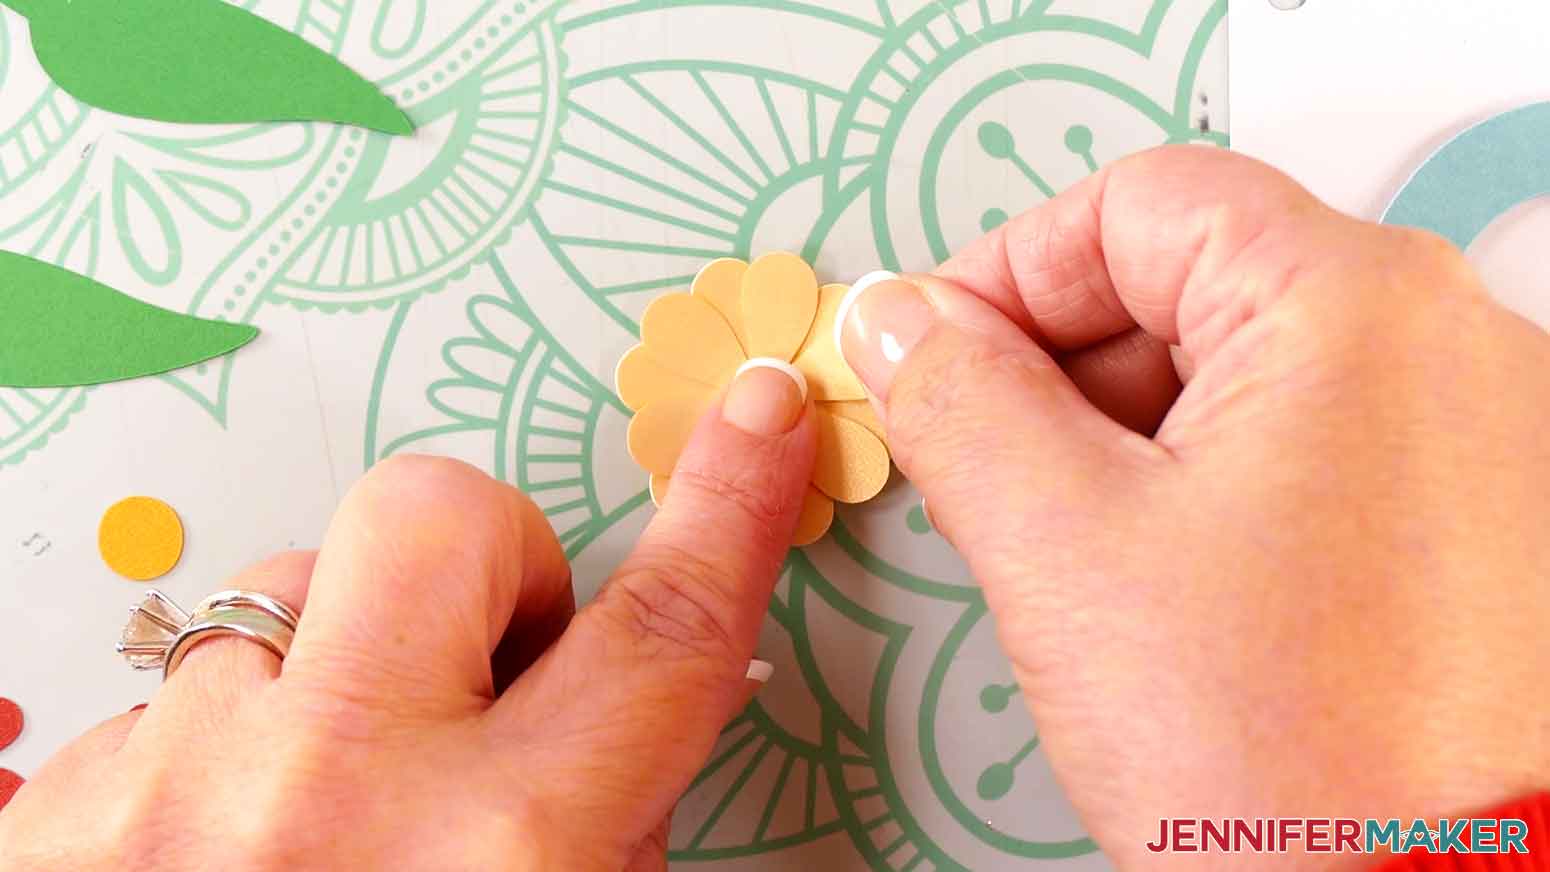
- Apply a small amount of glue to the front center of the assembled flower.
- Place the circle piece in the middle of the flower, and press with a finger to adhere.
- Repeat steps 12-18 with the smaller flower petal pieces and the small circle piece.
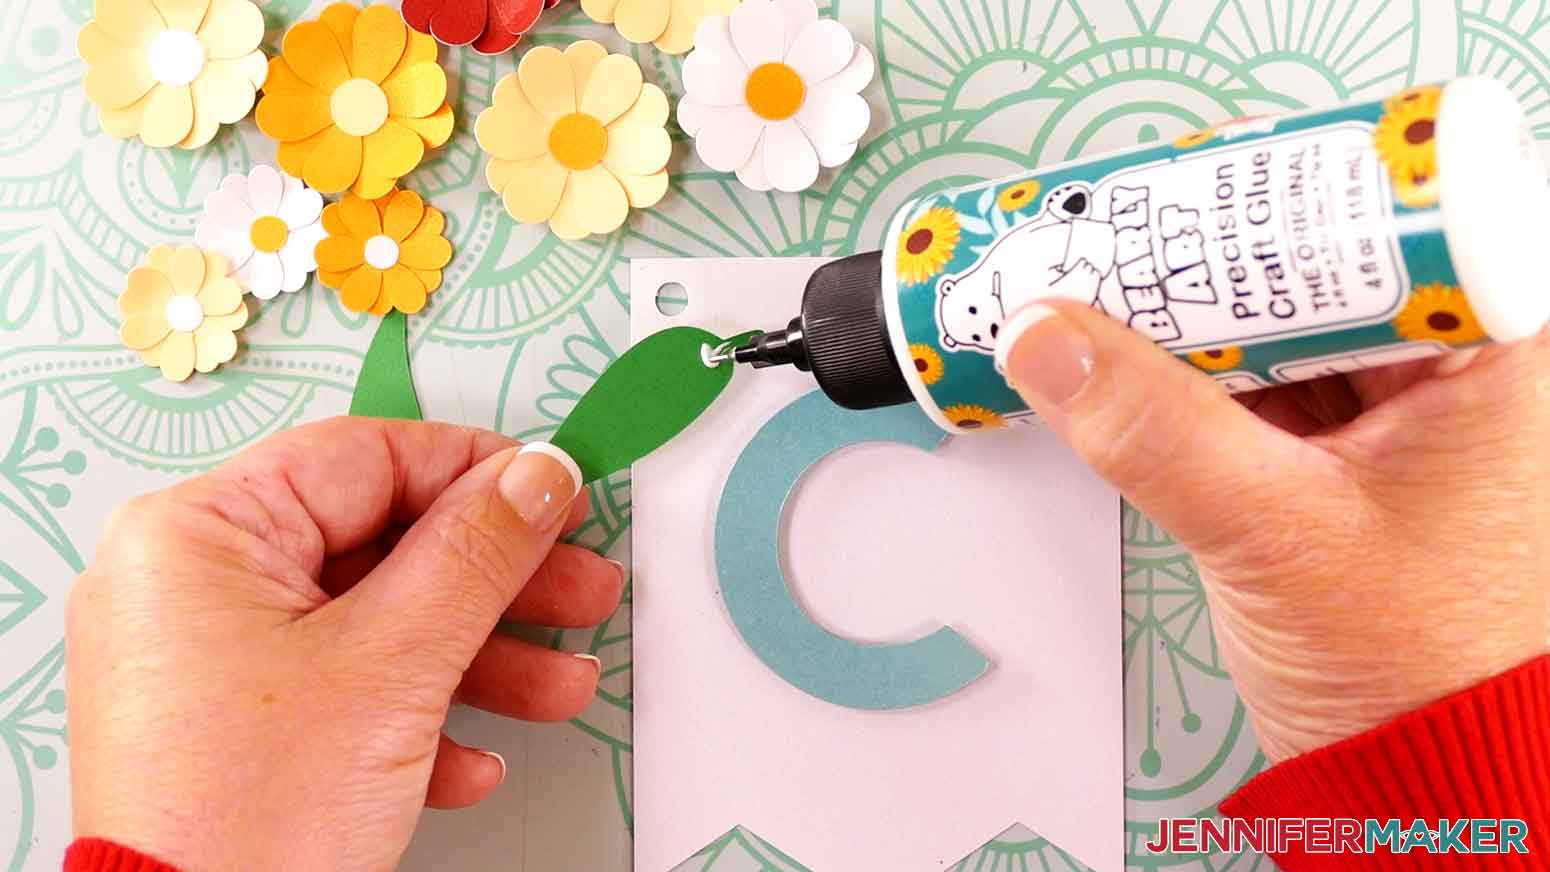
NOTE: If you want, you can skip layering matching flower petal pieces and use them as single-layer flowers. - Apply some glue to the back of one of the leaf pieces, near the end with the stem.
- Adhere the leaf where you want it to be on the banner panel. I added mine on the top left, partially hanging off the edge of the banner panel. Be sure not to cover any of the holes where you’ll string the ribbon.
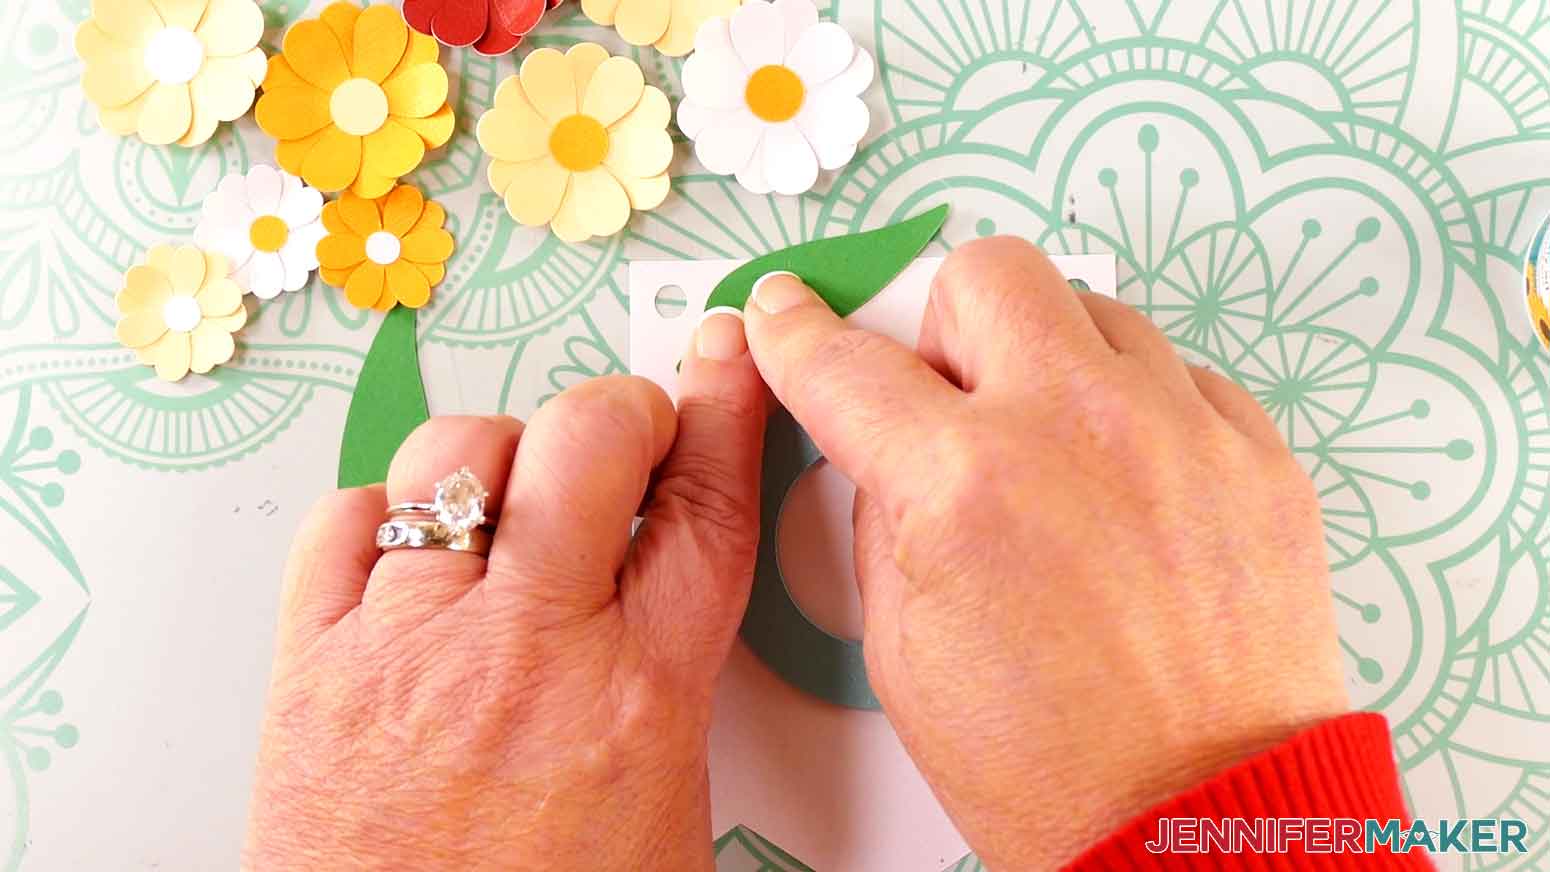
- Repeat steps 20-21 with the other leaf piece. I adhered my second leaf partially overlapping the first, but pointed in a different direction.
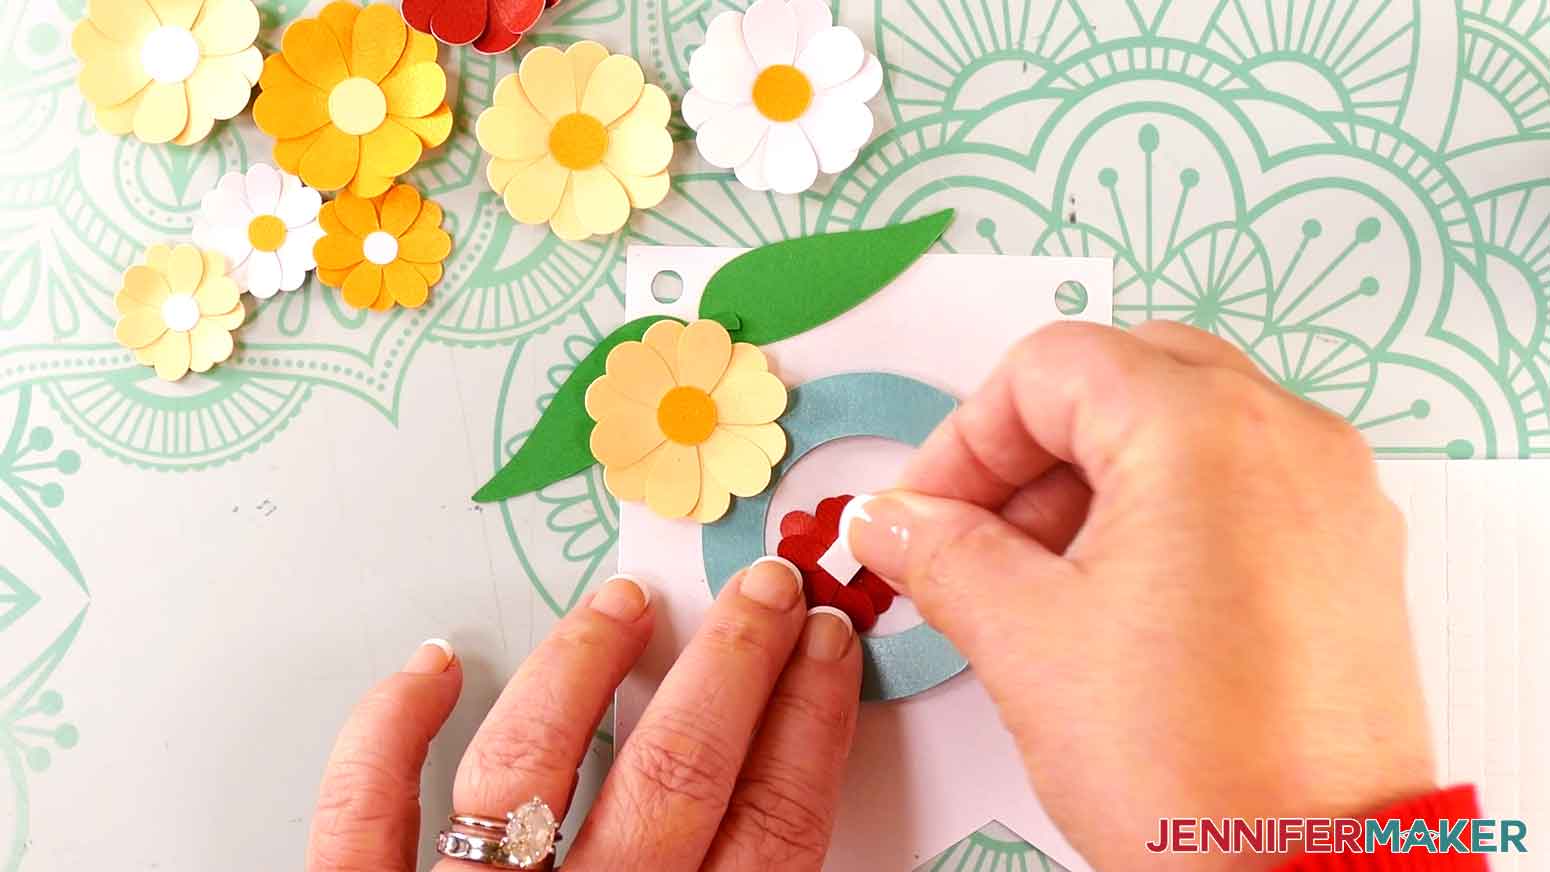
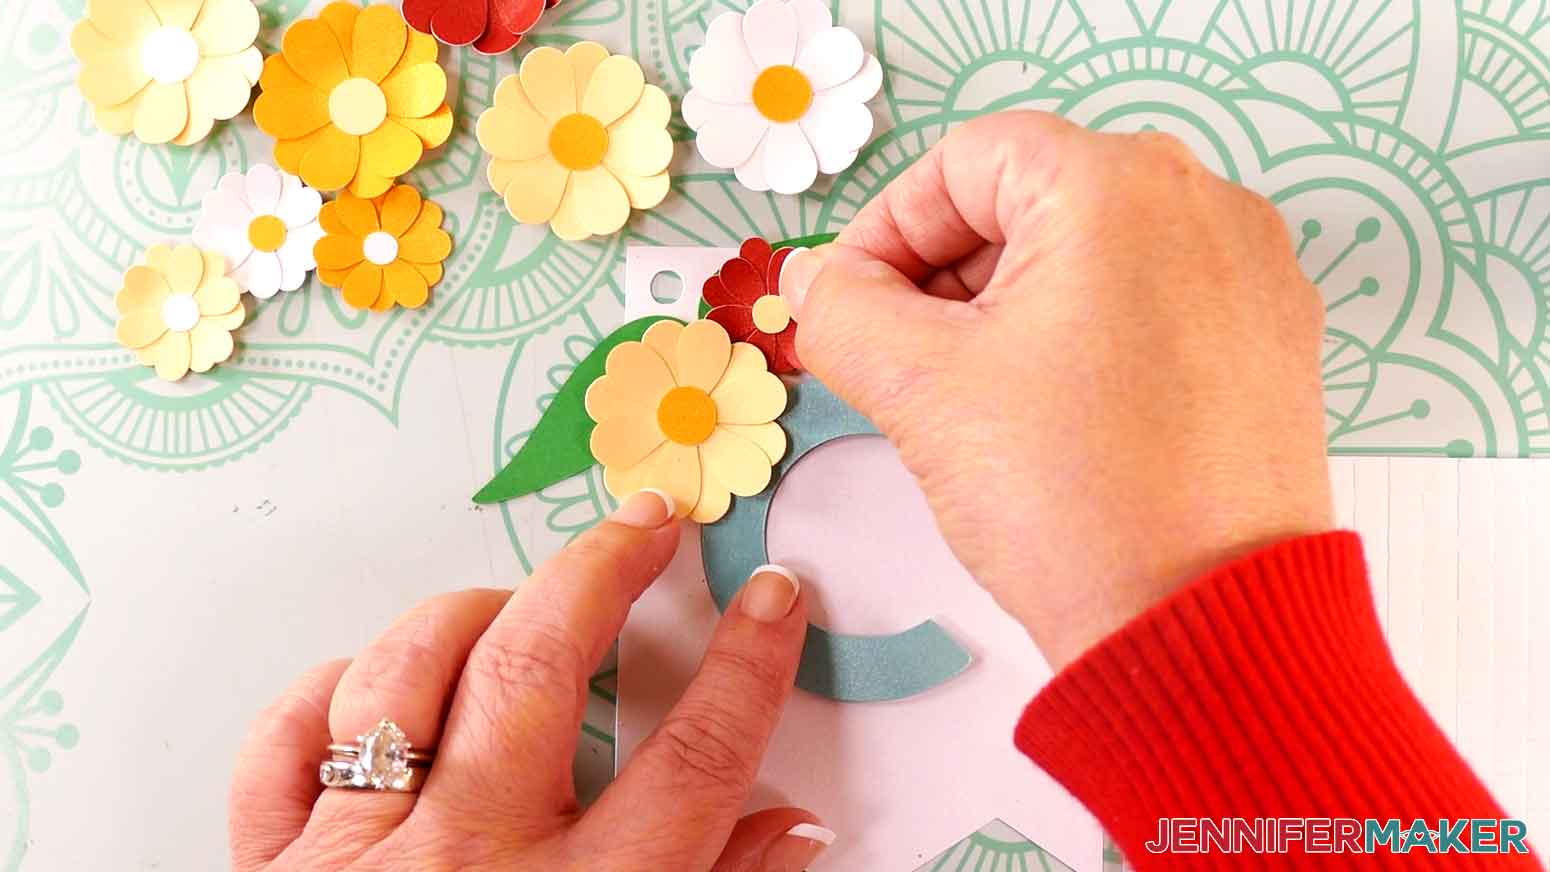
TIP: To add more dimension, you can also use adhesive foam squares to attach your embellishments. - Peel the backer off one adhesive foam square.
- Press to attach it to the back center of a larger assembled flower.
- Turn it over and press to attach it to the banner panel. I attached mine on top of the overlapped leaves.
- Repeat steps 23-25 with the smaller assembled flower. I attached mine next to the larger flower, on top of a leaf.
NOTE: Be sure not to cover the holes with the embellishments. - Repeat steps 12-26 to assemble the remaining flowers and decorate each of your remaining banner panels with two to four leaf embellishments and one to two flower embellishments.
TIP: Use your Canvas in Cricut Design Space as reference for placement of the different colors and sizes of embellishments. - Follow steps 18-25 from “STEP 3: ASSEMBLE YOUR “HAPPY BIRTHDAY” PAPER BUNTING BANNER” above to string your banner pieces onto ribbon.


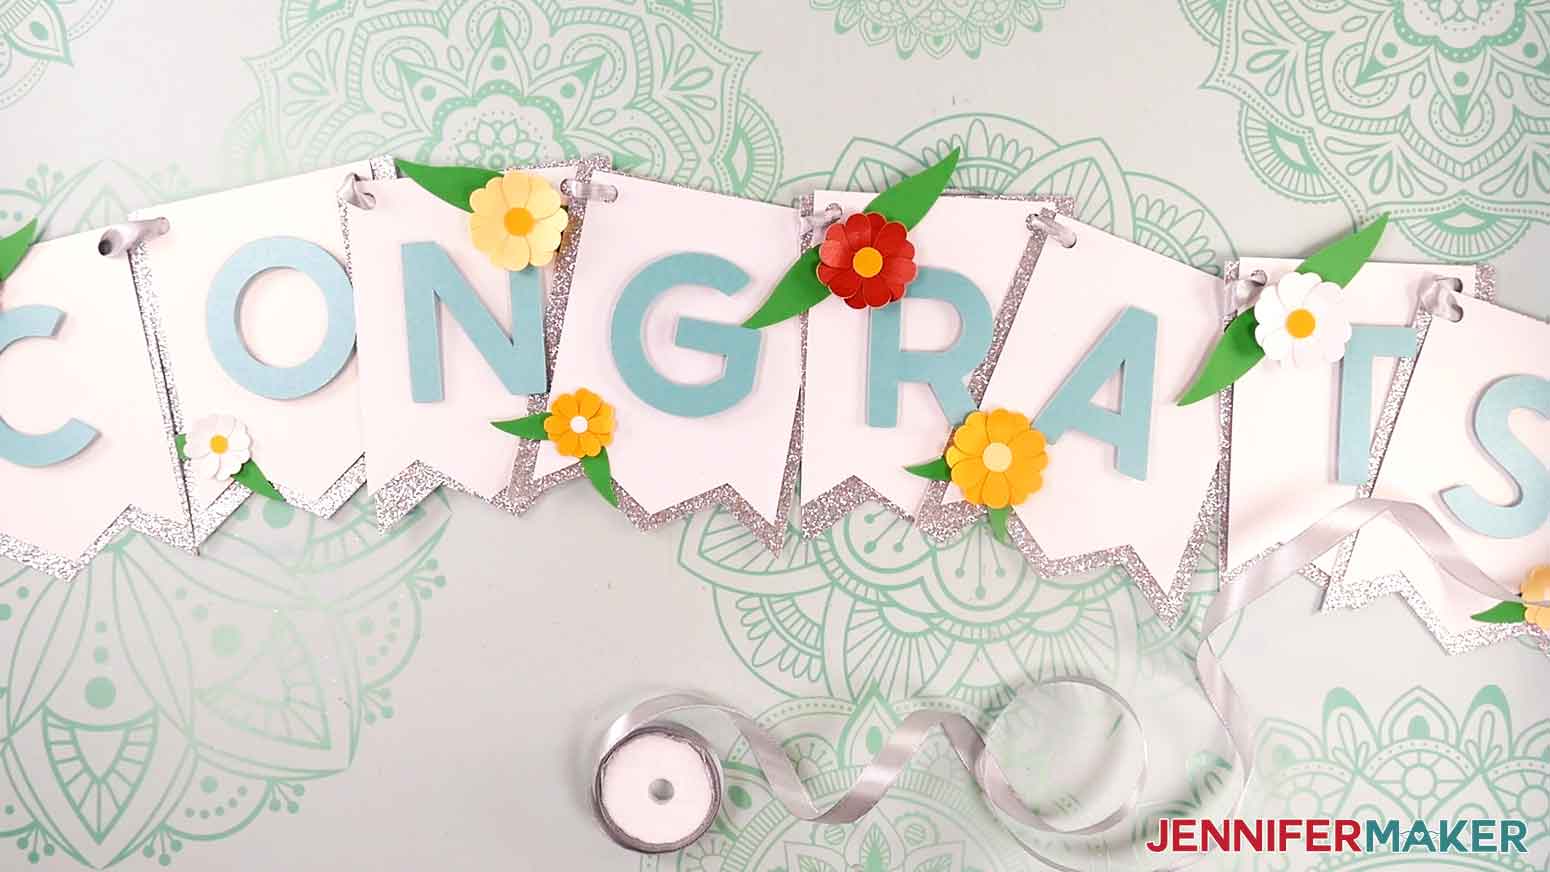
STEP 4: SHOW IT OFF
Here are my finished paper bunting banners!
Notes
Fonts Used:
JM Block Caps (“Happy Birthday” banner design)
Crafty Font (“Congrats” banner design), Free Alternative: Moderniz
Finished Banner Panel Size:
“Happy Birthday” panels: 4.22” x 5.65” each
“Congrats” panels: 4” x 5” each (plus flower embellishments)
Finished Banner Length (strung):
When the panels are spaced 1/4" to 1/2" apart, the finished banners measure approximately:
“Happy”: 31"
“Birthday”: 44"
“Congrats”: 35"
Care Instructions: Store flat in a zippered plastic storage bag.
Answers to Your Questions About Making a Paper Bunting Banner
Q: I want a different design. How do I design my own custom paper bunting banner?
A: You can learn how to design your own customized bunting banner with different shaped panels and a personalized sentiment in my ADVANCE program. Learn more about ADVANCE here!
Q: Help! My Design Space screen looks different than yours!
A: If you’re using the latest version of Cricut Design Space, your screen may have slight variations than the screen you see on the video tutorial. Good news: All of the same functions are there, they may just be in different spots or have new icons. Pause the video if you need, or follow along with the written tutorial. If you get stuck, ask for expert support in our Facebook group. Our group has become not just a help center, but also a vibrant community of real people and crafters! Plus, you can catch the latest news on JenniferMaker tutorials and more.
Q: How do I know if my design uploaded at the correct size?
A: If you are using Cricut Design Space Beta for Desktop, try switching to the Live version as this has sometimes worked in our testing. Here are the dimensions you should see for each design on your Canvas:
- paper-banner-birthday-jennifermaker-SVG: 11.67″ x 11.71″
- paper-banner-congrats-jennifermaker-SVG: 11.58″ x 5.89″
- paper-banner-toolkit-jennifermaker-SVG: 10.75″ x 11.2″
If you need help resizing your designs, please see my Resizing Guide.
Q: Where can I find the supplies and tools to make a paper bunting banner?
A: My paper banners can be made with simple supplies you may already have in your crafting stash. I like to shop on Amazon for their free shipping with my Amazon Prime membership (just make sure to look for sellers with 5-star reviews). You can also find most, if not all of the supplies and tools at your local craft store.
Q: Do I have to use the same kind of paper as you?
A: No, of course not! Use your own choice of paper for your paper bunting banners and make it your own! Just adjust your material sizes and cut settings on your cutting machine to work with your material. You can use different colors of paper, glitter, shimmer, foil, or textured card stock, or even book pages from old books! Using the materials you already have on hand makes this an inexpensive way to create personalized party decorations.
Q: Do I have to use the flower embellishments?
A: No, the decorations are completely up to you! Put your own spin on the design, or use other embellishments in a different shape to decorate your banner panels. Use autumn shapes for fall, holiday cutouts, or star and diamond shapes for other special events. You don’t even have to use cardstock embellishments — use beads, feathers, rhinestones, anything you have on hand that fits the occasion!
Q: Can I make and sell these paper bunting banner designs?
A: I love supporting creative entrepreneurs! If you want to use my designs and projects for commercial use, please familiarize yourself with my important licensing information before selling your crafts.
I do not permit sale of my digital items, but you can sell the creative goods you make with them — as long as you follow my licensing requirements. That means you cannot sell the banner SVG files, but you can sell buntings that you made with the files within the guidelines linked above.
Q: What fonts did you use?
A: JM Block Caps (“Happy Birthday” banner design)
Crafty Font (“Congrats” banner design), Free Alternative: Moderniz
[/non_member_content]
Get my free SVG/DXF/PDF files to make a Paper Bunting Banner!
(If you do not see the signup form above, click here.)
I love seeing what you make with my designs and how you use them! Please share a photo of your paper bunting banner in our Facebook group or tag me on social media with #jennifermaker.
Love,

Want to remember this? Save this Paper Bunting Banner tutorial to your favorite Pinterest Board!